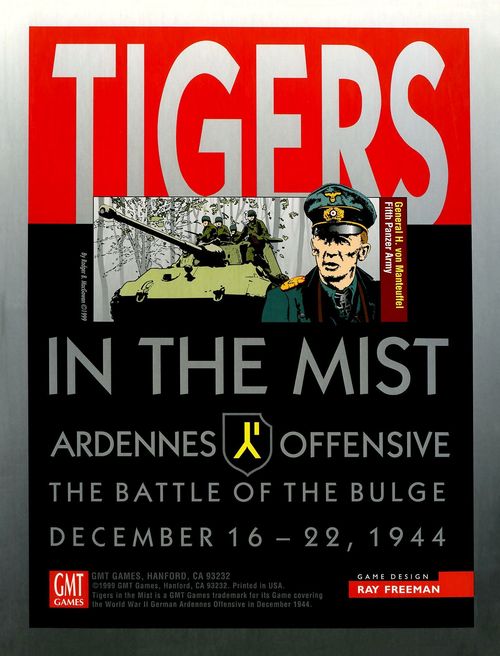
Tigers in the Mist: Ardennes Offensive
Tigers in the Mist: Ardennes Offensive Rulebook
Table of Contents
Table of Contents
- 1.0 Components
- 2.0 Object
- 3.0 The Map
- 4.0 The Playing Pieces
- 5.0 Preparing For Play
- 6.0 Sequence of Play
- 7.0 Area Occupation Limits
- 8.0 Activation/Movement
- 9.0 Combat
- 10.0 Bridges
- 11.0 Reinforcements
- 12.0 Victory Determination
- 13.0 Supply
- 14.0 German Special Forces
- Introductory Scenario: The 7th Army Attacks
- Scenario: The 5th Panzer Army vs: VIII Corps
- Scenario: The First Three Days
- The Campaign Game
- Examples of Play
- Designer's Notes
- Play Strategy
- Errata and Clarifications (1 October 2016)
1.0 Components
Tigers in the Mist contains the following parts:
- 22" x 34" mapsheet
- One Rulebook
- Two sheets of counters and markers
- Four ten sided dice. A die roll of "0" is always considered to be a 10.
- Five Scenario Cards
- One Player Aid Card.
2.0 Object
Tigers in the Mist is a two-player game. One player commands the German forces and the other player controls the Allied forces. The object of the game is to control some or all of the victory point areas at the end of each turn, or for the Germans, to move units into the perimeter zones that score victory points for exiting units. The winner is determined by the number of victory points the German has managed to obtain by the end of the last game turn.
The game simulates the early stages of the German offensive in the Ardennes section of western Europe (Germany, France, Belgium, and Luxembourg) in December of 1944. Historically, the Germans planned to break through the thin American defenses in this area, cross the Meuse River, and seize the port of Antwerp in Holland. The German high command hoped that success would force a political settlement on the Western Front, thus allowing Germany to direct its full attention to defeating the Russians. In order to win the game, the German player will almost certainly have to get some units across the Meuse River.
3.0 The Map
The mapboard portrays the critical geographical area where the actual campaign took place.
3.1 Scale
The scale is approximately one inch equals four miles.
3.2 Map Components
3.21 Perimeter zones are locations around the edges of the map which are identified by large capital letters. These are used to bring on reinforcements and act as supply sources. The Germans can score victory points by entering some of the Allied controlled zones.
3.22 Areas are irregularly-shaped spaces on the map. Each area represents a city, town, or crossroads. Each area is named and identified by a unique number. The area numbering system may be used to facilitate PBM or PBEM play as well as to aid in locating a particular area. The system is set up such that a numbered area is always adjacent to consecutive areas in the numbering sequence, ie. 75 is adjacent to 74 and 76.
Areas are connected by roads. Brown lines are minor roads. Gray lines are major roads. Units move from area to area along roads. Units may not move to an adjacent area unless it is connected to the area moved from by a road.
3.23 Significant rivers are shown on the map. Where a road crosses a river, a bridge is shown. Except as noted under section 5.1, all bridges are intact at the start of the game.
3.24 National boundaries, woods, marshland, and towns are shown purely for informational and historical purposes. They have no bearing on the game.
3.25 The original Allied front line areas have their ID numbers circled in black. This was done to facilitate determination of German artillery availability.
3.26 Some areas have victory point values printed inside a circle. The German player receives these points at the end of each game turn that he controls a VP area.
3.27 Some areas result in the release of reserve German Panzer divisions. These areas contain a printed tank silhouette.
3.28 Some perimeter zones have victory point multipliers printed inside a square. The German player receives victory points equal to the number of German strength points present in the zone at the end of the game multiplied by the victory point multiplier.
3.29 The Turn Record Track and the Victory Point Track are shown on the mapboard.
How to Read the Counters
Each combat counter shows: unit type (e.g., armor), set up area, strength points, movement restriction, unit ID, impulse of entry for reinforcements, attack factor, defense factor, and a background color denoting nationality. Artillery counters are also shown.
Unit Counter Summary
- Engineer (infantry type unit)
- Wheels denote motorized unit
- Armor
- Mechanized Infantry
- Motorized Infantry
- Airborne Infantry (no paradrop capability)
- Foot Infantry
- Units without a Unit ID are substitute counters.
- German Special Forces Unit (shows the turns the unit may be used)
4.0 The Playing Pieces
Included within the game are different colored die cut playing pieces. Most of the counters represent combat units. There are also numerous informational counters.
4.1 Combat Units
4.11 There are five basic types of combat units in the game: armor, mechanized, motorized, engineer, and foot infantry. Each type of unit has a unique symbol in the center of the counter to indicate its type. Some of the infantry type units are airborne units, but they do not have any airdrop capability.
4.12 There are several different colors of counters which distinguish unit nationality, or for the Germans, SS, Wehrmacht, or Luftwaffe units. SS units are black, Wehrmacht unit are grey, and Luftwaffe units are light blue. American units are green. British units are khaki. Allied garrison units (99 Norwegian and V Belgian Fusiliers) are dark blue.
4.13 Combat units present at the start of the game and reinforcements have battalion, brigade, divisional, corps, or army identifiers to the left of their unit type symbol. Unit counters without identifiers are substitutes used to represent units that have lost strength due to combat casualties. All of the unit counters are backprinted.
4.14 Numbers to the right side of their unit type symbols are either set up locations for units beginning the game on the board or impulse of arrival for reinforcements.
4.15 Substitute counters have a white bar over the unit symbol.
4.16 The large number in the bottom center of each combat unit is its strength. A units strength is the number of hits it can take before being destroyed and also is the number of dice it rolls when firing in a battle.
4.17 Each unit has an attack, defense, and movement factor which varies by type of unit. These factors are not shown on the counters, but are shown on the chart below. The numbers are left to right: attack-defense-movement.
| Unit type | Attack-Defense-Movement |
|---|---|
| Armor | 4-5-8 |
| Mechanized Infantry | 3-4-8 |
| Motorized Infantry | 3-4-8 |
| Engineer | 3-4-8 |
| Foot Infantry | 3-4-5 |
| Artillery | 3-5-X |
4.18 When attacking, the left most number is the basic to hit number used in combat. When defending, the center number is the basic to hit number used in combat. The movement allowance is always the same, except that infantry type units may voluntarily reduce their movement to that of foot infantry in order to cross a river at a blown bridge.
4.2 Informational Markers
Informational markers are provided for turn record, battle location, victory points, blown bridges, bridge repair modifiers, entrenchments, Out of Supply status, and movement completed indicators.
Informational Marker Summary: Turn/Impulse, Battle Location, Entrenchment, Victory Points, Blown Bridge, Bridge Repair Modifier, German Stack has Moved (Combat not Resolved), Allied Stack has Moved (Combat not Resolved), German Stack has Moved (Combat Resolved), Allied Stack has Moved (Combat Resolved).
5.0 Preparing For Play
Perform the following steps to set up the game.
5.1 Place Blown Bridges
The following bridges are blown at game start. Place a blown bridge marker on each.
- Wahlerscheid-Monschau (40-41)
- Dasburg-Marnach (51-70)
- Gemund-Holzhum (55-69)
- Nusbaum-Beaufort (19-20)
- Irrel-Echternach (10-11)
To aid in set-up, these bridges are indicated on the map as Blown.
5.2 Place Units and Markers
5.21 Place the units that begin the game on the board in their correct starting areas as indicated on the Order of Battle Cards.
5.22 Place "entrenched" counters on units that are indicated to start the game in entrenchments.
5.23 Only those Allied units that have a white triangle in the bottom right corner of their counter are eligible to move on the first impulse of December 16. No other Allied units may move on that impulse. Any Allied unit (except armor or units in areas where German units are present) may entrench on the first impulse of December 16.
5.24 German units that have a red triangle in the bottom right corner of their counter may not move until the second impulse of December 16.
5.3 Set Initial Track Values
5.31 Place the "Turn" counter on the 16-1 space of the Turn Record Track located on the mapboard.
5.32 Place the "VP" marker near the VP Track. Starting VP level is always "0."
6.0 Sequence of Play
I. Reinforcement/Replacement Phase: Both players consult their respective Order of Battle cards and place units scheduled to arrive in the current impulse in the entry zone listed for each reinforcing unit.
II. First German Impulse:
- The German player may move as many or as few of his units as he wishes including available reinforcements.
- Eligible Allied units may attempt bridge demolition while the German player is moving. Exception: The Allied player may not attempt bridge demolition on any impulse of December 16.
- After the German player has completed his movement for the impulse, both players resolve all battles which result from the German movement.
- Eligible German Engineer units may attempt to construct bridges.
III. First Allied Impulse:
- The Allied player may move as many or as few of his units as he wishes including available reinforcements.
- Eligible German units may attempt bridge demolition while the Allied player is moving.
- After the Allied player has completed his movement for the impulse, both players resolve all battles which result from the Allied movement.
- Eligible Allied Engineer units may attempt to construct bridges.
IV-VII. Steps II and III above are repeated until each player has completed three movement/combat impulses. This constitutes a full turn which represents a 24 hour period. Exception: Each player is allowed only one movement/combat impulse on the December 22 turn.
VIII. Attrition Phase: Determine Supply [13.11] for all units (of each side). Remove one strength point from each unit that is Out of Supply [13.21].
IX. Victory Determination Phase: Victory points (VPs) are determined at the end of each turn. Adjust the VP counter on the VP Track. Move the turn counter to the next space on the Turn Record Track after both sides have completed their movement and combat for the impulse.
7.0 Area Occupation Limits
7.1 Each player may have a maximum of 4 unit counters with a maximum total of 10 strength points occupying an area at the end of any movement impulse.
Important Exception: During set up, there are two locations where the German player exceeds the stacking limits. At the end of the 3rd impulse of the December 16 turn, rule 7.2 will apply to these two areas. During the December 16 turn, German units may not be moved so as to create new stacks or add to existing stacks such that the number of strength points exceeds ten or the number of units exceeds four.
7.2 If at the end of any movement impulse a player has more units and/or strength points occupying an area than is allowed under rule 7.1, he must eliminate sufficient units (not strength points) of his choice to bring the total down to the maximum allowed.
7.3 Any number of units and strength points may occupy a perimeter zone.
8.0 Activation/Movement
8.1 Impulses
Each daily turn is divided into six player impulses, a total of three for each side. Each impulse is shown on the Time Record Chart on the map and is labelled 16-1, 16-2, etc. The first number is the day, the second the impulse. These impulses are alternated between players with the German player always moving first. Refer to the Sequence of Play in section 6.0.
8.2 Movement
Units move from area to area along roads. Units may not move to an adjacent area unless it is connected to the area moved from by a road.
8.21 Units may move as stacks or individually. Only units beginning the turn together in an area may move as a stack.
8.22 Units must stop upon entering an area containing enemy units, and they may move no further that turn.
8.23 When units of one side enter an area containing units of the other side, the moving units must attack all enemy units present.
8.24 Once a unit or stack of units has completed its movement for the turn, it should be marked with a "movement completed" counter. Units that moved, but did not enter an enemy occupied area, place the movement completed counter with the nationality symbol up. Units that moved into enemy occupied areas place the movement completed counter with the arrow and the nationality symbol face up. As each battle is resolved, flip the movement completed counter to the side without the arrow.
8.25 Units which moved in an earlier impulse of the turn may not move again during the turn or join in any combat as attackers.
8.26 Entering a zone, whether occupied or not, costs only the MP for the road.
8.27 Units may not move from one enemy occupied area directly to another enemy occupied area.
8.28 Units may not move so as to place themselves Out of Supply (OoS). [13.0]
8.29 OoS units may move only one area.
8.3 Movement Allowance/Costs
8.31 Armor, Mechanized, Motorized, and Engineer units may spend eight (8) movement points per turn.
8.32 Foot infantry units may spend five (5) movement points per turn.
8.33 Movement Costs to move from area to area:
| Area Entered | Cost in MPs |
|---|---|
| Along Major Road | 1 |
| Along Minor Road | 2 |
| Across Unbridged River | 3 (as foot inf. only [8.34-5]) |
8.34 Mechanized, Motorized, or Engineer moving as foot infantry have may spend 5 MPs per turn. There is no road cost in addition to the 3 MP cost for crossing an unbridged river.
8.35 An infantry type unit with 8 MPs may voluntarily reduce its MPs for a turn to 5 in order to cross a river at a blown bridge. Units that exercise this option must continue to move at a rate of 5 MP per turn until they can trace a line of supply back to a friendly supply source without the supply line crossing a blown bridge. Once this is achieved, the units revert to their normal MPs.
8.36 Additional costs (cumulative)
| Action | Cost in MPs |
|---|---|
| Enter Occupied Area | 1 |
| Leave Enemy-Occupied Area | 1 |
| Bridge Blown While Attempting to Cross | 1 |
| Entrench | 4 (Engineers); All MPs (Other Inf. Types) |
| Construct Bridge | All MPs (Engineers only) |
8.37 It costs one additional movement point to enter an occupied area; whether the occupying units are enemy and/or friendly.
8.38 If a unit does not have sufficient movement points to move to an area, it may not make that move.
8.39 After the moving player has finished moving his units, both players resolve all battles which result from the moving player's movement for that impulse.
8.4 Bridge Demolition
8.41 During movement, the non-moving player may attempt bridge demolition whenever a moving unit attempts to cross a bridge where a non-moving infantry type unit is present in an area adjacent to that bridge [10.2].
8.42 If the bridge demolition attempt is successful, the moving player may alter the remainder of the move of his moving stack from the area adjacent to the blown bridge. However, the currently moving stack expends one MP due to the forced change of direction.
8.5 Entrenching
8.51 Infantry type units may entrench during any friendly impulse. Each unit must entrench individually. Units cannot use entrenchments constructed by other units.
8.52 Engineers may entrench by expending 4 movement points. Thus engineers may move (expending up to 4 MPs) and then entrench.
8.53 Other Infantry-type units entrench by expending all of their movement points.
8.54 Armor units may not entrench.
8.55 Units may not entrench when enemy units are present in the same area.
8.56 Defending entrenched units get a +1 DRM for shots taken against them.
8.57 Indicate entrenched units by placing them underneath an "entrenched" counter. The number of entrenchments allowed on the board at one time is not restricted by the number of entrenchment counters provided in the game.
8.58 Entrenchments are removed from the board if abandoned by the occupying unit or if the occupying unit is destroyed.
8.59 Attacking units can never be in entrenchments. Thus units which attack must abandon their entrenchments. The entrenchments are then removed [8.58].
9.0 Combat
Once the moving player has completed all his movement for the impulse, combat is resolved. Battles are fought in any order that the moving player chooses.
9.1 General
9.11 A unit may attack only once per turn, during one of the moving player's impulses. A unit may defend up to three times per turn--once in each of the enemy player's impulses.
9.12 Units of the moving player that enter an area containing enemy units during the current impulse are required to attack.
9.13 Units of the moving player that begin an impulse in the same area with enemy units have the options to attack, move elsewhere, or remain in place without attacking.
9.14 When units of the moving player enter an area that contains both enemy and friendly units, the moving units must attack (per 9.12) and the non-moving friendly units already in the area must exercise one of the options in 9.13. However, if such friendly units choose to remain in place without attacking, they still receive a Moved marker and cannot move or attack in a later impulse of the same turn.
9.15 Defending units do not have the option to decline combat.
9.16 A unit may not move in the same turn after it has conducted an attack.
9.17 No combat can occur in perimeter zones.
9.2 Process and Hits
9.21 Each unit present in a battle fires at a target by rolling one die for each strength point of the firing unit. If the die roll is equal to or less than the combat factor of the firing unit, it scores a hit which causes the target to lose one strength point. A one strength point unit is destroyed if it takes a hit.
9.22 Excess hits against a target may not be carried over against other enemy units present in a battle.
9.23 Units that are hit in combat are either flipped to their reverse side, replaced with a substitute counter, or destroyed. For example, a 4 strength point unit that is hit once would be flipped to become a 3. If hit twice, it would be replaced with a 2. If hit 4 times, it would be destroyed and removed from the board.
9.3 Combat Sequence
9.31 Determine artillery availability for both sides.
9.32 Defender's artillery fires; hits take effect.
9.33 Defender selects targets for his shots.
9.34 Defending units fire; hits take effect.
9.35 Attacker's artillery fires; hits take effect.
9.36 Attacker selects targets for his shots.
9.37 Attacking units fire; hits take effect.
9.38 Combat ends for the impulse in that area.
9.39 Proceed to the next area where combat occurs until all combat for the impulse has been resolved.
9.4 Artillery
9.41 Artillery is represented abstractly in the game. Each attacking or defending stack is assumed to have the possibility of artillery support during any impulse. The players roll dice for each artillery unit they are eligible to call on for support.
9.42 Artillery Call: Each player may make 1 call for artillery support for every 3 strength points he has present in a battle. The defender always gets a minimum of one call. Strength points are counted prior to any defensive fire. A player does not get credit toward a call for artillery for fractions of strength points. Example: 5 strength points generate one artillery call.
A stack of units may call for artillery in each battle in which it is a participant.
9.43 Allied artillery is available on a DR 1-8.
9.44 German artillery is available on a DR 1-6 against the original Allied front line (areas with area # in white circle only).
9.45 German artillery is available on a DR 1-4 in all other areas, including those East of the original Allied front line.
9.46 Available artillery counters (one per successful call) are targeted on enemy units prior to resolving each sides fire. Artillery must fire at the type of enemy unit with the most strength points present in the battle being fought. The firing player may select the target unit when more than one unit of the same type is present. Once a unit has been targeted by an artillery counter, the strength points of that counter are subtracted from the total strength points of that type for purposes of determining the next eligible target unit for artillery fire. Additional artillery shots are allocated similarly. [See the examples of play.] More than one artillery counter may not be targeted on a unit unless all other units in the battle have also been targeted by artillery.
9.47 Once the targets for artillery fire have been determined, a DR is made for each target unit. Note that it is possible for two or more artillery shots to land on a single unit. If the earlier shots destroy the unit, the remaining artillery shots against that unit would be lost.
9.48 Artillery supporting the attacker hits on a DR of 1-3. Artillery supporting the defender hits on a DR of 1-5.
9.49 Artillery shots are influenced by entrenchment, river crossing, and combined arms die roll modifiers (DRMs). Such influence is cumulative.
9.5 Combat Between Units
9.51 Unit quality. There is a hierarchy of unit quality in the game. Unit qualities, from highest to lowest, are: Engineer, Armor, Mechanized, Motorized, Foot Infantry.
9.52 Units must shoot at equal or lower quality units if possible. Units may not fire at a target of higher quality than themselves unless there are no other eligible targets. When all eligible targets are of higher quality than the firing unit, it must fire at the lowest quality target available.
9.53 Defending (or non-moving) units are not required to shoot at attacking units that are only one strength point. Exception: See 9.55.
9.54 Units attacking or defending alone in an area may fire at any enemy unit, subject to rules 9.52 and 9.53. Multiple attacking and defending units must allocate their fire according to rules 9.52 through 9.57. Rule 9.55 takes precedence over rule 9.53.
9.55 In a multiple unit battle, the firing player must shoot at each target unit with at least one unit of his own before he can allocate a second firing unit to any target. He must shoot at each target unit with at least two units of his own before he can allocate a third firing unit to any target.
9.56 Once each target unit has been allocated an attacker, the firing player may allocate his remaining units to the available targets any way he wishes, subject to the restrictions of rule 9.55.
9.57 In a multiple unit battle, firing units are allocated to target units in order of unit quality, from high to low. In multiple unit battles, firing units must shoot at equal quality targets if possible. If no equal targets are available, then the highest quality target of lesser quality than the firing unit must be selected. If no lesser quality targets are available, then the lowest quality target of higher quality than the firing unit must be selected. Unit strengths have no effect on this rule. Exception: See 9.53.
Example: The firing side has an armor, a mechanized, and two foot infantry. The target side has an engineer, a motorized unit and an armor unit. The armor must fire at the armor, since it is equal to the highest quality firing unit. The mechanized unit is forced to fire at the motorized target unit. One of the infantry (firers choice) then may fire at the engineer. The remaining unit may fire at any of the three target units.
9.58 A unit may not split its strength to fire at more than one target unit.
9.59 All firing units must be allocated to target units prior to resolving any shots. [9.3.]
9.6 Combined Arms
Where the attacker has infantry, armor, and artillery in his attack, there is no DRM to combat. Where the attacker does not have infantry, armor, and artillery in his attack, all defending shots get a -1 DRM. For artillery to be available for the attack, a successful call for artillery support must have been made.
9.7 Combat Modifiers (DRMs)
9.71 Combat Die Roll Modifiers (DRMs) are as follows:
| Whose Fire? | Condition | DRM |
|---|---|---|
| Attacker | vs. Entrenched Units | +1 |
| Att/Def | Firing units out of Supply | +1 |
| Defender | vs. non-Combined Arms Force | -1 |
| Defender | vs. units crossing a river (bridged or not). This only applies when all attacking units just moved into the area. | -1 |
9.72 Units that are being attacked by units coming from two different areas where one attacking group crossed a river and the other did not do not receive the -1 DRM to defensive shots conferred by river defense.
9.73 Units that are being attacked by units coming across a river do not receive the -1 DRM to defensive shots conferred by river defense if any enemy units (whether eligible to attack this impulse or not) began the impulse in the defenders area.
9.74 All combat DRMs are cumulative.
10.0 Bridges
Bridges may be constructed or demolished.
10.1 Bridge Construction
10.11 Only Engineer units may construct bridges.
10.12 To build a bridge, the Engineer must begin the turn in an area adjacent to the bridge site. There must also be a friendly unit (any type) in the area at the other end of the bridge, however the second unit could have moved there during the current impulse.
10.13 An Engineer may not attempt bridge construction if an enemy unit is present in its area. Enemy units may be present in the second area connected to the bridge without affecting bridge construction.
10.14 An Engineer may not move or attack in the same turn in which it attempts bridge construction. An Engineer may not attempt bridge construction during the same impulse a battle takes place in the area it (the Engineer) occupies.
10.15 Bridge construction is successful on a DR of 1-4.
10.16 The Engineer may attempt construction once each impulse until successful. After each unsuccessful bridge construction attempt, the next attempt is given a -1 DRM. These are additive per impulse, therefore the 2nd attempt to repair a particular bridge is successful on a DR of 1-5, the 3rd attempt on a DR of 1-6, etc. Place the appropriate construction DRM marker on the bridge after each failed attempt. Construction DRM markers remain in place even if the Engineer moves away from the bridge under repair prior to a successful construction die roll.
10.17 Having two engineers adjacent to a bridge does not increase the chances of successful construction. No more than one construction attempt per bridge per impulse may be made.
10.2 Bridge Demolition
10.21 During Movement, the non-moving player may attempt bridge demolition by making a Demolition Dieroll whenever a moving unit attempts to cross a bridge where a non-moving infantry type unit is present in an area adjacent to that bridge. Bridge demolition may only be attempted at the instant that an enemy unit attempts to cross a bridge.
10.22 Any infantry type unit (Engineer, Mechanized, Motorized, Foot) may attempt bridge demolition. Armor units may not attempt bridge demolition. The unit attempting demolition must be in an area adjacent to the bridge it is attempting to demolish.
10.23 A unit (if eligible) may attempt bridge demolition during each impulse of a turn. It may attempt to demolish up to two bridges per impulse. Bridge demolition does not count as a move.
10.24 A unit may not attempt bridge demolition if an enemy unit begins the current impulse in its area.
10.25 Two or more different units may not each attempt to demolish a single bridge in the same impulse.
10.26 Allied units may not attempt to demolish bridges on December 16.
10.27 Entrenching does not adversely affect a unit's bridge demolition die roll.
10.28 The number of blown bridges allowed on the board at one time is not restricted by the number of blown bridge counters provided in the game.
10.29 The Demolition Dieroll. Roll one die and refer to the type of unit attempting demolition. If the die result falls within the listed range, Demolition succeeds. Place a Demolished bridge marker on the bridge.
| Unit Type and Move Status | Success Range |
|---|---|
| Engineers not moved this turn | 1-8 |
| Engineers that moved this turn | 1-4 |
| Other Infantry not moved this turn | 1-4 |
| Other Infantry that moved this turn | 1-2 |
11.0 Reinforcements
11.1 Placement and Movement
11.11 Place reinforcing units on the perimeter (entry) zone indicated on the OB Reinforcements Cards.
11.12 Reinforcements may move onto the board on the impulse of arrival.
11.13 A major road is assumed to connect each perimeter zone to the adjacent area on the board.
11.14 Reinforcements may enter via an adjacent perimeter zone one impulse following the scheduled impulse of arrival, if desired. The shifting units also expend two MPs to do so. Similar restrictions apply to entering two or more zones away. The reinforcements arrive one impulse later and pay 2 MPs for each zone shifted.
11.15 A player may deliberately delay moving reinforcements from a zone if he so desires.
11.2 Restrictions
11.21 Allied reinforcements may not enter via a zone occupied by German units. German units may enter a victory point zone occupied by Allied units. The entering units do not pay an extra movement point to enter an occupied zone. No combat occurs in zones.
11.22 German units may not enter perimeter zones L, M, N, or P.
11.23 Allied units may not enter perimeter zones A, B, or C.
11.3 Contingent Reinforcements
Some German reinforcements are released contingent upon the German player having superiority in certain areas. Superiority is defined as a greater number of strength points in the area at the end of any Allied impulse.
11.31 The Reserve Panzer Reinforcement release areas and units are noted on the German Reinforcements OB Cards.
11.32 Release Areas are indicated on the mapboard with tank silhouettes.
12.0 Victory Determination
12.1 General
12.11 Victory points (VPs) are counted at the end of each turn.
12.12 Only the German player can score victory points.
12.13 The VP total is always zero ("0") at the start of a scenario.
12.2 Control and VPs
12.21 Several areas score VPs for the German when he is the controlling player.
12.22 A player controls an area by being the last player who was in sole possession of the area. When both players have units in an area, the player which last had exclusive control of the area at the end of any player Impulse is considered to have control, even if outnumbered. VP areas score points each turn they are controlled by the German Player.
12.23 The German player may also score VPs for occupying certain perimeter zones originally controlled by the Allied player. The number of points scored is equal to the German strength points in the zone multiplied by the factor in the zone (1-3). Each strength point in a VP zone scores points only once per game.
12.24 German units in a VP zone which are out of supply at the end of the game or scenario do not score VPs.
12.25 Once German units have entered an Allied VP zone, they may not return to the board.
13.0 Supply
13.1 Determining/Tracing Supply
13.11 A unit is "in supply" if it can trace a route free of enemy units back to a perimeter zone originally controlled by its side. For the Germans, these are zones A-C. For the Allies, zones D-P. Supply must be traced along roads.
A unit not "in supply" is considered "Out of Supply" (OoS).
13.12 Supply may not be traced through enemy-occupied areas or to an enemy-occupied zone.
13.13 Supply may be traced from a contested area to a perimeter zone.
13.14 Supply may only be traced across intact bridges.
Exception: Infantry type units may trace supply across (only) one blown bridge.
13.15 Supply status for movement purposes is determined prior to movement.
13.16 Supply status for combat is determined after movement and immediately prior to resolution of combat.
13.17 Supply status for attrition is determined during the Attrition Phase.
13.2 Out of Supply Effects
13.21 Attrition: Each counter present that is OoS during the Attrition Phase must immediately lose one strength point.
13.22 Combat: OoS units may attack, but units that are OoS do not get artillery support.
13.23 Movement:
- Units may not move so as to place themselves OoS.
- OoS units may only move one area, then must end their movement for the turn.
- OoS engineers may move and entrench.
- OoS infantry may entrench in place.
13.24 OoS units may not attempt to build or blow bridges.
14.0 German Special Forces
The Germans had several special units in the battle, the von der Heydte parachute unit, Greif commando teams, and on several occasions led assaults with captured US Sherman tanks to confuse the defenders. This section of the rules reflect the roles of these special forces.
14.1 Availability and Placement
14.11 One Special Forces counter is available for use on one impulse in each of the December 17th, 18th, and 19th turns. If the Special Forces counter is not used during the turn, it is forfeited. Special Forces may not be accumulated for use on a later turn.
14.12 At any time during his movement portion of an impulse, the German player places the Special Forces counter in any non-victory point area he wishes. He may not place the counter in a zone. The area may contain Allied units.
14.2 Effects
14.21 The German Player may choose the Special Force to have one of the following three effects. Once an effect has been used, it may not be used again in the game. A different effect must be chosen in subsequent turns.
14.22 Restrict Allied Mobility Through an Area: Allied units entering an area containing the Special Forces counter must expend one extra MP to enter the area. Allied units exiting an area containing the Special Forces counter must expend one extra MP to exit the area. Both entering and exiting penalties can apply to the same Allied unit. This effect may not be chosen on the 3rd impulse of any turn.
14.23 Interference with Bridge Demolition: The Special Forces counter may interfere with bridge demolition. This could affect all bridges connected to the area containing the Special Forces counter. The Special Forces counter must be placed in the same area as the US units which will be attempting the demolition. When this effect is chosen by the German Player, bridge demolition is only successful on a die roll of one. A separate die is rolled for each affected bridge.
14.24 Battlefield Confusion: The Special Forces counter may be used to affect the to hit values of all Allied units in a battle. All Allied fire in the designated battle, including artillery, suffers a +1 DRM. German fire in this battle remains unaffected.
14.3 Removal
The Special Forces counter is removed at the end of the Allied portion of the impulse in which it was placed.
Introductory Scenario: The 7th Army Attacks
Map Area: All areas and perimeter zones south and east of the green scenario line on the map.
Units
German: 212 VG, 276 VG, 352 VG, 47-2 Eng, 605 Eng, 44 MG, 7A PzJgr, 7A/15 Flak. Also: 614 JgPz, 653 JgPz.
Special Forces: None
Allied: 4 Inf, 9 Arm at Larochette, 9 Arm Inf, 803 TD, 78/2 Rngr. Also: 70 Tnk, 4 Inf (17-1), 10 Arm Inf.
Special Rules: Units may not move outside of the limits of the designated playing area. German supply source is zone C. Allied supply source is zone P. At start units (28th Inf) in Vianden and Diekirch are removed. Game ends at the end of the December 18th turn. All other normal rules in effect.
Victory Conditions
- German Decisive: Germans control both Luxembourg and Mersch
- German Tactical: Germans control one town and contest the other
- Draw: Both towns contested
- Allied Tactical: One town contested
- Allied Decisive: Neither town contested
- Both Sides Lose: One town controlled, other not contested
Estimated Playing Time: Less than one hour.
Scenario: The 5th Panzer Army vs: VIII Corps
Map Area: All areas and perimeter zones within the red colored scenario lines on the map.
Units
German: 18 VG, 244 Stg, 62 VG, LVIII/1 Flak, 560 VG, 116 Pz, 182 Flak, Lehr, 600 Eng, 2 Pz, 207 Eng, 26 VG, 5 FJ, 47-1 Eng, 352 VG unit at Sinspelt. Also: 614 Pz, 653 JgPz, 669 Ost, 2SS Pz, FBB, Fuh Gren, 10SS Pz, 11 Pz.
Special Forces: One available on 17th, 18th, or 19th.
Allied: 106 Inf, 28 Inf, 9 Arm at Weiswampach, 1107 Eng, 1128 Eng, 1A/526, 78/2 Rngr. Also: 70 Tnk, 7 Arm, 4 Inf (17-1), 10 Arm, 82 Abn, 101 Abn, 705 TD, 740 Tnk, 2HHC, 1313 Eng, 84 Inf, 551 Inf, 29 Tnk.
Special Rules: Units may not move outside of the limits of the designated playing area. Units that either start or enter the game (as reinforcements) outside these limits must end their first day on the map in supply and within the designated playing area or they are eliminated. All units are in supply at set up. All reinforcements are in supply when placed in their entry zone. Otherwise, supply may only be traced along roads and into or through areas within the designated playing area. German supply sources are zones B & C. Allied supply sources are zones G through K. The scenario ends at the end of the German December 22-1 impulse. The bridge at Diekirch-Ettlebruck begins the scenario blown. All other normal rules for the Campaign Game are in effect.
Victory Conditions
- German Decisive: 16 or more VP
- German Tactical: 13-15 VP
- Draw: 10-12 VP
- Allied Tactical: 7-9 VP
- Allied Decisive: 6 or less VP
Estimated Playing Time: 3 Hours
Scenario: The First Three Days
Map Area: Entire map
Units: All units per the Campaign Game.
Special Rules: The scenario ends at the end of the Allied December 18-3 impulse. All other normal rules are in effect except for scoring.
Scoring: Usual victory point areas indicated on the map do not score points. Exiting German units through a VP multiplier zone scores VPs normally. German Special Forces placement is restricted by the normal rules and usual VP areas. VP areas specific to this scenario have no effect on placement of the German Special Forces unit. The Germans score two points for each scenario victory point town occupied solely by German forces. One point is scored for each victory point town contested. Scenario victory point towns are Luxembourg, Arlon, Martelange, Bastogne, Noville, Houffalize, Vielsalm, Stavelot, Malmedy, Hoffrai, and Monschau. In addition, the Germans score 3 points for each undefended hole in the Allied lines through which the German Player can trace a road route to an exit zone between D and K, inclusive, from one of his entry zones (A, B or C). The points for this are determined at the end of the Allied 18-3 impulse.
Victory Conditions
- German Decisive: 13 or more VP
- German Tactical: 10-11-12 VP
- Draw: 8-9 VP
- Allied Tactical: 6-7 VP
- Allied Decisive: 5 or less VP
Estimated Playing Time: 3 Hours
The Campaign Game
Map Area: Use the entire map.
Units: Set up units as indicated on the Campaign Game Setup Cards.
Victory Conditions
| VP | Result |
|---|---|
| 0-14 | Allied Decisive |
| 15-24 | Allied Marginal |
| 25-29 | Draw |
| 30-39 | German Marginal |
| 40+ | German Decisive |
Examples of Play
(The original illustrates the movement, bridge-demolition and supply examples with map excerpts, which are not reproduced here.)
Movement
The German armor in Mersch could move to Rambrouch via Ettelbruck and Eschdorf in 5 movement points. However, if the bridge between 58-59 was blown, it could not reach Rambrouch since it would cost 9 MPs to reach there via the minor road through Sauel. However, if any of the infantry units moved before the armor, then the armor would be able to reach Rambrouch.
In the situation below, the stack at Waimes attempts to move to Malmedy. The US Engineer attempts to blow the bridge and is successful. The German Player may then alter his move and head in another direction. The German does not pay the cost of entering Malmedy, since he could not get there, but does pay a 1 MP penalty for having the bridge blown up as he was about to cross it.
Combat: Artillery Allocation
The German has two 3 factor foot infantry and one 2 factor armor in a battle. The Allied player has 2 artillery units available. Since there are 6 strength points of German foot infantry and two of armor, the first artillery must be against one of the infantry, since they are the most common type in the battle. To determine the target for the second artillery, subtract the number of previously targeted strength points from the total infantry strength points. 6-3 = 3. This accounts for the infantry shot at by the first artillery unit. Compare this to the number of armor points present 3 > 2. Since there are still more infantry strength points available as targets than armor strength points, the second artillery shot must be allocated to the other infantry unit.
Assume that in a different battle there are three German units as shown below. Since foot infantry is the primary type, the first artillery shot must go on one of the foot infantry units. The Allied Player could select either the 4 factor or the 3 factor as the primary target. The 4 factor is targeted, so the remaining foot value is 7-4 = 3. Since 3 factors of foot infantry remain, and this is equal to the number of mech factors, the Allied player may choose to shoot at either the mech unit or the remaining foot unit with his 2nd artillery shot.
Combat
The German is attacking with 4 units, an armor, a mech, and 2 foot infantry. The Allied player is defending with an armor and a mech unit. The mech unit is entrenched. The attack is taking place across a river, and all of the attackers just crossed a bridge to reach the battle area. The German Player, despite having 2 artillery calls, rolled a 9 and a 7, and therefore does not have a combined arms force. The US artillery has already fired and missed.
The defender fires first, so the US Player must shoot at the armor with his armor and decides to shoot at the 2 factor foot infantry with his mech unit. He is not required to shoot at the German mech unit because it is a one step unit. Normally, the armor would hit on a 5 and the mech on a 4 on defense, but the German is crossing a river and does not have combined arms, so all US shots get a -2 DRM. The armor unit rolls 2 and 8 for one hit. The mech unit rolls 3, 5, and 6 for 3 hits. The German armor unit is reduced to a 1 and the two factor foot infantry is destroyed. The extra hit on the foot infantry is lost.
Now it is the Germans turn to shoot. The armor must be allocated first, and is targeted on the armor. The mech unit is next, and must shoot at the mech unit. The foot infantry could fire at either, but is targeted on the armor since it has a better chance of a hit. The armor will hit on DRs of 1-4. The mech will hit on DRs of 1-2 against the entrenched unit, and the foot will hit the armor on a DR of 1-3.
Supply
Illustrated below is a typical situation at the beginning of a turn. The Allies have a continuous line of units stretching across the board from the north to the south edge. In some of the Allied front line areas, there are German units remaining from combat which occurred on the previous turn.
At the beginning of his first impulse, the German Player may not move his infantry unit from Bastogne to Spimont or his armor from Nives to Moircy because he does not have a line of supply into either of those destination areas.
Say the German attacks during the first impulse in Bastogne and eliminates the defending armor there. He does not move or attack with the armor in Nives. If in his impulse the Allied Player does not move a unit into Bastogne (combat required) or Sprimont, at the beginning of the 2nd impulse the German will have a line of supply into Moircy via Bastogne and Sprimont. His armor will then be free to move from Nives into Moircy and beyond.
Bridge Repair
The German has moved a 3 factor mech unit across the river from Dasburg to Marnach. In order to do this, the mech unit had to leave its vehicles behind and wade across the river. It costs 3 MP to cross a river at a blown bridge plus 1 MP to enter Marnach because it is occupied. The German armor can not cross at a blown bridge. Combat in Marnach is then resolved. If the German mech unit survives, then the German engineer in Dasburg can attempt to repair the blown bridge at the end of the impulse.
If the repair attempt is successful, on the next turn, the German mech unit can move up to 8 MP. Also, the armor unit could cross the bridge on the next impulse and attack the defenders in Marnach. (The German mech has already attacked and can not attack again that day). If the bridge repair attempt is not successful, the German mech could move only 5 MP on the following turns unless it can trace a line of supply across another unblown bridge.
If the mech unit is eliminated in the combat above, the original bridge repair attempt can not be made.
If the US counterattacks and eliminates the mech unit before the bridge is repaired (say the first repair attempt failed), then the German engineer could not make another repair attempt until another German unit was present in Marnach after combat during a German impulse. In this case, accumulated bridge repair modifiers would remain in place.
Designer's Notes
Research
I did not use primary sources in the course of my research for this game. My access to such sources was extremely limited. My primary design intent was to create a fun, playable game that would be an interesting challenge for relative novices as well as very good players. Historical accuracy was a secondary consideration and realism came third. The objective was to create a game that was a reasonable approximation of the first week of the Battle of the Bulge.
My main sources for the feel of the battle and historical information were Hugh Cole, The Ardennes: Battle of the Bulge, Charles MacDonald, A Time for Trumpets, (easily the most readable and perhaps best account of the battle), and SLA Marshall, Bastogne: The First Eight Days. There were many other books as noted in the bibliography, but these 3 really were instrumental in forming my impression of the nature of the campaign. My Order of Battle information was based on Avalon Hills "Battle of the Bulge, 1981", 3Ws "Hitler's Last Gamble", Danny Parkers OB in the appendices to MacDonald's book above, and an article by Parker in the Avalon Hill GENERAL, Vol. 23, #3, entitled "Kampfgruppe Peiper".
By use of a spreadsheet and considerable experimentation, I was able to develop a counter mix and strength point system that seemed reasonable. Initially I started with a relatively recent road map of the area. After getting out to California, I discovered some excellent map sources in the UC Berkeley Library. The final map was developed using several topographic maps of the battlefield area which covered the period 1928-1964.
In the course of my reading on the Bulge, three things struck me as highly significant about the battle. First, the highly compartmentalized nature of the terrain resulted in many small battles being fought in relative isolation from each other. The second factor is that the Germans didn't do as well as they could have, given the paper strength of the opposing forces available. This was probably due to poor low level training on the German troops part as well as huge differences in morale between the two sides. Finally, the contribution of their artillery to the American victory was immense, whereas German artillery effectiveness was poor at best, and nearly non-existent in many instances. In my opinion Bastogne could never have been held if the artillery situation had been reversed.
Design Decisions
The Board: The point to point movement system made sense from the standpoint that the battle was really a series of disconnected skirmishes over towns and important crossroads. The German's options for bypassing pockets of resistance were limited. Time and again, relatively small scratch forces were able to hold up powerful kampfgruppes simply by fighting tenaciously in well chosen positions. The attackers were successful mainly when they found holes in the defensive line which they exploited, or when they were able to maneuver around strong points and force the defenders to retreat or be surrounded. Point to point is definitely more limiting to maneuver than a hex system. Without hexes, terrain effects were diminished in importance. Purists may complain about the lack of fortresses at Liege, Namur, and Clervaux. I decided they were unnecessary chrome. Clervaux isn't even on the map. Marnach was the critical crossroads that was heavily fought over most of the day on December 16th. Aachen, Luxembourg, and Arlon are natural north-south boundaries for the campaign. Aachen was given a victory point value because it was the only major German city in Allied hands at the time. Its recapture would be a propaganda coup. It also controls important roads leading toward Antwerp. Luxembourg and Arlon are part of a critical road net located just south of the historical limits of the battle. They were given VP values to make the Americans fight for them and to force the Germans to garrison them if/when they capture those cities.
A lot of simplification occurred during development. At one time I had more road types and briefly considered some terrain features. All that got pitched in the interest of producing a clean system. The decision to convert the board to an "area" look was made in the interest of giving a better feel for the terrain to the players. Without the woods, towns, etc., it just didn't feel like you were campaigning in the Ardennes.
The Counters: The counters conform to no standard military designation. Originally this was a regimental game like most Bulge games, but that meant that the game would have many more counters than I preferred, like maybe 500-600. Now there are 352, including information counters. Instead of regimental size counters, each division has an overall strength and rough composition which relates to their historical makeup and character.
Morale and training have been taken into consideration, but not to the extent that it probably affected the situation in real life. It is up to the German player to provide better leadership than did his real life counterparts. For example, the 2nd Infantry Division comprises 4 counters totaling 12 strength points. The 99th infantry is only 2 counters totaling 6 SPs. This is because the 2nd Division troops were hardened veterans who had picked up a lot of extra weaponry from past battlefields and had considerable AFV forces attached. The 99th was green and didn't possess weapons in excess of its official TO&E, nor did it have attached AFVs, it's TD units being all towed guns.
Armor counters include tanks, tank destroyers, and assault guns. Mechanized counters include armored infantry, panzergrenadiers, motorized flak, etc. Motorized and foot infantry are obvious categories. Towed anti tank guns and infantry support weapons, etc. were factored into the infantry units. Engineers seemed critical to bridge construction and demolition. Not a whole lot of this went on during the battle, but what did was almost exclusively performed by engineer units attached to Corps or Armies and often was of critical importance.
Artillery: One of the key decisions in the game was to eliminate artillery counters in the traditional sense. The assumption is that artillery support was possible for any unit that had a radio, therefore were counters really needed? The idea is that you call up the local artillery controller and if the guns are not busy or displacing, they will fire off a few rounds in support of your position or attack. The more important (read bigger) the battle, the better chance you have for support.
Naturally the Americans have a big advantage here, due to superior communications, greater mobility of their artillery, and being on the defensive. The players will quickly discover that US artillery on defense is a very potent force. On the other hand, the German player will be happy if he can get his gunners on the radio, while an actual hit on a target should be regarded as an unexpected bonus. After much experimentation and adjustment, the probabilities feel about right for the system chosen, although realistically the power of US artillery is probably quite understated in the game. One very interesting thing about the artillery rules is that artillery support is not guaranteed. This represents loss of observers, need to displace at an untimely moment, busy elsewhere, lack of ammo, or a communication failure.
Movement: I am extremely proud of the movement system. It is difficult to appreciate just how good it is until you play 3 or 4 turns as the Germans. You will feel very frustrated at trying to mount efficient attacks. Nothing can seem to quite get where it's needed. The two types of roads, and the extra MP to enter an occupied area mesh beautifully with the 5 and 8 MPs of all the units. Note that a motorized unit can get from Luxembourg to Transinne in one move on a clear road (that's half way across the board), but the same unit can only move two areas on a minor road that has units in every area along the movement path. There were more types of roads and different movement factors at various times during the development process. The present system is cleaner and plays much better than earlier tries.
Combat: The Bulge was very much a battle of attrition, thus a step reduction system seemed in order. The Germans often took heavy casualties in their initial assaults, so the defender fires first and hits take effect rule also seemed appropriate. The battles tend to be very bloody, and somewhat dicey. Again, I was trying to avoid the "sure thing" attack. A single factor can survive a hit by a 10 factor stack. It's not likely, but the possibility is there. The uncertainty this produces tends to keep both players on the edge of their seats. You never know whether your troops will be heros, buffoons, or just average joes until the dice are rolled. In dense terrain, such as the Ardennes, the defender has a big advantage because the attacker cannot easily maneuver around defensive positions. Thus units on defense are rewarded with higher to hit numbers.
Bridge Demolition and Construction: Having introduced random factors and the idea of there are no guarantees in the game, it only seemed natural to apply the same principle to both bridge demolition and construction. Off the top of my head, I recall 3 instances of successful demolition (Trois Ponts twice and Werbomont) and two failures (Stavelot and Ourtheville). So bridge demolition was not a sure thing.
Chrome: I'm one of those guys who really hates chrome for chrome's sake. I have Black SS units, otherwise they are the same as any other German. Ditto for the British. The Special Forces counter was a suggestion of a playtest group. I added some refinements to make it a sort of limited use joker in the deck. Had the German supply people been fully informed that this was to be a major offensive, the Germans would have had plenty of gas for the 6 days the game covers, so I decided to forego fuel shortages and fuel dumps. Air power had a fairly negligible effect during the first 6 days. Entrenchments were clearly important historically, so they are in the game. Combined Arms I really wanted to factor in because it is one of the basic premises of warfare through the ages. Thus I have the 3 standard arms of every modern army: armor, infantry, and artillery. I penalized only the attacker because it seemed to me that not having artillery support or tanks did not necessarily mean your attack was less effective at causing casualties, but the defender had less reason to keep his head down. Therefore he would be better able to shoot up the attackers. Weather also seemed unnecessary given the thrust of the system although again purists may not appreciate its omission. A simple supply system is almost always needed in games of this scale. I tried to keep it to a minimum.
The Impulse System: I always liked the idea that each side should have to hold back reserves. Indeed this is one of the sacred cows of military theory and practice. The attacker needs reserves to exploit success. The defender needs them to seal off the penetrations. At one point I had 4 impulses per turn with night rules. It didn't work. Three impulses with no special night rules works very nicely. The German loves to use leapfrog tactics to keep the offensive moving forward, but the extra MP to enter occupied areas add up very quickly and creates nice congestion problems.
Stacking: The dual stacking system was developed because I wanted to accomplish two things which I couldn't seem to do with a single limiter:
- Control the strength that the Germans could put into any one attack.
- Make the effects of attrition on the ability to attack more pronounced, thus further justifying the step reduction system.
Unit Quality and Target Priority: These very artificial rules were put in for one reason; if I didn't have them, the US would only shoot at German armor and engineers, and never at volksgrenadiers (foot infantry). That is hardly realistic. This isn't a perfect solution, but it does work. I eased the impact of this rule a bit by not requiring defending units to fire at one factor attackers, otherwise some annoying sneaky tactics were possible.
Summary
My intent was to create a Bulge game that would be easy to learn and fun to play. I also wanted it to be enough of a challenge that serious players could enjoy it as well. The kind of games I enjoy most have clean, straightforward rules systems and are low in complexity, but rich in play possibilities. I want to spend my precious gaming time strategizing, not looking up some obscure rule. The counter quantity had to be manageable, and I wanted the game to be decided at the Meuse River. The Germans are definitely more capable than they were in reality, but otherwise the game would not be as interesting, at least to me. Finally, I decided early on that I couldn't deal with the entire campaign. It was just too big, and I think that it is really difficult to design a balanced game where the tide turns completely. I didn't want those headaches. After nearly ten years of effort, it seems to be just about right.
Play Strategy
The Germans have to attack constantly, but not rashly. Getting into a slugging match with the US is a slow, expensive proposition. It's risky to attack stacks of 6 SPs or more unless the area is critical to your chances (for example: Bastogne, Malmedy, or Arlon), or you need attrition badly, even unfavorable attrition. Always attack weak positions, simply to kill off American units. If possible, flank strong positions to force a withdrawal or to pocket the defenders and place them out of supply.
A much more difficult decision is whether to attack a strong US position within reach of a big stack or two, or to position those stacks for use against critical areas the following turn. If the German can't crack the Allied line open at least once in a game, he will likely lose. Keep in mind that you must have units with which to attack each impulse of a turn. Advancing only one or two areas each day will leave you short of the Meuse. Don't forget to hold back units to exploit with on the 2nd and 3rd impulse.
At first, the Germans seem to have unlimited resources. Not at all true! Soon enough they will have problems keeping the pressure on the US. As the German, you definitely need those reserve panzer divisions as early as possible, so push hard for the release objectives.
The problem for the Americans is just to survive the first crisis which occurs between 16-2 and 18-1. Be stingy with your defensive resources until the 3rd impulse of a turn. At first it will seem that you can't stop the German player from doing as he pleases, particularly once the panzers get going and your initial front line disintegrates. Then suddenly, on the 18th, you think, "Wow, I survived, and I've got all these units to play with now!" Don't kid yourself. A second crisis is coming between the 19-2 and 20-1 impulses, and it is very easy to throw away a virtually won position with an ill-considered move on the 19th.
It is generally unwise to over commit yourself early in a turn. Leaving even a single hole in the line at the end of a day can be fatal. For the Americans, possibly the most important weapon in their arsenal is the shovel. Dig in wherever possible, but be careful that you can't be outflanked and isolated by committing yourself too early in a turn. Tactically it is a good idea to shoot up the big German units. The Germans must have at least one 3 SP unit available to make a 9 factor attack force, and obviously four one factor units are not much of a threat yet still jam up the roads.
For both players, keeping one's morale up can be difficult. This is the sort of game where just when you think you've won (or lost), suddenly one turn later the entire picture can look very different. It is entirely possible to give up hope too early. I have played and observed games where the Germans were making very little progress, but seemed to be having good battle results. Still, they might have only scored one or two VP in the first three turns. Suddenly, on the 20th or 21st, the US line goes to pieces, and the Germans score 50 points on the 22nd. By the same token I have seen games where the Germans could do no wrong for the first three days (Bastogne falls on the 17th!) and yet on the 22nd, the game comes down to one last battle over a VP town.
Players often find that they have a very difficult time telling who is winning unless the game is very one-sided. The moral of this is that you shouldn't get too discouraged or too cocky. Overall, the system is simple, but requires a high level of skill and psychological toughness.
I wanted to design a game that would be decided at the Meuse River. If the Germans can get across the Meuse with some reasonable force, they should win. If not, they lose unless they own the rest of the board. That's the sort of victory conditions I was trying to set up. The point ranges for levels of victory seem about right based on playtesting. If you find that they skew the results too much after both players have some experience, then feel free to modify them.
Errata and Clarifications (1 October 2016)
Official GMT Games errata sheet, "Tigers in the Mist Errata and Clarifications, 1 October 2016". In the original, the latest changes are shown in red; that colouring is not preserved here.
Map
Sequence of Play: "7. Supply Phase" should be relabeled "Attrition Phase."
Rules
5.23: Only those Allied units that have a green triangle in the bottom right corner of their counter are eligible to move on the first impulse of December 16. These units may not move across a red or green scenario line on the 16-1 impulse. No other Allied units may move on the 16-1 impulse. Any Allied unit (except armor or units in an area where German units are present) may entrench on the first impulse of December 16.
6.0: In the sequence of play, IV-VII should read "Steps I, II and III above are repeated..." instead of "Steps II and III above are repeated..."
8.26: Add: Units may move from an on board area into a perimeter zone. Note that subsections 11.2 and 12.2 contain some restrictions which may apply to movement to or from zones.
8.295: Under the original rules, when a hole existed in the enemy line, supply could be traced to just about anywhere on the map. This led to some unrealistic play situations.
When a hole exists in either sides line at the end of a player impulse, place a movement marker on the hole(s) to indicate a point from where supply for units to be moved on the following impulse may be traced. The marker is placed on the closest connecting area between two friendly units that is closest to the other players supply zones. Moving units must pass through this area prior to moving further from their supply zones. Examples follow.
Example 1. There is a hole in the US line at Rochefort at the beginning of the turn. German units at Wellin, Grupont and Marche may not move further from their supply zones without first passing through Rochefort. Any of these three German units may move directly to Rochefort and then to Forzee and continue moving. The units at Petit Han and Ouffet may not move past the US line on this impulse.
Example 2. There is a hole in the US line at Noville at the beginning of the turn. German units at Bastogne, Longvilly and Houffalize may not move further from their supply zones without first passing through Noville. Any of these three German units may move directly to Noville and then to Bertogne and continue moving.
If the US unit in Longvilly was not present, the marker would still go to Noville because it is closer to Zones B & C than Bertogne.
If the German unit was in Longvilly, but there was not one in Bastogne, the marker would still go into Noville, not Buret, because Noville is one area from both Longvilly and Houffalize whereas Buret is two areas from Houffalize.
Example 3. There are holes in the US line at Noville and Martelange at the beginning of the Dec 18 turn. These holes are marked with German Moved counters. German units at Bastogne, Longvilly, and Houffalize must move through Noville prior to entering Bertogne. German units at Martelange may move to Fauvilliers. German units in Bastogne may not move directly to Nives.
(The map illustrations for these three examples are not reproduced.)
8.34: Delete the word "have"
8.34: Units may not cross rivers where there is no bridge or blown bridge. The first paragraph of 8.2 clearly states that movement between adjacent areas must be along roads.
11.11: Some US reinforcements specify multiple zones for their initial deployment (eg. D E F). The owning player may place those reinforcements in the possible entry zones in whatever combination he prefers.
11.24: Allied units may exit the map via a perimeter zone (D-P only) and re-enter the map at another zone after paying impulse and movement penalties per rule 11.14. In the smaller scenarios, on map units may not move to or from a zone if that requires them to move out of the scenario playing limits.
11.33: Superiority in only one of the listed areas is sufficient to release Axis contingent reinforcements. The OB cards for the scenarios are very explicit compared to the rules.
11.34: German reinforcements are not released if the unit(s) in the release area are placed OOS during the same game impulse superiority for release is achieved.
12.22: To effect control of a VP area, a unit must end an impulse in the area. Units can later move out of the area and it will still generate VP for that side, but the initial change of possession must be effected by a unit ending a player impulse in the VP area.
12.22: VP for control of on board areas is only scored if the units in the VP area are in supply at the end of the turn.
12.23: Add: VP for occupation of zones is only scored at the end of a scenario.
12.26: The German player scores VP normally at the end of the 22-1 impulse in the scenarios that end on 22-1. For scoring purposes, this one impulse counts as an entire day.
13.21: Attrition losses occur simultaneously for both sides. Therefore attrition losses have no effect on the OOS condition of any of the affected units for the current Attrition Phase.
14.13: In the smaller scenarios, the German Special Forces Unit may not be placed outside of the scenario lines for the scenario being played.
Examples of Play
Combat; the US mech unit shown in the example should have a strength of three in order to agree with the text.
Scenario Cards
5th Panzer Army Scenario card: for impulse 20-1, Beaufays and Oneux should be deleted from the list of areas for conditional reinforcements because they lie outside the map boundary for the scenario.
7th Army Scenario card, Turn Record Track: the first "16-3" should be a "16-2".
Scenarios
Introductory Scenario (The 7th Army Attacks), Special Rules: Add: For the Seventh Army scenario ONLY, Mersch is also a US supply source.
Counters
Due to an oversight, no substitute Wehrmacht mech units were printed. Use SS mech substitutes instead. We hope GMT will print some in an upcoming issue of C3i.
Questions and Answers
Q. (7.2) Is it legal to overstack in an area by bringing in fresh troops from behind the line and take the stacking losses from weak or already committed units? A. No. Rule 7.2 was written so that there was a penalty for mistaken overstacking, not so it could be twisted in an unreasonable fashion so as to circumvent the intent of the general stacking limit rules. Killing your own exhausted troops in order to make room for fresher units is not allowed.
Q. (8.28) May a unit in a scenario enter the active playing area at a location where it would be out of supply? A. No. See Rule 8.28.
Q. (8.28) Is a supplied unit allowed to move so that during the move it's OOS, but at the end in supply? A. No.
Q. (8.28, 13.23) May a unit that is out of supply move away from it's own lines? A. A unit that is OOS may move further OOS (one area). If it is not OOS, it may not move so as to become OOS.
Q. (8.3) Friendly Unit A (foot infantry) starts next to bridge and attempts to cross. Enemy Unit X blows bridge. Unit A loses 1 MP, so now has 4 MPs. Can Unit A cross river (3 for river crossing, +1 for entering enemy occupied area)? A. Yes, it can still cross the river for 4 additional MP (total of 5).
Q. (8.3) Same situation as the above question, but Unit A just decides to cross the river so the bridge won't be blown. Is this legal? A. Not legal. If the bridge is up, you must attempt to cross using it.
Q. Under Rule 8.34 and 8.35, mechanized/motorized/engineer unit can cross a river as foot infantry. Is this OK? A. Yes, they may cross, but must move at 5 MP during that impulse and all following impulses until they can trace a supply line back to a supply source without the supply line crossing a blown bridge.
Q. (8.34) At what point in a turn does a mech unit announce it's going to move strictly on foot in order to cross a river at a blown bridge? A. Whenever the owning player chooses, so long as the unit does not spend more than 5 MP. The owning player can see if the bridge is blown first prior to changing to foot mode.
Q. (8.52) Can an engineer moving as foot infantry (across a blown bridge) move 3 MP and then entrench? A. No. It costs engineers 4 MP to entrench. Engineers moving as foot infantry have only 5 MP.
Q. (8.53) May an infantry unit move and in the next impulse, on the same day, entrench? A. No.
Q. (9.14) If units move out of a contested area and leave some other units behind, must the units left behind attack the defending units or become committed (receiving a "moved" marker)? A. No. Units in a contested area are only required to attack or become committed if other units starting in that area or entering it attack defending units in the contested area.
Q. (9.46) If all attackers in a battle are eliminated, does their supporting artillery get to fire? A. Yes.
Q. (9.51) When motorized/mech/engineer units cross a river as foot infantry and go to combat in the destination Area, can I treat these units as mechanized in combat? A. The unit quality does not change as a result of the river fording rules.
Q. (9.46) (9.53) The attacker has four 1SP units: eng, mech, armor, foot infantry. May defending artillery fire on the engineer? Is the defenders 1SP foot unit constrained to fire on the attacking foot infantry or may it also fire on the engineer (if it survives the artillery shot)? A. Yes. Artillery may fire on the engineer. In this situation, 9.53 would be superceded by rule 9.52. So unit quality requirements for targeting by ground units would be in effect. The defender must fire on the foot unit.
Q. (10.21) Can units in an Perimeter Zone blow a bridge? It looks like the Allied player can leave reinforcing units in Zones G and H and blow bridges in the face of advancing Germans. A. Yes.
Q. (10.23) Does a defending infantry type unit get a bridge demolition die roll for each unit that attempts to cross the SAME bridge into its area or only one per impulse? A. No. There is only one bridge demo roll per bridge per impulse.
Q. (10.23) Could a stack of defending infantry type units attempt to blow up two bridges each or is the two bridge limit/Impulse the limit for the whole stack? A. The limit is per unit. For example: The US has a unit in Trois Ponts. The Germans try to enter from Vielsalm, Stavelot, and Stoumont. The US unit can only attempt to blow two of those bridges. If the US had two units in Trois Ponts, they could attempt to blow all three bridges as the Germans tried to cross each, however they get only one demo attempt per bridge.
Q. (10.23) Can a defending unit refuse to blow a bridge? A. Yes. However, that refusal counts as an attempt to blow a bridge anyway.
Q. (10.24) An enemy unit is defending behind a river. Unit A enters the defenders area. The bridge either blows or doesn't, but unit A has enough movement to enter the area in either case. Later in the same impulse, the player on the move attempts to move unit B into the defenders area via another bridge. May the defender attempt to blow this bridge? A. Yes. Rule 10.24 specifies that the defender may not blow bridges only if the attacker has a unit in the area at the start of the impulse.
Q. (11.14) When a player wants to enter a reinforcement from a different zone, when must he announce his intention? A. On the impulse he intends to move the units. Example: A reinforcing unit is placed in zone E on 17-1. On 17-2 it can enter at zone E [with no MP penalty] or at zones D or F with the MP penalty.
Q. (11.21) What happens if a German unit enters a VP zone where Allied reinforcements has been placed this impulse or if Allied units were left in the zone from an earlier impulse. Are the Allied units forbidden to leave that zone and enter an adjacent area? A. Yes.
Q. (11.21) If yes (to the question above), can they "move" to an adjacent zone following rule 11.14, next impulse at a cost of 2 MPs per zone? A. Yes
Q. (13.21) Units of each side occupy adjacent areas. During following impulses, both become OOS. (Both OOS units are part of the reason the other is OOS) Which unit suffers OOS attrition first? This could be critical since one unit surrendering might open an LOS to the other. A. The rules don't specify attrition order. Therefore both sides suffer attrition simultaneously, irregardless of the effect of the attrition on the OOS condition of any of the affected units.
Q. 5th Panzer Army Scenario: Rules say that: "The scenario ends at the end of the German December 22 - 1 impulse." This says to me that the game ends at the end of phase II, and that it goes directly to IX Victory phase. No US move or combat and no Attrition phase. But then, back at the beginning of the rules under 6.0 there is an exception that says each player gets an impulse on 22 - 1. As I see it the exception refers solely to the Campaign. In the 5th Panzer the Germans only get a 22 - 1 impulse. Not the US. A. Correct
Q. Is there an Attrition Phase in either scenario? A. No