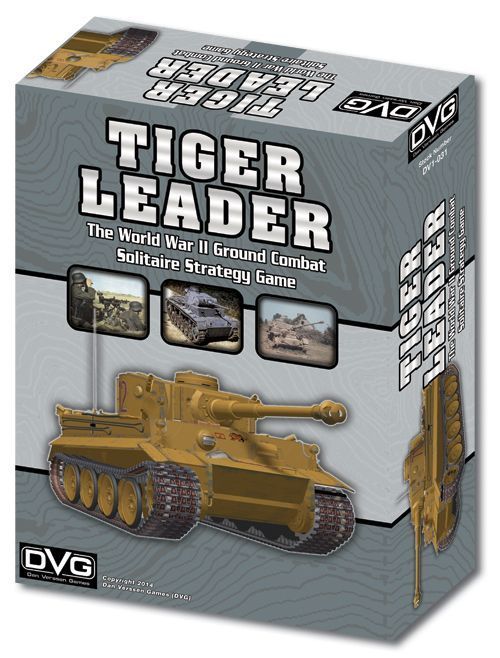
Tiger Leader
Tiger Leader Rulebook
Table of Contents
Table of Contents
Sequence of Play
This rulebook is organized according to this Sequence of Play.
Campaign Set-Up
- Select Campaign Card
- Select Objective Card
- Draw Battalion Cards
- Buy Units
- Select Commanders
Start of Week
- Special Condition Card
- Assign Units
Pre-Combat
- Event Card
- Place Turn Counter
- Place Terrain Tiles
- Place Friendly Units
- Unit Advancement
- Place Enemy Units
- Unit Advancement
Combat
- Fast Move and Attack
- Roll for Enemy Move
- Enemy Actions
- Slow Move and Attack
- Advance Turn Counter
Post-Combat
- Event Card
- Battalion Status
- Record Commander Stress
- Record Commander Experience Points
End of Week
- Move Battalions
- On Leave
- Adjust Special Option Points
- Repair/Replace
- Priority R&R
End of Campaign
- Campaign Outcome
Campaign Set-Up
Tactical Display Sheet
Place the Tactical Display Sheet on the table in front of you. Use this Display to resolve the Combat steps of each Battle.
The parts of the Tactical Display Sheet are:
- Battlefield Area
- Card Areas
- Turn Track
- Sequence of Play
- Initial Enemy Placement Diagram
- Operational Map
- Enemy Operational Movement Chart
- Enemy Tactical Movement Chart
Headquarters Sheet
Place the Headquarters Sheet next to the Tactical Display Sheet. This sheet shows the Tank types you will encounter during your Campaign, and general information you will need, as well as areas to place some of your cards.
Cards
Separate the cards by type: Unit cards, Commander cards, Campaign cards, Objective cards, Battalion cards, Event cards, and Special Condition cards.
Shuffle the Special Condition deck and Event deck, and then place them face down in the labeled areas on the Tactical Display Sheet. When you need to draw a card and no cards remain in a deck, shuffle the discard pile to form a new deck.
Separate the three types of Battalion cards, and form three Decks of Assault, Supply, and Command cards. Each Battalion card has its type noted on its card back.
Do not form decks for Campaign cards, Objective cards, Unit cards, and Commander cards. You select cards from each type at the beginning of a Campaign.
Counters
- Stress - Used to record the Stress your Commanders suffer during a Campaign.
- Tactics - Used to record the number of times your Commanders and Units can use Tactics in a Battle.
- Enemy Unit - The background color indicates the Unit's country. Poland is red, Britain is tan, France is blue, US is green, and Russia is brown. The reverse side shows the Unit when it is Destroyed. In the game, "Enemy" refers to the forces you are fighting against.
- German (Friendly) Unit - The number on the counter is its Unit number. This same number is also found on its Unit card. In the game, "Friendly" refers to your forces.
- Scout - Used to increase Battle Turns.
- Truck - Used to reduce the cost of attacking Enemy Battalions deep in enemy territory.
- Enemy Battalion - Full and Half Strength. Used to show the Battalion's position on the Operational Map.
Damage Counters
Gather the Damage counters and put them into an opaque cup. The Damage counters are two-sided.
- The camouflaged side is for Damage inflicted on your High Explosive (HE) Units.
- The gray side is for Damage inflicted on your Armor Piercing (AP) Units.
Expansion Game Counters
There are several red and green counters on counter sheet one. The red counters are for the Enemy Commander Expansion pack, and the green counters are for the Terrain Tile Expansion pack.
These counters are not used with the core game.
Player Log
The information you record on the Player Log determines Commander Promotion, and shows Special Option Point expenditures, Combat Unit Status, and Victory Points earned. Photocopy this sheet or download it from www.dvg.com.
The Die
Whenever a die roll is called for in the game, roll a ten-sided die (1d10). This will generate random numbers from 1 to 10. Some dice have numbers ranging from 1 to 10, others range from 0 to 9. Treat the die's "0" face as being a "10".
The only exception is rolling on the Enemy Tactical Movement chart. Depending on the Enemy's aggressiveness level, you may roll either a 6-sided die or a 10-sided die.
End of a Campaign
The Campaign ends when any one of the following occurs:
- When you complete the last Week of the Campaign.
- When you must pay a Special Option Point cost and cannot do so.
- When you achieve a Great result.
Select Campaign Card
Choose the Campaign card you would like to use and place it on the Headquarters sheet.
We recommend starting with an Introductory Campaign for your first Campaign.
Record the name of your Campaign card on the Player Log.
The parts of a Campaign card are:
- Campaign Name - The opposition and campaign you are fighting against. Example: In this Campaign, you will fight against the Polish army.
- Year of the Campaign - You may only choose Friendly Units whose years of service include this year.
- Difficulty Level - The difficulty Levels from easiest to hardest are: Introductory (Intro), Standard, Advanced, and Expert.
- Special Option Points - This number modifies the number of (Special Option) SO points you get from your Objective card at the start of the Campaign.
- Terrain - Each Campaign card lists the Terrain type used: Desert, European, Winter, or Jungle.
- The 8 Terrain tiles with the brown triangles are used in Desert Campaigns.
- The 8 Terrain tiles with the green triangles are used in European Campaigns.
- The 8 Terrain tiles with the gray triangles are used in the Winter Campaigns.
- The 8 Terrain tiles with the white triangles are used in the Jungle Campaigns.
- Special Notes - Each Campaign has Special Notes that modify the Campaign.
- Commander Skill Levels - Each Campaign card shows your starting Commander Skill levels. You get one Commander for each Unit you purchase. From lowest to highest the Commander Skill Levels are: Recruit (Re), Green (Gr), Average (Av), Skilled (Sk), Veteran (Ve), and Legendary (Le).
- Aggressiveness Level of Enemy Units - These die roll ranges determine if the Enemy Units will roll a d6 or d10 when performing Tactical Movements.
Example: I roll a 10-sided die to determine the Aggressiveness Level and get a 4. The Enemy will roll a 6-sided dice for their Movement rolls during the Battle.
Select Objective Card
Choose the Objective card you would like to use and place it on the Headquarters sheet.
These cards show information specific to your chosen Objective.
Record your Objective on the Player Log.
The parts of an Objective card are:
- Objective Name
- Starting SO Points - Each Objective card specifies the number of Special Option (SO) points you have at the beginning of the Campaign. This number is modified by the SO points shown on your Campaign card.
You purchase Units with your Special Option points. SO points may also be expended due to Special Conditions and Events.
Record your starting SO points on the Player Log.
- Weeks - You have the designated number of Weeks to complete the Campaign. Record the number of Weeks on the Player Log. You will also record each Week's activities on the Player Log.
- Weekly SO Points - At the end of each Campaign Week, you gain this number of SO points. Record this number on the Player Log Sheet.
- Battalion Point Value - This number shows the total value of Enemy Battalion Points you randomly draw at the start of the Campaign.
- Special Notes - Each Objective card has specific rules that modify your Campaign.
- Evaluation - The Victory Point chart shows how well you are doing in the Campaign. You score Victory Points (VPs) when you Destroy enemy Battalions. As you play the Campaign, compare the number of Victory Points you have earned to the Evaluation Chart on the Objective card.
Draw Battalion Cards
Battalion cards represent the enemy forces present in your vicinity.
The parts of a Battalion card are:
- Battalion Name
- Enemy Units - Lists the quantity and types of Enemy Units present in the Battalion. These are the Units that fight on the Battlefield area of the Tactical Display Sheet.
- Battalion Designation
- A - Assault Battalions: These Battalions advance quickly on the Operational and Tactical maps.
- S - Supply Battalions: These Battalions usually add or subtract from your SO points.
- C - Command Battalions: These Battalions usually have Special Notes that affect other Battalions.
- Half / Destroyed Values - Each Battalion card has a set of numbers. The Battalion is reduced to Half if the value of Enemy Units remaining on the Battlefield is reduced to the first number. The Battalion is Destroyed if the value of Enemy Units remaining on the Battlefield is reduced to the second number or lower.
Each Enemy Unit counter has a Point value in its top-left corner.
Example: This Tank Counter is worth 3 points.
Example: If, at the end of the Battle there are 19 or more points of Enemy Unit counters remaining on the Battlefield, the Battalion is still at Full strength. If that number is from 18 to 8 points, the Battalion is reduced to Half strength. If there are 7 or fewer points remaining, the Battalion has been Destroyed.
- Battalion Point Value - This number shows the Battalion's point value. You use this number when drawing Battalion cards for a Campaign, and you earn this number of Victory Points by Destroying the Battalion card.
- Placement and Special Notes - Each Battalion card designates which Operational Map's Range Band it starts in.
Example: A Battalion card has the Enemy Rear trait. Place its Battalion counter in the Enemy Rear Range Band on the Tactical Display Sheet.
Any Special Conditions specific to this Battalion card are also noted here. Unless the note specifies otherwise, Special Notes only affect this Battalion card.
Immediately ignore the Special Note text on a Battalion card when it is reduced to Half, with the exception of Special Note text in yellow. Yellow text effects still apply, even when the Battalion has been reduced to Half.
Example: "1XP" is in yellow. You still gain 1 extra XP when you Destroy the Battalion, even if it has been reduced to Half in the past.
Fixed Battalions
If a Battalion card has the "Fixed" Special Note, the Battalion does not Move during the Move Enemy Battalions phase. Fixed Battalions have a Building graphic on their counters. Fixed Battalions remain Fixed and never Move.
Determine and Place Battalions
Draw cards from the three Battalion decks in the following order: Assault, Assault, Supply, Command.
Draw one card from the Assault deck, then another card from the Assault deck, then one card from the Supply deck, and finally one card from the Command deck. Repeat the cycle as needed.
Once you draw a Battalion card and its Battalion point value brings the total equal to, or in excess of, the Objective card's Battalion point value, stop drawing Battalion cards. The Battalion cards drawn, including the last card drawn, are part of your Campaign.
Example: You are playing an Objective with 23 Battalion points. You draw an Assault Battalion worth 5 points, another Assault Battalion worth 2 points, a Support worth 2 points, a Command worth 5, an Assault worth 5, an Assault worth 3, and a Support worth 2. You have now drawn 24 points, which exceeds the Objective's value of 23, so you stop drawing. These are the Battalions in your Campaign.
Set aside the remaining Battalion cards. You will not use them during the Campaign.
The designation on the Battalion card corresponds to a Battalion counter.
Find the counter for each Battalion appearing in your Campaign. For easy reference, the Battalion's Victory Point value is printed on each counter.
Place the Battalion counters on the Tactical Display Sheet's Operational Map. Each Battalion card designates where on the Operational Map the counter is placed. The Battalion counters are placed with their Full Strength side facing up.
Example: The 2S Outpost is placed in the Enemy Rear band on the Operational Map.
Place the Battalion cards on the Headquarters Sheet in the area for Battalion cards.
Buy Units
Select the Unit cards you would like to have under your command. You can only select Units that have a Service Life that includes the Year of your Campaign.
Some Campaign cards also have a Special Note that limits the number of Armor Units you can have in the game at the same time.
Also, save a few SO points to purchase Trucks and Scouts, as well as for the other spending once the Campaign starts.
Example: This Campaign takes place in 1939. All Units purchased for this Campaign must have a Service life that includes 1939.
The parts of a Unit card are:
- Unit Name
- Service Life - The years that this Unit was in service.
- Unit Number - This number is also found on the Unit counter. The Unit card is placed in front of you on the table, and the Unit counter will be placed on the Terrain tiles during Combat.
- Special Option Points - Spend this number of SO points to purchase this Unit.
- Unit Type - Units have the following types: Armor, Light Armor, Artillery, and Infantry.
- Special Notes - Any Special Notes pertaining to this Unit are noted in this area.
- -X Attack when Moving: If the Unit Moves and Attacks during the same step, apply the modifier to each of its Attack rolls.
- Can only use AP at R0: The Unit can only conduct AP Attacks when it is at Range 0 from its target.
- X Stress if Move & Attack: If the Unit Moves and Attacks during the same step, inflict the noted number of Stress points on the Unit's Commander before the Unit Attacks.
- Cannot Move & Attack: The Unit can either Move or Attack during a step, but not do both.
- Transport: This Unit can Move 1 Infantry or 1 Artillery Unit in its hex when it Moves.
- Tactic: The Unit starts each Battle with the noted number of Tactic counters.
- Command Tactic: The Unit starts each Battle with the noted number of Tactic counters and can use them as Command Tactics.
- Speed - The maximum number of hexes that this Unit can Move during its turn.
- Attack - You must roll these numbers or higher on any of your Attack dice to Destroy an Enemy Unit.
Use the black "AP" (Armor Piercing) value when attacking an armored target: Tank, Halftrack, Bunker, or Armored Car.
Use the red "HE" (High Explosive) value when attacking a non-armored target: Truck, Building, Rifle, AT, MG, Mortar, or AT Gun.
- Range - This Unit can attack Enemy forces in any hex within its Attack Range. Some Units cannot Attack at Range 0 (in their own hex).
Example: A Unit has an Attack Range of 1-3. It cannot Attack at Range 0. It can attack 1, 2, or 3 hexes away from its hex.
- Defense - Roll this number or lower to negate each successful Enemy Attack rolled against the Unit.
Example: A Unit has a Defense of 2. An Enemy Unit rolls two Attacks against it, gets lucky, and they both hit. Roll a die for each of the 2 successful Attacks. A roll of 1 or 2 negates an Attack.
- Target Type - Each Unit can be attacked by either AP (Armor Piercing), or HE (High Explosive) Attacks.
Record on the Player Log the SO points you spent on Units.
Find the Unit counters that have the same Unit numbers as the Unit cards you selected. Place the Unit counters near the Tactical Display Sheet.
Place the Unit cards on the Headquarters sheet.
We suggest a balanced selection of Units.
For example: 2 or 3 Armor, 1 or 2 Light Armor, 2 or 3 Infantry, and 0 or 1 Artillery. Also, leave a few SO points unspent, to purchase Support forces, Promote your Commanders, or for future use in the Campaign.
Select Commanders
You automatically get one Commander, matching the Unit's type, for each Unit you purchased. You cannot select extra Commanders.
The Campaign card shows how many Commanders you receive at each Skill Level. You must select Commanders in order of Skill Level from lowest to highest: first Recruit, then Green, Average, Skilled, Veteran, and finally Legendary.
Once you have selected the specified number of Recruit Commanders, you then select the specified number of Green Commanders, and so on.
If you select more Commanders than are listed, all additional Commanders have the Skill level noted with the asterisk.
Example: You are playing the Poland 1939 Campaign. You purchased 15 Units. You must choose exactly 15 Commanders. According to the Campaign card, the first 3 Commanders are Recruits, the next 3 are Green, you then get 2 Average, and 1 Skilled. After gaining the 9 Commanders with the Skill levels found on the Campaign card, all additional Commanders will be Green.
If you had purchased only 6 Units, you would receive 3 Recruit and 3 Green ranked Commanders.
Each Commander card has two sides that show different Experience Levels. Each Commander's Name has 3 cards with a total of 6 Skill Levels.
A Commander can only Command the type of Unit listed on his card.
Example: If you purchased 2 Armor Units, 1 Light Armor Unit, 3 Infantry Units, and 1 Artillery Unit, you must select 2 Armor Commanders, 1 Light Armor Commander, 3 Infantry Commanders, and 1 Artillery Commander.
Commanders are not permanently assigned to a specific Unit. They can Command any Unit of that type.
Select the Commander cards you would like to have in your command. You may only choose one instance of each Commander's name.
The parts of a Commander's card:
- Commander's Name
- Unit Type - A Commander can only Command Units of the Type listed on his card.
- Skill Rating - The Commander's Skill Rating.
- XP (Experience Points) - The number of Experience Points the Commander must earn to be Promoted to his next higher Skill Level.
- Cool - Cool removes Stress from the Commander after a Battle.
- Stress - Commanders suffer Stress when participating in a Battle. Commanders can suffer additional Stress when attacked during a Battle.
If a Commander's Stress falls into the "Okay" range, he uses his "Okay" Skill Values.
Commanders exceeding their Okay range become Shaken, causing them to use their Shaken Skill values. Commanders exceeding the Shaken Range become Unfit.
Example: The Okay Stress range on the example card is 0 to 6, the Shaken Stress range is 7 to 12, and the Unfit range is 13 and higher.
If a Commander becomes Unfit during a battle, treat the Unit as not having a Commander. The Unit becomes Slow and suffers a -2 to its Attack rolls. Also, the Commander cannot use his Skills.
- Status - Okay, Shaken, or Unfit. This is based on the Commander's current Stress points.
- Speed - Fast or Slow. A Fast Commander Attacks before the Enemy Units Attack each Battle Turn. A Slow Commander Attacks after the Enemy Units Attack each Battle Turn.
- Attack Rating at Range 0, or Range 1+ - Modifies the Commander's die rolls when attacking the enemy.
Use the Range 0 modifier when attacking Enemy Units in the same hex. Use the Range 1+ modifier when attacking Enemy Units outside the hex.
- Special Notes - Any Special Notes pertaining to this Commander are noted in this area. Special Notes cannot be used when the Commander is Unfit.
- Aggressive: The Unit can Move and Attack without suffering the noted Stress.
- Cautious: The Commander's Unit cannot Move (even if Moved by a Transport) and Attack in the same step.
- Close Combat: Roll 1 extra die for the Unit when it performs Range 0 Attacks.
- Command Tactic: The same as Tactic, except the Unit can expend the Tactic for another Unit to use.
Example: A Commander uses a Command Tactic to allow a (Slow) Commander to attack during the Fast Move and Attack phase. The Slow Commander can also attack again during his normal Slow Move and Attack phase.
* **Marksman:** When rolling for an Enemy Unit's Defense, do not add a Terrain Cover bonus when defending against this Unit's Attacks.
* **Mechanic:** At the start of the Repair/Replace step, each of your Mechanics can freely repair 1 or 2 Vehicle Damage counters.
* **Medic:** At the start of the Repair/Replace step, each of your Medics can do one of the following: Freely remove a Wounded Commander counter, freely remove a Casualty Damage, or freely remove 2 Stress from one Commander.
* **Overdrive:** You can add 1 to the Speed of the Unit when it Moves, but the Commander suffers 1 Stress.
* **Spotter:** The Unit ignores blocking Line of Sight Terrain hexes.
* **Tactic:** Expend a Tactic counter for the Unit during either the Fast or Slow step when it is not due to act. The Unit can now act during this step for this Battle Turn in addition to acting during its normal step.
Example: A Commander is Fast. He attacks during the Fast Move and Attack phase, then uses a Tactic counter to attack again during the Slow Move and Attack phase.
Commander Promotion Priority
After selecting your Commanders, you may spend SO points to immediately Promote one or more of your Commanders to his next higher Skill Level.
When you Promote a Commander, pay 3 SO points for each Skill Level promotion. You can Promote a Commander more than once.
Example: I choose to use Commander Promotion to increase Cruz from Average to Skilled. I pay 3 SO points and use the Cruz Skilled card in my Campaign.
Record the Commander Names, Skill Levels, XPs needed for Promotion, and Cool points on the Player Log.
Record the number of Commanders you have with the Medic or Mechanic Skills on the Player Log.
Trucks and Scouts
You can also purchase support forces.
Trucks
Each Truck counter costs 2 SO points. Each Week, each Truck assigned to an Enemy Battalion in the Enemy Breakthrough, Enemy Rear, or Enemy Transit Range Band subtracts 2 from your SO point cost to attack the Battalion.
You can use each Truck once each Week and you can assign multiple Trucks to a single Battalion.
You may also purchase Trucks during the Repair/Replace step each Week.
The number of Truck counters does limit your purchases. You may not purchase more Truck counters than available in the game.
Scouts
Each Scout counter costs 1 SO point. Each Scout assigned to an Enemy Battalion adds 1 Battle Turn to the Battle.
You can use each Scout once each Week, and you can assign multiple Scouts to a single Battalion.
You may also purchase Scouts during the Repair/Replace step each Week.
The number of Scout counters does limit your purchases. You may not purchase more Scout counters than available in the game.
Enemy Units
Gather the Enemy Unit counters for your selected Campaign.
Place the Enemy Unit counters to the side of the Tactical Display Sheet. You will use them during the Combat steps.
Record on the Player Log the number of SO points you spent on Trucks, Scouts, and Promotions.
Write the number of remaining SO points in the SO points box of the first column.
This completes the Set-Up steps. You are now ready to start your Campaign.
Start of Week
Perform the following steps each Week of the Campaign.
Special Condition Card
Draw a card from the Special Condition deck on the Tactical Display Sheet and follow the card's directions.
Unless the card text says otherwise, the Special Condition applies to all of the Battles fought during the Week, and takes effect immediately. Any costs must also be paid immediately.
Assign Units
Each Week, you will need to attack 1 to 3 Enemy Battalions to do well in the Campaign. Compare the Victory Points you will earn by Destroying each Battalion to the Evaluation chart on the Objective card to get an idea of which Enemy Battalions you need to Destroy during the Campaign.
Choose which Battalions you will Attack during this Campaign Week. Then, select all the Units and Commanders that will Attack each Battalion, and place their cards together for later use. Each Unit assigned to a Battle must have a Commander of the same Type.
You may not assign Unfit or Wounded Commanders to a Battle. You may not assign Vehicles with Engine or Suspension Damage to a Battle.
Assign Trucks and Scouts to the Battalions you are attacking this Week.
Select the Battalion you would like to attack first for the Week. Write the number of the Battalion you have chosen to Attack on the Player Log in the Battalion Target box. Place the Battalion card you have chosen to attack in the Battalion card box on the Tactical Display Sheet.
On Leave
You may choose to leave some Commanders, and their Units, out of the Week's Battles. These Commanders are assumed to be On Leave and will reduce 4 Stress points at the end of the Week.
Operational Move Cost
The Operational Map is broken into Range Bands. If you assign Units to attack Enemy Battalions in their Enemy Transit, Enemy Rear, or Enemy Breakthrough Range Bands, you must immediately pay SO points.
Enemy Transit: If you attack a Battalion in their Transit area, you must pay 1 SO point when you assign Units.
Enemy Rear: If you attack a Battalion in their Rear area, you must pay 2 SO points when you assign Units.
Enemy Breakthrough: If you attack a Battalion in their Breakthrough area, you must pay 3 SO points when you assign Units.
Example: You attack a Battalion in the Enemy Rear, you must pay 2 SO points.
Remember to pay 2 fewer SO points for each Truck you assign to the Battalion.
Perform the Pre-Combat, Combat, and Post-Combat steps for each Battle before moving on to the next Battle.
Pre-Combat
Perform the following steps at the start of each Battle.
Event Card
Draw an Event card, and apply the effects of the top section.
This represents the time from when the Units are preparing for the battle, until they reach the battlefield.
- Pre-Combat Event
- Post-Combat Event
Unless an Event card states otherwise, Events only apply to the current Battle, and the Commanders and Units participating in that Battle. All effects and costs are immediate.
Place Turn Counter
Each Battle lasts 5 Turns. Place the Turn Counter on the "1" Box on the Tactical Display Sheet's Turn Track.
Place any Scouts you assigned to the Battle next to the Battle Turns track as a reminder of the extra Turns you can use during the Battle.
Place Terrain Tiles
Your Units and the Enemy Units move across the hexes during the Battles.
Gather all the Terrain Tiles of the type specified by your Campaign card. Each Battle, shuffle the Terrain Tiles and randomly place 6 of them on the 6 Tile spaces on the Tactical Display sheet.
The remaining Tiles will not be used during the Battle.
The 6 Tiles form your Battlefield for the Battle.
Each Tile has an arrow. Place the Tiles on the Tactical Display Sheet with all arrows pointing toward the top edge of the Tactical Display Sheet.
Each Tile is divided into 4 hexes.
Terrain Types
Some hexes have a special letter notation.
Line of Sight
Some hexes are noted as blocking Line of Sight. In order to Attack, the shortest path of hexes between an Attacking Unit's hex and the Target Unit's hex must be free of Line of Sight blocking hexes. When checking Line of Sight, check the Target's hex, but do not check the Attacker's hex. If a hex blocks your Line of Sight, you cannot target a Unit behind it.
Each special hex has special rules:
An "H" in a hex designates Heavy Cover. Heavy Cover adds 2 to a Unit's Defense, and blocks Line of Sight.
Example: A Tank is in a Heavy Cover hex. When it is attacked, add 2 to its Defense value.
An "L" in a hex designates Light Cover, adds 1 to a Unit's Defense, and Blocks Line of Sight.
"W" in a hex designates Water. Units may not enter a Water hex. A Water hex does not block Line of Sight.
A Bocage hex (wooded area) adds 1 to a Unit's Defense. A Unit in a Bocage hex can only be attacked from a range of 0 or 1. Bocage blocks Line of Sight.
An "Im" in a hex designates Impassable Terrain. AP Units (Armor, Light Armor, Tank, Halftrack, or Armored Car) may not enter an Impassable hex. Impassable hexes add 2 to a Unit's Defense, and Block Line of Sight.
HE Units may enter "Im" hexes as normal.
After laying out the Terrain tiles, verify that all non-Impassable hexes can trace a path to all other non-Impassable hexes. If any hex cannot be entered, pick up the Tiles and lay out a new set.
If all the hexes in the top or bottom rows contain Impassable hexes, pick up the Tiles and layout a new set.
You cannot place your AP Units in Impassable hexes.
If an Enemy AP Unit is to be placed in an Impassable hex, place it in the closest non-Impassable hex. If there is more than one hex equally close, you choose the hex.
Place Friendly Units
Gather the Unit cards and counters, as well as their Commanders, and place them next to the Tactical Display Sheet. Place your Unit counters in any hexes in the bottom row.
You may issue each of your AT and MG Units 1 Move Order.
You may issue each of your Rifle Units 1 or 2 Move Orders.
Move up to the Unit's Maximum Movement. Moving into a hex counts as 1 movement of a Unit's Speed.
Treat these Move Orders as normal Movement Orders for purposes of Terrain and other game effects.
This graphic shows the 8 Enemy starting hexes at the top of the map, as well as the 4 Friendly starting hexes at the bottom of the map.
Place Enemy Units
The quantity and type of Enemy Units present are shown on the Battalion card. However their hex locations on the Battlefield are not known until you begin the battle.
Each Battalion card shows the number and type of Enemy Units you will engage during the Battle.
Example: When engaging the Large Tank Force, you will encounter 6 Tanks, 4 Halftracks, 2 Rifle Teams, 2 Machine Gun Teams, 2 Anti-Tank Guns, and 2 Armored Cars.
Gather the Enemy Unit counters for the Battle. Enemy Units have two sides, an Active side and a Destroyed side.
Roll a die for each Enemy Unit to determine its hex placement.
The Initial Enemy Placement Diagram on the top of the Tactical Display sheet represents the top 2 rows of the Battlefield.
Place the Enemy Unit counters on the Battlefield with their Active sides up.
Example: I gather the 6 Enemy Units for the Outpost Battalion and roll a 10-sided die for each. The first die roll is a 3, so I place the first Enemy Unit in the hex noted with a "3". The second roll is a 7 so I place the second Enemy Unit in the hex noted with "6-7", as indicated on the Sheet. I continue rolling and placing until all the Enemy Units are placed.
Enemy Infantry - Starting Advances
After placing the Enemy Units:
Issue each of their AT and MG Units 1 Advance Order.
Issue each of their Rifle Units 2 Advance Orders.
For each Advance Order, move the Unit 1 hex closer to the closest Friendly Unit.
Treat these Advance Orders as normal movement Orders for purposes of Terrain and other game effects.
Enemy Aggressiveness Level
After placing and advancing the Enemy Units, roll a die and consult the Campaign card to determine their Aggressiveness level for the Battle. If you roll low, you will roll a 6-sided die on the Enemy Tactical Movement chart for the remainder of the Battle. If you roll high, you will roll a 10-sided die for the remainder of the Battle.
Half Battalions
If a Battalion is at Half Strength due to a previous Battle, place only 1/2 of each Unit type listed on the Battalion card.
Example: If the Outpost was at Half Strength, I would only place 1 Truck, 1 AT Gun, and 1 Bldg.
Enemy Units
Each Enemy Unit counter represents one vehicle, structure, or group of soldiers.
The specific values vary for each Nation.
Most Enemy Vehicles can perform HE (in Red) or AP (in Black) Attacks from Range 0 out to their listed maximum Range.
Enemy Rifle Units may only perform Armor Piercing Attacks at Range 0. They can Attack your Infantry and Artillery Units at Range 0 or 1.
If a Unit has a dash ("-") for an Attack type, it cannot perform that type of Attack.
Example: Enemy MG Units (Machine Gun Teams), cannot perform Armor Piercing Attacks.
Attack: This number indicates the number or higher the Enemy must roll to inflict a Hit. The Black number is the Unit's Attack roll against AP targets, and the Red number is the Unit's Attack roll against HE targets.
Each Friendly Unit's AP or HE Type is found on its card.
Example: The AT Gun (105mm) can only be Attacked with HE Attacks.
Point Value: The Battlefield value of the Unit. At the end of each Battle Turn, add up the Point Values of all Enemy Units on the Battlefield to determine if the Battalion is at Full Strength, Half Strength, or Destroyed.
Mortar Unit Indirect Fire Attacks: Mortar Units have the "Indirect Fire" ability. This is noted on the Enemy counters with an "i" in their Attack range circle. Friendly Units note this with the "Indirect Fire" notation on their cards. These Units do not check for Line of Sight when Attacking. This is the same as the "Spotter" Commander skill.
Range: The maximum distance of hexes that the Unit can Attack. If the Unit has a Range value of 0, it can only Attack Units in its same hex.
If a Unit only has one Range notation, it applies to both its AP and HE Attack.
Unit Type: Identifies the Unit's Type.
Defense: Roll this number or lower to negate each successful Attack rolled against the Unit.
Perform AP Attacks against Enemy Units with a black Defense background, and HE Attacks against Enemy Units with a red Defense background.
Example: When Attacking a Polish Tank, I roll 2 dice and score 1 hit. The Tank has a Defense of 2. To negate the Attack, the Tank must roll a 2 or less. I then roll a Defense die for the Tank. I roll a 5, the Tank does not negate my Attack, and I Destroy it.
Combat
During each Battle Turn, resolve the following steps. Use the Turn counter to keep track of the current Turn.
Fast Move and Attack
Commanders with a Speed rating of Fast can Move and Attack before Enemy Actions each turn. Commanders with a Speed rating of Slow will Move and Attack after the Enemy Actions each turn.
Resolve the movement and attack for each Fast Commander before moving on to the next Fast Commander. Once all Fast Commanders have acted, move on to the Enemy Actions step.
Unit Movement
A Unit's Speed shows the maximum number of hexes it can Move each Battle Step. Moving into a hex counts as 1 movement of a Unit's Speed.
If the Commander of an Infantry Unit chooses to both Move and Attack, he suffers the indicated Stress.
Artillery Units cannot Move and Attack during the same Battle Step.
Units with the Transport ability can freely pick up and Move one Infantry Unit, or Artillery in its same hex up to the Transport's Speed. The Transporting Unit, and Units being Transported, must all start the step in the same hex. The Transport can not drop off a Unit in a hex and keep moving.
A Transported Unit cannot Move before or after being Transported, or be Transported again during the same step.
Example: M3 Halftrack 501 is in the same hex as Rifle Team 902. The Halftrack can Move up to 2 hexes. It can also freely pick up and Move the Rifle Team up to 2 hexes.
A friendly Unit is Transported, it cannot Attack later in the Battle Turn.
If a friendly Unit Attacks, it cannot be Transported later in the Battle Turn.
When using Tactics, a Unit that is Transported, Moves or Attacks during the Fast step can also be Transported, Move or Attack during the Slow step.
Retreating
If you Move a Unit off the bottom edge of the Battlefield, the Unit Retreats out of the Battle. Place it off to the side until the end of the Battle. Retreated Units go through Post-Combat activities as normal.
If all your Units have been Destroyed or Retreated, end the Battle.
Cover
Being in a Light or Heavy Cover hex adds to a Unit's Defense, even when attacked by an opposing Unit in its same hex.
One Hit Destroys an Enemy Unit counter. When you Destroy a Unit, flip the counter to its Destroyed side. Once Destroyed, a Unit no longer Moves or Attacks or counts toward the Battalion's strength.
Line of Sight
If there is more than one equally direct path, the Attacker chooses the path that will give it a Line of Sight to the target.
A Unit cannot Attack an Enemy Unit if there is a Line of Sight blocking hex between it and its target.
Trace the most direct path through the hexes separating the Attacker's hex from the Target's hex. If any of the hexes on the path, inclusive of the Attacker's and Target's hexes, is a Heavy Cover, Light Cover, Bocage or Impassable Terrain, then the Line of Sight is blocked.
Unit Attacks
Perform the entire Movement for each Unit before conducting its Attack. You must declare the target of the Unit's Attack before rolling dice. The target you select must be both in range and have Line of Sight between the Attacker and the target.
Roll 2 dice to perform an Attack for each of your Units. Each die that rolls the Unit's Attack value or higher will inflict a Hit, unless negated by the target's Defense roll.
Use your Armor Piercing (AP) value when attacking Enemy Tanks, Armored Cars, Bunkers, and Halftracks. AP Units have a black background for their Defense.
Use your High Explosive (HE) value when attacking all other Enemy Units. HE Units have a red background for their Defense.
Add or Subtract your Commander's Skill modifier at that Range.
Subtract 1 from each die roll when attacking at Range 2.
Subtract 2 from each die roll when attacking at Range 3.
Subtract 3 from each die roll when attacking at Range 4.
Each Unit also has an Attack penalty to its die rolls if it Moved during this step.
After determining the number of potential Hits scored by an Attack, roll for the Enemy Unit's Defense.
Roll 1 die for each potential Hit. The target negates the Attack if the roll is equal to or less than the target's Defense.
Example: You are attacking an Enemy Tank Unit and are using your Unit's AP Attack value of 6. The Range is 1, and your Commander gives you +2 on your rolls. You need to roll a 4 or higher on each die to succeed. You roll a 1 (+2 = 3), which is a Miss, and a 5 (+2 = 7) inflicting 1 Hit.
The Tank Unit has a Defense of 3 and is in Heavy Cover (+2 = 5). If the Tank rolls a 5 or less the Attack will be negated. You roll a 2 for its Defense, and it is successful. Your Attack fails.
A successful Attack roll will Destroy the target if it is not negated by its Defense roll. When you Destroy a Unit, flip the counter to its Destroyed side.
Roll For Enemy Move
Roll once on the Enemy Tactical Movement chart to determine the Movement Orders for all enemy Units at the start of each Enemy Actions step.
Use the Tactical Move counter to mark the die roll as a reminder of the roll.
Enemy Tactical Movement
| Die Roll | Tank, AT, A.Car | Rifle, Half, MG | Truck, Mortar, AT Gun |
|---|---|---|---|
| 0- | Retreat to Cover | Retreat | Retreat |
| 1 | Hold | Retreat to Cover | Retreat to Cover |
| 2 | Cautious Advance | Hold | Hold |
| 3-4 | Advance to Cover | Adjacent Cover | Hold |
| 5-6 | Advance if cannot Attack | Advance to Cover* | Cautious Advance |
| 7-8 | Advance if cannot Attack | HE Advance* | Advance to Cover |
| 9-10 | AP Advance | HE Advance* | Advance if cannot Attack |
| 11+ | Advance | HE Advance* | HE Advance |
-2 when at Half Strength. * Rifles treat these orders as "AP Advance" when at Range 1 to an AP target.
Move & Attack Penalty: Tank, AT, A.Car -1; Rifle, Half, MG -2; Truck, Mortar, AT Gun Can't.
Enemy Actions
Move each Enemy Unit, then resolve its attack, before going on to the next Unit. You can resolve their actions in any order.
Each Enemy Unit type appears in one of the 3 Tactical Movement columns. Cross-reference the die roll with each column to determine how those Units Move. Buildings and Bunkers do not appear in any of the columns, because Buildings and Bunkers never Move.
Enemy Units follow these rules, even if there are friendly Units in their same hex.
Retreat: Move the Enemy Unit 1 hex closer toward the top edge of the Battlefield. If there is a choice of hexes, Move the Unit into the hex with the heaviest Cover.
If it is already in a top-most hex, Move it off the Battlefield, and treat it as being Destroyed.
Retreat to Cover: Move the Enemy Unit into an adjacent hex that is both 1 hex farther away from the closest Friendly Unit and has Cover. If none of the adjacent hexes that are farther away from the closest Friendly Unit have Cover, the Unit does not Move. If those hexes have different levels of Cover, Move the Unit to the hex with the heaviest Cover. If more than one hex has equal heaviest Cover, you choose the hex it Moves into.
Adjacent Cover: Move the Enemy Unit into an adjacent hex that has Cover. If none of the adjacent hexes have Cover, the Unit does not Move. If those hexes have different levels of Cover, Move the Unit to the hex with the heaviest Cover. If more than one hex has equal heaviest Cover, you choose the hex it Moves into.
Advance to Cover: Move the Enemy Unit into an adjacent hex that is both 1 hex closer to the closest Friendly Unit and has Cover. If none of the adjacent hexes have Cover, the Unit does not Move. If those hexes have different levels of Cover, Move the Unit to the hex with the heaviest Cover. If more than one hex has equal heaviest Cover, you choose the hex it Moves into.
Cautious Advance: Only Move the Enemy Unit into an adjacent hex that is 1 hex closer to the closest Friendly Unit. If the Unit cannot be attacked in the new hex, the Unit Moves. If the Unit can be attacked in the new hex, the Unit does not Move. If those hexes have different levels of Cover, Move the Unit to the hex with the heaviest Cover. If more than one hex has equal heaviest Cover, you choose the hex it Moves into.
HE Advance: Move the Enemy Unit 1 hex closer toward the closest HE Friendly Unit. If no Friendly Units on the map can be attacked with HE, the Unit does not Move. If those hexes have different levels of Cover, Move the Unit to the hex with the heaviest Cover. If more than one hex has equal heaviest Cover, you choose the hex it Moves into.
AP Advance: Move the Enemy Unit 1 hex closer toward the closest AP Friendly Unit. If no Friendly Units on the map can be attacked with AP, the Unit does not Move. If those hexes have different levels of Cover, Move the Unit to the hex with the heaviest Cover. If more than one hex has equal heaviest Cover, you choose the hex it Moves into.
Advance if cannot Attack: If the Enemy Unit cannot attack a Friendly Unit, Move the Enemy Unit 1 hex closer toward the closest Friendly Unit. If those hexes have different levels of Cover, Move the Unit to the hex with the heaviest Cover. If more than one hex has equal heaviest Cover, you choose the hex it Moves into. If the Unit can Attack, it does not Move.
Advance: Move the Enemy Unit 1 hex closer toward the closest Friendly Unit. If those hexes have different levels of Cover, Move the Unit to the hex with the heaviest Cover. If more than one hex has equal heaviest Cover, you choose the hex it Moves into.
Example: You roll a 1 for the Enemy Tactical Movement. Each enemy Tank, AT (Anti-Tank Team), and Armored Car will Hold. They do not move this turn.
Subtract 2 from the Movement roll if you are rolling for a Battalion that is at Half Strength, or if you have reduced the number of enemy forces on the Battlefield to the Half Strength Value.
Example: I am Attacking the Supply Convoy and I have reduced the Value of forces on the Battlefield to 6 points. It is now at Half Strength. On all future turns I subtract 2 from their Movement rolls.
Enemy Rifle Unit - Special Movement
Enemy Rifle Units treat their asterisked Orders as being "AP Advance" if they are at range 1 from an Friendly Unit which can be Attacked by AP.
Example: An Enemy Rifle Unit is at range 1 from one of your Tanks. It rolls for Movement and receives an "HE Advance" Order. The Rifle Unit treats it as an "AP Advance" Order, and Moves into the Tank's hex.*
Enemy Unit - Impassable Terrain Movement
Impassable hexes may prevent Enemy Units from carrying out Movement orders, such as Advance or Retreat. If an Impassable hex prevents a Unit from directly carrying out its Movement order, move the Unit into a hex that best carries out the order.
Example: An Enemy Tank receives an Advance order, but there is an Impassable hex directly in its best path to Advance. Move the Tank into a hex with the shortest path to the targeted Friendly Unit.
Enemy Attacks
After you Move each Enemy Unit, resolve its Attack before going on to the next Enemy Unit.
Use the Line of Sight rules as you did for your Fast Friendly Units.
Each Enemy Unit may only Attack one Friendly Unit each Turn. An Enemy Unit automatically targets the Friendly Unit that it has the lowest Attack roll required to Hit.
If more than one Friendly Unit has the same lowest chance to be Hit, attack the one with the lowest overall Defense. If more than one has the same lowest Defense, the player chooses which one should be Attacked.
The Enemy Tank's possible targets are 902 (Def 2), 931 (Def 1) and 1007 (Def 3). He is using an HE attack, and needs to roll a 6 or higher to hit each of them.
Since he has the same chance to hit all of them, he attacks the one with the lowest defense, 931.
Roll 2 dice to perform an Attack for each Enemy Unit. Each die that rolls the Unit's Attack value or higher will inflict a Hit, unless negated by the target's Defense.
Subtract 1 from each die roll when attacking at Range 2. Subtract 2 from each die roll when attacking at Range 3. Subtract 3 from each die roll when attacking at Range 4.
Enemy Units suffer the following penalties to their attack rolls if they Move and Attack during the turn:
- Tank, AT, A.Car: -1 die roll penalty.
- Rifle, MG, Half: -2 die roll penalty.
- Truck, AT Gun and Mortar: Cannot Attack if they Move.
Add 1 to a target's Defense value when it is in Light Cover.
Add 2 to a target's Defense Value when it is in Heavy Cover.
For each die that rolls equal to or greater than the Unit's Attack Value, roll a die for the target's Defense. If you roll the Unit's Defense or lower, you negate that Attack.
Draw a Damage counter for each successful Attack roll that was not negated.
Example: An Enemy Tank is at range 1 from a Jagdpanzer IV Tank. The Enemy Tank needs a 3 or higher to hit. I roll 2 dice to Attack the Jagdpanzer IV, getting a 7 and 9. These rolls will inflict 2 Hits. My Tank has a Defense of 2, and is in Light Cover, bringing it to a 3. I roll for its Defense, and roll a 4 and 9, both failing. I draw 2 Damage counters from the cup and refer to their gray AP Damage sides.
Armor Piercing (AP) Hits
The gray AP side of the Damage counter shows the Damage inflicted on your AP Unit.
Unless otherwise stated, Damage can only be removed during the Repair/Replace step.
1 Stress: Place 1 Stress on the Commander card. Return the damage counter to the cup.
Commander KIA (Killed In Action): Remove the Commander from the Campaign. Return the counter to the cup. The Unit continues to operate in the Battle, but without its Commander's skills. Treat the Unit as being Slow and subtract 2 from its Attack rolls.
Commander Wounded: Place the counter on the Commander card. No immediate effect. If the Commander suffers a second Commander Wounded Damage counter, he is KIA. A Wounded Commander cannot enter a new Battle until you pay to remove this counter.
Destroyed 2 Stress: Destroy the Unit and remove it from the Campaign. Return the counter to the cup. Place 2 Stress on the Commander.
Engine 1 Stress: Place the counter on the Unit card and add 1 Stress to its Commander card. The Vehicle cannot Move during the Battle. If it suffers a second Engine Damage, it is Destroyed. The Vehicle cannot enter a new Battle until you pay to remove this counter.
Exposed: Place the counter on the Unit. Enemy Units add 2 to their Attack rolls against this Unit starting on the next Battle turn. Return this counter to the cup when the Unit Moves.
Machine Gun: Place the counter on the Unit card. The Unit cannot attack at Range 0.
No Effect: No effect.
Suspension 1 Stress: Place the counter on the Unit card. The Vehicle cannot Move during the Battle. If it suffers a second Suspension Damage, it is Destroyed. The Vehicle cannot enter a new Battle until you pay to remove this counter. The Commander suffers 1 Stress.
Hull: Place the counter on the Unit card. If it suffers a second Hull Damage, it is Destroyed.
Glancing: Place the counter on the Unit card. Until repaired, inflict 1 Stress on each Commander assigned to this Vehicle at the start of each future Battle.
Gun: Place the counter on the Unit card. The Unit cannot attack at Range 2+.
Explosion: Destroy the Unit, KIA the Commander, and remove them from the Campaign. Return the counter to the cup.
High Explosive (HE) Hits
The green and brown HE side of the Damage counter shows what has happened to your HE Unit.
Unless otherwise stated, Damage can only be removed during the Repair/Replace step.
Commander Wounded: Place the counter on the Commander card. No immediate effect. If the Commander suffers a second Commander Wounded Damage counter, he is KIA. A Wounded Commander cannot enter a new Battle until you pay to remove this counter.
Commander KIA (Killed in Action): Remove the Commander from the Campaign. Return the counter to the cup. The Unit continues to operate in the Battle, but without its Commander's skills. Treat the Unit as being Slow and subtract 2 from its Attack rolls.
1 Stress: Place 1 Stress on the Commander card. Return the damage counter to the cup.
Casualty: Place the counter on the Unit card. If it suffers a second Casualty Damage, it is Destroyed.
Exposed: Place the counter on the Unit card. Enemy Units add 2 to their Attack rolls against this Unit starting on the next Battle turn. Return this counter to the cup when the Unit Moves.
Immobile (Temporary): Place the counter on the Unit card. During the Unit's next time to act, you may either choose to have it not Move and return this counter to the cup, or have it Move and have the Commander suffer 1 Stress. This Move restriction also applies to Infantry and Artillery Units being Transported. If you choose to suffer the Stress, place a 1 Stress counter on the Commander card.
Suppressed (Temporary): Place the counter on the Unit card. During the Unit's next time to act, you may either choose to have it not attack and return this counter to the cup, or have it attack and have the Commander suffer 1 Stress. If you choose to suffer the Stress, place a 1 Stress counter on the Commander card.
No Effect: No effect.
Mowed Down: Destroy the Unit, KIA the Commander, and remove them from the Campaign. Return the counter to the cup.
Damage Counter Rules
If a counter has no effect on a Unit, return it to the cup, and draw a replacement.
Example: Your Unit with a maximum Attack range of 1 suffers a Gun Hit. Since your Unit cannot attack at Range 2+, the Hit has no effect. Return it to the cup and draw a new Damage counter.
If a Unit's Commander has suffered a "Commander KIA" Damage during the Battle, redraw any future Damage counters that only inflict Stress. Also, the Unit cannot choose to suffer Stress when Immobile or Suppressed.
Example: Your Rifle Team's Commander suffered a KIA earlier in the Battle. You now draw a 1 Stress counter. Redraw the Hit counter.
Example: Your Rifle Team's Commander suffered a KIA earlier in the Battle. You now draw a Suppressed counter. During the Unit's next time to act, it cannot take the option to suffer 1 Stress and Attack.
Slow - Move and Attack
After the Enemy Units Move and Attack, your Slow Units Move and Attack.
Use the same procedure to resolve attacks as you did for your Fast Units.
Advance Turn Counter
Compare the total value of active Enemy Units on the Battlefield to the Half/Destroyed numbers on the Battalion card.
If the Battalion has been reduced to Half strength, subtract 2 from their Tactical Move rolls until the end of the Battle.
If the Battalion has been Destroyed, you may end the Battle. The Battle automatically ends when you run out of Battle turns.
If additional Units are added to a Battalion, add their values to the Battalion's total.
Advance the Turn Counter by 1 space.
Repeat Combat Steps
Repeat the Combat steps for the next Battle Turn until you have conducted 5 Battle Turns.
Gain 1 extra Turn for each Scout you assigned to the Battle.
Friendly Losses
Unlike other Leader games, in Tiger Leader, you do not suffer Victory Point penalties for having your Units Destroyed and your Commanders Killed. Combat losses were an expected occurrence during WWII.
Post-Combat
Event Card
Draw an Event card and resolve the Event in the bottom section.
Battalion Status
If the Battalion was Destroyed during the Battle, remove the Battalion counter from the Operational Map and set the Battalion card aside.
If the Battalion was reduced to Half, flip the Battalion Counter to its Half side and return the Battalion card to the Headquarters sheet.
If the Battalion is still at Full strength, return the Battalion card to the Headquarters sheet.
Ignore the Special Note text on a Battalion card that has been reduced to Half, with the exception of Special Note text in yellow. Yellow text effects still apply, even when the Battalion has been reduced to Half.
If the Battalion was Destroyed during the Battle, record an "X" in the Status and write the number of Victory Points (VPs) from the Battalion card on the VPs Gained line.
If the Battalion was reduced to Half, record a "1/2" on the Battalion Status line, and gain half of the Victory Points for the Battalion, rounding down. If you later Destroy the Battalion, gain its remaining VPs.
Example: You reduce 5 VP Battalion 1A to Half and gain 2 VPs. You later Destroy it and gain the remaining 3 VPs.
If you fail to reduce the Battalion to Half or Destroy the Battalion, place an "F" in the Battalion Status and record a 0 (zero) on the VPs Gained line.
Record Unit and Commander Damage
At the end of the Battle, record each Unit's Number and any lasting Damage on the Player Log and return all Damage counters to the cup. If the Damage is not Repaired at the end of the Week, find the Damage counters in the cup and place them back on the Unit before it enters the next Battle.
Record Commander Stress
Inflict 2 Stress on each Commander who participated in the Battle. Also add any Stress the Commander suffered during the Battle.
Reduce a Commander's Stress points by his Cool Skill. This number was also written on the Player Log at the start of the Campaign.
Example: A Commander started a Battle with 3 Stress. He suffered 1 Stress due to Damage during the Battle, and 2 Stress for being in the Battle. He has a Cool of 2. He ends the Battle with 4 Stress.
Record the current number of Stress points for each Commander on the Player Log, in the column for the current Battle.
Record Commander Experience Points (XPs)
XPs are awarded to all Commanders assigned to the Battle. Give each Commander who participated in the Battle 1 Experience Point in the XPs Gained column on the Player Log.
If the Battalion was Destroyed, each Commander assigned to the Battle gains 1 additional Experience Point.
Commanders can also gain Experience points due to Battalion cards, or Event cards.
Promoting Commanders
Check for Commander Promotions after recording all Experience Points. You may notice that some Commanders' stats have been reduced when they are Promoted, usually due to going from Speed Slow to Fast. This is a very strong improvement, which is balanced out by the other stats remaining the same or decreasing.
Example: Gerver's maximum Stress at Veteran Rank is 12. His maximum Stress reduces to 10 at Legendary due to him improving to Fast.
Promote a Commander if his Experience Point total is equal to or greater than the Experience Point number shown on his card. If a Commander is Promoted, exchange his card for his next higher Commander Skill Level card and note his new Experience Level on the Player Log.
Commanders Promote from Recruit to Green, Green to Average, Average to Skilled, Skilled to Veteran, and Veteran to Legendary.
Example: Gerver, at Skill Level Veteran, has just completed a successful Battle, gaining 2 XPs. He previously earned 9 XPs. This brings his new total to 11. He Promotes from Veteran to Legendary. The remaining XP is ignored.
If a Commander is Promoted, check his total Stress points total to determine if he is Okay, Shaken, or Unfit. Also check to see if his Cool rating has changed, and record his new Cool on the Player Log.
Once a Commander is Promoted, he loses the Experience Points that gained him the Promotion. Any Experience points not expended for the Promotion is carried over to the new Skill level. Record the new number of Experience Points he must earn to reach the next Skill Level on the Player Log.
Example: Stout, at Skill Level Average, needs 1 more Experience Point to Promote to Skilled. He earns 2 Experience Points during this Battle. 1 Point is added to his XPs to Promote him to Skilled, and the last Experience Point is retained and counted toward his Promotion to Veteran.
Next Battle
If there are more Battles scheduled for the Week, return to the start of the Pre-Combat Step.
End of Week
Move Battalions
Roll a die for each surviving Enemy Battalion and consult the chart on the Tactical Display Sheet in the Enemy Operational Movement section.
Assault Battalions, Support Battalions, and Command Battalions each have a row on the chart with the specific die rolls needed to Advance, Hold, or Retreat.
Enemy Operational Movement
| Bat. Type | Ret. | Hold | Adv. |
|---|---|---|---|
| Assault | 0- | 1-4 | 5+ |
| Supply | 0- | 1-6 | 7+ |
| Command | 0- | 1-7 | 8+ |
-2 when at Half Strength.
The rolls determine if the Battalion Advances one Range Band closer to your Friendly Staging Range Band, Holds position, or Retreats one Range Band toward the Enemy Breakthrough band. Battalions will not retreat behind their Enemy Breakthrough Range Band or past the Friendly Staging Range Band.
Never roll for Fixed Battalions. They always remain in their starting Range Bands.
When you roll for the Operational movement of Half Strength Battalions, subtract 2 from the die roll.
Example: You roll for the enemy Battalion Movement. You roll for Assault Battalion 7A in the Enemy Transit and get a 9. It Advances to the Front. You roll for Supply Battalion 2S in the Enemy Transit and get a 4. It does not Move. You roll for Assault Battalion 1A in the Enemy Rear and get a 5. Normally they would Advance, but they are at Half, subtracting 2 from their roll, so it does not Move.
On Leave
Any Commander that does not participate in a Battle during an entire Week reduces his Stress by 4 points. Do not modify this number by the Commander's Cool.
Example: Gerver has suffered 10 Stress from previous Battles. On Week 3 he is not assigned to a Battle. Gerver remains on the Headquarters sheet and recovers 4 Stress. He has a Cool of 2, but this does not affect his Stress recovery. Gerver now has 6 Stress at the start of Week 4.
Adjust Special Option Points
Gain Special Option Points
Consult your Objective card or Player Log to see how many Weekly SO points you gain.
Record the new SO points on the Player Log in the SO points box.
Lose Special Option Points (Map)
Lose 2 SO points for each Enemy Battalion in the Friendly Transit Range Band.
Lose 6 SO points for each Enemy Battalion in the Friendly Staging Range Band.
Record the lost SO points in the "+/- SO Points" area on your Player Log.
If you are unable to pay the SO points, the Campaign ends in failure.
Repair/Replace
Purchase
You can purchase new Friendly Units during this step. Pay the Unit's cost in SO points and add the new Unit to your group. Immediately select a Commander of that same Unit Type at Skill Level Recruit to join the Campaign. You may not choose a Commander whose Name has already appeared in the Campaign.
You cannot reuse a Unit with the same Unit Number if it has been previously Destroyed in the Campaign. The card mix does limit purchasing options.
Upgrade
If you would like to Upgrade a Unit in your group, you can turn in one or more undamaged Units. You gain the turned-in Unit's Cost in SO points toward the purchase of a new Unit. The new Unit must have a higher SO point cost than the total of all turned-in Units.
Example: I turn in a 5-SO point Experienced Anti-Tank Team and a 3-SO point Rifle Team, worth a total of 8 SO points. I purchase a 12-SO Point Experienced Mortar Team. I pay the extra 4 SO points.
If the new Unit is of the same Type as the old Unit, you do not get a new Commander.
If the new Unit is of a different Type than the old Unit, discard any 1 Commander of the old Unit's Type and select a Recruit Commander of the new Unit's Type.
If you traded in more than 1 Unit, discard Commanders so you do not end up with more Commanders than Units.
You may Upgrade more than one Unit during this step. You may also repurchase the Units you removed from your forces during the Upgrade.
Commander Replacements
This is useful when a Commander has suffered a KIA, is Unfit, or Wounded.
If a Commander is KIA, discard the Commander and add a Recruit Commander of the same Type to your group.
The replacement Commander cannot be one which has been previously selected in the Campaign. The card mix does limit purchasing options.
If a Commander is Unfit or Wounded, you many choose to discard the Commander and add a Recruit Commander to your group of the same Type.
You may replace more than one Commander during this step.
You may Promote the new Commander's Skill Level at this time by paying 3 SO points for each Skill Level increase.
You cannot have more Commanders than Units. You must always have the same number of Commanders as the Types of Unit they can Command.
Unit Loss
If a Unit is Destroyed, but its Commander survives, you must either purchase a new Unit of the Commander's Type, or discard any one Commander of that Type.
Repair Units & Heal Commanders
You may use SO points to Repair Units. One SO point removes one Damage counter from a Unit, with the exception of Engine Damage, which requires 2 SO points to remove.
A Unit may participate in a Battle whilst Damaged unless the specific Damage specifies otherwise.
You may spend 1 SO point to discard a Commander Wounded counter. A Commander cannot enter a new Battle while Wounded.
Use your Commander Medic and Mechanic Skills during this step.
Priority R&R
Once at the end of each Week, you may spend 5 SO points to remove 2 Stress from every Commander in your group.
Next Week
If there are any remaining Weeks in your Campaign, return to the Start of Week section of the Sequence of Play.
End of the Campaign
Campaign Outcome
After all Battles are resolved for the Campaign's last Week, find your Campaign result on the Objective card. Compare your total Victory Points to the numbers listed on the Objective card you were playing.
Example: If you were playing the Poland 1939 Campaign with the For the Reich! Objective, and you earned 15 Victory Points, you would have earned a Good Campaign Evaluation.
Optional Rules
Decide which Optional Rules you will use at the start of the Campaign.
Tenacity
At the end of the last Turn of each Battle, you can decide to extend the Battle by 1 Turn. If you do so, each participating Commander suffers 1 extra Stress at the end of the Battle.
At the start of the Campaign, pay 1 SO point for the number of weeks the Campaign is to use this rule.
Battlefield Heroics
If a Commander's Unit is Destroyed, and another Unit of the same Type is in the same hex later in the Battle and the new Unit has a KIA, Unfit, or Wounded Commander, you may have the Unitless Commander take command of the Unit.
The replaced Commander is retained, except that he now does not have a Unit to command.
At the start of the Campaign, pay 1 SO point for the number of weeks the Campaign is to use this rule.
Flank Attacks
After a Unit inflicts 1 or more hits on its target at range 0 or 1, roll a die before rolling for the target's Defense.
At Range 1, the attacker inflicts a Flank attack on a roll of 8 or higher.
At Range 0, the attacker inflicts a Flank attack on a roll of 6 or higher.
If a target suffers a Flank attack, reduce its Defense by 1 when you roll for its Defense.