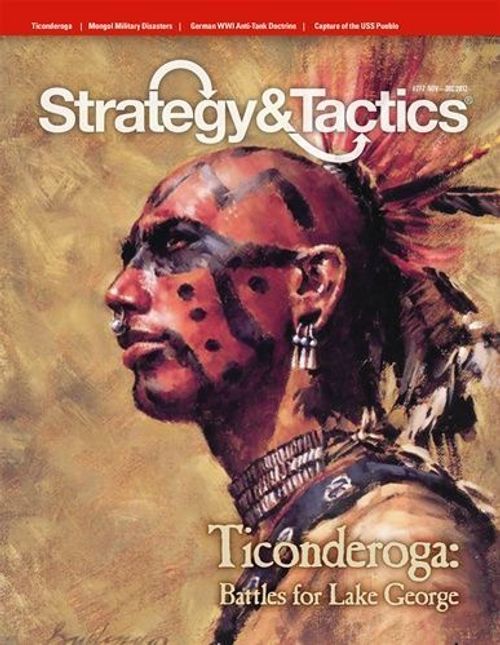
Ticonderoga: The Battles for Lake George, 1755-1758
Ticonderoga: The Battles for Lake George, 1755-1758 Rulebook
Table of Contents
Table of Contents
- 1.0 Introduction
- 2.0 Game Scales
- 3.0 Sequence of Play
- 4.0 Weather, Seasons and Time of Day
- 5.0 Council of War and Couriers
- 6.0 Stacking
- 7.0 Movement
- 8.0 Night and Becoming Lost
- 9.0 Tactical Map Movement
- 10.0 Constructing Earthworks
- 11.0 Attacking
- 12.0 Retreating
- 13.0 Advance After Combat
- 14.0 Surprise Attack
- 15.0 Indians (Recruitment)
- 16.0 Desertions (Indian)
- 17.0 Bombardment
- 18.0 Scenarios
- Leader Manifest (French)
- Leader Manifest (British)
1.0 Introduction
Ticonderoga is a two-map (Strategic and Tactical) game that simulates six engagements in the region between the upper Hudson and lower Lake Champlain, and specifically the area between northern Lake George and Fort Carillon (a.k.a. Ticonderoga) during the French and Indian War (1755-58). The game system emphasizes the importance of individual leaders, and especially historical leaders from the time period, and highlights the relative skills, circumstances and luck that could vary considerably, often within short periods of time. Throughout the game, leader skills will be tested as their units maneuver and fight, and every leader has the capacity to prove himself as either inept, capable or in some cases exceptional during various incidents throughout the game.
Moreover, the game includes much randomization, so that every game may potentially vary. One game may involve more soldiers than another, and often the quality of the lower level (unnamed) leaders will be different. There are three campaign and three raid scenarios, featuring many units for longer games, or just a few units for shorter games.
This game includes all the maps and charts necessary for play, as well as a single counter sheet of 280 units and markers. All game mechanisms use a 10-sided die, which players must provide.
2.0 Game Scales
Each hex on the Strategic map represents approximately 1.5 miles, whereas each hex on the Tactical map represents about 400 yards. Individual units represent from 50 to 800 men, and leader markers each represent a single commander, sometimes a famous, historical figure. An example of each type of unit is featured below:
[The example unit images are not present in the text version of the source.]
Map Errata: "Lake Champlain" on the Tactical map should be printed as "Lake George".
Several turn boxes are missing their turn dates. They are:
1757 Campaign = Aug 10, Aug 11, Aug 12, Aug 13, Aug 14, Aug 15. 1757 Winter Raid = March 16, March 17, March 18. 1758 Summer Raid = August 3, August 4, August 5.
3.0 Sequence of Play
Each scenario is comprised of a number of specific daily turns known as Date Turns. Each Date Turn comprises two Activation Turns (Day and Night). Weather, Council of War, Earthworks Completion and Indian Desertion Check is conducted during at the beginning of each Date Turn, and players activate their units to move and/or fight during each Activation Turn of each Date Turn.
Each Activation Turn involves a first player and a second player activation, in which that player conducts movement and/or combat with his units. The first and second player is determined by the current scenario, and indicated by the scenario chart (see 18.0).
Date Turn:
- Weather Phase (see 4.0)
- Council of War Phase (see 5.0)
- Earthworks Completion Phase (see 10.0)
- Indian Desertion Check Phase (see 16.0)
Activation Turn (Day):
- First Player Activation:
- Movement Phase (see 7.0)
- Combat Phase (see 11.0)
- Second Player Activation:
- Movement Phase (see 7.0)
- Combat Phase (see 11.0)
Activation Turn (Night):
- First Player Activation:
- Movement Phase (see 7.0)
- Combat Phase (see 11.0)
- Second Player Activation:
- Movement Phase (see 7.0)
- Combat Phase (see 11.0)
4.0 Weather, Seasons and Time of Day
Players must determine the current weather at the beginning of each scenario by first determining the current season; Consult the scenario's title to find the present date and season, determined as follows:
| Scenario Date | Current Season |
|---|---|
| April to May | Spring |
| June to August | Summer |
| September to October | Autumn |
| November to March | Winter |
Next, roll one 10-sided die to determine the current weather for the scenario being played, tabulated as follows:
[The die-roll-to-weather table is not present in the text version of the source.]
After the current weather has been determined, the following effects must be implemented for the current game turn. Weather is then rolled anew at the beginning of each game turn, during the Weather Phase, and applied for that turn only.
Snow/Rain/Sweltering = All units' movement is reduced by one movement point. Fleeing (see 13.1) is not possible.
Exception: Some units are equipped with snow shoes, ice skates, or are simply more adept at moving during inclement weather, and thus move normally during Snow, Rain and Sweltering weather (their movement is not reduced by one movement point). Such units are indicated by a green "triangle" symbol printed above their movement number. Fleeing is permitted normally for such units.
Rainstorm = One hex maximum movement, regardless of a unit's movement number and type. Fleeing is not possible.
- Note: A +1 die roll penalty applies to any "lost" die roll during a rainstorm.
Snowstorm = No movement is permitted, regardless of a unit's type. Fleeing is not possible.
- Note: A +2 die roll penalty applies to any "lost" die roll during a snowstorm.
5.0 Council of War and Couriers
The commanding officer of each army in the era often made decisions by convening a council of war among his officers and allied commander (including Indian leaders). Thereafter, any changes to the plan required couriers to reach subordinate leaders, oftentimes through inhospitable and hostile terrain. As such, during the Council of War Phase of each Date Turn, both players must demonstrate a path of connected land hexes* from each an every leader present in the game to the senior-most leader present on the map. This path of hexes may not enter any enemy unit's or fortification's hex, nor enemy unit's Zone of Control.
*Such a path may not cross any water depiction (even if frozen), including any river depictions coursing along a hexside, unless crossed by a bridge symbol.
If any particular leader cannot demonstrate a path of unobstructed hexes to his own senior-most leader, that subordinate leader is immediately subject to a leader ability die roll (see 2.2) to determine that leader's ability (see the die roll range printed on the back of that leader marker), regardless of any previous ability die roll results for that leader. The top-most row indicates an Inept leader, the middle row indicates a Capable leader, and the bottom-most row indicates an Exceptional leader, explained as follows:
Exceptional Leader: If that leader's current die roll is "Exceptional", that leader and any game pieces it is stacked with suffers no consequences as a result of being isolated; that leader and his units may be activated normally, without restriction.
Capable Leader: If that leader's die roll is "Capable", any game pieces stacked with that leader may not be activated during the current Date Turn (that leader and any game pieces it is stacked with may not move or conduct any attack).
Inept Leader: If that leader's die roll is "Inept", one game piece stacked with that leader (of the owning player's choice) becomes reduced (flipped to its back side), or replaced by a Cadre if already reduced, or eliminated if already a Cadre or an Indian unit or cannon that is already reduced. If that leader is not stacked with any game piece, that leader must be eliminated instead.
Note: If there is more than one senior-most leader present on the map, the owning player may choose either leader (but not both) during each Council of War Phase to act as the senior-most leader for that Date Turn.
6.0 Stacking
At this game's scale, there is no limit to the number of friendly game pieces that may stack together in any land hex on any map (strategic or tactical). Furthermore, leader game pieces are never exclusively assigned to any particular unit; leaders may enter hexes containing other friendly units, and even command such units without restriction (except for seniority limitations).
Opposing game pieces may never stack together, of course.
7.0 Movement
Each scenario indicates which side moves first during the first game turn (during each Activation Turn of every Date Turn). The first player thus completes the movement of any of his own units, and any attacks that they initiate, followed by the second player, thus completing an Activation Turn.
During each player's movement phase, he may move as many or as few of his own game pieces as he desires (unless unreachable by courier; see 5.0), but each game piece's movement must be completed before another game piece begins movement during that Movement Phase.
The active player may move his game pieces in any direction of linked hexes that he chooses, but an amount of movement points (MPs) must be paid from each game piece's movement number (the number printed within the yellow hexagon icon) as it enters each hex. Each type of hex requires a unique MP cost, as indicated on the map.
Note: If there is more than one type of terrain printed in a hex (such as Open and Hill), game pieces must pay the single highest MP cost to enter such a hex only, not both.
Also, some hexsides are printed with a river depiction, which costs +1 additional movement points (MPs) to cross even before entering into the hex on the other side of that river (although this does not apply if that river is spanned by a "bridge" symbol).
Example: If the attacking player wants to move his game piece across a river hexside into a clear hex, that unit must pay a total of 2 total MPs (1 MP +1 MP). However, some river hexsides have a road symbol and a "bridge" printed over the river depiction; These river bridge hexsides do not cost any extra movement points to cross.
Furthermore, if any game piece is moved from a hex with a road symbol directly into an adjacent hex with a road symbol (which is also connected across the same hexside), the cost is always one-half movement point, regardless of the other terrain type in either of the two road hexes. This bonus does not apply if merely entering a road hex from a non-road hex.
If any game piece lacks enough MPs to be moved into a hex or across a hexside, it may not enter that hex, although any game piece may always be moved into at least one hex during its own movement phase (regardless of the MP cost in that hex) if it has not moved during that activation.
No game piece may ever move off of the map, into any non-hex area of the map, into any enemy game piece's hex, or into any enemy fortress hex (unless unoccupied).
Each game piece must end its movement for the rest of the current movement phase when it lacks enough leftover MPs to continue moving. Of course, a player may choose to end any game piece's movement before then, but unused movement is not saved from one turn to the next. Also, a game piece's unused movement may not be transferred to any other game piece.
Note: Advance after combat, retreat and fleeing are never considered movement, and thus do not ever cost any MPs.
7.1 Forest Movement
Forest hexes represent particularly thick areas of trees (as differentiated from wooded areas that are not actually depicted on the map). As such, each "Forest" type terrain hex requires 2 MPs to enter, but some units are more accustomed or trained to move through wooded areas, and thus only ever pay 1 MP when entering any forest hex (unless there is also another type of non-open terrain in that same hex). Such units are indicated by a green "triangle" symbol printed above their movement number.
Note: The forest movement cost applies even in hexes that are only partly printed with a forest depiction. A moving unit may not 'skirt' a forest depiction within a hex it enters to avoid the forest MP cost.
7.2 Zones of Control
Zones of Control only ever exist on the Tactical map (never on the Strategic map). As such, the six hexagons surrounding each unit's hex on the Tactical map are known as a "Zone of Control" (non-unit game pieces such as cannons, boats and leaders do not project any Zone of Control, however), even if that unit is reduced or replaced by a Cadre, and regardless of the type of terrain in each surrounding hex (except lakes). Any game piece (including canoes and bateaux) that moves into a hex that is an enemy unit's Zone of Control hexagon must immediately end all further movement during that movement phase, except as an Advance After Combat (see 13.0) or a retreat.
Exception: Zones of Control do not extend into any Lake hexes or the Lake portion of any hex, even if the unit is aboard a boat or occupying a coastal hex.
Exiting an enemy Zone of Control hex does not affect the movement of any game piece, although a unit that moves from an enemy Zone of Control hex to an enemy Zone of Control must end its movement normally. ZOC to ZOC movement is allowed by this stricture.
7.3 Water Movement
Unless the current weather condition is "Snow" (see 4.0), a unit may only ever enter a lake hex via a canoe or a bateau marker (collectively known as "boats"). Each bateau marker in a lake hex can embark a maximum of one unit with a strength number of no more than "5", whereas each canoe can embark a maximum of one unit with a strength number of no more than "2". The capacity of bateaux and canoes in the same hex is cumulative, such that multiple bateaux and/or canoes in a hex can have their embarkation numbers (printed on the lower-left corner of each bateaux and canoe marker) combined. For example, one bateau and one canoe can embark a unit with a strength number of "7", or two units with a strength of "3" and "4", respectively, or any combination thereof if not exceeding two units and seven strength points.
Note: Embarkation aboard a bateau or canoe requires the embarking unit to expend one additional movement point. Disembarkation requires no additional movement, however.
A bateau (but never any canoes) can embark one cannon marker, but that bateau may not then embark any other unit at the same time (except a leader).
Any quantity of leaders can be embarked aboard any bateaux and/or canoes, along with any other friendly units at the same time. There is no restriction as to the quantity or leaders that may be embarked aboard any bateau or canoe. A lone leader may embark aboard a bateau, requiring that leader to expend one additional MP, normally.
When embarked, a bateau or canoe may then move into any hex featuring a water symbol, including a river (in such a case, the bateau or canoe marker is placed with the arrow symbol pointed at the river hexside where that bateau or canoe is traveling. In the case of river movement, the bateau or canoe - and any embarked markers - are not considered to be occupying any hex, but are considered to be occupying a hexspine where the river artwork is depicted.) Any such embarked units may be disembarked per the normal rules into a hex on either side of that river hexside. In the event that an embarked unit is attacked while occupying a river hexspine, it is attacked as if it was occupying a clear terrain hex (no terrain modifier applies to the attacker's die roll.) Furthermore, units aboard a canoe or bateau cannot defend (see 11.5).
A bateau or canoe may be moved individually, without embarking any unit, if the owning player prefers, in which case it moves normally. In no case does any bateau or canoe project a Zone of Control. A bateau or canoe cannot be moved individually over land, but may be portaged over land per 7.5.
Bateux and canoes possess a movement of "11", and their movement is never reduced or increased by any circumstances. Embarking any game piece never costs a bateau or canoe to expend additional movement points. The movement cost of entering any water (lake) hex is 1 MP on the Strategic map, or ½ MP on the Tactical map, whereas the movement cost of entering any river hexside is 1 MP on the Strategic map, or ½ MP on the Tactical map (in either case, per hexside traversed; for example, to enter every river hexside of a hypothetical river around a single hex would require a bateau or canoe to expend 6 MPs on the Strategic map, or 3 MPs on the Tactical map).
A bateau or canoe may end its movement in any hex with a land depiction (either a lake coastline hex or any river hex) and then be considered beached there, the only purpose being the embarkation and/or disembarkation of any friendly units onto/from that bateau or canoe. It is permitted for a bateau or canoe to embark and disembark at the same time, if not in excess of its capacity when doing so (which often requires a boat to disembark first before it embarks any other units). If any unit is disembarked into a hex that is within any enemy unit's Zone of Control, that unit must end its movement in that hex normally (see 7.2).
7.4 Bateau and Canoe Restricted Movement
There were five falls on the La Chute River which drained out of Lake George and into Lake Champlain. There is no river movement where that stretch of the river on the map is marked (hex 1304 and 1404). Bateaux and canoes can be portaged over land around those rapids per 7.5 below.
Additionally, bateaux and canoes cannot be moved via water movement during Snow weather (see 7.7), but may be portaged over ice normally (see 7.5).
A bateau or canoe can never Advance After Combat with any attacking unit. In such instances, a bateau or canoe may be left behind in its present hex while it portaging unit Advances After Combat normally, if the owning player desires, in which case that bateau or canoe will remain there until it is portaged again (see 7.5).
7.5 Bateau and Canoe Over Land Portage
Any non-Cadre unit that is stacked in the same hex with a bateau or a canoe game piece is eligible to transport that boat across land, but only into clear terrain hexes, or into a hex with a road or trail symbol from an adjacent hex with a connected road or trail symbol. No leader may ever transport any bateau or canoe alone.
Transporting a bateau or canoe doubles the normal movement cost in each entered hex. Clear terrain hexes are thus 2 MPs, whereas trail hexes are 2 MP, and road hexes are 1 MP (if entering a road or trail hex from an adjacent hex with a connected road or trail symbol).
A unit transporting a bateau or canoe may utilize water movement during the same turn that the bateau or canoe is transported over land, even without embarking any unit (bateaux and canoes are assumed to have their own inherent drovers and rowers), but embarkation of any game piece requires the embarking unit to expend one additional movement point (see 7.3). Disembarkation does not require any additional movement point, however.
A bateau or canoe that is being portaged over land can be abandoned in any clear or trail hex by its portaging unit, in which case that bateau or canoe simply remains there in the hex, unable to move (unless that hex is a coastline hex or astride a river) until it is portaged again.
7.6 Capturing Bateaux/Canoes
A bateau or canoe that is not stacked in the same hex with a non-leader enemy unit can be commandeered and used normally by any other unit that enters that canoe's or bateau's hex. Thereafter, that bateau or canoe is then considered owned by that commandeering player until it is recaptured, if ever, by a non-leader unit of the opposing side.
7.7 Ice Movement
If the current weather is "Snow" during a Winter scenario, any unit may move into any water hex as if it is a clear terrain hex. This allowance does not apply to couriers (whom rode horses, typically), however. No bateaux or canoe can ever move via water movement while the current weather is Snow, however, but may be portaged over iced water hexes per 7.5 normally.
Note: All units' printed movement is reduced by one movement point during snowy weather, and fleeing is not possible (see 13.1).
7.8 Prisoner Movement
The "Prisoners" marker cannot move unless stacked with any unit. In such a case, the prisoners marker may only ever move with a unit when stacked together, as signified by the "?" printed on the back of the prisoners marker. If a unit that is stacked with a prisoners marker is eliminated or departs the prisoners marker's hex, that prisoners marker must simply remain in that present hex (i.e., it may not move) until any other unit enters that hex (at which time that prisoners marker may move with that other unit, if the owning unit so desires).
A prisoners marker is assumed to be controlled by whichever side's unit occupies the prisoners marker's hex.
A prisoner cannot be moved with a lone leader per 7.9 below.
7.9 Leader Movement
No leader is printed with a movement number, but may simply move with any unit it is stacked with. However, a leader may move without any unit, but to do so the owning player must roll one 10-sided die at the beginning of that leader's intended movement (before that leader begins to move); If that die roll is equal or less than that leader's initiative number, that leader is then assumed to possess a movement number (for that movement phase only) equal to that same die roll. After the die is rolled, the owning player may (but is not required to) roll another die roll to determine that leader's ability (see the die roll range printed on the back of that leader marker), regardless of any previous ability die roll results for that leader.
The top-most row indicates an Inept leader, the middle row indicates a Capable leader, and the bottom-most row indicates an Exceptional leader. Use that ability result to add to or subtract from the leader's movement, tabulated as follows:
| Ability | Movement Modifier |
|---|---|
| Inept | -2 Movement Points |
| Capable | +1 Movement Point |
| Exceptional | +2 Movement Points |
Example: The British player intends to move Howe without a unit, and so he must first roll one die: He rolls a "2", which is below Howe's initiative number, thereby allowing Howe to move as if he possessed 2 movement points during that movement phase. However, the British player would like Howe to have more movement, and so he chooses to roll another die to determine Howe's ability: Unfortunately for the British player, Howe's die roll is "0", meaning that he is an "Inept" leader (per the back of the Howe marker) for purposes of leader movement during that movement phase (only). As such, the Howe leader must suffer a -2 movement point loss, per the chart above. In this case, therefore, Howe cannot be moved alone during that movement phase (although Howe may still be moved with a friendly unit normally, however).
If any leader fails its movement roll, it may not move without a unit during that movement phase, regardless of that leader's ability, although that leader may still move with any friendly unit it is stacked with normally (i.e., even after failing its movement roll).
A leader moving with a unit moves exactly as any other unit, and per the normal terrain movement costs in all respects.
8.0 Night and Becoming Lost
Any game piece that is stacked with a leader may possibly move during a "Night" Activation Turn, but may become lost as a result, unless moving into a hex with a road or trail symbol from an adjacent hex with a connected road or trail symbol. No game piece that is not stacked with a leader may ever move at night.
Exception: Indian units can never become lost.
To eligibly move at night, the owning player must roll one 10-sided die at the beginning of that game piece's intended movement (before that game piece begins to move) to determine that leader's initiative (see the number printed within an arrow symbol on the front of that leader marker). If there is more than one leader in the same hex, the owning player must choose the senior-most leader marker (the leader with the lowest Seniority Number). If multiple leaders in the same hex as the defending unit share the same seniority, the owning player may choose which leader. Next, roll one 10-sided die: If the roll is equal to or less than that leader's initiative number (the lower-right number), that leader and any other game pieces stacked with him may move at night per the normal movement rules. However, if the roll is greater than that leader's initiative number, that leader and all other game pieces stacked with it (including any other leaders) are considered to be lost, and are subject to a "lost" placement roll, explained as follows:
Note: A leader's abilities have no effect upon night movement or becoming lost.
When a game piece is lost, that game piece is moved automatically to another random hex, disregarding terrain and movement costs per the diagram below. On a roll of 1-4, the game piece remains in its present hex (as if it has not moved), on any other roll, place the game piece in the hex indicated, using the compass arrow to determine the north hexside. Ranger and Marine units automatically apply their -1 die roll modifier to a 'lost' die roll. In any case, all units in a hex are lost together, per one die roll, and are randomly placed into the same hex.
[The lost-placement diagram is not present in the text version of the source.]
Note: If the current weather is rainstorm, a +1 die roll penalty applies to any "lost" die roll; If the current weather is snowstorm, a +2 die roll penalty applies to any "lost" die roll.
If any game piece becomes randomly placed in a hex that is occupied by any enemy unit, any all-water hex (unless portaging a canoe or bateau, or a frozen all-water hex), or off of the map, that game piece is eliminated (they're never heard from again).
A game piece that becomes lost in an all-water hex where a friendly canoe or bateau is already present may be considered to be occupying that vessel, if not already occupied by other units to maximum capacity. A bateau or canoe using water movement that becomes lost in any land hex is not necessarily eliminated; it assumed to be lost normally, albeit on land (it assumed to have been portaged there in a desperate attempt to find their way).
If a game piece becomes lost, place a "Lost" marker atop that piece. It will remain lost during each successive Activation Turn thereafter until the owning player successfully rolls equal to or less than the present senior-most leader's initiative number during the movement phase of that Activation Turn. The owning player is eligible to roll once each Activation Turn (during his own movement phase), and if successful, the lost units may then move again normally immediately (they have found their way).
If the die roll is higher than the present senior-most leader's initiative number, that piece therefore becomes lost again, and is subject to another random placement die roll, per the diagram above. As such, it remains lost during each successive Activation Turn thereafter until the owning player successfully rolls equal to or less than the present senior-most leader's initiative number, as explained above.
If there is no leader present after a unit has become lost, all lost game pieces in that hex are eliminated instead (victims of a cryptid, perhaps).
8.1 Sound of Guns
During his own movement phase, a player is eligible to attempt to remove a "Lost" marker from the senior-most leader before rolling an initiative roll per 8.0. To do so, the owning player may roll one 10-sided die to determine that leader's ability (see the die roll range printed on the back of that leader marker), regardless of any previous ability die roll results for that leader. Next, consult that leader's ability die roll range printed on the back of that leader marker: The top-most row indicates an Inept leader, the middle row indicates a Capable leader, and the bottom-most row indicates an Exceptional leader.
If that leader's die roll is "Exceptional", the "Lost" marker in that hex is immediately removed, and that leader and his unit(s) in that hex are no longer considered lost (and may move immediately and normally); no die roll per 8.0 is necessary. However, if that leader's die roll is "Inept", that leader and his unit(s) in that hex are removed from the map, never to be heard from again. If that leader's die roll is "Capable", there is no additional effect, and that leader may simply roll an initiative die roll per 8.0 normally.
9.0 Tactical Map Movement
During games that utilize both the Strategic and the Tactical map, game pieces can transition from one map to the other when crossing the dotted border printed on the Strategic map, from hex 3408 to 3418 to 4109 to 4114. The area encompassed by these hexes is the area represented by the Tactical map. When any game piece crosses over the dotted border into this area, that game piece is removed from the Strategic map and placed on the edge of the Tactical map.
To determine which hexes on the Strategic map correspond to the Tactical map, consult the following chart:
| Strategic Hex | Tactical Hexes |
|---|---|
| 3407 (south side) | 0128, 0129, 0130, 0229 |
| 3408 (south side) | 0330, 0429, 0530 |
| 3409 (south side) | 1029, 1130, 1229, 1330 |
| 3410 (south side) | 1429, 1530, 1629, 1730 |
| 3411 (south side) | 1829, 1930, 2029, 2130 |
| 3412 (south side) | 2422, 2421, 2420, 2321 |
| 3508 (west side) | 0127, 0126, 0125, 0124 |
| 3607 (west side) | 0123, 0122, 0121, 0120 |
| 3708 (west side) | 0119, 0118, 0117, 0116 |
| 3807 (west side) | 0115, 0114, 0113, 0112 |
| 3906 (west side) | 0111, 0110, 0109, 0108 |
The movement mechanics on the Tactical map are exactly the same as the movement mechanics on the Strategic map, except that the printed movement numbers of all units (including boats) are assumed to be double (round fractions down) as of the moment that any such unit begins its movement phase on the Tactical map (a unit's movement is never doubled when merely entering the Tactical map).
Example: A Provincials unit with a printed movement number of "3" is actually assumed to possess a movement of "6" when it begins its movement on the Tactical map.
Any unit that begins its movement on the Tactical map and then enters the Strategic map must ends its movement for that movement phase in the first hex it enters on the Strategic map.
10.0 Constructing Earthworks
Any non-Indian unit may construct a Breastwork marker in its own hex. To do so, the constructing unit may not exit that hex during the entirety of the current Date Turn (Day and Night), either voluntarily or as a retreat. A Breastwork marker is therefore placed in that hex at the beginning of the next Date Turn (during the Earthworks Completion Phase).
Note: Earthworks must always begin construction during a Day Activation Turn.
Similarly, any non-Indian unit may construct a Redoubt marker in its own hex (but subject to a die roll). To do so, the constructing unit may not exit that hex during the entirety of the current Date Turn (Day and Night), either voluntarily or as a retreat. A Redoubt marker is therefore placed in that hex at the beginning of the next Date Turn (during the Earthworks Completion Phase). However, the owning player must roll one 10-sided die before beginning construction: If that die roll is equal to or less than that designated leader's initiative number, that Redoubt is successfully constructed, and a Redoubt marker is therefore placed in that hex during the Earthworks Completion Phase. If, though, that die roll is greater than that designated leader's initiative number, no Redoubt may be constructed in that hex during that same Date Turn. A Breastwork marker may be constructed in that hex normally nonetheless, instead.
Note: If a designated leader's die roll is unsuccessful, no other leader in that same hex, if any, is ever eligible to be designated for another die roll during that same movement phase.
Only one type of earthwork may ever exist in a single hex. A player may build an earthwork marker in a hex where an existing earthwork is already present, but the original earthwork marker is removed upon the completion of the newly constructed earthwork (for example, when building a Redoubt in a hex where a Breastwork is already present). No earthwork may ever be constructed in the same hex as any fort, however, and nor can any fort ever be removed.
Once constructed, no earthwork can ever be destroyed within the scope of the game. No fort of any kind may ever be constructed.
11.0 Attacking
No Unit may ever attack more than once per Activation Turn. Also, no cannon may ever participate in more than one attack per each Activation Turn (although this does not apply to defending units; a unit may defend each time it is attacked). However, each unit may attack one enemy hex (if it is adjacent, and not across an impassable hexside.) Two units may never combine their strength numbers as a singular attack (although two or more units may each attack the same enemy hex individually), nor may any unit's strength number be shared with another unit.
Note: Units embarked aboard any canoe or bateau can never attack, but may be attacked normally (but cannot defend if attacked; see 11.5).
To attack a hex, the attacking player must simply select one of his own adjacent units to conduct that attack (which must be adjacent to the enemy hex), and one enemy unit to be the target of that attack, and then roll one 10-sided die; that die roll is then possibly modified by the type of terrain or earthworks in that hex (or in between the attacker's and defender's hex, such as a river); the modifier for each type of terrain is printed as a "+" number on the map's terrain chart, within each terrain type hex. The modifier for each type of earthwork is printed on the back of the earthwork counter.
[The terrain modifier chart is printed on the map and is not present in the text version of the source.]
Note: The forest "+" number applies even to hexes that are only partly printed with a forest depiction. The attacking player may not disregard the forest terrain modifier in a hex that is mostly clear, for example, so long as there is any forest artwork in that hex.
Only one terrain modifier ever applies during an attack; If there is more than one type of terrain (for example, a river around hill terrain) between and/or in the enemy's hex, only the highest modifier is added to the attack die roll (not both.) The terrain in an attacking unit's hex never affects any battle.
Exception: An earthworks' "+" modifier may be combined with the terrain "+" modifier in the hex where it is constructed.
After adding any terrain modifiers, the attacking player must then also subtract the "-" (minus) number(s) of his cannon(s), if any, that are stacked with his same attacking unit. A player may include a maximum of two cannons, plus one (only) leader (for a total of three non-unit markers if at least one of the three is a leader).
If that attacking player's final die roll result is equal to or less than the attacking unit's printed strength number, the attack is successful, the targeted defending unit is reduced (flipped to its back side), or replaced by a Cadre if already reduced (although Indian units are never replaced by Cadre units). However, if the final die roll result is higher than the attacking unit's strength number, it is no effect.
Note: An actual die roll of "0" is always a successful attack, and an actual die roll of "9" is always an unsuccessful attack, regardless of any modifier(s).
11.1 Elite Unit Modifiers (Attacking)
In addition to terrain, cannons and leaders, "Elite" units also impose an attack die roll bonus to the attacker's die roll. Any non-cannon unit printed with a "-1" function encompassed in a square may apply a -1 die roll modifier to its attack die roll, but only when attacking an enemy non-elite unit in a non-open hex. An elite unit may never apply its die roll bonus when attacking an enemy unit in any open hex (open ground is where regular units were trained and expected to do combat, and were thus accustomed to fighting in that type of terrain against virtually any formation).
Any elite unit that becomes reduced to a Cadre loses this capability, permanently.
11.2 Indians fighting Indians
If both the attacking unit and the defending unit is an Indian unit, a +2 die roll penalty applies to both the attacking player's and the defending player's die roll (Indians were often disinclined to fight one another, for a variety of reasons). If both the attacking and the defending Indian units' die roll are unsuccessful, both Indian unit must be immediately reduced, or eliminated if already reduced (representing desertions).
11.3 Leading the Attack
An attacking unit that is stacked in the same hex with a leader of any kind must apply a battle die roll modifier when it conducts an attack (cumulative with any other modifiers, such as terrain). To determine this modifier, the owning player must choose one leader, if any, in that attacking unit's same hex, and first roll to determine that leader's ability (see the die roll range printed on the back of that leader marker), regardless of any previous ability die roll results for that leader. If there is more than one leader in the same hex, the player must choose the senior-most leader marker (the leader with the lowest Seniority Number). If multiple leaders in the same hex as the attacking unit share the same seniority, the owning player may choose which leader (presumably the leader with the best abilities). Next, consult that leader's ability die roll range printed on the back of that leader marker, and roll one 10-sided die: The top-most row indicates an Inept leader, the middle row indicates a Capable leader, and the bottom-most row indicates an Exceptional leader. Use that ability result to determine the attack die roll modifier for that attack, tabulated as follows:
| Ability | Attack Die Roll Modifier |
|---|---|
| Inept | +2 Battle Die Roll Modifier (attack) |
| Capable | -1 Battle Die Roll Modifier (attack) |
| Exceptional | -2 Battle Die Roll Modifier (attack) |
A leader die roll modifier, assuming a leader is present in the attacking unit's hex, must be applied to the attack die roll, in addition to any other applicable modifier(s), such as a cannon. If no leader is present in an attacking unit's hex, than no leader modifier is applied to that attack roll.
11.4 Earthworks Modifiers
A Breastwork, Redoubt or Fort functions exactly like defensive terrain in a hex where it is present, applying a "+" die roll penalty to unit that is attacking that hex (printed on the back of each earthwork marker). If a particular hex contains both defensive terrain and an earthwork marker, both "+" modifiers apply cumulatively. However, no more than one type of earthwork is ever applicable as a die roll modifier in any single hex.
11.5 Defending
Whether successful or not, after an attacking unit attacks any enemy unit, that enemy unit (but never a cannon, wagon, leader, canoe or bateau*, nor any other enemy unit in that same hex) is then immediately eligible to conduct a defense.
Note: If a hex contains multiple units, only the targeted unit in that hex (the unit that had been attacked) is eligible to defend.
A defense is exactly like an attack (the enemy player may roll one 10-sided die) except that no terrain modifiers are ever added to a defending unit's die roll. However, exactly like an attack, the defending player must then also subtract the "-" (minus) number(s) of his cannon(s), if any, that are stacked with his same defending unit. A player may include a maximum of two cannons, plus one (only) leader (for a total of three non-unit markers if at least one of the three is a leader).
*Although wagons and bateaux had drovers and rowers respectively who were expected to defend them, at the game's scale it is assumed that these types of units haven't sufficient firepower to inflict casualties upon any unit featured in the game. Thus, if they survive an enemy unit's attack, they must simply retreat per 12.0 below.
If the defending player's final die roll result is equal to or less than the defending unit's printed strength number, the defense is successful, and then that attacking unit is reduced (flipped to its back side.) However, if the final die roll result is higher than the defending unit's strength number, it is no effect.
Note: An actual die roll of "0" is always a successful defense, and an actual die roll of "9" is always an unsuccessful defense, regardless of any modifiers.
Cannons and leaders that are not stacked with any unit may not defend, even if they have been reduced and/or eliminated, but must retreat automatically after being attacked. However, cannons may bombard (see rule 17.0).
11.6 Elite Unit Modifiers (Defending)
In addition to cannons and leaders, "Elite" units also impose a defense die roll bonus to the defender's die roll. Any non-cannon unit printed with a "-1" function encompassed in a square may apply a -1 die roll modifier to its defense die roll, but only when defending against an enemy non-elite unit in a non-open hex. An elite unit may never apply its die roll bonus when defending in any open hex (open ground is where regular units were trained and expected to do combat, and were thus be accustomed fighting in that type of terrain against virtually any formation).
Any elite unit that becomes reduced to a Cadre loses this capability, permanently.
11.7 Leading the Defense
A defending unit that is stacked in the same hex with a leader of any kind must apply a battle die roll modifier when it conducts a defense roll (cumulative with any other modifiers, such as a cannon). To determine this modifier, the owning player must choose one leader, if any, in that defending unit's same hex, and first roll to determine that leader's ability (see the die roll range printed on the back of that leader marker), regardless of any previous ability die roll results for that leader. If there is more than one leader in the same hex, the player must choose the senior-most leader marker (the leader with the lowest Seniority Number). If multiple leaders in the same hex as the defending unit share the same seniority, the owning player may choose which leader (presumably the leader with the best abilities). Next, consult that leader's ability die roll range printed on the back of that leader marker, and roll one 10-sided die: The top-most row indicates an Inept leader, the middle row indicates a Capable leader, and the bottom-most row indicates an Exceptional leader. Use that ability result to determine the defense die roll modifier, tabulated as follows:
| Ability | Defense Die Roll Modifier |
|---|---|
| Inept | +2 Battle Die Roll Modifier (defense) |
| Capable | -1 Battle Die Roll Modifier (defense) |
| Exceptional | -2 Battle Die Roll Modifier (defense) |
A leader die roll modifier, assuming a leader is present in the defending unit's hex, must be applied to the defense die roll, in addition to any other applicable modifier(s), such as a cannon. If no leader is present in a defending unit's hex, than no leader modifier is applied to that defense roll.
11.8 Casualties and Cadres
When any unit is reduced, it is flipped to its back side, which features a lower strength number. A flipped unit operates identically (except for its lower strength number), although if any flipped unit is reduced again, it is immediately removed from the map and then replaced by a randomly selected "Cadre" unit of the same nationality (except Indian units, which never become Cadre units after becoming reduced again). To randomly select a Cadre unit, all of the Cadre markers of each nationality must be placed into a separate opaque cup (i.e., all British Cadres in one cup, and all French Cadres in a second cup); One Cadre unit is then drawn blindly from the cup of the owning player's nationality, and placed onto the map (in the same hex where his reduced unit had just been removed). When placed onto the map, that Cadre unit is placed with its front side (the side with the larger strength number) facing up, where it then remains on the map and functions like any other unit. If a Cadre replaces an elite unit, it does not retain any of that elite unit's capabilities; it becomes a normal unit instead.
Note: Some units do not feature a depiction on the back side; if they become reduced, they must be eliminated instead; they are not replaced by a Cadre unit.
A Cadre unit functions like a normal unit in every respect, although when any Cadre unit is reduced twice, no other unit or Cadre replaces it. Instead, it is eliminated (removed from the map), and no other game piece is placed on the map in its place. Some Cadre units are only printed with a front side; If such a Cadre unit is reduced, it is not flipped to its back side, but is simply eliminated instead, and no other unit replaces it.
Note: No leader may ever be chosen to be reduced or eliminated if stacked with any other unit or cannon. But if a lone leader is successfully attacked, it is simply eliminated immediately.
11.9 Leader Death
A leader is only subject to becoming eliminated if his unit's attack or defense was unsuccessful and the enemy unit's attack or defense was successful. In such a case, if his unit's net battle die roll result* was at least twice that of the enemy player's die roll, the leader is considered killed and thus eliminated immediately.
*Including any applicable modifiers, such as terrain, leader ability, earthworks, etc.
12.0 Retreating
When an attacker's die roll is successful but the defender's die roll is not successful (or in the case of any lone cannon, wagon, leader, canoe and/or bateau, which cannot defend), the defending player must immediately move any surviving unit, cannon, wagon, leader, canoe and bateau, if any, from that hex exactly two hexes away (to any hexes of his choice) unless across or into forbidden terrain, or into any hex occupied by an enemy unit, cannon, wagon, leader, canoe and/or bateau (even if alone), or within any enemy unit's Zone of Control. Any unit, cannon, wagon, leader, canoe or bateau that cannot retreat is eliminated. Otherwise, a retreating unit, cannon, wagon, leader, canoe and/or bateau may retreat in any direction, so long as the last retreat hex is two hexes distant from the battle hex (i.e., there must be one hex between the retreating game piece and the hex it had just retreated from). Retreats always ignore terrain and weather, and therefore must always be two hexes.
Note: Canoes and bateaux can only ever retreat to a hex containing a water depiction, via a hex containing a connected water depiction.
If a hex contains multiple markers, each may be retreated to a different hex if each retreat hex is at least two hexes distant from the battle hex.
Note: Retreating markers can never become "lost".
13.0 Advance After Combat
If every enemy unit is eliminated or is retreated from a particular hex, the attacking unit that caused that elimination or retreat may move into that hex immediately. An Advance After Combat is never mandatory, although the attacking player must decide to Advance After Combat or not immediately after each such battle.
Only the attacking unit and any leader(s) stacked with that unit (if any) that caused the elimination or retreat may Advance After Combat into that hex (and only into that hex). Advance After Combat never requires the advancing unit to expend any movement points; it is a free move.
A bateau or canoe can never Advance After Combat with any attacking unit. In such instances, a bateau or canoe may be left behind in its present hex while it portaging unit Advances After Combat normally, if the owning player desires, in which case that bateau or canoe will remain there until it is portaged again.
13.1 Fleeing and Pursuit
After any marker and/or stack has retreated, it is possible for that marker/stack to continue its retreat (known as "fleeing") one additional hex if there is a leader stacked in that same hex. To do so, the owning player must first roll to determine that leader's initiative (see the number printed within an arrow symbol on the front of that leader marker). If there is more than one leader in the same hex, the owning player must choose the senior-most leader marker (the leader with the lowest Seniority Number). If multiple leaders in the same hex as the defending unit share the same seniority, the owning player may choose which leader. Next, roll one 10-sided die: If the roll is equal to or less than that leader's initiative number (the lower-right number), that leader and any other markers stacked with him may continue the mandated retreat (per 12.0) up to one more hex (to any eligible and accessible hex adjacent to the last hex occupied after completing the mandated retreat per 12.0), but never into any enemy unit's Zone of Control.
Note: Unlike a retreat, weather can nullify an attempt to flee. If the weather is anything other than "Clear", a unit may not flee.
Now, after a retreat is complete, the attacking player may declare a "Pursuit" attempt if there is a leader stacked in the same hex as the attacking unit(s) that caused the retreat. A pursuit allows any of the attacking unit(s) to move a quantity of hexes immediately after the defending marker or stack has completed its retreat. To pursue, the owning player must roll one 10-sided die as well: If that roll is equal to or less than the most senior (in that same hex) leader's initiative number, any of those attacking unit(s) may also move a maximum of two hexes in any direction (even if not actually literally in pursuit of the retreating enemy). Not all of the attacking units from a stack are required to pursue, but the leader that implemented that pursuit must accompanying the pursuing unit(s); thus it is impossible for a stack of units to pursue as multiple units in multiple directions. It is possible, however - if there is another leader present in that same stack - to pursue with a different unit to a different direction and into different hexes, but the owning player must roll one 10-sided die for that other leader as well; if the roll is equal to or less than that other leader's initiative number, than that other leader may also pursue in any direction, up to a maximum of two hexes (regardless of terrain movement costs). Pursuits always ignore terrain and weather, and may be a maximum of two hexes, or only one hex, or none at all; a pursuit is never mandatory, even after a leader has rolled a successful initiative roll. It is even permissible for a player to postpone his decision to pursue until after he has rolled for each leader's initiative, if there is more than one leader stacked in that same hex, and then decide to pursue or not based upon the results of the initiative die roll results.
14.0 Surprise Attack
Though normally any attack die roll is followed by a defense die roll, it is possible to conduct an attack whereby the defending player may not be permitted to conduct a defensive die roll, known as a "surprise attack". However, a failed surprise attack can result in an "ambush" (see 14.1 below). A surprise attack may only ever be attempted in a non-open type terrain hex, and only by a unit that is accompanied by a leader.
Note: A cannon may never participate in a surprise attack.
To attempt a surprise attack, the attacking player must first declare a surprise attack, and then roll one 10-sided die: If that roll is equal to or less than the most senior (in that same hex) leader's initiative number, the attacking unit may conduct a surprise attack. A surprise attack is conducted exactly like a normal attack (see 11.0) except that the defending player is not eligible to roll a defensive die roll (as would normally be the procedure).
14.1 Ambush
If a surprise attack is not successful (i.e., the defending enemy unit is not reduced), then the defending unit is eligible to defend normally per 11.5 (and may include any cannons in that defending hex, if any). However, because a surprise attack attempt was unsuccessful, a -2 die roll bonus is applied to the defending unit's die roll.
Exception: If the attacking unit is an Indian unit, only a -1 die roll bonus is applied to the defending unit's roll after an unsuccessful surprise attack.
14.2 Preventing Surprise Attacks (Patrols)
Prior to resolving any surprise attack (before rolling the die per 14.0 above), the defending player may announce that his defending unit(s) in the battle hex have deployed a "patrol", but only if stacked with at least one leader. The deployment of any patrol simply prevents the attacking player from conducting any surprise attack against that hex (and thus no ambush is possible). However, if any patrol is deployed, that unit's strength number is temporarily reduced by one point during that pending attack.
Note: Units that are not stacked with a leader may not deploy a patrol.
After the resolution of that attack, that defending unit's strength is assumed to be its currently printed strength normally once again.
15.0 Indians (Recruitment)
Whenever Indian units are set-up or arrive on the map as a reinforcement, the owning player must roll one 10-sided die to determine the strength of the Indian force recruited. The result indicates the strength number of the Indian unit that is to be used for that set-up or reinforcement, tabulated as follows:
French player
| Roll | Result |
|---|---|
| 0 | 1 Strength |
| 1 | 2 Strength |
| 2-3 | 3 Strength |
| 4-5 | 4 Strength |
| 6-7 | 5 Strength |
| 8 | 6 Strength |
| 9 | 7 Strength |
British Player
| Roll | Result |
|---|---|
| 0-2 | 1 Strength |
| 3-5 | 2 Strength |
| 6-8 | 3 Strength |
| 9 | 4 Strength |
An Indian unit will remain at its rolled strength result until a Desertion (see 16.0 below) result has reduced its strength. Indian units can never become stronger than their initial recruitment strength.
16.0 Desertions (Indian)
During each Indian Desertion Check Phase, each player must roll one 10-sided die to determine if any Indian units of his side desert. The die roll result indicates the extent of the desertions, if any, tabulated as follows:
French player
| Roll | Result |
|---|---|
| 0-4 | No Desertion |
| 5-7 | Reduce one Indian unit |
| 8-9 | Eliminate one Indian unit |
British Player
| Roll | Result |
|---|---|
| 0-5 | No Desertion |
| 6-9 | Reduce one Indian unit. |
If a player suffers desertions, the owning player may choose which Indian unit is reduced or eliminated, if there is more than one Indian unit present on the map. A reduction result requires one Indian unit to be reduced (flipped to its back side, or eliminated if already reduced), whereas an elimination result requires one full-strength Indian unit (of any strength) to be removed from the map. If no full-strength Indian unit is available to be eliminated, two reduced Indian units must be eliminated instead (or, that player may choose to simply reduce one full-strength Indian unit, and eliminate another already-reduced Indian unit).
17.0 Bombardment
It is possible for any cannon(s), only, to conduct a "bombardment" instead of an attack during the Combat Phase of a friendly Activation Turn, but only for the purposes of targeting an earthwork or fortification marker, to remove that earthwork marker from the map (or "breach" that fortification). A cannon must be adjacent to the targeted earthwork or fortification, or no farther than two hexes from the targeted earthwork or fortification if on the Tactical map (with a clear terrain type of hex intervening between the cannon and the targeted earthwork or fortification). Each cannon may only targeted a single earthwork or fortification marker during the Combat Phase of the owning player's Activation Turn.
To conduct a bombardment, the owning player must simply roll one 10-sided die during the Combat Phase (if that cannon did not participate in any other attack during that same Combat Phase). The result of that die roll will determine the effect of that bombardment, tabulated as follows:
| Die Roll | Target Type and Result |
|---|---|
| 0-1 | Fortress "breached" (17.1). |
| 0-2 | Redoubt destroyed. |
| 0-3 | Breastwork destroyed. |
If a Redoubt or Breastwork is destroyed, it is removed from the map immediately, and that marker no longer imparts any benefit to any unit in that hex. Another Redoubt or Breastwork may be constructed in that same hex normally (time permitting), which will function normally when completed, regardless of any preceding bombardment result in that hex.
If the bombardment die roll is higher than the tabulated range to achieve the result as indicated, that bombardment is considered a miss, and no further effects are incurred.
A bombardment never has any effect upon any unit in a targeted hex, but nor is the bombarding cannon ever subject to a defense die roll; A cannon conducting a bombardment is immune to any enemy unit(s) during that same Combat Phase (although a bombarding cannon unit can be attacked normally during the enemy player's Combat Phase).
Note: It is a perfectly legitimate tactic for a player to conduct a bombardment before resolving a normal attack upon that same hex, for the purpose of potentially eliminating the earthwork there (or breaching the fortification there) prior to his intended attack.
17.1 Breaching a Fortress
No fortress can ever be destroyed by any bombardment, however a fortress can become "breached" by a successful bombardment. If any fortress becomes breached, its defensive modifier is simply halved permanently. A breached fortress can never be repaired, although subsequent breaches do not halve any bombarded fortress again (a fortress can only ever be breached and halved once per game).
A bombardment never has any effect upon any unit in a breached fortress hex.
18.0 Scenarios
There are six scenarios included with the game, three raids and three campaigns. Each scenario lists the Date Turns, map(s) used, victory conditions, set-ups and reinforcements (if any). Each Date Turn is played as a series of two Activation Turns (Day and Night), each Activation Turn comprising a French and British activation. Each scenario begins during the Day Activation Turn, and ends during the Night Activation Turn, and is always played in the order of Day and then Night. Various units and leaders will be specified as "random", indicating that the owning player must select that exact type of unit blindly from a draw cup. Note that "random leader" always refers to an unnamed leader only; No named leader is ever placed into the leader draw cup.
18.1 General Braddock (Optional Rule)
Historically, British General Braddock was killed in 1755, and so he is not included in any scenario. However, a "Braddock" counter is included in the counter mix for players that prefer to play as if Braddock had not been killed, and instead lived to participate in subsequent campaigns.
18.2 1755 Autumn Campaign
- Scenario: 1755 Autumn Campaign
- Map Used: Strategic Map
- Turn Start: 6 September Date Turn (Day)
- Turn End: 12 September Date Turn (Night)
- Victory: The French player wins if his forces were the last to have occupied hex 1803 and hex 1207 by the last game turn. If French forces only capture 1803 or 1207 by the last game turn, the game ends as a draw. Any other result is a British victory. Additionally, the French player loses the game automatically if both of his bateaux are eliminated. The French side moves first.
French Set-up:
- Hex 2309: Dieskau, one random Leader, 2-strength Regular, one random Leader, 6-strength Provincial, two random Leaders, one Indian (per 15.0), two bateaux, two canoes.
British Set-up:
- Hex 1803: Breastwork, Johnson, three random Leaders, three 5-strength Provincial, Hendrick, one Indian (per 15.0).
- Hex 1207: Redoubt, Lyman, one random Leader, 5-strength Provincial.
18.3 1757 Summer Campaign
- Scenario: 1757 Summer Campaign
- Map Used: Strategic Map
- Turn Start: 2 August Date Turn (Day)
- Turn End: 20 August Date Turn (Night)
- Victory: The French player wins if his forces capture and destroy both Forts and the Redoubt by the last game turn. If French forces only capture and destroy one Fort, the game ends as a draw. Any other result is a British victory. The French side moves first.
French Set-up:
- Hex 3711: Montcalm, one random Leader, 4-strength La Reine, one random Leader, 3-strength Languedoc, one random Leader, 5-strength Guyenne, one random Leader, 5-strength Bearn, one random Leader, 4-strength La Sarre, 5-strength Roussillon, two cannon, three bateaux, two canoes.
- Hex 3810: Levis, 2-strength Grenadier, 5-strength Marine, 3-strength Provincial, Langlade, one Indian (per 15.0).
British Set-up:
- Hex 1803: Fort, Monro, one random Leader, 6-strength 35th, 1-strength 60th/2nd, cannon.
- Hex 1804: Redoubt, three random Leaders, three 5-strength Provincial.
- Hex 1207: Fort, Webb, cannon, one random Leader, 5-strength, Provincial, one random Leader, 1-strength Ranger.
18.4 1758 Summer Campaign
- Scenario: 1758 Summer Campaign
- Map Used: Tactical Map
- Turn Start: 6 July Date Turn (Day)
- Turn End: 10 July Date Turn (Night)
- Victory: The French player wins if Fort Carillon (3812) is not captured by any British unit at any time during the game. The British player wins the game immediately if he captures Fort Carillon at any time during the game. The British side moves first.
French Set-up:
- Hex 2214: Fort, one random Leader, 4-strength 3rd Berry, cannon.
- Hex 1614: Breastwork, Montcalm, one random Leader, 4-strength Roussillon, 5-strength 2nd Berry.
- Hex 1613: Redoubt, Bougainville, 5-strength La Sarre, 4-strength Languedoc.
- Hex 1517: Redoubt, Bourlamaque, 3-strength La Reine, 5-strength Guyenne, 4-strength Bearn.
- Hex 1519: Redoubt, one random Leader, 1-strength Regular.
- Hex 1821: One random Leader, 3-strength Marine.
- Hex 0823: Langy, 3-strength Regular.
British Set-up:
- Hex 0728: Howe, Rogers, 4-strength Ranger, 4-strength 80th, bateau.
- Hex 0729: Abercromby, 7-strength 27th, 7-strength 55th, 7-strength 60th/1st, 7-strength 60th/4th, cannon, bateau.
- Hex 0628: One random Leader, 4-strength 1st Mass, 5-strength 2nd Mass, 5-strength 3rd Mass, Leader, 5-strength 4th Mass, 8-strength 5th Mass, 8-strength 6th Mass, bateau.
- Hex 0730: One random Leader, 6-strength 42nd/1st, 5-strength 42nd/2nd, One random Leader, 8-strength 44th, 7-strength 46th, cannon, bateau.
- Hex 0229: One random Leader, 5-strength 1st Conn, 5-strength 2nd Conn, 5-strength 3rd Conn, 5-strength 4th Conn, one random Leader, 5-strength 1st New York, 5-strength 2nd New York, 5-strength 3rd New York, one random Leader, 6-strength 1st New Hampshire, 6-strength 1st New Jersey, 7-strength 1st Rhode Island, cannon, bateau.
Note: The bateaux are to be considered sloops with the same movement, but unlimited transport capacity.
French Reinforcements:
- July 7 (Night): Levis, one random Leader, 2-strength Marine (hex 4830).
British Reinforcements:
- July 8 (Day): Johnson, one Indian (per 15.0) (in Abercromby's hex, or any other British leader's hex if Abercromby has been eliminated).
18.5 1757 Winter Raid
- Scenario: 1757 Winter Raid
- Map Used: Strategic Map and Tactical Map
- Turn Start: 10 March Turn (Day)
- Turn End: 17 March Turn (Night)
- Victory: The British player wins the game if he attacks and eliminates the Sleigh caravan from Fort St. Frederic to Fort Carillon during any game turn, or if he successfully attacks and reduces any French unit without any British unit becoming reduced by the last game turn. The French player wins the game if an equal number of French and British units are reduced by the last game turn, and the Sleigh caravan has not been eliminated, or if more British units have been reduced than French units (even if the Sleigh caravan has been eliminated). If the Sleigh caravan has not been eliminated, and an equal number of British and French units have been reduced by the last game turn, it is considered a draw. The British side moves first.
French Set-up:
- Hex 3811: Fort (Carillon), Sleigh, Langy, one random Leader, two 1-strength Regular, one random Leader, one Indian (per 15.0, with a -3 modifier).
British Set-up:
- Hex 1207: Fort (Edward), Rogers, three random Leaders, three random Ranger.
- Hex 1207: Redoubt, Lyman, one random Leader, 5-strength Provincial.
Note: The source prints hex 1207 for both British set-up entries. It is transcribed as printed.
18.6 1757 Summer Raid
- Scenario: 1757 Summer Raid
- Map Used: Strategic Map [Map 1] and Tactical Map [Map 2]
- Turn Start: 10 April Turn (Day)
- Turn End: 15 April Turn (Night)
- Victory: The British player wins if he enters a hex with the prisoners marker, and then moves a unit with that prisoners marker towards and into the Ft. William Henry hex (hex 1904). The British side moves first.
French Set-up:
- Hex 1614 [2]: Rigaud, 1-strength Grenadier.
- Hex 1519 [2]: Marin, 1-strength Marine.
- Hex 2706 [1]: Two random Leaders, one Indian (per 15.0), canoe.
British Set-up:
- Hex 1904 [1]: Fort (William Henry), two random Leaders, two 1-strength Provincial, two bateaux.
18.7 1758 Summer Raid
- Scenario: 1758 Summer Raid
- Map Used: Strategic Map
- Turn Start: 27 July Turn (Day)
- Turn End: 5 August Turn (Night)
- Victory: The French player wins the game if he attacks and eliminates the Wagon caravan from Fort Edward to the Lake George Redoubt during any game turn, or if any French unit captures (occupies, even if only momentarily) hex 1207. The British player wins if the Wagon caravan enters hex 1803. The French side moves first.
French Set-up:
- Hex 1905: Langy, one random Marine, one Indian (per 15.0).
- Hex 2309: Langlade, one random Marine, one Indian (per 15.0).
- Hex 2712: Marin, one random Marine, one Indian (per 15.0).
British Set-up:
- Hex 1207: Fort (Edward), Wagon, Rogers, two random Leaders, two random Ranger, two random Leaders, two random Regular.
- Hex 1803: Redoubt, one random Leader, one random Regular.
- Hex 1809: Putnam, one random Ranger.
Leader Manifest (French)
| Leader | Seniority | Initiative | Inept | Capable | Exceptional |
|---|---|---|---|---|---|
| Bougainville | 3 | 7 | 0 | 1-8 | 9 |
| Bourlamaque | 2 | 7 | 0 | 1-8 | 9 |
| Dieskau | 1 | 7 | 0-3 | 4-8 | 9 |
| Langlade | 4 | 8 | 0 | 1-7 | 8-9 |
| Langy |
Leader Manifest (British)
| Leader | Seniority | Initiative | Inept | Capable | Exceptional |
|---|---|---|---|---|---|
| Abercromby | 1 | 6 | 0-4 | 5-9 | |
| Braddock | 3 | 8 | 0 | 1-7 | 8-9 |
| Howe | 2 | 8 | 0 | 1-7 | 8-9 |
| Johnson | 3 | 7 | 0 | 1-7 | 8-9 |
| Lyman |
Note: The manifest prints "Rogerschit" as the name of a British leader, which is transcribed as printed. It is probably a misprint for "Rogers", but this was not verified against the printed counter.