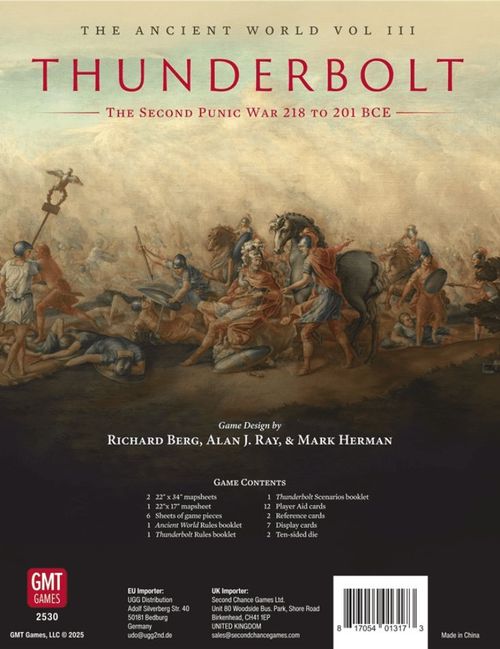
Thunderbolt: The Ancient World, Vol. III – 218-208 B.C.
Thunderbolt: The Ancient World, Vol. III – 218-208 B.C. Rulebook
Table of Contents
Table of Contents
- 1.0 Introduction
- 2.0 Components
- 3.0 The Sequence of Play
- 4.0 Roman Political and Command System
- 5.0 Roman Manpower
- 6.0 The Carthaginian Political System
- 7.0 Carthaginian Manpower
- 8.0 Naval Superiority System
- 9.0 The Celts
- 10.0 The Italian Allies
- 11.0 Macedonia
- 12.0 Auguries
- 13.0 Advanced Naval System (Optional)
1.0 Introduction
Thunderbolt Volume III of The Ancient World series simulates the second war of the three separate wars that comprised the 100+ years-long disagreement between Rome and Carthage - The Punic Wars - as to who would rule the western Mediterranean. It features two of the greatest military commanders in history: for Rome, Scipio Africanus, and for Carthage, Hannibal Barca, Hannibal the Thunderbolt.
The rules in this booklet are in addition to those in the Ancient World (AW) rule book. Those rules are in force unless stated otherwise in this rule book. Rules references to the Ancient World rule book have the prefix AW. All other references point to sections in this rule book.
2.0 Components
The Thunderbolt game contains the following:
- Two 22" x 34" maps (Italy and Spain)
- One 22" x 17" map (Africa)
- Six Counter Sheets (1,680 counters)
- The Ancient World Thunderbolt Edition series rules booklet
- Thunderbolt Rules booklet
- Thunderbolt Scenario booklet
- Four 11" x 17" The Ancient World PACs (one set of two for each player)
- Two 11" x 17" 2nd Punic War Scenarios PAC (two identical copies)
- Two 8 1/2" x 11" Celts Charts and Tables PAC (two identical copies)
- One 8 1/2" x 11" Roman Charts and Tables PAC
- One 8 1/2" x 11" Carthaginian Charts and Tables PAC
- One 8 1/2" x 11" Advanced Naval System Charts and Tables PAC
- One 8 1/2" x 11" 2nd Punic War Auguries PAC
- One 8 1/2" x 11" Roman Magistrate Quick Reference Card
- One 8 1/2" x 11" Map Gazetteer Card
- Two 8 1/2" x 11" Roman Army Displays (I and II)
- One 8 1/2" x 11" Carthaginian Army Display
- One 8 1/2" x 11" Carthaginian Political and Manpower Display
- Two 8 1/2" x 11" City Occupation Displays
- One 8 1/2" x 11" Alliance Level/Game Turn Track Display
- Two 10-sided dice
- Plastic storage bags
2.1 The Maps
The maps are covered with hexagons (hexes), used to regulate movement. The land areas are further divided into Provinces, which have a greater effect on play than individual hexes.
If more than one map is in play, hex numbers are preceded by a code indicating the applicable map: "I-" for the Italy map, "C-" for the Carthage map, and "S-" for the Spain & Mauretania map.
USAGE NOTE: The English and Latin forms for the cities of Rome and Carthage are used interchangeably throughout.
Italy Map
The map of Italy is based on the tribal/provincial divisions that prevailed in the heyday of the early Roman Republic. During the period of The Punic Wars, many of the individual provinces - e.g., Apulia - were no longer independent areas, but were instead allied to Rome.
For several game purposes, the provinces on the map are combined into larger administrative areas and spheres of command called Theaters. On the Italy map, there are six Theaters:
- Roman Italy: includes all provinces on mainland Italy south of and excluding Gallia Cispadana and Liguria Friniates, plus the island of Ilva.
- Sicily: includes East and West Sicilia, the Liparae Insulae, Melita, and the island of Cossyra.
- Sardinia and Corsica: includes Northern and Southern Sardinia and Corsica.
- Liguria: includes Liguria Taurini and Liguria Friniates.
- Gallia Cisalpina: includes Gallia Cispadana, Gallia Transpadana, and Venetia.
- Gallia Transalpina: Gallia Massilia and a small portion of Narbonensis.
Carthage Map
The Carthage map (also referred to as the Africa map) is divided into four game provinces: Carthage, Tripolitana, Numidia, and Mauretania. The actual political boundaries of what we know as the country of Carthage are a bit problematical to discern. The map uses the "Ditch" boundary (noted as the Carthage-era Province Boundary on the map). It seems that Carthage defined her home territory by digging a protective ditch at the edges of her domain, although exactly what protection it would offer is open to speculation (probably of the Line in the Sand variety). While we do not know the exact places of this boundary, we have a rather good idea (according to several of the sources we read) and have noted this on the map. For the Punic Wars scenarios, Carthage will be considered to lie within the Ditch Boundary, although, at various times, Carthage would hold Numidian towns.
To which we must add that during this period, and even while Carthage was fighting Rome, Carthage was always seeking to extend her boundaries to the west, into Numidia, and to the south and southeast, into the Libyan-populated area known as Tripolitana.
Numidia had a dichotomous relationship with Carthage. While it often supplied her with troops, it also was engaged in constant border warfare with Carthage. By the end of the Punic Wars, Numidia, under its great king, Masinissa, controlled much of northern Africa.
On the Carthage map there are two Theaters:
- Africa: includes the provinces of Carthage, Tripolitana, and Numidia.
- Mauretania: includes the provinces of Mauretania and Mauretania Tingitana (on the Spain & Mauretania map).
Rough Hexes: Each Rough hex in the Africa and Mauretania Theaters costs 1 Attrition Point to enter unless the movement is along a Level C road.
Design Note: This addition represents how difficult - mostly in terms of foraging - travel off the beaten paths was in this area. The reduction in attrition represents the fact that these future roads were built over well-traveled trade routes and paths.
Salt Marshes: The Salt Marsh hexes are impassable. No combat units may enter a full Salt Marsh hex or cross a Salt Marsh hexside. Partial Salt Marsh hexes may be entered; use the other terrain in the hex for Attrition purposes.
Spain & Mauretania Map
The Spain & Mauretania map (also referred to as the Spain map) represents that area as it appeared to the Romans at the end of the 1st Punic War. The map is divided into provinces that approximate the territory of indigenous tribes active in the period.
On the Spain & Mauretania map there are three Theaters:
- Hispania: includes the 26 provinces that comprise the Roman era provinces of Tarraconensis, Baetica, and Lusitania, along with the Baliares Insulae.
- Gallia Transalpina: includes the provinces of Gallia Massilia (on the Italy map), Narbonensis, and Aquitania.
- Mauretania: includes the provinces of Mauretania (part of which is on the Carthage map) and Mauretania Tingitana.
Design Note: The Roman division of the Iberian peninsula into three provinces is not suitable for the game mechanics. Rather than dividing up these Roman era provinces geographically, as was done on the Italy map (e.g., Etruria), the peninsula is divided into provinces with names of the larger tribes or tribal confederation that likely occupied the area bounded by the province during the 3rd century BCE.
Mauretania: Like the situation on the Carthage map, each Rough hex in the Mauretania Theater costs 1 Attrition Point to enter unless the movement is along a Level C road. The Salt Marsh hexes are impassable. No combat units may enter a full Salt Marsh hex or cross a Salt Marsh hexside. Partial Salt Marsh hexes may be entered; use the other terrain in the hex for Attrition purposes.
Hispania: Movement in provinces within the Hispania Theater exclusively along Level C roads provides an "Up two rows" adjustment on the Attrition Results Table. The player receives the adjustment even if the road does not cross a river hexside, though the AP cost to cross the river still applies. However, during this road movement the river cost is reduced by 1 AP if the road does cross the river.
EXAMPLE: A force moving along the coast road from Emporiae (S-2806) to Saguntum (S-2921) traverses three provinces of 4 AP each and 4 minor rivers not crossed by a Level C road for another 4 AP. The 16 AP for the move is adjusted two rows up on the Attrition Results Table since the move was exclusively along a Level C road. The 7-9 row on the table would be used to determine the attrition instead of the 13-16 row.
Design Note: Spain was not an easy "country" through which to move as it was heavily forested and not susceptible to foraging. Moreover, the local tribes could snipe and pick at moving armies furthering the losses during the march. However, even though there were no actual roads per se, movement along the routes indicated by such roads was easier simply by time-honored usage. And while there are many small rivers, not all were an appreciable barrier to ease of movement.
Gades: Gades (S-2248) is connected to the mainland via the Level C road crossing into S-2347 enabling land movement. Treat the crossing as a Minor river for all purposes.
All Three Maps
Roads: Level A and B roads are present in all scenarios. Level C roads are not treated as roads in any scenario but can reduce the effects of movement attrition (described above) in the Hispania, Africa, and Mauretania Theaters.
Seas: The seas are divided into areas, identified with era specific names. The hexes within the boundaries are either All Sea or Coastal which include shipping lane hexes as well as hexes that have some land.
Design Note: The sea areas are identified by their Latin names. Mare is the Latin word for sea, Fretum for strait, and Oceanus for ocean.
2.11 Home Territory: A force of Roman Legions, including attached Auxiliaries, halve (retaining fractions) the attrition cost of movement within any Roman-controlled province in Roman Italy. If non-Roman allied units are in the force, determine the AP separately for those units.
A force of exclusively Carthaginian, Numidian, or Libyan contingents halve (retaining fractions) any accumulated Attrition Points incurred moving in their own Home province: Carthage for the Carthaginians, Numidia for the Numidians and Tripolitana for the Libyans.
When determining the final row on the Attrition Chart, drop any fraction that remains.
2.2 The Counters
Legions
Roman combat units are grouped into Legions. Legions are self-contained organizations consisting of infantry and cavalry SP. Each numbered Legion has two counters: one for use on the Army Display showing its discipline level (Recruit or Veteran), and one for use on the map when the Legion is not with or part of a Consular Army. The Slave and Marine Legions have one counter for use on the map.
The counters show a Legion for the map, a Disrupted side, a Legion Marker (Recruit side and Veteran side).
Republican Legion
In the 2nd Punic War scenarios, a Legion has two types of infantry and cavalry units representing Roman Citizens and Roman Allies (Ala Sociorum). The standard composition and strength of a Legion is:
- 9 SP Citizen Infantry, 1 SP Citizen Cavalry
- 9 SP Ala Infantry, 3 SP Ala Cavalry
All newly raised Legions receive the above complement of SP. In some scenarios, Legions may begin play with a slightly different composition. Once in play, a Legion may have its Citizen Infantry reinforced up to 10 SP and its Ala Infantry reinforced up to 12 SP.
Design Note: In a departure from the first two volumes, we have done away with the component markers and opted to use combat units to distinguish the Roman Citizens from the Ala within the Legion.
Historical Note: The paper numerical strength of Legions varied from decade to decade, consul to consul, campaign to campaign, battle to battle. However, except for the Samnite era, the "standard" numerical composition of the Legion appears to have been 4,200 infantry but up to 5,000 in an emergency although sometimes the "allied" contingent would be "reinforced" up to 6,000 foot. As for cavalry, the citizen Legions of the republic were notoriously short and when they were not, they were usually so poorly handled (a Roman tradition) that they might as well have had half the numbers ascribed.
Tribes
Hispania, or Iberia, was, at the time of both the Carthaginian incursion and the early Roman conquests, composed of dozens of tribes, mostly of three basic groups: Iberians (mostly in the southern and southeastern coastal areas), Celts (western and central, which, on the map, would consist of Lusitania and Baetica) and Celtiberians (central Hispania, to the north and center of Tarraconensis). The tribes had many complex intertribal rivalries, and, while many remained neutral, providing mercenaries to both major empires, some were specific allies of either Carthage or Rome. Militarily, the Iberians were quasi-Greek, using their form of line tactics. They tended to side with, and join, the Carthaginians. The Celts were less formally organized, more like the Gallic armies that Julius Caesar would face. They did, however, provide the Romans with what would soon become their major weapon, the famous "Spanish sword". The Celtiberians, usually much smaller tribes, tended to be a mixture of the other two influences.
The Tribe counter shows a Tribe Base Hex, a Contingent, a Depleted side, an Aggression Rating, a Manpower Rating, and a Battle Rating.
Roman Leaders
The Roman Leader counter shows a Name, a Leader #, a Guile Rating, a Mortality Rating, an Initiative Rating, a Battle Rating, a Campaign Rating, and a Finished side.
The in-depth rules for these leaders are given in section 4.0. Each leader counter has a three-digit ID number. This allows the players to locate the leader counter without using the leader's name. The first digit identifies the time period. All ID numbers for the 2nd Punic War era leaders are of the form 4xx. The anchor symbol present on some counters is only relevant when using the Advanced Naval System (13.0) optional rules.
Each Roman leader in the game was an actual, historical Roman Consul or a militarily active Proconsul, Praetor, or Dictator during the 2nd Punic War. We have even provided a complete list of all these distinguished patricians (and plebeians) for the genuinely curious among you.
Historical Magistrate Usage: For those of you wishing to play with the actual leaders from the years in which they served, use the Magistrate Historical Information Chart to locate these men. In such usage, you will need to conduct elections only to fill spaces that play of the game creates.
Historical Note: The Romans had a system of sorts when it came to names, a system quite like what the western world uses today. Essentially - and somewhat simplistically - the first name was the given name, the second the all-important family (gens) name, and the third, if any, a sort of identifier (cognomen), or nickname, if you will. The first name was usually written as a simple initial. Romans tended to use the same names frequently. As for the cognomina, the Romans thought themselves a rather witty lot. For example, the consul who finally defeated Pyrrhus, Dentatus, was so-called because of his immense, bucked teeth.
Somewhat confusing is the number of consuls with the same name. The Romans were not overly inventive when it came to names, and the use of the same name by a family descendant kept that family's traditions - and patrician status - alive. This tended to be more prevalent before the end of the tribal wars, when a small group of patrician families controlled the Senate and the government. But starting with Appius Claudius Caecus, the number of "New Men" - families appearing on the Senatorial rolls for the first time - starts to grow, as more plebians graduate to patrician level. When in doubt, use the ID# on the counter ...the "You've seen one Mus, you've seen them all" theory.
Roman Magistrate and Theater Markers
The counter mix includes markers for each of the Roman magistracies (Consul, Proconsul, Praetor, etc.) and markers to denote a magistrate's assigned provincial area when necessary. These markers are either stacked with a leader or placed on the Roman Army Display with the Army/Legion he commands. The details are discussed in section 4.0.
Note: Magistrate is the same on the back. Markers show a Magistrate side and a Province side, with a Province Back.
Carthaginian Leaders
The Carthaginian Leader counter shows a Name, a Family, a Leader #, a Guile Rating, a Mortality Rating, an Initiative Rating, a Battle Rating, a Campaign Rating, and a Finished side.
If you thought the Romans used similar names, you have not wandered into the Carthaginian lists. Multiple Hannibals, Hannos, Hamilcars, and who knows what, many with the same family name. We have tried to sort them out, but that is often not easy.
Like the Roman leaders, the Carthaginian leaders use a numerical system to easily identify the counter. The counters also bear a colored stripe to show their Family alignment - red for Magonid, blue for Barcid - for use with the Carthaginian Political system rules. All ID numbers for the 2nd Punic War era leaders are of the form 2P-xx. The pre-Punic War Carthaginian leader counters used in the Iberia scenario do not have ID numbers. The anchor symbol present on some counters is only relevant when using the Advanced Naval System (13.0) optional rules.
Design Note: The leaders in the Iberia scenario have separate counters (Hamilcar and Hannibal) to differentiate them from their 1st/2nd Punic War versions. Educated guesses have been made for the less well-known leaders when it comes to family affiliation.
Other Leaders
Here we have the various kings, chiefs, tyrants, and other leaders that allied with or opposed the two major protagonists. In many cases, the leaders are not named but represent "generic" leaders for a tribe. The counters shown are Masinissa, Hippocrates, Tribe, and Indibilis.
2.3 Player Aids
The game includes several displays to help manage the large stacks of units and markers. Each player has an Army Display and City Occupation Display, the former for keeping track of which combat units belong to which Legion/Army, while the latter holds the various city garrisons. There are separate displays that may be used in several of the scenarios that combine portions of the Army, City Occupation, and Alliance and Game Turn track displays into a single display to conserve table space.
Army Displays: There are four Army Displays: two for the Romans, and two for the Carthaginians. All four displays include a series of holding boxes for the player's Armies. Each holding box has a corresponding marker that is used to represent the combat units, other leaders, and markers that are in the holding box, on the game map.
One of the Carthaginian Army Displays is used in all the Punic War scenarios and has five holding boxes for Carthaginian Armies with another four for Allied leaders. The Carthaginian Army holding boxes have a box (Hannibal's Army has two) to hold combat units operating away from the main army as a Detachment. The army box itself has a box to hold its Army Efficiency marker.
For the Roman Army Displays, one is the main display with holding boxes for eight Consular Armies and four Praetor-led Legions. The second is an extension that is partially placed under the main display to provide holding boxes for two more Consular armies, two more Praetor-led Legions, and a holding box for Roman leaders that celebrated a Triumph.
The Consular Army holding boxes are subdivided into boxes for each of the army's Legions, a box for Auxiliaries or allied units, and a box for Magistrate and Province markers. There are separate, less detailed, holding boxes for Praetor-led Legions.
The Legion counter showing its Veteran/Recruit status is used on the display to identify the box holding that Legion's SP. The other counter is used when the Legion is needed on the map.
EXAMPLE: The Roman player raises two new Legions, V & VI, and assigns them to a Consul as his Consular Army. The Consular Army II box is available, so he takes that Consular Army marker and places it and the Consul in Rome. The Legion V and VI markers with a discipline level noted on the counter are placed on their Recruit side in the left and right Legion Marker boxes in the Consular Army II box. The Roman player places 9 SP Citizen infantry, 1 SP Citizen Cavalry, 9 SP Ala Infantry and 3 SP Ala Cavalry in each Legion box. Lastly, he places the Consul magistrate marker and any Theater/province marker in the Magistrate and Province Markers box. The Legion V and VI counters without the discipline level are placed nearby until needed. Auxiliaries acquired during play would be placed in the Auxiliaries and Allies box.
City Occupation Display: There are two City Occupation Displays, one for the Romans and one for the Carthaginians. Each City Occupation display has an Attrition Point Track for keeping tabs on a moving force's accumulated Attrition Points. The remainder of the display consists of two types of holding boxes. One type has the name of a Large/Medium city with that city's IDS in the upper left corner of its box, and for ports the type of port in the upper right corner of its box. The other type has the label Garrison with a number from 1 to 5.
The players may place the counters that are inside the named city in its holding box on the display rather than the map. For counters that are inside a Small city, players may put them in one of the Garrison holding boxes and place the corresponding Garrison control marker on the map. The Garrison boxes may also be used for stacks located outside a city that are not affiliated with an army. In this case, use the Force side of the Garrison control marker on the map.
To ease play, place single-counter garrisons on the map and use holding boxes only for stacks.
The display has a box showing the Siege Capability Rating (SCR) at the start of the scenarios with the Maximum SCR that is possible noted below the box. As the SCR changes, an SCR marker indicating its current value is placed in the box.
Carthage Political and Manpower Display: This display has the Game Turn Track, tracks for recording the Family in Power and the Political Climate, and eight Manpower Holding Boxes, one for each contingent that the Carthaginian player may recruit. How these are used is explained in section 7.32.
Alliance Level & Game Turn Track Display: This display serves three functions: it has the Game Turn track to mark the current Game Turn, the Italian Allies Alliance track to record the Alliance Levels of the provinces in Roman Italy, and Theater Holding boxes for the placement of reinforcements and some other game functions.
Consolidated Display: The Romans and Carthaginians each have a display that serves as an Army Display and City Occupation Display along with a Game Turn track. The display may be used instead of the full displays in the short scenarios to save space.
3.0 The Sequence of Play
A. The Upgrade Phase
- City Rebuild: Rebuild sacked cities one level unless they are in a Devastated province (AW 9.85).
- Return/Replace Leaders: Place wounded leaders removed during the prior GT (AW 8.67) along with any replacements for killed/captured leaders (AW 8.63 B) on the map.
B. Strategic Phase
-
Roman Political Segment
Skip this segment if the Romans are not in play.
a. Imperium Prorogue. The Roman player decides which leaders on the map will remain in play for this GT (4.4). He then may Disband any Legions without a leader (5.3).
b. A Visit from Pluto. The Roman player checks to see if any of his leaders in play are removed (4.44).
c. Election of Magistrates. The Roman player chooses new magistrates (4.5).
-
Carthaginian Political Segment
a. Family in Power. The Carthaginian player determines which Family is in Power for the GT (6.1).
b. Political Climate. The Carthaginian player determines the Political Outlook the Council has (6.2).
c. Disband Armies. The Carthaginian player checks to see if he must disband any Armies due to a change in the political climate (6.3).
d. Appoint Army Commanders. The Carthaginian player appoints a leader for each Army without a commander (6.4).
e. Assign Theaters. The Carthaginian player assigns one Army to Africa and another Army to Hispania if the Political Climate is Cautious (6.22), Interested (6.23), or Alert (6.24).
Play Note: The Carthaginian player may conduct their political segment at the same time as the Roman player.
-
Force Determination Segment
C. The Initiative Phase
-
LAM Pool Segment. Each player places all the LAMs available for every leader he has in play in a cup or similarly opaque container. In addition, place the Augury marker, if the scenario requires it, and the three Siege Attrition markers in the same cup.
-
Initiative Determination Segment. Either player blindly draws one marker from the cup. If it is a LAM or a Siege Attrition marker, go to the Operations Phase (D). If it is the Augury marker, go to the Augury Phase (E). If there are no LAMs in the cup, proceed to the Devastation Phase (F).
Play Note: We suggest that the players alternate drawing from the pool.
D. The Operations Phase
The player who controls the leader drawn from the LAM pool may do anything with that leader that the rules (AW 5.3) allow. The phase ends when the leader is Finished. Remove any Failed Interception markers. Play now reverts to C/2. If the LAM says Siege Attrition, the players resolve that and play then reverts to C/2.
E. The Augury Phase
If the player has drawn the Augury marker, he rolls on the Augury Table and the players follow the instructions contained therein. If there are LAMs left, return to C/2.
F. Devastation Phase
- Devastation Recovery Segment. The players roll to see if Devastated provinces can recover (AW 6.75).
- Devastation Attempt Segment. The players may attempt to Devastate provinces (AW 6.73).
G. End-Turn Phase
- Inertia Attrition Segment. The players determine the effects of attrition on those units that have remained in the same province during the GT (AW 6.47, AW 7.26).
- Legion Training and Army Efficiency. The players finish training their Legions (5.4) and increase the efficiency of their Armies (6.7).
- Recovery from Battle. The players improve the After Battle Status of their forces (AW 8.55).
- Victory Determination. If this is the last Game Turn of the scenario the players consult the Victory section to see who has won, otherwise the players consult that same section to see if either player has achieved an automatic victory. If not, the Game Turn is over; advance the Game Turn marker and start another beginning with the Upgrade Phase (A).
4.0 Roman Political and Command System
Design Note: This set of rules encompasses the game's version of the Roman Republican and Carthaginian political systems, as they pertain to military necessities. While "quantifying" political systems is rare in historical games, it is a sine qua non for this era, where politics played a far more important part in how/why things occurred than any other single factor. Therefore, this section is the heart of the game, and the rules herein are quite extensive and rather more detailed than one normally finds.
4.1 The Magistrates of Rome
Historical Note: The Roman Republic was administered by two consuls, elected annually. In case of war, these consuls were entrusted with commanding her armies, usually with the assistance of praetors and proconsuls. As almost all the consuls and other magistrates were patrician politicians, Republican Rome's armies were sometimes saddled with a series of hacks and dilettantes whose level of military capability rarely approached workmanlike (you did have to have a ten-year background in the military, usually service, to be eligible for office, though). Realistically, since battle/tactical doctrine was infantry-oriented, and strictly adhered to upon pain of death (sometimes literally), the ability to creatively adapt was not one highly sought. The ability to do what everyone else had done in years past was what they were after. Rome's strength lay in her disciplined Legions, her sense of honor and duty, a rather rigid tactical doctrine, and, mostly, her manpower.
Design Note: The Roman leadership system in the game is far more complex and hierarchical than that for the other players. This has much to do with the republican form of Roman government, and the rather involved and political requirements therein for holding office.
The offices available to the Roman player were grouped under the term Magistrates, and magistrates who could command were those who had been given Imperium, the power to lead (plus a few other things unnecessary for game purposes). The magistrates available to the Roman player are:
Consul: The Roman player elects two Consuls each year/Game Turn. Prior to the 2nd Punic War era, these were the Rome Consul and the Field Consul (less historical terms than ones useful for game purposes). The Rome Consul was usually restricted to Italy, while the Field Consul was assigned where and as needed - usually to a specific province. From the 2nd Punic War onward, the distinction between the Consuls lapsed - both were simply Consuls. Each Consul can command two Legions, never more. The two Legions assigned to a Consul form his Consular Army. Occasionally, both Consular armies would be combined under the dual (and sometimes fractured) leadership of both Consuls. It was possible to field a bigger army by attaching Legions assigned to lesser magisterial offices, but this, too, had limitations.
Proconsul: Proconsuls were magistrates assigned as needed to Theaters/provinces, usually those outside Roman Italy and, in game terms, the Legions already there. Like Consuls, they held the Imperium of two Legions (and thus had a Consular Army), but, without permission from the Senate, they could not leave their assigned Theater/province with that army. While some Proconsuls were assigned from the available pool of patricians in Rome, many were consuls who were prorogued (kept in office without really being elected) in the provinces in which they had their armies. For example, a Consul would be given his Consular army and sent to Sicily to beat up the Carthaginians. Rather than bring his army back and replace him (which they did often enough to make you wonder), many times they would simply prorogue his imperium, let him stay there, with his army, as Proconsul. At Cannae, the Roman army had two Consuls and two proconsuls, the latter two having been prorogued specifically for the purpose of keeping their Legions in the field against Hannibal until they were joined by the new Legions of Varro and Paullus. Fat lot of good it did them. During the 2nd Punic War, the Romans frequently gave elected Praetors proconsular imperium, allowing them to command two Legions. These Praetors are treated as Proconsuls in the game.
Praetor: In times of military stress, Praetors were often appointed to lead individual Legions, usually for smaller campaigns. A Praetor's Imperium allowed him to command one Legion, never more. It was possible to attach that Legion to a Consul or Proconsul's army, to increase the latter's size. But the Praetor still had the Imperium for his Legion. Much of this fractured command system, which did much to destroy what efficiency the army mustered, resulted from Roman fear of kings, and the concomitant fear that if anyone could command a large army, they could become a king. From that viewpoint, and from no other, does this method make sense. With the acquisition of territory after the 1st Punic War, the Romans used Praetors as governors for these areas. Although Praetors were usually assigned to specific Legions, those elected as governors were assigned a province and may have various types of forces under their command.
Dictator: In times of emergency the Romans chose a Dictator to oversee command. The dictator's Imperium, while limited by time, superseded and replaced that of the consuls. Only the Dictator had Imperium, some of which he could apportion among lesser magistrates. Some were chosen only to run things back home, giving the consuls a free hand in the military arena. Others took the field. A Dictator was not limited in the number of Legions he could (theoretically) command; it was unusual, though, to see one lead an army of more than 4 Legions without the leadership support/presence of the other Consuls. Historically, no Roman army of the period covered by this game ever exceeded 4 Legions, unless you accept the 8-Legion theory for Cannae.
Magister Equitum (Master of Horse): A Dictator could choose an "assistant", the Magister Equitum (ME), Master of Horse. If the Dictator took the field, leading Legions, the ME stayed in Rome. If the Dictator stayed in Rome to oversee the day-to-day operation of the republic, the ME took his place with military Imperium. Someone had to lead the army.
Praetor Urbanus: The Praetor Urbanus was, essentially, commander of Rome garrison. During the 2nd Punic War (and after) he commanded the Urban Legions. His major task, outside of managing a variety of emergencies, was training Legions. The Praetor Urbanus' capabilities are further restricted in scenarios prior to the 2nd Punic War.
4.2 Imperium
4.21 Imperium (or if you prefer Army Command) is a Legion, Consular Army (2 Legions), or other force assigned to a leader usually during the Election of Magistrates segment (B/1/c) or Raise Manpower segment (B/3/b), but occasionally during the Operations Phase. The allowable Imperium for a Roman leader is a function of his office:
- Dictator: 2 Consular Armies (4 Legions)
- Magister Equitum (ME): 1 Consular Army (2 Legions)
- Consuls: 1 Consular Army (2 Legions)
- Proconsul: 1 Consular Army (2 Legions)
- Praetor: 1 Legion
- Praetor Urbanus: Rome Garrison
In addition to the above, an Imperium may also include Auxiliary (5.17) or Allied SP.
Design Note: Actually, a Dictator, or his Magister Equitum, whichever takes the field, commands all Roman forces. The above restrictions are partially for game purposes, and partially to reflect the realities of leading large armies.
4.22 The two Legions of a Consul/Proconsul's Imperium are that magistrate's Consular Army. These two Legions remain part of that army until one or both are eliminated or disbanded. Generally, the two Legions will remain together on the map, although there is no requirement that they must.
Important Note: The term Consular Army (CA) will be used frequently in these rules. When the rules say Consular Army (CA), they refer to the Legions, two in most cases, that are the Imperium of a specific magistrate.
4.23 A leader may always use his Imperium for Operations, Interceptions, etc. during the Operations Phase. A leader cannot directly use the Imperium of another leader but may include another leader and his Imperium in a force within the limits of the Roman command hierarchy (4.81).
EXAMPLE: At the start of the 2nd Punic War scenario, Sempronius Longus (#402) has Consular Army II (Legions III and IV) as his Imperium. Sempronius is the only Roman leader that can directly command (conduct Operations, use Interception, Avoidance, etc.) these two Legions. He has been assigned to Sicily and Africa as his Theaters of operation. Generally, a Consul is assigned a single Theater, but here we have an exception to reflect Rome's historical intent to invade Africa from its province of Sicily.
In most cases, a Praetor is not assigned a Theater/province. The exceptions are Sardinia (both provinces) and Sicily (both provinces). The Praetors in these two cases are the governors of their respective provinces (4.54).
Historical Note: The numbers assigned to Legions (e.g., I, II, etc.) were not permanent, in the sense that they were in the Empire. The Consular Army numbers are arbitrary and are provided solely for the purpose of identifying the box on the Roman Army Display holding the two Legions of a magistrate's imperium.
4.24 Treachery: As an exception to AW 9.62, Proconsuls may use Treachery if they have a Guile Point to spend.
4.33 A Roman leader generally may only conduct Operations within his assigned Theater/province. However, a Roman leader may always conduct any operation within the province (not Theater) where his CA/Legion was located at the start of his Operations Phase regardless of his Theater/province assignment. Furthermore, a Roman leader may always move with his CA/Legion to his assigned Theater/province using only Force Movement Operations (and Reform Scattered Units operations if Naval Transport is involved) until his CA/Legion stops in a hex/city in the target Theater/province. Any Stops must be in a hex/city that is closer to the assigned Theater/province than the hex/city occupied at the start of the operation. To move anywhere else would require permission from the Senate (4.61).
4.3 Theater and Province Assignments
Historical Note: Generally, magistrates were also restricted to where they could exercise their Imperium, usually to a specific province or other geographic area, unless they were given permission by the Senate to do otherwise.
4.31 A Consul or Proconsul is assigned a Theater (2.1) in which that leader may conduct Operations. Generally, a single province cannot be assigned to a Consul/Proconsul, with the notable exception of provinces within Roman Italy as described below. The following restrictions apply:
- A Consul can be assigned to any Theater; both Consuls may be assigned to the same Theater.
- A Proconsul can be assigned either to a Theater, but not Roman Italy, or to a Province that is within Roman Italy.
- No more than two Proconsuls can be assigned to a given Theater, and only one Proconsul can be assigned to a given Province in Roman Italy. Proconsul(s) can be assigned to a Theater that is also assigned to a Consul(s).
Design Note: The restrictions will help keep the allocation of Roman forces within historical bounds and encourage the Roman player to keep one or both consuls in Roman territory should the Carthaginian player invade Italy. For most of the 2nd Punic War, the bulk of the Roman forces were stationed in Roman Italy attempting to contain Hannibal and bringing wayward allies back in line.
4.32 A Dictator/ME is never assigned a Theater/province. In most cases, a Praetor is not assigned a Theater/province. The exceptions are Sardinia (both provinces) and Sicily (both provinces). The Praetors in these two cases are the governors of their respective provinces (4.54).
Design Note: With the acquisition of overseas provinces, the Romans began the practice of annually electing (or proroguing) a Praetor to govern them.
EXAMPLE: Crassus (#446) was elected Proconsul and given CA VI located in Samnium for his Imperium. The Roman player wants to increase the pressure on the Carthaginians in southern Italy and so assigns Calabria as his Province. When activated, Crassus succeeds in inducing Carthaginian-controlled Larinum to surrender and then moves through Apulia to Tarentum with a single Force Movement Operation. If the Roman player wanted Crassus to move elsewhere, say to Gallia Cispadana to deal with some pesky Gauls, he would need to have Crassus gain Senate Permission to do so. Moreover, once in his assigned province, Crassus would need Senate Permission to leave.
4.4 Prorogue of Imperium
4.41 During the Imperium Prorogue segment (B/1/a), the Roman player decides which leaders will remain on the map for the current Game Turn. This process is called Prorogue. The Roman player simply states that the leader has been prorogued. Leaders that are not prorogued are removed from the map (along with their office and Theater/Province markers) and placed back in the leader pool, or if the leader earned Triumph at any time during the game, the Triumph Holding Box.
Play Note: Prorogued leaders and all leaders in the Triumph Holding box are subject to A Visit from Pluto (4.44).
4.42 The Roman player may, in some cases must, prorogue the following magistrates:
- A Consul may be prorogued as a Proconsul (swap the Magistrate markers). He retains his CA. His Theater/province assignment is determined per 4.31.
- A Consul may be prorogued as a Praetor (swap the Magistrate markers and remove any Theater/province marker) if his current Imperium is a single Legion. He retains that Legion. If the Legion was part of a single Legion CA, replace the CA marker with the Legion's on-map marker and move the Legion's SP to a Legion box on the Roman Army display.
- A Proconsul may be prorogued as a Proconsul and retains his CA. His Theater/province assignment is determined per 4.31.
- A Praetor may be prorogued as a Praetor and retains his Legion and if applicable, his assignment as governor of West Sicilia or Sardinia.
- A Dictator/ME or the Praetor Urbanus cannot be voluntarily prorogued, nor can a Consul without Imperium.
- Any magistrate who is besieged (AW 9.0) in a city other than a port or Rome must be prorogued. A Dictator/ME or Consul is prorogued as a Proconsul (swap the markers). A Proconsul or Praetor retain their respective offices. All besieged magistrates retain their CA/Legions. Theater/province assignments are determined per 4.31.
4.43 A besieged magistrate without an Imperium is returned to the Roman leader pool (if he survives) when the siege is resolved.
4.44 A Visit from Pluto. The Roman player rolls on the Leader Loss Chart (AW 8.61) for every leader counter that was not returned to the leader pool. If the result is Leader Wounded, the leader is removed from the map and set aside until the end of this Strategic Phase (B) and then placed in the Roman leader pool. If the result is Leader Killed, he has taken the HMS Hades across the Styx and is removed from the game.
Design Note: No, he has not gone to Disney World. Pluto was the Roman god of the Underworld. This rather morbid rule applies only to the Romans because they have so many leaders.
4.5 Election and Assignment of Magistrates
The scenario instructions detail which Roman leader counters are placed in the leader pool at the start of the game. Leaders removed from the map are generally returned to the leader pool during the Imperium Prorogue segment (4.41). Leaders that have earned Triumphs are not returned to the pool but placed in the Triumph Holding Box instead.
PROCEDURE: To elect a magistrate, the Roman player either randomly draws a leader from his leader pool or selects a leader from the Triumph Holding Box. After each draw/selection, the Roman player designates an appropriate and eligible military force for that magistrate's Imperium (4.2) and, if applicable, assigns a Theater/province (4.3) to that magistrate. The order of election is as follows:
- Dictator: A Dictator is elected only if a State of Emergency exists (4.57). The process and options including the selection of the Magister Equitum are detailed in 4.56.
- Consuls: Two Consuls are always elected. The process for determining the Imperium and Theater assignments is detailed in 4.51.
- Proconsuls: Proconsuls are elected if there are Consular Armies or multiple independent Legions without leaders. The process is detailed in 4.53.
- Praetors: Praetors are only elected if there are single Legions without leaders, or there is no leader assigned as governor of Sicily or Sardinia. The process is detailed in 4.54.
- Praetor Urbanus: The Praetor Urbanus is always elected. The process is detailed in 4.55.
Design Note: The separate Consul designations as seen in the prior two volumes disappear with the 2nd Punic War as the reach of Rome grows beyond Italy. Starting with the 2nd Punic War, all scenarios will have the Roman player simply electing two Consuls, giving them armies where the Senate (the player) feels is most needed.
Play Note: There are markers to keep track of which leader holds which office and to which Theater/province he has been assigned. These markers may be placed under the leader on the map or on the Roman Army Display with the appropriate Consular Army/Legion. The Consular Army/Legion marker is placed on the map with the leader.
4.51 Consuls: The Roman player must elect two Consuls. Both Consuls are drawn/selected before any assignments are made. A leader can be selected from the Triumph Holding Box only if he earned a Triumph during the preceding Game Turn as a Consul or Proconsul.
IMPERIUM: The Roman player must assign each Consul to a CA without a leader if possible. He may combine any two Legions without leaders into a CA and must do so if there are not enough CAs without leaders for the Consuls. If there is only a single Legion without a leader, the Consul is assigned a CA composed of that single Legion. If a Consul cannot be given a CA, he is placed in Rome without an Imperium.
THEATER: Each Consul with an Imperium must be assigned a Theater per 4.31. He is placed either in Rome or with any Legion in his CA. He may not be placed in a besieged city unless it is a port or Rome.
EXAMPLE: The Roman player draws Postumius Albinus (#415) and Sempronius Tuditanus (#422) for his Consuls. There are four Consular Armies and a single Legion in play, with one CA under the command of a Consul from the prior turn who was Prorogued as Proconsul. The Roman player then must choose which Consul will command which of the three available armies. He cannot choose to have a Consul, Albinus for example, who is not one of the better Roman leaders, go without an army command or have him command the single Legion. Once assigned an army, the Consul is then given a Theater to operate in. Here he decides to give Albinus Roman Italy which is currently quiet and give Tuditanus Cisalpine Gaul.
Play Note: The Roman player should take care in deciding which magistrates to prorogue to ensure that his incoming Consuls have the desired armies to command.
4.52 Intentionally skipped.
4.53 Proconsuls: The Roman player must elect a Proconsul for any remaining CAs without leaders. The Roman play may select any leader from the Triumph Holding Box instead of drawing from the pool. In addition, the Roman player may combine two Legions without leaders located in the same Theater into a CA and elect a Proconsul.
IMPERIUM: The Imperium of the Proconsul is the selected CA.
THEATER/PROVINCE: The Proconsul is placed with a Legion in his CA. He is assigned a Theater/Province per 4.31. He may not be placed in a besieged city unless it is a port or Rome.
EXAMPLE: Continuing with the example in 4.51, the Roman player has a CA in need of a leader. He has no leader that has been awarded a Triumph during the game, so he draws Manlius Vulso (#432) from the Roman leader pool. The army is in Sicily, so Manlius takes Sicily for his Theater and is placed with his Consular army.
Design Note: Proconsuls generally were not elected. What we have here is a Praetor being elected and given proconsular imperium, the ability to command two Legions - a Proconsul for game purposes.
4.54 Praetors: The Roman player must, if possible, elect a Praetor for any single Legion without a leader. The Roman play may select any leader from the Triumph Holding Box instead of drawing from the pool. The Praetor is placed with the Legion. Regardless of the Initiative Rating of the Praetor, only one LAM per Praetor is placed in the LAM pool. Praetors thus have a game-restricted Initiative Rating of 1.
IMPERIUM: The Imperium of the Praetor is the selected Legion.
THEATER/PROVINCE: None. The Praetor is placed with his assigned Legion. He may not be placed in a besieged city unless it is a port or Rome.
GOVERNORS: The Roman player must either designate a Praetor in play or elect a Praetor as a governor for Sicily and another as a governor for Sardinia (the entire islands in both cases) unless:
- the former governor was prorogued or
- all provinces on the islands are controlled by Carthage or
- the islands were within the scope of a Consul's and/or Proconsul's Theater assignment.
The Roman player may either designate or elect a Praetor if the third bullet applies. Unlike other Praetors, governors are assigned to their provinces. Any unbesieged Praetor on the map may be designated as such. A Praetor elected to fill a governor slot is placed in any friendly city in his province and may conduct Operations with any friendly SP located there that are not part of another leader's Imperium. Place the appropriate Governor marker either with the leader or in the leader's Legion box.
The Roman player is limited to six Praetors (in addition to the Praetor Urbanus), two of which will often fill the role of governor. If the Roman player finds himself without enough Praetors for his single Legions, the Legions go without a leader.
Design Note: During the 2nd Punic War, the Romans made use of a significant number of Praetors to command Legions scattered throughout Italy to deal with provinces "liberated" in the wake of Hannibal's successes. Thus, the Praetor limit of one per Election segment in the RRR/CR periods is lifted.
EXAMPLE: Continuing with the example in 4.51 and 4.53 the Roman player has a single Legion without a leader, so he draws V. Philo (#436) from the Roman leader pool to command the Legion. Even though Philo has an Initiative of 2, he will receive only one LAM because he is a Praetor. He is placed with his Legion located in Umbria. Praetors, other than governors, are never assigned to a Theater or province.
4.55 Praetor Urbanus: The Praetor Urbanus is the last magistrate elected. The Roman player may select any leader from the Triumph Holding Box instead of drawing from the pool. The Praetor Urbanus' Imperium is the Rome Garrison and any newly raised Legions that will be placed in Rome to undergo training. His "province" is the city of Rome, where he is placed. He may leave Rome only when there is an Emergency (4.57) and only with the permission of the Senate (4.6). He is the only magistrate able to enter Rome with combat units without Senate Permission. There is no LAM for the Praetor Urbanus, but he may use a Consul LAM (instead of a Consul) to conduct operations. As with other Praetors, he is limited to one Operations Phase. Praetor Urbanus may conduct operations with one Legion instead of the Rome garrison if one is present in Rome for training.
Play Note: Given that the Praetor Urbanus is never prorogued, any Legions placed in Rome in the prior turn for training/garrison duty would be without a leader and thus assigned to a Consul/Proconsul/Praetor in the Election segment.
4.56 Dictator/Magister Equitum: If conditions for a State of Emergency (4.57) are present (e.g., cities are occupied), or if the battle loss conditions occurred in the previous Game Turn and no Dictator was elected at that time, a Dictator may (Minor Emergency) or must (Major Emergency) be elected. The Roman player may select any leader from the Triumph Holding Box instead of drawing from the pool.
Magister Equitum: The Roman player has the option of either having the Dictator operate in the field or remain in Rome. If the Dictator remains in Rome, the Roman player selects a Magister Equitum to take the field instead. To do so, the Roman player selects a leader (not blindly, but with purpose) from the Roman leader pool (those on the map are not eligible) whose ID# is within 5 of the Dictator's ID #. If the Dictator takes the field, the Magister Equitum (ME) is not brought into play. The Dictator is the Roman OC for all operations that require one whether he stays in Rome or takes the field.
Play Note: Thus, the Roman Player has an interesting choice to make when he elects his Dictator. Is he better off with a good leader in the Field or in Rome, running the show?
If a State of Emergency arises during the Operations Phase, the Roman player may/must elect a Dictator at the beginning of the next Roman Operations Phase (before that leader conducts any Operations) using the procedure detailed in 4.56. The Dictator/ME receives LAMs equal to his Initiative Rating, minus one, but never less than one.
IMPERIUM: The Roman player may assign one or two CAs without leaders to a Dictator that takes the field; one CA to the Magister Equitum if he takes the field. Alternatively, the Roman player may assign none and use the command hierarchy (4.8) to conduct operations with the armies of other magistrates. The Dictator/ME that takes the field is placed with any one of his armies if assigned one, otherwise he may be placed with any CA/Legion. He may not be placed in a besieged city unless it is a port or Rome.
Play Note: The more flexible arrangement is to have the Dictator/ME placed without a specific Army, which the Romans tended to do often.
THEATER/PROVINCE: A Dictator that will remain in Rome is placed there and cannot leave the city. He can, however, still conduct operations (Manpower the most important). Furthermore, the Dictator's presence in the city enables the Roman player to subtract the Dictator's Initiative Rating from all Senatorial Permission die rolls (4.66). A Dictator that stays can conduct operations with any force in the city.
EXAMPLE: A timid Quinctius Crispinus (#438) is elected Dictator. The Roman player decides he needs a better leader in the field so he selects Livius Salinator (#440) for his ME and will keep Quinctius in Rome. The Roman player decides not to assign a CA directly to Livius and places him in Roman Italy with one of the two Consular armies present. Livius will use his position in the command hierarchy to command those Legions through the regularly elected magistrates.
4.57 Emergencies: A Dictator may/must be elected during the Election of Magistrates segment (B/1/c) or during the Operations Phase (D) if a State of Emergency is in effect.
Minor State of Emergency: The Roman player may voluntarily elect a Dictator when:
- a Roman Consular Army or larger force loses a Major land battle (AW 8.52) and losses 30% or more of its SP in that battle; or
- an enemy force occupies two or more Medium/Large cities in Roman Italy
Major State of Emergency: The Roman player must elect a Dictator when:
- an enemy force occupies a city that is within 3 hexes of Roma (e.g., the town of Reate); or
- Rome loses two Major land battles in either the current GT or prior GT (one in each doesn't count), each involving at least one Consular Army, regardless of the number of losses; or
- Roma is Under Siege.
4.58 Rome Under Siege: Roma being besieged has no effect on the placement of elected leaders or their Imperium/province assignments. Prorogue is not mandatory for leaders located in the city.
EXTENDED EXAMPLE: [2nd Punic War] It is the Roman Political Segment of the 211 BCE Game Turn. The prior Game Turn's (212 BCE) magistrates, with their Imperium and location (all on the game map), are:
- Consul Q.F. Flaccus (#423) with CA II in Campania
- Consul C. Pulcher (#417) with CA III in Campania
- Proconsul C. Marcellus (#414) with CA IV in Sicilia
- Proconsul P.C. Scipio (#401) with CA I in Hispania
- Proconsul S. Gracchus (#416) with CA VI in Lucania
- Proconsul S. Tuditanus (#422) with CA V in Gallia Cisalpina
- Praetor C.C. Nero (#424) with Legion XV in Campania
- Praetor I. Silanus (#426) with Legion XVI in Etruria
- Praetor V. Laevinius (#431) with Legion XVII in the Macedonia Holding Box
- Praetor M. Scaevola (#421) with Legion XVIII in Sardinia
- Praetor P.C. Lentulus (#419) in Lilybaeum
- Praetor Urbanus C. Asellus (#444) with Legion XIX and XX in Rome
Scaevola and Lentulus are the governors of Sardinia and Sicily respectively.
Imperium Prorogue: The Roman player decides to keep most of his leaders in play. He removes Prater Urbanus Asellus, who cannot be prorogued, and the Governors Scaevola and Lentulus, placing them into the leader pool.
The Consul Flaccus (#423) is prorogued as a Proconsul and retains his CA. Campania is selected as his province. Note that Proconsuls are assigned provinces in Roman Italy. Likewise, the Consul Pulcher (#417) is prorogued as Proconsul, retains his CA, and is also given Campania as his province. In both cases, the Consul Magistrate markers are exchanged for Proconsul Magistrate markers. Both former Consuls had Roman Italy as their Theater, so those markers are replaced with Campania markers. Note that no more than two Proconsuls can be assigned to the same province.
The Proconsuls Marcellus (#414), Scipio (#401), and Tuditanus (#422) are all prorogued as Proconsuls, retain their CAs, and are assigned Sicily, Hispania, and Gallia Cisalpina respectively as their Theaters. Since their office and Theater have not changed, all three retain their Magistrate and Theater/Province markers. The Proconsul Gracchus (#416) was also prorogued, keeps his CA, and is assigned to the province of Lucania, retaining his markers as well. The Praetors Nero (#424), Silanus (#426), and Laevinius (#431) are prorogued as Praetors and retain their Legions, which are in Campania, Etruria, and the Macedonia Theater box respectively. All retain their Praetor markers.
None of the prior year's governors were prorogued, but the Proconsul Marcellus has Sicily covered. The Roman player is only required to fill the open governorship in Sardinia. Lentulus is conveniently there, so he gets the nod. The Sardinian governor marker is currently in the box with the Legion, so no marker adjustments need be made.
A Visit from Pluto: The Praetor Urbanus is the last magistrate elected. The Roman player draws from the leader pool and receives C. Piso (#433) and places him in Rome. This completes the Roman Political Segment.
The Roman player then makes a roll on the Leader Loss Table for each of his leaders in play. This includes leaders in the Theater Holding Boxes and the Triumph Box. The roll for Gracchus (MR 7) is a 6 so with the +1 DRM for A Visit From Pluto roll, he becomes a casualty. The second DR is a 6 (no DRM here) so he is wounded and set aside to be placed in the leader pool at the start of the next Game Turn. All the other leaders pass and remain in play.
The Roman player wants to keep Marcellus focused on Syracusa, so decides to elect a governor for Sicily to watch over the western half of the island. He draws C. Aurunculus (#435) from the leader pool and places him and the Sicily governor marker in Lilybaeum (no need to add the Praetor marker in this case).
Historical Note: This example portrays the historical personages and assignments for 211 BCE.
Election of Magistrates: A state of emergency does not exist, so no Dictator is elected. There are no leaders in the Triumph box, so all leaders will be drawn from the leader pool, starting with the Consuls. The Roman player draws Centumalus (#427) and Galba (#428). Note that both Consuls are drawn before assignments are made. There is a CA in Lucania, and a pair of Legions in Rome that were trained by the Praetor Urbanus, all without a leader, and a lone Legion in Sardinia.
The Roman player wants to keep his Consuls in Roman Italy to continue to put the squeeze on Hannibal so, he combines the now Veteran two Legions in Rome to form CA VII and assigns Galba that CA and selects Roman Italy for his Theater. The Roman player places Galba and the CA VII marker in Rome and moves the Legion XIX and XX markers and SP from the Rome box on the City Occupation display to the Consular Army VII box on the Roman Army Display (Part I). The Legion markers are placed on their Veteran side. A Consul Magistrate marker and a Roman Italy Theater/province marker are placed in the Consular Army VII box. He then assigns Centumalus CA VI, selects Roman Italy for his Theater, and places Centumalus with CA VI in Lucania. A Consul Magistrate marker and a Roman Italy Theater/province marker are placed in the Consular Army VII box.
With only a single Legion without a leader, no Proconsuls are needed so none are elected.
Legion XVIII in Sardinia requires a Praetor, so the Roman player draws from the leader pool to fill the need and receives L.C. Lentulus (#429) - not bad. Unfortunately, Praetors are restricted to 1 LAM, so Lentulus is a bit overqualified. Lentulus is placed with Legion XVIII and a Praetor marker is placed in the Legion box holding Legion XVIII.
4.6 The Senate
Historical Note: One of the interesting sidelights of all those Republican Roman laws designed to ensure that the monarchy never came back into existence was the one that forbade any magistrate from leaving his province of assignment and marching around Italy - and especially into Rome - without specific permission of the Senate. And even the Rome Consul had to ask permission to enter the city with an army - a permission rarely given. So, herewith is one of those chromatic lacunae so beloved by ancient's players.
Important: The charts and tables referred to in this section are located on the Thunderbolt Roman Charts & Tables PAC unless specifically stated otherwise.
Senatorial Permission is an Operation available to the Roman player (only) that may/must be used in a variety of situations. If permission is granted, the Roman player can continue with his Operations Phase; if denied, Continuation is by die roll (AW 5.25).
4.61 Leaving a Theater/Province: In general, no Roman leader may leave his assigned Theater/province, or in the case of a Praetor the province where his Legion is located, with his CA/Legion without Senate Permission. The exceptions are:
- A Dictator/ME never needs permission to leave a Theater/province.
- Hot Pursuit per 4.62 below.
- To fulfill the text of an Augury event.
A leader without an Imperium, or any leader using Leader Movement, does not require Senate Permission to leave any location.
Hierarchy: If a leader, other than a Dictator/ME, wants to leave the assigned Theater/province of any leader in his force, that leader must seek Senate Permission to do so. One attempt is made, and the result applies to all other leaders in his force. Censure (4.67) applies only to the leader conducting operations. A Dictator/ME, and any leader that is part of his force, never needs permission to leave a province.
EXAMPLE: A Consul wants to return to Roman Italy with a force that includes his CA and the CAs of the two Proconsuls assigned to Sicily. The Consul conducts a Senate Permission Operation and is successful. The Permission to Leave is granted to the Consul and both Proconsuls.
If granted Permission to Leave, a leader may conduct Operations in any Theater/province for the duration of the Game Turn.
Play Note: Place a Permission to Leave marker (these are printed on the back of the Theater/province markers) on the magistrate as a reminder that he can move outside his Theater/province.
4.62 The "Hot Pursuit Exception": A leader may leave his Theater/province without Senate Permission if that Force Movement Operation Stops either in a hex with or adjacent to an enemy force that is not inside a city. A leader may also leave without permission as the result of a successful Interception or Coordination (but see 4.67).
4.63 Entering/Leaving Rome: No Roman force may ever enter the city of Roma (I-3714), even during movement, without permission of the Senate ... and it will be a cold day in Carthage when that happens! Senate permission cannot be requested unless there are 20+ SP of enemy units within 10 hexes of Rome. The units of the Rome Garrison are an exception; they are always free to enter (return to) Rome, if moved there by the Praetor Urbanus. Furthermore, Legions that are placed in Rome to train may remain there, but once they leave, permission is required to re-enter. A Roman leader who moves alone is always free to enter Rome without permission. The Praetor Urbanus may not leave Rome without Senate Permission and may do so only if a State of Emergency exists.
Exception: A force conducting a Mandatory Retreat (AW 8.36) automatically has Senate Permission to enter Rome.
4.64 Eight Legions: A Dictator must seek Senate Permission to use a force of more than 8 Legions in a Force Movement Operation, an Interception attempt, or be included in a Coordination attempt (4.82). The latter situations are an exception in that seeking permission is not an operation but serves as a check to see if the Dictator can perform the function; there is no Continuation DR.
4.65 Senatorial Permission: Senatorial Permission is an operation (4.64, 4.72 are exceptions). If granted, continuation is automatic. If denied, continuation is by die roll. Permission to do something may be requested only once per Operations Phase per leader, although that leader may make more than one request to do different things. Any Senatorial Permission to do something lasts for the remainder of the Game Turn.
4.66 Permission Procedure: The Roman player consults the Senate Permission Chart, rolls a die and applies all relevant DRMs. If the adjusted DR is the same as or lower than the leader's Campaign Rating, permission has been granted, if higher, permission has been denied.
EXAMPLE: Claudius Pulcher (#417) has been prorogued as Proconsul for Cisalpine Gaul. He wishes to redeploy his army to Samnium so seeks Senate permission to leave Cisalpine Gaul. His army is in Gallia Transpadana which is not under Roman control. The DRM is +3 (+1 he is a Proconsul, +2 he was prorogued to the province, and there is no Dictator in play). With a Campaign Rating of 6, the Roman player will need to roll a 3 or less to receive the Senate's blessing. Claudius has no Guile Point to spend to improve his chances. The Roman player rolls a 6 so the Senate fails to see things Claudius' way. Since permission was denied, the Roman player will need to roll to see if Claudius can continue his Operations Phase.
4.67 Censure: A Consul/Proconsul/Praetor that engages in Hot Pursuit (4.62) is subject to Censure. At the end of the leader's Operations Phase, the Roman player must consult the Censure Chart, then rolls the die, adjusting the DR with the modifiers listed on the chart. If the adjusted die roll is higher than his Campaign Rating, he is Censured and removed from office and the map. He may not be placed in the magistrate pool for the rest of the game.
Historical Note: You may well ask why winning a battle would not simply eliminate the need for censure. Well, take the example of consul T. Manlius Torquatus, in 340 BCE, whose son disobeyed his orders, attacked the enemy, and won a great victory. Old Pops Manlius not only presided over his son's disobedience trial but made sure his execution was carried out. So much for military creativity in ancient Rome.
4.68 A censured Consul/Proconsul/Praetor is replaced upon removal by drawing a leader from the Roman leader pool. No LAMs are added to the LAM pool.
EXAMPLE: Continuing with the example in 4.66, the Roman player decides to have Claudius ignore the Senate and head for Samnium. Before completing his Operations Phase, he brings a Carthaginian force to battle and wins a victory, though one insufficient for a Triumph. When Claudius is Finished, the Roman player must roll for Censure. Due to the successful battle, he earned a -1 DRM but that is all the help he will get. The Roman player rolls a 7, which is just enough to keep him in the game.
4.7 The Roman Triumph
4.71 For purposes of being re-elected, winning a Triumph is important for a Roman magistrate. A Triumph is a victory in which the leader satisfies, during the Game Turn, all the following:
- The Winner in a battle (AW 8.51) or conducts a successful Siege by Assault or Attrition where enemy infantry SP were present, and
- Causes casualties of 10+ infantry/cavalry SP, and
- Returns his army to Rome. To do this, he moves his army into any hex adjacent to Rome and Stops. The leader then leaves his army outside Rome and moves into Rome by himself (Continuation is automatic in this case). Once he has entered Rome, he is Finished and may not conduct any more Operations Phases again that Game Turn. (He's busy fitting his oak-leaf tiara and celebrating with the boys at the Senate Club.)
The move to Rome need not occur in the same Game Turn in which the first two conditions were met. The leader may be prorogued and enter the city on a subsequent Game Turn if he remains in command of his Imperium.
4.72 Request to Grant Triumph: However, even if all the above have been fulfilled, the Senate may refuse to grant a Triumph! If Roman casualties to the leader's force from battle, Assault, or Siege Attrition during the Game Turn were 15% or more, the leader must seek permission from the Senate per 4.66 to celebrate the Triumph after he has entered Rome. The Roman player may expend as many Guile Points as the leader has available to modify the die roll. None of the other DRMs apply to this request. If Permission is granted, the leader earns the Triumph.
Play Note: A Triumph marker may be used when the leader is on the map as a reminder to return the leader to the Triumph Holding box.
Design Note: This is not purely a "game" formula. The "law" in Rome was, if you won a battle, killed 5000 of the enemy, and came back with your army, you got a Triumph. Triumphs were known to be refused if the Senate felt losses were too great. And your army stayed outside the city.
4.8 Command Hierarchy
4.81 A Roman leader may only use the units that are specifically assigned to that leader - one or two Legions, plus any auxiliaries, provincial garrison, and/or Allied troops. A Roman leader, however, may include other leaders and their units in a force if those leaders hold offices lower (same or lower for a Consul) in the command hierarchy. That command hierarchy in order of precedence is:
- Dictator/ME
- Consul
- Proconsul
- Praetor/Praetor Urbanus
- Allied Leader
Both Roman Consuls are treated as Overall Commanders (AW 5.12) unless a Dictator is in play. In the latter case, the Dictator is the OC if he takes the field, otherwise the ME is the OC.
4.82 Only the Dictator may conduct Force Movement, Interception, or Coordination with more than 8 Legions (plus auxiliaries/allies) regardless of how many leaders are gathered in one place. However, the Dictator requires Senate permission (4.66) to do so. There is no Legion limit for an Attack or any Siege Operation.
Play Note: The Dictator may never actually be assigned an army larger than four Legions. However, given the presence of other magistrates and their armies, he may have the opportunity to conduct operations with a larger army. This may seem to be a difference in semantics, but, to the Romans, it was a major one.
Historical Note: One of the arguments for the Romans having eight Legions at Cannae was that not only were the two Consuls for that year present (Varro and Paullus), but the two Consuls from the previous year - Servilius and Atilius - had been prorogued to command the Legions they already led. With each Consul and Proconsul allowed two Legions each, that would add up to a possible total of eight Legions present. (To be sure, there are many other arguments about what was at Cannae - and why.)
4.9 Command Efficiency
4.91 Command Efficiency Rating: Roman leaders have a Command Efficiency Rating (CER) derived from their Battle Rating which reflects their non-military training and restricts their ability to efficiently lead large armies; non-Roman leaders do not use this rule. The CER reflects the number of Legions that the leader may command efficiently, with the Battle Rating denoting the number of Legions the leader may effectively control as follows:
- A = 6 Legions
- B = 5 Legions
- C = 4 Legions
- D = 3 Legions
- E = 2 Legions
4.92 The letter is an efficiency rating, not a restriction. Only the number of Legions in the force matters; a Legion's SP strength is irrelevant. When the Roman player has a leader using a force larger than his efficiency limit, he suffers the following penalties:
- Battle: If attacking, there is a -1 DRM for each Legion over the leader's efficiency limit, if defending a +1 DRM for each.
- Siege Assault: If attacking, there is a -1 DRM for each Legion over the leader's efficiency limit. There is no penalty when defending.
- Siege Attrition: There is a +1 DRM to any Siege Attrition DR (whether besieging or besieged) for every 2 Legions over the efficiency limit of the highest-ranked leader in the location. If the ranks are the same, the Roman player chooses the leader. If there is no eligible commander present, all Legions are considered over the efficiency limit.
EXAMPLE: A Consul with a C Battle Rating, conducting an Attack Operation with 6 Legions, would incur a -2 DRM to the Battle DR. His opponent would receive a +2 DRM if the Consul were defending.
Design Note: The CER, which is restrictive to most Roman magistrates, reflects the historical inability of Roman leaders to efficiently use the remarkable resources of manpower they possessed. Most Roman magistrates had no training in maneuvering with truly large forces, and, when they did find themselves in such a position, they often could make little positive use of such numbers ... Cannae being the perfect example. Roman discipline was fine, but it could not compensate for, or adjust to, the problems of commanding armies of 50,000 or more men. The Romans, however, appear to have been aware of their limitations in this area, and, even with their almost limitless personnel reservoir - and the willingness to use it - the number of instances they fielded an army of more than 4 Legions in this era is limited to Cannae, Sentinum (where the force was split) and... we cannot even think of a third. The Romans were highly aware that sheer numbers meant little.
5.0 Roman Manpower
Historical Note: Rome's greatest strength - and the telling factor in almost all Republican Rome's wars - was her seemingly unlimited ability to raise troops. No matter how many men she lost, she simply raised some more men and came right back. For example, when Hannibal invaded Italy (218 BCE), Rome was fielding six Legions. By 212, she had 25 (mostly) Legions operating, almost a quarter of a million men, even though she lost, perhaps, 50,000+ Legionnaires at Cannae!! Hannibal's army rarely - if ever - topped 50,000 and was usually much less. These two comparative figures say a great deal about Rome ... and Hannibal's generalship.
Important: The charts and tables referred to in this section are located on the Thunderbolt Roman Charts & Tables PAC unless specifically stated otherwise. There are three separate Legion Request Tables. Be sure to use the one for the 2nd Punic War.
5.1 Raising Legions
5.11 The Roman player raises Legions through the Senate. Legions may be raised in the Raise Manpower segment (B/3/b). Raising units in this segment is not an operation and does not require the presence of any leader. Legions may be raised during this segment even if Rome is besieged.
5.12 Manpower Operation: The Roman player may raise Legions with a Manpower Operation conducted by a Dictator or a Consul. Only one of these leaders may perform a Manpower Operation and may do so only if located in Roman Italy and not besieged. That same leader may perform the Manpower Operation more than once per Operations Phase, but only once per LAM.
Important: The Roman player may only use a Manpower Operation if there is an enemy land force of at least 20 SP anywhere in Roman Italy (2.1).
Historical Note: The Roman player's historical ability to increase the size of his Legionary armies was almost limitless; the only "real" limit was the penury of the Roman Senate, and the maximums listed on the Legion Request Table. Scenarios prior to the 2nd Punic War place further limits on the number of Legions allowed.
5.13 The Roman player uses the 2nd Punic War Legion Request Table to raise Legions. He notes the number of Legions already in play (their SP strength does not matter), rolls the die, applies all relevant DRMs, and consults the table. The result is the number of new Legions raised. All newly raised Legions enter play at full strength (2.2) with a training level of Recruit. For one Legion newly raised, the Roman player may, instead, in a Siege Engine counter (if allowed in the scenario); only one Siege Engine may be substituted per Legion Request Table DR.
5.14 Leader Assignments: Newly raised Legions are assigned a leader in the following order:
- If there are CAs with a single Legion, newly raised Legions are added to those CAs, Roman player choice if there are more CAs than Legions.
- If one or both Consuls are without an Imperium, the Roman player must group the Legions that weren't added to a CA into as many Consular Armies as possible to ensure that the Consuls' (player's choice as to which) have an Imperium. If an odd number of Legions was raised and a Consul is without an Imperium, the Consul is assigned a CA composed of that single Legion.
- If both Consuls have an Imperium, and four or more Legions remain, at least two of the Legions must be combined into a CA. The remaining Legions may be combined into CAs with a Proconsul elected (4.53) for each, one or two Legions may be placed in Roma to be trained by the Praetor Urbanus, and/or a Praetors may be elected for the Legions subject to the six Praetor limit (4.54).
Theater/province assignments for the Consuls/Proconsuls are up to the Roman player subject to the restrictions in 4.3.
EXAMPLE: Two Legions were raised. No CA is short a Legion but both Consuls are without Imperium. The two Legions are combined into a CA and given to one of the Consuls for his Imperium. If one of the Legions was needed to complete a CA or if only one Legion was raised, that one Legion would compose the CA for one of the unemployed Consuls.
Play Note: The principle here is that the Consuls need to be in command of an army before a Proconsul or Praetor is brought into play, or Legions are given to the Praetor Urbanus for training.
5.15 Newly raised Legions may be placed in Rome or in a Roman-controlled city in a Roman-controlled province in Roman Italy. Newly raised Siege Engines are placed either in Rome or with any Legion in Roman Italy. Legions/Siege Engines cannot be placed in a besieged city. A Siege Engine may participate in an operation only when part of a Legion/CA's force.
5.16 Newly raised Legions that are placed in Rome may be trained if the Praetor Urbanus is present. In the Legion and Army Efficiency segment (G/2), the Roman player rolls the die for each Legion placed in Rome that remained in Rome. If the DR is 7 or more, the Legion is now Veteran; otherwise, it stays Recruit. If the Praetor Urbanus leaves Rome after the Legions are placed, no training occurs.
5.17 Auxiliaries: Whenever an adjusted DR of 9 or 10 is attained on the 2nd Punic War Legion Request Table when requesting Legions (not reinforcements), the Roman player may also raise one contingent of Auxiliaries. Auxiliaries are light/medium infantry troops - archers, slingers, or light infantry. All infantry Auxiliaries enter the game as a self-contained 6 SP contingent and may be included in any leader's force.
The raised Auxiliaries may be placed with any unbesieged CA/Legion in their home province. The home province is determined by the location of the CA/Legion where the SP will be placed as follows:
- Italian (any province in Roman Italy)
- Gallic (any province with "Gallia" in its name)
- Sicilian (any province in Sicily)
- Ligurian (Sardinia, Corsica, or Liguria)
- Lusitanian (Lusitania)
- Iberian or Celt-Iberian (Baetica or Tarraconensis)
Under certain circumstances, a contingent of Numidian cavalry is available. A Numidian Cavalry contingent is raised with a maximum of 4 SP; it is always Elite and placed in any province in the Africa Theater. See the individual scenarios for the details.
5.18 Legions/Auxiliaries that cannot be placed are lost.
5.2 Raising Reinforcements
5.21 The Roman player may raise reinforcement SP instead of Legions during the Raise Manpower segment (B/3/b) even if Rome is besieged, or by way of a Manpower Operation subject to the same restrictions described in 5.12 above, with the additional restriction that Legions outside Roman Italy cannot be reinforced with a Manpower Operation.
5.22 To do so, the Roman player undertakes a Legion Request Table roll as if he were raising new Legions. Instead, though, he always uses the "0-6" column, applies any relevant DRMs and uses the number in brackets [] to determine the number of SP raised. Every 8th SP raised is considered cavalry, though the player can substitute an infantry SP instead. Both Citizen and Ala SP may be raised in any combination.
EXAMPLE: The X and XIV Legions have been reduced by battle to 6 SP Citizen and Ala infantry each. Each Legion has also lost 1 SP Ala cavalry. The Roman wishes to bring these Legions up to strength, so he decides to raise reinforcements. He rolls a die, which is adjusted to an 8. This means he has 12 SP to allocate; or 11 Infantry SP, and 1 Cavalry SP. He uses 8 of those infantry SP, to build the X and XIV Citizen components up to their maximum allowed strength. He then uses 3 SP Ala infantry to raise Legion X's Ala component to 9 SP and gives 1 SP Ala cavalry to the XIV Legion.
5.23 Reinforcement SP may be immediately placed with any unbesieged Legions within Roman Italy, Gallia Cisalpina, and Liguria when raised, subject to the limits given in 2.2. Rome is an exception: reinforcements raised in the Raise Manpower segment (B/3/b) may be used to reinforce the Citizen components of any/all Legions present in Roma and/or the Rome Garrison (up to 10 Citizen SP) even if Roma is besieged. A besieged Roma cannot be reinforced with a Manpower Operation.
For Legions outside these three theaters or those in a besieged port within Roman Italy, Gallia Cisalpina, and Liguria, the Roman player instead places the reinforcement SP in the Theater Holding Box(es) associated with the Theater(s) where the receiving Legion(s) are located. He may distribute the SP among these Theater Holding Boxes as he sees fit. He then places the Legate LAM in the LAM pool.
5.24 When the Legate LAM is drawn, the Roman player must, for each Theater Holding Box with reinforcement SP, trace a path of sea hexes from an unbesieged Roman-controlled port in Roman Italy to one Roman/Allied controlled port in that Theater. The port cannot be besieged unless the Legion receiving the reinforcements is in the port. The port of origin may be the source for more than one Theater but the number of SP that leave the port cannot exceed its Embark limit. The player then rolls the die and consults the Naval Transport Table (AW Player Aid Card #2). Apply only the SP losses and leader casualty results; ignore the Scattered and NS results. The surviving SP, up to the port's Disembark limit (excess SP are eliminated), are then distributed among the unbesieged Legions in the Theater, or to those Legions in the besieged port of arrival, subject to the limits given in 2.2.
If there are no eligible ports or if no eligible Legions remain in the Theater, the SP are eliminated (lost at sea, etc.).
For reinforcements in the Sicily Theater Holding box, the Roman player may use the Strait Crossing Table (AW Player Aid Card #2) to resolve the placement if he chooses Rhegium (I-6015) as his port of origin and Messana (I-5915) as the destination port. Apply the results as noted on the table.
EXAMPLE: The Roman player decides to reinforce his beleaguered Legions in Hispania, and raises 12 SP in the Raise Manpower segment, placing the SP in the Hispania Theater Holding box. The Legate LAM is placed in the LAM pool during that segment. When the Legate LAM is pulled, the Roman player selects a port in the Theater, here the allied port of Emporiae is an excellent choice since it's the closest port in the Theater to Roman Italy. For the Romans, the disembark limits are not a factor given the number of reinforcement SP that can be raised. Pisae is chosen for the port of origin since it's the closest to the destination port. The Roman player traces a path of 33 Coastal hexes from Pisae to Emporiae, traversing Mare Ligusticum, Mare Gallicum, and the Mare Hispanum North and consults the Naval Transport Table. The NS level of the least friendly sea zone, the Mare Hispanum North, gives a -2 DRM. The Coastal hex distance is between 20 and 40, so there is a -1 DRM for the distance travelled, The Roman players rolls a 6; modified to a 3. The 25% loss result is applied, reducing the reinforcements to 9 SP. The SP are then incorporated into any unbesieged Legions in the Theater.
Play Note: There is no Legate leader counter - just the LAM - which triggers when the reinforcements are added to the targeted Legions.
5.3 Disbanding Legions
5.31 The Roman player may disband Legions during the Imperium Prorogue segment (B/1/a) after he makes all his prorogue assignments. Any/all unbesieged Legions without a leader are eligible. Both Legions that constitute a CA must be disbanded together. To disband a Legion, the player removes the Legion markers and unit counters from the map/displays.
5.4 Roman Discipline
5.41 In the Ancient World system, Legions are considered either Recruit or Veteran. Newly-raised Legions are Recruit. Legions can have their discipline level changed in the following circumstances:
- If a Roman player is the Winner in a battle (not Siege), he may promote one Legion of his choice that participated in the battle to Veteran; if a Major Victory (AW 8.52), he may promote two Legions to Veteran.
- If a Roman force is the Loser in a battle (not Siege), the Veteran Legion that lost the most SP in that battle is demoted to Recruit. In the case of a tie, the Roman player chooses which one. If the Loser in a Major Defeat, all Veteran Legions with 5 SP or less Citizen Infantry are demoted to Recruit. However, at least one Veteran Legion (player's choice) must be demoted to Recruit regardless of the Citizen strength.
- A Legion may be promoted to Veteran through training (5.16).
5.42 In battle, the Roman player receives a +1 DRM for each Veteran Legion with at least 6 SP of Roman Citizen Infantry if attacking or a -1 DRM for each when defending.
5.5 Special Legions
5.51 Marine Legion: The so-called Marine Legion consisted of the soldiers of the fleet; it was raised only in times of dire need in Italy, as happened after the disaster at Cannae (216 BCE). The Roman player may raise this Legion during the Force Determination segment (B/3/b) or as a Manpower Operation instead of rolling on the Legion Request Table if there is a Major State of Emergency (4.57). The Marine Legion may be commanded only by the Dictator, his ME, or a Praetor elected specifically for this Legion. It starts and remains a Recruit Legion. When the Marine Legion is raised, place the Legion marker in Ostia (or if Ostia is enemy-controlled, in Roma) and roll the die. That DR is the maximum strength of the Legion (use the Ala Legion counters); the Roman player may choose to reduce it. Why? Because for every SP assigned to the Marine Legion, one NS Level must be reduced. If disbanded, a NS level may be increased for each SP removed. The Marine Legion cannot be reinforced.
EXAMPLE: The Marine Legion is raised with a maximum strength of 5 SP. The Roman Player decides to use only 3 SP, places the Marine Legion marker in Ostia, and changes his NS Level in Mare Ionium from +2 to -1. He could have spread it out amongst two or three Naval Zones.
5.52 Slave Legions: Slave Legions, consisting of slave volunteers (volones) are raised under the same circumstances (Major State of Emergency, etc.) as the Marine Legion. There are some differences, however. When conditions permit, two Slave Legions each with 8 SP Ala infantry and no cavalry are raised. In addition, attached to each Slave Legion is a force of 6 Italian Auxiliary SP (...jailbirds, as Brian Caven notes in his book; see bibliography.) These auxiliaries may not be transferred to any other force or detached; they stay with the Slave Legion(s). The Slave Legions are placed in any Roman-controlled city in Roman Italy. The Slave Legions may be commanded only by the Dictator/ME or a Consul. These Legions start and remain Recruit Legions. The Slave Legions cannot leave Roman Italy and if a Slave Legion is used in Battle, there is a +/- 1 DRM in favor of the opposing player.
The Slave Legions and Marine Legion may be raised in the same segment/operation.
Design Note: It appears that one Slave Legion was raised from Roman-owned slaves and the other from slaves owned by Rome's allies.
5.53 Slave and Marine Legions are Disbanded (5.3) at the end of the Election segment if there is no State of Emergency (Major or Minor). They are always free to return, should circumstances warrant.
5.6 Leader Casualties and Replacements
Roman leaders may be replaced by leaders in the Roman leader pool. The leader may be brought into play by methods AW 8.63 A and C only, or by an Augury event. Leaders entering the game in such fashion are always chosen blindly/randomly. Replacement leaders are placed either in the hex where the previous magistrate was or in Rome. The replacement leader assumes the former leader's office, Imperium, and any assigned province. When a Roman leader enters as a replacement, there are no additions or subtractions from the LAM pool regardless of what the new leader's Initiative Rating is. The Roman player is not required to return a wounded leader to the map and instead may return the leader to the leader pool and replace him instead.
6.0 The Carthaginian Political System
Historical Note: The Carthaginian Political system - much admired by many Greek scholars of the era - was far less complex (thankfully) than that of the Romans, with power almost entirely in the hands of a small group of families. These families apparently dominated the Council of Thirty Elders, which acted as advisor to the Council of 104, which chose the offices of civil and religious power, the suffetes. Citizens, invariably limited to the Phoenician community, as the Assembly of the people had some input, but it was wealth and position in this decidedly mercantile community that held sway.
This is not to say that the families were always on the same platform; inter-familial fights were common, but, when things were going well, as they had been for centuries, everyone seemed to agree on most things, the result being that, to protect their wealth (which was considerable) and position, the people who held power in Carthage were often conservative. And as the suffetes did not hold military office - the Council selected the generals - they were, far too often, rather slow in making decisions that could affect the wealth of the city.
Important: The charts and tables referred to in this section are located on the Thunderbolt Carthaginian Charts & Tables PAC unless specifically stated otherwise. The Carthaginian Tables have different DRMs depending on the scenario being played. The 1st Punic War, Agathocles, and Mercenary War DRMs are not used in any Thunderbolt scenario.
6.1 Families
Carthaginian political power was divided into Families, with one family faction usually having the upper hand in the Councils and offices of Suffete. The scenarios state which Family starts in Power.
During the Family in Power segment (B/2/a), the Carthaginian player consults the Carthaginian Family Power Determination Table, rolls the die, and adjusts that roll using the listed modifiers. The result is the Family in power for the Game Turn.
Historical Note: There were probably more factions than the two families represented in the game, but there is not an abundance of information on this subject, and two is a suitable number for game purposes. The Magonids and the Barcids were the two prominent factions. In what is euphemistically called the 3rd Punic War, the factions were not familial, but political: "democratic", pro-Numidian, aggressively anti-Numidian, etc. Fat lot of good it did them.
6.2 Political Climate
6.21 As with the Roman Senate, the Carthaginian player must use the Council to determine his ability to raise manpower, among other items. In the Political Climate segment (B/2/b), he consults the Carthaginian Political Climate Table, rolls the die, and adjusts that roll using the applicable listed modifiers. The result will be a Council that is Cautious (and not willing to expend that many funds for some overseas ventures), Interested, Alert, or Aggressive (scared, if you wish). The resulting Political Climate affects the ability of the Carthaginian player to raise manpower, the number of Armies the Carthaginians may employ and, in some cases, where they can operate, summarized on the 2nd Punic War Army Limit Chart.
Important: Hannibal's Army can operate in any Theater in any Political Climate and is in addition to the number of armies listed on the 2nd Punic War Army Limit Chart. However, the three-army limit per Theater outside Africa applies to Hannibal's Army.
EXAMPLE: The Carthaginian player determines the family in power. He rolls a 4 which is modified by a +1 (Barcids were in power the previous GT) and +2 (2nd Punic War) for a net result of 7. The Barcids stay in power (the Barcids tended to dominate affairs throughout that war). The Carthaginian player then determines the Political Climate. He rolls a 7 which is modified by -1 (no enemy force with a leader in Africa), -1 (there is no Roman force with a leader in Hispania), and +1 (Carthage suffered a Major loss in battle during the prior GT) for a net result of 6. The Carthaginian Political Climate is Interested.
6.22 Cautious Climate: The Carthaginian player is allowed two Armies in addition to Hannibal's Army. If there are more than two in play, the excess armies may be disbanded (6.3). In the Assign Theaters segment (B/2/e), the Carthaginian player must assign one of his Armies to the Africa Theater, and if he has a second, that Army to the Hispania Theater. If the designated Army is outside its assigned Theater, its leader can only conduct Force Movement Operations (and Reform Scattered Units operations if Naval Transport is involved) until his Army stops in a hex/city in the assigned Theater. Any Stops must be in a hex/city that is closer to the assigned Theater than the hex/city occupied at the start of the operation. Once there, the leader can conduct operations normally within the theater but cannot leave.
An Army Commander without an assigned Theater may conduct operations in the Theater where he was located at the start of the Game Turn. He cannot leave the Theater except to move to the Africa or Hispania Theaters in the same manner as a leader moving to an assigned province as described above. Once there, the leader can conduct operations normally within the theater but cannot leave.
As an exception to the above, an Army assigned to the Hispania Theater may leave to move to the Africa Theater if an enemy land force occupies a hex in Africa, controls any cities in Africa, or a Carthaginian Allied province in Africa is in revolt, in the same manner as a leader moving to an assigned province as described above.
6.23 Interested Climate: The Carthaginian player is allowed three Armies in addition to Hannibal's Army. If there are more than three in play, the excess army may be disbanded (6.3). Use the procedure for the Cautious climate (6.22) for assigning and positioning Armies in the Africa and Hispania Theaters. The restrictions and exceptions of the Cautious climate (6.22) apply to these two armies. The third allowable Army and any excess Army may conduct operations in any playable Theater on the map.
6.24 Alert Climate: The Carthaginian player is allowed three Armies in addition to Hannibal's Army. If there are more than three in play, the excess army may be disbanded (6.3). All armies may conduct operations in any playable Theater on the map with the exception that there may never be more than 3 armies in any one Theater other than Africa.
6.25 Aggressive Climate: The Carthaginian player is allowed four Armies in addition to Hannibal's Army. All armies may conduct operations in any playable Theater on the map with the exception that there may never be more than 3 armies in any one Theater other than Africa.
EXAMPLE: The Carthaginian player has two Armies in Hispania and one in Sicily. The political climate has turned Cautious. All three armies survived their disband checks. The Carthaginian player decides to assign one of the armies in Hispania to Africa and the other to Hispania. The Army Commander of the army assigned to Africa must immediately move his army to Africa when it is his turn to conduct operations. Once in Africa, that Army Commander could conduct other operations there, but cannot leave the theater. The Army Commander of the army assigned to Hispania can conduct operations in Hispania but cannot leave the theater unless the Africa exception is triggered. The Army Commander of the army in Sicily can conduct operations in that theater and could move to either Africa or Hispania but once there could not leave.
6.26 Although a Carthaginian Army may be able to conduct operations in a Theater, certain unit types and contingents may not. See 7.12 for the geographic restrictions for these units.
6.3 Disbanding Armies
6.31 If the Political Climate is such that the number of Carthaginian Armies on the map is over the allowable limit, and only in this circumstance, the Carthaginian player must determine if any of the excess armies Disband. This check is conducted in the Disband Armies segment (B/2/c). The Carthaginian player selects any one unbesieged Army, consults the Army Disband and Commander Recall Table. He refers to the row of the table that corresponds to the family affiliation of the Army Commander to that of the family in power and compares the DR to the range listed in the Disband Army column. If the DR is within the range, he must disband the selected Army, otherwise the Army remains in play. If the Army has no commander, use the "Different/None" row. The player continues this process until he is either at the allowable army limit or has checked all his unbesieged Armies.
Important Exception: An Army commanded by Hannibal is exempt from this rule.
6.32 The Carthaginian player may disband an Army without resorting to the die roll as described in 6.31 above if the Army Commander has a different or no affiliation to the family in power. Regardless of the affiliation, the player cannot select the only Army located in the Africa Theater.
6.33 After all the Disband die rolls, the Carthaginian player distributes the SP in the disbanded armies based on their class (7.11) on the Holding Box on the Thunderbolt Carthaginian Political and Manpower Display, or out of play:
- Citizens: Place Carthaginian SP inside any unbesieged controlled cities in Carthage province or into the Carthaginian Manpower Holding box in any combination.
- Allies: Place Libya, Numidia, and Mauretania SP inside any unbesieged controlled cities in the Theater where the Army was located, the Africa and/or Mauretania Theaters (subject to 7.12), or into their matching Manpower Holding box in any combination.
- Tribal Levies: Place the Gallic, Iberian, Celtiberian, Lusitanian, and Ligurian SP in their matching Manpower Holding box (they have been discharged from service).
- Provincial Allies: Remove the SP from the map (they have gone home).
6.34 The commander of a disbanded Army is placed in the Carthaginian leader pool. If that leader was the Overall Commander, use the procedure in 6.48 to designate a new OC.
EXAMPLE: The Political Climate is Cautious, and the Carthaginian player has one Army in Africa and two in Hispania. The Magonid family is in power. The commanders of the two Armies in Hispania are Barcids, while the army in Africa is led by a Magonid. The Carthaginian player decides not to voluntarily disband a Barcid-led Army. The Carthaginian player picks one of the Armies in Hispania and rolls a 5. That Army does not disband. He then rolls a 3 for the other Army. That army must disband. Since he is now at the Army limit, no further die rolls are made. The Iberian and Celtiberian SP in the Army go home and are placed in their boxes on the Carthaginian Political and Manpower Display. He does the same for all remaining cavalry and elephant units. He would rather keep the African infantry in Hispania, so he distributes the SP among the various Carthaginian-controlled cities in Hispania. Note that if the Carthaginian Army located in Carthage province was disbanded instead, he Carthaginian player would need to move one of the armies in Hispania to Africa in the Operations Phase per the Cautious Climate requirements.
6.4 Carthaginian Commanders
6.41 Appointing Army Commanders: Unlike the Romans, once appointed, Carthaginian Army commanders remain in the field until they die, get recalled (and possibly crucified for such ineptitude), or their Army is disbanded, or eliminated. The initial deployment notes which Commanders start in play. The scenario instructions also provide a pool of Carthaginian commanders from which to choose when a new or replacement commander is needed. An Army Commander must be appointed:
- during the Appoint Army Commanders segment (B/2/d) for each Army without a Commander.
- whenever a new Army is formed (7.21).
- using Leader Replacement (AW 8.63, A or C only). A replaced Wounded leader no longer commands the Army and returns to the leader pool next GT. The Carthaginian player is not required to replace a Wounded leader.
- when an Army is eliminated when it has a detachment in play (6.58).
6.42 When choosing an Army Commander, the Carthaginian player simply draws one, randomly and blindly, from the Carthaginian leader pool and places him:
- in Carthago, or
- with the newly formed Army, or
- with the Army of the replaced commander. If the replaced commander was the Overall Commander, use the procedure in 6.48 to determine the new OC.
The leader cannot be placed with a besieged Army unless the city is a port.
Historical Note: It is almost impossible to figure out just which Hannibal, Hasdrubal or Hanno was doing what at any given time. We have tried to do our best to sort and identify them. But we do wish the Carthaginians had shown a bit more imagination with their surnames. Nearly all Carthaginian surnames had religious significance, e.g., Hannibal means "beloved of Baal", or something close.
Play Note: Keep in mind the effects of a change of commander on Army Efficiency.
6.43 Instead of drawing a leader from the pool, the Carthaginian player may select a leader on the map that is not in command of an Army. The leader must be of the same family as the one in power and not besieged in a non-port city. If the leader was in command of a Detachment, the Detachment goes without a leader. There are no changes to the LAM pool.
Design Note: Many of Hannibal's lieutenants assumed command of other Carthaginian armies as the war progressed.
6.44 Although an Army can have only one Army Commander, there is no limit to the number of Subordinate leaders that may be included in any operation involving the Army.
6.45 Intentionally skipped.
6.46 Recalling Commanders: Whenever the Carthaginian player loses a battle on land involving a Carthaginian Army of at least 20 SP or loses control of a Medium or Large City by Siege or Involuntary Surrender where an Army Commander was either in the hex or the city when the city was captured, that leader is subject to recall and replacement unless killed or captured. To determine if the commander is recalled, the Carthaginian player consults the Army Disband and Commander Recall Table and rolls the die. He refers to the row of the table that corresponds to the family affiliation of the Army Commander to that of the family in power and compares the DR to the range listed in the Recall Commander column. If the DR is within range, the commander is recalled, otherwise he remains in command.
Automatic Recall: An Army Commander whose army has lost its last SP is automatically Recalled (no DR necessary). This does not apply to a Detachment commander. In addition, the Carthaginian player may voluntarily Recall (no DR necessary) any Army Commander at any time during the Operations Phase. In these circumstances, place an Army Commander Recalled marker atop the effected commander to indicate he is subject to such action.
Play Note: Although the Carthaginian player may voluntarily recall an Army Commander, it is not without its consequences, such as the effect on the Army Efficiency Rating.
Recall Effects: Recall takes effect when the very next Carthaginian LAM is drawn. The recalled leader is placed back into the leader pool unless he runs into Crucifixion problems (6.47). Remove all the recalled leader's LAMs from the LAM pool. If the LAM drawn belonged to another Carthaginian leader, that leader conducts his Operations Phase normally. If there are no more Carthaginian LAMs in the pool, the recall takes effect after all LAMs have been played.
6.47 Crucifixion: Commanders recalled because of failure (as in 6.46) are subject to possible terminal censure by being crucified and removed from the game. Voluntary recall does not initiate a check for Crucifixion. For each commander recalled, roll the die immediately upon his recall. There is a +2 DRM if the disgraced leader is from a family different from the one in power. If the adjusted DR is higher than his Mortality rating, he has been, shall we say, "hung out to dry" and will not be returning to the game.
EXAMPLE: Hanno (2P-10), a Magonid, has just lost a major land battle. The Carthaginian player must immediately roll a die to determine if Hanno is Recalled. He rolls a 6 and since the Barcids are in power, he is Recalled. The Carthaginian player places an Army Commander Recalled marker on the unlucky Hanno. Since there are no more Carthaginian LAMs remaining, Hanno will be removed at the end of the Operations Phase, and given that the Recall was not voluntary, the Carthaginian player must check for Crucifixion. He rolls a 7, which is modified to a 9 (+2 different family), so Hanno (mortality 9) barely escapes.
6.48 If the Carthaginian Overall Commander has been killed, captured or placed back into the Carthaginian leader pool, the Carthaginian player must designate one of the remaining Army Commanders as his OC. His choice must be from the same family that is in power if one of the remaining commanders is so aligned.
6.49 Killed, Wounded, or captured Army Commanders may be replaced per AW 8.63 (A and C). Subordinate leaders cannot be replaced. The Carthaginian player cannot replace recalled leaders during the Operations Phase. Wounded Carthaginian leaders that were not replaced or recalled are returned during the Return/Replace Leaders segment (A/2). A released captured leader is returned to the leader pool.
6.5 Subordinate Leaders
Design Note: During the 2nd Punic War, the Carthaginians made extensive use of junior leaders in a variety of missions ranging from diplomatic envoys, garrison commanders, moving reinforcements, raising troops, along with commanding detachments from an army.
6.51 Carthaginian Subordinate leaders function as any other leaders. Unlike Carthaginian Army Commanders, they are not assigned to a permanent group of combat units, nor are they assigned to a specific Carthaginian Army. They cannot include units assigned to other Carthaginian commanders in a force, though they may include unassigned units, such as those in garrisons, or an Allied leader and his units in a force but no other leaders (6.6). A Subordinate leader may be included in any Carthaginian Army Commander's force.
6.52 Detachments: A detachment is a group of combat units drawn from a Carthaginian Army and placed under the command of a Subordinate leader. A detachment is like an army in that the units in the detachment must be included when the Subordinate leader composes a force. A Subordinate leader in command of a detachment can only include other units by changing the detachment composition (AW 5.44), though the player may use the command hierarchy to augment the detachment by including an Allied leader and his combat units in his force. A Carthaginian Army, other than Hannibal's Army, is allowed only one detachment; Hannibal's may have two.
6.53 When a Subordinate leader stacked in the same hex/city with the Army is activated or chosen for an Interception, the Carthaginian player may create a detachment of up to one half the army's current SP for that Subordinate leader. Alternatively, a detachment may be created during the Army Commander's Operations Phase when changing the composition of the Army (AW 5.44). A detachment cannot be created if the army is Useless. The detachment assumes the ABS of the army when it is created.
Play Note: The Carthaginian Army display has one or more detachment boxes for each army. Move the units that will comprise the Detachment to the army's Detachment box and place the corresponding Detachment marker on the map.
6.54 Detachments may be incorporated back into the same Army in either the Army Commander or Subordinate leader's Operations Phase if both the Army and detachment occupy the same hex/city. This can be done at the same time as other changes to the Army composition. The penalties in 6.75 apply only if any SP were added to the detachment, in which case all the detachment's SP are counted in the determination.
6.55 An Army's AER is considered one less than its current rating for each detachment in play, but never less than -3. The AER of a detachment is that of its Army's AER modified by the number of its detachments in play.
EXAMPLE: The Army Efficiency Rating of Hannibal's Army is +2. With two detachments in play, the AER is 0 for the Army and both detachments.
6.56 A Subordinate leader may only conduct operations with his detachment in the province where his Army is located and all adjacent provinces. If the Subordinate leader begins his Operations Phase outside this area (i.e., the Army moved away), he may still conduct operations with his detachment in that province. However, to leave that province, the Subordinate leader is limited to Force Movement Operations until he stops in a hex/city within the Army's province or one adjacent to it. Any Stops must be in a hex/city that is closer to his Army than the hex/city occupied at the start of the operation.
EXAMPLE: Mago's detachment has Faventia in Gallia Cispadana under siege. Hannibal's Army has since moved from Umbria to Sabinus. When it is Mago's Operations Phase, the Carthaginian player can continue the siege. If he would prefer to rejoin Hannibal, he could lift the siege and use Force Movement Operations to move to Sabinus or any province adjacent to Sabinus.
6.57 If a detachment's parent Army is eliminated, that detachment is now the Army. Move the units in the Detachment box to the Army box and replace the Detachment marker on the map with the Army marker. The Army's AER is immediately reduced by 1. If the Army Commander has been killed/captured, the Carthaginian player may immediately promote the former detachment commander to Army Commander. If he does so, the Army's AER is further reduced per 6.74. Alternatively, the player may use the procedure described in 6.41 to appoint the new commander. If Hannibal's army is eliminated and two detachments are in play, Carthaginian player's choice as to which to use as an army. However, if Hannibal has been killed/captured, the new Army may only deploy one detachment.
6.58 A Subordinate leader that is not in command of a detachment (see below) can conduct operations anywhere and may use SP that are not part of an Army or detachment in a force.
EXAMPLE: Mago is in Campania with Hannibal's Army. When Mago's LAM is drawn, the Carthaginian player decides that his armies in Spain need some help. Mago conducts a Leader Movement Operation, moving into Carthago. There is a group of combat units inside that are not part of an Army/Detachment. Since this is Mago's first operation, continuation is automatic. Mago composes a force with these units and conducts a Force Movement Operation, embarking them to use Naval Transport and then he is off to Hispania, disembarking in Carthago Nova, where his brother Hasdrubal and his army are waiting. Later in the turn Hasdrubal activates and the Carthaginian player adds the reinforcing units to his army, adjusts the AER if necessary and moves toward Tarraco with Mago in tow.
Play Note: Yes, Subordinate leaders that are not leading detachments can go anywhere the player wants, either using Leader Movement or Force Movement with units hanging around the map in garrisons, etc. They can be very useful in defending cities and moving units about, picking up reinforcements, shuffling garrisons and what not. Should the number of counters become unmanageable, use one of the Garrison boxes on the City Occupation display to hold the counters and the "Force" side of one of the numbered Garrison markers to represent the force on the map.
6.6 Command Hierarchy
A Carthaginian Army Commander or Subordinate leader in command of a Detachment may only conduct operations with the units of that Army or Detachment. A Carthaginian Army Commander or Subordinate leader, however, may include other leaders and their Armies in a force if those other leaders are lower in the command hierarchy. That command hierarchy is:
- Overall Commander
- Army Commander
- Subordinate Leader
- Allied Leader
Play Note: In most cases, the Carthaginian Overall Commander is also an Army Commander.
6.7 Carthaginian Army Efficiency
Historical Note: Except for some units - Numidian cavalry, the local Carthaginian phalanx, etc. - most of the mercenary-raised units were of inferior quality when initially raised. The Carthaginian command system, though, had one major benefit the Roman system did not have: Carthaginian Commanders tended to stay in command, and the longer they did this, the better that leader's army became, for reasons that had much to do with allegiance and other aspects of command longevity.
6.71 Every Carthaginian Army, through its Army Commander, has an Army Efficiency Rating (AER), a number ranging from -3 (poor) to +3 (excellent), which is used as a DRM in Battle. This rating is added to the die roll when the Army is attacking and subtracted when defending. Note that subtracting a negative rating is the same as adding it. If more than one Army participates in a Battle, use the lowest rating.
EXAMPLE: Hannibal (2P-1) starts the 2nd Punic War scenario with an AER of +2. When Hannibal and his Army are used in an Attack, 2 is added to the Battle die roll; when defending, 2 is subtracted from the Battle DR. If an army with a -3 AER participates in battle, the DRM is -3 if the army attacks, and +3 if it defends.
6.72 Armies that start the game deployed are given an AER. All newly-raised Armies start with an Army Efficiency of -3. Army Efficiency does not apply to SP in garrisons.
6.73 During the Legion Training/Army Efficiency segment (G/2), every Carthaginian Army in play that was under the command of the same leader throughout the Game Turn may increase its AER by 1 (but see 6.76) if all the following conditions are met:
- the Army was not Useless at any time during the Game Turn, and
- the army is not currently Disorganized, and
- its AER was not lowered at any time during the Game Turn per 6.74 or 6.75 below.
6.74 When an Army receives a new Commander, regardless of who it is, that Army lowers its AER by 2 to a minimum rating of -3. This case applies to a replacement leader. There is no change when a Wounded leader returns via 6.49.
6.75 The Carthaginian player may increase an Army's SP strength by adding SP that are not part of another Army (reinforcements, garrisons, etc.) up to 30% of its strength in SP (use the Percentage Loss Chart to determine the number), without penalty. If the number added is more than 30% but less than the current Army size in SP, the AER is reduced by 1. If the number added is equal to or greater than the current Army size in SP, the AER is reduced by 2. If the number added is twice or greater than the current Army size in SP, reduce the AER by 3. Carthaginian Citizen units and Elite units of any nationality may be added without penalty and are not considered in the above calculation. The AER is adjusted after the placement of SP in the Raise Manpower segment (B/3/b) and at the end of the Army Commander's current Operations Phase, counting all SP that were added during that phase.
6.76 Army Efficiency Limits: The AER can go no lower than -3 and no higher than +3. A Carthaginian Army of 60 SP or more cannot have an AER greater than +2 while an army of 100 SP or more cannot have an AER greater than +1. After any adjustments are made (6.75), adjust the AER, if necessary, to comply with these limits.
6.77 A Carthaginian force that is neither an Army nor Detachment has a -3 AER if involved in a Battle.
Design Note: As with the Romans, the Carthaginian commanders of the time could not as effectively manage large armies (when they could be raised) as those of a more manageable size.
7.0 Carthaginian Manpower
Historical Note: Carthage, as a country, did not have anywhere near the indigenous (and citizen) wells of manpower that Rome had. Carthage's own manpower base was about 3-400,000 Carthaginian citizens, half of whom were female. Therefore, most of the troops raised by Carthage were mercenary (from Europe) or provided by (often uneasy) alliance (Libya and Numidia).
Important: The charts and tables referred to in this section are located on the Thunderbolt Carthaginian Charts & Tables PAC. The Carthaginian Tables have different DRMs depending on the scenario being played. The 1st Punic War, Agathocles, and Mercenary War DRMs are not used in any Thunderbolt scenario.
7.1 Types and Restrictions
The Carthaginian player raises Manpower in the Raise Manpower segment (B/3/b) and under certain circumstances with Manpower Operations during the Operations Phase (7.26).
7.11 Carthage raises several classes of units:
- Citizens: enlisted from the indigenous Carthaginian population. Elephants are included in this category.
- Allies: levied from Libya (Tripolitania), Numidia, Mauretania, and Mauretania Tingitana.
- Tribal Levies: mercenaries and/or allies raised from tribes allied to Carthage.
- Provincial Allies: enlisted from independent provinces or those formerly allied to Rome.
Play Note: The types of units have nothing to do with their combat abilities, except those identified as Elite. Their type does determine their ease in raising and the location of their posting.
7.12 The Carthaginian player has several restrictions on how he may use certain types and the contingents within each type. These restrictions are:
- Carthaginian Citizen Infantry and Cavalry units can only be used in Africa, Hispania, Sicily, and Sardinia & Corsica.
- Libyan units may not be placed or used south/southeast of Carthage's Ditch Boundary.
- Numidian units may not be placed, or used, in Numidia, regardless of what the Carthaginians control.
- Mauretanian units may not be placed or used in any of the Mauretanian provinces.
- A Siege Engine may participate in an operation only when part of an Army/Detachment's force.
- Provincial Allies cannot be used outside Roman Italy.
Historical Note: Carthaginians made it a practice to rarely, if ever, use Allies in the lands from which they came, for fear of revolt. They kept most of the citizen troops home. The practice changed to a degree in the 2nd Punic War.
7.13 Political Climate: If the number of Carthaginian armies in play is less than the number of armies allowed by the Political Climate, the Carthaginian player may either raise one army or raise reinforcements during the Raise Manpower segment (B/3/b). If the number of armies in play is at the Political Climate limit, only reinforcements may be raised; if over, reinforcements cannot be raised. Furthermore, reinforcements cannot be raised if any army was disbanded in the Disband Armies segment (B/2/c). The Carthaginian player may raise manpower even if Carthage is besieged. The Political Climate has no effect on raising troops from the tribes (9.2) or provincial manpower (7.27).
7.2 Raising Manpower
7.21 Army: To raise manpower when forming an army during the Raise Manpower segment (B/3/b), the Carthaginian player selects one of the allowable contingents on the Carthaginian Manpower Table, rolls a die, and applies any applicable modifiers as listed on the table. He receives SP from that contingent corresponding to the modified die result. This process is repeated for other contingents allowed by the current Political Climate. The SP are placed on any unused Army holding box on the Carthaginian Army Display with the corresponding Army marker placed in an unbesieged Carthaginian-controlled Large or Medium city in Carthage province. He then appoints an Army Commander (6.41) and places an Army Efficiency -3 marker in the army's holding box. Once formed, an Army remains in play until disbanded (6.3) or its last SP is eliminated. If the number of SP in the newly raised Army is 20 SP or larger, the Carthaginian player may add a Subordinate leader by drawing one, randomly and blindly, from the Carthaginian leader pool. The leader is placed with the Army.
EXAMPLE: The Political Climate is Alert. The Carthaginian player has room to recruit a new Army and decides to raise troops from the Libyans, Numidians, and Carthaginians. He starts with the Libyans and rolls a 5, and since he increased his NS level last Game Turn, there is a -2 DRM resulting in a 3. He receives 10 Libyan infantry SP. He then rolls for the Numidians, here a 6, reduced to a 4, giving him 5 Numidian infantry SP and 10 Numidian Elite cavalry SP. For the Carthaginians, the roll is a 0, modified to a -2, so he receives 5 SP Carthaginian infantry SP and 5 SP Carthaginian cavalry. The Army will begin play with 20 SP of infantry and 15 SP of cavalry.
7.22 Reinforcements: When raising reinforcements during the Raise Manpower segment (B/3/b), the Carthaginian player consults the Carthaginian Manpower Table, selects one contingent, rolls a die, and applies any applicable modifiers as listed on the table. He receives SP corresponding to the modified die result. This process is repeated for other contingents allowed by the current Political Climate. If 20 SP or more were raised, the Carthaginian player may bring a Subordinate leader in as a reinforcement by drawing one, randomly and blindly, from the Carthaginian leader pool. The leader is treated as a reinforcement SP for purposes of placement.
7.23 Reinforcement SP may be placed with any unbesieged Carthaginian Armies in the Africa and Mauretania Theaters immediately when raised, subject to the restrictions listed in 7.12. Carthago is an exception: Carthaginian Armies in the city and/or the Carthage Garrison (up to 10 SP) may be reinforced even if Carthage is besieged but only Citizens (no Elephants) and a Subordinate leader may be placed there.
For Armies outside these Theaters, or those in a besieged port within the Africa and Mauretania Theaters, the Carthaginian player instead places the reinforcement SP in the Theater Holding box(es) associated with the Theater where a receiving Army is located. He may distribute the SP among these holding boxes as he sees fit. He then places the Carthaginian Reinforcement LAM in the LAM pool.
7.24 When the Reinforcement LAM is picked, the Carthaginian player must, for each Theater Holding Box with reinforcement SP, trace a path of sea hexes from a Carthaginian-controlled port in Carthage province to one Carthaginian/Allied-controlled port in that Theater. The port cannot be besieged unless the Army receiving the reinforcements is in the port. The port of origin may be the source for more than one Theater but the number of SP that leave the port cannot exceed its Embark limit. The player then rolls the die and consults the Naval Transport Table (AW PAC #2). Apply only the SP loss and leader casualty results; ignore the Scattered and NS results. The surviving SP, up to the port's Disembark limit (excess SP are eliminated), are then distributed among the unbesieged Armies in the Theater, or to those Armies in the besieged port of arrival, subject to the restrictions listed in 7.12. If there are no eligible ports or if there are no eligible Armies in the Theater, the SP are eliminated (lost at sea, etc.).
EXAMPLE: In a Cautious climate, the Carthaginian player decides to reinforce his Army in Hispania. He was able to raise 25 SP, a mixture of Libyans (10i) and Numidians (5i, 10c), placing the SP in the Hispania Theater Holding box. The closest port to Hispania is Hippo Regius, a Minor Port. Fortunately, its Embark limit is 25 SP so all may embark. When the Reinforcement LAM is drawn, the Carthaginian player selects a destination port in the Hispania Theater. Calpe is the closest using the coastal route, 60 hexes away. Carthago Nova is closer, but the route includes 9 All Sea and 13 Coastal hexes. Despite the All Sea hexes, the route provides a more favorable -2 DRM. The least favorable sea zone in both cases is the Mare Africum West at +3; it's good to be in friendly seas. So off to Carthago Nova. The Carthaginian player has a net +1 DRM (+3 for the sea zone, -2 for the distance) and rolls the die ... a 0. The +1 DRM prevents a total disaster. 50% of each contingent is lost with 5i Libyan, 3i Numidian, 5c Numidian landing in Carthago Nova and immediately placed with the Army in Hispania. The influx of reinforcement SP is more than 30% of the Army's strength but not greater, so the Army's AER is reduced by 1.
7.25 The Carthaginian player is not required to take all the resultant SP, nor is he required to make all allowable die rolls.
7.26 The Carthaginian player may use his OC (only) to raise reinforcements with a Manpower Operation under the following circumstances:
- The OC and his Army are in the Carthago city/hex.
- The OC is of the same family as the family in power.
- The Political Climate is Aggressive.
If successful, the raised SP are placed with the OC's Army, adjusting its AER where necessary. Only one such Manpower Operation attempt may be made per Game Turn.
Play Note: This is a Hail Mary rule to give the Carthaginian player the opportunity to do what Hannibal did when he returned home.
7.27 Provincial Manpower: An unbesieged Carthaginian Army Commander or Subordinate leader may use a Manpower Operation once per Operations Phase to raise SP from provinces that have manpower shown on the scenario's Province Information Chart (PIC). The Carthaginian player must control the province to raise manpower. An Army Commander may raise SP from the province where he is located and all adjacent controlled provinces with the same operation. A Subordinate leader may raise SP only from the province where he is located.
The number of SP raised per province is listed on the PIC. The SP are placed in the same hex/city as the leader conducting the operation. The SP may be added to the Army/detachment when the player is able to alter its composition (AW 5.44/45) of the Army/detachment. Only one such Manpower Operation attempt may be made per leader per Game Turn.
EXAMPLE: Hannibal is in Lucania. Carthage controls Lucania and Apulia. A successful Manpower Operation would produce 3 SP (2+1) of Italian infantry.
7.28 Tribal Manpower: An unbesieged Carthaginian leader can raise manpower from the various tribes in Hispania, Gaul, and Liguria using the procedure in 9.2.
Play Note: As a reminder, be sure to use the 2nd Punic War sections of the tables and charts.
7.3 Manpower Limits
7.31 Citizens: There may never be more than 50 SP of Carthaginian (the contingent) infantry and/or cavalry (not Elephants) in play at any one time.
7.32 Manpower Pools: The Carthaginian player has a limited manpower pool from which he can raise SP during the game. The Thunderbolt Carthaginian Political and Manpower Display has Holding Boxes for the nine contingents from which the Carthaginian player may raise manpower. These Holding Boxes are populated during the scenario setup with the number of SP of the appropriate contingent. There are large denomination counters available in the counter mix to facilitate the process. The Carthaginian manpower supply is limited to the SP in these Holding Boxes. All Numidian cavalry are Elite. The Carthaginian cavalry are a mixture of Elite and non-Elite. Use any combination to start. There is no limit on either of the two types and the units can be freely interchanged.
When armies/reinforcements are raised or SP are raised from the Tribes (9.2), the SP are drawn from the respective contingent Holding Box. SP are returned to an appropriate Holding Boxes under some circumstances as noted in those rules. The manpower limits apply only to the nine contingents with Holding Boxes. SP expended to bring on a Siege Engine are not drawn from the holding boxes.
The Manpower Pools are not used in the short scenarios.
Design Note: The manpower pool for Carthage was nowhere near that of Rome, even over the two decades each of the Punic wars raged. The number of Carthaginian citizens was far less than that of Rome, her allies were helpful (when they were cooperating), and the Carthaginian Senate was not enthusiastic about paying mercenaries.
Historical Note: While the totality of this rule is historical, actual population numbers are especially difficult to come by, even for the Carthaginians. Our maximums are based on the numbers used during the actual wars, adjusted for playability, et al. Roman maximums are determined by the number of Legions that can be raised in a scenario, with the totals for the 2nd Punic War as a ceiling guide.
Play Note: Having the counters sit on the display rather than in the counter tray or baggies eliminates the need for a track with special markers.
8.0 Naval Superiority System
This section supplements AW 7.0.
Historical Note: The Celtic Tribes of what is now Northern Italy, France, and Spain, were the Loose Cannons of the Republican era. They were not only as unstable as nitroglycerine, but about as dangerous. They are Celts: Gallic Celts (from the provinces that have the word "Gallia"), which we will call Gauls, and Iberian Celts from the three provinces of Hispania, which we will call Iberians and Celt-Iberians. Some tribes have been lumped together and assimilated into another, larger and representative tribe. For example, the Allobroges also include the Tricastini, the Vocontii and the Tricorii. Most of the splintered tribes of Liguria are treated as part of the two Ligurian provinces, except for the Taurini.
Play Note: The rules for the Celts are one of the reasons why the 2nd Punic War scenario is such a massive undertaking.
8.1 Construction
8.11 The Roman and Carthaginian players may increase the NS Level of any zone(s) (and, thereby, decrease the opponent's). To do so he rolls the die and consults the NS Level Construction Table (Thunderbolt 2nd Punic War Scenarios PAC) using the appropriate column on the table. The resultant number is the number of NS levels the player may use to adjust any Naval Zone(s). A player may construct and perform Re-allotment in the same segment, with construction completed before Re-allotment.
Design Note: There is no indication of any large scale naval construction during the war nor the scale of loss that occurred during the 1st Punic War.
8.12 NS level construction effects the ability of the players to raise troops in the subsequent Raise Manpower segment and certain Manpower Operations conducted during the Operations Phase. When using the Legion Request Table and Carthaginian Manpower Table, there is an adverse DRM which is equal to twice the number of NS Levels constructed. There is no effect on Provincial or Tribal Manpower Operations.
EXAMPLE: It is the 2nd Punic War, and the Roman player wishes to increase his presence in the Mare Africum, where Carthage has a +2 NS Level. In the Naval Superiority Construction/Reallotment Segment, he rolls 7 on the NS Construction Table and receives a 2 result. He takes those 2 NS levels and increases his presence in Mare Africum by reducing Carthage's NS Level to 0 (removing the marker). However, he must apply a -4 DRM to each die roll on the Legion Request Table for the remainder of the GT.
8.2 Rome and Ostia
Roma is treated as a Port for purposes of Siege Assault and Siege Attrition (and only in these two cases) if the Roman player controls Ostia, whether Ostia is besieged or not.
9.0 The Celts
The Charts and Tables referred to in this section are located on the Thunderbolt Celts Charts & Tables PAC unless noted otherwise.
9.1 The Tribes
9.11 All tribes have counters located in a specific hex (listed on the counter), which represents their general areas of operations. The counters show the tribe's name, whether it is Gallic or Iberian/Celtiberian, etc., its Aggression Rating, Battle Rating, and Manpower Rating, all of which are explained in this section. Each tribe has three color-coded counters showing their allegiance either to Carthage (purple), Rome (red), or Neutral (grey). The front side of the counter shows the tribe at full strength, the reverse side has a white stripe that shows the tribe's manpower has been depleted. The tribal counter only moves from its hex during a successful Interception (9.14) or as result of an Augury event. After the Interception or event is resolved, it is returned to its hex of origin. A settlement in a Tribe's Base hex is ignored for all game purposes.
9.12 Each tribe has an Allegiance, Status, and potential to provide manpower to the players:
Allegiance: Each tribe is either actively allied to Rome or Carthage, or it is Neutral. Use the appropriate counter to show its allegiance.
Status: Each tribe is either Active or Pacified. An Active tribe can also be Depleted; a Pacified tribe is always considered Depleted. A tribe is Active unless Pacified. A tribe is Pacified when it has suffered a Major Defeat in battle (AW 8.52). Any other level of defeat - or, of course, a victory - keeps it in Active status. A Pacified tribe cannot Intercept (9.14) and cannot be attacked. Forces may move through its hex as if nothing were there. Use a Pacified marker to indicate this Status.
Manpower: A tribe either has manpower available or is depleted. An Active tribe becomes Depleted if the Carthaginian (or Roman in certain circumstances) player raises manpower from the tribe. Flip the counter to its back side. The tribe may still Intercept and defend itself, but the Aggression Rating is halved (round up). Manpower cannot be raised from a Depleted tribe.
9.13 In the Tribal Segment (B/4), a Depleted and/or Pacified Tribe's status can be changed, albeit gradually, as follows:
Depletion Recovery: One of the players rolls for each tribe on its Depleted side. If the DR is the same as or lower than its Manpower Rating, the Tribe is no longer Depleted; flip the counter to its full-strength side.
Pacification Removal: The other player rolls the die for each tribe with a Pacified marker. If the DR is the same as or lower than the Aggression Rating, that tribe is now Active. If there is a non-allied leader-led force of 20+ SP in the same province as the tribe's base hex, instead use one-half the Tribe's Aggression Rating (round down) for the comparison. The Tribe remains Depleted; there is no change of allegiance.
Do not roll for Depletion Recovery or Pacification Removal for tribes in Devastated provinces (AW 6.7).
9.14 Tribal Interception: Each tribe has the ability to use Interception (AW 6.5), with its Aggression Rating as a substitute for the leader Campaign Rating. The Tribal interception range is 3 hexes. Any time a player moves within the Interception range of a tribe that is Active and is Allied to the opposing player, that opposing player may try to intercept the moving force. No leader is necessary (that is what the Aggression Rating stands for, among other things). A tribe may attempt one Interception per force per Force Movement Operation; there is no limit to the number of interceptions a Tribe may attempt during an Operations Phase and no adverse effect for a failure. Tribes (such as the Allobroges) that are based in a Mountain hex do not pay the Interception adjustment for Mountain hexes (AW 6.54). A Tribe does not check for Attrition following a successful interception.
9.15 Parley: If a force is intercepted by a Tribe, the leader of the intercepted force may use his available Guile Points to parley with the Tribe and talk them out of the attack. To do this the player must expend at least 1 Guile Point (he may spend more), and roll the die, adding all the expended Guile Points to the DR. If that adjusted DR is higher than the Aggression Rating of the tribe, the attack is cancelled. If the same as or lower, the attack takes place.
Design Note: This is a form of Instant Diplomacy, except that it has no "lasting" effect.
9.16 Battle: When a Tribe engages in Battle, the SP it has for that combat varies each time. To determine the size of the force, the player allied to the Tribe rolls the die and multiplies the DR by the Tribe's Aggression Rating; halve that rating (round up) if the Tribe is Depleted. That number is how many SP that tribe has raised for that battle. 10% of those SP are considered cavalry SP (use the Percentage Loss chart to determine the number). If the DR is a 0, the Attack or Interception is cancelled instead. If the battle was due to a player Attack Operation, continuation is by die roll (the tribe has avoided combat). All combat takes place according to the Land Combat (AW 8.0) and Interception (AW 6.5) rules. If the tribe suffers a Major Defeat, it is Pacified. Otherwise, the player simply takes his losses, and the tribal counter is returned to its base hex. After Battle Status is not relevant for the Tribe but does apply to the player's force.
Play Note: Combat unit counters are not required for the tribe, though you may use them if you wish. The player simply notes the number of infantry and cavalry SP involved.
EXAMPLE: The Allobroges are based in I-1226. Hannibal moves a force of 100 Infantry SP and 30 Cavalry SP into I-1326. The Roman player used the Allobroges to intercept (we will skip that mechanic). He checks to see how many SP the Allobroges can muster and rolls a 6. The Allobroges Aggression Rating is 7 so 42 SP will engage, 5 of which are cavalry (which has no additional effect in this hex). The Allobroges thus will attack the Carthaginians at 42 - 130, or 1:4. With Hannibal as commander, the Carthaginians obtain a -4 Leader Tactical Ability DRM, which, added to the -4 DRM for the 1:4 attack gives a -8 DRM. The Roman player rolls a 5, which reduces to a -3 on the BRT, for a 20/5 result. This is a Major Victory for the Carthaginians (see AW 8.52), so the Allobroges suffer a Major Defeat and are Pacified. However, Hannibal has lost 7 SP (or about 3500 men).
9.17 A moving force attacked by a Tribe may always continue its Force Movement Operation automatically (no DR to continue) unless the tribe is the Winner. If the tribe earns a Major Victory, the active leader is Finished. If a lesser victory, continuation is based on a DR with an automatic +2 DRM.
9.18 A player may use an Attack Operation against a Tribe's base hex if that Tribe is Active and either Neutral or Allied to the opposing player. The size of the defending force is determined, and a battle conducted per 9.16. A Tribe cannot use Avoidance or Coordination.
Play Note: A tribe may be attacked more than once with a new force raised in response to each attack.
9.19 Due to an Augury Event, a Tribe may attack a nearby city. The size of the force is determined per 9.16 and placed with the Tribe's marker in the targeted city's hex. If an enemy force is in the hex, the tribe attacks the force. If the enemy force remains in the hex (outside the city) after the attack, the Tribe marker is placed in its base hex ending the attack. If not, the tribe places the city Under Siege if it has enough infantry SP to do so. Place combat units of the appropriate strength and contingent in the hex. When a Siege Attrition marker is drawn, the Tribe will conduct a Siege Assault (the Celts were not a patient lot); neither side rolls for Siege Attrition. If the city is captured, it is automatically Sacked. If the siege is still unresolved in the Inertia Attrition Segment (G/1), remove the Under Siege marker and the SP from the map and return the Tribe's counter to its base hex. The besieging force can be attacked. The battle is resolved as a Land Combat (AW 8.0). However, if the attacking player is the Winner, remove all the tribal SP and return the Tribe's marker to its base hex; the siege is lifted. If the victory was Major, the Tribe is Pacified. If the battle was a Draw or a Tribal victory, apply SP losses and ABS to both sides. The Tribal SP remain in place.
The tribal force cannot use Coordination, Avoidance, or Voluntary Retreat under any circumstances.
9.2 Raising Troops from the Tribes
9.21 The Carthaginian player may raise troops from tribes in any Theater; the Roman Player may only do so in the Hispania Theater. The player may raise manpower from an Allied tribe that is neither Pacified nor Depleted and located in the same province as the leader trying to raise those troops. Eligible leaders are any Carthaginian Army or Detachment Commander and any Roman magistrate.
9.22 Raising troops from a tribe is a Manpower Operation that may only be conducted by an unbesieged eligible leader with available Guile Points. The Guile Points are not expended (unless the player wishes to do so), they just need to be available. The leader may attempt no more Manpower Operations than his printed Guile Rating in each of his Operations Phases, and only one such operation may be made per tribe. Thus, Hannibal could conceivably attempt 4 such operations per Operations Phase, while Hanno Barca would be limited to 1.
Play Note: The many leaders with a 0 Guile Rating, though otherwise eligible, cannot raise manpower from a tribe.
9.23 To raise troops from a tribe, the player rolls the die, which is modified as follows:
- -1 DRM per Guile Point expended. The player may spend as many as are available to that leader.
- -1 DRM if that leader has won a Victory (but not Major) during the Game Turn in that province or any adjacent province or
- -3 DRM if that leader has won a Major Victory during the Game Turn in that province or any adjacent province.
If the adjusted DR is the same as or lower than that leader's Campaign Rating, the player rolls the die again and multiplies the result by the Tribe's Manpower Rating. This is the number of SP raised, 10% of which may be taken as cavalry SP (use the Percentage Loss Chart to determine the number). Use counters of the contingent named on the Tribal marker. The tribe is now Depleted; flip the Tribe's counter to its depleted side. For the Carthaginian player, SP are drawn from the contingent's Carthaginian Manpower holding box if used in the scenario. Treat cavalry as infantry if necessary. If the DR is a 0, no SP are forthcoming, and the tribe remains undepleted. The SP are placed with the leader conducting the Manpower Operation.
EXAMPLE: Cn. Scipio (#405) is in Ausetani province where the undepleted Roman-allied Ausetani reside. Scipio has his 1 Guile Point available, so the Roman player decides to conduct a Manpower Operation to increase the size of his force. Since there are no other tribes allied to Rome, he decides to use 1 Guile Point to increase his chances. He rolls a 4, modified to 3, and succeeds. He rolls again, this time a 6 comes up which gives him 12 SP (Iberian), 1 SP of which is cavalry. The SP are placed with Scipio or in his Army box on the Roman Army Display. The Roman player flips the Ausetani tribe marker to its depleted side and rolls to continue with Scipio's Operations Phase.
9.3 Celtic Alliances
Design Note: The Celts did not forge alliances, in the diplomatic sense. They were "influenced" by personalities and events and whoever looked like he was going to win.
9.31 The tribes are either allied to Rome, Carthage, or Neutral. The scenario's Tribal Information Chart provides the at-start status for each tribe.
9.32 A Roman Consul, Proconsul, Dictator/ME, or Carthaginian Army Commander who is in the same province as the Tribe's base hex may use a Diplomacy Operation to attempt to change that tribe's allegiance, but only if he is accompanied by his Army/Legion(s). The allegiance of a Pacified tribe cannot be changed. The leader must have Guile Points available, although expending Guile Points is not required. The player may attempt no more Diplomacy Operations of this type than the leader's available Guile Points at the start of the leader's current Operations Phase, and only one such Diplomacy Operation may be made per tribe per Operations Phase.
9.33 To make the attempt, the player rolls the die, which is modified as follows:
- +1 DRM per Guile Point expended. The player may spend as many as are available to that leader.
- +2 DRM if his side won a Victory (but not Major) during the Game Turn in that province or
- +5 DRM if his side won a Major Victory during the Game Turn in that province.
- +1 DRM for the Roman player if the tribe is in the Hispania Theater, or for the Carthaginian player if the tribe is in the Gallia Cisalpina or Liguria Theaters.
If the adjusted DR is higher than the tribe's Aggression Rating, the tribe changes its allegiance to that player. If the same, the tribe becomes (or remains) Neutral, and if lower, there is no change of allegiance. If there is a change of allegiance, replace the Tribe's counter with one of the player's color or the neutral color.
Design Note: The overall political situation in Hispania was the opposite of that in northern Italy. There the Carthaginians were still in the process of subduing the tribes in the peninsula, often using heavy-handed means to maintain control of the areas they occupied. For a historical parallel, consider Julius Caesar's subjugation of Gaul two centuries hence. A major part of the Roman strategy was to weaken the Carthaginian influence in the peninsula, exploiting the disaffection many of the tribes had toward their Carthaginian overlords. The Carthaginian successful efforts in northern Italy are reflected in the scenario setup and special rules.
9.4 Celtic Unreliability
Design Note: In addition to the standard problems with the Celts, the following rules reflect just how unreliable they were as allies. Most of these problems concern the Gauls; Iberian Celts seemed to be a little less apt to strike out on their own.
9.41 Roman Garrisons: The Roman player may not use Gallic units to garrison cities/settlements. The Roman player may use Iberian/Celtiberian units but only if there is at least an equal number of Legion SP (Citizen or Ala) in the city/settlement.
9.42 Carthaginian Garrisons: The Carthaginian player may use Gallic and Iberians/Celtiberian units to garrison cities/settlements. However, in the Carthaginian Garrisons segment (B/4/c), he rolls for each unbesieged city that contains at least some Gauls/Iberians/Celtiberians SP and no Carthaginian Army or Detachment inside the city. If the DR is 6 or lower, nothing happens. However, for each number above 6, that number of Gallic SP are removed from that garrison. For each number above 8, remove that number of Iberians/Celtiberians (in addition to the removed Gauls). Each DR is modified as follows:
- -2 DRM if there was a Major Carthaginian Victory in that province in the previous Game Turn.
- -2 DRM if Hannibal is within 5 hexes of the garrison's location.
- +2 DRM if either the Gauls or the Iberians/Celtiberians are garrisoning a city/settlement in a province where there is a Tribe of the same contingent.
Thus, an unadjusted DR of 9 for a garrison would result in 3 Gallic SP and 1 Iberian SP going home. Place the SP back in the respective Carthaginian Manpower Holding box if those are used in the scenario.
9.43 Roman Gallic Desertion: Immediately prior to any battle in which the Romans have Gallic SP present in their force, the Carthaginian player may seek to have them come over to his side. The Carthaginian player rolls the die. Either or both players may adjust the die roll with Guile Points expended by the leaders in charge of the battle, the Carthaginian player making the decision first.
- If the adjusted DR is lower than the Carthaginian leader's Campaign Rating, he transfers that number of Gallic SP to his Carthaginian Army. There is no effect on the AER.
- If the adjusted DR is the same as the rating, nothing happens.
- If the DR is higher, those Gallic SP are considered Elite for that battle (only).
9.44 Carthaginian Gallic Desertion: Immediately prior to battle in any province in Roman Italy where the Carthaginians are using Gauls and Hannibal is not the commander, the Carthaginian player must first roll to see if his Gauls are reliable. He may expend any available Guile Points for use as a negative DRM. The Roman player may not use Guile Points here.
- If the adjusted DR is higher than that leader's Campaign Rating, remove Gallic SP equal to the difference (Carthaginian player's choice), and halve (round down) the value of all remaining Gallic SP. The removed SP are placed in the appropriate Carthaginian Manpower Holding box if used in the scenario.
- If the adjusted DR is the same as that leader's Campaign Rating, halve (round down) the value of all Gallic units.
- If the adjusted DR is lower, there is no change.
The reduced value is used in determining the Combat Ratio and Cavalry Superiority DRMs. The printed SP value is used in determining losses.
EXAMPLE: Mago Barca, about to engage in battle in Etruria, has 19 SP Gallic Infantry and 3 SP Gallic Cavalry in his force. He decides to expend his 1 Guile Point to help keep his Gauls engaged. The Carthaginian player rolls a 9 (ouch), modified to 8 due to the Guile Point expenditure. Mago's Campaign Rating is 6 so he sends 2 Infantry SP back to the Gauls Manpower Holding box. The 17 infantry SP are treated as 8 SP and the 3 cavalry SP as 1 SP in the upcoming battle when determining the Combat Ratio and Cavalry Superiority DRMs. Despite the reduction, Mago ekes out a win with a 20% loss. He removes 3 Gallic infantry SP and 1 cavalry SP to satisfy the loss.
9.5 Gallic Losses
Design Note: One of the more notable items of information concerning the Gauls - not Iberians - in the service of Hannibal was that they tended to take remarkably disproportionate losses in battles. This was the result of three factors:
- The Gallic tribes of Italy were pretty much the only place Hannibal could readily raise troops.
- Hannibal was very much aware that they were often unreliable.
- Roman tactical doctrine required them to focus their attack on the center of the enemy line.
Given the fact that the Gauls were liable to take off anyway, guess where Hannibal put them? See why they took so many losses!!
In computing battle losses, the Carthaginian player may increase by half (round down) his Gallic contingent losses to substitute for losses in the other contingents. Carthaginian's player's choice as to which non-Gallic SP to save.
EXAMPLE: A Carthaginian army with 30 SP of Carthaginians, 10 SP of Iberians and 30 SP of Gauls takes 20% losses. Instead of taking 6 SP in lost Carthaginians, 2 in Iberians and 6 in Gauls, the Carthaginian player increases his Gallic losses by half, to 9, and removes 3 Carthaginian and 2 Iberian SP.
9.6 Gallic Looting
A player that captures a city by Attrition, Siege Assault, or Treachery with a besieging force that includes Gallic SP must check to see if the Gauls go out of control, loot, and then go home. The player rolls the die and compares it to the active leader's Campaign Rating:
- if it is the same or lower, nothing happens.
- if it is higher, the Gauls have gotten out of hand. The player must remove a percentage of his Gauls equal to 10x the difference between the DR and the leader's Campaign Rating (they have gone home). In addition, any diplomatic benefits normally attributable to winning a siege are lost.
In the case of a Siege Assault, the check must be made even if no Gauls were included in the assaulting force.
The Carthaginian player returns the removed units to the Gauls Manpower Holding box on the Thunderbolt Carthaginian Political and Manpower Display if the Carthaginian Manpower pools are used in the scenario.
If the city falls during a Siege Attrition Phase, the capturing player uses his highest ranked leader for the above check. If no leader is present, all his Gallic units are removed.
Play Note: Despite the rather aggressive actions of such Gauls, the city is not considered Sacked just because the Gauls looted.
9.7 Tribal Settlements
The population centers of the Celtic and other indigenous peoples in the Iberian peninsula, Gallia, and Liguria are identified as Tribal Settlements on the maps rather than Small cities. Tribal settlements are treated as Small cities with the exception that they have a variable IDS and garrison and can be affected by diplomacy.
Design Note: The Celtic tribal settlements were of a different character than the Small cities in the more "civilized" areas of the map. Their oppida were populous and often sited in highly defensible terrain. Frequently at war with one another, they were able to mount a more vigorous defense than ungarrisoned cities elsewhere.
9.71 Tribal settlements located in a Flat hex have an IDS of 1, those in any other terrain an IDS of 3. Settlements have an intrinsic garrison that is raised when the settlement is subject to an Involuntary Surrender or an Under Siege Operation. To determine the garrison's strength, the opposing player rolls the die and divides the result by 3, rounding up and treating a 0 DR as a 1. Place that number of infantry SP inside the settlement (use counters from a nearby tribe). City militia counters are not used. No garrison is raised if the settlement is occupied by infantry SP of either player.
If an Involuntary Surrender Operation is no longer viable due to the garrison size, the operation is cancelled, Continuation automatic.
EXAMPLE: Bergomum (I-1113), located in a Rough hex, has an IDS of 3. The Roman player conducts an Involuntary Surrender Operation against it, so the Carthaginian player rolls a 7 for the garrison strength and places 3 SP Gallic infantry inside the settlement. The Roman player doesn't have the 90 SP to make the attempt, so the operation is cancelled, and he places the settlement Under Siege instead.
9.72 A tribal settlement that is captured via Involuntary Surrender or Siege must be garrisoned by the player with at least 1 SP of infantry to maintain control - a control marker is insufficient.
9.73 Garrison SP raised via 9.71 remain on the map until the Inertia Attrition Segment (G/1) when they are removed unless Under Siege.
9.74 Settlement Allegiance: A tribal settlement can be allied to the Romans, Carthaginians, or neutral and hostile to both. Allied settlements are friendly to and controlled by the allied player. The players may attempt to change the settlement's allegiance through a Diplomacy Operation conducted by a Roman magistrate, Carthaginian Army commander, or Carthaginian Subordinate commander. Settlements garrisoned by the opposing player cannot be the target. The procedure is the same as that for a Tribe (9.33), using the Aggression Rating of the nearest Tribe in the same province or if none there, an Aggression Rating of 4. All the listed DRMs are used. If the attempt is successful, the player places one of his control markers in the hex and removes the opposing player's control marker if present. If the result is Neutral, remove the opposing player's control marker if present.
Design Note: Like the tribes, the loyalties of the various tribal communities fluctuated throughout the war.
9.75 Tribal settlements are ignored when determining the military control of a province (AW 11.2).
10.0 The Italian Allies
Design Note: Hannibal's major goal in invading Italy was to defeat Rome by breaking its alliances in the peninsula. This rule uses elements of the Ancient World's Diplomacy rules to model the effect Hannibal's campaigns had on the loyalty of Rome's Italian Allies.
This section applies to those scenarios where Roman Italy is in play. The Italian Allies are those provinces in Roman Italy allied to Rome at the start of the scenario - see the 2nd Punic War PIC or scenario-specific PIC for the details. Other Roman allied provinces (e.g., Sardinia) are not Italian Allies for purposes of this rule.
10.1 Italian Allies Alliance Track
10.11 A Roman Italy province's level of loyalty to Rome or Carthage is recorded on the Italian Allies Alliance Track located on the Thunderbolt Alliance & Game Turn Tracks Display. This is a series of boxes, ranging from 0 to 4 (on both ends of the track) reflecting the strength of that province's commitment to Rome or Carthage. Each province has an Alliance marker which is placed on the track, red (Roman) side up if the province is allied to Rome or purple (Carthage) side up if the province is allied to Carthage. The scenario's PIC lists which side the province is allied to along with a number indicating the strength of that relationship at the start of the scenario: a negative value favors Carthage, a positive value favors Rome. The Alliance marker is placed in the box corresponding to the number given on the PIC; if positive on the Roman side of the track, if negative on the Carthaginian side.
EXAMPLE: At the start of the 2nd Punic War scenario, Lucania is allied to Rome with a starting level of 2 in favor of Rome. The Lucania Alliance marker is placed Roman side up on Box 2 on the Roman side of the track.
10.12 A province's Alliance level may change in response to various player actions as follows:
- 1 Box in favor of the player who wins a Major Victory in Battle (AW 8.52) in a non-adjacent province in Roman Italy.
- 2 Boxes in favor of a player who wins a Major Victory in Battle (AW 8.52) in that province or an adjacent province.
- 1 Box in favor of a player who wins a Major Victory via a successful Siege (AW 9.24) in an adjacent province.
- 3 Boxes in favor of a player who wins a Major Victory via a successful Siege (AW 9.24) in that province.
- 4 Boxes in favor of the opposing player if a player Devastates that province.
- ? Boxes as a result of the Ambassador Table or an Augury event (12.0).
- ? Boxes due to Roman Retribution (10.22).
- 1 Box due to a Watchful Presence (10.23).
The Alliance level adjustment is made at the conclusion of the operation or phase in which the above conditions are met. The adjustment cannot exceed Box 4 on either side. Military control (AW 11.2) has no effect on the Alliance level or the province's allegiance.
EXAMPLE: Hannibal has won a Major Victory in battle in Umbria. For Umbria, Sabinus, Etruria, and Picenum, their markers are moved 2 spaces toward the Carthage side of the track. All other provinces in Roman Italy have their markers moved 1 space toward the Carthage side of the track. If the battle had occurred in Cispadana, Umbria and Etruria would have had their markers moved 2 spaces in Carthage's favor. No other province would be affected since the battle occurred outside Roman Italy.
10.13 When the marker enters Box 4 on the Carthaginian side of the track, the province's allegiance switches to Carthage if the province is allied to Rome. Flip its marker to its purple (Carthage) side. Similarly, if the marker enters Box 4 on the Roman side of the track, the province's allegiance switches to Rome. Flip its marker to its red (Rome) side. See 10.3 on what to do when this happens.
EXAMPLE: Using the Lucania example, the Carthaginian player would need to move the marker 6 boxes, from Box 2 on the Roman side of the track to Box 4 on the Carthage side of the track, to gain an alliance with Lucania.
10.2 Influencing the Allies
10.21 Hannibal's Diplomacy: Hannibal may conduct one Diplomacy Operation per Operations Phase to attempt to move a Roman-allied province's alliance marker along the track. To do so, Hannibal must be in the province with his Army and spend 1 Guile Point. The Carthaginian player rolls the die and consults the Ambassador Table (AW PAC #1) to see the effect. Hannibal has an "A" Diplomacy Rating (see the Diplomacy Rating Chart). If the result is a positive number, the Carthaginian player shifts the province's Alliance marker by that number of boxes in his favor. If negative, the shift is towards the Roman player. Treat any "D" result as a -2. A given province may be targeted only once per Game Turn.
Design Note: This rule reflects Hannibal's diplomatic skill at wooing Rome's allies.
10.22 Roman Retribution: Any time that the Roman player Sacks a city in a Carthaginian-allied province in Roman Italy, the following occurs:
- Rome gains 2 boxes in its favor for that province.
- The Roman player rolls a die for each adjacent province. If the die is even, Rome gains 1 box in its favor for that province, if odd, no effect.
Design Note: The growth of Rome was predicated on, and, in many ways, attributable to, the harsh methods Rome had in dealing with all who opposed her. You rose in revolt, you challenged her hegemony, you paid the price. After a while, this practice, combined with Rome's ability to inflict it, began to have a salutary effect on most of her neighbors.
10.23 Watchful Presence: During the Inertia Attrition Segment (G/1), if a CA/Legion, a Carthaginian Army, or Carthaginian Detachment of at least 20 SP remained in an Allied province throughout the Game Turn (i.e., the force is susceptible to Inertia Attrition), the player may move that province's Alliance marker 1 box in his favor.
Design Note: The continuing presence of strong military forces tended to assure and/or intimidate wavering allies.
10.3 Change of Allegiance
10.31 Defection: When a Roman-allied province's Alliance marker reaches Box 4 on Carthage's side of the track, that province has defected and is now allied to Carthage. When this occurs, flip the Alliance marker to its Carthage side and then do the following for each city in the province that is not occupied by one or more Legions:
- Remove both players' control markers if present.
- Eliminate any Roman Citizen and Cavalry SP.
- Replace any Roman Ala Infantry and Cavalry SP with the equivalent in Italian SP. The Carthaginian player may use the Italian SP as he sees fit.
If all SP in a Medium or Large city were eliminated, place 1 SP Italian Infantry there.
In addition, the Carthaginian player receives the manpower listed on the Province Information Chart. The SP are placed with any Carthaginian leader in the province. If none there, they are placed in any city in the province, distributed as the Carthaginian player sees fit.
Play Note: The Italian combat units are used by both players. They are considered Carthaginian units unless located on the Roman Army display or with Roman Citizen/Ala units on garrison duty.
10.32 Returning to the Fold: If a province switches its allegiance back to Rome, flip the Alliance marker to its Rome side and then do the following for all cities in the province that are not occupied by a Carthaginian Army, Detachment, or force with a leader:
- Remove both players' control markers if present.
- Eliminate all non-Italian Infantry SP.
- Replace half (round up) of Italian Infantry SP with Ala Infantry SP.
If all SP in a Medium or Large city were eliminated, place 1 SP Ala Infantry there.
10.33 The player achieving the alliance now controls all cities in the province that are not occupied by the opposing player's forces. The player controls the province for victory and manpower purposes unless the opposing player has retained military control (AW 11.2).
11.0 Macedonia
Design Note: Macedonia was ruled by Philip V, a clever and capable king who not only saw that the expansion of Rome was imminent - and very dangerous to his Hellenic sphere - but that Hannibal's invasion might just be the opportunity to consolidate Macedonia's position in the Aegean and outlying areas. Remember, several of the important "Roman" southern ports - such as Tarentum, Rhegium and Neapolis - still considered themselves "Greek"! His efforts to reach a deal with the Carthaginians led to Rome sending off Valerius Laevinus (later Sulpicius Galba) and a bunch of Legions to prosecute the First Macedonian War and keep the seas free of Greeks. Now, a very quick look at the map will instantly reveal the fact that Macedonia does NOT exist in our little gaming world. Regardless, these rules will, albeit abstractly, allow you to make sure that this important facet of the war is covered.
This rule is only used in those scenarios where the 1st Macedonian War Augury event is in play.
11.1 The Macedonian War
These rules are not used until triggered by the first of the Macedonian Random Events (Augury). As soon as that happens, the Augury Table will refer you back here, and it will be up to the players to further their aims in Greece ... as they best be prepared for the next time that same Random Event occurs. Starting with the second time the random event occurs; the players will refer to the First Macedonian War Table to see what happens each time this event occurs. What happens will depend on a combination of die roll, Diplomacy, Roman Naval Supremacy, and Roman force commitment.
11.2 Ambassadors
Once the war is initiated, both players may send ambassadors to Macedonia to influence the next DR on The First Macedonian War Table located on the Thunderbolt 2nd Punic War Scenarios PAC. Hannibal and the current Roman OC are the only leaders that can send an ambassador. An ambassador is sent using a Diplomacy Operation, which requires the expenditure of 1 Guile Point. The player draws a leader from his leader pool to fill the role. Alternatively, the Carthaginian player may send any of its Subordinate leaders.
Place the ambassadors in the Macedonia Holding box located on the Thunderbolt Alliance & Game Turn Tracks display. A player may have only one ambassador in the box. The ambassadors remain in the Macedonia Theater box until used.
11.3 Roman Force Commitment
Once the Macedonian War is underway, the Roman player may commit forces to the war to enhance his chance of success. These forces are placed in the Macedonia Holding box which is treated as a Theater.
11.31 The Roman player may place one or two Legions raised in the Raise Manpower segment (B/3/b) in the Macedonia Holding box instead of on the map. If two Legions are placed, they are formed into a CA. Use 5.14 to determine the leader assignments. The elected Consul/Proconsul is assigned to the Macedonia Theater. The CA/Legions in the holding box are treated as if they were on the map for all game purposes. Leaders in the box do not conduct Operations; no LAMs are placed in the pool. The Legions remain in the Macedonia Holding box unless Disbanded (5.3) or returned at the war's end. No more than four Legions may occupy the holding box at any one time.
EXAMPLE: The Macedonian War is underway and the Macedonia Holding box is empty. The Roman player was able to raise a Legion during the Raise Manpower segment and elects a Praetor to take command. Wanting to avoid the negative DRM for the empty holding box and to take advantage of the +2 DRM for having a Legion there, he places the Legion and Praetor in the Macedonia Holding Box.
11.32 The Macedonian War ends via an Augury event. In the GT following the end of the war, all magistrates in the Macedonia Holding box are automatically prorogued. In the subsequent Raise Manpower segment, the returning Legions are placed per 5.15 with the exception that the CA cannot be placed in a province that is assigned to another Proconsul. The Legions in a CA must be placed in the same location. The province assignment for the Proconsul is the province where the CA is placed. If a CA/Legion cannot be placed, it is Disbanded (5.3) instead. If the end of the war result leaves 1 Legion in Macedonia, that Legion must be one that is not part of a CA. If there are only CAs present, break the CA into separate Legions. Place one per 5.15, and the other Legion and the Proconsul remain in the Macedonia Holding box. The magistrate retains his office Theater assignment until the Imperium Prorogue segment, when he is returned to the pool. Elect a Praetor if under the Praetor limit for the returning Legion.
Design Note: The Romans never used more than two Legions in the Macedonian Theater but did commit significant naval assets. The four Legion limit gives the Roman player a bit more flexibility although with some risk since Legions may end up in the Theater for the duration of the game.
11.4 Resolving the Event
To resolve the Macedonian War event after its first instance, the players may use their ambassadors in the Macedonia Theater Holding box to roll on the Ambassador Table (AW PAC#1) to generate a DRM for the upcoming roll. Each player consults the Diplomacy Ratings Chart to determine a Diplomacy Rating for his ambassador. Each player then rolls the die and consults the Ambassador Table, to see what effect, if any, he has had. A numerical result is used as a DRM on the table. Note per the First Macedonian War Table that a "D" result is replaced by a numerical value. There are no Diplomatic Disasters.
The Roman player then rolls the die and consults The First Macedonian War Table, applying the applicable DRMs noted on that table and implements the result. An ambassador is returned to the leader pool, if drawn from there, or if a Subordinate leader was used, placed with Hannibal, during segment A/2 on the following Game Turn.
12.0 Auguries
Most scenarios that use this rule have their own Augury Tables. The shorter scenarios use one die instead of two to determine the event.
The 2nd Punic War Auguries table located on Thunderbolt 2nd Punic War Auguries PAC has some additional features. Each event entry has a Conditional Event in addition to the primary event. These events have certain prerequisites that must be met before they are implemented. After the primary event text has been implemented, consult the Conditional Events Chart, and resolve the Conditional event if possible.
Most of the events are self-explanatory. Those that are more involved have special rules in those scenarios where they occur or in these rules. The text of the event takes precedence over the rules.
12.1 Revolts
Cities/Tribal Settlements: For each selected garrisoned city/settlement, the unaffected player rolls the die. If the DR is greater than the city's SADS, eliminate the garrison (if there is also a control marker, remove it as well). For each selected ungarrisoned city/settlement, remove any control marker present. If the target is a city, place an In Revolt marker there. Cities with an In Revolt marker are hostile to the player whose alliance is with that province and friendly to the opposing player.
Tribes: For a Tribe, place an In Revolt marker on the tribe and remove any Pacified marker. The allegiance and depletion status remain as is. The tribe is now hostile to its allied player. Raising manpower, using diplomacy, or conducting Interceptions are not possible for the allied player. The non-allied player may continue to use Diplomacy to attempt to gain an alliance and may use Interception per 9.14 against the allied player. The allied player may attack the tribe. The In Revolt marker is removed when the tribe is Pacified, changes its allegiance, or when directed by an Augury event.
13.0 Advanced Naval System (Optional)
Design Note: The standard Naval Superiority System models very well the naval activities during the 2nd Punic War. The Advanced Naval System, which was necessary to portray the operations during the 1st Punic War, is overkill here, adding detail, complexity, and play time out of proportion to its effect on the game. There are, however, some players who don't mind the extra work, so for completeness this section includes a modified version of the ANS used in the Carthage scenarios.
These optional rules may be used in place of AW 7.0 and 8.0 for the 2nd Punic War, Hannibal Ascendant, and Hannibal at Bay scenarios only. All other scenarios use the Naval Superiority System rules when required. When these rules are used, ignore any reference to NS levels and any NSS-related (AW 7.0) special rules in those three scenarios. Scenario setup modifications are noted in the scenarios where these rules may be used. Most of the charts and tables are located on the Thunderbolt Advance Naval System PAC (which is also used for Carthage). There is no dedicated Fleet Display; however, there are boxes on the City occupation displays with Fleet numbers that may be used to manage stacks.
13.1 Fleets and Naval Construction
Historical Note: At the start of the 2nd Punic War, Rome had around 230 quinquereme-size galleys in service compared to about 130 similarly-sized galleys for the Carthaginians. During the war, both sides increased the size of their navies moderately, with Rome peaking around 275 galleys and the Carthaginians around 185 galleys. The totals exclude triremes and smaller vessels as well as galleys supplied by Massilia, Syracuse, and Macedonia.
The charts and tables referred to in this section are located on the Thunderbolt Advanced Naval System Charts & Tables PAC unless specifically stated otherwise.
13.11 Fleets: Each player has a navy which is composed of one or more Fleets. Each Fleet is composed of one or more squadrons of war galleys. There is no upper limit to the number of squadrons that can comprise a Fleet, although there are limits on the total number of squadrons and Fleets that may be in play.
13.12 The Fleet counters are numbered and have a corresponding numbered box on the player's City Occupation Display (the box is shared with one of the cities). Only the Fleet counter is placed on the map. The Squadron unit(s) and the Crew Rating marker (13.13) are placed in the box. The backs of Fleet counters are printed to show an In Port status (13.45). The players may have no more than 10 Fleets in play at any one time.
13.13 Crews: Each Fleet is assigned a Crew Rating; the level of which often determines what will happen in battle. This rating applies to all squadrons in the Fleet. The rating, which ranges from 0 to 4, represents the level of crew expertise which may change throughout the game. Newly-constructed squadrons start with a Crew Rating of 0. The scenario setups list the Crew Ratings of Fleets that begin play on the map.
13.14 A Fleet's Crew may increase its rating, up to a maximum of 4 by means of the following:
Training: The Fleet spends an entire Game Turn In Port. A Fleet under training can do nothing in the Operations Phase; if it does, it gets no benefit from training. A leader must be present and remain in the hex throughout the entire Operations Phase. If the leader leaves the hex, the Fleet gains no benefit from the training. Each full turn of training raises the Crew Rating by 1.
Winning a Naval Battle: The Fleet's Crew Rating is raised by 1 when it's the Winner in a naval battle (13.56). A Fleet may have its Crew Rating raised as many times as possible (up to 4) by this method.
Design Note: There is no historical commentary suggesting that newly-recruited Carthaginian crews were any better than those of the Romans during the 2nd Punic War.
Play Note: There are a few Fleet in Training markers that may be used as a memory aid to identify Fleets that will likely remain in port.
13.15 The Fleet's Crew Rating can be reduced if it incorporates squadrons from another Fleet with a lower Crew Rating (13.32).
13.16 Fleet Construction: Squadrons are built during Naval Superiority Construction/Re-allotment (B/3/a) at the option of the player. To determine the number of squadrons the player may construct, the player rolls the die and halves the result (round up). This is the number of squadrons he may construct, subject to the limits described in 13.17 below.
The squadrons must be placed in one eligible controlled port (13.17), limited to the Port's Harbor Capacity as given on that chart, reduced by the number of squadrons already in the port. The built squadrons are placed in the port hex, In Port and given a Fleet and Crew marker (13.13).
For each squadron built, there is a -1 DRM on any die rolls conducted in the following Raise Manpower segment (B/3/b) and all Manpower Operations conducted during the Game Turn.
Design Note: Unlike the 1st Punic War, there were no large scale bouts of galley construction.
13.17 Squadron Construction Limits: Rome may never have more than 28 squadrons, Carthage never more than 20 squadrons, in play at any time. Rome may only build squadrons in Ostia, Neapolis, or Lilybaeum. Carthage may only build squadrons in Carthago. The player must control the port to build a Fleet there.
Historical Note: While the Roman Senate usually voted on fleet construction, most of the money to do so was raised from private sources. The problem was not so much building the galleys but raising the crews to man them. Large fleets contained up to (and often more than) twice the number of men as consular armies. Carthage, with its much more naval-oriented history, was quite used to fleet construction. However, for financial reasons, augmented by its conviction that its seagoing position was unassailable, she was often slow to react to the need to do so.
EXAMPLE: The Roman player has 20 squadrons in play and wishes to add a few more. He rolls a 5 so he may construct 3. He has capacity in Ostia, so he places an unused Fleet marker there and the squadrons along with a Crew Rating marker in the matching Fleet box on his City Occupation display.
13.18 Syracuse and Massilia: Syracuse and Massilia each have 1 Squadron. Neither power has a Fleet nor can independently undertake any naval operations or interceptions. The squadrons may be included in an Allied player's force and assume the Crew rating of that force. The squadrons are returned to their home ports during the Inertia Attrition segment (G/1) if elsewhere. These squadrons count as Fleets for siege purposes (13.9). Syracuse and Massilia cannot build squadrons. The squadrons are eliminated when their city is captured.
13.2 Fleet Commanders
As with Armies, Fleets require a leader to move, conduct combat, etc. Unlike Legions/Armies, Fleets are only assigned an Admiral under certain circumstances. A Fleet without an Admiral may be included in any leader's force. Only one such Fleet may be included. A Fleet with an Admiral may be included subject to the player's command hierarchy.
13.21 Admirals: Each player may have up to two Admirals in play at any one time. Leaders assigned as Admirals can only conduct operations with their assigned Fleet. Admirals are assigned as follows:
Romans: An Admiral may be assigned to a Fleet in either the Imperium Prorogue segment (B/1/a) or the Election of Magistrates segment (B/1/c). Only Praetors may be assigned as Admirals. A Praetor assigned a Fleet may be prorogued and retain command of the Fleet as the Admiral. Any magistrate may be prorogued as a Praetor and assigned as the Admiral to any Fleet without an Admiral. A Praetor may be elected per 4.54 as Admiral and assigned to any Fleet without an Admiral. The restriction on the number of allowable Praetors applies as does the 1 LAM provision except as noted below.
Carthaginians: An Admiral may be appointed to a Fleet without an Admiral in the Appoint Army Commanders segment (B/2/d) using the procedure described in 6.42/6.43. As with Army Commanders, the Admiral remains assigned to that Fleet until eliminated, recalled, or swapped (13.22).
13.22 Notable Admirals: Both players have a few leaders that have an anchor symbol on their counters noting their primary historical role as an Admiral. Carthaginian leaders with the symbol can never be assigned an Army. If one is drawn when appointing an Army Commander, the Carthaginian may assign the leader as an Admiral for a Fleet that doesn't have an Admiral or swap the leader with an Admiral without the anchor symbol, with that former Admiral taking command of the Army instead. The AER (6.7) penalties apply.
If, during the Election of Magistrates, the Roman player draws a leader with the anchor symbol when electing a Proconsul (not Consul or Dictator/ME), he may assign that leader as a Praetor and Admiral for a Fleet without one instead. Unlike the Carthaginians, a Roman leader with an anchor symbol may be assigned as any other Roman leader. In addition, a notable Admiral is not limited to 1 LAM. However, the total number of Praetor LAMs available is limited to the counter mix.
Design Note: Both sides tended to consolidate their Fleets for operations so there are no Duumviri conducting Fleet operations.
13.23 A Fleet without a leader present in the hex/port has an intrinsic Campaign Rating of 4 and an E Battle Rating for interception and avoidance attempts and defending in combat.
Play Note: Here is the presence of the Duumviri sans the counter.
13.3 Naval Operations
Operations with Fleets are handled in a similar manner to operations with land forces, though only the following operations are allowed when conducting an operation with a force that includes a Fleet:
- Force Movement
- Attack
- Reform Scattered Units
- Senate Permission
The operation's Finish is per AW 5.3 with the exception that for Notable Admirals there is a -1 DRM to the DR if a Force Movement Operation will follow a Force Movement Operation.
In general, Fleets and land forces cannot participate in the same operation. The notable exception is the Force Movement Operation where both Fleets and land forces may participate. A land force using Naval Transport is treated as a Fleet for operations.
13.31 Force Composition: As with land operations, a leader, whether an Admiral or not, may include one Fleet as part of his force for an operation, interception, or avoidance if that Fleet is in the same Coastal hex (it must have some land) as the leader, and the Fleet is either without a leader or the Admiral is lower in the player's command hierarchy. If there is an enemy Fleet in the hex, the leader and the Fleet both must either be inside the city/In Port or outside the city and not In Port, otherwise being in the same hex is all that is required.
13.32 Fleet Composition: A leader conducting operations may combine and/or split Fleets in the same hex which do not have an assigned Admiral before composing a force. If an enemy Fleet is present, the restrictions described in 13.31 apply.
To combine Fleets, move all squadrons from the contributing Fleet to the receiving Fleet and remove the Fleet marker. If the Crew Rating of the Fleet contributing squadrons is lower than the receiving Fleet, that Fleet's Crew Rating is set to the lower value.
To split a Fleet, remove the squadrons, player's choice of how many, and give these squadrons a Fleet marker. The Crew Rating is the same as the Fleet giving up the squadrons.
If the leader is an Admiral, the player may combine/split Fleets as noted above. After doing so, he may incorporate the squadrons of one Fleet into the Admiral's Fleet or create one Fleet from squadrons in the Admiral's Fleet (not both). If the Crew Rating of the Fleet contributing squadrons is lower than the receiving Fleet, that Fleet's Crew Rating is set to the lower value. A created Fleet inherits the Crew Rating of the Admiral's Fleet.
13.4 Naval Movement
13.41 Fleet Movement: Like land units, Fleets have no Movement Point allowance and, theoretically, can move anywhere during a Force Movement Operation. A Fleet may only enter Coastal hexes and All Sea hexes; they may not enter a hex that is exclusively land nor cross an all-land hexside. A Fleet may voluntarily Stop only in a Coastal hex that includes some land. A Stop is voluntary unless the Fleet enters a Coastal hex occupied by an enemy Fleet that is not Scattered, enters a friendly port by flipping the Fleet counter to its In Port side, or is intercepted. In the case of interception, the Stop can occur in an All Sea hex.
13.42 Distance Points: A Fleet that Stops, for whatever reason, must immediately check for effects of the voyage. As a Fleet moves, it accumulates Distance Points (DP):
- each Coastal hex is worth 1 DP.
- each All Sea hex is worth 5 DP.
The player totals the DP accumulated for that Force Movement Operation and consults the Naval Movement Distance Effects Table. The player rolls the die and applies a +1 DRM for each full 10 DP the Fleet has accumulated. He now sees what effect that adjusted die roll has produced, as per the table.
EXAMPLE: Accumulating 23 DP would result in a +2 DRM, 59 DP a +5 DRM, 8 DP no DRM.
13.43 Distance Effects: The possible effects are:
- No Effect: The player may continue operations or complete any desired actions with the Fleet.
- Scattered: The Fleet has fallen apart and landed in various locations along the shore. Place a Scattered marker on top of it. The player cannot perform any action with the Fleet (e.g., enter port, change its composition, move, etc.) until he successfully completes a Reform Scattered Units Operation (AW 5.3/I) to return the affected Fleet to normal status. A Scattered Fleet is always considered outside any port in the hex. Scattered Fleets are ignored for determining any die roll modifiers (13.8, etc.).
- Blown Off Course: The owning player places the Fleet in any non-Port Coastal hex with some land at least 3 hexes but no more than 5 hexes from the hex where the Stop occurred. The Fleet is Scattered, as above, in this hex.
- Blown Off Course and Lose 25% of Fleet: Eliminate 25% of the Fleet's squadrons and 25% of the SP if present, with a minimum of 1 Squadron and/or 1 SP lost. SP losses are distributed per AW 8.35. Any leaders with the Fleet must roll for a Leader Casualty (AW 8.6). The fleet is Blown Off Course as above.
13.44 Major Disaster: When checking for the effects of Distance, as above, any time the player rolls a natural 0 (regardless of the adjusted DR total) he checks to see if a Major Disaster has overcome the Fleet. Roll two dice, one before the other, reading the result as a number between 0 and 99. If that dice roll is lower than the number of DP Accumulated for that move, the entire Fleet has been sunk by a storm and is eliminated.
*EXAMPLE: A Roman Fleet of 11 Squadrons (110 galleys) escorting transports carrying a Consular Army, moves, in one Operation, from Syracuse (I-6419) to Utica (C-2928), using Coastal hexes all the way, and accumulating 25 DP. The Roman player, checking for the Distance Effects, rolls a 0, which, even with the +2 DRM would be a No Effect. However, because he has rolled a 0 he must now check for a Major Disaster. He rolls a 2 and a 3 - a 23 which is lower than the 25 DP he accumulated. His entire Fleet, including the transports with the Legions, has been sunk.
Historical Note: Far more galleys were destroyed by Mother Nature - and rash command decisions which put the Fleet into conflict with that person - in the Punic Wars than battle. The Romans, alone, lost several entire fleets to such horrors.
Design Note: The purpose of this seemingly harsh rule - it looks less so if you understand that the chances of the above happening were about 2.5% - is twofold. First is to simulate the Historical note, above. And the second is to reflect the caution, and often sloth-like nature of naval operations over the entire course of the Punic Wars.
13.45 Port Entry/Exit: An un-Scattered Fleet may enter port whenever it ends an operation in a friendly port hex. Flip the Fleet counter(s) to its reverse side to indicate this status. To leave port, the player simply flips the counter(s) back. There is no DP cost to enter or leave a port. The number of squadrons that can be placed In Port is limited to the port's harbor capacity. A Fleet, and this include units using Naval Transport, may enter a friendly port even if the city is Under Siege.
Design Note: Thurii (I-5509) is a port, even though it is inland. Many sources refer to Thurii as a usable port ... and all maps place it where it is. It is probable that the river it is on was navigable to commerce. Naval transport reaching I-5508 or I-5609 can consider itself to have reached Thurii if the player so wishes... and vice versa.
13.46 Combined Land/Naval Movement: A land force and Fleet moving together both must Stop if either force Stops. The land force checks for attrition per AW 6.4, while the Fleet uses Distance Points (13.42) to determine the effects of its voyage. If either is intercepted, only the relevant service is affected. Combat and avoidance attempts are handled separately, with one having no effect on the other. Note that land units using Naval Transport are treated as a Fleet.
13.47 Fleet Redeployment: The leader conducting operations in a hex/port where there is a Fleet without an Admiral may initiate a special Force Movement Operation to move that Fleet to a friendly port. The leader does not move the Fleet. Rather, the Fleet's intrinsic ratings (13.23) are used. The Fleet may voluntarily Stop and continue to use Force Movement Operations until it reaches a friendly port or is Finished by die roll or other consequences. After the Fleet finishes its movement, the initiating leader rolls to Continue as if he conducted the operation.
Design Note: The need for naval support varied over time in any given Theater. The Romans would often downsize a Fleet supporting an army in one Theater to reallocate those assets to another. This is the ANS version of the NSS re-allotment mechanic implemented such that the commander in the Theater doesn't personally have to do the work.
13.5 Naval Combat
The possibility of naval combat occurs any time two opposing naval forces are in the same hex. Land forces participating in a combined operation are ignored. A naval battle is initiated when:
- A leader conducting operations with a Fleet conducts an Attack Operation in the same hex as any enemy Fleet. All enemy Fleets in the hex must be attacked as a single force. Fleets In Port and those Scattered cannot be attacked.
- A Fleet successfully intercepts an enemy Fleet. In this case, the intercepting player initiates the combat.
A leader of a combined force is not required to participate in a naval battle unless he is an Admiral, though he may do so.
13.51 Interception: The opposing player may attempt an Interception against an enemy Fleet, regardless of his Fleet's In Port status, whenever:
- an enemy Fleet begins a Force Movement in the Fleet's hex.
- an enemy Fleet concludes a Reform Scattered Units Operation in the Fleet's hex.
- an enemy Fleet enters the Fleet's hex and does not Attack.
- an enemy Fleet enters a hex adjacent to the Fleet's hex.
If there are Fleets in more than one hex that are eligible to intercept, only one may make the attempt. A leader may attempt to intercept the same enemy Fleet only once during that Fleet's Operations Phase unless that Fleet moves 2 hexes away then, later in the same Operations Phase, moves such that one of the above criteria is met, or the enemy Fleet attempts to re-enter the hex with the Fleet that made the attempt.
EXAMPLE: The Roman player moves a Fleet into a hex with two Carthaginian Fleets without leaders. The Carthaginian player may intercept with only one of the Fleets. If the Roman player moves out of the hex, the other Fleet could attempt to intercept.
To attempt an Interception, the player announces the attempt and rolls the die, applying the following:
- +3 DRM if the Interception attempt is into an adjacent hex.
- +2 DRM if the Intercepting Fleet is In Port.
If the adjusted DR is the same as or lower than the leader's Campaign Rating, the Interception is successful. If the Interception was into an adjacent hex, the intercepted Fleet Stops and checks for Distance Effects (13.43). The intercepting Fleet then moves into the target hex and initiates Combat. There is no DP cost for this move.
If the adjusted DR is higher, there is no Interception, and the targeted Fleet can continue its current operation if applicable or use Continuation to conduct another operation.
13.52 Avoidance: A player defending against an Attack or successful Interception may attempt to avoid combat only if his Fleet is in a Coastal hex with some land. The player rolls the die and compares it to the Campaign Rating of the Fleet's Admiral. An Admiral-only leader may expend Guile Points for a -1 DRM for each one expended. If the adjusted DR is higher, the naval battle commences. Otherwise, the player may either enter a friendly port in the same hex or move his Fleet 1 or 2 hexes away from its hex with the following restrictions:
- Only Coastal hexes with some land may be entered.
- If the Fleet moved into the hex where it was intercepted, the first hex moved to must be the one by which the Fleet entered the hex where the interception occurred.
- If the Fleet was defending against an Attack, the Fleet may not move into the hex from which the attacking Fleet just entered its hex.
There is no DP cost for this move. If the attempt was in response to an Attack Operation, that operation canceled; the attacking player may select another operation.
Play Note: Unlike Interceptions on Land (AW 8.22), Fleets may attempt Avoidance after being successfully Intercepted.
Historical Note: It was easy to avoid a naval battle, given the difficulty of forming into battle line, etc.
13.53 Resolving Naval Battles: Naval battles are resolved using the Naval Battle Results Table. The table is a list of adjusted die rolls with the adjustments running from -2 to +11, a total of 14 possible results. To resolve a given battle:
- Determine all DRMs (13.54).
- Each player rolls one die, applying DRMs, and notes the result to his Fleet.
- Eliminate squadrons to reflect losses and check for Leader Casualties (13.55).
- Conduct retreats (13.57).
13.54 The Naval Battle DR Adjustments: A negative DRM helps the player as it reduces his loss possibilities; a positive DRM helps his opponent.
Strength Ratio: Each player determines the comparative strength ratio (combat odds) of his Fleet compared to that of his opponent, rounding down to conform to the ratios listed on the Naval Combat Ratio Chart, to determine the DRM.
EXAMPLE: If the Attacker has 7 Squadrons against 3 Defender Squadrons, the Attacker will incur a -2 DRM, the Defender a +3.
Tactical Superiority: The players compare their leaders Battle Ratings. A Fleet without a leader uses its intrinsic Battle Rating. The leader with the better Battle Rating (A being best, etc.) gains Tactical Superiority for the battle, and the ability to use that side's DRM listed below. If the Battle Ratings are the same, neither side has Tactical Superiority.
- Roman Tactical Superiority: -1 DRM to his die roll; +1 to his opponent's.
- Carthaginian Tactical Superiority: -2 DRM to his die roll; +2 DRM to his opponent's.
Design Note: The Carthaginians were far better "sailors" than their Roman counterparts, and they had great superiority in any battle in which they could use their speed and maneuverability to destroy Roman ships with the tactic of ramming. The Romans, while they fell far behind the Carthaginians in this aspect, were experts at land warfare ... and the naval tactic of boarding. Their bigger quinqueremes held more, and usually, better soldiers. The Carthaginian Tactical Superiority is less pronounced than in the 1st Punic War but the Carthaginians still had an edge over the Romans.
Crew Superiority: The player with the lower Crew Rating incurs the difference between higher Crew Rating and lower Crew Rating as a DRM to his Naval Battle die roll. If a player has more than one Fleet involved, use the lowest rating.
EXAMPLE: A Fleet with +3 Crew against a Fleet with a 0 Crew would require the player with the 0 Crew Fleet to add +3 to his Naval Battle die roll.
13.55 Combat Losses: All results are expressed in terms of the percentage of Squadrons lost, and whether to round any fractional losses up or down. If the result is an up, any fractional loss is treated as a loss of 1 Squadron. Thus a 10-up result for a Fleet with 10 or less Squadrons would cause a 1 Squadron loss. If a Fleet has lost Squadrons, any Admiral present with that Fleet must roll for a Leader Casualty (AW 8.6). If the entire Fleet is eliminated, the Admiral is Killed, no DR necessary. The owning player may allocate his squadron losses among the Fleets present as he sees fit.
Play Note: Unlike land combat there are no After Battle Status effects applied to the Fleets or any land units using Naval Transport.
13.56 Winners/Losers: The player that has the higher percentage loss (ignore the up or down) is the Loser, and the other player is the Winner. If both sides have the same percentage loss, there is no Winner or Loser. If the player conducting operations is the Winner, he may roll for Continuation, otherwise his leader is Finished. The Fleet that is the Winner has its Crew rating increased by 1 (13.14). If more than one Fleet was involved, each has its Crew Rating increased.
13.57 Retreats: Retreats are only sometimes mandatory. It is possible that both players may remain in the hex after combat. A Fleet must retreat if it is the Loser and suffers at least twice the number of losses in squadrons or loses any squadrons when the opposing Fleet has no loss. Otherwise, retreat is voluntary. The Loser gets to decide, first, if he wishes to retreat his Fleet. If he chooses not to, the Winner gets that choice. If neither chooses to Retreat, or there is no Winner or Loser, the Fleets stay where they are. A force crossing a strait never retreats (13.75).
A Fleet that retreats must leave the hex by moving (any distance) to a Coastal hex with some land unoccupied by enemy units. The retreating Fleet accumulates DP per 13.42 and when it arrives in the destination hex, the player determines the Distance Effects of such a move (13.43). A Fleet may not retreat into a hex if the opposing Fleet entered the battle from that hex during the current Operation Phase, nor may it enter a hex occupied by an enemy Fleet during the retreat.
EXAMPLE OF A NAVAL BATTLE: A Roman Fleet with 10 Squadrons under the command of Otacilius Crassus (#411) (C Battle Rating) engages a Carthaginian Fleet with 7 Squadrons under the command of Bomilcar (2P-2) (E Battle Rating) off the coast of Sicilia. The Roman player has Tactical Superiority which grants him a -1 DRM while inflicting a +1 DRM on the Carthaginian player. Both players have a 3 Crew Rating so there is no DRM for Crew Superiority. The Roman numerical advantage is insufficient to produce a DRM for himself but does inflict a +1 DRM on the Carthaginian player. The Roman player rolls a 6, adjusted to 5, for a "20 down" result. The Carthaginian player rolls a 7, adjusted to 9, for a "25 up" result. Both players eliminate 2 Squadrons. Both players roll for leader casualties (neither leader is affected). The Carthaginian player chooses to retreat, so Bomilcar heads for Carthago, a 12 DP voyage, arriving safely.*
13.6 Raids
Design Note: For much of the war, it was the Roman practice to send her main fleet of 100-120 galleys each year to raid Africa. The Carthaginian raiding mostly occurred in the first few years of the war and focused on Sardinia and Sicily.
13.61 Both players may use their Fleets to raid their opponent's territory. Only Fleets with at least 4 squadrons and commanded by an Admiral can conduct a Raid. To be eligible, a Carthaginian Fleet must begin the Operations Phase in a controlled port in Carthage province; a Roman Fleet must begin in a controlled port in Roman Italy or Sicily.
13.62 A Raid is a special Attack Operation against an enemy-controlled coastal city. For the Romans, only Small/Medium cities in Africa can be the targets of a raid, for the Carthaginians only Small/Medium cities in Roman Italy, Sicily and Sardinia. A raid cannot be conducted if there is an enemy Fleet in the hex (not In Port) or an enemy leader-led force in the hex/city. The operation has a die roll Finish regardless of outcome. The Fleet may conduct only one raid attempt per specific hex in that Operations Phase.
13.63 Raid Resolution: To resolve the raid, compare the number of squadrons in the Fleet to the city's SADS, treating squadrons In Port, and any cavalry or elephants in the city, as infantry when determining the SADS. The comparison is expressed as a simple ratio, dropping fractions. The raiding player consults the Naval Combat Ratio Chart to determine the Raid Defense DRM and rolls the die. If the modified die roll is less than 5, the Raid succeeds; otherwise, the Raid fails.
EXAMPLE: A Roman Fleet of 5 Squadrons conducts a raid on Thabraca (C-2533) garrisoned by 1 SP (SADS is 2). With a -2 Raid Superiority DRM, the Roman player wild need to roll a 6 or less to succeed.
13.64 Raid Effects: A successful raid gives the players beneficial and/or detrimental DRMs to rolls during the Naval Superiority Construction/Re-allotment (B/3/a) and Raise Manpower segments (B/3/b) of the following Game Turn. The player receives a +1 DRM for a successful raid on a Small city or a +2 DRM for a Medium/Large city. The Roman player incurs a -2 DRM for a successful Carthaginian raid against a Medium/Large city in Roman Italy, while the Carthaginian player incurs a -2 DRM for a successful Roman raid against a Medium/Large city in Africa. All DRMs are cumulative. Remove all Raid markers at the end of the Raise Manpower segment (B/3/b). There is no additional effect if the player successfully conducts more than one Raid.
13.7 Naval Transport
Players may move land combat units by sea using Naval Transport. Naval Transport occurs as part of a Force Movement Operation and can be used in conjunction with land movement in any order or combination.
13.71 Embark: A land force must begin a Force Movement Operation in a port, inside the city if there is one in the hex. The number of SP that can embark to use Naval Transport from that port is given in the Naval Transport Chart (AW PAC#2). To initiate Naval Transport, the player states the fact and places a Naval Transport marker on his force. Naval Transport can be conducted from a city Under Siege.
Play Note: A player may try to transport besieged land units from a Port, but Interception applies (13.51 bullet #1) if there is an enemy Fleet in the hex.
13.72 Transport Operations: Land units using Naval Transport are treated as a Fleet for Fleet Operations (13.3) with the following adjustments:
- The leader cannot conduct an Attack Operation unless a Fleet is part of the attacking force. The leader may avoid battle (13.52) but if forced into combat without a Fleet present, the battle is resolved per 13.53, with the Transport Fleet using 1 Squadron for the Strength Ratio adjustment and a Crew Rating of 0. The Attacking player does not roll the die and thus will take no losses. Any percentage loss to squadrons applies equally to the land units being transported. The losses are distributed using AW 8.35.
- If the Naval Transport Table result is Scattered, place a Scattered marker on the force and roll for a Leader Casualty (AW 8.6) for all leaders involved. A Scattered force is in the hex still undergoing Naval Transport. However, the force may be attacked by Land Combat but not Naval Combat. The force is treated as if it were Useless (AW 8.53) while Scattered, regardless of any ABS the force may have. The force remains Scattered until a suitable leader conducts a Reform Scattered Units Operation (AW 5.3 I), which removes the Scattered marker. The force may disembark, subject to the hex's disembark limit, as part of the Reform Scattered Units Operation instead of continuing Naval Transport.
13.73 Disembark: To disembark, a force using Naval Transport must Stop, and roll on the Naval Distance Effects Table per 13.42. If there was no adverse Distance Effects result, the entire force disembarks, concluding the Naval Transport. If the number of SP in the force exceeds the disembark limit of the hex/port, the excess SP are eliminated. A force may disembark into a port city Under Siege. Remove the Naval Transport marker after the force disembarks.
Design Note: The ability to land forces in non-port hexes is supported by several of the campaigns during the war, e.g., the Roman invasion of Africa in the 1st Punic War, which landed a consular army on Cape Bon (I-5834). Note also that restrictions on enemy-occupied hexes and adjacent cities have been removed.
13.74 If units disembark in a hex occupied by enemy land units and both those units and the debarking units are outside of a city, any attack by the debarking force incurs -3 DRM on the Battle Results Table. If it does not attack but is, in turn, attacked by enemy forces in that Game Turn before leaving the landing hex, there is a +3 DRM on the Battle Results Table.
13.75 Crossing Straits: Although land units crossing straits do not use Naval Transport, the opposing player may attempt Interception (and thus precipitate a Naval Battle) if he has enemy Fleets in either/both hexes joined by the strait. Interception attempts are resolved per 13.51, with the exception that only one Interception attempt can be made against the force making the crossing. If an Interception attempt is successful, the intercepted player has the option to retreat to (or remain in) the starting hex and there is no Naval Battle. If a Naval battle occurs, both players may include any/all Fleets in either hex (including any In Port) joined by the strait. At the conclusion of the battle, the force conducting operations is placed in the ending hex (regardless of where the actual Interception occurred) - it has crossed the strait and, Continuation permitting, the leader could conduct additional operations. For the purposes of determining Naval Battle results (losses, DRM, etc.), treat the force as if it were a Transport Fleet (13.72).
13.76 Reinforcements: Rules 5.24 and 7.24 are used, with the exception that the players treat the reinforcements as if they were undergoing Naval Transport. The path cannot enter a port/hex occupied by an enemy Fleet. Use the Naval Movement Distance Effects Table to determine the outcome. Treat a Scatter result as No Effect. If the result is Blown Off Course, apply any percentage loss then place the surviving SP in the selected hex. The SP are considered to have disembarked; eliminate SP above the hex's disembark limit. If the reinforcements arrived safely (i.e., No Effect) distribute the SP per 5.24 and 7.24.
13.8 Winter
13.81 Ports can safely harbor - dry-dock and keep safe from Winter - a limited number of squadrons. Land units using Naval Transport are not considered. The harbor capacity of a given port is listed on the Port Harbor Capacity Chart. Some Secondary Ports have larger harbor capacities than others; these are named and listed (e.g., Drepanum).
Historical Note: Carthage's harbor had "modern" drydocking facilities for 220 galleys at any one time. Presumably, more ships could anchor in the large harbor.
13.82 During the Inertia Attrition segment (G/1), each Fleet and any force using Naval Transport that is not In Port must be moved to a friendly Port hex without a Stop and enter Port. Each Fleet accumulates DP (13.42), but when it reaches its destination Port, the player rolls for a Major Disaster (13.44) instead of rolling on the Naval Distance Table. A Fleet that began the segment Scattered adds 20 to the Distance Point total.
A force using Naval Transport may disembark in its current location, either into the hex or inside a friendly port if one is present. Alternatively, the force may be moved to a port like any other Fleet and instead disembark there. If a player disembarks a Scattered force in its current location, he must check for Inertia Attrition (AW 6.47), treating the force as Useless. Remove the Naval Transport marker, and if present the Scattered marker, after the force disembarks.
Design Note: The above simulates the arrival of increased storms, which ended almost all naval movement of any kind, even in the Mediterranean.
13.9 Fleets and Sieges
Fleets have the following effects if In Port or in the hex of a city Under Siege.
- Siege Assaults: If only the attacker has Fleets in the hex and/or port, apply a +2 DRM; If only the defender has Fleets in the hex and/or port, apply a -2 DRM.
- Siege Attrition: If the port hex is solely occupied by an enemy Fleet, apply a +3 DRM to the besieged player's DR. Friendly Fleets In Port are ignored. If the port hex is solely occupied by a friendly Fleet, whether In Port or not, apply a -3 DRM to the besieged player's DR.
- Successful Siege: If the city Surrenders, Fleets In Port remain in the hex but are no longer In Port. In all other cases, the Fleets In Port are eliminated.
13.10 Augury Adjustments
Severe Weather at Sea: For the remainder of the GT, it costs 10 Distance Points to enter an All-Sea hex, and, when checking for Major Disaster (13.44), apply a -10 to the DR.
Oarsmen Shortage: Roll the die. If even, the Carthaginians are affected, if odd, the Romans. That player rolls the die and removes squadrons equal to 1/2 the DR (round down to a minimum of 1). Player's choice as to which to remove.
Naval Battle: Either player rolls the die then consults the Theater/Mare Table to determine the location of the naval battle. If more than Mare/Fretum is indicated, the battle occurs in the Mare/Fretum where both players have Fleets. If there are none with opposing Fleets, roll for another event. If more than one, one player rolls the die. If even, the Roman player picks the hex; if odd, the Carthaginian player. If a player has more than one Fleet, his choice as to which Fleet will participate. Resolve a Naval Battle (13.53) using steps 1 to 3 only; there are no retreats. The Fleets remain in place throughout. This event may occur more than once per GT.
Macedonian War Table Adjustments
DRM: +/-? The difference in the number of Roman and Carthaginian squadrons in their largest Fleet adjacent to/in the Mare Adriaticum. Treat an Admiral as a squadron, a notable one as two. DRM minimum/maximum is -4/+4.
Replace the following table entries:
- DR 0 or less: Macedonians smash Roman fleet: Eliminate 80% of the largest Roman Fleet adjacent to/in the Mare Adriaticum. Roll for Leader Casualty if one present.
- DR 1: Macedonians surprise Roman fleet: Eliminate 30% of the largest Roman Fleet adjacent to/in the Mare Adriaticum. Roll for Leader Casualty if one present. Fleet is Scattered.
- DR 2: Macedonians win naval skirmish: Eliminate 10% of the largest Roman Fleet adjacent to/in the Mare Adriaticum. Roll for Leader Casualty if one present.
- DR 13: Romans Win Naval Battle: Romans receive 2 Squadrons; place with the largest Roman Fleet adjacent to/in the Mare Adriaticum. No Crew Rating adjustment. +2 DRM to the next DR (only) on this table.