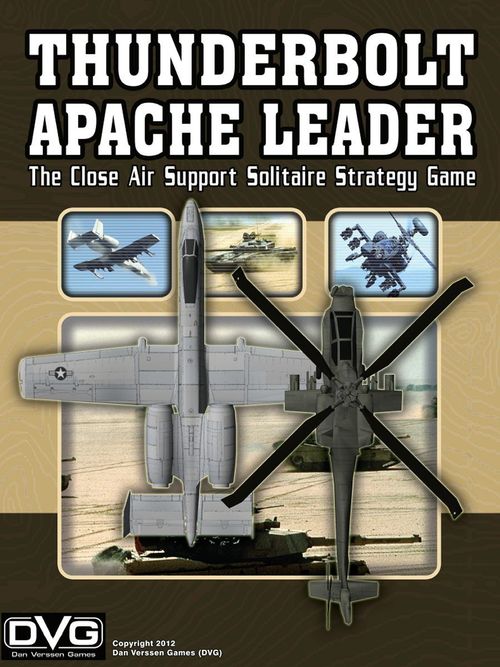
Thunderbolt Apache Leader
Thunderbolt Apache Leader Rulebook
Table of Contents
Table of Contents
Sequence of Play
This rulebook is organized according to this Sequence of Play.
Campaign Set-Up
- Campaign Preparation
- Select Campaign Card
- Select Situation Card
- Battalion Cards
- Buy Aircraft
- Buy Scout Counters
- Select Pilots
- Adjust Pilot Skill Levels
- Pilot Promotion Priority
- Place SO Point and Day Counters
Start of Day
- Special Condition
- Allocate Pilots and Aircraft
- Allocate Scouts
Mission Resolution
Target-Bound
- Abort Mission Option
- Arm Aircraft
- Target-Bound Mission Event
- Engine Damage Checks
- Place Terrain Hexes
- Place Enemy Units
- Place Friendly Aircraft
- Scout Success Check
- Place Loiter Counter
Battlefield Resolution
- Draw Pop-Up Counters
- Enemy Cover Roll
- Fast - Altitude, Move/Attack
- Enemy Attacks
- Slow - Altitude, Move/Attack
- Advance Loiter Counter
- Place Bingo Fuel Counters
Home-Bound
- Adjust Battalion Strength Counter
- Home-Bound Mission Event
- Bingo Fuel Checks
- Crashed Pilot SAR Check
- Record Pilot Stress
- Record Pilot Experience Points
- Record Mission Victory Points
End of Day
- No Fly Stress Recovery
- Gain Special Option Points
- Move Enemy Battalions
- Lose Special Option Points (Map)
- Replacements
- Repair Aircraft
End of Campaign
Optional Rules
Credits
Aircraft and Ordnance
Sample Game
Introduction
You are the squadron commander of a modern day Close Air Support (CAS) squadron.
Your squadron will carry out CAS missions against enemy battalions in hot spots and war zones around the world from the 1980's to the present day.
Each of your missions will involve operational and tactical decisions. The aircraft you choose and how you allocate your weapons is as vital to your campaign's success as the enemy battalions you choose to attack. Once over the battlefield, you'll have your hands full dodging enemy AAAs and SAMs while you rain destruction on the enemy forces.
You must balance your strategic and tactical priorities if you hope to be successful.
Campaign Set-Up
Campaign Preparation
Tactical Display
Place the Tactical Display Sheet in front of you on the table. Use this sheet to resolve the Battlefield portion of each Mission. This sheet shows the Sequence of Play, the Sector Map, Battlefield Information, and has areas to organize your cards.
Cards
Separate the cards by type: Aircraft Cards, Pilot Cards, Campaign Cards, Situation Cards, Battalion Cards, Special Condition Cards, and Mission Event Cards.
Form a Special Condition Card deck, and a Mission Event Card deck and shuffle each deck. Place them on their labeled areas on the Tactical Display Sheet. When you need to draw a card and no cards remain in the deck, shuffle the discards to form a new deck.
Aircraft Cards, Pilot Cards, Campaign Cards, and Situation Cards are card types you select from as you make choices.
Place the Assault, Support, and Command Battalion Cards to the side for future use.
Air Base Sheet
Place the Air Base Sheet near the Tactical Display Sheet. This sheet has helpful reference charts and general information you will need to play the game as well as areas to place your Aircraft Cards and Pilot Cards that are not on a Mission.
Player Log
Use the information you record on the Player Log to determine Pilot Promotion, Special Option Point expenditures, Battalion status, Pilot and Aircraft Status, and Victory Points earned. Photocopy this Sheet or download it from www.dvg.com.
The Die
Whenever a die roll is called for in the game, roll a ten-sided die (d10). This will generate random numbers from 1 to 10. Some dice have numbers ranging from 1 to 10, others range from 0 to 9. Treat the die's "0" face as being a "10".
End of a Campaign
The Campaign ends when you complete the last Day of your Campaign, or when there are no more Battalions to Attack, or when you must pay a Special Option Point and cannot do so.
Select Campaign Card
Choose the Campaign Card you would like to use and place it on the Air Base Sheet. We recommend starting with the Iraq Introductory Campaign Card.
These cards show your current Campaign success rating, the amount of Battalion Card Victory Points you will be Attacking, the Terrain Hexes used, and any specific notes that affect the Campaign.
The parts of a Campaign Card are as follows:
1 - Country Name
2 - Year of the Campaign
3 - Difficulty Level
The difficulty Levels from easiest to hardest are: Introductory, Standard, Advanced, and Expert.
4 - Evaluation
The Victory Point chart shows how well you are doing in the Campaign. You score Victory Points (VPs) when you Destroy Enemy Battalions. As you play the Campaign, compare the number of Victory Points you have earned to the Evaluation chart on the Campaign Card.
5 - Set-Up
This number shows the total value of Battalion Card Victory Points you randomly draw at the start of a Campaign.
6 - Terrain
Each Campaign Card lists the 10 specific Terrain Hexes used during its Campaign.
7 - Special Notes
Each Campaign has a Notes section that details special instructions for that Campaign.
If the Special Note on a Campaign Card or Special Condition Card directs you to "Remove 'No Enemy' Pop-Up Counters", remove the specified number of Pop-Up Counters with a "No Enemy" back side from the Campaign.
Record the name of the Campaign Card you selected on the Player Log.
Gather Terrain Hexes
Gather the 10 Hexes listed on your Campaign Card and place them next to the Tactical Display Sheet. Place the unused Hexes off to the side, you will not use them during the Campaign.
Select Situation Card
Choose the Situation Card you would like to use and place it on the Air Base Sheet. We recommend starting with the Surge Situation Card.
These cards show information specific to your chosen type of conflict.
The parts of a Situation Card are as follows:
1 - Situation Name
2 - Starting SO Points
Each Situation Card specifies the number of Special Option Points (SO Points) you have at the beginning of the Campaign.
You can purchase Weapons, Aircraft, Aircraft Repairs, and Priority Options with your Special Option Points. SO Points may also be expended during Special Conditions and Mission Events. The Weapon costs are found on the Weapon Counters. The Priority costs are found on the Air Base Sheet. The Aircraft costs are found on the Aircraft Cards.
3 - Days
You have the designated number of Days to complete this Campaign.
Record the number of Days on the Player Log.
4 - Daily SO Points
At the end of each Campaign Day, gain this number of SO Points.
5 - Tactical Situation
Each Situation has specific rules that modify your Campaign.
6 - Description
A flavorful description of your overall Situation.
Record the name of the Situation Card you selected on the Player Log.
Each Situation Card specifies the number of Special Option Points available at the beginning of a Campaign. Record that number on the Player Log.
Battalion Cards
Battalion Cards detail your Mission objectives and the Enemy Units present.
The parts of a Battalion Card are as follows:
1 - Battalion Name
2 - Battalion Designation
This corresponds to a Battalion Counter which will be placed on the Sector Map of the Tactical Display Sheet.
3 - Enemy Units
This area lists the number and types of Enemy Units present in the Battalion.
4 - Victory Point (VP) Value
This number shows the Victory Points (VPs) you earn by Destroying this Battalion Card.
5 - Half / Destroyed Values
Each Battalion Card has a set of numbers in [brackets]. The Battalion is reduced to Half if the value of Enemy Units remaining on the Battlefield is reduced to the first number. The Battalion is Destroyed if the value of Enemy Units remaining on the Battlefield is reduced to the second number or lower.
The Point value of each Enemy Unit Counter is in its top-left corner.
Example: This SCUD Counter is worth 3 Points.
Example: If, at the end of the Mission there are 6 to 20 Points of Enemy Unit Counters remaining on the Battlefield, the Battalion is reduced to Half strength. If there are 5 or fewer Points remaining, the Battalion has been Destroyed.
6 - Special Notes
Any special conditions specific to this Battalion Card are displayed here. Unless the note specifies otherwise, Special Notes only affect the Battalion's Card.
When you reduce a Battalion's strength from Full to Half, ignore its Special Notes for the remainder of the Campaign. Do not ignore Notes that refer to Destroying the Battalion. Example: Do not ignore Notes that allow you to gain Experience Points after Destroying the Battalion.
Battalion Trait Words
Many Battalion Cards have trait words in their Special Notes area.
All - This text applies to ALL Battalions until this Battalion is reduced to Half or Destroyed.
Fixed - This Battalion does not move during the Move Enemy Battalions phase. Fixed Battalions have a Building graphic on their counters. Fixed Battalions remain Fixed, even when at Half.
Range Band - The Battalion starts the Campaign in the noted Range Band. This may then be further modified by the Situation Card.
XP - When you Destroy this Battalion Card, give each Pilot assigned to the Mission the bonus number of Experience Points, even if the Pilot was Killed during the Mission. Record the Experience Points on the Player Log.
Determine and Place Battalions
Separate the Battalion Cards into three decks: Assault, Support, and Command.
Draw Battalion Cards from the Battalion decks one at a time in the following order: Assault, Assault, Support, Command. Repeat the cycle as needed. Accumulate their VP values until you reach or exceed the Set-Up value on your Campaign Card.
Once you draw a Battalion Card and its Victory Point value brings your total equal to, or in excess of, the Campaign's Set-Up value, stop drawing Battalion Cards. The Battalion Cards drawn, including the last card drawn, are part of your Campaign.
Example: While setting up for an Iraq 1991 Campaign, I draw the following Battalion Cards: 8A (2VP), 1A (5VP), 4S (3VP), 5C (4VP), 4A (3VP), 9A (3VP), and 1S (6VP). I stopped drawing Battalion Cards because I reached or exceeded 25 Victory Points worth of Battalions.
Set aside the remaining Battalion Cards, you will not use them during the Campaign.
Find the Battalion Counters that have the same Battalion Designations as the Battalion Cards appearing in your Campaign.
Place the Battalion Counters on the Tactical Display Sheet's Sector Map. The Battalion counters are placed with their Full side facing up.
Each Battalion is designated as either an A (Assault), S (Support), or C (Command).
Unless otherwise stated on the Battalion Card:
Place Assault Battalion Counters in the Front Line Range Band.
Place Support Battalion Counters in the Enemy Transit Range Band.
Place Command Battalion Counters in the Enemy Rear Range Band.
Some Situation Cards and Battalion Cards adjust the placement of Battalion Counters on the Sector Map.
Example: A Command Battalion would usually be placed in the Enemy Rear Range Band, however, Command Battalion 6C has a Special note to place it in the Friendly Transit Range Band.
Campaign Cards and Situation Cards adjust the Battalion Counters after any Battalion Card adjustments.
Place the Campaign's Battalion Cards on the Tactical Display Sheet in the Battalion Deck area.
Buy Aircraft
There are several types of Aircraft Cards: A-10A, A-10C, AH-64A, AH-64D, F-16, AV-8B, AC-130, AH-1, RQ-1, and MQ-1.
Check the Aircraft Descriptions at the end of this rulebook for special rules not found on Aircraft Cards for the following Aircraft Types: AC-130, RQ-1 and MQ-1.
Select Aircraft
Select the Aircraft Cards you would like to have in your Squadron. You can only select Aircraft that have a Service Year that is the same or earlier than the Year of your Campaign. The SO Point cost for each Aircraft is noted on its card.
You should save some of your SO Points for purchasing other resources, such as Scouts, Weapons, and Aircraft Repairs.
The parts of an Aircraft Card are as follows:
1 - Aircraft Number
Aircraft numbers are for reference purposes.
2 - Aircraft Type
The military designation for the Aircraft.
3 - Cannon Rating
Aircraft can Attack Enemy Units with their Cannons.
4 - Special Option Points
Expend this number of SO Points when you purchase this Aircraft at the start of the Campaign.
5 - Year of Service
The first year the aircraft was put into service by the military.
6 - Structural Hits to Crash
The number of Structural Hits the Aircraft can suffer before Crashing.
Example: The A-10 above can suffer 3 Structural Hits without a problem. It Crashes when it suffers a 4th Structural Hit.
7 - Weapons and Special Notes
The types of Weapons this Aircraft can carry. Only Weapon types shown on the Aircraft Card may be loaded onto the Aircraft. Any Special Notes pertaining to this Aircraft are also noted in this area.
Example: The A-10C above gives the Pilot +1 to all Strike, Cannon, and Stand-Off Attacks. The Aircraft is also Linked.
8 - Weight Points
The maximum number of Weight Points the Aircraft can carry in Weapons, Fuel Tanks, or ECM Pods. You may arm your Aircraft with fewer Weight Points.
Record on the Player Log the SO Points you spent on Aircraft. Record each Aircraft and its Aircraft Number in the lower area of the Player Log. This area is also where you will note any damage the Aircraft suffers.
Buy Scout Counters
Scout Aircraft increase the duration your Aircraft can spend over the Battlefield. Pay 1 SO Point for each Scout Counter you buy.
Place your purchased Scout Counters on the Scout square on the Sector Map.
Record the SO Points you spent on Scout Counters on the Player Log.
Subtract the SO Points spent on Aircraft and Scouts from the SO Points originally given to you by your chosen Situation Card.
In the Start of Mission SO Points area, record how many SO Points are still remaining for the first Day of the Campaign.
Select Pilots
Select the Pilot Cards you would like to have in your Squadron.
Each Pilot Card has two sides that show different Experience Levels for the Pilot. Each Pilot Name has 3 cards with a total of 6 Skill Levels.
Choose 1 Average Skill Level Pilot for each Aircraft Card in your Squadron, plus 1 additional Average Pilot for each Aircraft type in your Squadron. Do not choose Pilots for Unmanned Aircraft (RQ-1 and MQ-1) and do not count Unmanned Aircraft as an Aircraft type when choosing additional Pilots.
Example: I chose 1 A-10A Thunderbolt, 1 A-10C Thunderbolt, 1 AH-64D Apache, and 1 MQ-1. I get to select 3 Thunderbolt Pilots and 2 Apache Pilots.
Example: If I had chosen an all A-10 Squadron, I would get 1 A-10 Pilot for each Aircraft, plus 1 extra A-10 Pilot.
Example: If I had chosen A-10s, AH-64s, AV-8Bs, and AH-1s, I would gain Pilots for each of the Aircraft I purchased, plus an extra A-10 Pilot, an extra AH-64 Pilot, an extra AV-8B Pilot, and an extra AH-1 Pilot.
If you do not have enough Pilot cards for a specific type of Aircraft to have 1 extra Pilot, select an extra Pilot for one of your other Aircraft types.
Find the Aircraft Counters that have the same Pilot names as the Pilot Cards you selected. Place the counters near the Tactical Display Sheet.
The parts of a Pilot Card are as follows:
1 - Pilot Name
Each Pilot Card has a corresponding Aircraft Counter. Use these counters on the Battlefield during Missions.
2 - Skill Rating
From lowest to highest, the Pilot Skills are: Newbie, Green, Average, Skilled, Veteran, and Legendary.
3 - XP (Experience Points)
The number of Experience Points the Pilot must earn to be Promoted to his next higher Skill Level.
4 - Aircraft Type
The military designation for the Aircraft. A Pilot can only fly the Aircraft type listed on his card.
Example: Shadow can fly AH-64As and AH-64Ds.
5 - Aircraft Name
The name of the Aircraft type the Pilot can fly.
6 - Speed
Fast or Slow. A Fast Pilot Attacks before the Enemy Attacks each turn. A Slow Pilot Attacks after the Enemy Attacks each turn.
7 - Cannon/Strike
Use this number to modify Weapon and Cannon Attacks targeting Enemy Units in the same Terrain Hex as the Aircraft.
8 - Stand-Off
Use this number to modify Weapon Attacks targeting Enemy Units that are not in the Aircraft's Terrain Hex.
9 - Cool
Cool removes Stress from the Pilot.
10 - Evasive
If the Pilot has the Evasive Skill, reduce the severity of the Attacks targeting the Aircraft. The Evasive Skill also affects Ridge Evasion rolls and reduces the Damage suffered by an Aircraft Card due to Mission Events.
11 - Status
Okay, Shaken, or Unfit. This is based on the Pilot's current Stress Points.
12 - Stress
Pilots suffer Stress when they fly Missions. Pilots also suffer Stress when suffering Enemy Attacks.
If a Pilot's Stress falls into the "Okay" range, he uses his normal Skill Values. The Okay range on the sample card is 0 to 7.
Pilots exceeding the Okay range become Shaken. Pilots exceeding the Shaken Range become Unfit.
Adjust Pilot Skill Levels
All Pilots join the Squadron with an Average Skill Level. You may choose to change the Skill Levels for the Pilots in your Squadron. One Pilot may increase by a Skill Level, but another must decrease by a Skill Level. Adjust any Pilots in your Squadron as many Skill Levels as you would like. Each increase must be matched with an equal decrease.
Example: I increase AH-1 Pilot Scuttle upward by 2 Skill Levels to Veteran, and decrease A-10 Pilot Pirate downward by 2 Skill Levels to Newbie.
Example: I increase AH-64 Pilot Hammer up to Legendary, and decrease AH-1 Pilot Freak, AH-64 Pilot Eagle, and A-10 Pilot Thor each down to Green.
Pilot Promotion Priority
During Set-Up, you may spend SO Points to immediately Promote one or more of your Pilots to his next higher Skill Level.
When you use Pilot Promotion Priority, you do not reduce another Pilot's Skill Level when you Promote a Pilot.
Pay 1 SO Point for each Skill Level improvement. You can Promote a Pilot more than once.
Example: I choose to use Pilot Promotion Priority to increase Shadow from Average to Veteran and Gator from Green to Skilled. I pay 4 SO Points and use the Shadow Veteran card and the Gator Skilled Card in my Campaign.
If you purchase Priorities, note the expenditure of SO Points on the Player Log in the SO Points (other) area.
Record the Pilot Names, Skill Levels, XPs needed for Promotion, and Cool Points on the Player Log.
Place SO Point and Day Counters
Place the Special Option Counter on the SO Points Track to show your current SO Points. If you have more than 15 SO Points, use the "+15" side of the counter. Keep track of your available SO Points using this track.
Place the Day Counter on the "1" box on the Days and SO Points Track on the Tactical Display.
Set-Up Complete
This completes the Set-Up portion of the rules. You are now ready to start flying Missions.
Start of Day
Perform the following steps each Day of the Campaign.
Special Condition
Draw a Special Condition Card from the deck on the Tactical Display Sheet and follow the Card's directions.
Unless the card text says otherwise, the Special Condition applies to all of the Missions flown during the Day.
Allocate Pilots and Aircraft
Choose which Battalions you will Attack during this Campaign Day. Then, select the Pilots and Aircraft from your Squadron that will Attack each Battalion and place their cards together for later use. Each Pilot assigned to a Mission must be paired-up with an Aircraft Card he is allowed to fly. Each Aircraft assigned to a Mission must have an appropriate Pilot. Do not assign Pilots to Unmanned Aircraft.
Place a Shaken -2 counter on each Pilot that begins the Mission with a Shaken Status.
You may not assign Unfit Pilots to a Mission.
Example: On Day 1, I choose to fly 2 Missions. I choose to send Scuttle and Grandpa in two AH-1s, Pirate in an A-10 and Hammer in an AH-64 to Battalion Target 12A. I also want Freak and Eagle and their Aircraft to Attack 9A. I place each Battalion Card with the assigned Pilots and Aircraft near the Tactical Display Sheet.
Select the Mission you would like to fly first for the Day. Write the number of the first Target Battalion you have chosen to Attack on the Player Log in the Battalion Target box. Place the Battalion Card you have chosen to attack in the Target Card box on the Tactical Display Sheet.
Allocate Scouts
Place your Scout Counters on any of the Battalion Counters you have chosen to Attack.
Each Scout may only be used for one Mission per Day, and you may only assign one Scout to each Battalion.
A Scout has a chance of giving your Aircraft extra turns over the Battlefield and reducing the Stress suffered by your Pilots flying the Mission.
Mission Resolution
Perform all of the following steps for a Mission before moving on to the next Mission. Repeat these steps for each Mission.
Target-Bound
This represents the time when the Aircraft are preparing for the Mission until they reach the Battlefield.
Abort Mission Option
You may decide to abort a Mission and not fly it. If you do so, the Aircraft and Pilots cannot be reassigned to a different Mission, and do not gain the No Fly Stress Recovery bonus.
Pilots do not gain Stress from an Aborted Mission.
Arm Aircraft
Allocate Weapons, ECM Pods, and Fuel Tanks to each of the Aircraft you've selected for this Mission. The specific Weapons you choose will depend on the combat role you expect each Aircraft to perform during the Mission. The number and types of Weapons your Aircraft can carry is limited by the Aircraft types, the Weight Points your Aircraft can carry and the Special Option Points you are able to spend on Weapons.
Each Aircraft is limited by which Weapon Counters it is allowed to carry. The list of allowed Weapon Counters is printed on each Aircraft's Card.
The counter mix limits the Weapons that you can choose for a Mission. All Weapon Counters are available for selection each Mission. The counters used for one Mission do not prevent them from being used during the next Mission.
The Range Band you are Attacking may have a Weight Point penalty. An Aircraft Attacking a Battalion in the Enemy Transit Range Band or the Enemy Rear Range Band will have fewer Weight Points available due to the necessary extra fuel it will use to get to the Range Band.
Example: If you were Attacking a Battalion in the Enemy Transit Range Band, each Aircraft suffers a -2 Weight Point penalty. An A-10 Thunderbolt, which can usually carry 14 Weight Points, would only be able to carry 12 WPs.
Fueling Priority
You can choose to purchase the Fueling Priority option during the Arming Step. Having Fueling Priority reduces the Mission's Weight Point penalty to -0 WPs for all Aircraft flying the Mission. Pay 1 SO Point to choose this option for each Mission.
If you purchase the Fueling Priority, note the expenditure of 1 SO Point on the Player Log in the SO Points (other) area.
Types of Weapons
There are five Weapon types: Air to Air, Air to Ground, Fuel Tanks, ECM Pods, and Cannons.
Air to Air Weapons (AIM-9s and AIM-92s) can only be fired against Helicopters. These counters have yellow stripes as a visual reminder that they are Air to Air counters.
All other Weapon Counters are Air to Ground and can Attack Ground Targets, but not Helicopters.
Weapon Characteristics
Each Weapon Counter in the game has the following characteristics:
Weight Points: Each Weapon has a Weight Point cost. An Aircraft can only carry as many Weight Points of counters as are stated on its Aircraft Card.
Example: The Mk. 83 has a Weight Point cost of 2.
Example: The AV-8B can hold up to 10 WPs of Weapon Counters.
Ordnance Point Cost: Each Weapon, ECM Pod, or Fuel Tank has an Ordnance Point Cost printed next to its Weight Point Cost. Every group of 10 Ordnance Points (or fraction thereof) assigned to a Mission costs 1 SO Point.
Example: I have selected a combined total of 32 Ordnance Points for my 3 Aircraft flying the Mission. This costs 4 Special Option Points, so I move the Special Option Counter down the Track by 4 boxes.
Example: The Mk. 83 has an Ordnance Point cost of 0.
Attack Number: Roll this number or higher to successfully Hit an Enemy Unit.
Example: The Mk. 83 has an Attack Number of 4.
Maximum Attack Range (black): The maximum distance the Weapon can travel to Attack an Enemy Unit.
Example: The LAU-61 can Attack at range 0 or 1.
Cannot Attack Range (red): If the Weapon Counter cannot Attack at a specific range, it will be shown in red next to the black range information.
Example: The AGM-114 cannot Attack at range 0, but it can Attack at ranges 1 or 2. It cannot Attack at ranges beyond 2.
High Altitude Attacks: The Weapon can only be used by an Aircraft at High Altitude.
Example: The GBU-12 can only be used by an Aircraft at High Altitude.
High and Low Altitude Attacks: The Weapon can be used by an Aircraft at High or Low Altitude.
Example: The Mk.20 can be used by an Aircraft at High or Low Altitude.
V (Vehicle) or B (Building): This Weapon can only be used against Vehicles or Buildings.
Example: The AGM-65 can only be used against Vehicle and Building Units.
Independent (I): The weapon can attack a Unit outside the one Hex being attacked by your Aircraft, provided that Unit is in the Aircraft's Attack Angle.
Example: You declare that your A-10 will attack Units in the Hex directly in front of the A-10. GBU-12's can attack Units in that Hex, as well as Units in the same Hex as your A-10.
Hex Attack [x]: Roll an Attack against all the Units in the Hex.
Example: When you drop a Mk.20 in a Hex, roll an Attack against each Unit in the Hex.
Expend (Retain) x(x): This Weapon has a chance of being retained when resolving its attack. Roll a die for its Attack and modify the die roll as normal. If the modified result is less than the first number, the Attack fails and the weapon is expended. If the modified result is equal to the first number, but less than the second number, the Unit is Destroyed and the weapon is expended. If the modified roll is equal to, or greater than, the second number, the Unit is Destroyed and the weapon is retained for use by a future Attack.
Example: I have an LAU-61 loaded onto my A-10 and I need to destroy a AAA Site. My Pilot has a +1 Skill. I roll a 2 and add 1 for my Skill. My modified roll is a 3. I expend the rocket and do not Destroy the AAA Site.
Example: I have an LAU-61 loaded onto my A-10 and I need to destroy a Tank. My Pilot has a +1 Skill and the Tank has a modifier of -2. I roll a 6 and add 1 for my Skill but subtract 2 for the Tank's modifier. My modified roll is a 5. I expend the rocket and Destroy the Tank.
Example: I have an LAU-61 loaded onto my A-10 and I need to destroy a SCUD. My Pilot has a +1 Skill. I roll a 7 and add 1 for my Skill. My modified roll is an 8. I keep the rocket to use again during another Attack, and Destroy the SCUD.
ECM Pod: ECM Pods are not expended like other Weapons. They remain with the Aircraft throughout the Mission and are always in effect. Each time the Aircraft is Attacked by an Enemy Unit or Helicopter or when reacting to a Special Event Attack when Weapon Counters can be expended to reduce the number of Special Event Attacks, roll a die for the ECM Pod before drawing the Hit Counters. Negate each Card's or Unit's Attack on a roll of 7 or higher. Each Aircraft can only carry 1 ECM Pod. Roll for the ECM Pod's success before using a Pilot's Evasive Skill.
Example: An A-10 carrying an ECM Pod is Attacked by a AAA Site. I roll an 8 for my ECM Pod and negate all 3 Light Hits.
Fuel Tank: Each Aircraft can carry 1 Fuel Tank Counter. In doing so, the Aircraft's Loiter time over the Battlefield is extended by 2 Turns. You can place a second counter of any type on the Loiter Track as a reminder.
Example: If Aircraft are permitted 5 Loiter Turns, Aircraft with Fuel Tanks would place a counter on the 7.
Once you purchase a Weapon Counter, place it on an Aircraft. The Special Option Points used to purchase Weapons are spent, even if the Weapons are not expended during the Mission.
Example: This loaded A-10C is currently holding 14 WPs of Weapons and using 8 Ordinance Points. If this Aircraft was attacking a Battalion alone, I would spend 1 SO Point for its Weapons. If the Aircraft was flying with other Aircraft, I could use the 9th and 10th Ordnance Points on other Aircraft without having to pay an additional SO Point.
Once your Aircraft are armed for the current Mission, record the number of SO Points you spent on the Player Log and the SO Points Track.
Cannons
In addition to the Weapon Counters you load on the Aircraft. Aircraft are also equipped with Cannons.
Cannon Attack Numbers are found on the Aircraft Card. There is no Ordnance cost to use a Cannon.
In Air-to-Ground combat, Cannons may be used to Attack a Unit in the same Hex as the Aircraft. The Aircraft can be at High or Low Altitude. A successful Attack will Destroy the engaged Unit. Use the Pilot's Cannon Skill to modify the Attack. In Air-to-Air combat, Cannons may be used to Attack Helicopters in the same Hex as the Aircraft. When Attacking a Helicopter, the Aircraft may be at High or Low Altitude. Use the Pilot's Cannon Skill to modify the Attack.
Target-Bound Mission Event
Draw a Mission Event card, and apply the effects of the top section.
Unless an Event card states otherwise, Events only apply to the Aircraft/Pilots participating in the Mission. Unless an Event states otherwise, immediately apply its effect.
A Pilot's Evasive Skill reduces the Hits inflicted on his Aircraft by Mission Events.
Engine Damage Checks
Each Aircraft that is suffering from unrepaired Engine Damage must roll a die for each unrepaired Engine Damage. On a roll of 2 or less the Aircraft Crashes. If an Aircraft Crashes, remove the Aircraft Card from the Campaign, and roll for Pilot SAR at the end of the Mission.
Place Terrain Hexes
Terrain Hexes are used as placement areas for the Enemy Units.
Each Mission, shuffle the 10 Terrain Hexes and place them face up on the 10 Hex spaces on the Tactical Display sheet. Each Hex has an arrow. Place the Hexes on the Display Sheet with all arrows pointing to the top of the Sheet.
The 10 Hexes form your Battlefield each Mission.
Place Enemy Units
The quantity and type of Enemies present are known, however their Hex locations on the Battlefield are not known until you reach the Target.
Each Battalion Card shows the number and type of Enemy Units you will draw for the Mission.
Enemy Units have two sides, an Active side and a Destroyed side. The Destroyed side has a red band across its name.
Roll a die for each Enemy Unit to determine its Hex placement. Place each Enemy Unit Counter on the Battlefield with its Active side up.
Half Battalions
If a Battalion is at Half Strength due to a previous Attack, place only 1/2 of each Unit type listed on the Battalion Card.
Example: For this card, you would only place: 2 AAAs, 4 APCs, 1 Command, 5 Infantry, and 2 Trucks.
Enemy Units
Each Enemy Unit Counter represents one vehicle, structure, or group of soldiers.
Point Value: The counter's value toward the destruction of its Battalion.
Attack Type / Attack Number: The number indicates the number of Hit Counters the Unit inflicts when Attacking an Aircraft. Units with a yellow background inflict Light Hits. Units with a red background inflict Heavy Hits.
Attack Range: The maximum number of Hexes the Unit can Attack Aircraft from. If the Unit does not have a Range value, it can only Attack Aircraft in its same Hex.
Unit Type: This is used when being Attacked by Aircraft. A "V" indicates it is a Vehicle Unit. Some Weapons can only Attack Vehicle "V" Units. A "B" indicates it is a Building Unit. Some Weapons can only Attack Building "B" Units. Some Units also have a number next to their Unit Type. Modify Aircraft Attack die rolls by this number.
Unit Name: The name of the Unit.
AAA: An Anti-Aircraft Artillery vehicle specializing in destroying aircraft with its guns. It inflicts 2 Heavy Hit Counters out to a range of 1 Hex. Value: 2
AAA Site: An Anti-Aircraft Artillery gun emplacement (Building) specializing in shooting down aircraft with its guns. It inflicts 3 Light Hit Counters out to a range of 2 Hexes. Value: 2
APC: An Armored Personnel Carrier vehicle specializing in transporting ground troops into combat environments. It inflicts 1 Light Hit Counter within its same Hex. Value: 1
Building: A general purpose structure. It inflicts 1 Light Hit Counter within its same Hex. Subtract 4 from Aircraft Attacks against the Building. Value: 3
Command: A mobile command vehicle tasked with controlling local forces. It inflicts 2 Light Hit Counters out to a range of 1 Hex. Value: 4
Helicopter: An attack helicopter. It inflicts 2 Heavy Hit Counters out to a range of 1 Hex. Moves with a Speed of 1. Value: 3
Infantry: A squad of soldiers. It inflicts 1 Light Hit Counter out to a range of 1 Hex. Value: 1
SAM: A Surface-to-Air Missile vehicle specializing in shooting down aircraft. It inflicts 2 Heavy Hit Counters out to a range of 3 Hexes. Value: 3
SCUD: A vehicle that launches large surface-to-surface missiles. Value: 3
SPA: A Self-Propelled Artillery vehicle. Value: 2
Storage: A general purpose storage Building. It inflicts 1 Light Hit Counter within its same Hex. Value: 2
Tank: A main battle vehicle. It inflicts 1 Light Hit Counter within its same Hex. Subtract 2 from Aircraft Attacks against the Tank. Value: 2
Truck: A general purpose transport vehicle. It inflicts 1 Light Hit Counter within its same Hex. Add 2 to Aircraft Attacks against the Truck. Value: 1
Place Friendly Aircraft
Place your Aircraft Counters that are participating in this Mission. Each Aircraft can start in any one of the 8 edge Terrain Hexes (1, 2, 3, 4, 7, 8, 9, or 10). More than one Aircraft may begin in a Hex.
Select the initial Altitude for each Aircraft Counter by flipping their counters to the desired High or Low sides.
The Speed of each type of Aircraft is shown on the Tactical Display Sheet. Aircraft with a minimum Speed of 0 can Hover. Aircraft with a minimum Speed of 1 or higher cannot Hover.
Example: An A-10 must move at least 1 Hex each turn, and can move up to 2 Hexes.
Example: An AV-8B can move 0 (Hover), or move up to 2 Hexes each turn.
Moving Aircraft
This applies to Aircraft that either must move, or to an Aircraft that can Hover that you want to move. Place the Aircraft on one of its starting Hex edges, facing the Hex you want it to move into during its first turn.
Aircraft that must move are: A-10, F-16, AC-130, RQ-1, MQ-1
Hovering Aircraft
This applies to Aircraft that can Hover, and that you want to Hover during their first turn. Designate an Aircraft as Hovering by placing it in the middle of its Hex.
Aircraft that can Hover are: AH-64, AH-1, AV-8B
Example: The AH-64 is moving and must enter the Hex it is facing during its next move. The AV-8B is Hovering.
Ridges
The sides of some Hexes contain Ridges. A Ridge is an area of high ground that interferes with a Low Altitude Aircraft's flight path.
If you place an Aircraft on a Hex edge with a Ridge, the Aircraft must start the Mission at High Altitude.
Scout Success Check
If you allocated a Scout to this Mission, roll a die and consult the Scout Table on the Tactical Display Sheet.
The roll will result in the loss of the Scout Counter, gaining extra Loiter Turns over the Battalion, or gaining extra Turns and reducing the Stress suffered by the Pilots flying the Mission.
Example: I assigned a Scout to my 1A Mission. I roll a die and get a 5. I can spend 7 Loiter Turns, instead of the normal 5, over the Battlefield.
Example: I assigned a Scout to my 1A Mission. I roll a die and get a 10. I can spend 9 Loiter Turns, instead of the normal 5, over the Battlefield and at the end of the Mission, I can remove 1 Stress from each Pilot assigned to the Mission.
A Scout does not participate in the battle. Return its counter to the Scout box following its die roll. If the Scout is Lost, remove the Scout Counter from the Campaign. If the Scout isn't Lost, it can be used again during the next Day.
Place Loiter Counter
Each Mission begins with 5 Loiter Turns. Place the Loiter Counter on the 5 Box on the Tactical Display Sheet's Loiter Time Track. Adjust the counter's placement on the Loiter Track based on the success level of the Scout roll, if a Scout was assigned.
Aircraft carrying Fuel Tanks at this time gain 2 extra Loiter Turns over the Battlefield.
Battlefield Resolution
During each Loiter Turn, resolve the following steps. Use the Loiter Turn Counter to keep track of the current Turn.
Draw Pop-Up Counters
Pop-Ups are Enemy targets that are not part of the Battalion card. Place all Pop-Up Counters into an opaque cup.
For each Aircraft at High Altitude during this step, draw one Pop-Up Counter. If the counter reads "No Enemy" it has no effect. Return it to the cup. If the counter has an Enemy Unit on its back side, roll a die and place the counter in the Battlefield Hex designated by the die roll.
Pop-Up Counters have a red triangle in the top left corner to distinguish them from Enemy Units belonging to the Battalion Card. Pop-Up Counters have no Victory Point value toward Halving or Destroying the Battalion.
As you Destroy each Pop-Up Counter, return it to the cup.
The RQ-1, MQ-1, and AC-130 can fly at High Altitude without drawing Pop-Up Counters.
Enemy Cover Roll
Roll a die and consult the Enemies Going to Cover table on the Tactical Display Sheet. Each result may affect some of the Enemy Units (including Pop-Up Units) on the Battlefield.
Cover Rolls
1 - No Units move to Cover this Turn.
2-3 - Move all Units in the same Hexes with Aircraft to Cover.
4-5 - Move all Units in Hexes with Destroyed Units to Cover.
6 - Move all Infantry Units in all Hexes to Cover.
7 - Roll a die. Move all the Units in that Hex to Cover.
8 - Select 1 Unit in each Hex to move to Cover.
9 - All the Units in the Hex with the most Active Units go to Cover. If there is more than 1 Hex with the highest number of Active Units, you may choose from those Hexes. An Active Unit is any Unit that has not been Destroyed, including Buildings.
10 - Select any 1 Hex. Move all the Units in that Hex out of Cover.
When a Unit goes to Cover, place the Enemy Unit on any Ridge in the Unit's Hex. If the affected Hex does not have a Ridge, the selected Enemy Unit may not go to Cover and the Unit remains out of Cover.
You may choose which Unit takes Cover in a Hex if there is more than 1 Unit in the Hex.
A Unit in Cover may not be Attacked by Stand-Off Attacks. It can only be Attacked by Strike and Cannon Attacks.
"B" (Building) Units never take Cover.
Enemy Helicopters move to Cover like a normal ground Unit. If you later move a Helicopter that is in Cover, it automatically emerges from Cover.
To remove a Unit from Cover, move it off the Ridge.
Fast - Altitude, Move/Attack
Pilots with a Speed rating of Fast, move and Attack before the Enemy Attacks each turn.
Pilots with a Speed rating of Slow, move and Attack after the Enemy Attacks each turn.
Resolve the Turn for each Fast Aircraft before moving on to the next Fast Aircraft. Once all Fast Aircraft have acted, move on to the Enemy Attack step.
Altitude
Before an Aircraft moves or Attacks, you must select its Altitude for the Turn. The Aircraft will keep this Altitude throughout its Turn and until the start of its next Turn.
Flip the Aircraft Counter to its High or Low side.
Aircraft Movement
You may decide on your Aircraft's movement one Hex at a time. You do not need to declare its movement ahead of time.
If an Aircraft is on a Hex edge, it must move into the Hex it is facing. When the Aircraft enters the new Hex, move it to any Hex edge except the edge it just entered through. Moving into a Hex counts as 1 movement of an Aircraft's Speed.
Example: Thor's A-10 uses 1 movement to move to the edge of the adjacent Hex, then a second movement to move to the edge of a second Hex, ending on the edge facing the Hex it will enter on its next Turn.
If the Aircraft can move at Speed 0, it can Hover. If an Aircraft goes into a Hover, place it in the middle of the new Hex instead of a Hex edge.
If an Aircraft started its turn in the middle of a Hex (Hovering), it can remain Hovering, or it can move to any edge of its Hex as its first movement. Moving from a Hover to a Hex edge counts as 1 movement of an Aircraft's Speed.
If an Aircraft moves to a Hex edge that does not lead to another Hex, it will leave the Battlefield on its next movement. If an Aircraft exits a Hex edge and leaves the Battlefield, remove it from the Battlefield portion of the Mission. It will rejoin the other Aircraft flying the Mission during the Home-Bound step.
Moving and Ridges
Aircraft at High Altitude enter and cross over Ridges without danger.
Example: Thor's A-10 would not roll for Ridge Evasion because it is at High Altitude.
Aircraft at Low Altitude must roll for Ridge Evasion each time they enter a Hex edge with a Ridge during their movement. Do not roll for a Ridge that the Aircraft starts its turn on top of.
Example: Thor's A-10 would roll for 1 Ridge Evasion.
Ridge Evasion
Roll a die and consult the Ridge Evasion chart on the Tactical Display Sheet. Add 1 to the roll for each Point of the Pilot's Evasive Skill. Subtract 1 from the roll for every Point of Stress the Pilot has.
The result will inflict Stress Points on the Pilot, and may cause the Aircraft to Crash.
The Aircraft Crashes if the roll results in Stress Points that make the Pilot Unfit.
Roll for each Ridge the Aircraft enters when it crosses the Ridge. Immediately apply the Stress to the Pilot before he enters another Ridge. The Stress from one Ridge Evasion does modify the die roll for the next Ridge Evasion.
Example: Thor's A-10 is moving twice and must perform 3 Ridge Evasion die rolls.
Aircraft Attacks
An Aircraft can Attack at any one time during its movement. An Aircraft can Attack before it moves, or the Aircraft can Attack after moving into any Hex during its movement.
Example: An Aircraft Attacks before it moves, and then conducts its movement.
Example: An Aircraft moves, Attacks, and then moves again.
Example: An Aircraft performs all its movement, and then Attacks.
You must declare the target of all Attacks before rolling for any of them.
When you expend Weapons or Attack an Enemy Unit with Cannons, roll a die for each Attack and look at the Attack number on the Weapon Counter. Cannon Attack numbers are found on the Aircraft Cards. If the modified die roll is equal to or greater than the Attack number, a Hit is scored on the Enemy. Remove each fired Weapon Counter from the Aircraft.
One Hit Destroys an Enemy Unit Counter. When you Destroy a Unit, flip the counter to its Destroyed side.
Modifiers
If a Pilot is Attacking with his Cannon, use his Cannon Skill to modify the die roll.
If a Pilot is Attacking with Weapon Counters against Units in his same Hex, use his Strike Skill to modify each die roll.
If a Pilot is Attacking with Weapon Counters against Units in a different Hex, use his Stand-Off Skill to modify each die roll.
Some Enemy Unit Counters also have an Attack modifier on their counter.
Example: When Gator makes a Stand-Off Attack with a BGM-71 he needs to roll the Attack Number of 7 or higher. His 1 Point of Stand-Off Skill lets him add one to his die roll. If he were Attacking a Truck, he would get to add 2 more to his die roll. He would Hit the Truck on a roll of 4 or higher.
Attack Restrictions
An Aircraft is limited to which Enemy Units it may Attack based on its current position, Altitude, and Weapons load. Each Turn a Pilot may declare the Enemy Unit Counters in only one Terrain Hex to be the targets of his Attack (unless he is using Independent weapons).
Moving Aircraft Attack Angle
Moving Aircraft can only Attack an Enemy Unit Counter if it is within the Aircraft's Attack Angle. The Attack Angle diagram is on the Tactical Display Sheet.
Only the lighted areas are within an Aircraft's Attack Angle.
Hovering Aircraft Attack Angle
A Hovering Aircraft can Attack into its own Hex or into any other one Hex in any direction.
Attack Choices
When an Aircraft is ready to Attack, declare the Enemy Units in the Terrain Hex targeted for Attack and the Weapon Counters to be expended, or declare if the Attack will be made with Cannons.
Attack the Enemy Units in your same Hex with any and all Weapon Counters, provided the Enemy Units are in range of the Weapon and your Aircraft is at the proper Altitude.
Example: There are 2 APCs and a Truck in your Hex. You drop 2 Mk.82s on one APC, a Mk.83 on the other APC, and fire an LAU-61 at the Truck.
OR
Attack the Enemy Units in a different Terrain Hex with any and all Weapon Counters, provided the Enemy Units are in the same Hex, in range of the Weapons, your Aircraft is at the proper Altitude, the Unit is in the Aircraft's Attack Angle and the Enemy Unit is not in Cover.
Example: There are 3 Tanks and a Helicopter in an adjacent Hex. 1 of the Tanks is in Cover. You fire 1 AGM-114 at a tank, 1 AGM-65 at another Tank, and an AIM-9 at the Helicopter. You may not Attack the Tank that is in Cover.
OR
Attack one Enemy Unit with Cannons, if it is in your same Terrain Hex.
Example: There is a SPA in your Hex. You fire your Cannon at it.
OR
Attack all the Enemy Units with your Cannon if your Aircraft is in the same Terrain Hex as the Enemy Unit Counters, and your Aircraft is Hovering.
Example: Your AH-1 is Hovering in a Hex with 1 Infantry, 1 APC, and 1 Helicopter. You roll a Cannon Attack against each.
Line of Sight
Ridges on Hex edges block Line of Sight for Aircraft at Low Altitude and for Enemy Units. An Aircraft at Low Altitude cannot Attack an Enemy Unit through a Ridge. An Enemy Unit cannot Attack an Aircraft flying at Low Altitude through a Ridge.
Ridges do not affect the Line of Sight of Aircraft at High Altitude. Ridges do not affect the Line of Sight of Enemy Units Attacking Aircraft at High Altitude.
Trace the shortest path through the Hexes connecting the Attacker's Hex to the target. If there is more than one equally direct path, the Attacker chooses the path that will give it a Line of Sight to the target.
If the path is blocked by a Ridge at any point, the Attacker's Line of Sight is blocked.
Example: Shadow's Apache can trace 2 legal paths to the APC. One is blocked, the other is clear. The Apache can Attack the APC.
Example: The Apache cannot Attack the Infantry.
Example: The Apache has 2 possible paths to the Building, but both are blocked.
Linked Aircraft
Some Aircraft (A-10C, AH-64D, MQ-1, and RQ-1) have the Linked capability.
If any Linked Aircraft over the Battlefield have an Enemy Unit in Line of Sight, all Linked Aircraft are considered to have that Unit in Line of Sight.
This capability does not extend Weapon ranges or alter Attack Angles, it only prevents Ridges from interfering with an Attack.
Example: A-10C Aircraft Card 551 (Piloted by Thor) and AH-64D 890 (Piloted by Shadow) are both Linked Aircraft at low altitude. Ridges block Shadow's Line of Sight to the Building, but Thor does have Line of Sight on the Building. Since the two Aircraft are Linked, the Ridge does not block Shadow's Line of Sight to the Building.
Enemy Attacks
Enemy Helicopter Movement
Move Enemy Helicopters at the start of the Enemy Attack phase.
Helicopters do not use Altitude. They move through Ridges without harm, but Ridges do block Line of Sight for Attacks involving Low Altitude Aircraft.
Use the following rules to determine if and where a Helicopter moves:
If there are one or more Aircraft within the Helicopter's Attack range and Line of Sight, the Helicopter does not move.
If no Aircraft are within the Helicopter's Attack range, but they are within the Helicopter's Line of Sight, move the Helicopter one Hex closer to the closest Aircraft. If there is more than 1 Aircraft equally close, randomly determine which Aircraft it moves toward.
If there are no Aircraft in the Helicopter's Line of Sight, do not move the Helicopter.
Once you move all Enemy Helicopters, conduct Enemy Attacks.
After Fast Aircraft Attack, all surviving Enemy Units Attack. The Altitude and range to the player's Aircraft limits which Aircraft each Unit can Attack.
Each Enemy Unit may only Attack one Aircraft each Loiter Turn. A Unit automatically targets the closest Aircraft it is allowed to Attack. If more than one Aircraft is equally close, randomly determine which one is Attacked.
Determine which Aircraft each Enemy Unit will Attack before resolving any of their Attacks.
Place all the Hit Counters into an opaque cup.
Draw all the Hit Counters against an Aircraft at the same time. Resolve their effects before drawing the counters for the next Aircraft. Return the Hit Counters to the cup before drawing for the next Aircraft.
Example: The APC cannot Attack because it has a range of 0 and there are no Aircraft in its Hex. The AAA can Attack either Shadow's Apache or Thor's A-10 (which is at High Altitude) because they are equally close and it has a Line of Sight to both. It does not have Line of Sight to Divot's Harrier. There are no Aircraft in range of the Building. The Infantry cannot Attack because it does not have Line of Sight to Shadow's Apache and the other Aircraft are out of its range. The SAM can only Attack Thor's A-10 because it does not have Line of Sight to the Apache or Harrier. The Tank Attacks Shadow's Apache.
I roll a die to randomly determine who the AAA Attacks. The AAA Attacks the Apache.
The Harrier suffers no Attacks. The Apache suffers 2 Heavy Attacks (from the AAA) and 1 Light Attack (from the Tank). The A-10 suffers 2 Heavy Attacks (from the SAM).
Evasive Skill
If a Pilot has Evasive Skill, decrease the number of Hits by the amount of his skill. Evasive Skill also adjusts the number of Hits an Aircraft will take from Mission Event Cards.
Each Point of Evasive Skill can be used to cancel 1 Light Hit or reduce 1 Heavy Hit to a Light Hit (which can then be canceled if the Pilot has a second Point of Evasive Skill.)
Example: If a Pilot has Evasive 1 Skill, negate one Light Hit result or reduce a Heavy Hit result to a Light Hit result.
Example: If a Pilot has Evasive 2 Skill, two Light Hit results will be negated, or two Heavy Hit results could be reduced to Light Hit results, or 1 Light Hit will be negated and 1 Heavy Hit result will be reduced to a Light Hit result.
Adjust the number of Hits before drawing Hit Counters.
Attack Resolution
Enemy Units inflict Hits on Aircraft with either Light Hits (the yellow side of the Hit Counter) or Heavy Hits (the red side of the Hit Counter). The Attack Number on the Enemy Unit specifies how many Hit Counters are drawn.
Example: An Aircraft being attacked by a AAA Enemy Unit would draw 2 Heavy Hit Counters.
Example: An Aircraft being attacked by a Tank Enemy Unit would draw 1 Light Hit Counter.
If the Hit Counter has the same Aircraft Type across the top of the counter as the Aircraft taking the Hit, disregard the counter.
Example: An A-10 is taking 3 Light Hits. You draw the following counters: Your A-10 will only take a Pylon Hit and a Structure Hit. The 1 Stress Hit is ignored.
If a Hit Counter has an asterisk (*), it means the Aircraft has suffered a Lasting Damage that will remain with the Aircraft until Repaired.
Example: The Pylon and Structure* Hit Counters above are Lasting Damage Hit Counters.*
Instant Hits
Apply the effects of these Hit counters, and then immediately return them to the cup.
No Effect: The counter has no effect.
Killed: The Pilot is Killed and the Aircraft Crashes.
Stress: Use Stress Counters to record the amount of Stress suffered by your Pilots. When a Pilot suffers Stress, immediately place a Stress Counter on his Pilot card showing the amount of Stress he has suffered.
If a Pilot's Stress falls into the "Shaken" range, he suffers -2 on all the Attacks he makes. When a Pilot's Stress exceeds the Shaken range, he becomes Unfit.
When a Pilot becomes Unfit, remove all Weapons (not ECM Pods or Fuel Tanks) from the Aircraft, and the Pilot can no longer Attack.
Temporary Hits
Place these Hit Counters next to the affected Aircraft's Counter. Return them to the cup at the end of the Aircraft's next Turn.
Altitude: Immediately change the Aircraft's Altitude. The Aircraft must remain at this Altitude until the end of its next turn. The Aircraft ignores any additional Altitude Hits suffered until this counter is removed at the end of the Pilot's next turn. If the Hit changes the Aircraft to Low Altitude and the Aircraft is over a Ridge, roll for Ridge Evasion.
Attack -1 or -2: If the Aircraft Attacks during its next turn, subtract 1 or 2 from its rolls.
No Cannon Attacks: The Aircraft cannot perform Cannon Attacks during its next Turn.
No Hover: If the Aircraft is Hovering, immediately move it to any edge of its Hex. You may adjust its Altitude. Whether Hovering or not, the Aircraft may not Hover until the end of its next Turn. If the Hit moves the Aircraft to a Hex edge with a Ridge, and the Aircraft is at Low Altitude, roll for Ridge Evasion.
No Stand-Off Attacks: The Aircraft cannot perform Stand-Off Attacks during its next Turn.
No Strike Attacks: The Aircraft cannot perform Strike Attacks during its next Turn.
Hits Resulting in Lasting Aircraft Damage
When an Aircraft suffers Lasting Damage, return the Hit Counter to the cup, and place the appropriate Damage Counter on the Aircraft. An Aircraft can suffer from the same type of Damage more than once. All Damage effects are cumulative. The Damage Counter mix does not limit the Damage an Aircraft can suffer. If you run out of counters, use some other counter to note the Lasting Damage.
Hit Counters have an asterisk (*) after the Damage type to designate they are Lasting Damage.
Lasting Damage remains with the Aircraft until it is Repaired.
Example: An Aircraft has suffered a Pylon and 2 Engine* Hits. Place a Pylon and 2 Engine Damage Counters on the Aircraft.*
The Aircraft can carry 2 Weight Points less than normal and must roll 2 Engine Check rolls during Target-Bound steps if the Damage is not repaired.
Bullet Holes*: This result affects future Missions, not the current Mission. A Pilot suffers 1 Stress at the time he is assigned to an Aircraft for each Bullet Hole Damage present on the Aircraft.
Cannon*: Subtract 2 from the Aircraft's Cannon rolls.
Controls*: Subtract 2 from the Aircraft's Ridge Evasion rolls.
Display*: Subtract 2 from the Aircraft's Stand-Off rolls.
Engine*: Aircraft must perform an Engine Damage Check die roll to avoiding Crashing during Target-Bound steps.
HUD*: Subtract 2 from the Aircraft's Strike (not Cannon) rolls.
Pylon*: Reduce the maximum Weight Points of counters the Aircraft can carry by 2, including the Weight Point penalty the Aircraft is suffering due to the Target Card's Range Band. Discard counters if needed to meet the new limit.
Example: An A-10 can normally carry 14 WPs of Counters. It is flying a mission in a -2 WP penalty Range Band. It suffers a Pylon Hit. It can now only carry 10 WPs of Counters.
Structure*: The Aircraft is one step closer to Crashing.
Wounded*: The Pilot suffers 4 Stress and cannot Attack. The Pilot cannot have his Stress reduced until the Wounded Counter is Repaired by paying 1 SO Point during the Repair Aircraft phase. If the Pilot suffers a second Wound while Wounded, he is Killed and the Aircraft Crashes. Place a Wounded Counter on the Pilot card, instead of the Aircraft card.
Unmanned Aircraft Hits
The following Hit Counters have no effect on Unmanned Aircraft: Stress, Wounded, Bullet Holes, HUD, and Cannon.
A "Killed" Hit Counter causes an Unmanned Aircraft to Crash.
Slow - Altitude, Move/Attack
After Fast Aircraft move and Attack, and Enemy Units Attack, Slow Aircraft move and Attack.
Use the same procedure as for the Fast Aircraft.
Advance Loiter Counter
Move the Loiter Counter down the Track by 1 space.
Place Bingo Fuel Counters
If an Aircraft is still in a Hex when the Loiter Counter is moved into the "Bingo 6+" square, place a Bingo 6+ Counter on the Aircraft Card.
If an Aircraft is still in a Hex when the Loiter Counter is moved into the "Bingo 10+" square, flip the Bingo 6+ Counter to its Bingo 10+ side.
If an Aircraft is still in a Hex when the Loiter Counter is moved past the "Bingo 10+" square, the Aircraft immediately Crashes.
Aircraft with a Bingo Counter will make a Bingo Fuel Check during the Home-Bound Flight.
Repeat Battlefield Resolution Steps
Return to the start of the Battlefield Resolution Rules.
Repeat the Battlefield Resolution steps for the next Loiter Turn. Continue to conduct Turns until there are no Aircraft in a Hex.
Home-Bound
Adjust Battalion Strength Counter
If the Battalion was Destroyed during the Mission, remove the Battalion Counter from the Sector Map and set the Battalion Card aside until the Campaign is over.
If the Battalion was reduced to Half, flip the Battalion Counter to its Half side.
Record the final Status of the Battalion. If the Battalion was Destroyed during the Mission, record an "X" in the Target Status and write the number of Victory Points (VPs) for the Battalion Card on the VPs Gained line.
If the Battalion was reduced to Half, place a 1/2 on the Battalion Status line, and gain 1/2 of the Victory Points for the Battalion, rounding down. If you later Destroy the Battalion, gain its remaining VPs.
Example: You Half a 5 VP Battalion and gain 2 VPs. You later Destroy it and gain the remaining 3 VPs.
If you fail to reduce the Battalion to Half or Destroy the Battalion, place an "F" in the Battalion Status and record a 0 (zero) on the VPs Gained line.
Home-Bound Mission Event
Draw an Event Card and resolve the Event in the bottom section.
A Pilot's Evasive Skill reduces Hits inflicted on his Aircraft by Mission Events.
Bingo Fuel Checks
Roll a die for each Aircraft with a Bingo Fuel Counter.
If the roll is equal to, or higher than, the Bingo number, the Pilot suffers no additional Stress.
If the roll is less than the Bingo number, the Pilot suffers 1 Stress for each point he failed the roll by.
Example: The Aircraft has a Bingo 10+ Counter. The roll is a 3. The Pilot suffers 7 Stress.
Crashed Pilot SAR Check
After resolving the Home-Bound Event, check the Crashed Pilot Search And Rescue, or SAR (pronounced "sar") results, for any Aircraft that Crashed during the Mission. This is done by rolling a die, modifying the result, and comparing it to the table below. The table is also found on the Air Base Sheet. Roll one die for each Crashed Aircraft.
Do not roll for Crashed Unmanned Aircraft.
Do not roll for Pilots who suffered a "Killed" Hit Counter.
Roll — Result:
5- — Killed. Pilot cannot be used again during the Campaign.
6-7 — Dangerous Recovery. The Pilot rejoins the Squadron after suffering normal Mission Stress, plus 6.
8 — Recovered. The Pilot rejoins the Squadron after suffering normal Mission Stress, plus 4.
9+ — Fast Recovery. The Pilot rejoins the Squadron after suffering normal Mission Stress, plus 2.
Modify the SAR check die roll as follows:
- Add 1 to the roll for each Weight Point of Weapon Counters expended, (including ECM Pods and Fuel Tanks). These Weapon Counters may be expended for this roll by any Aircraft flying the Mission. This modifier only applies to the current SAR die roll, not for all SAR die rolls.
- Add 2 to the roll if the Aircraft Crashed during the Target-Bound step.
- Add 1 if the Aircraft Crashed during the Home-Bound step.
Example: During the Mission, 2 of my 3 Pilots were shot down. Shadow was shot down during the Target-Bound step, and Pirate was shot down during the Battlefield Resolution step. Viper remains unharmed and still carries a Mk.83 Weapon Counter.
I choose to expend the Mk. 83 (2 Weight Points) from Viper for Shadow's SAR roll. I roll a die and get a 5. I add +2 to the roll for the expended Mk. 83 and +2 more because Shadow was shot down during the Target-Bound step. Shadow's Search and Rescue result is a 9. He has a Quick Recovery. I place 2 more Stress Points on his Pilot Card and return him to the Squadron.
Viper does not have any more Weapon Counters to use for Pirate. I roll a 4 for Pirate's Search And Rescue result. Pirate is Killed. I remove his Pilot and Aircraft Card from the Squadron for the rest of the Campaign.
Record Pilot Stress
Record the current number of Stress Points for each Pilot on the Player Log, in the column for the current Mission.
Do not track or record Stress for Unmanned Aircraft.
Each Pilot that flew the Mission suffers Stress based on the Battalion's Range Band.
Example: All Pilots who fly a Mission in the Enemy Transit Range Band suffer 2 Stress Points.
Reduce a Pilot's Stress Points by his Cool Skill. This number was also written on the Player Log at the start of the Campaign.
Example: A Pilot started a Mission with 3 Stress. He suffered 1 Stress during the Mission and he has a Cool of 2. He ends the Mission with 2 Stress.
Record Pilot Experience Points (XPs)
XPs are given to all Pilots assigned to a Mission. Give each Pilot who flew the Mission 1 Experience Point in the XP's Gained column on the Player Log, even if he Crashed or was Killed.
You can also gain Experience due to Battalion Cards, or Mission Event Cards.
If the Battalion was Destroyed, each Pilot assigned to the Mission gains 1 additional Experience Point.
If every Unit in the Battalion was Destroyed (excluding Pop-Ups), each Pilot assigned to the Mission gains 1 additional Experience Point.
Damaged Aircraft
Record the Lasting Damage suffered by each Aircraft on the Player Log for that Aircraft, then remove the Damage Counters from each Aircraft Card.
Destroyed Aircraft and Lost Pilots
Lose 1 Victory Point for each of your Aircraft that Crashed during the Campaign.
Lose an additional 1VP for each of your Pilots that suffered a Killed result.
Do not lose Victory Points for the loss of Unmanned Aircraft.
Promoting Pilots
Check for Pilot Promotions after recording all Mission Experience Points.
Promote a Pilot if his Experience Point total is equal to or greater than the Experience Point number shown on his card. If a Pilot is Promoted, exchange his card for his next higher Pilot Skill Level card and note his new Experience Level on the Player Log.
Pilots Promote from: Newbie to Green, Green to Average, Average to Skilled, Skilled to Veteran, and Veteran to Legendary.
Example: Green Skill Level Divot just completed a successful Mission, gaining 2 XPs. He previously earned 3 XPs. This brings his new total to 5. He Promotes from Green to Average.
If a Pilot is Promoted, recheck his Stress Points total to determine if he is Okay, Shaken, or Unfit. Also check to see if his Cool rating changed, and record his new Cool on the Player Log.
Once a Pilot is Promoted, he loses the Experience Points that gained him the Promotion. Record the new number of Experience Points he must earn to reach the next Skill Level on the Player Log.
Example: Green Divot only needed 4 Experience Points to Promote to Average, but he earned 2 during the Mission. 1 Point is added to his previous 3 XPs to Promote to Average, and the other Point is retained and counted toward his Promotion to Skilled.
Record Mission Victory Points
Record the Victory Points earned from the Mission on the Player Log Sheet.
If there are more Missions scheduled for the Day, return to the Mission Resolution Step.
End of Day
No Fly Stress Recovery
Any Pilot that does not participate in a Mission during an entire Day recovers 2 Stress Points. If the Pilot has a Cool rating, add that number to the number of Stress Points the Pilot recovers.
Example: Pirate has suffered 8 Stress from previous Missions. On Day 3 he is not assigned to a Mission. Pirate remains on the Air Base Sheet and recovers 2 Stress, plus he recovers 1 more Stress because of his Cool rating. He begins Day 4 with 5 Stress.
Gain Special Option Points
Consult your Situation Card to see how many SO Points you gain.
Record the new SO Points on the Player Log in the +Daily SO Points box and on the Track.
Move Enemy Battalions
Roll a die for each surviving Enemy Battalion and consult the chart on the Tactical Display Sheet in the Enemy Information section.
The rolls determine if the Battalion Advances one Range Band closer to your Air Base, Holds position, or Retreats one Range Band toward the Enemy Rear. Battalions will not retreat behind their Enemy Rear Range Band or past the Air Base Range Band.
Never roll for Fixed Battalions. They always remain in their starting Range Bands.
Lose Special Option Points (Map)
Lose 1 SO Point for each Enemy Battalion in the Friendly Rear Range Band.
Lose 3 SO Points for each Enemy Battalion in the Air Base Range Band.
Record the lost SO Points on your Player Log.
If you are unable to pay the SO Points, the Campaign ends in failure.
Replacements
Aircraft
This is useful when an Aircraft has Crashed or has suffered massive Lasting Damage. You can pay 2VPs to replace the Aircraft with a new Aircraft of the same type. If needed, you may use the same physical Aircraft Card to represent the new Aircraft. You may replace more than one Aircraft during this step. You may not increase the number of Aircraft in your Squadron.
You may not Replace an Aircraft if you have 0 or fewer VPs.
Salvage
If you are Replacing an Aircraft that did not Crash, you can Salvage it for parts to Repair an Aircraft of the same type. If the Salvaged Aircraft did not suffer a Damage of the types listed here, you can freely Repair one of each Damage type from the Aircraft you are replacing.
Salvageable parts: HUD, Display, Controls, Engine, Cannon, Pylon.
Example: You are Salvaging (replacing) A-10A 231. It did not suffer Display, Controls, or Cannon Damage. Your A-10A 233 has 1 Display Damage and 1 Controls Damage. You may freely Repair the Display and Controls Damage on A-10A 233.
Pilots
This is useful when a Pilot has been Killed or has suffered massive Stress. You can pay 1VP to replace the Pilot with a new Pilot of the same Skill Level and flying the same type of Aircraft. The card mix does limit Pilot replacement. You can only replace the Pilot if there is a new Pilot Name that was never part of your Squadron. You may replace more than one Pilot during this step. You may not increase the number of Pilots in your Squadron.
You may not Replace a Pilot if you have 0 or fewer VPs. You may not adjust the Pilot's Skill Level or use Pilot Promotion Priority.
Repair Aircraft
You may use SO Points to Repair Aircraft. One SO Point removes one Damage Counter from an Aircraft. An Aircraft that has not Crashed may fly a Mission, regardless of its Damage.
Record your remaining SO Points in the next Start of Mission SO Points box on the Player Log.
Advance Day Counter
Move the Day Counter 1 box along the Days and SO Points Track.
If there are more days in your Campaign, return to the Start of Day section of the Sequence of Play.
End of Campaign
Campaign Outcome
After all Missions are resolved for the Campaign's last Day, find your Campaign result on the Campaign Card. Compare your total Victory Points to the numbers listed on the Campaign Card you were playing.
Example: If you were playing a Libya 2011 Campaign, and earned 19 Victory Points, you would have earned a Good Campaign Victory outcome.
Optional Rules
At the start of a Campaign, decide which Optional Rules you want to use and note them on the Player Log.
If you purchase Optional Rules, note the expenditure of SO Points on the Player Log in the SO Points (other) area.
Random Squadron Selection
Instead of selecting your Pilots, randomly determine them. Form all the selectable Aircraft Cards (based on Year of Service) into a deck. Shuffle the deck and randomly draw an Aircraft Card and pay the SO Points for the Aircraft. Draw another Aircraft and decide if you want to pay for it. Continue to draw Aircraft Cards until you decide you do not want to purchase any more Aircraft.
Randomly Draw Average Skill Level Pilots specific to the Aircraft you purchased, using the normal Pilot Rules of 1 Pilot per Aircraft plus 1 Pilot per Aircraft type.
Adjust your Pilots or use the Pilot Promotion Priority as normal.
If you select this option, gain 4 extra SO Points.
High Stress Attacks
Before any Pilot performs an Attack for the Loiter Turn, you can decide to gain +1 on all his Attack rolls for the Turn. The Pilot suffers 1 Stress Point each Turn this is used. If you select this option, pay 2 SO Points.
Priority R&R
Once at the end of each Day, you may spend 2 SO Points to remove 2 Stress plus the Pilot's Cool from every Pilot in your Squadron.
Example: You pay 2 SO Points for R&R. All your Pilots recover 2 Stress. Each Pilot with a Cool of 1 recovers 3 Stress.
Single Weapon Attacks
When you declare an Attack involving an AGM-65, AGM-114, AIM-9 or AIM-92, you may declare that you are only using one of the two weapons represented by the Counter. Apply a -2 penalty to the Attack roll. Save the other weapon for a future attack. Rotate the Counter 90 degrees as a reminder that the Counter now represents only a single weapon. The future single-weapon Attack also suffers a -2 penalty. You may also conduct 2 single-weapon Attacks with an unreduced Counter. Both Attacks suffer a -2 penalty and can target the same or different Units in the same Hex. If you select this option, pay 1 SO Point.
Aircraft and Ordnance
Aircraft
A-10A: The single seat A-10 Thunderbolt II was designed to counter the Soviet tank threat during the Cold War. At a time when aircraft were flying higher and faster, the A-10 took tank busting in a radical new direction. The Thunderbolts flew low and slow, "down in the weeds". This gave them plenty of time to identify and destroy enemy vehicles and infantry. To survive in that environment, the A-10 was built rugged with internal armor and a titanium "bath tub" surrounding the cockpit. A-10s were quickly given the nickname of "Warthog" for their toughness.
A-10C: The A-10C is an upgrade that replaced the A-10A's original analog cockpit instruments with digital instruments. It also added enhanced communications and sensor equipment that ties each A-10C into the computerized integrated battlefield.
Special Rules: A-10Cs have the Linked capability. A-10Cs add 1 to their Pilot's Cannon/Strike and Stand-Off Skills.
AH-1: The twin seat AH-1 Cobra was designed as a dedicated attack helicopter during the Vietnam War. Since then, it has been upgraded multiple times and continues to serve.
AH-64A: The two seat AH-64A Apache was designed for the WWIII battlefields of Europe to defend against the might of the USSR and the Warsaw Pact. The goal was to improve upon the aging AH-1 design by creating a more lethal and survivable close support attack helicopter.
AH-64D: The AH-64D features the iconic mast-mounted radar dome on top of the main rotor. This allows the Apache to create a radar map of the surrounding battlefield to guide its weapons.
Special Rules: AH-64Ds have the Linked capability. AH-64Ds add 1 to their Pilot's Cannon/Strike and Stand-Off Skills.
AV-8B: The single seat Harrier is capable of taking-off and landing vertically. This made the aircraft a perfect choice to operate from small deck shore assault carriers, unfinished airfields, and rough forward bases.
F-16: The single seat Fighting Falcon was designed to be a lightweight low-cost fighter to counter the massive numbers of Soviet aircraft during the Cold War. It is one of the most widely exported aircraft in the world. It has since been adapted to a close air support role.
Special Rules: Add 2 to the F-16's Attacks when Attacking a Helicopter.
AC-130: The AC-130 is a converted C-130 cargo plane with a crew of 13. The Spectre is armed with a 25mm Gatling gun, 40mm cannon, and 105mm Howitzer. All these weapons are pointed out of the fuselage on the left side and angled downward to attack enemy ground forces.
Special Rules: The AC-130 can only fly at High Altitude. Do not draw a Pop-Up for the AC-130 being at High. A Cannon* Hit only affects one of its 3 Cannons. Randomly determine which Cannon is affected. Ignore Altitude Hits, Pylon Damage, and HUD Damage.
Instead of the normal Attack Angle, the AC-130 can only Attack into its 2 left side Hexes. The AC-130 does not carry Weapon Counters and does not suffer from Weight Point penalties. The AC-130 Attacks with all 3 of its Cannons each turn, and can target Units in one or both of its side Hexes each turn using Stand-Off Attacks. The high Evasive ratings on its Pilot Cards are due to its very high altitude and built-in counter-measures. AC-130s cannot Attack Helicopters or Units in Cover.
RQ-1: The RQ-1 is a UAV "Unmanned Air Vehicle". It is the size of a fighter plane and controlled via remote control from a control center anywhere in the world. These aircraft specialize in scouting and surveillance.
Special Rules: If the RQ-1 is at High Altitude, treat all your Pilots as being Fast. Do not draw a Pop-Up for the RQ-1 being at High. The RQ-1 is an unmanned Aircraft and does not use a Pilot. Do not lose 1VP when an RQ-1 Crashes. You can use an RQ-1 as a Scout instead of sending it on a Mission. RQ-1s have the Linked capability. The Predators do not carry Weapon Counters and do not suffer from Weight Point penalties. The RQ-1 does not have a Cannon.
MQ-1: The MQ-1 is the armed version of the RQ-1.
Special Rules: If the MQ-1 is at High Altitude, treat all your Pilots as being Fast. Do not draw a Pop-Up for the MQ-1 being at High. The MQ-1 is an unmanned Aircraft and does not use a Pilot. Do not lose 1VP when an MQ-1 Crashes. You can use an MQ-1 as a Scout instead of sending it on a Mission. MQ-1s have the Linked capability. The Predators can carry up to 2 AGM-114 counters and do not suffer from Weight Point penalties. The MQ-1 does not have a Cannon.
Ordnance Counters
Air to Air Missiles (AtA Weapons)
AIM-9 Sidewinder: The Sidewinder has been used by US aircraft since the 1950s. It is a heat-seeking weapon that homes in on the heat produced by engine exhaust.
AIM-92: The Stinger was developed from the shoulder-launched anti-aircraft missile system deployed by ground forces.
Air to Ground Weapons (AtG Weapons)
Mk. 20 Rockeye: As the bomb approaches the ground, the outer casing breaks open, scattering hundreds of hand-grenade sized bomblets over an area the size of a football field.
Mk. 82 Iron Bomb: This category represents a wide variety of close range ground attack weaponry in the 500-pound weight range. These weapons are unguided.
Mk. 83 Iron Bomb: These weapons are a larger version of the Mk. 82. Each weighs 1000 pounds.
AGM-65 Maverick: The Maverick is a rocket-powered precision-guided missile that has been in use since the 1970s.
GBU-16: The GBU-16 is based on the 1000 pound Mk. 83. The GBU (Guided Bomb Unit) adds a laser seeker head and guidance fins to convert the unguided bomb into a precision weapon.
GBU-12: The GBU-12 is based on the 500 pound Mk. 82.
LAU-61: These rocket pods hold unguided rockets. Each tube holds 19 rockets.
LAU-68: The LAU-68 is much like the LAU-61, but the tube is smaller, holding only 7 rockets.
BGM-71: The BGM-71 is a TOW (Tube-launched, Optically-tracked, Wire command data link, guided missile). It was first deployed during the Vietnam War. It is still carried by AH-1s.
AGM-114: The Hellfire is the latest lightweight Air to Ground guided missile to be carried by helicopters and fixed-wing aircraft.
ECM Pods
ECM Pod: This is an electronic counter-measures pod used to defend the Aircraft carrying it from enemy attacks.
Fuel Tanks
Fuel Tanks are detachable munitions that increase the range of Aircraft.
Sample Game
To begin a new Campaign, I select the Iraq 1991 Introductory Campaign Card. I also select the Surge Card for my Campaign's Situation. I place both cards on the Air Base Sheet. I gather the 10 Terrain Hexes listed on the Iraq Card.
I separate the enemy Battalion Cards into 3 decks: Assault, Support, and Command. According to the Iraq Card, I need to draw at least 26 VPs of Battalion Cards. I draw 11A, 4A, 5S, 2C, 3A, 7A, 3S, and 1C. The drawing of 1C equals and exceeds the minimum 26 VPs specified on the Campaign Card. I will be attacking 28 VPs of enemy Battalions.
I place their Battalion counters on the Sector Map on the Tactical Display Sheet with their Full sides face up. I place 11A, 4A, 3A, and 7A in the Front Line Range Band. I place 5S and 3S in the Enemy Transit Range Band, and 2C and 1C in the Enemy Rear Range Band. I consult the Battalion Notes on their cards, and move 7A to the Enemy Transit Range Band, and move 11A to the Friendly Transit Range Band. I place the Battalion Cards on the Tactical Display Sheet.
It is now time to buy the Aircraft Cards for my Squadron. I have 30 Special Option Points to spend based on the Starting SO Points noted on the Surge Card. All the Aircraft Cards must have a Service Year of 1991 or earlier. I purchase A-10A #234 for 8 SO Points, AH-64A #456 for 4 SO Points, AH-64A #459 for 4 SO Points, AH-1 #397 for 2 SO Points, and AH-1 #398 for 2 SO Points. I have spent 20 of my 30 SO Points on Aircraft Cards.
I have the option of purchasing Scouts, and I choose to purchase 2 Scouts for 2 SO Points, 1 SO Point each. I place the Scout counters on the Tactical Display Sheet.
At this point, I select Pilots, all with Average Skill Levels. I will receive 2 A-10 Pilot Cards, 3 AH-64 Pilot Cards, and 3 AH-1 Pilot Cards. For my A-10 Pilots, I choose Pirate and Viper. For my AH-64 Pilots, I choose Hammer, Judge, and Rock. For my AH-1 Pilots, I choose Gator, Grandpa, and Scuttle.
I can adjust Pilot Skill Levels if I like. I choose to increase Gator to Skilled and reduce Pirate to Green.
I can also perform Pilot Promotion Priority. I spend 1 SO Point to advance Pirate back to Average, 1 SO Point to boost Viper to Skilled, and 2 SO Points to advance Rock to Veteran.
I have spent 26 of my 30 SO Points, leaving me with 4 SO Points to start the first Day. I place the SO Points counter and Day counter on their Track on the Tactical Display Sheet. I also record all my Campaign, Pilot, and Aircraft information on my Player Log Sheet. I am now ready to start the Campaign.
I lose 1 SO Point due to the note on Battalion 3S.
I draw the "Enemy Advance" Special Condition Card. I choose to advance Battalion 1C into the Enemy Transit Range Band.
I decide which Battalions I want to attack during the Day, and I allocate Aircraft and Pilots to each. The Campaign will last only 3 Days according to the Surge Card, so I need to make the most of each Day. I choose to attack 11A Tank Leader and 5S Fuel Depot. I attack 11A with Gator (in AH-1 #397), Grandpa (in AH-1 #398), and Hammer (in AH-64 #459). I attack 5S with Judge (AH-64 #456) and Viper (A-10 #234).
I allocate a Scout to each Battalion.
I choose to resolve the 5S Mission first. 5S is in the Enemy Transit Range Band, so my Aircraft suffer -2 Weight Points. I choose not to spend 1 SO Point on Fuel Priority, and accept the penalty. I arm the AH-64 with: 2 AGM-114s and 2 LAU-61s. I arm the A-10 with: 2 Mk.20s, 1 AGM-114, 3 GBU-12s, 1 GBU-16, 1 Mk.82, 1 AGM-65, and 1 ECM Pod. The weapons have a total Ordnance cost of 13, so I pay 2 SO Points.
For my Target-Bound Event, I draw the "High Approach" Card. This means at least one of my Aircraft must start the battle at High Altitude.
I shuffle and place the Hexes. For positions 1 to 10, they are: (4, 7, 1), (12, 13, 18, 3), (9, 11, 14).
I reference the Battalion Card, collect the following Units, and roll a die for each Unit to determine its Hex (Locations 1 to 10): 2 AAA Sites (Hex #2, Hex #7), 2 Buildings (#1, #8), 2 Infantry (#6, #8), 6 Storage (#1, #3, #4, #4, #9, #10), 4 Trucks (#3, #6, #6, #10).
I place the Aircraft counters on the Battlefield. I place Judge in Hex #9 in a Hover at Low Altitude. I place Viper in Hex #8 at High Altitude, because of the High Approach Event, facing Hex #5.
I roll a die for my Scout and it gives me 2 extra Loiter Turns over the Battlefield. I normally receive 5 Turns, but Battalion 5S decreases the Turns by 1 for all Battalions until 5S is reduced to Half or Destroyed. I end up with 6 Loiter Turns. I place the Loiter counter on its Track.
I start the first Loiter Turn by drawing 1 Pop-Up counter because I have 1 Aircraft (Viper) at High Altitude. I draw an APC that will inflict 2 Heavy Hits at a range of 1 during the Enemy Attack phase. I roll a die and place it in Hex #6.
I roll for Enemy Cover and get a 7, One Random Hex. I roll another die to determine which Hex, and get a 10. The Truck goes to Cover, but the Storage does not because it is a Building.
My Fast Pilots now get to act. Viper is Fast. I keep his Altitude at High, move him into Hex #5 (facing Hex #6), and then move him into Hex #6 (facing Hex #7). I declare the following Attacks: I drop 2 Mk.20's in Hex #6, and I fling a GBU-12 into Hex #7. For the 2 Mk.20 Attacks, I get to roll 2 dice against each Unit in the Hex. Viper has a Strike Skill of +1, so I need to roll 5's or higher to succeed. Against the Infantry, I roll a 1 and a 7, Destroying it. Against the APC, I roll a 3 and 5, Destroying it. I return the Pop-Up APC to the Pop-Up cup. I then roll against the Trucks. Trucks have a +2 bonus to be Attacked, so I only need to roll 3's or higher. I roll a 2 and 8 against one, and a 7 and 8 against the other, Destroying both. I flip all the Destroyed Unit counters to their Destroyed sides. Finally, I roll for the GBU-12 Attack against the AAA Site, and roll a 9, Destroying it.
The enemy Units then Attack my Aircraft. The AAA Site in Hex #2 targets Viper. I roll for Viper's ECM Pod and get a 3, failing. The AAA Site inflicts 3 Light Hits and I draw the following Hit counters: 1 Stress (A-10), 1 Structure, and a Bullet Holes. I ignore the Stress, and the A-10 suffers a Structure and Bullet Holes. I place Structure and Bullet Holes Damage counters on the A-10 and return the three Hit counters to the cup. Judge gets attacked by a Storage Unit and an Infantry Unit for a total of 2 Light Hits: Engine (F-16) and No Effect. I place an Engine Damage counter on the AH-64.
My Slow Aircraft get to act. I choose for Judge to remain in a Low Altitude Hover in his Hex. Judge Attacks the Units in Hex #8. He fires 2 AGM-114s at the Building and 1 LAU-61 against the Infantry. His Stand-Off Skill is +0, so I need to roll an 8 to Destroy the Building, because AGM-114s need a 4 to hit, but are at minus 4 due to the Building. I roll a 3 and 9, Destroying it. I roll a 7 against the Infantry, Destroying it, and retaining the LAU-61 for future use.
This ends the first Turn and I advance the Loiter counter.
I draw 1 Pop-Up, get a No Enemy, and return it to the cup.
I roll a 9 for Cover. There are 4 Hexes tied for the most Units with 2 each. I choose to have the roll affect Hex #3. Hex #3 has no Ridges, its Units cannot move to Cover, so the roll has no effect.
Viper acts, and dives to Low Altitude. He moves into Hex #7 (facing Hex #3). He fires an AGM-65 against the AAA Site in Hex #2, Destroying it. Viper then moves into Hex #3 (facing Hex #2).
I have now Destroyed enough Units to reduce the Battalion to Half, but I need to Destroy this Battalion or I will lose the Campaign, due to the condition on the Surge Card.
The enemy attacks. Judge suffers 1 Light Hit for 2 Stress. I place a 2 Stress counter on his Pilot Card. Viper suffers Attacks from a Storage and Truck. I roll for his ECM Pod against each. I roll a 9 against the Storage, negating the Attack, and a 1 against the Truck, failing. I draw a Light Hit counter and get an Attack -1. I place the Hit counter next to his Aircraft counter.
Judge acts, and remains at Low. He fires 2 LAU-61's at the Storage in his Hex. I roll a 9 and 5. Both rolls are good enough to Destroy the Unit, but the roll of a 5 is not good enough to retain the LAU-61, so I discard it. He then moves to an edge in his Hex (facing Hex #10). This moves him onto a Ridge, so I must roll for Ridge Evasion, and roll an 8, minus 2 for his 2 Stress, so the roll becomes a 6, inflicting 2 more Stress on him.
This ends the Turn and I advance the Loiter counter.
I do not draw a Pop-Up counter.
The Cover roll is a 6, and all Infantry move to Cover. All Infantry have already been Destroyed, so it has no effect.
Viper attacks the Truck in his Hex with his Cannon. He needs to roll a 4, -1 for the Hit counter, +1 for his Skill, +2 for the Truck, so I need to roll a 2 or higher, and I roll a 4, Destroying the Truck. I return the Attack -1 counter to the cup. Viper moves into Hex #2 (facing Hex #1). No enemy Units are able to Attack my Aircraft.
Judge climbs to High, moves into Hex #10, and goes into a Hover. Judge Cannons both the Truck and the Storage. I need to roll a 7 against the Storage and a 5 against the Truck, I roll a 2 and a 3, missing both.
This ends the Turn and I advance the Loiter counter to the 3.
During the next few Turns, I receive low Attack rolls, and the Loiter counter is at "Bingo 6+". I reduce the remaining Units to 4 or fewer points, Destroy the Battalion, and my Aircraft have exited the Battlefield.
I move to the Home-Bound phase.
I adjust the Battalion strength by removing its counter from the Sector Map and I place its card off to the side.
I draw the "Enemy Aircraft" Mission Event Card, and Viper and Judge suffer 1 Stress.
I check for Bingo Fuel because my Aircraft stayed over the Battlefield into the Bingo 6+ Turn. Viper rolls a 6, for 0 Stress, and Judge rolls a 2 for 4 Stress.
I record Stress for the Pilots. They both suffer 2 Stress for the Battalion being in the Enemy Transit. Viper ends with 3 Stress. Judge ends with 11 Stress, -2 for his Cool, 9 Stress overall.
I record 3 XP for each Pilot (2 for Destroying the Battalion plus 1 for the note on 5S's Card). Neither Pilot Promotes.
I record gaining 4 VP's for Destroying the Battalion.
I then resolve the second Mission.
I start with Target-Bound, resolve Battlefield Resolution, and then Home-Bound. This mission doesn't go as well. I pay 1 SO Point for Weapons. I end up Destroying the Battalion, but Grandpa Crashes. I roll for SAR, and he is Killed. The loss of the AH-1 and Pilot cost me 2 VP's. I gain 4 VP's for Destroying the Battalion. I now have 6 VP's.
I move to the End of Day phase. I gain 6 SO Points as per the Surge Card. This brings me to 6 SO Points.
Due to the note on the Iraq card, I do not roll for Battalion Movement on the first Day. However, if I did need to roll for Movement, 1C adds 2 to all Battalion Move rolls, and 2C adds 2 to all Assault Battalion Move rolls. The Assault Battalions normally Advance on a 5+, but with the modifiers, they would automatically Advance. I would roll for the Support and Command Battalions at +2.
I decide to Replace Grandpa with Freak, an Average AH-1 Pilot at a cost of 1 VP. Freak begins at Average Skill Level because Grandpa was Average when he was Killed.
I spend 2 SO Points to Repair the following Damage: The Engine Damage on #456 and the Bullet Holes on #234.
I end the Day with 5VP's and 4 SO Points. I then repeat the steps for the next 2 Days. At the end of the third Day, I have gained 17 VP's from Destroying Battalions, and lost 4 VP's due to lost Pilots and Aircraft. This leaves me with 13 VP's, which is enough for a Good Evaluation.
You must balance your strategic and tactical priorities if you hope to be successful.