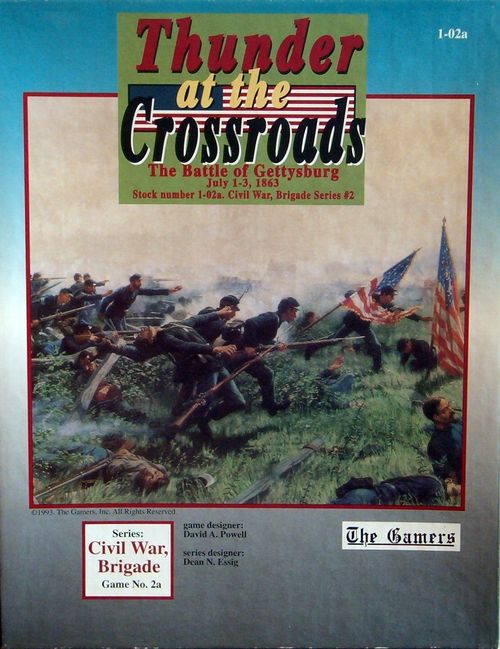
Thunder at the Crossroads: The Battle of Gettysburg, July 1-3, 1863 (Second Edition)
Thunder at the Crossroads: The Battle of Gettysburg, July 1-3, 1863 (Second Edition) Rulebook
Table of Contents
Table of Contents
- 1.0 Terrain and Map Notes
- 2.0 Union Special Rules
- 3.0 Confederate Special Rules
- 4.0 General Special Rules
- 5.0 General Victory Conditions
- 6.0 Scenarios
- 6.1 Scenario 1: The First Day
- 6.2 Scenario 2: Crisis at the Crossroads
- 6.3 Scenario 3: The Second Day
- 6.4 Scenario 4: The Whole Union Line Ablaze
- 6.5 Scenario 5: Little Round Top
- 6.6 Scenario 6: Cemetery and Culp's Hills
- 6.7 Scenario 7: The Third Day
- 6.8 Scenario 8: Pickett's Charge
- 6.9 Scenario 9: The Fourth Day
- 6.10 Scenario 10: The Historical Battle of Gettysburg
- 6.11 Scenario 11: Jackson Lives!
- 7.0 Battle Notes
- Designer's Notes
- Annotated Bibliography
- Standard Orders of Arrival
- Current Strength Charts
1.0 Terrain and Map Notes
1.0a The Sunken Road. This is a natural trench. Units which receive all fires directed at them (from regular fire combat or close combat) through Sunken Road Protective Hexsides apply all the modifiers for being in a Trench on the Fire Combat and Morale Tables. The Sunken Road Protective Hexsides are marked on the map with a red dashed line.
1.0b Gettysburg. Gettysburg town hexes are marked with the reddish buildings and the individual (non-orchard) tree symbols. These hexes are connected to all adjacent town hexes by primary roads.
1.0c The Railroad. The map contains both finished and unfinished portions of the Gettysburg and Hanover Railroad. Treat both sections as secondary roads. The Railroad Cuts west of the town are shown for informational purposes and have no effect on game play.
1.0d Entry Hexes. We set a few of the entry hex symbols into the map (away from the edge) so as to keep them from being sliced when the map was trimmed. Units do not enter directly into these hexes when they arrive on the map—they still must march onto the map from the very edge like before.
1.0e Map Placement. Set ups in the game were designed such that Map B overlaps atop Map A. To make full use of this fact, always place Map A first and Map B second.
2.0 Union Special Rules
2.1 Acting Army Commanders
Prior to Meade's arrival (or later, if Meade becomes a casualty), the ranking Union corps commander becomes the acting army commander and may issue orders to all Union forces as such.
The order of succession is as follows:
- Reynolds
- Slocum
- Sedgwick
- Hancock
- Howard
- Sickles
- Sykes
- Pleasonton
2.2 Major General Hancock
On July 1st, if Reynolds becomes a casualty, Hancock will be sent to replace him. Eight turns after Reynolds' loss, Hancock will arrive at Entry Area K and immediately become the acting army commander. He will continue in this role until Meade arrives. Even if Slocum or Sedgwick arrive on the field, Hancock remains in charge. If this rule would cause Hancock to arrive after the rest of his corps, ignore the eight turn provision and have him arrive normally.
Design Note: Upon hearing of Reynolds' fall, Meade immediately dispatched Hancock to take temporary command, in spite of the fact that Slocum and Sedgwick ranked him. and Howard was already at the battle. Hancock fulfilled his instructions, rebuilt the defense of Cemetery and Culp's Hills. Howard was incensed by this and regarded it as a denigration of his own abilities.
2.3 Union Artillery Ammunition
Unlike the first edition, the Union player, too, has been given an Artillery Ammunition Track and a limited amount of ammo to use in each scenario.
2.4 Union Reserve Artillery
All the Union Reserve Artillery units are independent, but are subject to the following restriction. They must be in the command radius of any Union Corps HQ. If they are found outside of all of the combined command radius zones of the Union army, they must move so as to be within them. Reserve Artillery units may be split among the corps or consolidated as the player desires.
2.5 Union "Plus" Weapons Units
All Union Cavalry Brigades have "plus" weapons and have that symbol on their counter. No other Union unit has plus weapons.
2.6 Attachments
No Union division which has an assigned corps (1-1 is assigned to 1st Corps) may be reattached to some other corps. French's and Naglee's Divisions (if their options are in play) may be assigned to any Union corps as the player sees fit—with the exception that both divisions cannot be assigned to the same corps at the same time. These two divisions may also be left unattached, in which case they may only function by orders which the army commander sends directly to them.
2.7 Lockwood's First Separate Brigade
This unit (Ind-12) was a reinforcement to the army from Washington. It is a 'separate' brigade and traces command radii directly to the 12 Corps HQ as if it were a division. When this brigade becomes wrecked, it uses the -6 morale modifier as a wrecked brigade of a wrecked division. The player may issue this brigade divisional goals.
Design Note: After the battle, this unit became the 2-1-12 brigade. Slocum left it nominally independent during the fight because Lockwood ranked Williams, but was completely inexperienced. Not wanting a green division commander and wishing to avoid the contretemps sure to ensue if he placed Williams over Lockwood, Slocum side-stepped the issue.
2.8 Brigades and Divisional Goals
The only brigades allowed to be issues divisional goals are those of the Cavalry Corps and Ind-12. The player cannot issue divisional goals directly to any other brigade. This rule does not affect divisional goals as applied to divisions—the handling of them is normal.
2.9 Sickles the Incredible
Sickles, the commander of 3rd Corps, treats any 2 dice roll on the Acceptance Table as a loose cannon result as well as those rolled for regular initiative. This rule only applies to orders issued to Sickles from Meade—if the latter is not the sender of the order (because of replacement by option, wounding or death, say) ignore this rule.
Design Note: Sickles was a crony of the outgoing army command administration (namely Hooker) and resents Meade's appointment. As such, he was likely to second-guess Meade's orders—which is exactly what he did on July 2nd, much to the detriment of the Union army.
3.0 Confederate Special Rules
3.1 Confederate Anti-Initiatives
Lee (when not using options) has an anti-initiative rating of -1. No other leader in the game (either side) has an anti-initiative rating.
3.2 Major General Trimble
The Southern army comes equipped with a spare major general, Isaac R. Trimble. The Confederate player may use Trimble as a replacement for any killed or wounded divisional leader.
Design Note: Trimble came north with the army in spite of his lack of command. He took command of Pender's Division after Dorsey Pender was killed and led it during Pickett's Charge. His zeal cost him dearly, however, for he was wounded during the attack, captured, and spent the rest of the war as a prisoner.
3.3 Confederate Attachments
Each Confederate corps can have one extra division attached to it from another corps. Only one such division may be attached to a given corps at one time. There is no limit to the number of divisions which can be detached from a given corps.
3.4 Brigades and Divisional Goals
In addition to the usual freedom to give divisional goals to cavalry brigades, the Confederate player can assign a divisional goal to one brigade of each infantry division. No more than one brigade per division may be given such a goal at one time. The method of handling this infantry brigade goal is the same as that used for cavalry brigades.
3.5 Confederate Plus Weapons
One Confederate unit has Plus weapons (F-Cav). No other Confederate unit has such weapons.
3.6 Confederate Leader Ratings
The counters for Lee, Ewell, and AP Hill have different ratings on their fronts and backs. For all historical scenarios, each leader is rated as a one. Use the higher ratings only when playing a variant.
3.7 The Cavalry Division
Stuart's Cavalry Division is not attached to any corps and has no corps radius to be within. Its units can only draw supply (to remove a low ammo marker) from the A NVa Supply unit and not from any corps supply.
4.0 General Special Rules
4.1 Rain
At 2:30pm on July 4th, it begins to rain. Starting on that turn, visibility drops to 3 hexes and all non-road movement costs one extra MP per hex for all units except cavalry, leaders, and HQs. Rain lasts from that turn until the end of the game.
4.2 Union Minor Variants
4.2a When the Pa-5 Division arrives, allow 2-Pa-5 to enter with it. This option gives the Confederate player 1 VP.
The entire Pa Reserve Division was stationed in Washington when it was sent to join the Army of the Potomac. 2-Pa-5 remained behind to guard the capitol, but could have just as easily remained with the division.
4.2b Allow 12 Corps to arrive at 12:30pm, July 1st at entry area F with the same historical orders. Ind-12 will still arrive at its regular time. This option gives the Rebel player 5 VPs.
Historically, this is the most likely of the Union options. 12th Corps reached Two Taverns (just a few hexes off the east map edge) by 11:30am. July 1st. The corps halted there for almost four hours before it moved to join the rest of the army. Despite the urgings of some of his subordinates, Slocum refused to decide to move. Had he acted more promptly, 12th Corps could have easily participated in the afternoon's fight.
4.2c Add French's Division to the Union Army. This command arrives at 8:00am, July 2nd at entry hex E. It may be assigned to any on-map infantry corps. It enters with orders to move to its new parent HQ and assumes the corps order when it arrives within command radius. This option gives the Rebel player 3 VPs.
Originally occupying the lower Shennandoah Valley, this unit retreated as Lee moved north and guarded Meade's rear at Frederick, MD during the battle. When Lee fell back, French joined the pursuit. French then assumed command of the 3rd Corps, and his brigades were officially incorporated into 1st and 3rd Corps on July 14th.
4.2d Add Naglee's Division to the Union Army. This command arrives at 9:00pm, July 2nd at entry hex E or F. Upon arrival, this division is subject to the same rules as French's Division (above, 4.2c). This option gives the Rebel player 3 VPs.
This is a composite unit made up of a brigade from each of the following garrisons: Baltimore, Washington, and Ft. Monroe. These troops were assembled in central Maryland in early July and joined the army at about the same time as French. Naglee was the commander of the District of Virginia at Norfolk and on July 10th assumed command of the Harper's Ferry District. All of these brigades were incorporated into the army, but separately and not as a unit.
4.3 Confederate Minor Variants
4.3a Add the brigades of Corse (C-P-1) and Jenkins (J-P-1) to Pickett's Division when it arrives. This option gives the Union player 1 VP.
Historically, Lee wanted these two brigades returned to his army for the offensive. Davis retained these units for the defense of Richmond and offered in their place the two large but inexperienced commands of Pettigrew and Davis from the Department of North Carolina.
4.3b Add Ransom's Division (Ransom, R-R-1, C-R-1, and the optional 1 Corps Battery) to Longstreet's Corps. They arrive at 8:00am, July 2nd at entry hex A. They are to report to the Corps HQ. When using this option, allow L-H-1 to arrive with the rest of Hood's Division, instead of later. This option gives the Union player 2 VPs.
Ransom's troops had previously served with the ANV and again, Lee wanted to augment his strength for the coming campaign. These men were also serving under D.H. Hill in North Carolina. Fearing to strip the Carolina coast, Davis retained them south of Richmond.
4.3c Add Jo-Cav and R-Cav to the arrival schedule. Jo-Cav arrives at 11:00am and R-Cav at 1:00pm on July 3rd at entry hex N. They are ordered to report to the Cavalry Division. This option gives the Union player 1 VP.
Both of these units operated on the Confederate right a couple of miles off-map to the west. They could have easily joined Lee's main army on July 3rd.
4.3d In the historical game, Lee and two of his corps commanders operate with poor ratings. Flip Lee, Hill, and Ewell over to their higher rated sides and ignore Lee's anti-initiative rating. This option gives the Union player 4 VPs.
The Army of Northern Virginia's command functioned exceedingly poorly at Gettysburg. Hill was sick, Ewell was hesitant, and Lee repeatedly failed to give clear instructions. This option allows them to work at their best.
4.3e As it stood, Lee's invasion was a fairly pointless affair, devoid of any real strategic objective except for the vaguely stated goal to defeat the Union army north of the Potomac. Even this was flawed, because Lee lacked the power to inflict a crushing defeat on Meade and still threaten Washington DC., but there was another way...
Allow D.H. Hill's entire corps to enter at 4:00pm July 2nd at entry hex A. This option gives the Union player 12 VPs. Or, better yet...
4.3f Allow Hill's Corps (or selected parts) arrive as desired. Prior to the start of the game, the Rebel player selects which of D.H. Hill's divisions he wishes to have enter play. He might select one, he might select all. Secretly plot the arrival location for each chosen division (these may be packaged in groups) and the hex of arrival. The corps HQ, supply and D.H. Hill himself are treated as a separate division for this and VP purposes. Each division so deployed can enter with one of Hill's batteries. Each division may have orders before entry (like any reinforcement), but these must be recorded before play begins. This option gives 3 VPs per division to the Union player.
4.3g And still the Rebs keep coming! Allow Buckner's Division (Buckner, G-B, T-B, P-B, B Div Artillery Battery) to arrive at either 12 noon, July 2nd; or to be preselected for surprise as with Hill's troops above. When it arrives, this division can be assigned to any corps or can take orders directly from the Army commander. This option gives the Union player 3 VPs.
Buckner's command was stationed in East Tennessee since May, 1863, Later he joined Bragg's army in time for Chickamauga that fall. With easy access to the Virginia-Tennessee railroad link, this division could have been ordered north to join Lee.
Note: When using 4.3e, 4.3f, or 4.3g, the following other changes are to be made:
L-H-1, P-1, and 1b all arrive at 12:00 midnight, July 2nd, entry hex A with the same orders as Hood's Division.
4.3h In scenario 11 (Jackson Lives!), the ANV reverts to its old tactical organization. There is some indication, however, that Lee desired a three corps structure anyway, regardless of Jackson's loss. As an alternative to scenario 11, simply replace Ewell with Jackson and leave the organization alone. Treat Ewell exactly like Trimble for this option (a spare division commander). This option gives the Union player 3 VPs. If combined with 4.3d above, the total cost for the improved command structure and Jackson's replacement of Ewell is 5 VPs.
4.3i Replace Meade with either Hooker or McClellan. Give the Union player 2 VPs for Hooker or 3 VPs for McClellan.
Three days before the battle, Lincoln made the difficult decision to replace Hooker with the relatively untested Meade. Meade went on to deliver a solid performance and to defeat the Army of Northern Virginia. Of course, Lincoln had other options. Hooker could have remained in charge or McClellan (always an army favorite) could have been called upon to "Save the Union" once again.
4.4 Set Up Notes
4.4a Leaders set up with their commands, except where noted otherwise.
4.4b Killed and wounded leaders are appropriately replaced with either subordinate leaders or repls. In higher level assignments, the replacement commander is named.
4.4c Unless specifically stated otherwise, units may set up in any desired formation, but may do so with only the extended lines listed in the set up itself.
4.4d Where a force has no orders listed specifically for it, it has no orders at all (at start) when using the historical orders given.
5.0 General Victory Conditions
The game winner is determined via the use of Victory Points (VPs) which are awarded for capturing specific objectives, inflicting losses, or seriously damaging enemy formations. These conditions apply in all scenarios except scenarios 1, 2, 5 & 6 (which have their own victory conditions).
All losses are cumulative for all scenarios. In other words, units wrecked on July 1st do count for victory points in a July 2nd scenario. This effect is intentional and, in effect, picking up play in the middle of the battle requires the player to carry the baggage of earlier success or failure. The total losses for earlier actions are provided in the scenario and you should start your own 'butcher's bill' from that mark.
5.1 Points for Terrain
| Feature | Union | Confederate |
|---|---|---|
| Cemetery Hill | 5 | 5 |
| Culp's Hill | 3 | 3 |
| Little Round Top | 4 | 4 |
| Gettysburg | 5 | 5 |
| Entry Hex A | 10 | 0 |
| Entry Hex N | 5 | 0 |
| Entry Hex I | 0 | 3 |
| Entry Hex J | 0 | 9 |
| Entry Hex K | 0 |
5.2 Points for Losses
Each side receives the VPs for losses it inflicts on the enemy. For instance, the points awarded for Confederate Losses are given to the Union player.
Confederate Losses VPs
| Confederate Losses | VPs |
|---|---|
| 0 to 54 | 0 |
| 55 to 84 | 1 |
| 85 to 114 | 3 |
| 115 to 144 | 5 |
| 145 to 169 | 8 |
| 170 to 199 | 11 |
| 200 to 219 | 15 |
| 220 to 254 | 19 |
| 255 to 284 | 23 |
| 285 to 314 | 27 |
| 315 or more | 31 |
Union Losses VPs
| Union Losses | VPs |
|---|---|
| 0 to 69 | 0 |
| 70 to 109 | 1 |
| 110 to 144 | 3 |
| 145 to 179 | 5 |
| 180 to 214 | 8 |
| 215 to 249 | 11 |
| 250 to 284 | 15 |
| 285 to 324 | 19 |
| 325 to 359 | 23 |
| 360 to 394 | 27 |
| 395 or more | 31 |
Count all losses of infantry and cavalry units. Do not count artillery losses. Generally, optional troops will have but a minimal effect on the above—with one exception: When the Confederate player has three or more optional divisions in the game, both players use the Union Losses Table to compute VP awards.
5.3 Victory Points for Wrecked Formations
In addition to the points given for raw casualties, the following are awarded for formations which can be considered wrecked. The given number of points is awarded for a formation if the number of brigades listed (or more) are wrecked at the end of the scenario. Wreckage for this purpose counts only actual casualties—ignore straggler losses for this purpose.
Points for the CSA Player Based on US Wrecked Formations
| Corps | # needed to wreck | VPs |
|---|---|---|
| 1 | 4 of 7 | 5 |
| 2 | 6 of 10 | 5 |
| 3 | 4 of 6 | 5 |
| 5 | 5 of 8 (or 9) | 5 |
| 6 | 5 of 8 | 5 |
| 11 | 4 of 6 | 3 |
| 12 | 4 of 6 | 3 |
| Cavalry | NA | 2 per wrecked Bde |
| French Div | 2 of 3 |
Points for US Player Based on CSA Wrecked Formations
| Corps | # needed to wreck | VPs |
|---|---|---|
| 1 | 6 of 11 (7/13 or 8/15) | 10 |
| 2 | 7 of 13 | 9 |
| 3 | 7 of 13 | 9 |
| Cavalry | NA | 2 per wrecked Bde |
| H Corps | 6 of 12 | 9 |
| B Div | 2 of 3 | 2 |
5.4 Determining Victory
Total the VPs garnered by each side at the end of the game. Subtract the Union total from the Confederate one to produce a single number. This result will be either positive (in the CSA favor) or negative (in the US favor). Compare this number to those listed on the Victory Chart specific to the given scenario to determine the winner and level of victory.
6.0 Scenarios
6.1 Scenario 1: The First Day
This scenario recaptures the fighting on July 1st, 1863 when two Union corps desperately try to hold off the converging strength of two Confederate corps west and north of the town. By the end of the day, the two Union corps have been wrecked, but still maintain a grip on Cemetery and Culp's' Hills. Their effort gives Meade a solid position from which to build a defense for the battles of the next two days.
General Information
Map Area: This scenario can be played on both maps OR on just Map A. If using just Map A, apply the following:
All 1st Corps forces which start set up on Map B, instead show up at hex A20.00 at 9:00am.
All units scheduled to arrive at entry hex G instead arrive at A20.00 three turns later.
All units scheduled to arrive at F instead arrive at A28.00 two turns later.
All units above now entering at A20.00 or A28.00 have already expended 4 of their movement points before entering the map area.
All units scheduled to arrive at E instead arrive one turn later at A38.00 with two MPs expended.
First Turn: 8:30am July 1st. Start play with the UNION player turn. Last Turn: 8:00pm July 1st Total Game Length: 23 turns
Union Information
Set Up: Buford, 1-1-Cv: A16.19 ex A15.19 Db(2): A16.19 2-1-Cv: A28.21 Reynolds, 1 Corps HQ, 2-1-1 (column): B13.19 1b (5, Limbered): B11.16 Wadsworth, 1-1-1 (column): B10.15
Orders: 1-Cv is to defend the approaches to Gettysburg. 1-1-Cv has a divisional goal to defend the Chambersburg Pike west of town, while 2-1-Cv has one to defend the Harrisburg and Carlisle Roads north of town.
1 Corps is to move to McPherson's Ridge (between Axx.30 and Axx.08) and defend.
Artillery Ammunition: 60
Reinforcements: As per Order of Arrival
Confederate Information
Set Up: No CSA units begin on the map.
Artillery Ammunition: 80
Reinforcements: As per Order of Arrival
Victory Determination Do not use the victory conditions outlined in 5.0 in this scenario. Instead use the following:
For each player, give: 1 VP per brigade wrecked counting both stragglers and casualties OR 2 VP per brigade wrecked counting casualties alone.
Levels of Victory
Rebel Massive—Available through shifts only. Rebel Major—10 or more Rebel Minor—9 to 5 Draw—4 to -4 Union Minor— -5 to -8 Union Major— -9 to -15 Union Massive— -16 or less
Victory Level Shifts: For the Confederate player (only): Control of all hexes of Culp's AND Cemetery Hills—Shift two levels Control of all hexes of Culp's Hill OR Cemetery Hill—Shift one level
Historical Outcome: The Confederates won a Minor Victory with 7 VPs.
6.2 Scenario 2: Crisis at the Crossroads
This scenario is confined to the actions of the afternoon of the first day at the time when four Rebel divisions overwhelmed the Union forward line and precipitated the withdrawal to Cemetery Hill.
General Information
Map Area: Use only Map A. Handle arrivals scheduled for Map B according to the special rules in 6. First Turn: 1:30pm July 1st Last Turn: 8:00pm July 1st Total Game Length: 14 turns
Union Information
Set Up: 1-1-1: A15.18 ex A15.19 2-1-1: A19.20 ex A19.19 1-2-1: A21.20 2-2-1: A21.23 1-3-1: A15.16 ex A15.17 2-3-1: A16.19 1b(5): A20.18 1b(4): A16.15 1 Corps HQ: A20.15 1-1-11: A30.21 2-1-11: A31.21 2-11 (all), 11b(3), 11 Corps Supply: w/i 1 A28.07 1-3-11: A24.22 ex A25.23 2-3-11: A26.20 11b(5): A26.21 11 Corps HQ: A27.17 1-1-Cv, Buford: A17.13 ex A17.14 2-1-Cv: A32.16 Db(2): A17.13
Reynolds has been killed. Howard is the acting army commander. Doubleday and Schurz command their respective corps.
Orders: 1 Corps is to defend McPherson's Ridge (between Axx.08 and Axx.25) and the western approaches to Gettysburg.
11 Corps is to defend Gettysburg and cover the 1st Corps' flank between Oak Ridge and Rock Creek. 2-11 has a divisional goal to defend Cemetery Hill.
2-1-Cv has a divisional goal to defend the 11 Corps' flank and the York Pike around Rock Creek. 1-1-Cv has a divisional goal to defend the 1st Corps' flank in the vicinity of the Fairfield Road back to Seminary Ridge.
Artillery Ammunition: 55
Reinforcements: As per Order of Arrival
Confederate Information
Set Up: Do-R-2: A26.27 I-R-2 (column): A17.33 O-R-2 (column): A18.33 Da-R-2 (column): A19.34 R-R-2 (column): A20.35 2b (5, limbered): A21.35
Note: If using the optional road column pacing rule, use the following set ups instead: I-R-2 (column): A17.28; O-R-2 (column): A15.30; Da-R-2 (column): A22.35; R-R-2 (column): A22.35; 2b (limbered): A23.35.
2 Corps HQ: A19.34 3 Corps HQ: A10.21 A-H-3: A11.16 P-H-3: A11.17 B-H-3: A11.18 D-H-3: A10.19 P-3 (all): w/i 1 A7.23 3b (5): one each in: A10.20, A9.22, A9.23
Orders: 2 Corps is to move to the Mummasburg Road then south to the vicinity of Oak Hill and attack the Union flank on Seminary and McPherson's Ridges. Once those positions are cleared, 2 Corps is to attack and capture the town of Gettysburg. Do-R-2 has a divisional goal to defend R-2's right flank and to screen the gap between R-2 and E-2.
3 Corps is to attack and clear McPherson's and Seminary Ridges north of the Fairfield Road.
Artillery Ammunition: 65
Reinforcements: As per Order of Arrival
Victory Determination Do not use the victory conditions outlined in 5.0 in this scenario. Instead use the following:
For each player, give: 1 VP per brigade wrecked counting both stragglers and casualties OR 2 VP per brigade wrecked counting casualties alone.
Levels of Victory
Rebel Massive—Available through shifts only. Rebel Major—10 or more Rebel Minor—9 to 5 Draw—4 to -4 Union Minor— -5 to -8 Union Major— -9 to -15 Union Massive— -16 or less
Victory Level Shifts: For the Confederate player (only): Control of all hexes of Culp's AND Cemetery Hills—Shift two levels Control of all hexes of Culp's Hill OR Cemetery Hill—Shift one level
Historical Outcome: The Confederates won a Minor Victory with 7 VPs.
6.3 Scenario 3: The Second Day
After the unexpected success on July 1st, Lee was faced with the option of either renewing the attack (this time against the largely concentrated Union army) or to maneuver in the face of the enemy to gain a better position from which to fight. Longstreet urged the latter, but Lee decided to attack. July 2nd proved to be a day of great disappointment for the south. The usually smoothly functioning Confederate command structure lapsed into a pattern of confusion and delay. Most of the day was wasted and the attacks did not commence until 4:00pm. While both sides took heavy losses, the Confederates achieved none of their objectives.
General Information
Map Area: Use both maps. First Turn: 4:00am July 2nd Last Turn: 8:00pm July 2nd Total Game Length: 33 turns
Union Information
Set Up: 1 Corps (all): w/i 4 A30.07 11 Corps (all): w/i 2 A28.08 12 Corps (less Ind-12): w/i 4 A32.07 2 Corps (all): w/i 3 B29.16 3 Corps (less 3-1-3, 3-2-3, 3 Corps Supply): w/i 3 B26.31 1-1-Cv, 2-1-Cv, Db(2): w/i 3 B19.30 A Pot HQ, Cav Corps HQ: B28.27 A Pot Supply, Cav Corps Supply: B29.17
Reynolds has been killed and Doubleday commands 1 Corps. Barlow is wounded.
Orders: 1 & 11 Corps is to defend Cemetery Hill and Cemetery Ridge.
12 Corps is to defend Culp's Hill.
2 Corps is to move to Cemetery Ridge and defend it to the south of, and in line with, 1 Corps.
3 Corps is to defend in place.
Cav Corps HQ must remain within 5 MPs of the A Pot HQ. 1-Cv has a divisional goal to control the Emmitsburg Road south of the Peach Orchard.
Artillery Ammunition: 120
Earlier Losses: 84
Reinforcements: As per Order of Arrival
Confederate Information
Set Up: H-3 (all): w/i 1 A14.10 P-3 (all): w/i 2 A18.12 A-3 (all): w/i 1 A17.08 5x 3b(5): with any 3 Corps unit R-2 (all), 3x 2b(5): w/i 2 A22.16 E-2, 2b(5): w/i 2 A31.16 J-2, 2b(5): w/i 3 A37.15 Jn-Cav: A43.19 H-1 (less L-H-1), M-1 (all), 2x 1b(5), 1b(2): w/i 4 A3.25 A NVa HQ, A NVa Supply: A19.18 1 Corps HQ, 1 Corps Supply: w/i 2 A5.24 2 Corps HQ, 2 Corps Supply: A29.16 3 Corps HQ, 3 Corps Supply: A17.10
Heth and Pender are both wounded.
Orders: Jn-Cav has a divisional goal to defend the York Pike.
No other Confederate units have any orders.
Artillery Ammunition: 100
Earlier Losses: 66
Reinforcements: As per Order of Arrival
Victory Determination Use the standard victory conditions in 5.0.
Levels of Victory
Rebel Massive—25 or more Rebel Major—16 to 24 Rebel Minor—6 to 15 Draw—5 to -5 Union Minor— -6 to -15 Union Major— -16 to -24 Union Massive— -25 or less
Historical Outcome: The Confederates won a minor victory with 8 VPs.
6.4 Scenario 4: The Whole Union Line Ablaze
This scenario examines the historical Confederate attacks of July 2nd. In the face of more numerous Federals, Longstreet managed to seriously damage 3 Corps and take quite a bit of ground. However, a significant victory remained out of reach. Ewell's portion of the attack was an uncoordinated mess and several local successes on Cemetery and Culp's Hills remained unexploited.
General Information
Map Area: Use both maps. First Turn: 4:00pm July 2nd Last Turn: 10:00pm July 2nd Total Game Length: 11 turns
Union Information
Set Up: 1 Corps (all), Rb(5): w/i 4 A30.07 12 Corps (all): w/i 4 A32.07 11 Corps (all), Rb(5): w/i 2 A28.08 3-2 (all), 2b(5): w/i 1 A27.06 2-2 (all), 2b(4): w/i 1 A26.03 1-2 (all, in line formation along the road): from A28.01 to A27.04 (inclusive) 2 Corps HQ, 2 Corps Supply: A28.04 A Pot HQ: A28.05 A Pot Supply: A34.03 Cav Corps HQ, Cav Corps Supply: A31.05 3x Rb(5): w/i 2 A28.05, east of 28.xx (inclusive) 1-5 (all): w/i 1 B29.33 2-5 (all): w/i 1 B33.33 Pa-5 (less 2-Pa-5): w/i 1 B35.34 5 Corps HQ: B29.33 5 Corps Supply: B31.33 5b(5), 5b(3): with any 5 Corps unit 2-1-3: B22.26 ex B22.25 and B22.27 3-1-3: B21.28 ex B21.29 1-1-3: B18.31 1-2-3: B18.32 ex B19.33 2-2-3: B19.34 ex B20.34 3-2-3: B22.30 3 Corps HQ: B23.31 3 Corps Supply: B23.32 3b(5, less 2 gun points): B18.32 3b(5): B19.34 Db(2): B22.26 Rb(5): one each in B20.30, B19.31 2-Cv (all), Cavb(5): w/i 1 A51.12 3-Cv (all, mounted), Cavb(5): w/i 3 A53.21
Reynolds has been killed. Doubleday commands 1 Corps. Barlow has been wounded. 1-Cv has been withdrawn and is no longer in play.
Orders: 1, 2, 3, 11, and 12 Corps are to defend in place.
1-2 has a divisional goal to move to aid 3 Corps as needed. It may begin moving on the first turn after any unit of 3 Corps has been attacked by small-arms fire.
5 Corps is to move to defend Little Round Top as well as help defend 3 Corps. It may begin moving on the first turn after any unit of 3 Corps has been attacked by small-arms fire.
2-Cv has a divisional goal to defend the Hanover Road.
3-Cv has a divisional goal to move to the York Pike and defend.
Artillery Ammunition: unlimited
Earlier Losses: 84
Reinforcements: As per Order of Arrival
Confederate Information
Set Up: Jn-Cav: A47.12 Stuart, H-Cav, F-Cav, C-Cav, 2x Cavb(5): w/i 10 A41.29, west of 45.xx J-2 (all), 2b(5): w/i 3 A37.15 E-2 (all), 2b(5): w/i 2 A31.16 R-2, 3x 2b(5): w/i 3 A22.16 2 Corps HQ, 2 Corps Supply: A29.16 H-3 (all): w/i 1 A14.10 P-3 (all): w/i 2 A18.12 Wx-A-3: A17.02 L-A-3: A18.04 Wt-A-3: A18.05 P-A-3: A20.06 M-A-3: A20.07 ex A20.08 3b(5): one each in: A19.06, A20.08, A20.10, A20.12, A21.14 3 Corps HQ, 3 Corps Supply: A18.09 A NVa: A19.18 A NVa Supply: B10.32 L-H-1: B16.23 ex B16.22 Tex-H-1: B16.25 ex B16.24 B-H-1: B15.24 ex B15.23 A-H-1: B15.26 ex B15.25 K-M-1: B15.29 ex B15.28 and B15.30 B-M-1: B15.32 ex B15.33 S-M-1: B14.30 ex B14.29 W-M-1: B14.32 ex B14.31 1b(5): one each in: B16.25, B15.29, B15.30, B15.32 1b(2): B15.27 1 Corps HQ: B15.29 1 Corps Supply: B12.29
Orders: 1 Corps is to attack and capture the positions of the Peach Orchard, Little Round Top, and the Taneytown Road behind them.
2 Corps is to attack Cemetery Hill as a diversionary effort. This order has a status of D1.
J-2 has a divisional goal to attack southwards to capture Culp's Hill. W-J-2 has a divisional goal to support Jn-Cav and defend the flank north of Benner's Hill.
A-3 has a divisional goal to support 1 Corps.
Cav has a divisional goal to defend the York Pike and the Hunterstown & Harrisburg Roads east of Rock Creek. Jn-Cav has a divisional goal to defend the Hanover Road between Benner's Hill and Brinkerhoff Ridge.
Artillery Ammunition: unlimited
Earlier Losses: 66
Reinforcements: As per Order of Arrival
Victory Determination Use the standard victory conditions in 5.0.
Levels of Victory
Rebel Massive—25 or more Rebel Major—16 to 24 Rebel Minor—6 to 15 Draw—5 to -5 Union Minor— -6 to -15 Union Major— -16 to -24 Union Massive— -25 or less
Historical Outcome: The Confederates won a minor victory with 8 VPs.
6.5 Scenario 5: Little Round Top
This is a shortened version of scenario 4 which focuses exclusively on Longstreet's attack.
General Information
Map Area: Use only Map B First Turn: 4:00pm July 2nd Last Turn: 8:00pm July 2nd Total Game Length: 9 turns
Union Information
Set Up: 1-5 (all): w/i 1 B29.33 2-5 (all): w/i 1 B33.33 Pa-5 (less 2-Pa-5): w/i 1 B35.34 5 Corps HQ: B29.33 5 Corps Supply: B31.33 5b(5), 5b(3): with any 5 Corps unit 2-1-3: B22.26 ex B22.25 and B22.27 3-1-3: B21.28 ex B21.29 1-1-3: B18.31 1-2-3: B18.32 ex B19.33 2-2-3: B19.34 ex B20.34 3-2-3: B22.30 3 Corps HQ: B23.31 3 Corps Supply: B23.32 3b(5, less 2 gun points): B18.32 3b(5): B19.34 Db(2): B22.26 Rb(5): one each in B20.30, B19.31
Orders: 3 Corps is to defend in place.
5 Corps is to move to defend Little Round Top as well as help defend 3 Corps. It may begin moving on the first turn after any unit of 3 Corps has been attacked by small-arms fire.
Artillery Ammunition: Unlimited
Reinforcements: 4:00pm—B28.35: Meade, A Pot HQ, and 1-2 (all). 1-2 arrives with a divisional goal to join 3 Corps and aid in its defense.
4:30pm—Entry Hex E: 6 Corps (all). 6 Corps arrives with orders to move to the vicinity of Powers Hill and await further orders.
Confederate Information
Set Up: A NVa Supply: B10.32 L-H-1: B16.23 ex B16.22 Tex-H-1: B16.25 ex B16.24 B-H-1: B15.24 ex B15.23 A-H-1: B15.26 ex B15.25 K-M-1: B15.29 ex B15.28 and B15.30 B-M-1: B15.32 ex B15.33 S-M-1: B14.30 ex B14.29 W-M-1: B14.32 ex B14.31 1b(5): one each in: B16.25, B15.29, B15.30, B15.32 1b(2): B15.27 1 Corps HQ: B15.29 1 Corps Supply: B12.29 Lee: Set up with any of the above.
Orders: 1 Corps is to attack and capture the positions of the Peach Orchard, Little Round Top, and the Taneytown Road behind them.
Artillery Ammunition: Unlimited
Reinforcements: None
Scenario Special Rules:
Victory Determination Do not use the victory conditions outlined in 5.0 in this scenario. Instead use the following:
For each player, give: 1 VP per brigade wrecked counting both stragglers and casualties OR 2 VP per brigade wrecked counting casualties alone.
Levels of Victory
Rebel Massive—19 or more Rebel Major—11 to 18 Rebel Minor—6 to 10 Draw—5 to -3 Union Minor— -4 to -8 Union Major— -9 to -15 Union Massive— -16 or less
Victory Level Shifts: For the Confederate player (only): Control of all hexes of Little Round Top—Shift one level
Historical Outcome: The Confederates won a minor victory with 10 VPs.
6.6 Scenario 6: Cemetery and Culp's Hills
As the companion to scenario 5, this one looks at the abortive efforts of Ewell's 2nd Corps. While they achieved some initial success, the Rebels were completely repulsed.
General Information
Map Area: Use Map A only. First Turn: 4:00pm July 2nd Last Turn: 10:00pm July 2nd Total Game Length: 11 turns
Union Information
Set Up: 1 Corps (all), Rb(5): w/i 4 A30.07 12 Corps (all): w/i 4 A32.07 11 Corps (all), Rb(5): w/i 2 A28.08 3-2 (all), 2b(5): w/i 1 A27.06 2-2 (all), 2b(4): w/i 1 A26.03 2 Corps HQ, 2 Corps Supply: A28.04 A Pot Supply: A34.03
Orders: 11 Corps and 12 Corps are to defend in place. 2-12 has a divisional goal to support 2 Corps.
2 Corps must maintain a continuous line of troops between 11 Corps' left flank and the south edge of Map A. Each hex of the 2 Corps line must be held by an A fire level (or better). No 2 Corps unit may move north of the xx.07 line or east of the Taneytown Road. Exception: One 2 Corps brigade may be sent to support the troops on Cemetery Hill.
1 Corps is to send 2-1 and 3-1 to support 2 Corps.
2-12, 2-1, 3-1 must all move to positions south of the xx.05 hexline.
Artillery Ammunition: Unlimited
Reinforcements: None
Confederate Information
Set Up: J-2 (all), 2b(5): w/i 3 A37.15 E-2 (all), 2b(5): w/i 2 A31.16 R-2, 3x 2b(5): w/i 3 A22.16 2 Corps HQ, 2 Corps Supply: A29.16 H-3 (all): w/i 1 A14.10 P-3 (all): w/i 2 A18.12 3b(5): one each in: A19.06, A20.08, A20.10, A20.12, A21.14 3 Corps HQ, 3 Corps Supply: A18.09 A NVa: A19.18
Orders: 2 Corps is to attack Cemetery Hill as a diversionary effort. This order has a status of D1.
J-2 has a divisional goal to attack southwards to capture Culp's Hill. W-J-2 has a divisional goal to support Jn-Cav and defend the flank north of Benner's Hill.
Artillery Ammunition: Unlimited
Reinforcements: As per the Order of Arrival
Victory Determination Do not use the victory conditions outlined in 5.0 in this scenario. Instead use the following:
For each player, give: 1 VP per brigade wrecked counting both stragglers and casualties OR 2 VP per brigade wrecked counting casualties alone.
Levels of Victory
Rebel Massive— 28 or more Rebel Major— 21 to 27 Rebel Minor— 15 to 20 Draw— 14 to 10 Union Minor— 9 to 4 Union Major— 3 to -2 Union Massive— -3 or less
Victory Level Shifts: For the Confederate player (only): Control of all hexes of Culp's AND Cemetery Hills—Shift two levels Control of all hexes of Culp's Hill OR Cemetery Hill—Shift one level
Historical Outcome: This action was a draw with 14 VPs.
6.7 Scenario 7: The Third Day
After the failures of July 2nd, the A NVa's high command was left in the same dilemma that confronted it 24 hours earlier. Now, however, only Pickett's Division remained unblooded. The rest of the army had had their combat edge blunted by heavy losses.
General Information
Map Area: Use both maps. First Turn: 4:00am July 3rd Last Turn: 8:00pm July 3rd Total Game Length: 33 turns
Union Information
Set Up: Cav Corps HQ, Cav Corps Supply: A31.05 2-Cv, 2-3-Cv, 2x Cavb(5): w/i 5 A55.11 Kilpatrick, 1-3-Cv: w/i 5 B29.23
Note: 1-Cv (less R-1-Cv) has been withdrawn from play.
1-1-1: A33.09 2-1-1: A32.08 1-2-1, 2-2-1: A27.05 1-3-1, 2-3-1: A27.04 3-3-1: A26.03 1b(5): A32.08 1b(4): A30.08 1 Corps HQ, 1 Corps Supply: A30.06 1-2 (all): split into hexes: B26.30, B26.31, B26.32, B27.32 1-2-2, 3-2-2: A26.04 2-2-2: A26.05 1-3-2, 2-3-2: A26.06 3-3-2: A26.07 2b(5): A26.07 2b(4): A26.05 2 Corps HQ, 2 Corps Supply: A28.05 1-3: w/i 1 A27.02 2-3: w/i B27.34 3b(5): one each in: A26.02, B26.34 3 Corps HQ, 3 Corps Supply: A27.01 1-5: w/i 1 B24.22 2-5: w/i 1 B26.25 Pa-5 (less 2-Pa-5): w/i 1 B27.28 5b(5): B26.26 5b(3): B26.28 5 Corps HQ, 5 Corps Supply: B27.27 1-6, 6b(5): w/i 3 B27.28, east of 27.xx (inclusive) 2-6, 6b(5): w/i 2 B29.21 3-6, 6b(5): w/i 3 B38.34, west of Rock Creek 6 Corps HQ, 6 Corps Supply: B28.25 1-1-11: A30.08 2-1-11: A29.09 1-2-11: A27.09 2-2-11: A27.08 1-3-11: A28.09 2-3-11: A28.08 11b(5): A27.09 11b(3): A29.09 11 Corps HQ, 11 Corps Supply: A29.08 1-1-12: A34.04 3-1-12: A35.05 Ind-12: A32.05 1-2-12: A33.07 2-2-12: A34.07 3-2-12: A34.08 12b(5): A33.07 12b(2): A33.09 12 Corps HQ, 12 Corps Supply: A31.06 Resb(5): one each in hexes: A31.08, A28.09, A27.08, A26.06, A26.03, B26.33, B26.31 A Pot HQ: A28.07 A Pot Supply: B33.33
Reynolds has been killed. Newton (3-6) commands 1 Corps. Barlow and Sickles have been wounded. Birney commands 3 Corps.
Orders: 2-Cv (with 2-3-Cv attached) has a divisional goal to defend the Hanover Road and the Union right flank. 3-Cv (less 2-3-Cv) has a divisional goal to defend the Taneytown Road.
1, 2, 3, 5, and 11 Corps all have orders to defend in place. 1-5 has a divisional goal to defend Big Round Top.
1-6 has no orders. 2-6 has a divisional goal to defend in place. 3-6 has a divisional goal to defend the Baltimore Pike and the army's right flank.
12 Corps is to attack and recapture the high ground southeast of Culp's Hill up to the Rock Creek.
Artillery Ammunition: 150
Earlier Losses: 182
Reinforcements: As per the Order of Arrival
Confederate Information
Set Up: Tex-H-1: B22.25 B-H-1: B20.25 A-H-1: B18.25 L-H-1: B16.25 W-M-1: B22.27 S-M-1: B22.29 K-M-1: B21.31 B-M-1: B20.32 P-1 (all): w/i 1 A15.05 1b (5): one each in hexes: B16.25, B19.31, B20.33, B20.34, A20.01 1b (2): A20.02 1 Corps HQ: A17.02 1 Corps Supply: B15.31 A-3 (all): w/i 3 A20.06 H-3 (all): w/i 2 A17.08 P-3 (all): w/i 2 A18.10 3 Corps HQ: A18.09 3 Corps Supply: A18.13 3b (5): one each in hexes: A19.04, A19.05, A20.06, A20.08, A20.10 Do-R-2: A24.11 R-R-2: A25.12 I-R-2: A25.13 E-2 (all): spread between A30.14, A31.14, A32.14, A33.14 S-J-2: A35.06 Swl-J-2: A36.06 J-J-2: A35.07 W-J-2: A35.08 O-R-2: A35.09 Da-R-2: A34.09 2 Corps HQ, 2 Corps Supply: A27.15 2b (5): one each in hexes: A21.14, A21.15, A21.20, A30.14, A36.15 Jn-Cav: A40.13 Stuart, H-Cav, F-Cav, C-Cav, 2x Cavb(5): w/i 10 A41.22 A NVa HQ, A NVa Supply: A19.18
Pender has been killed. Hood and Heth have been wounded. Trimble commands P-3.
Orders: 1 Corps and 2 Corps are to defend in place. Da-R-2 and O-R-2 are attached to J-2 for this scenario. J-2 has a divisional goal to attack and capture Culp's Hill and the high ground south of it.
Jn-Cav has a divisional goal to defend the Hanover Road. The remainder of the Cav Division has a divisional goal to defend the York Pike and Hunterstown Road.
Artillery Ammunition: 100
Earlier Losses: 143
Reinforcements: As per the Order of Arrival
Victory Determination Use the standard victory conditions in 5.0.
Levels of Victory
Rebel Massive—30 or more Rebel Major—29 to 20 Rebel Minor—19 to 9 Draw—8 to -8 Union Minor— -9 to -19 Union Major— -20 to -29 Union Massive— -30 or less
Historical Outcome: The Union won a minor victory with -11 VPs.
6.8 Scenario 8: Pickett's Charge
In one sense, I believe this scenario to be an exercise in futility. Following the orders as written, there is almost no chance that the Confederates can pierce the Union center (let alone drive them off Cemetery Ridge!) No matter what the outcome, the enormous CSA losses will far outweigh any gain. Still, 'Pickett's Charge' has been immortalized and to not include it in the game would verge on heresy. For those inclined to grand (and useless) gestures, here is the grandest of them all.
General Information
Map Area: Use both maps. First Turn: 1:00pm July 3rd Last Turn: 8:00pm July 3rd Total Game Length: 14 turns
Union Information
Set Up: 1 Corps HQ, 1 Corps Supply: A28.06 1-1-1: A33.09 2-1-1: A32.08 1-3-1, 2-3-1: A27.04 3-3-1: A26.03 1b(5): A32.08 1b(4): A30.08 2 Corps HQ, 2 Corps Supply: A27.03 1-2 (all): spread between B26.30, B26.31, B26.32, B27.32 1-2-2, 3-2-2: A26.04 2-2-2: A26.05 1-3-2, 2-3-2: A26.06 3-3-2: A26.07 2b (5): A26.05 2b (4): A26.07 3 Corps HQ, 3 Corps Supply: A27.01 1-3 (all): w/i 1 A27.02 2-3 (all): w/i 1 B27.34 3b (5): one each in hexes: A26.02, B26.34 5 Corps HQ, 5 Corps Supply: B27.27 1-5 (all): w/i 1 B24.22 2-5 (all): w/i 1 B26.25 Pa-5 (all): w/i 1 B27.28 5b (3): B26.28 5b (5): B26.26 6 Corps HQ, 6 Corps Supply: B28.25 1-6 (all), 6b (5): w/i 3 B27.28, east of 27.xx inclusive 2-6, 6b (5): w/i 2 B29.21 3-6, 6b (5): w/i 3 B38.34, west of Rock Creek 11 Corps HQ, 11 Corps Supply: A29.08 1-1-11: A30.08 2-1-11: A29.09 1-2-11: A27.09 2-2-11: A27.08 1-3-11: A28.09 2-3-11: A28.08 11b (5): A27.09 11b (3): A29.09 12 Corps HQ, 12 Corps Supply: A33.06 1-1-12: A34.08 3-1-12: A35.07 Ind-12: A34.07 1-2-12: A35.06 ex A35.05 2-2-12: A36.04 3-2-12: A36.03 12b (2): A33.09 12b (5): A34.07 Cav Corps HQ, Cav Corps Supply: A31.05 1-2-Cv: A59.17 3-2-Cv: A55.11 2-3-Cv: A57.16 Cavb (5): A56.15 Kilpatrick, 1-3-Cv, Cavb (5): w/i 5 B29.23
Note: 1-Cv (except R-1-Cv) has been withdrawn from play.
A Pot HQ: A28.07 A Pot Supply: B33.33 Resb (5): one each in hexes: A31.08, A28.09, A27.08, A26.06, A26.03, B26.33, B26.31
Reynolds has been killed. Newton (3-6) commands 1 Corps. Barlow and Sickles have been wounded. Birney commands 3 Corps.
Orders: 1, 2, 3, 5, 6, 11 and 12 Corps are to defend in place. 1-5 has a divisional goal to defend Big Round Top. 3-6 has a divisional goal to defend the Baltimore Pike and the army's right flank.
2-Cv has a divisional goal to defend the Low Dutch Road—Brinkerhoff Ridge area and to prevent the enemy's approach to the Baltimore Pike.
3-Cv has a divisional goal to defend the Taneytown Road and the army's left flank.
Artillery Ammunition: 150
Earlier Losses: 197
Reinforcements: As per the Order of Arrival
Confederate Information
Set Up: 1 Corps HQ: A18.05 1 Corps Supply: B15.31 Tex-H-1: B22.25 B-H-1: B20.25 A-H-1: B18.25 L-H-1: B16.25 W-M-1: B22.27 S-M-1: B22.29 K-M-1: B21.31 B-M-1: B20.32 K-P-1: A17.03 G-P-1: A17.04 A-P-1: A16.03 1b (5): one each in hexes: B16.25, B19.31, B20.33, B20.34, A20.01 1b (2): A20.02 2 Corps HQ, 2 Corps Supply: A27.15 J-2 (all), O-R-2, Da-R-2: w/i 3 A38.12 E-2 (all): spread among A30.14, A31.14, A32.14, A33.14 Do-R-2: A24.11 R-R-2: A25.12 I-R-2: A25.13 2b (5): one each in hexes: A21.14, A21.15, A21.20, A30.14, A36.15 3 Corps HQ, 3 Corps Supply: A19.11 A-H-3: A18.06 P-H-3: A18.07 D-H-3: A19.08 B-H-3: A19.09 S-P-3: A17.07 L-P-3: A17.08 T-P-3: A23.10 P-P-3: A22.08 Wx-A-3: A18.01 L-A-3: A18.02 Wt-A-3: A17.06 P-A-3: A18.08 M-A-3: A19.10 3b (5): one each in hexes: A19.04, A19.05, A20.06, A20.08, A20.10 A NVa HQ, A NVa Supply: A19.18 I-Cav: w/i 5 A19.18 F-Cav: A58.22 Jn-Cav: A57.21 C-Cav: A55.21 H-Cav: A56.22 Cavb (5, limbered): one each in hexes: A56.23, A56.24
Pender has been killed. Hood and Heth have been wounded. Trimble commands P-3.
Orders: H-1 and M-1 have divisional goals to defend in place and protect the army's right flank.
H-3 and P-3 (less T-P-3 and P-P-3 which are attached to R-2) have been attached to 1 Corps.
1 Corps (less H-1 and M-1) is to attack the Union center along Cemetery Ridge in order to capture the four adjacent hexes of the ridge between hexes A26.02 and A27.07. The attack is to be made at 3:00pm after four turns of artillery preparation.
Wx-A-3 and L-A-3 are combined to make a separate division (commanded by a repl leader). This ad hoc division has a divisional goal to advance to protect P-1's flank. This divisional goal has a D1 acceptance status.
Da-R-2 and O-R-2 are attached to J-2.
J-2 has a divisional goal to defend the vicinity of Benner's Hill and the Hanover Road.
2 Corps is to defend in place.
Stuart's Cavalry Division (less I-Cav) has a divisional goal to attack south along Brinkerhoff's Ridge to reach the Baltimore Pike and to block that road. I-Cav is under the direct control of the army HQ and has no orders.
Artillery Ammunition: 100
Earlier Losses: 160
Reinforcements: As per the Order of Arrival
Victory Determination Use the standard victory conditions in 5.0.
Levels of Victory
Rebel Massive—30 or more Rebel Major—29 to 20 Rebel Minor—19 to 9 Draw—8 to -8 Union Minor— -9 to -19 Union Major— -20 to -29 Union Massive— -30 or less
Historical Outcome: The Union won a minor victory with -11 VPs.
6.9 Scenario 9: The Fourth Day
On July 4th, Lee hoped to redeem the failures of the last two days with a decisive victory. While his army had temporarily exhausted its offensive punch, Lee still hoped to provoke Meade into an attack which he could easily stop. For his part, Meade remained wary. The Army of the Potomac had suffered heavy losses (including three of its most aggressive corps commanders). Still, the army had one entire fresh corps—6 Corps—with which it might deal Lee a crippling blow.
General Information
Map Area: Use both maps. First Turn: 4:00am July 4th Last Turn: 8:00pm July 4th Total Game Length: 33 turns
Union Information
Set Up: Set up as per scenario 8, plus the following: R-1-Cv, Cavb (3): with Kilpatrick and 1-3-Cv
Reynolds is dead. Sickels, Hancock, Gibbon and Barlow have been wounded. Newton (3-6) commands 1 Corps, Birney commands 3 Corps, and Hays commands 2 Corps.
Orders: Same as scenario 8, plus R-1-Cv has been attached to 3-Cv.
Artillery Ammunition: 150
Earlier Losses: 221
Reinforcements: None
Confederate Information
Set Up: 1 Corps: All units on Map B, west of 19.xx, north of xx.15. 2 Corps: All units on Map A, west of 27.xx, north of the Hagerstown-Fairfield Road. 3 Corps: All units west of 21.xx, north of 1 Corps, south of 2 Corps. Cav Div (less I-Cav): w/i 10 any CSA unit, west of 27.xx, no closer than 5 of any Union unit. A NVa HQ, A NVa Supply: w/i 5 A19.18 I-Cav: On the Chambersburg Pike west of A19.18.
Hood, Heth, and Trimble have been wounded. Pender is dead.
Orders: 1, 2, and 3 Corps are to defend in place.
Cav has no orders.
I-Cav has a divisional goal to exit the map via Entry Hex A on or after 3:00pm. Failure to do so or in exiting early will result in a 10 VP award to the Union player.
Artillery Ammunition: 60
Earlier Losses: 223
Reinforcements: None
Victory Determination Use the standard victory conditions in 5.0.
Levels of Victory
Rebel Massive—30 or more Rebel Major—29 to 20 Rebel Minor—19 to 9 Draw—8 to -8 Union Minor— -9 to -19 Union Major— -20 to -29 Union Massive— -30 or less
Historical Outcome: The Union won a major victory with -21 VPs.
6.10 Scenario 10: The Historical Battle of Gettysburg
This scenario recreates the entire battle—from July 1st to July 4th.
General Information
Map Area: Use both maps. First Turn: 8:30am July 1st Start play with the UNION player turn. Last Turn: 8:00pm July 4th Total Game Length: 144 Turns
Union Information
Set Up: As per scenario 1
Orders: As per scenario 1
Artillery Ammunition: 600
Reinforcements: As per Order of Arrival
Confederate Information
Set Up: None
Orders: As per scenario 1
Artillery Ammunition: 300
Reinforcements: As per Order of Arrival
Victory Determination Use the standard victory conditions in 5.0.
Levels of Victory
Rebel Massive—30 or more Rebel Major—29 to 20 Rebel Minor—19 to 9 Draw—8 to -8 Union Minor— -9 to -19 Union Major— -20 to -29 Union Massive— -30 or less
Historical Outcome: The Union won a minor victory with -11 VPs.
6.11 Scenario 11: Jackson Lives!
Of all the what-ifs of the Battle of Gettysburg, the most often raised has to be the question of what would have happened had Thomas J. "Stonewall" Jackson been there to command—as opposed to dying after Chancellorsville. Certainly Lee missed his presence on the field, and historians inevitably compare AP Hill's and Ewell's performances to Jackson's campaigns. In this spirit, I have included a Jackson scenario in order for players to draw their own conclusions about his participation. This scenario assumes Jackson was not wounded in May and was alive and well for the invasion of Pennsylvania.
All conditions for this scenario are the same as that listed in 6.10, except for the following:
- Revised Confederate Order of Battle
The following organization is substituted for the regular OB. With Jackson alive, Lee probably would not have reorganized into three corps.
1 Corps—Longstreet Hood's Division McLaws' Division Pickett's Division Anderson's (A-3) Division 5x 1b (5) 1x 1b (2) 2x 3b (5)
2 Corps—Jackson Early's Division Rodes' Division Johnson's Division AP Hill's Light Division (4-rated Hill, A-H-3, B-H-3, P-3 (all)) Ewell's Provisional Division (3-rated Ewell, P-H-3, D-H-3) 5x 2b (5) 3x 3b (5)
Stuart's Cavalry Division (unchanged)
Heth and Pender now assume the same status as Trimble. 3 Corps HQ, 3 Corps Supply are not used.
- Revised Order of Arrival
Use the Jackson Lives Confederate Order of Arrival instead of the standard Order of Arrival.
6.12 Variable Arrival Charts
The following charts (Union and Confederate) allow players to exercise more control over the developing pace of events. The historical battle was a classic meeting engagement with both army's colliding near the town. Using these charts, each player can vary the arrival times and locations of his forces to better implement his plans. I have introduced a measure of uncertainty (in the form of a dice roll) to keep players from absolute control.
1. Location Selection
Prior to the start of the game, each player selects a location of entry for each of his "forces" (see list below). Based on the entry area chosen, the chart lists the first turn the player may begin rolling for that force's arrival. Note that some forces are not listed—those troops always arrive according to the historical Standard Order of Arrival.
2. Entry Rolls
Beginning on the turn specified by the chart, the player rolls two dice for each force awaiting entry separately during the Command Phase. On a dice roll of 10 or more, the force in question is released for entry at the selected entry hex and may enter as early as the same turn's Movement and Close Combat Phase. A successful release only indicates that a force can enter the map—any force can be deliberately held off-map after this time and brought on later without penalty or any additional die roll. It is perfectly legitimate to hold a force off-map to further deceive the enemy. Regardless of how long a player delays a force's entry, they must enter at the originally specified entry hex. If a force's roll is unsuccessful, the player may roll again on each following turn until he achieves a release. The success or failure of the each roll a player makes for each of his different groups has no effect on any other group or roll.
3. Order Selection
Prior to the start of play, each player needs to record the desired initial orders for each entry force. Orders can be of any type and are accepted before the force enters the map. Attack orders should be fairly detailed with specific listings of objective (a town, hill, etc.) and boundaries of the advance.
Example: The Union player wishes to change the arrival of his 6 Corps which is marked as "force 15". Running down the left side of the table, he comes to the 15 line. In order to have them arrive at the Union left flank, he decides to bring 6 Corps in at Entry Hex L (the Emmitsburg Road) and attack the Confederate flank along the Warfield Ridge. Looking across the table to the Entry Hex L column, he sees the notation "4am, 3rd" which means he can begin rolling for release at 4:00am, July 3rd. If he rolls a 10 or more, he can then bring on 6 Corps at L. If unsuccessful, he must wait until the next turn.
If this Union player had simply wanted to vary the historical arrivals (see 4. below), he would refer to the Standard Order of Arrival. Next to the historical time of 4:30pm, July 2nd, the time (3:00pm) is shown. At the 3:00pm turn of July 2nd, the Union player could begin rolling to see if the 6 Corps can enter the map.
4. Historical Variable Arrivals
The above is rather lengthy and preparation intensive. A short hand method of introducing variability is to use the variable times listed on the Standard Order of Arrivals themselves. Next to the historical time shown for each arrival is a second time (in parenthesis). The second time is the turn to begin rolling for arrival. Release to the map still occurs on a roll of 10 or more on two dice, but orders and locations of arrival are the same as when using the historical arrivals. Variable entries (using this method) may be delayed after release, just like those above. Note that some arrivals have no second time shown in parenthesis—these always appear at the historical time.
5. Confederate Forces
| Force | Units |
|---|---|
| 1 | R-2, Ewell, 2 Corps HQ, 2b (5) |
| 2 | E-2, Jn-Cav, 2b (5) |
| 3 | J-2, 2 Corps Supply, 3x 2b (5) |
| 4 | A-3, 3 Corps Supply, 2x 3b |
| 5 | M-1, 1b (5), 1b (2), 1 Corps HQ, Longstreet |
| 6 | H-1, 3x 1b (5), 1 Corps Supply |
| 7 | P-1, 1b (5) |
| 8 | Buckner's Division, B Div b (5) (optional) |
| 9 | DH Hill's Corps (optional) |
| 10 | Stuart, C-Cav, F-Cav, H-Cav, 2x Cb (5) |
| 11 | I-Cav |
| 12 |
6. Union Forces
| Force | Units |
|---|---|
| 1 | 3-3-1, 1 Corps Supply |
| 2 | 12 Corps (less Ind-12) |
| 3 | Sickels, 3 Corps HQ, 1-3 (less 3-1-3), 3b (5) |
| 4 | 2 Corps |
| 5 | 2-3 (less 3-2-3), 3b (5) |
| 6 | A Pot HQ, A Pot Supply, Cav HQ, Cav Supply, Meade, Pleasonton |
| 7 | Sykes, 5 Corps HQ, 1-5, 5b (5) |
| 8 | 2-5, 5b (3), 5 Corps Supply |
| 9 | Ind-12 |
| 10 | 7x Rb (5) |
| 11 | 3-1-3, 3-2-3, 3 Corps Supply |
| 12 |
7.0 Battle Notes
By the summer of 1863, the Confederacy faced critical choices. Two years of bloody attrition were beginning to tell on both the Southern economy and populace. Out West (the modern Midwest, that is), vast tracts of secessionist territory were firmly occupied by Federal forces. The occupied lands included the important industrial centers of Nashville and New Orleans. Only two besieged Rebel bastions—Vicksburg and Port Hudson—still denied the Union control of the entire Mississippi. Their fall was merely a question of time. Unquestionably, disaster loomed in the west.
In Virginia, however, Southern prospects seemed brighter. Under the able leadership of General Robert E. Lee, the Army of Northern Virginia repeatedly defeated its Federal foes, most recently at Chancellorsville in May of 1863. President Jefferson C. Davis now looked to Lee's army to redeem Confederate fortunes.
A number of plans were discussed by the Rebel leaders in late May, all of them designed to strike an offensive blow which would recoup Confederate losses. Within Lee's own army, James Longstreet, in conjunction with Joseph E. Johnston, urged Davis to shift a portion of Lee's army to Tennessee, unite with Bragg's Army of Tennessee, and attack to drive the Union forces back to the Ohio River. Lee himself might go, they thought, to bring success to the west.
Lee demurred. He preferred to remain in Virginia, his home state, where he was intimately familiar with the terrain and opponents. Instead, he offered up his own plan—a move north of the Potomac onto Federal soil. In the end, Davis agreed with Lee's proposal setting the stage for a move into Pennsylvania.
It is debatable whether Bragg could have won a victory no matter how strongly reinforced. In that sense, Davis made the right choice in reinforcing success instead of failure. But Lee's invasion was murky in concept. Its goal was to transfer the seat of the war to Union soil and to defeat the Army of the Potomac in a northern state. Davis hoped such a victory would bring foreign recognition—that most illusive of Southern objectives. Capturing Washington or permanently holding Union territory was simply unattainable given the size and depth of Federal garrisons. Lee simply lacked the strength to permanently threaten the strongest areas of the north.
Nor did Davis seem willing to give Lee the kind of strength he needed to do much of anything except launch a giant raid. Lee's forces numbered some 75,000 men and only small reinforcements were to be had. Davis clung to his departmental defense strategy and major infantry forces were retained to defend Richmond and the Carolinas. What was needed was a major gamble; Davis chose to hedge his bets.
The first week of June found the Army of Northern Virginia concentrated around Culpepper, Virginia. Two large brigades were sent to Lee from North Carolina, but these only replaced veteran commands which were retained for the defense of Richmond. Most significantly, Lee revised his command structure from two corps to three in the wake of Jackson's death. Longstreet continued to command 1st Corps and two of the army's ablest division commanders—Richard S. Ewell and A.P. Hill—were elevated to command the 2nd and 3rd Corps, respectively. Each corps now commanded three divisions in a well-balanced and flexible structure.
It was the Union army which opened the campaign with a surprise cavalry reconnaissance which crossed the Rapidan River and attacked Stuart's Rebel horsemen at the battle of Brandy Station. The Rebel Cavalry, concentrated for the coming offensive, had just completed one grand review the day before and was preparing for another. The Union cavalry surprised Stuart's men on the 9th of June in what, with some 15,000 troopers involved, was the largest mounted action of the war. An inconclusive affair, Stuart managed to drive off the Yankees, but only with great embarrassment to the Rebel cavalry chief. Stuart was harshly criticized for both being surprised and for his handling of the fight. Extremely sensitive, he would be looking for ways to obliterate the stain in the upcoming campaign.
By mid-June, the Rebels were underway. Ewell's Corps led the way into the Shennandoah Valley on a left hook into Pennsylvania. Longstreet followed and Hill brought up the rear. Both new corps commanders quickly laid to rest any reservations Lee might have had regarding their performance. Ewell did especially well, handily defeating a Union force at Winchester and rapidly moving north.
The third week of June found Ewell menacing the Pennsylvania state capitol at Harrisburg while the rest of the army was concentrated around Chambersburg. The various Union state governments panicked and militias mobilized as far away as New England. The Federal government kept tight rein on the Army of the Potomac and recalled troops from North Carolina to reinforce Baltimore and Washington.
Stuart, however, made a mistake. Allowed considerable latitude in his orders to screen Lee's army, he elected to take his best three brigades and ride completely around the Union army—an exploit he had pulled off successfully several times before. This time, however, he found marching Union columns blocking the roads which forced detour and delay. For ten critical days, Stuart was completely out of contact with Lee and unable to alert his commander to Yankee movements. Not until July 2nd—after the battle began—did Stuart reach the army.
This was a dangerous lapse, for the Army of the Potomac was moving north, following Lee's movements like a wary boxer between the Rebels and Washington. Joseph Hooker commanded—but not for long. After his defeat at Chancellorsville, Lincoln doubted his ability and took a decisive (and dangerous) step.
On the night of June 27th, the Union 5th Corps commander, George G. Meade, was awakened in his tent and informed he was the new commander of the Army of the Potomac. Lincoln would brook no refusal. Meade went immediately to work preparing for the fight of his career.
Meade's circumstances were hardly encouraging. He was not a member of Hooker's inner circle and knew little of Hooker's plans beyond that of his own corps. There was no time to replace the army staff with men of his own choosing. Instead, he had to pick up command in mid stride and formulate his plans on the run. Meade adopted a conservative approach and examined a plan to set up a defensive line along the Pipe Creek. His plan was to maintain a defensive screen in front of Washington and Baltimore, and react to Lee's moves as they became fully revealed.
The next night, Lee got his own midnight surprise. A spy in Longstreet's employ arrived in the Rebel camps with news of the Union army's proximity and Hooker's replacement. Lee was doubtful of the spy's reliability and was puzzled that Stuart had not provided this information. He also quickly realized he could not afford inaction. Lee ordered the Army of Northern Virginia to concentrate in preparation of the coming fight. Gettysburg was chosen as the focal point because of its convenient road network. Ewell was ordered south, abandoning his threat of Harrisburg, while Hill started east over South Mountain towards Cashtown.
On the evening of June 30th, a brigade of Heth's Division encountered what they thought were Union militia just west of Gettysburg. That night, Heth asked Hill if he had any objections to his taking his whole division into town the next morning. Hill answered that he had "none in the world."
The First Day
In reality, the Federals were two brigades of John Buford's cavalry division which was screening the Union left wing. At 9:30am, Heth's lead two brigades (Archer and Davis) collided with the Union horsemen at Willoughby Run. First Heth tried to brush aside the Federals, but was repulsed. In response, both brigades went into line and tried again.
This time they found Yankee infantry. The Union 1st Corps under John Reynolds, hurrying to Buford's support, reached the field with two brigades at about 10:00am. Led by the Iron Brigade, these brigades rebuffed the Rebels with a sharp counterattack. Several hundred prisoners, including Archer himself, were captured.
Heth set about re-organizing his straggled command and adopted a defensive posture. About that time, John Reynolds was killed by a Rebel sniper—but not before reaching the crucial decision to fight at Gettysburg. Just prior to his death, Reynolds had ordered up the 11th and 3rd Corps to his support and sent word to Meade that the army could fight successfully at Gettysburg.
To his own credit, upon receiving Reynolds' message, Meade started the concentration of the rest of the army at Gettysburg. While he had not yet seen the ground himself, he had great trust in Reynolds' judgment and shelved his own Pipe Creek plan.
For the Confederates, the rest of the morning passed quietly. Lee's final instructions to the scattered corps and divisional commanders was to move to Gettysburg, but "not to bring on a general engagement until the [whole] army was up." Heth was soon joined by A.P. Hill, but they hesitated to attack again knowing that they faced large Federal forces of veteran troops and not scattered militia. Hill elected to bring up his next division, Pender's, and to await Lee's own arrival.
By 1:00pm, two Union corps had arrived and were busy deploying. The Union 1st Corps continued to defend McPherson's Ridge, the scene of the initial clash, while the 11th Corps filed in on their right. Oliver O. Howard, the 11th's commander, had by now reached the field and took charge as the senior man present. Leaving one of his three divisions in reserve on Cemetery Hill, the other two advanced with orders to seize and defend Oak Hill to secure 1st Corps' flank.
Fresh Rebel arrivals foiled Howard's intentions, as Ewell's 2nd Corps reached Oak Hill first with Rodes' Division in the lead. Ewell realized his arrival flanked the Union 1st Corps line and ordered an attack. When Early's Division arrived it further overlapped the Union line by outflanking even the 11th Corps positions. The situation couldn't be better for Lee's men.
Rodes' Division struck first, but faltered in his first attack. Poorly handled, Iverson's Brigade was virtually eliminated in the initial clash. Rodes quickly renewed the assault but hard fighting was needed to clear the Union line off McPherson's Ridge.
By now, Lee had arrived and was with Hill to witness Rodes' advance. Realizing the battle had begun whether he desired it or not, Lee let Hill advance with Heth and Pender's Divisions. Facing more than twice their numbers, the Union 1st Corps continued to give ground and fell back from Seminary Ridge. What was worse, the 11th Corps had broken behind them and forced a general retreat to Cemetery Hill.
The 11th Corps, scapegoats of Chancellorsville, were sorely handled on July 1st. The four brigades Howard sent forward to the north of the town were defeated piecemeal by only two Rebel brigades (Doles' and Gordon's). Barlow, commander of 1-11 Corps, advanced too far forward to a rise of ground later called "Barlow's Knoll" and allowed himself to be flanked on both sides. The two brigades of the division were quickly routed. This left the 3-11 Division alone on the field and they were none too steady after the collapse of their comrades. Again the Yankees were out maneuvered; by 3:30pm organized resistance ended north of the town.
Now Ewell made a fateful decision. Despite having routed 11th Corps and defeated 1st Corps, Ewell halted his command rather than continue on to capture Cemetery Hill. That decision has been castigated by historians and armchair generals ever since.
In reality, Ewell faced significant problems. First of all, there was still organized resistance on the field. Second Division, 11th Corps, unscathed so far, remained in defense atop the hill and the rest of the Union troops were rallying there. Ewell's own men had suffered heavily. Rodes' command lost almost 3,000 men and many more were stragglers in the confused pursuit through the town. Effectively, Ewell had but two fresh brigades of Early's Divisions with which to storm Cemetery Hill. Finally, Lee's own orders warning of caution seemed still to be effect—though the army commander himself was on the field, no countermanding order arrived.
Lee seemed upset that Ewell had stopped, but if blame must be laid at anyone's feet for the delay, Lee must assume the lion's share himself. Lee never ordered Ewell to press on, nor did he order Hill (who was in a better position to do so) to take the Federal position. Instead of two brigades, Hill had eight or nine with which to attack—including the Anderson's Division of fresh troops. Lee, however, did nothing.
As Union troops drifted back to Cemetery Hill, a new Federal commander greeted them. Winfield Scott Hancock, commander of the 2nd Corps, was sent on ahead by Meade to assume command after Reynolds' death. His presence was greeted joyfully by everyone except Howard—who felt his competence was being questioned. (Undoubtedly it was, since Hancock was junior to Howard but better trusted by Meade.) Hancock worked diligently to restore organization to the Union line and, by 4:00pm, the defense was solidly in lace atop Cemetery Hill. Soon, the 12th Corps arrived and anchored the Union line on Culp's Hill forestalling a Confederate effort to occupy that height themselves in the dark.
The Second Day
Lee spent the morning of July 2nd conferring with his corps commanders. After the success of the first day's action, Lee intended to continue the attack. His subordinates' opinions, however, were divided. Longstreet wanted to execute a flank move to get between the Union army and Washington with the goal of forcing the Union army to attack the Rebels on ground of their choosing. Ewell seemed uncertain about attacking on his front (between Cemetery and Culp's Hills), but, when asked if he preferred to withdraw, he decided an attack was possible. Hill added little to the debate because of his illness.
Around 10:00am, Lee again met with Longstreet and Hill (having returned from Ewell's HQ). Lee rejected Longstreet's maneuver and told his officers that the army would attack the Union right along the Emmitsburg Road. Longstreet's Corps (only two divisions of which were up) would make the assault with the support of Anderson's Division of Hill's Corps. A secondary attack would be made on Ewell's front when the action began.
Earlier that morning, Lee sent a scouting party out which returned with good news. The party reported that the Union flank ended a short ways down Cemetery Ridge and that the Round Tops were unoccupied. They claimed to have crossed the Emmitsburg Road and climbed Little Round Top without encountering a single Federal.
They must have been mistaken. In reality, Emmitsburg Road was a busy highway that morning. Buford's Cavalry patrolled the area and large elements of 3rd Corps continued to arrive. A Union signal station was located atop Little Round Top itself and parts of 3rd and 12th Corps occupied the ground just north of the hill. Had Lee's scouts followed the route they claimed, they would have repeatedly run into Federal troops.
Based on this faulty intelligence, Lee envisioned an attack by Longstreet's two divisions parallel to the Emmitsburg Road aimed at hitting the imaginary Union flank on Cemetery Ridge. Those orders were issued shortly before 11:00am as the conference broke up.
Longstreet had with him only two of his three divisions and Hood's Division was further short Law's Brigade. Longstreet asked Lee if he could wait until Law was up and Lee agreed. The Rebel move did not start until around noon.
Longstreet's route was designed to keep his column concealed from Union observation and was about three miles long to the start position. Once underway, however, the Rebel army's lack of cavalry became apparent again. The route had been improperly scouted and at one point the column was exposed. Mindful of the need to maintain surprise, Longstreet ordered a lengthy countermarch which added some two miles to the total distance.
At 3:00pm, Longstreet reached his attack point—only to make another startling discovery: The Union flank was not where it was supposed to be. An entire Union corps was deployed along the Emmitsburg Road and it extended as far south as Devil's Den in front of the Round Tops. In the next 45 minutes, Lee, Longstreet, and his division commanders realigned and redeployed the entire attack—changing the axis from north-south to east-west.
The advanced Union position was adopted by Dan Sickles' 3rd Corps. As one of Hooker's cronies, Sickles resented Meade. The assigned 3rd Corps position (just north of Little Round Top) was dominated by the high ground around the Peach Orchard about 800 yards to its front. Around 2:00pm, Sickles advanced his entire corps to the new, forward, position. Viewed in isolation, this might have been a better defensive position, but it created a line far too long for Sickles to defend by himself and left both his flanks unsupported—as well as leaving the Round Tops uncovered.
During the process of realigning his division, Hood sent out his own scouts and discovered that Big Round Top was unoccupied. He then repeatedly asked Longstreet to allow him to swing around the big hill and attack astride the Taneytown Road in order to hit the Union rear. Longstreet rejected the idea because there wasn't enough daylight left to complete the move and attack that afternoon.
At 3:30pm, the Rebel cannon opened and a few minutes later Longstreet's infantry advanced to begin one of the fiercest tactical engagements of the war. Longstreet employed eleven brigades and the Federals committed all of the 3rd and 5th Corps as well as 2/3rds of the 2nd Corps and a division of the 6th Corps to stop him. Longstreet had about 18,000 men (losing about 6,000) to the Union's 30,000 (losing 9,000). The Confederates overwhelmed Sickles' thin line, but recoiled against fresh Union troops holding the Round Tops and Cemetery Ridge.
Ewell's supporting attack was less solidly delivered. At dusk, two brigades struck the Union 11th Corps on the east face of Cemetery Hill briefly gaining a lodgment only to be flung back by fresh Union troops. After dark, Johnson's Division captured Union defensive positions around Culp's Hill which were abandoned when Meade ordered the 12th Corps to send troops to Sickles' position. Still, Ewell never managed to put more than three brigades into action at any one time and the Union lines were never seriously threatened.
By about 8:00pm, fighting died away with little Confederate gain. The Union position remained solidly anchored between the Little Round Top and Cemetery-Culp's Hills area with fresh troops available to replace the battered 3rd Corps. If July 1st was a Rebel success, July 2nd was at best a draw.
The Third Day
As July 3rd dawned, Lee was convinced that the Union army was perched on the precipice of collapse—and needed but one more push to complete the rout. He chose to gamble all on one mighty blow at Meade's center on the assumption that the Federals had weakened this part of the line the day before to meet the crises on their flanks.
Lee turned to Longstreet to mount this attack. In addition to being his most dependable corps commander, Longstreet's last division (Pickett's) was the only fresh formation available.
Longstreet opposed the idea of the attack. Not only had his remaining two divisions suffered heavily the day before and would be unable to participate, but he considered the attack foolhardy at best. The approach was over a mile of open ground which faced a compact Union line well supported by artillery.
Lee insisted on the attack and only agreed to replace Hood and McLaws with Heth and two of Pender's Brigades from 3rd Corps. Longstreet deferred, pointing out that two-thirds of the force belonged to Hill and that he should command. Again, Lee insisted.
Pickett's Charge went forward despite Longstreet's belief that it was nothing more than a futile waste of life. At 1:00pm, the Rebels opened a two hour bombardment by over 100 cannon in an attempt to shatter the Federal center. The nine assault brigades massed and were supported by two more of Anderson's brigades which were to protect Pickett's flank. Stuart, who had made his belated arrival on the afternoon of July 2nd, was ordered took four brigades of cavalry and block the Baltimore Pike (in anticipation of the expected Federal rout).
The barrage proved to be almost completely ineffective. For over 90 minutes, the cannons worked and were joined by many Federal guns. While the noise was deafening, damage was slight. Finally, at about 3:00pm, the Rebels stepped off.
It was all of the disaster Longstreet expected. Of the 14,000 Rebels who advanced (counting Anderson's men), 6,000 became casualties. Pickett's Division suffered some 60% losses and would require the entire next year to recover. The Federals lost only about 2,000 men and received a major morale boost from the Rebel repulse.
As a footnote to the main attack, Stuart's Cavalry were also repulsed in their efforts to cut the Union retreat route.
The Fourth Day
By July 4th, Lee was out of offensive options. All nine Rebel divisions had been heavily engaged and artillery ammunition was running low. Lee's losses stood at more than 23,000 men and may have been as high as 28,000. Still the Confederate commander refused to admit complete defeat and pulled into a defensive line along Seminary Ridge. Here, Lee hoped to redeem his fortunes by enticing Meade to attack. It was a long shot at best.
For his part, Meade knew he had won a sizable victory and was not inclined to risk it all by attacking now. The Union 6th Corps remained fresh and available (not having seen significant action earlier), but other losses were heavy. 1st, 3rd, and 11th Corps were all badly mauled. Three corps commanders (including Meade's most trusted subordinates, Reynolds and Hancock). In all, 23,000 Federals had been lost.
With Meade refusing to attack, Lee finally elected to withdraw. At 2:00pm, the last wagons of a 20 mile long train of suffering—the Rebel wounded—departed towards Chambersburg. In a hard rain and darkness, Lee began the retreat back into Virginia. Meade followed cautiously.
After waiting for the Potomac to subside, Lee crossed into Virginia on July 14th and the campaign ended.
The north had twin victories to celebrate, for on July 4th Vicksburg had surrendered to Grant. Still, Lincoln was disappointed that Meade allowed Lee to escape and in the end brought Grant east to finish the job.
Designer's Notes
As I sat down to start work on the Second Edition of Thunder, I began to examine ways to add to the package in addition to cleaning up previous errors and omissions. Gettysburg still holds tremendous interest for me and I hadn't stopped study of the affair with the publication of the first edition. As a result, a variety of things have been added to this version to make it better than what came before.
Order of Battle Changes
A number of changes have been made to various units in the game. Brigades whose morale level was altered reflect my changed opinion of their performance. A brigade's morale level is based on a number of different factors, which include: the ability of the commander, the amount of fighting done during the battle, and performance while in combat. For instance, O'Neal's Brigade is made of some pretty good troops but was downgraded because of O'Neal's weak leadership. In the first game, I adjusted their wreck level to compensate, now I have adopted a different philosophy. Overall, there have been a number of morale adjustments—some upwards, most downwards. On the whole, however, both the ANVa and AOP remain crack forces.
Some strengths have changed by a point here and there. This is not the result of new information (Busey and Martin remain the definitive numbers source), but rather a better job of rounding on my part to equal divisional totals. These numeric changes are virtually insignificant, however, and shouldn't affect play at all.
The real changes to the OB are in the cavalry and optional forces. Both armies have quite a different mounted force from before. In the first Thunder, Union cavalry, with infantry fire values and plus weapons, is a deadly force—far out of proportion to its actual effectiveness. I have punished it heavily to reflect a more historical employment. First, I reduced some morale ratings and greatly modified the wreck levels to preclude using troopers in sustained combat. Only Buford's first two brigades are still effective while dismounted because of their commander's emphasis on such tactics long before the rest of the corps adopted them. Second, I added to the cavalry's fragility by increasing the victory point awards for wrecked cavalry brigades. This gives the player a force he can ill afford to use very much—which is as it should be since cavalry was far to valuable in advance and retreat to be used in sustained battle against infantry.
A quick look at the CSA horsemen provides a greater shock. No more are these troops cursed with ineffective fire levels. Instead, I apportioned the various types of weaponry extant within the command and tried to match a number of brigades to that armament. Fitz Lee's men, for instance, represent all the carbines of the division and have plus weapons now. Other units have either rifles or pistols as their primary weapon. Of course, the CSA horsemen were penalized in terms of wrecked levels and VP value as well. The overall effects to put both cavalry commands on a more equal—read less effective—footing.
The Optional Units
One of the reasons that the South lost the war was that its nominal strategic advantage of interior lines was mostly illusionary. The southern railways were vastly inferior to the North's and coastal shipping was denied by the Union navy. Hence, the Rebels could rarely concentrate effectively. Still, they did manage to achieve strategic concentration at Chickamauga—and that was after their main East-West link had been severed. With a bit more foresight and effective planning, the South could have given Lee enough strength for a serious effort to win the war and dictate a peace to the North.
In July, Beauregard (commander of the Charleston area) wrote Joseph Johnston (overall commander in the west) complaining of the uselessness of Lee's "raid." Instead, he desired a powerful concentration in the West to redeem Southern fortunes there. With 20,000 men from Lee and 10,000 more from Beauregard's own command, Johnston might win a critical victory in the Mississippi valley. Beauregard was famous for proposing grandiose plans, but inherent in this one was true strategic insight. The South did need to concentrate its limited resources for a maximum effort because the long, inconclusive war was draining it and making more certain a Union victory thorough attrition. Having already committed the South to a Napoleonic style of warfare, her leadership now had no real recourse but to gamble all on a major effort.
What a gamble it would have been indeed! Concentration of efforts would have had to commence on the heels of the Chancellorsville victory in May. Troops from three major areas were realistically available.
An entire corps could be assembled from the coastal garrisons of the Carolinas. D.H. Hill, a proven combat commander under Lee, was an easy choice for the commander of this new corps. Historically, Hill was promoted to corps command under Bragg in September anyway. Taliaferro's units were from South Carolina, while Whiting's came from Hill's own North Carolina command. Evans' Brigade (E-T-H) was added because in the summer of '63 it moved from Mississippi to Beauregard's department and hence available.
Next came the troops of Southwest Virginia under Sam Jones. Lee had already taken Imboden's mounted force from there. Jones was ordered to take some troops northwards after the battle to help cover Lee's retreat. Jones' infantry was less reliable than most—given the high proportion of 'Partisan Rangers' and other irregulars—but these troops fought well in 1864.
Finally, Buckner's three brigades were stationed in east Tennessee. Buckner took command of the district in May and promptly reorganized the available forces to free up three brigades of infantry to act as a mobile reserve. In September, Buckner's men moved to join Bragg in Tennessee—it took no great leap to send them north in June instead.
Enough troops—mostly cavalry and artillery, but with a smattering of garrison infantry—were omitted from the above contingents to provide a viable screen in their respective departments. Assuming the historical relatively passive Union response in these departments during the invasion, the Confederacy should suffer no irretrievable losses. All of the major points could be held and any minor set backs could be more than compensated by a substantial victory north of the Potomac.
Additionally, with such a major Confederate effort directed northwards, the Lincoln administration would likely react in the same manner it did historically (only more so): expending all efforts on a frantic scramble to cover Washington—not on launching subsidiary offensives elsewhere. The larger the threat in Pennsylvania; the greater this response would be.
Still, use of these CSA troops would have been a gamble which would aim at ending the war—win or lose—in 1863. Davis was not that kind of man—the opposite in fact. The Confederate President's policies doomed the South to a compartmentalized defense and to defeat in the end in detail. In the game, use of all these options will force the Rebel to seek a decisive win because it will cost him 21 VPs to use them all at once. Anything short of crushing Meade's army will be a net loss.
The Union options add to the game nearly all the effective field forces available to aid the army. Significant numbers of garrison troops held DC., but would not have been released for the field. A large number of emergency militia were being assembled in Baltimore and Pennsylvania as well, but would have been unable to offer serious resistance to veteran combat troops. By way of example, look at the disaster which befell a similar scratch force in 1862 at Richmond, Kentucky, when confronted by veterans. Only in West Virginia—on the opposite side of Lee's army—were substantial Union troops available (some 14,000 men), but they would have had great difficulty in joining Meade with Lee's whole army in the way. Given time, of course, massive Union reinforcements could arrive to oppose Lee's operations. In the short run, however, Meade pretty well had what was available. Both of the included Federal optional divisions did join the army after the fighting and were incorporated piecemeal into the various Union corps. Here, I have assumed the Union government simply expedited matters.
The optional units bring the game a great deal of flexibility and balance. Mixing options can keep repeated play different and challenging. Hidden selection can provide some measure of uncertainty between players. Options also allow players to customize the game to account for differing players' experience and ability levels. Be forewarned that a full tilt Rebel army—with all the options—is an awesome force.
The Scenarios
Thunder now includes some new scenarios as well. A couple of smaller situations have made their way into the game to provide short, quick-play, scenarios. By extending the northern map to the east, the region of the cavalry battlefield was added, allowing its inclusion. There are now a total of four one-map scenarios for those players with limited table area. All told, there are now scenarios addressing every major action of the battle with playing times ranging from 3 to 50 hours.
Victory
The victory conditions have been altered somewhat. It is now easier to trigger an award for a wrecked corps. I have also adopted the method I used in Barren Victory for awards for losses—having come to prefer that style. Now the emphasis on troop conservation is greater than ever. Most of the individual brigade awards have been eliminated, with the exception of cavalry penalties. Finally, I have gone to great efforts to show the historical outcomes in the various scenarios—in order to provide a better yardstick to measure one's own play against.
The Leaders
In Thunder I, Jackson appeared simply because his presence is one of the most intensely speculated-about topics of the American Civil War. The second time around, I also wanted to include other commanders who might have earned the sobriquet "Commander at Gettysburg." Hooker could have been left in command because Lincoln was worried about changing commanders on the eve of what was to be obviously a major engagement. In the end, his distrust of Hooker outweighed his fear of abrupt change.
Of course, McClellan was always ready to step in and "save the country." After Second Bull Run, Lincoln turned to him for just that circumstance—a reliable, if extremely cautious, commander who would take no great risks with the capitol's safety. In some of the Union commands hurrying north into Pennsylvania, rumors were deliberately planted to the effect of McClellan's taking command to play on his great popularity with the troops.
Note that both of these variants are CSA options and give the Union player victory points. Why? I don't think either man would have done as good a job as did Meade and that the use of these options degrades the Union player's army a bit.
I have come to have a high opinion of Meade's handling of the battle and have rated him accordingly. In other circumstances he would display a cautious streak and in the end Grant overshadowed him, but here he was a determined fighter. I suspect no other available Union commander would have elected to remain and fight after July 1st—certainly not McClellan—and Meade's willingness to fight smacks of more belligerence than men in blue usually displayed.
Annotated Bibliography
Busey, John W, and Martin, David G. Regimental Strengths and Losses at Gettysburg. Longstreet House, Hightstown, NJ, 1986.
For numbers and Order of Battle, this is the definitive source. I wish there were a book like this extant for every battle I've researched.
Coddington, Edwin B. The Gettysburg Campaign: A Study in Command. (reprint) Morningside Press, Dayton, OH 1983.
This solid study of the overall campaign is an excellent overview of events and is extremely readable.
Hassler, Warren J. Crises at the Crossroads: The First Day at Gettysburg. University of Alabama, University, AL 1970.
Hassler focuses on the crucial fighting of July 1st and provides a clear picture of the initial clashes.
Pfanz, Harry W. Gettysburg: The Second Day. University of North Carolina Press, Chapel Hill, NC, 1987.
Pfanz, formerly a Park Service historian at Gettysburg, has provided an exhaustive account of the second day's fighting. His major focus is on Longstreet's attack, but he does cover Ewell's attempts to carry Cemetery Hill.
Stewart, George R. Pickett's Charge. (reprint) Morningside Press, Dayton, OH, 1983.
Here is coverage of the third day's fighting. Stewart's book is especially valuable for some of the tactical insights it provides as to the nature of formations, etc. It is also extremely readable.
Tucker, Glen. Lee and Longstreet at Gettysburg. (reprint) Morningside Press, Dayton, OH, 1982.
Tucker, who also authored a study on the battle itself, examines the relationships within the Rebel command structure—primarily between Lee and Longstreet, but also among Lee's other ranking generals. This book goes a long way towards clarifying the actual facts regarding the many myths of this battle. It is superior to Douglas Southall Freeman's (in Lee's Lieutenants) overly idealized view of Lee.
The Gettysburg Magazine. Published semi-annually by Morningside Press, Dayton, OH.
Each issue of this magazine (eight so far) has over 100 pages of invaluable text and maps. A number of prominent historians have contributed and the magazine covers many topics—from tactical analysis, to unit histories and life of veterans.
US War Department. The War of the Rebellion: A Compilation of the Official Records of the Union and Confederate Armies. 128 volumes. Washington DC, US Government Printing Office, 1880-1901.
These are the fabled ORs containing all the official reports and a myriad of other documents. They are dull to wade through, but are invaluable for study on any aspect of the Civil War.
Gettysburg is another of those battles, like Waterloo fifty years earlier, that captured the attention of history. Several hundred books have been written on the subject and more are sure to come. The above items will, I think, provide a thorough understanding of the battle without wading through the vast amount of verbiage already expended on the topic. I have not included any first-person accounts (other than the official ones provided in the OR) simply because it seems every man who was there managed to set his observations on paper—and they all conflict. Some have malicious motives, others are simply mistaken. Sorting out the two can take a lifetime of effort. Fortunately, the above secondary sources have all done an excellent job of winnowing.
Standard Orders of Arrival
The following are the master reinforcement schedules referenced throughout Section 6.0 (used in full in Scenario 10, The Historical Battle of Gettysburg, and in the sections of Scenarios 1-9 that call for "Reinforcements: As per Order of Arrival"). Each entry lists the time of arrival, the entry hex, the Order Explanation number in force, and the units arriving. Times shown in parenthesis are the variable-arrival release turn (see 6.12).
Confederate Standard Order of Arrival
| Time | Hex | Orders | Units |
|---|---|---|---|
| July 1st | |||
| 9:00am | A | 1 | Heth, A-H-3, D-H-3, 3b(5) |
| 9:30 | A | 2 | P-H-3, B-H-3, 3b(5) |
| 11:00 (9:30) | A | 1 | AP Hill, 3 Corps HQ |
| Noon (10:30) | A | 3 | Pender, P-3 (all), 3b(5), 3 Corps Supply |
| 1:00pm (11:30) | C | 4 | Ewell, 2 Corps HQ, Rodes, R-2 (all), 2b(5) |
Order Explanations:
- 3 Corps is to attack along the Chambersburg Pike in order to capture Gettysburg. Corps boundaries are eight hexes north and south of the Pike (inclusive).
- Move to join the division.
- Move to the corps HQ.
- Attack south to capture Gettysburg. Units may also attack to clear Oak and Seminary Ridges north of the Chambersburg Pike if currently occupied by the enemy.
- E-2 has a divisional goal to attack and capture the town of Gettysburg.
- Jn-Cav is attached to 2 Corps and has a divisional goal to block the York Pike from Union advances coming from the east.
- Move to the vicinity of Herr Tavern. Once there, units must go into line or unlimber off the road and enter camp for the night.
- Move to the Army HQ and await orders.
Union Standard Order of Arrival
| Time | Hex | Orders | Units |
|---|---|---|---|
| July 1st | |||
| 8:30am | L | 1 | Robinson, 2-1 (all), 1b(4) |
| 9:30 (8:30) | L | 2 | Barlow, 1-11 (all) |
| 10:00 (8:30) | K | 2 | Howard, 11 Corps HQ, Schurz, 3-11 (all), 11b(5) |
| 11:00 (10:00) | N | 1 | Doubleday, 1-3-1, 2-3-1 |
| 11:00 (9:30) | K | 3 | Steinwher, 2-11 (all), 11 Corps Supply, 11b(3) |
Order Explanations:
- Move to join Corps HQ.
- Move to Gettysburg and await further orders.
- 2-11 has a divisional goal to defend Cemetery Hill in the area within 3 hexes of A28.07.
- Move to Culps and Cemetery Hills and defend them.
- Move to the Army HQ and await orders.
- Move to hex B29.16 and halt for the night. All units must move just off the road and go into line or unlimbered formations.
- Cav HQ must remain within 5 hexes of the army HQ.
- Move to Culp's Hill and defend. Move via the secondary road along Wolf's Hill to the Baltimore Pike and then to Culp's Hill. The corps HQ will post itself on Power's Hill.
- The Reserve Artillery is independent, but see rule 2.4.
- Move to the right flank of the army and defend.
- Move to the left flank of the army and defend.
Special "Jackson Lives!" Confederate Order of Arrival
Used instead of the Confederate Standard Order of Arrival when playing Scenario 11 (see 6.11).
| Time | Hex | Orders | Units |
|---|---|---|---|
| July 1st | |||
| 9:00am | A | 1 | Ewell, Ewell's Prov Div (all), 2x 3b(5) |
| 11:00 (9:30) | A | 1 | AP Hill, Hill's Light Div (all), 2b(5), 3b(5) |
| 1:30pm (Noon) | B | 2 | Jackson, 2 Corps HQ, R-2, 2b(5) |
| 2:00 (1:00pm) | C | 3 | E-2 (all), 2b(5) |
| 2:30 (1:30) | C | 4 | Jn-Cav |
Order Explanations:
- LD-2, EPD-2 each have divisional goals and are to attack along the Chambersburg Pike in order to capture Gettysburg. Boundaries are eight hexes north and south of the Pike (inclusive).
- Attack south to capture Gettysburg. Units may also attack to clear Oak and Seminary Ridges north of the Chambersburg Pike if currently occupied by the enemy.
- E-2 has a divisional goal to attack and capture the town of Gettysburg.
- Jn-Cav is attached to 2 Corps and has a divisional goal to block the York Pike from Union advances coming from the east.
- Move to join corps.
- Move to the Army HQ and await orders.
Current Strength Charts
These charts give the reduced starting strength of each brigade counter for scenarios that begin after the battle is already underway. Example: 2-1-1 starts out scenario 2 with a strength of 14(2). The first number is the maximum strength of the brigade (after all stragglers have been recovered, the second number is the number of stragglers currently lost). Mark off enough casualties (6, in this case) to show the current strength of 14. Then mark off another two as stragglers. In the end, the brigade starts the scenario with a strength of 12 and two recoverable stragglers. A blank cell means the brigade is not present, or fights at its full printed strength, in that scenario.
Union
| Unit | Scenarios 1, 10 | Scenario 2 | Scenarios 3-6 | Scenario 7 | Scenario 8 | Scenario 9 |
|---|---|---|---|---|---|---|
| 1-1-1 | 18 | 12 | 6 | 6 | 6 | 6 |
| 2-1-1 | 20 | 14(2) | 11 | 10 | 10 | 10 |
| 1-2-1 | 15 | 5(2) | 5 | 5 | 5 | |
| 2-2-1 | 15 |
Union Artillery Losses (gun points):
| Corps | Scenarios 1, 10 | Scenario 2 | Scenarios 3-6 | Scenario 7 | Scenario 8 | Scenario 9 |
|---|---|---|---|---|---|---|
| 1 Corps | 2 | 3 | 3 | 3 | ||
| 2 Corps | 4 | |||||
| 3 Corps | 4 | 4 | 4 | |||
| 5 Corps |
Subtract the above from available Gun Points in each given corps.
Confederate
| Unit | Scenarios 1, 10 | Scenario 2 | Scenarios 3-6 | Scenario 7 | Scenario 8 | Scenario 9 |
|---|---|---|---|---|---|---|
| L-H-1 | 19 | 14 | 14 | 14 | ||
| Tex-H-1 | 17 | 11 | 11 | 11 | ||
| B-H-1 | 15 | 10 | 10 | 10 | ||
| A-H-1 | 19 |
Confederate Artillery Losses (gun points):
| Corps | Scenarios 1, 10 | Scenario 2 | Scenarios 3-6 | Scenario 7 | Scenario 8 | Scenario 9 |
|---|---|---|---|---|---|---|
| 1 Corps | 1 | 1 | 3 | |||
| 2 Corps | 1 | 2 | 2 | 3 | ||
| 3 Corps | 2 | 2 | 2 | 3 | ||
| Cav | ...none... |
Subtract the above from available Gun Points in each given corps.