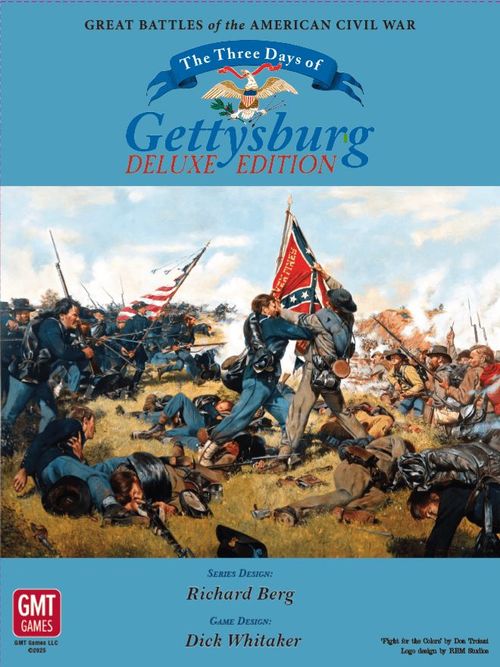
Three Days of Gettysburg: Deluxe Edition
Three Days of Gettysburg: Deluxe Edition Rulebook
Table of Contents
Table of Contents
- GBACW Series Rule Book (2024 Edition)
- 1.0 Introduction
- 2.0 Components and Terminology
- 3.0 Sequence of Play
- 4.0 The Command System
- 5.0 The Activation System
- 6.0 The Orders System
- 7.0 Facing and Refusal
- 8.0 Stacking and Extension
- 9.0 Movement
- 10.0 Fire Combat
- 11.0 Shock Assault
- 12.0 Combat Results
- 13.0 Combat Effectiveness and Rally
- 14.0 Special Units
- 15.0 Engineering
- 16.0 Night
- 17.0 Fatigue [Optional]
- Three Days of Gettysburg Deluxe Edition Battle Book
GBACW Series Rule Book (2024 Edition)
1.0 Introduction
The Great Battles of the American Civil War (GBACW) system allows gamers to simulate American Civil War era battles on a regimental level, using mechanics that concentrate on the use, effects and personalities of battlefield command, as well as the tactical difficulty in maneuvering such large numbers of troops and bringing them to bear on the enemy.
Each game in the system uses this base set of Series Rules. However, each battle also contains additional rules, and typically some changes to the Series Rules, which allow us—and you—to simulate the specifics and peculiarities of each battle. Battle Book rules take precedence over Series Rules. Each game in the system has its own set of components.
Developer’s Note: The 2024 Series Rules includes numerous editorial changes and clarifications. The developers thank all the many GBACW players whose comments and questions since 2019 have helped improve this document. The relatively few significant rules changes or clarifications are noted with a minie ball icon in the margin (this transcription does not reproduce the margin icons).
2.0 Components and Terminology
2.1 The Game Maps
The maps depict the battlefields, covered by a hexagonal grid that is used to regulate movement and combat. The different types of terrain featured on the map, such as Woods, Streams, Roads, etc., are explained in these rules.
2.2 Counters
Three types of counters are in the game: combat units, leaders, and informational markers.
2.21 Combat Units. Combat Counters are infantry, cavalry, or artillery. In addition, cavalry may have two types of counters: mounted and dismounted. Each combat unit is rated for Weapon Type, and, reading across the bottom of the counter, Combat Strength (Fire Strength for Artillery), Cohesion Rating, and Movement Allowance. Artillery Combat Strengths are bracketed to show they are used for Fire only.
Each counter also shows the unit’s parent organization, usually its brigade, division, and corps.
The individual units are color-coded so that they can be identified by brigade. The color of the top band identifies the division to which that unit belongs; the colored Cohesion box identifies the brigade within that division to which the unit belongs. The designation on the right side of the counter indicates the brigade/division/corps to which that unit belongs.
Counter layout (from the diagrams): an Infantry Unit shows Name, Formation, Weapon Type, Strength, Cohesion and Movement Allowance. An Artillery Unit shows Name, Formation, Weapon Type, Strength, Cohesion, and Movement Allowance. Cavalry units have a Mounted and a Dismounted counter.
The reverse of all combat units is their Disordered side, indicated by a [d] icon (or a stripe in Gringo! and its expansions). The values and ratings for Disordered units are lower, except for the Combat Strength, which remains the same. Artillery values remain the same in Gringo!, Churubusco, and Battles with the Gringos. Artillery Movement Allowance remains the same in Twin Peaks, Death Valley, and Into the Woods.
Horse Artillery Movement Allowance is printed in yellow with a black outline as a reminder.
2.22 Leaders. There are four levels of leaders: brigadiers (AKA brigade leader), division leaders, corps commanders, and army commanders [4.1]. Ratings shown on the leader counters (from the diagrams):
- Army Commander: Name, Rank, Initiative Rating, Command Range.
- Corps Commander: Name, Rank, Efficiency Rating, Command Range.
- Division Leader: Name, Rank, Brigade Coordination, Command Range, Activation Rating.
- Brigade or Regiment Leader: Name, Rank, Action Profile, Command Range, Orders Rating.
2.23 Activation Markers (AM). These markers (usually three or four for each division) represent the mechanic the game uses to determine who goes, and when [see 5.0]. (AMs have a front and a back.)
2.24 Informational Markers. These include corps Efficiency Markers (EMs), Orders markers, Step Loss markers to record combat losses, Extended Line markers, markers related to special events, and other similar indicators of status. Use of markers is explained throughout the rules.
2.3 Charts and Tables
The game provides several charts and tables, all used to resolve actions and/or list applied effects. These are discussed throughout the rules in detail.
2.4 Game Scale
2.41 Unit Scale. Most infantry units are regiments, but some units called battalions are included. Cavalry is also by regiment, although many cavalry regiments are divided into two or even three battalions. Artillery units are mostly batteries (usually of four to six guns each); however, where the guns within the battery were not uniform in caliber, each gun type is represented by a “section.” In some games, same caliber guns within a battery may also be divided into sections. Each infantry or cavalry combat Strength Point represents 50 men, and each artillery Strength Point is one gun.
2.42 Map Scale. See the individual game’s Battle Book.
2.43 Time Scale. Each turn encompasses about one hour of real time. The game uses a military (0100-2400) clock. For example, 1600 is four o’clock in the afternoon. Exception: Turns in Twin Peaks are 45 minutes, and Into The Woods uses 12 hour standard time.
2.5 The Die
The game includes one ten-sided die that is used to resolve certain game functions. The 0 is read as zero, not 10.
2.6 The Universal Disorder Die Roll
During play, you will often perform a Universal Disorder Die roll (UDD) to determine the outcome of certain situations. When a unit is required to undergo a UDD, the owning player rolls one die and compares the result to that unit’s Cohesion Rating:
-
If the result is the same as or lower than the unit’s Cohesion Rating, the unit passes, usually without penalty.
-
If the result is higher than the unit’s Cohesion Rating, the unit fails, and a penalty usually applies.
Note: UDDs are not actions [3.0 III/C/3]
2.7 Terminology
The following words, abbreviations and phrases are used throughout the rules.
- Activation: The game mechanic whereby the player determines which of his units is going to undertake movement, fire, etc.
- Advance: Occupying an enemy hex vacated due to Fire or Shock. Advance is distinguished from Movement, but affected by terrain, particularly when the advancing unit may Advance beyond the vacated hex [11.46, 11.47, 12.6].
- AM (Activation Marker): A chit (one to four for each division) placed in the AM Pool and used in the Activation mechanic.
- AM Pool: An opaque container used to hold AMs and other markers for both players.
- Base Elevation: The actual elevation of the ground in the hex irrespective of other terrain such as Woods or Towns.
- Charge: A Charge is a form of Shock combat in which movement creates much of the effect. There are two types of Charge: Infantry [11.21] and Cavalry [11.5].
- CI (Combat Ineffective): A term referring to a formation severely degraded by casualties and disorganization [13.2, 13.3].
- Cohesion Rating: The measure of a combat unit’s morale, training, regimental-level command, equipment, and esprit de corps, all of which affect how well that unit can fight and what happens to it after taking losses.
- Command: A group of units commanded by a leader. This can be a brigade, a division, or a corps.
- Commander: A term for the corps and Overall Commanders.
- The maximum distance: 1) a combat unit may be from its leader to be In Command, or 2) a subordinate leader can be from his superior to be in the Chain of Command [4.15].
2.8 Questions?
For ongoing online support of this game, the GBACW Facebook Group has grown into a major resource, with over 1800 members, including a number of GBACW designers and developers.
The GBACW design team can also be found, along with most of the rest of the GMT designers and developers, on Consimworld’s discussion boards, at www.consimworld.com. We heartily recommend this site to anyone interested in wargaming.
3.0 Sequence of Play
The Sequence of Play is the order in which you perform the functions the rules describe.
General Overview of Play: After determining Efficiency, and giving Orders to eligible brigades, the player with the Initiative (determined by die roll at the start of the turn) chooses which division he wants activated to start the turn. In the Activation Phase, brigades may change Orders and units Move, Fire, Shock, etc., based on their Orders. After the Initiative Player undertakes actions with his chosen command, commands are then activated by blindly drawing an AM from the AM Pool. This continues until all AMs have been drawn. After the Activation Phase, some housekeeping steps are performed, and the turn ends.
The Sequence of Play
I. Initiative Segment
Players roll a die to determine who has the Initiative for that turn [5.1].
II. Orders Segment
- A. Determine Chain of Command Phase. Determine if division leaders, brigade leaders, and individual units are within their Chain of Command [4.2].
- B. Activation Efficiency Determination Phase. Each player picks Efficiency Markers to determine the Efficiency of each of his corps. He uses this Efficiency to see how many AMs the divisions of that corps receive that turn [5.2 and 5.4].
- C. Division Orders Phase. Players with a Chain of Command from brigade leaders to corps commanders may change the Orders of any brigade in that chain.
- D. Reinforcement Orders Phase. Give Orders to all reinforcements scheduled to arrive that turn.
- E. Reserve Placement Phase. Commands may be placed In Reserve [6.3].
- F. Engineering Phase. Place build markers to indicate Breastwork construction.
III. Activation Segment
-
A. Initiative Activation Choice. The player with the Initiative chooses which AM he will activate to start the turn.
-
B. AM Pool Placement. All AMs available from II/B for both sides, except the one selected for the Initiative Activation [3.0 III/A], are now placed in the Pool (an opaque container).
-
C. Activation. The command selected in III/A activates first. Thereafter, either player draws an AM from the Pool. The AM drawn determines which command is now active and able to undertake various actions. An active command may do the following:
- CHANGE ORDERS PHASE. The player may attempt to change the Orders of activated brigade leaders by die roll, using the Brigade Orders Change Table.
- BRIGADE COORDINATION PHASE. The player may attempt to activate all brigades in the division simultaneously by die roll using the Brigade Coordination Table.
- ACTION PHASE. Each unit in an activated brigade may undertake one of the two actions below if not assigned to Construction, or it may do nothing.
- Move and/or Fire; or
- Resupply Ammo [Optional for small arms units] and Rally Disordered units.
Eligible units may Shock after the brigade’s units have undertaken all desired actions. Each brigade in that division completes all actions before the next brigade goes. (Exception: Brigade Coordination.)
When the selected division has finished, one of the players blindly draws a new AM from the AM Pool. If none remain, go to IV.
IV. End of Turn Segment
- A. Commander Movement Phase. All corps and Overall Commanders may move. This is the only time in the turn they may voluntarily do so.
- B. Replacement/Recovery Phase.
- Replace any eliminated leaders.
- Undertake In-Reserve activities [6.35] and automatic Rally or Fatigue reduction [17.42].
- Remove commands from Reserve status, if so desired. Assign Advance or Attack orders to commands removed from Reserve.
- Eliminate all artillery with an Abandoned 2 marker.
- Flip Abandoned guns markers from Abandoned 1 to Abandoned 2.
- Replace Construction markers with Breastwork markers if construction is finished.
- C. Combat Effectiveness Phase. Players check to see if any brigades or divisions are Combat Ineffective.
- D. Turn Record Phase. Advance the Turn marker one space on the Turn Track and begin a new turn. If the new turn begins past 0000, move the Day marker to the next day.
4.0 The Command System
There are four levels of command in most GBACW games: army, corps, division, and brigade. Each command is represented by a leader (brigade/division) or commander (corps/army). One of the premises of the game system is that units operate better when communications are maintained, in the form of a Chain of Command.
4.1 Commanders and Leaders
4.11 Overall (Army) Commanders (OC) are the generals in command of the battle (e.g., at Gettysburg, Lee and Meade). They have four stars on their counters. An OC has two ratings on his counter:
Initiative Rating
Command Range
INITIATIVE RATING: This rating is used to:
-
Affect the Initiative Die Roll; and
-
Increase the corps Efficiency of that number of corps commanders, if eligible [5.22]. COMMAND RANGE [4.15].
4.12 Corps Commanders have three stars on their counters. A corps commander has the following ratings on his counter:
Efficiency Rating
Command Range
EFFICIENCY RATING: A Modifier (e.g., +1) used to adjust division Efficiency [5.23]. COMMAND RANGE [4.15].
4.13 Division Leaders have two stars on their counters. They command all brigade leaders in their division, and they are subordinate to their corps commander. They have the following ratings: Brigade Coordination Command Range Activation Rating
BRIGADE COORDINATION [5.34]. COMMAND RANGE [4.15].
ACTIVATION RATING: A modifier (e.g., +1) used to adjust the number of Activations that division may undertake that turn [5.23].
4.14 Brigade Leaders are the leaders directly commanding combat units. They have one star on their counters. Brigade leaders have the following ratings: Action Profile Command Range Orders Rating
ACTION PROFILE: (A = Aggressive, N = Normal, C = Cautious, U = Unreliable) This rating is used when a “Loose Cannon” result occurs while changing Orders [see 6.24]. An Aggressive leader also may provide a DRM in Shock. COMMAND RANGE [4.15].
ORDERS RATING: A DRM used whenever the brigade wishes to change Orders, as needed [6.21].
4.15 Command Range. Command Range is measured in leader MPs and is always counted from the superior to the subordinate leader/unit, including the subordinate’s hex but not the superior’s hex. Command Range:
-
May not be traced into/through a hex/hexside impassable for Leader Movement; and
-
May not be traced through a hex adjacent to an enemy unit unless occupied by a friendly combat unit. This applies to all Command Ranges. See 5.36 for the effects of being Out of Command.
-
May be extended through adjacent friendly units [4.22]. If a combat unit is adjacent to its leader it is automatically In Command, regardless of the intervening terrain hexside.
4.16 Brigade and Division Leader Movement Allowances. Leaders do not have their MA printed on the counter; it is ten (10) for all brigade and division leaders [9.33].
4.17 Corps and Overall Commander Movement Allowances. The MA for these leaders is 40. They may move only in the Commander Movement Phase, and if they use more than 10 MPs, their abilities are reduced in the upcoming turn [9.32].
4.18 Replacement Leaders and Commanders. The reverse side of a leader counter usually shows the leader who replaces him if he becomes a casualty. See 12.74.
4.2 Chain of Command
4.21 The Chain of Command can use up to four levels of command, from the Overall Commander (OC) to corps commanders to division leaders to brigade leaders.
PLAY NOTE: While the OC is part of the chain, he has little effect on play; you are the OC.
4.22 The Chain of Command is maintained through the Command Range of the leaders.
EXAMPLE: If a brigade leader is 3 MPs from his division leader (Command Range of 5), who is 5 MPs from his corps commander (Command Range of 6), then the Chain of Command is complete from that corps to that brigade.
Exception: If a combat unit is outside its brigade leader’s Command Range but adjacent to a unit from the same brigade that is within Command Range, it is considered to be In Command. Likewise, if a combat unit is part of a chain of units, and at least one unit in the chain is in Command Range, then all units in that chain are In Command. Each unit in the chain must belong to the same brigade and must be adjacent to at least one other unit in its brigade. The same applies to units directly subordinate to a division or higher leader (i.e., if the unit is adjacent to another unit that is within range of their direct leader, it too is In Command).
4.23 Command status for Activation purposes and Engineering eligibility [15.11] is only checked during Step II/A of the Sequence of Play. Command status for orders purposes is checked during Step II/A and at the time of a Brigade Orders Change [6.2]. Units Out of Command at these times do not change orders. However, such units automatically change to the orders of their brigade if they are within Command Range when that brigade next activates.
PLAY NOTE: As units/commands under March Orders may move the equivalent of four Activations, they are, in effect, always considered to be In Command for Activation purposes [5.35].
4.3 Artillery Command
4.31 Artillery brigade leaders are treated as brigade leaders for purposes of Activation. All batteries assigned to that artillery brigadier may Move, Fire, etc., when activated.
4.32 Artillery assigned at division level may be attached to brigades in that division, one battery per brigade. Assign artillery during the Division Orders Phase [3.0 II/C] at the start of a turn. Command Range does not matter for such an assignment, but will for the number of times the artillery activates [5.36].
4.33 Certain battles have artillery commanders (corps-level officers) and large “Reserve” formations. The rules for their use are found in the individual Battle Books.
5.0 The Activation System
The Activation system is based on Efficiency—the ability of the cardboard units to do what the player wants them to do. Efficiency is a product of Chain of Command and leadership ability. The Efficiency mechanic serves two other play and simulation functions: it slows down the pace of a gamed battle to something approaching reality a bit more, and it provides just a touch of the fog of war. General Overview: Players determine the Efficiency of their corps by blindly drawing an Efficiency Marker for each corps that has units on the map from the Pool of available Efficiency Markers. The number on that marker represents the number of Activations he may provide for each of his subordinate divisions. For each division, that number may be further adjusted by the corps commander’s Efficiency Rating, the Activation Rating of the individual division leader, the Chain of Command, and Combat Effectiveness. To represent a division’s Activation Efficiency, both players then place AMs equal to that Efficiency, for each division, in the AM Pool for blind draw. When a division is activated by AM, each of its brigades may then undertake actions.
5.1 Turn Initiative
5.11 To determine which player will have the Initiative each turn, each player rolls one die, to which the following adjustments (DRMs) may be made:
-
The player who had the Initiative for the previous turn adds one (+1) to his roll.
-
The player may add his OC’s Initiative Rating to the roll if the OC did not use more than 10 MPs in the Commander Movement Phase and has at least one of his corps commanders in his range.
Exception: Some scenarios state which player automatically has the Initiative for the first turn of the game.
5.12 The player with the higher total has the Initiative. If the modified rolls are tied, no one has the Initiative. Place all AMs in the Pool and start drawing.
5.13 The player with the Initiative chooses which of his divisions will be used first in the Activation Phase. Remember to set aside one of that division’s AMs; it does not go into the Pool. The March AM of the Initiative Player’s side may also be chosen as the first AM. Also, the player with the Initiative changes Orders, gives Reinforcement Orders, and moves commanders before the other player. If neither player has Initiative, apply the above to the player who last had Initiative.
PLAY NOTE: Phases II/C, II/D, and IV/A normally can be done simultaneously. But, if it matters, the Initiative Player goes first.
5.2 Efficiency
Efficiency determines how many times the units in a corps may be activated in a turn.
DESIGN NOTE: Smaller battles, especially those that do not have corps, use a similar system to this but focus more on divisions.
5.21 In the Activation Efficiency Determination Phase [II.B], each player places his EMs (the ones numbered 1 through 4) into an opaque cup (the Efficiency Pool). The player then randomly draws an Efficiency Marker for each corps which has any units on the map or entering that turn as Reinforcements. The drawing player must announce for which corps he is drawing and assign the Efficiency Marker to that corps on the Efficiency/Activation Chart.
PLAY NOTE: On the game map or on a separate display there is a series of boxes for each corps commander (the Efficiency/ Activation Charts), so that the drawn Efficiency Marker may be placed in it, face down, in case “A Matter of Honor” arises.
5.22 A corps’ Efficiency may be adjusted by the OC’s Initiative Rating. If an on-map corps commander is within Command Range of his OC, and the OC has an Initiative Rating greater than zero, the OC may increase that number of corps commanders’ Efficiency by +1 (each). Thus, an Initiative Rating of +2 (quite rare in this series), would allow an OC to increase two in-range corps’ Efficiency by one each. A corps’ Efficiency may never end up below one or above four.
DESIGN NOTE: The number and ratings of the EMs for each battle differ and they are not truly linear. They reflect a bell curve of capabilities, possibly adjusted for different battles.
5.23 Each division in a corps uses its parent corps’ Efficiency (regardless of where it is on the map) to determine the number of Activations it may undertake that turn. That corps’ Efficiency [5.22] may be adjusted as follows, for each division:
- If a division leader is within Command Range of his corps commander, the corps commander’s Efficiency Rating is applied as follows:
a. When the corps commander’s Efficiency Rating is +2, the Activation Efficiency of one In Command Division may be increased by two, or the Activation Efficiencies of two In Command Divisions may be increased by one each.
b. If the corps commander’s Efficiency Rating is +1, he may increase the Activation Efficiency of any one, In Command division leader by one.
c. If the corps commander’s Efficiency Rating is –1, the corps Efficiency for that turn is reduced by one for all In Command divisions [see #3, below].
d. If the corps commander’s Efficiency Rating is 0, there is no effect.
-
If a division leader is not within Command Range of his corps commander, subtract one from that number (for that division only). This applies if a division leader and/or corps commander is/are not on the map. Exception: Entering Reinforcements [9.71].
-
The division leader’s Activation Rating, whether positive or negative, adjusts the number of Activations that the division may undertake that turn [4.13]. If the leader is off map, do not apply the adjustment. Exception: Entering Reinforcements [9.71].
-
Division Ineffective Status [13.32].
EXAMPLE: II Corps draws an Efficiency of 3 for that turn. The II Corps commander has a +1 CE Rating. There are three divisions: 1/II and 2/II’s leaders have Activation Ratings of 0; The 3/II leader has an Activation Rating of +1. Both 2/II and 3/II are within the corps commander’s range; 1/II is not. The following division AMs are used this turn:
-
1/II: 2 AMs. The division leader is out of range (–1).
-
2/II: 4 AMs. The corps commander gives him the +1 [1b above].
-
3/II: 4 AMs. His Activation Rating gives him a +1.
5.24 The result of the above is the number of Activations [5.3] the brigades in that division may undertake that turn, represented by AMs. For each division, take that number of AMs and place them in the AM Pool. A division’s number of AMs may never be below one or above four.
5.25 A Division whose division leader is not within Command Range of that division’s corps commander may never use more than 3 AMs in a turn, although units under March Orders may move the equivalent of four activations regardless of their command status.
5.26 A brigade whose brigade leader starts his turn out of the Command Range of his division leader must skip one division AM in that turn. The choice of which AM not to use (for that brigade) is up to the player.
EXAMPLE: Division 1/I gets 3 AMs for a turn, but 1/1/I is Out of Command Range. As the turn progresses, the player decides, as the second 1/I AM is drawn, not to “activate” the 1/1/I with that AM.
5.27 Unless specifically stated otherwise in the rules for a given battle, a brigade always activates at least once per turn.
5.28 The following are instances when certain units do not use the marker-induced Activation result:
- MARCH ORDER UNITS: Units (be they corps, division, brigade, or individual) entering the map as reinforcements under March Orders, or have been given March Orders to move, have a maximum possible Activation Level of four. Moreover, units under March Orders do not use the divisional AM [5.35].
Exception: On-map Commands given March Orders during the Division Orders Phase use the March AM, but in the initial turn of that March receive a number of AM equivalents equal to the AMs allotted for that division. Thus, such a command may be limited to less than four Activation equivalents that turn, with a minimum of one [5.24].
- SPECIFIC AM: Some reinforcements arrive with a specific number of Activations available for that turn.
EXAMPLE: A brigade that arrives as a reinforcement with an Activation Efficiency of 1 may be activated only once that turn, regardless of how many AM its division has.
PLAY NOTE: Even if an entire command corresponding to a division AM is under March Orders or in Reserve, its Division AMs should be placed in the Pool during Step III/C, as the possibility of changing orders or involuntarily leaving Reserve would otherwise leave such commands unable to activate. Calculate division AMs as if the command were not under March Orders.
5.3 Activation
5.31 The player with the Initiative selects the AM he will use to start the turn. All other AMs are randomly drawn from the Pool (an opaque cup or similar container). Each turn, the Pool will start with:
-
All of the AMs available that turn to each player (or fewer, if a player so elects),
-
The March AM for each player (if he has units under March Orders at the time),
-
The Random Event marker (if the game uses that rule), and
-
Any Battle-specific AMs (e.g., Artillery leaders).
5.32 When a division’s AM is drawn, all that division’s brigades— regardless where they are on the map—may be activated. Each brigade activates individually, completing all actions before the next brigade is activated (Exceptions: Brigade Coordination [5.34] and Out of Command Brigades [5.26, 5.36]).
EXAMPLE: The 1/I Union Division has three brigades: 1/1/I, 2/1/ I, and 3/1/I. The Union player activates 2/1/I first, completing all of its actions. He then activates 1/1/I, etc.
5.33 Brigade Activation. When a brigade is activated, all combat units—regardless of their location—may do what the Orders for the units in that brigade allow [4.23, 6.1]. The brigade may include as a combat unit any one artillery battery (all sections) that is from that division.
EXAMPLE: A brigade under Advance Orders has four regiments. The player may now Rally one of its Disordered units, construct Breastworks with another, and Move or Fire with the other two.
5.34 Brigade Coordination. Division leaders are rated for their ability to coordinate and combine the actions of more than one of their infantry or cavalry brigades during any one action (a DRM ranging from +0 to +3). Any divisions attempting this must have their brigade leaders within the division leader’s Command Range; brigades outside that range are not eligible for coordination. The player wishing to combine brigades into a single Activation rolls the die, adjusting it by adding the division leader’s Coordination Rating. The possible results are:
-
CONFUSION: No units of the brigades whose leaders are within the division leader’s Command Range may undertake any move or combat actions that AM. Leader Movement, Rally, Ammunition Resupply, and one-vertex Facing changes are allowed.
-
FAIL: No penalty; brigades move individually: No coordination is possible, but there is no penalty for trying.
-
MAY COORDINATE # BRIGADES: The player may undertake actions with that number of In Command brigades from that division as if they were one brigade.
-
MAY COORDINATE ALL BRIGADES IN COMMAND: All eligible brigades may undertake actions as if they were one brigade.
PLAY NOTE: Coordination does not override stacking restrictions [see 8.12], nor does Confusion override Loose Cannon results of Brigade Orders Change [see 6.24].
Brigade Coordination Table
| Adjusted Die Roll | Result |
|---|---|
| 0-2 | Confusion |
| 3-6 | Fail |
| 7-9 | May Coordinate 2 Brigades |
| 10, 11 | May Coordinate 3 Brigades |
| 12 | All |
DRM: + ? Division Leader’s Coordination Rating
EXAMPLE: Smith’s Division’s AM is drawn. All three of Smith’s brigades are within his range, and the player wants to launch a division-sized attack with all of his brigades at once, rather than piecemeal. Smith has a Coordination Rating of 2. He rolls the die, getting a 6. The player may activate two of Smith’s brigades (his choice) at the same time, as if they were one. The other activates separately.
PLAY NOTE: The Coordination Ratings usually are not very high (lots of 0’s).
5.35 March Order Activation. Units under March Orders do not move when their division AM is drawn; they move only when their (one) March AM is drawn. When a player’s March AM is drawn, he may move all units under March Orders the equivalent of any number of Activations, from one to four (but see the Fatigue rules [17.22]). Each unit completes its move before the next one starts.
Exception 1: Entering reinforcements with an AM # are limited to that number of Activations [9.74].
Exception 2: see 5.28.
5.36 Out of Command. Being Out of Command affects units depending on the nature of that unit or command.
-
DIVISION LEADERS: May not receive Orders from their corps commander, which means they may not transmit any Orders to their brigades in the II/C Phase. The division has one fewer AM placed in the AM Pool [5.23 #2].
-
BRIGADE LEADERS: May not receive Orders from their division leader in the II/C Phase. They must roll a die in the III/C/1 Phase, if they wish to change Orders. And, they activate one fewer times than the division [5.26].
-
INDIVIDUAL UNITS: Out of Command combat units use the last Order received while In Command. They also activate one fewer times than the division, with a minimum of one, like Out of Command brigades.
PLAY NOTE: Units, brigades, or divisions under March Orders and Out of Command cannot change orders during the II/C Phase but suffer no other penalty.
5.4 Efficiency Transfer
Players may take advantage of the Chain of Command to increase the Efficiency of certain commands by transferring two Activations from one or two divisions to another division. These divisions need not belong to the same corps.
5.41 In the Activation Efficiency Phase [3.0 II/B], after all Efficiency and Activation Levels have been determined for that turn, a player may transfer focus—in the form of an increased Activation Level—to a selected division.
5.42 Only divisions that can trace a Chain of Command back to the Overall Commander may benefit by, or be used for, Transfer.
5.43 A player may add one to a division’s number of Activations by lowering another division’s by two, or lowering two other divisions’ by one each. A division may never have its Activation Level reduced to 0, nor increased above 4, by Efficiency Transfer.
5.44 A Player may undertake only one Efficiency Transfer per turn.
EXAMPLE: The corps Efficiency for XV Corps is 2. All of XV Corps’ division leaders are within range, and 2/XV has a +1 division leader. This means that, normally, 1/XV and 3/XV would get two AMs, and 2/XV three AMs. However, the player wants to undertake a big push with 2/XV, so he reduces 1/XV and 3/XV to one AM each, and gives an extra AM to 2/XV, so that it has four.
5.5 Ending the Turn
The Activation Segment is finished when no AMs remain to be drawn from the Pool.
6.0 The Orders System
General Premise: All brigades operate under Orders. Orders determine the parameters under which the combat units under those Orders may Move, Fire, Rally, etc. The ability to give and change Orders has nothing to do with the Efficiency or AM mechanics; it has everything to do with Chain of Command and brigadier leadership ability.
6.1 The Orders
6.11 The three types of Orders are March, Advance, and Attack. A brigade (and the units therein) must be under one of these three Orders at any given time. If a command has no such marker, it is considered to be under Orders to Advance. Death Valley and later games include a limited number of Advance markers used to designate units that were Out of Command when their brigades switched from Advance to March or Attack.
Orders Comparison Chart
| Action | March Orders | Advance Orders | Attack Orders |
|---|---|---|---|
| Road/Pike Movement Rate | ½ MP | 1 MP | NA |
| Move Adjacent to enemy unit? | No (keep 4 hexes away) | No (except enemy artillery) | Yes |
| Activation | March AM | normal | normal |
| Infantry Stacking | 7 SPs | 15 SPs | 15 SPs |
| Cavalry Stacking | 4 SPs | 7 SPs | 7 SPs |
| Construction? | No | Yes | No |
6.12 Orders can be changed in three different phases:
-
DURING THE DIVISON ORDERS PHASE [3.0 II/C]: Any division leader that is within Command Range of his corps commander may change the Orders of any or all of his brigades if the brigadier is within his range. Each brigade may have different Orders; no die roll is necessary—simply change the Orders.
-
DURING THE CHANGE ORDERS PHASE OF THE ACTIVATION SEGMENT [3.0 III/C/1]: Before any brigade is activated, the player may, if he wishes, try to change brigade orders by rolling a die [6.2].
-
DURING THE REPLACEMENT/RECOVERY PHASE [3.0 IV/B]: Commands removed from Reserve status may be assigned Attack or Advance orders.
6.13 March Orders. A command or unit under March Orders:
-
Uses March Movement Rates [9.22].
-
Moves only when the March Order AM is drawn.
-
May not move into any hex that is within four hexes and LOS of an enemy combat unit. Regardless of LOS, no such unit may move adjacent to an enemy unit. Units under March Orders that start their Activation within four hexes and LOS of an enemy combat unit may not move. [see also 6.25 and 6.26]
-
Must use Extended Column [8.5] where applicable.
-
Must obey the Stacking limits for March Orders [8.12].
-
May not Fire—not even Reaction Fire.
-
Suffers a Pre-Shock Cohesion Check DRM of +2 if shock attacked.
-
May not Rally or Resupply.
-
May not Retreat Before Shock, Advance after Shock, or Continue Shock.
-
May not undertake any Construction.
-
May not use Reaction Refusal/Facing Change [9.61] or Reaction Movement [9.63].
PLAY NOTE: In essence, the only thing units under March Orders can do is move.
6.14 An on-map Command may be given March Orders only in the Division Orders Phase, and only if no unit in that command is currently within four hexes and LOS of an enemy combat unit. Entering reinforcements may be assigned March Orders during the Reinforcement Orders phase, unless the Battle Book specifies otherwise.
6.15 Advance Orders. An activated combat unit under Advance Orders:
-
May Move or Fire, not both (changing Facing one vertex to fire is not considered movement).
-
If moving, uses Advance Movement [9.23].
-
May not move into the hexes adjacent to an enemy combat unit other than artillery. (Exception: Bridge/Ford [9.23].) If it starts the Shock sub-phase adjacent to an enemy combat unit, it may Shock Attack if otherwise eligible.
-
If firing as a phasing unit, it may gain Prepared Fire bonus.
-
May use Prepared Fire when undertaking Non-Phasing Fire.
-
May undertake Construction.
-
Must obey the Stacking Limits for Advance Orders.
-
May Retreat Before Shock.
-
May Refuse [7.3].
6.16 Attack Orders. An activated combat unit under Attack Orders:
-
Uses Attack Movement restrictions [9.24].
-
May Move and/or Fire.
-
If Firing, gains the Prepared Fire Bonus if phasing (but not moving) or when using Non-Phasing Fire [10.4].
-
May be eligible for the Infantry Charge bonus if moving and not firing [11.21].
-
If mounted, cavalry may Charge.
-
May Refuse [7.3].
-
May not undertake Construction.
-
May not Retreat Before Shock.
-
Must obey the Stacking Limits for Attack Orders.
6.17 Assigned Orders. Initial Deployment instructions in the Battle Books often assign Orders to commands that start the game on the map. Similarly, the Battle Book may assign orders to Reinforcements for their turn of entry. Where orders are not assigned, the player assigns them.
6.18 Artillery and Orders. Artillery is never under Attack Orders. See 9.52, 10.61 and 11.33 for exceptions when Artillery is under Advance Orders.
6.19 Leaders and Orders. Leaders/commanders are never under Orders. Only combat units are under Orders. However, leaders whose commands are under March Orders activate when the March AM is drawn for that side.
6.2 Brigade Orders Change
6.21 When an AM is drawn that activates an on-map brigade (whether it be a division AM or March AM), each brigade so activated may attempt to change its Orders [3.0 III/C/1], provided its leader is also on map. This is done before any units of any brigade or any leaders activating under this AM undertake any actions. To attempt to change the Orders of an Activated brigade, the player rolls the die, adjusts it by the Brigadier’s Orders Rating DRM, and consults the Orders Change Table [6.23]. Brigade Orders Change applies only to units of the brigade within the brigadier’s Command Range at the start of the activation [4.23]. In the rules that follow, such units are referred to as “in command units”.
PLAY NOTE: Orders may be changed automatically only in the Division Orders Phase [6.12].
6.22 If the brigadier is stacked with his division leader there is a +1 DRM. If his corps and/or Overall Commander is stacked with the brigadier there is a +2 DRM. Both DRMs may apply.
6.23 The Orders Change Table
| Die Roll | Result |
|---|---|
| 1 or Less | Retain and Stand |
| 2 or 3 | Retain |
| 4 | Loose Cannon |
| 5 | Change and Stand |
| 6 or More | Change |
Key: Retain: Brigade keeps the Orders it has. Change: Brigade may change to Attack or Advance Orders. Stand: In Command units of the brigade may not move (i.e., expend MPs) this Action Phase. A Stand result does not prohibit Leader Movement or a unit from firing, changing facing to fire, engaging in shock, rallying, resupplying, or engaging in construction. However, if any unit performs an action other than Rally, Resupply, or a Facing change costing no MPs, the Activation counts toward Fatigue.
Note: Cavalry units may not Mount or Dismount [14.22]. Loose Cannon: See 6.24 below.
EXAMPLE: A 2nd Division AM has been selected. General Hackenbush, in command of the division’s 1st Brigade, wants to change his Orders from Advance to Attack. His division leader was too far away to do this in the Division Orders Phase, so Hack must now roll a die to effect the change. His Orders Rating DRM, though, is a –1. He rolls the die, getting a 4, which his rating lowers to 3. Hack’s Brigade retains its Orders for that Activation.
6.24 Loose Cannon. If the result is Loose Cannon, the player who was trying to change Orders now consults the Action Profile of the brigadier in question [Aggressive (A), Normal (N), Cautious (C), or Unreliable (U)] and follows the instructions below. If Aggressive, the phasing player does one of the following:
-
If any In Command unit in the brigade is within 3 MPs (5 MPs if mounted cavalry) of a hex adjacent to an enemy combat unit, the player places that brigade under Attack Orders and launches a Charge [11.21] (or shocks without firing if mounted cavalry) with as many of the In Command units in that brigade as possible. Choice of targets is otherwise up to the player. Green units are still required to pass their Green Attacker Commitment Check [11.36]. Any In Command unit (including a Disordered unit) unable to move adjacent to the enemy must move as far as it can toward the nearest enemy unit and may not fire. Units that start adjacent to enemy units shock those units without a Charge bonus, but may not fire prior to shock. Exception: see 6.25.
-
If no In Command unit in the brigade is within 3 MPs (5 MPs if mounted cavalry) of a hex adjacent to an enemy unit, place the brigade under Advance Orders and move all its In Command units as far as possible towards the nearest enemy units. If Normal, the brigade retains its Orders. If Cautious, the player retreats each In Command non-artillery unit in the brigade one hex, after which he places the brigade under Advance Orders. The In Command units may perform no other actions during that Activation.
If Unreliable, roll the die, consult the following table, and treat the brigadier in the appropriate manner listed above:
| Die Roll | Result |
|---|---|
| 0-2 | Aggressive |
| 3-6 | Normal |
| 7-9 | Cautious |
6.25 A brigade under March Orders may attempt to Change Orders, as per III/C/1, to any other Orders when the March AM is drawn. If successful, the brigade remains in place and its March Orders are replaced by Advance or Attack Orders. Brigades that change Orders use their division AMs for the rest of the turn, if any remain to be drawn. Regiments not currently In Command [see 4.23] retain their March Orders and may move without penalty, but cannot activate under any remaining division AMs [5.35]. A Change and Stand result applies to the first Division AM drawn. If none remain to be drawn, a Change and Stand has no effect on the next turn. A Retain and Stand applies to the current March AM. Exception: Treat a Loose Cannon rolled by an Aggressive brigadier as a Retain.
6.26 A brigade that is under March Orders that is either Shock attacked or undergoes any fire except artillery Shot/Shell is, at the end of that enemy brigade Activation, immediately placed under Advance Orders. Unless the March AM has already been drawn, the brigade activates for the rest of the turn when its Division AMs are drawn. Combat does not affect other Orders.
6.3 Reserve
6.31 Any command (brigade, division, or corps) may be placed In Reserve, regardless of its Orders, if it qualifies, as below:
-
All units must be out of LOS of any enemy unit and at least five hexes from the nearest enemy combat unit; or
-
All units are at least ten hexes away from the nearest enemy combat unit (there are no LOS requirements for this qualification).
-
If it is a Night Turn, the minimum distance is reduced to five hexes.
6.32 Commands are placed In Reserve in the Reserve Placement Phase at the beginning of the turn. Commands In Reserve pay no attention to drawn AMs. They may not undertake any actions available to non-Reserve units.
6.33 If all (remaining) units in a command have been Routed [12.5], the command may be put In Reserve by having the brigade leader follow 6.31. The leader loses his In Reserve status if alone in a hex and an enemy unit moves adjacent [see also 12.73].
6.34 Reserve status is removed:
-
VOLUNTARILY: At the end of the turn, in the Recovery Phase.
-
INVOLUNTARILY: If any unit in the brigade is designated as a target of Shock or of Fire at a range of four hexes or less, all units of the brigade immediately Disorder (unless already Disordered) and adopt Advance Orders. The shock or fire is then conducted normally. The brigade may activate when its division AMs are drawn (if any remain).
6.35 During the Replacement/Recovery Phase, units from a command in Reserve may do the following, in the order listed:
-
Reduce Fatigue [17.0] by two levels.
-
Flip all Disordered [12.3] units to their normal side unless Collapsed.
-
Attempt Straggler Recovery [16.2].
-
Attempt to recover routed units [13.5].
-
Fully resupply ammo (including small arms units if using 10.9).
-
Change Orders to Attack or Advance Orders (no die roll needed; applies to all units regardless of command status).
7.0 Facing and Refusal
7.1 Facing
7.11 At the end of Movement, Advance, and Reaction Facing [9.61] each combat unit under Attack or Advance Orders must be faced towards a vertex (joint) of the hex it is in—not a hexside—as in the top of the diagram below. All combat units under March Orders must be faced towards a hexside, as in the bottom of the diagram below. The first unit to stop movement in a hex determines the facing for units that stack with it.
7.12 Facing determines a unit’s front, flank, and rear.
7.13 A unit may Move, Fire and/or Shock only into its Front hexes.
7.2 Changing Facing
7.21 A unit may change facing without leaving the hex. A moving unit under Advance or Attack orders may change facing one vertex for each hex it starts in or enters at no cost in MPs. Any change of more than one vertex (per hex) costs 1 MP. Units under March Orders pay 1 MP for a change of more than one hexside (per hex)
Exceptions: see 7.22 and 9.53. If changing 180° when stacked, invert the stacking order for all non-artillery units not exiting the hex during the current Activation, as the top unit is now the bottom unit, etc. When inverting, non-artillery units may choose to stack above or beneath artillery [see 8.44 for Extended Lines].
7.22 In addition to the above, units under Attack Orders, because of their very linear state, pay 1 MP per vertex when changing facing in a Woods hex. As an alternative to paying 3 MPs for changing three vertices, they may pay only 1 MP to change 180° [7.21].
7.23 Under certain circumstances a unit pays no MP cost to change facing:
-
When changing to/from March Orders. Adjust facing at the time the new order takes effect, either during the Division Orders Phase or the Change Orders Phase [7.13].
-
Pike/Road/Trail movement [9.45].
-
Advance after combat [12.6].
-
As a Reaction to enemy Movement or Fire [9.62].
-
Changing one vertex to fire [10.32]. Exception: see 7.22.
-
After Rally [13.41].
-
An Extended Column may become an Extended Line when the unit’s orders change from March to Advance or Attack, as long as the requirements for Extended Line are met. Vice versa is also true. There is no cost for changing facing in either case.
7.24 A phasing unit that starts movement adjacent to an enemy unit may change facing by (only) one vertex in that hex before exiting [9.53].
7.25 Units suffering certain combat results, or rallying from such results, have the following abilities and restrictions concerning changing facing:
-
RETREAT: Unit maintains original facing; no change allowed.
-
RALLY: A rallied unit may change facing one vertex upon being rallied [but see 13.41].
7.3 Refused Flanks
7.31 A unit may Refuse if it is either:
-
At the end of a line, or
-
In the center of a line with a friendly unit in one flank hex and another friendly unit in the opposite rear hex, or
-
Not adjacent to any friendly unit. This means that the end of the unit (or stack of units) bends backward, away from the line, as in the diagram below. Place a Refuse Right, or Refuse Left, as appropriate, on the unit so doing.
7.32 Only units under Attack or Advance Orders may Refuse. Exception: Units in Extended Column may not Refuse. In addition:
-
It costs each unit in a stack 1 MP to Refuse. Units subsequently stacking with a Refused unit must spend an additional MP to enter the hex.
-
A unit alone in a hex must have at least 2 SPs to refuse. If a refused unit alone in a hex falls below 2 SPs, immediately remove the marker at no MP cost.
-
A unit may not Refuse in both directions. Exception: see 8.44.
-
A unit may not Refuse if it is adjacent to an enemy unit. Exception: Reaction Refuse [9.61]. Treat parts of Extended Lines separately for purposes of this rule.
-
A unit may not Refuse if it is in between (adjacent to) two, friendly-occupied (flank) hexes. If a friendly unit ends Movement, Retreat, Advance or Reaction Move in a unit’s Refused flank, immediately remove the marker. If phasing and it has not yet moved, the stationary unit has 1 less MP than it otherwise would.
-
A moving unit may not Refuse when stacking with a unit that is not Refused, unless the stationary unit exits the hex during the same Activation.
7.33 Each unit in a phasing stack pays 1 MP to leave Refused status. A unit must leave Refused Status to move or change facing. Any Reaction Movement, Withdrawal Movement, Advance, or Retreat similarly ends Refused status, but at no MP cost.
7.34 A Refused unit or stack has three Frontal hexes: the usual two Frontal hexes plus the third, Refused Frontal hex, see above. The hexside adjacent to the Refused Front is now a Flank hexside. Refused units may fire into/through any or all of these frontal hexes, splitting their fire to do so. However, no more than half a stack’s Fire Strength may fire into/through a Refused frontal hex, and, if Refused, no more than half may fire into/through its normal Frontal hexes. If the unit’s/stack’s SP is “odd,” round down for the Refused Frontal hex; round up for the normal Frontal hexes. When the top unit in a refused stack has fewer SPs than the total eligible to fire into/through its normal Frontal hexes, the next unit(s) in the stack may also fire into/through the normal frontals up to the maximum SPs defined in the above paragraph. If the top unit cannot fire all its SPs into/through its normal Frontal hexes, it may fire the remainder into/through the Refused Frontal hex up to the maximum. If it cannot fire the maximum, the next unit(s) stacked below it may also fire into/through the Refused Frontal up to the maximum. Artillery consisting of multiple sections follows the above provisions, as if the sections were separate units.
Exception: A unit under Attack orders that stacks with one or more Refused units after any of the latter fire may not itself fire during that Activation. Refused units/stacks may not shock defenders in the Refused Frontal hex.
Fire Arcs for Refused Units
EXAMPLES:
-
A 7-SP unit on top could fire 4 SPs through its normal frontal hexes and 3 SPs through its Refused Frontal hex. Units stacked beneath it could not fire.
-
A 5-SP unit stacked above a 3-SP unit could fire 4 SPs through its normal frontal hexes and 1 SP through its Refused Frontal hex. The 3-SP unit beneath it could fire 2 SPs only through its Refused Frontal hex.
-
A 3-SP unit stacked on top with a 2-SP unit below it and an 8 SP on bottom could fire its 3 SPs through its normal frontal hexes. The 2-SP unit could fire 1 SP through its normal frontal hexes and the other through its Refused Frontal hex. The 8-SP unit could fire 2 SPs only through its Refused Frontal hex.
-
A 2-SP unit under Attack Orders stacks with a refused 4-SP that has already fired. The 2-SP unit may not fire during this Activation. During its next Activation it would fire both its SPs through its Refused Frontal hex.
-
A battery with four TBs and two H12s is stacked above infantry. The TBs are stacked above the H12s. The four TBs may fire into/ through the frontal hexes. The two H12s plus 1 SP of infantry may fire into/through the refused frontal. If the H12s had been stacked above the TBs, they plus two TBs could fire into/through the frontal hexes, while the other two TBs and 1 SP of infantry could fire into/through the refused frontal.
-
A stack of two six-gun batteries refuses. The top battery may fire into/through the frontal hexes. The bottom battery fires into/ through the refused frontal.
8.0 Stacking and Extension
Stacking refers to having more than one combat unit in a hex, a function more of tactical usage than how many men can be crammed into a space. Extension is just the opposite, in that it is concerned with the ability of a unit to increase its frontage.
8.1 Stacking Limits
8.11 Stacking limits apply at all times during the turn. Exceptions:
-
Moving/retreating through units [8.22, 12.46]
-
Cavalry mounting/dismounting prior to movement [14.22].
-
Prior to movement for on-map units assigned March Orders [see 8.25]. There are no stacking limits for leaders or informational markers.
8.12 The stacking limits depend on the Orders applicable to the unit. Stacking also may vary according to the scale of the battle.
March Orders:
-
INFANTRY: May stack up to 7 SPs of infantry (as long as they are all from the same brigade). If an individual unit contains more than 7 SPs, the player must use Extended Column.
-
CAVALRY: May stack up to four mounted cavalry SPs in a hex, as long as they are all from the same brigade. If an individual unit contains more than 4 SPs, the player must use Extended Column.
-
ARTILLERY: Two batteries, regardless of the number of guns, or 12 guns from any number of batteries may occupy a hex. There is no intermingling of unit types when in March Order; artillery may not stack with infantry, etc. Units under March Orders may not stack with units under other orders. Dismounted cavalry may not be assigned March Orders.
Advance or Attack Orders:
-
INFANTRY: May stack any units from the same brigade, up to a maximum of 15 SPs per hex, or any one unit regardless of strength. (Exception: Units in Extended Line/Column; see 8.44 and 8.5.) In addition, one battery or 6 guns from any number of batteries may stack with infantry. The artillery need not be part of the infantry’s brigade.
-
CAVALRY: 7 mounted SPs from the same brigade or one mounted unit regardless of strength. In addition, one battery or 6 guns from any number of batteries may stack with cavalry. The artillery need not be part of the cavalry’s brigade.
-
ARTILLERY: If not stacked with infantry or cavalry, up to two artillery batteries per hex, regardless of strength, or 12 guns from any number of batteries. If stacked with infantry or cavalry, artillery is limited to one battery per hex, or 6 guns from any number of batteries.
8.13 Units under Advance Orders that wish to make use of the movement costs for Pikes, Roads and Trails [9.43] must use March Orders stacking to do so [8.5].
EXAMPLE: An infantry regiment with 8 SPs would require one extension between itself and a following unit; a 15-SP unit would need two.
8.2 Stacking and Movement
8.21 During an Action Phase, each unit must be moved one at a time. See 9.31 for Leaders moving with units.
Exception 1: Stacks under March or Advance Orders and adhering to March Order stacking limits may move as stacks.
Exception 2: Cavalry moving along a Charge Path may move as a stack [8.52].
8.22 A combat unit may move through another unit at a cost of 2 MPs (in addition to the terrain). In addition, the moving unit undertakes a UDD [2.6] immediately after exiting the stationary unit’s hex. It adds to that roll the normal cost for entering the stationary unit’s hex, if that cost is two or greater. There is no DRM if the hex is Clear terrain. The stationary unit does not undertake a UDD. If the moving unit fails the UDD it is Disordered. The unit may continue moving if any MA remains. If incurring a 2nd Disorder, the unit returns to the hex from which it entered the stationary unit’s hex without changing facing, its Activation finished.
Note: A combat unit that starts its Activation stacked with another combat unit is never considered to be moving/retreating/advancing through the other combat unit when it leaves its starting hex.
PLAY NOTE: Given the terrain costs for Woods, it will be extremely difficult for units to pass through units in that type of hex.
Exceptions: 1) THE ARTILLERY Exception: Infantry or cavalry units may move through artillery units, but not vice versa. The non-artillery do not UDD or pay the 2 MPs in addition to the terrain in this case. 2) THE ROAD MOVEMENT Exception: Units (including artillery) moving along Pikes and Roads (but not Trails) may move through friendly units in such a hex, paying the movement cost for the Pike or Road, unless the latter are under March orders. The moving unit must enter and exit the stationary unit’s hex from/to a connected Pike or Road hex. If the friendly units are under March orders, the moving unit pays the cost of the actual terrain in the hex plus any hexside cost to enter it; in essence, moving around the units blocking the Road. 3) THE BRIDGE/FORD Exception: If a unit under March Orders occupies either side of a Bridge or Ford, a moving unit may not use that Bridge or Ford.
8.23 A unit may move or retreat [12.44] into a hex with another unit within stacking restrictions [8.12], and end its movement therein. If the moving unit entered the stationary unit’s hex through a Frontal hexside, it is placed on top of the stack. If it entered through a Flank or Rear hexside, it is stacked beneath the non-moving unit(s).
Exception: Infantry or cavalry that moves or voluntarily retreats [12.43] into a hex that contains only artillery may freely choose to stack under or on top of artillery. If non-artillery is already stacked under the artillery, and the moving unit enters the hex through one of the stationary stack’s front hexsides, it may stack directly under or above the artillery (if stacking restrictions allow).
8.24 A phasing unit may change its stacking order within a hex instead of moving and/or changing facing. Exception: A phasing multi-section battery may change the stacking order of its sections after movement or before firing (this stacking change is not considered Movement). If under Advance Orders, an infantry or cavalry unit changing stacking order cannot fire [see 10.61 for artillery]. Stacking order may not be changed if the stack is adjacent to an enemy unit.
Exception: see 7.21.
8.25 Units assigned March Orders may begin the turn using Attack/ Advance stacking limits. They must follow March Order stacking limits when they move.
8.26 When stacked small arms and artillery units activate using different AMs or with different brigades activated by the same AM, any facing change by one unit in the stack determines the new facing for the entire stack, unless the phasing unit moves after the facing change. Similarly, if one unit in the stack Refuses, the entire stack is then Refused, except for phasing units that exit the hex during the same Activation. If using the optional Fatigue rules, non-activated infantry or cavalry does not incur Fatigue if stacked with phasing artillery that changes facing or Refuses.
8.3 Stacking and Combat
8.31 Maximum Fire Strength Per Hex.
-
If not stacked below artillery, 7 SPs of infantry or dismounted cavalry or 4 SPs of mounted cavalry can fire from a hex. Example: A 10-SP infantry unit may fire with only 7 SPs.
-
If not stacked with infantry or cavalry, 12 artillery SPs can fire from a hex.
-
If artillery is stacked above infantry or dismounted cavalry, any combination of 7 total SPs or one battery (which, on occasion, can exceed 7 SPs) can fire from a hex [8.33].
-
If stacked above mounted cavalry, any combination of 7 total SPs or one battery can fire from a hex with the cavalry firing no more than 4 SPs. These limits apply each brigade activation to the units currently in the hex. Reset the limits if all those units exit the hex after firing (for any reason), and others subsequently move into it.
8.32 If an infantry and an artillery unit are stacked together and both are eligible to fire [see 8.33], each may fire at separate targets or the same target. However, they may not combine their fire upon the same target.
8.33 The Fire Frontage Rule. The top-most units up to the limits of 8.31 do the firing (in any order). If the topmost unit(s) cannot or choose not to fire for any reason, units stacked with it are limited to firing the number of SPs they could have fired had the top unit(s) also fired.
Exception: Artillery stacked with infantry or cavalry can only fire if it is stacked above all non-artillery at the time of the fire.
EXAMPLES:
-
When a 5-SP infantry unit is stacked on top of a 9-SP unit, 7 SPs of infantry (the top unit plus 2 SPs of the lower unit) can fire out of the hex.
-
When a 6-SP battery is stacked on top of a 7-SP unit, the battery and 1 SP of infantry can fire out of the hex
-
When a 5-SP unit at the top of a stack performs a rally action, units beneath it can fire a maximum of 2 SPs.
8.34 Massed and Dispersed Targets. For artillery firing at Shot/ Shell range, if 8 SPs or more of any (non-artillery) type are in a hex, that hex is subject to a Massed Target penalty. The shot gets a +1 DRM on the Fire Table. Conversely, where there are 2 SPs or fewer (again, excluding artillery SPs), then apply a Dispersed Target adjustment of –1 to the roll. Hexes occupied solely by artillery receive neither of the above DRMs; they do not apply to artillery alone.
8.35 Stacking and Fire Table Results. The top unit suffers Fire Table results. However, if it is eliminated or suffers a Disorder, the player must undertake a UDD [2.6] for all other units in the hex, ignoring any +/– from the Fire Table result.
Exceptions:
-
If step losses eliminate a unit, excess step losses are applied to the next unit in the stack. Non-step loss results are ignored, the other units in the stack conduct UDDs because the top unit was eliminated.
-
This rule does not apply to the results of Shot/Shell artillery fire, because all the units in the hex are individually affected by such fire [10.67].
EXAMPLE: Artillery fire at a range of five hexes results in a UDD for a stacked hex. Each unit will UDD individually. The top unit fails its UDD, but the bottom unit passes. Because this was artillery fire at a range greater than three hexes, the bottom unit does not suffer another UDD because the top unit failed.
-
Pre-Shock Fire [10.43] targets the top shocking unit. Apply excess step losses to the new top shocking unit or, if there is no such unit, to the top unit in the hex. All units in the hex undertake a UDD if the top shocking unit is eliminated or Disorders.
-
For multi-section batteries, randomly determine the section losing the SP.
8.36 Stacking and Shock.
-
Stacked units, whether attacking or defending, combine their strengths during Shock resolution [see also 11.32].
-
The top unit takes all step losses [see also 12.35e]. Exceptions: For Bloody Standoff results, the participating unit with the highest cohesion takes the step loss, unless artillery is the top unit in the defending stack, in which case it takes the loss. If step losses eliminate a unit, excess step losses are applied to the next unit in the stack.
-
Retreats apply to all units. Exception: Abandoned guns [12.36]. See 11.46 for Advances.
-
Shock Resolution Table Disorder results apply to all units in affected stacks; previously Disordered units thus incur a 2nd Disorder.
-
The top defending unit is used for the Pre-Shock Cohesion Check [11.37]. A Disorder result applies to all units in the stack, as above.
-
Defending units conduct Pre-Shock Reaction Fire separately [10.43, 11.38].
-
Each Green unit checks Attacker Commitment separately [11.36].
-
If attacking units Disorder due to Shock results, any non-participating units stacked with them also Disorder and, if necessary, retreat.
8.37 Artillery. A battery is always a single unit. If a battery consists of two or more sections all sections must stack together and move together and conduct UDDs as a single unit. If a multi-section battery suffers a loss, randomly assign the loss to a section.
8.4 Extended Lines
8.41 Individual infantry units (but not dismounted cavalry) with 8 SPs or more may extend their presence into an adjacent Flank hex by placing an Extended Line marker in that adjacent hex.
-
It must be placed either to the direct left or right Flank of that unit.
-
The extending unit may not be stacked with another non-artillery unit, nor can the Extension hex be occupied by another non-artillery unit.
-
The hex into which the line is extending must not be adjacent to an enemy unit. However, an extension, even if Disordered, may retract into the parent unit or vice versa, despite the stationary part of the unit being adjacent to the enemy. The unit must then stop movement and cannot change facing [9.53]. A retracting part that starts adjacent to an enemy unit may be subject to Withdrawal Fire [10.44].
-
The MP cost to extend or retract must not be greater than 2 MPs.
8.42 The MP cost to Extend or Retract is the same as moving into the hex. No Facing Change is involved. Thus, a unit in a Woods hex and extending or retracting into another Woods hex pays 2 MPs in most games of the series, whether under Attack Orders or not. Withdrawal Fire versus a retracting part earns the +1 DRM for Flank Fire only if the non-phasing unit is in the retracting part’s flank hex [Exception to 10.44]. If an Extended Line is reduced in strength by combat below 8 SPs, remove the Extended Line marker at the end of the brigade activation in which the reduction occurs, and place the parent unit in either hex, without spending any MPs.
8.43 Units with 15 SPs or more may Extend to both sides (if they drop below 15 SPs, remove the extension of the player’s choice as in 8.42). As long as both extensions are placed simultaneously, the MP cost to extend to both sides is the same as Extending to one side. If the terrain costs on both sides are different, the larger is used.
8.44 An Extended Line occupies two hexes, or, if desired, three in the case of units exceeding 14 SPs. No part of an Extended Line may end movement stacked with a non-artillery unit. The base unit and any extensions must all have the same facing. The Extended Line has the following properties:
- For Movement it is treated as one, solid unit. The unit may only move into a frontal hex (as in the “A” diagram below), unless using Withdrawal Movement [9.54]. MPs are paid for the most costly hex entered by any portion of the Extended Line. As units may move only frontally, an Extended Line must either pivot to change its direction (and facing), paying the cost of the hex into which it pivoted (as in the “B” diagram below), or may change facing 180° paying 1 MP [7.22]. If under Attack Orders, it pays an additional 1 MP when pivoting into a Woods hex. If stacked with artillery and not exiting the hex, the artillery must also change its facing. An Extended Line changing facing 180°
and remaining in the hex may stack above or below the artillery [8.23]. If the artillery is activating with the brigade, its Facing change costs 1 MP, and it would thus suffer a –2 DRM for any fire conducted either before or after the Facing Change [10.61].
-
A unit with two line extensions in place “pivots” on either the left or right extension when changing direction (and facing). This means the line extension on the circumference of such a “pivot” must move two hexes.
-
An Extended Line cannot use Reaction Facing [9.61]. Extended Lines may use Refusal and may Refuse in both directions, if otherwise eligible [7.3]. If half the Extended Line is adjacent to the enemy, the other half may move adjacent only to enemy artillery, unless the Extended Line is under Attack Orders and in good order [but see also 8.48]. If under Advance Orders and not adjacent to an enemy unit, an Extended Line may form Extended Column [8.5, 8.52], paying 1 MP if changing facing by more than one vertex.
-
For purposes of Fire and Massed Target determination, an Extended Line has its strength divided among the hexes it occupies as equally as possible (with any left-over points assigned to the actual unit counter, or, in the case of a unit with two extensions, to the actual unit counter and one of the extensions).
EXAMPLES: An extended 9-SP unit would have 5 SPs in the counter’s hex, and 4 SPs in the Extension hex. A 17-SP unit extended to both sides would have 6 SPs in the counter’s hex, 6 SPs in one Extension hex, and 5 SPs in the other.
8.45 Extended Lines and Fire Combat
-
Each part of a unit in Extended Line may fire separately, or combine fire with one or both the other parts versus a single target hex. When a phasing Extended Line fires its parts separately, announce all its fires before rolling for any. All Return Fire is simultaneous [10.42], unless the latter is preceded by a Reaction Refusal/Facing Change.When firing at the same enemy hex with more than one part, an Extended Line must combine the fire of those parts. Parts that split their fire [see 10.15] may not combine that fire with other parts.
-
If combined fire crosses hexsides providing different terrain DRM, the defender receives the most favorable DRM benefit.
-
Return Fire [10.42] versus an Extended Line that combined its fire may target any of that Extended Line’s hexes in the non-phasing unit’s fire arc.
-
For fire versus part of an Extended Line, the part targeted benefits only from the terrain of the hex it occupies.
-
Any Disorder result against any part of an Extended Line Disorders the entire unit. Artillery stacked in any hex of an Extended Line must UDD if the Extended Line Disorders.
-
If using optional rule 10.9, apply ammo depletion to the entire unit. The diagram above shows the possible maximum Fire SPs per hex (side) from a 10-SP unit (5 and 5) and a double-extended 18-SP unit (6-6-6) out to two-hex range.
8.46 Extended Lines and Shock. An Extended Line must attack all enemy units in its frontal hexes as one shock attack in accordance with 11.31. An Extended Line is treated as one solid unit, attacking or defending. Calculate the Shock Ratio [11.43] using the Extended Line’s full strength. Units attacking an Extended Line are not required to be adjacent to all the defender’s hexes, but see 11.32 for combining attacking units’ strength.
8.47 Extended Lines Advance or Retreat as follows:
-
If the Extended Line advances, it must do so Extended, unless it cannot do so, in which case the Extended Line marker must be removed before advancing. Extended markers may not be removed voluntarily in an advance. An advance by pivoting the Extended Line is allowable as if using Wrap-Around [8.48].
-
If an Extended Line retreats, it must retreat Extended, unless it cannot do so or would be forced to change facing for any reason. If it does not retreat Extended, the Extended Line marker is removed and the unit retreated. The owning player then conducts a UDD [2.6]. If it fails, the unit suffers a Disorder result. If already Disordered, there is no further penalty.
EXAMPLE: A 9-SP infantry unit is in 2222, Extended into 2223. It Shock Assaults an enemy infantry unit in 2323, causing it to retreat. The unit may advance after combat by moving directly ahead, into, say, 2323-2324, or it may pivot into the abandoned 2323, leaving the Extender in 2223. The Extender, of course, has its facing adjusted to reflect its flank extension.
8.48 Wrap-Around. When a two-hex Extended Line unit in Good Order and under Advance or Attack orders shock attacks a single-hex enemy unit, and part of the Extended Line is not adjacent to the enemy (but, if it could move forward, it would be), that half of the Extended Line may move forward following Shock Step 3 (causing the unit to pivot and at no cost in MP) into the empty hex if:
-
The moving part of the extension does not begin its attack in an enemy frontal hex, and
-
It would place the defending hex in one of its Frontal hexes without the pivot placing any additional enemy units in any of the Extended Line’s other frontal hexes, and
-
The empty hex is not in the Frontal hex of another enemy unit, and
-
The Extended Line is not Refused.
PLAY NOTE: This will probably result in a +4 DRM for attacking through the Front and Flank or Rear and Flank.
EXAMPLE OF WRAP-AROUND: Defender in 3412 facing west; attacker in 3210-3211, Extended, facing east. Attacker moves into 3311-3312 to Shock. The extension in 3311 is not in contact with the defending unit but it may become so by moving the half that is in 3311 into 3411.
8.49 Before any Advance, Retreat, or Continued Shock, an attacker using Wrap-Around immediately retracts, removing the Extended Line marker.
8.5 Extended Columns
Individual infantry units of 8 SPs or more (but not dismounted cavalry), and individual cavalry units of 5 SPs or more, under March Orders or under Advance Orders but using March Order stacking for Pike/Road/ Trail Movement, must Extend one hex to the Rear to represent the length of that column. An infantry unit with 15 SPs or more, or a cavalry unit with 9 SPs or more, must Extend two hexes to the Rear when at full strength. A unit in Extended Column has its strength divided as equally as possible among the hexes it occupies, with any left-over points assigned to the actual unit counter, or, in the case of a unit with two extensions, to the actual unit counter and one of the extensions.
EXAMPLES: An 8-SP infantry regiment or a 5-SP cavalry regiment would require one marker between itself and a following unit; a 15-SP infantry unit or a 9-SP cavalry unit would need two markers.
-
If not adjacent to the enemy, an Extended Line under Advance Orders may form Extended Column [8.44] by changing facing. Switch the parent unit with its rearmost extension if the direction of movement requires.
-
For units larger than 7 SPs and not in Extended Line, place the Extended Column marker(s) in the starting hex of the parent unit after it moves out of that hex. It follows behind the parent unit as it moves, as illustrated below.
-
For units under Advance Orders, subtract 1 MP from the extension’s MA for the Activation in which it is created. For a second extension, subtract 2 MP. These subtractions apply only to this Activation.
-
At the end of Movement, a unit in Extended Column cannot be stacked with another unit. Count MP expenditure for extensions as if they were separate units. The extensions must follow the hex path of the parent and must end movement adjacent to the parent (or to the first extension), unless they retract.
-
Treat each part of a unit in Extended Column as a separate unit when targeted by enemy fire. Exception: Any Disorder result against any part of an Extended Column disorders the entire unit.
PLAY NOTE: Use of Extended Column markers is often unnecessary, as long as players remember which units are extended, as this status may matter for command and combat. Extended Columns fulfill the “chain of units” requirement in 4.22’s Exception.
-
If shocked, an Extended Column is treated as one “solid” unit. Calculate the Shock Ratio [11.43] using the unit’s full strength. Attacking units are not required to be adjacent to all the Extended Unit’s hexes. See 11.32 for combining attackers’ strength.
-
Extended columns follow 8.47 if retreating. See 6.13 and 8.52 for Advance after combat.
-
If combat reduces an Extended Unit’s strength below that which requires an Extended Column, remove the extension at the end of the brigade activation in which the reduction occurs, and place the parent unit in either hex, without spending any MPs.
8.51 March Orders. Units under March Orders moving along a Pike/Road/Trail extend to the Rear in conformance with the Road. With two-hex extensions or several consecutive Extended Columns moving by Road, this can result in a serpentine column that follows the Road.
In all cases, as shown in the diagram above, the column has only one Front and Rear hex (at the beginning and end of the column); all other hexes are flank hexes. This also applies to non-Road/Pike/ Trail column Movement. A unit in Extended Column may change facing 180 degrees. Switch the parent unit with its rearmost extension. If not moving along a Pike/Road/Trail, the facing change costs 1 MP [7.21]. If the target of Small Arms Fire or Shock, apply Advance Orders to the attacked brigade at the end of that enemy brigade Activation [6.26], and change its units’ facing immediately [7.23]. Unless their March Order AM has already been drawn for that turn, such brigades may activate when any remaining divisional AMs are drawn.
8.52 Advance Orders. Units under Advance Orders and using March Orders Stacking adhere to the following:
-
They use Advance Orders facing [7.11].
-
Unless forming Extended Line, an extension must face at least one of its parent unit’s rear hexsides after movement and after a change from March Orders. The parent unit’s facing must allow this. In the case of a unit with two extensions, the second extension must similarly face at least one of the first extension’s rear hexsides. Exception: If the course of a Pike/Road/Trail makes this impossible, the affected extension(s) must face the next contiguous Pike/Road/Trail hex(es). Within these provisions, a phasing unit in Extended Column may change facing as desired. Switch the parent unit with its rearmost extension if the new direction of movement requires. If not moving along a Pike/Road/Trail, the facing change costs 1 MP [7.21].
-
Provided it has sufficient remaining MPs, a unit in Extended Column may retract into any of the hexes it occupies, even if adjacent to the enemy. The movement cost is that for the hexside and the other terrain in the hex, rather than the Pike/Road/ Trail cost. Units with two extensions pay the cost of the second extension’s retraction unless retracting into the middle hex of the unit.
-
Unless ineligible due to the course of a Pike/Road/Trail, Extended Columns may form Extended Line during movement by changing facing, paying 1 MP for any change of 2 or more vertices.
Note: Forming Extended Line is not Pike/Road/Trail movement; hence the exemption in 7.23 does not apply.
-
If retracting into a hex adjacent to an enemy, a unit may not form Extended Line or change facing after retracting [9.53].
-
Only the parent hex may fire. It is never eligible for Prepared Fire.
PLAY NOTE: Extended Columns may not conduct Reaction Facing Change [9.61], which may significantly affect their ability to fire.
- Units in Extended Column cannot shock without first retracting or forming Extended Line. They defend against shock normally, and, if otherwise eligible, may Advance after Fire or Shock, automatically retracting their Extended Column marker(s) prior to advancing [11.46].
8.53 Extended Column and Attack Orders. When first activated under Attack Orders, units in Extended Column must Retract or form Extended Line [8.52] before undertaking any other action. If retracting into a hex adjacent to an enemy unit, apply the restrictions in 9.42, Exception 2, and those of 9.53. If expending MP it is ineligible for Prepared Fire. If unable to retract due to a Change and Stand result, it may remain in Extended Column until able to Move, applying the restrictions of 8.52. If unable to retract due to Movement restrictions on units under Attack Orders [see 9.24], it retracts but automatically Disorders and is finished for the Activation.
9.0 Movement
9.1 Movement Allowance
9.11 Each combat unit has a MA printed on its counter. Leaders do not have a printed MA—it is 10 for brigadiers and division leaders, and 40 for corps and army commanders.
9.12 The MA represents the total number of MPs the unit may use in a phase, which may vary according to the Orders under which a unit is operating.
9.13 Units expend MPs to enter hexes and cross hexsides, moving into adjacent, contiguous hexes. These MPs may not be saved or transferred in any way. A unit need not use its entire MA. The player may choose to expend fewer; he may never expend more.
Note: No unit may leave the map voluntarily (some battles have exceptions to this).
9.14 Dismounted cavalry uses infantry movement costs and horse artillery uses artillery movement costs.
9.2 Movement Modes
9.21 There are three different modes of Movement, corresponding to the Orders under which a unit is operating. The entire brigade must use the type of Movement corresponding to its Orders.
Exception: Units Out of Command at the time the brigade changed orders continue to use the type of Movement corresponding to the brigade’s previous order, until the start of their next Activation after reentering Command Range [4.23].
9.22 March Movement. An activated combat unit under March Orders uses March Movement, as follows:
-
It may move into a hex with any type of terrain.
-
It may not move adjacent to an enemy unit.
-
It may not move into any hex that is within four hexes and within LOS [10.2] of an enemy combat unit at any time. A March Orders unit starting its move within four hexes and LOS of an enemy unit must change orders in order to move.
-
The MP cost for Pikes and Roads (but not Trails) is halved (to ½ MP per hex).
-
It may be activated only by the March AM; the division AM does not affect it [5.35].
9.23 Advance Movement. An activated combat unit under Advance Orders uses Advance Movement, as follows:
- It may not voluntarily move adjacent to an enemy combat unit other than artillery. (Exception: A unit under Advance Orders
may cross a Bridge or Ford to move adjacent to an enemy combat unit. It cannot shock attack, however, until its next Activation.)
- It may use Roads, Trails, Pikes, Bridges, and/or Fords (which will speed movement [9.43]).
9.24 Attack Movement. An activated combat unit under Attack Orders uses Attack Movement, as follows:
-
Its MA is halved, rounding up.
-
It may not use Road, Trails, or Pike movement costs; instead it uses the MP cost of the terrain in the hex.
-
It may not use Bridges or Fords as part of movement [9.44].
-
If artillery is attached to a brigade under Attack Orders, it moves as if under Advance Orders [6.18].
9.3 Leader Movement
9.31 A brigade, division, or Artillery leader may move when his command is activated. Unless moving with a unit with which he was stacked at the start of the Activation, he moves as if he were a separate unit. A leader may also move to and stack with a unit of the activated command and continue moving with that unit, as if he had started the Activation with it, provided he does not exceed his movement allowance. These leaders do not have their MA printed on the counter; it is ten (10) MPs. A brigade, division, or Artillery leader may move only once per Phase; i.e., he must undertake all of his movement at one time and may not break up his movement into sections. The MA of a leader/commander is unaffected by the Orders of its Commands. Leaders always use the best available movement rate for movement and command. A Division leader moves during the Action Phase of any one brigade in his division. If a subordinate brigadier under March Orders is within his Command Range, he can instead move when the March Orders AM is drawn.
9.32 Corps and Overall Commanders may move only in the Commander Movement Phase [3.0 IV/A]. However:
-
If a corps commander uses more than ten of his allowed 40 MPs, his Command Range is reduced to 0 during the following turn (only division leaders stacked with the corps commander would be In Command).
-
If an OC uses more than ten of his allowed 40 MPs, he may not use his Initiative Rating for any purpose during the following turn.
9.33 A Leader may move adjacent to an enemy unit only if the hex is occupied by friendly units, or if moving with a unit of his command.
9.4 Terrain and Movement
As a general rule, this section applies to all games within the system. Specific terrain rules can be found in the respective Battle Book.
9.41 The type of terrain in a hex dictates the cost to enter (such as Woods) or to cross (such as Stream or Slope hexsides), depending on the unit type moving. For example, it may cost an infantry unit 2 MPs to enter a Woods hex, whereas it will cost an artillery unit 4 MPs to do the same. Most terrain types are self-explanatory; those that require elaboration are discussed below or in the Battle Book.
9.42 If a unit does not have the necessary MPs to enter a hex—for whatever reason—it may not enter that hex.
Exception 1: A unit may always move one hex (including any and all facing changes) as long as it would have been able to enter that hex using its full, Good Order MA and does not move adjacent to an enemy unit.
Exception 2: A unit under Attack Orders may always move one hex (including any and all facing changes) into a hex adjacent to an enemy unit provided it neither Shocks nor Fires during that Activation and it would have been able to enter that hex using its full (unhalved), Good Order MA. Prohibited hexes or hexsides may never be entered or crossed despite these exceptions.
PLAY NOTE: Extension/Retraction counts as a 1-hex move.
9.43 Pikes, Roads, Trails, Fords, and Bridges can speed movement.
-
For units in March Order, the cost to enter a Road or Pike hex is ½ MP [9.45]. All other costs are as listed for the terrain on the Terrain Effects Chart.
-
Units under Advance Orders use printed Pike, Road, Trail, Ford and/ or Bridge movement costs if complying with March Order stacking limits [8.13]. A unit must pay the cost of the hexside and the other terrain in the hex to end its move stacked with another unit, if the resulting stack will exceed March Order stacking limits.
-
Units under Attack Orders may not use Roads, Pikes, Trails, Fords, and/or Bridges. They must use the cost of the terrain in that hex.
-
Artillery is always under Advance or March Orders and therefore may use the movement cost benefits of Road, Pikes, Trails, Fords, and Bridges.
9.44 When being used:
PIKES AND ROADS: Pike and Road movement rates apply regardless of the terrain, including elevation changes. Units are not subject to Disorder from terrain [9.47].
TRAILS: Trail movement rates are one-half the non-Trail rate for the terrain in the hex. Units are not subject to Disorder from terrain [9.47]:
-
Round down, to a minimum of 1 MP, if under March, and for Leaders;
-
Round up, if under Advance (and obeying stacking limits [8.13]).
EXAMPLE: If Woods terrain would normally cost 5 MPs for an artillery unit under Advance Orders, using a Trail costs 3 MPs.
Note: Trail movement costs vary by game, particularly on whether trails negate the cost of hexside terrain. See the Battle Book and TEC.
BRIDGES: Units may not move (as part of Movement) across a Bridge if under Attack Orders. However, they may Shock Attack across the Bridge under those Orders, and, if the result allows, advance across that Bridge [see also 6.15 and 9.23].
FORDS: They may be used under March or Advance Orders; units under Attack Orders may not move using Fords, but they may attack and advance across the Stream or River through the Ford hexside. The cost to use Fords is often appropriate to the specific battle. See the Battle Book and the game’s Terrain Effects Chart.
9.45 Units gain the benefit of Roads, Pikes, Trails, Fords, and Bridges, when available, only if they enter such a hex from a connecting Pike/Road/Trail hex. In addition, units using these paths, do not pay any MPs to change facing during movement as long as they are moving from one Pike/Road/Trail hex directly into another, connected Pike/Road/Trail hex.
9.46 The GBACW system uses a graduated Elevation system to represent changes in terrain height. Some changes in elevation are gradual, others are not. As the representation varies from game to game, depending on the elevation scale adopted, see the Battle Book for specifics.
9.47 Certain terrain, as shown in the Terrain Effects Chart, carries with it Disorder possibilities:
-
If a unit enters or crosses terrain with a “D,” that unit is automatically Disordered the instant it enters/crosses that hex/hexside (and remember the reduced MA of a Disordered unit [12.33]).
-
If a unit enters or crosses terrain with a “d” or “dr,” that unit undergoes a UDD [2.6] the instant it enters/crosses that hex/ hexside. If the roll is higher than its Cohesion Rating, the unit is Disordered. Notes:
-
No D or d/dr applies to a unit using a Pike/Road/Trail, unless Battle Book rules specify otherwise.
-
TECs vary. The most recent use a note rather than “d” or “dr”.
9.5 Enemy Units and Movement
9.51 A friendly unit may never enter a hex containing an enemy combat unit.
9.52 Only units under Attack Orders may move adjacent to an enemy infantry or cavalry combat unit, unless crossing a Bridge or Ford hexside to do so [9.23]. Units under Advance Orders may move adjacent to artillery, but artillery may never move adjacent to an enemy unit.
Exception: If the hexside between the non-phasing and phasing unit is uncrossable (e.g., a river), the prohibition on moving adjacent to enemy infantry and cavalry does not apply for infantry and cavalry units under Advance Orders
9.53 A combat unit must cease movement for the Phase when it moves adjacent to an enemy combat unit, even if separated by what would be impassable terrain. It may not change facing after moving adjacent.
Exception: If in moving adjacent to the enemy the moving unit stacks with another unit and must adjust its facing to match that of the stationary unit, it can neither fire nor shock during that Activation. A unit that starts movement adjacent to an enemy unit may change facing by only one vertex before moving. If not moving, it may change facing any number of vertices. If its orders permit, a unit starting movement adjacent to an enemy unit may move directly to another hex that is adjacent to the same (or another) enemy unit, whereupon it ceases movement.
9.54 Withdrawal Movement. Units under either Advance or Attack Orders may use Withdrawal Movement as their movement for that Activation. When using Withdrawal Movement, a unit moves backwards (rear hexes only) a maximum of two hexes. It may not extend, and may not change facing unless stacking requires it [7.11]. If any hex the unit enters costs more than 1 MP, the unit undergoes a UDD [2.6] as it enters each such hex, earning a +1 DRM for each MP in excess of one required to enter.
-
If the unit fails it is Disordered.
-
If a Disordered unit fails, it may not enter the second hex; it remains Disordered in the first Withdrawal Movement hex.
If under Advance Orders and adhering to March Order Stacking limits, units may use Pike/Road/Trail movement costs to modify or avoid a required UDD. Except along a Road or Pike, artillery using Withdrawal Movement may not move through a friendly unit, and non-artillery may not move through a non-artillery unit. Extended Columns may not use Withdrawal Movement; Extended Line may not use thoroughfares. If an Extended Line cannot withdraw extended, it may Disorder, retract into any of its hexes, and then follow normal Withdrawal Movement rules. If already Disordered there is no additional effect. Units under Advance Orders must comply with 6.15, third bullet. Units under Attack Orders must comply with 9.53. Units using Withdrawal Movement may not fire or shock. If Refused, they remove their Refused marker after any Withdrawal Fire [10.44].
EXAMPLE: An infantry unit withdraws two hexes, both Woods. Woods has a normal cost of 2 MPs. The player rolls the die for each hex, adding +1 for each Woods hex to get the UDD result. If the infantry unit started the move Disordered and fails the UDD for the first hex, it may not enter the second Woods hex. If it is Disordered in the first hex and fails the UDD for the second hex, it must return to the first hex.
9.55 Artillery and Enemy Units.
DESIGN NOTE: While Civil War artillery manuals cautioned against artillery deploying within effective small arms range of the enemy, at least one conceded that it might sometimes be justified. Attempts to do so occurred throughout the war, with varying results. Thus, we offer players two mutually exclusive options. The first reflects the prudent streak in Civil War gunnery. The second allows for the actual practice of “running the guns in close”. Option 1: Artillery units may move no closer than four hexes away from enemy combat units, unless the enemy has no LOS to the closer hex. Friendly units do not block LOS for purposes of this rule. If otherwise eligible [see 6.15, 9.53, and 10.44], artillery starting an Activation within three hexes of enemy combat units may move into or through a hex equally close or further away from the enemy regardless of LOS, but may not fire during that same Activation unless it ends its move at least four hexes from the nearest enemy with LOS to its hex. Option 2: Unless stacking with or adjacent to friendly infantry or cavalry, artillery cannot move within three hexes of enemy mounted cavalry. Provided it conforms to this restriction, the following rules apply:
- Artillery moving into a hex within three of any enemy unit having LOS to it must, after resolving any Approach Fire targeting it, immediately undertake a UDD with a +DRM equal to the number of enemy units within three hexes and LOS. Count all extensions as separate units. Disregard enemy range limitations or ammo depletion when calculating the DRM. Enemy units block LOS [10.26], but units friendly to the moving artillery do not block LOS for this purpose. Failing the UDD results in Disorder and retreat to a hex not within three of enemy units or out of their LOS. If the artillery fails the UDD by more than two, it loses a number of guns equal to half the margin of failure, rounding down. Restrictions on artillery retreat apply [12.45].
EXAMPLE: Artillery with cohesion “7” rolls a ten for its UDD. Its margin of failure is three. The artillery loses one gun.
EXAMPLE OF MOVEMENT AND REACTION (caption of the diagram): All phasing units are under Attack Orders. Unit A is an artillery unit that cannot move closer to enemy units, unless the latter have no LOS to it. [9.55 Option 1]. Unit E uses Withdrawal Movement to back up two hexes without changing facing [9.54]. Unit F moves into the rear of the enemy. Enemy Unit C may conduct Reaction Facing Change [9.61] and rotates one vertex then must conduct a UDD. Enemy Unit D cannot change facing because it is in the Frontal hex of another enemy unit. Unit B moves directly across the frontal hex of an enemy unit, which is allowed [9.53]; however, it must stop after that first hex. The movement by Unit B triggers possible Artillery Reaction Movement from Artillery A [9.63]. Unit G moves toward the enemy cavalry and artillery units, which triggers Moving In Reaction [9.63]. The enemy cavalry and artillery units may move one or two hexes and then undergo a UDD. Unit G may continue moving. Unit I cannot use the Road rate through the Woods because Roads may not be used by units with Attack Orders.
-
Artillery moving within two hexes and LOS of enemy units adds two to the DRM for its UDD in addition to the DRM for the qualifying enemy units described above.
-
Already Disordered artillery failing this UDD retreats as above and loses a gun in addition to any others lost.
-
Artillery starting its own or an enemy brigade activation within three hexes and LOS of the enemy is not subject to the provisions of this option if it retreats, conducts a Reaction Move, or enters only hexes further from enemy units within LOS and does not fire.
PLAY NOTE: Artillery typically had a healthy respect for enemy capabilities. When it ventured close, it did so on the assumption the enemy was too weak or disorganized to threaten it. That assumption often proved wrong.
9.6 Reaction Movement
A non-phasing unit may move during an opponent’s phase in Reaction to what is happening, if not under March Orders [6.13] or in Extended Column [8.5]. Phasing units and units friendly to them may not react.
9.61 Reaction Refusal/Facing Change. A non-phasing combat unit may Refuse or change facing in reaction to movement by, or fire from, an enemy unit.
-
Any enemy movement or advance into a hex adjacent to the non-phasing unit may trigger a Refusal or Facing Change.
-
Enemy fire targeting a non-phasing combat unit from a hex outside its front may trigger a Refusal or Facing Change by the targeted unit, unless the non-phasing unit must retreat as a result of the fire. The reaction occurs after the results of the Phasing Fire are applied, including both shots from rapid firing artillery [10.68] or Spencer Repeaters [14.3]. A unit may Return Fire after a Refusal or facing change [10.42], unless it suffers a 2nd Disorder due to failing its UDD [9.62]. For firing after Reaction Refusal, follow the restrictions of 7.34.
-
To use Reaction Refuse, a unit must be eligible to Refuse [7.31, 7.32].
-
Units in Extended Line may Refuse, but cannot change facing using this rule.
9.62 Restrictions on the use of Reaction Refusal or Facing Change.
-
A unit may do so only once per enemy brigade Activation.
-
The unit undergoes a UDD [2.6] when it does so (infantry and cavalry only, not artillery). If it fails, it suffers a Disorder result. Stacked units conduct separate UDDs.
-
There is no MP cost (as it is not a phasing unit).
-
A unit may not use these Reactions if already in the Frontal hex of another enemy unit. Apply this restriction to each part of a unit in Extended Line separately, as if the part were an independent unit. Additional restrictions on the use of Reaction Facing Change:
-
May change facing by only one vertex.
-
May not do so if it is Refused or stacked with a unit that cannot Reaction Face.
-
If artillery, it is subject to a –2 DRM for the first non-phasing fire following the Reaction Facing during that enemy brigade Activation. Rapid Fire is not allowed for that fire.
9.63 Moving in Reaction. Mounted cavalry and artillery have the additional capability of moving in reaction to enemy Movement within three hexes of their present position. They may not react to enemy Advance or Retreat.
-
Mounted cavalry and artillery may move in reaction one or two hexes, using the Retreat rules [12.44]. Because it is a non-phasing unit, there is no MP cost to do so.
-
A mounted cavalry or artillery unit under March Orders or already in the Frontal hex of another enemy unit may not reaction move.
-
Artillery may not reaction move into a hex that would normally cost it more than 2 MPs to enter. Artillery may use the Road/ Pike/Trail movement cost if eligible.
-
Units must perform a UDD after a reaction move. A failed UDD results in Disorder, a 2nd Disorder results in the loss of 1 SP or one gun. For cavalry, add to the roll the MP cost of any hexside crossed plus that of each non-clear hex entered. If the cavalry unit’s strength is 4 SPs or less, and it is under Advance Orders, it may use the Pike/Road/Trail cost to calculate the UDD modifier [8.13].
-
The decision to move in reaction is announced and implemented before the phasing unit moves to a hex in triggering range but use the triggering hex to determine the retreat path.
-
If mounted cavalry or artillery chooses to move in reaction, the phasing unit must move into the triggering hex, but may keep moving, if it has MPs remaining.
-
An artillery unit may move in reaction once per enemy brigade Activation.
-
An artillery unit can either move in reaction or use Approach Fire [10.45] during a given enemy brigade Activation, but may not do both.
-
Each hex artillery enters during Reaction Movement may not be closer to any enemy unit that is within four hexes of the artillery and has LOS to it.
-
If possible, the phasing unit may fire at artillery before the reaction move. Any failed UDD, D, or step loss limits the reaction move to one hex.
PLAY NOTE: Theoretically, cavalry can keep retreating if the phasing unit keeps moving toward it. This could happen even when the phasing unit is mounted. However, each time the non-phasing unit so retreats, it could incur Disorder.
9.7 Reinforcements
9.71 In most games in the GBACW system, reinforcements enter through the map edge hexes listed in the scenario, paying the appropriate movement cost to enter the edge hex. Arriving units are given specific Orders—in the Reinforcement Orders Phase [3.0 II/D]—prior to their arrival, and use that Movement mode to enter. All reinforcements are considered to be In Command for Activation purposes during the turn of entry. Entering leaders and commanders apply their ratings to reinforcements that are under their command and entering via the same hex or area during the same turn, unless the Battle Book specifies the number of AMs the reinforcements receive. Off-map leaders do not affect commands already on the map. A unit entering without its brigadier retains its orders until starting an activation within Command Range of its brigadier. It then immediately assumes the orders of that brigade. If it already moved under March Orders, it is finished for the turn.
9.72 If more than one stack enters through the same hex during the same Action Phase, the first stack pays the cost of the entrance hex, the second its cost plus that of the first, and so on. Unless under March Orders, reinforcements may move into an Entrance Hex despite an enemy unit being adjacent to that hex. If under Advance Orders, however, they may not shock until their next Activation. No unit may enter an enemy Entrance hex until all reinforcements scheduled to enter through that hex have done so, or could have done so.
9.73 Arriving units that are unable to enter due to units entering ahead of them may enter the map during the next Action Phase for that command. Reinforcements may also delay their entry at the player’s discretion, but must enter before the next group scheduled to enter via the same entry hex(es). Unless stated otherwise in the Battle Book, reinforcements within a particular group do not have to enter in the order listed.
9.74 Some reinforcements are restricted as to the number of Activation Phases they may undertake in the turn in which they enter. This applies even to entering reinforcements using March Orders.
EXAMPLE: A unit arriving under March Orders stated to have only one AM allowable for its turn of entry may move only the equivalent of one Activation.
10.0 Fire Combat
10.1 Basic Fire Concepts
Fire combat is of two types: small arms and artillery.
10.11 Units may fire at the enemy when:
-
Activated and under Attack Orders (in addition to Movement).
-
Activated and under Advance Orders (instead of Movement).
-
In reaction to certain enemy actions (but not while under March Orders).
10.12 A unit may fire at any enemy unit within the Range of its Weapon Type and within its LOS [10.2]. The Range is the number of hexes from the firing unit to the target, counting the target unit’s hex but not the firing unit’s hex.
10.13 No unit is ever required to fire; fire is always voluntary. However, each phasing unit must complete its Movement/Fire before any other phasing unit starts. Exception: see optional rule 10.82.
10.14 Each unit fires separately; two units may not combine fire. See 8.31 for the maximum fire allowed from a single hex.
Exceptions:
-
An infantry unit in Extended Line may combine fire from its constituent hexes as it is a single unit. [8.45]
-
Artillery fire may be combined [10.63].
-
See optional rule 10.82, Combined Small Arms Fire.
10.15 When a phasing unit fires—and this includes a unit in Extended Line—it may split its fire between all possible adjacent targets in its Frontal hexes. Such splitting must be done as evenly as possible. A unit may not split its fire against the same target. Roll separately for each fire. Split fire and all Return Fire is simultaneous [10.42], unless the latter is preceded by a Reaction Refusal/Facing Change. See 10.65 for artillery exceptions to the above. Non-phasing units split Return, Withdrawal, and Approach fire by reserving part of their firepower for use in a possible later fire opportunity. They split Pre-Shock Fire the same way a Phasing unit splits its fire. Non-phasing units split their fire as evenly as possible and are limited to firing twice (treat a refused frontal hex separately). They are not limited to firing at units in their two frontal hexes, but cannot fire at the same hex twice. Non-phasing units that split Return Fire but suffer SP losses from the first fire combat may still fire with the SPs originally allotted for the second fire, unless their remaining SPs are less than allotted, in which case they fire with their remaining SPs.
EXAMPLE #1: A 5-SP phasing unit with an enemy unit in each Frontal hex may fire all 5 SPs at either unit. Or, it can split fire, directing 3 SPs at one hex and 2 SPs at the other. No other combinations are possible.
EXAMPLE #2: A 3-SP non-phasing unit may Return Fire with 1 or 2 SPs, reserving the rest for a later opportunity to return fire. If the result of the first fire combat leaves it with fewer SPs than the number reserved for the later fire, it may use only its remaining SPs for that fire.
10.16 Each Weapon Type has a Maximum and Prepared Fire Range, listed on the Range Effects Chart. Maximum and Prepared Fire Range can vary from game to game. No unit may fire at a target that is outside its maximum range. All fire must be through a unit’s Frontal hexsides, as depicted below:
EXAMPLE: Units with “R” weaponry (rifled-muskets) have a maximum range of five, and a Prepared Fire Range of one; and those with “M” (muskets) have a maximum range of two and, for Prepared Fire, one.
10.17 To resolve fire, the player determines the number of SPs and rolls one die, cross-referencing the roll with the Fire Strength on the Fire Table. The roll may be modified by several DRMs, all listed in 10.8 and on the Fire Table. The results are applied immediately [12.0].
Note: If there is Return Fire [10.42] non-artillery units and artillery able to Return Fire at Canister range will fire before the effects of the fire are applied; artillery units firing at Shot/Shell range will apply the results before they return fire [10.45].
10.2 Line of Sight
10.21 Units firing at a target two or more hexes distant may fire only at targets to which they can trace a LOS; they must be able to see the target. LOS is traced from the center of the firing hex, through the Front of the unit [7.11] to the center of the target hex. Line of Fire is the LOS extended indefinitely past both the firing and target units, regardless of terrain. For all purposes other than fire combat, LOS is traced from the center of the sighting unit’s hex, through any of its hexsides, to the center of the enemy unit’s hex (i.e., 360 degrees).
10.22 Certain terrain hexes block LOS [see Terrain Effects Chart]. If the LOS is blocked, fire is not possible. Blocking terrain hexes can always be fired into, but never through. Fire at an adjacent hex may be prohibited across certain hexsides [10.67; see individual Battle Books for specific cases].
10.23 The following may block LOS, depending on their location:
-
WOODS: Woods are treated as being one full level higher than the base elevation. However, Orchards do not block LOS.
-
TOWNS: Towns are treated as being one full level higher than the base elevation.
-
ELEVATIONS: A hex may block LOS due to its elevation and the type of slope hexside it has (if any). An elevation change from one hex to an adjacent hex determines the type of slope hexside between them. For LOS purposes there are two types of elevation changes: Gradual: One elevation change to an adjacent hex without any slope hex sides. Non-Gradual: One or more elevation changes to an adjacent hex with a Minor, Steep, or Sheer slope hexside between them. Notes:
-
Combat units are always considered to be at their hex’s base elevation.
-
Treat the hexsides of Woods and Town hexes like Steep Slopes for determining LOS, i.e., as if they were steeply-sloped hills one level higher than the actual ground level.
10.24 Intervening Blocking Terrain:
-
Higher Elevations. If both firing and target hex are on the same or different level, any intervening hex with an elevation higher than both units blocks LOS.
-
Canopy of Trees. LOS may not be traced through a lower Woods hex adjacent to a wooded target hex or a wooded firing hex (due to the canopy of the trees), unless:
a. The adjacent Woods hex is lower than both the firing and target hexes, and
b. The base elevation change between the two Woods hexes is non-gradual.
- Slopes. If the firing and target hexes are on different levels, LOS is blocked by any intervening hex or hexside higher than the average level between them and closer to the lower unit. Halfway or equidistant is closer if:
a. The potential blocking hex has a non-gradual slope hexside closer to the lower unit, or
b. The potential blocking hexside has a non-gradual slope. Notes:
-
The average level is the sum of the higher and lower units’ base elevations, divided by 2 [Average Level = (H+L)/2].
-
The halfway or equidistant point can either be a hex or hexside depending on the number of hexes between the firing and target hex.
-
A potential blocking hexside can exist only midway between the firing and target hexes, and only when the adjusted heights of its two adjacent hexes differ. In such cases, the height of a potential blocking hexside is the average of the two adjacent hexes’ adjusted height. Woods and Towns adjust the height of their hex’s base elevation by one level for this determination [10.23].
-
If the higher hex adjacent to the non-gradual hexside is only one elevation higher than the lower unit, treat the hexside as gradual. Exceptions: Woods and Town hexes.
SLOPE LOS EXAMPLE. In the illustration above, LOS is clear between A and W-Z. A is on Level 5, while X is on Level 2, thus the average level between them is 3.5, and W is lower than the average. Y/Z are on Level 1; the average level between them and A is 3. No hex higher than that level is closer to Y/Z than to A. Although the elevation of the non-gradual slope between A and W (4) is higher than any of the average levels for X-Z, it is not equidistant or closer to the lower hex. LOS is blocked between B and W because A (5) is higher than the average level (4.5) and has a non-gradual slope hexside closer to the lower unit (and also due to the Shadow Exception (see below)). The LOS is clear between B and X. A (5) is higher than the average elevation (4), but is not closer, while the height of the non-gradual slope (4) halfway between is not higher than the average level. The LOS is clear from B to Y-Z because there is no higher average level or non-gradual slope closer to the target hex. LOS is blocked between C and W. A is higher than the average level (5 vs. 4.5) and is closer to the lower hex. LOS is blocked between C and X. The average level (4) is lower than A (5), and A counts as closer to X as it has a non-gradual slope hexside closer to X. LOS is blocked between C and Y because the non-gradual slope that is halfway between has a height (4) that is higher than the average level (3.5). LOS between C and Z is clear because the potential blocking hexside is not halfway or closer to the target hex. LOS is blocked from D to W and X because A (5) is higher than the average level of both hexes (4.5 and 4) and closer to the lower hexes. LOS is blocked between D and Y because A (5) is higher than the average level (3.5) and has a non-gradual slope hexside closer to the lower hex. LOS is blocked between D and Z because the potential blocking hexside has a height (4) higher than the average level (3.5) and is halfway to the target hex.
Additional Restrictions on LOS.
-
The Intervening Hill Exception. An intervening hex or ridge at the same base elevation as the higher unit blocks LOS if separated from the higher unit along the Line of Fire by a hex of lower base elevation.
-
The Shadow Exception. For firing and target units on different levels:
a. An intervening Woods or Town hex always blocks LOS if higher than and adjacent to the firing or target unit.
b. A steep or sheer slope hexside blocks LOS if higher than, and adjacent to, the lower unit, unless all other hexsides along the LOF to the higher unit are equally steep or steeper.
- Crests [Optional, but Recommended]. If the firing and target units are at different elevations, LOS is blocked if:
a. The base elevation of hexes along the LOF and behind the higher unit descends sooner than it does between the higher and lower units (count the same level hexes in both directions from the higher unit’s hex, exclusive), and
b. The LOF beyond the higher unit does not cross any hexes of higher base elevation before entering hexes of lower base elevation. For purposes of this rule do not count Woods or Towns when determining elevation of hexes beyond the higher unit.
EXAMPLE of LOS and Geographic Crests: In the illustration above, LOS is blocked between A and Y, because elevation descends sooner beyond A than it does between A and Y, and the LOF beyond A crosses lower elevations before entering any higher hexes. This implies a geographic crest on the hexside between 4406 and
- LOS is clear between A and Z. The number of hexes at the same elevation along the LOF beyond A is the same as the number between A and Z, so the geographic crest does not block.
10.25 Reciprocal Nature of LOS. LOS is always reciprocal—if the Firing unit can see the target, then the target can see the firing unit. Exception: see 10.26.
10.26 Combat Units.
DESIGN NOTE: LOS is not the only consideration when determining whether combat units “block” fire. The danger of “friendly fire” incidents was such that small arms/canister fire over the heads of friendly troops only occurred when the latter were well below the LOS. Even then it was at least unnerving and sometimes damaging for the intervening unit. Firing over the heads of enemy troops held no such risks, but typically the closest enemy unit was the most exposed and the only one that mattered to the firing unit. Given no blocking terrain, intervening combat units block small arms fire at all ranges and artillery fire at canister ranges [10.67], with the following Exceptions:
-
The intervening unit’s hex has a base elevation lower than that of both the firing and target units.
-
No intervening units are friendly to the firing unit, and terrain blocks the firing unit’s LOS to all intervening enemy units.
-
An intervening unit in a hex adjacent to a hex two or more levels higher will not block fire for artillery in that higher hex [10.67].
-
The Firing and target units’ base elevations differ by two levels or more, the intervening unit is on the same base elevation as the lower unit and is not closer to the lower unit. Whenever fire is permitted over the heads of friendly combat units adjacent to the target, and the unadjusted Fire Roll is 2 or less, those friendly units must conduct a UDD, Disordering if they fail. Given no intervening, blocking terrain, friendly combat units block artillery fire at a range of four or more hexes regardless of their elevation, if such units are on the LOF and within two hexes of the target, including the two hexes past the target. This applies even if the firing unit’s range is sufficient only to reach the target. Where the LOF runs along a hexside, friendly units adjacent to that hexside and within two hexes of the target block as well. Enemy units do not block artillery fire at ranges of four or more hexes. Combat units do not block LOS to units under March Orders for the purposes of rule 6.13, or for purposes of rule 6.31 (Reserve), or to targets of Cavalry Charge [11.52].
10.27 If LOS runs along the hexside of a hex that blocks LOS, the LOS is blocked. (Accurate? No sir. But it stops arguments.)
10.3 Phasing Fire
Phasing Fire applies to activated units (i.e., it is their turn).
10.31 A phasing unit may fire only once per Activation, although it may split its fire at the time [10.15].
Exceptions: Artillery Rapid Fire [10.68] and, in certain battles in the series, Spencer Repeaters [14.3].
10.32 A phasing non-artillery unit may fire when Activated under the following Orders:
-
ATTACK ORDERS: It may fire once during its Activation, at any time before, during, or after Movement.
-
ADVANCE ORDERS: It may fire once, instead of Movement. It may change facing one vertex before firing, but not afterward. See 10.61 for Artillery.
10.33 The following units may not use Phasing Fire:
-
Units under March Orders.
-
Units under Advance Orders that expend MPs. Exception: Artillery [10.6].
10.4 Non-Phasing Fire
Non-Phasing Fire refers to opportunities for non-phasing units to fire at activated enemy units that are threatening them in some way. There are four different types of Non-Phasing Fire: Return Fire, Pre-Shock Fire, Withdrawal Fire (for infantry/cavalry only), and Approach Fire (for artillery only). Phasing units (and units friendly to them) may never use Non-Phasing Fire in any form.
Exception: If otherwise eligible [10.43], phasing units and units friendly to them may use Pre-Shock Fire versus non-phasing units that Continue Shock [11.47].
10.41 Non-Phasing Fire is available to units under Advance and Attack Orders; it may not be used by those under March Orders. An eligible unit may use all its SPs for each type of Non-Phasing Fire once per enemy brigade Activation. The limits in 10.14 apply. For each triggering action, the owning player must declare which units will use Non-Phasing Fire.
-
If multiple non-phasing units fire in response to the same trigger, apply each result in the order that it is rolled.
-
For each result, apply step losses before applying any non-step loss result [12.21].
-
If step losses eliminate the top unit in a targeted stack, apply excess step losses to the next unit in the stack, but ignore any unapplied non-step loss result (d+2 or D). Other units in the stack conduct a UDD if the top unit Disorders or is eliminated [8.35].
-
If the target hex is vacated before all fire has been conducted, non-phasing units that declared fire are still considered to have fired. No actual die roll is needed unless using optional rule 10.9, in which case the firing unit ammo depletes on an unadjusted roll of 5.
-
A non-phasing unit may choose to split its fire, provided it fires at two different stacks. In all cases except Pre-Shock Fire, splitting Non-Phasing Fire involves reserving part of it for a possible later opportunity, provided the fire targets two different stacks. Apply the restrictions of 10.15 and, for artillery, 10.65.
10.42 Return Fire. If fired upon by phasing enemy units, non-phasing units may fire back at the hex from which the Phasing Fire originated, if eligible (frontal hexes, range, and LOS all being taken into consideration). If facing permits, non-phasing units or eligible parts of Extended Units not targeted by Phasing Fire but adjacent to either the target unit, the firing enemy unit, or both may also Return Fire, unless already in the frontal hex of an enemy unit in another hex. Return Fire is simultaneous with the fire that triggered it: both sides fire before results are applied (see Exceptions below).
EXAMPLE #1: The phasing player announces a unit will fire. The non-phasing player then decides whether he will declare any return fire. The fire attack and associated Return Fire are then resolved. Note that multiple units may return fire, up to the 7 SPs per hex limit [8.31]. The phasing player then declares his next fire attack, and the non-phasing player declares any return fire to this next attack. Note that non-phasing units may be fired on by two or more enemy units in succession during an enemy brigade Activation. A non-phasing unit can hold back firepower in anticipation of a second Return Fire opportunity.
EXAMPLE #2: A phasing brigade has two 3-SP infantry units stacked above a 5-SP unit and a 4-SP unit. The top 3-SP unit announces its fire, which is then resolved, including any Return Fire it triggers. The 3-SP unit below the top unit (if still in the hex) now fires at the same or a different target. Such fire and any Return Fire is resolved. 1 SP from the 5-SP unit (if still in the hex) fires, either at one of the same targets or at a different target, and such fire is resolved as above. The 4-SP unit on the bottom cannot fire at all.
EXAMPLE #3: A phasing 1-SP unit stacked above a Disordered unit announces its fire versus a stack of two enemy units. The non-phasing player declares he will Return Fire with both units. The phasing unit and the two non-phasing units all fire before the results are applied. The top non-phasing unit’s fire results in a “1d+2”; the bottom non-phasing unit’s fire results in a “d”. The “1d+2” is applied [10.41]. It eliminates the 1-SP phasing unit. The “d+2” part of the result is disregarded, but the Disordered phasing unit remaining in the hex must undertake a UDD, as the top unit was eliminated [8.35]. It fails its UDD. Following the 2nd Disorder Table, it loses an SP, and must retreat one or two hexes. As it is a phasing unit suffering a 2nd Disorder, it cannot use Phasing Fire, as it is done for the Activation [12.35]. No phasing units remain in the hex, so the second non-phasing unit’s “d” result cannot be applied (although it may result in ammo depletion if using optional rule 10.9). If the bottom phasing unit had passed its required UDD and remained in the hex, it would now have had to again conduct a UDD due to the second non-phasing fire result.
Exceptions:
-
If Reaction/Refusal Facing [9.61] occurs prior to Return Fire, the attacker’s fire is resolved before the defender fires. This only applies if the Phasing fire that triggered the Return Fire also triggered the Reaction Refusal/Facing Change.
-
Artillery’s Return Fire is resolved after resolving the enemy fire at ranges of four hexes or more.
10.43 Pre-Shock Fire.
-
A unit may fire at its attackers’ hex(es) during Shock Resolution [11.38]. In the case of attacking units stacked beneath units not participating in the shock, the top shocking unit is the target.
-
If an enemy unit shocks a friendly unit while in the frontal hex of one or more other friendly units, or parts of Extended Units that are not in the frontal hex of another enemy unit, the nontargeted friendly unit(s) or eligible parts may also use Pre-Shock Fire, whether or not the targeted unit retreats or routs prior to shock resolution.
-
Pre-Shock Fire is available to both phasing and non-phasing defenders against Continued Shock [11.47], unless they used it previously during that brigade Activation or are in the Frontal hex of another enemy unit.
10.44 Withdrawal Fire. Whenever an enemy unit during Movement attempts to leave a non-phasing infantry or cavalry unit’s adjacent Frontal hexes, the latter may fire before the enemy unit leaves. This fire is possible only during voluntary Movement, not during Advances or Retreats. All eligible units fire before the phasing unit moves, but after any facing changes. Any failed UDD, D, or step loss limits the withdrawal to one hex. For a 2nd Disorder, the unit applies the result listed in the 2nd Disorder Table, instead of moving.
Exception: If any enemy units remain in the hex, then the fire targets the top remaining unit after the moving unit has finished its move.
10.45 Approach Fire: Artillery may fire at an enemy unit (LOS/ facing permitting) that, when using Movement [9.0], enters a hex anywhere within three hexes of the guns. It may do this only once per enemy brigade Activation. Artillery that uses Reaction Facing may fire at the enemy unit that moved adjacent, but with a –2 DRM [9.62]. Advancing [12.6] and retreating [12.4] units are not eligible targets for Approach Fire.
10.5 Prepared Fire
10.51 Each small arms (i.e., non-artillery) weapon type has a (reduced) range within which it may gain the DRM benefit of Prepared Fire (see the Range Effects Chart). Units may not gain the Prepared Fire DRM outside that Range.
10.52 Prepared Fire may be used (only) by:
-
Phasing infantry units (but not dismounted cavalry) in Good Order and under Advance or Attack Orders, instead of moving.
-
Non-phasing infantry and dismounted cavalry under Advance or Attack Orders and in Good Order [10.4].
-
Units that have not changed stacking order, advanced, retreated, or are in Extended Column during that activation [8.24, 8.52, 12.6, 12.4].
Note: Units that change facing by one vertex either before or after firing, remain eligible for Prepared Fire. Exception: Units in Woods hexes while under Attack Orders [see 7.22].
10.53 Units that are eligible for Prepared Fire have a +1 DRM when resolving fire.
10.6 Artillery Fire
For the most part, the mechanics for artillery fire and small arms fire are the same: roll the die, adjust the die roll for range, etc., and find the result. There are, though, some rules specific to artillery.
10.61 Artillery may move (once) and fire (once) in the same Activation. However, the following penalties/restrictions apply:
-
Guns that fire have their MA halved for that Activation.
-
Guns that move (or will move) suffer a –2 DRM when they do fire. Guns that change facing by one vertex either before or after firing do not suffer the –2 DRM.
-
Moving batteries that exceed half their MA may not fire.
-
Disordered artillery may not fire; it may move.
-
Phasing or non-phasing artillery that starts a brigade Activation stacked under non-artillery but for any reason becomes the top unit may fire if otherwise eligible, but incurs a –2 DRM for that fire and cannot Rapid Fire.
10.62 Artillery batteries may use Phasing Fire either when activated as part of a brigade or a division or when their Artillery leader is activated.
10.63 Combined Fire. Batteries or sections stacked in the same hex may combine their fire at ranges of four hexes or greater. Different batteries, even those in the same hex, that are firing at ranges of one to three hexes (canister/grape), may not combine fire, although gun sections from the same battery may combine.
10.64 If there is more than one type of gun combining fire, and the DRM for the range is different for each, use the worst DRM for all.
10.65 Split Fire. Unlike phasing Small Arms units that split fire, artillery may target enemy units at any range. [Exception: see 10.66]. A single battery may split fire in one of three ways, targeting a maximum of two hexes.
-
Batteries consisting of multiple gun types (sections) split fire by section, combining them as desired if consisting of three or more sections. Apply the restrictions of 10.15 when a battery of one gun type splits its fire.
-
A battery may split fire against the same hex [Exception to 10.15], but runs an increased risk of ammo depletion.
a. A battery consisting of one gun type may fire twice, splitting its fire as evenly as possible [10.15]. If eligible, it may use Rapid Fire [10.68], for either or both parts of the Split Fire, but any ammo depletion result leaves the whole battery in No Ammo status following the fire. If not using Rapid fire, apply one level of ammo depletion [10.69] to the whole battery, if either or both rolls are 5s.
b. A battery consisting of multiple gun types may fire each section at the same hex. If one or more sections uses Rapid Fire, any ammo depletion result leaves all Rapid firing sections in No Ammo status following their fires. Sections not using Rapid Fire deplete by one level, maximum, if any of the battery’s rolls results in any level of depletion.
- A multi-section battery targeting two hexes and assigning more than one section to fire at either or both may fire those sections separately, following the rules for ammo depletion listed in 2b, above. Additionally,
-
A battery’s Split Fire is declared prior to any fire die rolls. All Return Fire is declared prior to any fire die rolls, unless the Return Fire is not simultaneous with the Phasing Fire [10.42].
-
If splitting fire by section but combining two or more sections, see 10.64.
-
Two or more stacked batteries or sections combining fire may not split that fire [10.63].
-
A section may not split its fire.
10.66 A phasing battery choosing to fire when alone in a hex and in the Frontal hex of an enemy unit must, if it can, fire at that enemy unit. It may split its fire against that hex [10.65]. If enemy units are in both its adjacent frontal hexes, it may instead split fire between those two hexes, but may not target another hex unless unable to fire into either adjacent frontal hex.
10.67 Artillery Range Issues
-
Canister/Grapeshot vs. Shot/Shell. Artillery used different types of ammunition, depending on the range to the target:
-
Artillery fire at one, two or three hexes (canister and grapeshot) is resolved as small arms fire.
-
Artillery fire at a range of four hexes or greater uses the Artillery Fire Table. It affects all units individually and equally in the target hex [Exception to 8.35].
-
Artillery And High Ground. If an artillery unit is firing downhill—the target is at a level lower than the firing guns—at ranges of four hexes or greater, add one to the roll. This DRM is not cumulative with +1 DRMs for downhill fire listed in the TECs.
-
Artillery may not fire into an adjacent hex if it is two or more levels higher or lower than the firing hex. Exception: Artillery may use Pre-Shock Fire in such a case, but with a –2 DRM and may not Rapid Fire.
Note: Battle Book rules on terrain take precedence.
10.68 Rapid Fire. Smoothbore cannon-artillery types noted with an (RF) on the Range Chart; e.g., “N”-may use Rapid Fire to increase their firepower at ranges of one, two or three hexes. However, guns that have expended or will expend MPs may not use Rapid Fire. Procedure:
-
Cannon using Rapid Fire may fire twice (whether it is Phasing or Non-Phasing Fire).
-
When using Rapid Fire, if an unadjusted 0 or 5 is rolled on either shot, the guns are Out of Ammo after firing both shots (this represents overheating, overuse of available ammo, etc.) [10.69].
-
For both Phasing Fire and Return Fire, the artillery’s first and second shots are simultaneous with enemy fire. Apply the results of both shots in the order rolled. Exception: If the Phasing Fire is from outside its fire arc, a non-phasing unit applies both results prior to any Reaction Refusal/Facing Change.
-
If combining fire with rifled artillery types, all guns fire the first shot. Only the Rapid Firing smoothbore types fire the second shot. Rapid Fire is declared before any die roll and applies even if there is no remaining eligible target for the second shot. Both the first and the second shots must target the same hex.
10.69 Whenever a battery or section fires, either separately or in combination, and rolls an unadjusted 5, it incurs a Low Ammo –2 DRM. If it is already at –2, then it is Out of Ammo (with no firing allowed). If the firing unit is a section, then the penalty applies to the section. The new ammo depleted DRM does not apply to the fire that triggered it. For guns using Rapid Fire, anytime a player rolls an unadjusted 0 or 5, those guns are Out of Ammo [10.68]. Apply it after the second shot is resolved. Use the procedure in optional rules 10.92 and 10.93 for Ammo Resupply.
10.7 Small Arms Fire vs. Artillery
SP losses from small arms/grapeshot fire are treated as the loss of one gun per SP loss.
DESIGN NOTE: In reality, it is the crew loss that makes operation of that gun impossible, the gun being abandoned.
10.8 Fire Die Roll Modifiers
10.81 The die roll to resolve artillery or small arms fire may be modified by various conditions. All DRMs are cumulative.
- +/–? Range effects [see the Range Effects Chart].
- –? Terrain effects [see the Terrain Effects Chart].
- +1 Small arms fire from directly “behind” Breastworks (not for arty firing as small arms at one to three hexes).
- –1 Infantry/dismounted cavalry defending against small arms/canister fire through a Breastwork hexside. There is no defensive benefit for artillery fire at Shot/Shell range [15.23].
- +/–1 Massed or Dispersed Target [8.34], applies only to Shot/Shell artillery fire.
- +1 If target is non-phasing (only) mounted cavalry.
- –1 Mounted cavalry firing.
- +1 Prepared Fire [10.5].
- –1 Disordered unit firing.
- +1 Flanking Fire. If a target incurs fire through a Flank hexside, including flank fire from any part of an Extended Line using combined fire. This does not apply when:
- The target is under March Orders, or
- The fire is artillery (shell) at four hexes or greater.
- +1 Artillery Fire at a lower-level target at Ranges of four hexes or more [10.67].
- –2 Artillery Fire in same phase in which it Moved or became the top unit.
- –1 Green Infantry firing.
- –? Night Turn fire [16.1].
- –2 Dawn or Dusk firing [16.11].
- –2 Artillery Non-Phasing Fire after a facing change.
- –? Fatigue [17.31].
General Terrain Notes:
-
When a LOF follows a hexside and then enters the target unit’s hex at a vertex between a hexside that benefits the target unit and one that does not, the target unit receives the benefit.
-
The +1 benefit does not apply to a firing unit behind breastworks but whose LOF passes through the vertex between Breastwork and non-Breastwork hexsides.
-
Most Terrain Effects Charts in the series include the following note, which applies even when omitted. Combat Effects are all an adjustment to the Die Roll. They apply if the defender is in the named hex, or being shocked or fired at across that hexside directly into the target hex. For slope hexsides that provide DRM for fire, compare the firing unit’s elevation to the target’s elevation whenever the range is greater than one hex. Use that elevation difference to determine which Slope DRM applies.
10.82 Combined Small Arms (Non-Artillery) Fire [Optional]. Non-artillery units stacked in the same hex must combine fire when targeting a single hex, applying all other rules governing fire. Apply the least favorable DRMs for range, Prepared Fire, unit status, and ammo depletion. Phasing units may postpone fire after moving, until all units that will combine fire have stacked together. If splitting fire, follow 10.15, treating the stack as a single firing unit [Exception to 10.13 and 10.14].
10.9 Ammo Depletion and Resupply [Optional]
DESIGN NOTE: This is an optional rule because it means putting another layer of markers on the counters, which many of you do not like to do. We recommend it to players who like an added level of realism and enjoy the challenge of getting an army to do what you want it to do. Ammo Depletion DRM markers are not supplied with River of Death and Three Days of Gettysburg, 2nd Edition.
10.91 Whenever an infantry or dismounted cavalry unit fires and rolls an unadjusted 5, it incurs a –2 DRM Low Ammo. If it is already at –2, then it is Out of Ammo (with no firing allowed). The new ammo depleted DRM applies after the unit has finished its fire, including Split Fire and Rapid Fire. This rule does not apply to mounted cavalry.
10.92 A unit may reduce its ammo DRM by undergoing a Resupply and Rally Action [3.0 III/C/3]. An Out of Ammo can be reduced to a Low Ammo (–2 DRM), or a Low Ammo can be removed. A battery of multiple sections may Resupply one or more while firing with the others during the same Activation. Ammo Resupply is automatic—no UDD is required. Ammo Resupply is not a Fatigue action. A unit that Resupplies may change facing by one vertex, but only after resupplying and not if it already changed facing after rallying, or fails a rally attempt.
10.93 Units adjacent to an enemy unit are not eligible for Ammo Resupply.
10.94 Dismounted cavalry units that mount automatically and fully resupply ammo.
11.0 Shock Assault
The term “shock” simulates hand-to-hand, charge-and-assault. Although there is some firing going on, most of what is happening is an initial, short charge, followed by a rather disorganized melee intended to get the other guy to abandon his position. Shock was intended to take advantage of the casualties and Disorder caused by fire. In itself, it caused few losses; but when effective, it could throw an enemy unit, teetering on the edge of indecision, into a widespread loss of cohesion (if not headlong flight), rendering it ineffective for a long time.
11.1 Basic Shock Concepts
11.11 General Shock Procedure:
-
Designate all attacking units and targets of Shock and Charges [11.31].
-
Perform Retreat Before Shock [11.33].
-
Green Attacker Commitment Check [11.36].
-
Defender’s Pre-Shock Cohesion Check [11.37].
-
Pre-Shock Reaction Fire [11.38].
-
Resolve Shock and Apply Disorder [11.4]. Each of the above steps must be undertaken in the order listed, and each step must be completed for all units before the next is undertaken. Other than that, players may choose whichever units they wish to go first, second, etc.
Exception: Step 6 is resolved left-to-right or right-to-left down the line.
11.12 Shock is resolved after all Movement, Fire, Rally, and Resupply is completed by units of that brigade for that phase. A unit is eligible to Shock Attack if:
-
It is under Attack or Advance Orders, and
-
It is from the brigade that was active in that phase, and
-
It did not undertake Rally or Construction, and
-
There is an enemy unit in a Frontal hex, and
-
It did not enter the hex using a 9.42 Exception, and
-
It did not change facing after moving into the hex, and
-
There is no hexside terrain feature prohibiting movement between the attacker and defender hexes.
PLAY NOTE: Yes, units under Advance Orders may not move adjacent to non-artillery enemy units. But they may find themselves adjacent and, in those circumstances, may elect to Shock.
11.2 Requirements for Shock
Whether a unit “must” or “may” shock varies, as follows:
11.21 The units in the following circumstances must Shock Attack:
-
INFANTRY CHARGE: Infantry or dismounted cavalry under Attack Orders in that Action Phase that moved adjacent to an enemy unit, did not fire, and are not stacked under any non-charging units. An infantry Charge carries with it a +1 DRM in favor of the attacker (the +1 DRM does not carry over to Continued Shock [11.47]).
-
MOUNTED CAVALRY SHOCK: Mounted cavalry that moved adjacent to an enemy unit and did not fire, whether possessing fire capabilities or not.
-
MOUNTED CAVALRY CHARGE: Charging mounted cavalry [11.5].
Note: All stacked units participating in a shock must be eligible to Charge in order to gain the Charge DRM.
11.22 Any unit eligible under 11.12 and not listed in 11.21 may Shock Attack. This includes Disordered units, which are eligible to Shock (with a penalty for being Disordered).
11.3 Pre-Shock Resolution
The sections below refer to the steps of the General Shock Procedure [11.11].
11.31 Step 1: Target Designation. The phasing player designates his attacking units and the enemy units they will attack. He must designate all enemy units in the Frontal hexes of an attacking unit as the target of shock by at least one attacker. As long as this requirement is met, the phasing player is free to withhold eligible, non-charging units from participation in the shock. All declared shock attacks must be designated such that there is either only one attacking hex or one defending hex.
Exception: Multiple hexes can attack multiple hexes when a single Extended Line unit, possibly stacked with artillery, is either defending or attacking, or both.
Note: A designated shock that fails to reach Step 6 due to failed Green Commitment Checks [11.36] or retreats resulting from Pre-Shock Fire [11.38] has no effect on other designated shocks.
11.32 Combining Strength. Apply the following principles to determine when attacking units may combine their strengths against a single defending hex or Extended Unit. Combined attacks are declared during Shock Step 1 and apply even if the attacking units are no longer adjacent for any reason at the time they shock (e.g., results of Pre-Shock Reaction Fire versus the middle hex of three attacking hexes).
-
Adjacent infantry and/or dismounted cavalry must combine. If attacking units are not adjacent to each other (or to one other) they may not combine.
-
Infantry and/or dismounted cavalry may not combine with mounted cavalry.
-
Adjacent mounted cavalry must combine when charging—and adjacent mounted cavalry must combine when shocking—but charging cavalry may never combine with shocking cavalry.
-
Conversely, one attacking hex with defenders in both frontal hexes must shock both those hexes, combining the strength of the defenders, unless one of the defending hexes is the target of another shock.
-
A shocking unit may not split strength; that includes an Extended Unit.
-
A defending unit may end up being shock attacked more than once (e.g., by two attacking units not adjacent to each other). One attack is resolved, then, if the defender is still in place, the latter is resolved. The defender conducts only one Pre-Shock Cohesion Check in such instances, applying the worst case DRM from the Defender’s Pre-Shock DRMs table.
-
As long as all defending units in the frontal hexes of attacking units are designated for shock, there is no other requirement. Use the Shock markers to indicate attackers and targets, removing them as the combat proceeds.
EXAMPLE 1: In the diagram above, the following principles apply to Attacker “A”:
-
A1, A2 and A3 may not combine to attack D1 and D2 because each shock must designate only one attacking or one defending hex unless Extended Units are involved.
-
A2 may attack both D1 and D2, with A1 and A3 not attacking anyone.
-
If A2 (with or without A3) attacks D2, then A1 must attack D1.
-
If A1 attacks D1, and A2 attacks D2, then A3 need not attack, as all defenders are covered.
EXAMPLE 2. If A and B are attacking Extended Line C, they cannot combine their strength, as they are not adjacent. The Shock Ratio will be calculated for each shock using the Extended Line’s full 12 SPs. If Extended Line C is attacking, it must attack both A and B, and the Shock Ratio will be C’s 12 SPs versus A and B’s 12.
EXAMPLE 3. If Extended Line A is attacking B, the Shock Ratio will be calculated using the Extended Line’s full 12 SPs, despite B not being adjacent to both hexes of A.
EXAMPLE 4: If the three-hex Extended Line A is attacking, it must attack both C and B, and the Shock Ratio will be A’s 18 SPs versus B and C’s 12. If B and C are attacking A, they cannot combine their strength, as they are not adjacent.
11.33 Step 2: Retreat Before Shock. Non-phasing infantry and cavalry about to be shock attacked by infantry may Retreat Before Shock:
-
Infantry or dismounted cavalry move one hex away from the attacker, maintaining facing.
-
Mounted cavalry move up to two hexes, maintaining facing.
-
A disordered unit immediately conducts a UDD [2.6] after retreating. If the unit fails, consult the 2nd Disorder Table. The following may not Retreat Before Shock:
-
Units under Attack or March Orders,
-
Artillery units, and
-
Any unit being shocked or charged by mounted cavalry.
11.34 A retreating unit may not stop in a friendly-occupied hex in violation of stacking restrictions. Instead, it must retreat through those units [12.46] until it reaches a hex in which it can stack. A retreating unit may not enter an enemy Frontal hex occupied by a friendly unit if that hex is designated for a shock that is not yet resolved.
11.35 If all defenders retreat, only the following Shock steps may be performed:
-
Step 5, for units eligible to use Pre-Shock Fire [10.43]. Retreating units are not eligible.
-
Step 6c [11.46]. See 11.11 for the sequence in which these steps are performed.
11.36 Step 3: Green Attacker Commitment Check. If an attacking unit is Green [14.1], it must pass a UDD [2.6] before shock attacking. If it fails, it will not shock, but the failed check counts as a shock attempt for Target Designation purposes [11.31]. Failing this UDD does not produce Disorder.
11.37 Step 4: Defender’s Pre-Shock Cohesion Check. Prior to resolving Shock Assaults, each designated defending stack undergoes a Pre-Shock Cohesion Check. The top unit in each stack conducts a UDD [2.6]. If a defending Extended Line is stacked with artillery and more than one unit could be regarded as the “top” unit, the defending player has his choice of which one to use.
-
If the unit passes, the stack defends normally.
-
If the unit fails, all units in the defending stack immediately disorder. Non-artillery units already disordered prior to the failed roll then conduct a 2nd Disorder UDD [12.35] (already Disordered artillery is Abandoned). MARCH ORDER DEFENDER’S PRE-SHOCK COHESION
CHECK: If a defending unit is under March Orders, it undergoes the same check as above. However, the results are different:
-
If the unit passes, it Disorders.
-
If the unit fails, it Routs (non-artillery) or is Abandoned (artillery).
Exceptions:
-
Units attacked in Continued Shock do not perform a Pre-Shock Check.
-
If defending cavalry countercharges, the stack does not conduct a pre-shock cohesion check [11.56]. DRMs: Certain DRMs apply to the defending unit (only) in Pre- Shock Check. These are listed in the Defender Pre-Shock DRM section of the charts. The DRM for defenders attacked from the flank or rear applies regardless of whether the attacker would be eligible for a Position Modifier during Shock Resolution [11.42]. The DRM for Breastworks applies if the shock will cross a protected hexside. Extended Units qualify for the DRM if any one of their attacked parts qualify.
11.38 Step 5: Pre-Shock Reaction Fire. Units with shock attackers in their Frontal hexes may fire at those attackers only, within the restrictions for Non-Phasing Fire [10.4, 10.41, 10.43]. All results are applied immediately.
11.4 Step 6: Shock Resolution
11.41 Resolution Procedure. Each separate shock attack is resolved (conducting all of the steps listed below) before proceeding to the next. Resolve all attacks either left-to-right, or right-to-left.
a. Determine Shock DRMs
b. Resolve Shock
c. Conduct Advance
d. Perform Shock Continuation
e. Apply Post-Shock Automatic Disorder
11.42 Step 6a: Determine Shock DRMs. The Shock Adjustments chart lists adjustments favorable to the Attacker as additions and favorable to the Defender as subtractions from the die roll. In addition to the Shock Ratio DRM [11.43], and positional advantage [11.44], check the chart for other applicable DRMs. All such DRMs are cumulative. Multi-hex attacks use the following guidelines:
-
When the cumulative terrain DRMs between each attacking and defending hex are different, the best case cumulative terrain DRM for the defender applies as the terrain DRM for the attack.
-
The Charge DRM applies only if all participating units in all attacking hexes are charging, but charging units must Continue Shock if eligible [11.47].
-
When units from different, but coordinated brigades, are attacking and would have different brigadier DRMs, the best case DRM for the defender applies.
-
When the position DRMs for each defending hex are different, the best case position DRM for the defender applies.
-
When there are multiple attacking units with different Fatigue Level shock DRMs, use the Fatigue Level shock DRM that is least beneficial to the attacker.
-
When there are multiple defending units with different Fatigue Level shock DRMs, use the Fatigue Level shock DRM that is most beneficial to the defender.
11.43 Attacker and defender compare their combat strengths to obtain the Shock Ratio. The concepts regarding combining strength [11.32] apply. In addition, mounted cavalry charging into a defender’s Flank or Rear has its strength doubled, while mounted cavalry shocking or charging into Woods or Cedar hexes, or defending in such hexes, has its strength halved. The Attacker compares his SPs to those of the Defender and reduces that comparison to a simple odds ratio—one of the ratios given on the Shock Ratio Chart. Odds are always expressed attacker to defender. The Shock Ratio is used as a DRM. Rounding. When reducing to a simpler ratio, round off as follows:
-
Round off in favor of the Attacker if all Attackers moved during the Action Phase and the Defender is not getting any DRM benefit from terrain or Breastworks. Exception: Odds round in favor of the Defender during Continued Shock [11.47].
-
Round off in favor of the Defender in all other instances.
EXAMPLE: 5 SPs shock attacking 3 would be at a 2-to-1 ratio if the attacker moved, but the ratio would be 1½-to-1 if the attacker started adjacent or the defender is in the Woods. An odds ratio less than 1-4 is treated as 1-4; a ratio more than 5-1 is treated as 5-1.
11.44 Position. Position benefits only the Attacker and refers to whether the attacker is shock attacking through the defender’s Flank or Rear hexes, or a combination of Front, Flank, and/or Rear. Green units failing their Pre-Shock Commitment Check do not count for determining Position DRM. If attacking stacks have designated the same defender(s) but are ineligible to combine, apply any positional modifier to each of those shocks. Exception: Calculate positional modifiers separately for attackers using Continued Shock. “Surrounded” means that all hexes adjacent to the defender are either occupied by units shocking that defender or are Frontal hexes of those shocking units. Apply the +5 DRM to all shocks, regardless of whether the shocking units can combine. If the attacker will benefit from a DRM for Position, subtract one from the shock resolution die roll for each attacking hex in the frontal hex of an enemy unit not targeted for shock.
11.45 Step 6b: Resolve the Shock. Shock is resolved by rolling the die, adjusting according to the DRMs determined in 6a, and referring to the Shock Resolution Table. Results from the Shock Resolution Table are applied immediately and in the order listed. For units incurring a 2nd Disorder, see the 2nd Disorder Table.
Note: This is where Fatigue is incurred if using that option.
11.46 Step 6c: Undertake Advances. If all defenders vacate the hex(es) or only Abandoned guns remain, all attacking units within stacking limits, must now advance into at least one vacated hex. Charging units have first priority, followed by non-charging units at the top of stacks. (Exception: Advance is voluntary when the defender Retreats Before Shock [11.35].) The advancing unit(s) may change facing by one vertex after the advance. If extended, see 8.47. Defending units eligible for Continued Shock may Advance [11.47]. If attacked from the Flank or Rear, but eligible to Continue Shock, the original defender may change facing as needed to advance into the attacker’s vacated hex. If choosing not to Advance, the defender(s) may nevertheless freely change facing.
PLAY NOTE: Due to the Shock Resolution Procedure’s sequence of steps [11.41], Shock or Continued Shock [11.47] may result in a defender vacating a hex designated as the target of a still unresolved shock. In such a case the attacker now without a target must advance into the hex (stacking limits permitting). It then ends its shock sequence, suffering no Post-Shock Disorder [11.48]. If the defender remains in its hex, resolve the designated shock. Similarly, a victorious defender may target a phasing unit that declared a shock but has not yet resolved it. Resolve the phasing unit’s shock according to 11.41 if it does not vacate its hex as a result of the Continued Shock.
11.47 Step 6d: Continued Shock. A possible result of Shock (in addition to losses and Disorders) is the ability of the attacker to Continue Shock by attacking again or, in the case of the defender, counter-attacking. Eligibility. In the following cases, Continued Shock is mandatory for units that Charged [11.21] and voluntary for units that did not Charge.
-
Failed Pre-Shock Cohesion Checks lead to all non-artillery defenders routing and all defending artillery being Abandoned.
-
The adjusted Shock Resolution die roll is 8 or higher (see the Shock Resolution Table). In the following cases Continued Shock is always voluntary:
-
Adjusted Shock Resolution rolls of 8 or higher for any Continued Shock after the first.
-
For the Defender after an adjusted Shock Resolution roll of 1 or lower. In this case, the Defender in the original Shock becomes the Attacker for the Continued Shock [see also 11.48].
Exception: Units unable to advance in Shock Step 6c due to stacking restrictions are ineligible to Continue Shock. If the defender could not retreat, conduct Continued Shock against the same defending hex(es) with all charging units and any others chosen from the non-charging units that participated in the shock. If Continued Shock eligibility is due to Routs and/or Abandoned guns following failed Pre-Shock Cohesion Checks, and the attacking brigade has designated multiple shocks, place a Continued Shock marker on the eligible attacker(s). During their Shock Step 6 they advance into the vacated hex [11.46]. If then declining a voluntary Continued Shock, remove the marker. Procedures. Unit(s) able to advance in Shock Step 6c and conducting Continued Shock must, if possible, place at least one enemy unit in their frontal hexes, either in that initial advance, or by advancing one or two additional hexes. The attackers:
-
May change facing one vertex for each hex they Advance, and, if necessary, must do so to comply with the above rule.
-
May still advance one or two additional hexes, if unable to place an enemy unit in a frontal hex using the above rules.
-
Must declare a voluntary Continued Shock before the defender decides on Reaction Facing/Refuse, if the initial advance places an enemy unit in a frontal hex.
Exceptions: The attackers:
-
Must stop after advancing adjacent to an enemy combat unit or suffering a 2nd Disorder due to terrain.
-
May not enter or cross impassable terrain during any stage of the advance.
-
If advancing the one or two additional hexes, may not do so into any hex that would cost more than 2 MPs during Movement. Upon finishing their advance, the attackers must then shock all enemy units in their Frontal hexes, using standard rules for Steps 1 through 6d, with the following Exceptions:
-
If the defender was designated as the target of a different, still unresolved shock, the Continued Shock cannot combine with that other shock. However, the defender may not now Retreat Before Shock.
-
There is no die roll for Green attacker commitment or defender Pre-Shock Cohesion Check.
-
Continued Shock never gets a Charge bonus DRM, whether infantry or cavalry.
-
Odds ratios round in favor of the defender.
-
If the -1 DRM for “No Brigadier” did not apply to the first shock, it does not apply to Continued Shock.
-
For each Continued Shock a unit undertakes, subtract one (–1) from the Shock DR. Thus, the second Continued Shock (in succession) would be –2, etc.
-
Apply Shock Step 6e, Automatic Disorder [11.48], after all successive Continued Shocks have concluded.
-
Extended Lines that Continue Shock may not use Wrap-Around [8.48].
PLAY NOTE: It is possible that one Continued Shock attack will result in another. Successful attackers can roll up an enemy line in this fashion.
11.48 Step 6e: Apply Post-Shock Automatic Disorder. At the conclusion of each Shock attack (including any Continued Shocks, if applicable) the additional results below are applied unless the affected units routed. The term attacker, for this subsection, applies to the player who is rolling the die to resolve the Shock or Continued Shock. Both sides may have attacked during the phase. This Automatic Disorder applies only to units that have actually engaged in Shock Step 6b. (Exception: see March Order Defending Units, below.) It does not apply to an attacker when the defending unit voluntarily Retreats Before Shock or vacates the hex because of a Defender Pre-Shock Cohesion Check. Step losses from Post- Shock Automatic Disorder cannot cause leader casualties [12.7].
AFFECTING ONLY ATTACKING UNITS:
-
All attacking infantry and dismounted cavalry in Good Order are now automatically Disordered.
-
Each stack of attacking units (except Mounted Cavalry) with at least one already Disordered unit suffers a 1 SP loss. AFFECTING ATTACKING AND DEFENDING CAVALRY (whether charging [11.5] or not):
-
All mounted cavalry in Good Order is Disordered.
-
All Disordered mounted cavalry are now Blown. AFFECTING ONLY DEFENDING UNITS UNDER MARCH
ORDERS:
-
The brigade automatically changes to Advance Orders.
-
Units in that brigade that were not involved in Shock that phase must then undergo a UDD [2.6], which, if they fail, Disorders them. If already Disordered they lose 1 SP. Unbrigaded units that activate as a brigade are treated as a brigade for purposes of this rule.
Note: These two effects occur even if the defending March Orders unit routed before shock (Step 4).
PLAY NOTE: Essentially, units attacked while under March Orders suffer several (bad) effects: they cannot Reaction Fire, their Pre-Shock Cohesion Check can cause them to rout, and, when it is all finished, the rest of the brigade undergoes a UDD.
11.5 Cavalry Charge
11.51 Mounted cavalry units that Shock are Charging if they meet the requirements of 11.52 to 11.54. Cavalry units that did not move in the Action Phase, or that moved but are otherwise ineligible to Charge, use the normal Shock rules above.
11.52 Eligibility. For cavalry to Charge it must:
-
be under Attack Orders,
-
have an enemy unit within its LOS,
-
be able to move adjacent to that unit using no more than 5 MPs,
-
have started the Activation within Command Range of its brigade leader (if it has a brigade leader). Cavalry that Disorders during the Charge attempt must complete the Charge (Exception: see 11.57), unless it retreats due to suffering a 2nd Disorder [12.34]. Charging cavalry may not fire during any portion of a Charge.
11.53 Procedure. A player wishing to Charge announces his intention and, before moving, makes a UDD for the top eligible unit in the stack [2.6]:
-
If the unit passes, it and any eligible units with which it is stacked must Charge.
-
If the unit fails, there is no Charge, and the unit/stack remains in place, its Activation finished. Cavalry that passes its UDD then conducts its Movement. Stacked units that charge may move as a stack. (Exception to 8.21.) Upon moving adjacent to the enemy, mark the charging units with a Cavalry Charge marker. When the Shock sub-phase begins, conduct the applicable steps of the Shock Sequence, starting with Step 1 [11.11].
11.54 The Charge Path. The last three hexes (or less depending on how far it moved) of Movement is called the Charge Path. While in the Charge Path, the charging unit or stack may not change facing (it may, of course, have moved more than three hexes, but it may not change facing in the last three). The Charge Path does not include the target hex and may not include any hex occupied by a friendly unit or which costs more than 1 MP to enter, though crossing Streams is allowed.
11.55 Benefits of Charging. If charging a defender that does not receive a favorable terrain DRM, the Charging unit or stack earns the following benefits:
-
A +1 DRM for Charging.
-
Defending units except mounted cavalry add one (+1) to Pre- Shock Cohesion Checks. Regardless of terrain, Charging mounted cavalry doubles its strength if charging into a defender’s Rear or Flank, but halves it (cumulative with the doubling) if the defender is in a Woods or Town hex. As in the case of an Infantry Charge [11.21], the benefits of Cavalry Charge do not carry over to Continued Shock, nor does the defender’s option to Countercharge [11.56].
11.56 Countercharge. Defending cavalry may opt to Countercharge charging infantry or cavalry, provided it is not being attacked through Flank or Rear and has not used Return or Withdrawal Fire during the current enemy brigade Activation. A Countercharge does not include any actual movement by the non-phasing unit. Because Countercharges thus have no Charge Path, apply the terrain restrictions of cavalry Charges to the Attacker’s hex. For example, a defender cannot countercharge infantry units in Woods hexes. It may Continue Shock after an Attacker Retreats result.
-
If the non-phasing unit or stack is under Attack Orders, the ability to Countercharge is automatic. If it chooses to countercharge, the unit or stack does not roll a Pre-Shock Cohesion Check.
-
If the non-phasing unit or stack is under Advance Orders, it must pass a UDD [2.6] to Countercharge. The top cavalry unit in a stack rolls for the stack. If it fails, the stack must then undergo a Pre-Shock Cohesion Check [11.37], and the provisions of 11.55 will apply to the remainder of the Shock sequence. The effects of successful Countercharges are:
-
The defender may not use Pre-Shock Fire [14.24].
-
AGAINST PHASING MOUNTED CAVALRY: ignore the provisions of 11.55.
-
AGAINST PHASING INFANTRY: Instead of the infantry receiving a +1 shock DRM for charging, it suffers a -1 shock DRM (representing the Countercharge).
PLAY NOTE: A cavalry unit being shocked through a Flank hexside may first use Reaction Facing Change [9.61] to negate the Position approach of the enemy and then opt to Countercharge.
11.57 Cavalry Charge and Reaction Move. If the defending units Reaction Move [9.63], the charging cavalry has a choice:
-
It may continue its move up to the limit of its MA, but cannot violate the Charge Path restrictions. If it ends its move with an enemy unit/stack in its frontal hex(es), it must complete its Charge, even if that enemy unit/stack was not within LOS of the cavalry prior to moving.
-
It may attempt to break off the charge. To do so, roll a UDD for the top unit in the charging stack. If it passes, the stack stops in place, its activation finished. If it fails, the stack must proceed as in no. 1, above.
11.58 Blown Cavalry. Blown cavalry is a Disordered unit with the following additional restrictions:
-
Its Disordered printed MA is halved (rounded up) for all purposes.
-
A Blown unit that suffers any Disorder or Step Loss combat result automatically loses an additional 1 SP to that result and then must make a UDD [2.6] to check for possible Rout. If it fails, it routs. Blown stacks lose a maximum of 2 additional SPs, one from the top unit and the other applied randomly. Blown units that lose an SP after Collapse [12.23] check for Rout only once.
-
Blown cavalry may not Dismount.
-
Blown cavalry is considered under Advance Orders. A Blown marker is automatically removed at the end of the next Activation for that unit’s command unless the unit has again been been involved in a completed Shock Step 6b. After the Blown marker is removed, the unit remains Disordered, but assumes the orders of its brigade. (Battle Book rules may permit individual cavalry units to roll to change orders)
EXAMPLE: Hampton’s Legion Cavalry is Blown in its first Activation of the 1600 turn. At the end of its next Activation, Hampton’s Blown marker is removed; the unit starts its succeeding Activation Disordered.
11.6 Artillery Shock Capability
11.61 Artillery may never Shock attack. Artillery may not Retreat Before Shock.
11.62 If a Disordered artillery unit fails a Pre-Shock Cohesion Check [11.37, Shock Step 4], then the crew has abandoned the guns. Place an Abandoned 1 marker on the artillery unit.
11.63 Artillery does not use its printed strength to Determine Shock DRMs [11.42, Step 6a].
-
If artillery is the top unit in a stack with infantry or cavalry or if there is only artillery in the hex (unsupported artillery), then add 1 SP for every four guns in the hex, rounded down (with a minimum strength of 1 SP) to the strength of any non-artillery stacked beneath it when determining Shock DRMs.
-
Artillery units that are stacked with infantry or cavalry but are not the top unit, as well as Abandoned guns, do not contribute to the odds determination for shock.
11.64 To Resolve the Shock [11.45, Step 6b], refer to the Shock Resolution Table with the following Exceptions:
-
For an Attacker Retreat result, artillery cannot Continue Shock.
-
For a Bloody Standoff, if the artillery is the top unit or unsupported then it loses one gun.
-
For a die roll result of 10+, all defending artillery is abandoned. Place an Abandoned 1 marker(s) on the artillery unit(s) without retreating the artillery [12.36].
11.65 Any artillery that suffers a 2nd Disorder due to shock is abandoned. Ignore any Retreat result. Place an Abandoned 1 marker on the unit.
11.7 Leadership and Combat
11.71 Fire. Leaders/commanders have no effect on Fire.
11.72 Shock.
-
When a brigade designates shocks [11.31], and none of its shocking units are stacked with their brigadier, the player subtracts one from the roll for all attacks by regiments in that brigade. This does not apply to defending units, even those that Continue Shock.
-
If during Step 6 a unit is stacked with its “Aggressive” brigadier when attacking (not defending), add one to the Shock Resolution die roll.
11.73 UDD/Rally. A leader/commander stacked with units from his command will provide a negative DRM, equal to his rank (represented by the number of stars on the counter) for each unit in that stack, for any die roll that requires using the unit’s Cohesion Rating. Multiple leaders/commanders may combine their ranks/stars.
EXAMPLE: A corps commander (three stars) would provide a –3 DRM to a Rally die roll. Notes:
-
A leader/commander stacked with an Extended Unit benefits all parts of that unit.
-
A leader that must stack with the nearest friendly unit/stack [see 12.73] may not assist its UDDs during that brigade activation.
12.0 Combat Results
12.1 Combat Unit Strengths
12.11 All combat units have combat SPs, i.e., incremental steps representing their manpower (for infantry/cavalry) or guns (for artillery) at the start of the battle. Thus, an infantry unit with 6 SPs starts with six such “steps,” while one with 11 SPs starts with eleven steps.
12.12 The SP value on the counter is the maximum strength that unit may ever have.
12.13 To indicate lost steps (SPs), place a numbered Step Loss marker beneath the counter to keep track of its present strength. When a unit has taken step losses equal to its original strength it is eliminated.
PLAY NOTE: Some players like the marker to indicate steps lost; others, present strength. It matters little which method you use, as long as both of you agree what method is being used.
12.2 Strength Point Losses
12.21 Units take SP losses from enemy fire (as indicated by the numbered results on the Fire Table), from Shock (where indicated by the Shock Resolution Table), from Additional Disorder [12.35], and from Recovery from Rout [13.5]. All step losses are taken before applying any other results.
12.22 All step losses apply to the top unit. If the top unit is eliminated before absorbing all the required step losses, the next unit in the stack takes the remaining losses. If all units are eliminated, ignore leftover losses. Exceptions: Bloody Standoff [8.36]; Artillery fire at Shot/Shell Range [12.35e].
12.23 Collapse. A non-artillery unit that has taken step losses that reduce it to less than half of its original strength is automatically and immediately Disordered the instant such loss takes effect. (There is no effect if already Disordered.) It is also considered Collapsed; place a Collapsed marker on this unit. Extended Units are considered one unit for the purposes of Collapse.
Note: If the combat result causing Collapse also includes Disorder this Disorder will be a 2nd Disorder. A Collapsed unit has these characteristics, in addition to those for being Disordered:
-
It may never be rallied to normal status while at less than half strength [16.2].
-
Each time a Collapsed unit takes additional SP losses, the player must make a UDD [2.6] after any required retreat and/or other UDD for 2nd Disorder. If it fails this final UDD, it Routs. This does not apply to the step loss involved in Recovery from Rout [13.5]. Collapsed defenders suffering a shock result of an adjusted 10 or higher check for rout only once.
-
A unit recovers from Collapse only by recovering stragglers [16.2].
EXAMPLE #1: An 8-SP unit that has lost 4 SPs is still normal. The instant it loses its 5th SP it is Disordered and Collapsed. If the Collapse is due to a numbered step loss result, then apply the D or d+2 result.
EXAMPLE #2: The unit from the above example suffers an additional result of “1D” from enemy fire. The player reduces it to 3 SPs, flips the unit to its Disordered side and places a “Collapsed” marker on it. The unit is then reduced to 2 SPs, from the (now 2nd) Disorder result (and retreated). Lastly, as it has taken additional SP losses while Collapsed, it must roll to see if it Routs.
12.3 Disorder
Disorder represents a wide range of reactions to combat, other than being killed. As such, it often (but not always) represents disintegration of a unit’s cohesion.
12.31 The reverse side of a combat unit is its Disordered side. When a unit in Good Order suffers a Disordered result it is flipped to its Disordered side (retaining its facing). A unit’s Cohesion Rating and MA are reduced when Disordered; not the Strength.
Exception: Disordered status for artillery does not affect Movement. This is a design change beginning with Battles with the Gringos! and may be applied to all previous games.
12.32 Disorder from the Fire or Shock Tables:
-
A “d” means that all affected units must make a UDD [2.6]. Roll one die for each unit. The UDD is modified by any DRM listed with the combat result (e.g., “d+2”), and/or the presence of a leader [11.73]. If a unit fails, it is Disordered.
-
A “D” means that the Disorder result is automatic to all affected units.
12.33 Disorder from Terrain (as shown in the Terrain Effects Chart) is the same as in 12.32 (without any of the DRMs). In addition, a moving unit Disordered by terrain immediately uses the MA on its Disordered side, subtracting what it has already expended.
12.34 The effects of being Disordered are:
-
Units may not voluntarily move adjacent to an enemy. However, if a Disordered unit is already adjacent to an enemy it may shock attack. Also, cavalry that is Disordered during a Charge is still eligible to move adjacent and must attack unless suffering a 2nd Disorder. [11.55].
-
Disordered units may Retreat Before Shock, but must undergo a UDD [2.6] upon doing so. If the unit fails, consult the 2nd Disorder Table and/or see 12.35b.
-
Disorder also causes DRMs for the Pre-Shock Cohesion Check and for Shock (see the Shock Resolution Table).
-
A firing Disordered unit has a –1 DRM and may not use Prepared Fire [10.52].
-
Disordered Artillery may not fire, but it may move.
-
A unit Disordered while it is moving assumes the MA of its Disordered status.
12.35 Additional Disorder to Infantry or Cavalry [see also the 2nd Disorder Table]. Infantry and cavalry units that are already Disordered and that incur another Disorder suffer effects that depend upon the cause of the Disorder (“a” through “d”, below), and upon whether a unit is stacked with other units (“e”, below).
a. FROM FIRE (including UDDs due to Fire Table results Disordering or eliminating the top unit). A Disordered infantry/cavalry unit (including Blown cavalry) that takes an additional Disorder remains Disordered and:
-
Takes one step loss, and
-
Retreats one or two hexes, player’s choice.
b. FROM SHOCK (including Pre-Shock Cohesion Checks and Retreat Before Infantry Shock), FROM REACTION FACING/ REFUSAL, ADJACENT UNIT ROUT, FRIENDLY FIRE, OR
FROM RETREAT THROUGH FRIENDLY UNITS: The unit undergoes a UDD [2.6]:
-
If it fails, it Routs.
-
If it passes, it loses 1 SP and retreats one or two hexes (player’s choice). Non-phasing units incurring a 2nd Disorder due to a failed UDD for Reaction Facing Change/Refusal may not return fire versus the triggering unit.
c. FROM TERRAIN: If a Disordered unit is Disordered a second time by terrain (e.g., in Dead of Winter, Disordered artillery crosses a Stream hexside and fails the UDD) it ceases movement in the hex that caused it. There is no other penalty. Exception: see 12.46.
d. FROM AUTOMATIC POST-SHOCK DISORDER:
-
Disordered mounted cavalry is Blown.
-
Disordered infantry or dismounted cavalry loses 1 SP.
e. When two or more stacked non-artillery units suffer a 1 SP loss from additional Disorder as a result of the same Fire or Shock, or as a result of failing UDDs for any reason, the stack loses a total of 1 SP. Treat each Shock Step separately (it is possible to lose SPs during Shock Steps 2, 4, 5, 6b and 6e). Apply the loss to the unit that was at the top of the stack prior to any retreats required by the fire combat or Shock Step in question, or after any required advances. Exceptions:
-
In case of additional Disorders caused by artillery fire at Shot/ Shell range, apply the loss randomly.
-
Blown Cavalry [11.58].
-
A stack momentarily formed by a stationary unit and a retreating unit which must continue its retreat after a 2nd Disorder UDD does not count as a stack for purposes of this rule.
f. If a phasing unit incurs a 2nd Disorder from any of the causes listed in 12.35a or 12.35b, it may not undertake further phasing actions of any kind during that Activation. Exception: see 12.47.
12.36 Additional Disorder to Artillery. If a Disordered artillery unit suffers an additional Disorder:
-
From Friendly Fire, Pre-Shock Cohesion Checks or shock results, it is abandoned, ignoring any Retreat specified on the Shock Resolution Table.
-
From Fire, it loses 1 SP [10.7]. It does not retreat.
12.4 Retreat
12.41 Units retreat due to a variety of circumstances. The owning player always has the choice of retreat path, when choices are available. If under Advance Orders and adhering to March Order Stacking limits, a retreating unit may “use” Pikes/Roads/Trails to enter a hex it could otherwise not enter, or to avoid a UDD or Auto-D that might otherwise limit its retreat to one hex.
12.42 Involuntary Retreats.
-
ONE HEX: As a result of a Shock Resolution die roll of 1 or lower (attacker) or 5-9 (defender), or by a Loose Cannon result for a Cautious Leader [6.24].
-
TWO HEXES: As a result of a Shock Resolution die roll of 10+.
-
ONE OR TWO HEXES: Additional Disorder from Fire, Reaction Facing Change, Retreat Before Infantry Shock, Pre-Shock Cohesion Check, Adjacent Unit Routs, Friendly Fire, and Retreat Through Friendly Units.
12.43 Voluntary Retreats. These are retreats the player chooses to conduct.
-
ONE HEX: Infantry Retreat Before Shock.
-
ONE OR TWO HEXES: Mounted cavalry Retreat Before Shock and Cavalry or Artillery Reaction Movement.
12.44 A retreating unit is subject to the following restrictions:
-
It cannot retreat off the map, enter an enemy-occupied hex, or cross a hexside or enter a hex that in movement it would not be able to enter or cross. Exception: Units under March Orders may retreat involuntarily even if within four hexes and LOS of the enemy.
-
It may stop in a friendly-occupied hex only within stacking restrictions. The retreating unit automatically assumes the facing of the non-retreating unit.
Note: A retreating unit that stacks with a non-retreating unit, but which must then keep retreating due to a 2nd Disorder, retreats through the non-retreating unit [12.46].
- If possible, the retreating unit must end its retreat further from the closest enemy units and not adjacent to any other enemy unit. If only a two-hex retreat will allow the retreating unit to comply with these requirements, and the required retreat is one or two hexes, it must retreat two hexes.
Note: Possible retreats include retreat Through Friendly Units [12.46].
-
It cannot enter an enemy frontal hex or any hex adjacent to either the unit(s) causing the retreat or to any unit(s) that designated it for a separate but unresolved shock, unless that hex is occupied by a friendly unit not currently designated for shock
-
If a unit retreats into a hex that carries a “d” or “D” terrain cost, the retreating unit must either conduct a UDD (d) or take the Auto Disorder (D) as part of the retreat. A failed UDD or a D halts the retreat if the unit is already Disordered.
-
Stacked units retreating as a result of shock do so as a stack, and retain their stacking order, unless retreating to different hexes. If any of the above restrictions prevent a non-artillery stack from retreating, then the stack loses 1 SP for each hex it should retreat but cannot [see 12.45 regarding artillery]. The top unit suffers the loss. Resolve Shocks and Continued Shocks declared against a unit unable to retreat after subtracting the appropriate number of Strength Points.
PLAY NOTE: See 8.47 and 8.5 for treatment of Extended Units.
12.45 Artillery and Retreat
-
Artillery may not retreat into a hex that would normally cost it more than 2 MPs to enter. Artillery may use the Road/Pike/Trail movement cost if eligible.
-
If an Artillery unit cannot complete a retreat, it is abandoned.
12.46 Retreat Through Friendly Units. A unit or stack that retreats but finds its path blocked by friendly units with which it cannot stack, or which must retreat through friendly units due to 2nd Disorder Table results, continues its retreat until it reaches a hex in which it can stop, regardless of any “D” or “d” listed in the TEC for the terrain in the hex(es) of the stationary unit(s). Once the retreating unit or stack has concluded its retreat and conducted any 2nd Disorder UDD or Rout check to which it might be liable, all stationary units through which the unit or stack retreated must conduct a UDD, with failure causing Disorder. If already Disordered, consult the 2nd Disorder Table or 12.35b. A stationary Extended Unit conducts only one UDD, even if a unit retreats through more than one of its hexes. Successive retreats caused by the same Fire Table or Shock Table result do not require additional UDDs for the stationary unit; retreats caused by a new Fire Table or shock result do.
Exceptions:
-
A retreating unit cannot retreat through friendly units in a hex designated for a shock yet to be resolved.
-
A unit required to retreat 1-2 hexes must stop after one hex if a retreat of two hexes would force it to retreat through a friendly unit.
Note: As stationary units suffering a 2nd Disorder may also be forced to retreat, a chain reaction of retreats may result. However, for any given chain reaction there is no double jeopardy; neither units that have already conducted a UDD for retreat through nor the originally retreating unit(s) undertake a UDD if other units subsequently retreat through their hexes as a result of 2nd Disorders.
12.47 If a phasing unit is forced to retreat for any reason then it may not undertake further phasing actions of any kind during that Activation. Exception: If targeted by a defending unit’s Continued Shock, it may if otherwise eligible use Pre-Shock Reaction Fire and may Continue Shock on a Shock Resolution DR of 1 or less [10.43, 11.47].
12.48 If Both Sides Would Retreat. If both sides must retreat, and the order in which retreats are conducted matters, the side with the unit having the highest Cohesion Rating retreats last. If there is a tie, the defending unit(s) retreat first. If using the Fatigue rules, subtract half the unit’s Fatigue, rounded up, from its cohesion rating when determining the unit with the highest cohesion.
12.5 Rout
12.51 A Rout may occur when:
-
A Disordered unit suffers an additional Disorder. See 12.35b or the 2nd Disorder Table for specific cases.
-
An adjusted shock resolution roll is 10 or more.
-
A Collapsed or Blown unit loses a SP and fails its required UDD.
12.52 If Both Sides Would Rout. If both sides involved in shock end up routing, the single (one) unit with the highest Cohesion Rating does not rout; it ignores the Rout result. All other units rout. If there is a tie, the defending unit(s) will rout; one attacking unit will not. If using the Fatigue rules, subtract half the unit’s Fatigue, rounded up, from its cohesion rating when determining the unit with the highest cohesion.
Note: For purposes of this rule consider an Abandoned guns result as a Rout [11.6]. Do not count them when determining which unit does not rout.
12.53 An infantry or cavalry unit that Routs is removed from the map and placed in the appropriate box for its Command on the Activation Tracking sheet.
12.54 Friendly infantry or cavalry units (but not artillery) that are adjacent to, or stacked with, a unit that routs (including one that routs from this rule) must undergo an immediate UDD [2.6] each time a unit so routs. If it fails the UDD, the unit incurs a Disorder result. The rout of one unit could end up having a chain reaction effect. However, there is no “double jeopardy” due to this rule; if a routing unit causes two adjacent units to UDD and one of those also routs, the remaining non-routed unit does not undergo another UDD. For example, unit A is adjacent to units B, C and D, while B and D are adjacent to C. If C routs due to A’s routing, B and D only check for A’s initial rout and not for C’s subsequent rout. The same applies if B and C happened to be stacked.
12.6 Advance
If all non-phasing units vacate a hex as a result of combat, or only Abandoned guns remain, the phasing unit(s) causing that result may (and sometimes must) advance into the vacated hex. Advancing units may change facing one vertex, unless that would prevent another unit from conducting a mandatory advance. Advance is subject to the following:
-
If the hex is vacated or only Abandoned guns remain in it during Shock (including Pre-Shock Cohesion Check, Adjacent Unit Routs, and failed Reaction Facing during Continued Shock), the phasing player must advance all of the attacking units, within stacking restrictions. Charging units have first priority, followed by non-charging units at the top of stacks. If the defender Retreats Before Shock, the attacker may advance [11.35]. Defenders may Advance after shock [11.46] and must advance to Continue Shock [11.47]. For Extended Units, see 8.47 and 8.52. Abandoned guns remain in the hex after an Advance [12.8]. Shock-related advances occur during Shock Step 6c.
-
If the hex is vacated due to the results of Fire, including failed UDDs, the phasing player may advance the firing unit (the decision must be made immediately). Such an advance may be made only if the firing unit started adjacent to the target. Again, see 8.47 and 8.52 for Extended Units. Units under Attack Orders may not move following an advance.
-
A unit may never advance across a hexside or into a hex where movement is prohibited. Exception: see 9.44.
-
If a unit advances into a hex that carries a “d” or “D” terrain cost, the advancing unit must either conduct a UDD (d) or take the Auto Disorder (D) as part of the advance. A failed UDD or a D halts the advance if the unit is already Disordered.
-
Artillery may never advance.
-
Advancing units are not eligible targets for Withdrawal Fire [10.44] or Approach Fire [10.45].
12.7 Leader Casualties
12.71 If a leader is stacked with combat units that suffer one or more step losses as a direct result of either Fire or Shock Steps 2, 4, 5, or 6b (including a step loss as a result of a 2nd Disorder), roll again for each such Fire Combat/Shock Step:
- If the roll is a 0, that leader has been killed and is removed from play.
Note: For a “1d+2” Fire Table result, roll first for the Leader(s), then for the unit’s UDD. For step losses incurred only due to 2nd Disorders, roll after all units have conducted their UDDs.
- If the roll is a 1-9, nothing has happened (to the leader). If all units in his command are eliminated, the leader is automatically Killed. A leader is not removed if all of his units are routed. He can bring them back by being placed In Reserve [6.33]. For an Extended Unit suffering a step loss, conduct casualty checks for any Leaders stacked in any of its hexes.
12.72 Leaders stacked with units which Advance or Retreat may stay with that unit for some or all of the advance or retreat. Leaders, themselves, are never routed nor are they required to advance or retreat.
12.73 If under any circumstances a leader not stacked with friendly units finds himself adjacent to an enemy unit, the leader is immediately placed with the nearest friendly combat unit he can reach, regardless of MP. Measure the path in leader MPs to determine the closest unit. A moving enemy unit continues moving as if the leader had not been there. If there is no path to any friendly combat unit free of enemy units, adjacent enemy units, or impassable terrain, the leader is Killed.
12.74 To replace a leader, in the Leader Replacement Phase flip the fallen counter over to the replacement leader side and place the new leader with any unit in that command.
-
If the leader is a brigadier and the counter is already on its Replacement side, simply bring that Replacement back in the Replacement Phase.
-
If all units in the leader’s brigade are routed, the Replacement is stacked with his immediate superior.
PLAY NOTE: The depiction of leader replacements varies from game to game. In addition, some leaders have no replacements and are not replaced if they become casualties. In such cases, all Chain of Command rules remain in effect, unless the Battle Book specifies otherwise.
12.75 If a Replacement leader happens to be the same person as a lower-level leader, flip over the latter’s counter, too, in the Replacement Phase.
12.76 If a Replacement leader is one who is already out of the game, flip the surviving original leader of the highest numbered immediately subordinate command. Thus, 1/III would be chosen before
2/III, etc., to replace the III Corps commander. Where subordinate commands are not numbered, use the immediate subordinate with the best ratings. It is the player’s choice in case of ties.
12.8 Abandoned Guns
When combat results call for artillery to be Abandoned, mark it with an “Abandoned 1” marker, retaining any strength marker. During that same turn’s Recovery Phase, flip the marker to its “Abandoned 2” side if not yet recrewed. Exception: If a friendly unit in the artillery’s hex and in Good Order passes its UDD for Friendly Fire or Retreat-Through, disregard Abandoned result(s). Abandoned guns do not count as units. They neither block LOS nor count toward the 7-SP limit on fire from a hex [8.31]. All units, friendly or enemy, may move without penalty through a hex containing only Abandoned guns.
12.81 Abandoned artillery may be recrewed. The owning player removes the Abandoned marker at the end of a Brigade Activation during which:
-
A friendly unit in Good Order moved into or through the hex (even if it subsequently Disordered), or
-
A friendly unit Advanced into the hex as a result of combat (even if Disordered), or
-
A friendly unit already in the hex rallied.. Friendly units may stack above or below the artillery. The Recrewed artillery returns to play in Disordered status. It may move or rally the next time its AM is drawn. When recrewed, the artillery assumes the facing of any friendly units in the hex. If no friendly units are in the hex, the artillery may choose its facing. Batteries may not be recrewed in excess of stacking limits.
12.82 If not recrewed before the Recovery Phase at the end of the second turn, any artillery with an “Abandoned 2” marker is eliminated.
13.0 Combat Effectiveness and Rally
13.1 Unit Combat Effectiveness
Individual units can have the following combat effectiveness states (which are not mutually exclusive):
-
GOOD ORDER: The unit is on its front side.
-
DISORDERED: The unit is on its Disordered side.
-
COLLAPSED: The unit is on its Disordered side, and it is at less than half strength.
-
ROUTED: The unit has disintegrated and is off the map. The last three states may be improved by Rally [13.4], Straggler Recovery [16.2], and Recovery From Rout [13.5], respectively.
13.2 Brigade Combat Effectiveness
The effectiveness of a command is dependent on how much of a beating its component units have taken.
13.21 Brigades become Combat Ineffective (CI) when one or both of the following situations exist:
-
All regiments (excluding those yet to enter as reinforcements) are either Eliminated, Collapsed, Disordered, or Routed.
-
More than one-half of the brigade’s regiments are Eliminated, Collapsed, or Routed.
13.22 The Combat Effectiveness of a brigade is determined in the Combat Effectiveness Phase [3.0 IV/C]. If either of the above apply, place a “Combat Ineffective: Brigade” marker atop the brigadier. The CI marker may be removed at the conclusion of any Combat Effectiveness Phase in which enough of the units return to normal status.
13.23 A CI brigade may activate a maximum of twice in a turn. When its parent division will activate more often, the player may choose which Activation(s) the CI brigade skips.
13.24 This rule does not apply to artillery battalions/brigades. Artillery that is part of the brigade or attached to it does not count for the determination of Combat Effectiveness for infantry and cavalry brigades.
13.3 Division Combat Effectiveness
13.31 A division is rendered CI when more than half of its brigades are Combat Ineffective in Phase IV/C. Place a “Combat Ineffective: Division” marker atop the division leader. Artillery battalions/brigades do not count as brigades for purposes of this rule.
13.32 If a division is Combat Ineffective, it (and its brigades) may not have more than two Activations in a turn. Moreover, its brigades may not be coordinated [5.34] in any Activation.
13.33 A “Combat Ineffective: Division” marker may be removed at the end of any Combat Effectiveness Phase in which a majority of its brigades are no longer CI.
13.4 Rally
Disordered units may be rallied as part of an Ammo Resupply and Rally action [3.0 III/C/3]. Units wishing to Rally may perform no other voluntary actions except Resupply Ammo in the phase in which Rally is attempted.
13.41 To Rally a Disordered unit, roll the die, adjusting as described below in 13.42. If the adjusted roll is:
-
The same as or lower than its Disordered Cohesion Rating, the unit is no longer Disordered. Flip the unit to its normal side. Unless the unit is Refused, Extended, or has already changed facing after Resupplying in the same Activation, the player may adjust facing by one vertex. Two or more stacked units attempting Rally may change facing only if all succeed, and if all other units in the stack are still eligible to change facing.
-
Higher than its Disordered Cohesion Rating, it remains Disordered. However, see below.
-
At least two times higher than its Disordered Cohesion Rating or an adjusted 9 or higher, it remains Disordered and loses 1 SP.
EXAMPLE #1: A unit with a Disordered Cohesion Rating of 5:
-
A Rally roll of 4 would flip the unit to its normal side.
-
A Rally roll of 8 would keep the unit Disordered.
-
A Rally roll of 9 would keep the unit Disordered and cause the loss of 1 SP.
EXAMPLE #2: A unit with a Disordered Cohesion Rating of 4:
-
A Rally die roll of 4 would flip unit to normal side.
-
A Rally die roll of 5 would keep unit Disordered.
-
A Rally die roll of 8 or higher would keep unit Disordered but minus 1 SP.
13.42 The following DRMs, all cumulative, apply to any Rally roll:
-
If the unit is adjacent to an enemy combat unit there is a +1 DRM.
-
If the unit is mounted cavalry there is a –1 DRM.
-
If the unit is stacked with a leader, subtract one (–1) for each rank (star) on the leader counter [11.73].
13.43 A leader may affect a Rally attempt only at the end of his movement. The leader may not participate in Shock during the same brigade activation in which he affected a Rally attempt.
13.44 Rally is Voluntary. Players may choose to not attempt Rally for a unit. Such units retain their present status.
13.45 Automatic Rally/Fatigue Reduction. Any on-map brigade that is not in Reserve but whose non-artillery units do not move, reaction move, use Phasing Fire, construct Breastworks, declare a shock, or are designated as a shock target for one full turn may, during the Replacement/Recovery Phase [3.0 IV/B] of that turn either:
-
Automatically rally all Disordered units within Command Range of their brigadier, or
-
Reduce Fatigue by one level [17.42]. Neither facing changes that do not expend Movement points, mounting/dismounting, nor Reaction Refusal/Facing Changes are considered Movement for purposes of this rule. Notes:
-
Disordered batteries of artillery battalions/brigades may rally if the battalion/brigade meets the above requirements.
-
Unbrigaded units may rally or reduce Fatigue by one level if they meet the above requirements and are within Command Range of their immediate superior.
13.5 Recovery From Rout
13.51 Routed units in an off-map Division Box are eligible to be returned to play at the conclusion of any turn [3.0 IV/B] in which that brigade has been In Reserve [6.3] for the entire Activation segment [3.0 III].
13.52 To have a routed unit recover, the player undertakes a UDD for the unit using its Disordered side Cohesion Rating (cavalry uses its mounted rating):
-
If the roll is the same as or lower than the Cohesion Rating, it passes. Place the unit on the map within one hex of its brigadier. However, reduce the unit by 1 SP, and the unit is Disordered.
-
If the roll is higher than the Cohesion Rating, it fails. The unit loses 1 SP and remains routed.
-
Regardless, if a 9 is rolled the unit is permanently eliminated instead.
13.53 Recovered cavalry is always replaced on the map in mounted status.
14.0 Special Units
Individual battles usually have additional Special Units, other than those discussed below.
14.1 Green Units
Regiments that had not been in any action before are Green; they are indicated with a “G” next to their Cohesion Rating. Green units remain green the entire course of the game. Green units must make a special, Pre-Shock Commitment Check when shock attacking and have a –1 DRM when firing. Other than that, they are treated normally.
14.2 Cavalry
14.21 Cavalry can exist in one of two states: mounted or dismounted. Therefore, each cavalry unit has two counters, each one representing one of these states. See individual Battle Books for exceptions.
14.22 Units may Mount or Dismount only at the beginning of their Activation, before Movement. The unit must not be adjacent to an enemy unit. To indicate its status, simply change counters. Its MA for that Activation (only) is one-half (rounded up) of the printed MA of its new status. If under Attack Orders, halve its printed MA again (round up). If under Advance Orders, units that Mount or Dismount may not Fire.
Exception: Mounted cavalry that is Blown may not dismount.
14.23 Mounted cavalry is treated as cavalry; dismounted cavalry is treated as infantry.
14.24 Mounted cavalry may fire, but they may never do so during an Activation in which they are Charging or Countercharging. Moreover, phasing mounted cavalry may not fire at a distance in excess of two hexes. The latter restriction does not apply to non-phasing mounted cavalry using Return Fire. Fire from Mounted cavalry has a –1 DRM. Fire at a non-phasing, mounted cavalry benefits from a fire DRM of +1.
14.25 Horse-holders. For purposes of fire and shock strength all dismounted cavalry units subtract one from every 4 SPs the unit currently has, to account for the fellows holding the horses.
EXAMPLES: Both a 4- and a 7-SP unit would subtract 1 SP; an 8-SP unit would subtract 2 SPs.
PLAY NOTE: The advantages to being mounted are Movement (including Reaction Movement) and Charge (and Countercharge). The advantage to being dismounted (where available), is better fire ability.
14.3 Spencer Repeaters
The Spencer Repeating rifle (and its brethren) was a major step forward in small arms firepower. This increase is reflected in several rules that apply to units armed with Spencer Rifles (SR) and Spencer Carbines (SC). These rules do not apply to mounted cavalry or to Disordered units.
Note: A Disordered Spencer Repeater unit or a mounted cavalry unit using Spencers undertakes phasing and/or non-phasing fire as if it were any other type of small arms. Units armed with Spencer Repeaters fire twice if they are in Good Order prior to their first shot and do not suffer a 2nd Disorder [12.35] before their second shot. If they fire twice, both shots must target the same hex, even if there is no enemy unit in the hex after the first shot.
14.31 If a phasing unit in Good Order is firing with Spencer Repeaters, it gets an extra round of fire, as shown in the following play sequence:
-
Phasing unit fires; apply results.
-
Any Return Fire is not simultaneous but follows the Phasing Fire; apply results.
-
Unless it suffers a 2nd Disorder, the phasing unit fires again, whether or not the target used Return Fire.
14.32 If a non-phasing unit in Good Order is returning fire with Spencer Repeaters, it gets an extra round of fire, as follows:
-
Phasing unit announces fire.
-
Phasing unit fires, and non-phasing SR unit(s) Return Fire simultaneously; apply results. Exception: If it conducts a Reaction Facing Change triggered by the Phasing Fire, a non-phasing SR unit’s Return Fire is not simultaneous with the Phasing Fire.
-
SR units that have not suffered a 2nd Disorder fire a second round of Return Fire.
14.33 The “*” on the Fire Table means that if a player rolls an unadjusted 5 for a Spencer Repeater unit when it is firing in any of these “second rounds,” the unit is Out of Ammo (a representation of jammed weapons—a problem with many Spencers—and/or overuse of ammunition). Use the procedure in optional rule 10.92 for Ammo Resupply. If using 10.91 and rolling an unadjusted 5 on the first shot only, ammo depletion applies after the second shot.
14.34 Return Fire by non-target units versus phasing units armed with Spencers follows Series Rule 14.31—the Spencers fire first.
14.35 When using Withdrawal Fire, a unit armed with Spencers fires twice before the withdrawing unit leaves the hex, or against the top unit remaining in the hex.
14.36 Units armed with Spencers fire twice for Pre-Shock Reaction Fire.
14.37 When a unit in Good Order, armed with Spencers returns fire against phasing, rapid-firing artillery, both the first shots and the second shots are simultaneous. The result of each shot is applied after all of the rolls are complete.
14.38 When a unit in Good Order, armed with Spencers, fires at non-phasing, rapid-firing artillery, the Spencer fire alternates with the artillery fire, with the Spencers firing first. Artillery suffering a Disorder as a result of the first or second shot from the Spencers cannot fire after that result is applied. Any non-artillery unit stacked with the artillery and eligible to fire does so after the Spencers’ first shot.
15.0 Engineering
Engineering, in the base rules, involves constructing Breastworks. Individual battles may have rules for Bridge construction and so on. Breastworks represent temporary fortifications that provide a benefit against both Fire and Shock. However, they do take some time to construct, because the only available materials for such construction are trees (which are hard to cut and take time to saw) and wooden farm fences.
15.1 Constructing Breastworks
15.11 Breastworks may be built by any infantry or dismounted cavalry unit under Advance Orders if it is In Command and its brigade leader is eligible to change orders during Step II/C of the Sequence of Play [3.0]. Units under March or Attack Orders may not build Breastworks. If using the Fatigue rules [17.0], units at Fatigue Level 2 or higher may not build Breastworks.
15.12 With the exception of Town and Marsh hexes, Breastworks may be constructed in any hex that is within three hexes of a Woods, Orchard, or Town hex or a hex with a Building/House. The hex of construction, the Woods, Orchard, Town, or Building/ house hex, and the two hex path between them cannot be adjacent to an enemy unit when construction is started.
Note: No hex can contain more than two Breastworks. Two Breastworks markers in a hex only serve the purpose of protecting additional hexsides.
15.13 Breastworks require two complete Game Turns for construction, except at Night, when they require only one turn. A building unit cannot do anything else for those turn(s). For construction starting in a non-night turn, place the build marker during the Engineering Phase [3.0 II/F] of the first turn, re-facing the building unit toward the hexsides the Breastwork will cover. Flip the marker in the Replacement/Recovery Phase of the second turn (or the same Night turn) so that the Breastwork design matches the hex configuration. Once placed, Breastworks can never be reoriented.
15.14 If a constructing unit changes to Attack Orders, retreats out of the construction hex for any reason, conducts any action other than construction (including Non-Phasing Fire), or if its hex is the subject of enemy shock assault or its brigade’s Fatigue level increases to 2 or more, construction is discontinued. Remove the Construction marker. Construction may continue despite the constructing unit being Out of Command or its brigadier unable to change orders at the start of the second turn of construction. Non-phasing units that use Return Fire benefit from Prepared Fire if otherwise eligible.
15.15 Construction started by one unit must be completed by that unit. Additional units in the hex do not speed up construction. Each part of a unit in Extended Line may build Breastworks.
15.16 Units building Breastworks retain all defensive capabilities.
15.17 Breastworks may be removed by any combat unit that moves across a Breastworks hexside by expending one additional MP to do so. Once a unit has moved through the protective hexside of a Breastwork and expended the extra MP, remove the Breastworks marker.
15.2 Effects of Breastworks
15.21 Breastworks have a two-hexside facing, as indicated on the Breastworks counter. The Breastworks must be placed to conform to those hexsides, and they affect Fire/Shock/Movement only through those hexsides.
15.22 The cost to move through a Breastworks hexside is listed in the Terrain Effects Chart. This cost applies regardless of Pikes, Roads, Trails, and Railroads.
15.23 Breastworks provide the following beneficial DRMs:
-
+1 Firing small arms fire from within Breastworks (through a Breastworks hexside). This does not apply to artillery firing at canister range.
-
–1 Infantry/dismounted cavalry defending against small arms/ canister fire through a Breastworks hexside (there is no defensive benefit when targeted by artillery at Shot/Shell range).
-
–1 Defender’s Pre-Shock Cohesion Check [11.37].
-
–1 Defending against shock within Breastworks.
16.0 Night
16.1 From Dusk ‘til Dawn
16.11 For a Dawn or Dusk Game Turn, all daylight rules are in effect, with the following changes/additions:
-
All Command Ranges are halved, rounding up.
-
There is a –2 DRM for any fire over one hex range.
16.12 For a Night Game Turn, all daylight rules are in effect, with the following changes and additions:
-
All Command Ranges are halved, rounding up.
-
There is a negative adjustment for distance that is cumulative. For one hex, it is –1; for two hexes, it would be –3 (–1 + –2). For a range of four hexes it would be –10 (or prohibitive).
-
Artillery batteries each fire separately, regardless of the command situation or stacking.
-
There is no Prepared Fire or Cavalry Charge.
-
All Activations while under Attack Orders incur Fatigue, unless the brigade’s only actions are Leader Movement, mounting/dismounting, Rally, Resupply, Retreats caused by Cautious Loose Cannon results, facing changes that cost no MPs, or no action at all. When part of a brigade is under Attack Orders, the brigade incurs Fatigue only if the units under Attack Orders conduct a Fatigue action.
-
Cavalry and artillery may Reaction Move only when the enemy is about to move adjacent.
16.2 Straggler Recovery
16.21 To undergo Straggler Recovery, a brigade must be In Reserve during a Dusk or Night turn. It undertakes the actual Recovery at the conclusion of each such turn.
16.22 For eligible brigades [16.21], each non-artillery unit within its brigadier’s Command Range conducts a UDD.
-
If it passes, increase its SP by one.
-
If it fails, there is No Effect.
16.23 A unit’s strength may never be increased to its original face value (nor higher). The best it can do is to return to one short of its original strength.
16.24 Units may Recover Stragglers and Fatigue; they are not mutually exclusive.
HISTORICAL NOTE: Not all combat losses were casualties. A not-insignificant number of losses were from soldiers who simply drifted off, fell by the road during marches, or opted for discretion, etc. Some of these could be recovered during extended lulls in the battle, which here means at Dusk/Night.
17.0 Fatigue [Optional]
DESIGN NOTE: This is optional because it adds another layer of complexity to the game. However, we highly recommend its use. It adds a level of realism.
17.1 Who Gets Fatigued?
Fatigue applies to all combat units, except artillery. Fatigue is applied at the brigade level, and a brigade can incur a new level of Fatigue if even one unit in that brigade does any of the actions that would incur Fatigue.
17.2 How Fatigue is Incurred
17.21 Brigades start with no Fatigue Level. This is indicated by the absence of any Fatigue Indicator with the brigadier. Fatigue is incurred as it happens, but the effects—placement of the Fatigue marker—take place when the affected brigade has done all that it will for that Activation.
PLAY NOTE: In certain battles, on-map commands may start and reinforcements may enter at a specific Fatigue Level.
17.22 There are two ways in which Fatigue is incurred: CAUSE 1: Any turn in which a brigade undertakes more than two Activations, its Fatigue Level increases by one for each Activation above two [17.24]. Thus, a brigade that undertakes four Activations in one turn will increase its Fatigue Level by two. Activations by Out of Command units also count towards Fatigue, but Activations that are solely undertaken by attached artillery, alone, do not count.
Exceptions:
-
A brigade Activation during which its units undertake no actions at all, or undertake only mounting/dismounting, Rally, Resupply, Retreats caused by Cautious Loose Cannon results, facing changes that cost no MPs, and/or engineering, does not count toward Fatigue.
-
A unit using March Movement solely on Roads/Pikes (including Bridges and Fords) does not incur Fatigue for its brigade for the first three Activation-equivalents in a turn; it does for a fourth. If it enters any terrain other than Roads or Pikes, both a third and fourth Activation-equivalent earn Fatigue.
-
The retreat caused by a “Cautious” Loose Cannon result does not incur Fatigue.
-
Leader Movement does not incur Fatigue, because Leaders are not units.
EXAMPLE: An infantry regiment under March Orders can move up to 24 MPs (or 4 AM worth) in one turn (for that March AM), incurring Fatigue for any movement above 18 MPs. Note that in most games, Road movement would be at ½ MP per hex, so the maximum distance would be 48 hexes, with Fatigue being incurred starting with hex 37. CAUSE 2: If any brigade has been engaged in Shock (either attacking or defending) in more than one friendly or enemy Action Phase [3.0 III/C/3] in a turn, all such phases after the first earn Fatigue. A brigade engages in Shock by one or more of its non-artillery units participating in Shock Step 6b [11.45]. Only one level of Fatigue is incurred per Action Phase per participating brigade, no matter how many times it participated in Shock Step 6b during that phase.
COMPREHENSIVE EXAMPLE OF FATIGUE: A unit moves for its first AM, shock attacks for second AM, and shock attacks for its third AM. It also had to defend against shock during two different enemy Action Phases (AMs). The brigade has incurred four levels of Fatigue as follows:
-
Its first AM movement did not incur Fatigue as Fatigue is not incurred for the first two Activations.
-
Its second AM shock attack did not incur Fatigue as Fatigue is neither incurred for the first two Activations nor does the first shock incur Fatigue.
-
It incurred one Fatigue Level for its third AM Activation and one Fatigue Level for its second shock attack (for a total of two Fatigue Levels).
-
Add one Fatigue Level each for the two shock defenses.
17.23 Each turn a brigade may incur a maximum of two Fatigue Level increases due to Activations. (Exception: see 16.12.) There is no limit to how many Fatigue Levels may be incurred due to shock attacks/defenses. However, an Activation in which a brigade shock attacks and subsequently defends against a shock (due to rolling a 1) only counts once toward Fatigue, not twice (and the same is true for the initial defender-turned-attacker).
HISTORICAL NOTE: It is estimated that the average unit/ brigade could undergo about one and one-half hours of combat before becoming so fatigued as to be relatively worthless.
17.24 Other than having no Fatigue marker, the following are the levels of Fatigue incurred, in ascending order. Place an appropriate marker with the brigadier to so indicate:
-
Fatigue OK
-
Fatigue 0
-
Fatigue 1
-
Fatigue 2
-
Fatigue 3
-
Fatigue 4 (the highest)
17.25 Once a unit reaches Fatigue Level 4, it goes no higher, nor is there any further effect of undertaking an action that would earn Fatigue.
17.26 Artillery neither incurs nor generates Fatigue for an infantry or cavalry brigade to which it is attached. However, if under March Orders and using a fourth AM-equivalent [17.23], an artillery unit must check for broken wheels. Roll the die; if it is 6 - 9, the unit loses 1 SP.
PLAY NOTE: If artillery MA is 8 or higher, it usually only need move the equivalent of three AMs to keep up with the foot-sloggers.
17.3 Effects of Fatigue
17.31 All units in a brigade use the number on the Fatigue Level marker as a modifier to a variety of actions. Subtract half the Fatigue Level (rounding up) from:
-
MA (after halving for Attack Orders and/or cavalry that mounts or dismounts) but see also 9.42.
-
All Shock Resolution rolls when attacking.
-
All Fire rolls. Add half the Fatigue Level (rounding up) to:
-
All UDDs.
-
All Shock Resolution rolls when defending.
-
All Pre-Shock Check rolls (including Green).
-
All Rally Attempts.
17.32 Brigades at Fatigue Level 4 automatically and immediately revert to Advance Orders. They may not be given March or Attack Orders until they lower their Fatigue Level.
17.33 Fatigue OK and Fatigue Level 0 have no effect, other than that they are a level closer to one that does.
17.34 Units at Fatigue Level 2 or higher may not build Breastworks.
17.4 Reducing Fatigue
17.41 To reduce a brigade’s Fatigue Level, the player may place that brigade In Reserve for that entire turn [6.31]. At the end of the turn, if the brigade is still In Reserve, its Fatigue Level is reduced by two levels.
17.42 Any on-map brigade that is not in Reserve but whose non-artillery units do not move, reaction move, use Phasing Fire, construct Breastworks, declare a shock or are designated as a shock target for one full turn may, during the Replacement/ Recovery Phase [3.0 IV/B] of that turn either:
-
Automatically rally all Disordered units within Command Range of their brigadier [13.45], or
-
Reduce Fatigue by one level. Neither facing changes that do not expend movement points, mounting/dismounting, nor Reaction Refusal/Facing Changes are considered movement for purposes of this rule. Notes:
-
Disordered batteries of artillery battalions/brigades may rally if the battalion/brigade meets the above requirements.
-
Unbrigaded units may rally or reduce Fatigue by one level if they meet the above requirements and are within Command Range of their immediate superior.
Three Days of Gettysburg Deluxe Edition Battle Book
1.0 Introduction
Three Days of Gettysburg – Deluxe Edition is the 5th edition of Richard H. Berg’s game to cover the most famous battle of the American Civil War. Originally published in 1995, the game has stood the test of time, improving with each new edition. All rules below are in addition to the GBACW Series Rules. If they change the rules, such change is noted. Players will discover a wealth of optional rules (marked with a §) that offer a unique gameplay experience. These rules, reflecting singular conditions, exceptional cases, or extraordinary heroics of the battle, are not mandatory, although some scenarios recommend or require them. We encourage you to explore and use your favorite ones, as they add depth to the game. However, we respect that wargamers have different preferences, and we’ve ensured that those who prefer a simpler gameplay can still enjoy the game without these rules. The choice is yours, and the game remains engaging and evocative of the most famous battle of the War Between the States. The most extensive optional rule set is for Skirmishers. All rules for Skirmish units are conveniently placed in a separate rule section for easy access and a smooth transition when using this option.
2.0 Components
A complete game of Three Days of Gettysburg – Deluxe Edition should have these components:
-
Two single-sided 22"×34" maps representing the northern Gettysburg battlefield
-
One double-sided 22"×34" map for the southern Gettysburg battlefield (back: enlarged Pickett’s Charge map)
-
One double-sided 22"×34" map for the East Cavalry battlefield (back: Combined map)
-
One double-sided 17"×22" small-scenario map
-
One double-sided 11"×17" small-scenario map
-
Eight counter sheets of combat units and counters (including optional and errata counters for other GBACW games)
-
Two 11"×17" (2-sided) Combat Tables Player Aid Cards
-
Two 11"×17" (2-sided) Terrain Effects Charts + 2nd Disorder Tables & Range Effects Charts w/o Overshoot
-
One 8½"×11" (2-sided) Turn Record Track & VP/BCI Track
-
One 11"×17" (1-sided) Union AM Chart
-
One 8½"×11" (1-sided) Confederate AM Chart
-
One 8½"×11" (2-sided) Confederate Reinforcement Schedule
-
One 8½"×11" (2-sided) Random Events Table + Confederate Release Schedule for Longstreet’s Assault
-
One 8½"×11" (2-sided) Union Reinforcement Schedule, 2-map + Federal Release Schedule for Longstreet’s Assault
2.42 Map Scale
Each hex covers approximately 125 yards. Terrain elevation changes represent approximately 40 feet. Where the elevation changes are more abrupt, a Slope graphic has been added to the elevation change(s). Deluxe Edition Maps: New terrain details have been added to the original 3rd edition maps to enhance historicity and improve the player experience. The maps are the fantastic artwork created by Mark Simonitch based on topography by Rick Barber and Dick Whitaker. A map with the cavalry battlefield area adjoining the original maps has been added to give players greater tactical options and allow the re-creation of the eastern cavalry brawl on July 3rd. Many scenarios have their own map to make the game accessible to those with limited space. Players of the 2004 edition may note that additional battlefield areas are titled. If there was an accepted, well-known name before the battle, we generally went with the original title (e.g., Blocher’s Knoll instead of Barlow’s Knoll). An exception is Big Round Top versus Round Top, where we use the name that became common after the battle. In less-well-known places, we have used the name that history has bestowed on that bloody piece of ground. Some of the Roads and Pikes leading into Gettysburg have hexes with small red or yellow dots. These have no effect on the game and are there to help players track movement. Each is 12 hexes from either the entrance area or the previous dot.
4.1 Commanders and Leaders
4.13 Cavalry Division Leaders
Each divisional cavalry leader—Stuart, Buford, Gregg, and Kilpatrick—draws their own Efficiency chit. There is no Cavalry Corps commander (in the game). Cavalry brigadiers are considered In Command for AM calculation and Division Orders if starting the turn within their division leader’s command range.
HISTORICAL NOTE: Alfred Pleasonton, the Union Cavalry Corps Commander, stayed at Meade’s side for the entire battle.
4.24 Slocum
Unless using optional Leader rule BB 4.46, Slocum (Wing Leader) is an extra Commander counter that has no game effect other than helping with UDDs of the XII Corps. However, if acting XII Commander Williams is killed, replace Williams with Slocum’s XII Corps Commander counter and remove the Wing Leader counter. If Slocum is killed after replacing Williams, use the replacement side of the Williams counter.
4.3 Artillery Command
DESIGN NOTE: Typically, both the Army of the Potomac and the Army of Northern Virginia had four to six batteries grouped under a single commander. The Union army called this formation an artillery brigade, while the Confederates called it an artillery battalion. For game purposes, they are the same, and in the rules that follow, both are referred to as brigades.
4.35 All artillery attachments for every level (reserve, division, or brigade) are assigned during the Division Orders Phase [3.0 II/C] at the beginning of the turn. The command range is irrelevant for these assignments; however, it does affect the number of times the artillery can activate.
4.36 Artillery AMs
Artillery AMs are provided for those groups of artillery not attached to an infantry division or brigade. They are used somewhat differently than regular AMs:
-
They may not be used for Efficiency transfer, either to or from.
-
The maximum number of Artillery AMs available for a single turn is three. Treat a drawn Efficiency marker of four as a three.
EXAMPLE 1: The Union player draws an Efficiency marker of four for the artillery. It is treated as if an Efficiency of three was drawn: Hunt [BB 4.37] cannot increase the number of AMs beyond three, and Out of Command units could only Activate twice.
EXAMPLE 2: The Union player draws an Efficiency of one. Any artillery brigade leaders within the range of Hunt could Activate twice (this is true even if they are not a part of the Reserve). Other artillery brigades could Activate once. This includes Out of Command units, as the minimum AM for a turn is one.
-
Other than individual batteries attached to brigades, all artillery is limited to three Activations. This rule applies even if the brigade is attached to a division that has four AMs. If activating under the March Orders AM, they may use the equivalent of four activations for movement but will roll for broken wheels [SR 17.26].
-
Out of Command artillery brigades are limited to a maximum of two Activations.
-
When activated by the Artillery AM, batteries are activated by brigade; that is, all batteries in a brigade move and fire before activating the next brigade.
-
Individual batteries attached to infantry or cavalry brigades may Activate four times if attached to a brigade that has four AMs. However, they will Disorder at the end of the fourth Activation, regardless of their actions (Fire, move, or Rally/ Resupply (i.e., effectively, an artillery unit cannot Rally but could Resupply)). If already Disordered there is no effect. They are not limited to the two Activation limit of Out of Command artillery brigades (i.e., individual Out of Command batteries could conceivably Activate three times if attached to a brigade with four Activations).
IMPORTANT PLAY NOTE: In all circumstances, artillery brigades can only Activate a maximum of three times, whether activating with the Artillery AM or a division. Individual batteries attached to infantry or cavalry brigades could Activate up to four times if the brigade has four Activations.
4.37 Union Artillery Formations and Subordination
General Henry Hunt is the Union Reserve Artillery Commander (formally, Chief of Artillery). He is treated as a Corps Commander and directly commands the brigades of the Artillery Reserve. He may command any corps artillery brigades as well. His Efficiency modifier (+1) affects the number of AMs for all Artillery brigades within Hunt’s command range, i.e., all artillery brigades within his command range that are activated by the Artillery AM would get an additional Activation beyond the Efficiency Draw, up to the maximum of 3 AMs. They do not have to be a part of the Reserve. The Union foot artillery has two different organizations: artillery brigades attached to individual corps, and Reserve artillery brigades under Hunt. Their rules for Activation and attachment are different.
Corps artillery brigades:
-
Activate with the Artillery AM. Brigadiers trace command to the Corps Commander or Hunt. Or,
-
The artillery brigade may be attached to one division of that corps. In this case, the corps artillery brigade leader would function as a brigadier of the division, and the artillery brigade would Activate with that division.
-
In either case above, individual batteries may be attached to brigades of that corps. Apply SR 4.32, which limits such assignments to one battery per brigade. If this option is chosen and all batteries are assigned to brigades, the corps artillery leader has no function other than modifying the UDD of the batteries he is stacked with.
Army reserve artillery brigades:
-
Only activate with the Artillery AM. Brigadiers trace command to Hunt.
-
Individual batteries can be assigned to infantry brigades [SR 5.33].
-
Reserve artillery brigades may not be attached to divisions.
-
§ Exception: If Hunt is killed, Reserve artillery brigades may be attached to any infantry division that does not have a corps artillery brigade attached.
PLAY NOTE: Brigades may attach a maximum of one battery, regardless of source.
Horse artillery (HA) must be attached to a cavalry formation; they may not Activate with the Artillery AM.
-
The two HA brigades can be attached to any cavalry division, one brigade per division.
-
Individual HA batteries can be attached to individual brigades, one per brigade.
-
Rank’s battery (3rd Pennsylvania Heavy Artillery, Battery H) is a part of the 1/2/Cav and activates with that brigade.
4.38 Confederate Artillery Formations and Subordination
The Confederates have an Artillery Commander, William Pendleton. He is treated as a Corps Commander and may command any Corps Reserve CSA artillery brigade in range. This decision for direct command is made during the II.A section of the Orders Segment. His Efficiency modifier (–1) affects all artillery brigades commanded directly by him. For game purposes, all Confederate artillery brigades commanded directly by Pendleton will Activate one less time than the Efficiency Draw, the same as Out of Command brigades do.
PLAY NOTE: Players have complained that Pendleton is useless. However, Lee could increase his Efficiency to 0 for a turn, and he can be used to modify Rally rolls.
Pendleton and Alexander (if used as the Artillery Corps Commander) are treated exactly like Hunt for commanding batteries directly. The Confederate foot artillery had two different organizations: a single artillery brigade attached to each infantry division, and two artillery Reserve brigades attached to each corps.
Divisional artillery brigades:
-
Only Activate with their division and may not be assigned to another division.
-
Individual batteries of the brigade can be assigned to brigades of that division, one per brigade. If all batteries are assigned to brigades, the brigade artillery leader has no function other than modifying the UDD of batteries he is stacked with.
I, II, and III Corps Reserve brigades:
-
Activate with the artillery AM. They trace command to the corps Commander or Pendleton. Or,
-
Attach to a division in their corps as an individual brigade. No more than one artillery brigade can be attached to a division (i.e., the division could have a maximum of two brigades, one integral brigade, and one attached corps reserve). Each brigade activates separately.
-
Their batteries may not be attached to infantry brigades.
Beckham’s horse artillery:
-
Activates as a separate brigade of Stuart’s division.
-
Individual batteries may be assigned to any cavalry brigade except Jenkins (who has his own artillery). Only one battery may be assigned to each brigade.
-
They may not activate with the Artillery AM.
PLAY AID NOTE: Attachment of artillery brigades is tracked by using the artillery attachment counters on the Efficiency/Activation PACs. When attaching eligible corps or reserve artillery to a division, place that specific attachment counter on the appropriate division chart space. Use the individual battery attachment list for tracking individual battery attachment.
4.39 Simpler Artillery Attachment
§ For those players who want less overhead with artillery attachment, do not allow any single batteries to be attached to any brigade. Only artillery brigades may be attached to divisions. Use the restrictions above.
4.4 Special Leader Rules
§
4.41 Major General Warren Meade’s Chief of Engineers, Gouverneur Warren, played an important part in the battle’s last two days, undertaking various command decisions and using his sense of what was happening and his initiative to do something about it. At the beginning of the 0500 turn of July 2nd, place the Warren counter with Meade. Warren moves during the Commander Movement Phase and has 40 movement points (MPs). Starting on 0700 turn of July 2nd, after any Activation, the Union player may interrupt the normal flow of play (i.e., Activation by AM draw) and declare a Warren Activation for any brigade leader within Warren’s command range if he did not move more than 10 MPs in the previous Commander Movement Phase. He designates that one brigade as instantly activated, with a free Orders change, with all in-command units of that brigade undertaking whatever actions the player feels necessary.
-
This Activation is in addition to what that brigade will get from their Division AMs.
-
The selected brigade is still limited by the maximum of four Activations per turn. If a CI brigade is chosen, it is still limited to a maximum of two Activations.
-
This Activation counts for Fatigue. Warren cannot affect any unit UDDs. He is susceptible to Leader Casualty checks like any other leader. Players cannot use the Warren Activation if Warren moved more than 10 MPs in the previous turn. Once the special Activation is used, remove the Warren counter.
4.42 Major General Trimble Isaac Trimble, who had recently returned to the army, reported to Lee’s HQ just in time for Gettysburg. However, he had no command. He is a spare leader. Trimble may be used to replace any division leader when the leader is eliminated (instead of the normal Replacement procedure). Replace the eliminated leader with Trimble in the Replacement/Recovery Phase [IV.B.1.]. Once used, Trimble cannot be reassigned.
4.43 Brigadier General Alfred Iverson Alfred Iverson did not perform well at Gettysburg and was accused of cowardice by many in his command. When ordered by Rodes to attack the Union lines, he sent his men in without skirmishers against unknown Union forces while he sheltered behind the lines. His North Carolina troops were ambushed and slaughtered. He was later relieved of duty and transferred after his men refused to serve under him. To reflect his leadership (or lack thereof), Iverson cannot voluntarily move adjacent to an enemy unit. If adjacent at the beginning of an activation, he must move at least one hex away from enemy units if possible. If moving with his unit, he cannot affect a UDD caused by Withdrawal Fire. All Shocks conducted by his brigade will always have a –1 Dice Roll Modifier (DRM) for shocking without a brigadier. This DRM does not apply to defending units. Iverson’s Leader Casualty checks are modified. When rolling a 0 for the Leader Casualty check, roll again. If the roll is 0-1, he is killed. On a roll of 2-9, he survives. If Iverson is killed, his replacement does not have the restrictions, and his replacement and brigade may Shock normally.
4.44 The Sickly General Hill Lieutenant General Ambrose Powell Hill was partly responsible for the Battle of Gettysburg. His orders to Heth to march to Gettysburg and for Pender to follow were done with the knowledge that they might encounter enemy troops or even a segment of the enemy army—even though Lee’s orders were to avoid an engagement. Hill was sick that day, and some have said that the approach was “incautious” for possibly that reason. Perhaps the aggressive division commander was still learning his trade as a corps commander. Regardless, after the initial day, the sickly general might as well have been in Virginia—for the rest of the battle, his corps fought in spurts with little coordination among the divisions or even brigades. To help simulate his performance, use the rules below:
-
A.P. Hill has two counters representing his actions/non-actions at Gettysburg.
-
On July 1st, use the A.P. Hill counter with a 0 Efficiency modifier until the 1800 turn.
-
At the beginning of the July 1st, 1800 turn, replace the original counter with the A.P. Hill counter that has a –1 Efficiency modifier.
-
The –1 Efficiency counter is used for the rest of the game unless a Random Event dictates otherwise.
4.45 General James “Pete” Longstreet Regardless of the after-war criticisms leveled at him, Longstreet was Lee’s go-to subordinate throughout this battle. At least twice, Longstreet had a division from another corps under his nominal control or coordinating with his troops.
In any daylight turn, Lee can use his Efficiency Rating to simulate this by placing a single division from either the 2nd or 3rd Corps under Longstreet’s command. This decision is made during the II.A Determine Chain of Command phase, and the division leader must be in Longstreet’s command range. Lee cannot use his Initiative Rating to increase corps Efficiency for that turn, but he may still affect the Initiative die roll. The selected outside division will trace command to Longstreet for all game purposes and receive AMs as if it was a division of the 1st Corps. Longstreet cannot use his Efficiency Rating to increase the number of AMs for the attached division while under his command. This attachment can be done once a day on July 2nd and 3rd. Once attached, the division will remain attached for six turns or until the end of the first night turn, whichever comes first. The division will revert to its standard chain of command at that time. Notate the division on the time record card when it is attached.
PLAY NOTE: Using the Hill and Longstreet options together is strongly recommended.
4.46 Major General Henry Slocum Henry Slocum was the ranking Major General among Meade’s subordinates and was the commander of the right wing of the Union army as it approached Gettysburg. Slocum never acted as XII Corps commander during the battle, leaving that duty to General Alpheus Williams. This arrangement caused both misunderstandings and delays during the fight. Slocum has a special wing commander counter, and both his and Williams’ Corps Commander counters are used in the game. When using Slocum as a wing commander:
-
As corps commander, Williams must be within command range of wing commander Slocum to be considered In Command during the Determine Chain of Command Phase (II.A). If not In Command, the corps will activate one fewer time than the Efficiency drawn (with a minimum of one). Meade can use his Initiative to affect Williams.
-
If a XII Corps division leader is In Command for the turn or within range of Slocum at the time of Activation, roll a die. On a roll of 0-6, the division may move normally. On a roll of 7 or 8, the division’s units have half their normal movement allowance rounded up. On a roll of 9, no expenditure of movement points is allowed, but units may do all other activities, including changing Orders. Normal Fatigue rules apply. Leaders are not affected and may move their full movement allowance.
-
If an XII Corps division leader is not In Command for the turn or within Slocum’s command range at the beginning of the Activation, no roll for movement is required.
-
This rule does not affect commands under March Orders at the beginning of the turn (i.e., before the II.C Division Orders Phase). They do not roll for movement regardless of Slocum’s proximity. If adopting March Orders during
II.C of the current turn, subtract 1 AM worth of movement for a roll of 7 or 8 (with a minimum of 1 AM worth of movement). On a roll of 9, no movement is allowed. This roll is made at the beginning of the March Activation.
-
If Slocum is killed, there is no longer any movement die roll and he is not replaced. However, Williams will continue to activate one fewer than the Efficiency drawn (with a minimum of one).
-
If Williams is killed, replace him with the Slocum XII Corps Commander counter and remove the wing leader counter. If Slocum has been killed beforehand, use the Geary Replacement on the back of Slocum’s Corps counter. If Slocum is not used as a wing commander, he is a supernumerary leader, valuable only when stacked with XII Corps units to modify their UDDs. He continues to move only in the Commander Movement Phase. If killed, there is no effect on the corps, and he is not replaced. If Williams is killed, replace him with Slocum, as above.
PLAY NOTE: The Northern player will not enjoy this option, but it reflects some of the difficulties the command arrangement caused for the XII Corps. Although very effective defensively on Culp’s Hill, the corps was not an offensive force in the battle.
4.47 Major General John Reynolds John Reynolds is credited with fighting north of Gettysburg and delaying the Rebel forces long enough for the Union army to arrive. Riding to the scene of the fighting to direct the brigades of Wadsworth’s division, Reynold’s actions contributed to his early demise. For the 0900, 1000, and 1100 turns of July 1st, for Wadsworth’s brigades (Meredith’s 1/1/I and Cutler’s 2/1/I) to be In Command, the brigade leaders must be within Reynolds’ command range as well as Wadsworth’s. During these turns, each time a unit of Wadsworth’s division takes a Strength Point (SP) loss from fire (only), Reynolds must make a special Leader Casualty check. There is only one Leader Casualty check for each fire result, even if two or more SPs are lost. For this special check, a DR of 0 or 1 will cause Reynolds’ death. This is in addition to any regular Leader Casualty check required. Players may, at their option, keep Reynolds Out of Command range of the two brigadiers during the Determine Chain of Command Phase (II.A) for the specific turn and avoid this roll. However, both brigades will Activate as Out of Command (including Division Order Change). Reynolds is still subject to normal Leader Casualty checks. If Reynolds is killed, the restriction for tracing the brigade command range to the corps commander is lifted. Regardless, this restriction/effect is not in effect after the 1100 turn.
PLAY NOTE: This rule will probably end the general’s life if there is heavy fighting. It is intended for those who want to simulate the historical battle issues without an iron handcuff.
HISTORICAL NOTE: Reynolds’ performance on the first day cost him his life. His decisions to come to Buford’s support and fight at Gettysburg have been remembered and honored. However, when reaching the fighting area, he acted as a lower-level commander would, placing brigades near the front lines. Dying makes you a hero even when the action is questionable.
Simpler Option: For those players who prefer an easier design for effect rule, replace the above rule with the following. Roll a single die during the Commander Movement Phase (IV.A) for game turns 1000 and 1100. On a DR of 0-4, Reynolds is killed and removed from the game. Follow normal Replacement rules during the Replacement Phase.
4.48 Major General Winfield Hancock After any CSA Activation, the Union player may interrupt play and Activate any one II Corps regiment within four hexes of Hancock and in Good Order. The regiment is placed under Attack Orders (if not already) and must move to Shock an enemy unit or units. For this special Activation, the unit has 6 MPs and cannot Fire in this Activation. The unit chosen must be close enough to an enemy unit to Shock. There is no –1 DRM for Shocking without a brigadier, and the unit receives the Charge DRM. All other Shock DRMs are calculated normally. The regiment cannot move through any hex (including hexside costs) that costs more than 1 MP except for a Farmhouse/Building hex (i.e., it may move through a Farmhouse/Building hex). If Disordered by artillery Approach fire before reaching an enemy unit, the unit must stop in the hex where it Disordered and is finished with its special Activation. This special Activation may be used only once per game and does not count toward the regiment’s brigade Activation limit nor cause Fatigue.
HISTORICAL NOTE: The 1st Minnesota’s dramatic charge into a wall of Confederates on July 2nd is one of the great David and Goliath moments of battle history. It was on Hancock’s direct order to the regimental commander that these brave men charged the enemy in a desperate and deadly attempt to slow the Southern tide.
4.49 General William Pendleton William Pendleton, the leader of the Army of Northern Virginia’s artillery, was not particularly active at this battle. When the time came for the great bombardment of July 3rd, Edward Porter Alexander was effectively put in charge. For those who wish to simulate this unofficial change of commander, we present the following. At the beginning of any daylight turn when both Pendleton and Alexander are on the map, the CSA player may replace Pendleton with Alexander. During the II.A Chain of Command Phase, the CSA player may:
-
Flip the Pendleton counter to his reverse side (to Alexander as Artillery Commander).
-
Flip Alexander’s I Arty Reserve counter to its replacement side.
-
Lee cannot use his Initiative to increase a corps’ Efficiency for that turn.
-
Lee’s Initiative can be used to modify the Initiative die roll.
NOTE: If Pendleton is killed, replacement with Alexander is available but still limits Lee’s ability to modify Efficiency for a corps on the turn implemented. The player has the choice of playing without an artillery commander.
6.4 Skirmish Order § See separate Skirmisher rule section.
7.35 Refused Units
Refused units can fire up to 7 SP through their standard Frontal hexes and 4 SP through their Refused Frontal hex if they have the prerequisite strength. Use the Split Table below for splitting fire.
PLAY NOTE: Up to 7 SP, the splits are identical to the Series Rules.
Up to 7 SPs may fire through the two Frontal hexsides
Up to 7 SPs may fire through the two Frontal hexsides; up to 4 SPs may fire through the Refused Front hexside.
| SP in hex | Front SPs / Refused Front SPs |
|---|---|
| 1-2 | Not Allowed |
| 3 | 2/1 |
| 4 | 2/2 |
| 5 | 3/2 |
| 6 | 3/3 |
| 7 | 4/3 |
| Additional SPs: 8 | 5/3 |
| 9 | 6/3 |
| 10 | 7/3 |
| 11+ | 7/4 |
9.22 March Order Movement
-
On July 1st and until the end of the 1100 turn on July 2nd, the only thoroughfares that cost ½ MP in March Order are all roads in Gettysburg, all Pikes (including those shown in town), and the following Roads: Taneytown Road, Carlisle Road, Mummasburg Road, and Hanover Road. All other roads cost 1 MP. This does not affect the ability of March Order units to move three Activations on Roads and Pikes without earning Fatigue. This restriction ends at the conclusion of the July 2nd 1100 turn. Leaders continue to pay ½ MP for Pikes and Roads at any time. This includes tracing command.
-
If using all four maps, the Union (only) may use Low Dutch Road with normal (½ MP) March movement rates as well.
PLAY NOTE: The off-map roads [BB 9.49] are not included in this restriction.
DESIGN NOTE: On July 1st and early on July 2nd, commanders would have been very careful in movement, as many were entering a battle area with little knowledge of the enemy’s whereabouts. This change slows down the use of March Orders by players to envelop or flank an enemy with their god-like vision.
- § On July 1st, the brigades of Cutler (2/1/I), Meredith (1/1/I), and Stone (2/3/I), if under March Orders, may move up to three Activations without incurring Fatigue even if not using Roads for the entire movement. The units are limited to using terrain with a maximum 1 MP cost, including Trails and Roads. If entering terrain that costs greater than 1 MP, they incur Fatigue for the third Activation. This special off-road movement is limited to hexes north of the Codori Farm (B6028, exclusive) and east of hexes ending in xx03 (exclusive) on map A. Units must start their Activation either within these boundaries or on the Emmitsburg Road and remain within these boundaries once off the road for this benefit. This special movement rule ends with the conclusion of the 1100 turn.
DESIGN NOTE: This optional rule allows players to use the Union I Corps’ historical march from the Codori house to McPherson Ridge without undue Fatigue.
9.4 Terrain Effects
PLAY NOTE: The Terrain Effects Chart (TEC) covers terrain effects on combat and movement costs. This listing is generalized information to help players better understand the rationale for the terrain and its impact. Additional effects (primarily Town) listed here are above and beyond what can be presented on the TEC.
9.43 Roads, Pikes, and Trails
Roads: Units moving along Roads ignore the movement costs for changing elevation and for all types of terrain, and are not subject to Disorder from the terrain. When using Roads to cross Creek Fords, treat both hexes adjacent to the Ford as connected Road hexes and add the cost of the Ford.
Pikes: Treat the same as Roads unless it is a Thunderstorm Turn (Random Event). Units moving on Pikes under Advance or March Orders are not affected for movement cost changes for Thunderstorms.
Trails: Units using Trails pay one-half of the non-Trail rates for the terrain to enter the hex (minimum of 1 MP). This includes terrain hexside costs. March Order units round down when using Trails; Advance Order units round up. Units do not UDD for movement when using Trails (Exception: artillery crossing Creek Fords). When using Trails to cross Creek Fords, treat both hexes adjacent to the Ford as connected Trail hexes and add the cost of the Ford (unhalved).
9.44 Terrain Elevation Level and Terrain Effects
The elevation of a hex is found at its center and covers the majority of the hex area.
Woods: Woods are considered one level higher than the base elevation of the hex. Woods block LOS. Firing at units in Woods incurs a –1 DRM. There is no DRM for Shock, but round in favor of the defender when in a Woods hex.
PLAY NOTE: Hex B5824 is neither a Woods nor Orchard hex. The small collection of tree symbols is the famous “Copse of Trees,” which was the supposed objective of Pickett’s Charge. Treat the hex as clear for all purposes.
Marsh: Marsh hexes represent boggy or marshy ground that makes movement difficult, especially for wheeled vehicles. They have no effect on LOS or Fire combat. There is no DRM for Shock, but round in favor of the defender when in a Marsh hex.
Cemetery: Cemeteries are for historical interest only. They do not affect play.
Orchards: Orchards do not block LOS but do affect fire directed through one or more Orchard hexes. Any small arms fire through Orchard hex(es) carries a –1 DRM. This DRM is for fire through an Orchard hex, not for being fired on in an Orchard hex. If the target and firing hexes are both higher than any Orchard hex along the LOS, there is no effect; otherwise all small arms fire is always affected. Artillery fire at 4+ hexes is unaffected by Orchards in any way. Cavalry is halved in strength when Shocking or Charging a unit in an Orchard hex. When cavalry Reaction moves through Orchards, count the hex as clear for UDD purposes (i.e., round the movement cost down to 1 MP).
Gettysburg: It is challenging to move through the town of Gettysburg, except on streets (inclusively Roads, Pikes, and Trails/Alleys). The presence of buildings, fences, and other annoyances slows movement and hinders any unit formation cohesion. Additionally, fighting in town is disjointed and disorganized.
Moving in Town Disorder any unit that enters or exits a Town hex and does not use street movement. The movement cost to exit a Town hex into a non-Town hex is the same as entering unless using a street. If already Disordered, there is no additional effect. Ignore any additional hexside or hex cost when moving from a Town hex to a non-Town hex. Attack Order units treat Town hexes like Woods for all facing changes [SR 7.22]. Units in town cannot Refuse nor form Extended Line. If an enemy unit moves or advances adjacent to an Extended Column unit in town, the Extended unit immediately Disorders and retracts into either hex. If already Disordered, it loses 1 SP in addition to the retraction. If an Extended Column unit has only one of its parts in town, both hexes are treated as in town for this rule.
Fire Combat in Town When in a Town hex, units firing:
-
Have a maximum of 1 SP that can fire out of each frontal hexside. Because of the limited LOS, the two frontal hexsides cannot target the same hex but may fire at targets at different ranges: i.e., the targets need not be adjacent (an exception to SR 10.15).
-
Have no –3 DRM for firing at units in town (other DRMs may apply).
-
Units in town may not use Prepared Fire.
-
Units in town may fire down a street. They have a maximum range of two hexes [BB 10.23] in town. They may not target a hex outside of town if firing down a street.
-
Neither infantry nor artillery may fire down a street from outside the town.
-
Artillery may not fire from a Town hex. There is no Flank Fire DRM when firing on a unit in a Town hex.
DESIGN NOTE: Outside units could bring more arms to bear, but the LOS obstruction and protection of the buildings would be substantial.
Town hexes are one level higher than the base elevation of the hex. They block LOS normally unless firing down a street [BB 10.23].
Shock Combat in Town
- Town hexes limit maximum Shock strength to 4 SP per hex (offensively and defensively), regardless of the size of the unit.
EXAMPLE 1: Two adjacent stacks Shock a single hex. The defensive player could have up to 4 SPs, and the attacking player could have a maximum of 8 SPs.
EXAMPLE 2: A single attacking stack Shocks two enemy hexes. The attacking player could have a maximum of 4 SP and the defensive player could have a maximum of 8 SP. Assume all units are in Town hexes for both examples. Units outside of town may bring their entire strength to bear when Shocking a Town Hex.
-
When attacking a Town hex, there is no Continued Shock for attacker or defender.
-
Normal position DRMs apply to units Shocked in a Town hex.
Retreat in Town Units that retreat into a Town hex without following a street lose 1 SP. This SP loss is in addition to any other required losses. Units can be under any Orders and do not have to use March Order stacking to follow the street. If it is a stack that is retreating (even to separate hexes), only 1 SP is lost. The loss comes from the top unit.
Surrender and Line of Communication Units in Town hexes that are in the frontal hex(es) of enemy units may be required to surrender if they cannot trace a line of communication (LOC) to any friendly entry area. This LOC can be of any length but must use a Road or Pike while inside or exiting the town. Once out of town, the LOC may use any terrain to reach an entry area. The LOC cannot be traced through enemy units or hexes adjacent to enemy units unless a friendly unit occupies the hex. If, at the end of its Activation, a unit in town cannot trace an LOC and is in the Frontal hex of an enemy unit, it must UDD, with failure resulting in surrender. Collapsed units will add +2 DRM to their UDD. There is no effect if it passes. Units that surrender are immediately taken from the board and counted as lost SPs. The unit is removed from the game and cannot be used for Straggler Recovery. Units in town without a LOC cannot Ammo Resupply. Both Union and Confederate units are affected by this rule. Gettysburg town limits have a dotted/dashed outline to delineate what is considered a Town hex. Hexes inside this dashed line are considered Town.
PLAY NOTE: Hex B3520 is a Town hex.
Rocky Hexes: Rocky hexes represent exceptionally large boulders and difficult terrain for movement. Refer to the TEC. They have no DRM effects on Fire or Shock, but round down in the defender’s favor in Shock. Exception: Skirmishers, if not overstacked, receive a –1 DRM when fired upon in a Rocky hex.
DESIGN NOTE: Unlike the earlier map editions, we have limited the effects of rocky terrain to areas with large or very dense rock formations. Although some areas in the various hills may qualify as rocky, the sloping terrain effects should take care of the issues that moving units would face.
Sloping Ground Hexes: Sloping Ground represents sloping or uneven terrain. These hexes are used to show both rough terrain and more pronounced sloping when adjacent to a Slope hexside. Sloping Ground hexes do not affect incoming fire but do affect artillery firing out of the hex (–2 DRM). Shocking from a Sloping Ground hex to the same or higher elevation carries a –1 DRM. This effect is cumulative with a Steep Slope hexside (i.e., –2 DRM). There is no effect when shocking lower terrain levels. Sloping Ground hexes affect movement; refer to the TEC.
Slopes: Gradual Slopes are hexsides with one contour line and no hatching slope graphic. They have no effects on Fire or Shock. Steep Slopes have a hatching slope graphic and may have any number of contour lines. Steep Slopes have the following properties:
-
Small Arms Fire from any lower-level hex at any distance through a Steep Slope hexside to a unit adjacent to that Steep Slope carries a –1 DRM. Artillery Fire at 4+ hexes is not affected. Fire from terrain as high as or higher than the target hex through a Steep Slope hexside does not have a modifier.
-
Non-artillery units adjacent to and firing through a Steep Slope at a lower adjacent hex have a –1 DRM. Do not apply this DRM when firing at a lower hex at two or more hex range.
-
Artillery units adjacent to and firing through a Steep Slope at a lower adjacent hex have a –2 DRM for Fire at that hex. Additionally, if Shocked through a Steep Slope from a lower hex, artillery cannot Rapid Fire when using Pre-Shock Fire. Artillery firing through a Steep Slope at a higher adjacent hex have a –1 DRM (first bullet point above) but are otherwise unaffected.
PLAY NOTE: This is an alteration of SR 10.67, Artillery and High Ground, second bullet, and reflects the problems with artillery depressing their barrels in these situations. They had no such problem when firing uphill.
-
Shocking across a Steep Slope to a higher level carries a –1 DRM.
-
Steep Slope hexsides affect movement; refer to the TEC.
-
For LOS purposes, Steep Slopes are considered non-Gradual (regardless of the number of elevation changes). If there are continuous Steep Slope hexsides (e.g., Little Round Top), continue to apply –2 DRM for artillery fire to the lower target hex fired on through an adjacent Slope hexside. The –2 DRM is not cumulative and is applied only once no matter how many Steep Slope hexsides are crossed.
EXAMPLE: Hazlett’s battery would have a –2 DRM firing (disregarding other modifiers) on either 5 TX or 4 TX because of the continuous Steep Slope hexsides between it and the targeted units. Both the firing hex and the target hex must be adjacent to a Steep Slope hexside.
The Unfinished Railroad: Construction on the railroad stopped when the war broke out. Treat the Unfinished Railroad as a Trail.
Railroad Cuts: Where railroad construction had cut through hills, it left gorge-like passes. Railroad Cuts (hereafter RR Cuts) have the following properties:
- Advance Order units moving into or out of, or Advancing into or out of, a RR Cut hex will Disorder and end their movement unless following the path of the unfinished railroad and using March Order stacking limits. Attack Order units will always Disorder and end their move when entering, exiting, or Advancing, regardless of how they enter or exit. If already Disordered, there is no further effect on any unit. This does not preclude a Good Order unit from moving adjacent to an enemy unit, as Disorder occurs after it enters the new hex.
EXAMPLE 1: An Advance Order unit with 8 SP would need to be in Extended Column and follow the unfinished railroad path to enter the RR Cut without Disordering and ending its move.
EXAMPLE 2: A 2 SP Attack Order unit would Disorder and end its movement regardless of how it entered the RR Cut.
-
March Order units cannot enter or leave a RR Cut hex unless following the path of the unfinished railroad.
-
Artillery can only enter or leave a RR Cut through an Unfinished Railroad hexside.
-
Artillery cannot fire out of a RR Cut hex.
-
Advance and March Order units cannot retreat through, into, or out of a RR Cut hex unless following the path of the Unfinished Railroad and capable of using March Order stacking limits. That is, if the unit is larger than what March Order stacking allows and is not extended before the required retreat, it may not use the RR Cut hex. Attack Order units may not retreat through, into, or out of a RR Cut.
-
If unable to retreat when in a RR Cut hex, units lose 2 SP for each hex of retreat unfulfilled.
-
All units in a RR Cut, under any Orders, can only Shock from the hex if following the path of the Unfinished Railroad.
-
There is no Continued Shock when Shocking into or from a RR Cut hex.
-
Units in a RR Cut hex are considered one elevation level lower than the elevation of the hex. This does not change the elevation of the hex itself.
-
Units in a RR Cut hex can only be fired at by units directly adjacent to the hex or by units that have a straight LOS down the unfinished railroad line to the RR Cut hex and are within five hexes of the target. Units cannot shoot through a RR Cut hex into another hex using this fire.
-
If using the Skirmish Order option, Skirmishers do not Disorder when entering or exiting by movement, Advance, or Retreat, nor do they end their movement if not following the path of the Unfinished Railroad.
Example of LOS into a RR Cut Hex:
[Diagram not reproduced: it labels the fire modifiers for adjacent units firing into the target RR Cut hex.]
Hexes with stars have LOS to the red target. The dotted line denotes hexes with LOS down the Unfinished Railroad and within range. Fire modifiers for adjacent units firing into the red target RR Cut are shown. Other fire modifiers (such as range or firing through an Orchard hex) are not shown.
-
Adjacent units firing on an enemy unit in a Railroad Cut hex receive a +2 DRM (cumulative with other modifiers) if not in a RR Cut themselves.
-
Units in a RR Cut always have a –2 DRM when firing at any target (cumulative with other modifiers). They do not receive the +2 DRM for firing at another unit in a RR Cut hex.
-
Units in a RR Cut cannot use Prepared Fire.
-
No unit may Shock Assault into or out of a RR Cut hex unless following the path of the unfinished railroad. All units Shocking from a RR Cut hex will Disorder (Exception: Skirmishers do not Disorder). The Disorder from Shocking occurs after the Defender’s Pre-Shock Reaction Fire [SR 11.11, Step 5]. If already Disordered, there is no additional effect.
The Lott’s Ridge Bridge: On Map A, across the RR Cut between 1522 and 1723, there is a bridge. Treat it like any other bridge, with the following exceptions:
-
Units may use this bridge only when moving from 1522 to 1723 or vice versa.
-
A unit—or its Extension—may not end movement in hex 1623 when using the bridge.
-
If there is an enemy unit (including artillery) in hex 1622, 1623, or 1523, a unit may not use the bridge. The bridge has no effect on LOS.
DESIGN NOTE: The Lott’s Ridge Bridge was only about 10 yards across; the cut is very narrow and incapable of holding more than a few men at a time.
Rock Hexsides (Devil’s Den): These two hexsides represent the massive formation of rocks in the famous Devil’s Den area. They pose a serious obstacle to infantry movement, and neither cavalry nor artillery may cross. Artillery adjacent to these hexsides may not fire through them. For LOS purposes, treat them as a Steep Slope. Refer to TEC for full effects.
Farms/Buildings: Hexes containing any number of buildings (other than Town hexes) add +1 to unit movement costs to account for fences, out-buildings, etc. Farms/buildings also have defensive benefits for Skirmish Order units, if not overstacked.
PLAY NOTE: Tiny slivers of houses or house shadows encroaching on an adjacent hex do not count as a Farm.
Watercourses: The map has four types of watercourses (Creeks, Difficult Streams, Streams, and Brooks). Creeks and Streams are hexside features; Brooks are in-hex. Creeks are impassable except at bridges and fords. Streams of both types are a lesser obstacle and can be crossed with an additional movement cost (Exception: Artillery may not cross Difficult Streams). Brooks only affect artillery movement and are ignored if using any Road, Pike, or Trail to enter and leave the hex or if any Road, Pike, or Trail crosses the Brook regardless of how the artillery unit enters or leaves. Multiple brooks in a single hex are treated as one.
PLAY NOTE: Rock Creek, despite its name, is treated as a Stream, Creek, or a Difficult Stream depending on the location. The hexsides from B5707/5708 to B6605/6606 inclusive are treated as a Creek and have a darker blue Creek symbology to denote those hexsides. Some other hexsides have a dotted dark blue symbology, denoting a crossable but deep and difficult area. North of Culp’s Hill, it is treated as a normal Stream.
Bridges: Bridges can only be used by units under March or Advance Orders adhering to March Order stacking. Infantry and cavalry Advance Order units pay +1 MP to cross a Bridge. Artillery and any March Order units cross without an additional MP cost.
Fords: Fords represent shallow crossing areas for both Creeks and Streams. Assume a Ford exists where a Trail or Road crosses any Stream or Creek and no Bridge is shown. A Stream Ford has no additional movement cost for any unit other than artillery. Creek Fords provide a way to cross these deeper and wider waterways and carry greater movement costs. Artillery will auto Disorder if using a Creek Ford. When using a Road or Trail and crossing a Ford, treat both hexes as if connected by the Road/Trail and add the full cost of the Ford.
Stone Walls: Most farmers had collected stones over the years out of their fields and created Stone Walls to delineate their properties and restrict livestock movement. Stone Walls give a defensive benefit for small arms fire when the target unit is adjacent to the wall. Stone Walls have two-sided facing for their defensive benefit, i.e., the defensive fire benefit can be gained on either side. However, only one side benefits when two units/stacks are adjacent to the same Stone Wall hexside. If they are enemy units, the first unit to reach the Stone Wall with their frontal hexside “owns” it. If all the adjacent enemy units leave (for any reason), the remaining unit/ stack receives the benefit. Although it should be obvious and easy most of the time, First to the Wall markers are provided to help players keep track in questionable situations. To receive the benefit or “own” the Stone Wall, the unit’s frontal hex(es) must face the Stone Wall hexside(s). This includes Refused frontal hexes. Units do not receive the Stone Wall benefit if fired on through the flank or rear hexsides. March Order units do not receive Stone Wall benefits. They cannot “own” the Stone Wall nor deny benefits of the Stone Wall to an enemy unit. Stone Walls do not affect movement. However, cavalry cannot Charge through a Stone Wall or Charge a unit that has an adjacent Stone Wall between it and the cavalry. The defending unit need not face the Stone Wall for this benefit. Although Stone Walls give no Shock benefit to a defender, round down in favor of the defender that is Shocked by a unit through a Stone Wall. The defending unit need not “own” the Stone Wall.
Mounted cavalry units do not receive Stone Wall benefits. However, they deny benefits of the Stone Wall to enemy units if they are first to the wall as defined above. Artillery Reaction moving through a Stone Wall adds +2 DRM to its required UDD. See BB 9.64. When Breastworks are built on a Stone Wall hexside, ignore the Stone Wall—use the Breastworks rules for both combat and movement. If the Breastworks are later removed, the Stone Wall is treated normally.
DESIGN NOTE: Stone walls in 1863 Adams County were generally piles of rocks two to three feet high, not the mortared walls frequently seen in Gettysburg today. Although they could be a detriment to livestock wanderings and an obstacle to wheeled vehicles, they could be crossed. At the scale of 125 yards per hex and with the need to have Stone Walls shown as a hexside feature, it is impossible to show all the openings available to artillery and cavalry units.
9.48 An artillery unit moving into a hex that costs 5 MP or greater rolls for Disorder. If the DR is equal to or less than the MP cost of the hex, the unit Disorders. Artillery that suffers a 2nd Disorder when attempting to enter terrain loses an SP and returns to the hex it attempted to enter from. Its Activation is finished. The Three Days of Gettysburg – Deluxe Edition map contains hexes where artillery movement costs (including hexsides) exceed 8 MP, preventing entry by foot artillery [SR 9.42]. In addition, horse artillery cannot enter a hex through a specific hexside if the movement cost exceeds 8 MPs (exception to SR 9.42).
PLAY NOTE: Some of these hexes could be entered through a hexside with a lower cost.
9.49 At the southern end of Maps C and D, several Roads/Trails allow players to move from one entry hex to another if they so wish. Players may use these Roads/Trails to either enter as reinforcements or leave the playing area of the map (exception to SR 9.13). No unit may move adjacent to an enemy unit using an off-map Road/Trail. Off-map units cannot Fire at units on the map or be fire targets from on-map units. Units in hexes separated by thick black hexsides are not considered adjacent and cannot trace LOS through the hexside. The Map D off-map road carries special limits:
-
Confederate units may not use the off-map roads on Map D.
-
Union units entering by D7026 from the map may only exit by D7033 or their original entry hex (D7026).
-
Union units entering at D7033 or D7017 may exit at any location.
9.64 Artillery using Reaction Movement through a Stone Wall adds a +2 DRM to the required UDD for that movement. If already Disordered, a 2nd Disorder stops the unit in the hex entered through the Stone Wall in addition to the required loss. Roads, Pikes, and Trails do not affect this die roll.
9.7 Reinforcements
9.75 All reinforcements enter through the Entry Area listed in the scenario. Entry areas consist of a Direct Entrance hex (the one with the Road/Pike) and may have several adjacent Border Entrance hexes. Unless specified differently by the scenario instructions:
-
Units entering from the Direct Entrance hex may use any type of Order they wish.
-
Units entering from a Border Entrance hex must use Advance or Attack Orders.
-
Enemy units may not move adjacent (i.e., there must be at least one hex in between) to any Entrance hex (Direct or Border) until all reinforcements for that Entry Area have arrived or chosen a different entrance.
-
Reinforcements arrive with four Activations (or their equivalent if under March Orders), unless specified otherwise on the Arrival Charts. Reinforcements may have a different number of Activations than their command on map. Players may decide which AMs to skip for the lesser of the two. Reinforcement Entry Area hexes are notated by inclusive arrows on the map border, except for Area 11 on Map C and Area 15 on Map D. Those hexes are outlined in blue and count as the first hex for MP purposes. When using the additional 4th map, some Entry areas are changed, and additional Entry areas created. Refer to the four-map Reinforcement Arrival charts for units that are affected.
10.2 Line of Sight
10.23 For LOS purposes, treat Town hexes like Woods unless the fire is directed straight down a street.
EXAMPLE: A unit in B3618 could not fire at a unit in B3819. A unit in B3619 could fire at a unit in B3819. Fire down a street is limited to 1 SP and a maximum range of two hexes. Fire down a street is limited to firing units in town firing at a target hex in town. Units outside of town cannot fire down a street at a target, and units in town cannot fire down a street at units outside of town.
10.24 Canopy of Trees
Canopy of Trees is modified as below (subsection b): LOS may not be traced through a lower Woods hex adjacent to a wooded target hex or a wooded firing hex (due to the canopy of the trees) unless:
a. The adjacent Woods hex is lower than both the firing and target hexes and
b. The base elevation change between the two Woods hexes is a Steep Slope hexside, regardless of number of levels.
10.24 Exceptions to the Slopes Rules (add) §
- Three Days of Gettysburg Shadow Exception. For firing units and target units on different levels:
- An intervening higher elevation adjacent to the lower unit always blocks LOS if there are lower hexes between it and the higher unit (i.e., think of a valley between the higher unit and the blocking elevation).
EXAMPLE: An artillery unit firing from Cemetery Hill (hex 4920) could not fire upon the units in hexes 4826 or 4926 directly behind the higher ground in hexes 4825 or 4925. It could fire upon hexes 4827 or 4927.
10.46 Opportunity Fire
§ Non-Phasing infantry and cavalry may fire at Phasing units that use SR 9.42, Exception 2, to move adjacent to them. Opportunity Fire uses the same rules as Return Fire, except that its trigger is enemy Movement, rather than enemy Fire. For game purposes, this counts as the non-Phasing unit’s Return Fire. If the Phasing unit using SR 9.42, Exception 2 stacks with an existing unit in the hex, there is no Opportunity Fire.
10.67 Artillery Fire at Adjacent Hex (modification to Series Rules)
Artillery units adjacent to and firing through a Steep Slope at a lower adjacent hex have a –2 DRM for fire at that hex. Additionally, if Shocked through a Steep Slope from a lower hex, artillery cannot Rapid Fire when using Pre-Shock Fire. Artillery firing through a Steep Slope at a higher adjacent hex have a –1 DRM but are otherwise unaffected (i.e., they can Rapid Fire when using Pre-Shock Fire).
10.91 Ammo Depletion (if using Ammo Supply rules) A player may, as an option, fire infantry or dismounted cavalry without a –2 DRM when at Low Ammo. When using this option, the unit automatically Ammo Depletes afterward. A unit splitting its fire completes both fires before depleting.
12.23 Elite Units
Infantry units (only) with a Good Order Cohesion of 8 or 9 only Collapse after losing more than two-thirds of their original strength. Up to that limit, they may Rally normally. A chart is provided below. As a mnemonic reminder, these units are denoted by a black outline around their Cohesion boxes on both the front and back of the counters.
HISTORICAL NOTE: Many elite units on both sides continued to defend and attack courageously, even after horrendous losses. This rule reflects that.
| Original SPs | Collapsed when SPs ≤ |
|---|---|
| 14 | 4 |
| 13 | 4 |
| 12 | 3 |
| 11 | 3 |
| 10 | 3 |
| 9 | 2 |
| 8 | 2 |
| 7 | 2 |
| 6 | 1 |
| 5 | 1 |
| 4 | 1 |
| 3 | n/a |
| 2 |
n/a = not applicable
12.24 § Unless stacked with or adjacent to any friendly unit (except other Collapsed 1 SP units), a 1 SP Collapsed will surrender if an enemy unit moves or Advances adjacent to it. Simply pick the unit up and remove from the map. The removed unit counts as a loss for all purposes. Advance Order units may move adjacent to a Collapsed 1 SP unit with an +1 MP cost. The Advance Order units cannot move adjacent if that would also place them adjacent to normal infantry units or if the Collapsed unit does not qualify for surrender as described above. Any number of Collapsed 1 SP units can be captured by a single enemy unit moving adjacent. The “capturing” units may continue to move if they have the MPs or Advance if they have the ability.
PLAY NOTE: Some playtesters felt it was too easy to stop enemy Advance Order units with a sacrificial lamb in the 3rd edition full battle. Players should not use this option when using smaller scenarios that have few units or many low SP units.
12.32 Artillery Losses
§
- Good Order artillery with a Cohesion of 7 or 8 that fails a UDD from fire may take a 1 SP loss instead of Disordering. A Good Order artillery with a Cohesion of 8 may take a 2 SP loss instead of a D result. These losses are in addition to any loss required by a numeric result on the fire table. An artillery unit cannot use this option if it would eliminate the unit.
HISTORICAL NOTE: The artillery at Gettysburg, especially among the Union batteries, took greater losses than perhaps in any other battle of the American Civil War.
12.45 Artillery that Retreats through a Stone Wall hexside must UDD with a +2 DRM. Failing the UDD causes a loss of one gun; passing has no effect. Pikes, Roads, and Trails through the Stone Walls do not affect this DR.
12.7 Leader Casualties
§
12.77 Leaders stacked with units either Shocking or defending against Shock make a Leader Casualty check. This roll occurs during Step 6b of Shock Resolution and is in addition to any other rolls required by Step Losses. It occurs before any required UDD. This roll is made for each completed Shock and Continued Shock. For Continued Shock, roll for each additional 6b Shock Resolution.
13.1 Unit Combat Effectiveness (addition)
Collapsed: An infantry unit with Good Order Cohesion of 8 or 9 is on its Disordered side and is at less than one-third strength.
13.2 Brigade Combat Effectiveness
Count infantry half-regiment units (i.e., 26th NC a & b and 24 Michigan a & b) and cavalry “battalions” (e.g., 9 VA a & b) as regiments for BCI purposes. For example, if a cavalry brigade of 4 regiments had 11 battalions, at least 6 of the battalions would need to be Eliminated, Collapsed, or Routed for the brigade to be Combat Ineffective.
14.0 Special Units
14.1 Green Units
No units in Three Days of Gettysburg – Deluxe Edition are denoted as Green.
DESIGN NOTE: The designer could find little historical record of the untested units at Gettysburg displaying the characteristics of Green units as defined in the Series Rules. Many performed exceptionally well. The design gives them a Cohesion value corresponding to their performance, with some having a significant drop on their Disordered side. For the most part they gave satisfactory service, but few were tested under great duress. Bad circumstances might have brought their “greenness” to light.
14.21 Dismounted Cavalry
Both Union and Confederates have Dismounted cavalry.
14.25 Horse Holders (change)
For the purposes of Fire and Shock strength, all 3- and 4-SPs dismounted cavalry units subtract 1 SP from their strength to account for the fellows holding the horses. Their strengths are red with white outlines as a reminder. Units with a current strength of 1 or 2 SPs are not affected. Dismounted cavalry must have a strength level of 4 SPs in the hex to Refuse (at least 1 SP for each frontal and Refused frontal hex).
14.26 Cavalry regiments of 5 SPs or larger are broken down into sub-units of 4 SPs or fewer. For game purposes, these sub-units are called cavalry battalions.
14.4 Skirmishers § Skirmisher units are an option described in the Skirmisher rules section.
14.5 Berdan’s Sharpshooters
Berdan’s Sharpshooters—the 1st US SS and 2nd US SS—were specially trained sharpshooters and are somewhat independent units.
-
The two units are attached to Ward’s brigade of Birney’s division (2/1/III) and activate with that brigade. However, they are considered In Command for all purposes if within the range of any III Corps brigadier or division leader.
-
They have specially equipped Sharps breechloading rifles. Use the BR (SS) row for fire results range DRMs. They may fire out to six hexes (see Range Effects Chart).
-
They cannot adopt Attack Orders. If Ward’s brigade adopts Attack Orders, the two units remain under Advance Orders.
-
They may not Shock offensively; this does not preclude continued Shock as the defender.
-
The two units incur a +1 DRM when defending in Shock, even when stacked with other units.
-
They receive a –1 DRM benefit if fired upon by small arms or artillery at less than four hexes if not stacked with any other unit (including the other Berdan SS unit).
-
They may adopt Skirmish Order (if using Skirmisher rules or if called for by the scenario). Use the specific US Sharpshooters Breakdown counters when doing so.
14.6 Breakdown Units
There are two infantry units represented by regimental breakdown units. They are the 24th Michigan from the Iron Brigade (1/1/I Corps) and the 26th North Carolina from Pettigrew’s brigade (Heth’s Division, III Corps). The Breakdown units are treated as normal units in all ways. Treat them as separate regiments for Brigade Combat Ineffectiveness calculations.
PLAY NOTE: These units were picked for two reasons. First, they are large regiments that required an extended line to avoid the artillery fire DRM for massed units; the 26th North Carolina requiring an unwieldy three-hex extension (the only unit in the game to do so). Second, the Iron Brigade showed a tactical finesse that is more easily shown with the flexibility that comes with two smaller units instead of one large one. Although the 26th will have greater flexibility, its two breakdown units are still massed targets unless they extend.
Although arguments could be made to do this with other units, there was a desire not to increase unit count above what this version of the game already has. In some scenarios, specific Union batteries are broken into sections to better reflect the tactical realities of their fight.
15.0 Engineering
15.12 (change) For Breastworks Construction:
-
Units must be within 20 hexes of an enemy infantry unit to be eligible for starting Breastworks construction. They may be at any distance when completed.
-
During the night, Breastworks can be built in a Woods hex, a hex that is adjacent to a Woods hex, a Building/Farmhouse hex, a Rocky hex, or along the Stone Wall hexsides of a hex. Breastworks cannot be built in Marsh or Town hexes. Breastworks require only one night turn for construction.
-
During the day (including Dawn and Dusk), Breastworks can only be built in Woods hexes. They require two turns to complete.
-
No construction hex can be adjacent to an enemy unit when construction is started.
-
Construction requires a minimum of 4 SP per hex. Multiple units can be stacked to achieve the required SP; all must obey the construction rules and be stacked underneath the Breastworks Construction marker.
-
All SP requirements include subtracting for horse holders if cavalry is used to construct Breastworks.
-
§ 6 SP or more in a hex may construct Breastworks covering three hexsides. You cannot use this rule to create three Breastworks hexsides if a standard two hexsides in the building hex would connect two separate Breastworks lines.
PLAY NOTE: The eligible hexes have been changed. Rocky hexes have been added, but Orchard hexes and the extended range of hexes available in the Series Rules have been severely curtailed. The requirement for enemy units to be within 20 hexes is there to prevent as much “Déjà vu” building as occurred in the 3rd edition. We created the optional rule allowing three hexside construction to allow players to construct a solid line of breastworks when the hexes are not in a straight line or to shield the end of the breastwork line. It is not meant to allow players to create traverses.
15.18 Level Two Breastworks
Level Two Breastworks (L2) are extensive defensive works that take considerably more time to construct than normal Breastworks; however, they give greater defensive benefits to units that occupy them.
L2 Breastworks:
-
May only be built in Woods.
-
May only be built on existing Breastworks hexsides, using the same Facing as the underlying Breastwork.
-
Use normal Breastworks construction rules except that four turns are required to complete.
-
Cannot be started or built during Night turns.
-
May only be built by Union units.
-
Are limited by the counter mix (13 total).
-
Have the same effects and beneficial DRMs as regular Breastworks except the DRM is –2 for Shock and –2 for Fire into the hex through the Breastworks hexside.
-
Units receive the normal Breastworks benefits while constructing L2 Breastworks.
16.0 Night
16.11 (change)
Command Ranges are not halved for Dawn and Dusk turns. The Fire Table DRM remains in effect.
16.13 Night Turns
There are three night turns during each 24-hour period in the game. They each represent multiple hours of different lengths of time. Both the first (2000-2100) and the third (0200-0300) are treated like normal night turns. The mid-night turn (2200- 0100) has the following special rules:
-
All Activations, under any Orders, incur Fatigue for infantry and cavalry. The normal exceptions (Rally, leader movement, facing change, attached artillery movement, etc.), do not apply (i.e., don’t Activate a brigade unless you want to increase Fatigue!). March Order units incur Fatigue commensurate with the Activation equivalent of their movement minus one—with a minimum of one Fatigue level. E.g., if an infantry unit moved up to 6 MPs in March Order, it would incur one level of Fatigue; 7-12 MPs would incur one level of Fatigue; 13-18 MPs would incur two levels of Fatigue, 19-24 MPs would incur three levels. This is an exception to SR 17.22 limiting Fatigue for Activations.
-
Artillery movement is limited to one hex per Activation except for artillery on Roads or Pikes (not Trails). It cannot enter a hex with a movement cost greater than 3 MP. Artillery starting an Activation on a Road or Pike must remain on a Road or Pike if moving more than one hex.
-
March Order units pay +1 MP additional for each hex not on a Road or Pike.
-
Leaders that move during the Commander Movement Phase are unaffected.
-
Reserve Status is not negatively affected, and no Reserve actions cause Fatigue.
-
Any Breastworks construction in this turn will Fatigue the brigade by two levels. Units may neither Fire, Shock, nor move adjacent to an enemy unit in this turn. Artillery may not move closer than four hexes (three intervening hexes) from an enemy unit, even if SR 9.55 Option 2 is being used. If within three, it must move further away if it moves at all. If a unit is adjacent to an enemy unit at the beginning of an Activation, it may move away, but it is not required. It will incur Fatigue. There is no Withdrawal Fire. Brigades that do not Activate for the entire turn recover Fatigue normally per SR 17.42.
16.2 Straggler Recovery
16.22 (change)
For eligible commands [SR 16.21], the player makes a DR for each In Command unit (infantry and cavalry) in the brigade that is eligible to recover stragglers. For non-Collapsed units with a Good Order Cohesion of 7 or less, on a roll of:
-
0-2, increase its SP by one.
-
3-9, there is no effect. For non-Collapsed units with a Good Order Cohesion of 8 or 9, on a roll of:
-
0-1, increase its SP by one.
-
2-9, there is no effect. For a Collapsed unit with an original Good Order cohesion of 7 or less, on a roll of:
-
0-1, increase its SP by one.
-
2-9, there is no effect. For a Collapsed unit with an original Good Order cohesion of 8 or 9, on a roll of:
-
0, increase its SP by one.
-
1-9, there is no effect. When rolling for cavalry units, use their Dismounted cohesion levels (i.e., they will always roll as a 7 or less cohesion unit). Cavalry also have a –2 DRM when rolling for Straggler Recovery.
DESIGN NOTE: Cavalry units seldom suffered losses as high as those portrayed in our games. For our purposes, we assume that cavalry losses represent more fatigue and disorganization than actual casualties.
16.25 Artillery Recovery
§ Artillery units that do not move or fire during the three consecutive night turns may recover 1 SP at the end of the third night turn Recovery phase. Mark them with an In Reserve marker as a reminder. When placed in Recovery, these units must be at least 10 hexes away from any enemy unit. The artillery units’ Recovery is not affected by enemy units that move closer during the three turns. No roll is required for recovering the SP. If desired, players may voluntarily remove the artillery from Recovery (at any point in a turn—including an enemy Activation). However, no SP will be recovered. No unit can ever recover to its original starting strength, including artillery if using this option.
DESIGN NOTE: Why this departure from GBACW’s system rules? For this battle the better regiments tended to lose strength from actual casualties (i.e., killed, wounded) versus the straggling or “run off” that lesser morale units might have. This makes losses harder to recover. As a historical side note, the Iron Brigade never recovered from the slaughter on July 1st. The rebuilt remnant of the unit routed for the first time in the Battle of the Wilderness on May 5th, 1864.
18.0 Special Artillery Rules
(Also see BB optional rule 12.32)
18.1 Artillery Accuracy and Overshoot
18.11 At ranges of eight hexes or more, artillery may overshoot or miss their target (Exception: Do not apply to the Whitworth unit). After rolling the die for the fire results but before applying them, roll again using the Overshoot table to see if the fire is accurate. That roll determines if the fire affects the target hex or hexes beyond the target hex, or scatters with no effect.
18.12 Overshoots affect the hex one or two hexes further along the LOF. The fire is directed on the hexes directly beyond the target based on an extension of the LOF. If one hex beyond the target is a hexside, roll again; odd, target the left hex; even, target the right (judged by the view from the firing position).
18.13 A Scatter result does not affect the target hex or any other. It is a wasted shot. No Return Fire is allowed.
18.14 There is no LOS requirement to the new hex, and the original fire results are applied regardless of differences in terrain, range, and/or unit density. All Return Fire rules are in effect for the original targeted hex (i.e., the original targeted hex and adjacent hexes could Return Fire as if they were fired upon with no effect).
18.15 Overshoots can exceed the maximum ranges for artillery. (Exception: Overshoots from H12s and H24s cannot exceed their stated ranges. Treat any out-of-range Overshoot from these units as a Scatter.)
18.16 Vacant hexes cannot be targeted in the hope of an Overshoot.
18.17 Confederate artillery add a +1 modifier to their Overshoot DR.
DESIGN NOTES: Artillery, in general, and especially at Gettysburg, frequently overshot its target; and the longer ranges on the Deluxe 3DoG REC have been modified to be more effective when artillery fire hits its target. This rule brings the negatives of firing at long range into the system. Additionally, the Rebel artillery had serious problems with their fuses, and the CSA modifier is a simple way to show that effect. Finally, it highlights the benefits of enfilade fire. Firing down the length of a line of units now has its advantages.
PLAY NOTE: Some testers did not like the additional time required to adjudicate long-range shots. However, in real-time play, the easiest way to determine all firing results is to use three dice simultaneously; one for fire effect, one for a UDD if required, and one for Overshoot. If a player is superstitious about their opponent rolling against their Cohesion, the firing player may roll two dice simultaneously: one for the fire and one for Overshoot.
18.2 Simpler Artillery Accuracy
§ For players who do not want to deal with the additional rules overhead and wristage of Overshoot, use the traditional Range Effects Chart. Although there is no Overshoot, the negative fire DRMs at longer ranges are significant.
18.3 Artillery Leaders and Combined Fire
§
18.31 Phasing artillery, when firing at 4+ hexes, may combine the fire from adjacent hexes (LOS permitting) if one of the firing hexes contains the brigade officer of the same formation. This combination is limited to two adjacent hexes, and only artillery batteries under the leader’s direct command can combine in this fire.
18.32 This only applies to Phasing artillery brigade leaders who are stacked with their artillery command, not to infantry officers, cavalry officers, or higher-level artillery commanders. Non-phasing artillery cannot combine fire.
18.33 Any Ammo Depletion roll affects all the units. If the participating artillery units are at different ranges, use the longest-range modifier for the attack.
18.34 Both stacks may change a single vertex before firing (simultaneously).
18.35 Any Return Fire on either hex that causes Disorder or a gun loss requires a Leader Casualty check regardless of what hex the artillery leader is in. Only the specific brigade leaders are required to make this special check, and it replaces the normal Leader Casualty check. No other leaders are affected for this specific rule. Leader Casualty checks that would be required on any Leader are still in effect (i.e., they are in an affected hex that took an SP loss).
18.36 If using the Overshoot rules, the Phasing player may pick either firing hex to judge the Overshoot hex (if it makes a difference).
18.37 Replacement artillery officers cannot combine fire from adjacent hexes.
18.4 Artillery Ammo Expenditure and Ranged Fire
§ Artillery firing at ranges of eight hexes or more goes to No Ammo if rolling a natural 0. This is in addition to normal Ammo depletion rolls (change to SR 10.69).
PLAY NOTE: This rule is more about controlling the ahistoric use of artillery than simulating actual ammo usage. Players fire more at long range than their historical counterparts when there is little downside. Using this rule will bring that fire more in line with reality. This rule is strongly recommended for the larger scenarios, such as the full 2nd day. It is not needed for the short, small scenarios.
19.0 Random Events
§ Place the Random Events AM in the Draw Cup along with the AMs for both sides at the beginning of every Daylight (not Dawn or Dusk) turn. When the Random Events AM is drawn, roll two different-colored dice and refer to the Random Events table.
-
By mutual agreement, players may ignore any Random Event they do not care for.
-
Do not use Random Events before 1300 on July 1st.
-
The use of Random Events is not suggested for smaller scenarios.
Skirmisher Rules
DESIGN NOTE: The 1st Day at Gettysburg is perhaps the showcase for what effectively led and trained dismounted cavalry could do. Buford used his men’s skirmishing abilities to slow the Confederate advance on Gettysburg so that the Union infantry corps would have time to arrive and ultimately deploy on the excellent defensive ground south of town, probably saving the Union from defeat. The following rules are used to simulate that struggle and other small unit contests. These rules will add complexity and time to the game. We do not suggest using them unless you are a player looking for the ultimate simulation or want to play a small scenario designed specifically for Skirmisher use. Seldom will use of the Skirmishers change the course of battle. Skirmish Order is loosely based on the excellent Open Order rules created by Greg Laubach and Bill Byrne. While much is similar, Skirmishers in 1863 do not pack the punch or have the staying power of the loose formations of 1864 portrayed in Death Valley. Skirmish Order is in addition to Advance, Attack, and March Orders.
2.7 Terminology (Please Read!) Disperse: A type of retreat by Skirmish Order units that allows them to avoid Shock. This is in addition to normal retreat from Shock. Formed unit: Any unit that is not a Skirmisher. Parent: A unit that detaches a Skirmish unit or a unit that is replaced when it creates Breakdown Skirmishers.
§ Skirmish Breakdown units: Skirmish units created when their parent unit is replaced. They are denoted by number (1, 2, 3, …). Skirmish Detachments: Skirmish units created when the player detaches them from their parent unit. They are denoted by letter (A, B, C, …). Skirmish Order: An inclusive term for all Skirmish units; it is in addition to other Orders.
4.2 Chain of Command
4.22 Skirmish Detachments are considered In Command if they are within five hexes of any non-Collapsed unit of their brigade. The five hexes cannot be traced through an enemy unit or any hex adjacent to an enemy unit unless occupied by a friendly unit. Skirmish Breakdown units are considered In Command if they are within five hexes of any non-Collapsed unit of the division that they belong to or are attached to. The five hexes cannot be traced through an enemy unit or any hex adjacent to an enemy unit unless occupied by a friendly unit. Neither Breakdown units nor Detachments may extend the command range per SR 4.22’s exception. Skirmish units that begin an Activation Out of Command Range must place themselves within Command Range before the end of that Activation. This can be accomplished either by moving the Skirmisher, moving units that can be used for command, removal of any enemy obstacles, or any combination of those three. Skirmishers still Out of Command at the end of the Activation are eliminated.
6.0 The Orders System
6.15 Advance Orders An activated combat unit under Advance Orders: (addition)
- May move adjacent to a Skirmish Unit. The Advance Order unit pays an additional 1 MP to do so.
PLAY NOTE: Units under Attack Orders do not pay the +1 MP.
6.4 Skirmish Order
6.41 There are two types of Skirmish units; specific Skirmish Breakdown units created by a breakdown of their parent unit, and generic Skirmish Detachments that any eligible infantry or Dismounted cavalry unit may create. Only certain units may create Skirmish Breakdown units or create a Skirmish Detachment. All Skirmish units are 1 SP and have a cohesion of 7.
-
Select infantry units (see list in BB 6.44) are eligible for Skirmish Order if they are not Disordered, in Extended Column, or under March Orders. These units have breakdown counters to represent their Skirmisher formations and become Skirmish units as a substitute for their normal formation. When changing to Skirmish Order, substitute the original unit with Skirmish counters bearing the same designation in the hex, retaining the original facing. If there have been losses, the number of Skirmishers created is limited to the current SPs of the unit.
-
Any infantry unit not Disordered, in Extended Column, or under March Orders with a Cohesion of 6 or more may create up to two Skirmish Detachment counters that operate under Skirmish Order. These Skirmisher Detachments are discrete, with a letter (e.g., a, b, c, etc.) designation. Place the created Skirmisher counter in the same hex as its parent, and lower the original unit’s strength by the number of skirmisher counters created. Denote the Cohesion of the parent unit when they are created, either writing it down on scratch paper or by putting a strength marker equal to the Cohesion under the Skirmisher.
-
Extended Line infantry may detach Skirmishers. Place the Skirmisher(s) in either hex. If detaching lowers the Extended Line unit below 8 SP, it retracts at the end of the Activation.
-
Any 4 SP Dismounted Union cavalry unit not Disordered or under March Orders with a Cohesion of 6 or more (when Dismounted) may create up to two cavalry Skirmish Detachments. 3 SP and 2 SP Dismounted cavalry units are limited to creating one cavalry Skirmisher Detachment.
PLAY NOTE: Dismounted cavalry that creates Skirmishers may remount in a later Activation.
PLAY NOTE: Cavalry units Dismount at the beginning of an Activation before movement. Skirmishers are created at the beginning of a unit’s movement. So, a mounted cavalry unit could Dismount and create Skirmishers in the same Activation.
- A unit cannot create a Skirmisher Detachment if the detachment of the SP would cause Collapse or eliminate the unit. If the unit later Collapses, it does not affect the Detachment. Units recover immediately when combining enough Skirmishers to be above the SP limit for Collapsed. They are still Disordered. Detachments must combine with a unit in the brigade with the same or lower Cohesion as the original parent unit, unless all such units are killed or Routed, in which case they may be combined with any remaining unit in the brigade with the lowest Good Order Cohesion. No unit can combine with a Skirmisher if that would increase its strength over its original value. If all units in a brigade are killed or routed, any Skirmisher of that brigade is removed at the end of the Activation (Phasing or non-Phasing) where this occurs. It is eliminated. The terms Skirmisher or Skirmish Order unit denote both types of units (Breakdown and Detachment). Where the rules are different, the specific type is listed.
6.42 Creation of Skirmishers Eligible units can:
-
If within command range of their brigade commander, switch to Skirmish Breakdown units or create Skirmish Detachments at the beginning of movement.
-
Units outside their commander’s range may do the same if the individual unit passes a UDD. Failing the UDD has no effect other than that no Skirmish Breakdown unit or Detachment is created. The UDD is rolled at the beginning of the specific unit’s move. The 1st and 2nd US Sharpshooters are always considered In Command for Skirmish Breakdown purposes. No Skirmishers can be created while the parent unit (or extension) is adjacent to any enemy unit.
6.43 Combining Skirmishers To combine a Skirmish Detachment with a parent unit (infantry and Dismounted cavalry):
-
The units must be stacked.
-
Up to two Skirmishers may combine with a single parent unit (if otherwise allowed) in a single Activation.
-
The combined unit is finished for the Activation (whether it absorbs one or two detachments).
-
Both parent and Skirmisher may have fired and/or moved before combining.
-
The units need not be In Command.
-
Disordered Skirmishers do not disorder parents when combining.
-
When combined, remove the Skirmish Detachment(s), and adjust the SPs of the parent unit.
-
The parent unit cannot be adjacent to an enemy unit when combining.
-
There is no movement cost to combine.
To combine Skirmisher Breakdown units:
-
All component Skirmishers must be stacked together.
-
They combine at the end of all component units’ movement and are finished for the Activation.
-
They may have moved and/or fired before combining.
-
If only one Breakdown unit is left of the parent, it may reconstitute the parent unit at the end of movement without stacking.
-
They adopt their brigade's Orders or adopt Advance Orders if they do not belong to a brigade.
-
Ignore the Disorder status of the Skirmish Breakdown units when re-creating the parent unit – the parent is always created with Good Order. Exception: After combining, if the parent unit does not have sufficient SPs to avoid Collapsed status, it is Disordered. Once Collapsed, the parent unit may not Breakdown until it recovers stragglers sufficient to recover from Collapsed status.
-
Recombining units need not be In Command.
-
They cannot be adjacent to an enemy unit when combining.
-
There is no movement cost to combine. To combine a Skirmish Detachment with Mounted Cavalry:
-
The cavalry must be adjacent or move adjacent to the Skirmish unit and pay 1 MP to absorb the SP (terrain does not affect the cost, but uncrossable hexsides prohibit combining).
-
The Skirmisher can be adjacent to an enemy unit and is not subject to Withdrawal Fire.
-
The parent unit cannot be adjacent to an enemy unit.
-
After combining, the cavalry unit may continue to move if it has the necessary MP.
6.44 A unit in Skirmish Order is not affected when its parent unit or brigade changes from Advance to Attack Orders or vice versa. It remains in Skirmish Order until combined with its parent unit. If the parent brigade changes to March Orders, units remaining in Skirmish Order are eliminated, unless their parent unit is Out of Command and remains in Advance or Attack Orders.
6.45 Skirmish Order Breakdown Units Skirmish Order Breakdown counters are provided for the units below: USA: 1st and 2nd US Sharpshooters, III Corps. CSA: 3rd GA Sharpshooter Battalion, Wofford’s Brigade, McLaws’ Division In addition, Skirmisher Detachments can be created by the units described below: USA and CSA: Ten 1 SP generic infantry Skirmish Detachment counters. These may be created by any eligible infantry unit [BB 6.41]. USA only: Ten 1 SP generic cavalry Skirmish Detachment counters. These may be created by any eligible cavalry unit [BB 6.41]. These are hard counter limits. Scenarios may deviate from that limit or allow regiments not listed above to fully breakdown into detached Skirmishers.
PLAY NOTE: Players may, for simplicity, agree to limit Skirmish Order to the 1st and 2nd US Sharpshooter regiments only unless playing any scenario requiring use of Skirmishers.
DESIGN NOTES: 1) Players will note that Skirmish Breakdown units may have higher Disordered Cohesion than their parents, reflecting how that specific unit was trained and used. 2) Units with a Cohesion of 6 are allowed to detach Skirmishers with a Cohesion of 7, a recognition that Skirmishers frequently were hand-picked from the best soldiers of the regiment. 3) Detachments are universally armed with rifles if infantry, and breech-loading carbines if cavalry. This is a simplification for game play.
8.0 Stacking and Extension
8.2 Stacking and Movement
8.22 Any friendly combat unit can freely move through a Skirmisher unit without penalty and vice versa (i.e., there are no additional MPs or UDD).
8.6 Skirmish Order
8.61 Units in Skirmish Order can stack up to 2 SPs per hex and still receive Skirmisher benefits. If stacked with formed units or in violation of this limit, Skirmishers do not receive Skirmish Order benefits until they comply with the stacking limit. Skirmisher units, when overstacked with any units, still have a –1 DRM when firing. For formed units, there is a +2 DRM for Shock if all overstacked defending units are in Skirmish Order. If fewer than all but at least half or more SPs are Skirmishers, there is a +1 DRM in a Shock.
8.62 A unit in Skirmish Order cannot stack with formed units except infantry or dismounted cavalry units of its brigade. Skirmishers cannot stack with artillery. Continue a retreat as needed if a Skirmisher would be forced to stack with ineligible units. If stacked with other non-Skirmish units, Skirmish units are always on the bottom. Changing stacking order with a Skirmisher does not constitute movement for any unit.
9.0 Movement
9.55 Artillery and Enemy Skirmisher Units If using Option 1, artillery may move within three hexes (two intervening hexes) of Skirmishers but no closer. If using Option 2, in addition to the stated DRMs and restrictions, artillery ending its move within three hexes and LOS must undertake the stated UDDs, but Skirmishers only add a +1 to the DRM if there are least two or more. Only +1 is added to the DRM, regardless of the number of Skirmishers above two.
EXAMPLE: An artillery unit ending its move within two hexes of a Skirmisher and within three hexes of an infantry regiment would have a +3 DRM: +1 for the infantry regiment, +2 for ending a movement within two hexes of the enemy (the Skirmish unit), and no DRM for the Skirmisher, as it requires two Skirmishers to affect the DRM.
9.56 Advance Order Units Moving Adjacent Advance Order units when moving or attempting to move adjacent to a Skirmisher will pay an additional 1 MP. This additional cost is assessed even if the Skirmisher Reaction moves away from the designated hex. Artillery may not move adjacent to Skirmishers.
9.61 (add)
- If not already in the frontal hex of an enemy unit, Skirmish Order units may Reaction Face any number of vertices without a UDD when any enemy moves or Advances adjacent or fires at it.
9.8 Movement in Skirmish Order
9.81 A Skirmish Order unit’s movement allowance is that for Advance Orders, no matter what the orders of its parent brigade. Skirmish Order units do not pay movement costs to change Facing. They always have full movement on the Activation they are created (specifically, Skirmishers created by a cavalry unit that Dismounted in the same Activation have their full movement allowance).
9.82 Skirmishers may not move adjacent to enemy units unless the enemy units are in Skirmish Order. They may Advance adjacent to any enemy unit.
9.83 Units in Skirmish Order can Reaction Move (Retreat) like cavalry [SR 9.63], with the following differences:
-
Reaction Movement can be triggered only if an enemy unit would otherwise move or Advance adjacent. The triggering unit is required to move to the specified hex regardless of whether the Skirmisher Reaction moves.
-
Units in Skirmish Order do not add a DRM for entering non-clear hexes or any terrain hexside when conducting their UDD following a Reaction Move.
9.84 When using Withdrawal Movement, units in Skirmish Order do not UDD for hexes costing more than 1 MP to enter.
9.85 Skirmish Order units may fire with an additional –1 DRM and move half of their movement allowance. See BB 10.10.
9.86 Skirmishers do not Disorder and are not required to stop when entering or exiting a Railroad Cut hex or Town hex, regardless of how they entered or exited.
9.87 Skirmishers pay a maximum of 3 MP per hex regardless of terrain entered or hexside crossed. Prohibited terrain is still prohibited.
PLAY NOTE: Skirmisher units do not have a lowered Movement allowance on their Disordered side.
10.0 Fire Combat
10.10 Fire Combat and Skirmish Order
-
Skirmish Order units fire with a –1 DRM.
-
Skirmish Order units are not eligible for Prepared Fire.
-
Skirmish Order units may fire or move normally when activated. In addition, a Skirmish Order unit may fire with an additional –1 DRM (–2 DRM total) and move half their movement allowance (rounded up). They may Fire at any point in their movement.
-
All fire targeting units in Skirmish Order incurs a –2 DRM in addition to any terrain benefit. Shot and Shell versus Skirmish Order units applies the usual Dispersed Target DRM if applicable (i.e., the Skirmisher would benefit from both DRMs).
-
Fire directed at Skirmish Order units through their flanks does not receive the +1 DRM for Flanking Fire.
-
Skirmish Order units receive an additional –1 DRM from Small Arms Fire if fired upon in a Farm or building hex.
-
Skirmish Order units do not Ammo Deplete.
-
If not overstacked, two stacked Skirmish units may combine their fire if stacked together at the beginning of the Activation. The two units may not move when combining fire. They may change facing simultaneously, as needed.
11.0 Shock Assault
11.2 Requirements for Shock
11.23 Skirmish Order and Shock
-
Skirmish Order units may only Shock attack defending Skirmishers.
-
Skirmish Order units do not receive a Charge bonus and are not required to Shock if moving adjacent to an enemy Skirmisher and not Firing.
-
Skirmish Order units suffer a –1 DRM when Shocking alone.
-
They may not Continue Shock, offensively or defensively. Ignore any Shock Resolution instructions for Shock Continuation.
-
When units (under any Orders) Shock attack only Skirmish Order units, treat a Bloody Stand Off as a Stand Off (no SP losses).
-
When defending in the same Shock with adjacent Attack or Advance order units, do not use any terrain benefits that the Skirmish Order unit would normally receive. Count the terrain benefits of the non-Skirmish Order units only.
-
Skirmish units by themselves are not affected by positional DRMs for Shock, either offensively or defensively. Nor do they subtract from an enemy attacker’s positional value if the enemy attacker is in their frontal hex. If defending with a non-Skirmish unit, they are subject to the positional DRM affecting that unit.
-
Attack/Advance Order units shocking only Skirmishers receive a +2 DRM. The attacking force may include friendly Skirmishers.
-
Advance Order units that moved adjacent to Skirmishers may Shock in the same Activation. Because they are under Advance Orders, this is not a Charge and they incur a –1 DRM for Shock.
-
Units Shocking only Skirmishers do not incur a –1 DRM for no brigadier present.
-
Skirmishers combining with Attack Order units do not incur the –1 DRM for Shock.
11.3 Pre-Shock Resolution Skirmish Order and Retreat Before Shock Retreat Before Shock for Skirmishers: When the target of a Shock Attack, a Skirmisher may Retreat Before Shock (Exceptions: Cavalry and Charging Infantry; see below.) Skirmishers always UDD when they Retreat Before Shock. If already Disordered, failing the UDD requires a 2nd Disorder UDD. Refer to 2nd Disorder table. Disperse: When the target of a Shock Attack, a unit in Skirmish Order may also opt to Disperse, retreating up to three hexes away from the unit threatening the attack, passing through friendly units and/or enemy Frontal hexes. This includes regular Shock attacks from enemy cavalry. It may not Disperse if already Disordered. After dispersing, the unit is automatically Disordered. When the target of a Shock Attack, a unit in Skirmish Order may:
-
Retreat or Disperse before Shock if attacked by other Skirmish units.
-
Retreat or Disperse before Shock if attacked by Advance order infantry.
-
Retreat or Disperse before Shock if attacked by Attack order infantry that is not charging.
-
Only Disperse before Shock if Charged by infantry.
-
Only Disperse before Shock if attacked by cavalry that is not Charging, unless in a Woods, Rocky, or Farm/Building hex. If in a Woods, Rocky hex, or Farm/Building hex, they may retreat.
-
Skirmishers may not Retreat or Disperse when being Charged by cavalry. They may Reaction move as the Charging cavalry moves adjacent. However, the required UDD has a +3 DRM unless the Skirmishers are in a Woods, Rocky, or Farm/ Building hex. Refer to Skirmisher Retreat from Shock Matrix for more clarity (located at the end of the Skirmisher rules).
11.37 Step 4: Defender’s Pre-Shock Cohesion Check Skirmishers that receive a 2nd Disorder from their Pre-Shock Cohesion Check either UDD if Shocked by Skirmishers only or are Eliminated if Shocked by formed units (even if attacking Skirmishers are involved).
11.45 Step 6b: Resolve the Shock Skirmishers that receive a 2nd Disorder from Shock either UDD if shocked by Skirmishers only or are Eliminated if Shocked by formed units (even if attacking Skirmishers are involved).
11.48 Step 6e: Apply Post-Shock Automatic Disorder Attacking units do not suffer Post-Shock Disorder when shocking only Skirmish Order units.
Skirmisher Retreat before Shock Matrix (use when Skirmishers are defending in Shock):
| Attacker is a… | Skirmisher | Advance-order infantry | Attack-order infantry not Charging | Attack-order infantry Charging | Non-Charging cavalry | Charging cavalry |
|---|---|---|---|---|---|---|
| Skirmisher Retreat before Shock | Yes | Yes | Yes | NO | NO* | NO** |
| Skirmisher Disperse | Yes | Yes | Yes | Yes | Yes | NO** |
* Skirmishers may Retreat before Shock from non-Charging cavalry if they are in a Woods, Rocky, or Farm/Building hex (regardless of other terrain in the hex).
** Skirmishers may only Reaction move as the Charging cavalry moves adjacent. They UDD after with a +3 DRM. A 2nd Disorder results in automatic elimination (i.e., do not refer to the 2nd Disorder table). There is no +3 DRM if they are in a Woods, Rocky, or Farm/Building hex (regardless of other terrain in the hex).
12.0 Combat Results
12.49 Skirmish Order and Retreat
-
A stationary unit in Skirmish Order must UDD if a unit not in Skirmish Order retreats through its hex, but any stationary unit (including Skirmishers) does not conduct a UDD if a unit in Skirmish Order retreats or disperses through its hex. Exception: March Order units UDD if a Skirmish unit retreats/Disperses through their hex.
-
Formed units may retreat through an enemy frontal hex if it is occupied by Friendly Skirmisher(s) (SR 12.44, 4th bullet).
-
If retreating into the hex of a friendly unit would violate stacking rules, continue retreating the Skirmish unit to a legal stacking hex.
-
All units (including artillery) may freely retreat through hexes adjacent to enemy Skirmishers. Skirmishers do not count as the closest enemy unit when determining retreats.
-
Skirmishers may be immediately absorbed when voluntarily retreating or Dispersing before Shock into a parent unit’s hex. The parent unit cannot be adjacent to an enemy unit. The combined unit is incapable of Prepared Fire afterward in that Activation.
-
Skirmish Order units do not lose SPs from retreating into or from Town hexes and not using a street.
-
Skirmishers can retreat into a RR Cut from any adjacent hex. They do not need to use the Unfinished Railroad.
12.55 Skirmish Order and Rout Skirmish Order units do not Rout. When required to roll a 2nd Disorder UDD, failure results in elimination. Passing the UDD requires a two-hex retreat. Some failed 2nd Disorders automatically eliminate the Skirmishers (Shock and Pre-Shock Cohesion Checks when Shocked by formed units). See the Skirmisher column on the 2nd Disorder Table for specifics.
13.0 Combat Effectiveness and Rally
13.23 Skirmisher units of Combat Ineffective brigades are limited to 2 AMs.
13.41 Skirmisher units do not lose 1 SP when rolling an adjusted 9 or higher for Rally. Skirmishers cannot Rally when adjacent to an enemy formed unit. They may attempt to Rally when adjacent to enemy Skirmishers with the standard +1 DRM.
15.1 Constructing Breastworks Skirmish Order units may not build Breastworks or contribute to Breastworks construction.
17.0 Fatigue 17.22 CAUSE 1:
Exceptions: (addition) Combining with Skirmishers where the parent unit does not expend MPs does not incur Fatigue. CAUSE 2:
Exception: (addition) Advance or Attack Order units that only Shock Skirmish Order units do not incur Fatigue.
17.27 Skirmish Order and Fatigue Skirmish Order units do not cause or earn Fatigue for their brigade. However, if activating for a fourth time in the same turn, the Skirmish unit must UDD with a +3 DRM before moving or firing. Skirmishers failing this roll Disorder. There is no effect if already Disordered. Neither Rally attempts nor any facing change trigger this additional UDD.