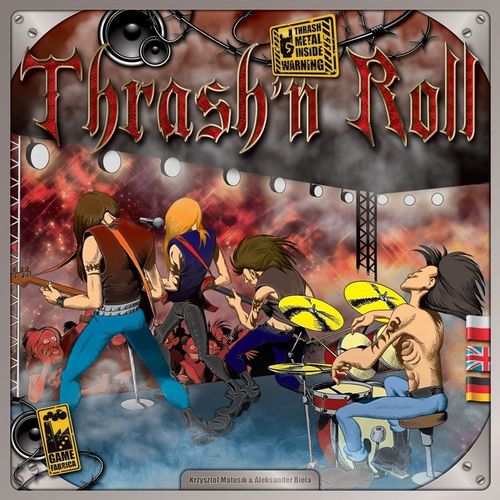
Thrash'n Roll
Thrash'n Roll Rulebook
Table of Contents
Table of Contents
Game components
- main board,
- 5 band boards,
- 60 support cards (support deck),
- 25 scandal cards (scandal deck),
- 40 fan cards (fan deck),
- 25 dice (5 in each of 5 colors),
- 2 neutral dice (white),
- 5 wooden score discs (in 5 colors),
- 10 wooden cubes (2 in each of 5 colors),
- wooden time marker,
- 100 skill markers (20 in each of 5 types),
- 130 popularity markers (26 in each of 5 colors),
- 30 record markers (6 in each of 5 colors),
- 8 Assassin markers,
- 5 statuette tokens,
- rulebook.
The band board
The band board depicts your band. It contains four sections:
(A) Gear level track: It shows how advanced your band's gear is. Each time you raise the gear level, you mark it by moving the wooden marker on the gear track to the next space.
(B) Timing level track: It shows how well your band members play together. Each band member gains experience and skill in their own field, but what indicates how well the band performs live is timing. Each time you raise the timing level, you mark it by moving the wooden marker on the timing track to the next space.
(C) Popularity track: Popularity markers are placed here. Each time you gain a fan, your popularity rises. You mark it by taking the marker which is the closest to the start of the track and placing it face up next to your board. If the marker shows a bonus, you get this bonus (see: fan deck).
(D) Place for skill markers: You store your skill markers here.
Game setup
Before your first game, punch all the elements out of the frames and sort them.
- Unfold the main board and place it on the table so that each player can easily reach it (E).
- Shuffle each deck: support, fans and scandals, then place the decks face down next to the board (F).
- Take top three cards from the support deck and display them face up next to the deck – these are the available characters (G).
- Place all the skill and Assassin markers in stacks next to the board (H).
- Place the time marker on the first space on the time track (I).
- One of the statuette tokens serves as the first player marker. The remaining four may be set aside, they will not be used in the gameplay. The statuettes are only awarded at the end of the game.
The next steps are taken separately by each player:
- Choose your color (red, blue, green, yellow or black) and take all the components in this color: a wooden score disc, 2 wooden cubes, 6 record markers, 26 popularity markers and 5 dice.
- Place your score disc on space „0" on the fame track (J).
- Choose a band board and place it in front of you (K).
- Place one cube on each of the gear and timing tracks (L).
- Sort your popularity markers according to the numbers on their backs. Remove one marker from each group without looking at it. Then place the remaining popularity markers face down on the appropriate spaces on your band board (M).
- Draw 3 support cards from the top of the support deck (N).
- Place the record markers and dice next to your board (O).
You are now ready to play.
The player who screams "Assassin!" the loudest starts the game.
Game overview
The first player gets the first player marker (one chosen statuette token).
The game lasts 6 rounds. Each round is divided into 3 phases:
- Preparation phase
- Action phase
- Ending phase
The phases always happen in the same order. No phase can be skipped.
Phase 1: Preparation phase
During this phase the players roll all of their dice and place them next to their band boards without changing the results. These dice will be used in the next phase.
Phase 2: Action phase
Starting from the first player and continuing clockwise, players will take actions by placing their dice on locations. Each player may either take an action or pass. The player who has passed cannot take any more actions this round. The phase ends when everyone passes.
Phase 3: Ending phase
During this phase each player takes the following steps:
- Score points for albums and singles recorded.
- Take your dice off the board and place them next to your band board.
- The first player moves the time marker to the next space on the time track.
- The first player passes the first player marker to the next person (clockwise).
- Take the scandals caused this round to your hand.
- Lose fame points for the scandals in hand.
- The first player discards the available support cards and replaces them with new cards drawn from the top of the support deck.
- Each player may discard fan cards to receive a skill marker (see: fan deck).
The round ends now. If the sixth round of the game has just ended, proceed to the final stage of the game: The Thrash Metal Awards Ceremony, during which the players will be able to gain extra fame points. The game ends after the ceremony, and the player with the most fame points is the winner.
Taking actions
There are eight locations on the board. In each of them you may take one of the actions available there. Each action has a cost expressed in the number of dice. In order to take an action, place the required number of dice on the location. The dice used for taking an action must either have the same value or form a sequence.
Example of dice with the same value.
Example of dice forming a sequence.
If the action cost is one die, the number on the die does not matter. Dice used for taking an action remain on the location until the end of the round.
Locations have spaces on which players place their dice. They have different colors and symbols. Depending on the number of players, you may place your dice only on the spaces with appropriate symbols.
- Action cost – (A)
- Action type – (B)
- Spaces to put your dice on:
- for a 2-player game – (C),
- for a 3-player game – (C), (D),
- for a 4-player game – (C), (D), (E),
- for a 5-player game – (C), (D), (E), (F).
The detailed description of all the actions is available in section "Let's hit the city!" later in this rulebook.
Support deck
Each support card shows a character that might help you. It gives you an extra die of a given value, so that you can take a more expensive action. After playing a support card, place it face up next to the support deck. This is the discard pile for this deck.
You may use a support card in any location. When placing the dice there, you play the card and take the location action as if you placed one die more. Of course, you may play more than one support card in a single action, then you take the action as if you placed more dice. The dice shown on the cards have to match the dice you actually placed on the location (form a sequence or have the same value).
Each time you play a support card, you gain a skill marker matching the symbol on the card. Take it from the pool next to the main board and place it next to your band board.
Additionally, if you have played the card in the bonus location, you may use the character's special ability.
You can have no more than 5 support cards in hand. If you ever have more, you must discard the excess.
Support card layout: A – die value, B – bonus locations, C – special ability, D – skill symbol.
Characters' special abilities are described in section „Who can help you?" later in this rulebook.
You cannot pay for an action with cards only. Support cards are played only when placing dice (one or more) on a location. You can use a character's special abilitty only after taking an action.
Each time you take a card from the available support cards on display, fill the free space with the top card from the support deck.
Example: The player places 2 dice with values 3 and 4 (A) on the Thrashing Mall location. He wants to take the action which costs 3, so he plays the Technician card, showing a 5 die (B). In this way he is treated as if he placed 3 dice, with values 3, 4 and 5. Additionally, Thrashing Mall is a bonus location (C), so the player raises his gear level by 1 (D), but only after completing the action. The Technician card also shows a drums symbol, so the player takes a skill marker with this symbol and places it on his band board (E).
Fan deck
You gain fans during the game. You can have no more than 7 fan cards in hand. If you ever have more, you must discard the excess. After you gain a fan, you do two things:
- You draw the top card from the fan deck and add it to your hand.
- You take the lowest-valued popularity marker off your board and get the bonus shown on its back. After applying the bonus, return the marker to the box.
POPULARITY
The popularity track is shown on the board. When gaining fans, players take markers off this track, always with the lowest value, and then get bonuses shown on the markers. The band's popularity is equal to the highest visible value on the popularity track.
Bonuses on popularity markers
- cards icon – draw the top card from the support deck,
- guitar icon – raise your band's gear level by 1, mark it on the gear track on your band board,
- treble clef icon – raise your band's timing level by 1, mark it on the timing track on your band board,
- microphone icon – gain a skill marker of your choice, put it on your band board,
- single icon – move your single one space forward,
- album icon – move your album one space forward,
- camera icon – discard one of your scandals from hand,
- star icons 1 / 3 / 5 / 10 – gain respectively: one, three, five or ten fame points, mark it on the fame track.
Each time you discard a fan card, place it face up next to the fan deck. This is the fan discard pile. If the card has an Assassin symbol, place an Assassin marker on the location "Concert with Assassin". If there are no more Assassin markers available, you do not place one.
There are three ways to use fan cards
-
At any moment you can discard a fan card to re-roll one of your dice. You can do it multiple times, discarding one card per each extra re-roll.
-
In the ending phase you can discard two fan cards with the same skill symbol to gain a matching skill marker. You can do it multiple times if you have enough cards in hand. Place the markers obatined this way on your band board.
-
You can use fan cards to take a more expensive action in a location. When placing dice on a location, discard fan cards according to the following rules:
a) You must discard one fan card more than your action costs. E.g. if you placed two dice on a location, you must discard 3 fan cards to take an action which costs 3.
b) You cannot discard fan cards with the same skill symbols.
c) Fan cards can be combined with support and scandal cards (as explained later in this rulebook), but they must always be played last.
Fan card layout: A – skill symbol, B – Assassin symbol
Example: The player places 2 dice on the Broken Bone location (5, 5). He wants to take an action with the cost of 3, so he discards 3 extra fan cards with guitar, microphone and drums symbols. This enables him to take the action.
Scandal deck
When taking an action, you can cause a scandal, which will ensure you some short-term profits. When you cause a scandal, you take the top card from the scandal deck and place it face down next to your board.
You can only cause two scandals per turn. If there are already two scnadals next to your board, you cannot cause more this turn.
You can have no more than a total of 5 scandal cards in your hand and next to your board. If you have a total of 5 scandal cards, you cannot cause more or get more from other players.
Causing a scandal has ONE of the three effects
-
When taking an action, you can cause a scandal to take an action which costs one die more. Of course, you can cause two scandals in one action to take an even more expensive action. If you also use other types of cards during this action, scandals happen after playing support cards, but before playing fan cards.
Example: The player places his last die on the Metal Skull location. He wants to take an action which costs 2. After placing a die, the player draws the top card from the scandal deck and places it next to his board, then he takes the action.
-
You can cause a scandal to take an action which would exceed the location limit – if in this location there is no space to hold all the dice you want to spend on the action. Despite causing a scandal, you must still pay the required number of dice.
Example: The player wants to take an action which costs 2 in the Viper TV location, but there is only one empty space in the location. The player causes a scandal and places two dice on the location, then he takes the chosen action.
-
During the Battle of Hits, the player initiating the Battle may cause a scandal to automatically win the Battle.
The Battle of Hits is described in more detail later in this rulebook.
During the ending phase each player loses fame points for the scandal cards they have. The number of fame points lost is equal to the mathematical product of the number of the player's scandal cards and his band's popularity.
Example: In the ending phase the player has 3 scandal cards in hand, and his popularity equals 2. He loses 6 fame points.
Example: The player wants to take an action which costs 4 in the Thrashing Mall location. He places there a die that shows 2. Then he plays a support card, Music Teacher, which shows 1. 1 and 2 form a sequence. At this point the player can take an action which costs 2. He wants to take an action worth 4, so he causes a scandal, draws a scandal card and places it next to his band board. He's almost there, but he must do one more thing. He discards four fan cards with different symbols. Now he can take the action which costs 4.
If at any moment in the game any deck runs out, reshuffle its discard pile to create a new deck.
End of the round
The round ends after all the players have passed. In the ending phase the players take the following steps:
-
The players gain fame points for albums and singles they have recorded. The number of points is marked with stars on appropriate spaces. Additionally, the player who has the best single gains 2 extra points, and the player who has the best album gains 3 extra points..
-
The players take all their dice off the board and place them next to their band boards.
-
The first player moves the marker on the time track one space forward, then passes the first player marker to the next player in the clockwise order.
-
The players take the scandals they have caused this round to their hands.
-
If a player has scandal cards in hand, they lose the number of fame points equal to the player's popularity for each scandal card in hand.
-
The first player discards the 3 available support cards and reveals 3 new cards from the top of the support deck.
-
The players can discard fan cards according to the rules presented in section "Fan deck" to gain skill markers.
After completeing the above steps, the players are ready for the next round. If the time marker has reached the sixth space, the last round begins. After this round the game ends and the Thrash Metal Awards Ceremony takes place.
End of the game
The game ends after the sixth round. The players proceed to the final scoring. Before this happens, however, scandals are revealed. Each player shows their scandal cards and for each card they lose the number of fame points equal to the number of skill markers they have that match the symbol on the card.
Example: At the end of the game the player has three scandal cards in hand: two with the lead guitar symbol and one with the microphone symbol. On his band board the player has 5 skill markers with the lead guitar and 4 with the microphone. This means he loses 14 (2x5 + 4) fame points.
Thrash Metal Awards Ceremony
After exposing scandalists, the players take part in the ceremony and get awards in five categories: best vocalist, best lead guitarist, best solo guitarist, best drummer and best bassist. In each category the player with the biggest number of the appropriate skill markers gets the statuette.
In the case of a tie, the tied players add their popularity to the number of markers and compare the new results. If there is still a tie, the player with the best album gets the first place. Each award is worth 25 fame points, which is immediately marked on the fame track.
The player who has the most fame points after the award ceremony wins the game. In the case of a tie, the player with the highest scoring album is the winner.
Who can help you?
Bouncer Special ability: Draw a card from the top of the support deck and keep it. Bonus locations: Metal Skull, Broken Bone
Megafan Special ability: Gain 5 fame points. Bonus locations: Concert, Broken Bone
Radio DJ Special ability: Raise the position of your single by one. Bonus locations: Radio, Broken Bone
Technician Special ability: Raise your gear level by one. Bonus locations: Concert, Trashing Mall
Session musician Special ability: Raise your timing level by one. Bonus locations: Concert, SPV Records
Paparazzi Special ability: Give one scandal from your hand to another player. You cannot target a player who already has 5 scandal cards. Bonus locations: Metal Skull, Broken Bone
Music teacher Special ability: You take any chosen skill marker and place it on your band board. Bonus locations: Academy, Trashing Mall
TV Reporter Special ability: You take the lowest-valued popularity marker off your band board and get the bonus from this marker. Bonus locations: Viper TV, SPV Records
Manager Special ability: You can use another character's ability. Bonus locations: Thrashing Mall, Radio
Talent scout Special ability: You can change the value of one of your remaining dice by one (up or down). Bonus locations: Metal Skull, Academy
Bodyguard Special ability: You draw the top card from the fan deck. This does not technically count as gaining a fan, so you do NOT flip another popularity marker. Bonus locations: Metal Skull, Viper TV
Critic Special ability: You can raise the position of your album by one or lower the position of an opponent's album by one. Bonus locations: Academy, SPV Records
Let's hit the city!
You get a bonus in each location, regardless of the action taken. Bonuses are applied AFTER taking the action.
Metal Skull Club
Bonus: After taking an action in this location, you gain a fan.
Available actions:
- Cost 1: Draw the top card from the support deck.
- Cost 2: Draw top two cards from the support deck.
- Cost 3: Take one of the available support cards, you can also discard a scandal card from hand.
- Cost 4: Take two of the available support cards, you can also discard a scandal card from hand.
Academy
Bonus: After taking an action in this location, you gain a fan.
Available actions:
- Cost 1: Gain a skill marker of your choice.
- Cost 2: Raise your band's timing level by one.
- Cost 3: Raise your band's timing level by two.
Broken Bone
Bonus: After taking an action in this location, you gain a fan.
Available actions:
- Cost 1: Gain the number of fame points equal to the sum of your band's timing and gear level.
- Cost 2: Gain the number of fame points equal to the sum of your band's timing and gear level, and raise the position of your single by one.
- Cost 3: Gain the number of fame points equal to the sum of your band's timing and gear level, and raise the position of your album by one.
Trashing Mall
Bonus: After taking an action in this location, you gain a fan.
Available actions:
- Cost 2: Raise your gear level by one.
- Cost 3: Raise your gear level by two.
- Cost 4: Raise your gear level by three.
SPV RECORDS
Bonus: After taking an action in this location, raise your band's timing level by one.
Available actions:
- Cost 2: You can record a single. If you have a record marker on the singles hit track, remove it. Place a new marker on the position determined by the sum of your popularity and gear level.
- Cost 3: You can record an album. Place a record marker on the albums hit track on the position determined by: the value of the single plus the gear level plus the number of different skill markers you have plus a neutral die roll.
Example of how to record a single: You place two dice on the SPV Records location. Your gear level is 3 and your popularity is 2. You place a record marker on space 5 on the singles hit track.
Example of how to record an album: You place three dice on the SPV Records location. You have a single with the value of 4, your gear level is 3. You also have 4 vocalist skill markers and 2 bassist skill markers, which gives you two different types of markers. You roll a neutral die and get 5. You place a record marker on space 14 (4 + 3 + 2 + 5 = 14) on the albums hit track.
You can use fan cards to change the result on the die while recording albums.
Viper TV
Bonus: After taking an action in this location, you can discard a scandal card from hand or give it to another player.
Available actions:
- Cost 1: Gain the number of fame points equal to the sum of your popularity and the frontman's skill.
- Cost 2: Gain the number of fame points equal to the sum of your popularity and the value of your single, and raise the value of your single by one.
- Cost 3: Gain the number of fame points equal to the sum of your popularity and the value of your best album, and raise the value of your album by one.
Radio
Bonus: After taking an action in this location, raise the value of your single by two.
Available actions:
- Cost 1: Gain a fan and discard a scandal card from hand or give it to another player.
- Cost 2: Gain the number of fame points equal to the sum of your popularity, timing level and the result of a neutral die roll.
- Cost 3: Gain twice as many fame points as you have fan cards and draw the top card from the support deck.
Concert
This location has no dice limit.
Bonus: You remove all Assassin markers present on this location and gain as many fame points as markers you have removed.
Available action:
- Cost 5: You gain as many fame points as the sum of your gear level, popularity, frontman's skill and twice the timing. You can also discard any number of fan cards with different symbols from hand. For each discarded card you gain as many fame points as skill markers of a given type you have. Then you raise the value of your album by as many spaces as fan cards you have just discarded.
Example: You place 5 dice on the Concert location. You have the following skill markers: bass x3, microphone x2, drums x1, so your frontman is the bassist with the value of 3. You add your band's timing level x2 (3x2), gear level (4) and your popularity (2) to it. The result is 15 fame points. Additionally, you discard two fan cards (one with the drums symbol and one with the microphone) to gain 3 (2+1) extra fame points. Because you have discarded two fan cards, your album goes up by two spaces.
The Battle of Hits
If, after you have recorded a single or an album, you are to place your record marker on a space occupied by another player, "the battle of hits" starts. The player initiating the battle (entering the space on the track) can automatically win by using a scandal (see: Scandal deck). If the player does not decide to do that, the battle begins. All the players taking part in the battle roll a neutral die and add the result to their popularity. The player with the highest total result wins the battle. The winner stays on the space on the track, the loser must go down by one space. In the case of a tie, the player initiating the battle wins. If your marker is on the lowest space of the track and you are forced to move one space down, you take the marker off the board and back to your pool instead. During "the battle of hits" players can use their fan cards to re-roll.
After one battle ends, another one can begin if the loser's marker enters a space occupied by another player's marker.
FRONTMAN
Every band has a frontman, both in reality and in our game. Your band's frontman is the member with the most skill markers on the band board. The frontman may change during the game.
Example: GYou have the following skill markers: microphone x2, drums x3, solo guitar x2, lead guitar x1, bass x3. Your band's frontman is the bassist. The frontman's skill value is 3.