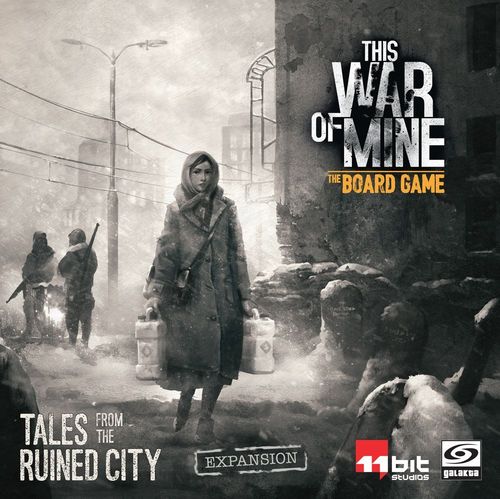
This War of Mine: Tales from the Ruined City
This War of Mine: Tales from the Ruined City Rulebook
Table of Contents
Table of Contents
Game Components
The expansion contains the following components (as listed on the booklet's Game Components page):
- Character Miniature and Card (Emira)
- Cat Miniature and Card
- 5 Miniatures (3 Thugs and 2 Farmers)
- 7 Desperate Measures Cards
- Wartime Diary I
- 22 Sewers Cards (12 Corridors and 10 Rooms)
- 8 Sewers Map Tiles and 1 Exploring Party Token
- 2 Chapter Objective Cards and 1 Narrative Action Card
- 5 Scenario Sheets (double-sided) with assorted cards, tokens and envelopes (listed on each sheet)
- 7 Farmers Cards
- 15 Wares Cards
- 1 Market Sheet (double-sided) and 1 Tolerance Token
Game Modules
Emira, the 13th Character
War took away everything people had. Homes, families and dignity of life. However I lost all that many years before.
Some of us get a particularly rough treatment from life, lose everything over a day, including the most valuable – hope and any fight that was left in them. Without knowing when, you simply become a shadow of the person you used to be, a dirty piece of the background. Before the war, you used to pass me by, looking away from me. It was impossible to pierce that invisible barrier that divided your fast lives from the existence of those who, for various reasons, were pushed aside. Yet we are also human beings.
When the war broke out, all were subjected to the same treatment and there are no barriers between us now. For the first time, since many years, you see a person in me, same as all the others around. I am no longer a homeless outcast, I am Emira again. I am better used to living like this, in hiding, in poverty and searching for leftovers. What made me an outcast now proves to be valuable knowledge. Welcome to my world. Don't think it brings me any joy. As much as everyone else, I wait for the end of this nightmare. Someday this must all change.
This module features 1 miniature and 1 Character card representing Emira, the Homeless. This module can be used freely with the base game whenever you play as this Character's story is already included in the Book of Scripts.
Before starting a new Campaign, shuffle Emira's Character card into the Characters deck and place her miniature in the box. Emira should be treated just the same as any other Character.
You can also meet Emira when resolving one of the scripts. If she is already in the game, simply ignore that script. Otherwise, use her card and miniature instead of following instructions from the script.
Emira card (Homeless)
- Prowess 0, Empathy 5, Inventory 3
- Quite OK: Once per Scavenging, Emira may add 1 Vegetable to the Findings Pile.
- Spirit – Habit: Discard 1 Moonshine or 100% Alcohol from the Storage or raise Emira's Misery by 1.
- Spirit: If Emira is hungry, lower her Hunger by 1.
- Spirit: If Emira is miserable (level 2 or 3), raise her Misery by 1.
The Cat
Beside all the people, many animals were trapped in the war-torn city as well. Pets used to be loved and taken care of, but now no one cares about them anymore, and they have to try to live through the conflict they don't understand. They fight their own war to survive at any cost...
This module features 1 miniature of the Cat and 1 card representing the animal. They are used if you come across the Cat in one of the scripts and decide to keep it under your roof in the Shelter.
In the Campaign mode, you may choose to start the game with the Cat already in the Shelter. If you do this, do not add 3 Raw Food to the Storage during Setup.
The Cat card
- Once per day, at any time, roll the Black die.
- Result = 1-4 – the Cat wandered off. It will be back tomorrow.
- Result = 5-7 – I've always liked cats... Lower the Misery of 1 chosen Character present by 1.
- Result = 8-10 – the Cat has brought something. Add 1 Raw Food to the Storage.
Desperate Measures
We know it sounds desperate... but what other choice do we have at those desperate times?
This module features 7 cards. These cards will come to your aid when things start falling apart. The Desperate Measures cards provide you with new possibilities. However, nothing is for free and most of the time there will be a choice to make. In order to obtain what a given card offers, a price must be paid, be it in risk or other factors.
The Desperate Measures cards become available once one of the Characters dies or abandons the group. All other rules for using them are described in their text.
When a Character is removed from the game, draw 1 Desperate Measures card. Keep it and use at any time as described on its front. If more than 1 Character is removed from the game at the same time, draw 1 Desperate Measures card for each of them.
Desperate Measures card texts (as printed; each card is kept and used as described on its front):
-
Hidden Stash – You have discovered a stash full of valuable stuff. Play during any crafting in the Shelter. Choose 1 token / resource type requirement when crafting a Fitting card and ignore it (do not discard any tokens / resources of that type). You may raise 1 chosen Character's Fatigue by 2 to build this Fitting immediately (during any phase) without spending an action. After using this card, remove it from the game.
-
Wait a Minute! – Play when a Combat is about to begin. Choose 1 Character present and roll the Black die, comparing the result with their Empathy. A result that is equal to or lower than that Character's Empathy = you were able to avoid the Combat. A result that is greater than that Character's Empathy = the Enemies perform a Backstab before Combat. After using this card, remove it from the game.
-
Stuff of Nightmares – Tonight, no one will dare approach our door. Those blood stains were a real omen... Play at the beginning of the Night Raid phase. Do not draw any Night Raid cards during this Night Raid phase. Additionally, roll the Black die and compare the result with the Empathy of each Character present in the Shelter. A result that is equal to or lower than a Character's Empathy = raise their Misery by 1. After using this card, remove it from the game.
Source note: the last words of the comparison line are partly covered by an overlapping card in the booklet; the bracketed wording above is the reading of the visible text.
-
Jokes and Hopes – Sometimes when things are really rough, a joke comes to mind and it just gets to the bottom of things. It is like a flashback of normalcy... Roll the Black die and compare the result with the Empathy of each Character present. A result that is equal to or lower than a Character's Empathy = lower their Misery by 2. A result that is greater than a Character's Empathy = raise their Misery by 1. After using this card, remove it from the game.
-
Through the Window! – Play at any time. Resolve 1 Shelter card (Furniture or Heap), even if it is not available yet (e.g. blocked by a Rubble, Closed Door, or Bars card) without spending an action. Roll the Black die. Result = 1-3 – 1 chosen Character suffers 2 Wounds.
Source note: the component list gives 7 Desperate Measures cards. The text of the five cards above is legible in the booklet; the remaining card(s) are not legible in this PDF and are not transcribed.
Incidents
Each day of this hellish siege is full of countless stories and personal drama. Yet there are tales that are so deeply moving, so important that they must be told no matter what.
This module is comprised of 5 completely new Scenarios and their accompanying game components. Each Scenario features 1 sheet, a set of cards and tokens used only with it and a closed envelope marked with a letter (from A to E).
The Scenarios allow you to enjoy shorter – albeit very intense and hard – games, introduce special rules as well as new elements and each of them tells a unique story. Below you can find a quick overview of each Scenario:
- Blood in the Snow: besides trying to survive, you must also investigate a near-murder case, casting suspicion on each other and your neighbors, with your bleeding friend standing at death's door.
- Refugees: a group of persecuted strangers enters the Shelter. Will you manage to keep them hidden from their enemies, at the same time cunningly using their presence to help you in ultimate survival?
- Epidemic: with thousands of corpses left unburied, a horrible disease starts ravaging Pogoren's populace. Staying alive becomes even harder and the only way is to obtain vaccines… by any means.
- Side By Side: what happens to good people when a war starts? What do you think would happen to your neighbors? Do you even know their names? Now, surviving becomes your common goal.
- You and Me: a Shakespearean romance among the ruins – Dina and Zoran are torn between their turbulent past and desperate presence, with the local safe area offering a chance to live a normal life.
All the information required to set up each Scenario-based game can be found on one side of the corresponding Scenario sheet. It also contains a list of all cards and special tokens required to play. Additionally, general rules for using Scenarios can be found in FAQ 905 in the Book of Scripts in the base game.
If a Scenario refers to a script, this script can be found in the Wartime Diary I, in the Incidents chapter under a proper heading.
Do not open any closed envelopes found inside the box until you are instructed to do so by a Scenario sheet (i.e. until you successfully complete a given Scenario).
Note: Each Scenario can be played on each side of the board, as well as with the use of any other game modules provided for This War Of Mine: The Board Game. However, choosing the advanced side of the board or certain modules may radically influence the gameplay and difficulty of a Scenario (e.g. the Farmers module in case of the Refugees Scenario). Therefore, it is recommended to play any Scenarios on the basic side of the board and without any modules (besides Emira).
Scenario Sheets
The five Scenario sheets are double-sided. Each sheet gives its own narrative, Setup and a list of the cards and tokens used. The Scenario sheet is the source for setup; general Scenario rules are in FAQ 905 of the base game's Book of Scripts.
Source note: the back sides of the Scenario sheets carry the charts and tracks that these Scenarios refer to (the Suspicions chart, the Cover and Condition tracks, the Blizzard track, the Neighbors' Needs tracks and the Visit the Neighbors table). They are not part of this 8-page booklet and are not reproduced here.
Blood in the Snow
What you see before you is almost beautiful. The world is covered in snow and there is only one exception – the red pool of frozen blood beneath your feet. As you look closer, you notice something glittering like diamonds in the snow. A knife? The blizzards of the last few days are something Pogoren has not seen for ages. The streets are empty, the fighting has calmed down. The city is even more of a dead shell than it has been lately. Everything is covered by a thick layer of snow. And it's still snowing. The visibility is often no more than a few meters. Even the snipers from across the river have left their stations. Instead of bullets now, it's the chill in the air cutting us down.
Yesterday though, something terrible happened. Luka, one of the four of us, was found behind our shelter, covered in blood. He had gone out to look for pieces of wood and found death instead. Almost. He's alive, but barely so – still has not woken up. There was a bloodied knife next to him. Our knife. Is one of us guilty? For so long we've lived in extreme conditions, but as mutual trust is beginning to dissipate, substituted by suspicions, it's becoming harder and harder to push through yet another day. We need to care for Luka and discover who tried to murder him, even if it was one of us. Maybe one of the neighbors saw something? Maybe they know something we do not? Luka might wake up and point to his attacker. We're watching others' behavior, over-analyzing each word, fish for hints and traces of evidence. Tonight somebody has brought back a long rope, in case we manage to find the attacker. When the time comes, when we are sure, we will need to capture and subdue the would-be murderer.
Setup changes
- Draw 1 OBJECTIVE card and place it on the Objectives space. Resolve it at the end of the game, while resolving script 1000 (Ceasefire), instead of resolving the Final Objective. If you do not manage to accomplish this Objective, you lose the game. Do not use any other OBJECTIVE cards when playing this Scenario. Remove them from the game.
- The NIGHT RAIDS and RESIDENTS decks should contain all of their cards. Do not remove any cards with a red corner.
- Remove the following cards from the VISITORS deck: STARVING NEIGHBORS, PLEASE HELP US!, DOCTOR, and BEGGARS.
- Place all of the FITTING cards (both those with a green corner and with an orange corner) in a single deck on the Fittings space. In this Scenario the Ideas space and the New Idea action are not used.
Construct the Events deck
Before constructing the Events deck, find and set aside the HARSH WINTER card. Then place Event cards on the Events space face-down (without looking at their fronts) in the following order:
- Shuffle 3 ENDING EVENT cards – this will be the bottom of the deck.
- Randomly draw 3 EVENT cards and stack them on top of the deck.
Starting Cold: Place 4 COLD tokens on the Cold space. Additionally, place the HARSH WINTER card on the Cold space.
Draw 3 Characters: Take the Character cards, shuffle them and draw:
- the first 2 RED-BORDERED cards
- the first BLACK-BORDERED card
Place the Character cards on the spaces on the back of this sheet. If new Characters join the group during the game, do not place their cards on these spaces. Place a MISERY LEVEL 2 token next to each Character. Place 1 SUSPICIONS token on the "0" space of each of 4 Suspicions tracks (3 tracks for the Characters and 1 for the Neighbors).
Starting Fittings: Find the SIMPLE HEATER and choose any 1 BASIC / ADVANCED FITTING card and place them on any empty Shelter spaces. Any advanced Fittings should be placed next to their prerequisite basic Fittings, according to the description on their backs.
Starting stuff: Place these on the Storage space:
- 2 WATER, 10 WOOD, 10 COMPONENTS,
- a KNIFE,
- any other TOKENS WORTH 20 or less
Scenario special cards:
- Place the WOUNDED LUKA card near the board and then place the CONDITION token on it on the Heavily Wounded level.
- Place the DAWN PHASE card on the Fate deck. You will need to resolve it at the beginning of each Dawn Phase, before drawing the Fate card.
- Shuffle 4 SPECIAL VISITORS cards into the Visitors deck.
Scenario special tokens: Place the ZIP-TIE token in the Storage. This token cannot be stolen, lost or traded in any way until the end of the game. The value of the token is 0. Finally, place the BLIZZARD token on the "3" space of the Blizzard track.
List of additional Blood in the Snow scenario items: BLIZZARD TOKEN; 4 SUSPICIONS TOKENS; CONDITION TOKEN; ZIP-TIE TOKEN; 4 SPECIAL VISITORS CARDS; DAWN PHASE CARD; WOUNDED LUKA CARD.
After finishing a game, please remember to find all the additional elements of the Scenario among the cards and tokens and pack them up separately, as they are used exclusively in this Scenario.
Blood in the Snow cards
- Dawn Phase card – Resolve this card at the beginning of each Dawn phase. If the Condition token is at the Heavily Wounded level, roll the Black die. Result = 8-10 – see Blood In The Snow script 2. If Wounded Luka was given Bandages: move the Condition token up by 1 and discard Bandages from Luka. If Wounded Luka was not given Bandages: move the Condition token down by 1. Make a roll on the Suspicions chart. Afterwards, shuffle this card back into the Visitors deck.
- Wounded Luka card – levels printed on the card: Heavily Wounded, Critical Condition, Dead. See Blood in the Snow script 1.
- Startling Revelation – A casual comment by one of our neighbors shed a completely different light on the whole story. Choose a Suspicions track with the lowest Suspicions level and raise its level by 2. Afterwards, shuffle this card back into the Visitors deck.
- Trust Issues – Who can we trust? Whenever the topic of the murder comes up in our house, everyone seems to avoid giving a direct answer. You may make a roll on the Suspicions chart and raise the Suspicions level on the proper Suspicions track by 2 (instead of 1). Afterwards, shuffle this card back into the Visitors deck.
- It All Falls Into Place – A neighbor gives us a hint during a conversation that turns out to be an essential piece to our puzzle. Raise the Suspicions level by 1 on 1 chosen Suspicions track. Afterwards, shuffle this card back into the Visitors deck.
- Is There Any Truth to the Gossip? – Who is responsible? Who had motive? After asking around the neighborhood, it turns out that nearly everyone could be under suspicion... Make 2 rolls on the Suspicions chart.
Refugees
When humanity is put to the test it easy to forget about those who are suffering even more than we are. A few remaining members of the minority have taken shelter under your roof. These people have lost all hope – don't let them lose the last bits of life they cling to.
There is a family living in our shelter's hidden cellar. Those people are hated by everyone, sought out by everyone as pests, subhuman, heretics. Blamed for everything wrong that happens to everyone else. They are made scapegoats only because of the tone their skin and their slightly different language, customs and preference for different clothing. They are people just like we are – we could find more differences between two random passersby than their folk and ours. And still, it's enough. When hatred and the burning desire for revenge are on the rise and there is no way to let go of them, when there are no answers to "who" or "why", any small reason is enough to direct all the anger at those who cannot fend for themselves.
These people cannot step outside even for a moment. They are prisoners whose escape would mean immediate and certain death. We are responsible for them now. Only we can gather food and medication for them. We need to care for not only our own survival, but theirs as well, or at the very least occupy them with something so that they can suffer their indignity in silence. Their lives are in our hands. Often enough, saving someone's life takes a truly huge toll. Few people would choose to pay it should they have a choice.
Setup changes
- Draw 1 OBJECTIVE card and place it on the Objectives space. Resolve it at the end of the game, while resolving script 1000 (Ceasefire), instead of resolving the Final Objective. If you do not manage to accomplish this Objective, you lose the game. Do not use any other OBJECTIVE cards when playing this Scenario. Remove them from the game.
- The NIGHT RAIDS and RESIDENTS decks should contain all of their cards. Do not remove any cards with a red corner.
- Remove the following cards from the NIGHT RAIDS deck: HOBOS, 2x LOOTERS, MEMORIES, and RAGING GANG.
- Remove the following cards from the VISITORS deck: all ARRIVAL cards, STARVING NEIGHBORS, and BEGGARS. Please notice: As this game will not involve any Arrival cards, there is little to no chance any new Characters will join the starting group.
- Place all of the FITTING cards (both those with a green corner and with an orange corner) in a single deck on the Fittings space. In this Scenario the Ideas space and the New Idea action are not used.
Construct the Events deck: Place the Event cards on the Events space face-down (without looking at their fronts) in the following order:
- Find the CEASEFIRE card in the ENDING EVENTS cards and place it on the bottom of the Events deck. Remove the remaining 2 Ending Event cards from the game.
- Randomly draw 5 EVENT cards and stack them on top of the deck.
Draw 2 Characters: Take the Character cards, shuffle them and draw:
- the first RED-BORDERED card
- the first BLACK-BORDERED card
Place a MISERY LEVEL 2 token next to 1 chosen Character. Place a HUNGER LEVEL 1 token next to 1 chosen Character.
Starting Fittings: Choose any 1 BASIC / ADVANCED FITTING and place it on any empty Shelter space.
Starting stuff: Place these on the Storage space:
- 2 WATER, 10 WOOD, 10 COMPONENTS,
- 2 MECHANICAL PARTS, 2 ELECTRICAL PARTS, 2 WEAPON PARTS,
- any other TOKENS WORTH 20 or less
Scenario special cards:
- Place the DAWN PHASE card on the Fate deck. You will resolve it at the beginning of each Dawn phase, before drawing a Fate card.
- Place the REFUGEE HIDEOUT card on any empty Shelter space.
- Shuffle 3 SPECIAL VISITORS cards into the Visitors deck.
- Shuffle 3 SPECIAL NIGHT RAID cards into the Night Raids deck.
Scenario special tokens: Place 3 REFUGEE HELP tokens on the Scenario sheet on the Refugee Help space. Place the COVER token on the space "4" of the Cover track. Place the CONDITION token on the space "3" of the Condition track.
List of additional Refugees scenario items: 3 SPECIAL VISITORS CARDS; 3 SPECIAL NIGHT RAID CARDS; DAWN PHASE CARD; REFUGEE HIDEOUT CARD; 3 REFUGEE HELP TOKENS; CONDITION TOKEN; COVER TOKEN.
After finishing a game, please remember to find all the additional elements of the Scenario among the cards and tokens and pack them up separately, as they are used exclusively in this Scenario.
Refugees cards (text as printed; the deck each card is shuffled into is stated on the card):
- We Are Looking for Someone... – Make the Cover roll using the Black die. If the result is higher than the current Cover of the Refugees, lower the Cover by 3. Afterwards, shuffle this card back into the Night Raids deck.
- We Know They Are Here... – Make the Cover roll using the Black die. If the result is higher than the current Cover of the Refugees, lower the Cover by 5. Afterwards, shuffle this card back into the Night Raids deck.
- Refugees – Make the Cover roll using the Black die. If the result is higher than the current Cover of the Refugees, lower the Cover by 3. Afterwards, shuffle this card back into the Night Raids deck.
- We Are Looking for Someone... – Afterwards, shuffle this card back into the Visitors deck.
- We Know They Are Here... – Make the Cover roll using the Black die. If the result is higher than the current Cover of the Refugees, lower the Cover by 5. Afterwards, shuffle this card back into the Visitors deck.
- We Are Looking for Someone... – Make the Cover roll using the Black die. If the result is higher than the current Cover of the Refugees, lower the Cover by 3. Afterwards, shuffle this card back into the Visitors deck.
- We Are Looking for Someone... – Make the Cover roll using the Black die. If the result is higher than the current Cover of the Refugees, lower the Cover by 3.
Source note: the text layer does not state the deck for the last card above, and the Visitors-deck entry with no Cover roll is printed as found. Check these against the printed cards if precise pairing matters.
- Refugees (Dawn Phase card) – Resolve this card at the beginning of each Dawn phase. Roll the Black die. If the result is equal to or lower than the amount of Cold tokens minus Board-Ups, lower the Condition of the Refugees by 1. Now make the Cover roll using the Black die. If the result is higher than the current Cover of the Refugees, lower the Cover by 3. If the Condition = 1 or 2: lower the Cover of the Refugees by 2. If the Condition = 5 or 6: raise the Cover of the Refugees by 2. Lower the Condition by 2.
- Refugee Hideout – Concealing the Hideout: 1 Component + 1 Wood ➥ Raise the Cover of the Refugees by 1.
Epidemic
The streets are empty and deathly silent. The disease is far more scary than any human – not even the soldiers dare venture into the contamination zone. The chances of catching the disease are gravely high. For many days now there has been an epidemic in the city. Even the frost on the streets cannot stop the spread of the sickness and only weakens the bodies emaciated from hunger. The vaccines delivered to the city have run out long ago and the last remaining batches can only be purchased second hand for insane amounts of money. Whenever we meet anyone on the street, we first look at each other warily, watching for the symptoms of the disease. We treat those affected as plague carriers and not people in need. It's hard to help a fellow man when the price you would pay could be that high.
Setup changes
- Draw 1 OBJECTIVE card and place it on the Objectives space. Resolve it at the end of the game, while resolving script 1000 (Ceasefire), instead of resolving the Final Objective. If you do not manage to accomplish this Objective, you lose the game. Do not use any other OBJECTIVE cards when playing this Scenario. Remove them from the game.
- The NIGHT RAIDS and RESIDENTS decks should contain all of their cards. Do not remove any cards with a red corner.
- Place all of the FITTING cards (both those with a green corner and with an orange corner) in a single deck on the Fittings space. In this Scenario the Ideas space and the New Idea action are not used.
Construct the Events deck: Place the Event cards on the Events space face-down (without looking at their fronts) in the following order:
- Find the CEASEFIRE card in the ENDING EVENTS cards and place it on the bottom of the Events deck. Remove the remaining 2 Ending Event cards from the game.
- Randomly draw 5 EVENT cards and stack them on top of the deck.
Starting Cold: Place 2 COLD tokens on the Cold space.
Draw 3 Characters: Take the Character cards, shuffle them and draw:
- the first 2 RED-BORDERED cards
- the first BLACK-BORDERED card
Place an ILLNESS LEVEL 1 token next to each Character.
Starting Fittings: Find the SIMPLE HEATER and choose any 1 BASIC / ADVANCED FITTING card and place them on any empty Shelter spaces. Any advanced Fittings should be placed next to their prerequisite basic Fittings, according to the description on their backs.
Starting stuff: Place these on the Storage space:
- 2 WATER, 10 WOOD, 10 COMPONENTS,
- any other TOKENS WORTH 20 or less (except for the VACCINE)
Scenario special cards: Shuffle the EPIDEMIC deck and place it face-down on the Epidemic space on the Scenario sheet.
Scenario special tokens: Place 3 VACCINE tokens on the Vaccine space on the Scenario sheet. Slide the EPIDEMIC token between the first and the second card on top of the Events deck.
List of additional Epidemic scenario items: EPIDEMIC DECK (5 EPIDEMIC CARDS); EPIDEMIC TOKEN; 3 VACCINE TOKENS.
After finishing a game, please remember to find all the additional elements of the Scenario among the cards and tokens and pack them up separately, as they are used exclusively in this Scenario.
Epidemic cards
- Let's Avoid the Infected – Most people, upon seeing an infected person, keep their distance or even flash their weapons to drive the poor soul away. And what do we do? Talk with the infected or choose 1 Character present and raise their Misery by 1. If you talk with the infected, roll the Black die. Result = 1-3 – choose 1 Character present and raise their Illness by 1. Afterwards, shuffle this card back into the Epidemic deck.
- I Was Just Seeing Things... (two copies) – No one is here, only the wind. The epidemic has snuffed out most of the life in the city. It is a ghost town now. Remove this card from the game.
- The Infected! – The victims of the epidemic look more like ghosts than people. They clutch at hands and feet, begging for help. Like us, they know that there is no hope for them. We are finally able to get away from them, leaving their pleas and wails behind us. Choose 1 Character present and raise their Illness by 1. Afterwards, shuffle this card back into the Epidemic deck.
- Do Not Leave Me to Die... – Discard 1 Meds / Herbal Meds / Canned Food / Raw Food / Vegetable if you possess such a token (in the Findings Pile / the Storage), or roll the Black die and compare the result with the Empathy of each Character present. A result that is equal to or lower than a Character's Empathy = raise their Misery by 1. Afterwards, shuffle this card back into the Epidemic deck.
Side By Side
Before the war we used to see each other almost every day. We passed our neighbors while shopping or taking out garbage. From time to time we shared the newest gossip, lent salt to each other, helped take out old furniture… Those days we thought we understand each other and that each one of us is a significant part of the others' lives. We were sure that in the world which distances people, we'd managed to create a real community that would survive every possible turmoil. Now, everyone just looks through dirty windows, too scared of the looters to even open the door. Is it all that's left of our old, neighborhood friendship?
Setup changes
- The following decks are excluded from this playthrough: SHELTER, OBJECTIVES. Remove them from the game.
- Remove the DUTY card from the NARRATIVE ACTIONS deck.
- The NIGHT RAIDS and RESIDENTS decks should contain all of their cards. Do not remove any cards with a red corner.
- Place all of the FITTING cards (both those with a green corner and with an orange corner) in a single deck on the Fittings space. In this Scenario the Ideas space and the New Idea action are not used.
Construct the Events deck: Place the Event cards on the Events space face-down (without looking at their fronts) in the following order:
- Find the CEASEFIRE card in the ENDING EVENTS cards and place it on the bottom of the Events deck. Remove the remaining 2 Ending Event cards from the game.
- Randomly draw 5 EVENT cards and stack them on top of the deck.
Draw 3 Characters: Take the Character cards, shuffle them and draw:
- the first RED-BORDERED card
- the first 2 BLACK-BORDERED cards
Place a HUNGER LEVEL 2 token next to 2 different Characters. Place an ILLNESS LEVEL 1 token next to 1 Character without any State tokens.
Starting Fittings: Choose any 1 BASIC FITTING card and place it on any empty Shelter space.
Starting stuff: Place these on the Storage space:
- 3 WATER, 10 WOOD, 10 COMPONENTS,
- any other TOKENS WORTH 20 or less
Scenario special cards: Place the DAWN PHASE card on the Fate deck. You will need to resolve it at the beginning of each Dawn phase, before drawing the Fate card. Read the narrative introduction from all NEIGHBOR spaces. Then place all NEIGHBOR cards face-up on their corresponding spaces on the Scenario sheet.
Scenario special tokens: Place 4 NEEDS tokens, 1 on each marked space of each Needs track next to the NEIGHBOR cards. Place the VLADIMIR token on Vladimir's card.
List of additional Side By Side scenario items: 4 NEIGHBOR CARDS; DAWN PHASE CARD; VLADIMIR TOKEN; 4 NEEDS TOKENS.
Side By Side cards
- Dawn Phase card – Resolve this card at the beginning of each Dawn phase. Raise the Needs of all Neighbors by 1. If Vladimir's card is placed with its red side face-up, move the Vladimir token to the Visit the Neighbors action space on the Scenario sheet.
- Vladimir – Vladimir unceasingly wanders around the neighborhood, angry like a wounded bear. For some reason he blames us for his misery. Now only vodka or blood can ease this man's torment... When resolving the Dawn phase card, place the Vladimir token on the action space Visit the Neighbors on the Scenario sheet. Before any Character performs this action, discard any tokens with a total value of 10 or more from the Storage. If you do, return the Vladimir token to Vladimir's card. Otherwise, enraged Vladimir attacks.
- Vladimir's Attack: Place the Vladimir token in the first column of the Combat chart. Treat it as an Enemy token with a Prowess of 3, armed with a Hatchet. All Characters present in the Shelter participate in this Combat (no matter their States). Then, begin Combat – see Journal: COMBAT sheet. You cannot Flee from this Combat. When Vladimir is killed, remove his card and token from the game and add 1 Hatchet to the Storage.
- Andrei – If you wish to check how this Neighbor is doing, see Side by Side script 4 according to their current Needs level.
- Needs: Discard any tokens with a total value of 10 or more from the Storage = lower Andrei's Needs by 1. Discard any 3 part tokens (Electrical Part, Mechanical Part, Weapon Part) from the Storage = lower Andrei's Needs by 1. You can fulfill these requirements more than once during one visit.
- Aid: Place a new Fitting card in the Shelter for free (without performing any actions or discarding any required resources / tokens).
- Kovačević – If you wish to check how this Neighbor is doing, see Side by Side script 7 according to their current Needs level. During the Evening phase, assign 1 Character present in the Shelter to defend Kovacević's home (place their miniature on this Neighbor's card) and treat this Character as if they were placed on the Guard space. You can assign a Character this way even if no one visited Kovacević this day. During the Night Raid phase, the defending Character separately resolves Wounds from the Night Raids card drawn according to normal rules. This Character's rolls have no effect on Guarding the Shelter. Then, lower Kovacević's Needs by 1.
Source note: the Aid text for Durić and the Needs-level tables are not legible in the booklet text layer and are not reproduced here.
You and Me
Just you and me. Nothing else matters. The whole world may burn, but we must survive. Dina lost her parents a few months ago – they were killed in front of her. Her younger brother, Petar, was taken away to some unknown place. It would be easier to assume he's dead too, but Dina refuses to admit this. Almost every night she searches the city, fooling herself that Petar is still out there. It's like her own private ceremony, repeated more often than the prayers for her parents' peaceful rest.
Zoran doesn't know how his folks are doing. When the war started, he was with Dina. Despite the fact they'd known each other for just a few months, he was sure he found his soulmate, and that only death could do them part. Because of her, he never tried to make his way back to the countryside, to his family. These days he has doubts if it was the right decision, but there is no turning back now.
They both live day after day, sharing each moment – happy or sad, each loaf of stale bread and food leftovers and every musty drop of water from their leaking tap. Will the feeling that connected them so strong be stifled by the horrors of war?
Setup changes
- The following decks are excluded from this playthrough: SHELTER, OBJECTIVES. Remove them from the game.
- Remove ZLATA and MARKO cards from the CHARACTERS deck.
- Remove the MEMORIES... card from the NIGHT RAIDS deck.
- Remove the HOSPITAL card from the LOCATIONS deck.
- Remove the DUTY card from the NARRATIVE ACTIONS deck.
- The RESIDENTS deck should contain all of its cards. Do not remove any cards with a red corner.
- Place all of the FITTING cards (both those with a green corner and with an orange corner) in a single deck on the Fittings space. In this Scenario the Ideas space and the New Idea action are not used.
Construct the Events deck: Place the Event cards on the Events space face-down (without looking at their fronts) in the following order:
- Find the CEASEFIRE card in the ENDING EVENTS cards and place it on the bottom of the Events deck. Remove the remaining 2 Ending Event cards from the game.
- Randomly draw 5 EVENT cards and stack them on top of the deck.
Take Characters: Take 2 SPECIAL CHARACTER cards: DINA and ZORAN. Use Zlata's and Marko's miniatures to represent Dina and Zoran, respectively, in this Scenario. Place an ILLNESS LEVEL 1 token next to 1 Character.
Starting Fittings: Choose any 2 BASIC FITTING cards and place them on any empty Shelter spaces.
Starting stuff: Place these on the Storage space:
- 2 WATER, 10 WOOD, 10 COMPONENTS, 1 VEGETABLE
- any other TOKENS WORTH 20 or less
Scenario special cards: Place the AID ZONE deck face-down on the AID ZONE space on the Scenario sheet. Place the VISITING THE AID ZONE card on the Findings Pile.
List of additional You and Me scenario items: 2 SPECIAL CHARACTER CARDS; 7 AID ZONE CARDS.
You and Me cards
- Dina (Promising Singer) – Spirit: If neither Dina nor Zoran participated in the Scavenging today, raise Dina's Misery by 1. If Zoran is removed from the game, raise Dina's Misery by 2. If the Guitar is in the Storage, lower Dina's and Zoran's Misery by 1. Creative: If, during the Evening phase, Dina is assigned to Sleeping in a Bed, draw and keep 1 additional Narrative Action card.
- Zoran (Lumberjack) – Break In: Zoran may use a Hatchet to open Closed Doors as if he was using a Lockpick (do not discard the Hatchet afterwards). Spirit: If Dina is removed from the game, raise Zoran's Misery by 2. If Dina is wounded, ill, miserable or hungry (level 2 or 3), raise Zoran's Misery by 1. Lower Dina's Misery by 1.
Source note: the Prowess, Empathy and Inventory values on the Dina and Zoran cards are not legible in the booklet text layer and are not reproduced.
- Visiting the Aid Zone – Each time after you have finished Scavenging (but before the Choose Findings stage), you may decide to visit the Aid Zone (see the Scenario sheet). This card remains on the Findings Pile until the Departure option from the Closing Down the Zone card has been resolved. Other cards can be placed on the Findings Pile normally (they do not cause this card to be removed from the game). If you have just flipped this card – see Side by Side script 11.
Aid Zone cards (7 cards)
-
Humanitarian Aid – Rumor has it that the news worldwide report about the situation here, in Pogoren. Everyone wants to help us! Some say people from other countries send money and offer charity! Choose 1 token from the following: 1 Meds, 1x 100% Alcohol, 1 Bandages, 1 Guitar. Then add it to the Findings Pile. After you resolve this card, remove it from the game.
-
Package – We have waited for a really long time, but finally it's our turn! A compassionate woman shows us a tent full of food and medical supplies. It feels like a different world – even the soldiers guarding the place are smiling… Add 1 Canned Food to the Findings Pile. After you resolve this card, remove it from the game.
-
Goons – After several hours of waiting we are really close to the tents. Suddenly, a group of local thugs arrives. They elbow people standing in the queue, taking their place. We, among others, are the unlucky ones. No food today… Distribute 1 Wound among the Characters present. After you resolve this card, remove it from the game.
-
Long Queue – The queue seems to be endless today. Hundreds of people – just like us – hope for some aid from the outside world, but the supplies are limited. There isn't enough for everyone – we won't get anything here today. Distribute 1 Fatigue among the Characters present. After you resolve the Departure option, remove all Aid Zone cards from the game.
Source note: the text layer places the footer line "After you resolve the Departure option, remove all Aid Zone cards from the game." after this card, while the Departure option belongs to the Closing Down the Zone card; the footer is transcribed in the position the text layer gives it.
-
Closing Down the Zone – Tents are already packed and the last few people are getting into the trucks. In the end, all that remains is the empty square full of mud and trash. The convoy leaves the place, escorted by armored vehicles. If the space below the Aid Zone deck contains the Preparation for Closing Down the Zone card, resolve the Departure option (see below). Otherwise, draw an additional Aid Zone Card and shuffle the Closing Down the Zone card back into the deck.
Source note: the "Only You and Me" rule that New Friend and the sheet refer to is not printed in the booklet text layer and is not reproduced here.
Farmers and Market
Being cut off from any news as we are, we suddenly realize that new people start appearing around the city. People who look well fed and seem to be barely touched by the war. They do not understand that living in the city will bring them no solace no matter what horrors have driven them away from their homes in the countryside.
Some of them are here to stay, others come just to exchange food for valuables that we might still hoard in our hideouts, but one thing is sure – from now on, we will share this sorrowful fate together.
This module changes the gameplay by adding new possibilities as well as new threats. It also comes with new scripts that are thematically connected to the arrival of the folk from rural areas into the besieged city. With it comes the Market, a place full of makeshift booths and tables where newcomers mingle with city inhabitants, thugs become bodyguards and the omnipresent threat of enemy soldiers clashes with the will to trade and feel normally… if only for a little while.
This module is basically divided into two parts: the main part featuring 2 Farmer and 3 Thug miniatures and 7 cards and the Market part including 15 Wares cards, the dedicated Market sheet, the Tolerance token and a dedicated Farmers chapter in the Wartime Diary I containing unique scripts for Wares cards. If you choose to use this module, introduce all aforementioned components into the game.
Setting up the main part:
At the beginning of a playthrough, during Setup, place the two Fitting cards from the main part on the board in accordance with the description provided on the backs of the cards.
Shuffle the remaining cards from the main part of the module into their corresponding decks.
The Farmers and the Thug miniatures will enter the game when a game component instructs you.
Setting up the Market part:
All Setup instructions as well as the rules for using this part and its accompanying components can be found on the Market sheet.
Note: If you choose to include this module in your playthrough or Campaign, you have to use the basic side of the board. Additionally, the Farmers scripts are already included in the Book of Scripts, while the Market scripts triggered by the Wares cards can be found in the Wartime Diary I, in the Farmers chapter.
Farmers and Market – Cards
Farmers cards (main part)
-
Desperate People (Night Raids card) – Damage: any 2 tokens (starting with yellow tokens) → Wounds: 3. OR if you choose not to roll any Combat dice for the guards: Damage: any 8 tokens (starting with yellow tokens) → Wounds: 0. Afterwards, shuffle this card back into the Night Raids deck.
-
Desperate People (Residents card) – We encounter a new group of local farmers plundering the area. The conversation is really tense. Determine the number of Desperate People encountered – roll the Black die: 1-3 – one, 4-8 – two, 9-10 – three and draw their tokens. They are armed with: nothing, Knife, Hatchet. Choose one of the Characters present and roll the Black die. If the result is greater than their Empathy – Combat begins automatically (see Journal: COMBAT sheet). If there is no Combat: You may return 1 Exploration card to TRADE with them – see 355. If there is Combat: You may try to STOP the fight – see 880. After defeating all Enemies – see 33. Afterwards, shuffle this card back into the Residents deck.
-
Village Folk – Strangers are dragging some bags behind them. Even though their eyes are hopelessly empty, they look well-fed. They must be new in town... You may perform a TRADE (see Journal: TRADE sheet) to exchange any tokens from the Findings Pile for any green tokens. TRADING COMMISSION: 1. Afterwards, shuffle this card back into the Residents deck.
-
Goat – Get some milk: 1 Vegetable + 1 Water ➥ Lower the Hunger of 2 chosen Characters by 1. Kill the Goat: Set the Hunger of all Characters present to 0 and add 6 Raw Food to the Storage. Then roll the Black die and compare the result with the Empathy of each Character present. A result that is equal to or lower than a Character's Empathy = raise their Misery by 1. Afterwards, remove this card from the game.
-
Rooftop Garden – 2 Chems ➥ Place a WAIT token here. Then roll the Black die. Result = 1 – the Character placed here is hit by a sniper bullet and suffers 2 Wounds. When WAIT tokens are resolved, roll the Black die and consult the table below, adding that amount of Vegetables to the Storage:
Market (Changes in Rules and Market sheet)
Changes in rules – Each time after you have finished Scavenging (but before the Choose Findings stage), you may decide to visit the Market where people from all walks of life come to trade and talk. Discard any 1 token from the Findings Pile. Then draw 1 card from the Wares deck: if it is the Reality Impact card, resolve a script according to the current position of the Tolerance token on the Tolerance track. Otherwise, place the card on the Current Wares space or next to the Market sheet as instructed. Choose and resolve one option from the current Wares card. Remove any Farmer and Thug miniatures from the Market sheet. If any Character miniature is placed on the Thief space, move it back to the Findings Pile. Then resolve the Choose Findings stage.
Market sheet – options (as printed on the sheet):
- TRADE: Resolve TRADE according to normal rules (see Journal: TRADE sheet for details). The current Wares card informs which tokens are available for trading. Green or yellow tokens are not accepted.
- LOOT: Draw 1 Enemy token for each Farmer and Thug miniature on the Market sheet and refer to the LOOT sections next to their spaces to see what they are armed with. Then Combat begins (see Journal: COMBAT sheet). If all Enemies from the Market sheet are killed, add to the Findings Pile all tokens shown on the current Wares card. No matter the Combat result, move the Tolerance token to the "0" space of the Tolerance track.
- STEAL: Move 1 Character to the Thief space. Then roll the Grey Combat die (the Character may use their Prowess). For each icon rolled, add to the Findings Pile any tokens from those shown on the current Wares card worth up to 5. If the Character rolls a blank, refer to the STEAL sections next to the Farmer and Thug spaces and resolve them if a miniature is present on a given space. No matter the result, lower the Tolerance by moving the Tolerance token on the track 1 space to the left.
- Steal (Thug space): Raise the Thief's Wounds by 1.
- Steal (Farmer space): Raise the Thief's Fatigue by 1.
- LOOT (Farmer space): A – nothing, B – Knife, C – Hatchet.
- LOOT (Thug space): A – Knife, B – Hatchet, C – Pistol.
Market sheet – end of part: RESOLVE THE "0" TOLERANCE SCRIPT FROM THE CURRENT WARES CARD. THEN REMOVE ALL MARKET COMPONENTS FROM THE GAME.
Wares cards (15) – Each Wares card shows the miniatures to place on the Market sheet (Farmer and/or Thug), three rows headed Tolerance: 4, Tolerance: 3-1 and Tolerance: 0, the options You may STEAL / LOOT / TRADE, the tokens available for TRADE and the Trade Commission value.
Source note: the individual token lists and Trade Commission values for each of the 15 Wares cards are printed on overlapping card faces in the booklet and are not reliably legible in the text layer. They are not transcribed card by card here; the card structure and the market rules above are transcribed in full.
Sewers
With snipers everywhere, it becomes harder and harder to travel around the city. We have no other choice but to descend underground looking for new routes and new ways to scavenge.
The city sewers are a true labyrinth comprised of tunnels, waterways, forgotten basements and passages. Going through them is risky, but it will also give us a chance to find more supplies. The question is – who will dare enter them?
This module is comprised of a modular tile-based board featuring 8 tiles, 12 Corridor cards, 10 Room cards, 1 Exploring Party token and a dedicated Sewers chapter in the Wartime Diary I containing unique scripts for Corridor and Room cards. It enables you to descend into the canals beneath the city and explore them. Doing so gives you the option to reach 1 of the 3 Locations, thus providing the possibility of an additional Scavenging during the same day.
When traveling through the Sewers, you will be using Sewers Map tiles – they will form a separate board to move the Scavenging Party around. You should not treat the tiles literally – the corridors that you will cross do not run exactly as shown in the illustrations. These tiles are meant to be a representation of your wandering in the seemingly endless network of tunnels. Similarly, the rules for movement are just a mechanics-driven representation of the fact that you are moving about without knowing the way, losing track of where you are, and trying to find a way out. If a Sewers Map tile depicts a Room, it might in fact stand for many different types of places, be it a tangle of tunnels and pipes or an actual room.
One other assumption that was made is that the Characters descending into the Sewers carry some sort of long-lasting light source, e.g. flashlights.
Due to a complex gameplay experience and more complicated rules, this module is suggested for advanced players.
At the beginning of a playthrough, divide the Sewers module cards into two decks: Rooms deck and Corridors deck. Place the decks face-down in a chosen spot next to the board.
Then set aside the Exploring Party token and the Sewers Starting Zone tile, shuffle the remaining Sewers Map tiles and place them face-down in a pile next to the board. Finally, place the Sewers Starting Zone on top of the pile and the Exploring Party token next to the pile.
At the beginning of each Day Actions phase, you may choose to send any number of Characters on the Sewers Exploration – they form the Exploring Party represented by the special token. Place these Characters on the Findings Pile. These Characters cannot perform any actions during this Day Actions phase. However, even a Character with no access to actions due to their current States can still participate in the Sewers Exploration.
At the beginning of the Day Actions phase, but before you start performing actions in the Shelter, resolve the Sewers Exploration and its subsequent Scavenging. Consider the Characters sent to the Sewers to be acting while the Characters in the Shelter are performing their actions. The Characters sent to the Sewers will return to the Shelter at the beginning of the Dusk phase.
Then resolve the Day Actions phase normally, with the Characters left in the Shelter performing their actions. The Characters cannot use any tokens or resources found by the Exploring Party – they will become available from the beginning of the Dusk phase.
Source note: the text printed on the 22 Corridor and Room cards is not reproduced in this booklet; the Sewers scripts are in the Wartime Diary I companion (not transcribed here).
Resolving the Sewers Exploration
Choose Equipment: Resolve this stage just like during a normal Scavenging (see SCAVENGING: Choose Equipment in the Journal). Any tokens taken from the Storage now will not be available in the Shelter during the Day Actions phase.
Descent: First, place the Sewers Starting Zone tile (face-up) next to the board. Keep in mind that you will need additional space on the table, because you will be placing more tiles from the Sewers Map pile next to the Sewers Starting Zone tile. Place the Exploring Party token on this tile, on the Room marked with the letter "S".
Movement: Choose any path leading to one of the exits shown on the edge of the tile and start moving the Exploring Party token along the path, resolving cards as described below.
Next player
Resolve all the letters (Rooms) and numbers (Corridors) that are shown on the path you have chosen. Do so according to the following steps:
- To resolve a letter, draw a card from the Rooms deck and find the corresponding letter on it. Resolve the text.
Afterwards, next player
- To resolve a number, draw a card from the Corridors deck and find the corresponding number on it. Resolve the text.
Afterwards, next player
Next tile: Once you have resolved all the numbers and letters shown on the chosen path, draw a new tile from the Sewers Map pile and place it face-up adjacent to the tile with the Exploring Party token. Place the new tile so that one of its short edges or long edges matches either a short or a long edge (respectively) from the tile with the Exploring Party token. Additionally, the exit that will lead you out of your current Sewers Map tile must be connected to an entrance on the new Sewers Map tile.
Now, move the Scavenging Party token to the new tile and, just like before, choose a path leading to a next exit, resolve all numbers and letters shown on that path and continue doing so until you leave the Sewers.
Note: The group cannot split while in the Sewers. There is also no possibility to backtrack – the same tiles and the same Rooms and Corridors cannot be visited again.
Additionally, if the Corridor on the new tile has no number, do not draw any Corridor cards – just move the Exploring Party token along the path until you reach a numbered Corridor or a Room with a letter.
The Sewers Map tiles carry these printed labels: on the tile with Room C, No Return: the only exits from Room C are the paths marked with dotted lines. On the Starting Zone tile, Starting Zone: the EXIT is on the third Sewers Map tile placed. Roll the Black die when you leave the Sewers: 1-5 – Close Location, 6-8 – Distant Location, 9-10 – Far Location.
Editor's note: the Starting Zone tile prints "Close Location" for 1-5, while the rules text below uses "Near Location" for the same result. Both wordings are transcribed as printed.
Forfeiting the Sewers Exploration: You may return to the Shelter instead of drawing a new tile from the Sewers Map pile. By doing so, you forfeit any further exploration – resolve the Choose Findings stage (see SCAVENGING: Choose Findings in the Journal). In this case you cannot add free resources (Water, Wood, Components) to the Findings Pile. The Characters return to the Shelter at the beginning of the Dusk phase, bringing any tokens and resources with them (see DAWN: The Scavenging Party Returns in the Journal).
Reaching the Exit from the Sewers: If you have not forfeited the Sewers Exploration earlier by returning to the Shelter, you will finally reach the Sewers exit leading to 1 of the 3 Locations. Once you have placed the third Sewers Map tile on the table (the Sewers Starting Zone tile does not count), the Exit from the Sewers is found on that third tile in a room marked with a brightly colored letter.
Once this Room is reached (you must first resolve its card normally), you may exit to 1 of the 3 Locations – roll the Black die:
- A result of 1-5 – Near Location
- A result of 6-8 – Distant Location
- A result of 9-10 – Far Location
Now you may begin Scavenging in this Location (identically like in the Scavenging phase), with the following exceptions:
- If you draw any Reality Impact card, ignore it and draw a new card from the proper deck; if you draw such a card from the Unknown deck, draw a new Exploration card from the Exploration deck.
- The number of Exploration cards in the Unknown deck is half its normal number (rounding down).
- When using other game modules, Characters exploring the Sewers cannot visit the Market or the Aid Zone before returning to the Shelter after Scavenging.
After you have resolved the Scavenging, the Exploring Party returns to the Shelter at the beginning of the Dusk phase.
Note: Some scripts and cards will allow you to reach the Exit to 1 of the 3 Locations earlier. Additionally, remember to discard any cards placed on the Exploration slot during the Sewers Exploration – they have no impact on the Scavenging that follows.
No matter whether the Exploring Party forfeited the Sewers Exploration or managed to fully resolve both the exploration and the Scavenging after it, its Characters continue the game normally from the Dusk phase (i.e. they drink Water and eat in the Dusk phase and each of them can be assigned to different tasks in the Evening phase – including the Scavenging, which may result in some Characters participating in two Scavenging runs in one day).
Once the Exploring Party is back in the Shelter, shuffle all revealed Sewers Map tiles back into the pile and place the Sewers Starting Zone tile on top of the pile. Finally, place the Exploring Party token next to the pile.
Thugs and the Sewers Module (Optional Rule)
Whenever you enter the Sewers, roll the Black die and place the corresponding number of Thug miniatures on the Sewers Starting Zone tile:
- A result of 1-5 – 1 Thug
- A result of 6-8 – 2 Thugs
- A result of 9-10 – 3 Thugs
The Threat level during your current Sewers Exploration is equal to the number of Thugs on the Sewers Starting Zone tile. If you voluntarily forfeit the Sewers Exploration and choose to return to the Shelter, you should first roll the Black die a number of times equal to the current Threat level:
- A result equal to or lower than the Threat level: on your way back you have encountered the Thugs. Combat begins automatically (see Journal: COMBAT Sheet). The number of Thugs encountered is equal to the Threat level. All Thugs are armed with Knives. You may try to STOP the fight – see 40 in the Book of Scripts.
After Combat – remove all the Thug miniatures from the tile (the Threat level is now 0). After defeating all Enemies – see 33 in the Book of Scripts.
Envelopes
In the box you can find 5 closed envelopes marked with letters A to E. They contain "legacy" game elements. They become available once you win certain Scenarios from this expansion. Each Scenario sheet refers to one of the envelopes.
Do not open any envelopes unless instructed.
Once you gain rewards, you may add them to the base game according to their type.
Other Game Components
The cards shown below should be simply shuffled into their corresponding decks found in the base game – they offer a wider range of options as far as Chapter Objectives and Narrative Action cards are concerned. You do not need to remove them from the game when you start a new playthrough or a Campaign – they now form the integral part of their decks.
Black Market Goods (Chapter Objective card)
- At any moment you may discard any number of Ammo / 100% Alcohol (without resolving their effects). For each discarded token advance the Objective Marker by 1 / 2 respectively.
- Reward: FAVOR. You may perform a TRADE (see Journal: TRADE sheet) to exchange tokens from the Storage for any other tokens. Trade Commission: 0.
- Penalty: DEVASTATION. Discard 2 crafted Fitting cards (back to the Fittings deck).
Spare Parts for Smugglers (Chapter Objective card)
- At any moment you may discard any number of part tokens (Electrical Part, Mechanical Part). For each discarded part advance the Objective marker by 1.
- Reward: PAYOFF. Add 2 Moonshine to the Storage.
- Penalty: BEATING. Distribute 2 Wounds between Characters.
Valuable Trinkets (Narrative Action card)
- Play when Trading. Ignore the Trade Commission. Additionally, treat this card as a grey token with a value of 10.
- After playing this card, remove it from the game.