This War of Mine: Sewers
This War of Mine: Sewers Rulebook
Table of Contents
Table of Contents
Components
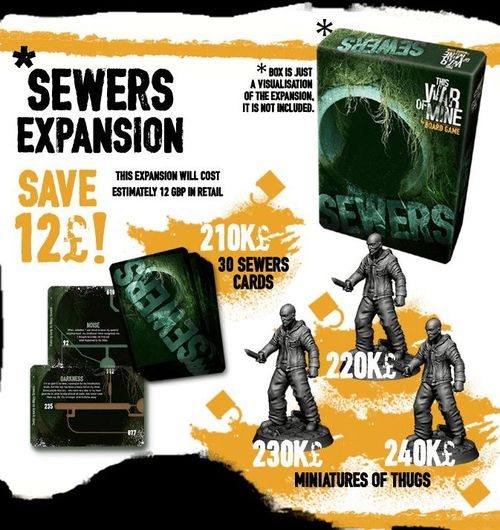
- 22 Sewers Cards (12 Corridors and 10 Rooms)
- 8 Sewers Map Tiles and 1 Exploring Party Token
This module is comprised of a modular tile-based board featuring 8 tiles, 12 Corridor cards, 10 Room cards, 1 Exploring Party token and a dedicated Sewers chapter in the Wartime Diary I containing unique scripts for Corridor and Room cards. It enables you to descend into the canals beneath the city and explore them. Doing so gives you the option to reach 1 of the 3 Locations, thus providing the possibility of an additional Scavenging during the same day.
When traveling through the Sewers, you will be using Sewers Map tiles – they will form a separate board to move the Scavenging Party around. You should not treat the tiles literally – the corridors that you will cross do not run exactly as shown in the illustrations. These tiles are meant to be a representation of your wandering in the seemingly endless network of tunnels. Similarly, the rules for movement are just a mechanics-driven representation of the fact that you are moving about without knowing the way, losing track of where you are, and trying to find a way out. If a Sewers Map tile depicts a Room, it might in fact stand for many different types of places, be it a tangle of tunnels and pipes or an actual room.
One other assumption that was made is that the Characters descending into the Sewers carry some sort of long-lasting light source e.g., flashlights.
Due to a complex gameplay experience and more complicated rules, this module is suggested for advanced players.
Setup
At the beginning of a playthrough, divide the Sewers module cards into two decks: Rooms deck and Corridors deck. Place the decks face-down in a chosen spot next to the board.
Then set aside the Exploring Party token and the Sewers Starting Zone tile, shuffle the remaining Sewers Map tiles and place them face-down in a pile next to the board. Finally, place the Sewers Starting Zone on top of the pile and the Exploring Party token next to the pile.
Sending the Exploring Party
At the beginning of each Day Actions phase, you may choose to send any number of Characters on the Sewers Exploration – they form the Exploring Party represented by the special token. Place these Characters on the Findings Pile. These Characters cannot perform any actions during this Day Actions phase. However, even a Character with no access to actions due to their current States can still participate in the Sewers Exploration.
At the beginning of the Day Actions phase, but before you start performing actions in the Shelter, resolve the Sewers Exploration and its subsequent Scavenging. Consider the Characters sent to the Sewers to be acting while the Characters in the Shelter are performing their actions. The Characters sent to the Sewers will return to the Shelter at the beginning of the Dusk phase.
Then resolve the Day Actions phase normally, with the Characters left in the Shelter performing their actions. The Characters cannot use any tokens or resources found by the Exploring Party – they will become available from the beginning of the Dusk phase.
Resolving the Sewers Exploration
CHOOSE EQUIPMENT: Resolve this stage just like during a normal Scavenging (see SCAVENGING: Choose Equipment in the Journal). Any tokens taken from the Storage now will not be available in the Shelter during the Day Actions phase.
DESCENT: First, place the Sewers Starting Zone tile (face-up) next to the board. Keep in mind that you will need additional space on the table, because you will be placing more tiles from the Sewers Map pile next to the Sewers Starting Zone tile.
Place the Exploring Party token on this tile, on the Room marked with the letter "S".
MOVEMENT: Choose any path leading to one of the exits shown on the edge of the tile and start moving the Exploring Party token along the path, resolving cards as described below.
Resolve all the letters (Rooms) and numbers (Corridors) that are shown on the path you have chosen. Do so according to the following steps:
- to resolve a letter, draw a card from the Rooms deck and find the corresponding letter on it. Resolve the text.
Afterwards
- to resolve a number, draw a card from the Corridors deck and find the corresponding number on it. Resolve the text.
Afterwards
NEXT TILE: Once you have resolved all the numbers and letters shown on the chosen path, draw a new tile from the Sewers Map pile and place it face-up adjacent to the tile with the Exploring Party token. Place the new tile so that one of its short edges or long edges matches either a short or a long edge (respectively) from the tile with the Exploring Party token. Additionally, the exit that will lead you out of your current Sewers Map tile must be connected to an entrance on the new Sewers Map tile.
Now, move the Scavenging Party token to the new tile and, just like before, choose a path leading to a next exit, resolve all numbers and letters shown on that path and continue doing so until you leave the Sewers.
Note in the source: the printed text reads "Scavenging Party token" at this step; the token is the Exploring Party token, as in the rest of this section.
Note: The group cannot split while in the Sewers. There is also no possibility to backtrack – the same tiles and the same Rooms and Corridors cannot be visited again.
Additionally, if the Corridor on the new tile has no number, do not draw any Corridor cards – just move the Exploring Party token along the path until you reach a numbered Corridor or a Room with a letter.
FORFEITING THE SEWERS EXPLORATION: You may return to the Shelter instead of drawing a new tile from the Sewers Map pile. By doing so, you forfeit any further exploration – resolve the Choose Findings stage (see SCAVENGING: Choose Findings in the Journal). In this case you cannot add free resources (Water, Wood, Components) to the Findings Pile. The Characters return to the Shelter at the beginning of the Dusk phase, bringing any tokens and resources with them (see DAWN: The Scavenging Party Returns in the Journal).
REACHING THE EXIT FROM THE SEWERS: If you have not forfeited the Sewers Exploration earlier by returning to the Shelter, you will finally reach the Sewers exit leading to 1 of the 3 Locations. Once you have placed the third Sewers Map tile on the table (the Sewers Starting Zone tile does not count), the Exit from the Sewers is found on that third tile in a room marked with a brightly colored letter.
Once this Room is reached (you must first resolve its card normally), you may exit to 1 of the 3 Locations – roll the Black die:
- A result of 1-5 – Near Location
- A result of 6-8 – Distant Location
- A result of 9-10 – Far Location
Note in the source: the Sewers Starting Zone tile prints the same bands as "1-5 – Close Location / 6-8 – Distant Location / 9-10 – Far Location"; the rules text above uses "Near Location" for 1-5. Both are transcribed as printed.
Now you may begin Scavenging in this Location (identically like in the Scavenging phase), with the following exceptions:
- if you draw any Reality Impact card, ignore it and draw a new card from the proper deck; if you draw such a card from the Unknown deck, draw a new Exploration card from the Exploration deck
- the number of Exploration cards in the Unknown deck is half its normal number (rounding down)
- when using other game modules, Characters exploring the Sewers cannot visit the Market or the Aid Zone before returning to the Shelter after Scavenging.
After you have resolved the Scavenging, the Exploring Party returns to the Shelter at the beginning of the Dusk phase.
Note: Some scripts and cards will allow you to reach the Exit to 1 of the 3 Locations earlier. Additionally, remember to discard any cards placed on the Exploration slot during the Sewers Exploration – they have no impact on the Scavenging that follows.
No matter whether the Exploring Party forfeited the Sewers Exploration or managed to fully resolve both the exploration and the Scavenging after it, its Characters continue the game normally from the Dusk phase (i.e. they drink Water and eat in the Dusk phase and each of them can be assigned to different tasks in the Evening phase – including the Scavenging, which may result in some Characters participating in two Scavenging runs in one day).
Once the Exploring Party is back in the Shelter, shuffle all revealed Sewers Map tiles back into the pile and place the Sewers Starting Zone tile on top of the pile. Finally, place the Exploring Party token next to the pile.
Sewers Map Tile Notes
The following text is printed on the Sewers Map tiles themselves:
- Sewers Starting Zone: "Dark and stinky. The EXIT is on the third Sewers Map tile placed. Roll the Black die when you leave the Sewers: 1-5 – Close Location, 6-8 – Distant Location, 9-10 – Far Location."
- Map tile with Room B and Room C: "NO RETURN. The only exits from Room C are the paths marked with dotted lines."
Thugs and the Sewers Module (Optional Rule)
Whenever you enter the Sewers, roll the Black die and place the corresponding number of Thug miniatures on the Sewers Starting Zone tile:
- A result of 1-5 – 1 Thug
- A result of 6-8 – 2 Thugs
- A result of 9-10 – 3 Thugs
The Threat level during your current Sewers Exploration is equal to the number of Thugs on the Sewers Starting Zone tile. If you voluntarily forfeit the Sewers Exploration and choose to return to the Shelter, you should first roll the Black die a number of times equal to the current Threat level:
- A result equal to or lower than the Threat level: on your way back you have encountered the Thugs. Combat begins automatically (see Journal: COMBAT Sheet). The number of Thugs encountered is equal to the Threat level. All Thugs are armed with Knives. You may try to STOP the fight – see 40 in the Book of Scripts.
- After Combat – remove all the Thug miniatures from the tile (the Threat level is now 0). After defeating all Enemies – see 33 in the Book of Scripts.