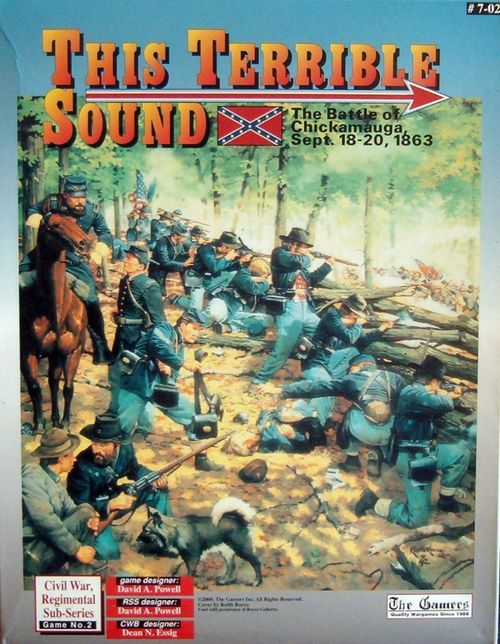
This Terrible Sound
This Terrible Sound Rulebook
Table of Contents
Table of Contents
- 1.0 Terrain and Map Notes
- 2.0 Union Special Rules
- 3.0 Confederate Special Rules
- 4.0 General Special Rules
- 5.0 Victory
- 6.0 Scenarios
- 6.1 Opening Guns (smaller scenario)
- 6.2 Jay's Mill (smaller scenario)
- 6.3 Crawfish Springs (smaller scenario)
- 6.4 Afternoon of the 19th (mid-size scenario)
- 6.5 Polk vs. Thomas (mid-size scenario)
- 6.6 Rock of Chickamauga (mid-size scenario)
- 6.7 Saturday, 19th of September (large scenario)
- 6.8 Sunday, 20th of September (large scenario)
- 6.9 Longstreet's Attack (large scenario)
- 6.10 Three Days of Battle (large scenario)
- Losses and Scenario Starting Strengths
- Officer Seniority Lists
- Artillery Unit Listing
- Bibliography
- Designer's Notes
- Historical Notes
- Union Reinforcement Schedule
- Confederate Reinforcement Schedule
- Union Random Events Table
- Confederate Random Events Table
1.0 Terrain and Map Notes
1.1 Slopes and Extreme Slopes
Three features represent elevation change. The thin contour lines represent simple elevation changes and are not slope hexsides. The thick contour lines are slopes.
One thick line is a regular slope hexside, while two or more thick contour lines along a single hexside is an extreme slope. The contour lines are drawn to generally conform to the hexsides. In those cases where ambiguity may exist, a unit's movement can be assumed to follow a straight path from approximate hex center to approximate hex center. There is no additional effect (beyond the extreme slope penalties) for crossing more than two thick contour lines in a single hexside.
1.2 Slope Hexes
In addition to the more common hexside elevation, slope and extreme slope features, there are slope hexes. Slope hexes are included to more accurately reflect the effects of a steep hillside on moving troops, especially when moving laterally instead of up or down hill. Note that slope hexes do not have any additional effect on Line of Sight: the presence of a slope hex reflects only that there is a steep slope there, not anything specific about how the ground effects visibility. LOS is determined normally, ignoring slope hexes.
1.3 Runs
There are a number of in-hex water features on the map referred to as runs. These are provided for historical reference and as a visual cue for determining terrain elevations. They have no effect on play, since these streams were militarily insignificant.
1.4 Orchards
Ignore one Orchard hex in any hex along a Line of Sight (LOS). Two or more Orchard hexes block LOS normally. As always, ignore the terrain of both the firer and target hexes in determining LOS. Any hex that contains one or more complete Orchard Tree Symbols is an Orchard hex.
1.5 Fields and Fences
A Field hex is any hex that contains no Woods symbol or contains any amount of Woods symbol plus a Fence symbol. A hex with both Woods and Fence in it is Open for movement purposes, and the Woods symbol exists only for LOS determination. A hex with Woods in it and no Fence symbol is Forest for both movement and LOS. Fences, themselves, have no effect on movement and only exist to make clear the boundary between an open field and the surrounding forest.
1.6 Buildings
No building has an effect on play. They are included only for historical reference.
1.7 Map Assembly
There are 6 maps included in TTS, four full size 22x34 inch maps (A, B, D, and E) and two half-size 22x17 inch maps (C and F). A is the map's northwest corner, oriented so its long axis is north-south. B and C both extend that southward orientation, so that once assembled, they fit into a 22x85 inch column. Place D, E, and F similarly so they connect to the east edge of maps A, B and C. The final shape is a rectangle 2 maps wide by 2 1/2 maps long.
2.0 Union Special Rules
2.1 On-map Army Command
In scenarios where Rosecrans is not in play, no Union commander assumes army command. New orders may only be accomplished via initiative. Of course, if Rosecrans is in play but becomes killed or wounded, then he is replaced by the senior available corps commander (see the Officer Seniority List) becomes the new army commander, and who may issue orders normally.
2.2 Attachments and Detachments
2.2a Divisions. The 14th Corps may attach up to two divisions from any other corps if Thomas is in play. In all other cases, no corps may attach more than one division at a time. If attached, a division is treated as part of the new corps for all purposes. Any Union division can be detached and given a Divisional Goal.
2.2b Brigades and Regiments. No Union brigade or regiment can ever be assigned to act as part of another division or brigade. Up to one Union brigade per division may be detached and given a Divisional Goal. Regiments are never allowed to be detached or attached.
2.2c Scenario Specific Rules. Some scenarios have special rules or orders that will detach or reassign units in direct violation of the above. Only these specified attachments are allowed, in which case any orders for them will be spelled out in detail.
Design Note: The above limits on attachment and detachment are designed to prevent player abuse in terms of trying to maximize combat power or bypass poor commanders. Historically, there were instances of brigades and even regiments being cross-attached to other commands. There is no way to craft rules that realistically limit a player's options for such unit shifting while still allowing for historical attachments, short of detailed record-keeping. I deemed the cost not worth it.
2.3 Major John Mendenhall
Mendenhall was the Chief of Artillery for Crittenden's 21st Corps and an outstanding artillerist. It was his timely deployment of guns that so badly mauled Breckenridge's Confederates at Stones' River on January 1st, 1863. Here at Chickamauga his greatest contribution was in establishing a gun line of about 15 pieces (fragments of several batteries) on a long ridge on the west side of the Dyer field. Unfortunately, he was never given proper infantry support, and despite a valiant effort by the guns alone, his batteries were overrun by the Rebels of Johnston's Provisional Division.
Any artillery units within 2 hexes of Mendenhall may fire on a single target as a group, ignoring the restriction prohibiting any more than three batteries to file at a single target. On a successful initiative roll, Mendenhall may assume command of up to six batteries from any Union command and give them orders as a group. These batteries trace command radius to him as if he were a brigade commander. This initiative takes the form of an order, and this force is not independent, but any previous orders or affiliation are immediately superseded. Mendenhall may never affect more than 6 batteries at a time. He may dissolve this ad-hoc command during any subsequent command phase by allowing the units in question to revert to their parent organizations (and they must immediately start moving to return to normal command radius for those parent organizations if they are not within range.) All batteries must be within brigade command radius of Mendenhall when he rolls initiative to create this command—he may not draw units outside this range to him.
2.4 Wilder's Brigade
Wilder's Brigade may be given orders directly by the Army Commander, or instead be attached to any Union Corps, at the player's choice. This attachment never counts against the limits in 2.2, above. If not attached to a corps, Wilder's brigade uses a generic HQ marker to mark its position, and may move that HQ only via army orders or initiative, just as any other HQ. If Wilder is attached to a corps, he traces radii as if he were a division commander to the Corps HQ, though the units in his brigade still trace to him normally. Wilder never rolls for attack stoppage or defensive order failure. If using the cavalry optional rules, units of Wilder's Brigade may enter close combat as an attacker if dismounted, may use the cavalry retreat rules, but may not attack in close combat while mounted. Any fire combat resolved exclusively against dismounted units of Wilder's Brigade has that fire shifted one column to the left before resolution.
2.5 Brigades without Divisions
McCook's 2/2/Res Brigade has no divisional commander in the regular game. McCook traces command radii directly to the Corps commander, as if he were a division commander. His units still trace normal brigade radii to him. The brigade can be given divisional goals as if it were a division. Treat it as a "one brigade" division for all stoppage rolls. If the rest of the 2/Res division is in play due to an option, treat 2/2/Res normally.
2.6 The Reserve Corps Ammunition Train
The Reserve Corps Ammunition Train acts as a source of resupply to all Union units, not just those of the Reserve Corps. In addition, it acts as a source of supply for Union Artillery that cannot trace to the Army Train, as required by CWB Series Rule 27.1.
2.7 Union Minor Variants
2.7a 1/1/20 Brigade. Allow this brigade and the 5th Wisc Lt Battery of Arty/1/20 to set up or enter the game with the rest of 1/20 Division, instead of their normal arrival time at midday on the 20th. This option gives the Confederate Player 1 VP.
Post's Brigade escorted trains for much of the battle, until on the morning of the 20th Post was ordered to send the trains to Chattanooga and join the corps. By the time Post reached Crawfish Spring, most of McCook's command had retired in the face of Longstreet's attack, and the Cavalry commander, Mitchell, informed Post that it was impossible to join 20th Corps via the Lafayette Road. Here we assume that the trains were sent back sooner, allowing Post to join his command on the 18th.
2.7b 2/1/21 Brigade. Allow this brigade, the 10th Ind Lt Artillery (Arty/1/21) 3rd Indiana Bn Cavalry (1/2/Cav) and 110th Illinois Bn (2/21) all to set up or enter the game with their respective units. This option gives the Confederate Player 3 VP.
This force was the Chattanooga Garrison, detailed on the 10th of September to take control of the town. Returning these men to the ranks could easily have been done on the 18th, though it would have left Chattanooga unsecured.
2.7c The Reserve Corps Arrives. Allow the all of the optional units for the Reserve corps to set up within 10 hexes of the Reserve Corps HQ or enter play when the Reserve Corps HQ arrives. These units include Morgan, R. Granger, and all the units and commanders of the 3/1/Res, 1/2/Res, 3/2/Res, 1/3/Res, 2/3/Res, and 3/3/Res Brigades. This option gives the Confederate player 8 VP.
All of these troops were detached by Rosecrans as he advanced to cover the Union supply line through Tennessee, and would have been an invaluable addition to the front line had they been available. Here it is assumed that more of Grant's troops were shipped to central Tennessee instead of scattered about Mississippi, allowing the Reserve Corps to be concentrated with the bulk of the Army of the Cumberland. Historically, the 3/1/Res brigade was located at Murfreesboro, the two brigades of the 2/Res were stationed at Stevenson, Alabama, R. Granger and the 2/3/Res were at Nashville, 1/3/Res was enroute between Nashville and Chattanooga, while the 3/3/Res was at Jasper, Tennessee. Virtually all of these troops were in the process of moving forward, but not soon enough.
2.7d An End to File Closing. Allow the following units to set up or enter with their respective commands: 3 Ohio/1/2/14, 38 Ohio/1/3/14, 80 Ill/2/4/14, and 21 Ky/3/3/21. Use of all these units gives the Confederate Player 1 VP.
These four regiments were scattered around on various train guard duties. Each of their brigade commanders made a point of complaining about their absence in the official records.
2.7e The Pioneer Brigade. Allow the Pioneer Brigade to set up within 5 hexes of the Union Army HQ. It functions exactly like Wilder's Brigade. Inclusion of the Pioneers gives the Confederate Player 1 VP.
These specialized troops were instrumental in helping Rosecrans cross the Tennessee River, and proved immensely valuable later on during the siege of Chattanooga. They spent the battle at Stevenson and Bridgeport, joining the army after the fight.
2.7f Rosecrans' Caution. For those players interested in more closely mirroring history, subtract two from every attack stoppage die roll made by any Union leader. When using this rule, give the Union (yes, Union) player 2 VP.
Historically, Rosecrans was not thinking aggressively by this stage in the campaign. Having risked being cut off deep in the North Georgia mountains at least twice in the past week, all the Federal commander wanted to do was get his forces safely to Chattanooga and regroup. This option will definitely put a damper on any Union offensive activity, but by the same token, Bragg had no way of really knowing that his opponent was unwilling to resume the offensive. I strongly suggest that if players do use this option, it remain secret from the Rebel Player until the end of play.
2.7g 3/1/Cav Arrives. Allow this brigade to arrive at C13.01, at 9:00 a.m. on the 20th. They arrive at full strength. This option gives the Confederate player 1 VP.
This brigade, escorting various trains and sick men, was ordered to Crawfish Spring on the 20th. It never got there, but instead became involved in a running fight with Wheeler's cavalry that cost it 1/3 of the command, mostly captured. The column eventually made it to Chattanooga on the 21st.
Not so minor variants...
2.7h Reinforcements from the East. Allow the 11th Corps (including the units of the 12th Corps, treated for all purposes as an integral part of the 11th Corps) to arrive at any road hex on the north or west edge of Map A, on or after 10:00 a.m. on September 19th, on a roll of 10+ on two dice. Roll once per turn. This option gives the Confederate player 11 VP.
This force was rushed to Tennessee from the Army of the Potomac in response to Longstreet's departure and the defeat at Chickamauga. They contributed materially to the victory at Chattanooga in November. Had the Union been quicker to react, it is not inconceivable that they could have reached the field before the battle of Chickamauga was over.
2.7i Reinforcements from the West. Allow the 15th Corps (including the division of 17th Corps, treated for all purposes as an integral part of 15th Corps) to arrive on any road hex of the west edges of map B or C on or after noon of September 19th, on a roll of 10+ on two dice. Roll once per turn. This option gives the Confederate player 14 VP.
After Vicksburg, Grant's army of over 100,000 men was largely inactive. Some were sent to secure the Mississippi River, many were used as occupying troops in Tennessee, Mississippi, and other parts of the South, but most sat idle. In October, in response to Chickamauga, Sherman was ordered to bring a column east from Mississippi to reinforce the trapped Federal army at Chattanooga. These troops were also part of the victorious Union force that won the battle at Chattanooga at the end of November. Given their relative inactivity from July to September, it is very possible that an earlier decision to reinforce Rosecrans could have seen them arrive on the field at Chickamauga.
2.7j Rogue Generals. Sherman, Hooker, and McPherson may arrive with either the 11th Corps (Hooker) or with the 15th Corps (Sherman and McPherson.) For each general used give the Confederate player 2 VP. Each can effect morale for any unit, issue orders via initiative to any unit and/or replace any wounded or killed corps commander (do not use the die roll modifier for attack stoppage rolls if used as a replacement).
Hooker was sent with the combined 11th and 12th Corps to command that force. Sherman commanded the expedition from Mississippi, and McPherson would have been along except that he was absent on leave at the time—there is a great deal of speculation that his presence at Chattanooga would have been significant in the fight against Cleburne in that later battle. In any case, when all were assembled, all of these men were effectively 'extra' commanders, and used by Grant as ad-hoc wing commanders. Here I have given them a more limited role, but one that can still be very effective if used correctly.
3.0 Confederate Special Rules
3.1 On-map Army Command
In scenarios where Bragg is not in play, no Confederate commander assumes army command. New orders may only be accomplished via initiative. Of course, if Bragg is in play but becomes killed or wounded, then he is replaced by the senior available corps commander (see the Officer Seniority List) becomes the new army commander, and who issues orders normally.
3.2 Anti-Initiative Ratings
By 1863, the Confederate Army of Tennessee was a cesspool of dissension and resentment, mostly directed at Bragg. Bragg reciprocated in kind, which created an atmosphere hardly conducive to success in the stress of combat. These ratings reflect the impact of that dissension on the battle. For every Confederate commander with a modifier (a negative number, e.g. -1 or -2) apply the following:
A) Add the modifier to the leader's individual rating before rolling for Initiative. For example, a "4" rated leader with a "-2" modifier would roll for initiative as a "2", not a "4".
B) Add the modifier to final order acceptance value on the Acceptance Table when orders are sent from Bragg to the leader in question. For instance, if the acceptance value of an order is 5, but there is a -2 anti-initiative between Bragg and the receiving leader, the final acceptance value would be 3.
| Leader | Command | Modifier |
|---|---|---|
| Polk | P Corps | -1 |
| Cheatham | C/P | -1 |
| Hindman | H/P | -1 |
| Hill | H Corps | -2 |
| Breckenridge | B/H | -3 |
| Walker | Res Corps | -1 |
| Buckner | B Corps | -1 |
| Wheeler | W Cav Corps | -1 |
| Forrest | F Cav Corps |
Design Note: Players will quickly note that these ratings effectively hamstring most of the better Confederate leaders. For competitive play, use the option ignoring them.
3.3 The Confederate Command Structure
On the 18th, Bragg's army consisted of five separate corps, each of two to three divisions. On the 20th, when Longstreet reached the field, this structure was revised into two wings, Longstreet with six divisions and Polk with five. This revision had a dramatic effect on the battle, as Longstreet managed to fight his new command as a unified force, with damaging results for the Federals. Polk, on the other hand, proved no more effective with five divisions than he had with his two: in fact, the extra layer of bureaucracy likely only added to the problems.
At any point after Longstreet enters play, Bragg may issue a "create wing commands" order. This is a simple order, and must be given simultaneously to each new wing commander. A "create wing command" order must specify a Wing Commander, the divisions are assigned, and the location to place the new wing HQ. Once accepted by the receiving leader, the order is in effect for all units in that wing. This is an all-or-nothing deal: Bragg must create both wings, not just one, and must assign all infantry divisions in play to a wing. Wing command effects are different for different leaders. No more than six divisions can be assigned to a single wing. No more than one existing corps can be broken up to create wing commands: otherwise, all divisions of a corps must be assigned to the same wing.
The Confederate player can also choose to not use wings. In that case, Longstreet commands the 1 Corps, Hood returns to command of Law's Division (L/1) and Law commands Sheffield's brigade (S/L/1). Additionally, at some point the player may issue an order dissolving the wings, written in the same manner as in creating the wings, above. If the wings are dissolved, then all wing commanders revert to their corps commands, and the wings may never be reformed.
3.3a Longstreet and Wing Command. Once given wing command, Longstreet becomes a super corps commander. Up to six infantry divisions may be assigned to his wing, and all divisions so assigned trace command radius directly to his Wing HQ. Once Longstreet accepts a subsequent order (say, to attack) all units are free to start acting on that order, without the existing corps commanders under his control having to roll for acceptance themselves. Longstreet can roll for initiative and, if successful, give an order (or divisional goal) to any unit in his wing. Any commanders in his wing may ignore their anti-initiative modifiers when rolling for initiative themselves. When rolling for Corps Attack Stoppage, roll as if Longstreet's Wing were a single corps. Divisions under Longstreet's command do not roll for attack stoppage separately. Under Longstreet, any corps HQs assigned to his wing are superfluous—they are not needed for command range, nor do they trigger an ECR if an enemy unit occupies their hex. Until such time as Longstreet's Wing ceases to be, the corps HQs move normally, but have no effect on command.
3.3b Other Wing Commanders. As the next ranking Lieutenant General on the field, Polk must be assigned the other wing, unless he is killed or wounded, in which case use Hill. If Hill is also not available, use any corps commander. Unlike Longstreet, units assigned to any other wing commander do not act like a giant corps. Instead, units assigned to the other wing still trace to their existing corps HQ and roll for attack stoppage normally, division by division (see rule 4.1 below). Whoever becomes the other wing commander, remove the appropriate Corps HQ and use the Wing HQ instead. For any division of a corps remaining in the wing of their former corps commander (and all escorts) trace radii normally to the Wing HQ instead. However, orders from the new Wing commander to divisions in his own corps must be sent via normal acceptance procedures, even self-generated initiative orders (see below.) Once the new wing commander accepts the wing order, then all subsequent orders to the units in his wing must receive their orders from him. For example, when Polk accepts an order from Bragg, he calculates command points (just as if he were an army commander) and issues orders to the corps—or directly to the divisions of his own corps—under his command. Those orders need not be exactly the same as the order issued to Polk by Bragg, but all orders issued by Polk must support the intent of that order from Bragg. Orders from Polk are rolled for individually on the Order Acceptance Table, and all anti-initiative modifiers apply. Polk may only issue an order after either first getting an order from Bragg himself or via initiative. If Polk gets initiative, it only allows him to issue an order to a corps or division commander under his command, which still requires an acceptance roll on the subordinate's part. Obviously, once Polk is in wing command, initiative is a pretty poor bet for him. Officers under Polk (or any other wing commander) may roll for initiative normally, but all anti-initiative modifiers apply.
3.3c Optional Troops and Wing Command. When playing with the Army of Mississippi Variant, the Rebel player will have three more divisions, and therefore too many divisions (14) to fit into the wing structure. In that case, Bragg may form a third wing. Use a Divisional Goal HQ as this extra wing HQ. Hardee must be given wing command, unless he is not in play, in which case use Hill. If they are both not available, use the senior ranking corps commander. In any case, whoever commands the new wing functions like Polk, not like Longstreet. All the infantry divisions in play must be divided as equally as possible between the three wings.
3.3d Wing Command and Leader Losses. If a wing commander becomes a casualty after the wing commands are created, then that wing is considered dissolved, and all units in the wing revert to their corps control. Replace the now lost corps commander normally. Once dissolved, that wing may never be recreated, and Bragg must return to issuing orders to the various corps of that wing individually. If a potential wing commander is killed or wounded before the wings are in play, the wings can still be formed, use the next ranking commander.
3.3e Bragg and Wing Command. After Bragg initiates the Wing structure, he cannot initially bypass that structure to give orders to subordinates in the wings without going through the wing commander. Every turn after the orders creating wing command have all been accepted, Bragg may instead roll two dice at the beginning of the Command Phase each turn: with a roll of 10-12, he can start bypassing wing commanders if he wants.
Design Note: Bragg historically did not interfere with his subordinates' commands until his frustration level reached a peak on the 20th over Polk and Hill's delays.
3.3f Historical Wing Structure.
Right Wing—Polk: Cheatham's Division (C/P), H Corps HQ, Cleburne's Division (C/H), Breckenridge's Division (B/H), Res Corps HQ, Gist's Division (G/Res), Liddell's Division (L/Res)
Left Wing—Longstreet: Hindman's Division (H/P), Stewart's Division (S/B), Preston's Division (P/B), Law's Division (L/1), McLaws' Division (M/1), Johnson's Provisional Division (JPD/1)
Buckner, Hood, B Corps and 1 Corps are part of the Left Wing.
3.4 Attachments and Detachments
3.4a Divisions. No corps can attach a division from another corps. Any division can be detached and given a Divisional Goal.
3.4b Brigades and Regiments. No Confederate brigade or regiment can ever be assigned to act as part of another division or brigade. Up to one Confederate brigade per division may be detached and given a Divisional Goal. Regiments are never allowed to be detached or attached.
3.4c Scenario Specific Rules. Some scenarios have special rules or orders that will detach or reassign units in direct violation of the above. Only these specified attachments are allowed, in which case any orders for them will be spelled out in detail.
3.5 Confederate Cavalry
Unlike their eastern counterparts, the men of both Forrest's and Wheeler's commands often fought as infantry, and were well drilled in that regard. If using the optional cavalry rules, all rules apply, except that dismounted Confederate cavalry can enter close combat as an attacker.
3.6 Pickett's Miners and Sappers
This unit consists of three companies of pioneers—two from the Army of Tennessee and one from Buckner's East Tennessee command—that performed various engineering duties during the battle. They were not directly engaged. The Miners and Sappers are assumed to have a nominal command rating of 4 for order acceptance, and roll normally for orders received from Bragg. Any bridge repair order issued by Bragg does not cost any Command Points. For all other purposes, treat this unit like any other escort as per rule 4.2.
3.7 Confederate Minor Variants
3.7a First Corps Sent Earlier. Allow all the optional units of 1st Corps to arrive when Longstreet does, at 10:00 p.m. on the 19th. These units include the infantry and leaders of B/M/1, W/M/1, A/L/1, and J/L/1, plus Alexander and the six artillery units of A/1 Corps. This option gives the Union player 6 VPs.
Longstreet's corps straggled into Ringgold and Dalton all through the battle, as trains kept arriving with more troops. Alexander's artillery took the longest time. Had the First Corps gotten started even a day or two earlier, most of these men would have been present on the field.
3.7b Full Confederate Effort. Allow Hardee, the Army of Mississippi HQ and Supply (which always functions as a corps HQ, despite its name) and all units of French's (F/Miss) Loring's (L/Miss) and Stevenson's (S/Miss) Divisions to enter at 8:00 a.m. on the 20th. The Confederate Player may take less than all three divisions, if he chooses. This option gives the Union player 3 VP for F/Miss, 5 VP for L/Miss, and 3 VP for S/Miss, for a total of 11 VP if all units are in play.
These were the remnants of the "Army of Relief" assembled by Johnston at Jackson, Mississippi to come to Vicksburg's rescue. The Reserve Corps was also part of this command, and was sent to Bragg at the end of August to help defend Chattanooga. A more ambitious Confederate response would have left a few Cavalry and local defense forces in Mississippi (where the Federals were not showing much activity anyway) and sent all of Johnston's command to Bragg. Evans Brigade (E/F/Miss) was in fact sent back to Charleston earlier that summer. Stevenson's Division (S/Miss) are those paroled men of the Vicksburg garrison who did not desert—something like 60% of the surrendered men did—and were reformed in Northern Alabama awaiting exchange. They actually joined the Army of Tennessee in October, just in time for the defeat at Missionary Ridge. In the spring of 1864, when Sherman began his drive on Atlanta, the rest of these troops finally ended up in the Army of Tennessee. Hardee had been transferred out of the Army of Tennessee in July to assume command of the Army of Mississippi.
3.7c Change in Command. By 1863, Bragg had lost the confidence of most of his officers, and was not likely to inspire them to surpass previous efforts. Replace Bragg with either Lee (rated a 4) or Johnston (rated a 2). If Lee, give the Union player 8 VP. If Johnston, give the player 5 VP. Note that if this option is used, ignore all anti-initiatives.
It is debatable whether or not either of these two men could have changed things at Chickamauga. Johnston had already all but declined command of the army once, after Murfreesboro, while Lee was very reluctant to leave Virginia. When Johnston did finally replace Bragg after the fiasco of Missionary Ridge (by which time replacement had become virtually inevitable, and Johnston could not refuse) the army's morale did improve. Joseph E. Johnston remained the Army of Tennessee's favorite commander, though he commanded it only from December of 1863 to July, 1864. It is assumed that Lee, had he taken command, would certainly have won the confidence of this army as he did that of the eastern troops.
3.7d Gist and the 16th South Carolina. When Gist and the C/G/Res Brigade arrive on the 20th, allow the 16th SC and Ferguson's Battery to arrive with them. This option gives the Union player 1/10 VP—yes, that's one-tenth of a VP, useful only in tipping the balance on a victory scale. How much more useful can one regiment and a battery be?
Gist regretted that there were not trains enough to get this final regiment and the battery up from Rome, Georgia, in time for the fight. They did arrive by the 22nd or so.
3.7e A Well-Oiled Machine. Ignore all the anti-initiative ratings listed in 3.2, above. Subordinate leaders use their printed values for order acceptance and initiative. This option gives the Union player 4 VPs.
Any Confederate player who spends some map-time with the historical restrictions will undoubtedly come to hate Bragg and all his minions. Here, at least, we can free up some of the minions.
3.7f Scott's Brigade Arrives. Allow Scott and all units of S/P/F Cav to arrive at D40.34 at 11:00 p.m. September 19th, including the Martin detachment which was previously withdrawn. They move immediately to join their division. Note that without this option, only Martin and 10 Conf are considered non-optional units for this brigade. This option gives the Union player 1 VP.
Scott's men were mostly guarding bridges to the north, and skirmished with Whittaker's Federals on the 19th, and Minty's Cavalry on the 20th. The 10th Confederate was part of Scott's Brigade, but remained with Davidson through the 21st. Martin's Detachment of Morgan's men was sent to join Scott's Brigade on the 19th.
3.7g Morgan's Raiders. Allow this division (Mo/W Cav) to arrive when Wheeler and the W.Cav HQ arrive, or set up within 5 hexes of the W Cav HQ in any scenario where the W Cav corps is in play. If using this option, remove Martin's Kentucky Detachment counter permanently. This option gives the Union player 3 VP.
In July, Morgan's Division was sent to raid Union communications in Tennessee and Kentucky. In direct violation of his orders, Morgan crossed the Ohio River into Indiana, and the division was eventually trapped and captured in Ohio. Had Morgan followed orders, there is every reason to expect that he would have returned to the army by the time of the battle.
3.7h Roddey's Brigade. Allow this brigade (R/W Cav) to arrive when Wheeler and the W Cav HQ arrive, or set up within 5 hexes of the W Cav HQ in any scenario where the W Cav Corps is in play. This option gives the Union player 1 VP.
This brigade was stationed in Northern Alabama during the battle, and could easily have joined Bragg.
3.7i Strip the Coasts! Allow Cantey's and/or Mercer's Brigades to arrive on or after 10:00 a.m. on September 19th. They arrive on any road hex on the east edge of maps E or F, on a roll of 10+ on 2 dice. When they arrive, they must be immediately attached to an in-play division, and remain an organic part of that division for the rest of play. This option gives the Union player 2 VP.
In 1864, as the threat to Atlanta grew, both these commands were sent to join the Army of Tennessee. Cantey's command drawn from the infantry components of the garrison at Mobile, while Mercer's men came from the Savannah region. The coastal regions remained very heavily garrisoned by the Confederacy until late in the war, but likely could have been reduced much sooner to provide significant reinforcements for the main armies. In 1864, necessity forced the South to adopt this strategy.
3.7j Southwest Virginia. Allow the J/B Corps division to set up within 5 hexes of the B Corps HQ (but no closer than 5 hexes to any enemy unit) in any scenario where the B Corps is in play. This option gives the Union player 6 VP.
Frankly, this is one of the least likely options. It is very unlikely that the Confederates would strip Southwest Virginia of its defending infantry, exposing both Lee's flank and very important salt and nitre works to enemy action. However, there was at one time a proposal to unite Buckner's East Tennessee command with Jones' Southwest Virginia department, not an unreasonable idea given that the two departments were so close geographically. The VPs on this one have been goosed a little not because the troops are so good, but because the risk to critical war-making industries (those salt and nitre works) is so high.
4.0 General Special Rules
4.1 Divisional Attack Stoppage
With the exception of Longstreet, corps commanders do not check for corps attack stoppage. Instead, all stoppage checks are done at divisional level. Even with a corps order, where several divisions are attacking together, each still checks individually for stoppage. Divisions under Longstreet's command, while exempt from regular stoppage rolls, are still subject to divisional stoppage via the Random Events Table. When a division acting on a divisional goal stops, it reverts to no orders status. When a division stops and is part of a larger corps order, it must remain in command range, but withdraw from small arms range of the defender. All units of the stopped division may not attack, but may defend if attacked. Generally, units of the stopped division should withdraw a turn's movement or as far as possible and still remain in command radius. A stopped division can return to the attack in any of the following ways: 1) Initiative from either the divisional commander or the corps commander. 2) An order from the army commander to either the divisional commander directly, or to the corps commander, telling him to rejoin the corps effort. This order is a complex order.
Divisional Goal Reversion: In the CWB rules, a division under Divisional goals can revert to the Corps order voluntarily by moving back into Corps Commander's command range. This mechanic gives a loophole to players who find themselves hampered by the divisional orders at start, or who want to circumvent various divisional attack stoppages. In the RSS rules, I have added a section that expressly prohibits this loophole by more clearly defining no-orders status for these units. As noted above, now only units with positive orders to do so or initiative can rejoin a corps attack or let a divisional goal lapse.
4.2 Headquarters Guards and Provosts
A number of Union and Confederate headquarters have troops directly attached to them, including both army HQs. These troops may never be reassigned to any subordinate brigade or division—they must instead remain within 6 MPs of their designated HQ at all times, tracing command to that HQ as if it were their brigade commander. These units may never recover stragglers. Any straggler losses they take are gone forever. (Exception: When using the detailed regimental loss charts, they can lose and recover stragglers normally, if the players so choose.) The sole reason for the inclusion of these units is to provide some minimal form of HQ defense for these otherwise vulnerable HQs, without having to detach significant line units to do the job.
4.3 Breastworks
Similar to Gettysburg, use of breastworks was spotty during the battle. Thomas' line on the 2nd day used strong breastworks, while Crittenden and McCook's men were less entrenched, some not at all.
4.3a Permission to Build. Each player can build breastworks in any hex that meets the following criteria: 1) The hex must be in or adjacent to a woods hex. 2) There must be at least one friendly unit, morale state of Shaken or better, who has remained in the hex without moving. 3) One of the leaders in the entrenching unit's chain of command must have successfully rolled initiative to create breastworks. This roll is exclusive of any other roll, must be made expressly for the purpose of creating breastworks, and must be an initiative roll. The army commander may never issue orders to entrench. This roll may be made by every leader in the chain of command, as the player desires. For example, both a corps commander and all his division commanders could roll during the same turn to see if units under their command could entrench. Ignore loose cannon results when rolling for breastworks, and no leader may ever roll more than five times during the course of a game—no more than three times per day.
4.3b How to Build. It takes three hours to build breastworks—12 day turns, or 6 night turns, or any combination thereof. During construction time, the units may not move, fire, be fired on, recover stragglers, or be in any morale state worse than shaken. If they do any of these things, building is paused and may not resume until the building unit again meets the criteria, but the accumulated time is not lost—instead make a note of the turns accumulated for that hex and start from that point.
4.3c Breastwork Effects. A) Breastworks have three hexside facing—chosen at the time construction begins. Once emplaced, breastwork facing cannot be changed. To change facing, new breastworks would have to be built. B) Breastworks provide 1 shift left on the Fire Combat Table, and +1 to the Morale Table.
4.4 Random Events
Too much of what occurs in a Civil War battle lies beyond the realm of predictability. At Chickamauga this was especially true, given Wood's fateful choice to follow an unfortunate order from what amounted to a confused Army HQ, despite fully knowing that the order was flawed, created a situation almost impossible to recreate within the context of the normal rules. In order to introduce a number of these events to the game table in a suitably chaotic manner, a Random Events Table for each side is the logical solution.
4.4a Checking for Random Events. During each command phase, immediately after rolling for New Order Acceptance, each player rolls on his own Random Events Table, and applies the result (if any) immediately. No Union Random Event can occur during a Confederate Player Turn, or vice-versa. Each Player has separate Random Events Tables, with explanations and special rules that apply to each event. Note that all random events occur last in the Command Phase sequence: This means that while a leader casualty will not take affect until after a stoppage roll occurs, for example, there is also nothing that can be done about a RE-imposed attack stoppage until next turn at the earliest.
4.4b Random Events and Scenarios. Use Random Events in all scenarios except 6.1, 6.2, and 6.3. The effects of random events in these smaller scenarios can radically alter the course of a game, and many events do not really apply anyway.
4.4c Random Events and Leader Loss. When leader loss is called for, leaders can only be selected if they are currently eligible for losses. Any leader selected for loss must actually be in play at the time of the event. Brigade leaders must be within four hexes of an enemy unit to be eligible, Division leaders must be within 8 hexes of an enemy unit. Corps leaders or Army commanders need not be within a specific range, just in play.
Design Note: Some of you will pursue vendettas against specific leaders any chance you get. In order to prevent this kind of assassination, I suggest that no enemy leader can be targeted for a random event loss a second time until all currently eligible leaders have been targeted at least once. This does not imply that no leader can be targeted twice until ALL leaders on the board have been targeted once, only that of those currently exposed, all must have been selected as potential losses at least once.
4.4d Random Events are Random. Some results will call for a choice among attacking divisions, or among various leaders. In each case, the outcome should be determined by chance. For example, when choosing a division at random to suffer attack stoppage, roll a die to choose which division (assuming there are 6 or less eligible divisions) or place all potentially effected leaders in a cup and pull out one, to determine the final result.
4.5 Bridge Destruction and Repair (optional)
Both Reed's and Alexander's Bridges were claimed as destroyed by Union troops early in the battle, though neither actually were. These rules will have little impact on the game, and by all means players not exacting about the history of the battle should ignore this section.
4.5a Bridge Destruction. Any unit may destroy a bridge. The unit has to be adjacent to the bridge with no enemy units adjacent to the bridge and in a morale state of Shaken or better. During the friendly order acceptance phase, roll two dice: on an 11 or 12, the bridge is burned. Additional friendly units adjacent have no effect, and only one roll per bridge may be made per order acceptance phase.
4.5b Bridge Repair. Any unit can attempt to repair a bridge. Bridge repair rolls are made during the friendly order acceptance phase: a roll of 10+ on two dice successfully repairs a bridge. A Pioneer or Sapper unit has a +1 die roll modifier for this roll. As above, no enemy unit may be adjacent to the bridge, the repairing unit must have a morale of Shaken or better, additional friendly units have no additional repair effect, and only one roll per bridge per order acceptance phase is allowed.
4.6 Shifting Reinforcements (optional)
In some circumstances, reinforcement entry hexes might either be blocked or isolated from other friendly units to the point that it would be suicidal to bring on those troops at the assigned time and place. In order to alleviate this problem, apply the following. At the time of entry, the friendly player may instead choose to shift troops to a different road entry hex. The Union player may shift entry to any road map-edge hex on maps A, B, or C, while the Confederate player may shift entry to any road map-edge hex on maps D, E, or F. This shifting will incur a delay. To determine the extent of the delay, count the number of road map-edge hexes shifted, and roll one die for each hex shifted. Add all die rolls together. The number rolled is the number of hours entry is delayed. If the new entry time is after the last turn of play, these units do not enter play. A single unit or reinforcement may be shifted more than once, if needed.
Example: Sheridan's Federal 3/20 Division is scheduled to arrive at hex C31.04 at 10:00 a.m. on September 19th. Doing so, however, would mean having to fight his way through an entire Rebel Corps, ensuring almost certain destruction for Sheridan's men and an end to a promising military career. Instead, the Union player decides to shift Sheridan's arrival hex to B17.01. Counting clockwise around the map from C31.04, the original entry point, B17.01 is the fourth road entry hex away, counting C13.01, B50.01, B39.01, and finally getting to B17.01. Four dice are rolled, a 1, two 3's, and a 5 = 12. Sheridan's arrival is delayed 12 hours, until 10:00 p.m. on the 19th.
Design Note: This rule exists because in This Hallowed Ground, there were several instances where Union reinforcements could arrive in compromised positions, and in reality, those units almost certainly would have found other routes. The relative certainty of the arrival times and locations creates anomalies that players can artificially manipulate. The solution above gives players a chance to prevent such odd arrivals, and yet still imposes a significant penalty on units for shifting. Admittedly, the time delay is somewhat arbitrary, but it provides a quick, easy solution to a nagging problem without much excess detail. Players should feel free to keep both the new entry hex and the new entry time secret from their opponents. Players are prevented from shifting onto 'enemy' maps to prevent impromptu commando raids.
5.0 Victory
These rules don't apply to the smaller scenarios which have their own victory conditions. Use the below in the larger scenarios. Each player totals up his victory points. Subtract the Union total from the Confederate total, to produce a single numeric result (which can be either positive or negative) and consult the victory chart at the end of each scenario. Where this number falls within the ranges given will determine who won, and by how much. All losses are cumulative for the scenarios. For those scenarios that start later in the battle, pre-scenario losses are given, which should be added to the losses inflicted during the scenario in play, to produce a final result. This is intentional: players will have to overcome previous mistakes committed by their historical counterparts. No battle happens in a vacuum.
5.1 Points for Terrain
Each player receives points for holding certain hexes on the various maps. A side is defined as holding the hex by having friendly troops occupying or having been the last to move through the hex in question at the end of the scenario. There are VP hexes on all maps, often worth differing amounts for each side. Only use VP hexes of maps in play: if a scenario only uses Map A, for example, VP hexes on the other maps are ignored.
| Hex | Confederate Award | Union Award |
|---|---|---|
| A19.18 | 1 | 1 |
| A36.17 | 1 | 0 |
| A47.23 | 1 | 0 |
| A48.15 | 1 | 0 |
| A62.10 | 3 | 1 |
| B12.14 | 1 | 1 |
| B34.25 | 1 | 1 |
| B45.23 | 1 | 0 |
| B48.09 | 1 |
Each Bridge over Chickamauga Creek—2 VPs. Each Ford over Chickamauga Creek—1/2 VP. For a Confederate player to get points for a bridge or ford, the bridge must be intact (or rebuilt) and the player must control both hexes, one on each side of the creek. For the Federal player, they must only hold one hex, and get points for any burned bridge that has not been rebuilt.
5.2 Points for Losses
Each side receives victory points for total losses inflicted on the enemy. Each loss should be recorded on the loss track provided. In scenarios that start with previous losses, record those losses on the track before play begins. Only permanent losses count for VPs, do not record stragglers here. VPs are awarded below, with the Federal player receiving any award for Confederate losses, and vice versa.
| VP Award | Confederate Losses | Union Losses |
|---|---|---|
| 0 | 0-60 | 0-50 |
| 1 | 61-90 | 51-80 |
| 3 | 92-115 | 81-105 |
| 6 | 116-150 | 106-140 |
| 9 | 151-175 | 141-165 |
| 12 | 176-211 | 166-195 |
| 16 | 212-250 | 196-230 |
| 20 | 251-288 | 231-260 |
| 24 | 289-330 |
If the Confederate player is using all his optional troops, shift the VP award to the next lowest level. For example, if the Confederate player has all optional in play, and loses 521 strength points, the Union player would get 41 VPs, not 46. If the Union player is using all his optional troops, use the Confederate loss column to determine VP awards.
5.4 Points for Wrecked Formations
Victory points are also awarded for wrecking larger formations. All kinds of losses count when determining wrecked formations, including stragglers, since these VPs are meant to measure the combat readiness (or lack thereof) of a given formation at any given time. Award 1 VP for each wrecked enemy infantry brigade. Award 1 VP for each wrecked enemy cavalry regiment. Award 1/2 VP for every battery completely destroyed. VPs are awarded for inflicting significant damage on enemy corps. A wrecked corps is determined by adding up the number of wrecked brigades within it—if it equals or exceeds the number given below, award the opposing player the appropriate points. In some instances, units may exit the map before the game ends. Departing units still count for VP determination after leaving the map. Units wrecked when they departed remain wrecked: they do not recover stragglers while off-map.
Confederate VPs for Wrecked Union Formations:
| Formation | Threshold | VP |
|---|---|---|
| 14 Corps | 7 of 11 Brigades (do not include Wilder) | 10 |
| 20 Corps | 5 of 9 Brigades | 9 |
| 21 Corps | 5 of 8 (or 9) Brigades | 9 |
| Res Corps | 2 of 3 (or 5 of 9) Brigades | 3 (or 8) |
| 11th Corps | 5 of 8 Brigades | 8 |
| 15th Corps | 6 of 10 Brigades | 10 |
| Each Cav Brigade | — | 1 |
| Wilder's Brigade | — | 2 |
Union VPs for Wrecked Confederate Formations:
| Formation | Threshold | VP |
|---|---|---|
| P Corps | 5 of 8 Brigades | 6 |
| H Corps | 4 of 6 Brigades | 6 |
| Res Corps | 3 of 5 Brigades | 4 |
| B Corps | 4 of 6 Brigades | 6 |
| 1 Corps | 5 of 8 (or 7 of 12) Brigades | 7 (or 11) |
| Army of Miss. | 5 of 9 Brigades | 7 |
| Each Cav Brigade | — | 1 |
| Pickett's Miners and Sappers | — | 1 |
5.5 Points for Exiting Troops
In addition to the various awards listed above, the Confederate player can also receive victory points for exiting troops through critical road exits, determined by location, day and time. The Union player does not receive VPs for exiting, but failure to prevent Confederate exits can very well cost him the game.
5.5a Critical Exits. Various north and west map edge road hexes are numbered to determine their relative importance to the Union player. Some numbers apply to more than one exit, while some apply to only one hex. The lower the number, the more critical the exit to the Union rear area. Generally, the Rebel player gets more points for exiting at a lower numbered hex sooner in the game. As the game progresses, exits can become worth less or worth nothing at all.
5.5b Conditions for Exiting. The Confederate player may only exit full brigades. All currently surviving units of a brigade must exit in order for the brigade to count. Brigades must have orders to exit, either issued from higher command or via initiative. Wrecked brigades may exit, but do not count for VPs. (Note: it may be necessary to exit a wrecked brigade as part of a larger formation at times, given the orders situation.) An exited brigade is worth the amount of VPs listed for the numbered exit at the time it exits, even though the VPs don't apply until the end of play. An exited brigade must be able to trace a line of communications at the 8:00 p.m. turn of each game day and on the last turn of any scenario (see below) in order to count for VPs. If an exited unit cannot trace a line of communications on one day, but can at the end of play, it is still not counted for VPs. Note that the tracing requirement is in force only for the turns specified—being unable to trace on another turn, for example, does not negate the award.
5.5c Line of Communications. To count for VP purposes, an exited unit must be able to trace a line of communications from its exit hex, via contiguous roads and trails, to the army HQ, and the army HQ must be able to likewise trace a route off the east map edge. Any hex occupied or adjacent to a Union combat unit will break the chain, and negate the Line of communications.
5.5d Points for Exit Hexes. Each exit number is listed below. Points are given per exited brigade.
| Exit | Prior to Noon, 19th | Prior to Noon (or 5 AM), 20th | By End of Game |
|---|---|---|---|
| #1 | 3 VP | 2 VP | 1 VP |
| #2 | 2 VP | 1 VP | 0 VP |
| #3 | 2 VP | 1/2 VP | 0 VP |
| #4 | 3 VP | 1/2 VP | 0 VP |
| #5 | 3 VP | 2 VP (prior to 5 AM, 20th) | 0 VP |
| #6 | 2 VP | 1 VP (prior to 5 AM, 20th) | 0 VP |
6.0 Scenarios
- Many scenarios will call for use of halves of maps. Back-fold the map along the appropriate crease, and use the half called for in play. For those who don't wish to backfold, just use the crease as a map-edge.
- A couple of scenario set-ups may have a hex begin slightly overstacked, usually no more than a strength point or two. Units that begin overstacked in a specific hex may remain there without penalty, as long as they do not move. If they move, they become subject to all normal stacking rules.
Design Note: Some of the Federal set-ups are very condensed, as Thomas packed troops into very small areas. In order to historically duplicate some of those set-ups, a few overstacking aberrations have been allowed.
- Each scenario lists the first player. Conduct that player turn first and alternate as needed to give each player his player turn each game turn.
- Each set up listing a higher organization sets up with all subordinate units and leaders.
- Some units are followed by a number in parenthesis. That number is the unit's current strength. If no number is given, the unit starts at full strength (see also the Scenario Starting Strength rosters).
6.1 Opening Guns (smaller scenario)
Fighting at Chickamauga actually began on the 18th, when Rebel troops moved to cross West Chickamauga Creek in the face of Union cavalry. The resultant fighting, while not especially fierce compared to the two days to follow, was significant, and alerted Rosecrans to trouble on his northern flank. This scenario allows the Federal player to recreate a classic holding action and also nicely serves as an introduction to the system, given the low counter density.
General Information Map Area: Bottom half of Map D, Top half of Map E. First Turn: 2:00 p.m. September 18th Last Turn: 6:00 p.m. September 18th Total Game Length: 17 turns First Player: Confederate
Union Information
Set Up: Wilder, 92 Ill, 98 Ill, 17 Ind, 18a Ind Lt battery—w/i 4 E4.17, all units in breastworks. 1/2/Cav: 4 Mich—D37.27, 4 US—D41.27, 7 Penn—D38.27. Minty, CBOT battery—D39.27.
Orders: 1. Wilder's Brigade has a brigade goal to prevent a Rebel crossing at Alexander's Bridge as long as possible, and then to exit the map along any west edge. 2. Minty's Brigade has a brigade goal to prevent a Rebel Crossing at Reed's Bridge and Ford as long as possible, and then to exit the map along any west edge.
Ammunition and Previous Losses: Ammunition is unlimited, and there are no previous losses.
Reinforcements: 72 Ind/Wilder, 123 Ill/Wilder, 18b Ind Lt/Wilder—arrive hex D32.15 at 4:00 p.m. Orders—move to join brigade. If Wilder and Minty have already triggered voluntary withdrawal or left the map, these units do not arrive.
Confederate Information
Set Up: Liddell, L/Res Division—w/i 4 E13.23.
Orders: 1. L/Res Corps has a Divisional Goal to cross Chickamauga Creek at Alexander's Bridge. Once across, they are to move to the Winfrey house, hex D57.15, and wait for First Corps.
Victory (the source text recovered here begins mid-sentence): "...in both Union brigades on or before the 3:00 p.m. turn, he automatically wins. If the Union player is still in play by 5:00 p.m., AND the Rebel player does not have at least a 3 to 1 ratio of VPs, then the Union player automatically wins."
6.2 Jay's Mill (smaller scenario)
Action started slowly on the morning of September 19th, as Thomas sent one Federal division forward to develop the Confederate position and pick off what was thought to be a lone Rebel Brigade near Jay's Mill. That brigade turned out to be the Confederate Reserve Corps, with Forrest's Cavalry in support, all of which became drawn in piecemeal to the developing fight around the Mill. In turn, Thomas sent support, and the battle grew of its own accord...
General Information Map Area: Map D. First Turn: 8:00 a.m. September 19th Last Turn: 1:00 p.m. September 19th Total Game Length: 21 Turns First Player: Union
Union Information
Set Up: Brannan—D40.04. 1/3/14: Connell, 17 Ohio—D42.01, 82 Ind—D40.01, 31 Ohio—D46.02, D, 1 Mich battery—D41.01. 3/3/14: Van Derveer, 87 Ind—D32.02, 2 Minn—D32.04, 35 Ohio—D34.03, I, 4 US battery—D33.01. 2/3/14: Croxton, 10 Ind—D42.07, 74 Ind—D43.08, 14 Ohio—D44.05, 10 Ky—D40.07, 4 Ky—D41.08, C, 1 Ohio battery—D42.06.
Orders: 1. 3/14 Division has a divisional goal to attack west between the Reed's Bridge and Alexander's Bridge Roads, in order to capture Jay's Mill. 2. 31 Ohio/1/3/14 is attached to 2/3/14.
Ammunition and Previous Losses: Ammunition is unlimited, and there are no previous losses.
Reinforcements: 10:00 a.m., west map edge between D37.01 and D49.01: Baird, 1/1/14, 3/1/14, H 5 US and A 1 Mich batteries. 10:15 a.m., west map edge between D37.01 and D49.01: 2/1/14, 4 Ind Lt battery. 10:30 a.m., hex D30.01: 9 Ohio/3/3/14.
Reinforcements Orders: 1. 1/14 has a divisional goal to support the attack of 3/14, and capture Jay's Mill. 2. 9 Ohio/3/3/14 is ordered to join its brigade.
Confederate Information
Set Up: Forrest, F Cav HQ, Jackson/F Cav (1)—w/i 1 D40.17. 10 Conf/S/P/F Cav (2)—D42.15, Routed. D/P/F Cav: Huwald battery—D40.13, Davidson, Rucker Lgn—D42.10, Martin/S/P/F Cav—D44.11, Pegram, 6 Ga—D41.11, 1 Ga—D40.11. Armstrong, Bradley Cav, D/A/F Cav, Morton and Huggins Batteries—w/i 2 D36.15. Liddell, L/Res (29 Miss/W/L/Res (6), 34 Miss/W/L/Res (5))—on road in line between D62.04 and D59.14.
Orders: 1. F Cav has orders to Defend Jay's Mill. 2. L/Res has a divisional goal to attack in line due north from its current position, to take the Union attack in the flank. This order is currently in delay status D5, and must be rolled for acceptance every Confederate command phase. 3. Martin/S/P/F Cav and 10 Conf/S/P/F Cav are attached to D/P/F Cav. 4. First Corps is ordered to cross Chickamauga Creek at Reed's Bridge, clear the road to the Winfrey house (D57.15), and then move west to D62.04 and deploy into line. 5. F Cav is ordered to help First Corps cross at Reed's Bridge, and then move to the Winfrey House and halt. 6. Martin/S/P/F Cav is attached to the F Cav HQ, as if it were an escort. 7. 10 Conf/S/P/F Cav is attached to D/P/F Cav.
Ammunition and Previous Losses: Ammunition is unlimited. The following units have losses: Jackson/F Cav—1; 10 Conf/S/P/F Cav—1 killed, 2 stragglers; 29 Miss/W/L/Res—1; 34 Miss/W/L/Res—1. S/P/F Cav has 1 wrecked Regiment.
Reinforcements: 9:00 a.m., hex D62.15: Ector, W/G/Res, Res Corps HQ and Supply, Nelson Cav, Walker. 9:45 a.m., hex D62.15: E/G/Res, Howell battery, Repl Commander for E/G/Res. 2:00 p.m., D40.34: Johnson, JPD/1 Division, R/L/1, Forrest, F Cav HQ, Jackson/F Cav, Martin/S/P/F Cav. 3:30 p.m., D40.34: Pegram, D/P/F Cav, 10 Conf Bn/S/P/F Cav. 4:30 p.m., D40.34: Hood, 1 Corps HQ, E+C 1 La Cav, Lumsden/R/1 Corps.
Reinforcements Orders: 1. Res Corps itself has no orders, and must move to D57.15 and halt. 2. G/Res division has a divisional goal to support F Cav in defense of Jay's Mill, and to counterattack the Union line around the Brotherton Road. Ector commands the division; a repl leader commands E/G/Res.
Scenario Special Rules: 1. Ignore all anti-initiatives for this scenario. 2. At any point in the scenario, the Union player can trigger voluntary withdrawal for each brigade. Once triggered, all units of that brigade must immediately move to exit the map as called for in their orders. 3. The Confederate player may not use any fords to cross Chickamauga Creek until he has successfully rolled initiative to do so. (The Rebels did not at first know where the fords were, and had to scout for them.)
Victory: Do not use the Victory conditions given in rules section 5.0. Instead, use these: Score 1 VP for each side for each permanent loss. Score 2 VP for each side for each wrecked regiment (counting stragglers.) Score 1 VP for wounding or killing Johnson, Liddell or Minty. Score 2 VP for wounding or killing Forrest or Wilder. The side with the higher VP total wins. If the Rebel player triggers withdrawal, [text as recovered continues below under the second printed Victory note] do not use the rules given in section 5.0, instead the following apply. Note that to avoid confusion, where a Field is named, one hex of that Field is listed. However, to control that field, all hexes must be occupied or moved through last by friendly units. If the Confederate Player controls all hexes of Jay's Mill Field (D43.14) and Winfrey Field (D48.05), and also controls all hexes of the Brotherton Road between D43.14 and D53.01, and also has wrecked at least three Union brigades (including straggler losses) he wins a tactical victory. If the Union player controls Jay's Mill Field (D43.14) and Youngblood Field (D51.10) west of the Jay's Mill Road, and wrecks at least three Confederate Brigades (including straggler losses) he wins a tactical victory. Any other result is a draw.
6.3 Crawfish Springs (smaller scenario)
Over the course of the day on the 20th, the area around Crawfish Springs saw repeated—if disjointed—action. In a move reminiscent of Stuart's at Gettysburg, Rebel cavalry commander Joe Wheeler extrapolated a picketing mission to an attack on the Union flank. What passes for the battle of Crawfish Springs is really a two-part affair: in the morning Wheeler's dismounted men crossed Chickamauga Creek at Glass Mill, and roughly handled a Federal Brigade of dismounted Cavalry under Col. Eli Long. Then, having been recalled to Lee and Gordon's Mill, Wheeler mounted, moved back to the west bank and rode to that site, where they promptly recrossed to menace Crawfish Spring from the north. By this time, however, no less than three brigades of Federal Cavalry and one of infantry were on hand, and the afternoon's action never developed beyond desultory skirmishing. While Wheeler's men had failed to draw any Federal troops away from the main battle, they did manage to convince the Union Cavalry that they had faced the veteran infantry of Hindman and Longstreet that afternoon.
General Information Map Area: South half of Map B, Map C. First Turn: 12:00 noon September 20th Last Turn: 3:00 p.m. September 20th Total Game Length: 13 Turns First Player: Confederate
Union Information
Set Up: Mitchell, Cav Corps HQ and Supply—C3.03. Crook, CBOT/Arty/2/Cav, 2/2/Cav—w/i 2 C19.14. McCook, D 1 Ohio/Arty/1/Cav—w/i 2 B55.10. 1/1/Cav—w/i 2 D52.12. 2/1/Cav—w/i 2 D57.15.
Orders: 1. Cav Corps is ordered to defend Crawfish Spring. 2. 2/Cav has a Divisional Goal to delay the Rebel advance on Crawfish Spring via Glass Mill as long as possible.
Ammunition and Previous Losses: Ammunition is unlimited and there are no previous losses.
Reinforcements: 1:00 p.m., hex C13.01: 1/1/20, 5 Wisc Battery/Arty/1/20.
Reinforcements Orders: 1/1/20 is attached to the Cav Corps, and is ordered to help defend Crawfish Spring.
Confederate Information
Set Up: Wheeler, W Cav HQ—C22.23. Wharton, W/W Cav—w/i 2 C20.21. Martin, M/W Cav—w/i 2 C23.27.
Orders: 1. W Cav has orders to attack towards Crawfish Spring and threaten the Union forces there. However, every turn the Rebel player must roll 2 dice—on a roll of 9+, the W Cav corps must immediately re-cross Chickamauga Creek to the east bank, move north to Lee and Gordon's Mill, cross again, and attack southwest towards Crawfish Spring.
Design Note: These orders faithfully recreate the additional instructions Wheeler received from Bragg at about 1 p.m. Wheeler's overriding mission was to protect the left flank of Bragg's army, which could be best done from Lee and Gordon's Mill. The roll of 9+ simulates the arrival and acceptance of the new orders from Bragg.
Ammunition and Previous Losses: Ammunition is unlimited and there are no previous losses.
Reinforcements: None.
Victory: If the Rebel player captures Crawfish Springs, inflicts more losses than he suffers, and wrecks at least two Federal brigades, he wins a major victory. If the Rebel player fulfills at least two of the above conditions, he wins a minor victory. If the Rebel player fulfills only one of the above conditions, the Union player wins a minor victory. If none of the above conditions are met, the Union player wins a major victory.
Design Note: A great deal of army baggage and many wounded men were evacuated from the hospitals around Crawfish Spring by the Union Cavalry. Their loss would have been a difficult blow to recover from, coming on the heels of the defeat of the main Union army further north. Hence, despite the sideshow nature of this engagement, it is possible for either side to win a major victory.
6.4 Afternoon of the 19th (mid-size scenario)
By the afternoon of the 19th, the fighting had become general. Cheatham's, Stewart's and Cleburne's Rebel divisions all made powerful attacks, each gaining some headway until repulsed in turn by Union counter thrusts. What remained lacking was any overall sense of coordination on either side, leaving each newly committed command to fight largely unsupported.
General Information Map Area: Maps A, B, D, and E. First Turn: 1:00 p.m. September 19th Last Turn: 9:00 p.m. September 19th Total Game Length: 30 Turns First Player: Confederate
Union Information
Set Up: Rosecrans, A Cumb HQ and Supply—B12.14. 15 Penn Cav, 1 Bn Ohio SS, 10 Ohio—w/i 2 B12.14. 1/2/Cav, CBOT/Arty/2/Cav—w/i 2 B12.14: 4 Mich Cav (5), 7 Penn Cav (6). Thomas, 14 Corps HQ and supply—A47.23. 9 Mich, L 1 Ohio Cav—w/i 1 A47.23.
1/14: Baird—A29.26. 1/1/14, 4 Ind battery (4)—w/i 1 A34.28: 2 Ohio (2), 33 Ohio (4), 94 Ohio (4), 10 Wisc (2), 38 Ind (5). 2/1/14, A 1 Mich battery (1)—w/i 2 A29.29: 1 Wisc (4), 24 Ill (4), 21 Wisc (5), 79 Penn (4). 3/1/14, H 5US battery (2)—w/i 1 A26.27: 1/15 US (1), 1/18 US (3), 2/18 (2); 1/16 US and 1/19 US eliminated.
3/14: Brannan, D 1 Mich Battery—A36.27. 1/3/14, I 4 US battery—w/i 1 A34.28: 17 Ohio (8), 31 Ohio (9). 2/3/14—w/i 2 A37.27: 10 Ind (3), 74 Ind (3), 4 Ky (8), 10 Ky (5), 14 Ohio (3). 3/3/14, C 1 Ohio battery—w/i 2 A40.26: 87 Ind (5), 2 Minn (7), 35 Ohio (5), 9 Ohio (6).
4/14: Reynolds, 75 Ind/2/4/14—A60.22. 2/4/14: 68 Ind—A60.24, E. King, 101 Ind, 19 Ind Lt battery—A61.24, 105 Ohio—A62.24. 3/4/14, 21 Ind Lt battery—w/i 2 A42.23.
2/20: Johnson—A50.28. 1/2/20: Willich, 15 Ohio, 49 Ohio—A51.31, 32 Ind, 89 Ill—A52.30. 2/2/20: Dodge, 77 Penn, 29 Ind—A51.28, 79 Ill, 30 Ind—A50.28. 3/2/20: Baldwin—A47.31, 5 Ky, 93 Ohio—A47.32, 1 Ohio, 6 Ind—A48.31. Arty/2/20: A 1 Ohio—A51.30, 20 Ohio Lt—A50.27, 5 Ind Lt—A47.31.
2/21: Palmer, C 7 Ill Cav—A54.31. 1/2/21: 1 Ky—A56.29, Cruft, 2 Ky—A58.31, 31 Ind, B 1 Ohio Lt/Arty/2/21—A58.32, 90 Ohio—A58.33. 2/2/21: 41 Ohio—A57.34, 124 Ohio—A56.34, 9 Ind, F 1 Ohio/Arty/2/21—A55.43, Hazen, 6 Ky—A56.32. 3/2/21: 23 Ky—A59.29, Grose, H 4US/Arty/2/21—A59.28, 24 Ohio—A60.28, 36 Ind—A60.27, 84 Ill—A60.26.
3/21: Van Cleve—B4.24. 1/3/21: 17 Ky—B1.25, Beatty, 79 Ind, 9 Ky—B2.24, 19 Ohio, 26 Penn Lt/Arty/3/21—B3.25. 2/3/21: 59 Ohio—B4.25, Dick, 18 Ohio, 7 Ind Lt/Arty/3/21—B5.25, 86 Ind, 44 Ind—B6.25. 3/3/21, 3 Wisc Lt/Arty/3/21—w/i 3 B36.24.
Wilder's Brigade: 92 Ill, 18 Ind Lt b battery—B1.23. 98 Ill (7)—B17.22. 72 Ind—B18.21. Wilder, Brigade HQ A, 18 Ind Lt a battery—B19.22. 123 Ill (4)—B20.21. 17 Ind—B21.22.
1/20: Davis—B16.26. 2/1/20: 38 Ill—B16.27, Carlin, 101 Ohio—B17.28, 81 Ind—B18.27, 21 Ill—B17.26. 3/1/20: 8 Kansas—B13.20, Heg, 35 Ill, 15 Wisc—B14.30, 25 Ill—B15.30. Arty/1/20: 8 Wisc Lt—B14.29, 2 Minn Lt—B19.26.
21 Corps HQ and Supply, Crittenden, Mendenhall, K 15 Ill Cav—B46.19. 1/21—w/i 4 B44.20.
Union breastworks: B17.22, B18.21, B19.22, B20.21, B21.22.
Orders: 1. 14 Corps is ordered to defend the line of the Lafayette Road from Reed's Bridge Road south to the Brock House at B10.24. Further, to maintain a forward defense along the Alexander's Bridge and Brotherton Roads to their junction. 2/20, 2/21, and 3/21 are attached to 14 Corps. 2. 2/4/14 is detached from 4/14, ordered to move to join the 2/21 division, and be attached to that division to support its defense. 92 Ill and 18 Ind Lt b of Wilder are attached to 4/14. 3. Wilder has a Brigade Goal to defend the hill he currently occupies in the vicinity of B19.22. 4. 3/3/21 has a Brigade Goal to defend the Lafayette Road at the vicinity of the Scott House and the junction of the Alexander Road. 5. 21 Corps has orders to defend Lee and Gordon's Mill and the crossing there. 6. 1/2/Cav has no orders.
Ammunition and Previous Losses: Artillery Ammunition: 150. Previous Losses: 56. Stragglers and wrecked regiments: 1/1/14—9 stragglers, 3 wrecked regiments; 2/1/14—3 stragglers, 2 wrecked regiments; 3/1/14—9 stragglers, 5 wrecked regiments; 1/3/14—1 straggler; 2/3/14—7 stragglers, 2 wrecked regiments; 3/3/14—2 stragglers.
Reinforcements: 1:30, hex B62.04—McCook, 20 Corps HQ and Supply, I 2 Ky Cav, 3/20. Orders: move to Lee and Gordon's Mill and replace 21 Corps in defending the crossing there. 4:30, hex B62.04—Negley, 2/14 (less 1/2/14, 78 Penn/3/2/14, Bridges battery). Orders: move to Army HQ and await further orders.
Confederate Information
Set Up: Bragg, A Tenn HQ and Supply, Dreux, Holloway—E27.17. Forrest, F Cav Corps HQ, Jackson (1)—D39.16. Armstrong, Bradley Cav, Arty/A/F Cav—D46.06. D/A/F Cav—w/i 3 D46.06: 9 Tenn (4), 10 Tenn (6), Shaw (2), 11 Tenn (4), 4 Tenn (6), 8 Tenn (5). Pegram, Huwald/Arty/P/F Cav—D36.10. D/P/F Cav, 10 Conf/S/P/F Cav (2)—w/i 3 D36.10: Rucker (5), 6 Ga (2), 6 NC (4), 1 Ga (5). Walker, Res Corps HQ and Supply, Nelson Cav—D43.14. Ector, G/Res (less Gist, C/G/Res)—w/i 2 D53.17. E/G/Res (repl leader, Ector commands Division): Stone (0), 10 Texas (1), 29 NC (1), Pound (0), 14 Texas (0), 32 Texas (0), 9 Texas (0).
W/G/Res: 29 Ga (1), 25 Ga (2), 4 La Bn (1), 1 Ga Bn SS (0), 30 Ga (3). Liddell, Arty/L/Res—D44.10.
W/L/Res: 30 Miss (5)—D49.11. 34 Miss (3)—D46.09. Walthall, 27 Miss (5)—D47.10. 29 Miss (3)—D46.09. 24 Miss (5)—D45.09.
G/L/Res: 8 Ark (4)—D44.08. Govan, 5+13 Ark—D43.09. 1 La Reg (1)—D42.08. 2+15 Ark (2)—D41.09. 6+7 Ark (3)—D40.08.
Polk, P Corps HQ and Supply, Greenleaf—D58.07. Cheatham, 2 Ga Cav—D55.03.
J/C/P: 2 Ga Bn SS—D49.02. 8 Miss—D50.01. 5 Miss, 2 Bn-1 Conf—D51.02. Jackson, 5 Ga—D52.02.
M/C/P: 1+27 Tenn—D52.05. Maney, 24 Tenn Bn SS, 4 Tenn (PA)—D53.05. 6+9 Tenn—D54.04.
Sm/C/P: Dawson SS—D56.02. 13+154 Tenn—D57.03. Smith, 12+47 Tenn—D58.02. 11 Tenn—D59.02. 29 Tenn—D60.02.
St/C/P: 19 Tenn—D56.06. Strahl, 31 Tenn—D57.06. 33 Tenn—D58.05. 24 Tenn—D59.05. 4+5 Tenn—D60.04.
W/C/P: 16 Tenn—D62.01. 8 Tenn—E1.01. 51+52 Tenn—B2.34. 28 Tenn—B4.33. 38 Tenn—B4.31. Wright, Brigade goal HQ A—B3.34.
Arty/C/P: Scogin—D50.02. Smith—D53.06. Scott—D59.03. Stanford—D58.06. Carnes—B3.34.
H/P, Divisional Goal HQ B—w/i 3 B47.30. Hood, 1 Corps HQ, E+C 1 La Cav—E12.04. Law, Lumsden/R/1 Corps—E7.01.
S/L/1: 44 Ala, 48 Ala—E5.01. Sheffield, 15 Ala—B6.34. 47 Ala, 4 Ala—B7.34.
R/L/1: Robertson, 1 Texas, 4 Texas—B8.33. 5 Texas, 3 Ark—B9.34.
B/L/1: Benning, 15 Ga, 17 Ga—E8.01. 2 Ga, 20 Ga—E7.02.
Johnson—E15.02. F/JPD/1: 17 Tenn, 25 Tenn—B10.34. Fulton, 23 Tenn, York battery—E11.01. 44 Tenn—B12.34.
G/JPD/1: Gregg, 7 Texas, Bledsoe battery—E13.01. 10 Tenn, 30 Tenn—B14.34. 3 Tenn, 1 Tenn Bn—B15.34. 41 Tenn, 50 Tenn—B16.34.
M/JPD/1: McNair, 4+31+4 Ark Bn—E14.02. 1 Ark MR, 2 Ark MR—E13.02. 25 Ark, 39 NC—E12.02. Culpepper battery—E13.03.
Buckner, B Corps HQ and Supply, Clark Cav—E26.06. W/B Corps—w/i 2 E26.06. Preston—E23.03. Arty/P/B—w/i 2 E23.03.
T/P/B: Trigg—B20.34. 1 Fla Cav—B18.34. 54 Va—B19.34. 6 Fla—B20.33. 7 Fla—B21.34.
G/P/B: 4 Ala Bn, 1 Ala Bn—E19.03. 43 Ala—E20.02. Gracie, 3 Ala Bn, 2 Ala Bn—E21.02. 63 Tenn—E22.01.
K/P/B: 58 NC—E19.05. 63 Va—E20.04. Kelly, 65 Ga—E21.04. 5 Ky—E22.03.
Stewart, Divisional Goal HQ C—E9.05. C/S/B, Humphreys/Arty/S/B—w/i 2 E9.05, column or limbered. Br/S/B, Anderson/Arty/S/B—w/i 2 E13.06, column or limbered. Ba/S/B, Oliver/Arty/S/B—w/i 2 E17.08, column or limbered.
Orders: 1. F Cav has no orders. 2. 10 Conf/S/P/F Cav is considered attached to D/P/F Cav. 3. Res Corps has no orders. 4. P Corps has orders to attack and clear the Brock Field, continue and capture the Lafayette Road between the Poe and Brotherton Fields. 5. W/C/P has a brigade goal to capture the Brotherton House. 6. H/P has a Divisional Goal to defend the crossing at Lee and Gordon's Mill until relieved by Breckinridge's Division of Hill's Corps, upon which time H/P is ordered to join the corps. 7. B Corps has no orders. S/B has a Divisional Goal to support the P Corps attack and capture the Brotherton House. 8. 1 Corps has no orders.
Ammunition and Previous Losses: Artillery Ammunition: 140. Previous Losses: 58. Stragglers and Wrecked Regiments: D/A/F Cav—4 stragglers, 1 wrecked regiment; P/A/F Cav—5 stragglers, 2 wrecked regiments; S/P/F Cav—2 stragglers, 1 wrecked regiment; E/G/Res—9 stragglers, 7 wrecked regiments; W/G/Res—7 stragglers, 5 wrecked regiments; W/L/Res—6 stragglers, 2 wrecked regiments; G/L/Res—8 stragglers, 3 wrecked regiments.
Reinforcements: 2:00 p.m., hex B62.33: Hill, H Corps HQ and Supply. Orders: move to army HQ and await further orders. 2:30 p.m., hex B62.33: B/H Div, Divisional Goal HQ D. Orders: move to Lee and Gordon's Mill to replace Hindman in defending that crossing. 3:30 p.m., hex E62.10: C/H Division. Orders: move to Thedford Ford and await further orders.
Victory: Confederate Decisive: 21+ VPs. Confederate Major: 11 to 20 VPs. Confederate Minor: 7 to 10 VPs. Draw: 6 to -4 VPs. Union Minor: -5 to -9 VPs. Union Major: -10 to -19 VPs. Union Decisive: -20 or less VPs. Historically, the Confederates won a minor victory with 7 VPs.
6.5 Polk vs. Thomas (mid-size scenario)
On the morning of the 20th, Polk's tardy attacks finally commenced against Thomas' well sited line around the Kelly Field. Despite repeated attacks and a temporary flank crisis near the McDonald House, Thomas' line held firm.
General Information Map Area: Map A, west half of Map D. First Turn: 8:00 a.m. September 20th Last Turn: 1:00 p.m. September 20th Total Game Length: 21 game turns First Player: Confederate
Union Information
Set Up: Thomas, 14 Corps HQ and Supply—A47.23. L, 1 Ohio Cav, 9 Mich/14 Corps—w/i 1 A47.23.
1/14: Baird—A43.26. 1/1/14: Scribner, 33 Ohio (6)—A42.26, 2 Ohio (5), 10 Wisc (4)—A43.26, 94 Ohio (5), 38 Ind (6), 4 Ind Lt Bty (4)—A43.27. 2/1/14: Starkweather, 24 Ill (5), 21 Wisc (6)—A44.27, 1 Wisc (6), 79 Penn (6)—A44.26. 3/1/14: J. King, 1/18 US (4), 2/18 US (4)—A40.25, 1/16 US (2), 1/19 US (2)—A41.26, 1/15 US (3), H 5 US Bty (2), A 1 Mich Bty (1)—A41.25.
2/14: Negley, Divisional Goal HQ—A59.20. 1/2/14: Beatty, Brigade Goal HQ, 104 Ill—A36.21, 88 Ind—A30.21, 42 Ind—A31.22, 15 Ky—A38.23. 2/2/14 (all units in column): 11 Mich—A55.20, Stanley, 19 Ill—A56.20, 18 Ohio—A57.20. 3/2/14 (all units in column): 78 Penn—A60.20, 21 Ohio—A61.20, Sirwell, 74 Ohio—A62.20, 37 Ind—A62.19. Arty/2/14 (all units limbered): Bridges—A33.21, M 1 Ohio—A58.20, G 1 Ohio—A59.20.
3/14: Brannan—A57.22. 1/3/14: 17 Ohio (9)—A57.23, Connell, 82 Ind—A58.23, 31 Ohio (9)—A59.23. 2/3/14: Croxton, 4 Ky (9)—A56.23, 14 Ohio (5), 10 Ky (5)—A55.23, 10 Ind (4), 74 Ind (5)—A54.23. 3/3/14: Van Derveer, 9 Ohio (7), 35 Ohio (5)—A59.22, 2 Minn (7), 87 Ind (6)—A60.21. Arty/3/14—w/i 1 A57.22.
4/14: Reynolds—A52.22. 2/4/14: E. King, 75 Ind (5), 101 Ind (7)—A52.23, 105 Ohio (6), 68 Ind (5), 19 Ind Lt Bty—A53.23. 3/4/14: Turchin, 92 Ohio (7), 18 Ky (4)—A50.24, 11 Ohio—A50.23, 36 Ohio (7), 21 Ind Lt Bty—A51.24.
2/20: Johnson—A42.22. 1/2/20: Willich, 89 Ill (7), 15 Ohio—A43.24, 32 Ind (6), 49 Ohio (4)—A44.24. 2/2/20: Dodge, 30 Ind (3), 77 Penn (3)—A40.23, 79 Ill (3)—A39.23, 29 Ind (5)—A40.24. 3/2/20: Repl leader, 1 Ohio (6), 6 Ind (5)—A46.26, 93 Ohio (4), 5 Ind Lt Bty (5)—A45.27, 5 Ky (4)—A45.26. Arty/2/20: 20 Ohio Lt, A 1 Ohio—A44.23.
2/21: Palmer, C 7 Ill Cav—A46.22. 1/2/21: 31 Ind (6), 1 Ky (1), 2 Ky (6)—A47.26, Cruft, 90 Ohio (6)—A47.25. 2/2/21: Hazen, 6 Ky (4), 124 Ohio (6)—A48.24, 11 Ohio (5), B 1 Ohio Bty—A49.25, 9 Ind (6), F 1 Ohio Bty—A48.25. 3/2/21: Grose, 84 Ill (7), 6 Ohio (5)—A47.24, 36 Ind (5), 23 Ky (4), 24 Ohio (4)—A46.24. Arty/2/21: H 4 US, M 4 US—A46.23.
Union Breastworks: A39.23, A40.23, A40.24, A40.25, A41.26, A42.26, A43.27, A44.27, A49.25, A50.24, A51.24, A52.23, A53.23, A54.23, A55.23, A56.23, A57.23, A58.23, A59.23, A60.22, A61.22, A62.22. Uncompleted Breastworks: A45.27, A46.26, A47.26, A48.25, A48.24, A48.23, all have 8 accumulated day turns of construction, and will be done by 8:45 a.m.
Orders: 1. 14 Corps is ordered to defend the line of the Lafayette Road from the McDonald House to the Brotherton House and Field. 2. 2/20 Division is attached to 14 Corps. 3. 2/21 Division is attached to 14 Corps. 4. 1/2/14 has a Brigade Goal to defend the Union flank in the McDonald Field. 5. 2/14 Division (less 1/2/14) has a Divisional Goal to move to the Snodgrass Field and await further orders.
Ammunition and Previous Losses: Artillery Ammunition: 200. Previous Losses: 145. Stragglers: none. Wrecked Regiments: 3/1/14—3; 1/2/21—1.
Reinforcements: 11:00 a.m., hex A1.12: Res Corps. Res Corps has orders to move to support 14 Corps.
Confederate Information
Set Up: Bragg, A Tenn HQ—D50.03. Polk, P Corps HQ and Supply, Right Wing HQ, Greenleaf—D62.15. Forrest, F Cav Corps HQ, Jackson/F Cav (1)—A25.34. Armstrong, Bradley Cav, Arty/A/F Cav—A26.32. D/A/F Cav—w/i 2 A25.32: 4 Tenn (6), 8 Tenn (6), 9 Tenn (5), 10 Tenn (6), 11 Tenn (5), Shaw (3). W/A/F Cav—w/i 2 A27.32. Pegram—D26.02. D/P/F Cav—w/i 2 D26.02: 1 Ga (5), 6 Ga (4), Rucker (6). 10 Conf/S/P/F (4). Walker, Res Corps HQ and Supply, Nelson Cav—D32.04.
G/Res: Gist—D36.02. C/G/Res: 46 Ga—D40.01, Colquitt, 24 SC—D41.01, 8 Ga Bn—D42.01. E/G/Res: 29 NC (2), Pound (1)—D35.02, 32 Texas (2), Howell/Arty/G/Res—D36.02, Ector, 10 Texas (2), 14 Texas (1)—D37.02, 9 Texas (2), Stone (1)—D38.02. W/G/Res: 1 Ga Bn SS (1), 4 La Bn (2)—D29.03, 25 Ga (4)—D30.02, Wilson, 30 Ga (4)—D31.03, 29 Ga (3)—D32.02.
L/Res: Liddell, Fowler/Arty/L/Res (3), Warren/Arty/L/Res—D32.06. G/L/Res: 5+13 Ark (7)—D29.06, 6+7 Ark (4)—D30.05, Govan, 1 La Reg (2), 2+15 Ark (4)—D31.06, 8 Ark (6)—D32.05. W/L/Res: 29 Miss (4)—D33.06, 30 Miss (6)—D34.05, Walthall, 27 Miss (6)—D35.06, 24 Miss (7)—D36.05, 34 Miss (4)—D37.06.
C/P: Cheatham, Arty/C/P—w/i 1 D59.06: Carnes (2), Scogin (3), Scott (3). J/C/P: 2 Ga Bn SS (1), 5 Ga (4)—D60.05, Jackson, 2 Bn 1 Conf (3), 5 Miss (4)—D61.05, 8 Miss (7)—D62.05. M/C/P: Maney, 6+9 Tenn (3)—D60.02, 1+27 Tenn (10)—D61.03, 4 Tenn (PA) (3), 24 Tenn Bn SS—D62.03. Sm/C/P: Dawson SS (5), 12+47 Tenn (4)—D54.04, Repl leader, 11 Tenn (4)—D55.05, 29 Tenn (4)—D56.05, 13+154 Tenn (4)—D57.05. St/C/P: 33 Tenn, 31 Tenn (4)—D54.01, Strahl, 24 Tenn (4), 19 Tenn (3)—D55.02, 4+5 Tenn (4)—D56.02. W/C/P: 38 Tenn (3)—D57.03, Wright, 16 Tenn (4), 51+52 Tenn (3)—D58.02, 8 Tenn (4), 28 Tenn (4)—D59.03.
H Corps: DH Hill, H Corps HQ and Supply—D50.03. B/H: Breckinridge, Foules—A41.32. A/B/H: 13+20 La—A31.32, 16+25 La—A32.31, Adams, 19 La—A33.32, 32 Ala, 14 La Bn—A34.31. H/B/H: 6 Ky, 4 Ky—A40.31, 41 Ala—A41.31, 9 Ky—A42.31, 2 Ky—A43.31. S/B/H: 47 Ga, 60 NC—A36.31, Stovall, 4 Fla—A37.32, 1+3 Fla—A38.31. Arty/B/H: Cobb—A42.32, Slocumb (3)—A32.32, Mebane—A41.32.
C/H: Cleburne, Sanders, Divisional Goal HQ—A52.34. D/C/H: 9+24 Ark, 6 Texas—A58.30, 10+15 Texas—A57.31, Deshler, 17+18 Texas—A56.31, 24+25 Texas—A55.32. P/C/H: 1 Ark—D47.02, 35 Tenn—D48.01, Polk, 48 Tenn, 2 Tenn—D49.01, 3+5 Conf (7)—A50.34. W/C/H: 33 Ala (6), 16 Ala (5)—B51.34, Wood, 45 Ala (6)—A52.33, 32+45 Miss (7)—A53.33, 15 Miss Bn SS, 18 Ala Bn—A54.32. Arty/C/H: Douglas—A57.32, Semples—A54.33, Calvert—D50.01.
S/B: Stewart, Divisional Goal HQ—A55.29. Ba/S/B: 37 Ga (5)—A52.27, Bate, 20 Tenn, 15+37 Tenn (2)—A53.27, 4 Ga Bn SS (1), 58 Ala (5)—A54.26. Br/S/B: 23 Tenn Bn (2), 18 Tenn (4)—A55.26, Brown, 32 Tenn (5)—A56.26, 26 Tenn (3), 45 Tenn (3)—A57.26. C/S/B: 36 Ala (7)—A53.29, Clayton, 38 Ala (7)—A54.28, 18 Ala (6)—A55.28. Arty/S/B: Oliver—A53.27, Anderson—A56.26, Humphreys—A54.28.
Confederate Breastworks: A52.27, A53.27, A54.26, A55.26, A56.26, A57.26.
Orders: 1. The Right Wing is in effect, using the historical composition listed in 3.3f. The Right Wing has transmitted an attack order, the status of that attack order is as follows: 2. H Corps is ordered to attack at once to clear the Lafayette Road. B/H Division is ordered to capture the McDonald Field and flank the Union line from the north, while the 3. C/H Division has a divisional goal to launch a frontal attack against the line along Kelly Field. The C/H divisional goal is in D5 status. Res Corps has an order to support H Corps, that order is currently in D6 Status. 4. C/P Division has no attack orders at this time. It is ordered to act as wing reserve, and await further orders. 5. S/B Division, which is not part of the Right Wing, has a divisional goal to attack the Poe Field. These orders are in D6 status. 6. F Cav Corps, also not part of the Right Wing, has orders to advance with B/H Division and protect its northern flank. 7. 10 Conf/S/P/F Cav is attached to D/P/F Cav.
Ammunition and Previous Losses: Artillery Ammunition: 160. Previous Losses: 169. Stragglers: none. Wrecked Regiments: E/G/Res—6; W/G/Res—2; G/L/Res—1; J/C/P—1; M/C/P—1; W/C/P—1; Ba/S/B—2.
Reinforcements: None.
Victory: Confederate Decisive: 24 VPs or more. Confederate Major: 13 to 23 VPs. Confederate Minor: 7 to 12 VPs. Draw: 6 to -6 VPs. Union Minor: -7 to -12 VPs. Union Major: -13 to -23 VPs. Union Decisive: -24 VPs or less. Historically, the Union won a minor victory with -11 VPs.
6.6 Rock of Chickamauga (mid-size scenario)
As the final line rallied on Snodgrass Hill, Thomas waged what soon became a two front war, with Longstreet pounding from the south while Polk renewed attacks from the west. Granger's Federal reinforcements helped stabilize the situation for a while, but all the Union commanders involved realized that at best they could manage a rearguard action while the rest of the army escaped to Rossville. That afternoon, once Thomas got word that the Federal line had been reestablished at the Rossville Gap, the 14th Corps began to retreat in the face of tremendous pressure from the Rebels.
General Information Map Area: Map A, west half of Map D First Turn: 1:00 p.m. September 20th Last Turn: 8:00 p.m. September 20th Total Game Length: 28 Turns First Player: Confederate
Union Information
Set Up: Set up only the units specifically called for. Many units are not present, including brigade commanders or parts of brigades.
Thomas, 14 Corps HQ and Supply. 9 Mich, L 1 Ohio Cav—w/i 1 A57.23
1/14: Baird—A43.25. 1/1/14—A41.26, A40.25: 2 Ohio (4), 33 Ohio (5), 94 Ohio (4), 38 Ind (5), 10 Wisc (4). 2/1/14—A42.26, A43.27: 24 Ill (5), 79 Penn (6), 1 Wisc (6), 21 Wisc (6). 3/1/14—A40.24, A41.24: 1/15US (3), 1/16US (2), 1/18US (4), 2/18US (4), 1/19US (2). Arty/1/14—set up with any 1/14 unit: 4 Ind Lt (4), A 1 Mich (1), H 5 US (2).
2/14: Beatty/1/2/14—A50.16 (no other units present). 2/2/14 (all units in column): 19 Ill—A50.11, Stanley, 11 Mich—A49.11, 18 Ohio—A48.10. 3/2/14 (no commander or other units present): 21 Ohio—A59.09.
3/14: Div Goal HQ A—A47.13. Brannan—A53.12. 1/3/14—regular brigade commander gone, brigade led by Col. Walker from RE table: Walker—A51.13, 82 Ind—A52.14, 17 Ohio (8)—A50.13, disorganized, 31 Ohio (8)—A50.14, disorganized.
2/3/14: Repl Leader, 4 Ky (1), 14 Ohio (5)—A54.11. 10 Ky (5)—A53.12. 74 Ind (5), 10 Ind (4)—A50.22 (units attached to 2/4/14). 3/3/14 (all units in column): V. Derveer, 35 Ohio (4)—A44.19, 2 Minn (6)—A44.20, 9 Ohio (7)—A44.21, 87 Ind (6)—A43.15. Arty/3/14: D 1 Mich—A43.15, I 4 US—A48.16.
4/14: Reynolds—A51.23. 2/4/14, 19 Ind Battery—A51.23, A51.24: 68 Ind (5), 105 Ohio (6), 101 Ind (7), 75 Ind (5). 3/4/14, 21 Ind Battery—A50.24, A49.25: 18 Ky (4), 36 Ohio (7), 92 Ohio (7).
20 Corps, 2/20: Johnson—A42.22. 1/2/20—A48.21, A48.22: 89 Ill (5), 32 Ind (5), 15 Ohio (4), 49 Ohio (3). 2/2/20, A 1 Ohio Battery—A39.22, A38.21: 79 Ill (1), 29 Ind (3), 30 Ind (3), 77 Penn (3). 3/2/20, repl leader, 5 Ind Lt Battery—A39.23, A40.23: 6 Ind (3), 5 Ky (4), 1 Ohio (4), 93 Ohio (2).
21 Corps, 1/21: Wood—A48.16. 1/1/21: Buell, 58 Ind (3)—A55.11. 3/1/21: Harker, 64 Ohio—A48.16, 125 Ohio (5)—A47.17, 65 Ohio—A46.16, 3 Ky—A47.15.
2/21: Palmer, C 7 Ill Cav—A45.25. 1/2/21—A45.27, A46.26: 31 Ind (6), 1 Ky (1), 2 Ky (6), 90 Ohio (6). 2/2/21—A47.26, A47.25: 84 Ill (7), 36 Ind (5), 23 Ky (4), 6 Ohio (5), 24 Ohio (4). 3/2/21—A48.24, A48.25: 9 Ind (6), 6 Ky (4), 41 Ohio (5), 124 Ohio (6). Arty/2/21—with any 2/21 unit. 3/3/21—(attached to 2/21)—A44.27, A44.26: 8 Ky (5), 35 Ind (4), 51 Ohio (5).
3/21: 1/3/21: 17 Ky (4)—A51.13, disorganized (no other units present). 2/3/21: Dick, 13 Ohio (2)—A52.11, 44 Ind (1), 86 Ind (2)—A45.17.
Union Breastworks: A39.23, A40.23, A40.24, A40.25, A41.26, A42.26, A43.27, A44.27, A45.27, A46.26, A47.26, A48.25, A48.24, A48.23, A49.25, A50.24, A51.24, A52.23, A53.23.
Orders: 1. 14 Corps has orders to defend the Kelly Field position. 2. 3/14 has a divisional goal to defend Snodgrass House and the hills to the south, comprising Horseshoe Ridge.
Special Command Rules: Thomas may command any unit on the field via initiative, including Res Corps. All divisions are attached to and trace to 14 Corps, except where given divisional goals. 1 Res Corps and 2/2/Res Corps trace divisional radii to either corps command, as needed. 10 and 74 Ind trace command to 2/4/14, as noted in set up. 3/3/21 is attached to 2/21, as noted. Any unit who does not have a brigade commander can trace to any brigade commander. Beatty, 1/2/14, has none of his units present. He can command any 'lost' units as above, and may use his ratings with any unit. Any brigade commander without a divisional commander may trace to any divisional commander. When Reserve Corps arrives, Brannan's divisional goal lapses, and all units defending Horseshoe Ridge are attached to the Reserve Corps.
Ammunition and Previous Losses: Artillery Ammunition: 80. Previous Losses: 190. Stragglers and Wrecked Regiments: 1/1/14—1 wrecked regiment. 3/1/14—3 wrecked regiments. 2/3/14—0 wrecked regiments, 2 stragglers. 1/2/20—0 wrecked regiments, 3 stragglers. 2/2/20—2 wrecked regiments, 2 stragglers. 3/2/20—2 wrecked regiments, 3 stragglers. 1/3/20—4 wrecked regiments, 6 stragglers. 2/3/20—4 wrecked regiments, 4 stragglers. 3/3/20—4 wrecked regiments, 5 stragglers. 1/1/21—4 wrecked regiments, 3 recoverable stragglers. 1/2/21—1 wrecked regiment. 1/3/21—4 wrecked regiments, 4 recoverable stragglers. 2/3/21—3 wrecked regiments, 9 recoverable stragglers.
Reinforcements: 1:00 p.m., hex A1.12: All units of Reserve Corps. 3:00 p.m., hex A1.12: roll 2 dice every turn, on 9+ Sheridan and 3/20 Division arrive (use loss charts for starting strengths).
Reinforcements Orders: 1. Res Corps is ordered to move to Horseshoe Ridge, defend the flank of the 14th Corps, including the hills to the west. 2. 2/2/Res has a brigade goal to move to Savannah Church (A36.17) and defend McDonald Field. 3. 3/20 has a divisional goal to defend McDonald Field.
Confederate Information
Set Up: Bragg, A Tenn HQ and Supply, Dreux Cavalry, Holloway Cavalry—w/i 1 D43.14. Polk, Right Wing HQ, P Corps Supply, Greenleaf Cavalry—D50.01.
C/P: Cheatham, 2 Ga Cavalry—A38.32.
Sm/C/P: 23 Tenn (4)—A29.29. Dawson SS (5)—A30.29. Repl leader, 13+154 Tenn (4), Scott Battery (3)—A31.30. 11 Tenn (4)—A32.30. 12+47 Tenn (4)—A33.31.
St/C/P: 33 Tenn, 4+5 Tenn (4)—A34.31. Strahl, 31 Tenn (4), Stanford Battery—A35.32. 19 Tenn (3)—A36.32. 24 Tenn (4)—A37.33.
W/C/P: 8 Tenn (4), 28 Tenn (4)—A38.32. Wright, 38 Tenn (3), Carnes (2)—A39.33. 16 Tenn (4), 51+52 Tenn (3)—A40.33.
M/C/P: 24 Tenn Bn SS (1), 4 Tenn PA (3)—A41.34. Maney, 1+27 Tenn (10)—A42.33. 6+9 Tenn (3), Smith Battery—A43.34.
H Corps: Hill, H Corps HQ and Supply, Raum Cavalry—A41.32.
B/H: Breckinridge, Foules Cavalry—A35.31.
S/B/H: 1+3 Fla (2), Mebane Battery—A30.25. Stovall, 4 Fla (1)—A31.26. 47 Ga (1), 60 NC (1)—A32.26.
A/B/H: 14 La Bn, 32 La (2)—A33.27. 16+25 La (2), Slocumb Battery—A34.27. Repl leader, 13+20 La (2)—A35.28. 19 La (2)—A36.28.
H/B/H: 2 Ky (2), Cobb Battery—A36.29. Repl leader, 41 Ala (2)—A37.30. 4 Ky (3)—A38.30. 6 Ky, 9 Ky (1)—A39.31.
C/H: Cleburne, Sanders Cavalry—A47.31.
P/C/H: 35 Tenn, 48 Tenn (1)—A42.30. Polk, 1 Ark (4), Calvert Battery—A43.30. 3+5 Conf (7), 2 Tenn (2)—A44.30.
W/C/H: 33 Ala (5)—A45.30. 16 Ala (4), Semples Battery—A46.29. Wood, 45 Ala (7)—A47.29. 32+45 Miss (4), 18 Ala Bn (1), 15 Miss Bn SS (1)—A48.28.
D/C/H: 24+25 Texas (4), Douglas Battery—A49.28. Repl leader, 10+15 Texas (4), 17+18 Texas (3)—A50.27. 6 Texas (4), 9+24 Ark (1)—A51.27.
J/C/P (attached to C/H): 5 Miss (4), 5 Ga (4)—A39.29. 8 Miss (7), Scogins Battery (3)—A40.29. Jackson, 2/1 Conf (3), 2 Ga Bn SS (1)—A41.30.
Res Corps: Walker, Res Corps HQ, Nelson Cavalry—A33.25. Res Corps Supply—A29.26.
G/Res: Gist, Howell/G/Res—A36.25.
E/G/Res: 9 Texas (2), 14 Texas Cav (1), Stone SS (1), Pound SS (1)—A37.27. Ector, 29 NC (2), 32 Texas Cav (2), 10 Texas Cav (2)—A37.26.
W/G/Res: Wilson, 29 Ga (3), 25 Ga (3)—A37.25. 4 La Bn (2), 1 Ga Bn SS (1), 30 Ga (3)—A36.24.
C/G/Res: Colquitt, 24 SC (4)—A35.24. 46 Ga (5), 8 Ga Bn (2)—A34.23.
L/Res: Liddell, Warren Battery—A32.23.
W/L/Res: 30 Miss (3), 29 Miss (2)—A33.23. Walthall, 27 Miss (4), 34 Miss (2)—A32.22. 24 Miss (5)—A31.23.
G/L/Res: Govan, 5+13 Ark (5), 2+15 Ark (2)—A30.23. 8 Ark (3), 1 La Reg (1), 6+7 Ark (2)—A29.23. Fowler Battery—A30.24.
F Cav Corps: Forrest, F Cav HQ, Jackson (1)—A25.28.
A/F: Armstrong, Bradley Cavalry—A24.26. Huggins Battery—A28.26. Morton Battery—A26.26. W/A/F—w/i 1 A24.26. D/A/F—w/i 1 A22.26: 4 Tenn (6), 8 Tenn (6), 9 Tenn (6), 10 Tenn (6), 11 Tenn (5), Shaw (3).
P/F: Pegram—A20.25. D/P/F, 10 Conf/S/P/F (4)—w/i 2 A18.26: 1 Ga (3), 6 Ga (4), 6 NC (6), Rucker (6).
Left Wing: Longstreet, Left Wing HQ, A 1 La Cav—A60.24. R 1 Corps Artillery—w/i 1 A60.24.
B Corps, S/B: Stewart—A58.25.
Ba/S/B: 15+37 Tenn, 20 Tenn (2)—A57.27. Bate, 58 Ala (5), 1 Ga Bn SS (1)—A58.26. 37 Ga (5)—A58.25.
Br/S/B: 32 Tenn (5), Anderson Battery—A57.24. Repl leader, 23 Tenn Bn (2), 18 Tenn (4), Oliver Battery—A56.24. 45 Tenn (3), 26 Tenn (3), Humphreys Battery—A56.25.
C/S/B: 38 Ala (7)—A55.26. Clayton, 18 Ala (6)—A54.26. 36 Ala (7)—A53.27.
1 Corps: Hood, 1 Corps HQ, E+C 1 La Cavalry—A60.16.
JPD/1: Johnson—A60.13. G/JPD/1—w/i 1 A61.12: Repl leader, 1 Tenn Bn (1), 3 Tenn (3), 10 Tenn (3), 30 Tenn (2), 41 Tenn (3), 50 Tenn (1), 7 Texas (2). F/JPD/1—w/i 1 A61.10: 17 Tenn (3), 23 Tenn (3), 25 Tenn (2), 44 Tenn (5). M/JPD/1—w/i 1 A60.14: 1 Ark MR (4), 4+31+4 Ark Bn (7), 25 Ark (2), 39 NC (4).
L/1: Law—A58.19. B/L/1—A57.21: 2 Ga (3), 15 Ga (2), 17 Ga (4), 20 Ga (2). R/L/1—w/i 1 A58.20: 3 Ark (5), 1 Texas (3), 4 Texas (3), 5 Texas (2). S/L/1—w/i 1 A58.22: Repl leader, 4 Ala (3), 15 Ala (4), 44 Ala (3), 47 Ala (4), 48 Ala (2).
M/1: Kershaw—A57.18.
H/M/1: Humphreys, 21 Miss, 18 Miss—A55.19. 13 Miss, 17 Miss—A55.20.
K/M/1: 8 SC, 15 SC—A58.16. Repl Leader A, 3 SC Bn, 3 SC—A58.17. 7 SC, 2 SC—A58.18.
Orders: 1. Both wings are in force, and consist of the historical structures listed in 3.3f. 2. Kershaw commands M/1, as McLaws is not present. 3. J/C/P is attached to C/H Division. 4. 10 Conf/S/P/F Cav is attached to D/P/F Cav. 5. NO units have any orders at start, except the M/1 Division, which has orders to attack Horshoe Ridge and capture the Snodgrass House.
Ammunition and Previous Losses: Artillery Ammunition: 120. Previous Losses: 254. Stragglers and Wrecked Regiments: J/C/P—1 wrecked regiment. M/C/P—1 wrecked regiment. W/C/P—1 wrecked regiment. A/H/P—2 wrecked regiments, 9 stragglers. D/H/P—1 wrecked regiment, 8 stragglers. M/H/P—1 wrecked regiment, 7 stragglers. D/C/H—4 wrecked regiments, 9 stragglers. P/C/H—3 wrecked regiments, 4 stragglers. W/C/H—4 wrecked regiments, 3 stragglers. A/B/H—3 wrecked regiments, 8 stragglers. H/B/H—3 wrecked regiments, 7 stragglers. S/B/H—4 wrecked regiments, 6 stragglers. C/G/Res—2 wrecked regiments, 4 stragglers. E/G/Res—6 wrecked regiments. W/G/Res—4 wrecked regiments, 2 stragglers. G/L/Res—4 wrecked regiments, 6 stragglers. W/L/Res—3 wrecked regiments, 6 stragglers. Ba/S/B—2 wrecked regiments. G/JPD/1—5 wrecked regiments. B/L/1—2 wrecked regiments. R/L/1—3 wrecked regiments, 3 stragglers. S/L/1—2 wrecked regiments, 5 stragglers.
Reinforcements: All reinforcements enter play on a roll of 9+ on two dice. Start rolling at time indicated, roll once per turn for each group. 2:00 p.m., hex A62.24: Buckner, B Corps HQ and Supply, Clark Cav, Preston, P/B (less 65 Ga and Jeffress Battery), W/B Corps Artillery (less Baxter Battery). 2:30 p.m., hex A62.10: H/P Division.
Orders: 1. P/B has a divisional goal to move to Dyer Field and attack Horseshoe Ridge from the southeast. 2. H/P has a divisional goal to move to the Vittatoe House (A57.09) and attack to flank Horseshoe Ridge from the southwest. Note: H/P can recover stragglers off map, starting with the first turn of the scenario, as long as it does not begin rolling for entry. Once it begins rolling, it may not stop and recover stragglers again while still off-map. Once on-map, it is subject to all normal command and straggler rules.
Victory: Confederate Decisive: 20 VPs or more. Confederate Major: 10 to 19 VPs. Confederate Minor: 4 to 9 VPs. Draw: 3 to -3 VPs. Union Minor: -4 to -9 VPs. Union Major: -10 to -19 VPs. Union Decisive: -20 VPs or less. Historically, the Confederates won a minor victory with 4 VPs. Note that 25 Points here are not counted for ineligible terrain, on maps not used, all of which would be Confederate awards. These conditions attempt to judge how well the players did with the immediate tactical situation, not the overall picture.
6.7 Saturday, 19th of September (large scenario)
This scenario recreates the full scope of the fighting on the 19th, from those initial contacts near Jay's Mill that morning to the final drive by Cleburne's Division against the Lafayette Road after dark.
General Information Map Area: All First Turn: 7:00 a.m. September 19th Last Turn: 9:00 p.m. September 19th Total Game Length: 54 turns First Player: Union
Union Information
Set Up: Rosecrans, A Cumb HQ and Supply, 1 Bn Ohio SS, 15 Penn Cav, 10 Ohio—w/i 1 C3.03. Thomas, 14 Corps HQ and Supply, 9 Mich, L 1 Ohio Cav—A47.23. Baird—A48.24. 1/1/14, A 1 Mich battery—w/i 1 A47.26. 2/1/14, 4 Ind battery—w/i 2 A49.24. 3/1/14, H 5 US battery—w/i 1 A44.27. Negley—C15.15. 1/2/14—w/i 2 C21.16. Bridges/A/2/14—C20.14. 2/2/14, M 1 Ohio battery—w/i 1 C12.16. 3/2/14, G 1 Ohio battery—w/i 2 C10.15. Brannan—A38.23. 1/3/14, D 1 Mich battery—w/i 2 A37.26. 2/3/14, C 1 Ohio battery—w/i 2 A40.26. 3/3/14, I 4 US battery—w/i 2 A38.23. Reynolds, 4/14 Division—in line along road between B36.11 and B46.10. McCook, 20 Corps HQ and Supply, I 2 Ky Cav—C4.04. Johnson, 2/20 Division—w/i 3 C7.04. Crittenden, 21 Corps HQ and Supply, Mendenhall, K 15 Ill Cav—B46.19. Wood, 1/21 Division—w/i 4 B44.20. Palmer, 2/21 Division—w/i 5 B31.26. Van Cleve, 3/21 Division—w/i 4 B34.22. Wilder, Wilder Brigade (less 39 Ind, 98 Ill—7, 123 Ill—4)—w/i 2 B19.22, all units in breastworks. Minty, 1/2/Cav (4 Mich—5, 7 Penn—6), CBOT Battery—w/i 1 B13.13. 2/2/Res—w/i 2 D37.12. 2/1/Res—w/i 1 D35.09.
Orders: 1. 14 Corps is ordered to defend the Lafayette Road from attack from the west, between the Brotherton house and Cloud Church. 2. 1/14 has a divisional goal to move to the support of 3/14 if it encounters enemy infantry. 3. 2/14 has a divisional goal to defend the crossings at Glass Mill bridge and ford, to protect the Lafayette Road. 4. 3/14 has a divisional goal to deploy in line and advance west towards Jays Mill, to find and attack enemy infantry in the vicinity of the mill. Units of 3/14 should generally remain between the Reed's Bridge and Alexander's Bridge Roads. 5. 4/14 has a divisional goal to join the corps. 6. 20 Corps has no orders. 7. 2/20 has a divisional goal to move to join 14 Corps, and act under its orders until further notice. 8. 21 Corps has orders to defend the Lafayette Road and protect the crossing at Lee and Gordon's Mill. 9. Wilder has a brigade goal to defend the ridgeline currently occupied. 10. 1/2/Cav has no orders. 11. 2/1/Res and 2/2/Res each have a separate brigade goal to exit the map as soon as possible, moving up the Reed's Bridge Road to exit via the north edge of Map A. These orders may not be changed by initiative, and if these units move off the map before they accept new orders from the Army HQ, those orders are considered distorted and lost.
Ammunition and Previous Losses: Ammunition: 300. Previous Losses: 4. No stragglers or wrecked regiments.
Reinforcements: as per Union Reinforcement Schedule for September 19th, from 7:00 a.m. on.
Confederate Information
Set Up: D H Hill, H Corps HQ and Supply—C28.31. Breckinridge, Foules Cav—C27.27. A/B/H, S/B/H, Slocumb, Mebane—w/i 5 C27.27. H/B/H, Cobb battery—w/i 2 C21.22. Polk, P Corps HQ and Supply, Greenleaf Cav—C2.32. H/P Division—w/i 3 B47.30. C/P Division—w/i 5 E42.05. Buckner, B Corps HQ and Supply, Clark Cav—E26.06. W/B Corps—w/i 2 E26.06. Preston, Arty/P/B—w/i 1 E27.05. G/P/B—w/i 2 E25.02. K/P/B—w/i 2 E27.04. T/P/B—w/i 2 E27.06. Stewart—E21.04. C/S/B, Humphreys battery—w/i 1 E21.02. Br/S/B, Anderson battery—w/i 2 E21.04. Ba/S/B, Oliver battery—w/i 2 E21.06. Hood, Walker, 1 Corps HQ—E12.04. Johnson—E15.02. G/JPD/1—w/i 2 E15.02. F/JPD/1—w/i 1 E11.01. M/JPD/1—w/i 2 E13.02. Law—B9.34. R/L/1—w/i 2 B7.33. S/L/1—w/i 2 B3.32. B/L/1, Lumsden battery—w/i 2 E5.02. Res Corps HQ, Nelson Cav—E2.12. Ector—E7.09. E/G/Res (repl leader, Ector commands division)—on road in line between E5.10 and E10.07. W/G/Res, Res Corps Supply—w/i 2 E1.15. Liddell, L/Res (29 Miss/W/L/Res (6), 34 Miss/W/L/Res (5))—on road in line between D62.04 and D59.14. Forrest, F Cav HQ, Jackson Cav (1)—E5.19. Armstrong, A/F Cav Division—w/i 3 F14.23. Pegram, D/P/F, 10 Conf/S/P/F, Martin/S/P/F (7)—w/i 2 E5.19.
Orders: 1. H Corps has orders to defend the crossing at Glass Mill, and to demonstrate across Chickamauga Creek with one brigade in order to draw Union attention, but not to become seriously engaged. 2. P Corps has orders to move HQ to E31.09. 3. H/P Division has a divisional goal to defend the crossing at Lee and Gordon's Mill. 4. C/P Division has a divisional goal to move north via Dalton Ford to the vicinity of E12.13, halt, form line facing west, and await further orders. 5. B Corps has no orders. 6. 1 Corps has no orders. 7. Res Corps has no orders. 8. G/Res Division has a divisional goal to move to Jay's Mill and support Forrest's Cavalry Corps in the defense of that place. This order is currently in delay, D5 status. 9. F Cav Corps has orders to move at once to Jays Mill and defend it, including both the Reed's Bridge Roads and Brotherton Roads. 10. 10 Conf/S/P/F and Martin/S/P/F are attached to D/P/F Cav. 11. A/F Cav Division has orders to rejoin the Corps. 12. W/A/F Cav Brigade has a brigade goal to move to the vicinity of C13.27 and defend the ford against a Union crossing.
Ammunition and Previous Losses: Ammunition: 250. Previous losses: 5. No stragglers or wrecked regiments.
Reinforcements: as per September 19th, from 7:00 a.m. on.
Victory: Confederate Decisive: 21+ VPs. Confederate Major: 11 to 20 VPs. Confederate Minor: 7 to 10 VPs. Draw: 6 to -4 VPs. Union Minor: -5 to -9 VPs. Union Major: -10 to -19 VPs. Union Decisive: -20 or less VPs. Historically, the fight was a draw, with 4 VPs in the Confederate favor.
6.8 Sunday, 20th of September (large scenario)
The full day's action, from Polk's piecemeal attacks to Longstreet's breakthrough and the last stand on Snodgrass Hill.
General Information Map Area: All First Turn: 8:00 a.m. September 20th Last Turn: 8:00 p.m. September 20th Total Game Length: 48 game turns First Player: Confederate
Union Information
Set Up: Rosecrans, A Cumb HQ and Supply—B12.14. 15 Penn Cav, 10 Ohio, 1 Bn Ohio SS—w/i 1 B12.14. Thomas, 14 Corps HQ and Supply—A47.23. L, 1 Ohio Cav, 9 Mich/14 Corps—w/i 1 A47.23.
1/14: Baird—A43.26. 1/1/14: Scribner, 33 Ohio (6)—A42.26. 2 Ohio (5), 10 Wisc (4)—A43.26. 94 Ohio (5), 38 Ind (6), 4 Ind Lt Bty (4)—A43.27. 2/1/14: Starkweather, 24 Ill (5), 21 Wisc (6)—A44.27. 1 Wisc (6), 79 Penn (6)—A44.26. 3/1/14: J. King, 1/18 US (4), 2/18 US (4)—A40.25. 1/16 US (2), 1/19 US (2)—A41.26. 1/15 US (3), H 5 US Bty (2), A 1 Mich Bty (1)—A41.25.
2/14: Negley, Divisional Goal HQ—A59.20. 1/2/14: Beatty, Brigade Goal HQ, 104 Ill—A36.21. 88 Ind—A30.21. 42 Ind—A31.22. 15 Ky—A38.23. 2/2/14—all units in column: 11 Mich—A55.20, Stanley, 19 Ill—A56.20, 18 Ohio—A57.20. 3/2/14—all units in column: 78 Penn—A60.20, 21 Ohio—A61.20, Sirwell, 74 Ohio—A62.20, 37 Ind—A62.19. Arty/2/14—all units limbered, Bridges—A33.21: M 1 Ohio—A58.20, G 1 Ohio—A59.20.
3/14: Brannan—A57.22. 1/3/14: 17 Ohio (9)—A57.23. Connell, 82 Ind—A58.23. 31 Ohio (9)—A59.23. 2/3/14: Croxton, 4 Ky (9)—A56.23. 14 Ohio (5), 10 Ky (5)—A55.23. 10 Ind (4), 74 Ind (5)—A54.23. 3/3/14: Van Derveer, 9 Ohio (7), 35 Ohio (5)—A59.22. 2 Minn (7), 87 Ind (6)—A60.21. Arty/3/14—w/i 1 A57.22.
4/14: Reynolds—A52.22. 2/4/14: E. King, 75 Ind (5), 101 Ind (7)—A52.23. 105 Ohio (6), 68 Ind (5), 19 Ind Lt Bty—A53.23. 3/4/14: Turchin, 92 Ohio (7), 18 Ky (4)—A50.24. 11 Ohio—A50.23. 36 Ohio (7), 21 Ind Lt Bty—A51.24.
2/20: Johnson—A42.22. 1/2/20: Willich, 89 Ill (7), 15 Ohio—A43.24. 32 Ind (6), 49 Ohio (4)—A44.24. 2/2/20: Dodge, 30 Ind (3), 77 Penn (3)—A40.23. 79 Ill (3)—A39.23. 29 Ind (5)—A40.24. 3/2/20: Repl leader, 1 Ohio (6), 6 Ind (5)—A46.26. 93 Ohio (4), 5 Ind Lt Bty (5)—A45.27. 5 Ky (4)—A45.26. Arty/2/20: 20 Ohio Lt, A 1 Ohio—A44.23.
2/21: Palmer, C 7 Ill Cav—A46.22. 1/2/21: 31 Ind (6), 1 Ky (1), 2 Ky (6)—A47.26. Cruft, 90 Ohio (6)—A47.25. 2/2/21: Hazen, 6 Ky (4), 124 Ohio (6)—A48.23. 11 Ohio (5), B 1 Ohio Bty—A48.24. 9 Ind (6), F 1 Ohio Bty—A48.25. 3/2/21: Grose, 84 Ill (7), 6 Ohio (5)—A47.24. 36 Ind (5), 23 Ky (4), 24 Ohio (4)—A46.24. Arty/2/21: H 4 US, M 4 US—A46.23.
McCook, 20 Corps HQ and Supply, I 2 Ky Cav—B11.15. 1/20: Davis—B7.12. 2/1/20, 2 Minn Bty—w/i 1 B9.11: 21 Ill (5), 38 Ill (4), 81 Ind (4), 101 Ohio (3). 3/1/20, 8 Wisc Lt Bty—w/i 2 B7.12: Repl Leader, 8 Kansas (5), 15 Wisc (3), 25 Ill (5), 35 Ill (4). 3/20: Sheridan, Arty/3/20—w/i 1 B14.13. 1/3/20—w/i 1 B13.13. 2/3/20—w/i 1 B15.13. 3/3/20—w/i 1 B14.12: Repl Leader, 22 Ill (5), 27 Ill (5), 51 Ill (5).
Crittenden, 21 Corps HQ and Supply, Mendenhall, K 15 Ill Cav—B1.11. 1/21: Wood, Arty/1/21—w/i 1 B3.12. 1/1/21—w/i 1 B2.11: 13 Mich (3), 26 Ohio (5), 58 Ind (6), 100 Ill (5). 3/1/21—w/i 1 B4.12: 25 Ohio (5). 3/21: Van Cleve—A59.10. 1/3/21, 26 Pa Lt Bty—w/i 1 A57.09: Repl Leader, 9 Ky (3), 17 Ky (8), 19 Ohio (7), 79 Ind (5). 2/3/21, 7 Ind Lt Bty—w/i 1 A59.10: 18 Ohio (5), 59 Ohio (5), 86 Ind (4). 3/3/21, 3 Wisc Lt Bty—w/i 1 A61.11: 8 Ky (5), 35 Ind (4), 51 Ohio (5).
Wilder, 17 Ind, 18 Ind Lt a Bty, Brigade goal HQ—B22.11. 39 Ind—B19.11. 92 Ill, 18 Ind Lt b Bty—B20.11. 98 Ill (7)—B21.11. 72 Ind—B23.11. 123 Ill (4)—B24.11.
Mitchell, Cav Corps HQ—C3.03. 1/Cav Division—w/i 4 C3.03.
Union Breastworks: A39.23, A40.23, A40.24, A40.25, A41.26, A42.26, A43.27, A44.27, A49.25, A50.24, A51.24, A52.23, A53.23, A54.23, A55.23, A56.23, A57.23, A58.23, A59.23, A60.22, A61.22, A62.22, B1.23, B2.22, B19.11, B20.11, B21.11, B22.11, B23.11, B24.11. Uncompleted Breastworks: A45.27, A46.26, A47.26, A48.25, A48.24, A48.23 all have 8 accumulated day turns of construction, and will be done by 8:45 a.m.
Orders: 1. 14 Corps is ordered to defend the line of the Lafayette Road from the McDonald House to the Brotherton House and Field. 2. 2/20 Division is attached to 14 Corps. 3. 2/21 Division is attached to 14 Corps. 4. 1/2/14 has a Brigade Goal to defend the Union flank in the McDonald Field. 5. 2/14 Division (less 1/2/14) has a Divisional Goal to move to the Snodgrass Field and await further orders. 6. 20 Corps has no orders. 7. 21 Corps has no orders. 8. Cav Corps has no orders.
Ammunition and Previous Losses: Ammunition: 300. Previous losses: 145. Stragglers: none. Wrecked Regiments: 3/1/14—3. 1/2/21—1.
Reinforcements: As per reinforcement schedule for Sept. 20th, after 8:00 a.m.
Confederate Information
Set Up: Bragg—D50.03. A Tenn HQ and Supply, Dreux, Halloway, Pickett—E27.17. Polk, P Corps HQ and Supply, Right Wing HQ, Greenleaf—D62.15. Forrest, F Cav Corps HQ, Jackson/F Cav (1)—A25.34. Armstrong, Bradley Cav, Arty/A/F Cav—A26.32. D/A/F Cav—w/i 2 A25.32: 4 Tenn (6), 8 Tenn (6), 9 Tenn (5), 10 Tenn (6), 11 Tenn (5), Shaw (3). W/A/F Cav—w/i 2 A27.32. Pegram—D26.02. D/P/F Cav—w/i 2 D26.02: 1 Ga (5), 6 Ga (4), Rucker (6). 10 Conf/S/P/F Cav (4)—w/i 2 D24.03. Walker, Res Corps HQ and Supply, Nelson Cav—D32.04.
G/Res: Gist—D36.02. C/G/Res: 46 Ga—D40.01. Colquitt, 24 SC—D41.01. 8 Ga Bn—D42.01. E/G/Res: 29 NC (2), Pound (1)—D35.02. 32 Texas (2), Howell/Arty/G/Res—D36.02. Ector, 10 Texas (2), 14 Texas (1)—D37.02. 9 Texas (2), Stone (1)—D38.02. W/G/Res: 1 Ga Bn SS (1), 4 La Bn (2)—D29.03. 25 Ga (4)—D30.02. Wilson, 30 Ga (4)—D31.03. 29 Ga (3)—D32.02.
L/Res: Liddell, Fowler/Arty/L/Res (3), Warren/Arty/L/Res—D32.06. G/L/Res: 5+13 Ark (7)—D29.06. 6+7 Ark (4)—D30.05. Govan, 1 La Reg (2), 2+15 Ark (4)—D31.06. 8 Ark (6)—D32.05. W/L/Res: 29 Miss (4)—D33.06. 30 Miss (6)—D34.05. Walthall, 27 Miss (6)—D35.06. 24 Miss (7)—D36.05. 34 Miss (4)—D37.06.
C/P: Cheatham, Arty/C/P—w/i 1 D59.06: Carnes (2), Scogin (3), Scott (3). J/C/P: 2 Ga Bn SS (1), 5 Ga (4)—D60.05. Jackson, 2 Bn 1 Conf (3), 5 Miss (4)—D61.05. 8 Miss (7)—D62.05. M/C/P: Maney, 6+9 Tenn (3)—D60.02. 1+27 Tenn (10)—D61.03. 4 Tenn (PA) (3), 24 Tenn Bn SS—D62.03. Sm/C/P: Dawson SS (5), 12+47 Tenn (4)—D54.04. Repl leader, 11 Tenn (4)—D55.05. 29 Tenn (4)—D56.05. 13+154 Tenn (4)—D57.05. St/C/P: 33 Tenn, 31 Tenn (4)—D54.01. Strahl, 24 Tenn (4), 19 Tenn (3)—D55.02. 4+5 Tenn (4)—D56.02. W/C/P: 38 Tenn (3)—D57.03. Wright, 16 Tenn (4), 51+52 Tenn (3)—D58.02. 8 Tenn (4), 28 Tenn (4)—D59.03.
H Corps: DH Hill, H Corps HQ and Supply—D50.03. B/H: Breckinridge, Foules—A41.32. A/B/H: 13+20 La—A31.32. 16+25 La—A32.31. Adams, 19 La—A33.32. 32 Ala, 14 La Bn—A34.31. H/B/H: 6 Ky, 4 Ky—A40.31. 41 Ala—A41.31. 9 Ky—A42.31. 2 Ky—A43.31. S/B/H: 47 Ga, 60 NC—A36.31. Stovall, 4 Fla—A37.32. 1+3 Fla—A38.31. Arty/B/H: Cobb—A42.32. Slocumb (5)—A32.32. Mebane—A41.32.
C/H: Cleburne, Sanders, Divisional Goal HQ—A52.34. D/C/H: 9+24 Ark, 6 Texas—A58.30. 10+15 Texas—A57.31. Deshler, 17+18 Texas—A56.31. 24+25 Texas—A55.32. P/C/H: 1 Ark—D47.02. 35 Tenn—D48.01. Polk, 48 Tenn, 2 Tenn—D49.01. 3+5 Conf (7)—A50.34. W/C/H: 33 Ala (6), 16 Ala (5)—B51.34. Wood, 45 Ala (7)—A52.33. 32+45 Miss (7)—A53.33. 15 Miss Bn SS, 18 Ala Bn—A54.32. Arty/C/H: Douglas—A57.32. Semples—A54.33. Calvert—D50.01.
Longstreet, Left Wing HQ, A 1 La Cav—E15.02. Buckner, B Corps HQ and Supply, Clark—E25.06. W/B Corps Arty—w/i 2 E24.02.
P/B: Preston—E22.02. G/P/B—w/i 1 B24.34. K/P/B—w/i 1 B21.01. T/P/B—w/i 1 B19.32: 1 Fla Cav (7), 6 Fla (4), 7 Fla (7), 54 Va (7). Arty/P/B—w/i 2 E22.02.
S/B: Stewart, Divisional Goal HQ—A55.29. Ba/S/B: 37 Ga (5)—A52.27. Bate, 20 Tenn, 15+37 Tenn (2)—A53.27. 4 Ga Bn SS (1), 58 Ala (5)—A54.26. Br/S/B: 23 Tenn Bn (2), 18 Tenn (4)—A55.26. Brown, 32 Tenn (5)—A56.26. 26 Tenn (3), 45 Tenn (3)—A57.26. C/S/B: 36 Ala (7)—A53.29. Clayton, 38 Ala (7)—A54.28. 18 Ala (6)—A55.28. Arty/S/B: Oliver—A53.27. Anderson—A56.26. Humphreys—A54.28.
Hood, 1 Corps HQ, C+E 1 La Cav—A61.32. JPD/1: Johnson—A59.25. F/JPD/1—w/i 1 A61.27: 17 Tenn (3), 23 Tenn (3), 25 Tenn (2), 44 Tenn (5). G/JPD/1—w/i 1 A59.29: Repl Leader, 1 Tenn Bn (1), 3 Tenn (3), 10 Tenn (3), 30 Tenn (2), 41 Tenn (3), 50 Tenn (1), 7 Texas (2). M/JPD/1—w/i 1 A59.27: 1 Ark MR (4), 25 Ark (2), 4+31+4 Ark Bn (7), 39 NC (4).
L/1: Law—B1.30. B/L/1—w/i 1 B1.30: 2 Ga (3), 15 Ga (2), 17 Ga (4), 20 Ga (2). R/L/1—w/i 1 B1.32: 3 Ark (5), 1 Texas (5), 4 Texas (5), 5 Texas (4). S/L/1—w/i 1 B2.29: Repl Leader, 4 Ala (4), 15 Ala (6), 44 Ala (5), 47 Ala (5), 48 Ala (4). Lumsden/R/1 Corps Arty (3)—A61.32.
M/1: Kershaw, Divisional goal HQ—E3.18. K/M/1, Repl leader—w/i 1 E3.18. H/M/1—w/i 1 E4.18. R/1 Corps Arty (except Lumsden, above)—w/i 1 E5.19.
H/P: Hindman, Lenoir—B6.32. A/H/P: 9 Miss—B5.33. 9 Miss Bn, 44 Miss—B6.32. Anderson, 7 Miss, 10 Miss—B7.33. 41 Miss—B8.33. D/H/P: 50 Ala—B4.30. Deas, 39 Ala, 25 Ala—B5.31. 19 Ala—B6.30. 17 Ala Bn SS, 22 Ala—B7.31. M/H/P: 10+19 SC—B9.31. Manigault, 28 Ala—B10.30. 24 Ala—B11.31. 34 Ala—B12.31. Arty/H/P—w/i 2 B6.32.
Wharton, Divisional goal HQ—C25.33. C/W/W Cav—w/i 3 C13.30. H/W/W Cav—w/i 3 C26.25.
Confederate Breastworks: A52.27, A53.27, A54.26, A55.26, A56.26, A57.26.
Orders: 1. The Right Wing is in effect, using the historical composition listed in 3.3f. The Right Wing has transmitted an attack order, the status of that attack order is as follows: 2. H Corps is ordered to attack at once to clear the Lafayette Road. B/H Division is ordered to capture the McDonald Field and flank the Union line from the north, while the 3. C/H Division has a divisional goal to launch a frontal attack against the line along Kelly Field. C/H divisional goal is in D5 status. 4. Res Corps has an order to support H Corps, that order is currently in D6 Status. 5. C/P Division has no attack orders at this time. It is ordered to act as wing reserve, and await further orders. 6. The Left Wing is in effect, using the historical composition listed in 3.3f. The Left Wing has no orders except for S/B Division and M/1 Divisions, below. 7. S/B Division has a divisional goal to attack the Poe Field. These orders are in D6 status. 8. M/1 Division has a divisional goal to join First Corps. 9. F Cav Corps has orders to advance with B/H Division and protect its northern flank. 10. 10 Conf/S/P/F Cav is attached to D/P/F Cav. 11. W/W Cav has a divisional goal to defend the crossings of Glass Mill Bridge and Ford.
Ammunition and Previous Losses: Artillery Ammunition: 225. Previous Losses: 169. Stragglers: none. Wrecked Regiments: E/G/Res—6. W/G/Res—2. G/L/Res—1. J/C/P—1. M/C/P—1. W/C/P—1. Ba/S/B—2. G/JPD/1—5. B/L/1—2.
Reinforcements: As per Reinforcement Schedule after 8:00 a.m. Sept. 20th.
Victory: Confederate Decisive: 36 VPs or more. Confederate Major: 22 to 35 VPs. Confederate Minor: 11 to 21 VPs. Draw: 10 to -10 VPs. Union Minor: -11 to -21 VPs. Union Major: -22 to -35 VPs. Union Decisive: -36 VPs or less. Historically, the Confederates won a major victory with 29 VPs.
6.9 Longstreet's Attack (large scenario)
At about 11:00 a.m., Longstreet's massive assault column stepped off, directly towards the gap unfortunately created by Rosecrans' peremptory order to General Wood. The result was the shattering of the Union left, with Rosecrans, McCook, and Crittenden—along with most of their troops—streaming off the field.
General Information Map Area: All First Turn: 11:00 a.m. September 20th Last Turn: 8:00 p.m. September 20th Total Game Length: 36 Turns First Player: Confederate
Union Information
Set Up: Rosecrans, A Cumb HQ—B4.14. 1 Bn Ohio SS, 10 Ohio, 15 Penn Cav, A Cumb Supply—w/i 1 B12.14. Thomas, 14 Corps HQ and Supply—A47.23. 9 Mich, L 1 Ohio Cav—w/i 1 A47.23.
1/14 — Baird—A43.26.
- 1/1/14: 94 Ohio (5), 38 Ind (4), 4 Ind Lt Bty (4)—A43.27. 2 Ohio (2), 10 Wisc (4)—A43.26. Scribner, 33 Ohio (4)—A42.26.
- 2/1/14: Starkweather, 24 Ill (5), 21 Wisc (6)—A44.27. 79 Penn (6), 1 Wisc (6)—A44.26.
- 3/1/14: J. King, 1/18 US (4), 2/18 US (4)—A40.25. 1/16 US (2), 1/19 US (2)—A41.26. 1/15 US (3), H 5 US Bty (2), A 1 Mich Bty (1)—A41.25.
2/14 — Negley—A47.16.
- 1/2/14: J. Beatty, 104 Ill (4), 15 Ky (4)—A45.19. 88 Ind (3), 42 Ind (3)—A45.20.
- 2/2/14: Stanley, 18 Ohio—A45.21. 11 Mich, 19 Ill, Bridges Bty (2)—A45.22. 3/2/14—w/i 1 A47.15. Arty/2/14: M 1 Ohio, G 1 Ohio—w/i 1 A47.16. I 4 US/Arty/3/14—A48.18.
3/14 — Brannan—A57.22.
- 1/3/14: Connell, 82 Ind—A58.23. 31 Ohio (9)—A59.23. 17 Ohio (9)—A57.23.
- 2/3/14: Croxton, 4 Ky (9)—A56.23. 14 Ohio (5), 10 Ky (5)—A55.23. 10 Ind (4), 74 Ind (5)—A54.23.
- 3/3/14: Van Derveer, 2 Minn (6), 87 Ind (6)—A44.22. 9 Ohio (7), 35 Ohio (4)—A44.23. Arty/3/14: D 1 Mich, C 1 Ohio—w/i 1 A57.22.
4/14 — Reynolds—A52.22.
- 2/4/14: E. King, 75 Ind (5), 101 Ind (7)—A52.23. 105 Ohio (6), 68 Ind (5), 19 Ind Lt Bty—A53.23.
- 3/4/14: Turchin, 92 Ohio (7), 18 Ky (4)—A50.24. 96 Ohio (7), 21 Ind Lt Bty—A51.24. 11 Ohio—A50.23.
Wilder, 17 Ind, 18 Ind a Lt Bty, Brigade goal HQ—B22.11. 39 Ind—B19.11. 92 Ill, 18 Ind b Lt Bty—B20.11. 98 Ill (7)—B21.11. 72 Ind—B23.11. 123 Ill (4)—B24.11.
McCook, 20 Corps HQ, I 2 Ky Cav—B5.21. 20 Corps Supply—B8.19.
1/20 — Davis—B7.23.
- 2/1/20: Carlin, 21 Ill (5)—B7.25. 101 Ohio (3), 81 Ind (4)—B6.24. 38 Ill (4), 2 Minn Lt Bty—B8.24.
- 3/1/20: Repl Leader, 8 Kansas (5), 35 Ill (4)—B7.23. 25 Ill (5), 15 Wisc (3)—B8.22. 8 Wisc Lt Bty—B7.22.
2/20 — Johnson—A43.24.
- 1/2/20: Willich, 89 Ill (7), 15 Ohio—A43.24. 32 Ind (6), 49 Ohio (4)—A44.24.
- 2/2/20: Dodge, 30 Ind (3), 77 Penn (3)—A40.23. 79 Ill (3)—A39.23. 29 Ind (5)—A40.24.
- 3/2/20: Repl leader, 1 Ohio (6), 6 Ind (5)—A46.26. 93 Ohio (4), 5 Ind Lt Bty (5)—A45.27. 5 Ky (4)—A45.26. Arty/2/20: 20 Ohio Lt, A 1 Ohio—A45.25.
3/20 — Sheridan—B8.15.
- 1/3/20: Lytle, 88 Ill, 36 Ill—B10.15. 24 Wisc, 21 Mich—B11.15.
- 2/3/20 (all units in column): Laiboldt, 15 Mo—B7.16. 73 Ill—B6.16. 44 Ill—B8.16. 2 Mo—B9.16.
- 3/3/20 (all units in column): 22 Ill (5)—B13.14. 51 Ill (5)—B14.13. Repl Leader, 42 Ill—B15.14. 27 Ill (5)—B16.13.
- Arty/3/20 (all units limbered): C 1 Ill—B11.14. 11 Ind Lt—B8.15. G 1 Mo—B17.14.
21 Corps HQ and Supply, K 15 Ill Cav—B1.11. Crittenden—A54.20.
1/21 — Wood—A61.20.
- 1/1/21 (all units in column): Buell, 100 Ill (5)—B1.20. 26 Ohio (5)—A62.20. 58 Ind (6)—B1.21. 13 Mich (3)—B2.20.
- 3/1/21 (all units in column): Harker, 65 Ohio—A59.20. 3 Ky—A60.19. 64 Ohio—A60.20. 125 Ohio (5)—A61.20.
- Arty/1/21 (all units limbered): 8 Ind Lt—A61.21. 6 Ohio Lt—A58.20.
2/21 — Palmer, C 7 Ill Cav—A46.22.
- 1/2/21: Cruft, 90 Ohio (6)—A47.25. 31 Ind (6), 1 Ky (1), 2 Ky (6)—A47.26.
- 2/2/21: Hazen, 6 Ky (4), 124 Ohio (6)—A48.24. 9 Ind (6), F 1 Ohio Bty—A48.25. 41 Ohio (5), B 1 Ohio Bty—A49.25.
- 3/2/21: Grose, 84 Ill (7), 6 Ohio (5)—A47.24. 36 Ind (5), 23 Ky (4), 24 Ohio (4)—A46.24.
- Arty/2/21: H 4 US, M 4 US—A46.23.
3/21 — Van Cleve—A54.20.
- 1/3/21 (all units in column): 19 Ohio (7)—A54.19. S. Beatty, 9 Ky (3)—A55.20. 79 Ind (5)—A56.20. 17 Ky (8)—A57.20.
- 2/3/21 (all units in column): 86 Ind (4)—A51.19. Dick, 59 Ohio (5)—A52.19. 44 Ind—A53.20. 13 Ohio (5)—A54.20.
- 3/3/21 (all units in column): 99 Ohio—A47.20. Barnes, 51 Ohio (5)—A48.19. 35 Ind (4)—A49.19. 8 Ky (5)—A50.19.
- Arty/3/21: 3 Wisc Lt—A54.16. 26 Penn Lt, Mendenhall—A54.15. 7 Ind Lt—A56.15.
Mitchell, Cav Corps HQ and Supply—C3.03. Crook, CBOT/Arty/2/Cav, 2/2/Cav—w/i 2 C19.14. McCook, D 1 Ohio/Arty/1/Cav—w/i 2 B55.10. 1/1/Cav—w/i 2 D52.12. 2/1/Cav—w/i 2 D57.15.
Union breastworks: A39.23, A40.23, A40.24, A40.25, A41.26, A42.26, A43.27, A44.27, A45.27, A46.26, A47.26, A48.25, A48.24, A48.23, A49.25, A50.24, A51.24, A52.23, A53.23, A54.23, A55.23, A56.23, A57.23, A58.23, A59.23, A60.22, A61.22, A62.22, B1.23, B2.22, B19.11, B20.11, B21.11, B22.11, B23.11, B24.11.
Orders: 1. 14 Corps is ordered to defend the line of the Lafayette Road and their current position. 2. Wilder is ordered to defend in place. 3. 2/20 Division is attached to 14th Corps. 4. 2/21 Division is attached to 14th Corps. 5. 20 Corps has orders to defend the southern flank of the 14th Corps. 6. 21 Corps no orders. 7. 1/21 Division has a Divisional Goal to move north and attach itself to the 14th Corps. 8. 3/21 Division has a Divisional Goal to move north and attach itself to the 14th Corps. 9. Mendenhall commands the 3 Wisc, 26 Penn, and 7 Ind Lt Batteries, with a Divisional Goal to defend the Dyer Field from current locations. 10. Cav Corps is ordered to defend Crawfish Spring. 11. 2/Cav has a Divisional Goal to delay the Rebel advance on Crawfish Spring via Glass Mill as long as possible.
Ammunition and Previous Losses: Ammunition: 250. Previous losses: 160. Stragglers and wrecked regiments: 1/1/14—4 stragglers, 2 wrecked regiments. 3/1/14—3 wrecked regiments. 1/2/14—5 stragglers, 1 wrecked regiment. 1/2/21—1 wrecked regiment.
Reinforcements: As per Arrival chart, after 11:00 a.m. September 20th.
Confederate Information
Set Up: Bragg, ATenn HQ and Supply—D43.15. Holloway Cav, Dreux Cav, Pickett—w/i 1 D43.15.
Right Wing — Polk, Right Wing HQ, P Corps Supply, Greenleaf Cav—D50.03.
C/P — Cheatham, G 2 Ga Cav—D56.06.
- J/C/P: Jackson, 8 Miss (7), Scogin Bty (3)—D61.05. 5 Ga (4), 5 Miss (4)—D60.05. 2 Ga Bn SS (1), 2 Bn 1 Conf—D62.05.
- M/C/P: Maney, 6+9 Tenn (3), 24 Tenn Bn SS, 4 Tenn (PA) (3)—D62.03. 1+27 Tenn (10), Smith Bty—D61.03.
- Sm/C/P: Repl leader, Dawson Bn SS (5), Scott Bty (3)—D57.05. 11 Tenn (4), 12+47 Tenn (4)—D56.05. 13+154 Tenn (4), 29 Tenn (4)—D55.05.
- St/C/P: Strahl, 23 Tenn, Stanford Bty—D56.02. 24 Tenn (4), 19 Tenn (3)—D57.03. 4+5 Tenn (4), 31 Tenn (4)—D55.03.
- W/C/P: Wright, 8 Tenn (4), Carnes Bty (2)—D59.03. 16 Tenn (4), 38 Tenn (3)—D60.02. 28 Tenn (4), 51+52 Tenn (3)—D58.02.
D. H. Hill, H Corps HQ and Supply, Raum Cav—A41.32.
B/H — Breckinridge, Foules Cav—A34.30.
- A/B/H: Repl leader, 13+20 La (2), 19 La (2)—A35.29. 32 Ala (2), Slocumb Bty (5)—A34.28. 16+25 La (2), 14 La Bn—A33.28.
- H/B/H: 6 Ky (3), Cobb Bty—A39.31. 2 Ky (1), 41 Ala (2)—A38.30. Repl leader, 9 Ky (1), 4 Ky (3)—A37.30.
- S/B/H: Stovall, 60 NC (1), 4 Fla (1), 1+3 Fla (2), Mebane Bty—A31.27.
C/H — Cleburne, Sanders Cav—A50.29.
- D/C/H: Repl leader, 17+18 Texas (3), 24+25 Texas (4)—A49.29. 6 Texas (4), 10+15 Texas (4), 9+24 Ark (1)—A50.28.
- P/C/H: 35 Tenn, Calvert Bty—A48.29. Polk, 3+5 Conf (7), Douglas Bty—A47.30. 2 Tenn (2), 1 Ark (4), 48 Tenn (1)—A46.30.
- W/C/H: 32+45 Miss (4), 15 Miss Bn SS (1), 18 Ala Bn (1), Semples Bty—A50.27. Wood, 16 Ala (4), 33 Ala (5)—A51.27. 45 Ala (7)—A52.26.
Walker, Res Corps HQ and Supply, Nelson Cav—A29.25.
G/Res — Gist—A34.25.
- C/G/Res: Colquitt, 46 Ga, 8 Ga Bn—A33.25. 24 SC—A34.25.
- E/W/Res: Ector, 32 Texas DC (2), 14 Texas DC (1), 29 NC (2), Stone SS (1)—A57.27. 10 Texas DC (2), Pound SS (1), 9 Texas DC (2)—A38.27.
- W/G/Res: Wilson, 29 Ga (3), 25 Ga (4)—A35.26. 4 La Bn (2), 1 Ga Bn SS (1), 30 Ga (4)—A36.26.
- Arty/G/Res: Howell—A34.26.
L/Res — Liddell—A33.21.
- G/L/Res: 8 Ark (5), Warren Bty—A36.21. Govan, 1 La Reg (2), 6+7 Ark (4)—A35.21. 2+15 Ark (4), 5+13 Ark (5)—A34.21.
- W/L/Res: 30 Miss (6), Fowler Bty (3)—A33.21. Walthall, 27 Miss (4), 24 Miss (5)—A32.21. 29 Miss (4), 34 Miss (4)—A31.21.
Left Wing — Longstreet, Left Wing HQ, A 1 La Cav—B4.32.
H/P — Hindman, Lenoir Cav—B8.30.
- A/H/P: 9 Miss—B9.30. Anderson, 10 Miss, 44 Miss—B8.29. 7 Miss, 9 Miss Bn—B7.30. 41 Miss—B6.29.
- D/H/P: 25 Ala, 39 Ala—B4.27. 50 Ala—B5.28. 22 Ala, 17 Ala Bn SS—B6.27. Deas, 19 Ala—B7.28.
- M/H/P: 10+19 SC—B8.27. Manigault, 24 Ala—B9.28. 28 Ala—B10.27. 34 Ala—B11.28.
- Arty/H/P: Dent—B6.28. Garrity—B8.30. Waters—B10.28.
Buckner, B Corps HQ and Supply, Clark Cav—E23.03.
P/B — Preston—E15.02.
- G/P/B: 3 Ala Bn—E24.01. Wolihin Bty—E23.02. 1 Ala Bn—E22.01. Gracie, 63 Tenn, Baxter Bty—E21.02. 43 Ala—E20.02. Peeples Bty—E19.03. 2 Ala Bn—E18.02. 4 Ala Bn—E17.02.
- K/P/B: Jeffress Bty—E16.01. 65 Ga—E15.01. Kelly, 5 Ky—B14.34. 58 NC—B13.34. 63 Va—B12.34.
- T/P/B: Trigg, 6 Fla (4)—B13.31. 1 Fla Cav (7)—B14.30. 54 Va (7)—B13.30. 7 Fla (7)—B12.30.
S/B — Stewart, Humphreys Bty—A53.30.
- Ba/S/B: 15+37 Tenn, 58 Ala (5)—A53.27. Bate, 26 Tenn (3), 23 Tenn Bn (2), Oliver Bty—A52.27. 37 Ga (5), 20 Tenn (2), 4 Ga Bn SS (1)—A51.28.
- Br/S/B: Repl leader, 32 Tenn (5), Anderson Bty—A54.26. 18 Tenn (4), 45 Tenn (3)—A55.26.
- C/S/B: 18 Ala (6)—A52.29. Clayton, 36 Ala (7)—A53.29. 38 Ala (7)—A54.28.
W/B Corps Arty—w/i 1 E23.04.
Hood, 1 Corps HQ, E+C 1 La Cav—A60.31.
JPD/1 — Johnson—A60.26.
- F/JPD/1: Fulton, 44 Tenn (5), 25 Tenn (2)—A62.25. 47 Tenn (3), 23 Tenn (3), York Bty—B1.26.
- G/JPD/1: 30 Tenn (2), 7 Texas (2)—B2.26. Repl leader, 41 Tenn (3), 1 Tenn Bn (1), 50 Tenn (1)—B2.27. 10 Tenn (3), 3 Tenn (3), Bledsoe Bty—A62.26.
- M/JPD/1: 1 Ark MR (4), 2 Ark MR—A59.25. McNair, 4+31+4 Bn Ark (7), Culpepper Bty—A60.25. 39 NC (4), 25 Ark (2)—A61.25.
L/1 — Law—A59.28.
- B/L/1: Benning, 15 Ga (2), 17 Ga (4)—A61.29. 20 Ga (2), 2 Ga (3)—A60.28.
- R/L/1: Robertson, 3 Ark (5), 5 Texas (4)—A62.27. 1 Texas (5), 4 Texas (5)—B1.28.
- S/L/1: 15 Ala (6)—A60.27. Repl leader, 47 Ala (5), 48 Ala (4)—A59.27. 44 Ala (5), 4 Ala (4)—A58.27.
M/1 — Kershaw—A59.30.
- K/M/1: Repl Col., 2 SC, 7 SC—A59.30. 3 SC Bn, 8 SC—A58.30. 3 SC, 15 SC—A60.30.
- H/M/1: Humphreys, 13 Miss, 18 Miss—A61.30. 17 Miss, 21 Miss—A62.30.
R/1 Corps Arty Bn—w/i 2 B5.33.
F Cav Corps — Forrest, F Cav HQ, Jackson (1)—A24.29.
- A/F Cav: Armstrong—A23.28. D/A/F Cav—w/i 1 A23.26: 8 Tenn (6), 11 Tenn (5), Shaw (3), 10 Tenn (6), 4 Tenn (6), 9 Tenn (5). W/A/F Cav—w/i 1 A26.26.
- Arty/A/F Cav: Morton—A27.26. Huggins—A29.26.
- P/F Cav: Pegram—A19.25. D/P/F Cav—w/i 1 A18.24: 1 Ga (5), 6 NC (6), 6 Ga (4), Rucker Lgn (6). 10 Conf/S/P/F Cav (4)—w/i 1 A18.24, attached to D/P/F Cav.
W Cav — Wheeler, W Cav HQ—C22.23. Wharton, W/W Cav—w/i 2 C20.21. Martin, M/W Cav—w/i 2 C23.27.
Confederate Breastworks: A52.27, A53.27, A54.26, A55.26, A56.26, A57.26.
Orders: 1. The Wing structure is in play, using the historical wing compositions given in rule 3.3f, above. 2. No unit in the Right Wing has any orders. 3. The Left Wing has orders to attack to capture the Lafayette Rd, Dyer Field, and the Widow Glenn House, and flank the Union line along the Lafayette Road around the Poe Field. 4. F Cav has orders to defend in place. 5. 10 Conf/S/P/F Cav is attached to D/P/F Cav. 6. W Cav has orders to attack towards Crawfish Spring and threaten the Union forces there.
Ammunition and Previous Losses: Artillery Ammunition—200. Previous Losses—212. Stragglers and wrecked regiments: J/C/P—1 wrecked regiment. W/C/P—1 wrecked regiment. A/B/H—8 stragglers, 3 wrecked regiments. H/B/H—9 stragglers, 3 wrecked regiments. S/B/H—7 stragglers, 4 wrecked regiments (note, 47 Ga eliminated by straggling). D/C/H—9 stragglers, 4 wrecked regiments. P/C/H—6 stragglers, 3 wrecked regiments. W/C/H—6 stragglers, 4 wrecked regiments. E/G/Res—6 wrecked regiments. W/G/Res—2 wrecked regiments. G/L/Res—2 stragglers, 1 wrecked regiment. W/L/Res—2 stragglers. Ba/S/B—2 wrecked regiments. G/JPD/1—5 wrecked regiments. B/L/1—2 wrecked regiments.
Reinforcements: As per Arrival Chart, after 11:00 a.m. September 20th.
Victory: Confederate Decisive: 36 VPs or more. Confederate Major: 22 to 35 VPs. Confederate Minor: 11 to 21 VPs. Draw: 10 to -10 VPs. Union Minor: -11 to -21 VPs. Union Major: -22 to -35 VPs. Union Decisive: -36 VPs or less. Historically, the Confederates won a major victory with 29 VPs.
6.10 Three Days of Battle (large scenario)
This is the most complete (and lengthy) scenario, covering the entire scope of the action from the opening skirmishing on the 18th to the final desperate fighting of the evening of the 20th.
General Information Map Area: All First Turn: 2:00 p.m. September 18th Last Turn: 8:00 p.m. September 20th Total Game Length: 178 turns First Player: Confederate
Union Information
Set Up: Rosecrans, A Cumb HQ and Supply, 1 Bn Ohio SS, 10 Ohio, 15 Penn Cav.—w/i 2 C3.03. Crittenden, 21 Corps HQ and Supply, K, 15 Ill Cav—B46.19. Wood, 1/21 Division—w/i 5 B45.23, west of Chickamauga Creek. Palmer, 2/21—w/i 5 C23.13. Van Cleve, 3/21 Division (less 3/3/21 and 3 Wisc Lt battery)—w/i 10 of B36.24, west of Chickamauga Creek. 3/3/21, 3 Wisc Lt battery—w/i 5 C20.20. Wilder, 92 Ill, 98 Ill, 17 Ind, 18a Ind Lt battery—w/i 4 E4.17, all units in breastworks. 4 Mich/1/2/Cav—D37.27. 4 US/1/2/Cav—D41.27. 7 Penn/1/2/Cav—D38.27. Minty, CBOT battery—D39.27. 72 Ind/Wilder, 123 Ill/Wilder, 18b Ind Lt battery—w/i 5 D15.21.
Orders: 1. 21 Corps has orders to defend the crossing at Lee and Gordon's Mills, and the left flank of the Union army. 2. 2/21 has a divisional goal to defend the crossings near Glass Mill. 3. 3/3/21 has a brigade goal to defend the crossings near Glass Mill. 4. Wilder's Brigade has a brigade goal to prevent a Rebel crossing at Alexander's Bridge as long as possible, and then to fall back and join 21 Corps. 5. Minty's Brigade has a brigade goal to prevent a Rebel Crossing at Reed's Bridge and ford as long as possible, and then to fall back and join 21 Corps. 6. The 72 Ind, 123 Ill, and 18b Ind Lt battery collectively have a brigade goal to defend the Dyers Mill crossings until Wilder's Brigade moves to join the 21 Corps, then they are to rejoin their brigade.
Ammunition and Previous Losses: Artillery Ammunition: 600. Previous Losses: none, no stragglers or wrecked regiments.
Reinforcements: As per the Arrival Chart.
Confederate Information
Set Up: Hill, H Corps HQ and Supply—C29.31. Breckinridge, B/H Division—w/i 5 C27.27. Polk, P Corps HQ and Supply, Greenleaf Cav—C2.32. Hindman, H/P Division—w/i 5 B47.30, east of Chickamauga Creek. Cheatham, C/P Division—w/i 5 E43.05. Armstrong, A/F Cav Division—w/i 4 F14.23. Walker, Res Corps HQ and Supply, Nelson Cav—E55.14. Ector, E/G/Res, W/G/Res, Howell/Arty/G/Res—w/i 5 E55.12. Liddell, L/Res Division—w/i 4 E13.23. Buckner, B Corps HQ and Supply, Clark's Tenn Cav—E32.15. W/B Corps—w/i 2 E32.15, east of Chickamauga Creek. Preston, P/B Division—w/i 5 E39.10. Stewart, S/B Division—w/i 5 E30.20.
Orders: 1. H Corps has orders to defend the crossing at Glass Mill. 2. P Corps has orders to defend the crossing at Lee and Gordon's Mill. 3. A/F Cav has no orders. 4. Res Corps has orders to cross Chickamauga Creek at Alexander's Bridge. Once across, they are to wait for the 1 Corps to arrive from the north, and then take up the line behind 1 Corps and support them. 5. B Corps has orders to cross at Thedford's and Dalton Fords and take up defensive positions in support of Res Corps, once Res Corps has finished crossing at Alexander's Bridge. 6. Ector commands G/Res division.
Ammunition and Previous Losses: Artillery Ammunition: 450. Previous losses: none, no stragglers or wrecked regiments.
Reinforcements: As per the Arrival Chart.
Victory: Confederate Decisive: 36 VPs or more. Confederate Major: 22 to 35 VPs. Confederate Minor: 11 to 21 VPs. Draw: 10 to -10 VPs. Union Minor: -11 to -21 VPs. Union Major: -22 to -35 VPs. Union Decisive: -36 VPs or less. Historically, the Confederates won a major victory with 29 VPs.
6.11 Two Days of Battle (large scenario)
This scenario recreates the more traditional two-day look at the battle, starting with the opening actions around Jay's Mill on Saturday morning.
General Information Map Area: All First Turn: 7:00 a.m. September 19th Last Turn: 8:00 p.m. September 20th Total Game Length: 129 turns First Player: Union
Union Information: Identical to the Union set up, orders, ammunition/previous losses, and reinforcements given for Scenario 6.7, Saturday, 19th of September, above.
Confederate Information: Identical to the Confederate set up, orders, ammunition/previous losses, and reinforcements given for Scenario 6.7, Saturday, 19th of September, above.
Victory: Confederate Decisive: 36 VPs or more. Confederate Major: 22 to 35 VPs. Confederate Minor: 11 to 21 VPs. Draw: 10 to -10 VPs. Union Minor: -11 to -21 VPs. Union Major: -22 to -35 VPs. Union Decisive: -36 VPs or less. Historically, the Confederates won a major victory with 29 VPs.
6.12 Four Map Chickamauga (large scenario)
Players will quickly note that maps C and F are not essential to capturing the bulk of the battle, despite the Crawfish Spring action. This scenario allows the spatially-challenged to omit maps C and F and play out the action on four maps.
General Information Map Area: Maps A, B, D, E First Turn: 7:00 a.m. September 19th Last Turn: 8:00 p.m. September 20th Total Game Length: 129 turns First Player: Union
Union Information
Set Up: Thomas, 14 Corps HQ and Supply, 9 Mich, L 1 Ohio Cav—A47.23. Baird—A48.24. 1/1/14, A 1 Mich battery—w/i 1 A47.26. 2/1/14, 4 Ind battery—w/i 2 A49.24. 3/1/14, H 5 US battery—w/i 1 A44.27. Brannan—A38.23. 1/3/14, D 1 Mich battery—w/i 2 A37.26. 2/3/14, C 1 Ohio battery—w/i 2 A40.26. 3/3/14, I 4 US battery—w/i 2 A38.23. Reynolds, 4/14 Division—in line along road between B36.11 and B46.10. Crittenden, 21 Corps HQ and Supply, Mendenhall, K 15 Ill Cav—B46.19. Wood, 1/21 Division—w/i 4 B44.20. Palmer, 2/21 Division—w/i 5 B31.26. Van Cleve, 3/21 Division—w/i 4 B34.22. Wilder, Wilder Brigade (less 39 Ind, 98 Ill—7, 123 Ill—4)—w/i 2 B19.22, all units in breastworks. Minty, 1/2/Cav (4 Mich—5, 7 Penn—6), CBOT Battery—w/i 1 B13.13. 2/2/Res—w/i 2 D37.12. 2/1/Res—w/i 1 D35.09.
Orders: 1. 14 Corps is ordered to defend the Lafayette Road from attack from the west, between the Brotherton house and Cloud Church. 2. 1/14 has a divisional goal to move to the support of 3/14 if it encounters enemy infantry. 3. 3/14 has a divisional goal to deploy in line and advance west towards Jays Mill, to find and attack enemy infantry in the vicinity of the mill. Units of 3/14 should generally remain between the Reed's Bridge and Alexander's Bridge Roads. 4. 4/14 has a divisional goal to join the corps. 5. 21 Corps has orders to defend the Lafayette Road and protect the crossing at Lee and Gordon's Mill. 6. Wilder has a brigade goal to defend the ridgeline currently occupied. 7. 1/2/Cav has no orders. 8. 2/1/Res and 2/2/Res each have a separate brigade goal to exit the map as soon as possible, moving up the Reed's Bridge Road to exit via the north edge of Map A. These orders may not be changed by initiative, and if these units move off the map before they accept new orders from the Army HQ, those orders are considered distorted and lost.
Ammunition and Previous Losses: Ammunition: 300. Previous Losses: 4. No stragglers or wrecked regiments.
Reinforcements: Use the following instead of the regular reinforcement schedule.
| Area | Time | Units | Order # |
|---|---|---|---|
| B62.04 | 10:00 a.m., Sept 19th | 2/20 Division | 1 |
| B62.04 | 10:30 a.m. | Rosecrans, 15 Penn Cav, 1 Bn Ohio SS, 10 Ohio, A Cumb HQ and Supply | 2 |
| B62.04 | 11:30 a.m. | 1/20 Division (less 1/1/20, 5 Wisc Battery) | 3 |
| B62.04 | Noon | McCook, I 2 Ky Cav, 20 Corps HQ and Supply | 4 |
| B62.04 | 2:00 p.m. | 3/20 Division | 5 |
| B62.04 | 3:00 p.m. | 2/14 Division | 6 |
Orders Explanations: 1. Move to join 14 Corps, division is attached to 14 Corps. 2. Army HQ is to move to B12.14. 3. 1/20 has a Divisional Goal to move to B17.27 and defend the Vinyard field and the line of the Lafayette Road. 4. 20 Corps is ordered to move to B48.11 and assume defense of the crossing at Lee and Gordon's Mill. 5. Move to join 20 Corps. 6. 2/14 has a Divisional Goal to move to B12.14 and await further orders. 7. Move to join brigade. 8. Res Corps has orders to move to support Thomas. Once Granger arrives at Thomas' HQ, the Union player may give Granger one free (immediately accepted) order.
Confederate Information
Set Up: Polk, P Corps HQ and Supply, Greenleaf Cav—B62.33. H/P Division—w/i 3 B47.30. C/P Division—w/i 5 E42.05. Buckner, B Corps HQ and Supply, Clark Cav—E26.06. W/B Corps—w/i 2 E26.06. Preston, Arty/P/B—w/i 1 E27.05. G/P/B—w/i 2 E25.02. K/P/B—w/i 2 E27.04. T/P/B—w/i 2 E27.06. Stewart—E21.04. C/S/B, Humphreys battery—w/i 1 E21.02. Br/S/B, Anderson battery—w/i 2 E21.04. Ba/S/B, Oliver battery—w/i 2 E21.06. Hood, Walker, 1 Corps HQ—E12.04. Johnson—E15.02. G/JPD/1—w/i 2 E15.02. F/JPD/1—w/i 1 E11.01. M/JPD/1—w/i 2 E13.02. Law—B9.34. R/L/1—w/i 2 B7.33. S/L/1—w/i 2 B3.32. B/L/1, Lumsden battery—w/i 2 E5.02. Res Corps HQ, Nelson Cav—E2.12. Ector—E7.09. E/G/Res (repl leader, Ector commands division)—on road in line between E5.10 and E10.07. W/G/Res, Res Corps Supply—w/i 2 E1.15. Liddell, L/Res (29 Miss/W/L/Res (6), 34 Miss/W/L/Res (5))—on road in line between D62.04 and D59.14. Forrest, F Cav HQ, Jackson Cav (1)—E5.19. Pegram, D/P/F, 10 Conf/S/P/F, Martin/S/P/F (7)—w/i 2 E5.19.
Orders: 1. P Corps has orders to move HQ to E31.09. 2. H/P Division has a divisional goal to defend the crossing at Lee and Gordon's Mill. 3. C/P Division has a divisional goal to move north via Dalton Ford to the vicinity of E12.13, halt, form line facing west, and await further orders. 4. B Corps has no orders. 5. 1 Corps has no orders. 6. Res Corps has no orders. 7. G/Res Division has a divisional goal to move to Jay's Mill and support Forrest's Cavalry Corps in the defense of that place. This order is currently in delay, D5 status. 8. F Cav Corps has orders to move at once to Jays Mill and defend it, including both the Reed's Bridge Roads and Brotherton Roads. 9. 10 Conf/S/P/F and Martin/S/P/F are attached to D/P/F Cav.
Ammunition and Previous Losses: Ammunition: 250. Previous losses: 5. No stragglers or wrecked regiments.
Reinforcements: Use the following instead of the regular reinforcement schedule.
| Area | Time | Units | Order # |
|---|---|---|---|
| E62.34 | 7:00 a.m., Sept 19 | Bragg, A Tenn HQ and Supply, Drews/A Tenn, Holloway/A Tenn | 1 |
| D40.34 | Noon | WITHDRAW: Martin/S/P/F Cav | — |
| E62.10 | 2:00 p.m. | Cleburne, C/H Division | 2 |
| E5.35 | 10:00 p.m. | Longstreet, Kershaw, H/M/1, K/M/1, R/1 Corps artillery (except Lumsden) | 2 |
| E5.35 | 5:00 a.m., Sept 20th | Gist, C/G/Res | 2 |
Orders Explanations: 1. Army HQ is ordered to move to E6.19. 2. Move to join corps or division.
Victory: Confederate Decisive: 30 VPs or more. Confederate Major: 19 to 29 VPs. Confederate Minor: 8 to 18 VPs. Draw: 7 to -7 VPs. Union Minor: -8 to -18 VPs. Union Major: -19 to -29 VPs. Union Decisive: -30 VPs or less. Historically, the Confederates won a major victory with 23 VPs.
Losses and Scenario Starting Strengths
Only those units that sustained losses are listed. All other units had no losses.
Note: each unit's row below lists, in order: Full (printed) strength, then current strength at the start of Scenario 6.1 (Sept 19 am), Scenarios 6.2/6.7/6.10 (Sept 19 pm), Scenario 6.4 (Sept 20 am), Scenario 6.3 (Sept 20), Scenarios 6.9/6.6 (Sept 20 pm), and finally cumulative total losses (referenced by Scenarios 6.11/6.12 and 6.5/6.8). "-" means the unit is not yet in play at that checkpoint. A number in parentheses after a strength is a recoverable straggler count — see the explanatory note at the end of the Confederate Forces table.
Union Forces
Wilder—Wilder
| Unit | Full | Sept 19 am | Sept 19 pm | Sept 20 am | Sept 20 | Sept 20 pm | Total Losses |
|---|---|---|---|---|---|---|---|
| 92 Ill | 8 | - | - | - | 7 | 7 | 1 |
| 98 Ill | 8 (7)* | 7 | 7 | 7 | 7 | 7 | 1 |
| 123 Ill | 5 (4)* | 4 | 4 | 4 | 4 | 4 | 1 |
14 Corps—Thomas / 1/1/14—Scribner
| Unit | Full | Sept 19 am | Sept 19 pm | Sept 20 am | Sept 20 | Sept 20 pm | Total Losses |
|---|---|---|---|---|---|---|---|
| 38 Ind | 7 | 6 (5) | 6 | 5 (4) | 5 | 5 | 2 |
| 2 Ohio | 8 | 5 (2) | 5 | 4 (2) | 4 | 4 | 4 |
| 33 Ohio | 8 | 6 (4) | 6 | 5 (4) | 5 | 5 | 3 |
2/1/14—Starkweather
| Unit | Full | Sept 19 am | Sept 19 pm | Sept 20 am | Sept 20 | Sept 20 pm | Total Losses |
|---|---|---|---|---|---|---|---|
| 24 Ill | 7 | 5 (4) | 5 | 5 | 5 | 4 | 3 |
| 79 Penn | 8 | 6 (4) | 6 | 6 | 6 | 5 | 3 |
| 1 Wis | 8 | 6 (4) | 6 | 6 | 6 | 4 | 4 |
3/1/14—J. King
| Unit | Full | Sept 19 am | Sept 19 pm | Sept 20 am | Sept 20 | Sept 20 pm | Total Losses |
|---|---|---|---|---|---|---|---|
| 1/15 US | 6 | 3 (1) | 3 | 3 | 3 | 3 | 3 |
| 1/16 US | 6 | 2 (0) | 2 | 2 | 2 | 2 | 4 |
| 1/18 US | 6 | 4 (2) | 4 | 4 | 4 | 3 | 3 |
Arty/1/14
| Unit | Full | Sept 19 am | Sept 19 pm | Sept 20 am | Sept 20 | Sept 20 pm | Total Losses |
|---|---|---|---|---|---|---|---|
| A 1 Mich | 6 | 1 | 1 | 1 | 1 | 1 | 5 |
| 4 Ind Lt | 6 | 4 | 4 | 4 | 4 | 2 | 4 |
| H 5 US | 6 | 2 | 2 | 2 | 2 | 2 | 4 |
1/2/14—Beatty
| Unit | Full | Sept 19 am | Sept 19 pm | Sept 20 am | Sept 20 | Sept 20 pm | Total Losses |
|---|---|---|---|---|---|---|---|
| 104 Ill | 6 | - | - | - | 5 (4) | 5 | 1 |
| 42 Ind | 7 | - | - | - | 5 (3) | 5 | 2 |
| 88 Ind | 5 | - | - | - | 4 (3) | 4 | 1 |
2/2/14—Stanley (wounded)
| Unit | Full | Sept 19 am | Sept 19 pm | Sept 20 am | Sept 20 | Sept 20 pm | Total Losses |
|---|---|---|---|---|---|---|---|
| 19 Ill | 5 | - | - | - | - | 4 | 1 |
| 11 Mich | 7 | - | - | - | - | 6 | 1 |
| 18 Ohio | 7 | - | - | - | - | 5 | 2 |
3/2/14—Sirwell
| Unit | Full | Sept 19 am | Sept 19 pm | Sept 20 am | Sept 20 | Sept 20 pm | Total Losses |
|---|---|---|---|---|---|---|---|
| 21 Ohio | 11 | - | - | - | - | 6 | 5 |
Arty/2/14
| Unit | Full | Sept 19 am | Sept 19 pm | Sept 20 am | Sept 20 | Sept 20 pm | Total Losses |
|---|---|---|---|---|---|---|---|
| Bridges | 6 | - | - | - | 2 | 2 | 4 |
1/3/14—Connell
| Unit | Full | Sept 19 am | Sept 19 pm | Sept 20 am | Sept 20 | Sept 20 pm | Total Losses |
|---|---|---|---|---|---|---|---|
| 82 Ind | 6 | - | - | - | - | 4 | 2 |
| 17 Ohio | 10 | 9 (8) | 9 | 9 | 9 (8) | 7 | 3 |
| 31 Ohio | 10 | 9 | 9 | 9 | 9 (8) | 6 | 4 |
2/3/14—Croxton (wounded)
| Unit | Full | Sept 19 am | Sept 19 pm | Sept 20 am | Sept 20 | Sept 20 pm | Total Losses |
|---|---|---|---|---|---|---|---|
| 10 Ind | 7 | 4 (3) | 4 | 4 | 4 | 4 | 3 |
| 74 Ind | 8 | 5 (3) | 5 | 5 | 5 | 5 | 3 |
| 4 Ky | 11 | 9 (8) | 9 | 9 | 9 (8) | 7 | 4 |
3/3/14—Van Derveer
| Unit | Full | Sept 19 am | Sept 19 pm | Sept 20 am | Sept 20 | Sept 20 pm | Total Losses |
|---|---|---|---|---|---|---|---|
| 87 Ind | 8 | 6 (5) | 6 | 6 | 6 | 4 | 4 |
| 2 Minn | 8 | 7 | 7 | 6 | 6 | 5 | 3 |
| 9 Ohio | 10 | 7 (6) | 7 | 7 | 7 | 5 | 5 |
Arty/3/14
| Unit | Full | Sept 19 am | Sept 19 pm | Sept 20 am | Sept 20 | Sept 20 pm | Total Losses |
|---|---|---|---|---|---|---|---|
| D 1 Mich | 6 | - | - | - | - | 1 | 5 |
| C 1 Ohio | 6 | - | - | - | - | 5 | 1 |
2/4/14—E. King (killed)
| Unit | Full | Sept 19 am | Sept 19 pm | Sept 20 am | Sept 20 | Sept 20 pm | Total Losses |
|---|---|---|---|---|---|---|---|
| 68 Ind | 7 | - | 5 | 5 | 5 | 4 | 3 |
| 75 Ind | 7 | - | 5 | 5 | 5 | 4 | 3 |
| 101 Ind | 8 | - | 7 | 7 | 7 | 6 | 2 |
3/4/14—Turchin
| Unit | Full | Sept 19 am | Sept 19 pm | Sept 20 am | Sept 20 | Sept 20 pm | Total Losses |
|---|---|---|---|---|---|---|---|
| 18 Ky | 5 | - | 4 | 4 | 4 | 3 | 2 |
| 11 Ohio | 9 | - | - | - | - | 8 | 1 |
| 36 Ohio | 8 | - | 7 | 7 | 7 | 6 | 2 |
Arty/4/14
| Unit | Full | Sept 19 am | Sept 19 pm | Sept 20 am | Sept 20 | Sept 20 pm | Total Losses |
|---|---|---|---|---|---|---|---|
| 19 Ind Lt | 6 | - | - | - | - | 4 | 2 |
| 21 Ind Lt | 6 | - | - | - | - | 5 | 1 |
20 Corps / 2/1/20—Carlin
| Unit | Full | Sept 19 am | Sept 19 pm | Sept 20 am | Sept 20 | Sept 20 pm | Total Losses |
|---|---|---|---|---|---|---|---|
| 21 Ill | 8 | - | 5 | 5 | 5 | 3 | 5 |
| 38 Ill | 6 | - | 4 | 4 | 4 | 3 | 3 |
| 81 Ind | 5 | - | 4 | 4 | 4 | 3 | 2 |
3/1/20—Heg (killed)
| Unit | Full | Sept 19 am | Sept 19 pm | Sept 20 am | Sept 20 | Sept 20 pm | Total Losses |
|---|---|---|---|---|---|---|---|
| 25 Ill | 7 | - | 5 | 5 | 5 | 3 | 4 |
| 35 Ill | 6 | - | 4 | 4 | 4 | 3 | 3 |
| 8 Kansas | 8 | - | 5 | 5 | 5 | 3 | 5 |
1/2/20—Willich
| Unit | Full | Sept 19 am | Sept 19 pm | Sept 20 am | Sept 20 | Sept 20 pm | Total Losses |
|---|---|---|---|---|---|---|---|
| 49 Ohio | 5 | - | 4 | 4 | 3 | 3 | 2 |
| 32 Ind | 7 | - | 6 | 6 | 5 (4) | 5 | 2 |
| 15 Ohio | 7 | - | - | - | 6 (5) | 5 | 2 |
2/2/20—Dodge
| Unit | Full | Sept 19 am | Sept 19 pm | Sept 20 am | Sept 20 | Sept 20 pm | Total Losses |
|---|---|---|---|---|---|---|---|
| 79 Ill | 5 | - | 3 | 3 | 2 (1) | 2 | 3 |
| 29 Ind | 7 | - | 5 | 5 | 4 (3) | 4 | 3 |
| 30 Ind | 5 | - | 3 | 3 | 3 | 2 | 3 |
3/2/20—Baldwin (killed)
| Unit | Full | Sept 19 am | Sept 19 pm | Sept 20 am | Sept 20 | Sept 20 pm | Total Losses |
|---|---|---|---|---|---|---|---|
| 6 Ind | 7 | - | 5 | 5 | 4 (3) | 4 | 3 |
| 5 Ky | 6 | - | 4 | 4 | 4 | 4 | 2 |
| 1 Ohio | 7 | - | 6 | 6 | 5 (4) | 4 | 3 |
Arty/2/20
| Unit | Full | Sept 19 am | Sept 19 pm | Sept 20 am | Sept 20 | Sept 20 pm | Total Losses |
|---|---|---|---|---|---|---|---|
| 5 Ind Lt | 6 | - | 5 | 5 | 4 | 4 | 2 |
1/3/20—Lytle (killed)
| Unit | Full | Sept 19 am | Sept 19 pm | Sept 20 am | Sept 20 | Sept 20 pm | Total Losses |
|---|---|---|---|---|---|---|---|
| 36 Ill | 7 | - | - | - | 4 (2) | 4 | 3 |
| 88 Ill | 5 | - | - | - | 3 (1) | 3 | 2 |
| 21 Mich | 6 | - | - | - | 4 (3) | 4 | 2 |
2/3/20—Laiboldt
| Unit | Full | Sept 19 am | Sept 19 pm | Sept 20 am | Sept 20 | Sept 20 pm | Total Losses |
|---|---|---|---|---|---|---|---|
| 44 Ill | 7 | - | - | - | 5 (4) | 5 | 2 |
| 73 Ill | 6 | - | - | - | 4 (3) | 4 | 2 |
| 2 Mo | 5 | - | - | - | 3 (2) | 3 | 2 |
3/3/20—Bradley (wounded)
| Unit | Full | Sept 19 am | Sept 19 pm | Sept 20 am | Sept 20 | Sept 20 pm | Total Losses |
|---|---|---|---|---|---|---|---|
| 22 Ill | 6 | - | 5 | 5 | 4 (3) | 4 | 2 |
| 27 Ill | 6 | - | 5 | 5 | 4 (2) | 4 | 2 |
| 42 Ill | 6 | - | - | - | 3 (2) | 3 | 3 |
Arty/3/20
| Unit | Full | Sept 19 am | Sept 19 pm | Sept 20 am | Sept 20 | Sept 20 pm | Total Losses |
|---|---|---|---|---|---|---|---|
| C 1 Ill | 6 | - | - | - | 3 | 3 | 3 |
| 11 Ind Lt | 6 | - | - | - | 4 | 4 | 2 |
| G 1 Mo | 6 | - | - | - | 6 | 6 | 0 |
21 Corps / 1/1/21—Buell
| Unit | Full | Sept 19 am | Sept 19 pm | Sept 20 am | Sept 20 | Sept 20 pm | Total Losses |
|---|---|---|---|---|---|---|---|
| 100 Ill | 7 | - | 5 | 5 | 5 | 4 | 3 |
| 58 Ind | 8 | - | 6 | 6 | 6 (3) | 5 | 3 |
| 13 Mich | 4 | - | 3 | 3 | 3 | 2 | 2 |
3/1/21—Harker
| Unit | Full | Sept 19 am | Sept 19 pm | Sept 20 am | Sept 20 | Sept 20 pm | Total Losses |
|---|---|---|---|---|---|---|---|
| 3 Ky | 8 | - | - | - | - | 6 | 2 |
| 64 Ohio | 7 | - | - | - | - | 5 | 2 |
| 65 Ohio | 6 | - | - | - | - | 4 | 2 |
1/2/21—Cruft
| Unit | Full | Sept 19 am | Sept 19 pm | Sept 20 am | Sept 20 | Sept 20 pm | Total Losses |
|---|---|---|---|---|---|---|---|
| 31 Ind | 8 | - | 6 | 6 | 6 | 6 | 2 |
| 1 Ky | 2 | - | 1 | 1 | 1 | 1 | 1 |
| 2 Ky | 7 | - | 6 | 6 | 6 | 5 | 2 |
2/2/21—Hazen
| Unit | Full | Sept 19 am | Sept 19 pm | Sept 20 am | Sept 20 | Sept 20 pm | Total Losses |
|---|---|---|---|---|---|---|---|
| 9 Ind | 8 | - | 6 | 6 | 6 | 5 | 3 |
| 6 Ky | 6 | - | 4 | 4 | 4 | 4 | 2 |
| 41 Ohio | 7 | - | 5 | 5 | 5 | 5 | 2 |
3/2/21—Grose
| Unit | Full | Sept 19 am | Sept 19 pm | Sept 20 am | Sept 20 | Sept 20 pm | Total Losses |
|---|---|---|---|---|---|---|---|
| 84 Ill | 8 | - | 7 | 7 | 7 | 6 | 2 |
| 36 Ind | 7 | - | 5 | 5 | 5 | 4 | 3 |
| 23 Ky | 5 | - | 4 | 4 | 4 | 4 | 1 |
Arty/2/21
| Unit | Full | Sept 19 am | Sept 19 pm | Sept 20 am | Sept 20 | Sept 20 pm | Total Losses |
|---|---|---|---|---|---|---|---|
| B 1 Ohio | 6 | - | - | - | - | 3 | 3 |
| H 4 US | 4 | - | - | - | - | 1 | 3 |
1/3/21—Beatty
| Unit | Full | Sept 19 am | Sept 19 pm | Sept 20 am | Sept 20 | Sept 20 pm | Total Losses |
|---|---|---|---|---|---|---|---|
| 79 Ind | 6 | - | 5 | 5 | 5 | 5 | 1 |
| 9 Ky | 4 | - | 3 | 3 | 3 | 3 | 1 |
| 17 Ky | 10 | - | 8 | 8 | 8 (4) | 7 | 3 |
2/3/21—Dick
| Unit | Full | Sept 19 am | Sept 19 pm | Sept 20 am | Sept 20 | Sept 20 pm | Total Losses |
|---|---|---|---|---|---|---|---|
| 44 Ind | 5 | - | - | - | - | (1) 4 | 1 |
| 86 Ind | 5 | - | 4 | 4 | 4 (2) | 4 | 1 |
| 13 Ohio | 6 | - | 5 | 5 | 5 (2) | 4 | 2 |
3/3/21—Barnes
| Unit | Full | Sept 19 am | Sept 19 pm | Sept 20 am | Sept 20 | Sept 20 pm | Total Losses |
|---|---|---|---|---|---|---|---|
| 35 Ind | 5 | - | 4 | 4 | 4 | 4 | 1 |
| 8 Ky | 6 | - | 5 | 5 | 5 | 4 | 2 |
| 51 Ohio | 6 | - | 5 | 5 | 5 | 4 | 2 |
Arty/3/21
| Unit | Full | Sept 19 am | Sept 19 pm | Sept 20 am | Sept 20 | Sept 20 pm | Total Losses |
|---|---|---|---|---|---|---|---|
| 7 Ind Lt | 6 | - | - | - | - | 5 | 1 |
| 26 Penn Lt | 6 | - | - | - | - | 2 | 4 |
| 3 Wisc Lt | 6 | - | - | - | - | 1 | 5 |
Res Corps / 1/1/Res—Whittaker
| Unit | Full | Sept 19 am | Sept 19 pm | Sept 20 am | Sept 20 | Sept 20 pm | Total Losses |
|---|---|---|---|---|---|---|---|
| 96 Ill | 8 | - | - | - | - | 4 | 4 |
| 115 Ill | 8 | - | - | - | - | 4 | 4 |
| 84 Ind | 8 | - | - | - | - | 5 | 3 |
2/1/Res—Mitchell
| Unit | Full | Sept 19 am | Sept 19 pm | Sept 20 am | Sept 20 | Sept 20 pm | Total Losses |
|---|---|---|---|---|---|---|---|
| 78 Ill | 7 | - | - | - | - | 4 | 3 |
| 98 Ohio | 4 | - | - | - | - | 3 | 1 |
| 113 Ohio | 7 | - | - | - | - | 4 | 3 |
Cav Corps / 3/1/Cav—Watkins
| Unit | Full | Sept 19 am | Sept 19 pm | Sept 20 am | Sept 20 | Sept 20 pm | Total Losses |
|---|---|---|---|---|---|---|---|
| 4 Ky Cav | 6 | - | - | - | - | 4 | 2 |
| 5 Ky Cav | 6 | - | - | - | - | 5 | 1 |
| 6 Ky Cav | 4 | - | - | - | - | 2 | 2 |
1/2/Cav—Minty
| Unit | Full | Sept 19 am | Sept 19 pm | Sept 20 am | Sept 20 | Sept 20 pm | Total Losses |
|---|---|---|---|---|---|---|---|
| 4 Mich Cav | 6 (5)* | 5 | 5 | 5 | 5 | 5 | 1 |
| 7 Penn Cav | 7 (6)* | 6 | 6 | 6 | 6 | 6 | 1 |
2/2/Cav—Long
| Unit | Full | Sept 19 am | Sept 19 pm | Sept 20 am | Sept 20 | Sept 20 pm | Total Losses |
|---|---|---|---|---|---|---|---|
| 2 Ky Cav | 4 | - | - | - | 3 | 3 | 1 |
| 1 Ohio Cav | 5 | - | - | - | 4 | 4 | 1 |
| 4 Ohio Cav | 8 | - | - | - | 7 | 7 | 1 |
Confederate Forces
P Corps / J/C/P—Jackson
| Unit | Full | Sept 19 am | Sept 19 pm | Sept 20 am | Sept 20 | Sept 20 pm | Total Losses |
|---|---|---|---|---|---|---|---|
| 2/1 Conf | 4 | - | 3 | 3 | 3 | 2 | 2 |
| 2 Ga Bn SS | 2 | - | 1 | 1 | 1 | 1 | 1 |
| 5 Ga | 7 | - | 4 | 4 | 4 | 3 | 4 |
M/C/P—Maney
| Unit | Full | Sept 19 am | Sept 19 pm | Sept 20 am | Sept 20 | Sept 20 pm | Total Losses |
|---|---|---|---|---|---|---|---|
| 1+27 Tenn | 12 | - | 10 | 10 | 10 | 10 | 2 |
| 4 Tenn (PA) | 4 | - | 3 | 3 | 3 | 3 | 1 |
| 6+9 Tenn | 7 | - | 3 | 3 | 3 | 3 | 4 |
Sm/C/P—Smith (killed)
| Unit | Full | Sept 19 am | Sept 19 pm | Sept 20 am | Sept 20 | Sept 20 pm | Total Losses |
|---|---|---|---|---|---|---|---|
| 11 Tenn | 5 | - | 4 | 4 | 4 | 4 | 1 |
| 12+47 Tenn | 6 | - | 4 | 4 | 4 | 4 | 2 |
| 13+154 Tenn | 6 | - | 4 | 4 | 4 | 4 | 2 |
St/C/P—Strahl
| Unit | Full | Sept 19 am | Sept 19 pm | Sept 20 am | Sept 20 | Sept 20 pm | Total Losses |
|---|---|---|---|---|---|---|---|
| 4+5 Tenn | 5 | - | 4 | 4 | 4 | 4 | 1 |
| 19 Tenn | 5 | - | 3 | 3 | 3 | 3 | 2 |
| 24 Tenn | 5 | - | 4 | 4 | 4 | 4 | 1 |
W/C/P—Wright
| Unit | Full | Sept 19 am | Sept 19 pm | Sept 20 am | Sept 20 | Sept 20 pm | Total Losses |
|---|---|---|---|---|---|---|---|
| 8 Tenn | 6 | - | 4 | 4 | 4 | 4 | 2 |
| 16 Tenn | 5 | - | 4 | 4 | 4 | 4 | 1 |
| 28 Tenn | 6 | - | 4 | 4 | 4 | 4 | 2 |
Arty/C/P
| Unit | Full | Sept 19 am | Sept 19 pm | Sept 20 am | Sept 20 | Sept 20 pm | Total Losses |
|---|---|---|---|---|---|---|---|
| Carnes | 4 | - | 2 | 2 | 2 | 2 | 2 |
| Scogin | 4 | - | 3 | 3 | 3 | 3 | 1 |
| Scott | 4 | - | 3 | 3 | 3 | 3 | 1 |
Hindman (Wounded) — A/H/P—Anderson
| Unit | Full | Sept 19 am | Sept 19 pm | Sept 20 am | Sept 20 | Sept 20 pm | Total Losses |
|---|---|---|---|---|---|---|---|
| 7 Miss | 6 | - | - | - | 5 (4) | 4 | 2 |
| 9 Miss | 7 | - | - | - | 6 (4) | 5 | 2 |
| 10 Miss | 5 | - | - | - | (4) | 4 | 1 |
D/H/P—Deas
| Unit | Full | Sept 19 am | Sept 19 pm | Sept 20 am | Sept 20 | Sept 20 pm | Total Losses |
|---|---|---|---|---|---|---|---|
| 19 Ala | 9 | - | - | - | 7 (5) | 5 | 4 |
| 22 Ala | 7 | - | - | - | 5 (4) | 2 | 5 |
| 25 Ala | 6 | - | - | - | 5 (4) | 4 | 2 |
M/H/P—Manigault
| Unit | Full | Sept 19 am | Sept 19 pm | Sept 20 am | Sept 20 | Sept 20 pm | Total Losses |
|---|---|---|---|---|---|---|---|
| 24 Ala | 8 | - | - | - | 7 (6) | 6 | 2 |
| 28 Ala | 9 | - | - | - | 8 (6) | 7 | 2 |
| 34 Ala | 9 | - | - | - | 8 (7) | 7 | 2 |
Arty/H/P
| Unit | Full | Sept 19 am | Sept 19 pm | Sept 20 am | Sept 20 | Sept 20 pm | Total Losses |
|---|---|---|---|---|---|---|---|
| Waters | 4 | - | - | - | - | 3 | 1 |
D/C/H—Deshler (Killed)
| Unit | Full | Sept 19 am | Sept 19 pm | Sept 20 am | Sept 20 | Sept 20 pm | Total Losses |
|---|---|---|---|---|---|---|---|
| 9+24 Ark | 5 | - | - | 3 (1) | 3 (1) | 3 | 2 |
| 6 Texas | 6 | - | - | 5 (4) | 5 (4) | 5 | 1 |
| 10+15 Texas | 8 | - | - | 6 (4) | 6 (4) | 6 |
P/C/H—Polk
| Unit | Full | Sept 19 am | Sept 19 pm | Sept 20 am | Sept 20 | Sept 20 pm | Total Losses |
|---|---|---|---|---|---|---|---|
| 1 Ark | 9 | - | - | 6 (4) | 6 (4) | 5 | 4 |
| 3+5 Conf | 8 | - | 7 | 7 (6) | 7 | 6 | 2 |
| 2 Tenn | 5 | - | - | 3 (2) | 3 (2) | 2 | 3 |
W/C/H—Wood
| Unit | Full | Sept 19 am | Sept 19 pm | Sept 20 am | Sept 20 | Sept 20 pm | Total Losses |
|---|---|---|---|---|---|---|---|
| 16 Ala | 8 | - | 5 | 4 (3) | 4 | 3 | 5 |
| 33 Ala | 7 | - | 6 | 5 (4) | 5 | 4 | 3 |
| 45 Ala | 8 | - | 7 | 7 | 7 | 6 | 2 |
H Corps / A/B/H—Adams (Wounded)
| Unit | Full | Sept 19 am | Sept 19 pm | Sept 20 am | Sept 20 | Sept 20 pm | Total Losses |
|---|---|---|---|---|---|---|---|
| 13+20 La | 6 | - | - | 4 (2) | 4 (2) | 4 | 2 |
| 16+25 La | 6 | - | - | 4 (2) | 4 (2) | 3 | 3 |
| 19 La | 7 | - | - | 5 (2) | 5 (2) | 4 |
H/B/H—Helm (killed)
| Unit | Full | Sept 19 am | Sept 19 pm | Sept 20 am | Sept 20 | Sept 20 pm | Total Losses |
|---|---|---|---|---|---|---|---|
| 41 Ala | 8 | - | - | 5 (2) | 5 (2) | 5 | 3 |
| 2 Ky | 6 | - | - | 3 (1) | 3 (2) | 3 | 3 |
| 4 Ky | 5 | - | - | 4 (3) | 4 (3) | 4 | 1 |
S/B/H—Stovall
| Unit | Full | Sept 19 am | Sept 19 pm | Sept 20 am | Sept 20 | Sept 20 pm | Total Losses |
|---|---|---|---|---|---|---|---|
| 1+3 Fla | 6 | - | - | 4 (2) | 4 (2) | 4 | 2 |
| 4 Fla | 5 | - | - | 3 (1) | 3 (1) | 3 | 2 |
| 47 Ga | 4 | - | - | 2 (0) | 2 (1) | 2 | 2 |
Arty/B/H
| Unit | Full | Sept 19 am | Sept 19 pm | Sept 20 am | Sept 20 | Sept 20 pm | Total Losses |
|---|---|---|---|---|---|---|---|
| Slocumb | 6 | - | 5 | 5 | 5 | 5 | 1 |
Res Corps / C/G/Res—Colquitt (killed)
| Unit | Full | Sept 19 am | Sept 19 pm | Sept 20 am | Sept 20 | Sept 20 pm | Total Losses |
|---|---|---|---|---|---|---|---|
| 46 Ga | 6 | - | - | - | - | (5) 4 | 2 |
| 8 Ga Bn | 4 | - | - | - | 3 (2) | 2 | 2 |
| 24 SC | 8 | - | - | - | 6 (4) | 5 | 3 |
E/G/Res—Ector
| Unit | Full | Sept 19 am | Sept 19 pm | Sept 20 am | Sept 20 | Sept 20 pm | Total Losses |
|---|---|---|---|---|---|---|---|
| Stone Ala Bn | 2 | 1 | 1 | 1 | 1 | 1 | 1 |
| Pound Ms Bn | 2 | 1 | 1 | 1 | 1 | 1 | 1 |
| 29 NC | 4 | 2 | 2 | 2 | 2 | 2 | 2 |
W/G/Res—Wilson
| Unit | Full | Sept 19 am | Sept 19 pm | Sept 20 am | Sept 20 | Sept 20 pm | Total Losses |
|---|---|---|---|---|---|---|---|
| 25 Ga | 7 | 4 | 4 | 4 | 4 (3) | 4 | 3 |
| 29 Ga | 7 | 3 | 3 | 3 | 3 | 3 | 4 |
| 30 Ga | 7 | 4 | 4 | 4 | 4 (3) | 4 | 3 |
G/L/Res—Govan
| Unit | Full | Sept 19 am | Sept 19 pm | Sept 20 am | Sept 20 | Sept 20 pm | Total Losses |
|---|---|---|---|---|---|---|---|
| 2+15 Ark | 5 | 4 | 4 | 4 | 3 (2) | 3 | 2 |
| 5+13 Ark | 9 | 7 | 7 | 6 (5) | 6 (5) | 5 | 4 |
| 6+7 Ark | 6 | 4 | 4 | 4 | 3 (2) | 3 | 3 |
W/L/Res—Walthall
| Unit | Full | Sept 19 am | Sept 19 pm | Sept 20 am | Sept 20 | Sept 20 pm | Total Losses |
|---|---|---|---|---|---|---|---|
| 24 Miss | 9 | 7 | 7 | 6 (5) | 6 (5) | 6 | 3 |
| 27 Miss | 7 | 6 | 6 | 5 (4) | 5 (4) | 5 | 2 |
| 29 Miss | 7 (6)* | 4 | 4 | 4 | 3 (2) | 3 |
Arty/L/Res
| Unit | Full | Sept 19 am | Sept 19 pm | Sept 20 am | Sept 20 | Sept 20 pm | Total Losses |
|---|---|---|---|---|---|---|---|
| Fowler | 4 | 3 | 3 | 3 | 3 | 3 | 1 |
B Corps / G/P/B—Gracie
| Unit | Full | Sept 19 am | Sept 19 pm | Sept 20 am | Sept 20 | Sept 20 pm | Total Losses |
|---|---|---|---|---|---|---|---|
| 43 Ala | 16 | - | - | - | - | 12 | 4 |
| 1 Ala Bn | 5 | - | - | - | - | 2 | 3 |
| 2 Ala Bn | 5 | - | - | - | - | 3 | 2 |
K/P/B—Kelly
| Unit | Full | Sept 19 am | Sept 19 pm | Sept 20 am | Sept 20 | Sept 20 pm | Total Losses |
|---|---|---|---|---|---|---|---|
| 5 Ky | 8 | - | - | - | - | 6 | 2 |
| 58 NC | 6 | - | - | - | - | 3 | 3 |
| 63 Va | 8 | - | - | - | - | 6 | 2 |
T/P/B—Trigg
| Unit | Full | Sept 19 am | Sept 19 pm | Sept 20 am | Sept 20 | Sept 20 pm | Total Losses |
|---|---|---|---|---|---|---|---|
| 1 Fla DC | 8 | - | 7 | 7 | 7 | 7 | 1 |
| 6 Fla | 7 | - | 4 | 4 | 4 | 4 | 3 |
| 7 Fla | 8 | - | 7 | 7 | 7 | 7 | 1 |
Arty/P/B
| Unit | Full | Sept 19 am | Sept 19 pm | Sept 20 am | Sept 20 | Sept 20 pm | Total Losses |
|---|---|---|---|---|---|---|---|
| Peeples | 4 | - | - | - | - | 2 | 2 |
Ba/S/B—Bate
| Unit | Full | Sept 19 am | Sept 19 pm | Sept 20 am | Sept 20 | Sept 20 pm | Total Losses |
|---|---|---|---|---|---|---|---|
| 58 Ala | 6 | - | 5 | 5 | 5 | 3 | 3 |
| 37 Ga | 8 | - | 5 | 5 | 5 | 4 | 4 |
| 4 Ga Bn | 2 | - | 1 | 1 | 1 | 1 | 1 |
Br/S/B—Brown (Wounded)
| Unit | Full | Sept 19 am | Sept 19 pm | Sept 20 am | Sept 20 | Sept 20 pm | Total Losses |
|---|---|---|---|---|---|---|---|
| 18 Tenn | 7 | - | 4 | 4 | 4 | 4 | 3 |
| 26 Tenn | 5 | - | 3 | 3 | 3 | 3 | 2 |
| 32 Tenn | 7 | - | 5 | 5 | 5 | 5 | 2 |
C/S/B—Clayton
| Unit | Full | Sept 19 am | Sept 19 pm | Sept 20 am | Sept 20 | Sept 20 pm | Total Losses |
|---|---|---|---|---|---|---|---|
| 18 Ala | 10 | - | 6 | 6 | 6 | 4 | 6 |
| 36 Ala | 9 | - | 7 | 7 | 7 | 6 | 3 |
| 38 Ala | 10 | - | 7 | 7 | 7 | 6 | 4 |
1 Corps — Hood (Wounded), Johnson / F/JPD/1—Fulton
| Unit | Full | Sept 19 am | Sept 19 pm | Sept 20 am | Sept 20 | Sept 20 pm | Total Losses |
|---|---|---|---|---|---|---|---|
| 17 Tenn | 5 | - | 3 | 3 | 3 | 2 | 3 |
| 23 Tenn | 4 | - | 3 | 3 | 3 | 2 | 2 |
| 25 Tenn | 3 | - | 2 | 2 | 2 | 2 | 1 |
G/JPD/1—Gregg (Wounded)
| Unit | Full | Sept 19 am | Sept 19 pm | Sept 20 am | Sept 20 | Sept 20 pm | Total Losses |
|---|---|---|---|---|---|---|---|
| 3 Tenn | 5 | - | 3 | 3 | 3 | 2 | 3 |
| 10 Tenn | 4 | - | 3 | 3 | 3 | 2 | 2 |
| 30 Tenn | 4 | - | 2 | 2 | 2 | 2 | 2 |
M/JPD/1—McNair (Wounded)
| Unit | Full | Sept 19 am | Sept 19 pm | Sept 20 am | Sept 20 | Sept 20 pm | Total Losses |
|---|---|---|---|---|---|---|---|
| 1 Ark MR | 5 | - | 4 | 4 | 4 | 3 | 2 |
| 2 Ark MR | 3 | - | - | - | - | 2 | 1 |
| 25 Ark | 3 | - | 2 | 2 | 2 | 2 | 1 |
H/M/1—Humphreys
| Unit | Full | Sept 19 am | Sept 19 pm | Sept 20 am | Sept 20 | Sept 20 pm | Total Losses |
|---|---|---|---|---|---|---|---|
| 17 Miss | 6 | - | - | - | - | 4 | 2 |
| 21 Miss | 7 | - | - | - | - | 6 | 1 |
K/M/1—Kershaw
| Unit | Full | Sept 19 am | Sept 19 pm | Sept 20 am | Sept 20 | Sept 20 pm | Total Losses |
|---|---|---|---|---|---|---|---|
| 2 SC | 6 | - | - | - | - | 4 | 2 |
| 3 SC | 7 | - | - | - | - | 4 | 3 |
| 7 SC | 6 | - | - | - | - | 4 | 2 |
B/L/1—Benning
| Unit | Full | Sept 19 am | Sept 19 pm | Sept 20 am | Sept 20 | Sept 20 pm | Total Losses |
|---|---|---|---|---|---|---|---|
| 2 Ga | 4 | - | 3 | 3 | 3 | 2 | 2 |
| 15 Ga | 4 | - | 2 | 2 | 2 | 1 | 3 |
| 17 Ga | 5 | - | 4 | 4 | 4 | 3 | 2 |
R/L/1—Robertson
| Unit | Full | Sept 19 am | Sept 19 pm | Sept 20 am | Sept 20 | Sept 20 pm | Total Losses |
|---|---|---|---|---|---|---|---|
| 3 Ark | 6 | - | 5 | 5 | 5 | 5 | 1 |
| 1 Texas | 7 | - | 5 | 5 | 4 (3) | 4 | 3 |
| 4 Texas | 6 | - | 5 | 5 | 4 (3) | 4 | 2 |
S/L/1—Sheffield (Law: Injured)
| Unit | Full | Sept 19 am | Sept 19 pm | Sept 20 am | Sept 20 | Sept 20 pm | Total Losses |
|---|---|---|---|---|---|---|---|
| 4 Ala | 5 | - | 4 | 4 | 4 (3) | 4 | 1 |
| 15 Ala | 7 | - | 6 | 6 | 5 (4) | 5 | 2 |
| 44 Ala | 6 | - | 5 | 5 | 4 (3) | 4 | 2 |
R Arty
| Unit | Full | Sept 19 am | Sept 19 pm | Sept 20 am | Sept 20 | Sept 20 pm | Total Losses |
|---|---|---|---|---|---|---|---|
| Havis | 3 | - | - | - | - | 2 | 1 |
| Lumsden | 5 | - | 3 | 3 | 3 | 3 | 2 |
W Cav Corps / M/M/W Cav—Morgan
| Unit | Full | Sept 19 am | Sept 19 pm | Sept 20 am | Sept 20 | Sept 20 pm | Total Losses |
|---|---|---|---|---|---|---|---|
| 1 Ala Cav | 6 | - | - | - | 5 | 5 | 1 |
| 8 Conf Cav | 7 | - | - | - | - | 6 | 1 |
R/M/W Cav—Russell
| Unit | Full | Sept 19 am | Sept 19 pm | Sept 20 am | Sept 20 | Sept 20 pm | Total Losses |
|---|---|---|---|---|---|---|---|
| 4 Ala Cav | 6 | - | - | - | - | 5 | 1 |
C/W/W Cav—Crews
| Unit | Full | Sept 19 am | Sept 19 pm | Sept 20 am | Sept 20 | Sept 20 pm | Total Losses |
|---|---|---|---|---|---|---|---|
| Malone Cav | 6 | - | - | - | - | 5 | 1 |
| 2 Ga Cav | 5 | - | - | - | - | 4 | 1 |
F Cav Corps
| Unit | Full | Sept 19 am | Sept 19 pm | Sept 20 am | Sept 20 | Sept 20 pm | Total Losses |
|---|---|---|---|---|---|---|---|
| Jackson Cav | 2 (1)* | 1 | 1 | 1 | 1 | 1 | 1 |
D/A/F Cav—Dibrell
| Unit | Full | Sept 19 am | Sept 19 pm | Sept 20 am | Sept 20 | Sept 20 pm | Total Losses |
|---|---|---|---|---|---|---|---|
| 4 Tenn Cav | 7 | 6 | 6 | 6 | 6 | 6 | 1 |
| 8 Tenn Cav | 8 | 6 | 6 | 6 | 6 | 6 | 2 |
| 9 Tenn Cav | 6 | 5 | 5 | 5 | 5 | 5 | 1 |
D/P/F Cav—Davidson
| Unit | Full | Sept 19 am | Sept 19 pm | Sept 20 am | Sept 20 | Sept 20 pm | Total Losses |
|---|---|---|---|---|---|---|---|
| 1 Ga Cav | 6 | 5 | 5 | 5 | 5 | 5 | 1 |
| 6 Ga Cav | 6 | 4 | 4 | 4 | 4 | 4 | 2 |
| 6 NC Cav | 8 | 6 | 6 | 6 | 6 | 6 | 2 |
S/P/F Cav—Scott
| Unit | Full | Sept 19 am | Sept 19 pm | Sept 20 am | Sept 20 | Sept 20 pm | Total Losses |
|---|---|---|---|---|---|---|---|
| 10 Conf Cav | 5 | 4 | 4 | 4 | 4 | 4 | 1 |
| Martin Det | 8 (7)* | 7 | 7 | 7 | 7 | 7 | 1 |
| 2 Tenn Cav | 6 | - | 5 | 5 | 5 | 5 | 1 |
All units marked with an asterisk () each lost 1 or 2 SP on the 18th. They start Scenario 6.1 at full strength, all other scenarios at the parenthesized strength. In all other cases, units with two strengths listed represent those units with stragglers in a given scenario. In such cases, set up the unit with its parenthesized strength, and allow it to recover stragglers only up to the unparenthesized strength, not to the full strength given on the counter. For example, a unit with a 7 (6) strength listed, and with a printed strength of 10, would have a current strength of 6, one of which would be a recoverable straggler loss. The other three losses are permanent. Some units have a (0) strength, meaning they do not set up on-map but can recover stragglers and return to play.
Officer Seniority Lists
Army of the Cumberland Seniority List
MG William S. Rosecrans
14th Corps—MG George H. Thomas
- 4/14—MG Joseph J. Reynolds, BG John B. Turchin, Col. Edward King
- 2/14—MG James S. Negley, BG John Beatty, Col. Timothy R. Stanley, Col. William Sirwell
- 1/14—BG Absalom Baird, BG John H. King, BG John C. Starkweather, Col. Benjamin F. Scribner
- 3/14—BG John M. Brannan, Col. John T. Croxton, Col. Ferdinand Van Derveer, Col. John M. Connell
21 Corps—MG Thomas L. Crittenden
- 2/21—MG John M. Palmer, BG Charles Cruft, BG William B. Hazen, Col. William Grose
- 1/21—BG Thomas J. Wood, BG George D. Wagner, Col. George P. Buell, Col. Charles G. Harker
- 3/21—BG Horatio P. Van Cleve, BG Samuel Beatty, Col. George F. Dick, Col. Sidney M. Barnes
20 Corps—MG Alexander McD. McCook
- 3/20—MG Philip H. Sheridan, BG William Lytle, Col. Bernard Laiboldt, Col. Luther P. Bradley
- 2/20—BG Richard W. Johnson, BG August Willich, Col. Joseph B. Dodge, Col. Philomon P. Baldwin
- 1/20—BG Jefferson C. Davis, BG William P. Carlin, Col. P. Sidney Post, Col. Hans Heg
Reserve Corps—MG Gordon Granger
- 1/Res—BG James B. Steedman, BG Walter C. Whitaker, Col. Mitchell, Col. John Coburn
- 2/Res—BG James D. Morgan, Col. John Tillson, Col. Daniel McCook, Col. Herbert La Favour
- 3/Res—BG Robert S. Granger, BG James G. Spears, Col. Sanders D. Bruce, Col. Benjamin Harrison
Cav Corps—BG Robert B. Mitchell
- 2/Cav—BG George Crook, Col. Robert H.G. Minty, Col. Eli Long
- 1/Cav—Col. Edward M. McCook, Col. Archibald P. Campbell, Col. Daniel M. Ray, Col. Louis D. Watkins
Note: the optional commanders from 11th, 12th, 15th, and 17th Corps, not to mention the triumvirate of senior commanders — Hooker, Sherman, and McPherson — remained unclear in terms of order of precedence: ultimately, many of them ranked the officers of the Army of the Cumberland, but these organizations always remained separate from the Army itself.
Army of Tennessee Seniority List
General Robert E. Lee General Joseph E. Johnston General Braxton Bragg
1 Corps—LTG James Longstreet
- H/1—MG John B. Hood, BG Evander M. Law, BG Micah Jenkins, BG Jerome B. Robertson, BG George T. Anderson, BG Henry L. Benning
- M/1—MG Lafayette McLaws, BG Joseph B. Kershaw, BG William T. Wofford, BG Benjamin G. Humphreys, BG Goode Bryan
- JPD/1—BG Bushrod R. Johnson, BG John Gregg, BG Evander McNair
Army of Mississippi—LTG William J. Hardee
- L/Miss—MG William W. Loring, BG Winfield S. Featherston, BG Abraham Buford, BG John Adams
- F/Miss—MG Samuel French, BG Nathan G. Evans, BG Samuel B. Maxey
- S/Miss—MG Carter L. Stevenson, BG John C. Moore, BG John C. Vaughn, BG Alfred Cumming, BG Edmund W. Pettus
Polk's Corps—LTG Leonidas Polk
- C/P—MG Benjamin F. Cheatham, BG John K. Jackson, BG George Maney, BG Preston Smith, BG Marcus J. Wright, BG Otho F. Strahl
- H/P—MG Thomas C. Hindman, BG James Patten Anderson, BG Zachariah C. Deas, BG Arthur M. Manigault
Hill's Corps—LTG Daniel H. Hill
- B/H—MG John C. Breckinridge, BG Benjamin H. Helm, BG Daniel W. Adams, BG Marcellus A. Stovall
- C/H—MG Patrick R. Cleburne, BG S.A.M. Wood, BG Lucius E. Polk, BG James Deshler
Buckner's Corps—MG Simon B. Buckner
- J/B—MG Samuel Jones, BG John Echols, BG Montgomery D. Corse, Col. John Wharton, Col. John McCausland
- S/B—MG Alexander P. Stewart, BG William B. Bate, BG John C. Brown, BG Henry D. Clayton
- P/B—BG William Preston, BG Archibald Gracie, Col. Robert C. Trigg, Col. John H. Kelly
Reserve Corps—MG William H. T. Walker
- G/Res—BG States Rights Gist, BG Mathew D. Ector, Col. Claudius C. Wilson, Col. Peyton Colquitt
- L/Res—BG St. John R. Liddell, BG Edward C. Walthall, Col. Daniel C. Govan
Wheeler's Cav Corps—MG Joseph Wheeler
- W/W Cav—BG John A. Wharton, Col. C.C. Crews, Col. Thomas Harrison
- M/W Cav—BG William T. Martin, Col. John T. Morgan, Col. A.A. Russell
- Mo/W Cav—BG John H. Morgan, Col. Basil Duke, Col. R. S. Cluke
Forrest's Cav Corps—BG Nathan B. Forrest
- P/F Cav—BG John Pegram, BG H. B. Davidson, Col. John S. Scott
- A/F Cav—BG Frank C. Armstrong, Col. George C. Dibrell, Col. James T. Wheeler
Artillery Unit Listing
In lieu of the normal unit manifest, This Terrible Sound lists only the artillery units (below). These are the only units not fully listed already in the various manifests in the game.
Union Artillery
- 14 Corps: Bridges, 4 Ind Lt, 19 Ind Lt, 21 Ind Lt, A 1 Mich Lt, D 1 Mich, C 1 Ohio, G 1 Ohio, M 1 Ohio, I 4 US, H 5 US
- Wilder's Brigade: 18 Ind Lt a, 18 Ind Lt b
- 20 Corps: C 1 Ill, 5 Ind Lt, 11 Ind Lt, G 1 Mo, 2 Minn Lt, A 1 Ohio, 20 Ohio Lt, 5 Wisc Lt, 8 Wisc Lt
- 21 Corps: 7 Ind Lt, 8 Ind Lt, 10 Ind Lt, B 1 Ohio, F 1 Ohio, 6 Ohio Lt, 26 Penn Lt, H 4 US, M 4 US, 3 Wisc Lt
- Res Corps: M 1 Ill, C 2 Ill, H 2 Ill, I 2 Ill, E 1 Mich, E 1 Ohio, 9 Ohio Lt, 18 Ohio Lt, 1 Tenn Lt, 10 Wisc Lt
- 11 Corps: I 1 Ohio, K 1 Ohio, I 1 NY Lt, 13 NY, G 4 US
- 12 Corps: F Penn Lt, K 5 US
- 15 Corps: A 1 Ill, B 1 Ill, F 1 Ill, H 1 Ill, I 1 Ill, 1 Iowa Lt, D 1 Mo Lt, F 2 Mo Lt, 4 Ohio Lt
- 17 Corps: Cogswell, 6 Wisc Lt, 12 Wisc Lt
- Cav Corps: D 1 Ohio, CBOT
Confederate Artillery
- P Corps: Carnes, Dent, Garrity, Scogin, Scott, Smith, Stanford, Waters
- H Corps: Calvert, Cobb, Douglas, Mebane, Semples, Slocomb
- Res Corps: Howell, Ferguson, Fowler, Warren
- B Corps: Anderson, Baxter, Darden, Humphreys, Jeffress, Kolb, McCants, Oliver, Peeples, Wolihin
- 1 Corps: Barret, Bledsoe, Culpepper, Fickling, Havis, Jordan, Le Gardeur, Lumsden, Massenberg, Moody, Parker, Taylor, York, Woodfolk
- W Cav Corps: Byrne, Ferrell, White, Wiggins
- F Cav Corps: Huggins, Hulwald, Morton, Robinson
- Miss Corps: Barry, Bonanchaud, Carpenter, Corput, Culbertson, Fenner, Jeler, Marshall, Rowan
Bibliography
While Chickamauga does not have the shelf space devoted to it that Gettysburg does, there are a number of worthwhile works written on the battle or concerning participants there. These detailed citations were the designer's main references in doing the game.
- Abbazia, Patrick. The Chickamauga Campaign. Bryn Mawr, Pennsylvania. Combined Books, 1988. I was disappointed in this book, especially the maps, given its oversized format. Tucker provides a better narrative, and is more entertaining a writer as well. There is better stuff around.
- Baumgartner, Richard A. Blue Lightning. Huntington, West Virginia. Blue Acorn Press, 1997. This volume deals exclusively with Wilder's Brigade at Chickamauga, and covers their participation in great detail. It was most useful for details on the fight of the 18th. Uniquely armed and well-led, the Lightning Brigade had an impact on the battle well beyond that warranted by the mere size of the unit.
- Buell, Clarence, and Robert Johnson, eds. Battles and Leaders of the Civil War. 4 Vols. New York, Thomas Yoseloff, 1956. Battles and Leaders was as usual invaluable for the personal narratives from a number of senior commanders involved in the battle. As usual, a strong recommendation for reading the full set of this excellent work.
- Connelly, Thomas L. Autumn of Glory. Baton Rouge, Louisiana. Louisiana State University Press, 1971. Connelly's history of the Army of Tennessee remains the best single book on that unlucky command. Connelly's discussion of the command dissension in the Army is especially clear.
- Cozzens, Peter. This Terrible Sound. Urbana, Illinois. University of Illinois Press, 1992. The current standard work on the battle. A detailed account, Cozzens spends a great deal of time reconstructing regimental actions, and is sometimes tough to follow unless you are very familiar with the armies. His other books also deal with the Army of the Cumberland, covering Murfreesboro, Corinth, and Chattanooga. An excellent book, if a little dry.
- Gracie, Archibald. The Truth About Chickamauga. Dayton, Ohio, Morningside Bookshop, 1986. Reprint of 1911 edition. As you might expect from the title, Gracie has a huge grudge—he found the accepted version of events of September 20th as described by the park historians to be completely wrong. Much of his motivation stems from the fact that Gracie had a relative in the battle. Uncle Archibald Gracie, Jr. led a Confederate Brigade attacking Horseshoe Ridge that afternoon. This book is not an easy read—the narrative is disjointed, it covers specific points in great detail while ignoring parts of the action the author was not interested in, and it pre-supposes a great deal of knowledge on the part of the reader. Individual chapters deal with specific questions about the battle with no particular sense of overall organization. However, the end result is a very detailed look at the Horseshoe Ridge fighting that made the scenarios covering that action possible.
A number of regimental, brigade, and divisional histories were consulted, as well as personal memoirs from men who fought at the battle. The best of those are listed below:
- We were the 9th—9th Ohio Infantry
- Enlisted for the War—the 24th South Carolina Infantry
- Pride of the Confederate Artillery—5th Company Washington Artillery
- A History of the 3rd South Carolina Infantry
- History of the 36th Illinois Infantry
- History of the 1st Ohio Cavalry
- A Stupendous Effort—87th Indiana Infantry
- A Hundred Battles in the West—2nd Michigan Cavalry
- Cleburne and His Command—Cleburne's Division of Breckinridge's Corps
- A History of Morgan's Cavalry
- A Carolinian goes to War—CSA Brig Gen Arthur M. Manigault
- The Citizen Soldier—USA Brig Gen John Beatty
A number of other sources were consulted in passing, or were used to answer specific questions, but did not warrant a mention. A large number of individual biographies were used, for example, but most of them have no more than a chapter devoted to the battle. It is the designer's sincere hope that Chickamauga will be paid much more attention in the coming years—it is a battle fully as worthy of detailed study as any in the Civil War.
Designer's Notes
RSS Series Modifications
A few adjustments have been made to the series rules, all designed to fit seamlessly into This Hallowed Ground. The straggler recovery tables have been modified. Due to an oversight in the first iteration, stragglers came back way too quickly in This Hallowed Ground. While I felt that the change in time scale (doubling the turns) was offset by doubling the strength points, (50 men per instead of 100) I neglected to properly factor in the fact that now each brigade would be rolling 4-5 times (once per regiment) instead of only once. Fortunately, this can be easily fixed, and the new straggler recovery tables do just that. Artillery as a target, especially at long range, has been clarified a little. One unintended consequence of the new artillery sequencing was the long range sniping at units stacked with limbered artillery just in hopes of driving off a few stragglers or getting the lucky bad morale result. Now, any fire over 500 yards just effects the cannon, which is a much better reflection of reality. At close range, limbered artillery is still a detriment when stacked with advancing infantry, which is as it should be. Further, artillery re-supply is now only allowed by limbered artillery, which means that players will have to move batteries in and out of action much more historically. The loss tables have been changed slightly to produce more losses—the original charts were a little too bloodless. The changes are fairly small, but important in recreating historical losses. I feel that the overall impact of this change will not greatly effect the way This Terrible Sound plays versus This Hallowed Ground, but will have subtle effects on how long units hold ground.
Game Specific Notes
Perhaps the single biggest change is the reliance on divisional stoppage instead of Corps attack stoppage. By dropping the basic stop level to divisions, I have created a much more fragmented battle. Because of the few roads and extensive timber, Chickamauga was fought mainly by divisions, with the sole exception really being Longstreet's powerful attack on the 20th. All of the action of the 19th, was characterized by the piecemeal nature of the action, usually with a division committed at a time. Hence, the main phases of Saturdays' fighting are known by the divisional commands that became engaged: Cheatham's arrival, Stewart's Attack, Cleburne's attack, etc. I wanted to capture that intermittent commitment. By using divisional attack stoppage, I created more stopping and starting, more fragmented responses to attacks or defenses, and a much greater sense of tactical frustration. Longstreet was the sole exception here. I think this battle was one of his finest hours, and wanted his standout abilities to be noticed. Arriving on the field late on the 19th, he managed not only to find all of his new command the next morning, but to get them all advancing as one, and sustained that attack through the entire afternoon, even pivoting his axis of attack 90° after the Union rally on Snodgrass Hill. No other command on the field, Union or Confederate, managed to do so well.
Random events have finally arrived. I reached the conclusion that I needed them because of the much greater difficulty units had here in coordinating efforts. Most attacks were divisional, even brigade, in size; prior to Longstreet's arrival concerted action was elusive to both sides. I experimented with various mechanics to simulate things like Army Panic, unexpected stoppages, and the like, but found all my efforts either too clumsy or having too dramatic an effect. Finally, I went to Random Events in order to get the probabilities I wanted. Random Events will also accomplish one other thing that I have wanted to do for a while: increase leader losses slightly. This Hallowed Ground saw too few leader casualties on average, but on a 2-12 dice result it was tricky to change the probabilities without going way overboard and producing wildly excessive results. Through Random Events, I can tweak the probabilities more gradually to achieve a more historical loss rate. (Corps and divisional leaders have an additional exposure of about 1 in 235 and 1 in 141 turns, respectively, while brigade leaders have an additional exposure of about 1 in 88 turns. Even army commanders have a 1 in 706 chance of becoming a statistic.) Most of the losses will still come from regular fires, and the player who uses more leaders in the front line will lose more, but these added events have a way of removing some of the certainty of leader safety for players who routinely avoid exposing senior officers in the front line. In fact, many senior officers were lost in combat well behind the leading edge of the fight from things like friendly fire, long range artillery, etc.
The artillery units in TTS have a much more diverse selection of weaponry than we saw in This Hallowed Ground—especially the Confederates. Both sides were armed with many more 2nd-class guns, including large numbers of the light 6-lb smoothbore, technically no longer part of the artillery inventory for either army by 1863. Of course, with never enough cannon to go around, and with the armies in Virginia taking priority on both sides, many of these older guns were still in action. There are even mountain howitzers on both sides, and for the Confederates, two 2.25" rifled guns in the horse artillery. Also, mixed gun types in batteries were much more common on both sides. I chose to ignore this cross-typing and standardize guns within batteries for simplicity's sake. Doubling or tripling the artillery countermix to represent the batteries by section simply complicates the mechanics of play—especially with regard to stacking—for virtually no real payoff in game effect. Artillery was largely ineffective at Chickamauga, since terrain so often limited field of fire. Carrying the burden of the offensive means that this rule is harder on the Confederates. Rebel Artillery had very little impact on this battle.
Cavalry are more involved than ever before, however. Partly this is due to the aggressive nature of the leadership, and partly due to the fact that Bragg's army had such a huge proportion of cavalry to infantry compared to Lee's army that the cavalry here were expected to carry more of the tactical load. In August, 1863, Bragg's army combined with Buckner's East Tennessee command numbered about 60,000 men total. About 1/3 of that force was committed to the mounted arm. Forrest and Wheeler's commands numbered 12,000 men, with another 6,000 troopers on duty with Buckner, and about 1500 cavalry under Roddey stationed in Northern Alabama. No wonder Rosecrans felt himself unable to move without more horsemen! In keeping with Rebel post-war efforts to denigrate any advantage and always show themselves as outnumbered, accurate counts of the Confederate cavalry have been largely obscured. No returns for the cavalry exist for September, and so most accounts of the battle have only given the Rebels no more than 7500 troopers for their whole force, a number that is clearly inadequate. A good example of this problem can be found in Forrest's corps. On the 31st of August, Forrest's Division—two brigades strong—is reported with 3700 mounted men present for duty, equipped. At this time, the East Tennessee cavalry force, Pegram and Scott's brigades, numbering almost 6,000 men, were placed under Forrest to create an additional Cavalry Corps for the Army of Tennessee. Forrest's most important biographers, Jordon and Pryor (ex-Confederate officers who worked closely with Forrest himself to produce their history) claim that Forrest's entire command, now four brigades strong, still only numbered 3500 men by September 18th. The Rebels have about 10,000 mounted troops, a figure I think consistent with the forces involved and the attrition those mounted units likely suffered in the active operations preceding the battle.
There are some other unique aspects to western cavalry. Forrest and Wheeler both expected their men to fight in the thick of battle, and both forces often fought in line as infantry. Wheeler's command, when it attacked the Federal forces at Crawfish Springs on the 20th, was completely mistaken for infantry, formed as it was in line of battle. Most of the western units did not even carry sabers. While the Union cavalry was more like its eastern counterparts, Wilder's mounted infantry was quite different. Wilder disdained both the saber and the line of battle, finding that his Spencer-armed troops could maintain such a volume of fire—even when fighting in skirmish line—that they could drive enemy troops formed in normal battle lines. Wilder's men evolved tactics based on lines with no greater a density than 1 man per yard, if that, and proved very menacing to Rebel troops they faced. These tactics are the primary reason for the -1 shift on the fire tables when targeting Wilder's men, making them a very dangerous force indeed. One brigade of Federal cavalry (3/1/Cav, under Watkins) is optional, and yet takes heavy losses on the loss charts. This Brigade almost reached Crawfish Spring on the afternoon of the 20th, but found the area in enemy hands. Its losses came from a sharp engagement just south of the existing maps, as the column retreated over Missionary Ridge to seek a back road to Chattanooga. I decided to include its losses on the charts for historical interest.
HQ Escorts and Provosts
In This Hallowed Ground, I chose to omit all the small detachments and various units that comprised the provosts of the various commands. Here, I have chosen to include them. The primary reason for this is HQ defense. These troops are generally small enough that they will not stop an HQ being overrun in a legitimate attack, but might well prevent gamy commando raids with the sole intent of stepping on the enemy HQ and triggering a cheap Emergency Corps Retreat. I confess they are a bit of an experiment, and one that may not pan out over time. However, I think they are mostly too small and scattered to have much of an effect on the game, and I find their inclusion interesting. If you find them being abused as line troops too much in play, leave them out. These units are prohibited from recovering straggler losses for two reasons: 1) I did not have a good way to include them on the brigade charts without lumping them all together, which seemed a little silly. 2) This will greatly inhibit their use as regular line troops, given that generally poor morale and small strengths that will see them eliminated quickly. I did give them detailed regimental charts for the sense of completeness, and purists could allow them to recover stragglers when using those charts without effecting the game much at all.
Burning Bridges
Union troops claimed that they destroyed both Alexander's and Reed's Bridges on the evening of the 18th or on the morning of the 19th. In fact, neither bridge was ever destroyed. Years after the war, Wilder advanced the claim that his troops burned Alexander's Bridge in the face of Walthall's Brigade, a claim that does not bear scrutiny when we look at the contemporary accounts, Union or Confederate. The last Federals to leave the area—Company A of the 72nd Indiana—retreated in great haste, and certainly did not have time to reach the bridge, much less set it afire. What they did do was tear up the planking before the action commenced, making the bridge unusable under fire, but readily repairable once the Federals retreated. The bridge remained firmly in Rebel hands for the rest of the battle, and a large number of troops used it on the 19th, including Breckinridge's Division, Kershaw's Brigade, and Humphrey's Brigade.
Reed's Bridge holds a similar story. Minty's troopers retreated hastily across the bridge, and formed line 2-300 yards west of the creek. Their position was outflanked by Forrest's men as they were being pressed by Bushrod Johnson's infantry and shelled by First Corps cannon under Hood's direction, all of which triggered Minty's withdrawal. Some of the planking had been removed, which Johnson's infantry replaced with siding torn off J.J. Reed's Barn. The next morning, the 69th Ohio was sent forward at dawn to burn the bridge, in what amounted to a trip of a mile behind enemy lines. The 69th reached the bridge, piled burnables on it, and set it alight; all of which attracted the attention of Rebel troops bivouacked just east of the creek. The arrival of those Rebel skirmishers was more than enough for the 69th, who immediately departed back to their own lines, certain that the bridge was ruined. The Confederates promptly extinguished the flames and fixed the bridge again. It also remained in use for the rest of the battle. Two accounts of Federals captured in the fighting both mention crossing it, and Breckinridge's divisional hospitals lined Reed's Bridge road starting just east of the creek, indicating heavy use in the days after the fight.
Based on the above outcomes, I almost ignored the bridges entirely. However, in the end, I decided that bridge destruction was potentially a viable tactic for both players, and that I should include some sort of mechanic. The final rules were left as optionals, since they tend to effect play very little in the overall scheme of things.
Rosecrans' Mindset
Most Chickamauga games are characterized by much a more aggressive Federal attitude than reflected in reality. Historically, even though Rosecrans refused to believe until the very end that Bragg had received significant reinforcements from other theaters, he did regard himself as outnumbered. By September 18th, Rosecrans' only thoughts were of escaping to safety in Chattanooga, and from there resuming the campaign. During the fighting of the 19th and 20th the Union army as a whole remained mostly on the defensive, despite having provoked the clash on Saturday morning. Initially, I made Union option 2.7f a standard rule, but decided it limited the Federals too much and was too easily predictable from the Confederate viewpoint, Rebel players could count on Union attacks collapsing early and could ignore their own defensive concerns. This is why the rule is now an option, allowing players to choose what course suits them best. If 2.7f is used, it should be kept secret from the Rebel player to preserve uncertainty.
Reinforcements
Players should note that variable reinforcement times are gone—delays are now incorporated into the random events. This is much more of a set-piece battle, and variable reinforcement times proved to be less useful. However, the delays included in the random events can be significant.
Minty's exact role after the clash on the 18th is somewhat vague. He was withdrawn on the 19th to guard trains, but exactly when his command left the map is unclear. On the 20th his command skirmished with Scott's Confederate Cavalry up on the Ringgold Road, just off-map to the north. Further, the CBOT battery did not actually leave the map, but moved to join the rest of the Cavalry Corps, coming up. In order to forego a special "wandering battery" rule for just one unit, I have taken the liberty of withdrawing it and re-entering it with the next cavalry reinforcements.
Equally vague are the exact deployments of Wheeler on the 19th. All his report says is that he was "on the left." Exactly when his troops entered the map is unclear, though Bragg did send him orders to guard the creek from Lee and Gordon's to Owens Ford (off map to the south) on the afternoon of the 19th, as Breckinridge's command was being moved north. I have elected to bring on Wharton's division at 1:00 a.m. on the 20th for this mission, later to be joined by the rest of the corps. While this is all speculative, barring any confirmation from either the primary or secondary sources (all very sketchy) available on Wheeler's command, I think this is a close approximation of the actual sequence of events.
Scott, Martin, and the 10th Confederate. Scott's Brigade of Pegram's Division never actually entered the map. However, both Martin's detachment and the 10th Confederate did enter the map, and in the latter case remained on-map through the entire battle. I almost chose to make the 10th part of Davidson's brigade, but in the end I decided to err on the side of accuracy, and let the nominal command relationship stand. Martin's detachment was sent to join Scott's brigade at some point on the 19th, but the only good source for the role of this unit—Duke's history of Morgan's Cavalry—does not really specify when. Whenever the 10th Confederate or Martin's detachment are in play, treat them as an integral part of D/P/F Cav.
Vegetation
Visitors to Chickamauga Battlefield Park will notice two things about the woods there: forest predominates, and the tree cover is thick and overgrown, with lots of underbrush. In fact, the tree cover is considerably different today than it was during the battle. The woods then was old growth forest, trees which are almost completely gone now, due to farming and to fire. Fires started by the battle helped kill many hardwoods, and a number of forest fires over the years have finished the job. Agriculture, however, also changed the woods in other less direct ways. Consistent with many other parts of the country, the local economy was open-range farming, which meant that the fields were fenced off but the livestock roamed free, over everyone's land. While at first glance this might not seem significant, in fact it produced forested areas that looked a lot different than modern woods. The forests of the time were quite open, with no real undergrowth and even tree trunks bare up to about six feet off the ground. Sometimes this landscape had an almost park like appearance, with no tall grass, no low-hanging branches or new trees, and deadfalls and dead wood of all kinds gathered up by the locals for fuel. Hence, visibility on a clear day might be as much as 150 to 200 yards, even in the trees.
Technically, this should mean ranged fire in woods should be possible out to two hexes—at least for the first shot. For a long time I puzzled over accounts of units firing or taking fire at ranges that should have been impossible, given the trees. However, I soon determined that these accounts were not describing very sustained fire (hence not really effective fire) and tended to soon deteriorate into blind fire as smoke, trapped by the tree cover, blocked those sight-lines. This is why no vestige of ranged fire in the woods survives. Of course, for the real purists, you could allow initial fire to fire through two hexes of woods. (Initial fire can be defined as any fire combat passing through a hex that has not had any fire through or into the hex in question, or any adjacent hex, for the past four turns.) I declined to even make this rule an "official" optional, because I don't think it will even slightly effect the game, but I thought I'd mention it here because the importance of trees in combat—the famous 'woods debate' for those of you who have been following our games for a long time—comes up quite often in wargaming.
As a side note to the density of the tree cover on the battlefield, perhaps the behavior of the veterans themselves is most instructive: When Congress finally appropriated the money for the park in the 1890's, the first thing the newly created park administrators did was undertake a massive undergrowth removal program designed to restore the woods to its open character of the 1860's. This work was pressed vigorously, so as to be ready for the official dedication ceremonies, to which thousands of returning veterans of the battle were invited. If only funding for a modern brush clearing effort could be found, as it would really change modern perceptions of the field.
All Those Optional Troops!
Why all the options? Why not! Seriously, the armies at Chickamauga were smaller than those in This Hallowed Ground, and I had managed to save a full countersheet in the original design. When I talked to Dean, however, he pointed out that the impact of one less countersheet in a project as big as the RSS games was hardly going to matter in the final price—a difference of 2-3 dollars out of the 100+ that these games sell for. At that point, working under the philosophy that we should pack these games with as much value as possible, we decided to add in all the options. I was pleased because I had originally wanted to use Sherman and Hooker, given their historical participation in the latter part of the campaign at Chattanooga.
Now, of course, both sides have many options to choose from. I never expect players to play with ALL of these troops at once. (Of course, some will—but that is a size issue, fraught with Freudian overtones.) Instead, I have given players enough different options to allow both sides to create armies different enough to add a great deal of uncertainty into the gaming experience—you can now keep the exact composition of your forces unknown to your opponent until the last minute, for example. I encourage players to experiment with hidden set-ups and order of battle substitutions as well—both of these mechanics can really keep an opponent guessing. Between the countermixes of This Hallowed Ground and this game, players now have a detailed look at about 85% of the entire Confederate Order of Battle for the summer of 1863, and about 65% of the entire Union Order of Battle. At the very least, I hope players find this glimpse into the forces stationed in the lesser-known theaters interesting.
General Victory Conditions
Most of the victory conditions are pretty standard, awards for losses, wrecked units, and terrain. What is new are the awards for exiting troops. Only the Confederate player gets points for exiting, but the Union player can certainly lose the game by ignoring that threat, either to the north or the south. Generally, the southern exits become less important as time goes on and Rosecrans' trains escape to Chattanooga, and the points for each exit are based on the relative threat to the Union access routes via Missionary and Lookout Valleys up to Chattanooga. Of course, exiting troops can be risky, since with the line of communication requirement the Rebel player must ensure he is not cut off after he leaves. The LOC requirement is not so much an expectation that supply would be urgently needed as it is a nod towards the mental worries any such exited commanders would have about their own security in turn.
OOB Notes
A great deal of work has gone into determining the unit strengths, but even so, many units remain elusive. Only about 40% of the regiments involved actually provided engaged strengths in the ORs. A number of other sources were consulted, including regimental histories and many statistical records (Fox's book on Regimental Losses, for example.) In about 20 cases for Federal units, a trip to the National Archives to examine the Regimental Morning Report books (if only all such records had survived!) helped immensely. In fact, the Archives solved one of my most perplexing OOB problems, that of the 75th Indiana, which gives no strength in the ORs, claims something like 700 men in their regimental History, and 360 engaged on their monument. The morning reports clearly indicate that the 360 figure was correct—which not only resolved a strength differential of 7 SPs, but solved an over-stacking problem I had with them in several scenarios. I feel that this is the most accurate OOB ever published anywhere for the battle, but I am certain that there is still more information out there, and doubtless I will find out about some of it after publication.
Deshler's Brigade, Cleburne's Division. This brigade technically only had three units, instead of the five shown. The 6, 10, and 15 Texas were consolidated into one unit, and the 17, 18, 24, and 25 Texas were also one consolidated unit. I have chosen to break them back down into battalions because it is a little more handy for game purposes, and because over most of the terrain that these Texans fought, they would have operated by battalion anyway, since the whole unit was too large for a single commander to control.
Confederate Artillery Armament. The primary source for Rebel artillery gun types are the plaque inscriptions in the park itself. In most cases, these agree with other sources—notably the O.R. reports—but in other cases, they disagree significantly. Given that the plaques were more varied, and more detailed, I feel that they better represent the recall of the crews at the exact time of the battle. Hence, the plaques take precedence where they disagree with the O.R. reports or other sources. The only changes have been to simplify gun types to one type per battery, as per standard series practice.
Graves' Kentucky Battery, Breckinridge's Division. This unit is listed in the OR order of battle, and hence can be found in various secondary works. However, it was not actually present. In fact, by the time of the battle it no longer existed, having been captured at Donelson the previous year. When exchanged it was not rebuilt with new guns, but instead merged with Cobb's Kentucky Battery, also in Breckinridge's Division. Major Rice E. Graves was present, as head of Breckinridge's Divisional artillery, and likely his presence is the source of the confusion. Graves was mortally wounded on the 20th.
Lumsden and York Batteries. York's Battery (Everett's Battery, also known as Co. E. 9th Georgia Artillery Bn) was originally with Stewart's Division, but fought the battle with Johnson in that commander's provisional division when his brigade was detached and joined with Gregg and McNair. One of York's guns was disabled on the 17th, became separated from the battery, was repaired early on the 18th, fought the battle with Lumsden's Battery of Robertson's Reserve Battalion. Here, York only has a strength of 3, while Lumsden has been augmented to 5 guns.
Huwald's Battery, Forrest's Cavalry. This unit was armed with two mountain howitzers and two 2.25" rifles, the latter a weapon I confess I had never heard of until now. Huwald's battery is armed with four mountain howitzers. Any increased effectiveness for 2.25" rifles would be fractional, at best, and I have chosen simplicity here, rather than generate a whole new gun type for what would be a minuscule difference in effectiveness. Purists can consider two of Huwald's guns to have a range of 15, fire value 1/2, if my simplification offends.
Twin 48th Tennessee Regiments. There are two 48th Tennessee Regiments. One is in Polk's Brigade, Cleburne's Division of Hill's Corps, and one is in Maxey's optional Brigade, a part of French's Division. This is not a miss-print: both regiments existed. The 48th (Nixon's) was with Polk, while the 48th (Voorheis) was with Maxey.
Twin 4th Tennessee Regiments. There are also two 4th Tennessee Cavalry units. The first is in Harrison's Brigade of Wheeler's Corps, and was officially known as the 8th Tennessee (Smith's) Cavalry, but almost always referred to as the 4th Tennessee. This is extremely confusing, because there are already both a 4th and an 8th Tennessee Cavalry in Dibrell's Brigade of Forrest's Corps. That 4th was known as the 4th Tennessee (Starnes) Cavalry, and the other 8th was actually the 13th Tennessee Cavalry, though no one called it that. The 8th (13th) was formerly a Partisan Ranger outfit that fought very well under Dibrell and Forrest's tutelage. Starnes' 4th Tennessee is famous for one other incident: one of the few documented instances of an organized body of slaves fighting in Confederate ranks. The body servants of a number of the officers—about 40 in number—had armed themselves with carbines and pistols over time, and acted as an unofficial extra company. During most of the battle, while the regiment fought dismounted, they stayed in the rear with the horse-holders, but when the Federals retreated they insisted on joining the pursuit—where they lost four dead and seven wounded to Union fire.
Confederate Regulars. Players will quickly note the several units designated "Conf." These troops were not actually regular troops in imitation of the US regulars, but instead men from more than one southern state serving in the same unit. A number of times, scattered companies from contiguous states were formed into a unit, and rather than offend state pride, were called "Confederate" units. There is one unit of true "regulars" in the Confederate army—Bradley's Company of Cavalry escorts to Armstrong's Division of Forrest's Corps. This company was alternatively known as Company A, 1st Confederate States Regular Cavalry. They started the war in Texas, recruited from deserters from the US Army, among other sources, and eventually moved across the Mississippi in 1862. To further confuse the issue, there is one unit in the countermix designated the 1st Louisiana Regulars, and two Tennessee units labeled (PA). The regulars were in fact nothing of the sort, but instead state troops that were raised early on, as part of the provisional army. The Provisional Army (the units labeled PA) were state regiments raised and accepted into government service originally for 12 months, though they ended up serving the full war just like everyone else. None of these units, however, were actually part of the authorized permanent Confederate Regular Army except for Bradley's Company.
Martin's Kentucky Detachment. This unit is not a regiment, but instead represents some of the survivors from John H. Morgan's division of cavalry. Morgan took about 2700 men on his famous raid into Ohio in July of 1863, and most of those were captured trying to recross the Ohio river, eliminating an entire division from Bragg's order of battle. These men were escapees or men who were left behind in the first place due to inadequate animals. At least a portion of them had managed to recross the Ohio at Buffington Island on July 17th, and made a harrowing journey through West Virginia to arrive in Sam. Jones' Department of Southwest Virginia near Salem in early August. They were formed into two battalions, and joined Bragg when Buckner's men abandoned East Tennessee. They are represented as one unit, since very little exists to tell us whether or not the battalions served together or separately.
Patrick Cleburne. Cleburne is another of those Confederate leaders around which what amounts to a cult of personality has sprung up. In fact, Cleburne did not shine here. He sent his command forward on the 19th in a useless night attack, which while it impressed many participants with its severity actually accomplished very little. On the 20th, his division repeatedly hurled itself, one brigade at a time, against Thomas' entrenched Union line. The result was a predictably bloody—and useless—failure: Cleburne lost control of his division to the extent that none of his three brigades had support for any of their attacks. Why then, does he warrant a "4" rating? Usually I only rate leaders based on their performance that battle—not for overall careers. However, there are two reasons to differ, here. First, Cleburne was in large part hamstrung by the direction (or lack of it) provided by either army or corps command. Had he given either a more realistic tactical goal, or been allowed more freedom of action, I suspect he would have done much better. Secondly, just two months later Cleburne was brilliant, handling what amounted to a corps-sized force, halting Sherman in his tracks at Tunnel Hill, and saving Bragg's army when it routed from Missionary Ridge. Since we are unlikely to ever do a game on Missionary Ridge, I thought I'd give Cleburne a break here, and rate him his due.
Law and Gist. Technically, Law's Division is really Hood's Division, commanded temporarily by the senior brigadier since Hood's wounding at Gettysburg in July—Law. However, Hood spent the battle commanding 1st Corps, since Longstreet assumed wing command on arrival, and Law never stepped down from divisional command. Hence, for simplicity's sake, I have shown the division as L/1, and Law's brigade, commanded by Sheffield, as S/L/1. Similarly, I have shown Walker as corps commander for the newly created Reserve Corps, with Gist—the senior brigadier and de facto commander of Walker's Division—in permanent command of G/Res. These troops were newly arrived from Mississippi, and had formerly been four brigades in one division plus an additional brigade from French's Division. Since it was deemed that a five brigade formation was too large to control as a single division, the two-division Reserve corps structure was created. Both of these changes were made for practical reasons, so that the organizational codes (G/Res, or S/L/1, for example) matched the format of the rest of the army, and players did not have to continually remember that Law, not Hood, commanded H/1.
Hindman's Wounding. Major General Hindman, commanding the H/P Division, was lightly wounded on the 20th, but did not surrender command until after the battle was over. Hence, while he is listed as a wounded officer on the loss chart, he appears in all the scenarios.
Frank Armstrong. Like Torbert in This Hallowed Ground, Armstrong—a division commander in Forrest's Cavalry Corps—has the distinction of having held commissions in both armies. Armstrong actually fought as a Federal lieutenant at First Bull Run. After that battle, he resigned and went south to become a Rebel cavalry officer. He served with great distinction under Forrest, and proved to be a fine officer. No doubts about his loyalty ever seemed to have been raised over his wearing blue at Bull Run. It was an odd sort of war.
1st Mich E&M. This is the 1st Michigan Engineers and Mechanics, armed as infantry, but really a specialized engineer unit. These guys were mostly responsible for the boats that were built to cross the Tennessee at the end of August, and again in October during the siege of Chattanooga. It is very unlikely that they would have been used merely as infantry in the battleline, given the great range of vital skills present in their ranks, but in desperate enough times, they were prepared to fight that way.
Col Moses Walker. Walker was the brigade commander for 1/3/14. He was arrested for a minor infraction and quarrel with a superior before the battle, and Connell rose to command the brigade. However, in the midst of crisis on Horseshoe Ridge, Walker encountered his old command in the confusion and took charge, a fortunate accident because Connell himself had become separated from the brigade and left the field with a handful of stragglers. In fact, Walker was instrumental in rallying a large number of men on the lower slopes of the ridge, and commanded a scratch brigade of those troops all through the rest of the day's fighting. He allows me to recreate some of the ad-hoc nature of the command structure on Snodgrass Hill without overly complicating the rules.
Historical Notes
In This Hallowed Ground, I skipped a formal narrative of the full battle to instead discuss some of the more interesting facets of Gettysburg in detail. Frankly, it is impossible to do justice to a battle like Gettysburg or Chickamauga in the few pages we can devote to a historical commentary. In that spirit, I would like to suggest two or three books for further reading, and save my comments for some of the highlights of the campaign. The best short narrative of the campaign and battle of Chickamauga is a new work by Steven E. Woodworth—A Deep Steady Thunder: The Battle of Chickamauga. This book covers the battle in about 85 pages of text, and includes nice maps and a good order of battle to the regimental level. It is a very quick read, and makes the ideal companion to the game. For more in-depth reading, two works stand out—Glenn Tucker's dated but still excellent Chickamauga, Bloody Battle in the West, and the recent This Terrible Sound, by Peter Cozzens, which of course inspired the title of this game. Tucker's book is about 30 years old, and goes into less detail at the tactical level, while Cozzens' book is a detailed regimental look at the fighting, which at times can get confusing. I strongly recommend that you become quite familiar with the overall course of the battle before you tackle Cozzens: it will enhance the read considerably.
Joe Johnston and Overall Command. Chickamauga has been hailed as one of the war's truly significant strategic concentrations, in that the Confederates drew troops from Virginia, the coasts, and Mississippi to mass a significant manpower advantage. In fact, the troop concentration in September was in response to a dangerous Union advance, and in that sense was not really a true strategic concentration (defined as concentrating to seize the initiative before the enemy does) but instead was a reaction to the Federal move. It mitigated failure instead of establishing success. Still, it was a critically needed action at a time of crisis for the South. Much of the blame for its halting nature rests with General Joseph E. Johnston. Johnston arrived in December of 1862 to assume overall direction of the War in the West (the territory between the Blue Ridge Mountains and the Mississippi River) as an intermediary between the various field commands and the Richmond government. In theory, this was a sound idea and one which flies in the face of the conventional wisdom that President Davis was detail obsessive and wedded to the idea of pure positional defense. Unfortunately, Davis and Johnston's strategic ideas were at odds—Johnston felt that Bragg's army in Tennessee was not the logical place to support Pemberton at Vicksburg from, but rather that both banks of the Mississippi should be used to repel enemy invasion. Davis saw Bragg and Pemberton as mutually supporting. The result was that all the major troop movements between the two armies for the next year would be directed by Richmond, acting over Johnston's head and in spite of his objections. It was Davis who stripped Bragg of 20% of his infantry just before the Battle of Murfreesboro, and took another two divisions in June, 1863, after Vicksburg had become besieged. For his part, Johnston refused to take a commanding role in the theater, instead considering himself an advisor who lacked the knowledge, if not the authority, to order troops transferred or make major policy decisions. Since this is exactly what Davis sent him west to do, it is hard to fathom what Johnston really understood his role to be.
The result was a disaster. By May of 1863, 40,000 Confederate troops were trapped in the garrisons of Vicksburg and Port Hudson. Almost another 30,000 Rebel troops were rushed to Mississippi to create an "Army of Relief" under Johnston's direct command, but Johnston failed to use this force to any effect, and Vicksburg passed into Union hands without a major relief effort. Johnston had always felt that Mississippi should have been abandoned, if necessary, to reinforce Tennessee, and clearly regarded the flow of troops the other way as a significant error which he was not about to compound by losing a major field battle. The stripping of Bragg's army, however, once again coincided with renewed activity by the Federals, exactly as Johnston feared: the result being the Tullahoma campaign, which saw Bragg retreating out of central Tennessee without a fight. By July, most of Tennessee was lost to Federal forces, with Bragg clinging only to Chattanooga. There both sides paused, as the Union army under Rosecrans brought up more supplies for the crossing of the Tennessee River, sure to be a major undertaking.
At this point, Bragg and Johnston indulged in a curious debate. Johnston, who had felt all along that weakening Tennessee was a bad policy, now proved reluctant to unite his Mississippi command to Bragg's army. Despite the fact the sole reason for defending Mississippi—keeping the river open to Confederate traffic across it—was now invalid, Johnston sat dormant around Jackson for July and August. Bragg even proposed to take the Army of Tennessee to join Johnston, but that idea was rejected as impractical. At the end of August, this debate became moot. Rosecrans' Federal Army of the Cumberland crossed the Tennessee River south of Chattanooga, while at the same time, another Federal Army under Ambrose Burnside entered East Tennessee. Once again outnumbered and outwitted, Bragg retreated into Georgia and called for help.
Finally the Confederacy began to concentrate major resources against the central threat. Buckner's East Tennessee command, unable to resist Burnside's force, united with Bragg, adding about 7000 infantry and 6000 cavalry to the Army of Tennessee. Longstreet's 1st Corps of the Army of Northern Virginia, 12,000 strong, began its lengthy, rambling rail journey across the South to arrive in Georgia at the last minute. The most obvious source of succor for Bragg, however, were the 30,000 troops under Johnston, still in Mississippi and serving no real strategic purpose. Now, began the oddest aspect of Johnston's ineffective tenure as theater commander: With Bragg urgently calling for help, with Richmond sending telegram after frantic telegram urging Johnston to send Bragg aid, it would seem the natural thing for Johnston to at last take field command, move his army to Tennessee, and unite in the center as he had wanted to since arriving in the region ten months before. In essence, he was finally being ordered to execute his most reiterated idea of a strategic concentration, in exactly the place he had urged must not be lost all along. At this point, however, Johnston resisted the movement. At first, Johnston was reluctant to send any troops, despite their inactivity and lack of any strategic objective. When pressed, he grudgingly sent about half of his infantry, essentially only after a direct order to that effect from Richmond. As they departed, Johnston told Bragg that the troops "were only a loan" to be returned as soon as the crisis had passed. Despite a growing concentration of force in Georgia from all over the South, and that Bragg's best Corps commander, William J. Hardee, had been taken from the Army of Tennessee to assume immediate command of the Mississippi forces, Johnston apparently never felt that his personal leadership might be needed with this growing concentration of unfamiliar forces in the north Georgia mountains. At the very least, Johnston should have assumed command. He clearly had the authority, and certainly the reputation, to provide a seamless command structure for the rapidly growing army under Bragg, which included a large number of commanders who had never worked together before. At best, it was a priceless opportunity to realize Johnston's own strategic concept, that of a major concentration of force in the decisive theater to redeem Confederate fortunes. Why he never seized that opportunity remains a mystery, but Johnston's whole tenure as overall commander in the West marks a period of indecision. Certainly Davis and his cabinet had reason to be gravely disappointed—they tried to create a unified command in the West which would be closer to the scene and provide firm onsite leadership far more effectively than they could in distant Richmond. Instead, what they created was another layer of administration that repeatedly hindered coordination in the West, not aided it. 1863 was a critical year in the fortunes of the Confederacy, and Joseph E. Johnston did little during that crucial period that proved positive for the South.
Bragg, Polk, and Breakfast. At dawn on September 20th, Bragg was up and moving forward, eagerly anticipating the sound of Polk's Wing entering action. His eagerness soon dissolved into frustration, and eventually to extreme anger, as no attack was forthcoming, despite what he regarded as clear orders for same the night before. The main target of his anger would eventually be Leonidas Polk, the man who had just been given command of no less than half the army, 30,000 troops in five divisions, the night before. Certainly the situation grew more tense when a staff officer, sent to find Polk, returned about an hour later with an incredible report: Polk was taking breakfast a mile to the rear, lounging on the porch of a local farmhouse reading a paper. No attack was forthcoming. Bragg, now thoroughly angered, cursed and headed for Polk's location.
The story of Polk on the porch is at the least, overstated. Polk was also up at dawn, and in fact was quite angry himself that his orders to his subordinates had not been delivered the night before. However, that does not mean that Polk was actually blameless for the fiasco: the overall carelessness with which both Bragg and Polk handled command arrangements on the night of the 19th is shocking to modern students of military science. So, what did happen? The root cause was really the meeting Bragg held that night. Calling all the senior officers to his headquarters, Bragg informed them of the new wing structure and of his intention to attack at dawn, starting with Polk's Wing. Hill, however, was not there—he was still trying to get Cleburne's men untangled from their night action and bring up Breckenridge. Polk met Hill's Chief of staff, Col. Archer Anderson, and gave him a message to Hill informing him of the Wing command and asking Hill to report to Polk's HQ, but not about the impending attack. Hill got the message about midnight, but decided to grab a couple hours rest before reporting to Polk. Unfortunately, Polk and Hill never met up that night. Polk waited several hours for Hill to appear, and when he did not, went to bed. Polk's camp was near Alexander's Bridge, but set back from the road about 50 feet. In order to make sure Hill found him, Polk posted a private from his escort company adjacent to the road, with orders to keep a fire burning and escort Hill to the HQ when he arrived. The private, however, got tired and cold: he left his post about 2:00 a.m. and left the fire to some infantrymen nearby. When Hill came looking for the HQ, he found neither Polk nor any courier to escort him to his new commander. Polk also sent written orders to Hill outlining the basics of the attack the next morning, but the courier entrusted with those orders failed to find Hill as well. Breckinridge did manage to spend the night at Polk's HQ, but oddly enough, Polk made no mention of the dawn attack to him, even though Breckinridge's fresh division had just come up and would likely be among the lead attackers tomorrow. Neither Bragg nor Polk made sufficient effort to inform their subordinates of the plans for the morning.
Polk awoke at dawn, expecting to hear the guns of Hill's attack opening up. Instead, only silence greeted him. Now, Polk was visibly agitated. He called for the couriers who should have delivered the orders, to find that they never made it to Hill. Urgently, Polk wrote orders to Hill's two division commanders, Breckinridge and Cleburne, to attack at once. Minutes later, he sent a duplicate set of orders to the same men with a different courier. The time on those orders was 5:30 a.m. Then Polk made a fateful choice: he sat down to eat a quick breakfast. It was this moment that one of Bragg's staff officers found Polk sitting down to breakfast when he should have been attacking. Major Pollack Lee asked Polk why there was no attack. Polk replied that he did not know, since he had not had a chance to ride to the front yet. Lee returned to Bragg. Lee told Bragg that he found Polk three miles behind the lines, calmly eating breakfast and reading a newspaper, instead of at the front. It is unclear why Lee embellished the facts, unless he disliked Polk. Certainly the Bishop was eating breakfast, but it was a hasty one, and it was mere minutes from Cheatham's division, just the other side of Alexander's Bridge, not "three miles behind the lines." Lee's distorted report put Bragg into a rage. Bragg mounted up and went forward to find Polk, and order the advance in person.
About 6:00 a.m., Polk's first courier found Hill, Breckinridge, and Cleburne together, eating at Hill's HQ. Captain Wheless, the courier, handed the orders directly to Breckinridge and Cleburne, informing Hill that Polk had been looking for him since Midnight. Cleburne, after reading them, told Hill that his men were already getting rations for the morning, and it would be better to wait another hour or so before attacking, so that they could finish eating. Hill agreed. This was almost certainly due to the fact that the orders themselves did not mention a dawn attack, but instead ordered Hill's corps to attack once the men were in position. No sense of urgency was imparted by the written instructions. However, Captain Wheless was there, and it seems odd that he would not convey Polk's agitation and desire for a dawn attack verbally. Hill wrote a rather stiff reply explaining that he could not find Polk's HQ last night, that the attack would take some time to launch, and that the Union position was very strong, unlikely to be taken by assault.
Returning, Wheless found Polk coming forward about 6:45 a.m. By now Major Wheless was fuming, and informed Polk that he did not expect Hill to attack within the next three hours without direct orders to do so. Polk sent a note to Bragg explaining that Hill was drawing rations, and then immediately rode forward to find Hill. Next up was Bragg, who found Wheless establishing Polk's new HQ. Wheless explained the comedy of errors so far, and Bragg galloped off after Polk. Polk was at Hill's HQ by now, about 7:15 a.m., and Hill explained about the rations. Polk peremptorily ordered Hill to attack immediately, and rode off, but to where, no one knows. One member of Polk's escort later claimed that Polk spent the next hour riding from brigade to brigade ordering each commander to attack at once, but none of the brigade commanders mention this incident at all. Polk simply disappeared for an hour or so. Bragg arrived at Hill's HQ about 8:00 a.m., waving Polk's note about the rations, and demanded to know why Hill had not attacked at dawn. This was apparently the first Hill had heard about a dawn attack, and told Bragg so. Bragg exploded in a diatribe against the absent Bishop, including relating Major Lee's story about breakfast on the porch, and gave Hill orders to attack at once.
The whole sorry mess could have easily been avoided with a little diligence on either Bragg or Polk's part. Bragg should have made a greater effort to disseminate clear orders to all his senior officers, instead of just Longstreet and Polk. Had Polk mentioned the dawn attack to Hill's Chief of Staff when they met, or had brought up the subject to Breckenridge while the latter spent the night at his camp; all of the subsequent confusion might well have been resolved. Instead, what played out was a scene all too typical of the Army of Tennessee—confusion compounded by controversy and distrust.
Longstreet. Chickamauga proved to be one of Longstreet's finest performances. He arrived late, was given an unfamiliar command in the middle of the night, and managed to mount the battle's only effective Confederate corps-sized attack. In contrast to Polk, Hill, Buckner, and Walker, he was ready when Bragg wanted, kept his formations acting in concert, and maintained a steady attack all day. However, his performance has been clouded by the post-war controversy that erupted over Gettysburg, his outspoken criticisms of Lee, and his distortions of reality in his memoirs. Further, in other aspects of the campaign in the west, he did not do nearly as well as he did on September 20th. All of these factors have created considerable difference of opinion on his skills as a soldier, and especially on his relationship with Bragg. Most historians accept that Longstreet traveled west with the hidden motive of taking Bragg's job. Frankly, I disagree. While Longstreet was as ambitious as the next man, his repeated urging of Lee to come west (usually rejected as disingenuous, despite any proof) and his initial efforts at Chickamauga reflect the spirit of a man committed to doing a good job in a difficult situation. Unfortunately, September 20th represented the high point in relations between the two men.
Despite his success on the battlefield, Longstreet's performance at Chickamauga has often been dismissed as lucky, and even Peter Cozzens' most recent narrative of the battle denigrates his actions after the initial breakthrough. Certainly Longstreet's wing penetrated the Union line at a highly unfortunate moment for the Federal Army—when an entire division mistakenly pulled out of line to create a massive gap. It was the sustained effort of an entire wing in motion, however, that exploited that gap and turned it from a local success to a rout of the entire Union left. A quick contrast illustrates the difference: Bushrod Johnson's Division managed the initial breakthrough at the Brotherton Cabin, while Breckenridge's division (in Polk's wing) turned Thomas' right flank, penetrated to the rear of the Union position, and unhinged much of 14th Corps's defensive position—an equally stunning tactical success. Breckinridge, however, received no support and was finally hurled back by Union reserves with heavy losses. Johnson's men were supported on both flanks, the Union reserves at that end of the field were met and defeated piecemeal, and finally that flank collapsed. The contrast is dramatic. The one thing Longstreet probably does deserve some criticism for that day is missing the gap between the Union line on Horseshoe Ridge and Thomas' main position about 1 mile to the east. Had Longstreet found and exploited that gap instead of trying to batter down the line on Snodgrass Hill, both Union positions would have become untenable. To be fair, all the other Rebel generals on the field also missed it, and Longstreet, with only a limited grasp of the overall tactical situation, is too often unfairly singled out here.
Longstreet's relationship with Bragg deteriorated rapidly after that. While Longstreet was bending the truth when he claimed in his memoirs that he urged a vigorous pursuit immediately (in fact, Longstreet was fairly cautious on the 21st) he was disappointed by Bragg's overall lethargic reaction to victory. Shortly the two men came to despise each other, and Longstreet's terrible performance the next month in the Wauhutchie Valley fighting had more to do with his overall disdain for Bragg than anything else. Equally, Bragg's decision to send Longstreet away to Knoxville at a time when Union numbers against him were growing was a choice of internal politics, not military strategy. Bragg's failure to provide Longstreet with even minimal logistical support illustrates the degree to which the two men were willing to set personal animosities above sound military decision-making.
One of the most famous instances of proof of Longstreet's intentions to replace Bragg, however, is somewhat forced. The famous "letter of protest" signed by virtually all officers in Bragg's army is usually seen as an attempt by Longstreet to get Bragg replaced. This interpretation, however, ignores the other players in the internal power struggle. Polk, Cheatham, Breckinridge, and Buckner were the prime movers here, and Longstreet was really almost an afterthought. Bragg's retaliation was aimed first and foremost at these four men, not Longstreet, his priorities reflect the real focus of the internal struggle within the army. The post-war suggestions of the Southern Historical Society crowd (Early, Pendleton, Fitz Lee and the like) twisted this ignoble affair into yet another Longstreet-oriented accusation of delusions of grandeur—and in fact obscured the real story. In fact this was the second such letter, the first instance happened in October, 1862, a full year before Longstreet arrived on the scene. Clearly the feud between Bragg and his senior commanders was bitter, long-standing, and dangerously vitriolic: Longstreet became caught up in the squabble, but he did not invent it.
Longstreet proved a brilliant battlefield commander at Chickamauga. If he did not win the war single-handedly, he certainly did more than his fair share in winning the battle, and his performance stand head and shoulders above every other general officer on the field—Blue or Gray—except George Thomas. To his discredit, however, in the weeks that followed he allowed his personal dislikes to interfere with his military duties, to the detriment of his command and his cause.
Walthall's Brigade. The Army of Tennessee tended to labor in relative obscurity, overshadowed by the more successful Army of Northern Virginia. This is as true today as it was in 1863: the number of words written about the Eastern Armies and campaigns dwarfs those expended on the west. Some of the more interesting units of the war, however, can be found in the west, and Walthall's Brigade is one of them. Walthall was a lawyer by trade, not a soldier, but his is one of the more interesting careers of the Army. He fought well at Mill Springs, held regimental command at Corinth and in Kentucky, and missed Murfreesboro due to illness. He displayed a great talent as a brigade and division commander despite his formal training, turning in an exceptional performance at Chickamauga. His brigade did very well at Lookout Mountain, and he was a steady division commander through the Atlanta campaign. After Nashville, he was given the almost impossible task of protecting the army's rear in the wake of that ignominious defeat, a mission which he managed largely successfully alongside Nathan B. Forrest. His combat skills rivaled those of Patrick Cleburne, but history has largely forgotten him.
At Chickamauga, his brigade delivered one of the most effective and tactically innovative attacks of the first day's fighting. Sweeping up from the south to take the Union line engaging Jay's Mill from the flank, Walthall and Govan's Brigades of St. John Liddell's Division smashed three Union battlelines in less than an hour's time. Walthall's Brigade was especially effective: charging across the Winfrey Field, they threw themselves to the ground at one hundred yards, letting a Union volley pass overhead, and then leapt to their feet again to close with the Union line. Scribner's Federal Brigade was overwhelmed: one-third losses, including several hundred prisoners, and the rest of the command scattered badly. Usually such an attack, even successful, would so disorganize an attacker so as to lose all momentum, but Walthall's command didn't stop. They smashed next through Starkweather's Federal Brigade, extracting another three hundred and fifty casualties, and routing it. Worst hit of all, however, was King's Brigade of Union Regulars, the third line of resistance. The Regulars were caught in the act of changing facing to meet the threat, and were slaughtered in some cases while barely firing a shot in return. Losses in King's Brigade reached fifty per cent, again with hundreds captured. A 5000 strong Federal Division had been effectively destroyed by 3500 Rebels, who inflicted almost 3000 Union casualties while losing less than 800 of their own. Finally, Walthall and Govan were brought to a halt when they encountered the fourth Union line, two brigades of Union General Brannan's 3rd Division, 14th Corps, who refused to panic at the sight of the routing Regulars. As a crowning touch, Walthall's men now met Federals just as aggressive and determined as themselves, in the form of Gustave Kamerling's 9th Ohio, who promptly countercharged into the teeth of Walthall's attack and drove the Mississippians from the field. Despite this final reverse, however, Walthall's men had displayed uncommon tactical cohesion and discipline.
Rosecrans, Wood, and "the Gap." The most unfortunate order issued at Chickamauga has to be that of Rosecrans to Wood ordering him to "close up" to the left with Reynolds' Division of the 14th Corps. Issued in haste to plug a supposed hole in the Federal line, it actually created one, and set the stage for the routing of half the Army of the Cumberland from the battlefield. The actual situation was more reminiscent of the atmosphere of Bragg's army than of Rosecrans', and clearly illustrated the most common failing of Civil War armies in general: poor to non-existent staff-work.
The mistake was simple enough. Rosecrans had become fixated on Thomas' line, because the 14th Corps represented his left flank and his direct connection with Chattanooga and the Army of the Cumberland's supply line. Rebels turning his left meant Rosecrans could be cut off from Chattanooga and driven southwards, deeper into MacLemore's Cove and the mountains of Northern Georgia, where lack of supply spelled disaster for the Federals. In keeping with this obsession, Rosecrans had been reinforcing Thomas the whole battle. In addition to his own four divisions, Thomas had command of at least two others, giving 14th Corps tactical control of six out of the army's ten basic maneuver elements at any given time. McCook and Crittenden were largely supernumerary for most of the battle as their troops were reassigned other missions (at one point Crittenden had no troops under his command at all, beyond his own HQ guard).
The morning of the 20th was no exception: Rosecrans' first thought was to meet Thomas' urgent demands for more troops to meet an expected attack on his front. Brannan's Division was one of the units Thomas wanted back—it was supposedly in reserve near the Dyer house. In fact, Brannan had moved up to fill a gap on Reynolds' right flank. Brannan got word from both Thomas and Rosecrans to shift to the left and support Thomas, but to his credit elected not to go, fearing—rightly—the looming gap it would leave in the center of the Union line. Unfortunately, this was not made clear at headquarters. When Thomas' aide, Capt. Kellogg, rode up to Rosecrans' HQ and relayed Thomas' request for Brannan, Rosecrans responded positively. His next step was to order another division into the gap Brannan's departure would leave—Wood's Division was selected. However, Rosecrans was not aware that Brannan had not left, and did not make Wood's order conditional on Brannan's departure. Worse yet, the regular Chief of Staff, Garfield, was busy writing orders to other units, so that the fateful order to Wood was penned by Major Bond, the officer usually in charge of ciphers, and an officer not experienced in writing battlefield orders nor cognizant of the actual deployment of the Union Army at that moment. Had Garfield written the order, or had Rosecrans reviewed the order before sending it, it almost certainly would have been made conditional upon Brannan actually moving. Instead the order was delivered with haste by Lt. Colonel Starling, another officer of HQ.
Wood was only 500 yards to the front, so little time was lost in delivering the order. Wood further knew that Brannan had not gone anywhere, and that closing up on Reynolds would thus require pulling his own division out of line, moving up behind Brannan, and effectively creating the gap he was nominally supposed to prevent. Unfortunately, Wood was a prickly officer, and one who had already been reprimanded several times by Rosecrans for not moving promptly—the most recent instance had been that very morning in fact, when Rosecrans had publicly upbraided Wood. Wood told Starling that the order made little sense, since Brannan had not departed, to which Starling replied that "then there was no order." Wood, however, insisted there was, going so far as to tell his staff that he held the "fateful order of the day in his hands." Intent on carrying out the letter, if not the spirit, of his instructions, Wood immediately put his men in motion to move north, behind Brannan and close up on Reynolds. Despite the proximity of Rosecrans' HQ, Wood made no effort to seek clarification in person, nor even wait until Starling could ride back and set matters straight. Had all this happened at 9:00 a.m., it is unlikely to have mattered much at all, given that Rosecrans was close by, had reserves available in the form of Sheridan's Division, and that a number of staff officers were aware that Brannan had not moved. Instead, however, it happened at 11:00 a.m., just as Longstreet's wing was moving forward to attack, leaving no time to plug the gap before the Rebels poured through.
The result was disastrous. Brannan's men were flanked and swept away. Sheridan's Division was badly decimated in a lone stand near Rosecrans' HQ, and then it, too, was pushed from the field. Elements of Wood and Van Cleve's divisions were caught up in the rout. Both McCook and Crittenden joined the tide, and despite repeated efforts could not rally or reform units for a stand. If the order to Wood cost Rosecrans the battle, his next major decision cost him his career. With the army all around him fleeing over Missionary Ridge to Chattanooga, Rosecrans set out for that point as well, seeking to reform the army. Soon, however, word arrived that Thomas was standing fast, and had not routed. Rosecrans hesitated, almost returned to the field, but instead chose to continue to Chattanooga where he could reorganize the scattered 20th and 21st Corps, trusting implicitly that Thomas would do all that could be done on the actual field. Almost certainly this was the correct military decision, since a firm hand was needed in each place, and Thomas was already present at Horseshoe Ridge. Politically, it was suicide, as it gave the appearance of the commanding general ignominiously fleeing the field while a staunch subordinate refused to admit defeat.
August Willich. One of a number of outstanding Union Brigade commanders, Willich was a German refugee and former Prussian army officer. In 1846, motivated by his ideals, he left the Prussian army and became a carpenter, but soon returned to soldiering as a revolutionary in the 1848 uprisings. Afterwards he fled first to France, and finally to Cincinnati, along with many other German social-democrats. In Cincinnati, he joined the 9th Ohio, a regiment of Germans raised by Robert McCook, yet another of the warrior McCook family. The 9th was one of the best disciplined and accomplished regiments of the war: it contained a large percentage of combat veterans and outstanding leaders. McCook did not speak German, and left the actual training and command to Willich. Willich later left to raise an Indiana regiment, but was replaced by the equally effective Gustave Kamerling. Willich was said to be an accomplished drillmaster—he led and fought a brigade as a single unit the way most officers commanded a single regiment. He certainly was an exacting disciplinarian, but his combat career was cut short by a wound at Resaca, in 1864. After the wound, he was given a post command, but was not fit to take the field on active service.
At Chickamauga, his brigade was instrumental in preventing disaster on both days. In the afternoon of the 19th, it was his quick thinking and action that prevented Govan's brigade from overlapping a Federal flank. His men repulsed yet another heavy attack by Walthall's brigade, and at one point Willich—who his division commander, Johnson, reported as being "always in the right place"—saw a fleeting opportunity to flank the Rebels in turn and do great damage. Lack of support prevented him from seizing the moment, but his timely rescue of Baldwin and repulse of Walthall was enough. The next morning, it was Willich again who was instrumental in saving Thomas' line when Breckenridge's Confederates penetrated the rear of the position at Kelly Field. Leaving two of his regiments in line supporting Cruft, Willich took the other two and attacked into the teeth of the Confederate onslaught, slowing it enough to bring up more Federal reserves. Without Willich, Thomas' entire line might well have collapsed.
August Willich is symbolic for the way the German-Americans were regarded in the Western armies, in striking contrast to the East. Even the casual Civil War student is familiar with the scorn heaped on the 11th Corps—Sigel's men—by most of the Army of the Potomac. In the West, however, no such stigma lingered over the Germans. Instead, they had a reputation as among the fiercest, most aggressive, and effective troops in the army. Willich and his 32nd Indiana, Kamerling at the head of the 9th Ohio, and Emerson Opdyke and the 125th Ohio were all prime examples of the martial skills of German-Americans.
Wilder's Brigade. John T. Wilder is almost too typically American. He fits all the stereotypes of Americans at war: untrained militarily, he was not bound by convention, innovative, a master of self promotion, and with a good eye for a chance to make money, he created an almost unique combat organization. His initial military experience was with the 17th Indiana in West Virginia in 1861. Rising to command of the regiment by Shiloh, he saw no action there, though he was part of Halleck's long slow siege of Corinth. His first real combat experience, however, came as commander of an independent post in the Kentucky campaign. In January, 1863, Wilder saw a need and a way to fill it. Rosecrans had inherited command of the Army of the Cumberland after Perryville, and was short on cavalry. Wilder proposed to mount his brigade on animals taken from the region, equip them with the new seven-shot Spencer repeater, and create a brigade of 3000 mounted infantry to supplement Rosecrans' meager cavalry arm. Given that Bragg's army outnumbered the Federals in cavalry almost 2-1, Rosecrans enthusiastically endorsed the idea.
Wilder proved a master of improvisation. A self-made man back in Indiana, he proved equally creative in equipping his new command. The Government would not authorize Spencers initially, so Wilder secured personal loans back in his hometown, and had the men cosign agreements to pay for the new weapons. Animals were drafted from all over. By March, Wilder's command was officially mounted infantry. Tactically, the brigade proved no less creative. The former infantrymen had no intention of becoming cavalry, and were never issued sabers or pistols. Instead, Wilder intended them to fight dismounted, a quick reaction infantry force with beefed up firepower. The men adopted a looser formation than the traditional infantry battleline, realizing that their enhanced firepower gave them a distinct advantage. Wilder's men tended to go into action in a single, dense skirmish line, usually about 1 man per meter. With the Spencers, and with the extra tubular magazines that became available later in the war, Wilder's men could throw more massive firepower than a traditional battleline. They first proved their worth during Rosecrans' move on Tullahoma. Seizing Hoover's Gap in a coup de main, Wilder's men held the gap for three hours against an entire Confederate division until relieved by Federal infantry. There, the Spencers proved their worth, easily repulsing three Rebel charges.
At Chickamauga Wilder's men opened the action on the 18th, delaying the Rebels at Alexander's Bridge for most of the afternoon. The brigade spent the 19th entrenched on a low hill in the Brotherton field, and were instrumental in repulsing several Confederate attacks, most notably that of Stewart's Rebel Division that evening. On the 20th, as Longstreet's breakthrough swept almost every Federal off the field, Wilder formulated a plan to reach Thomas. The idea was to form the brigade into a hollow square and advance into the southern flank of Longstreet's column. Before the plan got underway, however, Wilder met up with a wild-eyed civilian who immediately identified himself as Charles T. Dana, Assistant Secretary of War (Dana had been sent to act as liaison with Rosecrans, and in all probability act as Stanton's spy in Rosecrans' camp) and who tried to commandeer the brigade to take him to Chattanooga to report on the disaster. Dana was likely a little hysterical: telling Wilder that Rosecrans was likely dead or captured, that the army was routed worse than at Bull Run, and that Thomas' men were being pursued and cut down as they retreated. With that news, Wilder had to rethink his plan to cut his way through to Thomas, and elected to retreat.
After the war, Wilder returned to Chattanooga and became a businessman and prominent local citizen there, serving a term as mayor, and later as postmaster. He was also a tireless promoter of creating a park at Chickamauga. He was the first president of the Memorial Association that preceded creation of the National Park, and which bought up so much of the ground initially. In 1895, coinciding with the dedication of the new National Park, the Wilder Brigade monument was also dedicated—the famous Wilder Tower that stands at the Widow Glenn site, and is one of the most recognizable symbols of the park.
Union Reinforcement Schedule
| Hex | Time | Units | Order # |
|---|---|---|---|
| A1.12 | 4:00 p.m., Sept 18 | 2/2/Res | 1 |
| A1.12 | 5:00 p.m. | 2/1/Res | 1 |
| C31.04 | 5:00 p.m. | Negley, 2/14 Division | 2 |
| C31.04 | 6:00 p.m. | Thomas, 14 Corps HQ and Supply, 39 Mich, I 1 Ohio Cav | — |
| C31.04 | 11:00 p.m. | Baird, 1/14 Division | 4 |
| C31.04 | midnight | Brannan, 3/14 Division | 4 |
Orders Explanations
- Move to vicinity of Reed's Bridge to screen that crossing, replacing Minty's Brigade. If enemy infantry is encountered, halt in place and defend. In any case, retire off north edge of Map A by 8:00 a.m. 19 September. This order may not be changed by initiative, nor may they be sent new orders. (These troops were sent by Granger, off-map, and when they retreated that morning, it was to cover bridges further north that the player does not have to worry about. Hence, letting initiative or Rosecrans change the orders to keep them on-map fails to recreate the historical concerns about that flank.)
- Negley's Division has a Divisional Goal to move to Glass Mill Bridge and defend the crossings of the Bridge and ford immediately to the north.
- 14 Corps has an order to move to the Kelly House and defend the Lafayette Road between Cloud Church and the Brotherton House.
- Move to re-join corps.
- 20 Corps has orders to move to Crawfish Spring and await further orders.
- Cav Corps has orders to move to Crawfish Spring and defend the rear of the Union army. 39th Indiana must rejoin Wilder.
- Res Corps has orders to move to support Thomas. Once Granger arrives at Thomas' HQ, the Union player may give Granger one free (immediately accepted) order.
- Report to Cav Corps at Crawfish Spring. If Cav Corps is not at Crawfish Spring, treat as 4, above.
- Minty is ordered to withdraw at 10:00 p.m., to escort trains to Chattanooga and screen the area around Rossville. He may exit via any west edge road hex of Map A or B. These orders automatically supersede any orders Minty currently has, and may not be changed via initiative or the army commander. Note that the CBOT battery leaves with Minty, and returns with Crook and 2/2/Cav.
Confederate Reinforcement Schedule
| Hex | Time | Units | Order # |
|---|---|---|---|
| D40.34 | 2:00 p.m., Sept 18 | Johnson, JPD/1 Division, R/L/1, Forrest, F Cav HQ, Jackson/F Cav, Martin/S/P/F Cav | 1 |
| D40.34 | 3:30 p.m. | Pegram, D/P/F Cav, 10 Conf Bn/S/P/F Cav | 2 |
| D40.34 | 4:30 p.m. | Hood, 1 Corps HQ, Lumsden/R/1 Corps | 1 |
| D40.34 | 10:00 p.m. | Law, S/L/1, B/L/1 | 3 |
| F4.34 | 7:00 a.m., Sept 19 | Bragg, A Tenn HQ and Supply, Drews/A Tenn, Holloway/A Tenn | 4 |
| D40.34 | Noon | WITHDRAW: Martin/S/P/F Cav |
Orders Explanations
- 1 Corps has orders to cross at Reed's Bridge, move to Jay's Mill Road, clearing the road west of Chickamauga Creek to the southwest, to the vicinity of E12.04. There the Corps will halt and await further orders. F Cav has orders to help 1 Corps clear the roads designated, and then retire to the vicinity of Alexander's Bridge and await further orders.
- These units have the same orders as F Cav, above. Note that Martin (until it is withdrawn) and 10 Conf/S/P/F Cav are considered attached to D/P/F Cav unless their brigade enters play via the optional rules.
- Move to join corps or division.
- Army HQ is ordered to relocate to E6.19.
- Wharton's Division is ordered to move to the vicinity of the Glass Mill Bridge and defend that crossing.
- W Cav Corps is ordered to move to the vicinity of Glass Mill Bridge, cross, and attack the Union flank near Crawfish Spring.
Union Random Events Table
Roll two dice. 2-9: No effect. 10-12: Roll again below.
2—Union army Panic check; 3—Consult Leader Table; 4—The fateful order of the day; 5—Division attack stoppage; 6—Consult Leader Table; 7—Delay reinforcements; 8—Orders delay; 9—Roll on Leader Table; 10—Immediate order acceptance; 11—Corps attack stoppage; 12—Union Army Panic Check.
Results Explanations
1. Union Army Panic. Add up the number of infantry divisions currently wrecked. Roll two dice below.
| # Wrecked | Die Roll for Panic |
|---|---|
| 0-2 | — |
| 3-4 | — |
| 5-6 | 66 |
| 7 | 61-66 |
| 8 | 56-66 |
| 9 | 55-66 |
| 10 | 53-66 |
| 11 | 51-66 |
| 12+ | 46-66 |
If Panic occurs, roll one die for each corps commander on the map. On a roll equal to or less than the commander's rating, the corps and all attached units stay, otherwise, the units immediately move to exit the map. Any corps which remains is allowed to write one free order, accepted immediately, for the troops that stay. Each division commander in a corps which fails the above roll may attempt to roll itself, as long as at least one corps remains on the map. Roll once for each division commander; if they pass, they can move to join any corps that remains, and are considered attached to that corps for the remainder of the game. The Army commander and any units attached to him automatically leave the map. Wilder may roll independently to try and stay, as if he were a divisional commander. Divisions that have not yet arrived on-map each roll, and only units that pass the roll may enter (any unit can automatically choose not to enter, if desired.) Brigades scheduled to arrive may arrive if their division stays, otherwise they never arrive. Units that fail to stay must leave the map via its west or north edges, as quickly as possible. The senior corps commander of the units that stay takes command of the army, but can only issue orders to other corps commands via initiative.
2. Consult Leader Table. The player immediately rolls again and refers to the Leader Table, below. Roll two dice, reading them as an 11-66 result. All events are implemented immediately.
3. The fateful order of the day. The Rebel player chooses one Union division and immediately writes a movement order for that division. The order can only move the unit to a new location, it cannot have the division in question attack any other units, rout off the board, etc. The division must move to the new location, where it halts and enters no-orders status until a new order is written for it or it rolls for initiative. While in transit, new orders can be sent to the unit and initiative can be rolled for. An Emergency Corps Retreat may not be triggered for the command until it arrives at its new destination.
4. Division attack stoppage. One division of all those currently under attack orders (including any in a corps attack order) immediately suffers an attack stoppage—no roll needed. Choose the division at random.
5. Delay Reinforcements. The next scheduled reinforcement is automatically postponed for 8 turns. Note that this effect is magnified by the night turns: this is intentional. If no further reinforcements are left to enter, ignore this result.
6. Corps Attack Stoppage. One corps under attack orders immediately stops as in the divisional result, above. If more than one corps currently has attack orders, randomly choose which corps suffers this result. Note that all attacking divisions in this corps stop (including any attached units), not just one.
7. Orders delay. Any one order of those currently in transit or in delay has its delay status increased by one. For example, an order currently in D5 status would be increased to D6. An order still in transit, and not yet rolled for on the acceptance table has its status automatically effected once that status is rolled. In this case, a D6 order would become Dt, and an "A" result would become a D4. If no orders are currently in transit or in delay, ignore this result.
8. Immediate order acceptance. Any one order currently in delay or in transit is immediately accepted. No further waiting or rolling is required. If no orders are currently in transit or in delay, ignore this result.
Leader Table
11—Rosecrans is a casualty; 12-14—Check for Corps Commander loss; 15-23—Check for Divisional Commander loss; 24-35—Check for Brigade commander loss; 36-43—Deploy Col. Walker; 44-46—9th Ohio Attacks!; 51-52—Friendly Fire; 53-54—BG Whitaker Drunk; 55-64—Owning player random movement; 65-66—Enemy player random movement.
Leader Table Result Explanations
1. Rosecrans a casualty. Roll one die—1-5, wounded, 6 Killed. Rosecrans is immediately removed from play and replaced by the ranking corps commander. If Rosecrans is already killed or out of play, treat as no result.
2. Check for Corps Commander Loss. Choose randomly from all in-play corps commanders to find the affected leader. Roll one die: 1-4, wounded, 5-6 killed. Do not include replacement corps commanders in this selection process. If all permanent corps commanders are currently out of play, treat as no result.
3. Check for Divisional Commander Loss. Rebel player chooses two eligible division commanders, the Union player chooses one. From these three, randomly select the affected leader. Roll one die: 1-2 no effect, 3-4 wounded, 5-6 killed. Ignore replacement leaders for this process. If all permanent divisional commanders are currently ineligible, treat as no result.
4. Check for Brigade Commander Loss. Rebel player chooses two eligible brigade commanders, the Union player chooses one. From these, randomly select the affected leader. Roll one die: 1-2 no effect, 3-4 wounded, 5-6 Killed. Ignore replacement leaders for this process. If all permanent brigade leaders are currently ineligible, treat as no result.
5. Deploy Col. Walker. Col Walker was currently under arrest for a minor infraction during the battle, but normally he commanded the 1/3/14 Brigade. Walker was on the field, and instrumental in rallying troops on Horseshoe Ridge. Walker appears on-map when called for by the Random Events Table. When he appears, he is placed with any 14 Corps unit, and may take command of up to five regiments of any affiliation (including from other corps.) He then acts like a brigade commander for those five units, and traces normally to a division commander of his choice. When he deploys, a note should be made of which units he commands, and to which divisional commander he traces. Walker may add regiments to his command later, assuming he does not yet have five regiments under his command, but he cannot re-arrange units at will. Later changes to the regiments under his command, or changes in divisional affiliation, must come via normal initiative rolls.
6. 9th Ohio Attacks! The 9th Ohio, found in the 3/3/14 Brigade, was led by the extremely aggressive Col. Kammerling. Place the 9th Ohio in Bloodlust. The 9th Ohio must immediately move up to four hexes and close combat one enemy unit of its choice. It may move two hexes after any close combat, but it may not attack a second unit. If there are no enemy units within four hexes of the 9th, ignore this result.
7. Friendly Fire. The Rebel player chooses one Union unit, adjacent to at least one other Union unit and within 4 hexes of any Rebel unit, to suffer a fire attack. The fire is automatically resolved on the 4-6 column of the Fire Combat Table, and any low ammo rolls are ignored. Stragglers and morale are checked as if it were a flank attack.
8. BG Whitaker Drunk. Col. Whitaker's initial performance on Horseshoe ridge was quite good, and the timely commitment of his brigade (1/1/Res) saved the day. However, after the initial contact, Whitaker left the field for some additional support of the liquid kind, only to return roaring drunk. At one point, he ordered a Union battery to fix bayonets to their cannon. When rolled, treat Whitaker's rating—normally a 3—as a -3 for all morale checks. After four turns, flip Whitaker to his replacement side. Whitaker must stack with a unit of his brigade during this time.
9. Owning Player Random Movement. When rolled, the Union player may move two of his regiments anywhere on the board up to 3 hexes. They do not have to remain within command radius, and may remain outside command radius for the turn. They may move adjacent to enemy units, but not through hexes occupied by enemy units.
10. Enemy Player Random Movement. Same as above, except that the Rebel player gets to move those two regiments.
Confederate Random Events Table
Roll two dice. 2-9: No effect. 10-12: Roll again below.
2—Bragg's pessimism; 3—Consult Leader Table; 4—Poor staff work; 5—Division attack stoppage; 6—Consult Leader Table; 7—Delay Reinforcements; 8—Orders delay; 9—Consult Leader Table; 10—Immediate order acceptance; 11—Corps attack stoppage; 12—Bragg's Pessimism.
Result Explanations
1. Bragg's Pessimism. Add up the number of infantry divisions wrecked and roll two dice below.
| # Wrecked | Die Roll Range |
|---|---|
| 0-2 | — |
| 3-4 | 65-66 |
| 5-6 | 63-66 |
| 7 | 61-66 |
| 8 | 56-66 |
| 9 | 55-66 |
| 10 | 52-66 |
| 11+ | 46-66 |
If the Confederate Player rolls within this range, Bragg may not issue any attack orders for the next 24 hours. Initiative orders can still be rolled. No units may exit the map to fulfill any victory condition.
2. Consult Leader Table. The player immediately rolls again and refers to the Leader Table, below. Roll two dice, reading them as an 11-66 result. All events are implemented immediately.
3. Poor Staff work. Bragg's order to one commander (chosen at random) is thrown away as Dt, and Bragg may not issue new orders to that commander for the next 8 turns. This applies to orders, in transit, accepted, and in delay. If an order currently accepted is thrown away, treat as an appropriate attack stoppage. (If using the defensive orders option, the unit reverts to no orders, but does not need to perform an ECR.)
4. Division attack stoppage. One division of all those currently under attack orders (including any in a corps attack order) immediately suffers an attack stoppage—no roll needed. Choose the division at random. If no attack orders are currently accepted (ignore orders in delay), treat as no result.
5. Delay Reinforcements. The next scheduled reinforcement is automatically postponed for 8 turns. Note that this effect is magnified by the night turns: this is intentional. If no further reinforcements are left to enter, treat as no result.
6. Corps Attack Stoppage. One corps under attack orders immediately stops as in the divisional result, above. If more than one corps currently has attack orders, randomly choose which corps suffers this result. Note that all attacking divisions in this corps stop (including any attached units), not just one. If no attack orders are currently accepted (ignore orders in delay), treat as no result.
7. Orders delay. Any one order of those currently in transit or in delay has its delay status increased by one. For example, an order currently in D5 status would be increased to D6. An order still in transit, and not yet rolled for on the acceptance table has its status automatically effected once that status is rolled. In this case, a D6 order would become Dt, and an "A" result would become a D4. If no orders are currently in transit or in delay, ignore this result.
8. Immediate order acceptance. Any one order currently in delay or in transit is immediately accepted. No further waiting or rolling is required. If no orders are currently in transit or in delay, ignore this result.
Leader Table
11—Bragg is a casualty; 12-14—Check for Corps Commander loss; 15-23—Check for Divisional Commander loss; 24-35—Check for Brigade commander loss; 36-43—Col. Oates, where are you?; 44-46—Cheatham Drunk; 51-52—Friendly fire; 53-54—Walthall's tactics; 55-64—Owning player random movement; 65-66—Enemy player random movement.
Leader Table Result Explanations
1. Bragg a Casualty. Roll one die—1-5, wounded, 6 Killed. Bragg is immediately removed from play and replaced by the ranking corps commander. If Bragg is already killed, wounded, or otherwise out of play, treat as no result.
2. Check for Corps Commander Loss. Choose randomly from all in-play corps commanders to find the affected leader. Roll one die: 1-4, wounded, 5-6 killed. Do not include replacement corps commanders in this selection process. If all permanent corps commanders are currently out of play, treat as no result.
3. Check for Divisional Commander Loss. The Union player chooses two eligible division commanders, the Rebel player chooses one. From these three, randomly select the affected leader. Roll one die: 1-2 no effect, 3-4 wounded, 5-6 killed. Ignore replacement leaders for this process. If all permanent divisional commanders are currently ineligible, treat as no result.
4. Check for Brigade Commander Loss. The Union player chooses two eligible brigade commanders, the Rebel player chooses one. From these, randomly select the affected leader. Roll one die: 1-2 no effect, 3-4 wounded, 5-6 Killed. Ignore replacement leaders for this process. If all permanent brigade leaders are currently ineligible, treat as no result.
5. Col. Oates, where are you? When first rolled, treat the 15th Alabama regiment as semi-independent. It need not stay within command radius of the S/L/1 brigade commander, but instead traces a radius of 8 hexes (not movement points) to any Confederate brigade commander on the map. The 15th need not trace to the same brigade commander from turn to turn, but may change its leader of choice every turn, if so desired. It may move anywhere within these limits. If this result is rolled while already in force, the 15th reverts to normal command radius rules and must immediately begin moving to join its brigade.
Col. Oates must have been a difficult subordinate, since he had trouble obeying orders. At Gettysburg, despite orders to move around Big Round Top and attack, he climbed Big Round Top and tried to defend, until found by a courier from the brigade commander and sent forward into action. At Chickamauga, he managed to get lost again, wandering all over the Dyer Field. To his credit, Oates was not afraid to fight, and pitched in wherever he could. Still, one imagines that his superiors probably wished he would just stay with the class...
6. Cheatham Drunk. In an army of hard-drinking men, Benjamin F. Cheatham's reputation as a serious drinker was legendary. Unfortunately, however, his indulgences were not always confined to purely social occasions. At Murfreesboro, many officers suspected his poor handling of his command was due to alcohol-dulled wits. If this result is rolled, immediately flip Cheatham to his repl side. The leader loss modifier applies to all acceptance rolls, stoppage rolls, etc, for the rest of the day. Cheatham may flip back to his normal side on the first morning twilight turn of the next game day.
7. Friendly Fire. The Union player chooses one Rebel unit, adjacent to at least one other Rebel unit and within 4 hexes of any Union unit, to suffer a fire attack. The fire is automatically resolved on the 4-6 column of the Fire Combat Table, and any low ammo rolls are ignored. Stragglers and morale are checked as if it were a flank attack.
8. Walthall's Tactics. During the current game turn, any time any unit of Walthall's Brigade (W/L/Res) is the target of fire (including close combat), shift one column to the left on the Fire Combat Results Table. Note: this represents the remarkable degree of co-ordination shown in Walthall's first attack on the 19th. His brigade, advancing in line, charged impetuously upon the Union line, only to halt, throw themselves on the ground at 100 yards to avoid the Union volley, and then leapt to their feet, returned the fire, and continued the charge. The results were devastating.
9. Owning Player Random Movement. When rolled, the Rebel player may move two of his regiments anywhere on the board up to 3 hexes. They do not have to remain within command radius, and may remain outside command radius for the turn. They may move adjacent to enemy units, but not through hexes occupied by enemy units.
10. Enemy Player Random Movement. Same as above, except that the Union player gets to move those two regiments.