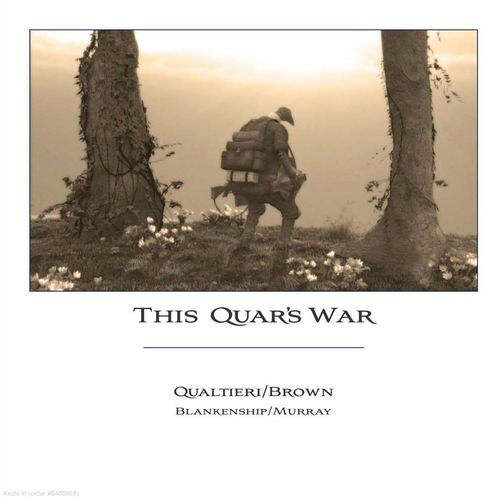
This Quar's War
This Quar's War Rulebook
Table of Contents
Table of Contents
Units
This Quar's War is played with miniatures. A miniature represents each rhyfler on the field, and the rhyflers are organized into the unit types below.
Squad
- The Squad is the base unit on the field. It usually has nine rhyflers and a Yawdryl, who issues its orders.
- Each rhyfler must stay in coherency with the rest of his Squad: no rhyfler may be more than 2 inches from another member of the Squad, and every rhyfler must remain within Command Range of his Yawdryl. Members who fall out of coherency may only move back into coherency when the Squad is activated.
- A Squad without a Yawdryl is in Loss of Leadership.
- Crusader Squad: nine rhyflers, six armed with the Bogen assault rifle and three with the Ryshi heavy rifle. The Yawdryl is armed with a Bogen.
- Coftyran Squad: nine rhyflers, commanded by a Yawdryl. Eight are armed with Harlech long rifles and one with a Cryfen LMG. The Yawdryl is armed with a Doru SMG.
Section
- A Section is the next level of organization. It consists of two Squads led by an is-Caerten, who must be attached to one of the two Squads.
- The is-Caerten assigns target priorities to the Section.
- Each Yawdryl in the Section must remain within Command Range of the is-Caerten. A Yawdryl outside Command Range is Out of Leadership and may not receive new priority targets. The Squad may still fire at previously assigned targets or move toward the is-Caerten.
- A Section without an is-Caerten is in Loss of Leadership.
Company
- The Company is the highest level of organization. It consists of two Sections led by the Caerten and his retinue. The Caerten directs the advance of the Company.
- Each is-Caerten must remain within Command Range of the Caerten. An is-Caerten outside Command Range is Out of Leadership and will not receive new advancement orders. The Section may only move according to previous orders or toward the Caerten.
- A Company without a Caerten is in Loss of Leadership.
- Caerten's Retinue: five Quar, namely a Master Yawdryl, a standard bearer, a musician, a PykPyk squirrel messenger and a cook, all armed with their faction's standard rifle. The Retinue is an Independent unit.
Command Range
Command Range is the maximum distance at which units can operate on the field of battle. It depends on the training and nationality of the units:
| Force | Squad | Section | Company |
|---|---|---|---|
| Crusader | 6" | 18" | 36" |
| Coftyran | 6" | 12" | 24" |
Independent Units
- Specialist units such as Snipers, heavy weapons or Cavalry Squads are attached to the Company. They have more autonomy than regular units and do not always follow the usual coherency rules.
- Independent units do not require Movement or Fire Priority orders. In the Yawdryl's Phase they receive their own activation card and follow the orders of their officer.
- An Independent unit without an officer is in Loss of Leadership.
Teams
Fire Teams. When an is-Caerten takes a Section into the field on its own, he may split each Squad into two Fire Teams: one of five rhyflers, and one of four rhyflers plus the Squad's Yawdryl. The is-Caerten must either attach himself to one of the Fire Teams or take one member from each Team to form a Retinue.
Weapons Teams.
- Crusader Light Machine Gun team: two rhyflers, a loader and a gunner, attached to a Squad. The gunner adds the LMG's firepower to the Squad; the loader is busy supplying ammunition and may only perform Movement or Assault actions. LMG teams count as members of the Squad for activation and for measuring Suppression.
- Crusader Mortar team: two rhyflers, a loader and a gunner. Because they fire indirectly they cannot be attached to Squads. Mortar teams are attached to a Yawdryl, who issues their Movement and Fire Priority orders. Several Mortar teams may be assigned to one Yawdryl, and they receive their own card in the Yawdryl's Phase.
- Coftyran Field Gun team: three rhyflers, one gunner and two loaders. Coftyran doctrine keeps Field Guns separate from regular Squads. Each Field Gun team is attached to a Yawdryl, who issues its Movement and Fire Priority orders, and it receives its own card in the Yawdryl's Phase.
The Field of Battle
A commander's ability to use the features of the battlefield to his advantage is as important as the units under his command.
Terrain
Terrain is classified by its effect on movement and on visibility. At the start of the battle both players must agree on the classification of every terrain feature on the field.
Terrain and movement
- Clear: roads and open fields. No movement penalty.
- Obstacle: static elements that slow a unit's progress. An obstacle applies a movement penalty equal to its height; for example, a low wall 1 inch tall subtracts 1 inch from a unit's movement when the unit climbs over it.
- Difficult: an area feature that halves the movement rate of any unit moving through it. Examples include dense forests, bodies of water and muddy fields.
- Impassable: units cannot move through it.
Terrain and visibility
Quar have a 360° field of view, so they are always aware of what is around them. Their view is only affected by terrain, classified as follows:
- Clear: nothing blocks the unit's line of sight. Examples include roads and fields.
- Low Visibility: obscures line of sight without blocking the rhyfler's view. Examples include light forests, smoke effects and available light (dawn, dusk, night).
- Blocking: completely obscures a target from the unit. Examples include dense forests, buildings and high walls.
- Obstacle: obscures a portion of an enemy unit from view. Examples include low walls, hedges and entrenchments.
Measuring
Measurements in This Quar's War are made in whole inches. Remainders are rounded up to the next whole inch. Commanders may measure at any point during the game.
Game Turn
The game is divided into turns. Each turn consists of the following phases, in order:
- The Caerten's Phase
- The is-Caerten's Phase
- The Yawdryl's Phase
- The End Phase
1. The Caerten's Phase
- The Caerten directs his Company's advance. Each player in turn places his arrow counters on the board, one per Section, showing the main direction of offensive pushes or defensive concentration. The order in which the arrows are placed is set by the scenario and may be changed by the defence or capture of primary objectives.
- Each arrow is the primary direction of movement for its Section. Squads in the Section performing Movement actions must move in the general direction of the arrow. Independent units do not receive a Movement order and may move as they see fit.
- When only a Section is used in the mission, the is-Caerten gives the Movement orders to the two Squads under his command instead.
2. The is-Caerten's Phase
- Each is-Caerten directs the fire of his Section. For each Squad he assigns a counter indicating that unit's priority targets. A target can be an enemy unit, a terrain feature or an empty spot of open ground where enemy rhyflers may advance.
- A Squad given a Fire order by its Yawdryl must fire on its assigned priority targets. However, if an enemy moves within 6 inches of the unit, the unit may fire at that enemy instead.
- Independent units do not receive Fire Priority markers and may choose their targets freely.
- When only a Section is used in the mission, the Yawdryls direct the fire of their Squads: in this phase each Yawdryl assigns Fire Priorities to his Squad. A Squad often splits into two Fire Teams, each with its own Fire Priority marker. The Yawdryl still assigns the actions in the next phase and may give each Fire Team different actions.
3. The Yawdryl's Phase
In this phase units activate by carrying out Movement, Combat and Utility actions to further the goals of their commander.
The stack. Each player needs one card for each unit in play, numbered in sequence: with ten units in play in total, the cards run from one to ten. At the start of the phase the cards are shuffled and each player draws one card per unit. The cards are assigned face down to the units, in the order the player wishes those units to activate. Units then activate in numerical order, from lowest to highest.
Example: Josh and Anthony each have five units (four Squads plus the Caerten and his Retinue), so ten cards numbered one to ten are used. Anthony draws 2, 4, 5, 6 and 9 and assigns them to his units in the activation order he wants. Josh draws 1, 3, 7, 8 and 10 and does the same. Unit 1 activates first, then 2, and so on until all units have activated.
Faceup cards. Some effects cause a unit's card to be placed face up. Such cards must be assigned first during the Yawdryl's Phase; the rest of the stack is then assigned as normal.
Activation. When a unit activates, its Yawdryl gives it a set of two actions. The action types are Move, Combat and Utility. Actions may be combined or doubled up depending on the action. See the Actions section below.
Combined activation. The two Squads in a Section may be assigned consecutive cards so that they activate together. When the first Squad activates, the second does as well. All movement is done at the same time, and all combat actions are resolved as one larger action.
Holding. One Squad in a Section may Hold its activation so that it acts together with the second Squad. The Squad must reveal its card and declare that it is Holding. The second Squad must be the next unit activated on that side, and no more than one activation may be skipped in between.
Example: Josh has the 3 and 5 cards and wants to activate two Squads as a Section. He assigns 3 to the first Squad and 5 to the second. When the 3 comes up he reveals it and declares the first Squad is Holding. His opponent activates unit 4. On activation 5, Josh's Squads activate as one Section. Had his opponent held both the 4 and the 5, he could not have stopped Josh from Holding the first Squad.
Squads that have been split into Fire Teams may also activate together in this way.
PykPyk squirrels. A Company command team often includes a squirrel messenger. The messenger fights as a normal rhyfler and counts as carrying the standard weapon of his force. At the start of each game he has three squirrel markers. A marker can be used at any point in the game to change a unit's Movement direction (set by the Caerten) or Fire order (set by an is-Caerten). Once used, the marker is set aside and may not be used again.
4. The End Phase
During the End Phase, effects left over from the turn are resolved before the next turn begins. These include Morale checks, the movement of smoke effects and the distribution of objective results. Then the next turn begins.
Actions
All actions fall into one of three categories: Movement, Combat or Utility.
Movement Actions
- Standard Movement: the unit may move up to 4 inches in its assigned direction. This order may be combined with another order, including another Standard Movement.
- Fast Movement: the unit expends both of its actions to move up to 8 inches in its assigned direction. It is then eligible to gain the Speed Condition Shift when targeted by enemy units. Fast Movement may only be used over clear terrain.
- Prone Movement: Prone units may move 2 inches per action. This may be combined with either a Standard Fire action or another Prone Movement order.
Combat Actions
- Standard Fire: the unit expends one action and nominates an enemy unit near its Fire Priority marker to shoot at. Each figure with line of sight to any figure in the enemy unit rolls its standard combat dice. This action may only be combined with Movement or Utility actions. Units may not divide their fire among several enemy units.
- Concentrated Fire: the unit expends both of its actions and nominates an enemy unit near its Fire Priority marker. Each figure with line of sight to any figure in the enemy unit rolls its standard combat dice plus one additional combat die.
- Opportunity Fire: the unit expends one action and receives an Opportunity Fire marker. The marker lasts until the end of the current turn or until used. A unit with the marker may fire at any unit that comes near its Fire Priority marker later in the turn. This is treated as a Standard Fire action, which occurs between the target unit's two actions. The marker is then removed.
- Return Fire: if a Squad takes fire from an enemy unit before it activates, it may Return Fire when activated. This is at the Yawdryl's discretion and overrides the is-Caerten's orders. Because the target change is hasty, the unit may only use its Standard Firepower. This action may only be combined with Get Up.
- Assault: if the unit is within Assault Range of an enemy unit, it may expend one action to make an Assault attack. Assault Range for standard rhyflers is 4 inches. Only one Assault action is allowed per activation.
Utility Actions
- Get Up: a unit that has gone Prone must Get Up before performing a Movement action. When a unit gets up it may move 2 inches in the direction of its Movement order.
- Break Down / Assemble Weapon: some weapons must be dismantled before they are moved. A Light Mortar must spend one action to Break Down before moving and one to Assemble before firing. HMGs and HSGs need two actions to Break Down, and two actions to Assemble.
Going Prone
A unit in the open, or under fire from devastating weapons, may react by going Prone. Going Prone gives the unit a Condition Shift of 1, with drawbacks:
- A unit that goes Prone in the open may still fire as normal, but must perform a Get Up action before it can receive a Standard Movement order. While Prone it may only move 2 inches per action without getting up.
- A unit that goes Prone while behind cover may not fire until it has performed a Get Up action, and enemy units cannot fire at it. A unit behind cover that goes Prone in reaction to fire still takes that fire. Once Prone behind cover, a unit can neither shoot nor be shot at.
- A Heavy weapon team that goes Prone leaves its field-of-fire cone in place. While the team is Prone, units within the cone do not suffer its effects. When the team Gets Up, the effects return.
- In an Assault, a defending unit that is Prone does not start with the Lead. Prone units that are assaulted Get Up as a free action at the end of the activation.
Resolving Actions
Basics
The standard die is the d6, used in one of two ways.
Combat resolution. The player rolls a number of dice based on the unit's weaponry and the Combat action being performed. Each die that comes up 6 is a hit and removes an enemy combatant. The target player chooses which rhyflers are removed. This method is modified by the factors below.
Special effects. The second method finds the result of effects with variable outcomes, such as Morale and Special Weapons. Two six-sided dice are rolled together and the two numbers are compared, separately, to a table. The outcomes are:
| Roll | Outcome | Notation |
|---|---|---|
| Each die results in a 6 | Very Positive | 6/6 |
| Either die results in a 6, the other in 2–5 | Positive | 6/2–5 |
| Either die results in a 6, the other in a 1 | Both bad and good | 6/1 |
| Neither die results in a 1 or a 6 | Neutral | 2–5/2–5 |
| Either die results in a 1, the other in 2–5 | Negative | 1/2–5 |
| Each die results in a 1 | Very negative | 1/1 |
Ranged Combat
Targeting
A unit may only fire at an enemy unit within proximity of its Fire marker. Rhyflers may fire through other members of their own unit, but not through members of other units, friendly or enemy.
Calculating Firepower
When performing a Fire action, a unit gathers a pool of dice based on the weaponry and training of its rhyflers. This pool is the unit's Firepower. Each rhyfler within line of sight and range of the enemy contributes the number of dice listed in the Ranged Weapons table, plus any Lethal dice his weapon provides. The Firepower is rolled, and each die showing a 6 is a hit that removes an enemy combatant.
Ranged Weapons Table
Crusader weapons
| Weapon | # of Dice | Lethal Dice | Max. Range | Assault | PV |
|---|---|---|---|---|---|
| Bogen Assault Rifle | 2 | 0 | 48 | No | 4 |
| Ryshi Heavy Rifle | 2 | 1 | 48 | No | 3 |
| Grifkis Shotgun | – | 3 | 12 | Yes | 5 |
| H-11A LMG | 10 | 2 | 48 | No | 3 |
| Dinas Cavalry Carbine | 2 | 1 | 24 | Yes | 4 |
| Mark 2 Infantry Mortar | Template | 48 | No | 4 |
Coftyran weapons
| Weapon | # of Dice | Lethal Dice | Max. Range | Assault | PV |
|---|---|---|---|---|---|
| Harlech Long Rifle | 1 | 0 | 96 | No | 3 |
| Doru SMG | 4 | 0 | 24 | Yes | 4 |
| Cryfen LMG | 8 | 3 | 48 | No | 3 |
| R.C.O. Field Gun | Template | 96 | No | 2 |
Common weapons
| Weapon | # of Dice | Lethal Dice | Max. Range | Assault | PV |
|---|---|---|---|---|---|
| HMG | 16 | 4 | 96 | No | 2 |
| HSG | 10 | 10 | 16 | No | 2 |
Condition Shifts
If the unit receiving a Combat action is obscured from the attacker in any way, the attacker's dice that show a 1, or a 2 or higher depending on the shift, block the 6s that would otherwise cause casualties. Condition Shifts represent obstacles on the battlefield, from cover such as low walls, hills and trenches, to the rapid movement of the target, and they can include visibility and target profile.
| Condition | Shift | Stacks |
|---|---|---|
| Obstacle | 1 | Yes |
| Fortification | 2 | Yes |
| Prone | 1 | Yes |
| Visibility | 1 | Yes |
| Speed | 1 | No |
- If the rhyflers in a unit are not all obscured in the same way, the Condition Shift that applies to the majority of the unit is used.
- Most Conditions are cumulative and stack. The exception is Speed, which does not stack with other Conditions.
- When cancelling casualties, always start with the highest blocking dice.
Lethal Dice
- Some weapons are more effective at certain ranges or have a sharper edge. Their dice are called Lethal dice, and they are rolled in a different colour from the standard dice.
- Lethal dice are not blocked by the standard pool. Only dice from their own sub-pool block them.
- Lethal dice reduce the Condition Shift applied to them by 1.
Suppression
- After resolving combat, each 6 that was blocked by a 1 causes one point of Suppression. Only 1s cause Suppression: 6s blocked by higher numbers from stacked Condition Shifts do not.
- Blocked Lethal dice and casualties each cause two points of Suppression.
- Suppression points are tracked until the end of the current turn.
- If after casualties are removed a unit has more Suppression points than members, its morale breaks.
- Once a unit has accumulated Suppression points equal to the number of rhyflers in it, it goes Prone. For every point of Suppression beyond that, one rhyfler must take a break test. The player rolls two dice per potentially broken rhyfler as a pool; each 6 in the pool keeps one rhyfler from breaking. Each rhyfler that breaks is laid on his side. Broken models no longer activate with their unit but stay in play, and they may recover later in the turn.
- Once members of a unit break, the unit's current Suppression is reduced to zero. If it takes further fire, it gathers Suppression again as normal, breaking when it exceeds its current size.
- A unit reduced to one unbroken rhyfler breaks as well.
Example: Josh targets one of Anthony's units with Standard Fire. Josh's unit has ten standard rhyflers, each with two combat dice, for a Firepower of twenty dice. Each 6 is a hit. Anthony's unit is in cover behind a low hedge, which gives a Condition Shift of 1, so each 1 Josh rolls blocks a 6. If a smoke cloud also obscured Anthony's unit, the shift would be 2, and each 1 or 2 would block a 6. Josh rolls five 6s, two 2s and two 1s. He first removes the two 6s blocked by 2s, which cause no Suppression because they were not blocked by 1s. He then removes the two 6s blocked by 1s, which cause Suppression. The remaining 6 is a casualty, which also causes two points of Suppression. Anthony chooses which figure is removed, and the unit takes four points of Suppression in total.
Assault Combat
Once enemy units are close enough, the fighting switches from ranged fire to an aggressive struggle with guns, knives, grenades and fists.
Assault Range
A unit must be within 4 inches of an enemy unit to perform an Assault action. When an Assault action is performed, all rhyflers within Assault Range of the attacking unit take part in the combat.
Calculating Combat Dice
Use these steps to calculate each side's combat dice:
- Every rhyfler within Assault Range gets one die.
- A rhyfler in base-to-base contact with an enemy rhyfler receives an additional die.
- Certain weapons give additional dice and/or Lethal dice. See the Assault Weapons table.
- The unit with the Lead gains an additional die per rhyfler.
Assault Weapons table
| Weapon | Dice | Lethal |
|---|---|---|
| Shotgun | +1 | +2 |
| SMG | +1 | +1 |
| Pistol | +1 | – |
| Carbine | +1 | +1 |
| Bayonet | – | +1* |
| Hand Weapon | – | +1* |
* Only in base-to-base contact.
The Lead
- A prepared defender is hard to assault. This is represented by the Lead. Any unit behind cover when assaulted gains the Lead. A unit in the open gains the Lead only if it has not yet activated. A Prone unit can never gain the Lead.
- The unit with the Lead gains an additional die per rhyfler. The advantage stays with the more successful combatant: after each Assault action, the player who caused the most Suppression gains the Lead. If both sides caused equal Suppression, neither side gains it.
Assault Resolution
- Both players gather combat dice and roll simultaneously. Every combatant receives a Condition Shift of 1, and no other Condition Shifts apply.
- The difference between Assault and Fire combat is that the defender's 1s cancel the attacker's 6s, and the attacker's 1s cancel the defender's 6s.
- Units involved in an Assault stay engaged until one side is killed off or retreats. A new Assault round is conducted each time a unit involved in the Assault is activated.
- A unit may retreat from an Assault when activated, but the first of its two actions must be an Assault action and the second must be a Move action.
- If a unit in an Assault has rhyflers outside Assault Range, those rhyflers may only move to join the Assault. They may not move to assault or fire at another unit.
Assault Against Broken Rhyflers
If all members of an engaged enemy unit are broken and have not yet made a Morale check, a commander may try to annihilate them. The attacker may perform an Assault action against the broken unit. The attacker gathers dice as usual, but the broken unit does not. Each 6 from the attacker removes a broken rhyfler and is not blocked by 1s.
Example: Anthony's unit has moved within Assault Range of one of Josh's units and declares an Assault action. Anthony has ten rhyflers in Assault Range, giving ten dice. Five are in base contact, adding five more dice, for fifteen. The Squad's Yawdryl carries a Shotgun, adding one die and two Lethal dice, so Anthony has sixteen dice and two Lethal dice. Josh has six rhyflers in Assault Range, giving six dice. Four are in base contact, adding four dice, and three carry Bayonets, adding three Lethal dice. That gives ten standard dice and three Lethal dice. Because Josh's unit is defending in the first round of the Assault, each of its rhyflers gets an extra die, so his total is nineteen dice and three Lethal dice.
Both sides throw their dice together. Anthony scores three 6s, two 1s and one Lethal 6. Josh scores four 6s, two 1s and two Lethal 6s. Josh's two 1s cancel two of Anthony's three 6s, leaving one 6 and an unblocked Lethal 6, which give two casualties and four Suppression. The two blocked 1s give one Suppression each, for six Suppression in total for Anthony. Anthony's two 1s block two of Josh's 6s, giving two Suppression. The two remaining 6s and the two Lethal 6s give four casualties and eight more Suppression, so Josh takes four casualties and ten Suppression. Josh's unit caused more Suppression and keeps the Lead for the next Assault activation. Both units must make a Morale check because they took more Suppression than they have members.
Removing Casualties
Rhyflers are well trained in the weapons their Squad uses, and a rhyfler will often pick up the equipment of a fallen comrade. Casualties are therefore chosen by the target of the attack.
- Ranged combat: casualties may be taken from anywhere in the unit within the attacker's line of sight. Officers and rhyflers with special weapons may be passed over in favour of removing a standard rhyfler.
- Assault: casualties must be removed from rhyflers in base contact first, then from rhyflers within Assault Range. If a rhyfler armed with a special weapon is the only available casualty, the model may be swapped with another rhyfler's, placing the special weapon rhyfler in the position of the removed model.
- An officer who is the only available casualty is removed, and the unit is then in Loss of Leadership.
- Template weapons: casualties from area-effect weapons must be removed from under the template first. If a rhyfler with a special weapon is the only available casualty, the models may be swapped as above. An officer under the template may be swapped with a rhyfler within 2 inches and outside the template, representing that rhyfler pushing the officer out of harm's way. If no rhyfler is available, the officer is removed and the unit is in Loss of Leadership.
Morale
Morale Table
Roll two dice and read the result from the table:
| Roll | Result |
|---|---|
| 6/6 | Extra immediate action for the rhyfler |
| 6/2–5 | Recover, no penalty |
| 6/1 | Fall back 8" then recover |
| 2–5/2–5 | Fall back 4" then recover |
| 1/2–5 | Fall back 8", not recovered |
| 1/1 | Remove as casualty |
Recovery
- During the End Phase, each unit with broken rhyflers rolls on the Morale table. Roll once per unit. The result applies to all broken rhyflers in that unit.
- If the rhyflers move out of coherency with their unit, they are Out of Leadership.
- Recovered rhyflers must move back towards coherency, while the main unit may continue to follow its orders.
Example: Josh has four broken rhyflers, three in one unit and one in another. In the End Phase he rolls two dice for the unit with three broken rhyflers and gets 4 and 6, which is the 6/2–5 result. The three rhyflers recover with no penalty. He then rolls for the single broken rhyfler and gets 6 and 1, so that rhyfler falls back 8 inches and then recovers. On the unit's next activation it must move to regain coherency.
Standard Bearer
A Company Standard boosts the Morale of Quar nearby. Any Morale check made within 12 inches of a Standard Bearer is made with three dice, and the player then picks the two values he wishes to use.
Musician
- During the End Phase, but before Morale checks, a commander may roll on the Musician's table to try to improve the Company's Morale. Bonuses to the Standard Bearer apply in the current End Phase; penalties apply to the next turn.
Musician's table
| Roll | Result |
|---|---|
| 6/6 | Plays State Song: +12" to Standard Bearer |
| 6/2–5 | Plays Company's Song: +6" to Standard Bearer |
| 6/1 | Plays Local Dirge: one unit within 12" is inspired to a suicidal act of bravery; the unit makes an immediate Move action towards the enemy |
| 2–5/2–5 | Play on, Llaedaw!: another turn of playing automatically receives +6" to the Standard Bearer that turn |
| 1/2–5 | Plays Song Out of Key: units within 12" gain four Suppression next turn |
| 1/1 | Instrument Destroyed: the Caerten's Retinue may not act next turn |
Loss of Leadership
When a command figure is killed or otherwise removed from play, all units under that leader's command suffer Loss of Leadership. The penalty depends on the fallen leader's position in the command structure.
Yawdryl
If a Yawdryl is lost, a new model is nominated as Yawdryl. In the next turn's stack phase the activation card for his unit is placed face up. On subsequent turns the unit stacks as normal, unless the new Yawdryl is also killed.
is-Caerten
If an is-Caerten is killed, either the Caerten or the Master Yawdryl, if available, may step in and lead the Section.
- If the Master Yawdryl takes over, in the next turn's stack phase the activation cards of all units under his command are placed face up. On subsequent turns the units stack as normal, unless the Master Yawdryl is also killed.
- If the Caerten takes over the Section, the Master Yawdryl rules above apply, and in addition during each following turn one unit in the Section must play a card face up during the stack.
- If neither the Master Yawdryl nor the Caerten is available, one of the Section's two Yawdryls may take command. If this happens, all cards for the Section are played face up for the rest of the game.
Caerten
If the Caerten is killed, either is-Caerten may replace him. A Master Yawdryl, or one of his own Yawdryls, must replace a missing is-Caerten as set out above. All cards for the Company are played face up on the turn after the Caerten's death.
Out of Leadership
Coherency
If a unit is out of coherency with the next level of command, it is Out of Leadership. While a unit is Out of Leadership its activation cards are placed face up, and it receives no new Movement directions or Fire Priority orders.
Broken Commander
If a unit's next level of command is broken by Suppression or Morale effects, the unit is Out of Leadership, with the same effects as above.
Units Out of Leadership may continue to follow previous Movement directions or Fire Priority orders, or move toward coherency.
Special Weapons
The following rules and tables define the effects of special and heavy weapons.
Light Mortar
Deployment. A Light Mortar team consists of two rhyflers. If one member is killed, the team may still fire, but less accurately. A mortar requires one action to Break Down before being moved and one to Set Up before it fires again.
Activation. Mortars ignore most Condition Shifts, except Prone. Obstacle and Fortification shifts apply only if they cover the top of the target. For each mortar firing, the attacking player places one 5-inch round template over the desired target location.
- Mortars are inaccurate but can target units outside their line of fire. If the mortar team can see the target, the template is placed and the attacker then rolls for scatter: roll a six-sided die and halve the result, which is how far the template drifts from the centre. Determine the direction with a scatter die or a twelve-sided die read as a clock face. If the firing unit cannot see the target, or is at half strength, apply the full result of the six-sided die instead. In either case, if the die shows 6, the template does not scatter. Any models under the template in its final position are targets.
- The standard effect is a pool of two dice per target under the template. The severity is set by the Blast table: roll on it and modify the pool accordingly.
Blast table
| Roll | Result |
|---|---|
| 6/6 | Hot Round: +one Lethal die per rhyfler |
| 6/2–5 | Strong Round: add one Lethal die to the pool |
| 6/1 | Weak Round: causes Suppression only (unblocked 6s count as Suppression in addition to the normal rules) |
| 2–5/2–5 | Normal Round: no modification |
| 1/2–5 | Dud Round: target unit takes a single die hit |
| 1/1 | Breech Explosion: firing unit takes a two-dice hit |
- When a unit receives mortar fire, its reflex is to seek cover. The target unit must go Prone and receives the Prone Condition Shift. Because the round drops from above, Prone is the only cover shift that affects the mortar, unless the target is in covered Fortification. In that case the target unit is not forced Prone and gains the Fortification cover shift.
Smoke. Light Mortars may also fire Smoke rounds. Smoke rounds are fired like normal rounds, but their effects remain in play. For each Smoke round fired, place a 5-inch Smoke template on the field. During the End Phase, roll on the Smoke table once for each Smoke template. Additional templates must be placed touching the original.
Smoke table
| Roll | Result |
|---|---|
| 6/6 | Strong Round: owner adds a second template |
| 6/2–5 | Favourable Wind: owner moves the template 3" |
| 6/1 | Mixed Blessing: opponent adds a second template |
| 2–5/2–5 | Smoke Disperses: remove the template |
| 1/2–5 | Unfavourable Wind: opponent moves the template 3" |
| 1/1 | Strong Wind: remove all Smoke templates |
Heavy Machine Guns and Heavy Shotguns
A Heavy Machine Gun (HMG) is one of the great terrors of the battlefield. Its heavy slugs and high rate of fire let it control entire sections of the field, but it is unwieldy to manoeuvre and affects only certain lanes of fire. The Heavy Shotgun (HSG) is a shorter-ranged version of the HMG: it gives up range for destructive power.
Deployment. Heavy weapons need support to be effective. A Heavy Weapons Squad has six rhyflers. The weapon requires a minimum of three rhyflers to fire; the rest prepare ammunition and defend the emplacement. Additional rhyflers may only fire at enemy units within 6 inches of the Assault. A Heavy Weapons Squad with fewer than three crew remaining may not perform Fire actions with the weapon, but may use its sidearms.
- Heavy weapons are set up in fixed positions and stay there for the whole game. If the scenario allows, they may be moved by spending two actions to Break Down the weapon. On the Squad's next turn it may move to a new position, and the weapon then requires two more actions to Assemble before it may fire.
- A heavy weapon may only be moved if its Squad is at full strength, and it will not fire as effectively after moving.
- For the rest of the game the weapon grants an additional Condition Shift to its target. This shift stacks with all others.
Fire resolution. Heavy weapons work differently from other Ranged Weapons. They are still tied to an activation card, but they also affect their field of fire for the whole turn. At the start of the game the controlling player places two touching, 5-inch wide counters at a set distance from the weapon. This forms a cone, which is the weapon's field of fire. Any model within the cone suffers the effects of the Heavy Weapon and loses one action.
- HMG: the two counters are placed 12 inches from the weapon. The field of fire extends past the counters to a maximum of 96 inches.
- HSG: the two counters are placed 16 inches from the weapon. The field of fire stops at the counters.
- If the field of fire is obscured by Smoke, the width of the cone drops to 5 inches. The controlling player chooses which of the two counters to remove. Any targeted unit also gains a Visibility Condition Shift.
Actions. When the weapon activates, the controlling player may choose to Hold, Move or Swing its field of fire. Whichever is chosen, the weapon may only perform one fire action per turn: either when activated, or placed in overwatch until a unit moves into the line of fire.
- Hold: the player simply states that the field is held. Any unit in the field of fire loses one of its two actions. The activated unit may fire at one unit within its field of fire.
- Move: the player places a third 5-inch marker on one side of the cone and then removes the further of the two initial counters. The firing unit may do this before or after firing for the turn. Units activated under the cone in its new position receive the full effects even if they were not fired upon that turn.
- Swing: during its activation the Heavy Weapon Squad removes the templates instead of firing. On its next activation the Squad may place the cone anywhere within its line of sight, however far it is from the previous position. The activated unit may then fire at one unit within the new field of fire.
Defensive fire. If the unit is in danger of being flanked or attacked from behind, it may abandon the Heavy Weapon to set up a defensive perimeter. The weapon's cone is dropped and the rhyflers may declare Opportunity Fire using their standard firearms.
Moving through fire. Any unit within the field of fire loses one action, but may attempt to regain its momentum. After the unit is activated, but before it moves, it may roll on the HMG/HSG table to regain lost momentum and apply the result. The roll may result in additional fire out of turn for the weapon. A unit that takes fire suffers a full normal attack from the weapon, whether or not it has fired previously; that is the risk of moving under heavy fire.
HMG/HSG table
| Roll | Result |
|---|---|
| 6/6 | Heroic Surge: the unit no longer suffers the penalty for the rest of the game |
| 6/2–5 | Keep Moving: the unit recovers its lost action |
| 6/1 | Advance at a Cost: full recovery, but the unit takes fire |
| 2–5/2–5 | Second Thoughts: the normal penalty applies |
| 1/2–5 | Too Much Fire: the unit loses both actions |
| 1/1 | Poor Timing: the unit takes fire and loses both actions |
Heavy weapons vs. Cavalry. Cavalry units suffer a 2-inch Movement penalty from HMGs and HSGs. A cavalry unit performing a Standard Movement action under the line of fire loses its additional Standard Fire action.
Coftyr Field Gun
A Coftyr Field Gun is crewed by three rhyflers. It may only be moved by a full-strength team. It requires one action to Break Down before being moved and one action to Assemble before being fired again. If the crew falls below three rhyflers, the gun may only fire every other turn.
Activation. When activated, the attacking player places a 3-inch round template within line of sight and range of the Field Gun. This template does not deviate. The Field Gun receives a pool of two dice per target under the template. The severity of the attack is set by the Blast table: roll on it and modify the pool according to the result.
Blast table
| Roll | Result |
|---|---|
| 6/6 | Hot Round: +one Lethal die per target |
| 6/2–5 | Strong Round: add one Lethal die to the pool |
| 6/1 | Weak Round: causes Suppression only (unblocked 6s count as Suppression in addition to the normal rules) |
| 2–5/2–5 | Normal Round: no modification |
| 1/2–5 | Dud Round: target unit takes a one-die hit |
| 1/1 | Breech Explosion: firing unit takes a two-dice hit |
Special Units
Snipers
- A Sniper acts as an Independent unit with its own activation card and is never in Loss of Leadership.
- The Sniper begins the battle off the board and is Hidden. On its activation a Hidden Sniper may only perform a Fire action. The result of that Fire action determines whether the Sniper's Detection Level rises.
Detection Level
- Level 1, Hidden: the Sniper is too well camouflaged to be seen. The model is not placed on the field and may target any enemy unit.
- Level 2, Heard: the enemy has a general idea of the Sniper's position, and if it fires again it is likely to be seen. The model remains off the field. Place a marker by the model to show the change in Detection Level.
- Level 3, Seen: the Sniper's position is revealed. The model is placed anywhere on the field with a line of fire to its last target, and it may then be targeted as normal. Spotted Snipers may perform Move actions.
- A Sniper may lower its Detection Level by not activating, or by moving into cover. For each turn the Sniper does not activate, its Detection Level drops by one. If a Sniper ends a Movement action in obscuring cover, its Detection Level drops by one.
Fire resolution. When a Sniper fires it does not roll a pool of dice. The player rolls on the Sniper table to find the result of the shot. The table determines whether the Sniper kills a target, which player chooses the victim, whether the unit must reflexively go Prone, and whether the Sniper's Detection Level rises. The Sniper rifle has a Penetration Value of 2.
Sniper table
| Roll | Kill | Who Picks Victim | Prone | Detection Level |
|---|---|---|---|---|
| 6/6 | Yes | Sniper | Yes | No change |
| 6/2–5 | Yes | Target | Yes | +1 Level |
| 6/1 | Yes | Target | No | +1 Level |
| 2–5/2–5 | Yes | Target | Yes | +1 Level |
| 1/2–5 | No | N/A | Yes | +1 Level |
| 1/1 | No | N/A | No | Spotted |
Communication disruption. When an opponent uses a PykPyk squirrel, a Sniper that has not yet activated this turn may activate out of sequence to cancel the squirrel's effect. This shot does not consult the table. It is an automatic kill and reveals the Sniper's position.
Cavalry Units
Cavalry Squads are Independent units.
- Condition Shift: a Cavalry unit always has a Condition Shift of 1. This shift only stacks with Speed and Visibility shifts. A Cavalry unit cannot gain Condition Shifts from Obstacles or Fortifications, and it cannot go Prone.
- Terrain: Cavalry units follow the normal terrain rules, with two exceptions. They may ignore low obstacles up to 2 inches high, and they may leap across gaps up to 3 inches wide.
- Actions: while the mount is moving, a rider can still carry out other actions. When activated, a Cavalry unit may perform one of the following actions:
- Standard Movement: the unit may move up to 16 inches. It may also perform a Standard Fire action at any point during its activation.
- Assault Movement: the unit may move up to 16 inches towards or through an enemy unit. When it moves within assault range of the enemy, it performs an Assault action. After the Assault action it may use any remaining movement to move past the unit.
- Evasive Movement: the unit must move between 8 and 16 inches. This grants the Cavalry unit a Speed Condition Shift of 1, for a combined shift of 2. The unit may not Fire nor Assault.
- Units with Opportunity Fire orders may interrupt a targeted Cavalry unit at any point during its activation.
- Cavalry are best suited to a mobile support role: they flank enemy units, fire a volley and move away before engagement. The Cavalry Carbine suits this role.
Baeliog Armored Gun Tractor
The Baeliog is treated as an Independent unit. It is armed with a 182mm Y1(t)(a) Crynstof artillery gun with a linked LMG, and an HSG for defence.
Activation. From the stack the Baeliog is assigned three cards instead of one. On each card's activation it may either move 4 inches or fire its main armament (the Crynstof and LMG). At the end of each activation it may either turn up to 90° or adjust the line of fire of its turret by up to 45°.
Movement.
- For each activation assigned to movement, the Baeliog may move up to 4 inches in a straight line. It may only turn at the end of an activation, up to 90° in either direction.
- The Baeliog ignores movement penalties from static terrain such as low walls and fortifications. A low wall or fortification crossed by a Baeliog is removed as destroyed.
- Area terrain such as mud and forests is difficult terrain for the Baeliog, halving its movement. Bodies of water are impassable to it.
- Units moved through by the Baeliog suffer two points of Suppression per rhyfler in its path. Rhyflers are moved out of its path, up to a maximum of 4 inches.
Receiving damage.
- Attacks against the Baeliog always hit. Each attacking unit receives one roll on the Fire Effect table, based on the Penetration Value (PV) of the weapons it fires. A unit with mixed weapons always uses the highest PV.
- Once the effect of the fire is determined, roll on the appropriate column of the Damage table.
- If the Baeliog is obscured from the attacking unit, it gains the applicable Condition Shift. That shift is then applied as a negative modifier to the Damage table roll.
Damage table
| Roll | Catastrophic | Disabling | Damaging |
|---|---|---|---|
| 6 | BOOM! | Roll Catastrophic | Lose Card Temp |
| 5 | Immobile | Lose Card Game | Retreat 2" |
| 4 | Lose Card Game | Turret Locked | Turn on Target |
| 3 | Turret Locked | Lose Card Temp | No Effect |
| 2 | Lose Card Temp | Retreat 2" | No Effect |
| 1 | Retreat 2" | Turn on Target | No Effect |
- Turn on Target: the vehicle must turn its hull or turret towards the attacking unit.
- Retreat 2": the unit must move 2 inches away from the attacking unit.
- Lose Card Temp: remove one card assigned to the vehicle. If the unit has no cards remaining, it is dealt one less card on the next turn.
- Turret Locked: the turret's facing may no longer be adjusted for the rest of the battle.
- Lose Card Game: the unit loses a card and is then dealt one less card for the rest of the battle.
- BOOM!: the unit is destroyed.
Ranged combat. When given a Fire order, the Baeliog fires its main armament: the Crynstof and a linked LMG. These always fire at the same target. The Baeliog may only target a unit within 45° of the turret's facing.
- The Crynstof ("Stovepipe") is an area-effect weapon using a 3-inch template, with PV 1. For each rhyfler under the template it gathers one normal die and two Lethal dice. The Blast table determines any additional severity: roll on it and modify the pool accordingly. Any unit with members under the template must go Prone. Because it fires alongside the Crynstof, the LMG's firepower is included in the pool above.
Fire Effect table
| Roll | PV 1 | PV 2 | PV 3 |
|---|---|---|---|
| 6/6 | Catastrophic +1 | Catastrophic | Disabling |
| 6/2–5 | Catastrophic | Disabling | Disabling -1 |
| 6/1 | Damaging | Damaging | Damaging |
| 2–5/2–5 | Disabling | Disabling -1 | Damaging -1 |
| 1/2–5 | No effect | No effect | No effect |
| 1/1 | No effect | No effect | No effect |
Assault. The Baeliog may not perform an Assault action; it may only be assaulted.
- When a unit assaults the vehicle, it must first survive the Baeliog's defensive fire. The Baeliog's HSG fires first against the attackers, only when it is assaulted. The HSG does not use the field-of-fire rules; it applies its firepower directly to the targeted unit. The attacking units never receive a Condition Shift against this fire.
- If the assaulting unit survives, it rolls once on the Fire Effect table using the PV 1 column.
- On their activation, units friendly to the Baeliog may fire at its attackers, provided they use PV 4 weapons.
- The Baeliog may move on its next activation after the Assault without penalty. This does not trigger a new Assault.
Special Rules
The following rules are used by specific missions. They may also be used in missions of a commander's own design.
Placing Command Markers
During the Caerten's and is-Caerten's Phases the commanders take turns placing their Movement and Fire Priority markers, referred to as "placing command markers." In standard games the commanders decide, or randomly determine, who places his markers first. Mission objectives often dictate who places first.
Controlled Stack
A controlled stack represents one commander having a strategic advantage over the other.
- Activation cards are dealt face up into two stacks. Once all cards have been dealt, the controlling commander chooses which stack he will use in the Yawdryl's Phase.
- The cards are then assigned to units as normal, face down.
Standard Victory Points
Commanders gain victory points (vp) for enemy casualties, based on the rank or unit type of the casualty:
| Rank | Victory Points |
|---|---|
| Rhyfler | 2 vp |
| Officer | 5 vp |
| Cavalry | 3 vp |
Many missions add other conditions for gaining victory points; these are given in the mission itself.
Reserves
- Units held in reserve are not deployed with the rest of a commander's forces. They come into play later in the turn, as the mission determines.
- When a reserve unit enters play, it must use at least one action to move onto the field from the outer edge of its deployment area. During that turn, reserve units may not be assigned enemy Fire Priority markers. Units without Fire Priority markers may target them, and enemy units within 6 inches of the reserve unit may also target them.
Artillery Bombardment
- When a mission uses artillery bombardment, at the start of the Yawdryl's Phase the attacking commander randomly determines where the bombardment falls. It scatters 2D6 x 2 inches in a random direction from the target point defined by the mission or by the commander.
- Once the target area is established, the attacking commander places a 10-inch template and makes an attack against all units under it. Each unit suffers an attack with a Firepower of two regular dice and one Lethal die per rhyfler under the template.
Trench Rules
Trench movement. Units in trenches move more freely than units in the open. A unit may elect to Drop Below the trench line to move where needed quickly. Drop Below is a Movement action. Units that Drop Below may move at double speed while remaining in the trench.
Trench combat. Trenches give the same Condition Shift as Fortifications, except against indirect fire weapons such as mortars. A unit that goes Prone when fired at gains an additional Condition Shift, for a total shift of 3. Units that have gone Prone or Dropped Below must use a movement order to Get Up before they may fire again. Enemy units may not target units that have Dropped Below.
Missions
The seven missions below are set in the Debated Land of southern Maer Braech and northern Coftyr. Each lists its forces, deployment, special rules and victory conditions. Setting fiction and quotations are omitted.
Meeting Engagement
- Forces. Crusaders: Infantry Section, 1st Section, A Company, 1023rd Line. Coftyrans: Infantry Section, 2nd Section, Company 9, 1212th Freywilgh.
- Deployment. Commanders randomly determine which side deploys first. The Commander who deploys first may choose whether to place Command Markers first or second for the duration of the game.
- Special rules. None.
- Victory. Commanders gain standard victory points for enemy casualties. The Commander with the most victory points at the end of five turns wins.
Ambush
- Forces. Crusaders: Infantry Section, 1st Section, D Company, 728th Line; Cavalry Squad, B squad, 2nd Wedge, 2nd Troop, 101st Cavalry. Coftyrans: is-Caerten with three five-rhyfler teams; HMG team, Company 3, The Royal Sentries.
- Deployment. Crusader troops deploy first, followed by the Coftyran forces. The Coftyran Commander may choose whether to place Command Markers first or second.
- Special rules. The Coftyran Commander uses the Controlled Stack special rule.
- Victory. The Crusader Commander gains 5 victory points for each fire team above half strength that leaves the battlefield from the designated edges. The Coftyran Commander gains standard victory points for each enemy casualty.
Breakout
- Forces. Crusaders: Infantry Section, 2nd Section, D Company, 1023rd Line; Cavalry Squad, C squad, 1st Wedge, 3rd Troop, 101st Cavalry. Coftyrans: Infantry Company, Company 7, 904th Freywilgh.
- Deployment. The Crusader Commander places his forces first, but places his Command Markers second.
- Special rules. The Crusader Cavalry unit is held in reserve. Random Artillery Bombardment is in effect, targeting outside the town.
- Victory. The Coftyran Commander begins with 20 victory points and loses 5 for each turn in which he has no units within the town. Both Commanders gain standard victory points for enemy casualties. The Commander with the most victory points at the end of six turns wins.
Armored Assault
- Forces. Crusaders: Infantry Company, F Company, 5094th RB; Baeliog "Irate Squirrel", Squadron B, 271st AT. Coftyrans: Infantry Section; 2 x HMG teams; Sniper; Field Gun; elements of Company 23, 4520th Militia; elements of the 3rd Crymuster HQ Group.
- Deployment. The Coftyran Commander deploys his HMG teams and Field Gun first. The Crusader Commander then deploys his forces. Lastly, the Coftyran Commander deploys the remaining section. The Crusader Commander has the advantage and may choose whether to place Command Markers first or second.
- Special rules. The mission uses the Trench Movement special rules.
- Victory. The Crusader Commander must keep his forces advancing. Every turn at least one Crusader rhyfler unit must advance into the next control zone. If the Crusader Commander has no rhyfler unit in the control zone assigned to that turn, he loses 5 victory points. The Crusaders gain 3 victory points per enemy casualty, regardless of rank. The Coftyran Commander gains 2 victory points per enemy casualty and 15 victory points for destroying the Baeliog.
Reconnaissance
- Forces. Crusaders: Infantry Section, 2nd Section, E Company, 55th Crusader Guard. Coftyrans: Infantry Section, 1st Section, Company 4, The Royal Sentries.
- Deployment. Commanders randomly determine who deploys first. The Commander who deploys first may choose to place Command Markers first or second.
- Special rules. None.
- Victory. Standard victory points are gained for enemy casualties. Commanders also gain victory points for scouting the destroyed tank. A unit that has moved to within 4 inches of the vehicle may spend an activation to gather intelligence. If that unit leaves the field from any edge with more than half strength, its Commander gains an additional 5 victory points. The Commander with the most victory points at the end of five turns is the winner.
Over the Top, Lads!
- Forces. Crusaders: Infantry Company, Sniper, HSG, elements of PB 824, elements of the 55th Guard HQ. Coftyrans: Infantry Company, Sniper, HMG, elements of the 1212th Freywilgh, elements of the 4610th Militia.
- Deployment. Commanders randomly determine which side deploys first. The Commander who deploys first may choose whether to place Command Markers first or second for the duration of the game.
- Special rules. The mission uses the Trench Movement special rules. Commanders may elect to use the Artillery Bombardment rules.
- Victory. Commanders gain standard victory points for enemy casualties. Victory points are also gained by capturing enemy territory: an additional 5 victory points are scored for each unit above half strength in the enemy's deployment zone at the end of the battle. The Commander with the most victory points at the end of five turns is the winner.
Open Warfare
- Forces. Crusaders: Infantry Company, Sniper, Cavalry Squad, Baeliog, G Company 728th Line, A Squad 1st Wedge 2nd Troop "Byrtha", Squadron B 271st AT. Coftyrans: Infantry Company, Sniper, Cavalry Squad, Baeliog (captured) "Tyslyn", Company 2 904th Freywilgh, elements of the 3rd Crymuster HQ.
- Deployment. The Commanders decide the order of deployment. The Commander who deploys first may choose whether to place Command Markers first or second.
- Special rules. Commanders may elect to use any special rules they wish.
- Victory. Standard victory points for casualties apply. Optionally, Commanders may play until one force is annihilated.
Force Organization
Crusader Force: 55th Guard Brigade
The Crusader force in the Force Organization section is the 55th Guard Brigade under Caernerol Liyr Forscs, with 16 officers and 136 enlisted. Its units are:
- 2nd Battalion, 55th Crusader Guard: Syrnol Creo, 9 companies, 27 officers, 402 enlisted.
- 1023rd Line: Syrnol Gwaeyb, 6 companies, 12 officers, 324 enlisted.
- 728th Line: Syrnol Mytryf, 13 companies, 43 officers, 517 enlisted.
- 5094th Reserve Battalion: Sylwedl Twyteb, 10 companies, 34 officers, 510 enlisted.
- PB 824 (penal battalion): Sylwedl Noryst, 5 companies, 12 officers, 350 enlisted.
- Squadron B, 271st Armored Tractors: Sylwedl mir Kyygl, 11 Baeliog, 6 officers, 84 enlisted.
- 3189th Field Artillery: Syrnol Deznitet, 5 batteries (15 guns) with 150 enlisted and 10 officers, plus 10 weapons sections with 137 enlisted and 5 officers. Totals: 15 officers, 287 enlisted.
- 101st Cavalry Squadron: Syrnol Breeg, 3 troops (A, B, D), 14 officers, 229 enlisted.
Coftyran Force: 3rd Coftyran Crymuster
The Coftyran force in the Force Organization section is the 3rd Coftyran Crymuster under syl-Caenerol Gayl mir Llorycho, with 22 officers and 117 enlisted. Its units are:
- Royal Sentries: Syrnol Galostra, 5 companies, 16 officers, 235 enlisted.
- 904th Freywilgh: Syrnol Pesuyn, 6 companies, 11 officers, 202 enlisted.
- 1212th Freywilgh: Sylwedl Entystyn, 10 companies, 34 officers, 480 enlisted.
- 80th Light Keff (cavalry): Syrnol Riin, 5 squadrons of light vehicles, 9 officers, 117 enlisted.
- 4520th Territorial Militia: Sylwedl Karset, 8 companies, 25 officers, 362 enlisted.
- 4610th Territorial Militia: Sylwedl Belduin, 10 companies, 32 officers, 505 enlisted.
- 7th Royal Artillery: Syrnol Helsygh, 10 batteries (24 guns), 18 officers, 240 enlisted.
Weapon Notes
The stat lines for every weapon are in the Ranged Weapons table above. The notes below give each weapon's rule-relevant characteristics.
- Bogen 12mm assault rifle (Crusader): semi-automatic, 5- or 10-round magazine, about 2.4 kg loaded. Effective range 150–250 meters. The C-pattern has a bayonet lug.
- Ryshi (R4) heavy rifle (Crusader): semi-automatic, 7-round magazine, 7.5 kg loaded. Effective range 500–600 meters. Usually fitted with a bayonet, and hard to fire in close quarters.
- Grifkis shotgun (Crusader): double-barrelled shotgun. Assault-capable (see the Assault Weapons table).
- Dinas Cavalry Carbine (Crusader): semi-automatic, 7mm, flatter trajectory than the Bogen. Assault-capable.
- Afir Tk3 15mm antimateriel rifle (Crusader): five-round magazine, telescopic sight, accurate to nearly 1500 meters. Can also damage vehicles and aircraft.
- H-11A light machine gun (Crusader): 12mm round, 10 dice, 2 Lethal dice.
- Mark 2 infantry mortar (Crusader): two-rhyfler light mortar, handled with the Light Mortar rules.
- Model 6 semi-automatic shotgun, heavy (Crusader): 50mm, Quar-portable heavy weapon, fired by one rhyfler with two loaders and served by a squad. Fires canister or heavy slug rounds. Its stat line is not in the Ranged Weapons table of the source, so no dice values are given here.
- Harlech long rifle (Coftyran): 8mm bolt-action rifle, five-round fixed magazine, 96-inch maximum range, 1 die and no Lethal dice.
- Cryfen LMG (Coftyran): 8 dice and 3 Lethal dice, 48-inch maximum range. Carried by the tenth rhyfler of each Coftyran Squad.
- Doru SMG (Coftyran): 4 dice, 24-inch maximum range, Assault-capable.
- R.C.O. Field Howitzer Model 60 (Coftyran): 100mm field gun, handled with the Coftyr Field Gun rules, 96-inch maximum range.
- M-3B heavy machine gun (Coftyran): 20mm, the standard HMG of all Coftyran branches.
- HMG (common): 16 dice, 4 Lethal dice, 96-inch maximum range. Handled with the Heavy Machine Gun rules.
- HSG (common): 10 dice, 10 Lethal dice, 16-inch maximum range. Handled with the Heavy Shotgun rules.
- Pistol, Carbine, SMG, Shotgun, Bayonet and Hand Weapon: see the Assault Weapons table in the Assault Combat section.