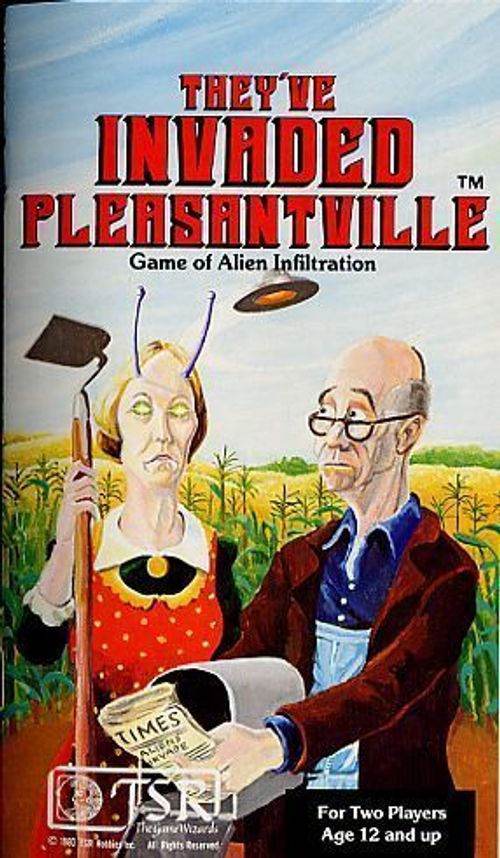
They've Invaded Pleasantville
They've Invaded Pleasantville Rulebook
Table of Contents
Table of Contents
I. How to Win
The Town player wins in either of two ways:
- Locating the Alien Headquarters and defeating in combat the Alien Sub-Commander (Zebu-Lon), or,
- Having half or more of the total Influence Factors in play under Town control at the end of the game.
(Any townspeople who are dead, Tied Up, unconscious, or stunned do not count as being in play; such pieces are ignored.)
If the Town player cannot meet either of these conditions, then the Alien player wins!
The length of the game is 12 complete turns. The Town player should mark off the turns as they are completed.
II. Explanation of the Map and Counters
Mapboard: The game map represents the main area of the town of Pleasantville. It has been divided into irregularly-shaped spaces for movement purposes. Green spaces are built-up areas such as parkland, alleyways, lawns, etc. Yellow, blue and orange spaces are major buildings (there can be several spaces within the same building). Major buildings are usually surrounded by walls (black lines) and can only be entered through doors (black boxes). Each major building has a name and a letter or number to identify it. Gray spaces are streets, some of which are named. Brown spaces are railroad tracks and the graveyard.
Counters: The playing pieces, or counters, represent the important townspeople of Pleasantville, with the exception of the Alien Sub-Commander and the Tied-Up markers. There are two sets of townspeople counters. The counters marked with an * on the back are townspeople who have been "taken over" by the Alien player. These marked counters are substituted for the unmarked counters whenever the Alien player "takes over" a normal townsperson. This process is fully explained later (see Alien "Take-over" and Observation).
Each counter is labeled with the numbers and letters that serve to identify that piece and its abilities. A typical example is shown (labels as printed: Starting Location, Movement Allowance, Townsperson, Influence Factor, Combat Factor):
TOWNSPERSON. This identifies the counter as the Lawyer.
STARTING LOCATION. This letter shows where the counter is placed on the map at the start of the game. For example, the Lawyer starts at building spot J, the Lawyer's Office.
MOVEMENT ALLOWANCE. This number is the maximum number of spaces that counter may usually be moved in one turn. The Lawyer, therefore, may be moved up to five spaces per turn.
INFLUENCE FACTOR. This number is the relative respect, personal charm or appeal and leadership abilities of that townsperson as viewed by the residents of Pleasantville. Townspeople with a high influence factor (such as the Minister with 20, or the Bank President at 19) are admired and trusted beyond all other residents. The Town Drunk, on the other hand, with an influence factor of 3, is the least influential townsperson in play.
COMBAT FACTOR. This number is the relative fighting ability of that townsperson. It reflects the townsperson's age, strength, courage and likely weaponry (if any). The Sheriff and Deputy Sheriff (with combat factors of 10 and 9 respectively) are the most powerful fighters in Pleasantville, while the Wife (combat factor: 4) is rather weak. The Alien creature has a combat factor of 10, and is a match for nearly any two townspeople.
OTHER COUNTERS: Note that the Alien Sub-Commander has no Movement Allowance or Influence Factor. It cannot use influence (see Conversation and Influence).
The "Tied Up" counters are used as markers only, and have no other function in the game.
III. Preparation for Play
To play this game, the players will need the materials provided with this package, at least 2 six-sided dice, paper and pencils, and a screen for the Alien player. A notebook stood on end, or TSR Referee's Screen or module map will work well for this purpose. The Alien player will need to record information and conceal his or her counters behind this screen.
The first step in preparing to play is for the Alien player to secretly choose where the Alien Sub-Commander is running his operations from. This Headquarters (HQ) must be a specified building, such as House 4, the Stock Pen, the Town Hall, etc. If the building chosen as the Alien HQ has more than one space, the Alien player must choose which area of that building is the Alien HQ. This information is secretly recorded on paper by the Alien player.
Second, the Town player rolls a die to determine which townsperson counter begins the game under his or her control, according to the given table. This information should be recorded for future use.
TOWN PLAYER STARTING TABLE
| Die Roll | Townsperson |
|---|---|
| 1 | Bank President |
| 2 | Doctor |
| 3 | Mayor |
| 4 | Minister |
| 5 | School Teacher |
| 6 | Sheriff |
Third, the Alien player secretly rolls the die twice on the Townsperson Table (see inside cover) to determine which townsperson begins the game under Alien control. Note: The Alien Player cannot begin with the same character as the Town player. Such a result must be rerolled by the Alien player. Also note that any 1st die roll of 6 must be rerolled when using this table.
The counters are then divided into two groups, the "normal" townspeople and the "taken-over" townspeople (marked with an * on the back). The Alien player places the marked counters behind his or her screen for future use, along with the Alien Sub-Commander counter. The normal townspeople are then placed on the map. The starting location of each piece is printed in the upper-left corner of the counter. The Town player should place every townsperson on the map, matching the letter or number on the counter with the letter or number on the map. If a building has more than one space in it, the Town player chooses which space to put the counter in. Only one counter may be placed in each space, however.
When all the counters are placed, the Town player should turn his or her back to the board (or leave the room for a moment). The Alien player then substitutes the marked, Alien-controlled counter for the normal counter of the townsperson who begins the game under Alien control. The Alien player keeps the normal townsperson counter hidden behind the screen with his or her other counters.
IV. Sequence of Play
During each turn, the following sequence of events must be used. Each game turn is divided into a number of steps, called phases.
- Random Movement Phase
- Alien Player Movement Phase
- Town Player Movement Phase
- Conversation and Influence Phase
- Combat Phase
- Alien Take-Over and Observation Phase
Each action is fully explained in the rules below. The Sequence of Play is followed each turn until the end of the game (12 turns) or until one player wins. No actions may take place out of sequence. The completion of each round of events equals one turn.
V. "Control"
In this game, it is very important to distinguish between a counter that is "controlled" or "uncontrolled" by either player. Each player begins the game with one townsperson who is "controlled". Every other townsperson begins as an "uncontrolled" counter; that is, a counter not under the control of either the Alien or the Town player.
Alien control. These counters are moved by the Alien player, and may be used to "take over" uncontrolled townspeople (by implanting a bio-mechanical device; see Alien "Take-over" and Observation) or to attack Town-controlled counters.
Town control. The Town player may move these counters or use them for "conversation", "influence", "interrogation", or "combat" (see the appropriate sections). Town control is gained by "influencing" an uncontrolled townsperson or by removing an implant from an Alien-controlled counter.
Uncontrolled counters. These are counters not controlled by either player. They are moved only in the random movement and Alien movement phases. In addition, such counters may be "skeptical" or "wary":
- Skeptical townspeople are those the Town player has tried to "influence" and failed. They will be harder to influence if the Town player tries again.
- Wary townspeople have "observed" an Alien "take-over". They may not be moved in the Alien movement phase, and must be attacked in "combat" by the Alien player before they can be "taken-over". These townspeople will also be easier for the Town Player to "influence".
VI. Movement
Movement is made according to each counter's Movement Allowance. A counter with a movement allowance of 5 can be moved up to (but not more than) 5 spaces per movement phase (exception: see Random Movement). A counter may be moved less than its movement allowance or not moved at all, if so desired. Unused movement may not be accumulated or transferred to another counter. All movement is subject to the following rules and conditions.
STACKING. Each player may "stack" up to three (3) of his or her controlled counters in any one space. Up to three uncontrolled counters can also be in a space; thus, a space may hold up to 9 counters: 3 Alien-controlled, 3 Town-controlled, and 3 uncontrolled.
A player cannot deliberately stack more than three friendly controlled counters in a given space. If the stacking limits are exceeded (for example, due to a successful "influence" attempt; see Conversation and Influence) then the controlling player must, at first opportunity, move enough counters so that the stack contains no more than three friendly controlled counters.
There is no movement cost for joining or leaving a stack. Counters in a stack may move alone or as a stack. If counters move as a stack, then the movement allowance of that group is that of the slowest counter in the stack.
DOORS. Counters may not be moved through walls (black lines). To enter or leave a building, a counter must move through a door (small black boxes on the map). There is no extra movement cost for this. Special areas with no walls around them (Graveyard, Stock Pens, and Gas Pumps) may be entered and moved through freely.
Random Movement: Random movement is checked four times at the beginning of every turn (therefore a maximum of 4 pieces can move randomly in any given turn). For each check, the Alien player rolls a die twice to determine which townsperson will move, using the Townsperson Table. The Town player rolls a die twice and consults the Target Building Table to determine the building that the townsperson will move toward. Random movement applies to one specific turn only, and never carries over to the next turn.
A townsperson designated by the roll of the dice for random movement is moved twice its movement allowance towards the target building, moving along the shortest possible path. If the counter enters the building, it must stop in the first space entered. Otherwise, the counter stops once it moves twice its normal movement allowance. If several different paths are available, all the same distance to the target building, roll randomly to see which path is taken.
Only uncontrolled townspeople are completely subject to random movement. A player may choose not to have counters he or she controls randomly moved if desired. Of course, the Alien player must keep in mind that doing this early in the game will reveal the identities of the Alien-controlled counters, so he or she may choose to let townspeople under Alien control move randomly to keep the Town player guessing.
A townsperson may not be moved randomly twice in one turn. If the same townsperson is rolled a second time, that roll is ignored, though it still counts as one of the four random movement rolls. Also, townspeople who are Tied Up, unconscious, or dead cannot be moved randomly, but the die roll counts as one of the four rolls. If a townsperson is already in the target building, the counter does not move and the die roll counts as one of the four possible rolls.
On the Target Building Table (see inside cover), as on the Townsperson Table, a first roll of 6 must be rerolled.
Alien Player Movement: During his or her movement phase, the Alien player may move up to five townsperson counters. However, these townspeople may not be controlled by the Town player, "wary", Tied Up, unconscious, or stunned. In effect, the Alien player is limited to moving up to five counters that are either Alien-controlled, "skeptical" or totally uncontrolled. Such counters may be moved in the Alien Movement Phase even if they were moved randomly. This rule allows the Alien player to keep the Town player guessing which counters are Alien-controlled and which are not. Of course, the Alien player is not required to move any pieces at all, if so desired. Any counters, including Town-controlled pieces, have no effect on Alien movement.
Town Player Movement: During his or her movement phase, the Town player may move any townsperson that is controlled by the Town player. The Town player may not move uncontrolled townspeople, Alien-controlled townspeople, or townspeople that are Tied Up, unconscious, or stunned.
An Alien-controlled counter in a space may halt or prevent the movement of one Town-controlled counter in that space. If a stack of Town-controlled counters starts its movement phase in a space containing one or more Alien-controlled counters, each Alien-controlled counter there may force one Town-controlled counter to remain in that space. Likewise, each Alien-controlled counter could halt the movement of a Town-controlled counter moving into that space. When there is more than one Town-controlled counter to choose from, the Alien player may choose which counters do not move. The decision whether or not to stop a Town-controlled counter is made by the Alien player as needed.
VII. Conversation and Influence (Town player only)
Conversation: Conversation is how the Town player discovers if a townsperson is Alien-controlled. In this phase, each Town-controlled counter can "talk to" one suspected townsperson (to discover if the person is acting mechanically or unnaturally). The two counters must be in the same space to have a "conversation". To have a "conversation", the Town player tells the Alien player which counters are having the "conversation" and rolls two dice. On a roll of 9 or better (including the modifiers given later) the Town player may turn the suspected counter over to see if it is Alien-controlled.
A townsperson may be "talked to" more than once a turn if there is more than one Town-controlled piece in that space, provided each Town-controlled piece only makes one attempt.
Modifiers to Conversation Attempts
| Influence Factor of Suspected Townsperson | Add to Dice Roll |
|---|---|
| 1-6 | 0 |
| 7-10 | +1 |
| 11-15 | +2 |
| 16-20 | +3 |
Influence: The Town player may also try to influence uncontrolled townsperson counters during this phase. Influencing is trying to convince other townspeople that there is an alien plot afoot to take over Pleasantville. This is how the Town player can gain control of additional townspeople. Alien-controlled counters cannot influence other counters.
The Town player may only try to influence other townspeople in the same space as the Town-controlled counter. Each Town-controlled counter may only try to influence one other counter per turn. To influence another counter, the Town player compares the Influence Factor of the Town-controlled counter to the Influence Factor of the other townsperson. This comparison is stated as the simplest possible odds-ratio (see Influence Results Table). For example, if the Minister (Influence Factor: 20) tries to influence the Supermarket Manager (Influence Factor: 10), the ratio is 20 to 10, simplified to 2 to 1. All fractions are rounded down, so a 20 to 11 ratio reduces to 3 to 2, not 2 to 1.
When a stack of Town-controlled pieces is attempting to influence the same counter, all the Influence Factors of the Town-controlled counters are added together. For example, the War Vet (Influence Factor: 12) and the Teller (Influence Factor: 9) are stacked together and are trying to influence the Paperboy (Influence Factor: 9). The final odds-ratio would be 12 + 9, or 21, to 9, reducing to 2 to 1 odds. If there is more than one uncontrolled townsperson in the same space the Town player can only attempt to influence one of them. If there were more than one Town-controlled counter in that space, each Town-controlled counter could try to influence a different uncontrolled counter.
Once the odds-ratio has been found, the Town player rolls 2 dice (plus or minus any modifiers) and consults the Influence Results Table. The final number is cross-indexed with the appropriate odds-column to determine the final result. All influence attempts are resolved one-by-one in this fashion.
Influence Results Table
| Dice Roll | 1-3 or worse | 1-2 | 2-3 | 1-1 | 3-2 | 2-1 | 3-1 | 4-1 or more |
|---|---|---|---|---|---|---|---|---|
| 2 | N | N | N | N | N | N | N | N |
| 3 | N | N | N | N | N | N | N | C |
| 4 | N | N | N | N |
N = No Effect; C = Convinced
No Effect: The townsperson did not believe the attempt to convince him or her. That particular townsperson is now highly skeptical about an alien invasion (this fact should be noted on paper by the Town player). If an attempt to influence that counter is made again, the Town player must subtract 1 from the dice roll on the Influence Results Table. This penalty is not cumulative.
Convinced: The counter is now Town-controlled. It will move and function thereafter as a Town-controlled piece. The counter's name should be recorded so the Town player will always know which counters are under his or her control.
Modifiers to Influence Attempts
| Condition | Modifier to Dice Roll |
|---|---|
| Townsperson is "skeptical" | -1 |
| Townsperson is "wary" | +1 |
| Influencing counter has "implant" as evidence | +1 |
(See also: Alien Take-over and Observation and Post-Combat Activity, Implant Removal.)
ALIEN-CONTROLLED TOWNSPEOPLE. Obviously, a townsperson under Alien control cannot be influenced by the Town player. However, the Town player might try to influence an Alien-controlled counter, not knowing it to be under Alien control. If a Convinced result is rolled, the Alien player must reveal that the counter is Alien-controlled. The influence attempt automatically fails. (If a No Effect is rolled, the Alien player should not reveal that the counter is Alien-controlled.) Any combat involving Alien-controlled counters upon which an influence attempt was made that turn is resolved with a one-column shift on the Combat Results Table in favor of the Alien player (see Combat). This shift occurs whether or not the Town player discovered the Alien counter's true identity before combat. For example, an Alien attack that would normally be rolled on the +1-3 column would shift to the +4-6 column instead. If the Town player made an attack on the +4-6 column, it would reduce to the +1-3 column (still shifting one column in favor of the Alien player).
VIII. Combat
All combat is resolved in this phase (including combat with Alien-controlled counters upon which an influence attempt was made). Both players will resolve combat during this phase of the turn.
General rules on combat: Combat takes place only between counters sharing the same space. It is not permitted to attack a counter in an adjacent space.
All combat is voluntary: neither player is ever forced to start combat. Thus, combat takes place only when at least one player desires it.
Either player may start combat as desired. Combat for each space is resolved separately and individually. There is no way combat in one area will affect combat in another area. Each counter may only be involved in one combat per turn.
Only Alien- or Town-controlled counters that are not Tied Up, unconscious or stunned may start a combat in the combat phase. Uncontrolled townspeople will not take part in combat unless attacked. If the Town player attacks one or more uncontrolled counters, thinking them to be Alien-controlled, the Alien player reveals their uncontrolled state. The result is automatically Attacker Wins for the Town player, regardless of the number of uncontrolled townspeople. Each defeated townsperson must roll for the effects of being defeated (see the Town Loss Table). The Alien player is not allowed to attack uncontrolled townspersons, except those who have "observed" an Alien "take-over" (see Alien Take-Over and Observation).
Combat Procedure: The Combat Factors of the counters involved in the combat are compared to one another, arriving at a positive difference (plus-differential) for one player's counters. The player with the greatest number of combat factors in a combat is always called the "Attacker", regardless of the overall game situation. The other player is called the "Defender" for that combat. The difference in Combat Factors determines which column on the Combat Results Table is used to resolve the combat: e.g. a differential of +2 for a combat is resolved on the +1-3 column. In the 0 column (for ties), the players should each roll a die, and the player rolling highest is the "Attacker". Once the combat factors have been added up and compared, the players should consult the Combat Results Table and two dice should be rolled by the Attacker. The dice roll is cross-indexed with the appropriate column and the result is then immediately applied to the counters involved.
For example, the Alien player has the Wife (under Alien control) in the same space as the Welder (who is Town-controlled). During the combat phase the Alien player decides to have combat with the Welder. The Combat Factor of the Welder is 7, and the Wife's is 4. Therefore, there is a +3 differential in favor of the Town player. Note that the Welder is the "Attacker" even though the Wife started the combat.
If either player controls more than one townsperson in a space, then all Combat Factors for each player must be totaled together and then compared. For example, in one space the Alien player controls the Lawyer (Combat Factor: 6) and the Drunk (Combat Factor: 8) and the Town player controls the Guard (Combat Factor: 8) and the Fire Chief (Combat Factor: 8). The resulting combat would be calculated as follows: 6 plus 8 against 8 plus 8, or 14 to 16, a +2 differential for the Town player. A maximum of 3 counters per player may be involved in any one combat. If the Town player is temporarily overstacked because of a successful influence attempt, the Town player may choose which three counters will fight.
Combat Results Table
| Dice Roll | 0 | +1-3 | +4-6 | +7-9 | +10 & up |
|---|---|---|---|---|---|
| 2 | D | AF | DF | D | A |
| 3 | D | A | D | D | AF |
| 4 | D | D | AF | A | A |
| 5 | D | D | A | DF | A |
| 6 | DF |
The column headings are the Combat Factor Difference.
Results:
- A = Attacker wins
- D = Defender wins
- AF = Attacker flees
- DF = Defender flees
EXPLANATION OF COMBAT RESULTS:
Attacker flees, Defender flees: Each counter of the Attacker or Defender must flee; treat as Random Movement. Roll for the building each counter flees to on the Target Building Table. If the counter is already in the building, roll again until a different target building is determined. The Alien Sub-Commander counter cannot flee; he is considered defeated instead (see below).
Attacker wins, Defender wins: The players must consult the appropriate Loss Table; the Alien Loss Table if the Alien player's counters were defeated, or the Town Loss Table if the Town player's counters were defeated. The dice must be rolled for each individual counter of the defeated force, and the results immediately applied. These tables and an explanation of their results are below. Note: Should the Town player succeed in defeating the Alien Sub-Commander in combat, the game is automatically ended with a Town player victory.
ALIEN LOSS TABLE
| Dice Roll | Result |
|---|---|
| 2-4 | Killed! Remove counter from play. |
| 5-6 | Knocked out. Flip the counter over; it remains unconscious until the end of the combat phase in the next turn. The counter may not be "interrogated" until conscious. It may be Tied Up. The Town player may also try to remove the implant. |
| 7-12 | Surrenders. The counter may be interrogated or Tied Up. The Town player may also try to remove the implant. |
TOWN LOSS TABLE
| Dice Roll | Result |
|---|---|
| 2-4 | Killed! Remove the counter from play. |
| 5-6 | Knocked out. Flip the counter over; it remains unconscious for one complete turn. An unconscious piece may not be moved or "taken-over" by the Alien player. After the combat phase on the next turn, the counter is flipped back over, but is then stunned (see below) and treated as a stunned counter for one complete turn. |
| 7-12 | Stunned. The counter must be retreated one space in any direction by the Town player. Until the end of the combat phase of the next turn, the counter may not be moved by either player, though it will move randomly if required. It may not be influenced by the Town player, but may be "taken-over" by the Alien player. After the combat phase of the next turn, the piece reverts to the full control of the Town player if it has not been "taken-over" by the Alien player and if it was originally controlled by the Town player. |
Post-Combat Activity (Town Player only): The Town player, after winning a combat, may choose to do one or all of the following actions with the defeated Alien-controlled counters. These actions are purely voluntary on the part of the Town player, though they can be crucial to the Town player's chances of victory. Depending on the actual result inflicted upon a defeated Alien-controlled counter, some actions may not always be possible (e.g. interrogating a dead or "knocked-out" piece). The Alien Loss Table specifies which actions may be taken in each given circumstance.
TIE UP. Town-controlled counters may always tie up knocked-out or surrendering Alien-controlled counters. Place a Tied Up marker over each Alien counter so treated. For purposes of stacking, Tied Up townspeople are ignored. A townsperson who is Tied Up may not move, attack, or be attacked, until freed. A Tied Up townsperson may be freed if a friendly counter is in that space at the end of a game turn and wishes to free it.
INTERROGATION. Any conscious, defeated, Alien-controlled counter may be interrogated by a Town-controlled piece. Interrogation consists of the Town player choosing any 4 spaces on the map board and asking if any of these spaces is the location of the Alien Headquarters. If the Town player guesses the correct space, the Alien player must answer yes. Only 4 choices may be made per interrogation, and each Alien-controlled counter may only be interrogated once. If the location of the Alien Headquarters is revealed, the Alien Sub-Commander counter is placed on the board in that space.
IMPLANT REMOVAL. Townspeople are "taken-over" by the Aliens by means of a bio-mechanical implant attached to the back of the victim's neck. As long as this implant remains attached, that counter remains under the Alien player's control. The Town player may try to remove this implant from a defeated Alien-controlled townsperson, thus breaking the Alien player's control over that counter. One Town-controlled counter is chosen to attempt the removal. The Town player rolls two dice and consults the Implant Removal Table (see inside cover) for the exact result. Successfully removing the implant causes the victim to come under the control of the Town player immediately. The counters are switched so the unmarked counter is in play. If an implant is removed intact, it should be noted on paper which townsperson will carry it around as evidence. Such evidence will add +1 to the influence roll when the townsperson carrying the implant is trying to "influence" another townsperson. As only Alien-controlled counters may be interrogated, it is wise to interrogate before attempting to remove an implant. Removing the implant generates an electric shock which erases all memory of the Alien Headquarters from the victim's mind, a unique safeguard which is built into the implant's circuits.
IX. Alien Take-Over and Observation
During this phase the Alien player may "take-over" uncontrolled townspeople, thus bringing them under Alien control. This is handled secretly so the Town player will not always know which counters are Alien-controlled.
"Take-over": At the beginning of this phase the Alien player may remove from the map any group of two counters in the same space, neither of which is controlled by the Town player. The Alien player should take these counters behind the dividing screen out of sight of the Town player. If one of the two counters is Alien-controlled and the other is uncontrolled, the Alien player may replace the uncontrolled counter with the duplicate, Alien-controlled counter. If neither of the removed counters are Alien-controlled, the Alien player can pretend to exchange them. The Alien player then returns the counters to their original space on the mapboard.
EXAMPLE OF A "TAKE-OVER". At the beginning of this phase the Alien player finds three spaces on the board that are holding more than one counter. However, the counters in one space are Town-controlled, so the Alien player cannot affect them. The next space contains the Plumber, who is Alien-controlled, and the Maid, who is uncontrolled. The Alien player removes these counters and puts them behind the screen. He puts aside the normal Maid counter and substitutes the marked, Alien-controlled Maid counter. He then places both the Plumber and the Maid back where they came from and notes in secret on his record-sheet that the Maid is now under Alien control. A "take-over" has been accomplished. In the last space are the Check-out Girl and the Paperboy. Both are uncontrolled, so no "take-over" is possible, but the Alien player takes them off anyway and shuffles the pieces about behind his screen, hoping to mislead the Town player. He then replaces the Check-out Girl and the Paperboy in their original location.
RESTRICTIONS ON TAKE-OVER. "Take-over" can occur in any space on the board. One of the two counters removed must be already Alien-controlled or "take-over" is not possible. An Alien-controlled counter may only "take-over" one townsperson per turn. If there is more than one Alien-controlled counter in the same space and more than one uncontrolled counter, each Alien-controlled counter may "take-over" an uncontrolled counter. An uncontrolled townsperson who has successfully "observed" an Alien "take-over" is not subject to "take-over"; this is explained in the following section.
Observation: There is a chance that a nearby townsperson will watch closely enough to detect an actual Alien "take-over" if one occurs. Any time the Alien player removes counters from the map board during "take-over" a townsperson might notice, or "observe", the "take-over". The Observation Table (see inside cover) gives the number that must be rolled on one die for a townsperson to successfully "observe", depending on the townsperson's exact location.
EFFECTS OF OBSERVATION. If the observation attempt is successful, the Town player may then flip over one of the observed counters to see if it is Alien-controlled. If an Alien-controlled counter is discovered, and the observing townsperson is currently uncontrolled, that counter's name should be recorded along with the fact that it observed an Alien "take-over". That counter is still uncontrolled, but wary. A Town player who tries to influence a wary townsperson will gain a +1 on his or her dice roll on the Influence Results Table (because that townsperson, having already witnessed some funny business, is already suspicious to a degree).
In addition, that townsperson is now somewhat alert to a "take-over" attempt, lest the same thing happen to him or her, and may not be moved or "taken-over" outright by the Alien player from that point on. This counter must be attacked and defeated in combat before the Alien player can move it or try a "take-over" again. If the Alien player is defeated in an attack on a wary townsperson, the result is an automatic flee result for the Alien-controlled counters involved.
RESTRICTIONS TO OBSERVATION. Observation cannot take place more than 3 spaces away. Observation will be blocked by corners and walls; townspeople have no chance of observing through doors, building walls, or around corners. A straight line should be able to connect the observing counter and the counters being observed without being blocked by corners, buildings, or walls. Other townspeople do not block this "line of sight". Each townsperson able to make an observation attempt may do so only once per turn. Counters that are taken off the mapboard during "take-over" may not observe.
Alien-controlled townspeople do not observe Alien "take-overs". If the Town player tries to observe with an undiscovered Alien-controlled townsperson and succeeds, the Alien player must tell the Town player that the townsperson observed nothing because the counter is actually under Alien control!
Reference Tables (Inside Covers)
Townsperson Table (used for Random Movement and for the Alien player's starting townsperson; the die is rolled twice and the two results are read as the table entry. A first roll of 6 is rerolled.)
| Roll | Townsperson | Roll | Townsperson |
|---|---|---|---|
| 1-1 | Mayor | 3-4 | Gas Station Attendant |
| 1-2 | Sheriff | 3-5 | Check-out Girl |
| 1-3 | Plumber | 3-6 | Paperboy |
| 1-4 | Lawyer | 4-1 | Maid |
| 1-5 | Hotel Owner | 4-2 | Bank Guard |
| 1-6 | Judge | 4-3 | Town Drunk |
| 2-1 |
Target Building Table (used for Random Movement and for combat fleeing; the die is rolled twice and the two results are read as the table entry. A first roll of 6 is rerolled.)
| Roll | Building | Roll | Building |
|---|---|---|---|
| 1-1 | Tavern | 3-4 | Church |
| 1-2 | Veterinarian's Office | 3-5 | Graveyard |
| 1-3 | Clothing Store | 3-6 | Stock Pen |
| 1-4 | General Store | 4-1 | Train Station |
| 1-5 | Gas Pumps | 4-2 | House A |
| 1-6 | Supermarket | 4-3 | House 1 |
| 2-1 |
Implant Removal Table (roll two dice)
| Dice Roll | Result |
|---|---|
| 2-3 | Implant explodes! The victim and the townsperson trying to remove the implant are killed and removed from play. |
| 4-6 | Implant is too tightly attached. It cannot be removed this turn, but another try may be made next turn during the post-combat activity phase. |
| 7-10 | Implant is removed. However, it immediately disintegrates and cannot be used as evidence. |
| 11-12 | Implant is removed intact! Evidence of Aliens is obtained. |
Observation Table (roll one die; the number shown is needed for a successful observation)
| Location of Removed Pieces | Location of the Observer | Needed for Successful Observation |
|---|---|---|
| Inside building | Outside that building | No observation possible |
| Inside building | Same space | 1-4 |
| Inside building | 1 space away | 1-3 |
| Inside building | 2 spaces away | 1-2 |
| Outdoors | Same space | 1-4 |
| Outdoors | 1 space away | 1-3 |
| Outdoors | 2 spaces away | 1-2 |
| Outdoors | 3 spaces away | 1 |
Transcriber's note: the Scribd text layer was corrected as follows. Stray footnote digits (after "menace", "Headquarters", "totaled", "least") were removed; the Scribd notes list "manace", "Hedquarters" and "totalled" as the original misspellings, so the corrected spellings are used. OCR errors were fixed (for example "secrete" to "secret", "en countered" to "encountered", "tee map" to "the map", "tl1e" to "the", "he Alien player" to "the Alien player", "towns person" to "townsperson"), and a missing "an" was restored in the Wary definition. Dash ranges written with a period in the text layer ("5.6", "4.6", "7.10", "11.12") are read as 5-6, 4-6, 7-10 and 11-12. A stray "5.7" fragment in the Town Loss Table is dropped.