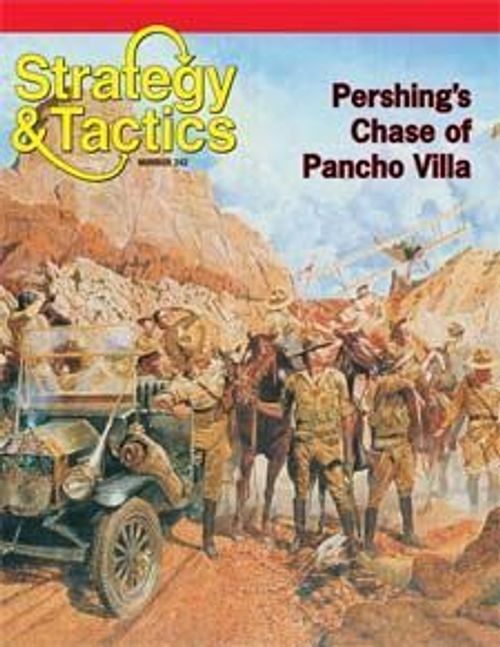
They Died With Their Boots On, Volume 2: Mad Anthony & Pershing
They Died With Their Boots On, Volume 2: Mad Anthony & Pershing Rulebook
Table of Contents
Table of Contents
- 1.0 Introduction
- 2.0 Components
- 3.0 Setup
- 4.0 Sequence of Play
- 5.0 Sub-Commands and Activations
- 6.0 Heroism
- 7.0 Movement
- 8.0 Stacking
- 9.0 Zones of Control
- 10.0 Combat
- 11.0 Retreat After Combat
- 12.0 Pursuit and Pursuit Combat
- 13.0 Reinforcements
- 14.0 Supply
- 15.0 Fog of War
- 16.0 Screening
- 17.0 Entrenchments and Stockades
- 18.0 Engineers
- 19.0 Riverine Units
- 20.0 Victory Conditions
- 21.0 Game I: Mad Anthony
- 22.0 Game II: Pershing
- 22.1 Players and Sides
- 22.2 Game Scales
- 22.3 Game Length
- 22.4 Setup Order
- 22.5 US Initial Forces
- 22.6 US Reinforcements
- 22.7 US Setup and Entry Codes
- 22.8 US Sub-Commands
- 22.9 National Guard Sub-Command Limitations
- 22.10 Pancho Villa Initial Forces
- 22.11 Pancho Villa Reinforcements
- 22.12 Division of the North Restrictions
1.0 Introduction
1.1 Background
They Died With Their Boots On, Volume 2 (Boots 2) is a wargame that simulates two US Army campaigns, one from the 18th century and the other from the early 20th.
1.2 Abbreviations
| Abbr | Meaning | Abbr | Meaning |
|---|---|---|---|
| CRT | Combat Results Table | OOS | Out of Supply |
| DRM | Die Roll Modifier | TEC | Terrain Effects Chart |
| EZOC | Enemy Zone of Control | TRT | Turn Record Track |
| MA | Movement Allowance | VP | Victory Point |
| MP | Movement Point | ZOC | Zone of Control |
2.0 Components
2.1 The Map
A hexagonal grid (hexes) has been superimposed over the terrain features on the maps to regularize the movement and positioning of the playing pieces.
2.2 Playing Pieces
The pieces are referred to as units for military forces, and markers for informational pieces.
2.3 Sample Unit
(Diagram of a sample unit; see the printed rulebook.)
2.4 Unit Types
In general, the unit types in the game correspond with the icons shown on their counters. For example, an icon of a standing soldier or warrior is infantry, men on horses are cavalry; wagons are supply wagons, etc.
2.5 Unit Designations, Nationalities and Sides
Units may be identified by a title, a number, or a two-part designation. See the scenario setup sections for details.
2.6 Counter Errata
There are two Tecumseh counters in the counter-mix. That is an error. The second Tecumseh counter should actually have been printed as the Wyandot counter. We will have a properly done replacement counter for you in issue 245.
3.0 Setup
3.1 In General
A. Set up according to these general rules.
B. The term w/i of # means within that many hexes of the location.
C. Play proceeds according to the sequence given in section 4.0 for the number of game turns specified in the scenario rules.
3.2 Pools
Players need two large-mouth opaque containers, such as coffee mugs. Throughout the course of a game, players will draw markers at random from those pools.
A. Place all command markers (the flag counters) in one container: the Command Pool.
B. Place all the Heroism markers in the second container: the Heroism Pool. (Heroism markers are the gray-on-white markers with things such as Ambush, Delusion of Grandeur, Do or Die, etc., printed on them.)
3.3 Unit Setup
A. The scenario rules designate the order in which players set up their forces. Units may be assigned specific set up hexes, or the players may be instructed to choose set up hexes.
B. After all units in the initial deployment have been set up, the remaining units are placed aside and brought into play according to the reinforcement schedules.
3.4 First Player
A. The scenario rules indicate which player is the first player, the one who draws first from the heroism and command pools each game turn. The other player is the second player.
B. The player who sets up first is not necessarily the first player.
4.0 Sequence of Play
4.1 Turn Structure
A. Boots 2 is played in sequential game turns (turns), each of which is composed of interactive phases and sub-phases.
B. During each Operations Phase, the players alternate picking command markers; each such pick indicates the sub-command to be activated for movement and combat at that time.
C. The player controlling a selected sub-command then receives reinforcements for it, if any are available that turn, and then moves and conducts combat with the units of that sub-command.
D. The player (or side) who is currently conducting an Operations Phase is called the phasing player (or side); the other player is the non-phasing player (or side).
4.2 Sequence of Play
Each game turn consists of the following sequence, which players must go through in the order specified.
4.2.1 Heroism Marker Phase
The first player draws the number of Heroism markers from that pool equal to the number indicated in the scenario rules. The second player then does the same.
4.2.2 Operations Phases
4.2.2.1 First Operations Phase
The first player draws a sub-command marker from the command pool. That sub-command named on the drawn chit is thereby activated. In general, the player who controls that sub-command—no matter who actually drew the counter—then executes the following steps with those units.
Exceptions: Indian Sub-Commands (21.13), Command Pool (22.14.)
4.2.2.1.1 Reinforcement Sub-Phase
The phasing side determines if it receives any new units of the activated sub-command and places them as indicated by the scenario and reinforcement rules.
4.2.2.1.2 Movement Sub-Phase
The phasing side moves all, some, or none of the units of his activated sub-command, as he chases.
4.2.2.1.3 Combat Sub-Phase
The phasing side uses units of its activated sub-command to attack enemy units.
4.2.2.2 Second Operations Phase
The second player draws a new chit as in the First Operations Phase, and the player owning that activated sub-command works through the sub-phases as in 4.2.2.1.
4.2.2.3 Subsequent Operations Phases
A. Continue alternating between the players drawing chits to activate sub-commands until all command markers have been picked from the pool, or until both players have passed consecutively.
Example: If there are five sub-command markers in the command pool, there could be up to five Operations Phases in a single turn.
B. Certain Heroism markers may end an Operations Phase before all its sub-phases have been completed.
4.2.3 Game Turn Interphase
4.2.3.1 Return Phase
Return all command markers to that pool.
4.2.3.2 Attrition Phase
A. Both sides check all of their unsupplied units for attrition, with the first player going first.
-
Units in Mad Anthony generally check for attrition at this time in the turn sequence during even numbered game turns.
-
Units in Pershing generally check for attrition at this time in the turn sequence during all game turns.
B. Exceptions to both those general rules are noted in the scenario rules.
4.2.3.3 Game Turn Advance
A. Move the Game Turn marker to the next box on the Turn Record Track (TRT).
B. If this is the last turn of the scenario, the game comes to an end and victory is determined.
4.3 Command Markers
After a command marker is picked, place it aside. Return the marker to the command pool only during the Return Phase.
4.4 Placing Command Markers in the Pool
Even if no units of a sub-command are on the map, still place its marker into the command pool unless otherwise noted in the scenario rules. If it is picked, nothing will actually happen during that particular Operations Phase unless that sub-command is due reinforcements that turn.
4.5 Passing
Players may pass on the option of picking a command marker. If both players pass consecutively, the Operations Phases for that turn come to an end and play moves to the Game Turn Interphase.
4.6 Multiple Markers
In certain scenarios, a player may have more than one marker at a time in the pool for a given sub-command. In those cases, that/those sub-command(s) may conduct more than one Operations Phase per turn. They do so whenever each of their individual sub-command markers is pulled during a given turn.
5.0 Sub-Commands and Activations
5.1 Sub-Commands
A. The armies in Boots 2 are divided into sub-commands, each of which operates as a semi-autonomous force within its overall army. Sub-commands are defined by abbreviations and colored stripes on the counters.
B. A particular sub-command is said to be activated for an Operations Phase when its marker is picked during the game sequence outline.
5.2 Conducting Sub-Phases
A. When a player picks the marker of his/her own army's sub-command, s/he must at that time execute the Reinforcement, Movement, and Combat Sub-Phases for that sub-command.
B. When an opponent's marker is picked, the player who drew that marker gives it to the opponent, who then executes the Reinforcement, Movement, and Combat Sub-Phases for that sub-command.
5.3 Activation Restrictions
A. In general, a sub-command may be activated (and thus reinforced, move, and fight) only during an Operations Phase in which its own marker has been picked.
B. Generally, only one sub-command may be activated per Operations Phase. At the completion of that Operations Phase, it is no longer activated.
5.4 Multiple Activations
In some scenarios, designated sub-commands, or sometimes even individual units within sub-commands, may be activated more than once in the same Operations Phase. That is also true when playing the Mad Dash Heroism marker.
5.5 Conduct of Actions
A. Neither side may carry out any action for units that are part of the enemy army, even if that side actually picked the sub-command marker. In such cases, the opponent uses it to conduct an Operations Phase of her/his own.
B. This means one side may conduct more than one Operations Phase before the other side is allowed to react with its own Operations Phase.
5.6 Stacking
A. Generally, units from different sub-commands may not stack together. They may move through each other, and even retreat and advance after combat through each other, but they may never end any phase or sub-phase stacked together.
B. If units from different sub-commands do end a phase or sub-phase stacked together, the owner must eliminate units such that only units from one sub-command remain in the hex.
C. Units eliminated for stacking violations count as victory points (VPs) if the scenario rules call for VPs from unit eliminations.
5.7 Fort Garrison Exception in MA
Units from different sub-commands of the same side may always stack together in hexes containing a fort garrison unit.
5.8 Attacking
Units from different sub-commands may not participate in the same attacks. Thus, only units from a single sub-command may attack during a given Operations Phase.
5.9 Defending
Units always defend normally, regardless of the sub-command, friendly or enemy, activated at the moment. Units from different sub-commands may be called on to defend together, such as when an enemy force attacks a fortress hex with defending units from different sub-commands. In such cases there is no penalty for multi-sub-command defenses.
6.0 Heroism
6.1 Description
Heroism markers represent the wide swings of fortune common in campaigns of the pre-radio era of warfare.
6.2 Picking Heroism Markers
A. When called on to pick a Heroism marker, randomly pick (without looking during picking) the designated number of markers from that pool.
B. During initial deployment, both sides pick Heroism markers according to the scenario rules. If a Heroism marker picked during initial deployment reads that it must be played immediately, it is instead returned to the pool without being played and a replacement is picked for it.
C. To avoid double-picks; redraw new markers before replacing the markers that need to be returned.
D. During each turn's Heroism Marker Phase, pick the number of Heroism markers from that pool equal to the number listed in the scenario instructions.
E. Certain combat results also require a player to pick one or more Heroism markers from the pool. Those picks are made as part of each battle's combat resolution process.
F. Scenario rules may also designate additional times for Heroism markers to be picked.
6.3 Marker Play
A. Each Heroism marker designates in its description when it may or must be played.
B. Players may hold most Heroism markers until they desire to play them.
C. Players may potentially play more than one Heroism marker as part of one particular game action.
Example: More than one marker may be played to affect the outcome of a single combat.
6.4 Marker Disposition
Heroism markers are generally returned to that pool each time after they've been played.
Exception: Some marker instructions state that a marker is not returned to the pool, but instead is removed from the game after having been played once or, alternatively, kept out until the start of a new turn, or has another disposition.
6.5 Limits and Restrictions
A. A player may never hold more than six Heroism markers at any one time.
B. A player may discard a Heroism marker at any time without playing it unless that marker has instructions that require it to be played.
6.6 Loss of Heroism Markers
A. Certain Heroism markers call for other Heroism markers to be returned to the pool without having been played. In that case the markers to be returned are drawn randomly from the player's hand. A player may not be required to return to the pool more markers than in hand. There is no carry over to later times in the game.
B. Players should thoroughly study the Heroism marker explanations prior to beginning play of their first game. The results of marker play have critical impacts on game outcomes. Heroism and command markers are two different things (two different pools), and have different rules.
6.7 Heroism Marker Explanations
Return Heroism markers to the pool as soon as they are played unless otherwise stated in their particular explanations. Heroism markers only affect units on the map; they may not be played against reinforcements that are waiting off the map. All the Heroism markers are listed in alphabetical order on the Heroism Marker Player Aid.
7.0 Movement
7.1 In General
During each Movement Sub-Phase, the phasing side may move as many or as few of the units of its activated sub-command as desired. Eligible units may be moved in any direction or combination of directions to the limits of their movement allowance (MA). Units with a printed MA of zero may not move once placed onto the map.
7.2 Movement Allowance
Each unit has a movement allowance printed on it.
A. Units move, tracing a path of contiguous hexes through the hex grid, until all movement points (MPs) are expended or the player decides to cease moving the unit, whichever comes first.
B. As each unit enters a hex, it expends one or more MPs from its MA. Consult the Terrain Effects Chart (TEC) for further details.
7.3 Restrictions
A. Units may move only during a Movement Sub-Phase in which one or more of their side's sub-commands have been activated.
B. Once a unit has been moved and the player's hand removed from it, it may not be moved again.
C. A unit may expend all, some, or none of its MPs in any one Movement Sub-Phase of its sub-command, but unused MPs may not be accumulated from turn to turn or phase to phase or sub-phase to sub-phase, nor may they be transferred from one unit to another.
7.4 Minimum Movement
All units are generally guaranteed the ability to move at least one hex per Movement Sub-Phase of their sub-command; however, units may never enter an enemy occupied or prohibited hex.
7.5 Zones of Control
Enemy zones of control (EZOCs) do not affect movement; see the ZOC rules (9.0).
7.6 Retreat and Pursuit
Retreat and pursuit, which occur as part of combat results, are not considered part of regular movement and so do not use MPs.
7.7 Terrain
To enter any given hex, a unit must expend the number of MPs designated by the TEC for the kind of terrain in it. When the TEC calls for an MP expenditure to cross a hexside, that cost is in addition to the terrain cost for entering the hex.
7.8 Multiple Terrain
If there is more than one type of terrain in a hex, use the highest single movement cost from among all the terrain involved.
Exception 1: If there is a road, or trail, or bridge, use the road, trail or bridge movement rate regardless of any other terrain in that hex (7.9).
Exception 2: For bateaux movement, always use the bateaux movement rate regardless of any other terrain in those hexes.
7.9 Trails and Railroads
A unit that moves from one trail or railroad hex directly into an adjacent trail or railroad hex through a hexside traversed by that trail or railroad expends ½ MP per hex entered. For more on special railroad movement allowed in Pershing, see 22.23.
7.10 Rivers and Lakes
A. Units pay the movement cost of other terrain in a hex when entering a river or lake hex and when moving along a contiguous path of river or lake hexes.
B. They pay the additional movement cost shown on the TEC only when leaving a river or lake hex for a non-river or non-lake hex, or to enter a non-contiguous river or lake hex. That cost is in addition to the cost of entering the next hex.
C. Unlike may other wargames, in Boots 2, rivers run through hexes, not along hexsides.
7.11 Bridge, Ferry, and Ford Movement
A bridge or ferry negates the effects of rivers on movement for units leaving the river hex. There must actually be a bridge or ferry symbol for this bonus to be operative; a road or trail that crosses a river without a bridge or ferry symbol present on the map does not function as a bridge, and exit MPs must be paid in such cases.
7.12 Bateaux, River, and Lake Movement
A. This rule pertains only to Mad Anthony. All units may move along river hexes, as well as lake hexes and hexsides, at an enhanced rate, representing the use of small boats (bateaux). To do so, a unit must begin its movement in a hex in which it is able to trace a supply path to a supply source for its side.
B. When using bateaux movement, it costs only ½ MP for a unit to move from one eligible hex to another such hex, regardless of other terrain in those hexes.
C. An eligible unit may use bateaux movement in combination with non-bateaux movement in the same movement sub-phase. It may also move out of supply and continue using bateaux movement for the remainder of that sub-phase as long as the in-supply requirement was met at the start of that move.
D. Units may never end their movement in an all-lake hex.
E. Units in river or lake hexes defend normally, using the defensive benefit of the river or lake regardless of the direction of attack.
8.0 Stacking
8.1 In General
A. Having more than one friendly unit in a hex at the same time is called stacking.
B. The maximum number of units a player may have in a hex is set by the TEC. Each type of terrain has its own stacking limit.
8.2 Applicability of Stacking Limits
A. Stacking limits apply for all units of both sides at the end of each Reinforcement, Movement, and Combat Sub-Phase, regardless of the activated sub-command.
B. Friendly units may move through hexes occupied by other friendly units, even if they belong to different friendly sub-commands, at no extra cost.
C. There is no limit on the number of friendly units that may pass through a single hex or cross a single hexside in one sub-phase, phase or turn.
D. If one or more hexes is overstacked at the end of any friendly or enemy Reinforcement, Movement, or Combat Sub-Phase, the excess units must be eliminated by the owner.
8.3 Enemy-Occupied Hexes
A friendly unit or stack may never enter a hex containing an enemy unit or stack.
8.4 Free-Stacking Units
Entrenchment and bateaux markers have no stacking values. Such markers may be added to otherwise overstacked hexes as long as the particular rules for their use are observed.
8.5 Stack Movement
Units are generally not moved as stacks in Boots 2. Move each unit of an activated sub-command one at a time, no matter if they begin a Movement Sub-Phase stacked together in the same hex.
Exceptions: Retreats (11.0) and Pursuits (12.0).
8.6 Stacking Order
A. Players are free to arrange their stacked units, from top to bottom, in any order they choose.
B. However, if a stack contains a fort garrison unit (22.5), that unit must always be kept as the top unit in that stack.
8.7 Inter-Sub-Command Stacking
A. Friendly units from different sub-commands may not stack together at the times described in 8.2.A.
B. However, if a hex contains a fort garrison marker, then friendly units from any number of sub-commands may stack together in that hex.
9.0 Zones of Control
9.1 In General
A. The six hexes immediately surrounding a unit's hex constitute that unit's ZOC. Hexes into which a unit exerts a ZOC are called controlled hexes.
B. ZOC do not affect movement or pursuit.
C. A friendly unit's presence in an EZOC at the start of its sub-command's Combat Sub-Phase requires that unit to attack.
D. ZOC also affect retreats.
9.2 Units Exerting a ZOC
A. In general, all units exert a ZOC at all times, regardless of the phase, sub-phase or game turn.
Exception: Garrison units in Pershing (9.3).
B. EZOCs are generally not negated by other units, enemy or friendly.
9.3 Pershing Garrison Units and ZOCs
A. In Pershing, units in hexes with a 2-0 garrison unit do not exert ZOC, and neither does the garrison unit itself.
B. ZOCs also do not extend into them from the outside.
C. Units in such hexes are therefore not required to attack adjacent enemy units, nor are units adjacent to such hexes required to attack enemy units within such hexes.
D. ZOCs extend into and out of all other types of terrain and across all types of hexsides unless otherwise noted on the TEC. There are only two such units in the Pershing game, and there are none in Mad Anthony.
9.4 Multiple ZOCs
Both friendly and enemy units may simultaneously exert ZOCs into the same hexes. There is no additional effect if more than one unit, friendly or enemy, exerts a ZOC into the same hex. If a given unit is in an EZOC, that enemy unit is also in its ZOC, except per 9.2. The two units are equally and mutually affected.
9.5 ZOCs and Movement
ZOCs and EZOCs do not affect friendly or enemy movement.
9.6 ZOCs and Combat
During an activated sub-command's Combat Sub-Phase, the phasing side must attack all enemy units exerting ZOC into hexes occupied by the units of its activated sub-command. All units belonging to an activated sub-command in an EZOC at the start of that sub-command's Combat Sub-Phase must attack one adjacent, ZOC-exerting enemy occupied hex.
10.0 Combat
10.1 In General
A. Attacking is mandatory for units of an activated sub-command found to be in EZOCs at the start of that activated sub-command's Combat Sub-Phase.
B. The phasing side is termed the attacker, and the non-phasing player is the defender, regardless of the overall strategic situation.
C. There are two different Combat Results Tables (CRTs) in Boots 2: Skirmish and Charge.
10.2 Combat Sequence
For each individual combat, follow the sequence below.
10.2.1 Attack Declaration
A. The phasing side specifies the units of its activated sub-command that will attack, and the defending enemy units (which may all belong to one or more than one enemy sub-command).
B. Determine which CRT will be used.
10.2.2 Heroism Marker Resolution
Each side secretly chooses which (if any) Heroism markers to use in this combat. All are then revealed simultaneously.
Exception: When used, Do or Die is revealed after the combat die roll.
10.2.3 Combat Strength Determination
A. Total the combat strength of all involved attacking units.
B. Total the defense strength of all involved defenders.
C. Divide the attacker's strength by the defender's strength and multiply that result by 100 to get a percentage (10.13).
10.2.4 Final Percentage Determination
A. Consult the appropriate CRT under the appropriate percentage column heading.
B. Apply all applicable shifts to the initial percentage column.
10.2.5 Combat Resolution
A. Roll a die and cross reference it with the final percentage column heading to determine the combat result. Implement the combat result immediately.
B. Execute any retreats.
C. Execute any pursuits and pursuit combats.
10.3 Which Units May Attack
Only the units of the activated sub-command may attack during a given Combat Sub-Phase. Units of other friendly non-activated sub-commands may not attack at that time.
10.4 Attack Declarations
The phasing side may resolve combat in any desired order. At the beginning of the Combat Sub-Phase, declare which adjacent activated units will be attacking which defending enemy units. This ensures that all adjacent ZOC-exerting enemy units are attacked.
10.5 Combat Requirements
A. All activated units in EZOCs must attack.
B. All ZOC-exerting enemy units adjacent to the activated units must be attacked.
C. Within that overall limit, the phasing side may choose which attacking units will attack which defending units, as long as all activated friendly units adjacent to a ZOC-exerting enemy unit participate in an attack.
D. A player may also attack enemy units that do not exert a ZOC, but such attacks are optional.
10.6 Multiple Attackers
A defended hex may be attacked from as many as six adjacent hexes, with all attacking units combined into one single attack.
10.7 Restrictions
In general, no unit may attack more than once per Combat Sub-Phase and no defending unit may be attacked more than once per Combat Sub-Phase.
Exception: Pursuit combat (12.0).
10.8 Stack Attacks
A. Units in the same stack must be combined together for combat. That is, all attacking units in a hex must be involved in the same attack as one single, combined force.
B. Units defending in the same hex must be attacked as a single combined total; they may not be attacked separately.
C. Pursuit combat rules (12.0) modify these requirements.
10.9 Multi-Unit and Multi-Hex Attacks
A. If an attacking unit is in the ZOC of more than one enemy unit, it must attack all those enemy units that are not engaged by some other attacking unit(s).
B. Units in two or more hexes may combine their combat strengths and attack into a single hex if all attacking units are adjacent to all the involved defending units.
C. Attacks may involve any number of attacking or defending units. For an attack to be resolved as a single combat, however, all involved attacking units must be adjacent to all involved defending units.
10.10 Diversionary Attacks
When making a series of attacks, the phasing side may allocate its attacking units, on a hex by hex basis, so some attacks are made at poor percentages while others are made at more advantageous percentages.
10.11 Combat Strength Unity
A single unit's attack and defense strengths are always unitary. A given unit's strength may not be divided among different combats, either for attack or defense.
10.12 Choice of CRT
The attacker generally chooses which CRT will be used in each combat; however, at least one involved attacking unit must be able to trace a supply line (14.0) for an attack to be resolved on the Charge CRT. The attacker may always choose the Skirmish CRT.
10.13 Combat Percentage
This is determined by dividing the attacker's strength by the defender's strength and then multiplying that result by 100. Then reference the corresponding column on the CRT when rolling the die.
Example: If the attacker has 20 combat factors and the defender 13, divide 20 by 13 to get 1.53. Then multiply 1.53 by 100 to convert it to a percentage: 153%. So that combat would be resolved on the 150-199% column of whichever CRT is chosen.
10.14 CRT Percentage Column Shifts
A. Certain game functions shift the combat odds.
B. They include:
- Heroism markers (6.7),
- Flanking attacks (10.16),
- Artillery (10.17)
- Terrain (10.18),
- Pursuit combat (12.0), and
- Sappers (17.3).
10.15 Applying Column Shifts
A. A CRT column shift to the right means the column is increased by the number of columns indicated (in favor of the attacker).
B. A shift to the left means the column is decreased by the number of columns indicated (in favor of the defender).
C. If both the attacker and defender have shifts, use the cumulative difference. Even if the starting percentage is less than 49% or greater than 500%, use the 49% and 500% columns as the baseline for shifts.
10.16 Flanking Attacks
A. A flanking attack provides a 1R shift.
B. A flanking attack occurs if units are attacking from two opposite hexes, or there is one or more attacking units in or adjacent to all six hexsides of the defender's hex. Count only units taking part in the attack, not other adjacent units that may be engaged against other enemy units.
C. This applies only to attacks against single hexes; there may not be a flanking attack bonus when attacking a defending force located in two or more hexes.
D. Units defending in hexes with fort garrisons, stockades, or entrenchments negate a flanking attack bonus that would otherwise be available.
E. A defender never receives any kind of flanking defense bonus, even if they surround the attacker.
F. The play of the Flank Success Heroism marker affects this bonus for the side playing it.
10.17 Artillery
A. Each side can receive shifts for each artillery unit involved in a battle.
-
The attacker receives a 1R shift for each friendly artillery unit involved in an attack.
-
The defender receives a 1L shift for each friendly artillery unit involved in a defense.
B. The final number of artillery shifts may not exceed the number of friendly non-artillery units involved in that combat.
C. The shifts are in addition to the combat factors of the artillery units themselves.
Example: The attacker has two artillery and three infantry units involved in an attack; the defender has one infantry and three artillery units involved in that combat. The attacker receives two shifts for artillery; the [defender] receives one shift for artillery.
(Note: the printed example reads "the receives one shift"; the bracketed word is supplied from context.)
D. Artillery includes all types of units with any kind of full cannon icon on them.
E. [T]he plus sign next to an artillery unit's combat factor is to indicate the unit provides a one column shift to friendly forces on the CRT.
(Note: the printed text reads "he plus sign"; the bracketed letter is supplied from context.)
10.18 Terrain
A. Defending units benefit from the terrain in the hex they occupy and, in certain cases, along the hexsides. The TEC gives the defensive shifts.
B. Benefits for terrain are not cumulative.
C. With one exception (10.19), a defending force can receive only the shift for one type of terrain. If a force has more than one defensive terrain shift available to it, it uses the single best one for that defense.
10.19 Entrenchment, Stockades, and Fort Garrisons
An entrenchment, stockade, or fort garrison counter in a hex always generates a 1L shift on top of any other terrain shift received.
10.20 Hexsides
A force receives the benefit for defending behind a hexside only if all attacking units are attacking across the hexside. (This is not an issue in Boots 2.)
10.21 Heroism Markers
Certain Heroism markers will provide additional shifts.
10.22 Combat Shifts Example
The attacker has one combat factor and the defender 10, which would normally give ≤ 49% odds. The attacker has a 3R shift, and the defender has a 1L, giving a final result of 2R. The final percentage column is 100-159% because the starting column (≤ 49%) shifted two to the right is the 100-159% column.
Designer's Note: This effect is intentional, to allow small forces the chance to win improbable victories and large forces the chance to go down in pitiful disasters.
10.23 Combat Results Explanations
The results for both CRTs are listed below in alphabetical order. When unit eliminations are called for, the choice of which involved unit(s) is/are to be eliminated is always up to the owning player.
10.23.1 AC (Attacker Catastrophe)
A. All involved attacking units are eliminated.
B. The defender picks two Heroism markers.
C. There is no pursuit.
10.23.2 AD (Attacker Defeated)
A. Eliminate half the total involved attacking strength points (round up).
B. All surviving involved attacking units are retreated two hexes by the attacker.
C. There is no pursuit.
D. The defender picks one Heroism marker.
10.23.3 AS (Attacker Skirmished)
A. One involved attacking unit is eliminated.
B. No retreat or pursuit, or Heroism marker picks.
10.23.4 AW (Attacker Withdraws)
A. All involved attacking units are retreated one hex by the attacker.
B. No pursuit or Heroism marker picks.
10.23.5 BB (Bloodbath)
A. All the involved units of the side with fewer printed combat factors are eliminated.
B. The other side must eliminate at least an equal number of combat factors.
C. No retreat or pursuit, or Heroism marker picks.
10.23.6 DC (Defender Catastrophe)
A. All involved defending units are eliminated.
B. Attacking units may pursue (two hexes for infantry and engineers, three for cavalry), and then conduct pursuit combat.
C. The attacker picks two Heroism markers.
10.23.7 DD (Defender Defeated)
A. Eliminate half the total involved defending strength points (round up).
B. All involved surviving defending units are retreated two hexes by the defender.
C. Attacking units may pursue (one hex for infantry and engineers, two for cavalry); they may not conduct pursuit combat.
D. The attacker picks a Heroism marker.
10.23.8 DS (Defender Skirmished)
A. One involved defending unit is eliminated.
B. No retreat or pursuit, or Heroism marker picks.
10.23.9 DT (Defender Routed)
A. Eliminate half the total involved defending strength points.
B. Roll a die. The defender must retreat his surviving involved units that number of hexes, and the path of that retreat is determined by the attacker.
C. Involved attacking units may pursue (two hexes for infantry and engineers, three for cavalry), and then conduct pursuit combat.
D. The attacker picks two Heroism markers.
10.23.10 DW (Defender Withdraws)
A. All involved defending units are retreated one hex by the defender.
B. Involved attacking units may pursue (one hex for infantry, engineers and cavalry); they may not conduct pursuit combat.
C. No Heroism markers are picked.
10.23.11 NE (No Effect)
Nothing happens.
11.0 Retreat After Combat
11.1 In General
A. When a combat result requires units to retreat, the affected side must immediately move those units the indicated number of hexes away from their position.
B. Retreat is not regular movement; its execution does not use MPs. Further, it is carried out in terms of hexes, not MPs, and units must always retreat the number of hexes indicated, regardless of their printed MA, and through a path that is as straight as possible within the restrictions below.
11.2 Restrictions
Retreat is subject to the following restrictions:
A. Units may never retreat into hexes containing enemy units, into otherwise prohibited terrain, or off the map. If there is no other alternative, they are eliminated in the last hex into which they were able to retreat.
B. Stacks may retreat into hexes containing EZOCs, but one unit in the retreating stack must then be eliminated by the owner. The stack must then retreat an additional hex, or hexes, until it is no longer in an EZOC. If a stack retreats into more than one enemy controlled hex, it loses one unit per hex so entered. A retreating lone unit would simply be eliminated.
C. Stacks may retreat into and through hexes containing friendly units. Units must still obey all stacking and sub-command rules in the final hex of their retreat path. If their last hex violates of any of those rules, the retreating stack loses one unit and continues retreating until it reaches a hex in which it meets the limit.
D. If both B and C above are violated in the same hex, the retreating stack loses two units.
E. A retreating stack must end its retreat the indicated number of hexes away from its combat position (more sometimes, see B and C above). If it cannot, and can retreat only a portion of the number of hexes called for in their combat result, it is eliminated in the last hex into which it was able to retreat.
F. Within these restrictions, stacks do not have to stay together when they retreat. They may be split up into separate sub-stacks or individual units, determined by the player moving the retreating units.
G. In no case may a unit retreat into a hex that would cause it to be eliminated or overstacked if another retreat path is available.
11.3 Fort Garrison Units, Stockades, and Retreats
A. Units in hexes with a fortress garrison or stockade that receive retreat results while attacking or defending may retreat at their owner's option on a case by case basis.
B. If units from outside retreat into a hex containing a friendly fort garrison unit, they may cease their retreat in that hex and do not have to retreat the full distance. That applies only to fort garrisons and stockades, not entrenchments.
11.4 Ending a Retreat Next to Enemy Units
In some cases, a unit may end its retreat adjacent to an enemy unit that does not exert a ZOC. Such a situation does not allow the retreated units to be attacked again in the same Combat Sub-Phase. Thus, a unit can retreat next to an enemy occupied fort garrison without penalty because units inside it exert no ZOC.
12.0 Pursuit and Pursuit Combat
12.1 In General
A. Pursuit is a special form of movement and combat that may occur after each battle if allowed by its combat result.
B. Pursuit is what is usually termed advance after combat in other wargames, though with additional possibilities here.
12.2 Requirements
A. If a combat result allows pursuit, the attacker may, but is generally not required to, immediately move some, none, or all of its eligible involved units the number of hexes indicated.
B. The first hex must be the hex the enemy units formerly occupied.
C. Any subsequent hexes, if allowed, may be in any direction.
12.3 Restrictions
A. Like retreat after combat, pursuit does not use MPs.
B. Pursuit be made only into hexes into which pursuing units could normally move.
C. Pursuing units ignore EZOCs.
12.4 Length of Pursuit
A. If a pursuit is more than one hex, some pursuing units may stop in the first hex, and others in the second or subsequent hexes.
B. The combat results list how many hexes different types of units may pursue.
C. Pursuit movement may not be increased by railroad, trail, or bateaux movement.
12.5 Pursuit Combat
If a combat result allows pursuit combat, then, upon completion of pursuit movement, if any pursuing units are adjacent to enemy units, the attacker has the following options:
A. Declare there will not be any pursuit combat, in which case nothing further occurs with those pursuing units that sub-phase.
B. Declare pursuit combat.
-
Place an inverted Burned marker (flame icons) atop each stack of eligible pursuing units that will attack again (but only one stack per original battle, 12.7).
-
Those units must attack again in that Combat Sub-Phase, per the normal rules of combat. They may attack by themselves, or in addition to other friendly units that have not yet attacked; however, any attack that had been declared at the start of that Combat Sub-Phase may not be rearranged.
-
The only allowable difference is the combat resolution percentage of such combats may be improved for the attacker by the addition of the newly added pursuing units.
12.6 Objects of Pursuit Combat
A. Pursuit combat does not necessarily have to be against the same enemy force as the original combat.
B. However, a pursuit attack must be resolved before any other combat occurs.
12.7 Multiple Stacks Pursuing
A. If there is more than one stack of units pursuing as a result of one original battle's combat result, only one of those stacks may receive a pursuit combat marker.
B. If two or more different attacking forces from the same sub-command, attacking from different hexes, advance into the same hex, a single, unifying pursuit combat marker may be placed on top of them, and they may conduct pursuit combat together.
12.8 Subsequent Pursuit and Pursuit Combat
If units conducting pursuit combat receive another result allowing them to pursue, or pursue and conduct further pursuit combat, they may do so again. There is no limit on the number of times a force may conduct pursuit or pursuit combat in the same Combat Sub-Phase.
12.9 Defender Attacked Multiple Times
Due to pursuit combat, defending units may in some cases be attacked more than once in a single Combat Sub-Phase. This is an exception to the normal combat rule.
13.0 Reinforcements
13.1 In General
Players may receive additional units over the course of a game; such units are called reinforcements. Reinforcements appear in the receiving sub-command's reinforcement sub-phase during the game turn indicated by the scenario reinforcement schedule.
13.2 Placement
A. During friendly Reinforcement Sub-Phase, the owner places reinforcement units in the hexes designated on the map for units of the activated sub-command scheduled to arrive that turn.
B. Reinforcements operate normally, starting with their sub-phase of arrival.
13.3 Restrictions
A. Reinforcements may not be placed in a hex occupied by an enemy unit. A reinforcing unit may enter a hex in an EZOC unless otherwise indicated by the scenario rules. Reinforcements may not be placed overstacked.
B. If all scheduled appearance hexes are occupied by enemy units, or would cause reinforcements to enter overstacked, those reinforcements are delayed. They are placed on the first subsequent Reinforcement Phase for their sub-command in which a legal hex is available. A player may not otherwise delay reinforcements.
13.4 Place of Appearance
Reinforcements are simply placed on the map – they do not march onto it from off the map. There are no MP costs for placement.
13.5 Special Reinforcements
Certain scenario rules state that reinforcements appear only if particular conditions have been met, or upon play of certain Heroism markers.
13.6 Withdrawals
Certain game actions will call for units to be withdrawn. Such units are simply picked up and removed from the map.
13.7 Exiting the Map
A. Some special scenario rules will allow units to move off the map. Exiting is done as normal movement, with the unit moving off from a hex adjacent to the mapsheet edge.
B. To exit, a unit must spend an entire Movement Sub-Phase of its activated sub-command adjacent to the map edge; it then exits at the very end of that sub-phase.
C. Once a unit exits, it may not reenter the map.
D. A unit may not exit the map via retreat or pursuit.
13.8 Reinforcement Pools
A. A scenario may designate that units start in a reinforcement pool. Use any opaque container into which such units are placed, and from which they are drawn at random (without first looking) by their owner.
B. Units are otherwise deliberately and specifically placed according to each scenario's reinforcement schedule.
14.0 Supply
14.1 In General
A. Units trace supply to supply sources. Supply allows the use of the Charge CRT.
B. Units that are out of supply (OOS) must make an attrition check in the Attrition Phase of each turn specified in those scenario rules (4.2.3.2).
C. In Boots 2, the supply units category includes units with icons of supply wagons and supply trucks (and Stockades in Mad Anthony, 17.5).
14.2 Units in Supply
A. Units in the same hex as a printed supply symbol for their side or a friendly supply unit are in supply.
B. Units able to trace a line of supply to a friendly supply unit or friendly supply symbol hex are also in supply.
C. Supply units are always themselves in supply while on the map.
D. Scenario instructions may also state that certain other units are always automatically in supply.
E. The maximum length of supply lines varies by scenario.
F. Units in reinforcement pools, as well as those that have exited the map or that have been withdrawn, are also always in supply.
14.3 Tracing Supply Lines
A. Supply lines may not be traced into, out of, or through a hex if there is an EZOC in that hex, unless the hex is also occupied by a friendly unit or stack. Thus, friendly units negate EZOCs for purposes of tracing supply.
B. When tracing supply, count from the unit or hex providing the supply to the unit or stacking receiving the supply. Do not count the hex containing the supply source; do count the hex containing the unit or stack receiving the supply.
14.4 Combat Supply
A. Check combat supply at the start of the resolution process of each individual attack for all involved attacking units in that combat.
B. If all involved attacking units are OOS, the attacker must use the Skirmish CRT for that attack.
C. Defenders are not directly affected by supply considerations, but surrounded defenders may be subject to the flanking attack penalty (10.16).
14.5 Attrition
A. During the Attrition Phase, both sides check all units on the map that are susceptible to attrition.
B. Roll a die for each eligible unit found to be OOS at that time.
C. In Pershing, make this check every turn.
D. In Mad Anthony, make this check only during turns designated for it on the TRT.
E. Roll one die for each OOS unit.
-
On a 6, the unit is eliminated.
-
On a 1-5, there is no effect.
F. No die roll modifiers (DRMs) apply to these checks.
14.6 Supply From Other Sub-Commands
Units may trace supply to any friendly supply source of their side, even if it belongs to a different sub-command.
14.7 Supply Replacement
A. Each turn, both players may return to play one eliminated supply unit per sub-command in each Reinforcement Sub-Phase for that sub-command.
B. Place such units like a regular reinforcement of their sub-command.
C. The mere act of providing supply to friendly units does not expend supply units in Boots 2.
14.8 Maximum Supply Line Lengths
| Game | Max Supply Line Length (hexes) |
|---|---|
| Mad Anthony | 3 |
| Pershing | 5 |
A. The maximum lengths remain unchanged regardless of the supply source (supply unit or hex) to which a supply line is being traced.
B. Always count supply paths in terms of plain hexes, regardless of terrain.
14.9 Blocking Terrains and Water Barriers
A. In Pershing, supply lines may not be traced across all-lake hexsides (but allowed across seasonal lakes), while supply units themselves may never enter rough hexes.
B. In Mad Anthony, supply lines may not be traced into or through all-lake hexes or hexsides, but there is no rough terrain prohibition for supply units.
14.10 Voluntary Movement OOS
Both sides may deliberately move their units into hexes in which they will, or might, become OOS.
15.0 Fog of War
15.1 In General
A. Unless allowed by 15.2, players may examine enemy stacks only during the combat resolution process.
B. Once declared, an attack may not be called off.
15.2 Scouting
A. Certain units of an activated sub-command may conduct scouting. Scouting occurs at the end of each Movement Sub-Phase, after all movement is completed for the activated sub-command.
B. The player who owns the activated sub-command may examine all enemy stacks within two hexes of an activated and scouting-qualified unit.
C. The scouting player must indicate (and show, if stacked or flipped over) the opponent the units conducting the scouting.
D. In Mad Anthony, only the 2-8 Tecumseh Indian unit may scout.
E. In Pershing, only the GHQ Aero unit and the 1-9 Mc and Patton motorcycle units may scout.
16.0 Screening
16.1 Choosing CRT
Normally the attacker chooses which CRT will be used; however, under certain circumstances, the defender may choose which CRT will be used. If the defender wishes to, and has a defending force qualified to do so, it may declare screening during the Attack Declaration Sub-Phase, allowing the defender to choose the CRT used for such battles.
16.2 Eligible Forces
A defending force is thereby eligible to screen when it consists only of cavalry (icons of men on horseback) and/or motorcycle units, and is attacked by a force containing no cavalry or motorcycle units.
16.3 Screening Optional
Screening is not mandatory; it is an option available to defenders, declared (or not) on a battle by battle basis, within the restrictions above at the defender's discretion.
17.0 Entrenchments and Stockades
17.1 In General
A. Entrenchments may be built to enhance the defense of friendly units within them.
B. In Mad Anthony, only British units may entrench.
C. In Pershing, all infantry and engineer units of both sides may entrench.
17.2 Requirements
A. To entrench, one or more activated and supplied infantry or engineer units (units with icons of men wielding pick axes or with a crossed shovel and pickaxe icon next to them) must remain in place for one complete Movement Sub-Phase of its sub-command.
B. At the end of that sub-phase, the owner rolls a die.
-
On a 1-3, place an entrenchment marker in the hex.
-
On a 4-6, the entrenchment attempt has failed.
-
Apply a -2 DRM if any engineer units are present in the hex.
C. Make only one roll per hex regardless of how many infantry units are actually present.
D. Entrenchments may not be built in hexes containing a fort garrison unit in Pershing.
E. Entrenchments may not be built in hexes containing a stockade in Mad Anthony.
17.3 Entrenching, Unentrenching, Movement
A. All friendly units of all types in an entrenched hex receive those benefits regardless of which units built it.
B. An entrenchment marker, once placed on the map, remains in place until there are no longer any friendly units in that hex at the end of a phase or sub-phase (that is, if all occupying units move off, or are removed as a result of combat).
C. A unit does not expend extra MPs to enter an already built entrenchment, or to unentrench.
D. Entrenchment markers may be recycled in and out of play any number of times during a game.
17.4 Defensive Benefit
An entrenchment marker generates a 1L shift for all units defending in that hex.
17.5 Stockades in Mad Anthony
A. In Mad Anthony, stockades (log-fort icons) may be built in the same manner as entrenchments.
B. Stockades may be built only by US Army infantry or engineer units. Indian units of either side may never build stockades.
C. Stockades are supply sources for their side as long as at least one friendly unit occupies them. Stockade markers remain on the map between the two campaign turns if occupied by a friendly unit at the end of 1791.
D. Some stockades start play already on the map.
E. The number of Stockade markers in the counter-mix is an absolute limit. If a given stockade marker is eliminated during play, it may return to the map at all.
(Note: the printed text of 17.5 E reads "it may return to the map at all"; transcribed as printed.)
F. US Army units in Mad Anthony never build entrenchments; they build only stockades.
G. The combat effect of a stockade marker is to generate a 1L shift for the units defending in that hex.
H. Units in stockades do exert a ZOC.
18.0 Engineers
18.1 In General
A. Engineer units have special capabilities for movement, building entrenchments (17.2.B.3), and conducting attacks against hexes with fort garrisons, stockades, or entrenchments.
B. Each engineer unit may potentially perform one of the following actions in each of its sub-command's Operations Phases throughout the game.
18.2 Build Pontoon Bridges
A. If an activated engineer unit remains in place on a river hex for an entire movement sub-phase of its sub-command, all units of the engineer's sub-command exiting that hex during that sub-phase do so as if a bridge were located there (meaning there is no extra river exiting cost). The bridge remains in place throughout that Movement Sub-Phase, and may be constructed and used again during subsequent Operations Phases.
B. To use it again in a future turn, the engineer unit must be in the hex during the start of that Movement Sub-Phase and follow the same procedure.
C. A single engineer may bridge only a single river hex at a time.
D. A pontoon bridge is in place only for the Friendly Movement Sub-Phase of the sub-command to which the constructing engineer unit belongs.
18.3 Entrenchments
Engineers may build, or assist infantry in building, entrenchments or stockades, as described above in 17.2.
18.4 Sappers
If an attacking force contains one or more engineer units the defender is in a hex containing a fort garrison unit, stockade or entrenchment, and the Charge CRT is being used, apply a 1R shift. There is a maximum of one such shift per combat, no matter how many engineer units are involved.
(Note: the printed text of 18.4 reads "If an attacking force contains one or more engineer units the defender is in a hex..."; transcribed as printed. Section 10.14 cross-references Sappers as 17.3, but Sappers are printed as 18.4.)
19.0 Riverine Units
There are no riverine units in Boots 2, but there is bateaux movement (7.12) in Mad Anthony.
20.0 Victory Conditions
20.1 Victory Points
A. Each scenario has its own victory conditions. Usually victory is determined by the number of VPs one or both sides earns for certain actions during the game, and/or for occupying certain hexes at the end of play.
B. Keep track of VPs on a piece of scrap paper during play. VPs should generally be recorded as soon as they are gained. The exception is for VPs designated as being gained at the end of a turn or at the end of the game.
C. VP earned for occupation of a hex means that side's unit or stack must actually in the hex at the times specified; markers do not count.
D. Enemy units must be eliminated in combat or due to stacking violations in order to gain points for them. VP are not earned for enemy units eliminated due to attrition or other game actions unless specified in the scenario rules.
E. Both sides start each scenario with zero VPs.
20.2 Determining the Winner
At the end of the game, the side player with more VPs than is the winner. Take the difference between the totals to determine the level of victory.
(Note: the printed sentence reads "the side player with more VPs than is the winner"; transcribed as printed.)
| Difference | Victory Level |
|---|---|
| 0-9 | Draw |
| 10-19 | Marginal |
| 20-29 | Glorious |
| 30+ | Epic |
21.0 Game I: Mad Anthony
21.1 Players and Sides
A. There are two players: the US player and the Indian player. The Indian player controls both Indian and British forces. The US side has one friendly (Frnd) Indian unit in its force mix. All rules applying to Indians apply equally to all units on both sides.
B. Dragoons are considered cavalry for all rules purposes.
| Nationality/Command | Color | Abbr |
|---|---|---|
| US/St. Claire | Blue/Orange | St |
| US/Scott | Blue/Magenta | Sc |
| US/Militia | Blue/Green | M |
| US/Wilkinson (Right Wing) | Blue/White | Wlk |
| US/Hamtramck (Left Wing) | Blue/Gray | Hm |
| British | Red | Br |
| Indian | Yellow-Green | None |
21.2 Scale
A. Each turn represents an amount of time between one week and four weeks, depending on the intensity of the maneuver and combat conducted in each turn.
B. Each hex represents approximately 10 miles (16 kilometers) from side to opposite side.
C. Units are army battalions and regiments, artillery batteries, and Indian war bands, as well as various tactical formations.
21.3 Game Length
A. The game has two campaign years, 1791 and 1794.
B. If a player wins an epic victory at the end of 1791, the game comes to an end. If not, players must fight a second campaign in 1794.
C. Each campaign year consists of eight turns, so a game can last a maximum of 16 turns.
21.4 Setup Order
The US side sets up before the Indian side begins its setup.
21.5 US Initial Setup
Heroism Markers: none.
A. The 3KY/Sc and 4KY/Sc Dragoon units come into play only in 1794.
B. The Friendly (Frnd) Indian unit is not part of the Scott command's initial set up; see 21.7 for its entry.
| Location | Command | Unit(s) |
|---|---|---|
| 1026 | Stockade | |
| 1026 | M | FF |
| 1432 | Stockade | |
| 1432 | M | FW |
| w/i 1 of 1432 | St | 1US, 2US, Be, Bu, Cl, Fa, Ga, Pa, Tr, Artillery, Supply Unit |
| Any town on the Ohio River | Sc | 1Ky, 2Ky, Supply Unit |
| Any US towns | 6 x militia units* |
*No more than one per town.
21.6 US Reinforcements
A. If neither side has won an epic victory at the end of 1791, the US takes the following actions.
B. Permanently remove from the map all units in St. Clair's command.
C. Place all other surviving US units in any US controlled towns or stockades or in any hexes on or south of the Ohio River not presently occupied by enemy units. When placing these units, normal stacking restrictions apply.
D. Place the units of Wilkinson's, Hamtramck's, and Scott's commands on or adjacent to any US controlled towns or stockades:
| Type | Wilkinson | Hamtramck | Scott |
|---|---|---|---|
| Light Infantry | 1RW, 2RW | 1Lw, 2Lw | |
| Infantry | RW | LW | |
| Dragoons | RW | LW | 3KY, 4KY |
| Engineers | RW | LW | |
| Artillery | RW | LW | |
| Supply Units | RW | LW |
E. Permanently remove the St. Clair command marker from the pool.
F. Add the Wayne, Hamtramck, and Wilkinson command markers to the pool.
G. Place any Heroism markers then held by the US player back into that pool. Then randomly pick two new Heroism markers.
21.7 US Setup and Entry Codes
US units are marked on their reverse sides to facilitate more rapid setup. At-start units, with one exception (21.8), begin on the map at the start of play in 1791. 1794 units are deployed at the start of the second campaign year.
21.8 US Friendly Indians
A. The US has a friendly Indian unit that may become part of the Scott sub-command during either campaign year. If the US side expends the Native Allies marker during a friendly Reinforcement Phase, it receives that unit on or adjacent to any Scott sub-command unit.
B. If the Indian side plays the Native Allies marker, it may remove the US Indian unit from the map (if in play). Set it aside, as it could enter again (multiple times) if the US again expended the same marker.
21.9 US Sub-Commands
A. In 1791 there are three US sub-commands: St. Clair (St), Scott (Sc), and Militia (M).
B. In 1794 there are five US sub-commands: Wayne, Hamtramck (Hm), Wilkinson (Wlk), Scott (Sc), and Militia (M).
C. The Wayne sub-command has no units of its own; instead, it controls all US units. If either side picks the Wayne marker, the US activates all of its units for the same Operations Phase.
21.10 Indian Initial Forces
Heroism Markers: two picked at random.
| Location | Units |
|---|---|
| On any Indian villages* | Chipwa, Delwre, Kickpo, Miami, Mohawk, Ottawa, Potowat, Seneca, Shawnee, Wyandot, Tecumsh |
| Adjacent to any Indian village | CA |
| 3236 | Stockade, CB. |
| 3737 | Stockade, DB |
* within stacking limits
Historical Note: Tecumseh was the name of an Indian war band, not a commander. (At that time, Tecumseh was the head of a band of Indian scouts, not a major war chief.)
21.11 Indian Reinforcements and Replacements
A. If neither side has won an epic victory at the end of 1791, the Indian side takes the following actions after the US side completes all the steps in 21.6.
B. The Indian side receives the Mohawk units as reinforcements, placing those units, along with all Indian units that survived the 1791 campaign year, on any unburned Indian villages that are not occupied by any US units at that time.
C. The Indian side receives a number of replacement Indian units equal to the number of unburned villages on the map. Take these from the dead pile of Indian (not British) units eliminated during 1791, picking at random the number of units equal to the number of unburned and non-US-occupied villages then on the map. Place these units are placed on any of those villages as desired, within stacking limits. If the number of eligible villages exceeds the number of eliminated units, there are no additional Indian replacements.
Example: If the Indian side had four replacement-eligible villages and two eliminated units, it would receive both those units as reinforcements.
D. The Indian side receives no replacement British units. Any surviving British units at the end of 1791 remain where they are if in a town or stockade hex. If in any other hex(es), the pick them up and place them on any British or Indian controlled town or stockade hex(es) within normal stacking limits. If no eligible hexes exist, the British units are removed from play.
E. Place any Heroism markers held by the Indian player back in the pool, then randomly pick two new ones.
21.12 Indian Setup and Entry Codes
All Indian units start on the map except the Creek and Mohawk units.
21.13 Indian Sub-Commands
A. If the Indian side picks either the Little Turtle or Blue Jacket command markers, it may move all Indian (non-British) units. If the US picks either of those markers, do not give it to the Indian player. It remains out of the pool until the end of that turn.
B. If the Indian side picks the British command marker, activate all British units. If the US picks that marker, do not give it to the Indian player. It remains out of the pool until the end of that turn.
21.14 Command Pool
A. Place the following markers in the command pool at the start of play: St. Clair, Scott, Militia, Blue Jacket, Little Turtle, British.
B. At the start of 1793-94, remove the St. Clair marker from the pool and add the Wayne, Hamtramck, and Wilkinson markers.
21.15 Heroism Pool
A. Place all Heroism markers in the heroism pool, except for the War Correspondents marker, which is not used in this game.
B. The numbers in the turn boxes printed on the map indicate the number of automatic Heroism marker picks, with the US to the left; Indian to the right.
21.16 US Victory Points
| VPs | When | Event/Condition |
|---|---|---|
| 1 | Immediately | per Indian unit eliminated in combat |
| 2 | End of 1791 | per burned Indian village |
| 1 | End of 1794 | per burned Indian village* |
| 3 | End of 1791 | for occupying (not burning) Fort Miami or Detroit (each) |
| 3 | End of 1794 | for occupying (not burning) Fort Miami or Detroit (each)** |
*Villages that earned VPs at the end of 1791 are counted again at the end of 1794.
**These locales may earn VPs at the ends of both campaign years.
21.17 Indian Victory Points
| VPs | When | Event/Condition |
|---|---|---|
| 2 | Immediately | per combat factor of each US unit eliminated in combat |
| 5 | End of 1791 | No Indian villages were burned. |
| 1 | End of 1791 | per burned US town |
| 2 | End of 1794 | per burned US town |
The same burned locales earn VPs at the end of both campaign years. Once burned it is burned for good; locales do not need to be burned again in 1794 if burned in 1791.
21.18 Transitional VPs
When transitioning from 1791 to 1794, do not start over with a new VP count. Both sides take their 1791 VPs with them into 1794.
21.19 VPs for Open US-British Hostilities
A. The first time a British unit attacks a US unit defending a town or stockade, or a US unit attacks a British unit defending in a town or stockade, the defender rolls two dice and receives that number of VPs. The US Friendly Indian unit does not count for this purpose.
B. This dice roll may occur a maximum of once per game, not once per player.
21.20 Stacking
A. British and Indian units may never end a Movement or Combat Sub-Phase stacked together.
B. US units and the US-friendly Indian unit may never end a Movement or Combat Sub-Phase stacked together.
21.21 Burning
A. The Indian side may burn US towns or stockades.
B. US units may burn only Indian villages.
C. Burning is done during any friendly Combat Sub-Phase. During any Combat Sub-Phase, when one or more friendly units of the activated sub-command enter a hex eligible for burning, the phasing side declares a site is burning, placing a flame marker in the hex.
D. Once burned, a locale remains burned for the remainder of the game. A burned hex has its stacking value permanently reduced to two, and no defensive terrain combat shifts are any longer generated by it.
E. Reinforcements and replacements may not be placed in a burned hex at the start of 1794.
21.22 Supply
A. Indian units on both sides are always in supply.
B. British units must check supply normally and may trace supply only to British occupied stockades.
C. US units trace supply to any friendly supply units or to US occupied stockades.
D. Units of the US Militia sub-command are in supply when in any unburned US towns or in any hexes on or south of the Ohio River.
21.23 Special Heroism Marker
A. In this game the Special Heroism marker is used as a Desertion marker. The side deploying the marker indicates any one enemy unit and rolls a die. If that result is greater than the unit's printed combat factor, remove it from the map.
B. Units of the Hamtramck and Wilkinson commands may not be designated for desertion.
C. A unit that deserts in 1791 is eligible for replacement in 1794 under normal restrictions.
21.24 Unit Abbreviations
21.24.1 US
| Command | Abbr | Unit |
|---|---|---|
| Sainte Claire | Be | Bedinger |
| Sainte Claire | Bu | Butler |
| Sainte Claire | Cl | Clarke |
| Sainte Claire | Fa | Faulkner |
| Sainte Claire | Ga | Gaither |
| Sainte Claire | Pa | Patterson |
| Sainte Claire | Tr | Truman |
| Scott | Ky | Kentucky |
| Militia |
21.24.2 Indian
| Abbr | Tribe | Abbr | Tribe |
|---|---|---|---|
| Tecumsh | Tecumseh | Chipwa | Chippewa |
| Delwre | Delaware | Kickpo | Kickapoo |
| Potowat | Pottawatomi |
21.24.3 British
| Abbr | Tribe | Abbr | Tribe |
|---|---|---|---|
| CA | Caldwell | DB | Detroit Brigade |
| CB | Campbell |
22.0 Game II: Pershing
22.1 Players and Sides
A. There are two players, the US and the Pancho Villa (Villa) player.
B. Mexican Government forces may be controlled by either player during the course of a game.
22.2 Game Scales
A. Each turn represents one month.
B. Each hex represents 10 miles (16 km) from side to opposite side.
C. Units of maneuver are regiments and brigades, along with some irregular or specialized smaller formations.
22.3 Game Length
The game has 11 turns: March 1916 through January 1917.
22.4 Setup Order
The US sets up before the Villa side begins its setup.
22.5 US Initial Forces
Heroism Markers: One marker picked at random.
Normal stacking limits apply.
| Location | Units |
|---|---|
| 4107 | Col fort garrison |
| 4214 | Bliss fort garrison |
| w/i 1 of 3900 | all WC units marked Start on their reverse sides |
| w/i 1 of 4107 and/or 4214 | all EC units marked Start on their reverse sides |
| Any hex containing other US units | all GHQ units marked Start on their reverse sides |
22.6 US Reinforcements
Units with the name of a month printed on their backs are received as reinforcements on that turn, placed in Columbus or Fort Bliss, decided by the US on a turn-by-turn and unit-by-unit basis. If both entry hexes are enemy occupied, they are placed on or adjacent to any hex on the north map edge.
22.7 US Setup and Entry Codes
A. Start units begin on the map at the start of play as noted.
B. Units with the name of a month printed on their reverse sides are entered during the appropriate Sub-Command Reinforcement Phase of that month.
22.8 US Sub-Commands
A. There are six US sub-commands: GHQ, East Column (EC), West Column (WC), North Column (NC), Frontier Command (FC) and National Guard (NG).
B. When either side picks the GHQ command marker, the US can activate all US units in any one US sub-command command along with the units of the GHQ sub-command.
C. Additionally, the US may command Mexican Government units (22.13).
22.9 National Guard Sub-Command Limitations
A. Units of the National Guard (NG) sub-command may never move or attack into Mexico; nor do their ZOCs extend across the border.
B. Each NG unit counts as two units for stacking because they are brigades rather that regiments like the regular US Army.
C. The 1 NM and 2 Ma Regiments (in the NC sub-command), while technically NG regiments, were officially part of the punitive expedition and are not bound by these rules.
22.10 Pancho Villa Initial Forces
Almost Anywhere in Mexico: all three Dorados (Do) sub-command units. These units may not be placed in city or town hexes. They may be set up together or in individual hexes, etc., within normal stacking limits.
Heroism Markers: two markers picked at random.
22.11 Pancho Villa Reinforcements
A. There are three Villa sub-commands: Dorados (Do), Division of the North (DN), and Bandito (B).
B. Additionally, the Villa side may command Mexican Government units (22.13).
C. If either side picks the DN sub-command marker, the Villa side picks at random three units from that sub-command that have not yet entered play, placing them anywhere in Mexico within normal stacking limits and restrictions, then conducts a normal Operations Phase with those units and any other DN units already in play on the map.
D. If either side picks the B sub-command marker, the Villa side picks at random one unit from that sub-command that has not yet entered play, placing it anywhere in Mexico within normal stacking limits and restrictions, then conducts a normal Operations Phase with those units and any other B units already in play on the map.
22.12 Division of the North Restrictions
Units of the DN sub-command may never move or attack into the US, and their ZOCs do not extend across the border.
22.13 Mexican Government Initial Forces
Heroism Markers: Mexican Government forces never pick or possess Heroism markers.
A. There are four Mexican Government sub-commands: Trevino (T), Murgria (M), Rurales (R), and Chihuahua Militia (CM). When either side picks a Mexican Government sub-command command marker, that side controls all of its forces for all purposes that turn.
B. As its last setup step, the Villa side picks at random six units of the CM sub-command, placing one per hex on any Mexican cities and towns, as desired. The city or town must be selected in before picking each unit. Both Juarez (4014) and Chihuahua (2115) must have a CM unit placed in them.
C. The US then picks at random, one at a time, the three units of the R sub-command, placing them, one at a time, on any Mexican cities or towns of his choice, as desired other as long as the hex does not contain a CM unit.
22.14 Mexican Government Reinforcements
A. If either side picks the T or M sub-command markers and that command has not yet entered play, roll a die.
-
On a 1-2, the sub-command deploys. The side drawing the marker deploys all units of that command on any hexes on the south map edge as long as there are no units from any other sub-commands of either side.
-
On a 3-6, the sub-command does not deploy that turn, but may be picked again (and go through this process again) on subsequent turns.
B. If either of the T and M sub-commands is already in play when its command marker is picked by either side, that Mexican Government sub-command is controlled that turn by the player who drew it (but see 22.15).
22.15 Mexican Government Forces Restrictions
A. Mexican Government may never move or attack into the US, and their ZOCs do not extend across border.
B. Each unit of the M and T sub-commands counts as two units for stacking.
C. Mexican Government units of all four sub-commands may never stack with US or Villa units at any time. They may move through hexes containing other sub-commands of the Mexican Government, but they may never end a sub-phase in the same hex with units of other Mexican Government sub-commands.
D. Neither side may use Mexican Government forces to attack any other forces it controls.
22.16 Command Pool
Place the following markers in the command pool at the start of play: B, CM, DN, Do, EC, FC, GHQ, M, NC, NG, R, T, and WC.
22.17 Heroism Pool
Place all Heroism markers in the heroism pool. Each side picks one marker from the pool each turn.
22.18 US Victory Points
Award as these occur:
| VPs | Event/Condition |
|---|---|
| 3 | per combat factor of each Do unit eliminated in combat |
| 9 | bonus for elimination of all three Do units (See Historical Note.) |
| 1 | per combat factor of every other Villa unit eliminated |
| X* | per attack by forces of a Mexican Government sub-command against US forces |
*Roll a die and award that number of VPs. Also see extra VPs per 22.21.A.
Historical Note: The Dorados were Villa's elite force, containing his cadres. The elimination of all three Dorados units would probably mean Villa himself has been killed or captured.
22.19 Villa Victory Points
A. Award as these occur:
| VPs | Event/Condition |
|---|---|
| 2 | per combat factor of each US unit eliminated in combat |
| 2 | per US town or city raided* |
| 5 | per raided locale that is a US supply source* |
| X | per attack by forces of a Mexican Government sub-command against Villa forces** |
*May receive only one of these per site raided.
**Roll a die and award that number of VPs. Also see extra VPs per 22.21.A.
B. Award these at the end of the game:
| VPs | Condition |
|---|---|
| 5 | per Mexican city occupied by one or more Villa units |
| 2 | per Mexican town occupied by one or more Villa units |
22.20 Raiding
A. Villa units may raid US cities and towns by entering them.
B. Raiding is done during any Villa Movement or Combat Sub-Phase. During any Combat Sub-Phase, when one or more friendly units of the activated sub-command enter a hex eligible for raiding. Place a Raided marker in the hex.
C. Once raided, a given town or city remains raided for the remainder of the game and cannot be raided again for VPs. (Such locales could still be moved or attacked into by otherwise eligible forces of either side.)
D. Attributes such as defensive combat benefits and supply sourcing remain unchanged in raided locales.
E. If both US supply source hexes, Columbus (4107) and Fort Bliss (4214), are raided over the course of a game, when the second of those raids takes place, play stops and the Villa side wins an epic sudden death victory.
22.21 Open Hostilities Victory Points
A. The first time a US unit attacks a Mexican Government unit, or a Mexican Government unit attacks a US unit, the defender rolls two dice and receives that number of VPs.
B. The advent of open hostilities does not change any of the other rules.
Examples: The US National Guard may still not cross the border, and rules concerning control of the Mexican Government forces sub-commands remain the same.
22.22 US Aero Unit
A. At the start of play, place the US Aero unit in the command pool.
B. If the US side picks that unit marker, it may do one of the following:
-
Examine any one Villa or Mexican Government stack on the map; or
-
Activate any one US sub-command.
C. If the Villa side picks the Aero unit, set it aside for the remainder of that turn. (It still counts as the Villa player's pick.)
D. The Aero unit is always returned to the pool during the Return Phase, and is available on following turns, no matter which side drew it during a given turn.
22.23 Railroads
A. Treat railroads in any country as roads by all mobile units of all sub-commands.
B. Additionally, US and Mexican Government units may potentially make use of special railroad movement. To do so, an eligible unit must start its sub-command's Movement Sub-Phase on a rail hex within its own country. It may then move an unlimited number of hexes via contiguous rail hexes, but only within its own country. This consumes the unit's entire movement for the turn.
C. Units may not enter enemy occupied hexes using special railroad movement, but EZOCs have no effect on that kind of movement.
D. Units with printed movement factors of zero and Villa units may never use special railroad movement.
22.24 Entrenching
A. Mexican Government infantry units successfully entrench on a roll of 1-5.
B. Villa infantry units successfully entrench on a 1.
C. All other units entrench normally (17.2.B).
22.25 Exiting the Map
No unit once in play on the map may exit it except to go into the dead pile.
22.26 Supply
A. All US units must trace supply normally. All Villa units are always in supply, as are all CM and R units. M and T units must trace supply normally.
B. US units may use the printed supply symbol hexes inside the US as supply sources if they are occupied by at least one friendly unit.
C. Mexican Government units may use the printed supply symbol hexes inside Mexico (Jiminez in 1121 and Chihuahua in 2115) as supply sources if they are occupied by at least one Mexican Government unit.
D. Mexican government units may always trace supply through other Mexican Government units, regardless of their state of control or sub-command affiliations.
22.27 Special Heroism Marker
Depending on who picks the marker, the outcomes are as follows.
22.27.1 US Morale Spike
A. If the US side picks it, select any one Mexican city or town occupied by one or more US units to place in that town any one previously eliminated US unit belonging to the sub-command in that town.
B. Subtract VPs awarded earlier to the Villa side for eliminating that replaced unit.
22.27.2 Anti-US Uprising
A. If the Villa side picks it, select any one Mexican city or town occupied by one or more US units. Those units are immediately moved one hex by the US side.
B. The Villa side may then place any one available Villa reinforcement unit (which has not yet entered play) in that hex as an immediate reinforcement.
22.28 The Second Mexican-American War Optional Scenario
By mutual agreement, players may decide to explore alternative history by having a full-scale war between Mexico and the United States. To do so, make the following changes to the scenario rules.
A. Lift all restrictions on US National Guard, Division of the North and Mexican Government sub-commands concerning moving and attacking across the border. All units are now free to move anywhere on the map.
B. All Mexican Government sub-commands are always controlled by the Villa side when drawn by that side. If a Mexican Government force sub-command marker is picked by the US side, that sub-command's units may simply not move or attack during that turn. (Such picks still count as a US player pick.)
C. German Intervention. Add the German Mexico Abteilung (MA) sub-command to the command pool. It is controlled by the Villa side whenever drawn by either side. The MA unit is always in supply.
D. Victory Points: In addition to normal victory conditions and VP awards, at the end of the game the US receives 5 VPs per Mexican city occupied by one or more US units and 2 VPs per Mexican town occupied by one or more US units.