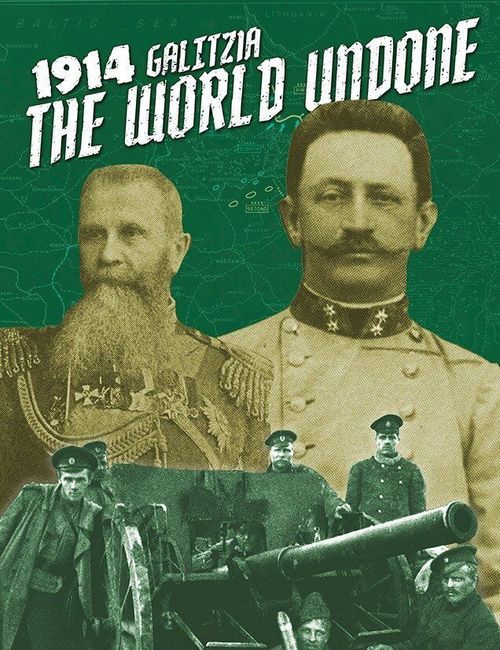
The World Undone: 1914 – Galitzia
The World Undone: 1914 – Galitzia Rulebook
Table of Contents
Table of Contents
1.0 Introduction
The World Undone is a series of WW1 games covering the start of the Great War in 1914. The mechanics are inspired by the classic SPI game 'The Marne' by the late John Young, which elegantly models the mobile period of WW1. The simplicity of the rules makes it suitable as an introductory wargame and advanced rules allow players to more accurately model the history involved. These games seek to evoke the same sense of immersion in the SPI games of yore, where a spartan but elegantly functional aesthetic allows players to focus on the situation at hand, as opposed to rules and overhead.
2.0 Abbreviations and Glossary
The World Undone (TWU) uses several terms frequently; experienced wargamers may be familiar with some of these terms.
Control – The last player to occupy or move through a hex is said to control that hex. At the start of the game, all hexes in Austria are under Austrian control while all hexes in Russia are under Russian control.
CRT – Combat Results Table
DRM – Die Roll Modifier
EZOC – Enemy Zone of Control – ZOC projected by an enemy unit
LOS – Line of Supply
MA – Movement Allowance, a unit's initial number of MP available to be used each movement phase
Movement Points (MP)
Markers – TWU uses several markers to denote special status on either hexes or units, including Entrained, Fortress Destroyed, and Control.
Phasing – The player whose turn it currently is
Non-phasing – The other player whose turn it currently is not
SP – Strength Points
TEC – Terrain Effects Chart
VP – Victory Points
ZOC – Zone of Control
3.0 Important Concepts
3.1 Units
TWU features 3 unit types; infantry, cavalry and heavy artillery. Hungarian units in the Austro-Hungarian army are marked with the Hungarian flag. All units have their unit type color correspond to their army attachment which is useful during setup. Note that unlike TWU East Prussia, no Headquarter units exist in TWU Galicia.
In the lower right corner of each counter is the unit's Movement Allowance (MA). For infantry and cavalry, the value in the lower left corner of its counter is its Strength Points (SP). Heavy artillery units instead have a (-1), which is a Die Roll Modifier (DRM) that only applies in combat if stacked with other units; otherwise, if alone in a hex, a heavy artillery unit defends with an SP value of 1 (and may not attack).
Units that arrive as reinforcements have the turn of their arrival in the top right corner of their counter. NOTE: This is a change from TWU East Prussia where they appear in the upper left corner.
3.2 Stacking
Stacking refers to placing one unit on top of another in the same hex. Up to 2 infantry and/or cavalry units may stack in a single hex. In addition, each hex may have 1 heavy artillery unit. Stacking limits are only enforced at the end of movement, hence units may temporarily overstack during movement and also after combat as a result of a retreat. If a hex is overstacked at the end of a friendly movement phase the excess units are eliminated (owning player's choice except in the case of overstacking as a result of retreat).
3.3 Zones of Control
Each unit projects a Zone of Control (ZOC) into the 6 hexes immediately adjacent to it. Exceptions: a unit ZOC does not project into an enemy fortress hex or across a river hexside. There are several Austro-Hungarian fortresses printed on the map; they also project a ZOC (each of which is printed on the map) that are treated the same as unit ZOCs except fortress ZOCs do extend over river hexsides. Units may not move into undestroyed fortress hexes. Russian fortresses do not project a ZOC.
A unit must stop moving if it enters an EZOC. If a unit begins its movement in an EZOC it may freely exit and continue moving normally. However, it may not move directly from the EZOC hex into another EZOC hex unless the destination hex is occupied by a friendly unit, in which case the unit may move into that hex but must then stop. A unit that retreats into an EZOC not occupied by a friendly unit is eliminated. A ZOC does not change the control of a hex (see victory conditions 8.0); control is only conferred by physical presence of a unit in a hex.
3.4 Line of Supply
A unit must be able to trace a Line of Supply (LOS) to perform movement and combat at full capacity. A LOS is a line of adjacent hexes, unobstructed by the presence of enemy units or unoccupied EZOCs, traced from a friendly supply source to the unit in question. The presence of a friendly unit in an EZOC negates the EZOC for the purposes of tracing LOS. A LOS has an unlimited length. A LOS may trace into, but not through mountain hexes except for mountain hexes with railroads. Austro-Hungarian sources of supply are the south and western edge of the map within the Austrian border. The Russian source of supply is the North and Eastern map edges. Players may not trace supply through enemy-controlled hexes.
A unit unable to trace a LOS when it begins its own movement deducts 1 from its MA for that phase. A unit unable to trace a LOS when resolving combat has its SP halved (round down) for that combat (exception: a unit in a fortress hex does not need to trace a LOS for combat).
Editor's note: section 3.4 says the SP is halved "round down" for combat without LOS, while section 6.2 says "rounded up". The two passages conflict in the printed rules; both are transcribed as printed. See section 6.2.
3.5 Attacker Disruption
Units which attack in the First Combat Phase are flipped over to their disrupted side and may not participate in either the Second Movement Phase or Second Combat Phase. They are flipped back to their front side at the end of their side's Second Combat Phase.
4.0 Game Turn Sequence of Play
Russian Player Turn
- First Movement Phase
- First Combat Phase
- Second Movement Phase
- Second Combat Phase
Austro-Hungarian Player Turn
- First Movement Phase
- First Combat Phase
- Second Movement Phase
- Second Combat Phase
Advance Game Turn Marker.
5.0 Movement
In a Movement Phase, all, some, or none of the phasing player's units may be moved; exception: disrupted units may not move (which can occur only in the Second Movement Phase).
At the instant a unit begins to move, it must check to see if it can trace a LOS; if it cannot, its MA is reduced by 1 for the current movement phase. A unit then spends MP for each adjacent hex or hexside entered according to the Terrain Effects Chart on the map. The unit must stop when it has spent MP equal to its MA, but it can choose to stop before that. A unit may always move at least 1 hex as long as the unit does not violate any standard movement rules (e.g. in relation to impassable terrain or ZOCs). A Russian unit may not move into an undestroyed Austrian fortress hex, but Austrian units may enter unoccupied Russian Fortresses without having to attack them first.
Units may move individually or as a stack; in the latter case although no unit may continue moving once it has spent all of its MP, the stack may drop off units as it moves, allowing higher-MA units to continue moving if desired. A dropped-off unit can move no further in that phase (even if it has MP remaining) but it can receive an 'MP Reserved' marker if eligible. A stack may not pick up units as it moves.
5.1 Reserve Movement
A maximum of one stack for each side may save unspent MP for later use (unlike nearly every other wargame in existence). The MP may be saved only in the First Movement Phase and if used they must be used in the Second Movement Phase, with any unspent MP lost at the end of the Second Movement Phase. Saving MP for the Second Movement Phase is called Reserve Movement and is recorded by placing the relevant 'MP Reserved' marker on the units. Each player may assign 1 stack to enter Reserve Movement each turn.
An 'MP Reserved' marker is placed on a hex containing a single unit or a stack once they stop moving and prior to moving another unit or stack. The marker applies to all units beneath it in that hex, therefore any subsequent units entering that hex must be eligible to receive the marker (a unit may have more MP remaining than indicated on the marker, but the extra MP are lost). In the Second Movement Phase the units under an 'MP Reserved' marker are not required to move together as a stack, they may move separately.
Any units with an 'MP Reserved' marker may participate in the First Combat Phase but if they do so then the marker is removed, and the units that participated in the combat will become disrupted as normal and cannot move in the Second Movement Phase. Any other units in the stack that did not participate in the combat will also lose their reserve movement benefit (as there is only one marker per hex and it will be removed by participating in the combat) but they will not be disrupted and remain eligible to move normally in the Second Movement Phase.
A unit with an MA of 3 could spend 0, 1, or 2 MP in the First Movement Phase, receive either a 3, 2 or 1 'MP Reserved' marker, respectively, and then add that number of reserved MP to its total MA (resulting in a temporary MA of 6, 5 or 4, respectively) for the Second Movement Phase. For example, the unit moves 1 hex in the First Movement Phase and then stops and receives a '2 MP Reserved' marker. If it does not participate in combat, then it has an MA of 5 to use in the Second Movement Phase. A unit entering a hex designated for reserve movement which has less MP remaining than the reserve movement marker is placed above the reserve movement marker indicating it is not eligible for reserve movement. The owning player has the option of reducing the reserve movement marker for the hex to reflect the lower value of the unit entering the hex thereby reducing the reserve movement MP available to all units in the hex. A unit remaining in the hex which has spent all of its MP will be placed above the reserve movement marker. Yet another unit, this time with an MA of 4 and adjacent to the hex with the marker could move into the hex and remain there, but it would only have 2 MP reserved, so the extra 1 MP it did not use would be lost.
5.2 Rail Movement
All units may use rail movement. It costs 1 MP to entrain, 1 MP to move an unlimited distance along uncut, friendly-controlled, connected railway hexes, and 1 MP to detrain. A unit may not entrain, detrain, nor use rail movement in an EZOC. A unit may remain entrained at the end of a movement phase. Units may not use rail movement outside of their friendly borders. If attacked while entrained units are immediately eliminated. Lastly units may not use remaining MP after rail movement.
5.2.1 Cutting/Repairing Rail Lines
Unlike TWU East Prussia, units may not cut nor repair rail lines, however, see optional rule 10.6.
5.2.2 Rail Capacity
Both sides may only entrain units a specific number of times per turn equal to their Rail Capacity. The Austrian Rail Capacity is 3 for the first 3 turns and increases to 4 on turn 4, and then 5 on turn 5 and remains at 5 for the remainder of the game. Russian Rail Capacity is randomized at the start of the Russian Movement Phase each turn. 1d6 is rolled and the result is halved (round up), the modified result is the Russian player's Rail Capacity for the remainder of that turn. Units entering as reinforcements also affect a player's Rail Capacity. Rail Capacity may not be carried over from turn to turn. Players may use spare markers or scrap paper to track Rail Capacity.
5.3 Reinforcements
A unit designated as a reinforcement enters the map in the First Movement Phase on the turn indicated on its counter. It enters from its side's map edge, paying the appropriate MP for the first hex entered. Reinforcements may enter already entrained (so do not need to spend the 1 MP to entrain) and use rail movement (and count against rail capacity, see 5.2.2). All reinforcements enter with their full movement allowance available.
6.0 Combat
During each combat phase, friendly units adjacent to enemy units or fortresses may choose to attack those hexes, but combat is never mandatory. However, if a unit chooses to attack then all enemy units in its ZOC must be attacked that phase, whether by that unit or by other friendly units. To resolve each individual combat each participating unit checks to see if it can trace a LOS, and then the total modified SP for the attacker is compared to that of the defender to create a ratio (rounded down in favor of the defender - for example, 14 SP attacking 5 SP is 2:1). The calculated ratio shows which column to use on the relevant Combat Results Table (CRT – there are two different CRTs printed on the map; one for the Russians attacking and one for the Germans attacking). The attacker rolls a single die, which is modified by appropriate DRMs and cross-indexed with the ratio column on the CRT to provide a result, which includes eliminations, retreats and advances. After each individual combat is completed in the First Combat Phase (only), all participating attacking units become disrupted.
6.1 Participating Units
All defending units in a hex must be combined into a single total SP; the units may not be attacked individually. Any units in the phasing (i.e. attacking) army that are adjacent to the defender may participate in the attack, and all of the participating attacking units' SP are combined into a single total. Units in the same hex may choose to attack different defending hexes. If the defender is in more than one hex and all attacking units are adjacent to all defending units, then it may be resolved as a single combat, summing all SP from all attacking hexes and comparing to the sum of all SP from all defending hexes. A defending unit in a fortress hex adds the fortress SP (printed on the map) to the total defending SP.
6.2 Combat Supply
At the start of any individual combat, each participating unit must check to see if it can trace a LOS. If unable to do so, unit SP is halved (rounded up) for the upcoming combat. A fortress and any unit defending in a fortress do not need to trace a LOS for combat.
Editor's note: section 6.2 says "rounded up", while section 3.4 says "round down" for the same halving. Both are transcribed as printed; the published rules do not resolve the conflict.
6.3 Die Roll Modifiers (DRMs)
The combat die roll may be modified by terrain (see the TEC on the map), if the attacker is making a flanking attack, and by heavy artillery.
NOTE—All DRMs are cumulative.
A forest or swamp in the defending hex adds a DRM of +1 or +2, respectively. If river hexsides are between all attackers and all defenders, then there is a DRM of +3; if any unit is not attacking across a river hexside then the DRM is not applied.
A flanking attack receives a -1 DRM and occurs where all the hexes adjacent to the defending hex(es) are either occupied by the participating attacking units or in the ZOC of the participating attacking units. Only units attacking in this individual combat are considered and the presence of defending units has no effect.
Any heavy artillery stacked with a unit participating in the combat applies its DRM to the combat, -1 for attackers and +1 for defenders. Artillery defends with a strength of 1 SP and no modifier when attacked alone. When in combat with other friendly units its DRM is applied to the combat.
6.4 Combat Result Explanation
- AE – Attacker Eliminated
- A# – Attacker Retreat (# of hexes)
- EX – Exchange: Defender Eliminated, Attacker eliminates SP equal to at least half the Defender's unmodified total, all units remain in place.
- D# – Defender Retreat
- DE – Defender Eliminated
6.5 Retreat After Combat
Units may be called on to retreat as a result of combat. Units must remain as a stack, must retreat towards their edge of the board, must avoid EZOCs unless the EZOC is occupied by a friendly unit, and must not cross river hexsides. Units unable to do so are instead eliminated. Units are allowed to overstack during a retreat, but if an overstacked hex is in a subsequent combat, the overstacked units do not contribute towards the combat and are eliminated if the original units in the hex suffer an adverse result. Units may be flipped to their Disrupted side to indicate overstacked units.
6.6 Advance After Combat
After any combat, any or all victorious infantry and cavalry units may advance, into any defending hex completely vacated by enemy units and into a hex the enemy retreated through (i.e. they may advance more than one hex). The advancing units may each advance separately. Both attacking and defending units may advance (not just attacking units like most other wargames). All units must stop advancing if they enter an EZOC.
Exceptions: Defending units may not advance across river hexsides; HQ, heavy artillery and any overstacked units may not advance after combat.
If the defending hex contained a fortress, it is destroyed if an attacking Russian unit advances into the hex. Once destroyed a fortress cannot be rebuilt; the symbol of the fortress and its ZOCs printed on the map are ignored for the remainder of the game, and the SP of the fortress is counted for VP purposes. Fort Destroyed Markers are used to indicate any destroyed fortresses.
7.0 Special Rules
These special rules take precedence over any previous rules to simulate various historical aspects of the Galicia campaign.
7.1 Conrad's Offensive Gambit
For the first 12 turns of the game, a number of Russian hexes are designated as objectives which are worth double the amount of their listed VP (see 8.0 for Victory Conditions). These VP are earned the instant the Austrian player enters the objective hex and remain permanently for the rest of the game (IE: The Austrian player keeps VP earned in this way even if they no longer control these hexes at the end of the game). The objective hexes include:
- 2502: Lublin (15)
- 3203: Kholm (15)
- 4202: Kovel (20)
- 2706: Lutsk (25)
- 5507: Rovno (30)
Additionally, any hexes designated as Russian setup hexes are worth 1 VP each.
7.2 Russian Fortresses
Russian fortresses on the map do not exert a ZOC as an exception to the normal ZOC rules regarding fortresses. On the map they are not depicted with a ZOC unlike Austrian Fortresses. These Russian fortresses were very antiquated and most of them were stripped of all their useful artillery/shells for use with the ground forces. Otherwise, Russian fortresses function like other fortresses.
Units inside a fortress are eligible to exert a ZOC do so, except across river hexes.
7.3 Austro-Hungarian Coordination Modifiers
The Austro-Hungarian order of battle paid little attention to the numerous languages/cultures present throughout the empire and often times the men were taught just enough German to follow orders.
Hungarian units feature a Hungarian flag on their counter. Whenever both Hungarian and Austrian units defend in a single hex, the attacker receives a -1 bonus DRM to the attack. Whenever making an attack including both Hungarian and Austrian units, the attacker receives a +1 penalty DRM to the attack.
8.0 Victory Conditions
At the end of the game each side determines its total VP, which are earned from controlling towns and cities (the VP gained are printed on the map) and by eliminating enemy units or fortresses (1 VP per SP). Note, VPs earned via Conrad's Offensive Gambit (7.1) are permanent and awarded immediately.
If one player's VP total is three times or more the VP total of the other player, then the former player has won a Significant Victory. If one player's VP total is two times or more the VP total of the other player, then the former player has won a Minor Victory. Otherwise the game is a draw.
9.0 Campaign
There are two scenarios covering the main campaign. More scenarios are possible when combining the three TWU games on the Eastern Front together as the Austrians can choose to either go all in on Serbia or Galicia.
9.1 Historical Campaign Setup
The Russian player sets up first followed by the Austrian player. On the map, setup zones are indicated with the Army designation printed in hex. Place units of each army designation inside of their labeled setup zones remaining within stacking limits. Units from the 8th and 9th Russian armies set up adjacent to their entry hexes on the map and enter the game on turn two as marked on their counters. All other units with reinforcement turns are placed on the turn track on their appropriate turn.
9.1.1 Austrian Second Army Mobilization
At the start of the game prior to the Russian Players first movement phase, the Austrian player rolls 1d6. On a result of 1-3, the Second Army may not move until the next turn (turn 2), otherwise units of the Second Army may not move until turn 3.
9.2 Second Army Mobilized Setup
This scenario is identical to the Historical Campaign except units of the Austrian second army have no movement restrictions at the start of the game.
10.0 Optional Rules
The following rules are optional; while more historical they may affect the balance of the game, and thus are recommended for solo players (with the exception of the Hidden Movement rule obviously, unless you are like me and have an awful short-term memory).
10.1 Hidden Movement
The backside of all units features a symbol specific to the unit's nationality. Players may flip all units on map over to their backsides to hide the identity of each unit. Players may inspect the front side of each enemy unit that is adjacent to a friendly unit. Included in the counter mix are 5 dummy units for each side, which you may use to add uncertainty, tricking your opponent into thinking you may have strong units where you in fact have none. German dummy units have an MA of 3 and Russian dummy units have an MA of 2. Once revealed dummy units are removed from the map and may re-enter the map as reinforcements the following turn. When using this rule disrupted units may be rotated 45 degrees instead of being flipped. Dummy units do not count towards stacking limits.
10.2 Cavalry Exceptions
Cavalry behaved differently from infantry in 1914; they never attacked infantry head on and had less auxiliary support than the average infantry unit (i.e. they were relatively useless except for probing/recon). The following rules reflect this.
10.2.1 Cavalry v. Infantry
Cavalry may never attack enemy infantry unless a friendly infantry is also involved in the attack. Cavalry defends as normal when attacked by infantry (but see 10.2.2).
10.2.2 Cavalry Retreat Before Combat
When cavalry is attacked by infantry units only (the presence of heavy artillery has no effect), the cavalry may choose to retreat 1-2 hexes before the combat is resolved. If there are cavalry with the attackers, the defending cavalry may still retreat before combat if it rolls a die and scores 1-3, otherwise it must fight the combat. Each defending cavalry chooses whether to retreat before combat individually and may only do so if not stacked with infantry or heavy artillery. Attacking infantry and cavalry units may advance into any hexes which the retreating cavalry vacated during its retreat before combat, but the attacking units are disrupted as if they had attacked normally regardless of whether they advance or not (also see 10.2.3). Attacking cavalry may also choose to retreat before combat, using the same process as above including becoming disrupted following their retreat.
(Important: Attacking cavalry units which successfully retreat before combat, free up adjacent friendly forces also adjacent to the same enemy force from having to attack that force during the combat phase (defending units can be temporarily disrupted to reflect this). This tactic explicitly models the probing/reconnaissance abilities of cavalry.)
10.2.3 Cavalry Hex Control
Cavalry units only control a hex while they occupy it unless they spend 1 MP while inside the hex they wish to control. This means that once a friendly cavalry unit moves out of a hex, control reverts to the side that previously controlled the hex (which may be the same side) unless the cavalry spent the 1 MP while in the hex.
10.3 Forced March
During either or both movement phases, a unit may increase its MA by 1 if it declares a forced march at the start of its movement. Units making a forced march may not enter an EZOC nor a hex adjacent to an enemy unit (like an enemy across a river hex, for example) and are not eligible for reserve movement. Forced Marching units may not cut rail lines (see 5.2.1).
10.4 Refugee Congestion
On the first 4 turns of the game, a unit must pay +1 MP to move into any town or city hex.
10.5 Replacements (Recommended)
When a unit is eliminated, roll a die and the unit will return as a reinforcement in that many turns. When using this rule, the players will need to keep a record of SP lost for VP purposes either using spare counters or scrap paper. Place the unit on the appropriate turn on the TRC indicating when it returns as a reinforcement.
10.6 Cutting/Repairing Rail Lines
Note: This optional rule will require that you borrow the railway markers from TWU East Prussia.
An infantry unit may spend 1 MP while in a rail hex in order to cut the rail line, placing a 'Rail Cut' marker in the hex. An infantry unit in a hex with a 'Rail Cut' marker may spend 1 MP to repair the rail line (and remove the marker). The unit performing the repair must be able to trace a LOS when in the hex, but the unit cutting the rail line does not require a LOS. Rail lines may be cut or repaired while in an EZOC. Units using the optional Forced March (see 10.3) may not cut nor repair rail lines.
11.0 Designer Notes
The Austro-Hungarian campaigns of 1914 are, in my humble opinion, some of the more difficult topics of the first world war to research (at least in the English language) because of a general dearth of information on the topic. While orders of battle and generalized narratives exist, there are really no significant accounts of the Galicia campaign that cover details such as what units were where on what dates, let alone what happened on a day to day basis as there are numerous accounts of similar action on the western front in English. The map alone was a real challenge to figure out at our scale of 4.5 miles per hex given I could find no detailed maps of the theater that were relevant to the period.
I decided to focus on what information was available as best as I could. The accounts that do exist of these campaigns provide the reader with a real insight into how the failings of various people as individuals would have tragic consequences for an entire generation of people. Chief among these individuals is Franz Conrad von Hötzendorf (Conrad for short), in charge of the Austrian Army at the outset of the Great War. A fanatic nationalist, he was personally responsible for the clearly unworkable terms that were presented to the Serbian government after the assassination of Franz Ferdinand, which he expressly designed to lead to war.
The assassination of Franz Ferdinand had freed Conrad to finally impose harsh terms over Serbia and Bosnia given Franz Ferdinand was the lone remaining voice of restraint and diplomacy in the region. Conrad was ready to avenge the territorial losses subjected to Austria Hungary during the Balkan Wars several years previous. For several years, Conrad drew up extensive plans which covered an all out offensive against Serbia and Russia (who would no doubt come to Serbia's aid) simultaneously, regardless of the fact that the Austrian army had neither the numbers, training let alone organization to take on both countries simultaneously. While drawing up these plans, Conrad falsely assured the Germans that in the event of war, most of his forces would be deployed to Galicia to relieve pressure from the Russians in East Prussia.
When the war did break out, Conrad of course executed his ambitious plan to simultaneously punish Serbia while leaving a relatively (to the size of the Russian army that is) thin screen of men tasked with defending the entire border from the Russian army. In what amounts to an ultimate absurdity, part of the reason Conrad was so eager for military glory was because he was trying to impress a woman he was enamored with, Virginia von Rettinghaus, who eventually would go to marry him in 1915. Despite his success in love, his success in campaigning was another matter entirely. While the Austrian offensive started off exceptionally well considering the numerical odds and had won several key meeting engagements against the Russians. Instead of consolidating these gains, Conrad ordered the army to continue pushing against the Russians on the offensive. The further the Austrians got from the Lines of the communication, the more exposed they became as they ran straight into fully mobilized Russian armies which appropriately counter attacked. Ultimately the Austrian armies were quickly beaten in the field and forced to retreat to the relative safety of the Carpathian Mountains (with the exception of a garrison left on their own to protect Przemysl Fortress).
Ultimately, Austria would require Germany's help to push back Russian (as well as Serbian and later Italian) forces away from Vienna, but the back and forth frantic and haphazard nature of the campaign lends itself well to the model of combat operations used for TWU. The situation is not completely hopeless as it was for the Austrians historically for the same reason that the Russians almost always perform better in board games than they actually did at the start of Barbarossa, given it's difficult for a player to be as incompetent as their historical counterpart having a birds eye view of the battlefield and forces at hand. The Russian player has to carefully either absorb or repulse the initial Austrian and then must decisively conduct a counter offensive doing as much damage as possible before the Austrians can scurry back into the mountains. The only real way for the Austrians to win is to go all out for the initial offensive while then trying to judiciously manage their losses across the front.
The relative lack of information from the campaign is the main reason for the more non-linear setup as detailed information as to where different divisions were located just does not seem to exist in English. The decision was made early on to limit the Austrian nationalities in-game to just Austrian and Hungarian, as the true scope of the multicultural hodgepodge that was the Austrian army of 1914 would make this a much more complicated game than I intended it to be. Other PC games such as To End All Wars model this well, but here it would have included coming up with different combinations of ethnicities such as Czech, Polish, Bosnian, Slovakia, Croation, Slovenian and even ethnic Italians from Trieste to the west. Conrad's plans paid little attention to these differences and it predictably resulted in a confusing and deadly shitshow for much of the infantry and cavalry.
Some personal observations that have less to do with the operational end of the campaign to openly admit my own bias. It is truly tragic that Franz Ferdinand was assassinated out of everyone else who could have been killed in the Austrian royalty given he was the one noble most opposed to Conrad's imperial/martial schemes, and wanted to give Serbia much of what they were asking for in Bosnia-Herzegovina. It is for this reason I ascribe particular blame onto Serbia and the aggressive nationalism which they perpetuated through the Balkan wars and into the Great War. This is not to say that the Austro-Hungarian empire was without its issues, but had Ferdinand been allowed to ascend to the throne, I would argue that many of the ethnic tensions that were simmering after the Balkan wars would have been arbitrated. Austria-Hungary during this period is also interesting for the fact that before the war wiped out much of their male population, Austria-Hungary in many ways mimicked America as it comprised of a diverse, multiethnic group of peoples all of whom in some way assimilated in Austrian culture much in the way that Immigrants to America would assimilate here. Its government of course was still autocratic and the stuff of Kafka's nightmares, but Franz Ferdinand wanted to make a genuine attempt for peace in the region and was more open to democratic reforms than other members of the Austrian or Hungarian aristocracy, had he survived the world would have arguably been a better place.