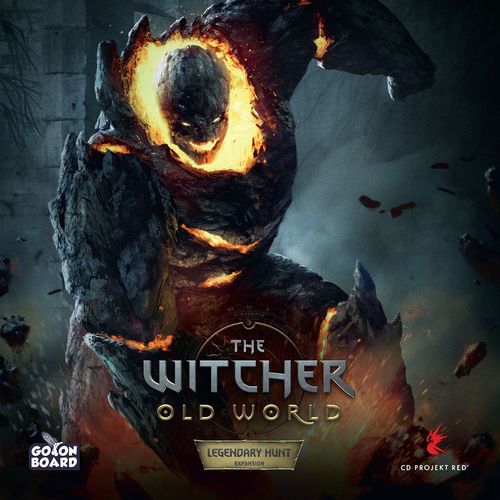
The Witcher: Old World – Legendary Hunt
The Witcher: Old World – Legendary Hunt Rulebook
Table of Contents
Table of Contents
Components
- 7 Legendary Monster Miniatures
- 24 Destruction Tokens
- 1 Large Help Card
- 20 Special Fight Cards
- 12 Legendary Monster Movement Cards
- 7 Large Legendary Monster Cards
Game Setup
First, setup the base game as normal. After, proceed to setup the Legendary Hunt as follows:
- A large help card is placed near the Trophy track:
- The first time you use the expansion, use the "A" side of the card.
- Side "A" is the basic version of the expansion; but if you decide you would prefer a longer game, use the "B" side.
- Players choose (or randomly determine) a Legendary Monster to use:
- Place its large card near the Main Board.
- Its miniature is placed on the Location shown on the large card.
- The remaining Legendary Monster cards and miniatures are returned to the box.
- Shuffle the Special Fight cards and place it near the large Monster card. (These cards are only used when fighting the Legendary Monster.)
- The Player sitting to the right of the starting Player (called the last Player in this rulebook) shuffles the 12 Legendary Monster Movement cards together and places it as a face-down deck near themself. (See Legendary Monster Movement below for what to do with these cards.)
- All Destruction tokens are shuffled face-down and kept near the Main Board.
Gameplay
While playing with the Legendary Hunt Expansion, the overall gameplay remains the same with some changes explained in this rulebook. The biggest change is the win condition; now, to win the game, the Player needs to kill a Legendary Monster. The first Player to do so immediately wins the game.
Legendary Monster
The Legendary Monster is present on the board from the beginning of the game.
Players may freely move onto and out of the Location occupied by the Legendary Monster. Players are not affected when the Legendary Monster moves into (or through) their Location.
Players may not use the Location Action of the Location occupied by the Legendary Monster. To remember it, place the Legendary Monster miniature on that Location Action.
Legendary Monster Movement
After the last Player takes their Turn, they reveal the top card of the Movement deck to determine how the Legendary Monster moves. (This essentially occurs at the end of the Round, after each Player has taken a Turn.) Each Movement card has three pieces of information:
- The main Location, depicted with a large Location number.
- The secondary Location, depicted with a small Location number.
- The number of Movements, depending on the number of Players in the game.
Players execute all the Movements shown on the card one by one:
- For each Movement, the Legendary Monster is moved onto the neighboring Location that is closest to the main Location. The Legendary Monster cannot be moved onto Destruction tokens during Legendary Monster Movement!
- If there are 2 equally close Locations, the last Player chooses which of the two Locations (without a Destruction token) the Monster moves onto.
- If the Legendary Monster is occupying the main Location on the card, it moves toward the secondary Location, following steps 1 and 2.
- If all of the closest Locations each contain a Destruction token, the last Player chooses any neighboring Location (without a Destruction token) to move it to.
- If all neighboring Locations contain a Destruction token, this Movement, and all consecutive Movements this Turn are ignored.
A 2-Player Game Example
- The Player draws a Legendary Monster Movement card. It's a 2-Player game so the Legendary Monster performs 2 Movements.
- The Legendary Monster is occupying the main Location, so the last Player chooses the neighboring Location closest to the secondary Location (18) and moves the Legendary Monster to it.
- The last Player places 1 face-down Destruction token on Location the Legendary Monster moved from.
- According to the Legendary Monster Movement card, the Legendary Monster moves twice during this Turn. The last Player repeats 2nd and 3rd steps, moving the Legendary Monster to the next closest Location (11).
Legendary Hunt Movement Clarifications
- Closest Location: a Location along a path that would require the least number of movement spaces to reach the marked Location.
- Each time the Legendary Monster leaves a Location, place 1 face-down Destruction token on the Location that the Monster just left. Place it on the Location art, so the Location Action is still visible and available.
- Multiple Destruction tokens may be placed during the same Turn.
- After completing the top-most Movement shown on the card, the last Player performs the next movement (if any), and so on.
- If the deck of the Movement cards ever runs out, shuffle its discard pile to create a new deck.
Driving the Legendary Monster Away
After performing at least one Movement in your Turn, you may decide to drive the Legendary Monster away. To do it, you must share the same Location with the Legendary Monster, then perform the following steps (in order) on your Turn:
- Discard any 1 card from your hand.
- Draw and reveal the top Legendary Monster Movement card from the Movement deck. Perform only 1 Movement toward the main Location depicted on the card. If the Monster is occupying the main Location, perform 1 Movement toward the secondary Location. (Follow the normal Movement rules, discard it as normal, and place a face-down Destruction token as normal).
- (Optional) Immediately perform the Location Action for your current Location.
Gaining Destruction Tokens
If a Player ends Phase I of their Turn on a Location with a Destruction token (before proceeding to Phase II) they draw and reveal that Destruction token. They gain the depicted bonus immediately, then they place the token face down near their Player Board.
Destruction token bonuses:
- Token showing 2 Potions: Draw 2 Potions.
- Token showing 1 Potion and the Phase III card-draw icon (+1): Draw 1 Potion and during Phase III, draw 1 additional card.
- Token showing 2 Gold: Gain 2 Gold.
- Token showing 1 Gold and the Phase III card-draw icon (+1): Gain 1 Gold and during Phase III, draw 1 additional card.
- Token showing -1 Shield and the Phase III card-draw icon (+2): Lower your Shield level by 1 and during Phase III, draw 2 additional cards.
- Token showing a 0-cost card and the Phase III card-draw icon (-1): Gain a 0-cost card (following the standard rules); and, during Phase III, draw 1 less card.
- Token showing +1 level of a Specific Attribute and the Phase III card-draw icon (-1): Gain 1 level of a Specific Attribute (e.g. Combat) shown on the token (if leveling-up, do not draw cards); and, during Phase III, draw 1 less card.
- Token showing a Shield level of 0 and +1 level of any Attribute: Lower your Shield level to 0 and gain 1 level of any Attribute (if leveling-up, do not draw cards).
After resolving a Destruction token, the Player completes Phases II and III of their Turn as normal.
Fighting the Legendary Monster
Players may decide to attack the Legendary Monster just like any other Monster.
If you have 1 or more face-down Destruction tokens, you take the first Fight Turn. Otherwise, the Legendary Monster takes the first Fight Turn.
The Player controlling the Legendary Monster shuffles all 20 Special Fight cards into a deck. Then, they put away a number of cards equal to the number of Destruction tokens that the attacking Player has.
The remaining cards are the Legendary Monster's Life Pool.
The attacking Player keeps their Destruction tokens.
The Legendary Monster has a Special Fight Ability that is used during the Fight.
The Legendary Monster has stronger attacks, as well as 4 Special Attacks that may appear during the Fight. If the chosen attack type (Charge or Bite) has a Special Attack shown on it, then the Player reads the attack description on the large Monster card.
The large Monster card lists the Special Attacks, marked with 1 to 4 claw icons:
- Crushing Strength (1st Special Attack): The Player discards 1 Offensive Sign (purple) card from their hand. If they are unable to do so, they take 4 Damage.
- Crushing the Armor (2nd Special Attack): The Player takes 3 Damage. The Player may not play any Defensive Sign (yellow) cards during their next Fight Turn.
- Elemental Power (3rd Special Attack): The Player takes 3 Damage. The Player may not play any Offensive Sign (purple) cards during their next Fight Turn.
- Unstoppable Attack (4th Special Attack): The Player takes 2 Damage and discards 1 Defensive Sign (yellow) card from their hand. If the Player is unable to do so, they take 6 Damage.
The large Monster card also carries the Golem's own ability, which reads: "During the entire Fight: the Player may not deal more than 5 Damage during one Fight Turn."
A Special Fight card that triggers a Special Attack reads: "The Monster Performs its 3rd Special Attack. The Player takes 5 Damage."
Legendary Monster Protection
The Legendary Monster has a level of Monster Protection that depends on the Player's position on the Trophy Track. It is shown on the large help card.
For the "A" side, the level of Monster Protection is 3/2/1/0.
For the "B" side, it is 4/3/2/1/0.
The Monster Protection level shows by how much Damage the Player's attack is lowered during each Player's Fight Turn. It affects all Damage dealt to the Monster (i.e. by Special Abilities, Potions, Combo, etc.).
For example: (Playing on the "A" side) The Player has 1 Trophy, so the Monster has 2 Monster Protection. In the Player's Fight Turn, the Player uses their Specialty that deals 1 Damage and it is cancelled by the Monster Protection. Then, the Player plays a Combo that deals 3 Damage – the 1 remaining Monster Protection lowers it by 1, so the Monster is actually dealt 2 Damage.
In the Player's next Fight Turn, the Monster Protection goes back to 2.
Fight Outcome
If the Player kills the Legendary Monster, they win the game.
If the Player fails to kill the Legendary Monster, the Player is defeated and draws 1 Destruction token from the pool, gains its immediate bonus, and places it face down near their Player Board.
Solo Mode
The goal of the game is to hunt down the Legendary Monster before it brings too much destruction to the Continent.
While playing with the Legendary Hunt expansion, the overall solo gameplay remains the same as the standard solo mode with some changes explained below.
Solo Setup
The setup follows the rules explained above with few differences:
- Place 3 Monsters in the pool - a Level I Monster, a Level II Monster, and a Level III Monster.
- Use the Solo help card that is part of the basic game components.
- The Player decides whether they use the "A" or "B" side of the large help card.
- Create a pool of face-down Legendary Monster Movement cards and put the remaining ones (without looking at them) in the game box. The size of the pool depends on the difficulty level you choose:
| Easy | Normal | Hard |
|---|---|---|
| 9 | 8 | 7 |
Solo Gameplay
The gameplay follows the rules explained above with few differences:
- If the Legendary Monster is unable to perform the Movement, the Player draws 1 Legendary Monster Movement card and places it on the top of the Legendary Monster Movement cards discard pile. They do not place the Destruction token on the Game Board.
- If the Player kills a Monster and gains the Trophy, they do not replace it with another Monster. If they drive the Monster away, they replace it with a new Monster of the same level as the driven away Monster.
- If the Player drives the Legendary Monster away, they do not draw a Legendary Monster Movement card. Instead, they choose any connected Location (without a Destruction token).
- The Legendary Monster's Life Pool is decreased by 1 card per each 2 Destruction tokens the Player possesses (rounded down).
The Player wins the game if they manage to kill the Legendary Monster.
The Player loses the game if, at any point during the game, they need to draw a Legendary Monster Movement card and the deck is empty.
Legendary Hunt and Other Expansions
The Legendary Hunt may be combined with some other Expansions. During the first game with this Expansion, we suggest not to use any other Expansion. When Players are familiar with this Expansion, they may use the Legendary Hunt Expansion with:
- Mages Expansion
- Monster Trail Expansion
- Adventure Pack Expansion
- Skellige Expansion
If combining the Legendary Hunt and Skellige Expansions: place the large help card nearby the Game Board, below the Trophy Track. When a Player fights the Legendary Monster, remember to check the Legendary Monster's Protection according to the Player's position on the Trophy Track.