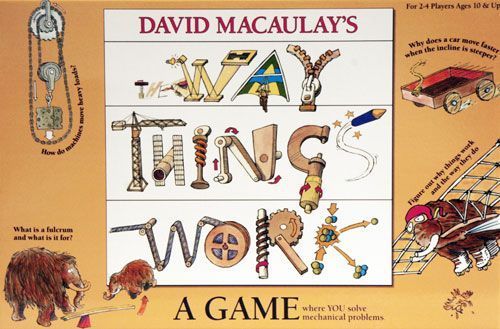
The Way Things Work
The Way Things Work Rulebook
Table of Contents
Table of Contents
Level 1: Jump Right Into Early Discoveries!
Open up the game and let the fun begin.
Object of the Game
You are a scientific explorer, keen on unlocking the mysteries of machines and their effect on the world - gears, levers, fulcrums, wheels; gravity, friction, inertia, force, etc.
If you are the first to collect the 6 tools you need to unlock these mysteries, plus one "What? When? Where? Why? How?" card, you win the game!
Contents
All the contents needed to play Level 1 are in the yellow bag:
- Game board
- 4 game pawns
- Die
- 4 tool boxes
- 24 tool cards
- 100 "What? When? Where? Why? How?" trivia cards
Before You Begin
Open the game board and put it on the table, where all players can reach it. Shuffle and place the "What? When? Where? Why? How?" cards on the space indicated. In this game you will not use the "Use Your Head" cards.
Fill the 4 toolboxes with tools by placing 1 of each tool into each of the toolboxes. There will be 6 tools in each box. Close the toolboxes so no one can see the contents.
Place the toolboxes on the game board where indicated.
Each player chooses a colored wooly mammoth game pawn and puts it on start.
Playing the Game
The youngest player begins the game by rolling the die and moving his/her game pawn the number of spaces indicated in either direction. On your turn:
-
If you land on a space that pictures a tool, you get to open a toolbox and take that tool out of the box. Remove the tool from the toolbox and place it in front of you, face-up so all players can see. Be sure you choose a toolbox that has this tool! Another player may already have removed it!
-
If you land on a space that says "tool box", you can open any toolbox and take a tool, but first you must answer a question correctly! Choose the top "What? When? Where? Why? How?" question card and ask another player to read it to you. If you answer correctly, open a toolbox of your choice. Hopefully there will be a tool inside that you need. You can only collect 1 of each of the 6 tools. If a tool you need is not in the toolbox, do not take any tools and close the toolbox. Your turn is over.
-
If you land on a "broken" space, you must have the tool to fix it! "Broken" spaces are red. If you have the tool needed to fix what's broken, you get to spin again! If you do not have the tool needed, your turn is over.
The broken spaces and the tool that fixes each one:
-
The bolt blocks your path. Tighten it with your pliers.
-
The pipe's leaking. Tighten it with a wrench.
-
A 2x4 blocks your path. Saw it in half with your saw.
-
There are staples sticking out of the floor. Pull them out with your pliers.
-
There are screws that must be inserted with your screwdriver.
-
The door knob comes off the door. Fix it with your screwdriver.
-
For these loose nails, you'll need your hammer.
-
If you collect 3 "Question" cards, you can trade them in for a tool! On your turn, instead of rolling the die, announce that you will perform this trade. Return your 3 "Question" cards to the bottom of the pile. Now, look into any toolbox. If the toolbox contains a tool you need, you can take it. If the toolbox does not contain a tool you need, you get nothing and have sacrificed 3 "Question" cards!
To win the game you need to have 1 "Question" card, so plan carefully how and when to trade them.
-
If you land on a "Use Your Head" space, move your playing piece to any Question Mark (?) space.
-
If you land on a space marked "Brilliant", you are so clever that you get to go again. Roll the die and take another turn.
Other spaces are self-explanatory.
Winning the Game
The first player to collect all 6 tools and at least 1 "Question" card must rush back to the "start/finish" space. He/she is the winner!
Note: Remember, you are not allowed to claim a tool if you already have that tool in front of you. You must collect 1 of each of the 6 tools.
Level 2: Kick It Up To Graduate Level!
Time for more challenges.
Contents
Additional contents needed to play Level 2 are all together in the box:
- 60 "Use Your Head" cards
- Parts for models
- Sam, the large wooly mammoth figure
- Scooter, the small wooly mammoth figure
- 4 Certificates of Brilliance
Object of the Game
To be the first player to collect 6 tools (1 of each), 1 "Question" card, 1 "Use Your Head" card, and a Certificate of Brilliance.
Before You Begin
In addition to placing the "What? When? Where? Why? How?" cards and the tools and tool boxes on the game board, shuffle and place the "Use Your Head" cards where indicated. Place the Certificates of Brilliance next to the game board.
Now, build the simple machines (scales, car and ramps), following the illustrated instructions at the end of this book. You will use these to answer some of the "Use Your Head" questions.
Playing the Game
The game plays the same as the Level 1 game, with the following additional challenges:
-
If you land on a "Use Your Head" space, draw a "Use Your Head" card and read the question/challenge aloud. Using your scientific brain power, figure out and answer the question/challenge. You may need to use the simple machines you assembled to help you answer some of the questions.
If you answer correctly, you get to keep the card! You can also open a toolbox and choose a tool. If the toolbox contains one of the tools you need, you can take it. If you answer the question incorrectly, you cannot choose a tool, and must put the card on the bottom of the pile. Your turn is over.
-
If you land on a space marked "Brilliant", you get to collect your Certificate of Brilliance. However, you cannot earn a certificate until you have all 6 tools and at least 1 "Use Your Head" and 1 "What? When? Where? Why? How?" card. You will want to land on a "Brilliant" space when you have successfully completed collecting all necessary tools and cards. Once you earn your Certificate of Brilliance you must travel to the finish space. If you do this before all other players, you have won the game!
Other spaces are self-explanatory.
Winning the Game
The first player to collect all 6 tools, and earn at least 1 "Use Your Head" card, 1 "What? When? Where? Why? How?" card and a "Certificate of Brilliance" and reach the finish space is the winner.
Level 3: Fly On Your Own To PhD Level!
The ultimate challenge. Combine Absolutely Amazing Experiments with the game.
Contents
The Absolutely Amazing Experiments book contains 50 easy-to-do fascinating experiments that explore the world of machines. Duration of play: 30-90 minutes (a great game for a rainy day!). You can enjoy these experiments any time you want. Here is how you incorporate them into The Way Things Work game.
Note: the Absolutely Amazing Experiments book is a separate publication and is not part of this rulebook copy.
Object of the Game
To be the first player to collect 6 tools (1 of each), 1 "What? When? Where? Why? How?" card, 1 "Use Your Head" card, and a Certificate of Brilliance. You will need to perform some experiments to earn these.
Before You Begin
The set-up for this game is the same as Level 2, but you will also use the Absolutely Amazing Experiments Book.
Playing the Game
The game plays the same as Level 2, except for the following changes:
-
If you land on a "tool" space, you can look into the toolbox of your choice to find a tool you need, but first you must solve an absolutely amazing experiment.
Choose an experiment from the book, follow the instructions and find your result. If you were successful, you get look into a tool box.
-
If you successfully answer a "Use Your Head" question, you get to keep the card and also get to look for a tool. You can either look into a toolbox hoping to find a tool you need, or you can take a tool you need from any other player.
Winning the Game
The first player to collect all 6 tools, and earn at least 1 "Use Your Head" card, 1 "What? When? Where? Why? How?" card, and a "Certificate of Brilliance" and reach the finish space is the winner.
Making the Models
To assemble the models, you need: scissors, paper clips, tape, common household glue, 3 nickels.
Wooly Mammoths, Sam and Scooter
Notice that both large Sam and small Scooter have small die cut holes. Take a 4" length of string and thread it through the holes on Sam, tying securely. Use a 6" length of string and do the same for Scooter. This will enable you to hang both Sam and Scooter from the scale you will make. Tape 2 nickles to the back of Sam and 1 nickle to the back Scooter.
Assembling the Vehicle
Part of the fascination of machines is learning how simple they really can be!
To begin to build your vehicle, you first make the base, which is pretty straightforward.
Take the base piece and fold toward you along the creases. You will soon see how the card folds into a box shape.
Fold the corners inside the box and glue in place. Use paper clips to hold the card in place until the glue is dried.
Now, add the wheels!
Pass the two dowels through the end holes in the sides of the base. Push the wheels a little way onto the dowels as shown. Make sure the wheels do not slip around the axles but that the axles turn freely within the holes of the base. You can wiggle the end of an axle around in the holes to widen them so that the axles turn easily.
Assembling the Ramps
Begin with the small ramp, marked "ABCD". First cut the small tabs. Fold the sides and the end of the ramp, along the lines. Glue the tabs to the folded end to create the ramp.
For the big ramp, first cut the tabs, as indicated. Fold the sides and end of the ramp, along the lines. Glue the tabs to the folded end to create the ramp.
Assembling the Scale
The scale represents probably the most important machine ever invented - the lever. You will learn while playing The Way Things Work game just how much the lever influences scientific fact.
Before you build the scale, you first need to build a base unit. Take the base piece for the scale and fold toward you along the creases. You will soon see how the card folds into a box shape. Fold the corners inside the box and glue in place. Use paper clips to hold the card in place until the glue is dried.
Now fold the tower support (the piece with 6 holes), apply glue to the tabs and position in the center of the base. Be sure to align the holes.
Fold the tower (the long piece that has 10 holes) and the 2 brackets. Put glue on the sides of the brackets and position them inside the tower. Each bracket should be lined up with the second set of holes from each end of the tower. Hold in place, or use paper clips, until the glue is dried.
Put the tower and the base together by sliding the tower over the support on the base.
Attach the tower to the base by slotting the dowel through the tower and the support.