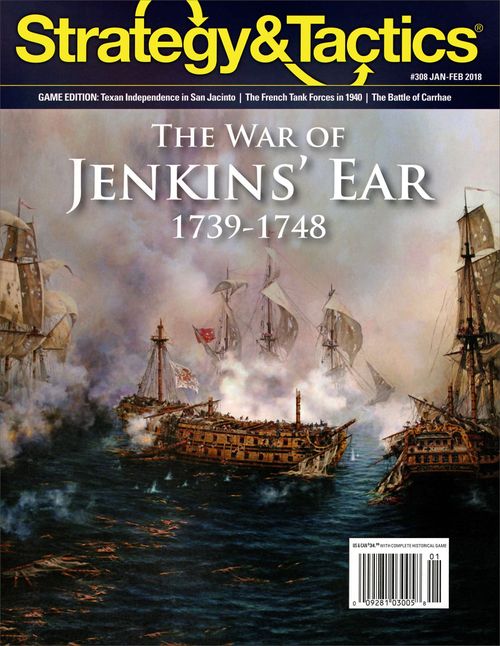
The War of Jenkins' Ear
The War of Jenkins' Ear Rulebook
Table of Contents
Table of Contents
1.0 Introduction
The War of Jenkins' Ear simulates the last major conflict in the Caribbean between England and Spain from about 1739 to 1748 (though it was largely eclipsed in Europe by the War of Austrian Succession at the time). The actual underlying cause of the war was trading rights in the lucrative West Indies. After centuries of intermittent and recurring war between the English and Spanish, these two maritime powers had managed to work out a trade agreement that ended their conflicts but not their longstanding enmity.
Due to the escalating tensions in Europe at the time, the War of Jenkins' Ear did not actually get underway until eight years after the eponymous incident, and it was only characterized by occasional English amphibious operations throughout Central and South America against a few important Spanish trading ports. The most significant of these operations, the assault on Cartagena, was the largest amphibious invasion in history until World War II, and it was unique, insofar as it was the first time that any nation had chartered so many private ships (nearly 80 English merchantmen) to conduct a transoceanic amphibious invasion. Many of these assaults (including the three assaults on Cartagena) were complete failures, although the Royal Navy continued to reign supreme in the West Indies because France (nominally Spain's ally) would not enter the war. Had France entered the war, the Spanish and French fleets would have collectively outnumbered the English fleet and altered the balance of power considerably. The War of Jenkins' Ear officially ended in 1750 with the Treaty of Madrid, whereby Spain agreed to pay over £95,000 to England in exchange for rights to the slave trade in the Americas (that was monopolized by the English South Sea Company), as well as agreeing to relax the restrictions on English trade in the Spanish Americas. There is still debate about which side won the war, and though it can be said to have been a defeat for the Spanish strategically, the assault on Cartagena stands as the single largest failure of an amphibious landing since the Battle of Marathon in 490 BC.
1.1 Sides
The War of Jenkins' Ear is a two-player game. There are two sides, the Spanish and the English, with the possibility that the French may come into the war on the Spanish side in the form of War Fund points.
1.2 Game Length
The game consists of ten turns; each turn is divided into an English Phase and then a Spanish Phase. Each phase consists of specific steps to regulate activities like movement (6.3). At the end of the tenth turn, the game ends and victory is assessed.
Designer's Note: Each turn does not represent a specific interval of time, but rather an expedition and/or operation. Historically there were about ten operations to capture enemy seaports throughout the war, most occurring during the first few years of the war.
2.0 Game Components
The game includes these rules, one 22 x 34" map of the Caribbean and its environs, which includes some of the charts necessary to play (most charts are included in the rules), and one counter sheet of 228 counters. The players will need to provide themselves with one six-sided die to resolve various game occurrences, particularly combat.
2.1 Counters
The game pieces, known as counters, include both Spanish and English land and naval forces. The counter sheet also includes various administrational counters that are used by both sides to indicate various circumstances that occur during game play, such as 3.2.
The sides of the counters are identified by their printed colors:
- English: Blue on beige
- Spanish: Red on yellow
- Administrative: Various
2.2 Counter Types
There are two primary types of game pieces: Naval and Land. Pictured here are a typical naval counter, land counter, and a leader counter (which is considered a land-type counter).
- Naval unit (sample): Name or Type; Type Symbol; Naval Combat Value (red number); Cannonade Value (blue with "+").
- Land unit (sample): Unit Name or Type; Type Symbol; Land Combat Value (green number); "Transportable by Merchant Ship only" (where the counter carries the anchor symbol).
- Leader (land unit) (sample): Leader Name; Type Symbol; Land Tactic Value (green with "+"); Naval Tactics Value (red with "+"); "Transportable by Any Ship."
Note: Units with a type symbol of crossed muskets may have different type unit names; however, they all function the same.
Note: The Naval Combat Value is also referred to as the "Gun Value." The red number represents the quantity of guns that ship carried when multiplied by ten. Example: The HMS Cornwall, printed with a red "8," was armed with eighty guns.
2.3 Scale
Each named ship represents one ship-of-the-line. Each frigate counter represents about ten ships of various sizes, as does each merchantman counter. Each fire ship and bomb ship counter represents about two vessels.
Land counters are more variable and can represent anywhere from 100 men to 1,000 men, depending on the unit and its combat strength.
Designer's Note: Spanish ships in the theater were often not outfitted with their full complement of cannon, and though this is not reflected by their naval combat value (insofar as ships of the line could only ever aim one of their broadsides at a time anyway), they are printed with lower cannonade values, relatively speaking.
3.0 Set-Up
Before the game begins, place each nationality's counters into their respective force pools (English and Spanish). Both players will be provided with "War Fund" points to purchase counters from his nationality's force pool (3.2).
3.1 Initial Set-Up
Some counters begin the game set up in specific hexes on the map and do not cost any War Fund points. Most counters are placed into the force pools to be available for purchase with War Fund points and then placed on the map by the owning player.
Except for the English Supplies counter and the Spanish ship Isidoro counter, all the counters that start the game on the hex portion of the map are back printed with "See 3.3." Set up the below counters in the locations listed.
English (set up first):
- Savannah: Oglethorpe (leader); x1 Supplies; x1 Americans (land combat value of "2"); x1 Frigates; x1 Cannons (gun value of "1")
- Port Royal: x1 Soldiers (land combat value of "2"); x1 Cannons (gun value of "7")
Spanish:
- Each Spanish Port hex with a seaport value of at least "2": x1 Soldiers (player's choice)
- Cartagena: Admiral Lezo (leader); x1 Boom Chain; x2 Cannons (gun value of 7); x2 Heavy Guns
- San Juan: Ship Galicia; Ship San Carlos
- San Isidoro Ship Counter: See 11.9 for instructions.
The English player must set up first. He must set up all the counters he purchased on the map in any English seaport he wishes. He may not withhold purchases to arrive during a later game turn. The English player may set up his counters in any English seaports that he prefers. Stacking limitations may not be violated (4.0).
When the English player announces that he has completed his set-up, the Spanish player then sets up all the counters using the same procedures, except that he sets his units up in Spanish seaports.
Neither player is permitted to examine each other's stacks of counters, and is only entitled to view the topmost counter of any enemy stack of counters (which may be nothing more than a deception counter). Both players are entitled to know what the other player purchases during the War Funds Purchases Step of a game turn.
3.2 War Fund Points
Both sides start the game with war fund points:
- The English side is provided with 100 war fund points.
- The Spanish side is provided with 50 war fund points.
Place both side's "War Funds" markers on the appropriate War Funds Track to denote each side's starting total. These tracks allow both players to denominate their purchases from their current war fund point allotments, as well as record additional war fund points that are received during subsequent game turns.
A player may never spend more war funds points than he currently has available (he may not "deficit spend" even if he knows that he will capture additional war fund points during a subsequent game turn). Each player may spend as few or as many of his starting war fund points when the game begins (during set-up), and all intended purchases must be paid for before they can be set up on the map. Once set-up is complete, no more war fund points may be spent by either player until each side's own War Funds Purchases Step of every following turn.
Note: During set-up, the Spanish player may compel the English player to complete his initial purchases, if any (which the Spanish player is entitled to know) before he begins his own initial purchases, if any.
In each game turn, at the beginning of each side's War Fund Purchases Step the active side (English during the English Phase, and Spanish during the Spanish Phase) is granted additional war fund points. These points may be spent during the current or any subsequent game turn. [The per-turn amounts are printed on the reference sidebar of the last page: English 30 points, Spanish 25 points.]
Both the Spanish and the English player may only save a maximum of 100 war fund points.
Designer's Note: Some otherwise identical counters may have different war fund costs printed on their backs. For instance, the "Deception" markers have varying costs to represent the fact that an attempt to deceive the enemy may be more difficult (more expensive in game terms) after initial deception attempts.
Note: Counters that begin the game set up on the map (3.1) are not purchased; they are free placements. Counters that begin the game set up on the map may not be purchased during a game and therefore are not printed with any war funds cost on their reverse sides.
Except for counters that begin the game set up on the map, most counters may possibly be repurchased after being eliminated (9.3).
3.3 Purchasing Counters
All war fund purchasing may only occur either at the start of the game or during each side's own War Funds Purchasing Step (after receiving all entitled war funds points for that turn). To purchase counters, each player chooses any friendly counter that he would like to place on the map from his side's Force Pool and then pays the war fund cost for each counter. The war fund point cost for each counter is printed on the back of the counter.
Example: A Spanish "Boom Chain" costs one (1) war fund point from the Spanish player's war fund total (6.1).
Both players are entitled to know what the other player purchases during the War Funds Purchases Step of a game turn.
If a player is unable or does not want to spend all the war fund points that he has available, he may save his extra points (recording them on his War Funds Track) until a later turn. A player may never save more war fund points than his track can record.
3.4 Capturing War Fund Points
Whenever a player's land-type counter captures (occupies) an enemy or foreign seaport, the capturing player gains war fund points for that enemy seaport. The amount of points that he receives is equal to the captured seaport's Seaport Value. The capturing player immediately adds the seaport value of the captured port to his War Fund Points Track.
Note: If adding these points to the track exceeds the maximum point total of 100, any excess points are lost.
Example: The English player would gain five war fund points for capturing Havana.
Each player can also gain additional war fund points by capturing enemy seaports (3.4) that may be spent during any subsequent War Funds Purchase Step. Neither player may ever accumulate more than 100 war fund points. Excess (more than 100) war fund points are assumed to be lost to privateering, corruption, wastage, and/or wear and tear.
The capturing player will also receive the war fund points for that captured seaport during each subsequent turn that it remains occupied by at least one of his land-type counters (during his War Funds Purchases Step). If he fails to maintain a valid occupation of that seaport (whether because of an enemy reconquest or voluntarily), he will not receive the war fund points for that seaport until it is recaptured or reoccupied.
To gain war fund points for a captured seaport, a player must have at least one friendly land-type counter presently occupying that seaport (during his War Fund Purchases Step). A naval type counter does not, by itself, qualify as an occupier of a captured seaport. Any land-type counter qualifies as an occupier of a captured seaport, even a supplies counter, or some other inconsequential land counter.
Note: Trade route lines are irrelevant when gaining war fund points for captured seaports. Trade route lines are only relevant when determining victory (5.0).
3.5 Placement on the Map
Aside from counters that start the game on the map, any counters that are purchased (either at the start of the game or during the War Funds Purchases Step) may be placed in any friendly seaport anywhere on the map (owning player's choice). Placement cannot exceed stacking limits (4.0). Once placed on the map, a counter may operate immediately during that same turn normally in all respects.
Exception: Units may not be placed in a seaport on the great South Sea side of the map.
4.0 Stacking
More than one game piece in the same hex is known as stacking. There is no stacking limit during the game except at seaports.
- Naval counters may stack in any quantity while in any sea hex, and land game pieces may stack in any quantity while in any land hex (except seaports).
- Naval counters may never occupy an all-land hex, nor may land counters ever occupy an all-sea hex. Exception: Land counters may be in an all-sea hex if being transported (4.1).
- Seaports are limited to a specific quantity of naval and land game pieces at any one time, depending on the capacity of each specific seaport:
- Friendly naval counters equal to the seaport's printed seaport value (representing the limits of the harbor there).
- Friendly land counters equal to the seaport's printed seaport value (representing the limits of the acreage there).
Exceptions: See 4.2.
The stacking of friendly naval and land counters in the same seaport is mutually exclusive (one does not affect the other). If stacking is found to be exceeded in a seaport or seaport hex, refer to 4.5.
Example: Port Royal, with a seaport value of "4," may stack a maximum of four naval counters AND a maximum of four land counters.
Important: It is possible for a ship to exist in a seaport hex without being in the seaport itself. In other words, that ship is assumed to be in the coastal waters, but not in the seaport. In such a case, a ship that is not in the seaport is assumed to be at sea normally (and does not derive the status of being a seaport, even though they occupy the same hex). In such cases, a ship that is in a seaport hex but not docked within the seaport there can be temporarily flipped over to its reverse side to indicate that it is not within the seaport.
Designer's Note: Zihuatanejo (hex 0218) is included on the map only for historic reference; it has no purpose during the game. Historically, Zihuatanejo was significant as a harbor for ships traversing the Pacific, but it was mostly irrelevant to the outcome of the war in the Caribbean. It is therefore printed with a seaport value of "0."
4.1 Transported Land Counters
The stacking limit of a seaport hex is not increased when any land counter there is embarked to be transported by a naval counter. The stacking limit remains the same in a hex whether a land counter there is presently being transported or not, and regardless of the type of land counter (including a supplies counter).
When land counters and naval counters are stacked together in the same hex (either in a seaport or in a coastal hex), all land counters that are not embarked should be stacked below all naval counters in that same hex. Any land counter that is embarked aboard a naval counter should be stacked directly above that naval counter (7.2).
Example: Port Royal's seaport value is four.
The stacking limit at a seaport is only relevant:
- During initial game set-up.
- When placing newly purchased counters.
- When a movement step of a game turn is complete.
A seaport's stacking limit can be ignored during movement (such that any ship may move into a seaport that is already replete with other ships if at least one of those other ships will be moving out of that seaport before the end of the current movement step).
4.2 Stacking Exceptions
Some types of counters are never counted when determining the stacking limit in a hex. The following counters never count against stacking:
- Deception
- Cannon
- Boom Chain
- Leader
- Storm
- Frigates
4.3 Stacking Order
A player may generally stack his own counters in any order he prefers, except as noted above in 4.1. While stacking order is not otherwise relevant, players should take care to stack counters in such a way that they are least susceptible to Fortunes of War (10.0).
4.4 Fog of War
Neither player is entitled to inspect any of his opponent's stacks. Players are always entitled to inspect the topmost counter of any stack (even if it is nothing more than a deception counter). However, when any stack enters any hex that is occupied by any enemy counter of any type (even counters such as a boom chain, deception, supplies, etc.), that stack's contents must be immediately revealed in its entirety to the opposing player so long as that stack is present there.
4.5 Overstacking
If any hex becomes overstacked for any reason, the owning player must immediately eliminate enough of his counters (of his choice) out of that hex to comply with the stacking limit there. Refer to 9.3 to determine if an eliminated unit is returned to the force pool or eliminated permanently.
5.0 How to Win
Victory is determined after completion of the last game turn (game turn 10). Follow the below procedures to determine which side has won.
- If the English player has not captured any Spanish seaports, the Spanish player has won the game. To be counted as a captured seaport, the seaport must be occupied by at least one English land counter of any type.
- Using the criteria above, if the English player can declare one or more captured Spanish seaports, he must then designate one captured seaport at a time and roll a die. He then compares the modified die roll (see below) against the seaport value of the designated captured Spanish seaport.
- Modifiers: If a captured seaport is printed with a trade route line that connects directly to another non-captured Spanish seaport hex, the English player must add one (+1) to that captured seaport's die roll for each non-captured seaport that is connected directly to the seaport the die roll is being made.
- Example: The English player has successfully captured the seaport of Cartagena, which has a seaport value of "6." The English player rolls one die for Cartagena. Because Cartagena's seaport value is a "6," he must roll six or less to win the game. However, because there is a trade route line printed from Cartagena to Santa Marta (which he did not capture), and a trade route line to Porto Bello (which he also did not capture), he must add a +2 to his victory determination die roll. Ergo, the English player would only win the game if he rolled a 4 or less.
- If the modified die roll is less than or equal to the captured seaport value of any one captured seaport, the English player has won the game.
- The English player may continue designating captured ports until he either meets the criteria above, or has rolled one die for each captured port.
- The English player is only entitled to roll one die per captured Spanish seaport.
- If the English player is unable to roll equal to or less than any one captured seaport's value, the Spanish player is declared the winner.
Designer's Note: The idea of this rule is that it may not be enough to merely capture, say, Cartagena only. Nearby enemy seaports (those connected by a trade route line) constitute a strategic threat in terms of raiding, harassment, jump-offs for counterassaults, and would probably require a "fleet in being" accordingly.
Note: The capture of non-Spanish seaports does not entitle the English player to victory determination die rolls. Their only purpose in the game is to regulate stacking limits and to provide additional war fund points to the captor.
6.0 Sequence of Play
Each game turn is divided into three phases: the English Phase, the Spanish Phase, and the Administrative Phase. Each phase is divided into numbered steps to regulate game activities. These phases and steps must be played in the exact order listed each game turn.
English Phase (first)
- War Fund Purchases Step (6.1)
- Storm Determination Step (6.2)
- Movement Step (6.3)
- Combat Resolution Step (6.4)
Spanish Phase (second)
- War Fund Purchases Step (6.1)
- Movement Step (6.3)
- Combat Resolution Step (6.4)
Administrative Phase (last)
- Storm Removal Step (6.5)
- Fortunes of War Step (6.6)
- Supply Step (6.7)
- The War of Austrian Succession Step (6.8)
Sequence of Play (printed on the map). Errata: Ignore the references printed by each step. The references noted above are correct.
6.1 War Fund Purchases Step
During this step of a player's phase, the active player (English in the English Phase, Spanish in the Spanish Phase) conducts the below procedures in the order given:
- Add the war fund points garnered per 3.2 to his War Fund Track.
- Add the points garnered for enemy seaports that he currently occupies with a friendly land counter (3.4).
- He may purchase counters from his force pool (9.3) by spending some or all his war fund points currently accumulated on his War Fund Track.
Note: War fund points are available for expenditure in the same step that they were added to the track.
6.2 Storm Determination Step
During the Storm Determination Step of the English Phase, roll one six-sided die and consult the Storm Location Table (printed on the map) to determine if any storms appear in the Caribbean. 8.0 details the effects and procedures for storms.
Storm Location Table Errata: Add "Curacao" to the result for a die roll of three.
6.3 Movement Step
During a player's Movement Step, he may move some or all his counters from their current hex location on the map to any other single hex location of the map, via a contiguous path of hexes between the starting hex and the destination hex. He is not required to move any counters.
Naval counters may never be moved across any all-land hexside, nor may land counters be moved across any all-sea hexside, unless they are being transported. Naval counters may be required to check for "Perilous Seas." Rule 7.0 details the requirements and procedures for conducting movement.
- During a friendly Movement Step, if a naval counter, or stack of naval counters, moves six sea and/or coastal hexes without entering a friendly seaport hex, they are subject to perilous seas.
- Note: Naval counters or stacks that attempt interception are not subject to a perilous sea die roll.
- When a naval counter or stack enters the sixth contiguous sea and/or coastal hex (that did not include a friendly seaport in any of those six hexes), the owning player must roll one six-sided die to determine if that naval counter or stack has become ill-fated.
- Consult the Perilous Sea Table at the end of the rules, modify the die roll using the below modifiers, and then implement the result corresponding to the modified die roll.
- Storm: Apply a -1 modifier if a naval counter or stack moved adjacent to a storm counter at any time during its current six-hexagon movement increment. Apply this modifier only once regardless of the number of storm counters the counter(s) encountered.
- Admiral: Apply a modifier equal to the "+" gun value of any one leader accompanying the naval counter(s).
- Example: The leader Ogle (gun value of +3) is accompanying the moving counters, and the counters moved adjacent to two storm markers. The total die roll modifier would be +2 (+3 for the leader, -1 for a storm counter (only one applies)).
- Important: A naval counter does not have to stop or otherwise dock in any friendly seaport to avoid the perilous sea die roll. Merely moving in or through a friendly seaport hex (irrespective of docking limits there) during a span of six hexes obviates the Perilous Sea die roll requirement.
- If a naval counter that is transporting any other counters is eliminated, the transported counter(s) are also eliminated.
- The six hexes that will constitute a perilous sea move are always counted as starting from the first sea and/or coastal hex entered after leaving a friendly seaport hex, or after having already just moved six sea and/or coastal hexes. A naval counter that ends its movement before entering a sixth sea and/or coastal hex is not subject to a perilous sea die roll during that turn.
6.4 Combat Resolution Step
If opposing counters are occupying the same hex (assuming there has been a successful interception, in the case of naval counters), combat is resolved to the extent possible. 9.0 details the requirements and procedures for conducting combat.
6.5 Storm Removal Step
During the Storm Removal Step of the Administrative Phase, remove all storm markers from the map.
6.6 Fortunes of War Step
Either player rolls one die during this step to determine the fortune of war that occurs. Consult the Fortunes of War Table printed on the map and implement the result. Rule 10.0 details the procedures when implementing the results of the die roll.
Fortunes of War Table Errata: In each result, change the word "may" to "must."
6.7 Supply Step
During the Supply Step, both players determine the supply status of the hexes occupied by their counters.
- Friendly occupied seaport hexes are always in supply. All friendly land and naval counters in that hex are in supply. Captured seaports are considered friendly for purposes of this rule.
- Storm markers have no effect on supply.
- All other hexes occupied by friendly counters are only in supply if there is a friendly supplies counter in the hex.
- If a hex containing friendly counters does not meet the above criteria, the hex is out of supply.
- In each out-of-supply hex, the owning player must eliminate (his choice) one friendly counter.
- Except for deception counters, any type of friendly land or naval counter may be chosen to be eliminated by the owning player.
Important: Supply counters are not eliminated when they provide supply.
6.8 The War of Austrian Succession
During this step, the players must determine what effect the War of Austrian Succession has on the War of Jenkins' Ear. Follow the below procedures:
- The Spanish player must roll one six-sided die. Modify the die roll result by the following:
- Capture of French Seaports: Modify the die roll by +1 if either side captured a French seaport during the current game turn. French seaports captured in previous game turns do not allow this modifier. A maximum of +1 can be applied, no matter how many French seaports qualify.
- Capture of Dutch Seaports: Modify the die roll by -1 if either side captured a Dutch seaport during the current game turn. Dutch seaports captured in previous game turns do not allow this modifier. A maximum of -1 can be applied, no matter how many Dutch seaports qualify.
- Consult the War of Austrian Succession Table at the end of the rules and implement the result.
- Once the War of Austrian Succession ends (modified die roll of 7), this step is no longer played for the remainder of the game.
Designer's Note: During the War of Austrian Succession, the French were considering the prospects of invading England (sort of). Had any French ports in the Caribbean been captured, the French would have probably sent an expedition to the Caribbean to recapture them (or to at least reinforce their other ports in the region), and this would have quite certainly dissuaded them from attempting to invade England proper.
7.0 Movement
Most counters in the game are capable of being moved, but only during their own Movement Step (or, in the case of naval counters, as a naval interception per 7.2). When a player moves any of his own counters during the Movement Step of his phase, he may move them one at a time or as stacks, and he may freely intermingle counters that are in the same hex, regardless of their origin and/or destination. In any case, he simply pushes the counter or stack that he wants to move from its current hex into an adjacent hex of his choice (if it is otherwise legal for that counter or stack to enter that adjacent hex; see below). He may continue to do so into successive adjacent hexes until that counter's movement is stopped.
There is no specific limit to the distance that any counter or stack can be moved, if otherwise permitted to move (as such, counters are not printed with any movement numeral or factor), but movement automatically stops when the following circumstances apply:
- A naval counter is successfully intercepted (7.2).
- A land counter has been eliminated by disease (7.5).
- Counters may not move in or out of a storm hex (8.1).
- A land counter enters a hex occupied by an enemy land counter (7.1).
- A naval counter enters a hex occupied by an enemy naval counter. The counter must stop even if a naval interception attempt there was unsuccessful (7.2).
- A player stops his naval counter's or stack's movement to begin the movement of any other naval counter or stack (except when joining two separate naval counters or stacks together during the same naval movement).
A counter (land or naval) is never prevented from exiting a hex that was already occupied by an enemy counter (if that exiting counter has not yet moved during the current Movement Step). If that exiting counter subsequently enters any hex that is occupied by an enemy counter of the same type (land or naval), it must cease its movement normally.
A stopped counter may continue its movement normally during its next Movement Step.
7.1 Movement Restrictions
A naval counter may never be moved across an all-land hexside. A land counter may never be moved across an all-sea hexside (unless transported; 7.3).
Important: Land counters and naval counters are not restricted from occupying the same coastal hex with one another. A land-type counter never interrupts nor inhibits the movement of any enemy naval-type counter in the same coastal hex, and a naval-type counter never interrupts nor inhibits the movement of any enemy land-type counter in the same coastal hex. Additionally, land and naval counters never interfere with each other's movement, even if occupying the same hex.
Land counters that are printed with a black anchor symbol may be embarked aboard merchant naval counters (only). Leader counters may be embarked aboard any kind of naval counter. Naval counters can never be transported by a land counter or other naval counter.
7.2 Naval Interception
If a naval counter or a stack of naval counters moves adjacent to an enemy naval counter or stack, that enemy player may (but is never required to) declare a "Naval Interception" attempt, thereby temporarily halting the movement of the moving naval counter(s) in that adjacent hex. A naval interception attempt cannot be avoided; the intercepted player is required to temporarily halt the movement of his naval counter or stack while that interception attempt is resolved. All counters in an intercepted hex (naval counters and land counters being transported) are always intercepted collectively. An intercepted player may not hold out, screen, or otherwise exclude any counters from his stack if it is intercepted.
Moving naval counters are required to attempt an interception when attempting to move into a hex occupied by enemy naval counters. The interception is always attempted in the hex adjacent to the hex that is the target of the interception (i.e., the enemy-occupied hex). In this case, if both players want to intercept, the non-moving naval counters always are required to attempt their interception first (before the moving naval counter is required to attempt his interception).
In either of the above instances, the interception attempt procedure is the same.
Exception: A moving naval counter or stack can never be intercepted when it enters a friendly seaport hex (even if not actually docking there); this restriction represents the perils of attempting an interception near navigational hazards like shoals, eddies, tidewaters, sandbars, et cetera.
- Naval counters cannot attempt naval interception from or into a hex marked with a storm marker. This is true regardless of which side is attempting the interception (8.1).
- The intercepting player may attempt to intercept with as many or as few of his naval counters that are adjacent to that moving naval counter(s), even if from multiple adjacent hexes.
- Prior to determining success or failure, the intercepting player must designate all units from all hexes that are attempting the interception.
- If attempting an interception from multiple adjacent hexes, all units in all hexes must do so as a single interception attempt (not as individual interception attempts).
- A successful interception of an enemy stack must intercept every enemy naval counter in that stack. The intercepting player may not exclude any enemy naval counter in a stack that he attempts to intercept.
- A naval interception attempt does not entitle the intercepting player to know what enemy counters are in an intercepted stack (beyond the topmost counter). Counters are only revealed during the Combat Step.
- The intercepted player is not entitled to know what naval counters are in the attempting stacks (beyond the topmost counter). Counters are only revealed during the Combat Step when combat is resolved.
- Once a naval interception is attempted (once the die is rolled), the intercepting player may not decide to renege or cancel his interception, nor exclude any counters that were a part of that naval interception attempt.
Designer's Note: The way to "hold out" a naval counter from a potential interception is to move it later during that same step.
To resolve a naval interception attempt, the intercepting player rolls one six-sided die. If the die roll is equal to or less than (≤) the quantity of naval counters participating in that naval interception, the interception is successful. The intercepting naval counters are immediately moved into the enemy (intercepted) naval counter or stack's hex.
Important: A die roll of "6" is always an unsuccessful interception attempt.
Note: Merchant naval counters may accompany a naval interception attempt, but they are disregarded when considering the die roll and the quantity of naval counters that are participating in that naval interception.
- If a naval interception attempt is unsuccessful, all naval counters that attempted that interception do not enter the enemy naval counter's or stack's hex; they remain in their own hex.
- A moving naval counter or stack may continue its movement (if the owning player so desires). They may move into that enemy naval counter's or stack's hex.
- An unsuccessful interception does not disallow further naval interception attempts by that same naval counter or stack during that same step. They may attempt another interception against the same counters, if those counters enter another adjacent hex.
- If the attempt is successful, the intercepting and intercepted naval counter(s) must resolve naval combat during the ensuing Combat Resolution Step of that same phase (regardless of which side conducted the interception or which side's combat step is ensuing).
- A naval counter or stack that has successfully intercepted an enemy naval counter or stack is not then eligible to attempt another interception during that same game turn. Flip the intercepting counters to their reverse side for the duration of that game turn to indicate that they are not eligible to attempt a naval interception until the following game turn.
Important: No matter which side conducted the interception, the resultant combat will be resolved in that hex during the Combat Resolution Step of that same phase.
7.3 Transport
Land counters cannot move into any all-sea hex or move across any all-sea hexside. If a qualified land counter (printed with an anchor symbol) is currently in the same seaport hex as a friendly naval counter that is in or enters that hex, the owning player may embark that land counter aboard it by stacking it directly atop that naval counter.
- A naval counter may transport any land counters that are printed with a black anchor symbol.
- There is no limit to the quantity of land counters that a merchant counter may transport.
- Exception: No two identical land counters may be transported by the same merchant counter at the same time.
- Example: A single merchant counter could transport a soldier's counter, a supplies counter, a deception counter, a cannons counter, and a leader counter (because each of them are printed with a black anchor symbol), but that same merchant counter could not transport two supplies counters at the same time. Even two leaders cannot be transported together in the same merchant counter (which may seem illogical, but none of the leaders that are featured in this game ever sailed together on the same ship).
- All other naval counters may transport land counters that are printed with a black anchor symbol. Non-merchant ship counters may only transport a maximum of one land counter at the same time.
- Exception: Bomb ship and fire ship counters cannot transport land counters.
Transported land counter(s) may be debarked onto any coastal or seaport hex that the transporting naval counter occupies, but only after the transporting naval counter's movement (the transporting naval counter cannot move further).
If there are any enemy naval counters in that same hex, naval combat must be resolved before any land counters are debarked. This may result in the sinking of those transporting naval counters (and their transported land counters) before debarkation can occur.
Exception: Naval counters cannot be intercepted when they enter a friendly seaport hex (whether docking there or not), even if there is an enemy naval counter or stack already present in that seaport hex.
7.4 Naval Movement to the Pacific (and vice versa)
During his Movement Step, a player may move any of his naval counters directly to the Turn Record Track, placing the selected naval counter(s) on the next game turn's box to be available to be moved into the Pacific (printed on the map as the Great Southern Sea). During that player's next Movement Step (of the very next game turn), he must then move all the naval counters that are on the Turn Record Track into any sea hex on the Pacific (the Great Southern Sea) side of New Spain (i.e., Mexico).
Note: This naval movement is not subject to a perilous sea die roll. Conversely, a player may also move any of his naval counters from the Pacific into the Caribbean Sea per the same exact procedure above.
In both cases, a naval counter that is to be moved from a sea hex to the Turn Record Track is liable to be intercepted in its current hex before it is moved onto the track (if it is adjacent to an enemy naval counter). If it is not successfully intercepted, it is then placed on the turn track as explained above. If it is successfully intercepted, it must remain in its current hex (where the interception will be resolved during the Combat Step).
A naval counter cannot be moved to the Turn Record Track if a storm counter is currently present in its hex.
Once a naval counter has been moved from the track onto the Pacific side of the map (or vice versa), it must be placed in any sea hex of the owning player's choice, but not in any Storm counter's hex. If placed adjacent to any enemy naval counter, interception may be attempted normally (7.2). If any such interception is not successful, that naval counter may then continue moving, if the owning player desires, per the normal movement rules on that side of the map.
Naval counters on the track may not move back to the sea it just came from (it is assumed to have already rounded Cape Horn en route to the other ocean); it must always, first, move to a hex in the opposite sea. On subsequent turns it may then be returned to the track and moved to the other sea.
7.5 Land Movement & Disease
Whenever any land counter or stack of land counters is moved into any non-seaport (friendly or enemy) land hex, the owning player must immediately roll one six-sided die (for each land hex entered). If his die roll is an even result (2, 4, or 6), there is no effect and that moving land counter or stack of land counters may continue moving (if the owning player desires). If the die roll is an odd result (1, 3, or 5), the owning player must immediately eliminate any one land counter (of his choice) in that hex, representing the effects of tropical diseases.
Note: It is perfectly legal for a player to eliminate any of his own non-combatant land-type counters (e.g., supplies) in a hex because of a disease (although a deception counter cannot be eliminated because of a disease).
A land counter is not susceptible to a disease die roll when embarking aboard a naval counter to be transported. Land counters are susceptible to a disease die roll when debarking into a non-seaport land hex from a naval counter.
Naval counters can never be chosen to be eliminated because of disease occurring in a hex.
7.6 Capturing a Hex
Naval counters can never capture any hex, including enemy coastal or seaport hexes that they occupy. A land counter is assumed to automatically capture a hex it occupies if there are no enemy land counters in that same hex.
When land counter(s) enter an enemy counter's hex, that enemy counter is assumed to retain ownership and control of that hex even while the entering land counter(s) are also present there. Ownership of a hex only changes when the entering land counter(s) cause all enemy counters already in that hex to be eliminated and/or retreated from that hex.
8.0 Storms
During the Storm Determination Step of the English Phase, the English player must roll one six-sided die to determine where storms may appear (see Storm Placement Table). Place storm markers in the locations determined by the die roll. Storm markers, once placed, do not move. They remain in their present location until the Storm Removal Step during the Administrative Phase.
8.1 Effects of a Storm
A storm marker prohibits any movement within (i.e., embarkation/debarkation), into and/or out of the storm hex. A storm does not affect the following:
- Collection of war funds.
- Victory determination die rolls, including the trade route modifier.
- The placement of any newly purchased counters.
9.0 Combat
There are two types of combat in the game: "Land combat" and "Naval combat," each of which is explained separately below. In both cases, combat can only ever occur when opposing counters occupy the same hex.
If there are instances when both land combat and naval combat must be resolved in a hex, naval combat must always be resolved first, and land combat second. For this reason, it is perfectly legitimate for a counter that has both naval and land combat values to participate in both combats in that hex (naval and then land), if it was not eliminated before the land combat begins.
9.1 Naval Combat
When two or more opposing naval counters occupy the same sea, coastal, or seaport hex during any combat Step, naval combat is resolved in that hex if one side or the other successfully intercepted (7.2). It makes no difference if it is the English or the Spanish combat Step, and is regardless of which side's naval counter entered the hex and/or which side initiated the interception attempt. The side that conducted the successful intercept is the attacker, and the intercepted side is the defender. To resolve naval combat in a hex, conduct the following procedures:
- Both players select their naval counters that occupy the same hex. If the naval combat is occurring in a coastal hex, the enemy player may also (but is never required to) select any of his own land counters, provided that the selected land counters are printed with a red gun value.
- Each player must roll one six-sided die for each of their naval counters. If there is a friendly leader counter in that same hex printed with a red "+" naval tactics value, that player may roll extra dice equal to that leader counter's "+" number for any friendly naval counter(s) of his choice.
- 2a. A leader's red "+" naval tactics value may be applied in total to one friendly naval counter of the owning player's choice (in the same hex as the leader, assuming the leader is aboard a naval counter there), or it may be divided amongst two or three friendly naval counters there in any denomination of that leader's red naval tactics value.
- Example: A +3 naval tactics value could be apportioned as one die to three friendly naval counters, or as two dice to one friendly naval counter and one die to another naval counter. A red +1 naval tactics value can only be applied to one naval counter.
- If the attacking player is in an enemy seaport hex, he must add that seaport's printed seaport value to each attacking naval counter's die roll.
- Example: If three English naval counters are attacking La Guaira/Puerto Cabello (seaport value "4"), each of the English naval counters would be required to add four (+4) to their naval combat die rolls.
- Note: Unlike during land combat, it is irrelevant if that seaport is not occupied by enemy land counters when naval combat is resolved there.
- If the modified die roll is equal to or less than (≤) the firing counter's red gun value, one enemy naval counter is eliminated. Each counter that is printed with a red gun value can only inflict one elimination per naval combat step. If the die roll is greater than (>) the counter's red gun value, it is a miss and there is no effect on an enemy counter.
- Naval counters can inflict eliminations on enemy land counters in the same coastal or seaport hex, if the land counter is participating in that naval combat. The owning player chooses which of his counters are eliminated.
Note (printed Naval Combat reference card, page 16): if there are fewer naval counters present than the die roll on a Perilous Sea result, the excess die roll value is never carried over, even if there are other naval counters from another stack in that same hex.
9.2 Land Combat
Land combat is resolved differently than naval combat. When two or more opposing land counters occupy the same land hex (except while being transported), land combat must then be resolved in that hex. It makes no difference if it is the English or the Spanish combat Step, and is regardless of which side's land counters entered the hex. To resolve land combat in a hex, conduct the following procedure:
- Each player must roll one six-sided die per each friendly land counter that is present in the hex and is printed with a green land combat value. If there is a friendly leader counter in that same hex (even if aboard a naval counter there) printed with a green "+" land tactics value, that player may roll extra dice equal to that counter's "+" number (once per land combat).
- If there are any counters, whether land or naval, in the hex that are printed with a blue "+" cannonade value, the owning player may roll additional dice equal to the total cannonade value of those units. To utilize the cannonade value of units there must be at least one friendly land counter with a land combat value.
- Note: Counters that are printed with a blue "+" cannonade value or a green "+" land tactic value have no ability to participate in land combat by themselves. Do not roll dice for any counter that is printed with a blue or green "+" number unless there is at least one friendly land counter printed with a green land combat value number in that same hex. If a land counter with a blue or green "+" number becomes involved in land combat while alone (whether as the attacker or the defender), it is eliminated automatically, even if it is the only land counter remaining in a hex after all other land counters have been eliminated.
- Important: Counters printed with an "X" in a value do not have a combat or tactical value. They have no effect on combat one way or another; they simply exist for other game purposes (11.2, 11.4, & 11.8).
- If the land combat hex is an enemy seaport hex, the attacking player (the player who entered that seaport hex) must deduct a quantity of dice equal to that seaport's printed seaport value. If a seaport value causes an attacking player to deduct more dice than he is otherwise entitled to roll, the attacking player cannot roll any dice during his attack and therefore cannot inflict any eliminations. The defending player is still eligible to roll his defending die rolls.
- Example: If an English land counter is engaging in land combat against a Spanish land counter in the Cartagena hex, the English player would deduct six (6) dice from his land counter's die rolls because Cartagena's seaport value is "6" (as printed on the map).
- Note: A seaport, by itself, has no intrinsic land combat capability; a friendly land counter (with a green land combat value number) must be present in a seaport's hex to impose a deduction of an attacker's dice. Otherwise, a seaport is simply captured automatically if there is no defending land counter (printed with a green land combat value number).
9.3 Eliminated Counters
When a counter is eliminated, it is either eliminated permanently (meaning that it is removed from the game completely and cannot be repurchased), or it is returned to its own force pool and available to be repurchased normally during the owning player's War Funds Purchases Step.
- When a counter is eliminated for any reason, the owning player rolls one six-sided die. If the die roll is greater than (>) that counter's war fund cost (printed on its back side), it is placed into the owning player's Force Pool Box and is available to be repurchased during any later War Funds Step of the owning player's game turn. Starting counters (i.e., without a war fund cost) may never be repurchased.
- If the die roll is less than or equal to (≤) the unit's war fund cost, the counter is permanently eliminated and cannot be repurchased.
- Repurchased counters cost the same war fund cost as when purchased initially (3.3), and they arrive on the map in the same exact way; there is no difference between a counter that is purchased or repurchased after being eliminated.
- It is possible for a counter to be repeatedly eliminated and repurchased, assuming it is successfully returned to its force pool each time it is eliminated.
Note: Some counters have a war funds cost greater than six. Those counters are not eligible to be repurchased.
10.0 Fortunes of War
During the Fortunes of War Step of a game turn, one six-sided die must be rolled by either player. Consult the Fortunes of War Table (printed on the map) and apply the results.
- When a result requires a player to choose an enemy counter to be eliminated, he may only choose a counter that he can see on the map.
- A player may select a unit located in a Seaport Holding Box.
- He may not sort through stacks of enemy counters to pick any counter below the top counter in that stack. For this reason, deception counters are useful purchases to be placed atop stacks to protect the counters below them from Fortunes of War.
Important: Fortunes of War may never be applied to counters in any Force Pool. They may be applied to counters in any Seaport Holding Box.
Designer's Note: Though storm counters (per 8.0) do not have any deleterious effect on land or naval counters (in terms of eliminating them), Fortunes of War often represent ships becoming wrecked by storms, which indeed happened on more than one occasion during the war. With regards to land counters, Fortunes of War almost always represent the ravages of tropical diseases whenever they cause a land counter to be eliminated.
11.0 Special Rules
Some counters have additional capabilities or requirements beyond their normal functions, listed as follows:
11.1 Bomb Ships
Bomb ships are naval counters in all respects, except that they also can conduct land combat in a coastal hex or an enemy seaport hex exactly as if they are a land counter. In this regard, they are considered a land counter in every respect except that they have no ability to occupy or capture any land hex, and they do not ever retreat from land combat. A bomb ship may be chosen as an elimination during land combat occurring in its hex, and it qualifies as a green land combat value counter when participating in land combat. A bomb ship is eligible to initiate and participate in land combat by itself or in conjunction with other land counters, including counters with a blue cannonade value. A bomb ship's presence in a coastal hex or seaport hex prevents friendly land counters printed with a blue cannonade value in the same hex from becoming eliminated automatically.
11.2 Deception Counters
A deception counter's presence functions to physically conceal the contents of a stack of friendly counters stacked below it in its same hex. Multiple deception counters in the same hex can be used to make a stack appear as if it is comprised of more combatants than exists there.
- A player may voluntarily expend any of his deception counters present during combat to nullify any one of his own combat die rolls. He may then re-roll that die roll.
- A player may also voluntarily expend any of his deception counters present during combat to nullify any one of his opponent's combat die rolls, and then enforce a re-roll of that die roll.
- A player may use as many of his deception counters as he presently has available in a combat hex (whether it is naval combat or land combat). Each deception counter may only ever re-roll one specific die roll per combat.
- If both sides have deception counters present during the same combat, each player may opt to voluntarily expend any deception counter(s). It is legal for an opponent to expend a deception counter to re-re-roll a die roll that his opponent had already re-rolled, regardless of whose combat die roll was re-rolled.
- In those instances when both players may want to re-roll the same die roll, the attacker must always decide to do so or not do so first. He remains eligible to re-re-roll the defender's re-roll, if he desires.
- After a deception counter is used to re-roll (or re-re-roll) a die roll, it is expended. Follow the procedures in 9.3 to determine the status of the expended deception counter.
Note: A deception counter may never be chosen as an eliminated unit during combat.
11.3 Fire Ships
Whenever a "Fire Ship" naval counter is utilized during naval combat (whenever its gun value is rolled to attack any enemy naval counter), it is automatically eliminated immediately after rolling its combat dice. If a leader is aboard that fire ship, it is also eliminated.
If a fire ship counter is used during naval combat that is occurring in an enemy seaport hex, its gun value is doubled. The fire ship is still eliminated (as noted above).
11.4 Leaders
All leaders are land counters. They can potentially influence land and naval combat, if eligible to participate in that form of combat.
- If being transported aboard a naval counter (i.e., not merely in the same coastal or seaport hex as a naval counter), any leader there adds a quantity of dice that is equal to its red "+" naval tactics value.
- If present in a hex where land combat is occurring, any leader there adds a quantity of dice that is equal to its green "+" land combat tactics value.
- Leaders printed with both a red "+" value and a green "+" value are eligible to participate in both naval and land combat, even if the combat occurs during the same combat resolution Step.
- Example: Spanish leader Lezo is printed with a red "+" naval tactics value and a green "+" land tactics value, and is eligible to participate in naval combat that is occurring in a coastal hex, and then participate in land combat in the same combat resolution Step.
- When an elimination is inflicted during land combat, a player may opt to eliminate any of his own present leaders (in lieu of some other land unit there) exactly like any type of land counter.
- Note: A leader is not required to be debarked from its naval counter into a coastal hex to apply his green "+" land tactics value there (it can be assumed that he is directing the battle from his ship), although he can be, if otherwise eligible.
11.5 Cannons
Cannon counters are land counters. Many cannon counters are not printed with an anchor symbol. They cannot be transported aboard any naval counter. They represent fortifications, as well as the batteries themselves. All cannon counters can participate in both land and naval combat during a single combat resolution Step. Other than the ability to be transported, all cannon counters function the same.
11.6 Boom Chains
Boom chain counters represent harbor obstacles preventing or at least delaying an enemy fleet's access to a seaport's bay. They are land counters.
- They cannot be transported aboard a naval counter.
- They do not have land combat capabilities.
- They can be chosen as a casualty during land or naval combat like any other eligible counter.
- Boom chain counters are land counters, but they are printed with a red gun value and are eligible to participate in any naval combat that occurs in their hex.
11.7 Scuttling Ships
The Spanish player may voluntarily opt to purposefully eliminate up to two of his naval counters that are present in a friendly seaport hex. He may only do this during his own Movement Step. Scuttling is not automatic.
- To scuttle a naval counter, the Spanish player declares the naval counter he wishes to scuttle and then rolls one six-sided die. If the die roll is equal to or less than (≤) the naval counter's gun value, the naval counter is replaced with a scuttled counter. The naval counter that was scuttled is permanently eliminated (it cannot be repurchased).
- If the die roll is greater than the naval counter's gun value, the naval counter is permanently eliminated. Do not place a scuttled counter.
- A scuttled counter has the effect of preventing any enemy naval counter from utilizing its cannonade or land combat value in that seaport hex.
11.8 Supplies
Supplies counters, when stacked with friendly land and/or naval counters that are not in a friendly (or captured) seaport hex, prevent the elimination of any such counters during the Supply Step of the Administrative Phase (6.7). A supplies counter is not consumed, expended, or used up in this capacity; it simply functions as supply for the hex it is presently in unless eliminated by combat or other rules. [Text-layer fragment, printed at the top of page 14 right column and placed here as the continuation of 11.8; wording as printed:] Supplies counters cannot use the deception counter as a loss, as deception counters are not naval counters.
11.9 San Isidoro
The San Isidoro (abbreviated as "San Isidro" on its counter) had been stationed near Corsica for nearly a year when it was intercepted by two larger English ships (the Ipswich and Revenge) in 1743. After a brief exchange of broadsides, the Spanish captain (Lage de Cueilly) burned the San Isidoro to prevent her capture (but inadvertently killed about fifty of her crew when it suddenly exploded). Had the San Isidoro been dispatched to the Caribbean before this pitiable event, she and her 60 cannons could have potentially made her presence felt in the West Indies, and so this rule allows for that possibility, explained as follows:
- When setting up the game, the Spanish player must place the San Isidoro on the Turn Record Track in any game turn box of his choice. He then rolls one six-sided die.
- If that die roll is less than (<) the game turn box number where the San Isidoro was just placed, the San Isidoro will arrive in the "To Spain" hex (4522) at the beginning of the Spanish player's Movement Step of that same game turn. Once on the map, the San Isidoro operates as a normal Spanish naval counter in every respect.
- Note: For purposes of determining perilous sea movement, hex 4522 is assumed to be the San Isidoro's starting hex when it is placed on the map.
- If the die roll is equal to or greater than (>) that game turn box number, the San Isidoro is not placed on the map. Remove it from the game (permanently). It is not eligible to be placed in the Spanish Force Pool per 9.3.
- Note: The San Isidoro cannot be purchased and thus is not printed with any war funds cost on its reverse side.
Example of Play
(Refer to the diagrams on the following page of the booklet; the diagrams are not reproduced here.)
It is the Movement Step of the English Phase (6.0).
Note: Check the stacking rules (4.0). While some of the hexes appear to be overstacked, each occupied hex is within the allotted stacking limit for seaports, due to many of the counters not being considered when determining maximum stacking (i.e., Frigates, boom chains, etc.).
The English player's eventual goal is to take Santo Domingo (3318); however, due to the seemingly large force stationed there and the high seaport value (5), he determines he needs to weaken the Spanish forces in the area first by taking Leogane (3018). He first needs to try and distract the Spanish Fleet (SP1) in 3019, so he embarks one supplies counter and Waterhouse, and then moves BR 1 along the path shown, avoiding any interception attempts from naval counters in 3318.
When he reaches 3320 he must make a Perilous Seas check (6.3). The result of his perilous sea die roll is three, modified to a four (admiral). The modified result of four requires the owning player to eliminate one naval counter of his choice. He chooses to eliminate his Frigate. The English player must then determine the status of the eliminated Frigate (9.3). The die roll is a two, thus the Frigate is permanently eliminated. He continues his move to 3119.
At that point, the Spanish player declares an interception attempt (7.2). SP1 contains three naval counters, and the Spanish player uses all three to conduct the interception. His die roll is three, thus the interception is successful. He then moves SP1 into 3119, thus ending BR1's movement.
Now that the Spanish player has taken the bait and been distracted by BR1, the English player moves his planned invasion fleet (BR2) located in Port Royal (2719). He moves to 2919 and halts his movement to allow the Spanish player to attempt an intercept from hex 3018. The Spanish player declines the attempt. At this point, to move into hex 3018, the English player must then attempt an interception (7.2). He rolls a four, successfully intercepting the Spanish naval counters in 3018. He moves BR2 into 3018 and declares his Movement Step complete.
It is now the English player's Combat Resolution Step. He chooses to resolve the combat in 3119 first (9.1). While all die rolls are simultaneous, the Spanish player rolls first. He has three naval counters and one leader. He decides to use Pizarro's +1 naval tactics value with one of the frigates. Die rolls are as follows: Oriente: three; Frigate (rolls one additional die due to Pizarro): both die rolls are five.
Note: Even if both frigate's die rolls had been hits, only one would have been counted (9.1).
The other frigate rolls a two; however, the English player expends one deception counter to force a reroll of the frigate's die roll. The reroll result is a four. The English player will be required to eliminate one naval counter (only the Oriente scored a hit). The English player now rolls his attack die rolls. He also applies his leader bonus to his frigate (the other was lost to perilous seas). The Boyne rolls a four, the frigate rolls a five and a six. The English player then decides to expend one of his deception counters to reroll one die for the frigate (11.2). The reroll is a two. The fire ship roll is four, and after the die roll the English player eliminates the fire ship (11.3). The English player has scored two eliminations on the Spanish naval counters (one for the Boyne and one on the reroll for the frigate). The Spanish player must eliminate two naval counters. He selects both the frigates for elimination. The English player must eliminate one naval counter, and he chooses the frigate. Since Waterhouse was aboard the frigate, he is eliminated also. Both players will then consult the back of the eliminated units (including the expended deception counters) to determine their placement (9.3). Combat in 3119 is complete with both sides having naval counters in the hex.
Since the Spanish player conducted the successful intercept, he is the attacking player and must move his naval counters one hex. He moves them back to 3019 (9.1).
Next, the players must resolve the naval combat in 3018. The Spanish player declares he is committing his cannon to the naval combat. The die rolls are as follows:
- Frigate: 6, miss.
- Santa Isabel: 5, hit.
- Cannons (using the +1 from Reggio) 1 and 2, scoring one hit (9.1).
Since the combat is taking place in a seaport hex occupied by Spanish units, the English player must add the seaport value of the port (2) to each of his die rolls (9.1, steps 3 and 4).
- Augusta (using 1 of Ogle's +3): The player rolls 2 dice, needing a modified die roll of 6 or less. He rolls a 5 and a 3 (5+2=7, miss; and 3+2=5, hit).
- Frederick: The player rolls 1 die, needing a modified die roll of 7 or less. He rolls a 3 (3+2=5, hit).
- Cornwall: The player rolls 1 die, needing a modified die roll of 8 or less. He rolls a 6 (6+2=8, hit).
- Frigate (using 2 of Ogle's +3): The player rolls 3 dice, needing a modified die of 4 or less. He rolls a 2, 3, and a 4 (2+2=4, hit; 3+2=5, miss; and 4+2=6, miss).
The English player must eliminate two naval counters. He chooses to eliminate the Augusta and one Frigate. The Spanish player must eliminate four naval counters. He only has two naval counters, and since the cannons participated, he must eliminate that counter also. Both players use 9.3 to determine the disposition of all eliminated counters.
The English player now disembarks his land counters and engages the remaining Spanish counters in land combat (9.2). The English player will roll two dice (one for each of his two soldiers counters) + 9 more dice (the total number of blue "+" values on his two remaining naval counters (Frederick & Cornwall) and the cannons counter). He then subtracts two dice, due to the seaport value of Leogane, leaving him to roll a total of nine dice (11-2=9). The Spanish player rolls two dice (one for the soldier counter + one for the leader counter).
The English player rolls the following: 2, 3, 6, 3, 1, 4, 4, 1, 5. One of the soldier counters has a green combat value of one and the other has a value of two, thus the English player scores two hits (one die roll is 2, which is equal to one soldier counter's value, and another die roll is 1, which is equal to the other soldier's value). The Spanish player rolls a 1 and a 5, scoring one hit.
The Spanish player must eliminate both the soldier and leader counter. The English player chooses to eliminate the soldier counter with the green combat value of one. Both players conduct the procedures in 9.3 to determine the dispositions of all eliminated units. The remaining English land counters occupy hex 3018 and capture Leogane. The English player immediately adds two points (the seaport's value) to his War Funds total (3.4). Since all combat has been resolved, play moves to the Spanish Phase, War Funds Purchases Step.
Editor's note: the text layer of the example of play was not fully ordered (the naval-combat dice lines and the diagram labels are interleaved); the sequence above follows the printed page 14 and 15 text, with the diagram labels omitted.
Reference Tables
These tables are printed on the reference card (page 16 of the booklet) and at the end of the rules.
Perilous Sea Table (6.3)
| Die Roll | Result |
|---|---|
| 1 | Nautical Disaster: The enemy player must roll one six-sided die and eliminate a quantity of naval counters (of his choice) in that moving stack equal to that die roll.* Note that the enemy player may inspect that entire moving stack to make his choice(s). |
| 2 | Lost at Sea: The owning player must roll one six-sided die and eliminate a quantity of naval counters (of his choice) in that moving stack equal to that die roll.* |
| 3 | Davy Jones' Locker: The enemy player must eliminate one naval counter (of his choice) in that moving stack. Note that the enemy player may inspect that entire moving stack to make his choice. |
| 4 | The Briny Deep: The owning player must eliminate one naval counter (of his choice) in that moving stack. |
| 5 & 6 | No effect: Naval movement may continue. |
*If there are fewer naval counters present than the die roll, the excess die roll value is never carried over (even if there are other naval counters from another stack in that same hex).
Die Roll Modifiers: Storm: -1. Admiral: + a number equal to the leader's gun value.
War of Austrian Succession Table (6.8)
| Die Roll | Result |
|---|---|
| 1 | The war in Europe is going badly for the English; the Spanish player may roll two six-sided dice and add that result to the Spanish War Funds Track immediately. |
| 2 | England needs reinforcements. The English player must remove one named English naval counter (of his choice) immediately. |
| 3 | England needs reinforcements. The English player must remove one English soldier counter (of his choice) immediately. |
| 4 | Spain needs reinforcements. The Spanish player must remove one Spanish soldier counter (of his choice) immediately. |
| 5 | Spain needs reinforcements. The Spanish player must remove one named Spanish naval counter (of his choice) immediately. |
| 6 | The war in Europe is going badly for the Spanish; the English player may roll two six-sided dice and add that result to the English War Funds Track. |
| 7 | The War of Austrian Succession ends (permanently). Do not roll on this table again. |
Die Roll Modifiers: Capture of French Seaports: +1 if any French seaport was captured this turn. Capture of Dutch Seaports: -1 if any Dutch seaport was captured this turn.
Land Movement & Disease (7.5)
If a land counter(s) is moved into any non-seaport land hex, the owning player rolls one six-sided die. If the die roll is an even number, there is no effect. If the die roll is an odd number, the owning player must eliminate one land counter (of his choice) in that hex.
War Fund Points (3.2 & 3.4) Reference
- At start: English 100 points; Spanish 50 points.
- Each game turn: English 30 points; Spanish 25 points.
Both sides receive war fund points equal to the captured seaport's Seaport Value immediately when captured and each following friendly War Purchases Step, if the port still qualifies.