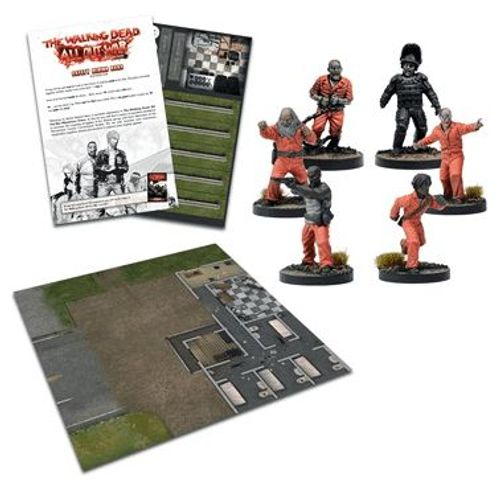
The Walking Dead: All Out War – Safety Behind Bars
The Walking Dead: All Out War – Safety Behind Bars Rulebook
Table of Contents
Table of Contents
New Rules
The following rules are additions to those found in the All Out War core set, or in some cases modify standard rules. Where there is any contradiction between a core rule and a rule found in this expansion, the expansion takes precedence.
New Actions
The following Actions are presented in addition to those on page 11 of the All Out War core set. They follow all of the usual rules for Actions.
Open/Close
At the beginning of the game, some doors are closed. A model can pass through an open door without penalty, but cannot pass through a closed door.
A model in base contact with a door may Open or Close it as an Action.
Barricade
A model may wish to barricade a door so that it can still be seen through, rather than close the door.
This Action may only be performed when the Survivor is inside a room and standing within 1" of the door. When the Action is performed, place a spare barrier across the doorway. This barrier follows all of the normal rules for barriers, except that it may be Smashed (see below), and has a Defense value of a white die.
Smash!
Smash! Actions are often required to break open closed doors, crates or safes. Whatever the reason for performing a Smash! Action, the method is always the same.
The object that needs to be Smashed will have a Defense value assigned to it in the same way as an enemy model. In order to perform the Action, the Survivor must be in base contact with the object, and otherwise unengaged. The Survivor rolls their Melee dice, adding a red die if they have an equipped MeleeWeapon with the Bludgeon keyword. If the Smash! roll beats the object's Defense roll, the Smash! Action is successful.
The Smash! Action creates NOISE.
Once a door is smashed, it is removed and can no longer be Opened or Closed.
New Scenery
The scenery in this expansion uses the Advanced Scenery rules from page 33 of the All Out War rulebook. Below you will find details of how to use the new Prison Grounds gaming area and Prison scenery pieces in your regular games.
The Prison Grounds
This expansion contains a unique gaming area, depicting parts of the interior of the prison. You must fight room-to-room, uncovering lurkers and enemies alike as you go.
When using the Prison Grounds gaming area in a regular game, only 7 Scenery Points' worth of scenery may be used, and they must be at least 2" from the prison.
If the edge with the Cafeteria is chosen for deployment, the Survivors may deploy anywhere in the Cafeteria instead of along the board edge. If any other edge is chosen, the Survivors must deploy outside the prison, along the edges as normal.
Remember that when you Search a supply counter inside a building, you draw [blue die] Supply cards instead of just one (resolving them one at a time in case of Incidents).
-
Walls: These solid walls are Blocking and Impassable.
-
Doors: Doors can be Opened and Closed, or Barricaded from the inside. Regular doors can be Smashed, and have a Defense of a blue die. Closed doors are Blocking and Impassable.
-
Cell Doors: These are treated like normal doors, except that they can only be Opened/Closed from the outside, cannot be Smashed, and are not Blocking. Cell Doors have the Secure Position special rule on page 4.
-
Main Door: This is treated like a regular door, but it also has the Collapse! rule.
-
Rooms and Cells: Rooms and cells always have closed doors at the start of a scenario unless the scenario rules state otherwise.
Rooms and Cells are Resource Hubs, and the supply counters within can be Searched by any model inside the room.
Important: When a room is entered for the first time, place [red die] Walkers inside, in contact with the supply counter if there is one, and outside the Kill Zone of any Survivors if possible.
-
The Tower: The tower and its balcony are treated like any other Room, but with the Elevated rule. Survivors may use an Action to scale the ladder, and are placed in the room, to one side of the ladder (not on top of it). The balcony can be accessed freely through the door. The balcony railing grants Cover (Light) as well as the Elevated rule.
-
Windows: Survivors may draw line of sight through windows. Models shooting through a window are affected by Cover (Heavy). Windows are also Defensible and Traversable.
-
Walker Entry Edges: When Walkers are required to enter play on this mat, they can enter from any edge marked in red, unless specified otherwise in the scenario.
-
The Armory: This is an overlay, used to replace a specified room on the Prison Grounds gaming area. It follows the rules for Rooms as described earlier, but will also have additional rules described in the scenarios.
Chain-Link Fence
Tall, secure fencing for keeping prisoners in, and Walkers out… most of the time.
- Scenery Points: 1
- Special Rules: Cover (Light), Impassable, Secure Position, Collapse!
Moving In and Around Buildings
When using buildings with accessible interiors, there are a few additions to the standard rules:
- When inside, Walkers do not stop moving when they hit a wall. They will hit the wall, and then continue moving around the wall towards their target via the shortest possible route, up to their full 6" movement.
Rick has made NOISE. The closest Walker in the nearby cell starts by moving directly towards him as normal. When it hits the wall, instead of stopping it will continue walking around the wall, trying to reach Rick by the shortest possible route, until it has moved its full 6".
- Note: When using buildings, the shortest route from outside to inside or vice versa will be the nearest door. Once a moving Walker has hit a wall, any further movement towards a Survivor on the other side will be towards the door.
- When inside, Survivors must use teamwork to safely maneuver through the corridors. Survivors may move through friendly unengaged Survivors. In addition, friendly Survivors do not block line of sight if they are in contact with the shooting model.
New Scenery Special Rules
Collapse!
If at any point three or more Walkers are in contact with the same scenery piece with this rule, the scenery piece is removed from play.
If you wish, you could also assign the Collapse! rule to barriers and other similar scenery pieces used in your regular games.
Secure Position
This scenery counts as Defensible against Walkers only, and Survivors do not take damage in melee when fighting through it. Survivors may not fight each other in melee over or through this scenery, even if they can see each other.
New Event and Supply Cards
This expansion contains extra Event and Supply cards. These are shuffled into the decks from the core game where mentioned in the scenarios.
If your opponent agrees, you can also shuffle them into the decks in your regular games as well, to represent the game being set in the Prison.
Armored Walkers
This expansion includes Armored Walker models and an Armored Walker reference card.
In The Walking Dead scenario, Armored Walkers may be included as long as both players agree, selected as part of the points limit as usual. Otherwise, Armored Walkers will be required for specific scenarios or Events.
Narrative Campaigns
The following set of scenarios are best played in order. They recreate the story of Rick leading his group to the discovery and defense of the prison.
This campaign comprises seven scenarios. Four of them are solo missions (see Going Solo on page 3 of the All Out War rulebook), which can also be played co-operatively with a friend by splitting the Survivors between players. Chapters 2, 5 and 6 are two-player games.
Participants
Each scenario lists the recommended participants - the Survivors that actually took part in the action in The Walking Dead storyline. Some of those participants can be found in The Walking Dead: All Out War core and in this expansion. The Leader of the group is marked (L) in the scenarios.
However, one box could never hold the huge cast of characters from the story, which means some of the recommended participants are found in separate booster packs, available from Mantic. If you do not have all of the Survivor models and cards required, never fear! In each scenario you will find a set of guidelines for Alternative Participants – this section will detail how to play with Survivors of your own choosing.
Story Mode
When playing a narrative campaign, the results of each scenario impact the next – the better you do in one game, the better chance you'll have of victory in the next one, or so the theory goes!
Each scenario will include the 'Story Mode' header. This will tell you how the results of the previous game affect the current one.
This will often relate to the number of supply counters collected in the previous scenario, so make sure to keep note of this number before you clear away the game.
Character Deaths and Injuries
If a Survivor is removed from play during a scenario, but is required for a later scenario in the campaign, roll a white die to see the extent of their injury. The result is the number of health points that are deducted from the Survivor's starting value in the next game.
If a Survivor undergoes an Amputation during a game, then the penalties carry over to subsequent scenarios.
Game Length
Unless stated otherwise in the scenario, these games last until one of the Victory Conditions has been met, or at the end of any turn in which the Threat Tracker is at Maximum Threat.
Chapter 1: Clear The Yard
Rick, Tyreese and Andrea enter the prison grounds, and clear a path to the prison for the others to follow. Or at least, that's the plan...
Survivor Groups
Recommended Participants
- Rick Grimes, Atlanta Camp Leader (L)
- Tyreese, Pro Football Player
- Andrea, Skilled Sharpshooter
- Up to 60 points of equipment
Alternative Participants
- 200 point limit
Story Mode
Miles Behind Us: If you also own the Miles Behind Us expansion, then you can link the scenarios from that box to the ones in this book to make a continuous narrative! Simply apply the Character Deaths and Injuries rules from page 5 to Miles Behind Us Chapter 6: Supply Raid, and continue onto Safety Behind Bars Chapter 1: Clear the Yard.
Setup Instructions
- Scenery
Set up the 20" x 20" Prison Grounds gaming area. Place four Chain-Link Fences in a straight line along the board as shown, 3" from the Deployment Edge, leaving a gap in the road section of the map. Place two Cars anywhere inside the Prison Grounds (but not in the prison building), at least 2" from the fence, each other, and the board edges.
The interior of the Prison is not used in this scenario, and is Impassable.
- Supplies
Place one supply counter in each Car.
- Walkers
You will need 8 Walker models. Place the Walkers anywhere in the Walker Zone, at least 3" from each other.
- Survivors
Survivor models deploy in contact with the Deployment Edge, as shown on the map.
Set Threat Level
Position the Threat Tracker to one side of the board, and point the arrow towards position 1.
Special Rules
Events
Add the Armored Assault and Hold the Fences! cards to the Event deck.
Infested Hallways
Whenever Walkers enter play during this game, they must be placed in contact with the double entrance doors of the prison, or within 3" of it if that is not possible. The rest of the rules for Walkers entering play apply as normal.
Victory Conditions
The player wins when there are no standing Walkers on the board, and at least two Survivors are still alive. The game ends immediately when this objective is met.
If the Threat Tracker reaches maximum, or two or more Survivors are removed as casualties, the game is lost.
Chapter 2: Unwanted Guests
Expecting to find the prison abandoned, Rick's group is surprised to find a group of prisoners holed up in the canteen. This scenario looks at what might have happened if their frayed tempers had spilled into violence a little sooner...
Survivor Groups
Unwanted Guests is a scenario for two players.
Recommended Participants
- Player 1
- Group A
- Rick Grimes, Atlanta Camp Leader (L)
- Tyreese, Pro Football Player
- Group B
- Lori Grimes, Caring Mother
- Allen
- Up to 35 points of equipment across both groups
- Group A
- Player 2
- Dexter (L)
- Thomas
- Andrew
- Axel
- Two Shivs
Alternative Participants
- Player 1
- Group A
- 125 point limit
- Group B
- 60 point limit
- Group A
- Player 2
- 110 point limit
- No ranged weapons
Story Mode
Player 1 may spend an extra 5 points on equipment for each supply counter they acquired in the previous scenario.
Setup Instructions
- Scenery
Set up a 20" x 20" Prison Grounds gaming area. Place four Chain-Link Fences in a straight line along the board as shown, 3" from the Deployment Edge, leaving a gap in the road section of the map.
Place the Armory over the office, as indicated on the map, creating a second room accessible through the office.
- Supplies
Place one supply counter in each of the four cells, one in the office, and one in the tower. Place three supply counters in the Armory.
- Walkers
You will need 12 Walker models. Beginning with the player with Setup Initiative, place the Walkers anywhere in the Walker Zone, at least 3" from each other.
- Survivors
Player One's Group A deploys outside the prison boundary, in contact with the board edge. Group B deploys anywhere in the inner corridor outside the cells.
Player Two then deploys their models anywhere in the Cafeteria, at least 2" from any enemy models.
Set Threat Level
Position the Threat Tracker to one side of the board, and point the arrow towards position 4.
Special Rules
Events and Supplies
Remove the Alarm! card from the Event Deck, and instead add the Armored Assault, Hold the Fences!, No Hope and Short Circuit cards.
Remove the Booby Trap card from the Supply deck and instead add the Safety Behind Bars Supply cards.
Room By Room
The rules for searching Rooms and Cells on page 3 are used in this scenario. The Armory door and all the cell doors begin the game closed. All other doors begin the game open.
The Armory
The door to the Armory cannot be opened for any reason, and must be Smashed. There are no Walkers in the Armory.
When a Survivor searches a supply counter in the Armory, they do not draw any Supply cards. Shuffle together all the Safety Behind Bars Equipment cards not currently in use, and take one of these at random instead.
Victory Conditions
A player wins when, at any point, more than half the models in the enemy group are removed as casualties. If using the recommended participants, this will be three models. The game ends immediately when this criteria is met.
If the Threat Tracker reaches maximum before either side completes its objective, the game is a draw.
Chapter 3: Clearing House
With their group now at its largest point, Rick organizes his people into teams to search the prison room-by-room and clear out the Walkers that roam the darkened corridors.
Survivor Groups
Recommended Participants
- Tyreese, Pro Football Player (L)
- Andrea, Skilled Sharpshooter
- Billy Greene
- Glenn, Supply Run Master
- Up to 50 points of equipment
Alternative Participants
- 210 point limit
- No more than 4 Survivors
Story Mode
You may spend an extra 5 points on equipment for each supply counter claimed by Player 1 in the previous scenario.
Setup Instructions
- Scenery
Set up a 20" x 20" Prison Grounds gaming area. Place four Chain-Link Fences in a straight line along the board as shown, 3" from the edge, leaving a gap in the road section of the map.
- Supplies
Place one supply counter in each of the four cells, one in the office, and one in the tower.
- Walkers
You will need 8 Walker models. Place 4 anywhere in the Walker Zone, and the other 4 outside the fence. All Walkers must be at least 3" from each other and 2" from the fence.
- Survivors
All Survivors are placed in the cafeteria.
Set Threat Level
Position the Threat Tracker to one side of the board, and point the arrow towards position 1.
Special Rules
Events and Supplies
Remove the Alarm! card from the Event Deck, and instead add the No Hope, Hold the Fences! and Short Circuit cards.
Remove the Booby Trap card from the Supply deck and instead add the Safety Behind Bars Supply cards.
Room By Room
The rules for searching Rooms and Cells on page 3 are used in this scenario. All doors begin the game closed.
Exploration
The prison is considered to be in almost complete darkness, and most of the doors are closed, making it hard to see what's coming!
Each time a room is entered, roll to see how many Walkers are inside, as per the rules on page 3. Additionally, each of the two corridor sections also contain [red die] Walkers. These are placed in the center of the corridor sections, outside the Kill Zones of any Survivors if possible.
Armored Walkers
When the Tower is entered for the first time, place one Armored Walker in the room instead of [red die] regular Walkers.
Walkers Entering Play
In this scenario, Walkers can only enter play via the corridor on the board edge, as shown on the map. If any cannot enter due to the positioning of other Walkers or Survivors, no more Walkers are placed and the Threat Level is advanced by 1 instead.
Victory Conditions
The player wins when every room has been opened, every supply counter Searched, and there are no Walkers left in play.
Chapter 4: Chance Encounter
While the others had gone on ahead and found the prison, Otis had stayed behind at the Greene family farm to tend the livestock. Eventually, he decided to forge on and catch up with his people. Unfortunately, he soon ran into trouble on the road, and only a chance encounter with a mysterious stranger offered any hope…
Survivor Groups
Recommended Participants
- Group A
- Otis
- Group B
- Michonne, Wandering Nomad
- Mike and Terry
- Up to 30 points of equipment across both groups
Alternative Participants
- Group A
- 35 point limit
- 1 Survivor
- Group B
- 75 point limit
- 1 Survivor
Setup Instructions
- Scenery
Set up a 20" x 20" gaming area. Place up to 8 Scenery Points' worth of scenery in the Walker Zone, each no closer than 3" to another scenery piece.
- Supplies
Supply counters are placed in Resource Hubs only, in the same manner as in the All Out War rulebook, up to a maximum of nine counters.
- Walkers
You will need 12 Walker models. Place them in the Walker Zone, no closer than 3" to each other or to a board edge.
- Survivors
Group A is placed in the center of one board edge. Group B does not begin the game in play.
Set Threat Level
Position the Threat Tracker to one side of the board, and point the arrow towards position 4.
Special Rules
Endless Horde
To represent the seemingly numberless herd, every time a Walker is removed from play, it immediately re-enters play using the normal rules.
In this scenario, all Walkers enter play via the Escape Edge.
Nick of Time
As soon as the Threat Level hits Medium, the model from Group B is placed on the board in contact with the corner marked on the map, and may act normally from that point onwards.
Victory Conditions
The player wins when both Survivors have moved off the Escape Edge. They must have enough movement to take them physically off the edge of the board, and this is the only way any model can leave the gaming area during the game. The game ends automatically as soon as the second Survivor has left the board.
If the Threat Tracker reaches maximum, or either Survivor is removed as a casualty, the game is lost.
Chapter 5: Mercy Mission
With Thomas locked away following the gruesome killings of Rachel and Susie Greene, Patricia took pity on the homicidal maniac and attempted to break him out!
Survivor Groups
Mercy Mission is a scenario for two players.
Recommended Participants
- Player 1
- Group A
- Andrea, Prison Sniper
- Maggie Greene, Rebellious Daughter
- Group B
- Rick Grimes, Atlanta Camp Leader (L)
- Up to 50 points of equipment across both groups
- Group A
- Player 2
- Patricia (L)
- Thomas
- Up to 30 points of equipment
Alternative Participants
- Player 1
- Group A
- 75 point limit
- Group B
- 75 point limit
- 1 Survivor
- Group A
- Player 2
- 75 point limit
Story Mode
If Player 2 won Chapter 2: Unwanted Guests, they may take Dexter in their group.
Setup Instructions
- Scenery
Set up a 20" x 20" Prison Grounds gaming area. Place four Chain-Link Fences in a straight line along the board as shown, 3" from the Deployment Edge, leaving a gap in the road section of the map.
- Supplies
Place one supply counter in the office, one in the tower, and one in each of the cells that isn't a Survivor Deployment Zone.
- Walkers
You will need 6 Walker models. These must be placed in the Walker Zone - outside the prison, within 8" of the center of the board, but not within 3" of the dead center point. They must be placed at least 2" apart.
- Survivors
Player One deploys Group A in the Cafeteria. Group B is deployed outside the prison, in the dead center of the board.
Player Two then deploys their models in the indicated cell.
Set Threat Level
Position the Threat Tracker to one side of the board, and point the arrow towards position 1.
Special Rules
Events and Supplies
Remove the Alarm! card from the Event Deck, and instead add the No Hope, Short Circuit, and Armored Assault cards.
Remove the Booby Trap card from the Supply deck and instead add the Safety Behind Bars Supply cards.
Room by Room
The rules for searching Rooms and Cells on page 3 are used in this scenario. All doors begin the game open.
The Dead Return
In this scenario, all Walkers enter play via one of the Escape Edges.
Friendly Fire
No model from Player 1's group may attack Patricia (by performing a Ranged Attack Action, or by moving deliberately into base contact with her) until Patricia or Thomas inflicts a wound on any of Player 1's models. They may attack Thomas normally.
Victory Conditions
Player 1 wins if Thomas is killed.
Player 2 wins if either Player 1's group is wiped out, or if Thomas can move off one of the Escape Edges. He must have enough movement to take him physically off the edge of the board, and this is the only way any model can leave the gaming area during the game. The game ends automatically as soon as Thomas has left the board.
If the Threat Tracker reaches maximum before either side completes its objective, or if Patricia is killed, the game is a draw.
Chapter 6: Misplaced Loyalty
With tensions running high following the death of Thomas, the prisoners, aided by Patricia, raid the armory and attempt a coup to remove Rick's group from the prison, but someone left the doors to A-Block open...
Survivor Groups
Misplaced Loyalty is a scenario for two players.
Recommended Participants
- Player 1
- Group A
- Tyreese, Pro Football Player
- Andrea, Prison Sniper
- Dale, Grizzled Leader
- Glenn, Supply Run Master
- Up to 50 points of equipment
- Group B
- Rick Grimes, Atlanta Camp Leader (L)
- Lori Grimes, Caring Mother
- Carl Grimes, Trainee Sharpshooter
- Up to 20 points of equipment
- Group A
- Player 2
- Group A
- Dexter
- Andrew
- Patricia
- Group B
- Axel
- Up to 60 points of equipment across both groups
- Group A
Alternative Participants
- Player 1
- Group A
- 200 point limit
- Group B
- 100 point limit
- No more than 20 points may be spent on equipment
- Group A
- Player 2
- Group A
- 125 point limit
- Group B
- 30 point limit
- 1 Survivor
- Group A
Story Mode
If Thomas survived Chapter 5, Player 2 may choose him instead of Patricia (Thomas does not benefit from the Friendly Fire rule, below).
If Patricia was killed in Chapter 5, but Otis survived Chapter 4, then Player 2 may include Otis in Group A. Otis benefits from Patricia's Friendly Fire rule, below.
Setup Instructions
- Scenery
Set up a 20" x 20" Prison Grounds gaming area. Place four Chain-Link Fences in a straight line along the board as shown, 3" from the edge, leaving a gap in the road section of the map.
Place the Armory over the office, as indicated on the map, creating a second room accessible through the office.
- Supplies
Place one supply counter in the tower, one in the office, and three in the Armory.
- Walkers
You will need 8 Walker models. These must be placed in contact with either of the Walker deployment edges, at least 2" apart.
- Survivors
Player 1 deploys Group A in the Cafeteria. Group B is deployed in the gap between the fence sections.
Player 2 then deploys Group A in the prison yard, in contact with the board edge indicated, and places Group B in any of the cells.
Set Threat Level
Position the Threat Tracker to one side of the board, and point the arrow towards position 1.
Special Rules
Events and Supplies
Remove the Alarm! card from the Event Deck, and instead add the Hold the Fences!, No Hope and Armored Assault cards.
Remove the Booby Trap card from the Supply deck and instead add the Safety Behind Bars Supply cards.
Room by Room
The rules for searching Rooms and Cells on page 3 are used in this scenario. All doors begin the game open, except the door to the Armory, which is closed. It may be Opened as usual.
The Armory
There are no Walkers in the Armory.
When a Survivor searches a supply counter in the Armory, they do not draw any Supply cards. Shuffle together all the Safety Behind Bars Equipment cards that are not currently in use, and take one of these at random instead.
Trust Issues
While the Threat Level is All Quiet or Low, the two players may attack each other's Survivors as normal (with the exceptions described below – see Friendly Fire). While the Threat Level is Medium or High however, Survivors may only attack each other if they have no Walkers within 8" – otherwise they can only attack the Walkers.
Friendly Fire
No model from Player 1's group may attack Patricia (by performing a Ranged Attack Action, or by moving deliberately into base contact with her) until Patricia inflicts a wound on any of Player One's models.
Likewise, Axel cannot attack any of Player 1's Survivors unless they first wound him. He may attack Walkers as normal.
If Patricia and/or Axel are not used, these rules do not apply.
Victory Conditions
A player wins when, at any point, more than half the models in the enemy group are removed as casualties. If using the recommended participants, this will be three models for Player 1 to win, and four models for Player 2 to win. The game ends immediately when this criteria is met.
If the Threat Tracker reaches maximum before either side completes its objective, the game is a draw.
Chapter 7: Down in Flames
Hopes are momentarily raised when a helicopter flies over the prison. However, it quickly becomes apparent that the chopper is in trouble, and has crashed nearby. Rick, Glenn and Michonne don their riot gear and take to the road to see if anyone survived the crash.
Survivor Groups
Recommended Participants
- Rick Grimes, Prison Advisor
- Michonne, Wandering Nomad
- Glenn, Prison Guard
- Riot Gear x 2
- Up to 40 points of equipment
Alternative Participants
- 210 point limit
- No more than 3 Survivors
Story Mode
If Player 1 won Chapter 6, you may spend an additional 15 points on equipment.
Setup Instructions
- Scenery
Set up a 20" x 20" gaming area. You will need 16 Scenery Points' worth of scenery, which can be placed anywhere you like, but not within 2" of another scenery piece.
- Supplies
There is only one supply counter in this scenario, placed in the opposite corner of the board to the Survivor deployment zone.
- Walkers
You will need 10 Walker models. Place them in the Walker Zone, at least 2" from a board edge and each other.
- Survivors
The Survivors are placed in contact with the board edge in the area shown on the map.
Set Threat Level
Position the Threat Tracker to one side of the board, and point the arrow towards position 4.
Special Rules
Walkers in the Darkness
You can't see them, but they are still following... At the start of each turn after the supply counter has been searched, roll a blue die for each board edge - that many Walkers enter play anywhere along it.
Victory Conditions
The player wins when the supply counter has been Searched, and at least two Survivors have moved off via the Survivor deployment zone, including the Survivor with the counter. They must have enough movement to take them physically off the edge of the board, and this is the only way any model can leave the gaming area during the game. The game ends automatically as soon as the second Survivor has left the board.
If the Threat Tracker reaches maximum, or two or more Survivors are removed as a casualty, the game is lost.