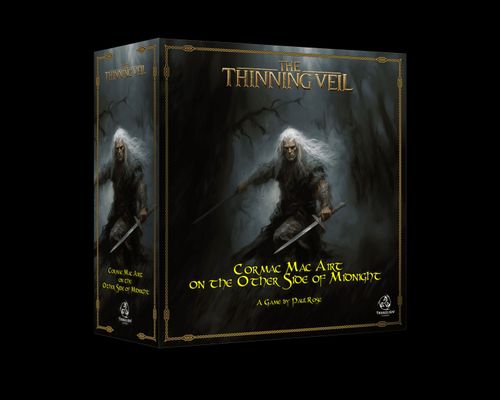
The Thinning Veil: Cormac Mac Airt on the Other Side of Midnight
The Thinning Veil: Cormac Mac Airt on the Other Side of Midnight Rulebook
Table of Contents
Table of Contents
Components
Component Overview
Cormac Mac Airt on the Other Side of Midnight Rulebook: The very book you are reading. This tells you a little bit about the world of the Thinning Veil but is mostly concerned with the dungeon crawl mode rules for solo and the variant 2 player rules section. By the time you have read, you will be ready for adventure in a world of horror and magic, mystery and beauty.
Cormac Mac Airt on the Other Side of Midnight Scenario Book: In this book you will find the story you help shape as you progress through the scenarios in this short series of linked adventures. Most narrative content is confined to this book, but it also presents the scenario format, so you know how to apply their structure.
Game Tiles
Players of this game navigate their way through these game tiles. At the start of play the large tile is either where you begin, or is perhaps where the scenario ends. Sometimes a scenario won't include this tile, and you simply set it aside for when it is required. The other tiles are all included in lists by scenario.
Stack the tiles, and shuffle them face down. Keep them 'Thinning Veil logo' side up. Each time a player explores, by leaving a zone, draw the top tile. You must decide before drawing where you'll place it cardinally. You may orient it however you wish during placement, but one path from the current tile must permit access to the new tile placed. Tiles are also often called zones.
A zone is everywhere within a single tile except in rare circumstances which will be detailed in the scenario, and presented in the Pit Trap rules.
Dice
12mm Dice: These are used to record cool downs, heat ups, health of enemies in play, poison, durability of weapons and items that are damaged, and generally facilitate many aspects of play.
16mm Custom Dice: Used for generating actions, making attacks and resolving tests.
Large d12 Round Tracker: This is used to track the progress of the game as detailed in the scenarios.
Dual-layered Dashboard & Hero Card
These contain the attributes of your Hero, spaces for 'banked dice', an extra space for conditions you may pick up and the dice to track them, and the spaces on the right for those results generated for your available actions. One of those spaces also records the Enemy activations your Hero grants the Enemy before you can spend any of your own actions.
Tokens and Standees
Acrylic Cubes: These are used to track Actions, Attributes and Corruption.
Hero Standees: These represent Cormac & Grainne's position on the map which unfolds tile by tile during play. You may prefer to use a suitable miniature you may own.
Hero Twilight Tokens: These are placed in the middle zone of the Twilight Card, should any attribute drop to 0, to track the position of your soul.
Enemy Standees: These represent the positions of Enemy Types in play. You may use suitable miniatures you may possess instead, if you wish.
Trap Tokens: When instructed to place a Trap, put one of these tokens on the Tile where it has been generated. Always place the token with the yellow lined side face up. This indicates the trap is set and has not been triggered. Once triggered, flip this token over, to show it is exhausted. Leave it in play though, some traps can be reset!
Lever: This is usually located on the Tomb tile & should cover the Tomb. Spend 1 Interact to pull the lever. Turn the token perpendicular to the Tomb on the tile, to remind yourself, when you do so. Scenarios will instruct you as to the game effect, usually it lowers or raises a Portcullis or opens a locked double door.
Treasure Chests Tokens: When instructed to place a Treasure Chest token, put one of these tokens on the Tile where it has been generated on the side with the lid closed. This indicates the chest has not been opened yet. Once a chest is opened, flip the token as a reminder of this, and roll a dice for your reward.
The scenario will tell you which deck to draw from based on the symbol you roll. Enemy symbols usually indicate the chest was trapped!
Treasure Chests have two listed values in the scenario: Their Lock Quality and their Durability, followed by the number. The number is the amount of 'successes' a Hero needs to open the chest. This is achieved in two ways: either by spending an Interact action to pick the lock, rolling 6 custom dice and needing Combat results (5+ on regular d6), or by attempting to break it open using Combat actions, rolling a number of dice equal to the Might score of the Hero, adding any damage bonuses from bludgeoning weapons. If the latter method is used and the chest contains a potion, that potion is broken and is discarded!
Arch Token: The Arch token is placed on the nearest path on a tile to the player, to mark the entry point, on most maps. Typically this is on the crossroad tile, permitting future movement in 1 of 3 directions. Sometimes the Arch is placed if a condition is met, and could create a previously unseen or concealed path to a secret chamber.
Stairs: Sometimes a Hero will instead enter a map via the Stairs. In some scenarios the Stairs are a target you need to find to access another level of the dungeon. Whatever the case, the scenario will make it clear. If you entered by the stairs, they simply mark the starting zone. If your target is the stairs, it costs an action of any type to exit via the stairs and trigger either the end of the scenario or the end of the level. You may then begin the next level, or record your stats and cards in play, then continue your adventure another time!
Double Doors: The double doors like the above, may be the starting point or a target. You will often need to find them and get them open to exit a dungeon or its level, in order to progress.
Opening an unlocked double door costs an action of any type. Double Doors, like Treasure Chests, have a stated Lock Quality and Durability. The rules for them work exactly the same way as they do for Treasure Chests.
Search Tokens: In the game, you may search all zones unless stated. Scenarios will tell you the difficulty of this search. If you want to, you can choose to increase the difficulty by 1 if the Hero is in Darkness, & lacks an ability to negate the penalty!
A Search test is made by spending an Interact action. Then you roll 6 dice, requiring 2 successes, or 3 with the above Darkness rule applied! A successful search permits you to draw the top card from the Treasure Deck. Once a successful search is made, mark the zone with a Search token. This zone may not be searched again.
Portcullis: The scenario will instruct you on what to do with these but most commonly they begin play down or up. You might need to lower or raise the Portcullis, to defend an area or to access a new one. Sometimes you will find a scenario trigger event, detailed later and in the scenarios, will lower and raise the Portcullis.
Poison Gas Token: The instructions for the Poison Gas trap are written on the card and explored elsewhere. The Poison Gas Token should be placed in the zone where one is set off or triggered.
Remove the trap token. Poison Gas Traps never reset. Place a Green d6 on the counter. Dial this down at the start of each Hero Phase after placement. Remove it when it drops below 1 as the Poison has dissipated. Until then anyone in the zone or passing through it is going to have a bad time!
Pit Trap: These are placed and the trap token is discarded. The pit becomes a mini-zone within a tile. The bottom of a pit, should you fall in and suffer damage, can even be searched, just like a zone or tile. It costs 1 action of any type to exit a pit. Only ranged attacks may target a Hero in a pit. A Hero in a pit cannot target an enemy in the tile 'above' the pit, on which the token has been placed. Sometimes game effects allow enemies to be pushed into a pit. An enemy pushed into a pit may climb out by spending 1 movement point. It will take 3 damage when it is pushed in!
Some scenarios allow a Hero finding a pit to access a new or hidden level or tile. The scenario will instruct you on this.
Soul Tokens: Each time a Hero kills an enemy that Hero claims a soul. Sometimes game effects and scenario events grant souls also as rewards.
Souls are a form of currency. They may power ancient artifacts or weapons, skills or portals. Mostly they are used to purchase Skill cards. These cost 5 souls each, or 10 souls for a 'once per game' Skill card. The latter is due to the Skill being very potent.
In Cormac Mac Airt, a Soul may be spent to reroll after Rolling Up, rolling an Attack or a Test. If this option is chosen, ALL the dice used in the test must be rerolled.
Cards
Skill cards: There are 12 per Hero. Each one has the name of the Hero at the bottom, and the name of the Skill at the top. The dashboard & Hero card details your starting Skill cards.
Twilight Scrolls: You draw 1 of these at the start of the Hero Phase if your Hero is in Twilight. It details a near death experience! But will your soul return to your body, revive and fight on, or will you succumb to death and pass over to the Other Side... or is there a more terrible fate in store for you?
Twilight Card: This card represents the journey of your soul to the other side, a step toward the light. You must wilfully attempt to resist the embrace of death, to carry on in life!
Enemy Scrolls: These cards show the image of the Enemy, and detail the behaviours and Health of that Enemy, as well as how many souls you are rewarded with for defeating them. It is generally 1, but some nasty bosses grant 1 per Hero, or more.
Trap Cards: Drawn when a Trap is triggered. These detail the trap, with instructions of a challenge it presents and the effects it has on those who fall prey to it!
Scroll Cards & Potion Cards: These form two distinct decks, but are drawn most typically on successful searches in certain tiles as instructed in the scenario, or upon successfully opening a chest.
In Cormac, these are often found in locations detailed in scenarios or by opening up Treasure Chests!
Treasure Cards: When you make a successful search, draw a treasure card and put a search token in the zone. Treasure cards can prove to be vital to your success.
Equipment Cards: These detail armour, weapons, items and gear.
World Overview
The Thinning Veil: Cormac Mac Airt on the Other Side of Midnight is a world crawling boardgame specifically designed for the solo gamer and with dedicated 'true solo' in mind. True solo is defined apart from cooperative games, which can all be played solo in truth using all the characters or a mix of them, as having the player focus on 'a single specific character who represents them in the game'. In this game this character is called your Hero.
Cormac, which we'll call the game for short, can also be played using the 2 player optional rules presented in the book, and this changes the narrative experience in a delightful way. So much so we recommend trying it even for the solo gamer, using the tried and tested method of playing two Heroes at once!
Be warned, the Thinning Veil is a horror fantasy, in a world where not every ending is going to be one that ends happily ever after. While the world you are about to enter is inspired by Celtic mythology, & British folk stories and legends, there are also other influences at work. The unique setting is the brainchild of the game designer in terms of the original fantasy elements, and also contains aspects of Greek, Norse, Chinese and Slavic mythology and cosmology. The vigilant will spot undercurrents of cosmic horror bubbling away beneath the surface, threatening to emerge from the bowels of the earth or reach across space time to confront and engulf the valorous. Or the craven. It is somewhat famed for its general indifference, both to the vessels it uses & to the victims upon which it feeds.
The Three Worlds
You will find the three worlds referred to often in narrative text and game elements, all divided by the Veil. This is an invisible but often tangible barrier, it may appear as a light, it may appear as a mist, but once you step through it, Dorothy, you are not in Kansas any more!
There are three worlds separated by the Veil: The Land of the Quick, where we short lived mortals toil in the coil, and when it is sprung, we dwell no more here on this side of the Veil...
Because now we are in the Land of the Dead, a realm of restless spirits, purgatorial wastes, sacred resting places, and the Halls of Cernunnos, the domain of Arawn, and other Gods, all concerned with the energies of the exanimate!
Finally there is that Otherworld. Where magic breathes and the air is alive with mischief, mayhem and mystery. A land of wonder and dread, secrets and revelations. The realm of the Aos Si (pronounced 'Eyes-She). Here the Sidhe (She) dwell in great number, alongside a host of creatures both Seelie and Unseelie, or good and evil, as us Quicks tend to generalise them as being. We call this mystical realm the Other Side of Midnight.
This game has been made with the blessings of the Good Folk. We've promised not to give away too many of their secrets.
Setup
-
Take the Twilight card and set it to one side in case the worst happens. Then sort the rest of your cards into their respective decks, shuffle them all except the Enemy Scrolls and place them within easy reach to one side of your 'game area', a typically 2' x 2' or more ideally a 3' x 3' space. Take your tokens, pool them by type, and ensure they are in easy reach to one side also.
-
Collect your Hero card and Dashboard, and starting cards. Set the remaining Skill cards for your chosen Hero to one side. If all goes well, you'll need them later!
-
Collect the custom dice and action cubes and prepare your dashboard.
Place action cubes set to a number equal to the current levels in these attributes. A blue cube is worth 5 and a clear cube is worth 1.
So if you are Cormac, you'd put a single blue cube and 3 clear cubes in the slot for Health. The Hero Dashboard shows the starting attribute values of each individual Hero.
To the right of your dashboard are 4 slots corresponding to the custom dice symbols of the game. Combat, Interact, Class and Enemy actions are generated at the start of the Hero Phase, detailed later. Allocate one clear action cube to the corresponding slot for each dice result generated. Pass the dice to the next player if you are not playing solo, until all players have generated their actions and enemy activations for the Hero Phase.
To the left of the dashboard is the bank, explained later. Up to 4 actions can be banked at any one time and you cannot bank Enemy actions, obviously! There is a fourth slot at the bottom for tracking various conditions.
The Hero Dashboard and how to prepare it
The symbols and slots on the Hero Card and those on the Player Dashboard line up and correspond. The Hero card sets the attribute value and the dashboard presents the slot for tracking these.
Pick a scenario to play and follow the instructions to form the tile stack/s, collect the Enemy Scrolls and tokens for the scenario and set the starting tile as instructed.
Roll your dice to generate your actions and enemy activations for the first game round, you are ready to begin play!
Game Overview
A game round consists of 2 phases. The Hero Phase & the Enemy Phase.
Rolling Up & Starting the Hero Phase
Each Hero begins play by 'Rolling Up'. This means generating their actions and their Enemy activations this game round, by rolling a 'Hand of Dice'. This term refers to six custom dice. The faces of the custom dice depict 4 symbols. There are 2 combat symbols, 2 interact symbols, 1 class symbol & 1 enemy activation symbol per dice.
The symbol for Interact on the dice is a Sidhe Spiral. The symbol for Class on the dice is a Triskelion.
Attributes
In order from left to right, these are Faith, Will, Mettle, Might and Health.
- Faith is a measure of spiritual conviction.
- Will is a measure of mental fortitude and determination.
- Mettle is a measure of stamina and endurance.
- Might is a measure of physical strength.
- Health is a measure of your physical condition.
These attributes are commonly tested in the game. When they are, you roll a number of dice equal to their current value, with combat results equalling successes. These attributes can go up and down in a game, Health due to wounds, and of course healing, while other attributes can be affected by spells, enemy abilities and even poisons.
Dice Symbols
-
Enemy Symbol: Each of these will generate one enemy activation when expended. This must be the closest Enemy to your Hero, then the next closest, and so on. Each Hero can only activate the same enemy again if they have activated all enemies in play. In the case of equidistant enemies the Hero decides which to activate. All Enemy activations must be exhausted before your Hero can spend any of their own actions. You must always spend at least 1 action after 'clearing your Enemy activations' before another Hero can act (if playing multi-player). After that, play may pass back to you as the players decide when and how to act and in what order.
The remaining 3 symbols may be used for movement as well as their specific uses as detailed below. Enemy symbols may only be used for activating enemies.
-
Class Symbol: This permits a player to activate skills that require one of these to use, with the icon shown on the Skill card, to augment a skill, and may count as successes in tests that relate to your Skill cards.
-
Interact Symbol: This permits the player to interact with a game element. This usually means doing one of the following: Searching, Picking a Lock, Open / Close a Door, Interact with an Objective, Trade items with a Character in your zone, Use a Scroll, Cast a Spell, activate a Skill, or allow you to perform a Might test to break open a chest or door, needing successes equal to the Durability.
-
Combat Symbol: This permits the player to make 1 attack action. This could be a melee or ranged attack.
Melee attacks occur in the same tile or zone as the Hero, referred to as Range 0. It may be made without a weapon. To make an attack, roll dice equal to the Might of your Hero, with Combat results equalling successes. Each success inflicts 1 damage. A weapon will often add a number of damage to these successes as can Skill cards and other effects. If there are no successes your attack missed and any bonus damage from any source does not apply, this includes conditions that do not state otherwise.
Ranged attacks are made in the same way unless a Skill or weapon instructs otherwise, but the range is typically from Range 0 or 1 up to a Range of 3. Range is counted in tiles/zones. Line of Sight is drawn in straight lines. If you can draw a straight line to a target zone, it is in line of sight.
Hero Phase
Once you have generated your actions by Rolling Up, take a cube for each result shown on the dice, and place them into the corresponding slots on your dashboard.
If you generate 4 of the same symbols, you may roll up again, but this time with one less dice. This forfeits 1 action but gives you a chance to generate symbols for actions you feel you really need, or avoid a huge amount of enemy activations!
You can choose to go 'Full Defensive'. This means you forego your actions this round in order to better protect yourself. For each action you would have been able to take, you gain 1 'Damage Reduction' or (DR). DR lasts until the end of the game round and is then removed.
Place a black d6 in the Bank, in the bottom left slot set to the total number actons forgone. Now, clear your enemy activations, granting the nearest enemy a single activation. Any damage to your attributes this round is deducted from your DR first. Dial down DR as damage is taken.
Example: Paul Rolls Up generating 3 Enemy activations, 2 Class and an Interact. He decides to go Full Defensive. He sets a black dice to 3 in the lowest slot of the Bank. He removes his Action Cubes. Paul activates the nearest enemy to his Hero. This is a Marbh Bheo Footman. The Enemy moves 2 zones and has a combat remaining, so it attacks. The Death Charge results in 4 damage. Paul would take the first 3 points of damage on his DR, dialling it down by one each time. The last point of damage would be applied to his Hero's Health.
While you have 'damage reduction' you remove any attribute damage from this dice first, before you begin to start taking damage yourself. Choosing whether to go Full Defensive or not can be imperative to your survival! Choose wisely!
How Play Goes Back & Forth
When the Hero to act first chooses to stop using actions, another player follows the above steps, clearing any enemy activations first. Bear in mind a Hero may stop using actions at any time after they have expended enemy results and spent at least 1 action. Players then alternate between their Heroes, or if not playing true solo and using multiple Heroes, you can switch back and forth between them with impunity. This is done until all Heroes have expended their actions, opting to forfeit any remaining actions, discarding them, or to bank them!
The Bank
You may bank up to 4 actions in the Hero Phase. Doing so counts as a free action, so you may only do this after expending Enemy activations. Banking 1 cube would allow play to pass to another Hero if you wish. The actions you bank are stored for the next round. Some Skills allow you to use Banked actions in the Enemy Phase.
When you do this, remember to observe your bank before generating actions during the next Hero Phase. Deduct the amount of actions banked from the number of dice rolled to generate more actions. Then generate your new actions, transfer your banked actions across, and you are ready for the new game round! This grants you some added agency.
Once all actions are spent or banked, or forfeited, the Hero Phase is over. This triggers the Enemy Phase.
Dialling Down: This game term means taking a dice and lowering the result by 1. Dialling Up is the reverse, where you increase the value by 1. You should use our 12 mm d6 dice for this.
The Enemy Phase
During the enemy phase, the last player to spend an action, bank or forfeit actions, activates the enemy furthest from their Hero. Then the player to their right carries on the enemy phase, activating the furthest enemy to their Hero. Once all players have activated one enemy, the enemy activations conclude for the phase.
There are also some events triggered by the number of the game round as it ends. This will be detailed in the scenario and it is always the last effect applied. Once the Enemy Phase is completed, increase the Round Tracker by 1 or set it to 1 again if it was on 12. From this point, at the start of each Hero phase, perform the following upkeep. Dial down cool downs, increase heat ups, flip once per turn cards face up, and perform this kind of upkeep as instructed on cards. If the Poison Gas trap is in play, dial it down. All other poisons dial down and deal damage, unless otherwise instructed which is rare. Begin the new Hero Phase and repeat all these steps.
Movement in the Game
Normally in a dungeon crawl, a game tile consists of multiple zones. In this game, each tile is 1 zone. There are rare instances where this changes, for example, observe the Pit Trap rules. Other examples will be specified in scenarios where they occur. As a result of this, the words "tile" and "zone" refer to the same thing.
Movement in the game is zonal. You may use any action to move 1 zone. You may use all of your actions in this fashion, enabling a Hero to move through multiple zones. You may move through zones containing enemies without impediment, unless it states otherwise on the Enemy Scroll or in the scenario.
The Universal
Some actions on cards are marked with a (U). This means any action symbol can be used to perform this, the same as when moving. A great example is drinking a potion. You will see this often in the game. Opening or Closing a door that is not locked costs a Universal action. Any action cube or symbol may be applied to cover the cost.
Tests in The Thinning Veil
A test indicated by a scenario or card will inform you which attribute must be tested, and the number of successes required to pass that test. If there is no attribute indicated, it is a common test using a hand of dice, sometimes referred to as an HoD or where you see this symbol. If you test Might, for example, to break through a stuck or barred door, you roll dice equal to your current value in that attribute. You might require 2 or more successes to push the door open. Each attempt would require use of an Interact action. While in Twilight you will be testing Will a lot, so preserve that attribute as much as you can to avoid death!
Upgrading Skills by Spending Souls
This may be done in game, in the Hero phase, at any point after gaining the required amount of Souls. It cannot be done during the Enemy phase. Simply pay the Soul cost, and collect the Skill card you wish to purchase and continue gaming.
Skills and Exploring
Skills
Some Skill cards have a level to them, ie a 1, 2 or 3. Pay attention to these as you cannot purchase a 2 card in a sequence before having the level 1 card, and you can never begin play with a 2 card (unless playing the Grave Piper). Often it is an obvious upgrade to the card before it. This means it will replace the level 1 card, but in some instances you get the benefit of both 'tiers'. All Skill cards cost 5 Souls to purchase, unless they are level 3 cards or Skills with a Once per Game effect. These cost 10 souls. Each Skill purchased is considered an Upgrade.
Cool Downs
Some Skills require you set a Cool Down and the card indicates number. Sometimes the number is randomly generated, for example many Potions and Scrolls have effects like this. The potency of Potions can ebb away or increase with age, and some magic is not so strong, or well cast, as in other instances! At the start of each Hero Phase, lower your Cool Downs. If the Cool Down is set at 1 already, remove the Cool Down. The Skill can now be used again!
Heat Ups
Heat Ups work like Cool Downs, but instead of 'Dialling Down' you 'Dial Up' as detailed on P.11. Some Enemy abilities Heat Up, growing more potent as play commences!
Once per Round Cards
Some cards say 'once per round' ability. When this is the case after using the card turn it face down and turn it face up at the start of the ensuing Hero Phase in readiness to be used again.
Action Costs on Cards
Most Skill cards and other Treasure & Artifact cards indicate what actions must be spent to use them. Some require multiple actions to use. Some Skills and items are always in effect and ready to influence dice rolls and tests.
Anatomy of a Card
The printed card anatomy, as laid out on the reference diagram for Treasure, Equipment and Artifact cards, marks these fields:
- Range
- Damage
- Durability
- Damage Type
- Defence
- Quality: Inferior, Standard or Superior
- Cooldown or Heat up
- Location: Neck, One Hand, Two Hands or Head
- Item size: S (small) or L (large)
- Gold Values: Numbers are used to indicate their availability within a given settlement.
- Value
Cormac is set on the Other Side of Midnight where there are other forms of currency, but not gold. The gold value on cards determines their value in trade in certain scenarios.
Exploring in a World Crawler
As you explore the dungeons and settings of the game, you will find yourself spending actions to perform tasks outside of Combat that are instructed to you by the card or scenario details. Treasure, Equipment, Artifacts, Scrolls & Potions all correspond to the following Anatomy of a Card section.
Weight, Weapons, Armour and Traps
Weight or Carrying Limits
A Hero may equip 2 items of any size in their hands unless an item or weapon is two handed. A Hero may carry up to 5 Small and 2 Large unequipped items. You may decide what is equipped at no cost, switching between items as needed during the Hero Phase. At the end of the Hero Phase, you can no longer switch items until the next Hero Phase, so be mindful!
Location Symbols on Equipment and Items
A Hero may wear one head item, one item worn about the neck and one armour protecting the body.
A Hero may benefit from two magical miscellaneous items worn elsewhere, e.g rings. Any worn item or ring does not count towards your carrying limits.
A Hero may increase their carrying limits with the use of a belt pouch, backpack, or scroll case.
A Hero may never carry more equipped and unequipped large items than their Might value.
Weapons and Armour
Weapons have a damage you add to a Hero's attack. If the attack has 0 successes then you cannot add the damage since your attack is said to have missed.
A weapon has a range, in zones, typically 0, extending to 0 – 2. Weapons have a damage type. This becomes important as the game progresses, when enemy types gain Defence Values, which can often be bypassed by certain weapon types. An entry that reads 'Defence:2 / Slashing' would mean that the enemy subtracts 2 from incoming damage, unless the damage type is slashing.
Weapons: Weapons have a Durability and a Quality score. Think of Durability as a weapon's Health score. Each time you attack if you roll an Enemy Activation result and your weapon is Inferior Quality, you must reduce the Durability of your weapon using a black dice. A weapon with 0 Durability is broken and should be discarded.
If the quality of your weapon is Standard, your weapon would only take damage to Durability if you roll 2 Enemy symbols when attacking. If your weapon is Superior in quality, you would need to roll 3 Enemy symbols in an attack for the weapon to take damage.
Armour: Whenever you are attacked and you are wearing armour or deciding to use the Defence value of your shield, a decision which must be made and declared prior to any attack roll, subtract 1 from the Durability of your armour if the attack generates any Enemy results and your armour is of Inferior Quality.
You reduce Durability from attacks which generated 2 Enemy results if your armour is Standard Quality.
If the armour is Superior Quality, an enemy attack must generate 3 Enemy Results to damage its Durability.
If wearing armour of mixed quality, the Defense Value stacks and the Quality is determined by the lowest quality piece of armour that you wear. When that armour is broken it is discarded and the Quality will be determined by the lowest Quality piece of armour.
Potions & Scrolls
Potions and scrolls are small items. To use a scroll you must spend 1 interact. To drink a Potion you must spend any action. To administer a Potion to another Hero in your zone, you must spend 1 Interact.
Dealing with Traps
When you move into a zone or tile you may generate or be instructed to place a trap token. These have active and exhausted sides. Assuming the trap is active, a Hero may perform an Interact to Test:3 to find the trap. If this test is not performed before the Hero uses another action, the trap is automatically triggered unless the action was to cast from a Scroll or drink a Potion. If multiple trap tokens are in place, the first action triggers one of these, chosen by the player, and a further action triggers the second.
If the Hero tests and fails to find a trap, by not getting 3 or more successes, this also triggers the trap. When a trap is triggered, flip the token and draw the top card from the Trap deck and apply it. Tokens for traps that reset remain in play.
In Cormac, this means you will remove the trap token if the trap card reveals a Poison Gas Trap, a Spiked Pit Trap or a Falling Block Trap.
With few exceptions the traps affect the Hero triggering them only, however some affect every Hero in the zone.
If a Hero succeeds in finding the trap that Hero may ignore the trap and perform actions with impunity until such time as the Hero leaves the zone. The Hero may spend any action to grant another Hero +1 success when they search for Traps when they enter. The Hero may spend 2 actions of any type to specify where the trap is, allowing another Hero entering the zone the ability to act as though they also had successfully searched for the trap.
Once a Hero who has succeeded in finding a trap leaves a zone, that Hero must test again should they re-enter: memory is not always as precise as we'd like!
Some Skills and game elements allow a Hero to remove a trap by deactivating it. The trap must be successfully found first!
Combat and Line of Sight
Doors
It costs 1 action of any type to open or close an unlocked door.
A Locked Door typically is given two values in the scenario. LQ stands for Lock Quality. D stands for Durability. To pick a lock spend an Interact to roll a HoD against the LQ. If the LQ is 2, you would need 2 successes to pick that lock. Lock Quality is typically 2 or 3.
Durability is a measure of how hard it is to break open a door. Spend an Interact action to perform a Might Test. The successes you need to break through the door are equal to D. D is typically 3 or more.
Whichever method is used, once successful, flip the door to the open side.
Chests
In the game these are also given LQ and D values a Hero needs to equal or beat when picking a lock or attempting to break them open. Each attempt to do so costs an Interact action. Should you open the chest, flip it over to note it is exhausted.
The scenario will typically instruct you to roll a single dice, and draw from the indicated deck. Chests often contain Potions, Scrolls or Equipment. More unpleasantly they do sometimes contain traps which are set off when opened!
Searching a Zone for Treasure
Each zone can be searched for treasure unless the scenario dictates otherwise. A search is performed by expending an Interact action to roll a HoD and you'll need 2 or 3 successes unless otherwise noted in the scenario which is rare. If a zone is successfully searched, place a searched token on it, as it may not be searched for treasure again. If you succeed in the search you draw the top card from the Treasure deck.
Caveat: Some zones will allow you to search multiple times as noted in the scenario. Place a Durability dice on the token you mark the zone with. After each successful search dial this dice down by 1. When it reaches 0 and is removed, the zone may not be searched for treasure again.
Sometimes when searching for treasure, you might exceed the number required by enough that you trigger hidden elements in the Scenario. Be vigilant and mindful of these instances! You wouldn't want to miss out and often this may reveal secret doors and hidden chambers!
Combat
Before your Hero can attack an enemy, first check range and Line of Sight or LoS. This is zonal. As long as there is an open path between tiles in a straight line from your Hero to the target, you have LoS.
The next thing to check is Range. Typically you'll be wielding a melee weapon at Range 0 or using your Might, at range 0. Range 0 is your current location by zone. Range 0 – 1 is your zone and an adjacent zone. Range 1 is an adjacent zone, but not your own zone. Range 0 – 3 would be your zone and up to three zones in a straight line!
Provided your target is in Range, and you have the correct action to spend to make the attack, you may do so. This is always a Combat action unless otherwise noted on a card.
R0 indicates range 0, R1 indicates range 1 and so on. A Hero may target any enemy in range. Only walls and closed doors block line of sight (LoS).
This means, while a Hero cannot move through a lowered portcullis, that a Hero may make a ranged attack through a lowered portcullis!
When making a ranged attack, use a Combat action. (The printed sentence ends with the Combat symbol icon, rendered here as words.)
Enemy Activations
If your attack is Melee you use a number of dice equal to your Might when you attack. At Range, you roll a Hand of Dice. Typically Combat results are successes, but some upgrades permit other results to add to your successes or influence your total.
You compare this total to any Defence Value (DV) the enemy may have printed on their Enemy Scroll. This is the number to subtract from damage inflicted. If you failed to record more successes than the DV you hit but failed to damage. Zero successes is always a miss. You do not add damage from weapons or other effects to an attack that misses.
For each point of damage, reduce the Health of the Enemy, placing red wound dice next to the model and count down until the Enemy is slain and removed from play.
Enemies do not usually start with Defence Values in your first few games, but some effects grant Enemies Defence Value increases, and tougher enemies will have them for sure! In Cormac, most enemies have Defence, but Cormac is a legend, and well prepared!
Note about Wound Dice
When an Enemy is wounded, place a red dice next to the enemy to track how much Health it has left. If an enemy ever restores its Health to its initial value, remove the red dice next to them for economy of dice.
Pierce
Pierce differs from the damage type: Piercing. A weapon or attack with Pierce followed by a number ignores Defense Value (DV) equal to that number. For example, Pierce 1 ignores the first point of DV.
Enemy Activations in the Hero Phase
When expending Enemy activation cubes in the Hero Phase, a Hero must select the nearest enemy to them. If there are equidistant enemies, the Hero may select an enemy from among them to activate. Take the Enemy Scroll and follow the instructions. Sometimes the enemy will not even target the Hero who is activating them, but place an ally in peril!
First the enemy moves its allowance towards the nearest most healthy Hero, unless another attribute symbol is shown next to its movement, in which case, it moves towards the nearest Hero with the highest value in that attribute.
Some enemy movement is variable and determined by its behaviour. When spending custom dice results on this movement, preserve the dice that would grant it attacks, expending them last.
When an enemy attacks, a Hero must roll the dice for that enemy. In solo that will be you! In a group game it is recommended the next player to your left rolls for the Enemy, but players may choose who gets to do the dirty on their fellows! Resolve the results as directed on the scroll.
Enemy Scroll Key
The Enemy Scroll diagram is labelled as follows:
- A: Cooldown & Heatup
- B: Number of Behavioural roles
- C: Health
- D: Defence
- E: Movement Range
- F: Amount of souls dropped when killed
Visibility, Darkness and Light
Enemy Behaviour Rolls
Some enemy scrolls will have a random behaviour or even more than one! When this is the case, you roll a single dice. The dice generates the behaviour indicated on the card. Complete that behaviour before generating any subsequent behaviours. Some enemies are granted more than one behaviour roll.
Once this is concluded, the enemy activation is complete.
When activating enemies in the Enemy Phase, the Hero who activated, banked or forfeited an action last in the Hero Phase will activate the furthest enemy from their Hero. If there are more players, go around the table starting with the player to their left until all Heroes have activated one enemy. This usually concludes the Enemy activations, but some scenarios will have a Boss or powerful enemy act also...
Taking Damage & Applying Conditions
If an Enemy inflicts damage from an attack, reduce your Health unless another attribute is specified. A Hero may take damage from a variety of sources in the game.
A Hero might be forced into a test, to negate the effects of an attack. Conditions bestowed on the Hero only apply when damage is taken, unless otherwise stated.
Aura
If an Enemy has an Aura effect, it influences the zone the Enemy occupies as specified on the Enemy scroll. It is in effect as long as the Enemy is alive.
Light and Darkness
Unless otherwise noted in a scenario, interior zones in the Thinning Veil are in darkness. The scenario will instruct you on whether exterior zones are in darkness or otherwise.
Darkness
When you attack an Enemy in Darkness, you must collect your successes from the attack and re-roll them. Only the subsequent successes are hits! Carrying a light source is very important!
Enemies are unaffected by Darkness when they attack, because the world isn't always fair. Some rules permit a Hero to ignore the darkness rule.
Light
When in a zone that is in light, or targeting a zone in LoS that is in Light, a Hero attacks normally. Light sources in the game typically have a number of turns they remain in play for, and you track these with red dice. As a candle lantern burns you dial down the dice at the end of every Enemy Phase.
Torches heat up on a single dice, when this reaches 6, the torch is expended during the next Upkeep. This represents the torch burning up and becoming too hot to hold.
The Candle Lantern burns down. When it is lit, set it to 12 and dial it down during upkeep at the start of each subsequent Hero Phase. Most light sources are Range 0. Those with greater range give light to adjacent zones also, provided there is an open path to that tile.
Mists
Some games take place in the Land of the Dead or in the Veil between worlds. When a scenario states it is played in Mists, visibility is reduced to Range 0.
Conditions
Bleed
You set Bleed using a red dice placed in the Bank at the lowest slot in the section. Each round Bleed is in place at the start of the Hero phase, you sustain Health damage which cannot be avoided, without magical healing. You may heal the damage, but magical healing and only magical healing removes Bleed. This includes a spell, a potion, a scroll, a game effect, but not a consumable like a mushroom unless the scenario states otherwise.
Corruption
Each time you gain Corruption, place a black cube in your Bank. Corruption can never exceed 4. For each point of Corruption, you may Bank one less action. If you have 4 Corruption and a game effect instructs you to take more, you will trigger any Corruption consequences of the scenario. Additionally, after certain game rounds, you are likely to start suffering ill effects, also detailed in scenarios!
Critical Hit
Double the damage of an attack.
Energy Damage & Effects
Bear in mind Armour protects your Hero from physical damage but will not protect your Hero from energy damage types or damage from conditions. Energy types include: Fire, Cold, Electric and Necrotic.
Poison
If you are poisoned take a green dice and place it in the lowest slot in the Bank. Set this to the value of the Poison. At the end of the Enemy Phase, take Damage equal to this value, then dial the dice down.
Some poisons will instruct you to dial up the poison dice at the end of the Enemy Phase. When this is the case you take the damage indicated before you dial up. At the end of the next Enemy Phase you would take 1 more damage, and so on. Poisons like this are typically rare, dangerous and capped to a set limit.
Be sure to observe any cap and once that value is reached, stop dialling up the dice. Dealing with these more deadly poisons swiftly is crucial to survival!
The Poison Gas Trap
When the gas trap is triggered, place the Gas token in the zone where this happened. Place a Green Poison Dice on the Gas Token or to the side of the tile. Set it to 6. At the end of each Enemy Phase, dial this down. It represents the gas dispersing. When the Value reaches 0 remove both the dice and the token.
When exposed by moving through the zone or remaining in it, a Hero must take Poison:1 (meaning to place a green dice set to 1 and place it on their dash as detailed in the Poison section above). At the end of a round that Hero must take 1 damage. Normally if they do so they remove the Poison dice, dialling it down.
However if the Hero is still in the zone with the Gas token they instead dial the dice up. So it is not a good idea to linger in a cloud of poison gas! Shocking!
Stun
Many sources of damage inflict stun, and when this happens you must remove actions equal to the stun sustained. If you cannot do this, typically because you have used your actions this round, you may take them from the Bank if you Banked any actions. Otherwise set a black dice on your Dashboard to the unspent Stun damage total. When you next generate actions for the Hero Phase, and set the results in your Dashboard, remove a number of actions equal to the Stun, and remove the dice you used as a reminder. Remember, you cannot pay Stun costs with Enemy activations!
Sunder
Some enemy types have Sunder, which means their attacks always count as having generated an Enemy result. This is very dangerous as it means your armour is more likely to take damage against such foes.
Winning, Losing and the Twilight
Death in the Thinning Veil
When a Hero is reduced to 0 in any attribute they 'go into Twilight'. This means they are journeying between realms, and that their spirit leaves their body. Place their Twilight token on the middle space of the Twilight card.
At the start of the next Hero Phase, draw a Twilight card for each Hero in Twilight and read it. In this Hero Phase the Hero must perform a Will test equal in difficulty to the number on the space they occupy. Should the Hero fail, move their Twilight token up the card toward the Light. If the Hero passes, move their token down the card toward their body.
If a Hero passes the Will test by more than the amount required, and also by the amount required to pass a test in the space their Twilight token would move to, then the token is moved two spaces toward their body, or more, instead. They might even immediately revive!
Example: Cormac's Health is reduced to 0, so his Hero token is placed in the middle space of the Twilight card. At the start of the next Hero Phase, Cormac draws a Twilight Scroll from the deck and reads it. The Scroll grants him +2 successes to his Will test. Cormac performs the test and scores 3 successes. He now has 5 total. The required successes to pass was 3, and in the next lowest space it is 2. So Cormac has excelled! His Twilight token would move 2 spaces down the Twilight card. There is no space below 2, so his token has reached his body! Cormac is revived!
In this way, a Hero scoring 9 successes could be in the top space of the Twilight card, then suddenly make an unprecedented recovery from their near death experience, and revive! (4+3+2=9).
Reviving
Roll a Hand of Dice +1, restore Health equal to the successes and remove your Twilight token from the card.
A test must be taken during the Hero Phase but not immediately. Other Heroes may have means to aid in the test!
Being in Twilight
Heroes in Twilight still Roll Up in case they revive. If they generate no enemy results they may even Bank while in Twilight. This means a Hero can store actions in preparation for their return to the Land of the Quick. A banked action can remain in the Bank over multiple game rounds.
A Hero in Twilight does not activate an Enemy during the Enemy Phase.
A Hero in Twilight may choose at which point in the Hero Phase the test on their Twilight card is taken. It need not be enacted the moment it has been read.
Going into the Light
If a Hero in the top space of the Twilight card fails the Will Test:4 they go into the Light and pass from the mortal realm. This Hero is dead. The Hero is eliminated.
In True Solo, a Hero always starts with a Sprig of Acacia. They may elect to use this while in Twilight, before they take a test. But if they choose to take the test the results of that test must then be applied. If a Hero in True Solo has burned their Acacia, and goes into the Light, the game is lost and the Hero is dead.
After the game, if the scenario was completed, and a Hero died in multiplayer, that Hero can rejoin play for the next scenario. The Gods revive the fallen as a reward for their valour, sacrifice and success of their mission, despite the calamity of their passing. As a penalty the Hero loses all unlocked Skills. They return to play in possession of the the gear with which they died. The exception to this is if the Hero is trapped in the Blight-hold.
Winning & Losing
To win, complete the objectives outlined in the scenario.
Loss Conditions: The scenario will instruct you on the conditions which bring about defeat. Sometimes this will include a narrative entry along with instructions on how to continue the campaign: sometimes losing a battle doesn't mean you lose the war.
However, you lose the game if all remaining Heroes are in Twilight at the same time, in 2 player. In True Solo, you lose the game if you ever pass into the Light or are otherwise dragged off to a place of eternal torment as a result of failing a challenge on a Twilight card.
Boss Enemies and Boss Fight Rules
Bosses often have Health times the number of Heroes. They grant 1 soul per Hero when defeated. This may be modified by the scenario.
A scenario will inform you when Boss Fight rules apply and when they will end.
When Boss Fight rules are in effect, each Enemy Phase the Boss will automatically activate with the first activation granted. Any further enemy activations, either due to there being 2 Heroes in play, or another game effect, apply to the enemies closest to the Boss.
Enemy activations triggered by players clearing their enemy activations in the Hero phase are dealt with normally, but if the Boss is as close as another enemy, the Boss must be chosen first.
Iconography and Scaling
Iconography
The iconography page shows these symbols, each with its printed name:
Movement, Small Item, Large Item, Neck, One Handed, Two Handed, Chest, Interact, Range, Head, Roll a Hand of Dice, Health, Damage, Durability, Faith, Enemy, Serpent, Soul, Will, Might, Combat, Class, Defence, Mettle.
Scaling by Hero Count
Cormac has been designed to scale effectively with 2 players or 2 Heroes in play without a need for much adjustment. Usually adjustments are detailed in the scenarios and related to 'Event Tiles' and 'Trigger Rounds'. These are explained in the Scenario Book.
Scaling in Relation to Upgrades
In the game purchasing a Skill card is considered an Upgrade. Each Hero begins play with their starting Skill cards as detailed on their Hero card.
For each Skill card bought, it influences the Enemy, in terms of their Defence Value, Health & Behaviour Rolls! Add up the number of Skills the Heroes have unlocked during play. Starting Skills are excluded from this count.
Divide this by the amount of Heroes in the game and round fractions down. Then consult the table 1.1 to modify the enemies accordingly.
Table 1.1 Scaling by Upgrades
The Defence and Health modifiers increase the scores noted on the Enemy Scrolls. Where it states + success, this means all test based attacks from that enemy require an additional success to thwart. It also means when that enemy attacks it gains bonus successes as though additional Combat results were rolled:
| Average Hero Upgrade | Enemy Modifier |
|---|---|
| 1-2 | No Adjust |
| 3-4 | +1 Defence Value & +1 Health |
| 5-6 | +1 Success, +2 Health |
| 7-8 | +2 Success, (printed line is truncated in the source; no further modifier is printed) |
| 9-10 | +2 Defence |
| 11+ | +3 Health, +1 Behaviour Roll |
Modifications
Each Modifier in effect due to Upgrades remains in effect thereafter. Each increased Modifier replaces the previous Modifier of the same type. They do not stack.