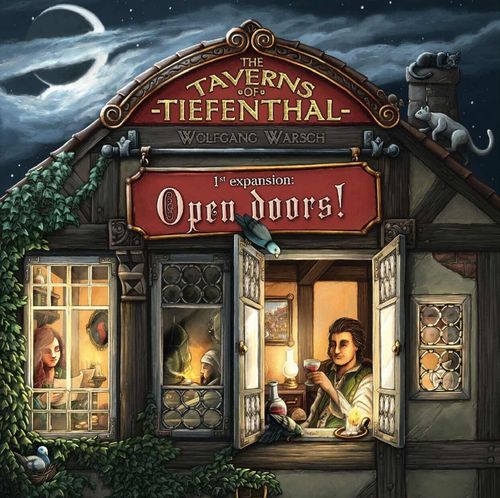
The Taverns of Tiefenthal: Open Doors
The Taverns of Tiefenthal: Open Doors Rulebook
Table of Contents
Table of Contents
About This Extension
This extension contains 4 modules:
- A. A song about wine
- B. It can be a room
- C. A landlord has it fine
- D. The village, it's mine!
We recommend that you only use modules A and B of this extension for your first game. You can later combine 2 or 3 modules from this extension as you like. (A game with all 4 modules is also possible, but very challenging!)
Of course, you can combine this expansion with the modules from the basic game. Make sure, however, that the five modules of the basic game build on each other.
The modules A, B and C form a new floor above your taverns.
- If you play without module B, the guest rooms stay in the box.
- If you play along Module A in this case, each player places a wine cellar above the tavern and to the left of it a host tile (if you are playing with module C, see preparation for module C) or a face-down host tile (if you are playing without module C).
- If you are playing along Module C but without modules A and B, each player places a house roof on the right of the host tile after setting up the game. You put the rest of the house roofs in the box.
- If you play along Module B (guest room), everyone creates a guest room above their own tavern.
- If you also play along Module A, everyone receives a wine cellar while preparing the game and places it on the right next to the guest room. Without module A, everyone takes one of the 4 house roofs and puts it on the right. The roof only serves a purely aesthetic purpose.
- If you also play along Module C, during the preparation of the game each player receives a landlord who he puts on the left of his guest room. Without module C, everyone takes any host tile and places it face down next to the guest room.
This expansion also includes 36 other nobles who do not belong to any of the four modules. Add them to the nobles of the base game.
Module A: The Song of Wine
There are actually supposed to be people who prefer wine to beer. Pah! But the target group is growing ... and nobody wants to miss it.
Additional Game Material
- 18 sommelier cards
- 18 quack cards
- 4 wine cellars
- 8 wine markers
Game Preparation
Set up the basic game as usual. Then place the sommelier cards between the beer dealers and the dishwasher, and place the quack cards between the guest draw pile and the "3" guests.
Now everyone takes a wine cellar and lays it out above their tavern so that the doubloon is visible at the top left. Then place 2 wine markers on your wine cellar. Put the remaining wine cellars and wine markers back in the box.
Changes in the Play of the Game
The sommelier
The sommelier is a new tavern card that you can recruit for 3 doubloons. As usual, you put a sommelier you recruit directly on top of your draw pile.
If you uncover a sommelier during phase B, put it to the right of the wine cellar.
As soon as all tables are occupied, you check whether you have one or more sommeliers in your tavern.
- If you have exactly 1 sommelier, take 1 wine marker from your wine cellar and place it on the dice field of the guest who last came to your tavern and took a seat on the table on the far right. So you are not allowed to choose which guest a wine marker is placed on!
- If you have 2 (or more) sommeliers, place 1 wine marker on each of the 2 last guests who came to your tavern and who sat on the last two tables from the right.
If there are more than 2 sommeliers in your tavern, you can still only place 2 wine markers (on the 2 last guests).
Example: There are 4 guests in your tavern and you have created 2 sommeliers. A wine marker is placed on the two guests on the far right.
Wine markers have the same function as dice. You may not place any other dice on this guest during this phase. During phase F you take the wine marker and put it back in your wine cellar. For this you will receive the reward shown (normally doubloons) for this guest, as if you had placed a suitable die on his action space.
Further rules for the sommeliers:
- If you are playing with module 3 of the basic game, the doubloons earned from wine markers count towards the determination of the reputation.
- A guest with a wine marker on it may not be removed from play.
- You can remove a wine marker at any time and put it back on the wine cellar without having to serve the guest, in order to clear the dice field again. In this case you may place a die on the dice field of the guest in phase E.
The wine cellar
The wine cellar is a new addition to your tavern. You can upgrade it for 9 doubloons and receive a nobleman in return, as usual. You can reduce these costs by putting one or more sommeliers back on top of the sommelier pile in your supply. For every sommelier you give up, the costs are reduced by 3 doubloons.
If you have improved your wine cellar, you will automatically have an additional sommelier available for each subsequent round, just as if you had him uncovered in phase B.
Only if you upgrade the wine cellar during phase A (e.g. through the bonus on the round track) can you still use it this round. But if you upgrade it after phase B, the upgraded wine cellar is only valid from the next round.
The quacks
The quack, like the sommelier, is a tavern card. However, you recruit quacks with beer (instead of doubloons). Pay 2 beers to recruit a quack. Then, as usual, put it on top of your draw pile.
Important! If you recruit a quack, you may not recruit a guest this round! This does not apply to nobles, whom you can always recruit with beer.
If you uncover a quack in phase B, put it on with the beer vendors and the bards, to the right of your beer warehouse.
During phase F you can activate a quack in one of two ways:
- Either, you repeat the immediate action of a guest in your tavern. Then you put the quack back on the quack pile in the general supply. In this way you are only allowed to copy each guest once per round.
- OR, you receive 1 doubloon. Then you don't have to put the quack back on the supply pile.
Example: You can put the quack back into the supply to copy your guest's immediate action (get 3 doubloons) OR you get 1 doubloon, but you don't have to put the quack back.
Don't forget: in each round you can only purchase one card of each type of tavern card!
Module B: It May Be a Room
It should already have happened to one or the other that he should not have found home after a boozy evening. We have come up with a special service for our top-class guests.
Additional Game Material
- 4 guest rooms (each with 4 rooms)
- 4 pastor cards
- 4 reservation markers (bed)
Game Preparation
Set up the basic game as usual. Then everyone takes a guest room and places it on top of their tavern so that the doubloon is visible in the top left. In addition, everyone takes a reservation marker (bed) and places it on the bed in the second room.
Finally, everyone takes a pastor and puts him on his (still empty) discard pile. You put the remaining guest rooms and pastors back in the box.
Changes in the Play of the Game
The guest rooms
With the guest rooms you invite nobles to spend a night in your home.
In phase B, when you move the first nobleman, put him into one of the four rooms (not on a table!). To do this, push him under one of the rooms so that its cube action is no longer visible. You have the free choice between all four rooms.
As soon as you have improved your guest room, you can take the first two nobles in phase B, move and accommodate them in 2 different rooms. Push the second nobleman under one of the remaining 3 rooms.
Example: During phase B you draw a nobleman for the first time and decide to send him to the third room. You put him under the room. If the guest room has already been improved, you can send the next nobleman you are moving to one of the other 3 rooms.
If you draw other nobles in phase B, you put them on a free table in your tavern or on a nobleman who has already been placed at a table.
The VIP reception
When you are in phase C (Waitress) or phase D (Dice selection) for the first time, place a die under your tavern that shows the number of a room occupied by a nobleman, and you immediately lead the bonus promotion shown there. The die that you placed under your tavern is not used for this. If you have accommodated 2 nobles in your rooms, you can also carry out a bonus action for both of them (provided you place the appropriate dice under your tavern).
You can also let the bonus campaign expire.
Example: You sent a nobleman to the third room. As soon as you place a die with a 4 under your tavern, you carry out the bonus action shown.
Important! Also, if you take multiple dice of one value, the bonus of each room will only take effect once!
Bonus promotions for the individual rooms
-
Immediately move your vault marker and your beer storage marker forward one space, if possible.
-
Immediately draw a card from your draw pile and place it appropriately in your tavern. Then place the reservation token from the room on the card. The card counts like any other card you have placed in your tavern in phase B. During phase G you have the choice whether you want to put this card on your discard pile or your draw pile. Then put the reservation marker back in the second room.
The following applies to the card drawn:
- A guest is placed to the right of the tavern. He doesn't need a table.
- If you have drawn a waitress, you immediately roll a die in your color (if there is one left) and place it under your tavern.
- If you have drawn a sommelier (Module A), immediately place a wine marker on the first guest from the right who has no wine marker on it (unless there are already 2 wine markers on guests).
- Unfortunately, you cannot use a table right away. Nevertheless, leave it unused at the other tables (you may not draw a replacement card).
- You put all other cards into your tavern as usual.
-
You can remove guests from your tavern with a reservation marker with a "no entry" effect and use tavern cards with reservation markers for a special offer. In both cases you put the reservation marker back in the guest room.
-
You can exchange one of your guests. There are two options for doing this:
- Remove a regular who is currently in your tavern from the game and take a "3" guest for it. Immediately place the new guest on the table that has just been vacated.
- OR, remove a previously referred guest who is currently in your tavern from the game and replace him with one of the four face-up guests who cost a maximum of 2 beers more than the removed guest. If the new guest has an immediate effect, you may not carry it out! Immediately place the new guest on the table that has just been vacated, and then complete the open display again.
Improvement of the guest room
You can upgrade the guest room for 8 doubloons and receive a nobleman for this, as usual. These costs cannot be reduced by a special offer. Only if you upgrade the guest room during phase A (e.g. through the bonus on the round track) can you already occupy two rooms with nobles this round. But if you upgrade it after phase B, the upgraded guest room only applies from the next round.
Pastor
When you uncover a pastor, you put him, like any other guest, on an empty table. When you activate the pastor, you do not get doubloons, but move your monastery marker 1 space forward on the church track. Like any other guest, you can remove the pastor from the game using the "House ban" effect. You can also remove the pastor through the action in the third room and exchange him for a "3" guest.
Module C: A Landlord Has It All
One would think that all hosts are the same. But that is a lie and a deception. Everyone is different. Everyone has their strengths. And using them correctly can't hurt.
Additional Game Material
- 8 host tiles
- 1 improved call bar
- 1 improved guest book
- 13 promissory notes
- 4 critic cards
Game Preparation
Set up the basic game as usual. If you are playing with modules C and D, you first do the game preparation for module D.
If you are playing with module 3 from the basic game, each player puts a critic card on his discard pile. Remaining critics come back in the box.
If you do not play with all the modules of the basic game, you take the corresponding host tiles out of the game.
Then shuffle the remaining host tiles. The starting player draws 3 host tiles, chooses one of them and passes the other two on to the next player in clockwise order. This player now draws a new host tile and selects one of the 3 host tiles again. Continue in this way until each player has taken a host tile. Now everyone reveals his host and places him to the left of his guest room. If you play without a guest room (module B), you place the landlord tile directly on the wine cellar (or on a roof, if you also play without module A).
The improved call bar, the improved guest book (which both differ from those of the basic game and recognize their special symbol) and the promissory notes are only required if a player has chosen the respective host. Otherwise, they will be put back in the box.
Variant with Module 4
If you play with module 4 of the basic game (starting cards), we recommend the following variant:
Instead of the procedure described above, you reveal a host tile and a start card for each player. The start player begins and takes either a host tile or a start card. Then it continues clockwise until everyone has taken either a host tile or a start card. Then the player who voted last begins and now chooses from the type he did not choose before. Then it continues counter-clockwise until each player has received a host tile and a start card.
Changes in the Play of the Game
Each player has a special ability through his host tile. These are described in detail below.
The individual hosts at a glance:
Player
You are allowed to place dice showing a 3 or a 4 face up on any action space in phase E. You are not turning the cube. (Since the guest room is dealt with in phase D, dice with a 3 or a 4 cannot be used to mark the spaces to activate the 2 or the 5.)
Abbess
Whenever you serve one Regular guest with a die, you may move your church marker 1 space on the church track.
If you serve a regular guest with wine (module A), you don't take a step on the church track. However, you may voluntarily remove wine markers (without serving the guest) and serve the guest with a die.
Historian
At the start of the game you will receive the improved guest book and use it instead of the guest book from module 5.
Builder
If you upgrade your tavern or hire a permanent employee, you can put all tavern cards that you would have to put back into the supply as a result of the special offer on your discard pile instead.
In addition, all upgrades for which there is no special offer (safe, beer warehouse, monk, cash register, barrel, guest room) cost you 2 doubloons less.
Brewmaster
Each guest you buy will cost you 2 beers less. If you recruit nobles with beer, you pay 1 beer less. So you need 8/13/17 beer for 1/2/3 nobles.
Trader
Every guest you serve with a white die brings you 1 more doubloon. The doubloons that you receive as a bonus do not count when calculating the call (module 3).
Charmer
You will receive the improved reputation bar at the start of the game. Replace it with the reputation bar in your tavern. If you are playing with module 5 of the basic game, place the small cut-out in the call bar so that the signature is visible; otherwise, use the blank side.
Tax collector
At the start of the game you receive the 13 promissory notes. Sort out those tiles that relate to modules that are not in play. Shuffle the remaining promissory notes and place them face down next to your tavern.
During phase A every round you draw a promissory note and place it face up next to your tavern. The promissory note shows in which phase you can activate it and receive the bonus. Once you have dealt with it, you put it back in the box. The following applies to all promissory notes: If you cannot or do not want to use the effect of a promissory note, you will receive 1 doubloon instead. Promissory notes never affect your reputation, as doubloons and beer are only paid out in phase F!
Further explanations for individual promissory notes:
- During phase C you may have an additional die in your dice color. If you have already received all the dice of your color from waitresses, you will receive 1 doubloon instead.
- During phase F you may repeat the immediate action of a guest in your tavern. If none of the guests in your tavern has an immediate action, or if you have already repeated all of these immediate actions through quacks (module A), you will receive 1 doubloon instead. The mayor's immediate action (module D) cannot be repeated!
- In phase C and phase D you may turn a total of up to two dice to any side after you roll them (phase C) or when you take them off a beer mat (phase D), and before you put them under your tavern. Only the new values count (also for the guest room, for example).
- You can use an additional wine marker, as if you had an additional sommelier at your disposal. If there are two or more sommeliers in your tavern, you will receive 1 doubloon instead.
- You can take back an already used bar guest and place him on your bar. If you have not yet used a counter, you will receive 1 doubloon instead.
- Take a beer dealer from the supply during phase B and place it in the appropriate place in your tavern.
Critic
When you uncover a critic, like any other guest, you put him on an empty table. If you activate the critic with a die, you do not get any doubloons, but move your reputation marker 2 spaces forward on the reputation track. Like any other guest, you can remove the critic from the game using the "House ban" effect.
You can also remove the critic through the action in the third room of the guest room and exchange him for a "3" guest.
Module D: The Village, It's Mine!
Allegedly there are supposed to be politicians who are corruptible. Of course I am not at all! But I have a couple of ... important assignments. And you would be happy to welcome me here as a regular, wouldn't you?
Additional Game Material
- 12 mission tokens
- 12 mission markers (3 each in player colors)
- 4 mayor cards
- 2 scroll bars
Game Preparation
Set up the basic game as usual.
The order tokens show a task on the front (the darker side) and a reward on the back (the lighter side). Shuffle the order tokens, then randomly draw 3 of them and attach them with the task side visible in the beginning of the scroll. If you move a task to a module that you are not playing with, shuffle it back with the other task tiles and draw a new one.
Then do the same with the rewards: draw 3 random order tiles from the remaining order tiles and attach them with the reward side visible to the right of the tasks. Then finally attach the end of the scroll to the right side. Likewise, replace any reward tile that shows a module you are not playing with.
Place an order marker for each player to the left of each of the 3 tasks, so that the victory points are not visible. Also have a mayor ready for each player. Remaining mission tokens, mission markers and mayors are put back in the box.
Changes in the Play of the Game
The mayoress has asked you to help her with some of her assignments. As honorable citizens of the Deep Valley, you naturally want to help as much as possible.
Each assignment consists of a task and a reward. As soon as you for the first time fulfill the task of an assignment, turn your task marker to the left of this task and place it on the right, next to the corresponding reward. Performing a task again has no effect.
You can use an order token to the right of a reward once to receive the bonus shown. Then you place the mission marker under your tavern.
The reward indicates in which phase you can do this. Sometimes the reward is linked to an action; you can only receive such rewards if you take the associated action.
Explanations for individual tasks:
- Closed society: Guests with wine markers are also counted as served for the closed society (module A).
- Honorable Deeds: For this task, only the reputation you get for the minimum amount of beer or doubloons (also from wine markers) counts, as well as any bards that are in your tavern. If you receive reputation from other actions, this does not count (e.g. not even from the critic from module C).
- Grand interior: It is not enough for the nobleman to be in a room. You must also have placed a matching die under your tavern.
- Ejection: In order to fulfill this task, you have to ban a guest who was not in your possession at the beginning of the game. You have to carry out a "House ban" effect in order to remove the guest, for example with the appropriate schnapps action or with the effect on the call bar.
Explanations of individual rewards:
- Large delivery: You can place white dice with any number on the supplier space.
- Hardworking employee: You may not use a die that shows a 1 as a 6, or vice versa. You don't turn the dice.
- Recommendation of the house: You can only perform this reward if there is a wine marker on at least one guest.
- With cross and crown: You count all the nobles in your tavern, whether at a table or in the guest room. Nobles in the draw pile or discard pile do not count.
Mayoress
As soon as you have completed each of the three missions (that is, none of your mission markers are left to the left of the missions), you immediately take a mayor card and put it on top of your draw pile.
You can immediately perform the "upgrade tavern" or "permanent staff" action without having to pay the costs. You won't get a noble for this, however.
The mayor is a guest like anyone else. You can serve them with any die and receive as many doubloons as the die indicates.
The mayor's immediate action cannot be copied with a quack (from module A) or the tax collector's note (from module C)!
Playing
For each mission that you have completed, you have turned the corresponding mission marker. For each of your upturned order markers (regardless of whether you used the bonus or not) you get 5 victory points.