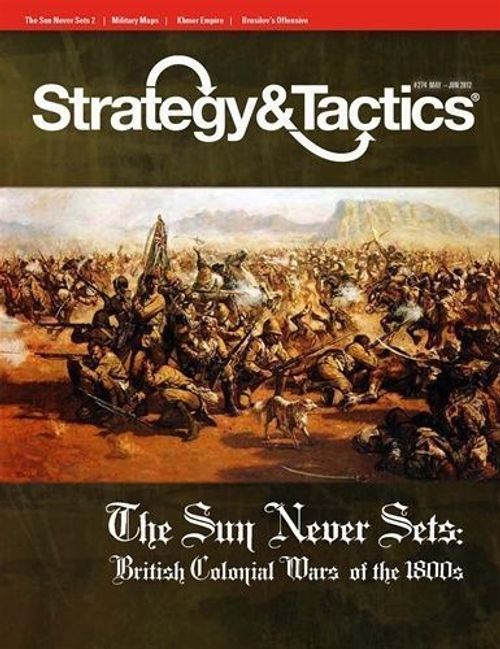
The Sun Never Sets volume II
The Sun Never Sets volume II Rulebook
Table of Contents
Table of Contents
- 1.0 Game Rules
- Standard Game
- 2.0 General Course of Play
- 3.0 Sequence of Play
- 4.0 Historical Events
- 5.0 Organization of Forces, Columns & Stacking
- 6.0 Land Unit March
- 7.0 Combat (General)
- 8.0 Battle Resolution
- 9.0 Zones of Control
- 10.0 Headquarters
- 11.0 Unit Morale, Demoralization & Rally
- 12.0 Logistics
- 13.0 Reinforcements, Replacements & Withdrawals
- 14.0 Hex Control
- 15.0 Scenarios
- 16.0 Victory Conditions
- Optional Rules
- 17.0 Engineers & Pioneers
- 18.0 Sieges
- 19.0 Intelligence & Fog of War
- 20.0 Attack from March
- 21.0 Ambush
- 22.0 Evasion
- 23.0 Atrocity & Fair Play
- 25.0 Political Officers
- 26.0 Civilians
- 27.0 River Operations
- 28.0 Fleets
- 29.0 Naval Movement of Land Forces (Abyssinia)
- 30.0 Railroads & Railroad Engineers
- 31.0 Signals
- 32.0 Supplied Combat
- 33.0 Routing
- 34.0 Simplified Forage Rule
- Sun Never Sets II Scenarios
- Abyssinia 1868
- Asante 1873-74
- Persia 1856-57
- Second Afghan War 1878-79
- Sun Never Sets II Random Events Table
1.0 Game Rules
1.1 Game Rules
The game rules are divided into three sections: the Standard Rules, Optional Rules, and Scenarios. The standard game allows participants to play a reasonable facsimile of these campaigns. The optional rules can be used by players to enhance the realism of the game. The scenarios account for conditions that apply only to a specific game.
Sun Never Sets II demonstrates the significant features of warfare in this era, including the great disparity in weapon types, the importance of supply and leadership, and interference from the home office. Players must use organizational as well as military capabilities to win the scenario. Though British forces have technological superiority, the "Native" player still has the opportunity for a victory if he properly exploits his advantages.
Sun Never Sets II is based on First Afghan War, French Foreign Legion, and Sun Never Sets by Decision Games. This volume of the rules supersedes earlier editions. Major changes are noted.
Standard Game
2.0 General Course of Play
One player controls the forces of the British Empire. The other player is the Native player. The game is played in turns representing a designated period of real time. During a turn, a player may move his units, attack, and then attempt to rally demoralized units. Combat is resolved in three rounds: artillery, rifle and melee results. Players have their units fire on the appropriate Combat Results Table. Units must check for supply in order to survive.
2.1 Game Scale
Time and space scale varies as designated by scenario. Each strength point of infantry or cavalry represents 200-250 men (or two companies.) Each artillery or machinegun strength point equals one battery (4-8 guns.) Each HQ unit represents a single great leader and his staff.
2.2 Game Equipment
Two game maps One set of game rules Two sheets of die cut counters (560 total) One set of game charts (printed on the map) Players will need to provide one six sided die.
2.3 Game Maps
Players use the appropriate map for the scenario chosen. A hexagonal grid has been superimposed on the maps to regularize movement and placement of units and to delineate terrain types.
2.4 Counters
The counters, the square cardboard pieces, are used to play the game. There are two basic types of counters in the game: units, which represent military forces, and markers, which are used to record various game functions and other information. Units are further classified into a number of special categories as discussed below.
2.41 National Colors
British: White on Red British Colonial: Black on Red Friendly Natives (British controlled): Black on Brown Afghans (Native): Dark Green Abyssinians (Native): Light Green Hostile Natives (Native controlled): Black on Brown
Note: The friendly and hostile natives are used in both Abyssinia and Second Afghan War. All other units are used in only one game.
The reverse side of all units has a national flag or symbol, and text indicating their deployment instructions.
2.42 Military Units
(Unit diagram; see the printed counters.)
2.43 Unit Types
Per the above diagram.
2.44 Weapons Types
Weapons type represents the type of weapon with which the unit is armed.
Note: Some of the weapon abbreviations have been changed from earlier versions of the system.
Artillery and machinegun types: A = Early Breechloader B = Late Breechloader G = Early Machinegun F = Field Gun Muzzle Loader H = Heavy Artillery L = Light Muzzle Loader M = Advanced Machinegun R = Rocket Launcher
Infantry/Mounted Infantry/Camel Corps types: B = Early Breechloader L = Late (Magazine) Breechloader M = Musket (Smoothbore) R = Rifled Musket S = Sword/Spear armed
Cavalry types: C = Cavalry, combined melee and fire weapons S = Cavalry, melee weapons
Other types: N = no weapons (may not "fire")
2.45 Morale
This is the letter in the center of the counter. V = Veteran L = Line R = Rabble F = Fanatic
2.46 Movement Factor
This is on the lower right of the counter. A number indicates the basic number of hexes the unit may move in a movement phase. "R" = Riverine movement "N" = Naval movement
2.47 Unit Size
The military echelon of the unit. This is not printed on the units. Generally, sizes are as follows:
British "3" or "4" strength infantry or engineer unit are battalions. "1" or "2" strength infantry or engineer units are detachments or companies. "3" or "4" strength cavalry units are regiments. "1" or "2" strength cavalry units are squadrons or detachments. Artillery units have one battery per strength point. Railroad engineers are one battalion.
Afghan regulars: Each unit is one regiment. Other natives: Each unit is an ad hoc formation.
2.48 Headquarters
The number before the slash is the Tactical Value. The number after the slash is the Strategic Value. The number on the lower right is the Movement Factor.
2.48 Special HQs (numbered 2.48 in the source, which repeats that number for the HQ entry above)
Engineer HQs have an "E" in lower left (see Optional rule 17.0.) Political Officers have a "P" in lower left (see Optional rule 25.0).
Note: A colored-in headquarters symbol indicates that the HQ represents the commander in chief for the campaign.
2.5 Game Markers
Game markers are used to identify certain game functions. Certain markers are back-printed with different data. Players use the side needed for the appropriate game function.
Atrocity: indicates a hex in which atrocities have taken place. Fair Play: indicates British have "won over" the natives in the indicated hex to the British side. Battle: indicates the location of units which are temporarily moved off the map in order to resolve a battle. Captured weapons (rifle, artillery, machineguns): indicates Native units which have armed themselves from captured weapons (not used in this edition of the game.) Column: used as substitute markers on the game map to indicate a force of units. Field Fortifications: indicate fortifications, entrenchments, laagers, etc. which have been constructed during the course of play. Railhead: used to indicate the furthest progress of a railroad. Railroad Cut: used to indicate sections of tracks which have been torn up. Siege: indicates fortresses that are under siege. Turn: indicates which turn is currently in progress. Victory Points: indicates a player's current victory point total.
Note: The game markers are used in both Abyssinia and Second Afghan War.
2.6 Charts & Displays
Column Display: holds the units represented by the column markers on the map. Combat Results Tables (CRTs): used to resolve a battle. There are three CRTs (Artillery, Rifle, Melee). Forage Table: used to resolve foraging attempts (see Supply). Game Turn Chart: keeps track of which turn is in progress. March Table: used to resolve movement attempts. Native Reinforcement Table: used to bring in additional Native reinforcements as well as replacements. Negotiations Table: used to resolve negotiations attempts. Victory Points Chart: indicates the current level of victory points for each player.
2.7 Definition of Terms
British Empire Player: the player controlling the forces of the British Empire and its associated forces. Combat Strength: the manpower strength of a unit. Demoralization: reduction of a unit's efficiency. Demoralization is indicated by placing a demoralized marker on it. Enemy Player: the player whose turn is not in progress. Friendly Player: the player whose turn (or other game function) is occurring. Good Order: a unit that is not demoralized. Lines of Communication: hexes on which friendly reinforcements/replacements appear, and from which the player may withdraw units. Line of Supply: a path of hexes from a force to a supply source. Morale: the general level of training, leadership and spirit of a unit. There are four types of morale: veteran, line, rabble and fanatic. Movement Factor: the basic number of hexes a unit can move in a turn. Native Player: the player controlling the forces opposed to the British. Strategic Value: the ability of a headquarters to organize a campaign, used to enhance supply and intelligence functions. Supply Source: a hex or unit which provides automatic supply to unit. Tactical Value: ability of a headquarters to take decisive military actions; in game terms this is represented by a die roll modifier in combat and additional rally capability. Unit Designation: a unit's historical identification, number or name.
3.0 Sequence of Play
The game is played in a series of game turns. Each game turn is subdivided into a "First Player Turn" and a "Second Player Turn." The scenario will designate which side is the first and second players. Each player's turn is further divided into a number of segments.
3.1 Sequence Outline
Each turn consists of the following segments:
-
First Player Turn a) Events Segment: the first player rolls on the Historical Event Table and applies the result. b) Reinforcement/Replacement Segment: the first player mobilizes any reinforcement and replacement units. c) Movement Segment: the first player moves some, none, or all of his units in accordance with the movement rules. (Players may optionally perform certain types of combat during movement, including attack from march and ambush.) d) Battle Segment: the first player may attack with some, none or all of his units, in accordance with the battle rules. e) Logistics Segment: the first player checks the supply status of all his forces. f) Rally Segment: the first player attempts to rally any friendly demoralized units.
-
Second Player Turn a) Events Segment: the second player rolls on the Historical Event Table and applies the result. b) Reinforcement/Replacement Segment: the second player mobilizes any reinforcement and replacement units. c) Movement Segment: the second player moves some, none, or all of his units in accordance with the movement rules. (Players may optionally perform certain types of combat during movement, including attack from march and ambush.) d) Battle Segment: the second player may attack with some, none or all of his units, in accordance with the battle rules. e) Logistics Segment: the second player checks the supply status of all his forces. f) Rally Segment: the second player attempts to rally any friendly demoralized units.
-
End of Turn Segment Move the Game Turn indicator one space and repeat the above sequence until the last turn is finished.
3.2 Weather Turns
The Turn Record Chart designates certain turns as winter or monsoon. They provide a die roll modifier to the March Table (6.0) and Forage Table (12.0). They are further explained on the respective tables.
4.0 Historical Events
Both the British and the Native players have their own Historical Event Tables. During the historical events segment, the friendly player determines at random one historical event and applies the result. Players should examine the Events Table closely, as several of the events have a considerable impact upon play.
4.1 Procedure
During the events segment, the player must roll two dice and locate the outcome on the Events Table. Treat the first number rolled as the "tens" digit, the second number as "ones" digit.
Example: A die roll of "1" and "2" would become a "12." Thus apply result "12" immediately. Unless otherwise specified, an event may occur more than once per game.
4.2
Certain events apply only in certain games or scenarios, as specified. If they are rolled in other games/scenarios, treat them as "No Event." Unless otherwise stated, all events may occur any number of times in a game. Note: Certain scenarios may have no special events.
5.0 Organization of Forces, Columns & Stacking
A player may organize his units in a single hex into one or more "forces." Generally, each force moves and fights together, and may be represented by a "column" marker. Friendly and enemy forces may not stack in the same hex.
5.1 Stacking
Having more than one unit in a hex is called "stacking."
5.11
There is no limit to the number of units that may be in a map hex.
5.12
Friendly and enemy units may not stack together in the same hexagon. Exception: see Negotiations (Optional Rule).
5.2 Columns
A player may group some, none, or all of his units in the same hex into "columns". This is indicated by replacing the units with a column marker. The units are then placed on the Column Display Chart with the same number as the column marker. This is entirely at the players option, and is intended as a means to reduce crowding on the game map.
5.21
A player may only reorganize his units in a hex into columns at the beginning and end of any friendly movement segment. He does this simply by shuffling his units between the appropriate column boxes, or returning them to the map. (See also 5.4.)
5.22
A player does not have to place any units into columns if he does not desire. A hex may contain both individual units and columns.
5.3 Movement
Units in the same column must all move together.
5.31
A column may drop off units as it moves. Units that have been dropped off may move no farther that turn. After a column has received a march result that allows it to move, it may drop off units in the column's starting hex. This supersedes rule 5.21.
5.32
A column may not pick up units as it marches; however, individual units may move into a friendly column's hex (and join it at their option at the end of the movement segment).
5.4 Columns & Combat
All units in a single column must attack together; however, the attacker may reorganize his columns prior to initiating combat in order to leave units out of the combat.
5.5
A player must have at least one unit in a column in order for a column marker to be placed on the map. Should all units in a column marker be eliminated, the column marker is removed from the map.
5.6 Fog of War
Players may examine the contents of enemy stacks only at the moment of combat. The optional intelligence rule changes this.
6.0 Land Unit March
During a player's movement segment he may move all, some or none of his units. A player must consult the March Table in order to move a unit, force, or column. Each unit may be moved as many or as few hexes as the player wants, as long as it does not exceed its movement factor. Unused movement points may not be accumulated or transferred from unit to unit.
6.1 Procedure
Whenever a force, unit or column attempts to move, it must first consult the March Table. The player rolls one die, adds a number equal to the strategic value of any one friendly HQ in the force, and then applies the result (printed adjacent to the March Table). March Table results may double, triple, or negate the force, unit or column movement allowance (see the March Table).
6.11 Die Roll Modifier
The player may add the strategic rating of one friendly HQ in the hex to the march die roll. This must be the commander in chief if present. Only one HQ may use its strategic rating to modify a die roll per moving force. A leader (HQ) may use his strategic rating only once per movement segment to provide a die roll modifier to the March Table. If there is more than one force in the same hex, a single leader may provide the die roll modifier to only one of them. A leader who adds his strategic rating to a march attempt may be dropped off at any point during the march, including the initial hex of movement. A leader who is dropped off may not use his strategic rating to modify another march die roll in the same turn.
6.12
A force does not require an HQ to make a march attempt.
6.2
Move each unit, force or column individually from one hex to another. Once a force has been moved, and the player's hand withdrawn, the force may not be moved again in that turn. During a player's march segment, only his forces may move.
6.21
A force moves with the movement factor of its slowest unit.
6.22
If you roll a Forced March + Attrition, you lose a unit from the moving force. You still lose a unit even if you move that force less than its normal movement allowance. This reflects the general attrition of a campaign. You can choose to eliminate a supply unit as the "attritted" unit, so you do not have to lose a combat unit.
6.3 Movement Costs
6.31
Each hex entered costs a certain number of movement points (MP) to enter. Some hexsides crossed during movement cost additional MP. All hex and hexside movement costs are indicated on the Terrain Effects Chart.
6.32
A force must have the necessary number of movement points available to enter a hex. If it does not have sufficient MP to enter a hex, it may not move into it, even if it has not moved at all during the current movement segment. Certain march results will allow a unit to increase its movement capability.
6.33
The movement cost for terrain is different for British and for Native units. It costs the Native player less to enter certain types of terrain, indicated on the Terrain Effects Chart.
Designer's Note: The locals knew the terrain better.
6.34
A unit may not enter a hex containing terrain that is forbidden by the Terrain Effects Chart.
6.4 Roads
Units pay a reduced movement cost for moving along roads. The cost of entering a road hex from a contiguous road hex is 1/2 (one half) of a movement point, meaning that for each movement point expended the unit may move through two road hexes.
6.41
To use road movement a force must move through contiguous road hexsides.
6.42
A force may combine road and off road movement in the same movement segment, rounding down all remainders.
Designer's Note: Unlike other games, players cannot use railroads as roads.
6.43 Bridges & Drifts
Bridges and drifts (Zulu War) allow units to cross river hexsides at no additional movement cost.
6.44
The benefit of bridges and drifts are only in effect when the appropriate map symbol is present. Bridges are not assumed to be in effect simply because a road ends adjacent to a river hexside.
6.5 New Units
Reinforcements/replacements do not ever make a march roll to be placed on the map during the Reinforcement segment.
6.6 Zero Movement Units
Units with a "0" movement may not move. If forced to retreat, they are eliminated instead.
MARCH TABLE
Die roll: 0 = Hold + Attrition 1 = Hold 2 = Hold 3 = March 4 = March 5 = March 6 = Forced March + Attrition 7 = Forced March 8(+) = Mad Dash
Die roll modifiers: Friendly HQ in hex: +strategic value of one HQ (must be commander in chief, if in the force). Winter or Monsoon turn: -1
Results: Hold: the force does not move. March: the force may move up to its normal movement allowance. Forced March: the force may move up to double its movement allowance. Mad Dash: the force may move up to triple its movement allowance. Attrition: the player must eliminate one unit from the force, or expend one supply unit with the force. HQ and fleets are not affected.
7.0 Combat (General)
Combat takes place between enemy units in adjacent hexes. Battle occurs when the player attacks enemy units in the combat segment.
7.1 Attacking
Attacking is not mandatory. It occurs only if the player whose turn it is declares he wants to attack. Otherwise, no combat occurs.
7.11
The attacking player may attack with some, none or all of his units in a force. He may reorganize his column markers in order to do so. That is, the attacker could keep some units in a column "in reserve," withholding them from potential destruction in the upcoming battle; of course, that means reducing one's total combat strength in the fray to come.
7.2 Defending
Defending is mandatory; if the attacker chooses to attack an enemy force, all enemy units in that hex must defend. The defender may not withhold any units from combat.
7.3 Multiple Hex Combat
7.31
An attacking force from a single hex may attack only one defending hex per combat segment, even if adjacent to more than one enemy hex.
7.32
If there are attacking forces from more than one hex adjacent to a single defending hex, each may attack that hex. Each attacker attacks separately. Attacking forces from different hexes may not be combined (due to limited communications in this era.)
7.33
A single defending hex may be attacked more than once per combat segment, as long as no attacking unit attacks more than once.
Designers Comment: This is unlike usual wargame practice.
7.4 Battle Display
Whenever conducting a battle, players may transfer units to the Battle Display in order to sort out their respective unit types. Use the battle marker to record the location of the battle, and then return surviving units to the map when combat is completed.
8.0 Battle Resolution
Players conduct battles in order to destroy/demoralize enemy forces and seize enemy occupied terrain. The game uses a quasi-tactical system to resolve combat, based on the weapons types with which units are armed. Each battle goes through a series of steps.
8.1 Battle Sequencing
Battles are resolved according to a rigid sequence of events.
- Determine who has "Tactical Superiority."
- Artillery Round: conduct artillery/machinegun fire; the side with tactical superiority fires first.
- Rifle Round: conduct rifle fire; the side with tactical superiority fires first.
- Melee Round: conduct melee combat; the side with tactical superiority fires first.
- Determine if either side has won the battle.
- Conduct post-combat retreat/advance after combat, if any.
8.2 Tactical Superiority
The player with tactical superiority fires first in each of the battle round. Tactical superiority is determined at a beginning of each battle. Once determined, it remains in effect for the entire battle.
8.21 Procedure
- Each player designates one HQ (if any are present) as his commander for the battle. If a player has an HQ designated as the "commander in chief", he MUST select that HQ.
- Each player rolls one die and then adds the result to the commander's tactical factor.
- The player with the higher total has "tactical superiority." The other player has "tactical inferiority."
- If there is a tie, repeat the above procedure until one side comes out ahead.
- If a player has no HQ unit involved in the combat, he still rolls one die. Use the number rolled (without modification) for tactical superiority determination.
Example: A force with an HQ who has a tactical factor of "2" attacks a force which has no leader. Each player rolls one die. The attacker's die roll is "3". He adds this to his HQ's tactical factor for a total of "5". The defender rolls one die and gets a "4"; since he has no HQ involved, he uses the value of "4". As a result, the attacker has tactical superiority.
8.3 Conduct of Rounds
Firing is resolved in three rounds. In each round, units fire on the appropriate Combat Results Table (CRT.) Firing is not simultaneous. The side with tactical superiority applies his results in each round before the other side fires back.
8.31 Combat Results Tables (CRT):
All combat is resolved on the CRTs. The column on the left side designates the type of weapon being fired. The numbers beneath each column are the number of factors firing. The columns to the right are cross-indexed with the die roll to give combat results.
-
Artillery CRT Used by following types in the artillery round: artillery, rocket, and machinegun units.
-
Rifle CRT Used by following unit types in the rifle round: all rifle-armed infantry (muskets and breechloaders), mounted infantry and camel corps if designated as being rifle-armed.
-
Melee CRT Used by following unit types in the rifle round: cavalry, sword or spear armed infantry, rifle armed infantry, mounted infantry, camel corps, engineers, regular supply corps.
Designer's Note: technically, muskets were not rifles, since their barrels were not grooved, but they are classed as "rifles" in the game for the sake of simplicity, still far superior to all inferior weapons.
[Gap in source: the numeric Artillery, Rifle and Melee CRT grids are not present in the source text. Consult the printed CRTs on the game map.]
8.4 Procedure for CRTs
- The player designates his firing units; all must be of the same morale and weapons type.
- Total the number of firing units and use that number to determine which line of the CRT will be used.
- Roll one die. Make any die roll modifiers called for by HQ, morale and terrain.
- Apply the result.
8.41 Volleys
Each time a player uses a CRT, it is called a "volley." A player may volley with all of his qualified units in each round.
- Artillery, machineguns and rockets may fire only in the artillery round.
- Rifle armed units can fire both in the rifle and melee rounds.
8.42
A player must have an equal or greater number of factors than listed on the row to fire. If he does not then he must use the next lowest line. For example, a player has 10 factors of muzzle-loaders firing. There is no "10" listed for muzzle loaders, therefore he uses the next lowest number, which is "8."
8.43
A player may fire any number of volleys as long as all of the following specifications are followed.
- No single unit may fire more than once per combat round; however, an enemy unit may be fired at more than once per individual combat. Remember that rifle-armed units may fire in both the rifle and melee rounds.
- Each unit must fire as an integral whole. For example, a unit with a combat strength of "4" would have to fire as a 4 factor unit; it could not fire four times as a "1" factor unit.
- Combining fire: more than one unit may fire in the same volley, as long as all firing units are of the exact same weapons and morale types. Also, demoralized and good order units may not be combined in the same volley. Simply add the combined combat strengths together. A player may fire units of the same weapon and morale type separately if he so desires.
- If a player has separate weapon types and morale classes firing, each must resolve its fire separately. This may be in any order that the player desires.
- If a player has more units firing than the maximum number of factors listed, he fires the excess units as separate volley.
Example: a player has a force of two veteran rifled-muskets, one line rifled-musket, and one line breechloader. He must fire the veteran rifled-muskets together, and he must fire the line rifled-musket and the breechloader separately.
8.44
In the melee phase of combat, all "rifle" (musket, rifle, breach-loading, including all mounted infantry and camel corps, if applicable) units of the same morale class combine for one volley under the "other" type (OT) units per the chart.
8.45
Optionally, you may fire units of the same weapon and morale class as separate volleys. But for the ease of play players must fire all units of the same weapons and morale class together.
8.46 Combining Fires
Even though certain weapon types use the same line on the CRT (for example, M, G and F types) they are still fired separately from each other. Demoralized units of the same weapons type but different morale units may fire together if they are all demoralized. Also, note units of the same weapon and morale classes, but with different unit symbols, may fire together. (For example, veteran breach-loader armed infantry and camel corps may fire together in the same volley.)
8.5 Combat Results Tables
Each of the weapons classes (artillery-rifle-melee) has an appropriate combat results table. They provide the following information.
8.51
Results are given as loss numbers. There are two types of results: 1) elimination of units; and 2) demoralization of units.
8.52
If the combat result is un-parenthesized, the enemy player loses the indicated number of units. Following the removal of eliminated units, the enemy player demoralizes an additional number of units equal to the loss number. For example, an un-parenthesized loss of "1" would mean the enemy player must eliminate one unit and then demoralize another.
Elimination/demoralization is listed in terms of the number of enemy units (not factors).
8.53
If the result is parenthesized, the enemy player must demoralize the indicated number of units.
8.54
The player owning the units to be eliminated/demoralized always selects which units will be lost/demoralized.
8.55
Already demoralized units that are demoralized again are eliminated.
8.56
Combat losses are applied immediately after each volley is fired in a round.
8.6 Modifiers to Die Roll
The die roll is modified by certain factors. Modification is done as follows: a positive die roll modifier raises the final die roll number; a negative die roll modifier lowers the final die roll number. If there is a combination of positive and negative die roll modifiers, use the sum of the difference. (e.g., if a unit has a plus "2" modifier and a minus "1", the final die roll modifier is "+1"; a die roll of "6", would be raised to "7"). Die roll modifiers are listed adjacent to the appropriate CRTs. They include:
-
Firing Unit Morale Good Order Veteran: +2 Good Order Line: +1 Good Order Rabble: +0 Good Order Fanatic: Melee: +3 Rifle & Artillery: +0 All Demoralized units: +0
-
Headquarters. Each HQ may add its tactical factor to the die roll of one friendly unit (or group of units of the same weapon and morale types) in the force per round. No more than one HQ can apply its tactical factor to any single unit/group of units.
-
Terrain effects (determined by the hex the defender is in).
Terrain effects apply only to the original defender, not to the attacker; the attacker never receives a benefit for terrain. Terrain effects are not cumulative on defense.
Designer's Note: This is because of the short range of weapons throughout most of that period, and the concentrated deployment of units; the defender would have to choose where he "made his stand."
If there is more than one terrain type in the hex, then the defender selects the one he wants.
Example of combat: A player fires 8 factors of veteran muzzle-loaders. He rolls a "4"; he adds 2 to it because the firing units are veterans. The final result is a modified die roll of "6." Cross-indexing this with the Rifle Fire Chart indicates a "1." The enemy must eliminate one unit; he must also demoralize one unit.
8.61
Headquarters may not be taken as losses in combat. They are eliminated only if all other friendly units in the hex are eliminated. Supply units and civilians may be taken as losses normally (they each count as one unit).
8.7 Victory/Defeat
Victory and defeat will be determined following the melee round.
8.71 Procedure
A force loses the battle (is defeated) if at least 50 percent of its combat strength points have been eliminated and/or demoralized by the battle. Only demoralizations suffered during the battle itself would count, not units demoralized prior to the battle's start. If one side loses a battle then, obviously, the other side is the victor.
8.72
A draw occurs when both sides get a defeat OR neither side gets a defeat.
8.73
If a draw occurs, neither side retreats or pursues.
8.8 Defeat and Retreat
A force suffering any defeat must retreat two hexes. The loser retreats his own units and may move them through any playable terrain. All units must be retreated together.
8.81
Units may not retreat into or across the following.
- Enemy or neutral occupied hexes
- Major Rivers (even if bridged)
- All sea
- Otherwise prohibited terrain
8.82
A force that retreats must end its retreat two hexes away from the original hex—it may not double back.
8.83 Enemy Zones of Control
A force may retreat into an enemy zone of control (see the Zone of Control rule.) A force that retreats into an enemy zone of control must demoralize a number of strength points equal to (or greater than) the total strength points of good order enemy units exerting the zone of control there.
Note: Units eliminated from retreating through a ZOC do count for victory points.
8.84 Defending Again
Any force that retreats into a hex that then comes under attack simply defends again (there is no special penalty for retreating to a hex that is attacked).
8.85 Fortresses and Retreat
Units defending in fortresses do not retreat after losing a combat. A force suffering a defeat may retreat into a friendly, or unoccupied, un-besieged fortress as its first hex of retreat and end the retreat in the fortress.
8.86
Should a force have no other alternative but to retreat through prohibited terrain or units, then it is eliminated instead.
8.9 Pursuit
A force that wins a battle may "advance after combat" by moving into the defeated enemy's hex. That is done by moving the victorious units into the vacated hex. Only the winner of a battle may advance (whether attacker's or defender's). A force that gains a draw or defeat may never advance even if, for some reason, all enemy units are eliminated by the combat.
8.91
All units in a winning force's hex may advance, even if they did not participate in the combat. They may not conduct further combat that turn.
8.92
Advance after combat costs no movement points. It may be conducted through enemy zones of control at no penalty. It may not be conducted into hexes occupied by enemy or neutral units or otherwise forbidden terrain.
8.93 Cavalry
All mounted types (including cavalry, mounted infantry, camel corps, and HQ) may advance two hexes after combat if the enemy has retreated two hexes. The first hex must be into the losing force's vacated hex; the second must be adjacent to the retreating force's new position. Horse artillery types are NOT considered to be mounted units for game purposes (see also 19.2 and 22.2).
8.10 Victory Points
Winning or losing battles will affect victory points (see victory points rule.) Each scenario designates the number of victory points gained for winning battles.
9.0 Zones of Control
The six hexes surrounding a force is called that force's zone of control. Zones of control is abbreviated "ZOC." ZOC affect enemy movement, retreat and line of supply.
9.1
All units have zones of control except: HQ, demoralized units, civilians, supply units, fleets, riverine and neutral units.
9.2 Extent of Zones of Control
A zone of control extends through all six hexes adjacent to a unit.
9.21
ZOC do not extend into or through any hexes/hexsides that could not normally be traversed by a unit (such as across an all sea hexside).
9.22
ZOC extend into any hexes occupied by enemy units (exception: see fortresses and ZOC below).
9.23 Fortresses & ZOC
ZOC do not extend into enemy occupied fortresses.
Optional Siege Rule: Units garrisoning (inside) non-besieged fortresses exert ZOC outside of the fortress. Friendly units garrisoning besieged fortresses do not exert ZOC (see siege rule).
9.24 Major Rivers
Zones of control do not extend across major rivers.
9.3 ZOC & Movement
9.31
It costs any force one (1) extra movement point to enter an enemy zone of control. This is in addition to other movement point costs for entering a hex. This represents the time needed to deploy in the face of enemy presence, as well as slowing of movement due to the need to deal with enemy snipers, pickets, etc.
9.32
It costs no extra movement points to exit an enemy ZOC.
9.33
A force may enter any number of enemy ZOC in the course of a single turn as long as it has the movement points available; that is, a force may freely move through and exit enemy ZOC as long as it expends the movement points.
9.34
Units may move directly from one ZOC to another by paying one extra movement point.
9.4 ZOC & Combat
ZOC affects combat as follows.
9.41
Units are not forced to have combat simply because they are in an enemy ZOC.
9.42
ZOC have no effect on advance after combat. Units may freely enter/exit enemy ZOC during advance.
9.43 ZOC Affect Retreat
A force that retreats through an enemy ZOC must demoralize at least a number of strength points equal to (or greater than) the enemy's good order strength points. A demoralized retreating unit that demoralizes again is eliminated. (Remember, units may not retreat through any enemy units.) The player controlling the retreating force chooses which units are to be demoralized. If a force retreats into more than one enemy ZOC in a single retreat, then it must perform this procedure for each enemy ZOC it enters.
9.5 Lines of Supply
Friendly ZOC block enemy lines of supply. A force may trace a line of supply into a hex containing an enemy ZOC only if there is at least one friendly unit in the hex.
10.0 Headquarters
Headquarters (HQ) represent great leaders, as well as their staffs. Each HQ has a tactical value, representing the leader's ability to conduct combat operations, and a strategic value, which represents the ability of that HQ to conduct detailed planning and coordinate support. HQ function as other units, with certain special capabilities.
10.1
Headquarters provide various benefits to forces in their hex by using their tactical and strategic factors as die roll modifiers. An HQ can provide tactical and strategic benefits only to units in its own hex.
Exception: See telegraph rule in some scenarios.
10.2 Commander in Chief
Certain HQ are designated as Commanders in Chief. If a commander in chief HQ is in a hex, the player must use the commander's tactical value to determine tactical superiority, and his strategic rating to modify march die rolls. That holds true even if there are other friendly HQs in the same hex with a higher tactical value. This requirement does not affect other HQ functions; otherwise, a player may use any friendly HQ for all functions with any units in his force.
10.21
If a force is divided into more than one subcommand, an HQ does not have to be of the same subcommand to apply its functions to units.
10.3 Tactical Factor
An HQ may use its tactical value for the following game functions.
10.31 Tactical Superiority
Add the tactical value of any one friendly HQ in a force to the die roll made for tactical superiority. This must be the commander in chief if present in a force.
10.32 Fire
Each HQ modifies the fire die roll of one friendly unit (or group of units of the same weapon and morale types) it is stacked with by an amount equal to its tactical factor. No more than one HQ may apply its tactical factor to any one unit per round of fire.
10.33 Rally
Each HQ modifies the rally die roll of one friendly unit it is stacked with by an amount equal to its tactical factor. No more than one HQ may apply its tactical factor to any one unit per rally segment.
10.4 Strategic Factor
An HQ may use its strategic factor to influence the following game functions.
10.41 March
Add the strategic value of any one friendly HQ in a force to the die roll made for march. This must be the commander in chief if present in a force.
10.31 Supply (numbered 10.31 in the source, a duplicate of 10.31 Tactical Superiority)
Add the strategic value of any one friendly HQ in a force to the die roll made for forage.
10.42 Intelligence (optional rules)
Each HQ may attempt one strategic intelligence operation. (See the fog of war rule.)
10.43 Fair Play (optional rules)
A British HQ may attempt fair play using its strategic factor; see the optional rules.
10.5 Headquarters & Combat
Combat involving headquarters (HQ) is resolved as follows.
10.51
A headquarters is eliminated in combat if all other friendly units in a force it is stacked with are eliminated by that combat. Otherwise, HQ are never affected by combat.
10.52
HQ are never demoralized.
10.53
Should all units in a hex be eliminated by some non-combat action (such as lack of supply) the HQ remains on the map.
10.54
If a friendly unit with a combat factor of 1 or more enters or attacks a hex containing only an enemy HQ, the enemy HQ is eliminated. Units may never otherwise enter hexes containing enemy HQ.
11.0 Unit Morale, Demoralization & Rally
All units have a morale class. Morale class has an impact upon combat and other game functions, as explained in the appropriate rules section. During a turn, a unit may become demoralized. Players may attempt to rally demoralized units to restore them to good order.
11.1 Classes of Discipline
The following letter codes indicate the discipline classes of the various units in each game.
V: Veteran—trained and battle experienced troops. L: Line—trained but inexperienced troops. R: Rabble—armed mob (or attacked civilians). F: Fanatic—warriors eager to close with and kill the enemy.
11.2
Units are always in one of two morale states: good order or demoralized. Good order is indicated by the front side of the counter; demoralized by the reverse.
11.21
Units are normally in good order, unless otherwise specified by a particular scenario setup instruction, or some game action demoralizes them.
11.22
Units become demoralized as the result of the following game actions: combat results, lack of supply or certain historical events.
11.3 Effects of Demoralization
A unit that is demoralized is affected as follows.
11.31
A demoralized unit has its movement factor halved for all land movement. Demoralization does not ever affect rail, river or sea movement.
11.32
A demoralized unit receives a die roll modifier of zero (0) when firing in combat, regardless of its morale class.
11.33
Demoralized units retain their normal discipline class for rally (for example, a demoralized elite unit rallies using the "veteran" line on the Rally Table).
11.34
Good order and demoralized units may coexist within the same hex. Demoralized units do not otherwise affect good order units in the same hex.
11.4 Multiple Demoralizations
Any demoralized unit that receives another demoralization result must be immediately eliminated.
11.5 Rally
The Rally Table is used to attempt to restore demoralized units to good order.
[Gap in source: the numeric Rally Table results are not present in the source text. The result codes are: "R" (rallies, flip to good order), "F" (fails, remains demoralized), "D" (desertion, eliminated). Consult the printed Rally Table for the die-roll thresholds.]
11.51 Rally Procedure
Rally is performed during the friendly rally segment. Roll once per unit and apply the result.
11.52
The rally results are printed adjacent to the Rally Table. A unit that successfully rallies ("R" result) is flipped to its good order status. A unit which fails to rally ("F" result) remains demoralized (but may try again on a subsequent turn.) A unit that rolls a desertion ("D" result) must be immediately eliminated.
11.53 HQs and Rallying
A friendly HQ may utilize its tactical factor to assist rallying of other units in its hexagon. Add the HQ's tactical factor to the rally die roll of one friendly unit in the hex. A player may utilize any number of friendly leaders in a hex to assist rally, but no more than one HQ may modify any one unit's rally die roll.
12.0 Logistics
Historical Commentary: throughout these periods, logistical (supply, transport and medical) arrangements were very primitive, at least by twentieth century standards. Food was the main problem (usually, enough ammunition could be carried to fight several battles on unit pack trains). Much of the supply system depended upon foraging. Supply trains were often used to supplement this, but they were in turn limited by the amount that draught and pack animals could carry. Consequently, armies usually had to remain dispersed, concentrating for only brief periods of combat. It wasn't until the development of the railroad that a means was devised to haul sufficient supplies overland to consistently support large land armies.
12.1 Procedure
During the Friendly Supply Segment, the phasing player checks the supply status of all his units. Units are in automatic supply under certain conditions. Units that are not must forage. Units that fail to forage are out of supply and become demoralized.
12.2 Automatic Supply
Supply is ignored in certain circumstances.
12.21
Certain units require no supply. They include headquarters, supply units and fleets, as well as units in the same hex as a friendly fleet (whether embarked or on land).
12.22
Certain hexes can supply an unlimited amount of units in their hex. They include:
- un-besieged fortresses;
- railroad hexes: all British units (only) on completed rail hexes are automatically in supply unless the line has been severed in between the unit and the LOS and/or the LOC.
12.23 Supply Units
If a player has a supply unit in a hex, up to 12 friendly units in the hex are automatically in supply. In such a case the supply unit is expended in the logistics phase of the turn. If a player has more than 12 units in a hex, he expends one supply unit for each additional 12 units or fraction thereof. A player may choose to expend supply units or not for a force.
Example: to supply 13 units in a hex, the player would have to expend two supply units.
Note: This rule is a change from the original SNS system where a single supply unit could supply an unlimited number of friendly units. Now the limit is 12 units per supply unit.
12.231
The player may not first roll on the Forage Table on the chance he may be able to supply all units in the hex. If a player has a supply unit in a hex, he has a choice to either expend the supply unit or to forage, but may not do both in the same hex.
12.24 Tracing a Line of Supply
Additionally, a force is in supply if it can trace an LOS (line of supply) to a friendly supply source. Both players must note the following supply considerations.
- Supply sources include the following. A friendly un-besieged fortress. A friendly supply unit (expend the supply unit). A friendly railroad in which an LOS back to a friendly supply source can be demonstrated. A player may only ever trace an LOS to a friendly un-besieged fortress, supply unit, or railroad; He may not trace it to a forage hex.
- An LOS may be no longer than 2 hexes, unless modified by a specific scenario.
- An LOS traced entirely along roads may be doubled in length. If any part of the LOS deviates from a road, then it may not be doubled.
- Zones of Control. An LOS may never enter any enemy ZOC unless there is at least one friendly unit in the hex.
- Any number of units may trace an LOS to any single supply source hex.
Example: Up to 12 units in more than one hex could draw supply from a single supply unit.
12.3 Forage
Units that are not covered by the above conditions must forage (see the Forage Table). To forage, the player checks the type of hex the units are in. He then rolls one die, cross-indexing it with the appropriate line for terrain. That will give the number of friendly units in the hex that are in supply. All units in excess of that number are out of supply.
FORAGE CHART (12.0)
Die Roll => 1(-) 2 3 4 5 6(+) Un-Besieged Fortress Unlimited Unlimited Unlimited Unlimited Unlimited Unlimited Town, Besieged Fortress 4 8 12 16 20 24 Clear, Hill (Rough), Well, Oasis hex, Minor River, Major River, Lake Hexside 2 4 8 12 16 20 Mountain, Jungle, Marsh 0 2(4) 4 6 8 10 Desert, Broken, Mud Flats, Sand; Atrocity Marker 0 0(2) 0(2) 2(4) 4 6 Road, Pass, Bridge, Coast, Drift, Railroad Other Terrain Other Terrain Other Terrain Other Terrain Other Terrain Other Terrain Sea n/a n/a n/a n/a n/a n/a
Die roll modifiers: +1 HQ Strategic value +1 Fieldworks marker in the hex. -1 Winter or Monsoon turn.
Results: The number rolled is the number of units which are in supply. Out of supply demoralized units are eliminated. Out of supply good order units are demoralized. Civilian units count as 4 units for purposes of supply. Parenthesized results apply to Native units only. Units in automatic supply do not count against result total.
Note: for players desiring to speed up play, see rule 34.0 (simplified foraging).
12.31
Units automatically in supply do not count against the total of friendly units when foraging.
12.32
If there is more than one type of terrain in a hex, the player chooses the single best one for forage. Certain hexsides (such as rivers) may provide supply.
12.33
One friendly HQ in a hex may modify the forage die roll by adding an amount equal to its strategic value.
12.34
Roll a die for each hex attempting to forage.
12.4 Out of Supply Effects
Out of supply units are affected as follows: already demoralized units are eliminated, or good order units are demoralized.
12.41
The player may choose which units are to be out of supply if there is a choice.
12.42
Units rally from demoralization caused by being out of supply via the standard rally rule. That means higher disciplined units have a better chance of surviving being out of supply in the long run.
12.5
A supply source hex may be used an unlimited number of times.
12.6 Supply Units
Supply units represent concentrations of wagons, pack animals, etc. which are used to carry water, food, ammunition, tents, clean linen, etc.
12.61
A single supply unit may supply up to a maximum of 12 friendly units in its hex and/or other units that can trace a line of supply to it.
12.62
A supply unit may provide supply regardless if it is good order or if it is demoralized.
12.63
Supply units are expended when used to provide supply.
12.64 Supply Unit Reinforcements/Replacements
A player may receive a quantity of supply units as reinforcements each turn, as designated by the scenario instructions. This does not require the expenditure of any replacement points. Supply units that have been expended/eliminated may be returned to play. New supply units are placed on lines of communications map hexes, the same as reinforcements/replacements. The number of supply units received each turn will vary with the scenario.
-
The number of supply units provided in the counter mix for a scenario is limited intentionally. At no time can the number of supply units in a scenario exceed the counter mix allotment. Supply units may not be accumulated off board; if not placed on the map during the game turn designated, the supply unit is lost.
-
Lines of communications hexes are not supply sources, per se. They are hexes or locations where reinforcements/replacements are received (including supply units), and where withdrawals may take place.
12.65
Supply units otherwise count as normal units. They may be taken as losses due to combat, march attrition, etc., and when lost in combat, they count as units eliminated for victory points.
Note: a particularly effective tactic is to expend a supply unit instead of a combat unit when an attrition loss is called for by the March Table.
12.7 Railroads
Some Sun Never Sets maps include a railroad. The railroad may be used to enhance supply for British-controlled units.
12.71
The rail hex used for supply must be able to trace a continuous line of rail hexes back to a friendly lines of communication map edge or hex which is a supply source (a port or fortress).
12.72
All rail hexes must be functional; they may not be "cut," nor occupied by enemy units or in enemy ZOC.
12.8 Allies
In some of the scenarios a player controls more than one country's units. In such scenarios, each country may use any other friendly country's supply sources/units.
13.0 Reinforcements, Replacements & Withdrawals
Reinforcements are new units introduced during the course of a game. Replacements are units that have been eliminated and brought back into play. Reinforcements and replacements are placed during the friendly reinforcement segment. In Addition, certain events will mandate withdrawal of units from play.
Note: the reverse side of units gives information about when those units appear.
13.1 British Reinforcements
Each scenario will designate some units as reinforcements. There are two types of reinforcements.
13.11 Scheduled Reinforcements
They arrive on a set turn as indicated in the scenario.
13.12 Contingency Reinforcements
They arrive as the result of a game action as specified in the scenario, or as a result of certain historical events. Certain contingency reinforcements will have prerequisites, such as the expenditure of victory points. Both players should read the scenario instructions and Events Chart for details.
13.2 British Replacements
Each scenario designates how many as well as what type of replacements a player may receive.
13.21
Generally, all replacements are specified in terms of the total number of combat factors that may be replaced per game; for example, if a scenario gives a player eight infantry replacement factors, he could in the course of a game replace two "4" strength infantry units, four "2" strength infantry units, or any other combination totaling "8". Replacements costs are the same for all morale classes (for example, a "4" factor veteran unit costs the same as a "4" factor rabble unit). Riverine units are given in terms of units.
13.22
A British player does not necessarily have to use replacements immediately as units are eliminated. He may save them for later.
13.3 Placement on the Map
British reinforcements and replacements are placed on the map on hexes termed lines of communication (LOC). Lines of communication hexes are designated in each scenario.
13.31
Lines of communication hexes may include: a specific hex on the map; a hex adjacent to the map edge; or coastal hexes.
13.32
Reinforcements must appear on the turn designated; if for some reason they cannot, then they are lost.
13.33
Replacement units enter the game the turn the replacement points are expended. Players should keep track of replacement points using pen and paper.
Expended/eliminated supply units may be brought back into play (see Supply rule).
13.34 Restrictions
- Units may not be placed on a hex occupied by enemy units.
- Eliminated headquarters and civilian units may not be replaced.
13.35
Units placed on coastal hexes are never considered to be using naval transport (landings occur during the reinforcement/replacement segment, not the movement segment).
Units landing on coastal hexes do not have to be in the same hex as a friendly fleet (the naval transports are considered to be brought in for the turn of landing).
13.36
Note the placement of units on the map is not considered movement. It occurs in the friendly Reinforcement/Replacement segment. It does not require a march die roll.
13.4 Withdrawal
British units may exit the map. They may do so only if the Evacuation event has occurred.
13.41 Withdrawal Procedure:
Move the units to a friendly lines of communication hex and remove them from play. They do not count as eliminated units. It costs one extra movement point to evacuate a unit. Units may withdraw via sea (from coastal hexes) if allowed in the scenario. They simply move to a coastal hex, pay one extra movement point, and are removed from the map. They do not need to embark on naval units to do so. Riverine units may withdraw by moving off map by a river hex adjacent to the appropriate map edge (see 27.0). Fleets may withdraw by moving off all sea or coastal map edge hexes.
Railroads: Units using rail movement to withdraw do not pay an extra movement point to exit the map.
13.42
Once withdrawn, a unit may not return to play.
13.43
A unit must be on the map in order for it to be withdrawn. For example, the Evacuation event is in effect on a turn in which the British player is supposed to received scheduled reinforcements. The British player could not gain the victory points for withdrawn units by simply refusing to bring the reinforcement on. The units would first have to enter the map and then be moved off.
13.5 Native Reinforcements/Replacements/Desertions
Scenario instructions will designate Native unit types to be received as reinforcements/replacements.
13.51
They are to be placed as indicated by the specific scenario. Native reinforcements may be either units which have not already entered play, or units which were previously eliminated.
Note: there is no distinction between Native reinforcements and replacements. A Native unit may be eliminated and then brought back into play any number of times in the game as long as reinforcements/replacements are called for.
The Native player may take supply units (if available, up to the limit of counter mix) as reinforcements/replacements.
13.52
Most scenarios will mandate that the Native player make a die roll on the Native Reinforcement Table to determine if he receives any additional reinforcements/replacements, or must make a check for desertions. This is in addition to other reinforcements the Native player receives.
Note: the Native player MUST make this die roll every reinforcement segment. The scenario will indicate the number of units to be gained/lost, depending on the outcome.
NATIVE REINFORCEMENT/REPLACEMENT TABLE [13.0]
Die Roll Result 1(-) Desertions 2-3 No effect 4-6 Reinforcements 7(+) Uprising
Die Roll Modifiers: Natives have five or more victory points than the British: +1 Natives have 15 or more victory points than the British: +2 British have 10 or more victory points than the Natives: -1
Desertions: Native player must remove units from the map designated by the scenario for desertions. No effect: no effect. Reinforcements: Native player receives units designated by the scenario reinforcements. Uprising: Native player receives units designated by the scenario uprising.
13.53
Native reinforcements/replacements are placed per scenario instructions. No Native reinforcements/replacements may be placed in hexes containing enemy units. Exceptions are noted in the scenarios or in the Historical Events.
Optional Rule: Native reinforcements/replacements may not be placed in hexes containing atrocity/fair play markers.
13.54
If no hex of the designated type is currently available, then the reinforcements are lost. Native reinforcements/replacements that are unused may not be accumulated.
13.55 Native Desertions
If a desertion result occurs, the Native player must remove the designated number and types of units from play, regardless their location. The Native player can select which units desert. They may be returned to play as reinforcements/replacements later, if called for.
Designer's Note: This represents the tendency of irregular forces to come and go at their own volition; often, this reflected the changing fortunes of war.
13.56 Native HQs as Reinforcements
Native headquarters may be taken as reinforcements, but counted as one unit each if they have not already appeared in a scenario. Eliminated Native HQ may never be taken as replacements. A player may choose to remove a Native HQ from play due to a desertion result. Any HQ removed via a desertion may be reintroduced into play at a later time as a reinforcement.
13.6 Supply Unit Reinforcements
The British player receives a designated number of supply units in each scenario per turn. Each game has its own set of British supply units. If the British have all the supply units for that game in play, they may receive no more. (that is, you may not take supply units from other games).
14.0 Hex Control
Certain game functions require players to "control" hexes.
14.1
A player controls a hex by physically occupying it with a friendly land unit of any strength (including HQ).
14.12
A friendly naval or riverine unit that ends its movement in a coastal hex (or land hex adjacent to a river hexside) also controls that hex (representing shore landing parties).
14.2 Control of Hexes
A hex may be in one of the following four conditions.
14.21
- British Empire controlled: the hex is occupied by British Empire units.
- Native controlled: the hex is occupied by native units.
- Neutral controlled: the hex is occupied by neutral units.
- Non-controlled: the hex is occupied by no units.
14.22
A player must physically occupy a hex in order to control it; should he move all of his forces out of a hex, he no longer controls it. He may regain control by reoccupying that hex.
14.3 ZOCs & Control of Hexes
A ZOC does not dispute control of a hex. In order to control a hex, a unit must be physically in a hex, not simply exerting a ZOC on it.
15.0 Scenarios
There are four games included, each representing an entire war. Each game has one or more scenarios. Players select which scenario they will play; set up the forces listed in the scenario, and then commence play.
15.1 How to Set Up the Game
Each scenario gives starting units for both sides. Units are deployed either on specific hexes, or within certain map areas. The scenario will designate the first and second players; note the first player may set up second and vice versa.
15.2 Special Rules
Certain scenarios have special rules. They modify the game rules as specified.
15.3 Ending the Game
A scenario ends whenever one of the following occurs.
- The specified number of game turns is completed.
- If one player capitulates.
- If both player agree to end the game.
- If an "automatic victory" is attained (see victory conditions).
16.0 Victory Conditions
The game is won by having gained control of the strategic objectives, eliminating enemy units, and other actions designated by the scenarios. Each action is worth a certain number of victory points. Players keep a running total of their victory points throughout the game on the Victory Point Track.
16.1 Levels of Victory
Each scenario specifies victory points for attaining certain objectives or eliminating enemy units. At the end of a game, each player checks the number of points he has attained. Subtract the lower player's point total from the higher player's to determine the extent (if any) of the victory.
0-10 points difference: Draw (neither side wins) 11-30 points difference: Local Victory 31-50 points difference: Campaign Victory 51+ points difference: Imperial Victory (highest)
16.2 Victory Points
Some victory points are received immediately, while others at the conclusion of the game.
- Objectives. Objectives are usually fortress and town hexes. Unless otherwise specified, the points for them are awarded at the end of the game.
- Combat Losses. Whenever enemy units are eliminated as a result of battle, the enemy player receives victory points as specified in the scenarios. These points are awarded at the instant of loss. Units eliminated from non-battle causes (such as lack of supply) do not count.
- Special Conditions. Some scenarios award victory points for special conditions.
- Losing Points. Certain actions will cause a player to lose victory points. If the player does not have sufficient points to lose, then the enemy player gains the difference. (for example, if the player is mandated to lose 10 victory points by a game action, but he only has three; he reduces his total to zero and the enemy player gains seven points).
- Non-combat losses. Units lost due to reasons other than combat (such as lack of supply) do not count as VP. Scenarios may provide exceptions to this.
16.3 Automatic Victory
If at any time in the course of play, one player is 75 or more victory points ahead of his opponent, the game comes to an immediate end and the player that is ahead then immediately attains an Imperial Victory. Remember, points for occupation of fortresses and towns are (generally) only awarded at the end of the game, so they are not counted in this case.
16.4 Treaty
Players may, by mutual agreement, end the game at the end of any turn. Victory points are evaluated as of that point.
Optional Rules
Players may use these optional rules to enhance realism and play balance.
17.0 Engineers & Pioneers
Good order engineer (and pioneers) units have additional special capabilities.
Note: this rule has been rewritten from the original SNS rule. Also, this incarnation of the rule includes a new type of unit: pioneers.
17.1 River Crossing (Engineers Only)
17.11
A force moving with an engineer unit may cross a major or a minor river hexside at no extra movement point cost.
17.12 Supply Requirement
For river crossing, the engineer unit must begin the move in the same hex as a friendly supply unit. The supply unit is not expended, nor does it have to accompany the force on its movement. It's considered to be carrying the bridging equipment and/or boats.
17.2 Sapper Assault (Engineers only)
Engineer units which are adjacent to an enemy fortress or fieldworks may make a special "sapper" attack.
17.21
Sapper attacks must be conducted prior to any other combat against a fortress. Sapper attacks do not require a tactical superiority die roll, and the enemy force may not fire back.
17.22
Sapper attacks are resolved by rolling one die on the Sapper Table and applying the result. Each engineer unit in a hex may make one sapper attack per turn. Sapper assault may negate the negative die roll modifier for a fortress, or eliminate a fieldwork. Specific sapper assault results are printed adjacent to the table.
SAPPER ATTACK TABLE
Die Roll Result 1(-) Countermine 2 No Effect 3 No Effect 4 Defenses Blown 5 Defenses Blown 6(+) Defenses Blown
Die Roll Modifiers Attacker Engineer HQ: +1 Attacker Good Order Veteran Engineer: +1 Defender Good Order Rebel Engineer: -1 Defender Engineer HQ: -1
Results Defenses Blown
- If attacking a fortress, the defender receives a zero defensive die roll modifier for defending in the fortress this phase; defender still may ignore retreat results.
- If attacking enemy fieldworks, the fieldworks eliminated (remove the marker.) Units in the fieldwork are not affected. No Effect: nothing happens. Countermine: demoralize the attacking engineer unit.
17.23
Sapper assaults must be made prior to the initiation of the tactical superiority die roll. The results of "defense blown" against an enemy fortress apply throughout the remainder of the battle segment. More than one sapper assault may be made against a single hex per turn, but each assault is made separately.
17.3 Fieldworks (Engineers & Pioneers)
Engineers and pioneers units may construct field fortifications, called "fieldworks."
17.31 Constructing Fieldworks
It takes one complete movement segment for an engineer unit to construct a fieldwork. The unit may not move in that segment. Fieldworks may be built in any playable terrain, except fortresses.
17.32 Effects of Fieldworks
If a force is located in a fieldworks implement the following.
- The defender receives a -2 die roll modifier when fired upon in any round of combat. This is NOT in addition to other defensive benefits (for example, if a fieldwork is in the same hex as a town, the defending force could use either the fieldwork or the town defensive modifier, not both).
- Units in fieldworks may attack normally, they do not have to "come out" of the fieldworks to do so.
- A single fieldworks marker may be used by all friendly units in a hex, not just the force which built it.
- Once built, units may enter the fieldwork at no extra movement cost.
- Fieldworks may never move.
- Fieldworks are not forts and should not be confused with fortresses. For example, they do not provide supply, etc.
17.33 Destruction of Fieldworks
Fieldworks are considered destroyed in the following circumstances.
- Sapper Attack. Engineer units may make sapper attacks against a hex containing enemy fieldworks. If a "blown" result is achieved, remove the fieldwork marker immediately. Any units which were in the fieldworks are unaffected.
- If the enemy player eliminates or retreats all friendly units out of a fieldworks marker, then the marker is removed. A player may not capture enemy fieldworks.
- If all friendly units leave a hex containing the fieldwork, remove the marker.
17.4 Mobility Enhancement (Engineers & Pioneers)
Engineer and pioneers units have the following movement bonuses.
17.41
If a force contains an engineer or pioneer unit, it pays two movement points for entering a mountain or jungle hex.
17.42
Per the standard rules, British (and other civilized forces) pay one-half movement factor to move via roads. British movement along roads now costs one movement point per hex (regardless of other terrain). However, if the moving force includes an engineer or pioneers unit, then the cost for moving along roads is indeed one-half movement point.
17.43
To qualify for the road movement bonus, the engineer or the pioneer must accompany the moving force for the entirety of the enhanced movement. Also, it may not be a unit chosen to be lost in the event of an attrition march result.
17.5 General Restrictions
Only good order engineers and pioneer units may perform these following functions; demoralized units may not. Railroad engineers may not perform them (though see rule 30.0).
18.0 Sieges
Any player may declare a "siege" against enemy fortresses in order to restrict movement into/out of that hex, and to undermine its supply capability. Siege is indicated by using the siege markers.
18.1 Procedure
A player must present at least one unit with a printed combat strength of "1" or more adjacent to an enemy occupied fortress for one complete friendly movement segment. At the end of the segment, he places a siege marker on top of the besieged fortress.
Note: any unit can do this; you do not need an engineer.
18.2 Effects of Siege
These rules are the collective effects of a siege.
18.21 Movement
No enemy units may enter or leave the fortress hex except via river or naval movement.
18.22 Supply
Besieged fortresses do not provide automatic supply. Units occupying them must roll for forage. Units may not trace a line of supply into or out of a besieged fortress.
18.23 Retreat
Units may not retreat into a besieged fortress.
18.24 Advance After Combat
Units garrisoning a besieged fortress cannot advance after combat unless they have eliminated or retreated all besieging units.
Designer's Note: Siege represents the besieging units surrounding the fortress; this happens on a scale less than the game hexes represent.
18.3 Besieging Units
Once any unit has a siege marker placed on it, other friendly units that enter the hex also are considered besieging the fortress. This does not cost them any additional movement points.
Note: A fortress may be besieged from more than one hex.
18.4 Duration of Siege
A siege ends when all siege markers have been removed from units adjacent to a fortress.
18.41
A siege marker is removed if all friendly units in that hex have moved out, retreated, or are entirely eliminated.
18.42
If there is more than one unit in a single besieging force, some can leave the hex and others remain and the siege is still be in effect.
18.5
Only fortress hexes may be besieged. Note: fieldworks may not be besieged.
18.6 Reinforcements
A player may place a maximum of one reinforcement/replacement unit per turn in a besieged fortress (if reinforcements/replacements can otherwise be placed in the hex).
18.7 Coastal Fortresses
If any player has a besieged force inside of a fortress that is on a coastal hex, and if he has at least one fleet in the scenario, the following special conditions are in effect.
18.71
The fortress remains in automatic supply.
18.72
The player may place reinforcements in the hex via naval landing.
19.0 Intelligence & Fog of War
Either player may examine the contents of enemy forces and column displays via intelligence operations.
19.1
A player is free to examine enemy forces or displays under the following circumstances.
- Combat: all attacking and defending units are revealed at the instant combat is declared. Once committed to an attack, the attack may not be called off.
- A player conducts a reconnaissance.
- A player conducts a successful strategic intelligence operation.
- Certain historical events dictate that a player can examine enemy forces.
- A player may, during his turn, reveal any of his own units for whatever reason he desires.
19.2 Reconnaissance
The following unit types may make a reconnaissance: good order cavalry, camel corps, and mounted infantry. Additionally, certain scenarios may allow other unit types to conduct recon.
19.21 Reconnaissance Procedure
The reconnoitering unit moves adjacent to the enemy force and declares reconnaissance. The enemy must then reveal all units in the hex. A reconnaissance costs zero movement points.
19.22 Screening
If the enemy player has good order cavalry, camel corps or mounted infantry units in the hex being reconnoitered, he may declare "screen." He has to reveal the screening unit(s) to do so. If the defending screening units' total combat factors are equal to or greater than those of the reconnaissance unit(s), then the reconnaissance attempt fails; otherwise it succeeds.
19.23
Each cavalry unit may conduct only one reconnaissance attempt per turn. It may continue moving after the attempt. A screening unit may conduct any number of screenings per turn.
19.3 Strategic Intelligence
An HQ conducts strategic intelligence at any time in its own turn. Each HQ may conduct only one strategic intelligence operation per player turn.
19.31 Procedure
The HQ designates any one enemy stack on the map and rolls one die.
- If the number rolled is less than or equal to the HQ's strategic rating: the player may examine all of the enemy units in the designated hex (or upon the display for column markers in the hex.)
- If the number rolled is "6": the enemy player may immediately examine any one stack belonging to the same side as the HQ that attempted that strategic intelligence operation.
Designer's Note: this represents the effects of successful counterintelligence.
- Any other number: no effect.
20.0 Attack from March
Attack from march is a special form of combat that is conducted during movement.
20.1
The player moves a force adjacent to an enemy force. He declares an "Attack from March" and pays "two" extra movement points. Combat is resolved. Upon successful completion of the combat, the attacking force may continue moving. Successful completion is defined as inflicting a defeat on the enemy force.
20.2
An attack from march costs two (2) extra movement points. This is in addition to the extra movement point cost for entering an enemy ZOC. An attack from march may be made from the hex in which a force begins its movement.
Designer's Note: unlike other games which allow this sort of attack, the attack from march is resolved from the adjacent hex; the attacker does not enter the defender's hex.
20.3
Attack from march is resolved as normal combat with the following addition.
20.31
The defending force adds an additional +2 to all fires it makes in that combat.
20.4 Post Combat
Upon completion of the battle procedure, victory is then evaluated normally.
20.41 Retreats
A losing force retreats as per the normally combat rules.
20.42 Advance After Combat
There is no advance after combat following attack from march per se (if the attacking force wins the battle, it may continue normal movement).
20.43
A moving force that conducts an attack from march and gains a draw or loses must cease movement for the turn.
20.5 Fortresses
Units may not conduct attack from march against enemy units inside of fortresses.
20.6
Within these restrictions, a force can conduct an unlimited number of attacks from march in a single turn, and can attempt to attack from march the same enemy force more than once (as long as it pays the appropriate movement costs).
20.7
A force that performs attack from march may conduct combat during the battle segment, regardless of the outcome of the attack from march.
21.0 Ambush
Ambush is a special form of combat declared by the enemy player in the friendly movement segment.
21.1
Whenever a friendly force enters an enemy ZOC, the enemy force may declare "Ambush." The enemy force may then attack the moving friendly force, temporarily reversing role of attacker and defender. This is resolved exactly as normal combat, with the non-moving force as the attacker, and the moving force as the defender. The ambushed force receives the benefit of terrain for defense.
21.11
Ambush is declared prior to the moving player declaring any attack from march.
21.2
Only moving units may be attacked by ambush. If there are non-moving forces in the same hex, then they are not affected by this.
Designer's Note: this represents the coordination problems of pre-radio forces.
21.3
A single force may execute only one ambush per enemy player turn. A single moving force may be attacked more than once by ambush, as long as each attack is conducted by a separate force.
21.4
Ambush combat may take place only in the enemy movement segment. It may not be conducted against enemy units conducting advance or retreat after combat.
21.5 Post Combat
If the moving force receives a defeat, then its move ends after it finishes its retreat; otherwise, it may continue moving. Ambush costs the moving force no movement points. Neither side may advance after combat.
21.6 Restrictions
- A force may not attempt an ambush through prohibited hexsides.
- A besieged force may not perform ambushes.
- Units entering a fortress may not be attacked in an ambush. (Since enemy ZOC do not ever extend into an enemy occupied fortress.)
- Optional Rule: Negotiations. A force that has obtained an "Honors of War" negotiations result may not be attacked in an ambush.
22.0 Evasion
Evasion allows the defender to retreat prior to the initiation of a battle.
22.1 Procedure
The defender declares "evasion." This is done after an attack has been initiated against a force although before it is resolved. No combat is resolved; instead the defending force conducts a normal retreat (see the retreat rule for details.) The attacker may then advance after combat.
22.2 Requirement
An evasion may only ever be performed per the following circumstances:
- if the defending force contains a number of good order cavalry/mounted infantry/camel corps strength points equal to or greater than the attacking force's good order cavalry, mounted infantry or camel corps strength points (this allows all units in the force to retreat); OR
- if the defending force is controlled by the Native player and is in a hex containing mountain or jungle terrain.
22.3 Restrictions
- Evasion is executed only in the enemy combat segment. It may not be performed as a response to an attack from march or ambush.
- A player may evade with some, none, or all units in a force (and may rearrange column markers to do this).
- Headquarters may evade only if other units in the force are qualified to evade.
- Only good order units may evade. Demoralized units do not ever evade. (5) A force which evades through enemy units or zones of control pays normal penalties (Good order units will become demoralized, already demoralized units are eliminated.)
22.34
Evasion does not count as a victory in combat for the attacker. The attacking units, once they complete any advance, may not attack again in the battle segment.
23.0 Atrocity & Fair Play
Players may attempt to interact with the civilian populace through atrocities and fair play/atrocity.
23.1 Atrocities
A player may conduct atrocities in any fortress, town or Kraal hex. This is done by having a friendly combat unit in such hexes at the beginning of the friendly supply segment. The player then declares an "atrocity" and places the marker in the hex.
23.2 Atrocity Markers
23.21
Once placed, atrocity markers may not be removed from the map.
23.22
There may be only one atrocity conducted per hex.
23.3 Atrocity Effects
- The turn an atrocity is conducted, all friendly units in the hex are considered automatically in supply.
- Thereafter, the presence of an atrocity marker destroys any inherent supply capability of a fortress, town, or Kraal hex. Use the atrocity line on the Forage Table for future forage attempts.
- The Native player may not place reinforcements/replacements on a hex containing an atrocity marker.
- Line of supply may not be traced to a fortress with an atrocity marker on it (see 12.24).
23.4 Fair Play
The British Player (only) may conduct "Fair Play." This is done by having a friendly HQ unit in a fortress, town or Kraal. At the beginning of a friendly supply segment, the British player may declare "Fair Play." He rolls one die: if the die roll result is less than or equal to the HQ's strategic rating, the natives are considered friendly and he places a fair play marker in the hex. If the die roll is greater than the HQ's strategic rating the result is "no effect" (he may try again on a later turn). Only one HQ may attempt a fair play per hex per turn.
23.41 Fair Play Effects
- A fair play marker in a town or fortress hex gives the British player a +1 modifier to forage die rolls in that hex.
- The British player receives ONE additional victory point per fortress, town and Kraal he controls with a fair play marker in it at the end of the game.
- The Native player may not place reinforcements/replacements on a hex containing a fair play marker.
23.42
The fair play marker may only ever be removed by the Native player conducting an atrocity in the hex.
23.43
The British player may not conduct an atrocity in a hex in which he has already conducted fair play. The British player may not conduct fair play in a hex that contains an atrocity marker.
24.0 Capturing Weapons (Disregarded in Volume II)
25.0 Political Officers
Certain HQ may conduct political officer missions. These missions include negotiations or raising friendly forces.
25.1
HQs capable of political officer operations include the commander in chief and HQ with a special negotiation capability (as indicated by "P" on the counter).
25.2 Negotiations
HQs printed with "P" may conduct negotiations as follows.
25.21
The player must have at least one available HQ capable of political operations adjacent to an enemy occupied hex. The enemy occupied hex must contain at least one HQ (which must be revealed as per the fog of war rule.) Roll one die on the Negotiations Table, make any die roll modifications called for, and then apply the results (all listed by the table).
[Gap in source: the Negotiations Table itself is not present in the source text; consult the printed table.]
25.22
Negotiations may be conducted at any time during a player's movement segment. Negotiations cost no movement points. A force may negotiate and then continue to move. A player may conduct no more than one negotiation attempt per turn.
25.23
Results are explained on the table itself.
25.24
Certain negotiations results will allow friendly units the ability to move through enemy hexes and zones of control. This is done as normal movement (no extra movement cost). The units must end their movement in a hex not occupied by enemy units. If they end in the same hex as an enemy force, then they are eliminated. This also allows units the ability to move into and out of besieged fortresses.
25.3 Raising Friendly Forces
The British may be capable of recruiting local units as friendly units. This will be designated by scenario.
25.31
This takes place during the British reinforcement/replacement phase. A British political officer HQ must be in a fortress or town hex. The British then expend two victory points and one replacement point (any type.) Place one friendly Native unit (from the units in the British counter mix) in the hex. The political officer may not move in the same turn of taking this action.
25.32
Eliminated friendly Native units are available as replacements, but must be paid for fully as per 25.31.
25.33
Additionally, political officers may recruit supply units in this manner. Expend one victory point and two replacement points (any type), and place a British supply unit with a movement of 4 in the hex. The political officer must be in a fortress (not a town.) This counts against the one unit per hex maximum recruiting of 25.31.
25.34
There may not be an atrocity marker in a hex in which these units are recruited.
25.4 Strategic Intelligence
Political officers may make strategic intelligence actions. Roll a die as if they had a strategic value of "3." See rule 19.3. (Commanders in chief still use their printed strategic value.)
25.5 Infiltration
Political Officers ignore enemy ZOC for all purposes. Units they are stacked with are affected normally.
26.0 Civilians
Civilian units, if in any scenario, represent assorted camp followers, families of soldiers, rescued prisoners, etc.
26.1
Civilians are treated as military units, except that they have no combat capabilities. They count as four units for purposes of forage (including extracting losses due to results from the Forage Table.) They count as four factors for purposes of riverine and naval transport. Civilians count as one unit for other game purposes, including march attrition and combat losses.
26.2 Combat
Civilian units may not attack. They are affected by combat normally, counted as one unit of rabble class. Civilians advance after combat and retreat with other friendly units in the hex.
27.0 River Operations
There are two types of riverine units included for the scenarios with rivers:
- gunboats/armed steamers/armed junks; and
- river transport.
27.1 River Operations
Riverine units may move on major rivers and coastal hexes. To move on a river, the riverine unit moves along river hexsides. Riverines may move an unlimited number of major river/coastal hexsides in a turn.
27.11
While technically moving along river "hexsides," the riverine units are placed in one of the two hexes adjacent to the hexside. They may be placed on one side of the hexside or the other whenever moving. When moving on coastal hexes, simply place them on the coast.
27.12
Riverine units may only move through contiguous hexsides. The player must designate which hexside the riverine unit is moving along.
27.13
Riverine units may move through hexes containing enemy land units. They may not stop in such hexes, however. Riverine units may move through enemy zones of control at no penalty.
27.14
Riverine units may not enter hexsides that contain either: enemy riverine or fleet units, or enemy occupied fortresses. Riverine units may not enter such hexsides even if the enemy unit is on the "other side" of the hexside.
27.15
Riverine units may enter/exit friendly fortresses that are besieged by enemy units, provided they comply with other rules for riverine movement.
27.16
Riverine units may not enter any all-sea hexes (they may enter coastal hexes).
27.17
Land units may never move into or through hexes containing enemy riverine units.
27.18
Riverine units (and the units they transport) are not affected by the "+Attrition" result on the March Table.
27.2
Riverine units have no zones of control.
27.21
Units embarked on riverine and naval units have no ZOC.
27.22
Riverines, naval units, and land units embarked upon riverines and naval units are not affected by enemy ZOC.
27.3 March
Riverine units make a march die roll just as other units.
27.31
Since they have unlimited movement, a result of March, Forced March and Mad Dash is generally the same (exception: see Waterfalls & Cataracts.) Riverines are never affected by +Attrition results on the March Table.
27.4 Transport
Riverine units may transport land units.
27.41
Each riverine unit may transport a certain quantity of friendly land units, measured in terms of strength point factors.
Gunboats, Armed Steamers/Armed Junks: 4 factors River Transport: 16 factors
27.42
Cavalry units count as double the number of factors under this rule.
Designer's Note: Horses take up more space.
27.43
Supply units and civilians count as four factors under this rule.
27.44
Headquarters count as "zero" factors under this rule. Therefore, a single riverine could transport any number of friendly HQ.
27.45
If a riverine unit carrying a land unit is eliminated, then the land unit is eliminated.
27.46
More than one riverine unit may combine to carry units (that is, two gunboats could transport one "8" unit.) If one of the units is destroyed and the other survives, the embarked unit is eliminated.
27.47 Embarkation
A land unit must begin its movement in a hex containing a riverine unit to be transported. The riverine unit must start the movement in the same hex as the land unit. Embarkation is indicated by placing the transported unit under the riverine. The units move together. Embarking does not require a march die roll.
27.471
Riverines may not pick up units other than those they began their movement with (owing to numerous command control reasons.)
27.48 Disembarking
At the end of the movement, a transported unit may be disembarked in the hex where the riverine ended its movement. Also, a riverine unit may drop off units as it moves, and continue moving. Disembarking does not require a march die roll.
27.481
Units may not be disembarked into hexes containing enemy units.
27.482
Units may remain embarked on riverines at the end of their turn.
27.5 Riverine Combat
Riverine units may attack, and also be attacked by, enemy units in adjacent hexes.
27.51
Such hexes must be connected to the riverines' hex by a contiguous coastal or river hexside, or must be on the "other side" of the river hexside. Riverines may also attack adjacent enemy riverines.
27.52
Each riverine unit has two combat factors: The top one designates its artillery strength, the bottom, its machinegun strength (if any.) They are used exactly like normal combat factors.
Example: A gunboat that has a combat strength of two and both an artillery and a machinegun weapons rating could fire each of them with a strength of two each. Riverine units fire their weapons in the appropriate segment of the battle sequence.
27.53
Riverine units may only ever be attacked by enemy artillery, rocket, and machineguns. They may never be attacked by rifle or melee combat (for a variety of reasons, chiefly range limitations and the problem of sinking a boat with rifle fire).
27.54
Riverine units take combat results normally, though they may only retreat across cataracts in flood months.
27.541
Armed steamers, junks and transports count as one unit for extracting losses.
27.542
British and French gunboats, and the units they transport, are never affected by "1" and "(1)" results.
Designer's Note: British and French gunboats were armored.
27.543
Should a riverine unit become demoralized, then all units aboard it are demoralized; should it be eliminated (sunk), all units aboard it are eliminated. Otherwise, units being transported are never affected by combat results.
27.544
Demoralized riverine units may still move an unlimited distance.
27.545
Terrain has no effect on attacks against riverine units, unless there are other disembarked land units in the same hex defending. Terrain has no effect on riverine units unless there are other non-embarked land units in the same hex defending (excluding leaders).
Designer's Note: transported artillery and machineguns cannot fire from riverines because of the difficulty in deploying them on the boats' decks. Note that land units may be disembarked during movement and attack during their combat segment, however.
27.55
Retreating riverine units must retreat along contiguous river hexsides, but they may retreat through enemy zones of control at no penalty. They may not retreat into hexsides they cannot otherwise enter. Riverines can always advance after combat an unlimited number of hexsides (but they may not advance into any forbidden hexsides or across waterfalls and cataracts).
27.56 Combat Restrictions on Riverines
Riverine units may not conduct attack from march or conduct ambush. They can, however, evade. To do so, riverine units (as well as the units they transport) may automatically evade when attacked during the enemy's battle segment, unless the enemy force contains at least one riverine or fleet unit.
27.6 Cataracts & the Nile Flood
This rule is used only in the original Khartoum game.
27.61 Crossing Cataracts
Cataract hexsides will have different effects upon river movement, depending on whether the Nile is flooded.
27.62
The Nile is considered flooded in the following turns: May/June, July/August, September/October.
27.63
During flood turns, riverine units may cross cataracts but must stop in the hex immediately after the cataract. They may not move further that turn (because of the time it takes to haul boats across them).
27.64
On turns in which the Nile is not flooded, riverine units may not cross cataract hexsides. They may move freely along the stretches of the Nile between cataract hexsides.
Designer's Note: these rules are a much more simplified rendition of the problems in operating on the Nile. When the Nile was not flooding, cataracts were too low for river traffic.
27.65 Forced March
If any riverine unit receives a Forced March or Mad Dash result, then it may, at the owning player's option, cross one or two extra cataract hexsides respectively if the Nile is in flood.
Example: a British riverine unit occupies the Wadi Halfa on the lower Nile and it is a Nile Flood turn. The British player rolls on the March Table to move the unit. A result of No March means the riverine stays in place; a result of march means the riverine could move to one hex beyond the second cataract; a result of Forced March means that the riverine could move to one hex beyond the third cataract; a result of Mad Dash means the riverine could move to one hex beyond the fourth cataract. And remember, results of +Attrition do not affect riverines and units embarked on them.
27.7
Supply units embarked on riverines provide supply normally.
27.8 Waterfalls
Riverines may never cross waterfall hexsides.
27.9 Coastal Movement
Riverines may move through coastal hexes. If all of the un-embarked land units in a hex containing riverines/fleets are eliminated or retreated due to combat, then any riverine/fleet units in the hex must also be retreated.
Note: if the only units within a river/coastal hex are riverines/fleets (or riverines/fleets plus leaders), they may be attacked by enemy land units. After combat has been resolved, the riverines/fleets MUST then be retreated, regardless of the outcome of combat. (The intent of this rule is to prevent players from using riverine and fleet units as invincible fortresses).
28.0 Fleets
Fleets operate similar to riverine units, with the following changes.
28.1 Fleet Units
Fleet units may move only upon sea and coastal hexes. They may move an unlimited number of such hexes each turn (indicated by the "N" movement factor).
28.2 Combat
Fleet units may attack enemy units in adjacent coastal hex(es) using their combat strengths. The fleet unit may attack from a coastal hex or an all sea hex. Fleet units may be attacked by enemy artillery (not rocket or machineguns) units firing from coastal hexes. Fleet units may not attack, nor ever be attacked from, all land hexes. Note that victorious fleets may advance after combat into coastal hexes (this represents landing parties).
28.21
Units embarked on fleet units may never fire.
28.22
Enemy fleets and riverine units may attack each other from adjacent hexes.
28.23 Combat results:
Fleets are never sunk (eliminated).
28.31 Pre-1880 Scenarios
A fleet is only affected by a "2" result or more inflicted by artillery fire. In this event the fleet is demoralized. If demoralized again, it is not sunk; it remains in play.
28.32 Post-1880 Scenarios
A fleet is only affected by a "3" result or more inflicted by artillery fire. In this event the fleet is demoralized. If demoralized again, it is not sunk; it remains in play; however, the side inflicting the subsequent demoralization still immediately gains the number of victory points that it would otherwise receive for eliminating an enemy combat unit.
29.0 Naval Movement of Land Forces (Abyssinia)
The British player has the ability to move his land units via naval transfer.
29.1 Procedure
Naval transfer takes place in the friendly march segment. The land unit must start in a coastal hex. It then makes a march die roll. If the result is March, Forced March, or Mad Dash, it may move to any other coastal hex on the map (which does not contain an enemy unit). This consumes the unit's entire movement capability for the turn.
29.2
"+Attrition" results are ignored by units using naval transfer. Units may not end their turn at sea. Naval transfer capability is in addition to any units that were landed as reinforcements in a turn.
29.3
The British player may move 12 land unit factors per turn via Naval Transfer.
Note: civilian, supply and railroad engineer units count as 4 factors for naval transfer. But, the player may transfer an unlimited number of leader units via Naval Transport.
29.4
Units may land in enemy zones of control and conduct combat normally in the combat segment.
29.5
Naval transfer does not require the presence of a friendly fleet in the same hex (it is considered to be conducted by other naval transports).
30.0 Railroads & Railroad Engineers
The British player may move along completed rail lines. He may use his railroad engineer units to extend his rails lines, and to repair railroad cuts. Rail hexes may also provide supply.
30.1
British units may use railroad movement along rail lines. A unit must start the friendly movement segment upon a friendly railroad hex. It may then move an unlimited number of rail hexes. Only British controlled units may use rail movement.
Note: A unit may not move further than the friendly railhead.
30.11
Units may only ever move along "friendly" railroads. A friendly railroad is one that is not occupied by an enemy unit.
30.12
A unit may not move into a hex as rail movement containing a rail cut.
30.13
A unit may not combine rail movement with off rail movement in the same turn.
30.14
Units using rail movement must still roll on the March Table. They are never affected by the +Attrition result. A result of March, Forced March, or Mad Dash allows the unit to move an unlimited number of connected railroad hexes.
30.15
A unit may use rail movement into a hex containing an enemy ZOC; however, it must stop and move no farther that turn.
30.16
There is no limit to the number of units that may use rail movement in an individual turn.
30.2
The British player may extend the position of his railhead markers through railroad construction. This builds new railroad hexes or rebuilds destroyed railroad hexes. Railroads may be constructed only along printed railroad routes as marked on the map. Railroads already in existence are marked black. Potential railroad lines are marked by broken black lines.
30.21
Railroad engineer units may build the following number of railroad hexes per turn.
One Engineer Unit: one hex per turn. Two Engineer Units stacked together: two hexes per turn. Special Engineer HQ (if included in a scenario): if stacked with any railroad engineer unit, it may increase their ability to build railroad hexes by one hex per turn. Maximum of three per turn if it is stacked with both railroad engineer units.
30.22 Procedure
The railroad engineer must start its movement segment on a railhead hex. The railhead a traceable line of completed railroad hexes back to an origin hex (see below). The railroad engineer unit is then moved the number of hexes designated above along potential rail lines. The position of the railhead is indicated by moving the railhead marker. The new railhead is placed at the end of the British movement segment. Railroad engineers do not have to make a march die roll to build railroads.
Note: in Abyssinia, the origin hex is any port hex that contains a railroad symbol.
Exception: new railroads may not be built in Second Afghan War.
30.23
A railroad engineer unit may not move during the same turn it constructs a railroad, other than as per 30.22.
30.24 Railheads
The railhead represents the furthest extent of the railroad. A player may use his railroad up to this point.
30.3 Railroad Cuts & Repairing Cuts
30.31
Enemy units may block a railroad by occupying a rail hex. That prevents the British player from using the railroad beyond the point of the enemy unit. As soon as the enemy unit moves off (or is eliminated) the British player may use the railroad freely.
30.32 Railroad Cuts
The enemy player may destroy a railroad hex by occupying it during a combat segment. The player rolls one die. On a 1-3, the hex is destroyed; place a "cut" marker in the hex to indicate it. On a 4-6 there is no effect. No more than one cut attempt may be made per turn per hex. The unit may conduct combat normally.
30.33
A cut marker may be repaired by a railroad engineer unit occupying the hex for one complete movement segment.
Note: to repair cuts, the player does not have to trace a line of rail hexes back to an origin hex (that is, he could repair them from either end).
30.4 Railroads & Combat
30.41
Units that use railroad movement may attack normally during the battle segment.
30.42
Units using rail movement may not conduct attack from march.
30.43
Units on rail hexes defend normally.
30.5 Supply
The British player may use railroad hexes as supply sources as far as the railhead marker. The railroad hex must be able to trace a line of contiguous rail hexes back to a line of communication hex to function. This path of railroad hexes is blocked by the presence of cut markers, enemy units, or ZOC. Enemy ZOC are negated by the presence of friendly units.
31.0 Signals
Certain scenarios will give the British player a specialized signals capacity. These can be telegraph and heliograph. In SNS II, the British have both telegraph and heliograph in the Abyssinia, Asante and Second Afghan War scenarios, but not Persia.
31.1 Telegraph
Each functional railroad hex is considered to possess a telegraph line running along with it. This may be used by the British player to enhance his HQ communications.
31.11
The British player may extend the range of his HQs. If a HQ unit is on a railroad hex, it may apply its strategic factor as a die roll modifier for the March Table to a force it is NOT stacked with, under the following conditions.
31.12
If a continuous line of completed railroad hexes exists between the HQ and the force. The telegraph line is blocked by a cut or the presence of an enemy unit (not zone of control).
31.13
The force may then add the HQ strategic rating to its march die roll. A force still can use only one HQ's strategic value as a die roll modifier each march attempt.
31.14
An HQ may only do this once per friendly movement segment. An HQ that performs this function cannot use its strategic value to enhance the die roll for forces within its own hex.
Designer's Note: this is due to the limited number of staff personnel.
An HQ may use the telegraph capability ONLY for this march die roll modifier, not for other game functions.
31.2 Heliograph
A British HQ may use its strategic value to modify march die rolls for units in its own hex, or units in any adjacent hexes. This is done in the same manner as telegraph, above, except that there is no need to trace along a railroad line.
31.3 Commander in Chief
A player is never required to use the strategic value of his commander in chief even if it is capable of using telegraph or heliograph for units in another hex.
32.0 Supplied Combat
A player may expend a supply unit to gain an additional die roll modifier in combat.
Note: this optional rule will highly favor the British player, if utilized.
32.1
At the start of each combat round, each player can decide to use any of his supply units to support combat. The player must have a supply unit in the same hex as a friendly unit engaged in firing. By expending one supply unit, up to 12 units (any type or strength) receive a +1 die roll modifier (in addition to all other die roll modifiers). This applies only to the round in which the supply unit was expended.
32.2
Supplied combat only applies to artillery and rifle fire, never to melee.
33.0 Routing
Units that suffer a retreat result must check for possible rout.
33.1 Rout Procedure
The player losing the battle checks each unit individually. Roll one die and cross-index on the Rally Table. The results are as follows.
R: The unit retreats one hex. F: Roll one die: the unit must retreat that number of hexes. D: The unit is eliminated.
33.2
All provisions of retreat (see 8.8) apply to routing.
33.3 HQs & Rout
Any friendly HQ may use its tactical factor to modify the die roll of one unit checking for rout.
33.31
Add the HQ's tactical factor to the rally die roll of one friendly unit in the hex. A player may utilize any number of friendly HQ in a hex to assist rally, but no more than one HQ may modify any one unit's rally die roll.
33.32
HQ do not check for rout. After all other units have finished checking for rout, place the HQ with any retreating units. If all of the friendly units are eliminated by routing, then all HQ are also eliminated.
33.4 Artillery & Supply Units
33.41
Artillery units, though never horse artillery, which get an "F" result are eliminated.
33.42
Supply units and elephants which get an "F" result are eliminated.
34.0 Simplified Forage Rule
This can be used to speed up the game. Players may choose to use this rule to supersede rule 12.3.
12.3 (as superseded by this rule, printed in section 34.0)
Units that do not benefit from automatic supply must forage. Each hex has a forage limit. This is the number of units that it can supply. All units in excess of this number are out of supply (do not roll on the Forage Table).
12.31
Increase the forage limit for each hex by the strategic value of one HQ unit.
12.32 Forage Limits (printed in section 34.0)
Terrain Forage Limit Un-besieged Fortress Unlimited Town, Besieged Fortress 14 Clear, Hill, Well, Oasis hex; Minor River, Major River, Lake Hexside 10 Mountain, Jungle, Marsh 5 Desert, Broken, Mud Flats, Sand; Atrocity marker 1(2) Road, Pass, Bridge, Coast, Drift, Railroad Other Terrain Sea n/a
Sun Never Sets II Scenarios
Each of the following scenarios is provided with a separate map and counter set, as well as individual exclusive rules that apply to each scenario individually.
Abyssinia 1868
Each hex equals about 15 miles. Each game turn equals about three weeks of operations. Each combat strength point equals 100-300 men, or one battery of artillery.
1.0 Sequence of Play
First player: British Second player: Abyssinian
2.0 Game Length
January 1-21 to June 16-July 6, 1866
3.0 Abyssinians
The Abyssinian player deploys first.
3.1 Initial Deployment
Abyssinian units: In either Makele, Gondar or Debra Tabor: Theodore HQ; all artillery; all regular infantry; all regular cavalry.
Hostile Natives: None are initially deployed. All arrive as reinforcements.
3.2 Reinforcements/Replacement Table:
3.21 Native Reinforcement Pool
Place all hostile Native units not deployed in the initial deployment in the Native Reinforcement Pool. Initially; no Abyssinian units are placed in the pool, but as Abyssinian units are eliminated in the course of play, they are placed into it.
3.22
Abyssinian player rolls a die per reinforcement/replacement segment on the Native Reinforcement/Replacement Table. The results are as follows.
Uprising: Abyssinian player rolls one die, picking that number of units from the pool. Reinforcements: Abyssinian player rolls one die, divides it by two (round up any fractions), picking that number of units from the pool. No Effect: Nothing happens. Desertions: Abyssinian player rolls one die, removing that number of units from the map (of his choice), placing them in reinforcement pool.
3.22
Units may also arrive via random events.
3.23 Deployment of Reinforcements
-
Abyssinian Units: units are placed in any town or fortress hexes in Abyssinia, or in hexes containing an Abyssinian HQ; additionally, there may be no enemy ZOC on the hex (if a town or HQ), or besieging the hex (if a fortress). If no such hexes exist, then the Abyssinian player returns the units to the pool. They may be stacked or placed separately. HQ may be placed in any hexes not occupied by an enemy unit.
-
Hostile Native Units: units appear on any hexes on the map not occupied by enemy units or ZOC. Any number of units may be placed in a hex containing a Hostile Native HQ (including an HQ being placed in this phase); if there is no HQ, only one unit per hex may be placed.
3.3 Contingency Reinforcements
There are no Abyssinian contingency reinforcements.
4.0 British
The British player deploys second.
4.1 Initial Deployment Force
- Place on any one fortress or town hex within four hexes of the coast: Field, Merewether HQ; 3 Bo Infantry; 10 B Cavalry; 1 B Engineers.
- Place remaining units marked "Abyssinia" on Zula and/or Massawa.
- Place 6 x supply on any port hex(es).
- Place the Fleet on any coastal hex.
- Place the Railhead and a field fortification marker in Zula.
4.11 Friendly Natives
Roll one die and pick a number of friendly native units (of the player's choice) equal to the die roll result. Place them in any one fortress or town that does not contain Abyssinian or British units.
4.2 Scheduled Reinforcements
None.
4.21 British Reinforcement Pool
The British player places all Native Ally units in a wide mouthed opaque container, called the Friendly Native Reinforcement Pool.
4.22
Events may give the British Native Ally reinforcements (in addition to initial deployment.) In this case, pick them at random from the pool. All native Ally units that are eliminated are returned to the pool.
4.23 Deployment
British replacements appear on any port or coastal hexes.
4.3 Contingency Reinforcements
There are no British contingency reinforcements.
4.4 Friendly Natives
Place all British Friendly Native units in a separate pool. They are picked at random and then placed on the map if an event calls for it, or via the political officer rule. These units are placed on any hexes on the map not containing enemy units or ZOC.
4.5 British Replacements
The British start with the following replacement points. They may use them at any time in the game. They appear in the same manner as reinforcements.
British (European): 4 infantry factors 3 cavalry factors 2 artillery factors 1 engineer factor
British (Indian): 8 infantry factors 6 cavalry factors 1 artillery factor 2 engineer factors
4.5 British Supply Units (second 4.5 as printed)
The British receive two supply units per turn. They appear on British occupied port hexes.
4.51 Highland Supply Units ("HL")
These are treated as other supply units, except they have a better morale and movement ratings. The British may deploy them initially, use them as reinforcements, etc.
4.6 British Lines of Communication
All British occupied port hexes are considered lines of communication for the British. Additionally, if the British do not occupy port hexes, then they may land reinforcements on coastal hexes if the fleet is in the hex. This included supply units. Units landed in this way may not move in the turn they appear.
5.0 Victory Points
5.1 British
British player receives these victory points immediately:
- Each Abyssinian HQ eliminated in combat: Commander in chief: 15 Other HQ: 5
- Each Abyssinian unit eliminated in combat: +1 Each Hostile Native unit eliminated in combat: +1
- First time the British capture an Abyssinian fortress: Magdala: 15 Other fortresses: 5 each
- Rescuing the hostages (see special rules): 50
British receive no victory points for occupying objectives at the game's end (since this was a gigantic raid).
5.2 Abyssinian
Abyssinian player receives these victory points immediately.
- Each British HQ eliminated in combat: + three times total of tactical and strategic value.
- Each British and British Indian unit eliminated in combat: +6.
- Each British Friendly Native unit eliminated in combat: +2.
Abyssinian player receives at end of game.
- Occupation of Magdala: 10
- Occupation of other fortresses: 5
6.0 Special Rules
6.1 Control
The British player controls all British, British Indian, as well as all friendly Native units. British and British Indian units may stack together. They may not end a phase stacked with friendly Native units (they may otherwise move through each other.) If something happens that causes this to happen, the friendly Native units are eliminated.
The Abyssinian player controls all Afghan and hostile Native units. Abyssinian and hostile Native units may stack together.
6.2 Area of Operations
Both players' units may enter all countries on the map, though only British and British Indian units may enter Massawa. Abyssinian, Hostile native and Friendly Native units may never enter Massawa (which was controlled by the Egyptians at the time).
6.3 Crowning the Heights
Certain units receive benefits for fighting in mountain hexes:
- Abyssinian, Hostile Native and Friendly Native units do not receive the -2 penalty when attacking enemy units in mountains or passes. Instead, they fire with a zero modifier.
- British and British Indian infantry, pioneer and engineer units receive a -1 penalty (instead of -2) when attacking enemy units defending in mountains or passes.
- If more than one type is firing a volley together, then use the single best modifier for the firing player.
6.4 Elephant Transport
Elephant units have the following special characteristics. They may each transport one supply unit, or one heavy artillery unit (movement factor = 4). To do so, the elephant must begin in the same hex as the unit to be transported and spend its entire movement with it. The elephant and transported unit both move with a factor of six. At the end of the move, the unit is debarked.
Note: eliminated elephant units may not be replaced.
6.5 Hostages
The British rescue the hostages by having at least one unit in Magdala at any time in the game. The instant that happens, place the hostage unit (civilians) in Magdala. The British control the hostage unit. They get victory points for evacuating it. To evacuate the hostages, the British must move the unit to a port hex. At the instant that the hostages reach a port hex, remove them from the map and the British get the victory points.
6.6 Optional Hostage Placement
Prior to initial deployment, the Abyssinian player rolls one die to determine in which fortress the hostages are being held. This die roll must be revealed to the British player.
1-3 = Magdala 4 = Debra Tabor 5-6 = Gondar
6.61
Whenever using the Optional Hostage Placement rule, VP awarded for Magdala are instead awarded for the fortress in which the hostages were held. Magdala is now worth the VP for a regular fortress.
UNIT ABBREVIATIONS
British: B: Bengal Bel: Beluch Bo: Bombay DG: Dragoon Guards HL: Highland Transport Train M: Madras MT: Mountain Train NB: Naval Brigade P: Punjab RA: Royal Artillery RB: Rifle Brigade RE: Royal Engineers RHA: Royal Horse Artillery Sd: Sindh
Abyssinian: BH: Black Horse
Asante 1873-74
Each hex equals five miles. Each game turn equals one half month of operations. Each combat strength point equals 100-300 men, or one battery of artillery.
1.0 Sequence of Play
First player: British Second player: Asante
2.0 Game Length
December II 1873-March I 1874 (six turns).
3.0 Asante
The Asante player deploys first.
3.1 Initial Deployment
The Asante player begins the game with all units marked "Asante."
Asante units: In Kumasa: Kofi HQ, Dwaben HQ; 3 x 8-S-6; 1 x 6-M-6. In Mampong: Nkwanta HQ; 1 x 3-M-8; 2 x 5-M-6, 2 x 5-S-6. In Prahsu: Bofo HQ; 4 x 3-M-6, 4 x 3-S-6.
Hostile Natives: None
3.2 Reinforcements/Replacement Table:
3.21 Native Reinforcement Pool
None initially, but as Asante units are eliminated in the course of play, they are placed in it.
3.22
Asante rolls a die per the Native Reinforcement/Replacement segment on the Native Reinforcement/Replacement Table. The results are as follows.
Uprising: Asante player rolls one die, dividing it by two, rounding up any fractions, and picks that number of units from the pool. Reinforcements: Asante player picks one unit from the pool. No Effect: Nothing happens. Desertions: Asante player rolls one die, divides it by two, rounds up any remainders, and must remove that number of units from the map (his choice). Place them in the reinforcement pool.
3.23 Additional Die Roll Modifier
If Kumasi is British occupied, or if there is an atrocity marker on it, then subtract an additional "1" from the Asante reinforcement die roll.
3.24
Units may also arrive via random events.
3.25 Deployment of Reinforcements
Asante units are placed in any town, or in hexes containing an Asante HQ; additionally, there may be no enemy ZOC on the hex. If no such hexes exist, then the Asante player returns the units to the pool. They may be stacked or placed separately.
Note: Asante reinforcements may not be placed on coastal towns.
3.3 Contingency Reinforcements
There are no Asante contingency reinforcements.
4.0 British
The British player deploys second.
4.1 Initial Deployment Force
- Place on coastal fortresses and town: Place the garrison units with corresponding names.
- Each coastal town: One field fortification marker each.
- Adda: Butler HQ; 1 x 5-S-6.
- Winneba: Glover HQ; 1 x 5-S-6.
- Coast Castle: Wolseley, Buller HQs; All remaining British units; 3 x supply units.
4.11 Friendly Natives
There are no Friendly Native units in this scenario (they are included in the British order of battle).
4.2 Scheduled Reinforcements
None.
4.21 British Reinforcement Pool
None.
4.23 Deployment
British replacements appear on any port or coastal hexes.
4.3 Contingency Reinforcements
The British player places two "5-S-6" irregular infantry aside at the start of play. During the first British reinforcement phase that any British unit occupies Kumasi, the British player places those two units on any British HQ or HQs.
4.4 Friendly Natives
There are no Friendly Native reinforcements; ignore any event calling for them.
4.5 British Replacements
The British start with the following replacement points; they may use them at any time in the game. They appear in the same manner as reinforcements.
British: 8 infantry factors 0 cavalry factors 1 artillery factor 1 engineer factor
4.5 British Supply Units (second 4.5 as printed)
The British receive one supply unit per turn. They appear on British coastal town or fortress hexes.
4.6 British Lines of Communication
All British occupied port hexes are considered British lines of communication. If the British occupy no port hexes, then they may land reinforcements on coastal hexes. This included supply units. Units landed in this way may not move in the turn they appear.
5.0 Victory Points
5.1 British
British player receives these victory points immediately:
- Each Asante HQ eliminated in combat: Kofi: 15 Other HQs: 5
- Each Asante unit eliminated in combat: +1
- First time the British occupy Kumasa: +25
- Optional Rules: British receive the points for Kumasa instead if they have committed an Atrocity in the hex (their goal was to destroy it).
5.2 Asante
The Asante player receives these victory points immediately:
- Each British HQ eliminated in combat: + three times total of tactical and strategic value.
- Each British unit eliminated in combat: +3.
The Asante player receives these victory points at game's end:
- Occupation of coastal towns: +5 each.
Optional Rule: the Asante receive the points for coastal towns instead if they have committed an atrocity in the hexes.
6.0 Special Rules
6.1 Control
- The British player controls all British units. Note that British forces in this scenario include units from around the Empire as well as native levies. They all may stack together.
- The Asante player controls all Asante units.
6.2 Area of Operations
Both players' units may generally be moved anywhere on the map, exceptions follow.
6.3 Fortresses
Only British units may enter a Coast Castle. Asante units may not enter or attack into it. Asante units may never conduct sieges.
6.4 Events
If "Friendly Natives Not So Friendly" occurs, the British player must roll one die for each British supply unit and "R" class infantry. On a "1-2" eliminate the unit; other results have no effect. Already demoralized units are instead eliminated.
6.5 Supply Rule
Units may not trace a LOC through jungle or marsh hexes, unless there is a road.
6.6 Asante Fortification Rule
Once per game, the Asante player may built a field fortification in the same hex as a "5" strength unit.
6.7 Reconnaissance
The British Gifford unit may conduct reconnaissance per rule 19.2.
UNIT ABBREVIATIONS
British: BW: Black Watch F: Fante allies NB: Naval Brigade RB: Rifle Brigade RF: Russell's Fante RM: Royal Marines RWF: Royal Welsh Fusiliers WI: West Indian WF: Wood's Fante
Asante: BH: Black Horse
Persia 1856-57
Each hex equals about five miles. Each game turn equals a half month of operations. Each combat strength point equals 100-300 men, or one battery of artillery.
1.0 Sequence of Play
First player: British Second player: Persian
2.0 Game Length
December I 1856 – March I 1856 (seven turns). (Year as printed in the source; the end date reads 1856 in the source and is probably a typo for 1857.)
3.0 Persians
The Persian player deploys first.
3.1 Initial Deployment
The Persian player begins the game with all units marked "Persia."
Persian units: In Bushehr: Bager Khan HQ; 2 x "R" morale infantry. In Shiraza: Shoja ol-Moolk HQ; 3 x "L" morale infantry; 1 x "L" morale cavalry; 1 x "L" morale artillery. In Dalaki: Eel-Khanee HQ; 2 x "R" morale infantry; 1 x "R" morale cavalry; 1 x "R" morale artillery. In Kasarum: 1 x "R" morale infantry.
3.2 Reinforcements/Replacement Table
3.21 Native Reinforcement Pool
Place the remaining units into the reinforcement pool. As Persian units are eliminated in the course of play, they are also placed in it.
3.22
Persian rolls a die per the Native Reinforcement/Replacement segment on the Native Reinforcement/Replacement Table. The results are as follows:
Uprising: Persian player rolls one die and picks that number of units from the pool. Reinforcements: Persian player rolls one die, divides it by two, rounds up any fractions, and picks that number of units from the pool. No Effect: Nothing happens. Desertions: The Persian player rolls one die, divides it by two, rounds up any fractions, and must remove that number of units from the map (his choice.) Place them in the reinforcement pool.
Designer's Note: While the Persian army was built around a core of regulars, they also fielded a considerable number of levies with low morale.
3.22
Units may also arrive via random events.
3.23 Deployment of Reinforcements
Persian units are placed in Persian occupied fortress hexes which are not besieged. In addition, units may be placed on any land hex on a map edge; these may be placed in enemy ZOC (or not).
3.3 Contingency Reinforcements
On the first Persian reinforcement phase that the British have any units on or east of the hex row containing the town of Khosab, the Persian player adds "+2" to his reinforcement die roll. This happens only once per game.
4.0 British
The British player deploys second.
4.1 Initial Deployment Force
Place on one coastal hex fortress or town hex not occupied by enemy units: all "Persia Start" units; one supply unit.
4.11 Friendly Natives
There are no Friendly Native units in this scenario.
4.2 Scheduled Reinforcements
January II: All "Persia Reinforcement" units.
4.21 British Reinforcement Pool
None.
4.23 Deployment
British replacements appear on any port or coastal hexes.
4.3 Contingency Reinforcements
There are no British contingency reinforcements.
4.4 Friendly Natives
There are no Friendly Native reinforcements; Ignore any event calling for them.
4.5 British Replacements
The British start with the following replacement points; they may use them at any time in the game. They appear in the same manner as reinforcements.
British: 4 infantry factors 2 cavalry factors 2 artillery factors 0 engineer factor
British Indian: 8 infantry factors 3 cavalry factors 1 engineer factor
4.5 British Supply Units (second 4.5 as printed)
The British receive one supply units per turn. They appear on British occupied coastal town or fortress hexes.
4.6 British Lines of Communication
All British occupied port hexes are British lines of communication. If the British occupy no port hexes, then they may land reinforcements on coastal hexes. This includes supply units. Units landed in this way may not move in the turn they appear.
5.0 Victory Points
5.1 British
British player receives these victory points immediately:
- Each Persian HQ eliminated in combat: +5
- Each Persian unit eliminated in combat: +1
British player receives these victory points at game's end:
Occupy fortresses: +5 each.
Occupy Khosab: +10
Occupy Shirza: +10
5.2 Persian
Persian player receives these victory points immediately:
- Each British HQ eliminated in combat: + three times total of tactical and strategic value.
- Each British unit eliminated in combat: +3.
Persian player receives these victory points at game's end:
Each Persian fortress occupied: +15 each.
6.0 Special Rules
6.1 Control
- The British player controls all British and British Indian units. They all may stack together.
- The Persian player controls all Persian units.
6.2 Area of Operations
Both players' units may go anywhere on the map.
UNIT ABBREVIATIONS
British: Bel: Beluch Bo: Bombay H: Highlander L: Local LI: Light Infantry M: Madras
Second Afghan War 1878-79
Each hex equals about 15 miles. Each game turn equals one month of operations. Each combat strength point equals 100-300 men or one battery of artillery.
1.0 Sequence of Play
First player: British Second player: Afghan
2.0 Game Length
Standard Scenario: November 1878-May 1879 Extended Scenario: November 1878-October 1879
3.0 Afghans
The Afghan player deploys first.
3.1 Initial Deployment
The Afghan player begins with the following units:
Khyber Pass: 1 x field fortification marker In Kabul: HQ Sher Ali; 2 x "V" class infantry; 1 x "V" class cavalry
In any fortress, town or pass hexes within Afghanistan: HQs Yakub Khan, Nek Mohammed, Gulam Haidar; 10 x "L" morale regular infantry; 5 x "R" morale regular infantry ("R" class weapon); 3 x "F" class irregular cavalry; 5 x "F" class irregular infantry; 5 x "R" class irregular infantry; 5 x "L" morale regular cavalry; 3 x "L" morale artillery ("F" and "H" class weapons); 4 x "L" morale artillery ("L" class weapon).
(Note: no Ghazi units are deployed at the start)
No more than 12 combat units per hex are deployed initially. Remaining Afghan units are received as reinforcements.
Hostile Natives: None are initially deployed. All may be received as reinforcements.
3.2 Reinforcements/Replacement Table
3.21 Native Reinforcement Pools
The Afghan player places all his remaining Afghan and Hostile Native units into a wide mouthed opaque container, called the reinforcement pool.
3.22
Afghanistan rolls a die per Native Reinforcement/Replacement Segment on the Native Reinforcement/Replacement Table. Results are as follows:
Uprising: Afghan player rolls two dice, totals them, picking that number of units from the Pool. Reinforcements: Afghan player rolls one die, picking that number of units from the Pool. No Effect: Nothing happens. Desertions: The Afghan player rolls one die and must remove that number of Afghan or Hostile native units from the map (his choice.) Place them in the reinforcement pool.
3.23
Reinforcements may also enter play via random events.
3.25 Deployment of Reinforcements
-
Afghan Regulars: regular infantry, regular cavalry and artillery reinforcements/replacements appear in any town or fortress hexes in Afghanistan occupied by Afghan units; additionally, there may be no enemy ZOC on the hex (if a town), or besieging the hex (if a fortress.) If no such hexes exist, then the Afghan player returns the units to the pool. They may be stacked or placed separately.
-
Irregulars: Afghan Ghazis, irregular infantry and irregular cavalry appear on any hexes in Afghanistan not occupied by enemy units or ZOCs. Any number of Afghan irregular may be placed in a hex containing a HQ of the same nationality (including a HQ being placed in this phase); if no HQ, then only one unit per hex may be placed.
-
HQ: HQ appear on any hexes not occupied by enemy units or ZOC, no more than one per hex.
-
Hostile Native units: Units appear on any hexes of Baluchistan or India not occupied by enemy units or ZOCs. Any number of units may be placed in a hex containing a Hostile Native HQ (including a HQ being placed in this phase); if no HQ, only one unit per hex may be placed. HQ may be placed in any hex not occupied by an enemy unit.
-
Geographic Restrictions: Afghan units must appear in Afghanistan. Hostile Natives must appear in Baluchistan or India.
3.3 Contingency Reinforcements
On the first Afghan reinforcement phase that the British occupy at least three or more fortresses in Afghanistan, the Afghan player adds "+2" to his reinforcement die roll. This happens only once per game.
4.0 British
The British player deploys second.
4.1 Initial Deployment Force
- Quetta (in Baluchistan): Place units marked "Quetta."
- Place units marked "India" as follows.
Note: Units may be of any British or British Indian types. The British may choose which units will be placed where.
Peshawar: 2 x HQ; 3 x cavalry; 13 x infantry; 2 x artillery; 1 x engineer; 2 x supply units. Kohat: 1 x HQ; 1 x cavalry; 6 x infantry; 2 x artillery; 1 x engineer; 2 x supply units. Sukkur: 2 x HQ; 6 x cavalry; 16 x infantry; 5 x artillery; 1 x engineer; 2 x supply units. Any fortress or towns in India: All remaining "India" units; Two elephants.
4.11 British Baluchistan allies (Friendly Natives)
Kalat: 1 x irregular cavalry; 1 x irregular infantry.
4.2 Scheduled British Reinforcements
4.21 Reserves
On December 1878, place all units marked "Reserve" on any British Line of Communications hexes or any un-besieged fortresses in India.
4.22 British Reinforcement Pool
The British player places all British and British Indian units labeled "Reinforcements" in a wide mouthed opaque container called the reinforcement pool.
4.22
During the reinforcement/replacement phase of each game turn, starting with January 1879, the British player rolls one die and checks the result. The player then picks out that number of units from the Pool.
Note: Unlike the Native player, the British player does not roll on a reinforcement table. Instead they just roll the die.
4.23 Deployment
Reinforcements appear on:
- any British occupied fortress in India;
- any British railroad or road hex on the east or south map edge;
- if no such hexes under (1) or under (2) are available, British reinforcements are then placed on the east map edge, or the south map edge; however, those units cannot move in the turn of placement.
4.3 Contingency Reinforcements
There are no British contingency reinforcements.
4.4 Friendly Natives
Place all British Friendly Native units in a separate Native Reinforcement Pool. They are picked at random and placed on the map if an event calls for it, or via the political officer rule.
4.5 British Replacements
The British start with the following replacement points; they may use them at any time in the game. They appear in the same manner as reinforcements.
British (European): 8 infantry factors 3 cavalry factors 6 artillery factors 1 engineer factor
British (Indian): 12 infantry factors 6 cavalry factors 2 artillery factors 3 engineer factors
4.5 British Supply Units (second 4.5 as printed)
The British receive three (s) supply units per turn, place in the same manner as reinforcements.
4.51 PFF Supply Units
These are treated as other supply units, except they have a better morale and movement ratings. The British may deploy them initially, use them as reinforcements normally, etc.
4.6 British Lines of Communication (Friendly Map Edges)
All fortresses in India are British lines of communication. All RR and road hexes on the east and south map edges.
5.0 Victory Points
5.1 British
British player receives these victory points immediately:
- Each Afghan HQ eliminated in combat: Commander in chief: +10 Other HQs: +5
- Each Afghan "V" class unit eliminated in combat: +2 Each other Afghan or Hostile Native unit eliminated in combat: +1 per unit.
- First time the British capture an Afghan fortress: Kabul: 10 Other fortresses: 5 each.
British player receives at game's end for occupying: Kabul: 25 Kandahar: 15 Jelalabad: 5 Gazni: 5 Kalat-i-Ghilzai: 5 Khyber Pass: 5 Quetta (in Baluchistan): 5
The British receive an additional 10 points if they have one or more "P" (political) leaders in Kabul at the end of the scenario.
5.2 Afghan
The Afghan player receives immediately:
- Each British HQ eliminated in combat: + twice total of tactical and strategic value.
- Each British and British Indian unit eliminated in combat: +3.
- Each British Friendly Native unit eliminated in combat: +1.
The Afghan player receives at game's end for occupying: Kabul: 15 Kandahar: 10 Jelalabad: 5 Gazni: 5 Kalat-i-Ghilzai: 5 Kohat: 5 Khyber Pass: 5 Bolan Pass (both hexes): 5 Kalat (in Baluchistan): 5 Quetta (in Baluchistan): 5 Peshawar (in India): 15 Kalabagh (in India): 10 Multan (in India): 10 Sukkur (in India): 10
Town hexes (anywhere): 1 each
The Afghan player will receive an additional 10 points if his commander in chief in Kabul at the end of the scenario.
6.0 Special Rules
6.1 Control
The British player controls all British, British Indian, and Friendly Native units. British and British Indian units may stack together. They may not end a phase stacked with Friendly Native units (they may otherwise move through each other.) If something happens which causes this to happen, then the Friendly Native units are eliminated.
The Afghan player controls all Afghan and Hostile Native units. Afghan and Hostile Native units may stack together.
6.2 Area of Operations
Both players' units may enter all countries on the map.
6.3 Baluchistan
Baluchistan is considered friendly to the British, and its units are represented by Friendly Native units.
6.4 Weather
December through February turns are Winter turns. See the Forage and March Tables for effects on die rolls.
6.5 Crowning the Heights
Some units receive benefits fighting in mountain hexes.
- Afghan, Hostile Native and Friendly Native units do not receive the -2 penalty when attacking enemy units defending in mountains or passes. Instead, they fire with a zero modifier.
- British and British Indian infantry, pioneer and engineer units receive a -1 penalty (instead of -2) when attacking enemy units defending in mountains or passes.
- If more than one type is firing a volley together, then use the single best modifier for the firing player.
6.6 Elephant Transport
Elephant units may transport one supply unit or one artillery unit with a movement factor = 4). To do so, the elephant must begin in the same hex as the unit to be transported and spend its entire movement with it. The elephant and transported unit both move with a factor of six. At the end of the move, the unit is debarked. Eliminated elephant units may not be replaced.
6.7 Ghazis
Afghan Ghazi units have both an "R" and "S" combat value. They use their "R" value in the rifle round and the "S" value in the melee round.
6.8 British Railhead
The Railhead marker does not start on the map. If the British player has a railroad engineer unit in the fortress of Sukkur at the start of a movement phase, the Railhead is placed in that hex and the British may begin building the railroad in that turn as per rule 30.22. (Note the potential rail hexes extend to Dardur.)
6.9 Roberts' HQ
The Roberts HQ also can function as a political officer (25.0).
6.10 Extended Scenario
Historically the campaign ended in May of 1879 with the Treaty of Gandamak; however, the British player can extend the scenario up to August of 1879. The British player declares this at the end of the May 1879 turn, thereby extending the game three additional months. By doing this, the Afghan player immediately gains 30 VP.
UNIT ABBREVIATIONS
British: B: Bengal Bh: Bhopal BL: Bengal Lancer Bo: Bombay Gka: Gurkha H: Hussars L: Lancers M: Madras Mh: Mhairwarra P: Pioneers PFF: Punjab Frontier Force RA: Royal Artillery RB: Rifle Brigade RE: Royal Engineers RHA: Royal Horse Artillery Sk: Sikh
Afghan: He: Herat Kb: Kabul Kd: Kandahar
Sun Never Sets II Random Events Table
Use for both Abyssinia and Second Afghan War.
British Events
11-12. Orders from the Colonial Office—Evacuate! (All scenarios): This applies ONLY if the Native player currently has at least 20 more victory points than the British. (1) The British player gains "1" victory point for each unit he withdraws from the map (immediately upon withdrawal). (2) Halve the point value for British holding geographical objectives at the end of the game. (3) Regardless of the final victory point total, the British Player may win no higher than a Local Victory. (4) Negate the "Onward" event if already in play.
"Evacuate" remains in effect until the end of the game, or unless the "Onward" event happens after this event goes into effect (at which point the "Evacuate" event is negated): If this event is negated (by the Onward event occurring subsequently), the British player still keeps the Victory Points for any withdrawal units. If this event is in effect and is rolled again, then there is no additional effect. Also note that if this event has been negated by an Onward event, it may go into effect again if rolled.
13-16. Orders from the Colonial Office—Onward! (All scenarios): This applies ONLY if the British player currently has at least 20 more victory points than the Natives. (1) The British player gains twice the point value for holding geographical objectives at the end of the game. (2) The British receives 8 additional replacement points which they may use for any unit type. (3) Negate the "Evacuate" event if it is in effect. (However, previously withdrawn units may NOT be returned to play).
"Onward" remains in effect until the end of the game, or unless the "Evacuate" event happens after this event goes into effect (at which point the "Onward" event is negated): The additional 8 replacement points may be used at any time in the game subsequently and are not lost if this event is negated (by the Onward event occurring subsequently): If this event is in effect and is rolled again, then there is no additional effect (no additional replacement points are received): Also note that if this event has been negated by an Evacuate event, it may go into effect again if rolled.
21-26. Orders from the Colonial Office—Rescue Mission Dispatched! (All scenarios): This applies ONLY if the Native player currently has at least 20 more victory points than the British. Otherwise, treat as "No Event." The British player rolls two dice and totals the result. He then picks at random that number of units from the Reinforcement Pool. If there are not sufficient units in the Pool, then any shortfall is taken as Replacement points (which may be used for any type of British unit). This Event may go into effect only once per game.
This event does not negate the effects of "Evacuate" or "Onward."
-
Increased Replacements (All scenarios): The British player rolls one die. He adds the number rolled to his total replacements (divided among any types).
-
Delayed Replacements (All scenarios): The British may not take any replacements this turn.
33-36. War Correspondents Mobilize (All scenarios): The British Player rolls one die. On a 1-4 he gains one die roll in victory points (favorable war coverage); on a "5" he loses one die roll in victory points (unfavorable coverage); on a "6" the Native player may examine any one British stack on the map (secret information on the front page of the Times).
34-36. Native Attrition (All scenarios): The British player designates one enemy occupied hex on the map; the Native player rolls one die for each unit. Results depend on type of unit. HQ: "1" = eliminated. Combat units: "1-2" unit is demoralized (already demoralized unit is eliminated). Supply unit: "1" = eliminated, "2-3" unit is demoralized (already demoralized unit is eliminated). All other results = no effect.
-
Intelligence Department (All scenarios): The British player designates one Native occupied hex on the map and may examine all units in it (or in associated column displays).
-
Dashing Heroics (All scenarios): The British player receives a +1 die roll modifier for all fires for one Battle this turn.
-
Muddling Through (All scenarios): British add +1 to any one March or Forage die roll this turn (British player's choice).
44-46. Friendly Tribes (All scenarios): The British place one of the following in any hex containing a British HQ: a BRITISH supply unit, or pick two units at random from the Friendly Native pool.
51-53. Intelligence Contacts Hostages (Abyssinia only): The British player may examine any one Abyssinian stack of units.
54-56. Abyssinian Civil War (Abyssinia only): The British player rolls one die and picks that number of Friendly Native units from the pool (if available): These are placed in one hex with three hexes of a British HQ.
61-63. Floods on Indus (Second Afghan War only): No units may cross the Indus major river hexsides this game turn. This applies to both the British and Natives.
64-66. Russians Play Great Game (Second Afghan War only): The British player rolls one die. On a 1-3 the Afghans roll a second die and pick that number of units from the deadpile. On a 4-6 the British roll a second die and gain that number of replacement points.
Native Events
11-13. Natives Are Restless (All scenarios): The Native player does not roll on the Reinforcement/Replacement table this player turn. Instead, he automatically implements the effects of "Uprising" for the scenario.
14-16. Natives Go Home (All scenarios): The Native player does not roll on the Reinforcement/Replacement table this player turn. Instead, he automatically implements the effects of "Desertion" for the scenario.
21-22. Mob Runs Amok (All scenarios): The Native player designates any one British controlled fortress on the map and places an Atrocity marker on it (this gives neither player any victory points). Also, roll one die for each British unit in the hex: On a "1-2" it is demoralized. Roll for each British Leader in the hex: on a "1" it is eliminated.
-
Vision (All scenarios): If the Native Commander in Chief is in play, then all Native units this player turn are considered to have a Morale of "Fanatic."
-
Spies (All scenarios): The Native player designates one British occupied hex on the map and may examine all units in it (or in associated column displays).
-
Earthquake (All scenarios): Roll one die. On a 1-3 the earthquake happens; on a 4-6 there is no effect. Remove all fieldworks from the map. Units may not use road movement or passes this turn and following player turn (they can enter such hexes paying other terrain cost). Units defending in fortresses this and following player turn receive a 0 defensive benefit (still immune from retreat). Comment: because walls come crashing down.
-
Someone Blundered (All scenarios): Add +2 to any one Native Tactical Superiority die roll this player turn.
31-33. Particularly Foul Weather (All scenarios): Subtract an additional -1 die roll modifier from all March and Forage die rolls. This is in effect for this and the following player turns.
34-36. British Attrition (All scenarios): The Native player designates one enemy occupied hex on the map; the British player rolls one die for each unit. Results depend on type of unit. HQ: "1" = eliminated. Combat units: "1-2" unit is demoralized (already demoralized unit is eliminated). Supply unit: "1" = eliminated, "2-3" unit is demoralized (already demoralized unit is eliminated). All other results = no effect.
41-43: Friendly Natives Not So Friendly (All scenarios): The Native player designates one hex on the map containing Friendly Native units (i.e., British controlled); the British player rolls one die for each Friendly Native unit in it. Results depend on type of unit. HQ: "1" = eliminated. Combat units: "1-2" unit is eliminated. Supply unit: "1-3" = eliminated. All other results = no effect.
44-45. Bandits (All scenarios): The Native player picks one unit at random from his Reinforcement pool. This is placed in its home country in any hex not containing an enemy unit (it may otherwise be placed in a ZOC, besieged fortress, etc.).
- Palace Infighting (All scenarios): The Native player may move only units which begin the movement phase stacked with the Command in Chief HQ this turn. They may move together or separately.
51-52 Theodore Inspires Troops (Abyssinia): Pick one Abyssinian unit from the Pool and place it with the Theodore HQ if on the map. For this turn, the Theodore HQ has a Tactical and Strategic values = 2/3.
53-55 Theodore Goes Mad (Abyssinia): For this turn, the Theodore HQ has Tactical and Strategic values = 0/0. Optional rules: also, place an Atrocity marker in the hex containing Theodore.
56 Abyssinian Cannon Explodes (Abyssinia): The Abyssinian player must roll one die for each artillery unit he controls. On a "1-2" it is eliminated.
61-62. Jihad (Second Afghan War): If the British currently have 20 or more Victory Points than the Afghans, and/or occupy two or more fortresses in Afghanistan, the Afghan player immediately implements an Uprising reinforcement die roll.
63-64. Morale Collapse (Second Afghan War): If the British currently have 20 or more Victory Points than the Afghans, the Afghan player immediately implements Desertion reinforcement die roll.
65-66. Afridis Raid Frontier (Second Afghan War): The Native player rolls one die and picks that number of units from the pool. Any Afghan units which are picked are returned to the Pool (and no replacement units are picked). Hostile Native units are placed in India as per deployment instructions.
Random Events Table 2
Use for scenarios as indicated.
Asante Events
11-16. King Debates with Missionaries (Asante): no event.
21-22. Mob Runs Amok (Asante, Persia): the Native player designates any one British controlled fortress on the map and places an atrocity marker on it (this gives neither player any victory points). Also, roll one die for each British unit in the hex; on a "1-2" it is demoralized. Roll for each British leader in the hex; on a "1" it is eliminated.
-
Vision (Asante): if the Native commander in chief is in play, then all Native units this player turn are considered to have a morale of "fanatic."
-
Spies (Asante, Persia): the Native player designates one British occupied hex on the map, and may examine all units in it (or in associated column displays).
-
Earthquake (Asante, Persia): roll one die. On a 1-3 the earthquake happens; on a 4-6 there is no effect. Remove all fieldworks from the map (both players'). Native and British units may not use road movement or passes this turn, and following player turn (they can enter such hexes paying other terrain cost). Units defending in fortresses this and following player turn receive a 0 defensive benefit (still immune from retreat).
-
Someone Blundered (Asante, Persia): add +2 to any one Native tactical superiority die roll this player turn.
31-33. Particularly Foul Weather (Asante, Persia): subtract an additional -1 die roll modifier from all march and forage die rolls. This is in effect for this and the following player turns.
34-35. British Attrition (Asante, Persia): the Native player designates one enemy occupied hex on the map; the British player rolls one die for each unit. Results depend on type of unit: HQ "1" = eliminated; combat units = "1-2" unit is demoralized (already demoralized unit is eliminated); supply unit "1" = eliminated, "2-3" unit is demoralized (already demoralized unit is eliminated). All other results = no effect.
- Golden Stool (Asante): this occurs if the British currently occupy one or more villages/town that are not on the coast. This stool, the material manifestation of Asante nationhood, is captured by the British. Each Asante stack anywhere on the map is immediately subject to a die roll: on an odd roll, that entire stack is demoralized; on an even roll, that stack receives a +1 to its march die rolls for that game turn owing to outrage. Also, British gain 5 VP. This event may only occur once per game; if rolled again, then treat as no effect.
41-42. King Loses Nerve (Asante): if any British force is within three hexes of Kumase, the King surrenders. He and all leaders and units stacked with him are removed from play, regardless of where he is (units and leaders other than the King are available for replacement). If this occurs, the golden stool cannot be captured by the British (see event, above) if it has not been captured already. This event may only occur once per game; if it has already occurred, then treat this as no event. This event is what happened historically; for decades afterward, the British searched without success for the stool's hiding place. At that same time, a majority of the Asante believed the British had it already hidden in the basement of the British museum. It was brought out of hiding by the Asante in 1900, and remains in their possession to this day.
43-46 Allies Desert (Asante): this goes into effect only if the British currently have 10 or more VP than the Asante. All Dwaben units are removed from play, but are available for replacement.
51-52 Rain (Asante, Persia): all Native movement rates halved this player turn.
53-54 Queen Mother Asserts Her Authority (Asante): although without legal authority, the Queen Mother had great moral force if she chose to exert it. All Asante gain a +1 on the March Table this turn. This may only occur once per game; if it has already occurred, then treat this as no event.
- King Deposed (Asante): if the British have 20 or more VP than the Asante, the king is removed from play and all Dwaben allies desert (removed from play but available for replacement). This event does not meet a British victory condition. This may only occur once per game; if it has already occurred, then treat this as no event.
56-61. Auspicious Day (Asante): at the start of each Asante attack this player turn, roll one die: on an even roll, the Asante (including allies) receive a +1 on all melee die rolls this player turn; on an odd roll, they receive a -1 instead.
62-63. Ambush (Asante): the Asante player may immediately launch one attack using any one stack of units adjacent to a British force. Both forces must be in non-clear terrain. Execute this combat normally, except the Asante automatically get tactical superiority. This event may only occur once per game; if rolled again, then treat as no effect.
64-66. No Event (Asante, Persia): no effect.
British Events
11-26. No Event (Asante, Persia).
31-32. Porters Desert (Asante): British porters are overcome by their fears of Asante prowess and flee. No British supply units may move this player turn (but no units are removed from the map).
- War Correspondents Mobilize (Asante, Persia): roll one die. On a 1-3, the British receive one additional replacement point, any type. On a 4-6, the Native player may examine one stack of British units anywhere on the hex field. Additionally, if the British conduct any attacks this player turn, then double any VP gained or lost for them.
34-35. Native Attrition (Asante, Persia): the British player designates one enemy occupied hex on the map; the Native player rolls one die for each unit. Results depend on type of unit. HQ "1" = eliminated; combat units = "1-2" unit is demoralized (already demoralized unit is eliminated); supply unit "1" = eliminated, "2-3" unit is demoralized (already demoralized unit is eliminated). All other results = no effect.
-
Intelligence Department (Asante, Persia): the British player designates one Native occupied hex on the map and may examine all units in it (or in associated column displays).
-
Dashing Heroics (Asante, Persia): the British player receives a +1 die roll modifier for all fires and melee for one battle this player turn.
-
Muddling Through (Asante, Persia): British add +1 to any one march or forage die roll this player turn (British player's choice).
43-45. Fever! (Asante): one British leader, selected randomly, has his tactical and strategic ratings reduced to zero for this player turn.
46-51. Allies Desert (Asante): roll one die for each British native levy unit. On a 1-3 there is no effect; on a 4-6 the unit is removed (and is available as a replacement).
52-53. Rain (Asante, Persia): all British movement rates halved this player turn.
- Mud (Persia): all British supply unit movement rates are halved this player turn. Other units are not affected.
55-56. Gifford's Scouts Prove Their Worth (Asante): Lt. Lord Gifford's rapport with the African troops pays off. This player turn British forces that have one or more levy units receive an additional +1 to tactical superiority determination. This event may only occur once per game; if rolled again, then treat as no effect.
- A Modern Major General (Asante): if Wolseley is on the map, the British player designates one Native occupied hex and may examine all units in it (or in associated column displays). Also, add +1 to all march and forage die rolls for stacks containing Wolseley this player turn. This event may only occur once per game; if rolled again, then treat as no effect.
61-66 No Event (Asante, Persia): no effect.