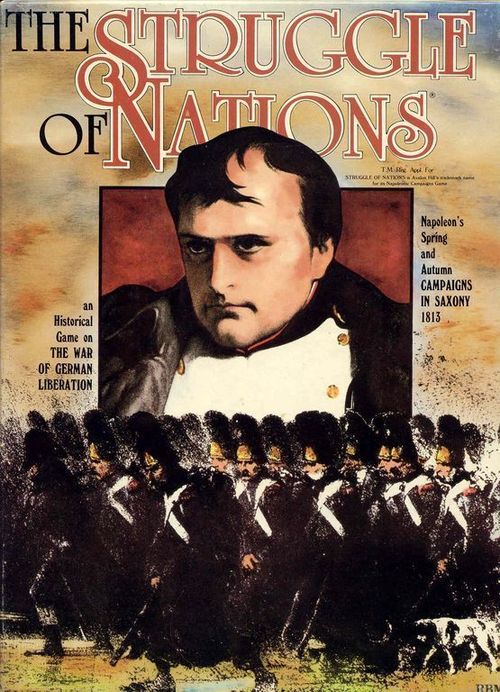
The Struggle of Nations
The Struggle of Nations Rulebook
Table of Contents
Table of Contents
- Rules Outline
- One: Introduction
- Two: Game Equipment
- Three: Glossary (Definition of Terms)
- Four: Sequence of Play
- Five: Administrative Points
- Six: Communications
- Seven: Movement Commands
- Eight: March Attrition
- Nine: Leadership
- Ten: Initiative
- Eleven: Organization Display
- Twelve: Morale
- Thirteen: Friendly Territory
- Fourteen: Movement
- Fifteen: Facing and Unit Mode
- Sixteen: Terrain
- Seventeen: Zones of Control
- Eighteen: Combat
- Nineteen: Retreat After Combat
- Twenty: Pursuit (Advance After Combat)
- Twenty-One: Disorganization and Rally
- Twenty-Two: Replacements and Reinforcements
- Twenty-Three: Fortresses (Citadels and Fortified Towns)
- Twenty-Four: Weather
- Twenty-Five: Effect of Special Unit Types
- Twenty-Six: Politics and Off Map Movement
- Armistice (Campaign Game Only)
- Twenty-Seven: Optional Rules
- Questions and Answers
Rules Outline
- Introduction (Background; General Course of Play)
- Game Equipment
- Glossary
- Sequence of Play
- Administrative Points
- Communications
- Movement Commands
- March Attrition
- Leadership
- Initiative
- Organization Display
- Morale
- Friendly Territory
- Movement (including Stacking and Repulse)
- Facing and Unit Mode
- Terrain
- Zones of Control
- Combat
- Retreat After Combat
- Pursuit
- Disorganization and Rally
- Replacements and Reinforcements
- Fortresses
- Weather
- Effect of Special Unit Types
- Politics and Off-Map Movement
- Armistice and Optional Rules
- Questions and Answers
One: Introduction
General Course of Play
The diagram in the rules shows the Administrative Rules as the top of an incompletely-articulated hierarchy. The major linkages run: Administrative Points and Communications lead to Movement Commands; Movement Commands and Leadership lead to Movement; Movement leads to March Attrition and to Zones of Control; Zones of Control lead to Combat.
The Administrative Rules, in function, regulate the pace of activities in the game, through their effect on March Attrition and Communications, while only Communications can have a reciprocal effect on the amount of Administrative Points: as the Line of Communications increases in length, the APs Received drop off (also reduced by Morale) and if the Line of Communications is broken, no new APs can be added.
To continue through the Semantic Network: the Center of Operations is a playing piece moved on the map; there is only one per army. The LOC is traced from the Supply Source to this piece (or to a depot). It is the center of Administration on the map, and its function is to convert the stock of APs, when needed, to Movement Commands. However, the more the AP stock is depleted, the greater will be the March Attrition suffered by the army. March Attrition is simply a non-combat loss of Combat Strength by the units on the Organization Display; it will serve to limit the length of marches.
Movement Commands are used to induce Movement. Each force a Player wishes to move must either receive a Movement Command (to do this the Leader of that force must be within Dispatch Distance of the Center of Opns) or attempt to move under his own Initiative, which is resolved by a die roll (modified by cavalry and morale). A Player may expend an additional Movement Command for a Force, enabling it to make an Extended March of up to 4 additional Movement Points; while Forced March occurs in a separate Forced March Phase during the Enemy Player Turn, only under Initiative.
The Leadership rules govern everything having to do with the constitution of a Force on the map. Each such Force is Commanded by one Leader, who may have subordinate Leaders in his force, depending upon his Command Span and how much of that number is taken up by the other Leaders' Subordination Ratings. By this means, the Size of the Force is limited (an upper Stacking Limit is also imposed) and the size, so determined, has an effect on how much Attrition the force will suffer.
The Movement rules explain how a force expends Movement Points from its Movement Allowance; these expenditures vary with the Terrain Type, each of which has its own MP cost. The ultimate Distance of March (the number of MPs expended in one Phase) will help determine how much March Attrition that force suffers.
The Zone of Control is simply the area of eight hexes surrounding a force (within certain limits of terrain). When a force enters the ZOC of an Enemy Force, Combat will ensue unless that Enemy Force is able to Force March out of the area, a question determined by an Initiative die roll (which is modified by the ratio of cavalry strength, and by comparison of opposing Leaders' Initiative Ratings).
Before Combat Resolution, Artillery may fire (a die roll modified by cavalry differential). The Combat procedure involves a die roll on the Combat Results Table (the column to use on this table is determined by Terrain Conditions). This die roll will specify a number of Casualties for one side and a Retreat for the other side (unless it is a Pitched Battle, in which case the Combat die roll procedure is repeated by each side in alternation). The Player owning the defeated force Retreats that force along a path determined by a set of Retreat Priorities. The victorious player may then make Pursuit along the Path of Retreat. The extent of Pursuit is determined by a comparison of Leader Initiative (again modified by cavalry) and a die roll, and determines the Casualties of the retreating side.
If certain Leaders are forced to Retreat, there is an adjustment in Morale of one space, either positive for the Pursuing Player or negative for the Retreating Player, at the Pursuing Player's option. Morale determines chances for an Armistice. Morale and Weather alike have an effect on Initiative of Leaders whenever consulted.
That, in outline, is pretty much the whole game.
Two: Game Equipment
The Game Map
The Game map shows the area of central Germany, primarily Saxony and parts of the surrounding states, in which the Campaign took place. (Fighting was also going on in Northern Italy and in Spain.) A field of hexagons has been superimposed upon the map to regularize the positioning of the units. The hexes are unnumbered; set-ups for the Scenarios are listed by town name, and the location of those towns involved in each scenario are shown on a reduced map printed on the same pages.
The Game Map comes in three sections; the maps should be placed with the print reading the same way on each, and with the Western section (Saxony) to the left, the Eastern section (Silesia) to the right, and the Northern section (Brandenburg) above and aligned with the left edge of the Western section, as shown in the diagram. The Organization Displays are placed adjacent (French and Allied). To set up the Displays as shown requires a total table surface area of approximately 2 1/2 x 7 1/2 feet. Alternately, they may be placed on an adjacent surface.
Terrain types are shown on the terrain key (Charts & Tables Folder). Some types of terrain are divided into sub-categories of primary (abbreviated 1°) and secondary (2°).
Game Charts, Tables and Displays
Various visual aids are provided for the Players in order to simplify and illustrate certain game functions. There are three displays on heavy paper stock: French and Allied Organization Displays, and Turn Record/Reinforcement Track. All Charts, Tables and Matrices are printed on two identical folded sheets (provided separately). The Chart Sheet includes: Weather Table, Bridge Destruction & Repair Table, Morale Change Table, Administrative Point Pool, Communications Table, French Depots, Initiative Comparison Matrix, Attrition Quotient Matrix, March Attrition Table, Terrain Key & Effects, Artillery Fire Table, Combat Results Table, Pursuit Table and Armistice Table. The use of these tables is explained in the text of the rules, and in some cases with the Tables themselves.
The Playing Pieces
There are three categories of Playing Pieces: Combat Units, are placed on the Organization Display in track spaces which indicate the force they are in and their strength (while concealing their strengths from the Enemy Player), Leaders, which represent the larger formations and show their location on the map (also sometimes placed on the Organization Display), and Utility Counters, including Center of Operations, Fortress Markers, and Bridging Condition Markers.
Every combat unit has one counter, which has no Combat Strength printed on it, as this Strength is variable. The Strength of each Combat Unit is recorded by its location in one space on the Organization Display; thus, if it is currently in a space with the large numeral "3", its Strength is three Strength Points (3,000 men). Units above the strength of 10 are inverted and placed in the space corresponding to their strength in excess of ten. For example, an inverted unit in the "3" space would have a strength of 13. To change a unit's strength, move it up or down the scale. No unit may exceed its Scenario Starting strength; in the Campaign Game, use the highest scenario strength as the maximum. If reduced to zero Strength Points (SPs) the unit is "eliminated" and removed from the display. Abbreviated names of Generals of Brigade or Division are printed on the counter for historical reference; further OB information is provided in the Scenario Folder.
A sample Leader counter shows: the Leader name, Corps I.D. (formation), Initiative, Command Span, Subordination Rating, and a Combat Bonus Point (if any). A sample Combat Unit shows its Unit Type, Unit Size, Unit I.D. and Superior (Corps) I.D.
Summary of Unit Types: Infantry; Artillery; Cavalry; March Regiment (infantry); March Regiment (cavalry); Light Cavalry.
Summary of Track Markers: French Morale, Allied Morale, Admin Point markers (ones and tens: "x1" and "x10").
Summary of Leader Types: Napoleon; Dummy Leader; Major General; Cavalry Major General.
Summary of Utility Counters: Center of Opns; Active Supply Source; Bridge Train; Blown Bridge.
Game Equipment Inventory
A complete game of Struggle of Nations includes the following parts:
- Game Map in three sections
- Organization Displays in two large sheets
- Charts & Tables in two sheets
- Turn Record/Reinforcement Track
- One Rules Folder
- One Scenario Folder
- Die Cut Counters in two sheets (180 and 260 pieces respectively)
If any of these parts are missing or damaged, write: Replacement Parts, The Avalon Hill Game Company, 4517 Harford Road, Baltimore, MD 21214.
Color Codes, French Nationality: Medium Blue: French Line; Purple: French Guard; Brown: German; Red: Polish; Light Blue: French March Regt.
Color Codes, Allied Nationality: White: Austrian; Green: Russian; Dark Blue: Prussian; Magenta: Swedish; Yellow: Allied March Regt; Orange: Allied Leaders, unspecified.
Unit Size Symbols: XX = Division, X = Brigade, III = Regiment.
Rules Questions
Rules Questions will be answered if 1) Phrased to be answered in a one-word reply, and 2) accompanied by a self-addressed, stamped envelope. Send Questions to the above address, marked "Rules Questions: Struggle of Nations."
You will find that the process of finding the right way of expressing your game questions is an exercise which will most often lead you to discover the correct answer for yourself. If you find a convincing answer in this way, submitting a written question may not be necessary.
Game Scale
The scale of the map is 1:400,000. Each 8mm hex represents an area 3.2 kilometers (2 miles) across. The manpower strength of a unit is shown in thousands (each Strength Point equals 1000 men), and each Game-Turn represents an average of two days real time.
Three: Glossary (Definition of Terms)
Administrative Points (APs) are allotted to the armies on a turn-by-turn basis. Admin. Points are used to create Movement Commands, and the level of accumulated APs helps to determine the severity of march attrition suffered by forces of that army.
Bonus Point is given to some Leaders. This is indicated on the Leader's Track by a star (*). Leaders with a Bonus Point may affect the die roll for Combat and Attrition.
Besieged: Only forces in citadels may be Besieged; this occurs if any enemy force is adjacent, and the force in the citadel has chosen to avoid combat.
Combat Strength is the basic, current attacking or defending power of a unit, quantified in Combat Strength Points. The units which may have a Combat Strength are known as Combat Units.
Commander or Commanding Leader is a Leader who has at least one Leader currently subordinate to him in his force, in addition to the Combat Units, which together are placed on his Track on the Organization Display. The total number of leaders which may be commanded is dependent upon the Commander's Command Span, and the Subordination Ratings of the Combat Units and of the Leaders on his Track. (Subordination Ratings of Combat Units on subordinate Leaders' Tracks count only against those Leaders' own Command Spans.) A Commander may command Leaders in one package adjacent to his own location. Only those Leaders in the same or adjacent hexes at the beginning of any Phase or Segment may be commanded by a particular Commander.
Command Span is the second number on a Leader's Display and refers to his ability to effectively control and coordinate the activities of subordinate leaders and individual combat units; it is a numerical limit against which the subordination ratings of his force constituents are compared.
Dispatch Distance is the maximum length (in Movement Points) that a force may be from its Center of Operations and still receive a Movement Command. This Dispatch Distance also has an effect on determination of "Supply" (see below).
Extended March is when a force receives an extra Movement Command to enable it to move up to four additional Movement Points.
Force refers to all the subordinate Leaders and all the combat units under a single Commander. A force must consist of at least one Leader plus at least one combat or support unit. A force of more than one Leader has one Leader designated as its Commander. If none of the Leaders present has an adequate Command Span, the Leaders must be treated as separate forces, even if they are stacked in the same location. A force may include Leaders in hexes adjacent to the Commander.
Forced March is a March executed during the Forced March Segment, which occurs during the Enemy Combat Phase.
Formation is the historical name of the Corps which the Leader's HQ was known as. Provided for historical reference.
Fortress (sometimes shortened to "fort") refers to both Citadels and Fortified Towns together.
Friendly Territory is defined in section XII, affects Length of Dispatch Distance, and causes the identity of French therein to be revealed (turn leader counters face-up). This is to be distinguished from "Occupied Territory" which applies to map area actually occupied at the beginning of the armistice, and is used in the Campaign Game only.
Initiative Rating is given to each Leader; the first number shown next to his name on the Organization Display. This is used to determine the ability of the Leader to move when the Player does not give it a Movement Command for its movement. It is also used to determine the ability of a Leader to pursue the Enemy after a successful Combat.
Installation: Supply Source, Depot, and Cent/Opns.
Leaders are represented by the named individual, rectangular counters and the Tracks on the Organization Display. The units on this track represent the combat strength of the force personally led by that Leader. The number of combat units each Leader may have on his Track depends on his Command Span and the number of subordinate Leaders he has. The Leader counter always represents the combat units on the map.
Light Cavalry are all Kossacks and cavalry units designated as Light ("Lt.").
Line of Communications (LOC) is a line of Primary Road hexes traced from an Army's Center of Operations to its Supply Source.
March is a normal manner in which units move, carried out during a Friendly Movement Phase.
March Attrition is Combat Strength lost while marching and other non-combat losses such as detachments along the line of communications, losses from disease, lack of forage, physical exhaustion, equipment abandoned, deserters and stragglers. March Attrition occurs each time a force moves, but at least once during the March Phase each turn whether it moves or not, as determined by the Attrition Quotient Matrix and the Attrition Table.
Movement Allowance is the basic, normal daily march distance of a unit quantified in Movement Points. Infantry units have a Movement Allowance of 5, French Guard, 6, Cavalry, 7, Light Cavalry and Leaders, 9.
Movement Commands can be given to individual forces to remove the chance element from their Movement; during the Movement Phase (March Phase) only; these are purchased on a one-for-one basis with Administrative Points. [The Movement Command represents not only the actual order (written by the army's Chief of Staff and delivered by a courier to the force Leader), but also the Administrative support for the movement, including the procurement of transport, traffic control, liaison, etc.]
Multi-Leader Forces give rise to the need for Commanders. The Commander is used to coordinate the individual Leaders into a single force. (Without a Leader with sufficient Command Span to equal the Subordination Rating of his own Organic units and another leader, each force may have only a single Leader in it.) A multi-leader force uses the Initiative Rating and Combat Bonus of the Commander. The Initiative Rating and Combat Bonus of any of the subordinate Leaders are ignored as long as they remain part of that force.
Organic Units of a given Leader are those units which are on that Leader's Track.
Organization Display is the sheet containing the Tracks where units are placed, at once assigning them to individual Leaders, establishing their strength, and concealing their assignment from the Enemy Player. However, the stacking rules apply to the combat units organic to two or more Leaders in the same location, and their organic units are always considered to be in the same place. Players should be careful when stacking Leaders to avoid overstacking combat units.
Package is a term which refers to the two adjacent hexes occupied by a given Leader counter on the game map (his "location"). Thus a Leader will be said to occupy a "package." Two packages are said to be adjacent if they have at least one hexside in common.
Pitched Battle is a combat situation in which a Force loses Strength Points rather than retreating. One "round" of Pitched Battle consists of one attack and one counter-attack.
Provisional Movement Commands can be issued via Depots; they act as Initiative Modifiers rather than guaranteeing movement; the cost is one AP.
Pursuit Battle is a combat situation in which a force retreats and has its losses determined by the pursuit of Enemy forces.
Subordinate Leader is a Leader whose own force makes up part of a larger force under a Commanding Leader. A subordinate Leader may not in turn have subordinate leaders of his own; only organic units.
Subordination Rating is the third number listed next to a Leader's name. (This number may either be 1, 2, 3 or 4). This number represents a Leader's ability to subordinate himself to the authority of a Commanding Leader. The Subordination Rating is deducted from the Command Span of the Commanding Leader of the force; thus the higher a Subordinate Leader's Subordination rating, the harder he is to control and the fewer points of the Commander's Command Span which will remain to be used to control other Leaders and combat units at the same time.
Subordination Rating: Combat Units. Infantry and artillery units and march regiments have a subordination rating of "one;" cavalry units and march regiments have a subordination rating of "one-half." Bridging trains cost zero.
Support Units are those units with special functions and no attack and defense capability: i.e., Engineers and Bridging Trains. These units may be assigned to a Leader at no cost to his Command Span. Note that only deployed Bridging Trains are actually placed on the game map; there are no Engineer counters.
Zone of Control is the area comprising the hexes a Leader occupies and the eight hexes adjacent thereto.
Four: Sequence of Play
How to Play
One Player assumes the command of the French Armies, including their German and Polish allies, and the other Player assumes the command of the Allied Armies of Austria, Prussia, Russia and Sweden. These armies are represented by the various combat units and Leaders. After choosing sides the Players must decide whether they will play the Campaign Game or one of the Scenarios.
The cardboard Playing Pieces should be punched out of the Unit Counter Sheet. The differently colored units represent forces of the various contingents. The French Player always controls all French Army units; his opponent always controls units of the Allied nationalities.
The Game Turn Outline
Struggle of Nations is played in sequential turns called Game-Turns. Each Game-Turn consists of two alternating Player-Turns, which consists of three Phases. The Player whose turn is in progress is termed the Phasing Player. All action must take place in sequence as outlined below. Any action taken out of sequence is a violation of the rules. All Game-Turns are identical and follow one another until the game is ended. The Scenario being Played determines which Player must move first (the "First Player").
A. First Player-Turn
I. COMMAND PHASE
a. Administrative Segment
The First Player, only, must determine weather as his first action. Either Player performs all other functions, but during his own turn. Once weather is determined for the Game-Turn, the Phasing Player's first concern is to determine the addition, if any, to the accumulated Administrative Point Track of each army. During the Campaign Game, only, the Phasing Player then adds any replacements indicated by the Game-Turn record track, to his accumulated Replacement Track.
b. Organization Segment
The Phasing Player may transfer combat units between Leaders in the same hex. He may also eliminate combat units and transfer the strength points from these eliminated units to any unit of the same type and nationality (if Allied) stacked in the same hex. Or, he may create a March Regiment with part of the strength of an existing unit, or from Replacement Points if eligible to receive them. Replacement Points are only accumulated during the first Game-Turn of each Game-Week, but may be incorporated into units during any Game-Turn. Reinforcements should be placed on the map.
II. MOVEMENT PHASE
a. Movement Command Segment.
The Phasing Player may move any of his Forces by expending one Movement Command (deducting one Administrative Point) per force to be so moved. The Player may also have a Force make an Extended March by expending an additional Movement Command and Administrative Point per Force.
b. Individual Initiative Segment.
The Phasing Player may attempt to move any Force which has not been moved in the Movement Command Segment, by use of the Force Leader/Commander's Initiative Rating. The die roll must be less than or equal to the Leader's Initiative Rating for the Force to be able to move, after all die roll modifiers have been incorporated.
Movement Routine
For each Force moved during the Movement Phase or the Forced March Segment, the procedure is similar. Note that all forces which are to receive Movement Commands must be moved before any forces move under Initiative. Then, each force to be moved under Initiative is rolled-for and moved (if possible) individually, before determining the Initiative die roll of the next force.
Step 1: Determine Movement Command Availability. Because he has a limited number of APs the Player must limit the number of Movement Commands; thus some Forces will do without. In addition, Forces in Enemy ZOCs may not be given Movement Commands; nor may units beyond Dispatch Distance of the Center of Operations receive them. All forces which do receive a Movement Command are now eligible to be moved and have their Attrition determined.
The March Phase is divided into two Segments: the first for all Movement under Movement Command, the second for all movement under Initiative. No Movement Commands may be issued after any force's Initiative die roll has been made.
Step 2. Determine Individual Initiative. This step is for Forces which failed Step 1 only (i.e., those without Movement Commands). If the Force is not in an Enemy ZOC the Player rolls a die: if the result (after being modified for Morale) is less than or equal to the Force Leader's Initiative Rating the Force may move. If the force is in an Enemy ZOC, its Leader Initiative Rating is compared with the Initiative of the Leader of the Force adjacent (or, if more than one, the highest). The Initiative Comparison Matrix yields a die roll modifier (which is added to weather, cavalry and morale modifiers); the modified die roll must be less than Leader Initiative for the force to be able to move. Whether it does or not, it still suffers attrition, and after all forces have been moved, all un-moved forces must also suffer attrition.
Step 3. Movement. The Force in question now moves, expending a number of Movement Points to cross each hexside into the adjacent hex. A Force may move to the limit of the Movement Allowance of its slowest component (5 MPs unless no infantry or artillery is present). Forces making Extended March move up to 9 MPs (infantry/artillery); cavalry likewise extend their March by 4 MPs. During the Forced March Phase no extended march is allowed.
Step 4. March Attrition. For all forces, find the column on the Attrition Quotient Matrix corresponding to the type of march executed and its distance. Cross-reference this with the line for the size of the force and its army's Accumulated AP total (unless out of Supply). With the resulting Attrition Quotient, resolve the Attrition Die Roll on the March Attrition Table, and assess the number of Strength Points shown against the strength of the Force. Steps one through four are repeated for each moving force (execute step four alone for non-moving forces during the Movement Phase).
c. Bridge Segment. Repair and destroy bridges. Deploy Bridging trains.
III. COMBAT PHASE
a. Forced March Segment, non-Phasing Player only.
No Movement Commands are issued during this Segment; any or all Forces may move, but may do so only under their Leader's Initiative. They may enter Enemy ZOCs only if the Enemy Force concerned is already adjacent to Friendly Force and must still be adjacent to the friendly force already adjacent. For each Forced Marching Force, the non-phasing Player rolls the die, moves the Force if successful, and adjusts its strength for attrition.
b. Battle Resolution Segment.
Combat occurs between all adjacent opposing forces. The forces of the Phasing Player are used to attack and the units of the non-Phasing Player defend, regardless of the overall strategic situation. Combat odds are determined by counting the opposing strengths for each combat situation and locating the simplified odds on the appropriate terrain line of the Combat Results Table. The die is rolled (modifying for Bonus Point, if any), the results are applied, and the losses are determined and deducted.
Combat Routine
For each force adjacent to the enemy during the Battle Resolution Segment, the following procedure is followed. Combat is mandatory for adjacent opposing units (except for attacking units adjacent to the same enemy stack unable to attack that enemy stack as a single force). Before starting, both sides must choose either pitched or pursuit battle.
Step 1. Determine Cavalry Differential. Count the strength of all cavalry which participates in the combat. Divide the lesser amount into the stronger side's total, to determine a simplified ratio: 2 to 1, 3 to 1 etc.
Step 2. Artillery Fire. Determine the amount of Artillery strength in the attacking (or counterattacking) force; the cavalry differential tells which column to find the result in; roll the die on the column corresponding to the cavalry differential. The result specifies the amount of strength lost by the defending side.
Step 3. Find the Odds Column on the CRT. The attacker's strength (including cavalry and excluding artillery) is compared with the strength of the defending force, and this comparison is simplified to the nearest odds shown on the CRT (rounding off in favor of the defender) which is then located on the line corresponding to the prevalent terrain.
Step 4. Resolve the Attack. Do this by rolling the die. The result, under the column found in Step 3, will specify which force retreats. The die result may be modified by the Attacking Leader's Bonus Points.
Step 5. If the losing force chose Pitched Battle at the beginning of the Combat Routine, then the result obtained in Step 4 shows the strength points lost by both sides, and these are now removed. If the losing force chose Pursuit Battle, then the results specify only the length of its retreat, while the winning side loses the number of points shown in the result obtained in Step 4.
Step 6. Counterattack or Re-attack (Pitched Battle only). The non-Phasing Player becomes the attacking player, and repeats Steps 1 through 5. The alternate Player in each successive attack continues to attack in turn until the losing player opts to apply the combat results achieved against him as a Retreat instead of as Combat Strength Points lost; or until the number of his losing rounds of Pitched Battle equals his Initiative Rating.
Step 7. Retreat. Now execute the retreat result obtained in Step 4.
Step 8. Pursuit (Advance After Combat). If the non-retreating force wishes to advance along the path of retreat vacated by the retreating force, compare its Leader's Initiative with the retreating Leader's initiative to determine the modifier to the Pursuit die roll (which is combined with modifiers for Cavalry differential and Active Morale). The Active Player rolls the die on the Pursuit Table. The modified result tells the number of hexes the force may advance along the path of retreat.
Step 9. Remove Losses. If there is an advance after combat, reduce the strength of the retreating force by an amount equal to the length of the advance, in hexes, of the pursuing force (only one force may pursue). If there is no pursuit, the retreating force loses the same amount of strength as the pursuing force.
Steps 1 through 9 are repeated for every attack.
c. Disorg. and Rally Segment (explained in Section XXI).
B. SECOND PLAYER-TURN
The Second Player now becomes the Phasing Player and accomplishes Command, Movement and Combat functions in the manner and sequence described above, exchanging roles with the First Player.
C. GAME-TURN RECORD
The Game-Turn Marker should begin the game on the Turn Record Track at the space corresponding to the initial turn of the scenario; for the full Campaign Game this is the first space on the track (a shortened Campaign may be begun on 15-16 August). At the end of each Game-Turn the Game-Turn Marker should be advanced one notch to mark the passage of one Game-Turn and signal the start of another. Weather conditions for the upcoming Game-Turn are determined by a die roll referenced to the Weather Chart. The concept of the "Game-Week" is also used during the Campaign Game for determining occurrence of Armistice.
Five: Administrative Points
The Administrative Points, which are allotted to each of the three armies on a turn-by-turn basis, show the effects of an army's administrative and staff functions. Timetabling troop movements, insuring the time and space for bivouacking and foraging, spacing moving columns so as to avoid traffic jams, providing the necessary wheeled transport, are all examples of the administration of an army, without which it cannot function.
Much more is also represented by the APs, however. Included in these are the physical and mental conditions of the Commander-in-Chief of an army and his staff. Bluecher suffered from delusions and a complete breakdown. Schwarzenberg suffered from gout, and Le Tondu himself was a manic depressive. Politics are another factor represented by the AP system: three emperors with three very different interests were present at Schwarzenberg's headquarters.
Further functions depicted are those of supply (the procuring and transporting of arms and food to the place they are needed), communications (if the transmission of orders is faulty or too slow, they might just as well never have been drafted), intelligence (if a commander has no news of enemy movements, he is forced to forestall his own orders until news reaches him), and strategic consumption (detachments along the LOC, reflected in the Admin effect on Attrition).
All of the above factors can hamper the movement of individual forces or an entire army, or halt it altogether; and the Player will be made to function under Administrative systems which are faulty. The player who fails to make the most conservative use of the resources available will be unlikely to win the game.
Administrative Points are used to create Movement Commands, which the Player must expend for each Force if he wants to be certain it can be moved. The Level of Accumulated APs determines the severity of March Attrition for Forces moving under Movement Commands. New Administrative Points are accumulated during the Administrative Segment of the Player-Turn.
How Admin Points Are Received
Admin Points are received during the Admin Segment of the Player Turn. The Player refers to the Administrative Point Pool and rolls the die to determine the point quantity he receives. The die is cross-referenced with the Length of the Line of Communications for the appropriate army, and is modified for Army Morale. If the Line of Communications is currently broken, or exceeds 80 hexes in length (60 hexes for North Army), the army may receive no new Admin Points.
How to Use the Admin Point Pool
Cross-reference the distance between the army's Center of Operations and its Supply Source (on the line for that army), with the die roll (adding the current Army Morale). During the Spring, the Allied Player rolls once each turn, using the line for the Silesian Army during "Armistice/Spring." He begins to roll a second time, for the Bohemian Army, on 19th July. With the arrival of the North Army on 25 August he will roll three times each turn. The number resulting from the roll of the die tells the Player the quantity of Admin Points which are added to his accumulated total. Admin Points may be exchanged for Movement Commands on a one-for-one basis during the Admin Segment.
How to Use the Admin Point Tracks. For each army, use the two markers provided: one indicates "Ones," the other "Tens" of Accumulated APs. These markers are moved back and forth along the track to record the level as it ebbs and flows. Examples: To show "Eleven" APs, place the Tens marker in the Nr. 1 space, and set the Ones marker on top of the Tens Marker. To show "Twenty," place the Tens marker in the Nr. 2 space, and the Ones marker in the Zero space. Use all three sets to show the levels for the armies of Bohemia, Silesia and North, on the same (Allied) AP Track.
Negative APs. The Player may continue to expend APs even beyond the "Zero" level, up to a limit shown on the Attrition Quotient Matrix for each army. Once negative APs are expended, forces out of Dispatch Distance for that army must use the current negative AP column.
Admin Point Pool Index. The index gives the average APs received per turn (minus one per turn), known as the "Index." During the Armistice, or during an army's withdrawal into cantonment, the army is assumed to gain the amount shown on the Index for each turn. The Index for the appropriate length of LOC is multiplied by the number of turns involved and the result, rounding fractions down, is the number added to the AP track at the end of the period. No die is rolled.
Effects on AQT Column of AP Accumulation
"What creates great difficulty in the profession of the land-commander, is the necessity of feeding so many men and animals. If he allows himself to be guided by the commissaries he will never stir, and all his expeditions will fail." —Napoleon
"Napoleon allowed 200,000 men to starve to death in Saxony." —Rogniat
Six: Communications
Admin Points are considered to flow along a Line of Communications from an Army's Supply Source to its Center of Operations, and accumulated Admin Points are considered to reside with the Center of Opns. From there, Admin Points may be converted into Movement Commands, which again are considered to flow along a limited Dispatch Distance from the Center of Opns to the forces for which they are intended. In actuality, the Center of Operations was the place, in the immediate rear of an army, where the hospitals, munitions convoys, and main field parks could congregate in support of operations.
Center of Operations
In order to issue any Movement Commands (or replacements), or to receive new Admin Points, an Army's Center of Operations must be active. In order to be active, it must not have moved during the last two full Player-Turns (one friendly and one enemy), and it must have a Line of Communications. This LOC may be traced only to the appropriate army's Supply Sources (listed on the Communications Table).
At the beginning of each Player-Turn, a Player must announce the level of support that he wishes to give his army by forgoing some or all of the APs that he would otherwise acquire in that turn. The level of "Support" on a given turn determines how many columns he must move away from the column corresponding to his current AP Level when he uses the Attrition Quotient Matrix to determine the result of Attrition die rolls. A Player must choose the amount of Support he wishes to give his army before he rolls for APs. He may choose a level of support that would require the expenditure of more APs than he could possibly receive. After the AP die roll he subtracts the number of APs allocated to Support from the number of APs received that turn. He need not subtract more than the number actually received as a result of that die roll. That is, if he doesn't receive as many APs as he has allocated for support, he gives up only the APs that he did acquire, but receives the shift that he chose anyway. (Exception: A Player can never shift one column to the left of the current, unmodified column unless he has received at least three APs and has subtracted those three APs from his AP total.) A Player never need shift to the right beyond the worst column on the AQT. Once a Player has established the direction and extent of his AQ shift, that shift applies in both the Movement Phase of that Player-Turn and in the immediately following Forced March Segment of his opponent's turn.
| AQ Shift on a given turn | APs subtracted from APs received on that turn |
|---|---|
| one column to the left | -3 |
| no shift | -2 |
| one column to the right | -1 |
| two columns to the right | 0 |
An army with an inactive Center of Opns receives no new Admin Points in the Admin Segment, and may issue no Movement Commands at all in the following Movement Command Segment.
Movement of Center of Operations. The Center of Operations (represented by a unit counter) has 5 MPs, moves just like cavalry, without the option of movement under Initiative, during the Movement Command Segment of the Movement Phase (only). No Movement Commands need be expended to allow movement of the Center of Opns. Unlike all other units, it may always move automatically, every turn.
Dispatch Distance on the turn of Center of Opns movement is determined toward the initial location of the Center of Opns that turn; the Center of Opns may not be moved until all Movement Commands have been allocated. The Center of Opns may not use Extended March. It is not subject to March Attrition. It may not enter an Enemy controlled hex. It is never considered to be part of a Force, does not require a Leader, and does not count against stacking limits. Its presence in a depot hex does not affect the functioning of either. Centers of Operation may be positioned anywhere on a Primary Road Hex. They have no Combat Strength or ZOC, and cannot block the enemy LOC or Dispatch Distance. Center of Opns cannot destroy bridges.
Effect of Movement of Center of Opns on AP receipt. If the Center of Opns was moved in the previous turn, no new APs are received and no APs may be issued. However, units in Dispatch Distance of the Center of Opns still get the benefit of the Accumulated APs when determining Attrition Quotient, and use the column on the AQM corresponding to the accumulated AP total even if the Center of Opns had moved on the previous Game-Turn (i.e. they are not automatically considered out of Dispatch Distance simply because the Center of Opns has moved).
Example: Second Player moves his Center of Operations in Turn 1, and flips it over; in this turn he added APs normally and his forces received Movement Commands. In his Admin Segment of Turn 2, he adds no APs, but turns his Center of Opns back over to its "Active" side. Thus, during his Forced March Phase of turn 2 and thereafter, his Center of Opns is considered to be functioning normally.
Disbanding of Center of Operations. The Player may voluntarily disband his Center of Operations. He simply removes it from the map and places it on the Turn Record Track where it will appear as a reinforcement seven Game-Turns later at the Army's Supply Source. He may disband it only during his Administrative Segment and before rolling for any Administrative Points. While it is disbanded no new Admin Points may be rolled for and no replacements may be added to combat units. All forces use the zero column on the A.Q.M. while it is disbanded. One Admin Point is required to disband the Center of Opns.
Dispatch Distance. Dispatch Distance is the maximum distance, in Movement Points, that a Force may be away from an active Center of Operations in order to receive Movement Commands or receive replacements (see the Communications Table). The path of the Dispatch may be traced through any passable terrain at the Cavalry Movement Cost. The distance is traced from the Center of Opns to the Force Commander.
When determining attrition, worse attrition is suffered if the force is not within Dispatch Distance of the Center of Opns or an active Depot (all friendly Supply Sources are active Depots).
To determine whether a force is within dispatch distance, refer to the Communications Table. This will tell the Dispatch Distance, in Movement Points, for the appropriate army. If the Player can trace a line of Movement from the Center of Operations to the force in question (not the other way around), no longer than the distance shown (as modified for friendly and hostile territory), and if the Center of Operations is Active, then the Force is within Dispatch Distance and may receive a Movement Command (regardless of whether it moves out of Dispatch Distance thereafter).
Effects of Being Beyond Dispatch Distance (i.e. out of Supply). A Force which is beyond Dispatch Distance must use the zero column (or the Army's current AP total, if worse) on the Attrition Quotient Matrix, and receives no Movement Commands. A force within Dispatch Distance may use the column on the AQM appropriate to the army's accumulated AP total, and may be given a Movement Command.
Communications Status of Forces.
- In Communications: (1) Capable of receiving Movement Command, because (2) Dispatch Distance can be traced from Center of Opns.
- In Supply: (1) Incapable of receiving Movement Command but still allowed to use column on AQM corresponding to current Army AP level, because (2) Dispatch Distance cannot be traced from Center of Opns, but can be traced to friendly Depot or Supply Source.
Displacement of Center of Operations. The enemy Player may never capture the Center of Operations (it was too small, and too mobile, to allow that). However, the Center of Operations must be moved whenever it is placed in an enemy ZOC or when Enemy Forces move into or through the hex occupied by the Center of Opns. If forced to move, the Center of Opns is picked up and moved five MPs down a primary road toward its Supply Source. This mandatory displacement is not impeded by the presence of enemy forces; for game purposes the Center of Operations is considered to "fly." If the Center of Opns is forced to "fly" it is out of order (inactive) for the next friendly and enemy Player-Turns.
Depots
Depots (printed on the map) may act just like a Center of Opns, with respect to determining Dispatch Distance, etc. Only the French Player has Depots specially so-called. However, the active and non-active Supply Sources of both sides are also Depots. Any number of Forces may trace Dispatch Distance to a single Depot in one turn, if it is active in the scenario (see the French Depot Table). Any number of Provisional Movement Commands may be transmitted through a Depot if it is in Dispatch Distance of the Center of Opns, and if the force receiving the Movement Command is in Dispatch Distance of the Depot.
Depot Symbology. The number inside the Depot Symbol tells the class of the Depot, as explained on the "French Depots" Table. Dresden has two numbers: one which refers to its Supply Source Class (4), and the other which refers to its Depot Class (3).
Enemy Depots may not be used. Once captured and occupied at the end of a phase, Depots (not Supply Sources) are considered inactive for the remainder of the game.
Line of Communications
A Line of Communications is a line of connected, primary road hexes free of enemy units or their Zones of Control (regardless of friendly occupation), stretching from the Center of Operations to the Supply Source. It may be up to 80 hexes in length, but the longer it is, the fewer APs will be received. If the Line of Communications is broken, or exceeds 80 hexes in length, all forces use the zero column on the AQM, the army may receive no new Admin Points or reinforcements, nor may it create any Movement Commands. A Line of Communications may be traced only along primary road hexes.
Supply Sources
Allied Supply Sources are not printed on the map. Supply Sources of the various armies are listed on the Communications Table. The Supply Source currently in use is designated by the placement of the Supply Source Marker. It may be placed on any 1° road hex on the appropriate map edge. An army may have only one active Supply Source at one time.
The Supply Source is the anchor of the Line of Communications. Any friendly Supply Source which is "active" (see French Depot Table) may be used as a Depot, whether or not it is currently in use as a Supply Source. Every Supply Source on the map (French and Allied) is considered a Depot which may be used only by the friendly player, and only by the appropriate army.
Supply Source Set-Up. The Active Supply Source Marker (and the Center of Opns), of which one each is provided per army, may begin the game at any possible Supply Source, and anywhere within Communications of that Active Supply Source, respectively. (Refer to the following: Communications Table, p.2 of Study Folder, and "Spring Scenario Allied Communications," below.)
Changing the Supply Source
Allied armies may only use Supply Sources listed for them, but they may switch freely from one primary road hex in the appropriate territory to another without delay or penalty. Allied armies may also trace through another army's Center of Opns (see below). To make this latter kind of change, and for the French Player to change his Supply Source, is a process which takes one or more complete Game-Turns to accomplish. To initiate, flip the Supply Source Marker over, to signify that the process is begun, at the beginning of the Admin. Segment. During each succeeding Admin Segment, roll a die: a one or a two indicates that the procedure is complete. While the Active Supply Source Marker is flipped over all forces use the zero column on the AQM, the army receives no new APs, and may issue no Movement Commands or replacements. You may attempt to change the Supply Source at any time.
Change of Dresden Supply Source. Dresden ceases to be a Supply Source on 20 September, unless it has been changed before. At this time Erfurt automatically begins to function as the Supply Source without need for die roll.
Tracing Through Friendly Army's Center of Operations. If an Allied army changes its Communications to go through the other Allied Center of Opns, the distance on the Admin Point Pool would be equal to the distance between the two Allied Centers of Opns and then onward to the other army's Supply Source. NOTE: Even though its Admin Points would be coming through the other army's Supply Source, those points are in no way associated with the Admin System of the other army: They are neither deducted from nor determined on the column of the other army.
Supply Source Garrisons. Each Active Supply Source Marker has an intrinsic garrison of one Strength Point. These garrisons have a Zone of Control, but cannot move (except by the Supply Source Change procedure, in which case the Supply Source Marker is displaced directly from one 1° road hex on the mapedge to another), nor may they attack. If attacked with no other Friendly combat units in the hex, the garrison is eliminated if forced to retreat. (The Marker may be reintroduced at an unblocked Supply Source hex during the next friendly Player-Turn.) If the attacking force retreats the garrison remains intact. In either case the attacking force's loss may never be more than one Strength Point. If other Friendly units defend in the hex their Strength is added to that of the garrison. Friendly retreat still results in the destruction in this case; if the enemy retreats the garrison remains intact (and all losses occur normally). Garrisons receive all the normal benefits of terrain. They may not be repulsed.
Capture of Supply Sources.
- Dresden: The Supply Source hex of Dresden must be occupied at the end of the phase to be permanently eliminated.
- Others: Cannot be permanently eliminated. The Supply Source Marker can be replaced as soon as the enemy forces are removed. If occupied, the Marker may be placed on the nearest unblocked 1° road hex in friendly territory (this would be considered a "change" in Supply Source).
Spring Scenario Allied Communications
Allied Line of Communications in Spring may be traced to any 1° mapedge road hex in Silesia or Brandenburg. Only one Center of Operations is used by the Allies, and for all purposes the Allied army is regarded as "Silesian Army." If you change it from Silesia to Brandenburg, you must roll a die as outlined under "Changing the Supply Source."
Seven: Movement Commands
The Movement Command represents not only the actual order (written by the army's Chief of Staff and delivered by courier to the force Leader), but also the Administrative support for the movement, including procurement of transport, traffic control, liaison, etc. Movement Commands are created and issued to the individual forces of an army during the Movement Command Segment.
Creation of Movement Commands
Movement Commands are created during the Movement Command Segment. The Player deducts one Admin Point from his accumulated total for each Command created. No Movement Commands may be created if the Army currently has no Line of Communications; not even from previously accumulated APs (these remain for use after reestablishment of an LOC).
Function of Movement Commands
Forces which are allocated Movement Commands are guaranteed to be able to move during the Movement Command Segment. (Exception: Provisional Movement Commands, issued through depots.) The only time a force may receive a Movement Command is during the Player's Movement Command Segment. At any other time the force may only move under its Leader's Initiative (cf).
Provisional Movement Commands. These may be issued to any force within Dispatch Distance of a Depot which is itself within Dispatch Distance of the Center of Opns. This issuance is signified in the usual way, by the deduction of one AP from the pool. The effect of the Provisional Movement Command so issued does not guarantee the movement of the force to which issued. Instead, its effect is to decrease the Initiative die roll, for that turn only, of the Leader to whom issued, by 2. Provisional Movement Commands may not be used for Extended March.
How to Issue Movement Commands
In order to receive a Movement Command, a Force must start the Segment within Dispatch Distance of the Center of Operations of its Army. (In the case of a multi-hex force, only one of the hexes occupied by the commander need be within range.) To receive a Provisional Movement Command, the Dispatch Distance is traced to a Depot. Simply announce that the force is receiving a Movement Command (or Provisional Movement Command) and immediately execute its March. One Movement Command is expended for the force, regardless of its total strength or the distance of its March. Exception: A force making an Extended March requires two Movement Commands.
Expending Movement Commands for Extended March
(See "Extended March" under "Movement".)
The force to make the Extended March must be within Dispatch Distance of its army's Center of Operations at the beginning of the Movement Command Segment and must be within Dispatch Distance at the end of its normal Movement. The Player must expend a Movement Command at both times, one for the normal move and one for the additional Movement Points. Thus, it would cost a total of two APs to perform Extended March. Note that the force is required to be within Dispatch Distance only at the two times APs are expended. Note also that "end of its normal movement" is when a Force wishes to enter a hex but would not be able to do so because of the terrain costs, unless it had the additional Movement Points.
Division of Command in the Allied Armies
An Army may only issue Movement Commands to a force in its own army. The breakdown is shown on the Organization Chart; but it will help to remember that the Army of Bohemia consists of Austrian and Russian Leaders and Corps, the Army of the North consists of Swedish and Prussian, and the Army of Silesia of Prussian and Russian contingents.
However, a Commander from one Army may lead a force of another army. If this Commander has no subordinates or Combat units from his nominal army in his force, the Movement Command must come from the army to which the subordinate Leaders and units belong. Similarly, the Admin Level for attrition determination is that of the army providing the Movement Command, not the army of the Commander. On the other hand, if there are Leaders of two different armies under one Commander, one Movement Command must be issued by both armies involved, if they are to move under Movement Command. There is no penalty, though, if the force can move under the Initiative of the commander. In short, the administration of the two armies must be kept completely separate.
Individual combat units may be switched around between the armies freely, though leaders may not permanently change armies. A Leader may have organic units and subordinates of any friendly nationality unless he is listed as the leader of a specific corps; in the latter case he must stick to his own nationality. Thus, you can't have a Prussian Inf Bde organic to a Russian Infantry Corps Leader. [Note that Nationality of French Player units has no effect.]
Eight: March Attrition
March Attrition reflects the many non-combat losses suffered by an army which, in a long campaign like the present one, exceeded losses in combat. Included in these would be detachments to guard communications in hostile territory, losses from disease, lack of forage or physical exhaustion, equipment abandoned in forced marches, particularly in muddy conditions, deserters and stragglers taken in or ambushed, respectively, by the populace. Taken together, these causes are known as Strategic Consumption.
Which Forces Suffer Attrition
Each force is subject to attrition during the March Phase, whether it moves or not, and during the Forced March Phase if it attempts a Forced March, only. Attrition is determined separately for each force.
Attrition Free Movement (see "Unit Type").
How to Determine Attrition Rate
This is a two-step procedure, both steps of which must be carried out to determine how many Strength Points a given force will lose in a given Movement Phase.
Attrition Quotient Procedure. After the force is moved, the Player must cross-reference the total strength of the force in SPs (excluding any Old Guard (OGde) units and cavalry; cavalry attrition is figured separately) with the number of APs remaining at the moment. (If the force began its move out of Dispatch Distance, it uses the "Zero APs" column or the current AP level, if negative.) He then cross-references this with the variety and distance of the March. This gives him the Attrition Quotient for that force. The Player needs this Attrition Quotient in the following procedure, but for now it tells him the average Attrition loss he can expect to suffer (he may decide at this point to modify the force's move). Note that marches with an attrition quotient greater than twelve are not allowed.
Attrition Determination Procedure. For each force, the Attrition procedure must be resolved once during the Friendly March Phase (whether it moves or not) and again if it Force Marches at least one hex. The Player rolls the die on the die roll line corresponding to the current weather, and reduces it by one for the Bonus Point of the force Commander (if any). He then cross references the resulting die roll number with the Attrition Quotient. The result is the Attrition loss to the moving force: the number of Strength Points shown must be removed from the units of the force.
Example: An Allied force of 20 SPs in the Bohemian Army, with five accumulated APs, marching three Movement Points in each of two different March Phases, would average a 5% loss in each Phase; whereas if it marched 5 MPs in one Phase only, it would lose 15%.
Distribution of Attrition Losses. Attrition losses must be distributed as evenly as possible between the different Corps of a force, and as evenly as possible among the units of a Corps during a given phase, but within that restriction each player may single-out units of his choice for attrition losses.
Figuring Cavalry Attrition. Cavalry and infantry may be part of the same force for movement and stacking purposes. However, their strength is not combined when determining attrition. Cavalry in a force must resolve its attrition separately, and only the total cavalry strength is counted (see "Cavalry").
Nine: Leadership
One of the great failings of the French Army was that it had only one great leader. This was not a clear handicap during the blitzkrieg campaigns of the early war years but later, with the increase in size of the theatre of war and the shifting of France onto the Strategic Defensive, entire Allied campaigns were waged on the simple precept that Napoleon was never to be fought in person, insofar as this could be avoided, and that each Allied army would maneuver relentlessly, in the absence of the Emperor, against his subordinates. Any Leader may command a force which consists, firstly, of those units organic to him on the Organization Display (they are considered to be in the same two hexes as their Leader). The number of such units is limited by the Subordination Rating of the Units, which counts against the Command Span of the Leader, printed on the Organization Display next to his name. Secondly, a Leader may command a number of subordinate Leaders, whose Subordination Ratings must also be deducted from the same Command Span. Subordinate Leaders must be in the same Package or any one package adjacent to the force Commander. However, none of these subordinates may presently have Leaders subordinate to themselves: each subordinate Leader's force must consist only of those units on his track on the organization Display.
Initiative Rating
The first number listed next to a Leader's name is his Initiative Rating (see "Ten: Initiative").
Limit on Force Size: Command Span
The Command Span is the second number on a Leader's Display. The number of combat units which may be on a Leader's track, and the number of subordinate Leaders a Commander may have, is dependent on that Leader's Command Span. Each Command Span is a numerical rating which is the basic number of Organic Units the Leader may have. A subordinate Leader may count up to "four" against the Command Span. Thus, if his Command Span is "five" the Commander could have five organic units and no subordinate Leaders, or subordinates with a combined Subordination Rating of "four" plus one organic unit on his own track, etc.
Creating Major Generals Markers
Major General markers can be used to create an on-map force whose Leader is the individual named on a given combat unit.
If you want a Major General Marker, since he is in reality already with the force he is to command, his counter can be instantaneously generated. If his division is eliminated or subsumed into a larger force, his counter must be done away with (it doesn't go to the Center of Operations). Creation of Major Generals is not dependent upon the limit of available markers or tracks.
Maj General Markers are created or removed only during the Organization Segment of a Friendly Command Phase. To create a Maj General, the Phasing Player places an unused Maj Gen on the map in the hex occupied by the force and then transfers combat units from the display of some leader in the hex to the Maj Gen's Display. Note that the Force Commander's Command Span may as a result be exceeded, because of the Higher Subordination Rating of Maj Gen. Thus, Players should be aware of the implications of creating an additional division of command within a Force, as it may alter the structure and capabilities of the force as a whole. To remove a Maj Gen simply reverse the above procedure, replacing the units on the Organic Units Track of some Leader in the hex and removing the Maj Gen Marker from the map.
Types of Major Generals
- Infantry Maj Gens: Where there is no other Leader on the spot, the general of division or brigade named on the combat unit Strength Marker may be pressed into service as a Leader, receiving Movement Commands and representing the location of his unit on the map. Anonymous, letter-coded Maj Gen Markers are provided for this purpose, each of which has a corresponding track on the Organization Display.
The names of the Major Generals are not given on the Maj Gen counter, since they would be identical to the name on his unit counter. Maj Gens have an Initiative Rating of zero; a Major General's force may not voluntarily enter or exit an enemy ZOC, unless they have a die roll modifier.
- Cavalry Maj Gens: Same as above, used for any Force consisting entirely of cavalry which hasn't already a Leader. Cav Maj Gens do have Initiative Ratings. Cav Maj Gens may enter and exit Enemy ZOCs.
Subordination Rating
The third number listed on a Leader's Display is his Subordination Rating. This number represents a Leader's ability to subordinate himself to the authority of a Commander. The Subordination Rating is deducted from the Command Span of the Commander of the force; thus the higher a subordinate Leader's Subordination Rating, the harder he is to control and the fewer Points of the Commander's Span which will remain to be used to control other Leaders and organic units at the same time.
Unit Subordination Ratings. Artillery and Infantry units and march regiments have a Subordination Rating of "one;" Cavalry units and march regiments have a Subordination Rating of "one-half."
Optional Rule: Replacement Leaders: Ney and Macdonald
To increase their flexibility, Ney and Macdonald assigned their corps provisionally to the command of one of their subordinate divisional commanders. The Player may at any time "create" the Leaders "Souham" and "Gerard," placing their counter in the same stack with Ney and Macdonald respectively, provided that the combat units numbered "8th" and "35th" respectively are present, and moving the organic units of the commander to their own tracks. Note: this procedure may not be undertaken when the Commander in question is subordinate to another commander.
The Replacement Leaders may be removed by reversing the above procedure. Similarly, the Allied Player may use either the tracks of Miloradowitsch or of Rajewski and Yermalow to display the Garde and Reserve infantry and represent their location on the map.
Optional Rule: Ney's Chief of Staff, Jomini
Jomini deserted during the Armistice. Make Ney a 4-6-3 in the Spring and a 3-5-3 in the Autumn period.
Movement of Individual Leaders
If a Leader wishes to move without any subordinates or organic units, he may do so without reference to the Attrition procedure and without expenditure of Movement Commands or necessity of rolling for Initiative. The Player simply moves the Leader. In this case he moves like light cavalry. That is, he has 9 MPs during the March and Forced March Phases. His movement is not impeded by enemy Zones of Control. However, if a Leader attempts to move a force under his own Initiative, whether he succeeds or fails, he may not then move independently.
Unemployed Leaders are Leaders who begin the Friendly Movement Phase alone in the hex. Unemployed Maj General Markers are removed from play. Other Unemployed Leaders must move towards the Center of Operations or they must move directly toward a designated friendly force. Unemployed Leaders which reach the Center of Opns are removed from the map, and remain out of play until troops appear at the Center of Operations out of which to create a force.
Elimination of Leaders. Leaders are only eliminated when all of the units with which they are stacked are eliminated in combat or pursuit.
When any Leader with a Command Span of 6 or greater is eliminated, the opposing Player may affect his own or the owning Player's Morale by one Space (see "Changes in Army Morale").
Leadership Bonus Points
The Leadership Bonus Point is shown by a star between the Initiative and Command Span on the leader Display.
In Combat. The Attacking Player may add or subtract one to the die roll, if the leader commanding his attacking force has a Bonus Point. In the case of a multi-leader attack, the bonus of only the Commander may be used.
In Attrition. A Leader's Bonus Point may be subtracted from the Attrition die roll of the force he is commanding.
The Force
A Force (represented on map by one or more Leader markers) may consist of one or more combat units, or of a number of units and Leaders, under the command of a single Commander. A force could consist, at the top, of a Leader with a Command Span of one or greater (such Leaders, when in command of the force, are termed Commanders). He would command a number of combat units organic to himself in combination with a number of Leaders Subordinate to him in the same or adjacent hexes, depending upon his Command Span. These subordinate Leaders would each control only the organic units on their track. Note: In order to be considered part of a force, a unit or Leader must begin the Phase as part of that Force.
Organic Units. Organic Units (Combat and Support units) are always considered to be in the same hexes as their Leader, and are kept on his Organic Units Track on the Organization Display. If they are not to remain with the Leader, they are placed under a new Leader and are moved to that new Leader's Organic Unit Track; this transfer may only happen when both leaders are in the same package.
Reorganizing Units on the Display. Unit assignment on the Organization Display may only be adjusted during the Organization Segment, e.g. the composition of a Leader's Organic Units Track may only be altered during the Organization Segment.
Creation of a Force. For the purpose of movement, the owning Player creates a Force just before he moves it. Each Leader is considered to be an individual Force until the Player states otherwise. Thus, if the Player wished to create a multi-Leader Force he would have to state his intention before moving any of the Leaders involved. This would be done by the Player stating that "Commander X is now moving, and subordinate Leaders include Leaders A, B and G." You can always detach a Leader or Leaders subordinate to a Commander at any point. A Commander may "drop off" a Leader or Leaders of his force in the middle of his movement, and continue on without that Leader to complete his movement (the detached leader would have to remain in the hex in which he was detached). No new Leaders may be "picked up" by a force in the middle of movement. For the purposes of combat, the Phasing Player (only) creates a Force of Friendly Leaders (only) at the instant of combat. Thus, he could move several Forces adjacent to the Enemy and within the Command Span of one Commander and have that Commander lead the attack. Players should note that the concept of the Force only comes into use during the Friendly Movement, Forced March or Combat phase, and that Forces can be re-defined at the beginning of any Phase. Only the active Player selects the units which constitute a Force, and he may do so only for his own units.
Ten: Initiative
The Initiative Rating represents the effects of troop motivation in a particular force and that force Leader's interactive effect upon it. Initiative die roll can be modified by Army Morale.
Initiative is the mental debate within the officer and among his immediate staff, among two courses of action in an unexpected situation when the Commander-in-Chief is not nearby. The first is to stick to the letter of the Commander's instruction; the second is to take advantage of other opportunities arising out of the unforeseen circumstances. Reason demands obedience to the former, intuition pleads an attempt at the latter. Initiative is a rating of intuition, clarity of imagination, as well as simple bravery.
Forces may attempt to move under the Initiative of their Leader. For each such Force, the Player rolls the die and adds or subtracts the current Army Morale. If the result is equal to or less than the Leader's Initiative Rating, the Force may be moved normally. If it is higher, the Force may not move that segment. (This form of Movement is obviously less than dependable, though it does have the advantage of requiring no Movement Command expenditure.)
Exiting Enemy Zones of Control
Another instance in which a Leader will be called upon to move under his own Initiative is when he wishes to exit an Enemy ZOC. Forces in Enemy Zones of Control may attempt to exit during the March and Forced March Phases. If they are to move, Forces which begin the Movement or Forced March Phases in an Enemy ZOC must move under their own Initiative; Movement Commands may not be issued to them. Their Initiative Die roll is modified for Resistance of enemy Leader and Cavalry Differential. Basically, the presence of an Enemy Leader tends to reduce Friendly chances of escaping (see the "Initiative Comparison Matrix") while a preponderance of enemy cavalry has the same effect (see also "Movement out of Enemy ZOCs").
Procedure. The Leader's Initiative Rating must be compared with the Enemy Leader's to obtain a die roll modifier known as the "Resistance Modifier." To this, the cavalry differential modifier is added or subtracted, and this combined modifier is added to or subtracted from the die roll. If the modified die roll is less than the moving ("Active") Leader's Initiative, the force may move.
Pursuit (Advance After Combat)
In a combat situation in which an enemy Force has been forced to retreat, the friendly Leader's Initiative Rating is cross-referenced with the length of that retreat, on the Pursuit Table. The die is rolled on that column, and modified for Resistance Modifier and Cavalry Differential, and the result is the number of hexes the Friendly force may advance (see "Combat-Pursuit."). Note that a force may never advance farther than the enemy force retreated, and that even if the pursuit places the opposing forces adjacent, another attack is not possible.
Initiative Comparison Procedure
The Active Leader is the Leader of the Force which is attempting to exit an Enemy ZOC or pursue. The Passive Leader must be the Enemy Leader in the hex. To determine the Active Leader's Initiative Modifier, simply cross-reference his printed Initiative with that of the opposing (Passive) Leader. The result is the Resistance Modifier. This may be modified by Cavalry Differential.
Eleven: Organization Display
All the pertinent information concerning any Leader or Commander is printed on an individual space on the Organization Display: The name of his command, his Initiative Rating and Command Span. Below this information is a track on which the combat units (and support units) organic to that Leader's formation are placed. Only the Leader is actually ever deployed on the map (although there may be instances when an individual bridging train is deployed directly on the map).
The Organization Displays for each Player are printed on separate sheets. The actual strength of a Leader's units as recorded on their Organic Units Track is concealed from the Enemy Player until revealed during combat. Note that not all Leaders begin the game on the map (see "Replacements-Reinforcements"). All units in place on a Leader's Track are considered to occupy the same hexes as the Leader's Marker.
In addition to the stacking limit, each Leader has a personal maximum number of units which can be placed on his Track, which varies depending on his Command Span and the number of Leaders subordinate to him (see "Leadership").
How to Use the Organization Display
Set the Organization Chart up on the opposite side of the map from the opposing player (names and strengths cannot be read from a couple of yards distance). At the beginning of the game place all combat units in the boxes indicated for them on each Leader's Track. The number in the box indicates the current strength (in Strength Points) of the unit. For example, in Scenarios "D" and "L", General Bluecher begins the game with an artillery unit at a strength of "5" (representing 5 x 16 or 80 guns).
Reorganizing Units on the Display. During a Friendly Organization Segment a unit may be transferred to the Organic Units Track of another Leader currently stacked in the same hex (see "Division of Command in the Allied Armies"). There are no nationality restrictions concerning placement of the French Player's units.
Eliminated Units. Once a unit is eliminated, it may never be re-formed. You can never bring eliminated units back with replacements. (Exceptions: Cavalry Constituents (below) and in the Campaign Game, during the Armistice.)
Austrian Brigades with Both Infantry and Cavalry Constituents. In many cases a unit has both Infantry and Cavalry strength, and thus many units have both Infantry and Cavalry markers. Cavalry Strength is shown by a "c" next to the name; infantry by "i." If the unit has no cavalry strength to start, put the Cavalry Marker aside. Cavalry Replacements could be used to bring the unit's Cavalry Marker onto the track.
Creating and Disbanding Combat Units. Strength may be transferred between units on the Display. The Combat Strength of two or more units of the same type may be amalgamated into a single combat unit, eliminating the others, so long as no unit exceeds its strength at the beginning of the scenario (except in the Campaign Game; see "When replacements may be added") or "three" Strength Points, whichever is greater (except March Regiments). The Combat Strength of a single unit may be divided, part going into another Combat Unit. For this purpose the Player may create a March Regiment placed on the same Track. The Strength of any unit may be increased via the introduction of Replacement Points.
Removing Losses from the Organization Display. Losses called for either in March Attrition or Combat must be distributed throughout the component units in a force as evenly as possible, beginning with the Leader in Command of the force, and proceeding to each Subordinate Leader in turn, each losing one Strength Point, until the specified number has been removed. If Strength has been removed from every leader in the force and the quota has not been fulfilled, begin the procedure again with the commander, taking a strength point from another unit on his track (if any), and from the Subordinates.
Leaders' Organic Units' Maximum Combat Strengths. Leaders with abbreviated tracks (with spaces numbered "1-5" only) may not have organic units stronger than "5" Strength Points. Other Leaders (with spaces from one to ten), may have organic units up to a strength of "13;" strength over "10" is indicated by flipping counter over and starting again in the "1" space to indicate "11," etc.
Twelve: Morale
Morale is the key to victory. This is shown in the Victory Conditions. If the Morale of an Army breaks, with the Morale Marker moving off the "+" end of the track, the cohesion of the Army's units is considered broken; the soldiers have agreed that their cause is lost (or unjust), and have gone home. The Allies have a Morale advantage to reflect their commitment to driving the French out of their homes. The French have only their faith in Napoleon, which after Russia was certainly not unshakable, and after Dresden, widely considered misplaced.
The Morale of the Armies is recorded on the Morale Track. The Morale may either be positive, neutral (which has no effect), or negative. Morale is affected by the outcome of all Pitched Battles in which certain commanders are involved (see "Effect of Pitched Battles on Morale").
Army Morale is tracked for each Player. (Though they have more than one "army," the Allies have only one "Army Morale" for their entire army-group.) Army Morale modifies Initiative and the number of APs received. At start, place the Morale Marker where indicated on the Track.
Effects of Army Morale
Tracked Army Morale Rating is a die roll modifier which applies to the active forces when moving under Initiative or Pursuing. It is also added to the Admin Point die roll, and vital to Victory Conditions.
Effect on AP Die Roll. Each Player adds or subtracts his current Morale Rating to the AP Die Roll before cross-referencing to determine how many APs he receives. The Modified die roll may not be greater than 6 or less than 1.
Changes in Army Morale.
- Allies, Fall of Berlin: move marker one space to left, if French capture Berlin and occupy at the end of a Phase. (If recaptured, move one space back to right.)
- Allies, Fall of Dresden: during the Spring (only), same as above.
- French, Fall of Dresden: during the Autumn (only), move marker one space to the left, if Allies capture Dresden and occupy at the end of any Phase. (Recapture, same as above).
- Either Side, Pitched Battle involving any Leader with Command Span of "6" or greater actually in command of a force (on either or both sides): The winner of such battle decides whether his morale goes up or loser's goes down one space. However, if either side is at the end of its track, the other side's marker must move. To qualify, the "winner" must pursue at least one hex and there must be at least one round of pitched battle before the Pursuit (See "Pitched Battle").
- Either Side, Leader with Command Span of 6 or greater is killed (same effect as the preceding).
Campaign Game Only: Objectives Controlled During Armistice. If the French Player starts in Berlin, or the Allies in Dresden, at the beginning of the Autumn Period, reduce the morale of the opposing side by one before play begins in that period.
Maximum Morale. Morale Marker may not be better than "-2" for the Allies and "-1" for the French. The Morale Marker may not exit the "good" end of the Morale Track.
Morale Victory. The Morale marker may have to move off the "bad" end of the Morale Track (i.e. worse than +2). If this happens, the enemy Player wins the game automatically. However, note this may happen only if the other side's Morale Marker is already at the "maximum" (see above). Also, the "winner" must not have lost any "round" of Pitched or Pursuit Battle in that combat situation. If both sides had lost at least one time in a given combat situation, there would be no effect on either side's morale.
Effect on Unit Identity. French Player forces moving in hostile territory have their identity revealed to the Allied Player (strength remains concealed). Allied Player can simply examine the identity of French Player Leader counters (not combat units or strength) in hostile territory.
Effects on Dispatch Distance. (see Communications Table)
Thirteen: Friendly Territory
Friendly Territory includes everything west of the Elbe (except Bohemia) for the French; Brandenburg, Silesia and Bohemia for the Allies (regardless of which Allied nationality). Saxon, Westphalian and Anhalt-Dessau territory east of the Elbe is friendly to neither side. Territory friendly to the Allies is hostile to the French; but the reverse is not true: no territory is hostile to the Allies.
Fourteen: Movement
Movement takes place during the Friendly March Phase and the Friendly Forced March Phase. The rules of Movement Command and Initiative govern which forces may be moved; all combat units move as part of a force, whose location is denoted by the presence on the map of a Leader. Combat units are never placed on the map. A force may be moved in any direction or combination of directions.
Forces are moved one at a time, tracing a path of contiguous hexes through the hex grid. As a force enters each hex, it must pay one or more Movement Points. Upon completing its move, each force is subject to the Attrition Procedure (cf).
The number of Movement Points which may be expended by a force during a single Phase may not exceed the different Movement Allowances of the different units in the force (except when given an extra Movement Command for an Extended March, cf). Unused Movement Points may not be accumulated from segment to segment or transferred from unit to unit.
How to Move Forces
During the Movement Segments, only the Forces belonging to the Player whose Segment it is may be moved; all, some or none of his Forces may be moved (depending upon the Movement Command and Initiative procedures). No Enemy movement and no combat may occur during a Movement Segment (but see "Repulse").
Movement is calculated in terms of Movement Points. The basic cost in MPs to enter a hex is one Movement Point; the cost varies with the type of terrain in the hex and the type(s) of units in the force. The terrain costs are fully described on the Terrain Effects Chart.
Movement Allowance
A Force may continue to move until any unit in the Force has expended its full Movement Allowance. The full Movement Allowance may be expended during both the March Phase and the Forced March Phase. A Force may add an Extended March of 4 MPs. A Force may never enter a hex unless every unit in the Force has sufficient MPs remaining to pay the full entry cost of the terrain in the hex (plus any additional cost for leaving an Enemy Controlled Hex).
The Movement Allowances of the various unit types are as follows: Regular and Heavy Cavalry = 7 MPs, Light Cavalry and Leaders = 9 MPs, All other 5 MPs.
Old Guard Movement Bonus. A force composed entirely of Old Guard infantry (plus engineers, YGde and cavalry, if any) receives a Movement Bonus of 1 MP; it may thus move up to 6 MPs in one Phase, without resorting to the Extended March procedure (which would allow the Old Gde force to expend another 4 MPs; i.e. up to Ten).
Expending Movement Points
A Force expends Movement Points in order to move from hex to hex on the game map. A force would normally expend one Movement Point to enter a hex. This might be altered depending on the terrain of the hex or the hexside crossed to enter that hex.
A Force is moved by displacing the Leader from hex to hex, paying the terrain cost for each hex from the Movement Allowance of each unit type in the Force. When a Force includes both infantry and cavalry and it enters a hex which requires a different expenditure of Movement Points for each, the Player must make the appropriate expenditure from each type and make a mental note as to the number of Movement Points remaining to each type.
Movement of a Multi-Leader Force. Movement of such a Force is in the same manner as explained above. Simply move the stack of Leaders through the path of hexes to be taken, expending Movement Points for each hex.
Movement of a Multi-Package Force. It is not necessary that each stack enter the same hex as the Commander's stack; neither need each stack remain within one hex of the path taken by the Commander. The only requirement on units which begin the March Phase as part of a single force is that they all be adjacent at the end of their march. Thus each stack is moved, and its Movement Point expenditure is calculated, separately. Consider the number of MPs expended by the Force as a whole to be equal to the larger amount expended by any one stack in the force (again keeping separate track of cavalry and infantry expenditure), unless you wish to "drop off" one stack along the way.
Movement Inhibitions and Prohibitions. A Force may never enter a hex occupied by an Enemy combat unit unless it first repulses the enemy. A Force which enters a hex containing no enemy combat units may displace the occupying Leaders to any adjacent hex of the non-moving Player's choice. If a bridging train is in such a hex (deployed or not), it is not displaced; but is automatically captured by the entering Force and may be placed on a present Leader's Organic Units Track.
A Force may freely enter (see "Force Integrity") and/or move through hexes containing other Friendly Forces. A Force does not expend any additional Movement Points to enter or leave Friendly-occupied hexes. A Force may never be moved off the mapedge, except through voluntary Withdrawal into Cantonment (cf), or unless required to retreat off the map. In the latter case, the Force re-enters the map in its following Movement Phase at the nearest possible mapedge hex. Pursuit of such retreating Forces must end at the mapedge hex.
When Movement Takes Place
A Player's Forces may be moved only during his own Movement or Forced March Phases. The one exception to this is when, during the Combat Phase, a Force involved in combat may be called upon to advance or retreat after combat. Once a Force has been moved, and the Attrition it suffers has been determined, it may move no farther that Phase, nor may it take back or change its move.
Extended March
Extended March occurs when the owning Player wishes to increase the Movement Allowance of his Force by as many as four additional Movement Points for each unit. In order to do this, the Force in question must be within Dispatch Distance at the end of the normal march (see "Expending Movement Commands for Extended March"). If it can receive the mandatory additional Movement Command, the Force may continue another four Movement Points along the way; note that the Movement Allowances of both Infantry and Cavalry are increased by 4 MPs during Extended March. Attrition for the force is determined only once, at the end of Extended March. Forces moving under Initiative may not make an Extended March.
Forced March
Forced March is simply movement of a Player's Force during his Forced March Segment, which occurs within the Enemy Player's Combat Phase. A Force may only move by its Leader's Initiative during Forced March. It may not use Extended March. It may not enter an Enemy Controlled hex unless the Enemy Force controlling that hex is already in a Friendly ZOC. In this case it must be adjacent to the Friendly Force already there.
Stacking
There is no stacking limit. However, maximum force size is 68,000 men (68 SPs), for Movement Purposes, and up to 68 SPs could occupy a single package. More than 68 SPs may combine in a single attack, if possible. The number of SPs which may pass through a hex is unlimited.
Suggestion: Leaders stacked together may be removed to the Organization Display of their Force Commander off map; they should be placed in the space on his track corresponding to their Subordination Rating. Thus, the Player can tell at a glance, by counting the Subordinates and Combat units on the track together, how much of the Commander's Span remains unused.
Overlapping Units. This is not allowed. Stacked units must both occupy the same two hexes. Such a stack is termed a "Package" (cf).
Force Integrity. Two Leaders may not be stacked in a single package unless one of them is a Commander capable of commanding the other, or a third Commander/Leader is in the package or adjacent, and actually in command of both Leaders stacked together. Exception: Two Forces without a capable Commander may end the Movement Phase in the same package if organic unit reorganization in the following Reorganization Segment removes all organic units from one of the Leaders. (Players must be careful to insure that a Commander's Command Span is not exceeded.) Further, a Leader stacked with the Commander of one Force may not be subordinate to another Commander in another package. Thus, two Forces may not end the Phase in the same hexes (see exception above). Therefore, all the Leaders in a hex will always belong to the same Force, unless the two forces can be consolidated in the next phase. Two separate and distinct forces which begin the phase in the same hex may not remain stacked together; this applies during Combat Phases as well as movement. In this case the excess Leaders unable to be combined under a single Commander's Span are displaced to an adjacent hex.
Overstacking Penalty. The Owning Player must choose, in the case of more than 68,000 men occupying a single package, units from the over-stacked package to be displaced in the direction they entered the hex from, and must displace units until the stack is in conformity with the stacking limit. This must be done at the beginning of any combat phase; during Movement, the over-stacked forces must simply separate.
Stacking Effects on Combat and Retreat. Units stacked in a single hex always defend as a combined strength. Units stacked in the same hex may never attack different hexes. Units in a Force must all attack the same hexes.
Units may not retreat into or through Friendly-occupied hexes: if such a hex is the only alternative to a Force retreating after combat, the non-retreating Force must be Displaced (cf), to an adjacent hex, and then the retreating Force may pass into the vacated hex.
Repulse
During the Movement Phase (only) the Phasing Player may attempt to Repulse the Enemy Forces in the path of any Friendly Force or Forces. The Phasing Player may exercise this option for any Force which he suspects has the necessary overwhelming odds. He must state which enemy Forces are being repulsed. In order to be excluded from the Repulse attempt, all other Enemy Forces adjacent to the Repulsing Force must be attacked or repulsed by other Friendly Forces during that same Player-Turn.
A successful Repulse requires seven-to-one odds or greater. The Repulsed Force simply retreats two hexes and neither Force takes any casualties.
Repulse attempts may be announced during the course of Movement. Simply move adjacent to the object Force (do not yet determine attrition for the moving Force). When the attempt is announced, the opposing strengths are revealed immediately. The two hex retreat is carried out if the odds are sufficient. If odds are six-to-one or less, the confrontation is resolved as a Pursuit Battle (not a Pitched Battle) during the battle segment, with the die rolled on the column two columns to the left of the actual odds.
If the Repulse attempt is successful, the Repulsing Force is entitled to march into the hex vacated by the Repulsed Force, and continue its march in any direction. There is no extra MP cost for Repulse. This march is considered a continuation of the Force's march, and hence it must afterward determine the attrition for the total of all Movement Points expended before and after the Repulse.
The Repulsing Force may march adjacent to other Enemy Forces after the successful Repulse, and may participate in or undertake attacks against any Enemy Force(s) to which it moves adjacent; it may even attack the Repulsed Force, or Repulse it again.
Fifteen: Facing and Unit Mode
"Column" and "Line" are terms of convenience; what is represented by the two possible unit modes is the difference between the extended array used by a force when marching (in reality being spread-out across a width of ten miles and a depth of perhaps thirty) and the concentration of this array for battle on a given frontage. Inducing the enemy to commit his troops to a false front was part of the Napoleonic method.
Leader Counters have two sides: in column, their identity is hidden from the Enemy Player; in line, their name shows. When in column, a unit has a "front" of 5 adjacent hexes; in line, the front is three. There is a cost of one-half MP to change facing, and it can be done during any friendly Movement Phase (March or Forced March).
Front of a Unit
In movement, a unit may enter the hex(es) its front faces. In addition, if in column (only), it may turn to one hex on either side (see diagram). If in line, it may turn by moving forward only one half the counter (left or right side). The direction of facing can be reversed (i.e. from east to west) at a cost of one-half MP (this does not change the unit position). To change direction or mode (any change or combination of changes not requiring displacement of the unit from the hexes it occupies) costs one-half MP.
Definition of Forward Movement. (Diagram: a Column unit has five hexes it can enter, the front hex and the two hexes on each side of it, marked "x"; a Line unit has the three hexes along its front marked "x".) A unit can enter any hex marked "x" when in the type of formation listed. A unit can enter "y" hexes only by reversing facing at a cost of 1/2 MP, and the side hexes ("dots") only by changing mode.
Column and Line Formations
According to which side of a Leader counter is showing, the troops in that Leader's force may be considered either in Column or Line. The cost to change formation is one-half MP. Attack strength is halved for improper facing, and formations have inherent facing.
Movement in Column. When in column, the rear half of the unit is considered to "follow" the front half. All turns are made at no extra cost. When moving a unit in column, completely disregard the following half. The only requirement is that at the end of movement, the following half must be in the hex the leading half of the unit entered its final hex from. Direction of facing may be reversed at a cost of one-half MP, at the end of the march, except if ending in enemy ZOC.
Movement in Line. When in Line, both halves of the counter move forward together, paying Movement Points only for the half which moved through the most costly terrain. Example: a unit in Line moving with one half on a road and the other half off it does not get the road benefit. In Line, a unit may only enter hexes it is facing. A turn (wherein only half the unit displaces into a different hex) still costs the full MP cost of the hex entered by that half. (The manual's diagram examples show that, in a given type of terrain, such a turn costs the same as a straight advance into that terrain.)
Changing Mode in Enemy ZOC. To make a change when you begin the Phase in an enemy ZOC requires a successful Initiative Die Roll, in order to expend the necessary 1/2 MP. The Force making the Mode change could then remain in place or continue to move out of the package. Mode cannot be changed at the end of march when in enemy ZOC (see "Movement out of Enemy ZOCs").
Effect of Mode Change on Facing. Note that the front of the package changes 90° with mode change (a counter facing right in Column becomes one facing up or down in Line, and vice versa). The position of the package does not change when it's flipped over.
Mode Change in Retreat/Pursuit. In Pursuit, you always advance the number of hexes, regardless of mode; retreating and Pursuing Forces may change mode during retreat/pursuit freely.
Facing Effect on Combat
The classic Napoleonic battle involved inducing the defending side to commit all its reserves at right angles to its front by placing a flanking force toward the defender's rear, whereupon an assault upon the resulting "hinge" in the defender's line habitually met with resounding success. To show this, however, it is not necessary (and, at this level, would be somewhat misleading) to depict the actual facing of the forces as it relates to combat, for the corps formations we are concerned with were capable of protecting their flanks by committing their own reserves thereto. It was only after this induced commitment that the real effect of the flanking gesture was felt: the lack of reserves to meet a new attack on the hinge. All that is required in our present application is a rule showing that a force, any one hex of which is surrounded by enemy forces or their Zones of Control, when forced to retreat, has its normal loss due to pursuit doubled. In complying with this regulation, Players will find it necessary to place a "flanking" force toward the enemy rear, though for purposes of the formulation in the following rule, the terms "front," "flank," and "rear" are irrelevant. Facing is thus completely disregarded during combat: A defending stack may be attacked from front or rear with no effect.
The only consideration concerning facing in combat is that it shows which hexes a force may attack without penalty: a force may attack any one or more hexes it faces, so long as every enemy Force adjacent to any side of the force is attacked by some Friendly Force, and that all Leaders participating in a given attack face the same defending stack and are all adjacent to the same Commander. (Note also the effect of unit Mode on Combat.)
Facing and Combat
If the attacking force consists of two packages, they must be adjacent, through at least one hexside, to each other. Facing does not affect the defender. However, if the attacking Force does not "face" the defender it attacks, if required to do so, at halved Combat Strength.
Two Leaders in the same package cannot attack different packages. Two Leaders in the same package cannot be attacked separately, and there may only be one commander per package.
Note that you can ignore facing if you're in column, as you are halved (see "Combat Effect of Unit Mode").
Terrain and Facing. A stack occupying two hexes divided by a river is halved in Defense Strength. Facing does not affect forces inside fortresses.
Attacking Forward. The Front of a unit determines which hex or hexes the unit may attack at full strength; it may attack a hex not to its front only when forced to do so.
A Friendly Force adjacent to an Enemy Force which is not being attacked by some other Friendly Force, and which is itself unable to change to face that Enemy Force, automatically attacks at halved Combat Strength.
Combat Effect of Unit Mode
A Force in column is halved in Strength. Exceptions: If the force is already halved due to having a river bisect its package, or due to attacking a package it does not face, or is reduced in strength for any other reason (e.g. mountains), there is no further effect for being in column.
Cavalry Strength Exemption. Cavalry Strengths, unlike Infantry and Artillery, are not affected by the halving of strength Penalty for being in column during combat (only).
Halving Strength. When Halving Strength, for whatever reason, always round defender's strength up, attacker's strength down.
Intelligence
Leader Identity. Leader counters moving across the map stay inverted, and their identity hidden from the Enemy Player, while in column. Their identity must be revealed for as long as they remain in Line, or for as long as they remain adjacent to Enemy units. If an Enemy Force moves through their ZOC, or vice-versa, their identity is revealed and again immediately concealed.
Effect of Hostile Territory on Intelligence (see "Hostile Territory").
Optional Rule: Dummy Counters
The Allied Player may place one Dummy Leader on the map for every actual Leader he has on the map. The French Player may place one dummy Leader for each two actual Leaders he has on the map. Dummy Forces are moved and in every way behave like real forces until their identity is revealed; at this point they are removed from the map (but may be replaced in the following turn). If the number of forces a Player has is reduced, he must reduce his number of Dummys. Dummys can be placed anywhere within Dispatch Distance.
Limit to Dummy Counters. The number of Dummy Counters which may be deployed is limited to those provided in the counter mix (32 for the Allies; 16 for the French).
Sixteen: Terrain
Effects of Terrain on Movement
The basic Movement Point cost is one Movement Point per Clear Terrain hex. The cost to enter certain non-clear terrain hexes and/or cross certain hexsides may be more or less than one MP, as shown on the Terrain Effects Chart. Terrain costs are cumulative.
Roads and Rivers. A Force which moves along a road across a road hexside pays the rate for that type of road (primary or secondary), regardless of other terrain in the hex. A Force may cross a primary River hexside only through a Bridge hexside (for which there is no additional MP Cost). Secondary River hexsides may be crossed at the MP cost noted on the Terrain Effects Chart. For purposes of movement and Combat, crossing of bridges must be done in column.
Variable Movement Point Costs. Some Movement Costs, shown on the TEC, are different for cavalry and infantry. Cavalry costs are applicable only to cavalry units, Centers of Opns, Leaders moving independently, and when calculating Dispatch Distance.
Effects of Terrain on Combat
Except for fortresses and rivers, which are special cases, when the package occupied by a counter is in split terrain, the defender gets the maximum benefit afforded by either hex. Note the separate case for a package split by a river; river benefit is only enjoyed if all hexsides between attacker and defender are river hexsides. A counter must occupy both hexes of a fortress to enjoy the benefit.
When a force is defending in "Affecting" Terrain and/or attacked exclusively across River hexsides, the Combat odds are located on the "Affecting" Terrain Line on the Combat Results Table. Units may attack across Primary River hexsides only if bridged on the hexside and may only make Pursuit Battles across them. To attack across a bridge, the attacking force must be in column. A Force may ignore the bridge and attack across a 2° river in line.
Affecting Terrain. Affecting Terrain includes all Fortified Town, Hill and Mountain hexes when the defender is in the hex, or secondary River, and Bridge hexsides attacked across. Use the "Affecting" line on the CRT. Non-affecting Terrain includes Clear, Towns, and Swamp (but see effects below). There is no cumulative benefit for hex and hexside Affecting Terrain.
Marsh Effect on Combat Strength. The Strength of units attacking out of such terrain is halved (rounding fractions up). Marsh is not Affecting Terrain. Strength of units defending in Marsh hexes is not affected (exception: see Cavalry Effects below).
Effect of Mountains on Tactical Deployment. A maximum of three Infantry and no Cavalry or Artillery units may attack from a single Mountain or part-Mountain package. This limit does not apply to defenders in Mountain hexes. (Note that this Attack Limit is not a Stacking Limit; units in excess of the Attack Limit are affected by adverse combat results, remaining with the Force and being affected by the combat result (they may pursue if their force wins).) Defending units in Mountain hexes receive the benefit for Affecting Terrain. (There is no effect on defending unit's strength.)
Fortified Towns Effect on Combat (see Section Twenty-three).
Effects of Terrain on Cavalry Strength. Cavalry Strength is halved when defending in (or attacking out of) Marsh hexes. Cavalry units may not attack or pursue out of Mountain hexes. When halving Strengths, round fractions down when attacking, up when defending. The Combat Strength of Cavalry units is also halved when attacking into, or defending in Woods hexes.
Seventeen: Zones of Control
A package (two hexes) and the eight hexagons immediately surrounding it constitute the Zone of Control (ZOC) of any units therein. Hexes upon which a Force exerts a Zone of Control are called controlled hexes. ZOCs halt Enemy Movement. Enemy Forces are compelled to attack when in a Friendly ZOC at the beginning of their own Battle Resolution Segment. Depending upon his Individual Initiative (as modified), a Leader and his Force may exit an Enemy Controlled hex during either the March or Forced March Phases. A Force may be compelled to retreat or advance out of an Enemy ZOC during the Combat Phase. Zones of Control do not extend across non-bridged Primary River hexsides.
When Forces Exert Zones of Control. All Forces exert a Zone of Control at all times during the game unless the Force has no combat units in it. (See also "Supply Source Garrisons.")
Effect on Infantry Maj Gens. A Force led by an infantry Maj Gen may not enter an Enemy ZOC (even a Friendly occupied one), unless he has a negative Initiative Die Roll modifier of at least "-1".
Extent of ZOC Influence
The presence of Enemy ZOCs is never negated due to the presence of Friendly units or their ZOCs, and it endures throughout the Game-Turn. Adjacent Enemy units are equally and mutually affected by each other's ZOC. There is no additional effect from having more than one Force exerting its ZOC into a single hex.
Repulse. An Enemy Force may be Repulsed (cf) during the Friendly Movement Phase. The effect of Repulse is that the Repulsed Force in no way impedes the Friendly March.
ZOCs and Terrain. The only terrain feature which blocks the Zones of Control of a Force is non-Bridged Primary River hexsides (see the Terrain Effects Chart).
ZOCs and Command. A Line of Communications or Dispatch Distance may never be traced into or out of an Enemy Controlled hex, regardless of presence of other friendly forces in ZOC. (This means that forces in enemy ZOCs may only move by Initiative.)
Effect of Zones of Control on Combat
A Force in an Enemy Controlled hex at the start of the Battle Segment must attack at least one Enemy Occupied hex. All enemy forces in Friendly ZOCs must be attacked by a Friendly Force.
Retreat into Enemy ZOCs. A Force may retreat into an Enemy Controlled hex (if permitted by the priorities under the Path of Retreat rules). A Force does not have to cease retreating upon entering an Enemy Controlled hex. However, such a Force must double its total losses caused by Enemy Pursuit.
Pursuit Effects. A Force entitled to advance after combat may ignore any and all ZOCs along its path of advance.
Movement Out of Enemy ZOCs
A unit is required to stop expending Movement Points upon entering an Enemy Zone of Control during the March and Forced March Phases, and remain in that enemy controlled hex for the remainder of that Movement Segment (without changing mode). It may leave in a subsequent Segment. There is a Movement Penalty for exiting Enemy ZOCs; there is no extra cost to enter. To exit an Enemy ZOC costs two additional Movement Points beyond the cost of entering the adjacent hex (exception: see below). A Force may never move directly from one Enemy Controlled hex to another (unless advancing or retreating after combat).
Initiative for Purposes of ZOC Exit. A Force in an Enemy controlled hex may move only under the Initiative of its Leader; it may not be issued a Movement Command. In addition, the Leader's Initiative may be adversely affected by the Initiative of the adjacent Enemy Leader. To determine the Initiative die modifier which the exiting Leader has, use the Initiative Comparison Matrix. If more than one Enemy Force controls any hex occupied by the friendly force, use the enemy Leader with the highest Initiative Rating for reference. Add the Cavalry Differential: In this case, total the cavalry in both enemy packages in determining the Cavalry Differential Modifier (see "Cavalry Differential Initiative Modifier").
Exceptions to Enemy ZOC Movement Penalty.
- Tiny Forces: A Force of only one Combat Strength Point does not compel an Enemy Force exiting its ZOC to expend any additional MPs for that purpose. A Force of two Combat Strength Points requires an additional MP cost of one MP (only) to exit its ZOC (exception: below).
- Cavalry: Cavalry units never pay any additional MP cost to exit an Enemy ZOC unless there is enemy cavalry (any amount) in the control-line hex. If there is any amount of cavalry (even one or two Strength Points) in a hex, all units must pay the full two additional MPs to exit its ZOC.
Eighteen: Combat
"You see that two armies are two bodies which meet and endeavor to frighten each other; a moment of panic occurs, and that moment must be turned to advantage ... it only requires a slight opportunity, a pretense, to restore confidence." —Napoleon.
By using the following procedures, adjacent opposing units inflict losses on one another. The Players first decide the type of battle being fought. In a Pursuit battle the Phasing Player makes a single attack on the Defending Force. In a Pitched Battle, after the Phasing Player attacks the Defending Force, the non-Phasing Player Counterattacks, and combat between the two Forces may continue for a number of alternating attacks and counterattacks. At the end of either type of battle the losing side must retreat and the victorious Force pursues. After all combat for the Phase has been resolved, all retreating forces roll to see if they become disorganized, and all currently disorganized forces roll to see if they rally.
All Enemy forces in Friendly Zones of Control must be attacked by the Phasing Player's units in the Combat Phase. All of the Phasing units adjacent to the Enemy must attack at least one Enemy occupied hex to which they are adjacent. (Non-phasing forces may counterattack, but are not required to attack all enemy forces adjacent.) Before resolving any Combat both Players must secretly and independently choose which type of battle they wish to fight in each combat situation (see below), and the Player attacking or counterattacking may resolve artillery fire (refer to "Artillery-Use in Combat").
How to Determine Combat Odds
After artillery fire has taken its toll, the attacker totals the Combat Strengths of all units attacking a given hex and compares the total to the total Combat Strengths of the defending units in the hex under attack. The comparison is expressed as a ratio between attacking and defending Strength Point totals (attacking Strength divided by defending Strength) and is simplified by rounding off (in favor of the defender) to one of the odds ratios shown on the Combat Results Table (CRT).
Example: If thirteen Strength Points were attacking four, the combat odds ratio would be 3.25 to 1, rounded off to three to one (rounded down). You may not voluntarily reduce the Combat Odds.
Having determined the actual combat odds, the Player locates the corresponding odds heading on the line for the governing terrain, and rolls the die, modifying the result for the attacking Leader's Bonus Point (if any). The resulting number indicates a line on the Combat Results Table, which is cross-indexed with the column representing the combat odds. The intersection of line and column yields the Combat Result. How this result is applied, and whether the defending Player counterattacks to continue the combat, depends on the type of battle chosen by the Owning Player of each Force. Each separate combat situation may be resolved in any order that the Phasing Player wishes, so long as each combat is fully resolved before proceeding to the next, and all enemy forces adjacent to Phasing forces are attacked during the Combat Phase.
Pursuit Battle
Every battle is a "Pursuit Battle" unless the loser has chosen "Pitched Battle" for that situation at the beginning of the Combat Routine. In a Pursuit Battle the losing force will retreat and have its losses determined by the Pursuit of the victorious Force. The Combat Result will give two numbers, one of which indicates distance in hexes the losing force must retreat; the other indicates the number of Strength Points lost by the victorious force (the retreating force's result is printed in italics). This result should be applied, and the Pursuit procedure carried out, before going on to resolve any other combat.
Pitched Battle
At the beginning of the Combat Routine both Players secretly choose which type of battle each Friendly Force involved in a combat situation will fight. These choices may be written down, or (if the Players can trust one another) simply stated before each battle is resolved. Once made, a Player's choice may not be altered until after the first "round" of Pitched Battle. Pitched Battle allows a Force to convert retreat results into Strength Point losses, thus compelling the Defending Force to counter-attack. This option may only be used by Forces that chose Pitched Battle at the beginning of the Combat Routine. In any Combat situation, Pitched Battle will continue only so long as the retreating side chooses (and is able) to remain in place. As with Pursuit Battle, the initial attack by the Phasing Player will produce a Combat Result of two numbers. If the retreating Force chose Pursuit Battle at the beginning of the Combat Routine then no Pitched Battle occurs; the losing Force simply retreats. If, however, the retreating force chose Pitched Battle, then no retreat occurs and the combat result indicates the number of Strength Points lost by each Force. After these losses have been applied the non-Phasing Player immediately counterattacks with all (surviving) units which defended against the original attack. This attack must be made against at least one stack of enemy units which made the original attack. The odds for this counterattack are calculated in the usual manner (allowing for artillery fire before determining strength), and are modified by affecting terrain and/or any Combat Bonus of the counterattacking Leader. The results of this and all subsequent attacks and counterattacks between the two Forces may be applied as if it were either a Pitched or Pursuit Battle, at the retreating Player's option. If the Player who loses the counterattack chooses to continue the Pitched Battle then the Phasing Player must repeat his original attack (on all defending hexes) possibly causing the non-Phasing Player to counterattack again. This alternating sequence of attacks and counterattacks continues until one force retreats (and has its losses for that particular combat determined by Pursuit).
Restrictions on the Type of Battle Chosen. Pitched Battle may not be conducted across 1° river bridges.
Infantry and Cavalry Major Generals may never choose Pitched Battle (i.e. they must retreat if such a result is indicated for them on the Combat Results Table). Of course, such Leaders could participate in a Pitched Battle if they were under a Friendly Commander's Force. The number of attacks (or counterattacks) a Force may make during a Pitched Battle may not voluntarily exceed the Initiative Rating of the Force Leader (for multi-Leader forces, use the Initiative of the Force Commander). For example, Lt. Gen. Osten-Sacken, with an Initiative of "3", could make no more than three attacks (or counterattacks) in any given Pitched Battle. If such a limit is reached and the Force is still required to attack or counterattack, it may continue to do so, but must retreat as soon as any Combat Result is obtained calling for the Force to do so (that is, once this limit is reached the Force may no longer convert retreat results to Strength Point losses and thus remain in place).
You always complete all the rounds of one Pitched Battle before going on to begin to resolve the next battle.
If a Force is entirely eliminated in a Pitched Battle, the winning side may advance into (but not beyond) the hexes occupied by the eliminated Force.
Remember: The loser of the round of battle is the Player who receives the italicized combat result. His choice, alone, always determines whether Pitched Battle will begin (or continue), according to whether he opts to take strength point losses or retreat. However, it is the Defender (the non-Phasing Player) who always makes the first counterattack, regardless of who lost.
Which Forces Attack
No Force may participate in more than one combat situation per Combat Phase. Although Forces engaged in a single Pitched Battle may attack and be attacked more than once per Phase, they may do so against only one opposing force. Combat is mandatory between adjacent opposing Forces. A Force in an Enemy ZOC at the beginning of the Battle Resolution Segment must attack at least one Enemy Occupied Hex (but see "Multi-Force Combat," below). All Enemy Forces adjacent to Phasing Forces must be attacked by a Phasing Force. The Phasing Player may choose which attacking units will attack each defending Force, as long as all adjacent opposing Forces are engaged by some Phasing Force, and as long as all opposing Forces are adjacent to each other. Non-phasing counterattackers need attack only one adjacent stack. All units which are attacking a given stack must belong to the same Force at the beginning of that Battle Segment. And every counter in the Force must be adjacent to the Enemy package being attacked; non-adjacent forces may not participate.
Multiple Force and Two-Package Combat
A Force must combine in a single attack; the strength of all units in the Force is totalled. Even if the Force occupies two packages, it may not separately engage Enemy-occupied packages. If the attacking units in the different packages are subordinate to a single Commander, he is considered in Command of each package. A defending Commander can only apply his Initiative for Pursuit to combat involving his own package.
A single combat may involve attacking or defending leaders in any number of different locations, so long as all of the attacking leaders are part of a single Force. To be resolved as a single combat, all of the attacking Force must be adjacent to at least one hex of each defending package. Two separate Forces may not make one combined attack; these attacks, on separate packages, must be resolved separately. Two or more separate defending stacks may be attacked simultaneously, in one combined attack, by an Enemy Force which occupies a hex adjacent to both Friendly defending Forces.
A force may never be attacked more than once in a given Combat Phase, and different Leaders in the same package may never be attacked separately.
Multi-Force Combat. Often a Player will have more than one Force adjacent to an Enemy-occupied package. The additional Forces may not add their strength in an attack against the defender, although the additional Forces would suffer any adverse results along with the Force actually attacking. In other words, a Player may have more than one Force adjacent to the defender, but only one force may use its Combat Strength for the calculation of the Combat Odds. (A diagram shows an OK attack by one force, and a not-allowed combined attack.)
Different Forces or units in a package may not be attacked separately. If the Phasing Player's Force is in the Zone of Control of more than one Enemy stack, it must attack all those adjacent enemy stacks which are not engaged by some other attacking Force. A Player may attack only those hexes to which his Forces are actually adjacent.
NOTE: The word "adjacent" as applied herein means that two opposing packages share at least one common hexside (examples are shown in diagrams, each pair showing an example of adjacence). The term does not refer to units across an unbridged primary hexside from each other; attacks are not allowed across such hexsides.
Combat Casualty Procedure
Losses called for in the Combat Results and Pursuit Procedures must be allocated to combat units on the Organization Display. Once a unit is eliminated, it remains out of play.
After rolling the die on the CRT, remove the losses called for for the non-retreating side (for both sides if the loser chooses to continue a Pitched Battle). If the loser will retreat, execute the retreat, removing no losses for now from the retreating side. Then go through the Pursuit Procedure, and determine whether the advance will extend the same distance as the retreat. If it does, the retreating force loses the full amount shown on the CRT (the number equal to the length of its retreat). If it does not, the retreater's losses are equal to the actual advance of the Enemy Force, but they must at least equal the loss taken by the Enemy. Put another way, the retreating Force takes the full loss shown on the CRT only when at least one Enemy Force involved advances the full distance of retreat along the Path of Retreat. If this does not occur, the retreating Force loses either the same number of Points as the Enemy or a number of SPs equal to the actual advance, whichever is greater.
Distribution of Losses. (See "Organization Display-Removing Losses.")
Calculating Lost Strength. Loss Calculation is always based on a unit's basic strength as shown on the Organization Display. No additional strength derived from terrain may be considered "lost" for pursuit or any other causes.
The Combat Strength loss which units take is the net effect of a series of events which would occur immediately after the battle and throughout the next day. First, many battalions, regiments and even entire brigades would have been "broken" in shock (hand to hand) combat and lost any cohesion or effectiveness. The Leaders would spend the next day attempting to rally the individual troops from these broken formations and reorganize them; the retreating army could only undertake this procedure beyond the limit of pursuit by Enemy Forces. But the farther away from the battlefield it takes place, the fewer men will eventually find their way back to their units. Inevitably, even for the side which retains possession of the battlefield, numbers of troops will be hopelessly and permanently lost, not only due to reorganization problems but, of course, also due to casualties resulting from enemy fire. But of the two types of strength loss (e.g. disintegration due to shock combat and wounds inflicted on individuals due to fire combat) the former is the more significant.
Effect on Morale of Pitched Battles. For each combat situation in which at least one "round" of Pitched Battle is resolved (that is, the loser at least once converts his retreat loss into combat strength points lost, and the defender counter-attacks), and at least one side's Force Commander has a Span of "six" or greater, and at the end of the combat one side pursues at least one hex, and that side did not lose any combat within the rounds of that Pitched Battle situation, there will be a change in morale. If all four conditions are met, the Pursuing side is considered the victorious side, and the victorious Player may make a change in either the French or Allied Morale Marker, one space at his choice. He may not move both markers at once. He may decide either to move his own Morale marker to the right, or to move the Enemy Morale Marker to the left, within the restrictions concerning the movement of the Morale Marker off the Track (see "Morale Victory").
Nineteen: Retreat After Combat
When the Combat Result requires that a Player's Forces be retreated, he must move them the full number of hexes shown. Units stacked together must remain together. Retreat is in terms of hexes (not Movement Points), but the easiest hex (in terms of MP cost) must be chosen along the Path of Retreat (see "Priority of Retreat Path").
Retreat Through Enemy ZOC. If any one package of a Force is completely surrounded by Enemy Forces or ZOCs, that Force may retreat through an Enemy controlled hex (never through an enemy-occupied hex). However, Forces which do retreat through Enemy-controlled hexes have their losses due to Pursuit doubled (see "Zones of Control-Retreating into Enemy ZOCs").
Retreat into Friendly Occupied Hexes. A retreat is permitted into or through a friendly-occupied hex. Units in these hexes, however, must be displaced (cf).
Retreat of a Two-Package Force
Leaders in adjacent packages may not retreat in different directions if they participated in a single combat. (Leaders in the same hex must always retreat together.) Such Forces must end the retreat adjacent. In this case the Path of Retreat is considered to be the path taken by the Leader Commanding the Force and for casualty determination purposes the Enemy Pursuit is counted along his path.
Path of Retreat
Whenever an Enemy force is forced to retreat, it will leave a path of vacant hexes behind it called the Path of Retreat. This path must be as straight as possible; no hex in the path may be adjacent to more than one hex already retreated through by the retreating Force, nor may one hex be passed through more than once. (Notice: for Path of Retreat purposes, ignore the "trailing" rear half of the Leader counter, and regard only the leading half.) The Path of the retreating Force may not pass through prohibited terrain. If no such path is available, the retreating Force retreats as far as it can; if the Enemy Pursuit would carry the Pursuing Force into the final hex in which the retreating Force came to a halt, the retreating Force is entirely eliminated. If there are two or more equally nice retreat paths to choose from, the retreating Force must incline in the general direction of its Supply Source. (cf. "Mode Change in Retreat/Pursuit" under "Facing").
Priority of Retreat Path. The following is a listing of the parameters in order of priority within which Forces may retreat.
- The Forces must retreat the total number of hexes indicated. They must end their retreat that number of hexes (as indicated by the Combat Result) away from the hex in which they suffered the result.
- They may not retreat into or through any hex they have already retreated into during this retreat. They may not retreat into an Enemy occupied hex. If any of these conditions cannot be met the force in question is eliminated in the last hex of the retreat path which did meet these conditions, if the Enemy Force advances into that hex.
- The Path must work out to be the one with the lowest Movement Point cost, as if the units were making a normal move along it, although the retreat execution is in terms of hexes.
- The path should be through hexes vacant of Friendly Forces. If the path must traverse Friendly occupied hexes, they should be those hexes containing the fewest Strength Points.
- The Path may only include Enemy Controlled hexes as a last resort, and then must include the fewest number of them possible.
- All other things being equal, the units must choose the path which places them closest (in terms of Movement Points) to their Supply Source (not the Center of Operations).
Turning During Retreat and Pursuit. An initial turn at the beginning of Retreat or Pursuit (where only half of a package moves) does not count as a hex of retreat.
Displacement
If the only hex available to the retreating Force (outside of Enemy ZOC) is one which is occupied by a Friendly Force, then the Friendly Force is displaced. The displaced force is moved out of the way one or more hexes as necessary, as if it were retreating as a result of combat, and the Path of Retreat proceeds into or through the hex it vacated. If the displacement would cause a move into prohibited terrain or Enemy ZOC(s), the retreating force is instead eliminated. Displaced forces can themselves displace other Friendly forces in a sort of chain reaction of displacement, if that is the only alternative.
Displacement of Part of a Package. You may displace only half of a force; in fact, in most cases it will only be necessary for a retreating force to traverse one of the hexes of a friendly occupied package. In these cases, the unit to be displaced is in effect "turned" with the non-displaced part of the Force remaining in its previous location while the other half of the Force moves to a hex adjacent to its old position (and, of course, to its non-displaced "other half"). Note that this same kind of turning maneuver may be allowed in retreats of only one hex, when only half of the package is adjacent to the enemy. You do not displace a Force out of its entire two-hex package unless this is the only route available for the retreating unit.
Retreat off the Map
If a Force is compelled to retreat off the map it may do so. Any Pursuing Enemy Force must stop at the mapedge, however, the retreating Force takes any losses due to any Pursuit normally (although the length of the Pursuit may be shortened because the Pursuing Force must stop at the mapedge). The retreating Force is automatically disorganized (regardless of its Leader's Initiative) but (once rallied) may re-enter the game as if it were a reinforcement, using the hex it exited the map from as its entry hex. If its exit hex is blocked, it may re-enter on the nearest free hex.
Twenty: Pursuit (Advance After Combat)
The Friendly Force which participated in the combat is allowed to pursue the Enemy, advancing along the Path of Retreat. Pursuing Forces may not stray from this Path. They may cease advancing in any hex along the Path of Retreat, short of or equal to the length of advance specified on the Pursuit Table. Pursuing units may advance from one Enemy controlled hex to another. A Pursuing Force may never move into the hex occupied by the retreating Force. If the retreating Force did not retreat its full allotment (cf. "Priority of Retreat Path," #1) and the Pursuing Force would be able to Pursue into either hex occupied by the retreating Force, the latter is eliminated and the Pursuit carries on into the last location of the retreating force. A Force may not advance farther than the number of hexes shown on the Pursuit Table, nor beyond the retreating force's position. The Pursuit Procedure must be carried out immediately, before any other combat resolution. Units are never forced to pursue. After advancing, units may not attack any more that Phase, even if their advance places them adjacent to Enemy forces whose battles are yet to be resolved, or who were not in a battle situation.
How to Determine the Extent of Pursuit
To determine the permissible length of advance after combat, take the advancing Leader's Initiative Rating, cross-reference it with the length of retreat of the enemy force (determined by the Combat Results Table), roll the die and modify it for Resistance and Cavalry Differential. The result is the length of advance permissible: the Player may opt to advance a shorter distance, or not at all.
If a force is entirely eliminated in retreat, the Pursuit may not go beyond the hex in which the force was eliminated. You may never advance beyond the hex in which the Enemy Force was eliminated.
Pursuit Bonus. Add one hex to the Length of Advance shown on the Pursuit Table for a Force of exclusively Cavalry and/or Old Guard. If a retreating force retreats its full allotment, but the pursuit bonus of a pursuing force composed of cavalry/Old Guard units could carry that pursuing force into the hex occupied by the retreating force, the pursuers halt their pursuit adjacent to the defeated force, which loses one extra SP.
Which Forces May Pursue. The entire Force actually involved in the Combat may pursue. However, a Player may wish to compose a Force consisting of only one or more of the participating Leaders, and their organic units, to make the Pursuit, while the remaining Leaders hold in place. He may not, however, create any new Maj Gens or juggle the units organic to the Leaders: this can only take place during the Organization Phase. Only one Force may make Pursuit. The Pursuing Force must be equal in Strength Points to the length of advance which it makes. And when determining the length of advance, only the advancing Leader's Initiative Rating is compared against the Enemy Leader's to get the Initiative Modifier for the Pursuing Force.
Only a Force actually engaged in combat with the Retreating Force may advance in its Path of Retreat. Forces adjacent to the Pursuing Force which are engaged with other Enemy forces may pursue only as a result of their own combat action.
Unit Mode in Retreat and Pursuit. A unit may change mode freely during Retreat and Pursuit. One initial turn of the force counter (where only half the counter moves to a different hex) may be made freely at the beginning of the retreat or pursuit (and nothing is deducted from the specified distance of retreat or pursuit for the turn).
Twenty-One: Disorganization and Rally
A Force that retreats after combat (due to either a Pitched or Pursuit Battle) must determine whether or not it (and its Leader) becomes disorganized. During the Disorganization and Rally Segment immediately following the retreat, the Owning Player must roll one die. If the die roll (modified for Army Morale, only) is greater than the force Leader's Initiative then the force (and its Leader) is immediately disorganized. Any other result has no effect. In the case of a Multi-Leader Force the Owning Player may choose to have the entire Force make one die roll using the Initiative of the force Commander; or have some or all of the Leaders in the Force make separate die rolls, each using their own Initiative. Forces that are Disorganized should have their identities recorded on a piece of paper, or Players may indicate this fact by rotating the affected combat units 180° on the Organization Display.
Effects of Disorganization
Disorganized Leaders may not use Forced March or attempt to move under Initiative. When moved using a Movement Command they must end their march closer (in terms of MPs) to their Supply Source. Disorganized Forces may not enter Enemy controlled hexes unless that hex is already occupied by a Friendly unit. Disorganized Forces may be included in a Commander's Force, but may still move only if that Commander is given a Movement Command, and must still move closer to their Supply Source. Disorganized units may not attack, but they may defend normally. If a Force composed entirely of disorganized units is compelled to attack, this attack is automatically resolved at the worst possible combat odds (the "1-5" Column). Disorganized combat units may not be reorganized on the Display into the force of some other Leader. Disorganized Leaders may not receive any additional units through reorganization. Disorganized Forces that are forced to retreat again do not roll for any additional disorganization. They merely remain disorganized.
Rally
Disorganized Leaders may attempt to recover from their disorganized state ("Rally") during all subsequent Disorganization and Rally Phases. For each force which begins the Phase Disorganized, the Owning Player should roll one die (modified for Army Morale), using the same procedure as above. If the die roll as modified is less than or equal to the Leader's Initiative the Force is considered to have rallied and is returned to "normal." There is no limit to the number of times a force may become disorganized, rally, and again become disorganized.
Players Note: Players who wish to increase the realism and uncertainty in the game should keep the results of their Disorganization and Rally die rolls hidden from their opponent.
Twenty-Two: Replacements and Reinforcements
Replacements
The Armies receive a limited number of Combat Strength Points which may be accumulated or distributed among any units of the specified type during the Organization Segment of the Player-Turn in which the replacements are listed. Replacements may be accumulated for distribution on later turns. The specific number of Strength Points of new replacements available on a given turn for each army and unit type is shown on the Turn Record Track.
When Replacements May be Added. Replacements may only be added to units of their own nationality and unit type which are within Dispatch Distance of the Center of Operations or Depot, and which are not at their starting strength for the Scenario in play. Units in an Enemy ZOC during the Organization Segment and disorganized units may not receive replacements. Units may not be increased in strength beyond their strength at the start of the scenario. For the Campaign Game, use their highest scenario strength as the maximum. Previously eliminated units may not be brought back into the game with replacements (except Austrian brigades with both infantry and cavalry; also except during the Armistice if playing the Campaign Game.)
How to Record Accumulated Replacement Points. Just use any combat unit marker of the proper nationality and type, which is currently not in play, to mark the level of accumulated replacements of that type and nationality. Example: An Austrian infantry unit in the Nr. 4 space would indicate four Points of Austrian Infantry Replacement Points available. Slide the combat unit marker along the track to reflect increases and decreases in accumulated Points. Obviously you may not accumulate more than 12 Points of a given type and nationality, since the track only goes that high. Make a written note of replacements for which you do not have a counter available to record.
Reinforcements
Each Player receives a limited quantity of Forces during the course of the game as reinforcements. The exact composition of each reinforcement Force and its turn of arrival are set forth on the Game-Turn Record Track; the combat unit set-up shown on tracks of Leaders in the reinforcement force applies to the units at the time of their arrival. Reinforcements enter the game during the Friendly March Phase. The reinforcement force is considered, for one turn only, to enter the map under its own initiative (i.e. initiative is already built into its arrival date). They may not perform extended march on their turn of arrival.
How Reinforcements Arrive. Reinforcements arrive on the road hex listed and pay the normal terrain cost for the entry hex (including the road bonus). Reinforcements may arrive stacked so long as the stacking and command rules are not violated. The first stack of reinforcement units brought onto a single hex in a Phase expends one Movement Point to enter the hex, the second stack expends three, the third five, etc., allowing for the two-hex length of each stack. These costs would be halved for units entering on Primary road hexes. Reinforcements must enter in the forces indicated on the Turn Record Track and may not be reorganized on the Organization Display before entering the game.
The owning player may delay the entry of any reinforcements beyond the Game-Turn indicated on the Game-Turn Record Track, only if the entry hex is occupied by an Enemy Force or is controlled by Enemy Force. If either condition exists, the Player may withhold the reinforcements until the removal of the Enemy presence, or he may bring the reinforcements on in any subsequent turn, at the nearest map edge hex unblocked by Enemy presence. Note that the owning Player has the option to enter into an enemy controlled hex but is not required to do so.
Road Entry. Entry of Reinforcements is always indicated by the name of the town nearest the map edge hex of arrival. Arrival hexes thus identified are always road hexes. Stettin Note: The road "to Stettin" exits the north map edge and runs through Berlin.
Army of Poland. This, or any, group of reinforcements without a strength shown for the scenario in which they enter the game, should use their strength for the following scenario.
In addition, the Army of Poland, as well as any other reinforcements which enter the map beyond their assigned army's communications, may be assigned to another Allied army. Such reinforcements are not limited to the army assignment shown on the Organization Display. (This, however, does not apply to forces removed into cantonments.)
Twenty-Three: Fortresses (Citadels and Fortified Towns)
There are eight Citadels (Madgeburg, Wittenburg, Torgau, Thieresienstadt, Spandau, Glogau, Breslau, Schweidnitz) and three Fortified towns (Leipzig, Dresden, Koenigstein). Together, these two types are referred to as Fortresses. Each fortress takes up two hexes (as indicated by the yellow tint extending beyond the "wall" symbol): the main, outlined hex, and the "bridgehead" hex on the opposite side of the river. In order to be considered to occupy a fortress, a Leader marker must be placed to occupy both hexes of the fortress package indicated by the yellow tint.
Zones of Control extend into and out of Fortresses normally, but combat between units in Citadels and adjacent Enemy forces is not mandatory. Forces in fortified towns are doubled in strength (up to a limit of ten SPs; thus 10 Strength Points would count as twenty and 15 would count as 25).
Stacking Limits. Because of their limited size, Fortresses have reduced stacking limits. No more than 25 Strength Points may end a Phase in a Fortress.
Sieges
Once a Force in a Citadel hex has taken advantage of the Citadel (i.e. used the Citadel to avoid combat with adjacent enemy units), that Force is considered to be under siege. The decision whether or not to use the Citadel benefit is made at the moment combat would normally be required, and a Force in such a hex may choose to ignore the Citadel and resolve combat normally. Once placed under siege, however, a Force remains in that condition until the beginning of any Phase in which the state of siege is removed.
Besieged Forces may not receive Movement Commands but may attempt to move and/or attack out of the Citadel (unless they are completely surrounded) by using the Initiative Modification procedure. If such an attack is made, it is resolved under the normal conditions, and on the Affecting Line of the Combat results table (see "Breaking the Siege").
If forced to retreat, the besieged Force would instead remain in place and lose a number of SPs equal to the number of hexes indicated on the Combat Result; there would be no Pursuit. If the besieging Force(s) is Forced to retreat it may either remain in place and lose Strength Points in the same manner, or retreat normally, at the owning Player's option.
How a Citadel is Placed Under Siege. Only Citadels may be besieged. As long as at least one hex adjacent to the outlined hex of the citadel is occupied by enemy forces at least equal in strength to those inside, the citadel is considered "besieged." This means that the friendly force in the citadel cannot be moved. However, if a Citadel is considered to be in supply (due to a depot within the Citadel) the besieged force suffers no attrition. The unit in the citadel controls only its own package (indicated by positioning of Leader or Garrison marker). Enemy forces may move past the package freely, though they may not move into or through the citadel package itself. If you move further forces into the hex and they are still besieged, the entering forces would be under the same strictures as the force already there.
State of Siege. A Force is considered in a state of siege (or "besieged") if it (1) has taken advantage of the citadel to avoid combat, and (2) is adjacent to a besieging force at least equal in SPs to itself. The besieging force need not occupy nor control all the hexes adjacent to the citadel in order to impose a state of siege.
Attrition of Forces in Citadels.
- Forces in Citadels are always considered "in Dispatch Distance" of the Center of Operations for purposes of Attrition Determination, if their strength is 6 SPs or less, and use current AP level to determine Quotient.
- For forces in Citadels stronger than 6 SPs, Attrition is always determined using the "Zero" column on the AQT (or the current Army Level, if negative).
Surrender. The Citadel will surrender at the end of any Besieged-force Player-Turn in which the number of SPs inside is "four" or less, and the citadel is besieged. When a Force surrenders, all surviving Strength Points (if any) are immediately eliminated; all Leaders are granted the "Honors of War" and return to the Center of Opns. Whenever a Citadel surrenders, units of the victorious Player may advance into the hex, within the stacking limits.
Breaking the Siege. Besieging forces are considered to occupy all eight hexes adjacent to the Citadel. All that is necessary to break the siege is to interpose some non-besieged force in a hex adjacent to the citadel not containing an enemy counter. The besieged force may leave the citadel otherwise only by first attacking the besieging force.
Fortified Towns
Effect on Combat. Units defending in a Fortified Town have their Combat Strength doubled, up to a maximum of ten extra SPs. For example, a 3 SP Force in such a hex would defend at 6, while a Force of 12 SPs would defend at 22 (since only ten of its SPs are doubled). A Fortified Town is considered Affecting Terrain.
Zones of Control do extend into Fortified Towns (unlike Citadels). However, units are never required to attack out of Fortified towns, either in their own Com- bat Phase or in a Pitched Battle counterattack. (By not counter-attacking, the battle is ended.) Enemy Units adjacent to Fortified Towns are required to attack normally.
Control of Fortresses
A fortress (Citadel or Fortified Town) is considered to be in Allied hands unless otherwise indicated by positioning of a leader or garrison marker. This marker's appearance on the map denotes the existence of the assigned "garrison units."
Fortress Markers. These are used to designate the location of fortress garrisons on the map, and to similarly show the location of the Allied force besieging Glogau.
Fortress Garrison and Besieging Force Leaders. The Leaders of these units are represented on the map by the Leader Markers with the name of their respective fortresses. Their Initiative Rating is "Zero." Since they each represent only one unit (maximum) they don't need a Command Span, and their Subordination Rating is the same as that of the one unit they represent (that is, "One"). Though labelled as "static," this refers to their historical capacity; they may be moved.
Twenty-Four: Weather
Mud increases attrition as a result of the men and materiel which would have to be left behind in a rapid march as roads and trails dissolved into quagmires. Rain facilitates retreat after combat by hampering pursuit; but it also allows a force to more easily "sneak up" on unsuspecting Enemy forces, by reducing the possibility of their being able to force march away from the battle.
There are five different types of weather, one of which must be in effect during each Game-Turn. The weather may be either Fair, Heat, Mud, Rain, or Mud & Rain. At the beginning of each scenario and at the beginning of each subsequent Game-Turn the First Player must roll the die and consult the Weather Table to determine the weather for the coming turn.
Effects of Nasty Weather
- MUD: Mud affects the severity of attrition. Players must use the indicated die roll column on the Attrition Table during Mud. During Mud, one SP of a Force's loss must come from an artillery unit, if the Force loses five or more SPs as a result of that march alone (see "Artillery").
- HEAT: Same as Mud, except that the special loss of one SP must come from Cavalry.
- MUD & RAIN: Same as Mud, plus the addition of a die roll modifier for Initiative during Pursuit and when exiting an enemy ZOC. The Die roll modifier is "+1".
- RAIN: The Initiative Die Roll Modifier only (no attrition effect; note on Table is incorrect).
- FAIR: No effects.
Twenty-Five: Effect of Special Unit Types
Bridges and Engineers
Repair of Blown Bridges. There are no Engineer counters per se in the game. However, each Leader on the Organization Display except Cavalry Major Generals (only) is considered to have one organic Engineer unit. The appropriate Leader is moved into the hex adjacent to either end of the Blown Bridge. There must be no enemy units adjacent to the leader counter (regardless of ZOCs). In the following Friendly Movement Phase, the Player rolls the die, finding the right line for type of engineer unit and bridge. There are two types of bridges, primary and secondary, which bridge primary and secondary rivers respectively. The bridge is repaired if the die roll is less than or equal to the number shown. Remove the blown bridge marker when the bridge repair die roll succeeds. Engineer units may not attack, and have a Strength of Zero.
To repair a bridge a Major General need not be put in charge of the engineers if the commander to whom the engineers are organic does not leave the bridge-occupied package that turn.
Destruction of Bridges. A bridge may only be blown if a Player has a unit (of any kind) in a hex into which the bridge enters. If there is an Enemy unit at the other end of the bridge when a Friendly unit is attempting to destroy it, he must increase the die by one. The procedure for determining whether the bridge is destroyed is the same for repair. If the bridge is blown a Blown Bridge Marker is placed adjacent to the bridge.
Effect of Destroyed Bridges. A destroyed bridge is ignored for all purposes; the hexside it bridged is treated as a normal river of whichever type.
Bridging Trains (Pontoons). Bridging Trains may be used to bridge any river hexside. Each Allied Army Command (i.e. Bluecher, Schwarzenberg, Wittgenstein (Spring only), and Bernadotte) is given one bridging train. Napoleon receives only one bridging train. The only way the French Player may get other bridging trains is to capture them (he can also lose them this way). This can only be done by moving a friendly unit into the hex containing the enemy bridging train, either during the March Phase or as a result of advance after combat. Bridging trains which are deployed do not retreat after combat when combat units in their hex suffer that result. They remain behind and may be captured by advancing enemy units. They may not be destroyed. Only bridging trains which are currently deployed (i.e. on the map as opposed to the Organization Display) can be captured. Bridging Trains can only be deployed or un-deployed during the Bridging Segment of the Friendly Player-Turn. To use a bridging train, simply place it across the river hexside to be bridged. In the following turn it is usable if it has remained in that hex, and units may move over it as if it were a normal bridge. It may be moved out of the package in the same turn it is crossed by units. When using a bridging train to cross a river it does not matter if there are enemy units in the hex across the river, and one can attack across it as a normal bridge. A bridging train can be used without an engineer unit present. A bridging train can be captured and moved by a cavalry unit, and can make an extended or forced march.
Function of Support Units. Engineers and Bridging Trains can be assigned to Major Generals, and they move like normal units, but only if these Support Units are to be employed in tasks suitable to their special properties, i.e., creating or removing bridges. They are powerless to capture anything, harm anyone, or block any path (and this goes for capture of Center of Operations, too). Support units may be allocated to a Leader's Organization Display in the same manner as normal combat units. They have no Combat Strength, for either attack or defense. They move as if they were infantry units, but do not suffer attrition of any kind.
French Imperial Guard
A Force of exclusively Old Guard (OGde) Infantry suffers no attrition (see "Attrition Free Movement"). In 1813, any Young Guard (YGde) troops in the force with the OGde may be counted as OGde so long as all Old Guard troops in the game are present in that Force. OGde (and YGde counted as OGde) do not count toward attrition in any force to which they belong. When moving in a Force which also includes other unit types, the Player may choose to remove attrition losses from the OGde units in a Force but he is not required to do so, as long as there are sufficient SPs of other types to absorb the losses.
A force of exclusively OGde (and YGde counted as OGde) and/or Cavalry has a Pursuit Bonus of one hex.
Artillery
Use in Combat. Artillery Fire occurs in Step 2 of the Battle Resolution Segment of the Game-Turn. This Step is repeated for each round of Pitched Battle. The effect of artillery fire is to eliminate enemy combat strength before the calculation of combat odds for battle resolution.
Procedure. The procedure relies on the Cavalry Strength Differential obtained in Step 1. The die is rolled and the result located in the column beneath the Cavalry Differential Ratio in effect. (The cavalry differential must be read as a ratio of: artillery-firing side-to-target side.) The die roll is cross-referenced in the column beneath the artillery strength.
Artillery Unit Losses.
- Artillery never suffer loss from enemy artillery fire, unless they are the only types in the force under attack.
- Artillery suffer no losses in Pitched Battle rounds.
- Artillery lose one Strength Point if their force was pursued more than five hexes (this SP loss does count toward the total Pursuit loss required).
- Artillery lose one SP to march attrition during mud, except if less than five SPs of attrition loss total is suffered by its force. During non-Mud turns, and during turns when March Attrition to its force is four SPs or less, Artillery loses nothing to March Attrition.
- Artillery Strength is never counted when determining force strength for attrition purposes, or for determining combat odds, and never suffers attrition loss of more than one SP per march.
Restrictions on Movement. Artillery may never make Extended Marches, or participate in Pursuits.
Cavalry
"An army superior in cavalry will always have the advantage of being able to cover its movements, of being well informed as to the enemy's movements and giving battle only when it chooses. Its defeats will have few evil consequences, and its successes will be decisive." —Napoleon
Cavalry Attrition Procedure. Roll for Attrition normally; do not count cavalry into total force strength for Attrition determination; resolve cavalry attrition as though it were a separate force. Then remove attrition specified from the cavalry unit(s) normally, replacing the strength lost on the same track with an Infantry March Regiment in the appropriate space. If this would result in an exceeded Command Span (and only then) the infantry strength may instead be incorporated into any infantry unit(s) in the same hex, or, if none, an infantry Major General may be created to represent the March Regiment on the Map. (This rule shows the loss of horses to the cavalry unit, and the March Regiment represents the dismounted cavalry troops.) Note that the dismounted cavalry will henceforth suffer attrition, and behave in all ways, like other infantry.
Cavalry Leader With Non-Cavalry Units. If any non-cavalry units are in the Force moving under the Initiative of a Cavalry Leader, add two to the Initiative Die Roll for that force.
Cavalry Differential Initiative Modifier
The side with superiority in cavalry may receive an Initiative Modifier in any case where Initiative is consulted and opposing forces are adjacent. Cavalry Superiority is also a factor in determining the effects of Artillery fire. The Maximum Modifier is 3 "+" or "-".
How to Use. First, determine the ratio of cavalry strengths (see below), and then subtract "one" from the Initiative die roll of the Leader with cavalry superiority for each order of magnitude above 1:1.
Procedure.
- Determine superiority of cavalry (which side has the most). Cavalry strength may not be withheld.
- If making a Pursuit, subtract one from the Initiative die roll of the side with superiority, for each order of magnitude of superiority: superior in cavalry, but less than a 2-1 ratio = subtract one; 2-1 ratio or greater = subtract two; etc.
- If making a Forced March out of enemy ZOC, Cavalry Differential Modifier can only be used to negate a "+" modifier from the Initiative Comparison Matrix. That is, Initiative cannot be better with combined Cavalry Differential and Initiative Modifiers than it would have been if the Force were not adjacent to the enemy. Example: Active "4", Passive "2"; there would be no Cavalry Modifier.
- To receive this benefit, cavalry must suffer one Strength Point of the loss in that combat die roll resulting in that pursuit situation.
Determining Superiority. Count the amount of cavalry present during Step 1 of the Combat Routine. (Leave out of account any losses sustained due to previous Pitched Battle.) Determine the difference in cavalry strength between the two sides and which side is superior.
When counting cavalry strength for purposes of determining cavalry differential, count only the cavalry actually in a package adjacent to the active force, and engaged in combat with that force. If one side has no cavalry, the other side has a "3-1" differential automatically.
Effect of non-Clear Terrain on Cavalry. When determining the cavalry ratio of opposing forces, do not count cavalry in non-clear Terrain. Always use "1-1" cavalry differential when firing Artillery into or out of non-clear Terrain.
March Regiments
Each Player has a number of March Regiments which are used to represent detachments of smaller than division size. They may be created in one of three ways: 1) With Replacement Points at Depots or Center of Opns., each Replacement Point deducted from the pool being added to the March Regiment's Strength. 2) By division, deducting strength from a combat unit and adding this strength to the March Regiment. 3) By Cavalry Attrition, wherein cavalry strength is converted to Infantry March Regiment Strength.
There are March Regiments for both infantry and cavalry. The maximum strength of an Infantry March Regiment is three Strength Points; Cavalry March Regiments may only be 1 or 2 SPs. Cavalry March Regiments count as 1/2 unit against a Leader's Command Span; i.e. their Subordination Rating is "1/2." Infantry March Regiments have a Subordination Rating of "1."
The strength of a March Regiment may be incorporated into the strength of any unit of the same type with which it is stacked, during the Administrative Segment, at no penalty. March Regiments can represent units of any nationality.
Nationality. The Turn Record Track mentions "nationality" of French Player's troops. There is no effect of these different nationalities on play.
Twenty-Six: Politics and Off Map Movement
Saxon Neutrality
The cultured and gentle Saxons (see Scenario folder) were more than usually unwilling to become involved in this war. Throughout the opening of the 1813 Campaign, their king had attempted to maintain the status of armed neutrality, along with Austria, and had even taken refuge in Prague until blackmailed into returning by Napoleon, dictating from his capital of Dresden.
The Saxon troops (which begin the game in Torgau) are considered neutral until the turn after Dresden is occupied by French forces; they become part of the French army at that time and remain so until such time as the Allies re-occupy Dresden (at which time the Saxon army dematerialized). During their neutrality, the Saxon troops cannot be moved, nor can they be attacked by either side, nor may Torgau be moved through by either side.
Note: "Occupied" means troops physically in place in the package.
Fall of Berlin
Since most of the administrative services had been located outside of Berlin (and off the map), the effects of the fall of the Prussian capital are largely moral.
Effects on Prussian Replacements. One half of the specified Prussian replacements are permanently lost during the period of French occupation of Berlin (rounding fractions down). Thus if the track specifies "4i" and the French currently occupy Berlin, only "2i" are received; the other 2i are not accumulated.
Effect on Army Morale. The Allied Army's Morale Marker moves one space to the left if Berlin falls to the French. If re-occupied by the Allies, morale moves back one space. French Player may not improve his own Morale in this contingency, unless Allied Morale is already "+1" and French Morale is less than "-1."
Berlin Militia. Tauenzien and 20,000 men (use the same units from his Dresden Scenario set-up at reduced strengths) constitute the Berlin garrison, which may not move or attack. They must fight a Pursuit Battle if attacked. They defend otherwise normally, and may retreat out of Berlin. They are placed on the map only if Berlin is approached by French forces, and must be placed only in Berlin and any one adjacent hex. If forced to retreat out of Berlin they may still not attack until the end of the Armistice. If Berlin is occupied by the French, or in French occupied territory, Tauenzien's force begins the Autumn at its strength at the beginning of the Armistice (plus any replacement points the player wishes to add). Otherwise, it sets up at its full Dresden set-up Strength automatically.
Dresden Effect on Morale
The effect on French Morale of the loss of Dresden to the Allies during the Autumn (only) is the same as the effect on the Allies Morale from the loss of Berlin. In this case, only the French Morale is affected (unless French Morale is already "+2," and Allied Morale is less than "-2," in which case the Allied Morale is affected); the marker is moved one space to the left.
Austrian Intervention and Neutrality
Austria is a neutral power out of play during the Spring. No units may enter Bohemia (Austrian territory) during the Spring. Any units forced to retreat across the border are considered "interned" and are out of play until the armistice (if any), at which time they are returned to the owning player (unless the game is over).
Austria is considered to intervene automatically at the conclusion of the Armistice. Her troops and leaders always enter the game under the control of the Allied Player, after 14 August. Note that APs are accumulated only from 19th July onward (the date of Austrian mobilization).
Bavarian Re-alignment
Bavarian reluctance reduced the originally-planned Bavarian contingent to Napoleon from an entire Corps (the IXth) to a single division (the 29th) plus cavalry. The remaining units of the corps were, however, raised and went over to the Allies upon the signing of a compact between Bavaria and Austria on 8th October. (These troops were defeated at the battle of Hanau on 30th October, off-map, during Napoleon's retreat toward Mainz.) On 8th October, unless the French Army Morale is "-1", the Bavarian units (29 and 29c) are removed from play along with any strength they contain.
Withdrawal into Cantonment (Off-Map Movement)
Troops of any Allied army may withdraw "into cantonment", off map, exiting at any possible Supply Source route for their army. While off the map, they suffer no attrition. If at any time you have no Combat Strength on the map, you are considered to have resigned and the game ends immediately.
Limit to Withdrawal. Troops of a given army may only withdraw off the map once in every 20 turns.
Return to the Map. The return of withdrawn forces is handled exactly like reinforcement entry. The minimum time off the map in cantonment is one game-week (4 turns). They may then return on any possible map edge Supply Source hex, or as near to the road as possible.
Center of Opns off Map.
- No APs may be expended while off map; APs may be accumulated using "index."
- Use current AP Level to determine attrition of forces off map, tracing to the exit hex for units still on map.
Armistice (Campaign Game Only)
Armistice occurrence depends upon the Armistice Table, and always lasts through the August 15-16 Game-Turn exclusive. During the Armistice, Players accumulate all APs, Replacements and Reinforcements receivable during the period of the armistice (see the Scenario Folder and the Turn Record/Reinforcement Track); individual Game-Turns are not played during the armistice. At the conclusion of the armistice procedure (see below), the Game-Turn Marker is advanced to the August 15-16 space and normal play resumes.
Effects on Forces on Map. Upon occurrence of the Armistice, no further Movement or Combat may take place: all forces are stopped in place. No attrition is considered to occur during the period of the Armistice.
Effect on Army Morale. Army Morale markers are reset at their "start" positions.
Procedure for determining Occurrence of Armistice. The Game-Week Interphase occurs before the First Player-Turn of the Game-Turns indicated by the tinted spaces on the TRC. At these times, compare the Allied and French Morale, and roll the die. If the result is less than or equal to the number shown for that morale combination, Armistice occurs immediately. Players may not "voluntarily" agree to commence Armistice; it must be brought about by die roll on the Armistice Table. Armistice occurs automatically at the end of the 9-10 June Turn, if not before.
Armistice Procedure
The Armistice procedure below is played through once, after commencement of the Armistice, and comprises a complete Armistice duration.
A. French Armistice-Turn.
I. COMMAND PHASE
a. Administrative Segment. Duration of Armistice (June 10-11 through August 13-14 inclusive) is 34 Game-Turns minimum. To this number are added turns of Armistice before June 10-11, if any, and subtracted are turns of Center of Opns movement. The French Player multiplies the number of turns thus obtained by the "index" shown on the AP Point Pool, using the position of the Center of Opns desired at the conclusion of the Armistice to determine the column on the Pool to consult (i.e. movement of the Center of Opns is considered to occur immediately after cessation of hostilities). Example: If distance between Center of Opns and Supply Source was 20 or less at the end, French Player would multiply duration of Armistice (minus turns of Center of Opns movement) by 1 1/2; assuming no additions or subtractions, 34 x 1 1/2 = 51 APs received.
Dresden as a French Supply Source. Dresden is a Supply Source throughout the Armistice, if occupied by the French at the end of the Spring period. It may never be used as a Supply Source by the Allies.
Occupied Depots and Supply Sources. If occupied by enemy forces, or in "enemy-occupied territory" during the Armistice, friendly installations may never be used thenceforth (see "Capture of Supply Sources" and "Depots").
b. Organization Segment. Replacements shown on the Table on page 3 of the Scenario Folder are received. Do not change the strength of units which are already in the game during the Spring unless you give them replacements. (They do not automatically move to their Dresden Scenario Strength.) Units need not be in forces in the same hex to be transferred between them. All other Organization Segment activities are carried out normally.
II. MOVEMENT PHASE. Any force may be moved anywhere on the map (within "Occupied Territory"; see the Turn Record Track) at will; simply remove the force and replace it where desired. Exception: Center of Opns movement must be counted out to determine number of turns inactive; this is done during Administrative Segment (in Armistice Procedure only). No APs are expended for such movement (it is already allowed for), and no Attrition is suffered by any Force at all during the Armistice. Bridges may be created and destroyed at will in "occupied territory." Once he is through moving, the Allied Armistice-Turn commences, and the French Player cannot make any further adjustments to his forces until his Player-Turn of 15-16 August. There is no combat Phase during the Armistice. In determining occupied territory, do not consider Cavalry Corps Leaders or Cavalry Major Generals. Ignore their presence for this purpose (see the Turn Record Track).
B. Allied Armistice-Turn.
I. COMMAND PHASE
a. Administrative Segment. The Silesian Army receives APs, calculated in the same manner as the French. The Austrian Army historically began its mobilization on 19th July, which allows only 14 Game-Turns in which to collect APs. Use index of 1 1/2 for Bohemian Army, over 14 Game-Turns (unless Center of Opns enters the map during the Armistice) for a total award of 21 APs at start. North army is not considered during Armistice.
b. Organization Segment (same as I.b., above).
II. MOVEMENT PHASE (same as II. above). All of Bohemia is always considered "Occupied territory" of the Allies during the Armistice.
C. Commence Play with August 15-16. The Armistice Procedure is complete, and normal Game-Turns resume.
Twenty-Seven: Optional Rules
The Sound of Guns
It was customary in written orders, to cover all contingencies in developing situations, to specify that a force should maneuver toward the sound of the guns, if there were any. We also know that Napoleon would travel out from headquarters until within earshot of cannonfire, and would be able to determine from listening what was happening (no doubt this was a common practice). The maximum distance the sound could carry, except in really large bombardments, seems to have been about ten miles.
This rule supplies an Initiative benefit which can be used only during the Forced March Phase by Forces not in Enemy ZOCs. The benefit can be used by any Force within five hexes of an Enemy Force about to attack a Friendly Force (the latter may not Force March out of the combat if the Initiative benefit is taken). The force to use the benefit must be close enough to make a Forced March of five hexes or less and end the forced march adjacent to the attacking Enemy Force. The Initiative Benefit for the Sound of Guns is to subtract one from Initiative Die Roll, but can be used only if the Force actually marches into the battle.
Forced March into Pitched Battle
Units which force march into a battle may not be considered present during the first few rounds of Pitched Battle. To determine in which round they are considered to arrive, consult the table below and roll the die, modifying for normal Initiative modifiers and cross-referencing with the number of MPs expended by the force in question. If there are fewer rounds of Pitched Battle than the number resulting on the table, the forced marching Force does not make any counterattack, and the attacking player may not attack it that Phase. He would conduct a normal Pursuit of the retreating Force, ending that Combat situation.
HURRY-UP TABLE (Forced March Distance in MPs)
| Die Roll | 1 | 2-3 | 4-5 |
|---|---|---|---|
| 1/2 | 0 | 0 | 1 |
| 3/4 | 0 | 1 | 2 |
| 5/6 | 2 | 2 | 3 |
KEY: # = Round of Battle during and after which troops arriving by forced march are considered present.
Modifiers: same as for Initiative; exclude Sound of Guns Modifier.
Modified Result of Zero = The Forced Marching Force arrives before the first attack (in this case the situation is as in the ordinary rules).
Unit Type Effect on Attrition
Units in special categories defined below must determine their attrition separately from the force they are moving with. Their strength is not combined with the other units in the force when determining attrition.
- Class C: French Cohorts, Austrians.
- Class D: French Conscripts, Prussian Landwehr, Swedes. +1 to Attrition Quotient.
- Class F: German and Italian Allies of France, Russian Kossacks. +2 to AQ.
For each unit in any such special class, the player resolves attrition separately. He determines the Attrition Quotient for the remainder of the force as usual, and adds to this the number of lines specified for the type of unit involved. Example: Attrition for the normal units in a force is determined normally, not counting units in classes C, D and F. Let's say their Attrition Quotient is determined to be "3/8." After resolving the normal attrition, this would be increased to the next line if there was class D unit, to 1; if a class F unit, it would be increased to "1 1/2". The die would be rolled on this modified column for each individual unit in classes C, D or F in a force. Each such unit would suffer the full amount of attrition called for in that individual die roll.
If the Force is 100% Class C, D and/or F, determine what its combined Attrition Quotient would have been if the force were composed of normal unit types, and then add to that Quotient for each individual unit in the force.
Questions and Answers
(Numbered headings below correspond to the numbered sections of the rules.)
2: Game Equipment
Q: Could not the following information be included on the TRC?...
May 28; June 6; October 30: Actions of Hoyerswerda; Luckau; Hanau.
May 27-8; 29-30: Note optional "No Armistice" Replacements and Reinforcements, arriving at any Supply Source/Depot possible.
Oct. 8-9: Bavarian units withdraw (unless French Army Morale is "-1.")
A: Yes, the above can be noted.
Q: I have a number of questions about the "Summary of Modifiers, Facts and Figures" on the Charts & Tables Sheet.
-
Should not the Maximum Force size really be specified as a maximum package size, and then only for movement purposes? A: Yes.
-
Can't replacements simply "arrive" with any unit in Dispatch Distance of the Center of Opns? A: Yes, they can.
-
Army Morale Number is also added to Disorg. & Rally die roll. A: Correct.
-
Another change in Army Morale is that for fall of Dresden in the Spring Scenario (affecting the Allies). A: Correct.
-
Rain, only, reduces Initiative (not heat); when exiting enemy ZOC and during Pursuit. A: Correct.
5: Administrative Points
Q: What level of "support" do the non-phasing players have during the force-march segment of the first Player-Turn of each scenario? A: They have the same level as will apply in their next Player-Turn.
Q: How do you determine the level of "support" given an army on the turn after its Center of Operations has moved (or when it is inactive)? A: In such instances the Level of Support is considered to be zero.
Q: On the turn after a Center of Operations has moved (or when it is inactive) the level of support it receives is considered to be zero. Does that mean that there is an AQ shift of two columns to the right because no APs were spent on "support"? A: Yes. In these cases you must shift two columns to the right.
6: Communications
Q: In the Spring Scenario, does the Allied Player choose at the beginning of the game whether he will have his Center of Operations trace its LOC back to a primary (1°) road hex in Silesia or back to a first degree road hex in Brandenburg, or does he automatically begin the game tracing his LOC back to the Silesian map-edge? If he does not switch the base of his LOC from Silesia to Brandenburg, can he still use first degree road map-edge hexes in Brandenburg as Depots and Supply Sources for the purpose of A) figuring attrition quotients; B) transmitting Provisional Movement Commands (assuming that the Allied Center of Operations is close enough)? A: It is the player's freedom of choice in all these questions.
Q: How do you figure Dispatch Distance regarding territory modification, from where the Center of Opns is or where the unit is? A: It doesn't matter. Either way, the territory modifier applies.
Q: Does a Center of Operations occupy one hex or two? (Should it occupy one hex or two?) Does a Supply Source occupy one hex or two? A: You may trace to either hex of the counter.
Q: Can a Center of Operations move two Player-Turns in succession? A: Yes.
Q: Should there be a Russian active supply and center of operations marker? A: One such set is supplied for each army (note there is only one Allied army in the spring). Players may use any of the colors provided to represent the various armies.
Q: Could you please spell out the functions of Depots? A: 1) If a force is within Dispatch Distance of a Depot, it is saved from having to roll for Attrition on the "Zero" Column, and 2) If a force is within Dispatch Distance of a Depot, and the Depot in turn is within Dispatch Distance of the Center of Opns., it can receive a Provisional Movement Command through the Depot.
Q: The rule states that to be "active," a Depot must be within Dispatch Distance of the Center of Operations. Yet elsewhere it states that it need be within Dispatch Distance of the Center of Operations only to provide Provisional Movement Commands, while the Depot can always keep forces off the "zero" Column for Attrition. A: The reference to "active" should be exchanged for the phrase: "able to provide Provisional Movement Commands." The Depot remains "active" whether in Dispatch Distance of the Center of Operations or not.
Q: Is the Road "to Kalisch" (i.e., the one just north of Sagan) near the Brandenburg border considered to be in Silesia, and therefore a valid Allied supply source in the Spring Scenario? A: Yes, it is valid. (The fact that Kalisch is actually in Polish territory makes no difference.)
Q: Does this "Fall of Berlin" rule only pertain to the Spring Scenario and the Campaign Game, or does this additional force of 20,000 Prussians appear in the Dresden Scenario even if Tauenzien is already deployed? Moreover, what constitutes Berlin being "approached by French forces"? A: The 20,000 Prussians are the nucleus of Tauenzien's force in the process of organizing. In the Spring they were not field-ready, or even adequately armed. These 20,000 are subsumed into the larger force under Tauenzien which appears in the Dresden Scenario; they are not a different or separate force, simply an earlier state of the same force. Berlin is "approached" whenever French forces come within 7 MPs of that place; Tauenzien can be placed on the map at the same instant that Berlin is "approached." Of course, if he is already on the map, this rule does not apply.
8: March Attrition
Q: What are the attrition figures for cavalry units that force-march 6-9 MPs? Does the 6-9 MP March column apply to cavalry at all? A: The printed figures apply to cavalry if they move 6-9 MPs.
Q: In figuring cavalry attrition, does cavalry roll on the 6-9 column when using its whole Movement Allowance? A: Yes.
Q: Is a Forced March of 6-9 MPs possible even for cavalry? A: Yes.
9: Leadership
Q: Does the attacking player decide whether he will add or subtract one (for a commander's bonus point) from the combat die roll before the die roll actually takes place or after it? A: He decides after the die roll.
Q: In the Dresden Scenario, Buelow has no Center of Opns until August 25-26, and no way to accumulate APs. Historically, Buelow was quite active (e.g. Battle of Grossbeeren). He also was the only Prussian Corps Leader to operate independently, and successfully too. So why not make his Initiative Rating a "3." A: In principle, I have no objections to the Players making such adjustments as they see fit on historical grounds; this suggestion is a good example of an absolutely viable alternative to the obviously subjective evaluation made by the designer.
Q: Obviously, opinions will differ on various Ratings and Spans of Leaders, but I note the following trends:
-
Of sixteen Infantry Corps Leaders in the French Army, eleven have Command Spans of "6." Throw out Augereau and Poniatowski, Leaders of very small corps, and it's 11 of 14. Doesn't this seem too high? I would assume the rationale includes previous independent commands, extra-large number of divisions, or historical role as wing or independent commander. But where does that leave Bertrand and Drouot (former Napoleonic aides), Souham (Gen. of Div.) Mortier and Victor (minor or unsuccessful in independent command)? Or Eugene, an independent army commander several times, never badly defeated, who rates a mere "5." Why is Augereau, a Marshal, only a "3", while Reynier, Bertrand, Souham and Drouot, rated higher, are generals only?
-
French Initiative Ratings of four are given to St. Cyr, Soult, Reynier and Macdonald (and Poniatowski, obviously a special case, commanding the equivalent of a flying column). A case can be made for each, but only these four, equal to Napoleon himself, even in a bad year? And in relation to the others? Reynier over Marmont?
-
Once again, a case can be made for the distribution of Bonus Points, but considered as a group: Vandamme, Mortier, Reynier, Bertrand and Macdonald? Bertrand over Marmont? or Soult? It's not the individual choice or matchups that matter but the overall picture.
-
Consider that, according to the ratings, Reynier and Macdonald are Napoleon's top generals (4*6) with Reynier (!?) marginally better because of his lower Subordination Rating (2 opposed to 3). Does that sound right? After the Katzbach, how could Macdonald be the second-ranked general?
Why not promote Eugene who, with the generally inflated ratings deserves a 3-6-3? Shorten to "5" the Command Spans of Mortier, Victor, Bertrand and Souham (and maybe Reynier)? Drop Initiative Ratings of Drouot (to 2), Reynier, and Macdonald (maybe not, since he disobeyed Napoleon to go to the Katzbach)? Drop Bonus Point for Macdonald (and maybe for Reynier and Bertrand)?
For the Allies, why is Markow the only other Initiative "4" besides Bluecher? Why do Hesse-Homburg and Dochturow have Subordination Ratings of "3"? (They're the only ones.) Why is Bennigsen only a "4" in Command Span, perverse delight in just denying him control of "Army of Poland"?
A: As I said above, I have no objections to players making personal adjustments to the ratings (or anything else; it's their game). I am including this rather lengthy disquisition not because I agree with the conclusions, but to show the incredible latitude given to anyone in making up these numbers (which are the substance of the game). To attempt a brief answer to the above, there are a few rationale considerations I relied heavily on which are not mentioned by the correspondent (Michael Jeck). Primarily they have to do with historical usage. That is, I first determined how many troops and subordinates were assigned to the Leaders at different times during the campaign. Then I made a judgement: did that commander handle all the subordinate Leaders and troops effectively? For all their bumbling, the French leaders rarely left large bodies of men lying near at hand, unused during engagements, while the Allies did so constantly. I therefore made a generalization: Allied commanders were less often capable of controlling all their assigned troops than were the French. That is, Napoleon was better able to gauge the number of subordinates and troops to assign to his Leaders; therefore the actual forces historically constituted are a better gauge to the abilities of the French Leaders than they are to the Allied Leaders. As a bias, if the documents show a French force constituted so-and-so, it can be done in the game in similar terms; whereas, an Allied force probably cannot be put together the way it looked on paper at Allied Headquarters. Of course, there are exceptions: Napoleon's placing Oudinot in charge of the "Berlin Army" is the best example of his failures. So, in this way, the Command Spans were based upon actual usage, with some exceptions, mostly on the Allied side. Initiative Ratings were also based upon performance. My main question was not "how does one leader stack up in comparison to another" but "what kind of number would a given leader need to match his historical performance in this campaign?" (Note that these ratings are tailored to 1813, not to an individual's lifetime.) In testing the game, the printed Leader Ratings seemed, overall, to work. That doesn't mean that these numbers are the final word. As for Macdonald, perhaps he should be down-graded. However, 1) with the higher rating, the Player may be induced to try more than he ought to with Macdonald as a separate wing commander, and 2) Perhaps it was this, and not the qualities of the Marshal per se, that resulted in his misfortune. For the ratings go a long way in determining what can be accomplished strategically, but they are not the only considerations; Macdonald was in an impossible position on the Katzbach, isolated and insupportable, like a branch waiting to be cut off, and no one could beat Bluecher anyway. Some Allied Leaders are given higher Subordination Ratings because of their large Command Spans. Some French Commanders with small Command Spans are given higher Initiative Ratings. To some degree therefore, the three ratings are inter-dependent.
Q: Is it permissible for a leader of lesser rank to command a force consisting of a leader of higher rank (and his attached units), assuming the command span is not violated? E.g., could General Reynier, assuming he has no attached organic units, be in command of a Force consisting of solely Marshal St. Cyr (with a command span and subordination rating of two, respectively)? A: Yes, it is permissible. Actual military rank is not a consideration in constituting a force.
11: Organization Display
Q: Can any unit be built up to 3 SPs or its maximum scenario strength, whichever is greater? A: Yes.
Q: On the Allied Army Manifest, the 4th Drag., Emanuel, is listed as "X" in all three scenarios, while it is listed as part of Borosdin's 1st Drag. of St. Priest's VII Corps in the Designer's game "Napoleon at Leipzig." A: The Emanuel counter was provided by accident; his unit strength is accounted for in the Borosdin unit.
Q: In the same place, the Austrian 2d Lt (Bubna) is listed as "X" under the Dresden Scenario, but under Maj Gen A on the Display. A: This unit should be in play from the beginning of the Dresden Scenario, as shown on the Display.
Q: All sources (W.P. Atlas, Chandler, etc.) have Barclay present at Bautzen, after bringing in 12,000 to 15,000 reinforcements with him. You have him present at June 4-5 Set-up (p. 3 of Scenario Folder); but nowhere have him entering. When does Barclay enter and with what and where? A: Barclay was investing the fortress of Thorn, in Poland, which capitulated on 18th April. From Thorn to Bautzen is over 250 miles, assuming primary roads and regular marches, a distance requiring over 13 turns, which would bring Barclay in about 14th May. In fact he arrived only shortly after that, albeit only with the III Cav Corps (later under Wassiltschikow). His infantry, presumably identical with Sacken's autumn force, fell behind and did not join the army until June.
To simplify things, I had Barclay and Wassiltsch. arriving along with Sacken during the armistice. In other instances also, where a single small-unit force is involved, I have simplified wherever possible.
However, Sacken's presence alone may be of importance to the Allies during the Spring, in that he's a better commander than Wittgenstein. Therefore, players interested in a closer reading of the historical texts may bring Barclay, with Wasiltschikow (4c) in his force, into the game from Kalisch on 11 May.
Q: This leads to another question. Where is Tschapliltz? Scenario lists him with Osten-Sacken, but the unit manifest has him with Ostermann-Tolstoi. A: The confusion here arises from the fact that Tschaplitz commanded the III Cav Corps (later given to Wasiltschikow) before he took over the militia cavalry of Ostermann-Tolstoi. Therefore when the sources stated that Tschaplitz was with Sacken, this referred to the III Cav Corps represented in the game by Wasiltschikow. Thus the placement of the "Tschaplitz" unit counter on Sacken's track is an error; Tschaplitz should always remain with Ostermann-Tolstoi. (The confusion is worsened by the fact that Wasiltschikow commanded Sacken's infantry corps before switching to the cavalry.)
Q: Shouldn't the following Static divisions of the French have a note on the organization display indicating "(D and L only)": Durosnel, Margaron, Lauer? A: Yes.
Q: Does Bluecher have the 9th Brigade at strength "6" in the Spring? This unit is listed on the Display, not on the manifest. A: Yes, he does; the manifest is in error.
Q: For the Dresden Scenario, Harpe is not listed on the Organization Display under Woronzow, but the Unit Manifest has him at strength "4" for this scenario. Which is correct? A: In this case, the Unit Manifest is correct.
Q: In the Spring, the Organization Display lists a "Kos X," but the Manifest says Mensdorf commanded the Kossacks under Kleist. A: Our sources did not know, or perhaps there was no formal organization of the Kossacks under Kleist. We just guessed Mensdorf when preparing the Manifest.
Q: The notation in Lt. Gen. Arrighi's box "2" on the Organization Display, specifying a Spring Scenario Strength, is misleading since Arrighi arrives during the Armistice. A: Correct: Arrighi was indeed on his way to the front, but was unable to join by the time of the Armistice. Therefore, his Spring set-up should have been removed from his track.
12: Morale
Q: Are army morale modifiers, even those affected at the same instant, always cumulative? E.g., in the Spring scenario, if the French win a pitched battle victory against an Allied force occupying Dresden, and are able to pursue the retreating Allied Force at least one hex into the city, would the French be able to adjust the Allied morale marker one to the left, and the French marker one to the right? (Or, if the Allied marker were already at "+1", would the French be able to claim a morale victory)? A: Yes to all examples.
14: Movement
Q: Does a repulsed force lose its ZOC in relation to the repulsing force for the duration of the Movement Phase? A: No.
15: Facing
Q: Are the terms "Formation" and "Mode" interchangeable? A: Yes. Both words refer to the same concept.
Q: When judging facing during a Battle Segment, how many hexes does a package in column "face?" A: It faces only the front three hexes. IMPORTANT: This is nowhere stated in the text of the rules.
Q: Does the force that is attacked at the beginning of a Pitched Battle halve its combat strength when it counter-attacks if it is not facing the force being counter-attacked? A: Yes.
Q: Can one leader stack with another if the two end a Movement Phase facing in different directions? I assume that they can't under the existing rules, but I suppose that it is possible that a subordinate leader's facing is automatically changed to bring it into conformity with that of the Commander of his package, if doing that doesn't entail changing mode or direction in an Enemy ZOC at the end of a move. If there are, indeed, significant restrictions on stacking units with different facings, they ought to be spelled out. Once they are spelled out, you might ask yourself again whether such restrictions on a player's freedom of action improve SN as a game or as a simulation. Given the time-scale you are working with, I have my doubts. A: Forces in the same hex must have the same facing and mode.
Q: What, if any, are the restrictions on changing mode during retreat and during pursuit? When changing mode, can a retreating or a pursuing force change its direction in mid-course? That is, can a retreating force, say, switch from column to line, making a ninety-degree shift in facing at the same time? Can a force pursuing a defeated force that is retreating in column (for it's no longer in the ZOC of the retreating unit), shift into line, pivot on one hex of the retreat path (without actually moving forward along the retreat path and thus inflicting casualties on the retreating force) and then continue the pursuit in line? (Maneuvers such as these seem to violate the spirit if not the letter of the rules, but I'm not certain of that.) A: There are no restrictions; mode changes do not count as hexes pursued.
18: Combat
Q: Does one "round" of Pitched Battle consist of a single combat resolution, or of an attack and counterattack together? A: One "round" is any single combat, whether attack or counterattack.
Q: Who is the commander, and who can counterattack, if two or more forces in adjacent packages without a leader of sufficient Command Span to combine both into one force, are attacked by a unified enemy force? A: In this case only one of the packages may counterattack.
Q: What if two separate forces were in the same hex, planning reorganization, when attacked? A: Again, only one force may counterattack.
Q: Rules, P. 29 "Restrictions on the type of Battle Chosen": "The number of attacks (or counterattacks) a Force may make during a pitched battle may not voluntarily exceed the Initiative Rating of the Force Leader ..." For the purposes of determining the number of rounds of voluntary pitched battle undertaken by the players, can the modified initiative ever be used? A: No. Strictly speaking there is no Modified Initiative, only modified Initiative die rolls. Use the printed Initiative Rating.
19: Retreat After Combat
Q: Does a turn of half of a package in line formation that is made after the initial turn of a retreat count as a full hex of retreat? A: Yes, but two consecutive ones in opposite directions do not. Turning is allowed, and counts, but two turns would count as one hex.
Q: If a package forced to retreat begins the retreat in column, with both hexes of the package in Enemy ZOCs, can it move laterally across the enemy front without incurring the penalty for retreating through an Enemy ZOC? (See Figure A) In this case, it is only the trailing half of the package that passes through the Enemy ZOC and according to the third sentence of "Path of Retreat", "for Path of Retreat purposes, ignore the trailing rear half of the Leader counter and regard only the leading half." Can a package that begins a retreat in such a position switch into line before moving (since, again, according to "Mode Change in Retreat/Pursuit" (p. 26), "retreating and pursuing forces may change mode during retreat/pursuit freely") and then move out of the Enemy ZOCs without penalty? (See Figure B.) Can such a package switch to line formation, make an initial turn (moving half the package), then switch back to column and begin the retreat? (See Figure C.) A: OK, OK (to the questions on Figures A, B and C; the figures themselves are diagrams).
20: Pursuit (Advance After Combat)
Q: In the pursuit table there is a note that says it's "impossible for pursuing force with initiative of 4 or 5" to get a modified die roll of 0 or -1. Why? A: You can't do it because you might be advancing farther than the retreat, which is not allowed.
Q: Being able to shift one hex for free makes it much easier to destroy the enemy force; merely pivot into his hex, get into column and off you go! A: This is impossible, as you can't change mode in an Enemy ZOC at the end of movement. (You may at the beginning of a move, if you get initiative.)
21: Disorganization and Rally
Q: Essentially a unit gets two rolls for Disorganization and Rally, one when it becomes disorganized and another to rally right back. A: No, if a unit is disorganized, it may not roll for rally in the same turn that it becomes disorganized.
Q: Does Army Morale also apply to Disorganization and Rally die rolls? A: Yes.
22: Replacements and Reinforcements
Q: When the rule states that if an LOC ... exceeds 80 hexes ... an army may receive no ... reinforcements, shouldn't this say "replacements" instead? A: Yes.
Q: Does the French player have his choice as to which of the two "Road to Hamburg" entry hexes he may bring the May 5-6 and May 13-14 reinforcements in on? Which route did they historically take? A: In any case such as this where the rule does not further restrict the Player, he may assume that the final choice is his. Either road may be used, since historically this choice was open. Apparently the actual road was the most westerly.
Q: Can only Guard Cavalry replacements be added to Guard cavalry units? A: Yes.
Q: On replacements for Sept. 8-9, there are two listings for infantry; also, I presume that it reads "one Old Guard," not 10. A: The second listing for infantry replacements ("3i") should be identified as Young Guard.
Q: Can units move in the same Player-Turn in which they receive replacements? Can a Player add replacements to the units of an army a) on the Game-Turn after its Center of Operations moves? b) While its Center of Operations is inactive? A: The answer to all three questions is "no."
23: Fortresses
Q: Can an Enemy force move into or through the "bridgehead" hex on the far side of the river before or after the citadel is placed under siege? A: No.
Q: Does a unit in a citadel or a fortified town exercise a ZOC in hexes that are adjacent to the bridgehead hex but aren't adjacent to the outlined citadel hex? A: No, both hexes are alike.
Q: Where, exactly, does the Allied Player place Major-General K (assigned to "Wittenberg", which is garrisoned by the French) and Wronzoff ("nr Madgeberg")? How near Madgeberg? A: "nr." means "adjacent to the citadel hex of".
Q: The Spring Scenario seems to require the Magdeburg garrison to attack Woronzof on French Player-Turn One, unless it is reinforced to the point where it can withstand a siege by Woronzof's force. A: Units in citadels never need to attack or be attacked, even on turn one. The minimum strength for siege applies only to the besieging force; there is no minimum necessary strength needed to be considered "besieged" and to take advantage of a citadel.
Q: The rule under "Fortresses" says that ZOC's extend into and out of Fortresses normally. However, other rules suggest that this is true of Fortified towns, but that it is not true of Citadels. A: ZOCs do extend into and out of Citadels and Fortified Towns alike. However, combat is not mandatory for units in Citadels.
Q: Is it true that a force in a Citadel can refuse combat anytime, but that it is "besieged" and unable to move only when the besieging force is at least equal in strength to it? A: Yes.
Q: Can a siege be broken in any of these ways? 1) When a friendly force moves adjacent (as noted in the rules); 2) When the besieging force drops via attrition or combat below the strength of the besieged force; 3) When strength is added to the besieged force making it greater than the besiegers in number. A: Yes, to all three.
Q: If a force in a fortified town is attacked, chooses Pitched Battle and loses the first die roll of the Pitched Battle, can it then decline to counter-attack? A: Yes.
Q: ... Take its SP loss and immediately end the battle? A: Yes.
Q: ... Without the morale of either side being affected? A: No! Its morale would be affected.
25: Effect of Special Unit Types
Q: When determining the cavalry ratio of opposing forces in pursuit situations, do you count cavalry attacking into "non-clear terrain"? A: You do count its strength but its strength is halved.
Q: When calculating the cavalry ratio of opposing forces in order to determine the die roll modifier of a force in non-clear terrain attempting to leave an Enemy ZOC, do you count the strength of cavalry units that are exercising a ZOC in non-clear terrain? That is, can cavalry prevent the exit of an enemy force from a wood or town hex? A: Yes, but again you halve the cavalry strength. NOTE: Towns may either be considered clear or non-clear terrain, at player's option, for this purpose.
Q: If there is an Enemy force at one end of a Blown Bridge that once spanned a River 1° when a Leader moves into the hex at the other end of that bridge with the intention of repairing it, is that Enemy force then considered to be "adjacent" to the Leader attempting the repair and thus able to prevent the bridge repair die roll from taking place? A: Yes.
Q: Can a Leader move into a hex at one end of a Blown Bridge during the Force-March Segment of the Enemy Player-Turn and then try to repair it during the next Friendly Movement Phase? A: No, it cannot be done. A unit which spans a bridge (occupying hexes on both banks) may not blow the bridge under it. A unit which begins the Movement Phase in a fort may withdraw to one side of the river spanned by the fortress and attempt to blow the bridge during the immediately ensuing Bridge Destruction & Repair Phase.
Q: Does a unit attempting to destroy a bridge have to spend any specific length of time at one end of the bridge before trying to destroy it? A: His entire Friendly Movement Phase.
Q: In several locations on the map you have two bridges crossing the river through the same hexside. This presents a problem when determining blown bridges. A: One blown bridge marker takes care of all bridges on the same hexside.
26: Politics and Off-Map Movement
Q: Does a Player have to take both Dresden hexes from his opponent in order to affect Army Morale? A: No, only the citadel hex on the west bank of the Elbe.
Q: Does the fall of Dresden to the French in fact affect morale? A: Yes, it does.
Q: When you state that the Berlin Militia "are placed on the map only if Berlin is approached by French forces ...", what exactly do you mean? Define "approached." A: "Within 7 MPs, counted at the inf. rate."
Q: What does the phrase "... through the August 15-16 Game Turn Exclusive" mean? Did you intend to say "Inclusive" instead of "exclusive"? A: No, the armistice excludes the 15-16 turn.
Q: If the Armistice occurs during the interphase between Turns June 2-3 and June 4-5, does the Allied Player win or is the game a draw? (I presume that it is a draw, but you might rewrite the rule to make that clear, adjusting it to the change in the procedure for determining the occurrence of the armistice introduced in the first set of additions.) A: It is not a draw; regard the said interphase as part of 4-5 June.
Q: On the Armistice Table, apparently an armistice occurrence is less likely if the French have a great morale advantage. And since the victory conditions allow a French victory for certain armistice occurrences, this appears to make it harder for the French to win in this manner. Is this intended? A: Yes. Even though it might not be to their advantage, a side with overwhelming strategic position is often less disposed to diplomacy. Thus, if the French Player finds his morale superiority extreme, he will have to seek the extreme, strictly military, solution, because historically, though the player knows better, that is most likely what the tendency would have been.
Q: On the Armistice Table, shouldn't the Table specify the addition of the modifier as "on June 4-5" (only)? A: Yes.