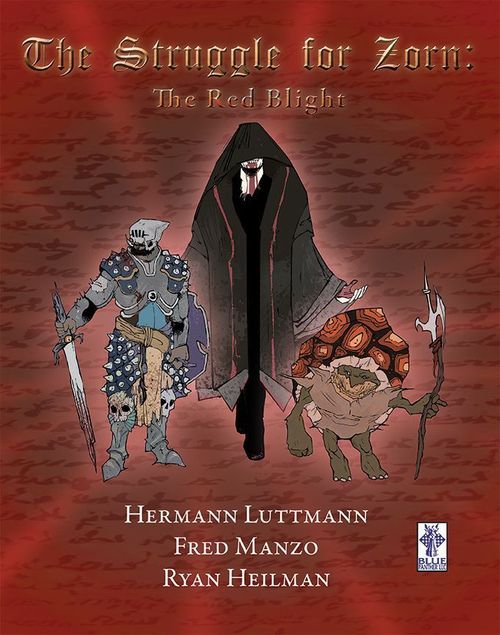
The Struggle For Zorn: The Red Blight
The Struggle For Zorn: The Red Blight Rulebook
Table of Contents
Table of Contents
- Game Overview
- A. Components
- B. Game Setup
- C. Sequence of Play
- D. Activation System
- E. Blight Unit Activations
- F. House Unit Activations
- G. Magic
- H. Missile Combat
- I. Melee Combat
- J. House Vs. House Combat
- K. Hit Application
- L. Movement
- M. Regroup
- N. Nighttime Game Turns
- O. Stunned & Terrorized
- P. Resources
- Q. Treasure
- R. Event Table
- S. Retreats
- T. Winning & Losing
- U. Special Abilities
- Player Aid: Event Table
Game Overview
The Struggle for Zorn: The Red Blight is a 1-5 player semi-cooperative fantasy wargame. Players collectively represent the various Houses of the Kingdom of Zorn, and these Houses have joined together to defeat the existential threat of the vile Red Blight. The Red Blight is an evil entity that has just launched an invasion of peaceful Slumbering Troll Valley, the northern-most province of the kingdom. The monsters of the Red Blight are now holding the citizens of the valley hostage and have absconded with the province's valuables, treasures, and vital resources. The Houses have been summoned by King Rufus V of Zorn to launch a Royal Crusade to free the valley and rid it of this blight. The game's players will each control a Commander, a Magic User, and a House Army, made up of various types of military units. Each player attempts to defeat enemy units and capture Treasure Tokens, and by so doing earn Glory Points. The player scoring the most Glory Points will be awarded with the title "Hand of the Crown" and win the game. However, players must cooperate and assist each other as well. If the Red Blight achieves certain conditions, all the players lose the game, regardless of their situation or amount of Glory Points. If players can stave off The Red Blight's attempt to exploit the valley for four full days, the monsters will lose access to the malignant power that sustains them. If this evil has been successfully thwarted, peace and freedom will be restored once again to the valley and one of the intrepid Houses will gain the ultimate royal reward. Will you become Hand of the Crown, Sire?
A. Components
- 1 22" x 34" Game Map
- 231 3/4" Counters/Markers
- 14 Standees
- 27 Playing Cards
- 15 Player Boards
- 3 Player Aids
- 1 Game Tracker
- 1 Rulebook
- 50 Cubes (10 Blue, 10 Orange, 10 Yellow, 10 Purple, 10 Green)
- 13 Dice (3 D6, 3 D8, 3 D10, 3 D12, 1 D20)
Standees and Unit Counters (front side Fresh, back side Battleworn) are shown on the component page.
1) Map
a. Areas: The map is divided into variably sized areas, each with one or more of eleven different terrain types:
- Mountain Passes
- Mountains
- Plains
- Forest
- Rough Hills
- Bog
- River
- Bridge
- Ford
- Towns
- Road
Areas are said to be adjacent to one another if they share a common border of any length.
b. Mountain Passes: There are five Mountain Pass areas that enter the valley at the bottom of the map. These are treated as Plains terrain (see below) for all purposes except the Area Unit Capacity is larger (see L-3). Each is lettered, from "A" through "E", and these represent the areas from which players' units enter the game.
c. Mountains: These are five areas above the Mountain Pass areas with the "mountainous" graphic inside them. These areas are normally impassable.
d. Plains: Tan-colored areas with no additional graphics are clear, open plains areas.
e. Forest: The areas containing green tree icons are forested areas, with heavy vegetation.
f. Rough Hills: These darker-tan areas with hills graphics represent heights and irregular terrain.
g. Bog: Deep, dark swampy areas that are difficult to move through en masse and conceal many horrors and difficulties.
h. River: The River Vile areas are those large blue areas located between the borders of the Ford and Bridge areas. These are normally impassable.
i. Bridge: There are three Bridge areas across the River Vile, shown with a large bridge graphic. Note that each Bridge is considered to be its own area.
j. Ford: There are three Ford areas crossing the River Vile, and function exactly like Bridge areas (but are more vulnerable).
k. Towns: Six Town areas are spread around the map. These are built-up inhabited areas that offer resources and defensive protection. Note that each Town area is also a Blight Den area (see below).
l. Road: Throughout the map is a white, dotted-outline graphic tracing the valley's road network. Roads do not change the type of area they pass through but do offer player units speedier movement.
m. Flanking Areas: Along each side of the map are special areas called Flanking Areas. These simulate a player's use of a flank march and taking extra time utilizing secret approaches to enter the valley. The label in each such area is "W" for the western flank and "E" for the eastern flank, along with an indicator of the required delay (+1, +2, or +3). The delay value indicates the number of their House's Activations a player must wait before those units may be placed into that specific Flanking Area. See Section L-4 for details.
n. Blight Dens: These are the 20 special burrows, camps, and prisons which the Blight Carpenter Ants have constructed to hold the Blight's loot and hostages. Each of these Blight Den areas are indicated with a white star icon. Den areas each have one Treasure Token and one Garrison unit placed into them (both face-down) at the start of the game.
o. Blight Entry Arrows: The 11 Areas with a large red arrow are the entry points for new spawning Blight units. Each arrow is labeled with a number from "2" through "12". Whenever a Blight unit enters the game via a Spawn! Activation or event instruction, any player rolls two D6 and sums the dice results. This total is cross-referenced with the Entry Arrow showing the same value and the arriving Blight unit is placed into the corresponding Blight Entry Arrow area.
p. Blight Movement Arrows: The small colored arrows on the map direct moving Blight units to their next area. These units simply follow the arrow path while conducting movement to the indicated adjacent area.
- If there are two possible exit paths from an area, this is called a Forked Area. The path to be used is determined by the Forked Area Directional Marker. There will be one blue arrow for the even-numbered path and one yellow arrow for the odd-numbered path.
- The Trollburg Gap Forked Area is a special area and has three yellow arrows instead. Players roll a D6 for each separate Blight unit that must exit that area and the unit will use the yellow path corresponding to that number result.
2) Scale
a. Ground scale: The game's scale is highly abstracted. Map areas range from hundreds of yards to a couple of miles.
b. Game Turns: There are normally 12 Game Turns in a game of The Struggle for Zorn, divided into four Days. Each Day consists of two Daytime Game Turns and one Nighttime Game Turn. However, it is possible for the game to end before all four Days are completed. During a Daytime Game Turn, normal activation procedures are conducted. During a Nighttime Game Turn, there are a number of special steps for the players to conduct.
3) Units
a. The Royal Houses of Zorn: Each player controls one of five Houses, and each individual House has a force of up to 12 units, depending on the number of players. The actual make up of these units is unique to each House. The Houses are:
b. Types of Royal House Units: All five Houses have a unique mix of these types of units:
- Royal Ironmen Squadron
- Royal Archers Regiment
- Swordstrikers Regiment
- Rock Thrower Machine Team
- Boomstickers Regiment
- Levy Division
- Harassers Team
- Pikers Wedge Regiment
c. House Unit Ratings: House units have an array of ratings displayed on their counters that are referenced throughout the game. Most of these ratings indicate the type of die rolled to resolve a combat or test. The types of dice are D6 (six-sided), D8 (eight-sided), D10 (ten-sided) or D12 (twelve-sided) for the following ratings:
- Melee Combat Rating: This is the type of die rolled by the unit when fighting in Melee Combat (attacking or defending).
- Missile Combat Rating: This is the type of die rolled by the unit when issuing Missile Combat. Not all units have this capability and those with a dash (-) cannot use Missile Combat. Listed after the type of die is the Range of the Missile Combat, shown with an "R" prefix. This displays the maximum number of Areas the unit can fire.
- Movement Allowance: This is the maximum number of Areas the unit can move into or through. Each area entered reduces the remaining Movement Allowance by one, regardless of terrain type.
Note that every type of terrain costs only one area of the unit's Movement Allowance. There are no terrain movement penalties, except that Mountains and River areas cannot normally be moved into.
- Bravery Rating: Events and combat situations may call for the unit to take a Bravery Test. This entry indicates the type of die rolled when testing.
Bravery Tests: In all cases when taking a Bravery Test, the unit's die result must be "5" or greater for it to pass. A roll of "4" or less means it fails the test. A player may spend 1 Food at any time to Upgrade a unit's Bravery Rating (known as "Liquid Courage").
- Special Ability: All units have one or more Special Abilities. These are unique actions or modifiers that the unit can use in specific situations. Reference the House Faction Board or section U for a detailed explanation of each Special Ability.
d. Commanders: Each House is led by a renowned leader of great skill, cunning and bravery. Players will draft or randomly draw a Commander unit at the start of each game, and they will then act as the Commander for that player's House. There are five Commanders in the game:
- Namtull "the Great"
- Lady Oznam
- Prince Nayr III
- Duchess Rammstein
- Regent Zenoj
e. Magic Users: This unit represents a wizard, warlock, or sorceress of the kingdom. They are drafted or drawn like Commanders by each player and assigned to that player's House. There are five Magic Users in the game, and each is a Master of one school of magical power:
- Morgan Von Fay – School: Air
- Mettea the Magnificent – School: Spirit
- Nilrem the Amazing – School: Water
- Prospero – School: Fire
- Sersi the Odd – School: Earth
f. Mercenary Units: These are independent units from neighboring kingdoms and lands that can be hired during the game by player's spending their Gold Resources. The unit's cost in Gold is shown in the top right corner of the unit counter. The rulebook's illustrated examples are the Vagnar Corps (cost 4), Argonian Berserkers (cost 6) and Death Riders (cost 8).
g. Hero Unit: There is one Hero unit that cannot be hired but arrives due to an Event. This is a "wild" unit in that any player can control it during their activation, as if it is one of their House units. The unit does not have to be fed by any House.
h. Red Blight Units: These are the evil adversary units of the Red Blight and they come in a variety of types. Blight counters display various ratings in the same manner as House units. The game controls how and when these units arrive, along with how they act once on the map, through the Blight Activation process and the Event Table. All Blight units are enemy units to all House and Mercenary units. The various types are listed below, in Evil Power order from weakest (1) to strongest (6):
-
Tortoses Garrisons: Tortoses Garrisons represent the mutated turtle-like creatures that are assigned to guard the hoard of valuables and hostages. These counters are randomly placed face-down on each Blight Den area at the beginning of the game (on top of Treasure Tokens). These units are unique in many ways:
- These units have two Movement Allowances – "0" when in a Blight Den area and "1" when they are in any other space. They never voluntarily move if in a Blight Den area. If in a non-Blight Den area, they move only 1 area during a "Blight Wave" card or if in the same area as a Far-Seer Champion during a "Far-Seer Champions Lead" activation.
- They have the Hard Shell Special Ability, which modifies the normal Area Protection Value by "+1" for both types of combat.
- They will not conduct Strikes while in a Blight Den area, they will only do so when in any other type of area.
- They are eliminated if 2 or more Hits are inflicted on them.
- They are not revealed unless Scouted, a Melee Combat attack is conducted against them, or they are required to have their Bravery Rating referenced.
- Ambush!: If a just revealed Tortoses Garrison counter has a white star in the top left of the counter, an Ambusher unit will be immediately spawned into that same area, before any Melee Combat is resolved. It will then be an additional defender of that area. If the area is beyond its Area Unit Capacity due to the Ambush, then the Ambusher unit is instead placed into an adjacent area with the highest Missile Combat Protection Value (player choice if more than one). If that adjacent area is occupied by House units, an immediate Melee Combat is resolved.
Note that an Ambusher will not be spawned if the Tortoses Garrison unit is outright eliminated before being revealed, such as from a Magic Spell, Missile Attack, or Event. Otherwise, the Ambusher is deployed per these rules.
-
Ambushers: These creatures appear randomly throughout the game. They can arrive when a white-starred Tortoses Garrison unit is revealed, by an Event result and during normal card procedures. They represent large swarms of demented creatures (spiders, snakes, rats, roaches, etc.) that spew out of hiding, often at the worst possible time.
All Blight Units, when eliminated, are placed back into the pool of available units. In the case of Far-Seer Champion units, do not place eliminated units back into the pool until there are no more units remaining in that pool. The Far-Seers are incredibly strong and resilient spirits, being crafted from the core paranormal forces that brought about the Red Blight to begin with. Though they can be eliminated from the game, they are not truly destroyed. They are only magically whisked back to their dens and slowly rejuvenated and therefore they can eventually return to action.
4) Chits and Markers
Various chits and markers are used in the game to indicate unit status, as reminders of events or conditions and to use on the various game tracks. Each section of the rules will dictate how to use these markers. The number of markers that can be used in the game is a fixed amount. If a player wishes to use a marker but there are no more available in the pool (such as an "Entrenchment" marker), the player may remove one that is on the game board that is owned by them and use it.
5) Cards
Twenty-seven Red Blight Activation Cards are used in the game to activate Red Blight units. The top card is drawn each time a Blight Activation occurs. The drawing player reads the card aloud and enacts its instructions. When the last card is drawn, resolve that card and then shuffle all the cards to form a new draw pile.
6) Dice
There are thirteen dice included in the game, which are shared by all the players. There are three six-sided dice (D6), three eight-sided dice (D8), three ten-sided dice (D10), three twelve-sided dice (D12) and one twenty-sided die (D20). The unit ratings will indicate which type of die is to be rolled to resolve combat or tests – the D20 is only used for certain events and the Night of Terror Phase.
a. D3: Some actions or modifications in the game call for a "D3". This means that the player rolls a D6 die and halves the result, rounded up.
b. Upgrading: Dice can be Upgraded by certain events or abilities. If so, use the next higher type of die. An Upgraded D12 allows the player to also roll a D6 and the two dice are added together. A die cannot be Upgraded beyond an Upgraded D12. Note that an Upgraded D12 does not become a D20.
c. Degrading: Dice can also be Degraded by certain events and conditions. If so, use the next lower die type. A D6 that is Degraded in this manner is treated as a D3. A die cannot be Degraded below a D3.
B. Game Setup
1) General Setup
Players place the game board in the middle of the table and within reach of all players. Players should try to sit down by the south end of the map (where the Mountains and Mountain Passes are located).
- Blight Activation Chits: Place one Blight Activation Marker in each of the odd-numbered spaces on the Activation Track.
- Blight Activation Cards: Shuffle the 27 Blight Activation cards and keep them in a draw pile near at least one of the players.
- Game Turn Marker: Place the "Game Turn" marker in the Game Turn #1 box on the Game Turn Track.
- Mercenary Units: These should also be placed near the map and sorted by the three types of units.
All of the game's general use markers – "Casualties", "Wounded", "Terrorized", etc. – are sorted and placed near the map.
2) Player Setup
Establish the number of players participating in the game. Each player will control one of the five Houses.
House Selection: Each player can choose the faction they wish to play, or this can be determined randomly. Players then take their associated House Faction Board and all the wooden cubes in that matching House color.
House Contingents: The number of units that each House receives is based on the number of players, as follows:
- 1 or 2 Players: All 12 House units
- 3 Players: Any 9 House units
- 4 Players: Any 7 House units
- 5 Players: Any 5 House units
For 3+ player games, the players choose the exact mix of units they wish to use from the available pool of 12 units for that House.
After selecting the exact House unit counters that will be used in the game, each player also chooses or randomly draws one Commander standee and one Magic User standee to become part of their House's contingent. Players then take their matching "half-moon" Commander and Magic User Boards, fitting them on either end of their House Faction Board.
All these player forces are then placed onto the map, with each House being allowed to deploy its units into one Mountain Pass area or two adjacent Mountain Pass areas (remember that the Area Capacity in these areas is 10 units each). In addition, players may assign units to travel on the flanks, heading for one or more Flanking Areas. These units are placed off the side of the map – west (W) or east (E) – indicating which Flanking Areas they are marching towards.
Finally, players take one or two of their House Activation Chits (see below) and all the wooden cubes in their House color.
House Activation Chits: The number of House Activation Chits each House is assigned is based on player count.
- 1-player: Solitaire players use the 2-player mode but control both Houses.
- 2-players: Each House receives two of their House Activation Chits, plus one Wild House Activation Chit is used.
- 3-players: Each House receives one of their House Activation Chit, plus two Wild House Activation Chits are used.
- 4-players: Each House receives one of their House Activation Chits, plus one Wild House Activation Chit is used.
- 5-players: Each House receives one of their House Activation Chits. No Wild chit is used at this player count.
The appropriate chits are then placed at the north end of the game map, near the Activation Track.
Starting Resources: Players start the game with some Resources already in hand. Each player receives Resources based on the number of players in the game:
- 1 and 2 Players: 10 Food & 6 Supplies
- 3 Players: 8 Food & 5 Supplies
- 4 Players: 6 Food & 4 Supplies
- 5 Players: 5 Food & 3 Supplies
Each player places their appropriately colored cube on each of the game tracks to record their starting Glory (zero), Food, and Supplies Resources. Also, they place a cube in the "1" box of the Magic Level Track.
3) Map Setup
Treasure Tokens Setup: Players have three available methods of deploying the 20 Treasure Tokens onto the map. The group decides which of the three they prefer and then place the Treasure Tokens on the map per the chosen method:
- Totally Random: Players take all 20 Treasure Tokens, turn them face down (so the "Treasure" side is face up) on the table, mix them up and then randomly place one into each Blight Den area (still face down).
- Weighted Random: In order to ensure that each type of Treasure Token is equally divided between locations north and south of the River Vile, players divide the Treasure Tokens into two piles, with each pile containing half of each type of Treasure Token. So, 3 "Relics", 2 "Hostages", 3 "Valuables" and 2 "Traps" (each chosen randomly) go into each pile. These should be facedown when split so players don't know exactly which tokens of each type are in each pile. One pile is then deployed (still facedown) randomly into the 10 Dens north of the River Vile and the other pile into the 10 Dens south of the river.
- Identified Relics: If players decide that they want to know where the "Relic" markers are located, they may place each of the six "Relic" tokens into each of the six Town areas. Then randomly place the remaining Treasure Tokens, using the Totally Random method described above.
Tortoses Garrisons Setup: Flip all 20 Tortoses Garrison units face-down and mix them up. Then randomly place one Tortoses Garrison unit face-down in each Blight Den space (which includes Town areas) on top of the Treasure Token located in the same area.
Red Blight Initial Deployment: Spawn 4 Minion Horde units using the normal Spawn procedure (see E-4). Then randomly select one Far-Seer Champion unit (using any convenient method) and Spawn that unit as well.
The game is now ready to begin!
C. Sequence of Play
The Struggle for Zorn is played in a series of up to 12 Game Turns. A Game Turn can be a Daytime or Nighttime turn, and each turn contains Phases and Steps. During a Daytime Game Turn, conduct only the two Daytime Phases. During a Nighttime Game Turn, conduct only the indicated Steps. All Phases and Steps must be completed in order and to conclusion before proceeding to the next Phase or Step for the type of Game Turn being played.
Daytime Game Turn
1) Game Turn Setup Phase
- a. Collect Discarded Activation Chits Step: Players collect all previously discarded Activation Chits. This step is skipped on the 1st Turn.
- b. Deploy Blight Activation Chits Step: Place the five Blight Activation Chits on the Activation Track in the odd-numbered spaces.
- c. Deploy House Activation Chits Step: Players collectively decide which House will activate first and the place that House's Activation Chit in the #2 space. All other House's Activation Chits (including Wild Activation Chits) are turned facedown, mixed up and placed randomly in the remaining even-numbered spaces.
- d. Forked Area Blight Movement Arrow Determination Step: Any player rolls any die to get an "odd" or "even" number result. That player takes the "Forked Area Directional" marker and places it near the map showing the appropriate side so all players can see it.
2) Activation Phase
- a. Discard Activation Chit Step: Players discard the Activation Chit (Blight or House) in the lowest numbered space of the Activation Track.
- b. Blight Activation Step: If the discarded chit is a Blight Activation Chit, conduct a Blight Activation by drawing the top Red Blight Activation Card and following its instructions.
- c. House Activation Step: If the discarded chit is a House Activation Chit, the player controlling the named House will conduct their House Activation.
- Cast Magic Spell: Magic Users attempt to cast a Magic Spell.
- Missile Combat Attacks: Eligible active House units conduct Missile Combat.
- Melee Combat Attacks: Eligible active House units move into an adjacent area and conduct Melee Combat.
- Movement: Eligible active House units conduct Movement. Designated Flanking units may move up one Flanking Area and enter the map there or enter the map into the current Flanking Area.
- Regroup: Eligible active House units Regroup.
- Hunger Recovery: Units suffering from Hunger inflicted during the previous Nighttime Game Turn recover and are made normal.
Nighttime Game Turn
- a. Collect Resources Step: Players controlling a Town area collect Resources from that area. Players controlling a Camp collect Resources from each "Camp" marker.
- b. Hunger Step: Players feed units with Food Resources. Then if there are any unfed units, players determine how many of their units become hungry.
- c. Poisoning Step: All units with a "Poisoned" marker take 1 Hit.
- d. Entrench Step: Eligible Units may build an "Entrenchment" or "Camp" marker.
- e. Recovery Step: All Stunned House and Blight units remove their marker. All Terrorized House and Blight units must pass a Bravery Test to remove their markers (House units first).
- f. Night March Step: Each player may move any or all their House units into an eligible adjacent area (only).
- g. Blight Night Strike Step:
- Blight Magic Missile Attack: Blight units conduct a Missile Combat attack with Upgraded Missile Combat ratings.
- Sneak Attack: Eligible Blight Ambushers conduct a Melee Combat attack.
- On Game Turn #12 (only), this becomes the "Night of Terror" Step, and a special procedure is used.
D. Activation System
The Struggle for Zorn uses a unit activation process that centers around the Activation Track. This track contains box numbers that run from #1 through #10 - even-numbered boxes being "House" boxes and odd-numbered boxes being "Blight" boxes. Each House in the game will have one or two House Activation Chits assigned to it (depending on player count) totaling five House/Wild Activation chits while the Red Blight also has five chits. The game proceeds along the track in order, from left to right. The Red Blight always activates first, and activations alternate from that point onward.
1) Activation Chits
All games, regardless of player count, use ten Activation Chits to determine who is the currently active side or players - five Blight Activation Chits and five House/Wild Activation Chits. Each player will control one House, except if playing solitaire in which case the player controls two Houses.
- a. House Activation Chits: The number of House Activation Chits each House is assigned is based on player count.
- 1-player: A solitaire player uses the 2-player mode and controls both Houses.
- 2-players: Each House receives two of their House Activation Chits, plus one Wild House Activation Chit is used.
- 3-players: Each House receives one of their House Activation Chit, plus two Wild House Activation Chits are used.
- 4-players: Each House receives one of their House Activation Chits, plus one Wild House Activation Chit is used.
- 5-players: Each House receives one of their House Activation Chits. No Wild chit is used at this player count.
- b. Wild Activation Chits: A Wild House Activation Chit allows the players to choose any player's House to conduct the current House Activation. Players discuss who it should be and the majority rules.
- The Duel: If players can't decide, each player who disagrees rolls a D12, and the highest die roll result decides on the active House. A player may abstain from the roll but may not then take any further part in deciding who gets the activation. All players who tie each other's die roll have their Commander unit take 1 Hit (no Save Attempt is allowed). If the highest die rolls tie, those players have their Commanders take a Hit and only they will re-roll.
2) Activation Chit Deployment
- a. Deploy Blight Activation Chits Step: Place the five Blight Activation Chits on spaces #1, #3, #5, #7 and #9 of the Activation Track.
- b. Deploy House Activation Chits Step: The players collectively decide which House will take the first activation – but it cannot be a Wild Activation Chit. If players can't decide, use the same The Duel procedure as described under Wild Activation Chits (C-1b). Players place the chosen House's Activation Chit face up into space #2. The remaining House and Wild Activation Chits are then placed face down, mixed up and then randomly placed face down into the #4, #6, #8 and #10 spaces (and are kept face down until discarded).
3) Activating Chits
Players begin the Game Turn by discarding the Blight Activation Chit in space #1, placing it aside and out of play for this turn. They conduct a Blight Activation Step and resolve all necessary spawning, movement, event resolution and combat. When concluded, the players note the House identified on the chit in space #2, discard that chit (in the same manner as the Blight Activation Chit) and the player whose House's chit was discarded conducts a House Activation Step. This procedure then continues with the Blight chit in space #3 and so on until all Blight and House Activation Chits on the track have been activated and discarded.
E. Blight Unit Activations
When a Blight Activation Chit is discarded, any player (preferably the luckiest of the group) will conduct the Blight Activation Step by drawing a Blight Activation Card. The drawn card contains specific instructions as to which Blight units are activated, spawned and/or moved. In some cases, the card has players roll on the Event Table.
1) Advance
The card indicates which type of Blight unit will conduct Movement (see L-2). If the unit's movement has it enter a House unit occupied area, resolve a Melee Combat attack by the moving Blight unit(s) after all movement on the map is concluded.
2) Crazed
The players will draw two new Blight Activation cards, one at a time, and resolve each one separately.
3) Event
Players roll a D20 on the Event Table (located on the Player Aid) and immediately enact the resulting event.
4) Spawn
The card states what type of Blight unit(s) enters the game. In the case of Terror Beasts, Fetid Knights and Far-Seer Champions, the spawned unit is chosen randomly. Any player rolls two D6 for each arriving unit and adds the resulting numbers together. They then place the unit(s) in the corresponding Blight Entry Arrow space. If there are no more units of the listed type remaining, players will Spawn one unit of the next stronger available type (based on the Evil Power ranking – see A-3h) instead. If there are no units remaining of a higher Evil Power rank, then circle back to the Ambushers and Spawn from there. If two units are being entered, enter them one by one in the order listed on the card.
5) Far-Seer Champions Lead
First, Spawn one Far-Seer Champion unit (chosen randomly if more than one is in the available pool). Then, all Far-Seer Champion units, along with any Blight units sharing an area with them, conduct an Advance using normal procedures.
6) Strike
All Blight units of the listed type(s) attack an eligible area (see below). If a unit of that type(s) cannot Strike, it will Advance instead, using normal procedures. Units attack in Evil Power order, with the most powerful attacking/moving first.
- a. If the affected Blight unit has a Missile Rating, it will conduct a Missile Fire attack against the closest House-occupied area within its listed Range. If more than one target area qualifies, the area with the lowest Missile Fire Protection Value is attacked. If still equal the players choose the area. If it is not mathematically possible for the Blight unit to score a Missile Combat Hit (ex: having a D6 Missile Rating when the net Protection Value of the eligible area is "7"), the unit will conduct a Melee Combat attack against the area instead.
- b. If a unit does not have a Missile Rating or cannot possibly score a Hit with a Missile Combat attack, it will conduct a Melee Combat attack into an adjacent House-occupied area that has the lowest Melee Combat Protection Value modifier. Players choose if more than one area qualifies.
- c. Note that Tortoses Garrison units do not Strike from a Blight Den area (they only do so from a different type area).
7) Blight Wave
All Blight units will conduct Movement in Evil Power order (most powerful first). The units are moved normally except that they will not move into a House-occupied area, and thus no Melee Combat attacks are initiated with this card. Units halt in the last area before they would enter a House area.
8) Multiple Unit Activations
In all cases, if the Blight Activation Card calls for multiple Blight units to be moving and/or attacking, resolve one unit at a time in order of their Evil Power (i.e., the strongest units activated first followed by the next strongest, etc.). Otherwise, Blight units are activated in any convenient order by the players. Players may find it convenient to turn the unit counter 45-degrees after moving to indicate those that have already moved with this card to avoid confusion.
F. House Unit Activations
If the discarded chit is a House Activation Chit, the player controlling the named House (or the House chosen by the players if the Wild Activation Chit is discarded) will conduct their House Activation Step. The active player may activate all the units in their House, along with eligible Mercenary units and/or the Hero unit. The active player conducts one eligible Unit Action with each of their House units (and any Mercenary Unit they may have hired or acquired and the Hero unit if in the game). Units are activated one by one and in sequence depending on what their selected Unit Action is. Each active unit must complete its Unit Action before the next unit activates. The activation sequence is as follows:
- Cast Magic Spell: The Magic User unit attached to the active House may attempt to Cast Magic Spell.
- Missile Combat Attacks: Eligible active House units that did not Cast Magic Spell may conduct Missile Combat.
- Melee Combat Attacks: Eligible active House units that did not conduct Cast Magic Spell nor a Missile Combat attack may move into an adjacent area (only) and conduct a Melee Combat attack.
- Movement: Eligible active House units that did not conduct Cast Magic Spell, Missile Combat or Melee Combat may conduct Movement.
- Regroup: Eligible House units that did not conduct any other Unit Action earlier in this step may Regroup.
- Special Ability: Some units have one or more Special Abilities that can be applied or that can modify a Unit Action. Each Special Ability indicates when it can be used (see the House Faction Board).
Remember that a Hero Unit can be activated by every House during their activation. So that means a Hero unit can be activated up to five times per Game Turn.
G. Magic
Each House begins the game with one Magic User unit. These units each have the normal ratings of House units plus they are proficient in a certain Field of Magic, which allows them to cast particular Spells that each have unique and powerful game effects. Only Magic Users may perform the Cast Magic Spell Unit Action as their one Unit Action, though they may perform one of the other normal Unit Actions instead.
1) Magic Levels and Range
The Magic Level of a Magic User unit indicates the maximum Range (in areas) to which they may cast their Spell.
Thus, for example, a Magic User at Magic Level 2 could Cast a Magic Spell up to two areas away. A Magic User may always target its own area. The Range cannot be traced through a Mountain or River area. Otherwise, no type of area terrain or units block a Magic Spell. Players record their Magic User's Magic Level using the appropriately colored cube on the Magic Level Track.
- a. Starting Magic Level: All Magic Users begin the game as Level 1 Magic Users. This can be improved during the game.
- b. Magic Level Upgrade: A Magic User's Magic Level may by upgraded in three ways:
- If the Magic User conducts a Regroup action and the player spends the necessary Resources, the Magic User creates a "Mana Potion" that gives them the strength and skill to improve their Magic Level by one. A player must spend Food, Supplies and Gold Resources equal to the next Magic Level the Magic User wishes to attain. For example, a Level 2 Magic User would need to create a Mana Potion of 3 Food, 3 Supplies and 3 Gold to reach Magic Level 3. Note that Gold cannot be used as a substitute for other Resources in this case. If the Resources are spent, the Magic Level is increased by one (only). Only one upgrade may be done per activation.
- Certain events from the Event Table can increase the Magic Level.
- Capturing a Relic Treasure Token increases the capturing House's Magic Level by one.
- c. The highest Magic Level is "5" – ignore any upgrades beyond that.
- d. If at Magic Level "3" or "4", that Magic User substitutes a D8 for one of the D6's it would normally roll (see below).
- e. If at Magic Level "5", that Magic User substitutes a D10 for the D8.
2) Mana Blessings
Magic Users can generate occasional small magical "power pockets" with the residual mana that remains after casting spells. These are referred to as "Mana Blessings" by the layfolk and they provide welcome assistance and relief to those in trouble.
- a. Number of Mana Blessings: Mana Blessings are kept track of with "Mana Blessing" markers. They are earned with some die roll results while attempting to Cast a Magic Spell.
- b. Mana Blessings Bonuses: A player may use one or more of their Mana Blessings during gameplay as indicated by the type of bonus used. Mana Blessings are earned if either or both Magic Spell dice are "6" or greater. Record them only after the Magic Spell is resolved.
- Mana Bolt: For 1 Mana Blessing, re-roll any one of your House's dice, for any reason. Blight rolls cannot be re-rolled nor can a roll on the Event Table. This option applies to any Combat, Magic, or Bravery die roll. Only one re-roll per situation is allowed and the re-roll must be used.
- Mana Push: For 1 Mana Blessing, increase a unit's Movement Allowance by +2 areas. This is announced before a unit moves.
- Mana Conjuring: Conjure 1 Supplies and 1 Food Resource per Mana Blessing. This can be done at any point during a House's activation.
- Mana Cleansing: For 2 Mana Blessings, remove a "Poisoned" marker from a unit that uses a Regroup action. If the unit does not Regroup, this blessing can't be used.
- Mana Resurrection: For 3 Mana Blessings, a "Lightly Wounded" marker may be removed from a Character standee or a "Heavily Wounded" marker may be flipped over to "Lightly Wounded". The Character must use a Regroup action to receive this blessing.
3) Spell Casting
When a Magic User unit wishes to use the Cast Magic Spell Unit Action, the player announces such during the Cast Magic Spell step. The player declares exactly which Spell the unit is casting (each Magic User has two Spells available) and the target area (which must be within the Magic User's Range).
-
a. Spell Casting Resolution: The player rolls two D6 dice (unless at Magic Level "3" or better) and checks the dice results on the Magic Table (on the back of Blight Powers Aid).
-
b. When at Magic Level "3" and "4", the player rolls a D6 and a D8.
-
c. When at Magic Level "5", the player rolls a D6 and a D10.
-
d. Magic Table: The player reads the two dice results and finds the corresponding entry on the Spell Casting Table on the player aid. The player is looking to roll a "5" and/or "6+" on the dice. If there's a choice of which enemy unit to affect, the player who controls the Magic User makes that choice. If no "5" or "6+" is rolled and one or both of the dice is a "1", then a bad effect applies.
Note therefore that when a Magic User reaches Magic Levels "3", "4" and "5", one of the two dice will be a stronger die (either a D8 or a D10) and thus it will be easier to roll a "6+" result on that die.
-
e. Magic Spells: Each Magic User has access to two unique Magic Spells that they may attempt to cast. If the spell is successful, the player consults the Magic Spell Table (see Magic User Board). The entry lists the two unique Magic Spells that they may cast and their effects. Remember that the player may only cast the spell that they announced using before the dice roll is made.
Note on this transcription: the Spell Casting Table and the Magic Spell Table are printed on the player aids and Magic User Board, not in this rulebook's text, so the individual spell entries are not reproduced here.
H. Missile Combat
Missile Combat represents ranged shooting combat with arrows, stones, bullets, fire, etc. Combat is resolved with a single die roll versus the target's Area Protection Value.
1) Missile Combat Eligibility
A House unit that did not conduct a Cast Magic Spell Unit Action previously in the activation may conduct a Missile Combat Unit Action. Blight units will conduct a Missile Combat attack if instructed to do so by a Blight Activation Card or Event. A unit may only attack an enemy unit within its Range.
2) Missile Combat Range
The Range a unit may conduct a Missile Combat attack is listed on each unit's counter with their Missile Combat Rating (after the "R"). This indicates the maximum number of connected areas through which the attack can be made.
For example, the adjacent area is Range 1, two connected areas away is Range 2, and so on.
Missile Combat fire cannot be blocked by other units or by area terrain, except for Mountains and Rivers.
Note that there is no "line of sight" requirements – just count the number of areas to the target and provided that no Mountain or River areas are traced through, the unit can fire.
3) Blight Unit Missile Fire Targeting
When a Blight unit is instructed to conduct a Missile Combat attack, it will target the closest House-occupied area (in number of areas) within its Range. If more than one area qualifies, the area with the lowest Missile Combat Protection Value (including any additional marker modifiers) is the target area.
If there are multiple House units in the targeted area, the unit chosen is the first one in the order of priority (players choose if all equal):
- Lowest Movement Allowance
- Lowest Bravery
- Lowest Melee Rating
4) Missile Combat Resolution
The firing unit will target one eligible enemy unit within Range. The attacking player (or any player if a Blight unit is firing) rolls a die of the type listed as the firing unit's Missile Rating.
- a. Area Protection Value: The Missile Combat die result is compared to the Protection Value of the target area's terrain type, which can be increased by certain types of units or markers in that area, as follows:
- Town: 6
- Rough Hills and Forest: 5
- Plains: 4
- Bog, Bridge or Ford: 3
- Target Unit is Tortoses Garrison: +1 (Hard Shell Special Ability)
- Earthquake marker: +2
- Entrenchments marker: +2
- Camp marker: +3
- b. Missile Combat Results: The player compares the die result to the Area Protection Value of the targeted area and applies the following results:
- If the die roll is less than the Area Protection Value, the attack misses and there is no effect.
- If the die roll equals the Area Protection Value, the target unit takes a Bravery Test. If it fails, it receives 1 Hit. If it passes, there is no effect.
- If the die roll exceeds (but is not double or more) the Area Protection Value, 1 Hit is scored.
- If the die roll exceeds the Area Protection Value by double or more, 2 Hits are scored instead.
Note therefore that no more than 2 Hits can be inflicted by Missile Combat unless a firing unit's Special Ability allows more.
I. Melee Combat
Melee Combat is close-in fighting and often a vicious hand/claw/tentacle vs. hand/claw/tentacle struggle. It is resolved by both sides rolling competing dice against one another. Units are always able to defend themselves in Melee Combat. The active unit conducting the attack is deemed the attacker and the targeted unit is the defender.
1) House Unit Melee Attack Eligibility
A House unit that did not Cast Magic Spell or conduct a Missile Combat attack earlier this activation may conduct a Melee Combat Attack Unit Action if it is currently adjacent to a Blight-occupied area. The attacking unit is moved into the defender's area. The player may do so with as many units as can fit into the attacked area up to that area's Area Capacity (see L-3).
It is important to note that a Melee Combat attack by a House unit can only be initiated from an adjacent area. House units cannot conduct normal movement and enter a Blight-occupied area to attack it. On the other hand, Red Blight units do conduct their Melee Combat attacks during normal movement (Advance but not Blight Wave) by moving into a House-occupied area.
2) Blight Unit Melee Attack Eligibility
Blight units will automatically conduct a Melee Combat attack if they enter a House-occupied area during their normal Movement. If instructed to conduct a Melee Combat attack by an Advance or Strike activation or an Event result, the Blight unit will find an eligible adjacent area to attack. The Blight unit will attack the adjacent House-occupied area with the lowest Area Protection Value Modifier (including any marker modifier adjustments). In all cases where multiple areas qualify, the players make the choice.
3) Multiple Attacking Units
All moves that would result in one or more Melee Combat Attacks are completed before resolving any of the combats. Thus, multiple units could end up attacking the same area. Players then resolve any Melee Combats on the map in any order desired.
4) Melee Combat Resolution
Both attacking and defending units will roll a die based on their respective Melee Ratings. If multiple units are attacking and/or defending, roll all units' Melee Dice together and sum the dice result into one amalgamated attacking total and one amalgamated defending total. The player sitting to the left of the active player will roll the dice for the Blight unit(s).
-
a. Area Protection Value Modifiers: The defending unit(s) only will get a bonus added to their die roll result depending on the type of terrain in the combat area and certain types of units and/or markers defending in the area:
- Town: +3
- Rough Hills: +2
- Forest: +1
- Bog, Plains, Bridge, Ford, or River: 0
- Any Defending Unit(s) is a Tortoses Garrison: +1 (Hard Shell Special Ability)
- Earthquake marker: +2
- Entrenchments marker: +2
- Camp marker: +3
Applicable modifiers are applied once to the total of the defending unit(s) die rolls.
-
b. Melee Combat Results: Players compare the total rolled by the attacking unit(s) to the total rolled by the defending unit(s). The dice roll sum comparison will yield one of the following results:
- If the dice roll totals are equal, both sides take 1 Hit (except if the Snapping Jaws Special Ability is in effect, then 2 Hits are inflicted on the House units). Each unit from both sides then takes a Bravery Test. If failed, the unit Retreats one area; if passed it remains in the combat area. If both sides have at least one unit that passes, then both sides must Retreat all units remaining in the area one hex.
- If one side's dice roll total exceeds the other (but is not at least double), 1 Hit is inflicted on the lower-scoring side and all those units Retreat one area.
- If one side's dice roll total is double the score of the lower-scoring side (but not triple), 2 Hits are inflicted on the lower-scoring side's units, and all those units Retreat one area.
- If one side's dice roll total is triple the score of the lower-scoring side (but not quadruple), 3 Hits are inflicted on the lower-scoring side and all units on that side Retreat two areas.
For example, three House units conduct a Melee Combat attack against two Blight units in a Forest area. The player controlling the attacking House units rolls their three Melee Combat dice while the player sitting to the left rolls the Blight units' two Melee Combat dice (adding +1 to the total for the Forest area). Players add their respective scores together and the House units score "18" while the Blight units scores a "6". The House score is triple the Blight score, so the Blight suffers three Hits. Players give each Blight unit one Hit, and the third Hit goes to the Blight unit with the lower Bravery Rating, so it receives two Hits in this combat. Then both Blight units are Retreated two areas.
J. House Vs. House Combat
Players may find it necessary (or even desirable) to attack one another. Of course, doing so may risk losing the game for all players, but circumstances may dictate that this is a viable strategy if a player needs to stymie another House's progress. Players may conduct normal Missile Combat or Melee Combat attacks against opposing House units during their activation. Declare the attack and resolve the combat normally. No declaration of war or any other kind of "casus belli" is needed.
Wergild: Open combat between Houses is not really condoned by the Kingdom. Therefore each time a player's unit attacks another player's unit, the attacking player must pay a total of 2 Gold – 1 Gold to the defending player as "Blood Money" and another 1 Gold to the Royal Bank (the Resource marker pool), which ends up in King Rufus V's hands as "Hush Money". A player who cannot or will not pay those Gold fees cannot attack another player.
The term Wergild is an ancient Zaiusian word and refers to the policy of penalizing belligerent behavior by forcing the aggressor to pay tribute to the victim as compensation for the loss of life and/or property. This all in an effort to bring about a more peaceful coexistence amongst the emerging Houses. It is still a recognized practice, though has hardly stemmed the inter-House wars much as the richer Houses can easily afford the fines, and thereby they are able to victimize the less-affluent poorer Houses with little consequence.
K. Hit Application
Hits scored against a unit for any reason (and regardless if they are a House or Blight unit) are cumulative with previous Hits scored on that unit. Most regular unit counters can absorb three Hits, with the fourth Hit eliminating the unit (exception: Tortoses Garrison units). These Hits are recorded using a combination of "Casualties" markers and flipping units to their Battleworn side. Units on standees (Commanders, Magic Users and Far-Seer Champions) represent individual characters and can only absorb two Hits, being eliminated with a third Hit. These Hits are recorded using a combination of "Lightly Wounded" and "Heavily Wounded" markers.
1) Regular Units
Regular units are those that are represented by unit counters (not standees). When these types of units take Hits, they are recorded as follows:
- a. 1st Hit: Place a "Casualties" marker under the unit. There has no effect on the unit.
- b. 2nd Hit: Remove the "Casualties" marker and flip the unit over to its Battleworn side. The unit now uses the lower ratings printed on this side of the counter. Exception: Blight Tortoses Garrison units do not have a Battleworn side and are therefore eliminated with a 2nd Hit.
- c. 3rd Hit: Place a "Casualties" marker under the Battleworn unit. This has no additional effect.
- d. 4th Hit: The unit is eliminated from the game. Eliminated Blight units score Glory Points for the player who eliminated them and eliminated House units score Terror Points for the Red Blight. All eliminated non-Tortoses Garrison Blight units are placed back into the pool of available units.
2) Character Units
Character units are represented on standees. These are named personalities and can become wounded during the game, as follows:
- a. Save Attempt: Character Units are granted a Save Attempt with each separate Hit they receive. This reflects their tougher constitution and agility. The unit takes a separate Bravery Test for each such Hit. If passed, there is no Hit. If failed, the Hit is applied as described below.
- b. Wounded Markers: Hits are recorded on Character Units using the "Lightly Wounded" and "Heavily Wounded" markers. These markers cannot be removed with a Regroup action as with normal Hits. They can only be removed via a Mana Blessing Bonus (G-2b – Mana Resurrection).
- 1st Hit: Place a "Lightly Wounded" marker under or next to the standee (or on the character's board). This has no dilatory effect on the unit.
- 2nd Hit: Flip the marker over to its "Heavily Wounded" side. The unit's Missile, Melee, and Bravery ratings are all Degraded.
- 3rd Hit: The unit is eliminated from the game.
L. Movement
Units that are conducting movement do so from their current Area to one or more adjacent Areas. Note that Movement Allowances are given in maximum number of areas that the unit may enter during their move.
1) House Unit Movement
-
a. A House unit that did not Cast Magic Spell or conduct a Missile or Melee Combat attack, may conduct a Movement Unit Action. A House unit conducting Movement can move into an adjacent Area (as defined under A-1a) at the cost of one Area against its Movement Allowance (see A-3c).
-
b. Movement Ability: A unit can enter a total number of Areas equal to its Movement Allowance. The Areas moved into must be passable and may not contain a Blight unit. The unit may end its Movement in any Area, even with other House units, based on the Area's Unit Capacity (see below).
Note that the only way a House unit may enter an area with one or more Blight units is by using a Melee Combat attack move (I-1).
-
c. Roads: House units may move one free Road area per Movement action (i.e., the free area does not count against the unit's Movement Allowance) if they are "following" a Road. "Following" is defined as moving from one area with a Road graphic to an adjacent area with a connected Road graphic.
-
d. Forced March: Units may move one additional area per Movement action. At the conclusion of that move, the unit takes a Bravery Test. If it fails, it takes 1 Hit (representing stragglers and injuries).
-
e. Mountains and Rivers are impassable unless a special rule or ability allows them to be entered.
2) Blight Unit Movement
- a. Blight units can be activated to conduct Movement by a Blight Activation Card instruction or Event result. They move from their current area to an adjacent area and keep doing so until they use their full Movement Allowance (as printed on the unit counter), following the Blight Movement Arrows printed on the map. If they enter an area with one or more House units, they must stop and conduct a Melee Combat attack (see I-2).
- b. Blight Movement Arrows: The small red-colored arrows on the map direct moving Blight units to their next Area. They simply follow the indicated arrow path, moving one area at a time, until their Movement Allowance is used up, they exit the map, or enter an area with a House unit.
- c. Forked Areas: If there are two exit arrows from an area, this is a Forked Area. There will be one blue arrow and one yellow arrow. The players move the unit via the arrow path corresponding to the "Forked Area Directional" marker, using the blue arrow if the marker shows "even" and the yellow arrow if it shows "odd".
- The Trollburg Gap Special Forked Area: In the Trollburg Gap Town area (with the "7" Blight Entry Arrow), there are three unique yellow arrows that warrant a different procedure. For each Blight unit moving from that area, roll a D6. The unit follows the arrow that shows the matching number.
Optional Variant: If players want a more variable but slightly more time-consuming process to use, they may opt to roll a die to achieve an "odd" or "even" result separately for every moving Blight unit each time it exits a Forked Area. This will make Blight unit movement truly unpredictable.
-
d. House Unit Encounter: If the Blight unit enters an area with one or more House units, it stops and automatically conducts a Melee Combat Attack. Finish moving all Blight units before resolving any Melee Combats.
Note that this means that more than one Blight unit can end up entering a House-occupied area (up to its Area Unit Capacity) and thus be included in the upcoming Melee Combat attack there.
-
e. Dead Zone Areas: There are a number of Bog areas in which Blight units can become stranded because the area does not have any Blight Movement Arrows (this can happen if players force a Blight unit to retreat into one of these areas). In those cases, the Blight units will remain in those areas until forced to Retreat from them, conduct a successful Melee Combat attack or an Event frees them.
Note that stranded Blight units will still be able to conduct a Strike from those areas.
These "dead zone" Bog areas apparently contain some kind of plant-life, insects or other creature or feature that adversely affects Blight units. The exact cause is unknown, but House troops quickly discovered that Blight units avoided these bogs and by forcing them to retreat into them, made these otherwise fanatical monsters lackadaisical and weak.
-
f. Exited Blight Units: If a Blight unit reaches any Mountain Pass area and needs to move one more area, it exits the game map and is placed back into the pool of available units. Blight units exiting in this manner will score Terror Points for the Red Blight.
3) Area Unit Capacity
Areas may only contain a certain number of units from each side at the end of any unit's Movement. This Area Unit Capacity cannot be exceeded at the end of the move, but it can be temporarily exceeded during such movement (i.e., units may pass through areas at maximum capacity). If the next area's capacity is at its limit and it would be the last area the unit enters, it will instead stop its move in the current area or, if that area would be then over capacity, the unit will move back to the last legal area it entered. Each Area's Unit Capacity is:
- Mountain Passes: Up to 10 units
- Plains: Up to 6 units
- Town: Up to 5 units
- Rough Hills: Up to 3 units
- Forest: Up to 2 units
- Bog, Bridge or Ford: Only 1 unit
- Mountains and Rivers: No units may enter these areas unless a Special Ability allows it.
Note again that the above-listed area capacities are applied to each side separately. So, for example, a Forest area could contain two House units and two Blight units at the same time.
4) Flanking Area Movement
Units assigned to move along the flanks (sides) of the map at the start of the game enter the Flank Area they are currently adjacent to or move up adjacent to the next higher Flanking Area (i.e., from the "+1" area to the "+2" area, etc.) and enter that Flanking Area.
- a. Units that are assigned to one of the two flanks ("W" or "E") are placed off to the side of the map at the start of the game (only) – they cannot be assigned after the game starts. More than one House may assign a force to the same flank and any number of units can be so designated.
- b. When the units' House activates, the player has two options with that flanking force:
- The flanking units can remain off map where they are and not move at all.
- The flanking units may move up the map edge to the next higher Flanking Area and remain off-map opposite that Flanking Area or one or more of the flanking units may be immediately placed directly into the Flanking Area to which they are currently adjacent. This counts as their entire movement for this activation.
- The force may be split up so that some elect the first option and others the second option.
- c. Units may not travel backwards (i.e., down to a Flanking Area that has already been passed up) but may remain off-map at the same area indefinitely.
For example, Patty deploys an eastern-side ("E") flank force of four units at the start of the game. When that House gets its first activation, that flanking force is placed opposite the "E+1" Flanking Area. Upon its second activation, Patty moves the flanking force up and opposite the "E+2" Flanking Area. She then decides to move two of the flanking units onto the map and places those two units directly into the "E+2" area, ending their activation there. On the third activation for that House, the player moves the remaining two units up opposite the "E+3" area and decides to leave them off map, waiting for a good opportunity to place them into the "E+3" area during a future activation.
M. Regroup
A House unit that did not conduct any previous Unit Actions this activation may Regroup. A unit using a Regroup action may do one (only) of the following eligible activities.
1) Remove a "Casualties" Marker
A unit with a "Casualties" marker that is not Stunned or Terrorized may remove that marker provided that the owning player pays the necessary Supplies. The player must spend 1 Supplies Resource per unit to remove the marker from a non-Machine unit. To do so from a Machine-type unit requires 3 Supplies (only the Rock Thrower Machine Team unit in this game). If there are no Supplies Resources available, the unit cannot remove its "Casualties" marker. Some Special Actions also allow the removal of a "Casualties" marker. A Character Unit standee may not use a Regroup action to remove either type of "Wounded" marker.
Note that a Regroup action only allows the removal of a "Casualties" marker. It does not allow for recovering a Hit on a Battleworn unit to allow it to flip back over to its Fresh side. Also remember that Gold can be used as a substitute for Supplies! This represents you purchasing medicines and equipment, and hiring doctors, nurses, etc.
2) Remove a "Poisoned" Marker
A unit with a "Poisoned" marker that is not Stunned or Terrorized may remove that marker provided that the owning player pays 2 Supplies Resources to do so.
3) Remove a "Stunned" Marker
A Stunned unit may remove its "Stunned" marker.
4) Attempt to Remove a "Terrorized" Marker
A Terrorized unit may attempt to remove its "Terrorized" marker by taking a Bravery Test. If passed, remove the marker. If failed, there is no effect, and the unit is still Terrorized.
N. Nighttime Game Turns
Nighttime Game Turns do not allow normal Unit Actions or Blight Activations. Instead, this is when the players' armies rest, recoup, and handle logistics. Unfortunately, the night is also the Red Blight's favorite time of day.
1) Collect Resources Step
- a. Towns: Each player who controls a Town area rolls a D6 per area and collects a total number of Food and/or Supplies Resources equal to the die roll, divided up between Food and Supplies as the player sees fit. If the die roll is a "6", the player also earns an additional 1 Gold Resource.
- A Town area is controlled by the first House to have a unit enter the area or remain there after a Melee Combat. The controlling player should place one of their House cubes in the area to designate it as theirs. If that area is subsequently solely occupied by another player or a Red Blight unit, the originally owning player loses control of the Town area to the other House or the Blight (in which case no player controls it).
- b. Camps: For each "Camp" marker a player owns, they collect a total of 3 Food and/or Supplies Resources, in any combination the player wishes.
- A Camp marker is controlled by the player who built the marker. If another player's unit solely enters the area with the Camp marker, it does not change control unless that player declares hostilities. If hostile, the new owner controls the Camp marker, but this is treated in the same way as an attack on the original owning player (see House to House Combat - section J). If a Red Blight unit enters the area alone, the Camp marker is eliminated and returned to the pool of markers.
2) Hunger Step
Each player discards 1 Food for every unit they wish to feed (including the Commander, Magic User and any Mercenary units that have joined the House). A player may spend Mana Blessings to conjure Food Resources at this point. The "Hero" unit does not have to be fed. The player then counts the number of units that are not fed and rolls a D6. The die result is deducted from the number of units not fed. If the result is zero or a positive number, this is the number of Hungry House and Mercenary units that result. The player must now designate that number of units as being Hungry by placing a House-colored cube on the unit. In the case of a "zero" difference, one unit must still be made Hungry. The player may choose any units in their House contingent to be so designated.
Hungry units may not conduct a Night March and may not be activated during their next House activation. In addition, their Missile Combat, Melee Combat and Bravery ratings are all Degraded.
Hungry units automatically recover and are returned to normal at the conclusion of their next House activation.
For example, Ryan has 9 units in his force. He is conducting the Hunger Step and has 5 Food and 2 Gold Resources. He chooses to spend all his Food and 1 Gold, so he can feed only 6 units. That means 3 units go unfed. He rolls a D6 and gets a "1", which forces him to choose two of his units to be Hungry (three unfed units less the die roll of "1"). He picks two of his units – a Swordstrikers and a Harassers unit - and places a colored cube on each one. These units cannot activate and are Degraded until the end of their next House activation.
Remember that Gold can be used as a substitute for Food! Basically, this represents you purchasing food on the Zorndian Black Market, farms, markets, etc.
3) Poisoning Step
All units that have a "Poisoned" marker immediately take 1 Hit. The marker remains with the unit.
4) Entrench Step
To use the Entrench Unit Action (which is only allowed during a Nighttime Game Turn), a player must select a unit that is not Stunned or Terrorized. The player may then build an "Entrenchment" or "Camp" marker in the same area as the chosen unit, as follows:
- a. Spend 3 Supplies Resources to place an "Entrenchments" marker.
- b. Spend 3 Supplies Resources to flip an "Entrenchments" marker to a "Camp" marker.
- c. Spend 6 Supplies Resources to place a "Camp" marker.
- d. Entrenchments and Camps cannot be built in a Bog, Bridge or Ford area and only one such marker, of either type, may be in the same area.
Remember that Gold can be used as a substitute for Supplies! This represents you purchasing material, tools, equipment, and hiring workers, etc.
5) Recovery Step
All Stunned units (House and Blight) remove their "Stunned" marker. All Terrorized units (House and Blight) take a Bravery Test, with House units doing so first. If passed, they remove their "Terrorized" marker. Finally, players may spend 6 Supplies per unit to return a previously eliminated core House unit back into the game. This cannot be done for Mercenary, Hero, or Character units. The rebuilt unit may be placed on the map, showing its full-strength side, in an area with the House's Commander or Magic User or in any Mountain Pass area.
6) Night March Step
All players may simultaneously move (only) each of their House units one area (only), regardless of their normal Movement Allowances, following normal Movement rules. However, units suffering from Hunger may not do so and no combats are allowed.
7) Blight Night Strike Step
-
a. Magic Missile Attack: All eligible Blight units conduct a Missile Combat attack with Upgraded Missile Combat ratings.
For some unknown reason, Red Blight missile weaponry becomes somewhat "enchanted" at night, perhaps kissed by the malignant fires of whatever evil pit forged them. They are more deadly and easily guided, making them exceptionally deadly in the dark.
-
b. Sneak Attack: All Blight Ambushers units (only) currently adjacent to one or more House units will move into an adjacent area and conduct a Melee Combat attack (remembering to use their "Surprise Attack" Special Ability) using normal Melee Combat procedures.
8) Night of Terror Step
At the end of Game Turn #12 (only), players resolve the Night of Terror Step instead of a normal Blight Night Strike Step. A Night of Terror Step is resolved in two sub-steps:
- a. Magic Missile Attack: Resolve this in the same manner as with a normal Blight Night Strike Step.
- b. Red Blight Vengeance Assault: All Fetid Knights, Terror Beasts and Far-Seer Champions units (only) conduct an Advance action and use a D20 as their Melee Combat Rating if they have not taken any Hits and are not Stunned or Terrorized. Otherwise, they use just Upgraded Melee Ratings.
O. Stunned & Terrorized
Units can receive "Stunned" or "Terrorized" markers from enemy combat or other unit/game effects. A Stunned unit that receives another Stunned result simply remains Stunned. A Stunned unit that receives a Terrorized result becomes Terrorized instead. A Terrorized unit that receives a Stunned result or another Terrorized result simply remains Terrorized.
1) Stunned
- a. A unit that is Stunned is given a "Stunned" marker. A Stunned House unit may not conduct any Unit Actions other than Regroup. Stunned Blight units activate normally but have their Movement Allowance reduced by one. While Stunned, both House and Blight units have all their ratings – Missile, Melee and Bravery - Degraded.
- b. Stunned House units remove their marker either when they do a Regroup action or during the Recovery Step of the Nighttime Game Turns. Stunned Blight units only remove their marker during the Recovery Step of Nighttime Game Turns.
2) Terrorized
Being Terrorized is a state of mind that negatively affects the unit until it passes any Bravery Test.
- a. A unit that is Terrorized is given a "Terrorized" marker. It keeps that marker until it is forced to take a Bravery Test (for any reason, including during the Nighttime Recovery Step) and it passes that test. If passed, the marker is removed from the unit, and it is no longer Terrorized. If failed, the unit remains Terrorized.
- b. A Terrorized unit has all three of its ratings - Missile, Melee and Bravery - Degraded and its Movement Allowance reduced by one.
P. Resources
There are three Resources used in the game – Food, Supplies, and Gold. Players will find and collect these Resources as they capture Dens and Towns and build a Camp. Each Resource has a specific value and purpose for the players. Resources are tracked on the general Resource Track using the appropriately colored cubes for each player's House.
1) Starting Resources
Players start the game with some Resources already in hand. Each player receives Resources based on the number of players in the game:
- 1- and 2-Players: 10 Food & 6 Supplies
- 3-Players: 8 Food & 5 Supplies
- 4-Players: 6 Food & 4 Supplies
- 5-Players: 5 Food & 3 Supplies
Note that this means each House sets off on its campaign with enough Food to feed about 75% of its units and sufficient Supplies to do some recovery of casualties. So, players will need to gather more Resources whenever possible.
2) Collecting Resources
Players will discover and collect Resources by controlling Treasure Tokens and Town areas and building one or more Camps. Treasure Tokens will list the types and amounts of Resources that they award. Town areas provide Resources which are collected each Nighttime Game Turn. Camp markers also collect Resources during the Nighttime Game Turns. Food and Supplies can also be gathered by a Harassers unit using its Forage Special Ability or by using the Mana Conjuring ability. Finally, some Events grant additional resources. The player who collects the Resources adjusts their colored cube on the Resources Track accordingly.
3) Trading Resources
Resources can be traded between players but only at the very beginning of the House's activation that is giving the Resource(s). Any agreement can be made between players – promises of support during gameplay, Glory Points, Mercenary unit control, and exchanging other types of Resources. Once agreed upon, the players may exchange the necessary Resources and/or other assets and update their respective tracks. The player may then conduct their activation normally.
4) Food
This Resource is used primarily for the Hunger Step of the Nighttime Game Turn, though it has other beneficial uses as well.
- a. Eating: Players must discard 1 Food for every unit to keep their House units (and any hired Mercenary units) fed during the Hunger Step of each Nighttime Game Turn. The Hero unit does not have to be fed.
- b. Liquid Courage: A player may spend 1 Food at any time to Upgrade a unit's Bravery Rating. This can only be done once per test. In this case, Food represents spirits, mead, tobacco, or whatever else boosts a unit's morale and activity level.
- c. Magician's Potion: In order for a Magic User unit to upgrade its Magic Level, Food needs to be spent to create the potion. The amount of Food spent depends on the Magic Level to which the unit is upgrading.
- d. Foraging: Units with the Forage Special Action can collect Food.
- e. Town Collection: Food can be gained by a controlled Town area marker during the Collect Resources Step of a Nighttime Game Turn.
- f. Gathering: Food can be gained by a "Camp" marker during the Collect Resources Step of a Nighttime Game Turn.
- g. Mana Conjuring: Food can be conjured out of thin air using one or more Mana Blessings.
5) Supplies
This Resource is needed to build and repair structures and machines, and to create a potion.
- a. Entrench: To use the Entrench Unit Action, a player must spend either 3 Supplies for an "Entrenchments" marker or to flip an "Entrenchment" marker over to its "Camp" marker side.
- b. Regrouping: For a unit to remove a "Casualties" marker, it uses a Regroup Unit Action and non-Machine units cost 1 Supplies Resource while a Rock Thrower Machine unit costs 3 Supplies Resources.
- c. Magician's Potion: In order for a Magic User unit to upgrade its Magic Level, Supplies needs to be spent to create the potion. The number of Supplies that is spent depends on the Magic Level to which the unit is upgrading.
- d. Foraging: Units with the Forage Special Action can collect Supplies.
- e. Poison Antidote: In order to remove a "Poisoned" marker, the unit must use a Regroup Unit Action and the owning player must spend 2 Supplies.
- f. Town Collection: Supplies can be gained by a controlled Town area marker during the Collect Resources Step of a Nighttime Game Turn.
- g. Gathering: Supplies can be gained by a "Camp" marker during the Collect Resources Step of a Nighttime Game Turn.
- h. Mana Conjuring: Supplies can be conjured out of thin air using one or more Mana Blessings.
6) Gold
This Resource is the most valuable and versatile of all the Resources.
- a. Hiring Mercenaries: A player may use Gold to purchase a Mercenary Unit. A Vagnar Corps unit is 4 Gold, an Argonian Berserker unit is 6 Gold and a Death Riders of Old Mahn unit costs 8 Gold. When a Mercenary unit is successfully hired, it appears in any area that contains a unit from the hiring House or in a designated Mountain Pass area. This Mercenary unit is now controlled by the hiring House (place a colored cube matching the Houses' color on the unit if tracking its ownership is difficult), but it may not activate on the turn it arrives. The Mercenary unit is controlled by the hiring player for the remainder of the game, as if part of the House's forces.
- b. Wild Resource: Gold may be substituted for Food and Supplies Resources on a one-for-one basis for any purpose. Exception: Gold may not be substituted when creating a Magician's Potion (see below).
- c. Magician's Potion: In order for a Magic User unit to upgrade its Magic Level, Gold needs to be spent to create the potion. The amount of Gold that is spent depends on the Magic Level to which the unit is upgrading.
- d. Town Collection: Gold can be gained by an owned Town area during the Collect Resources Step of a Nighttime Game Turn only if a "6" is rolled.
Q. Treasure
Treasure Tokens represent the various individuals and valuables that the Red Blight's raiders have kidnapped and stolen. They are hidden away in Dens and to reflect this, each Den has an unrevealed Treasure Token. The players need to rescue these tokens to gain their benefits. Treasure Tokens are randomly seeded onto the map before the game begins and kept face down until discovered.
1) Types of Treasure Tokens
There are 20 Treasure Tokens and they fall into four basic categories (the number of counters in each category is shown in parentheses):
- a. Relics (6): These are the most valuable treasures. At the end of the game, the Red Blight will score 3 Terror Points for each Relic token it controls. The player who captures this token gets 2 Glory Points and their House's Magic User unit immediately increases its Magic Level by one.
- b. Hostages (4): These may award a Vagnar Corps Mercenary unit (for free), if available (representing the hostages themselves and local townfolk joining your army) or a variable amount of Gold and/or Food Resources. Vagnar Corps units are immediately placed into the area in which the Treasure Token was located unless that causes over-stacking. In that case, the capturing player places the unit in any adjacent area instead.
- c. Valuables (6): These represent every kind of valuable found in the kingdom – art, jewels, gems, machinery, tools, etc. They award Gold and/or Supplies Resources.
- d. Traps (4): The Red Blight Cabal is very aware that the King of Zorn is going to attempt to rescue and recover these ill-gotten gains. Though the Blight engineers haven't had a lot of time to invent, construct, and place the required number of traps, some have been successfully deployed. There are four types of Trap tokens:
- Blight Portal!: Spawn a Fetid Knight unit into this area. If occupied by a House unit, the Fetid Knight unit will immediately conduct a Melee Combat attack against the area with an Upgraded Melee Combat rating.
- Horrific Snare Trap: All House units in the area are immediately Terrorized. If this is revealed by a Scouting action, the unit doing the Scouting is Terrorized.
- Green Fire: House units in the area collectively receive 2 Hits, distributed amongst units as the player sees fit. Then all units in the area are Stunned. If this is revealed by a Scouting action, the unit that does the Scouting takes 1 Hit and is Stunned.
- Poison Darts: All House units in the area each get a "Poisoned" marker. If revealed by a Scouting action, the unit that does the Scouting is Poisoned.
2) Treasure Token Capture
Treasure Tokens remain face down until a House unit is in the same area as the Treasure Token and no Blight unit is in the area, or with a Scouting action when the Tortoses Garrison unit is already revealed. The first House unit into that area is the capturing unit, and the owning player flips over and earns the rewards (or suffers the Trap effects) of that Treasure Token. Players immediately score any Treasure Tokens they capture – Resources, Glory Points and Magic Level upgrades are recorded by the capturing player for their House – and the player also keeps the captured token. If a player feels that another player aided in the elimination of one or more Blight units in that area, they may share any benefits awarded.
If the result on a Red Blight Activation Card indicates "Event!", any player will roll a D20 and cross reference that roll with the Event Table (found on the player aid). Players enact the resulting event's instructions immediately, and to conclusion.
R. Event Table
The Event Table below is the version printed in the rulebook's Event Table section (page 48). A second, differently worded Event Table is printed on the player aid; it is transcribed after this section.
-
12 = Cursed Land! The Red Blight's Master Necromancer, Albrekt the Scarlet, has permanently cursed a part of the valley. First, the Red Blight scores D3 Terror Points. Then place a "Cursed Land" marker in a random area, determined as follows: Roll for a Blight Entry Arrow. Then roll D20. Move the marker down the Blight Movement Arrows using normal movement rules (including forks) equal to the die roll. If the marker moves off the map, do not place it on the map and instead, the Red Blight scores another D3 Terror Point for infecting the kingdom.
The area the marker lands in, and all adjacent areas, are now "Cursed", as follows:
- These areas each cost one additional area of movement for House units (only).
- Any Road bonus is cancelled.
- House units have both their Missile and Melee Combat Ratings Degraded while in a Cursed area.
- Every House unit that is in a Cursed area at the start of a Nighttime Game Turn must take a Bravery Test. If failed, the unit Retreats until not in a Cursed area and then it takes 1 Hit.
This event may only occur once per game. If there are already "Cursed Land" markers on the map, re-roll the Event die.
-
1 = Blight Raiders Sweep! The Blight sends out its raiders – intercepting convoys, raiding supply depots, surging around the flanks and sweeping along the roads.
- Each player rolls a D3 and reduces each of their three Resources by that amount (if possible).
- Place an Ambusher unit in every Town area controlled by the Blight. If over the Area Unit Capacity, place the unit in a legal adjacent Road area of the players' choice. If none, the unit does not appear.
- Place an Ambusher unit in the "3" Blight Entry Arrow area and another in the "11" Blight Entry Arrow area and then both those units conduct an Advance!.
S. Retreats
Units from both sides will often be forced to retreat due to combat and/or other events. These represent the mandatory and uncontrolled fleeing by units to get away from immediate danger. Each side has a unique set of protocols and requirements when their units are instructed to retreat.
When any units (whether House or Red Blight) are instructed to conduct a Retreat, they must meet the following retreat parameters:
- a. They must increase the distance, in number of areas, from the enemy unit causing the Retreat or, if not caused by a unit, from the nearest enemy unit.
- b. If retreating from a Melee Combat attack they conducted, units must first Retreat back to the area from which they entered the combat area.
- c. Defending units in Melee Combat may not retreat into an area from which the attacking units moved into the area.
- d. Units may not retreat into an area with an enemy unit, an impassable area, or off the game map.
- e. Units will opt not to retreat into an area that exceeds its Area Unit Capacity (see L-3). If there is no choice but to retreat into such an area, units may enter the over-stacked area but then they must keep retreating until they enter a legal area that does not exceed the unit capacity.
- f. Within the above restrictions, players may choose the exact legal retreat path for each unit (Blight or House), even choosing different legal paths for each unit if they wish.
- g. If a unit cannot Retreat its entire required distance, it Retreats as far as it can and then takes 1 Hit. If the unit cannot Retreat even one legal area, it is eliminated instead.
T. Winning & Losing
The Struggle for Zorn is a semi-cooperative game adventure. All players will lose as a team if the Red Blight wins the game; the players win as a team if the Red Blight does not secure a win at the conclusion of 12 Game Turns. But, to determine who becomes "Hand of the Crown" (and thus the real victor), players will be scoring Glory Points during the game. The player with the highest total of Glory Points is declared the actual winner of the game.
1) Terror Points
The players lose the game if the Red Blight scores 21 or more Terror Points or causes a Catastrophic Loss. Terror Points are recorded during the game and at the conclusion of the game using the "Terror Points" marker and the Terror Points Track. Terror Points are immediately recorded when any of the following conditions are met:
- a. 3 Terror Points per "Relic" Treasure Token that is still on the map (i.e., not captured) at the end of Game Turn #12.
- b. 10 Terror Points per Far-Seer Champion unit that moves off the game map from a Mountain Pass area.
- c. 8 Terror Points per Fetid Knight unit that moves off the game map from a Mountain Pass area.
- d. 6 Terror Points per Terror Beasts unit that moves off the game map from a Mountain Pass area.
- e. 4 Terror Points per Minion Horde unit that moves off the game map from a Mountain Pass area.
- f. 2 Terror Points per Ambusher unit that moves off the game map from a Mountain Pass area.
- g. "X" Terror Points from possible Events, as indicated on the Event Table.
- h. 3 Terror Points per Commander or Magic User unit eliminated.
- i. 1 Terror Point per House (not Mercenary or Hero) unit eliminated. If a House unit is Regrouped back to the game and eliminated again, the Terror Point is rewarded again.
2) Catastrophic Losses
If any player has all their "core" units eliminated, all players automatically lose the game instantly. A "core" House unit is one of the units starting the game with that House, so it does not include any Mercenary units or the Hero unit.
3) Glory Points
If the players have not lost the game by the end of Game Turn #12, then the Houses have defeated the Red Blight. Congratulations! Now, who will become "Hand of the Crown"? Players will be keeping track of the total Glory Points they score during the game on the Glory Points Track using their House-colored cube to record their Glory Points during the game and at its conclusion. Glory Points are immediately recorded when any of the following conditions are met:
- a. 5 Glory Points per Far-Seer Champion unit eliminated.
- b. 3 Glory Points per Fetid Knight unit eliminated.
- c. 2 Glory Points per Terror Beasts unit eliminated.
- d. 1 Glory Point per Ambusher or Minion Horde unit eliminated.
- e. 2 Glory Points per "Relic" Treasure Token captured.
- f. Power Cache Glory Points:
- 2 Glory Points for each Fresh core unit in your House contingent at the end of the game. A Fresh core unit is a House unit (including the Commander and Magic User, but not a Mercenary or Hero unit) that does not have a "Casualties" marker, is not Battleworn, is not Terrorized and is not Stunned.
- 3 Glory Points per Gold Resource still in hand at the end of the game
- 2 Glory Points per Food Resource still in hand at the end of the game
- 1 Glory Point per Supplies Resource still in hand at the end of the game.
The winning player is the one with the most total Glory Points. If a tie, the player with the most Power Cache Glory Points is the winner; if still a tie, the players who captured the most "Relic" Treasure Tokens wins; if still tied, both players roll a D12 and high score is the winner; if still tied, both players kill each other in a duel and the third place player wins.
U. Special Abilities
- Assassin (Regent Zenoj): If this unit targets a Character unit (House or Blight) with Missile Combat, it may re-roll its Missile Combat attack die. The re-roll must be used. In addition, the target's Bravery Rating is Degraded for any Save Attempt (only).
- Assault (Swordstrikers): If this unit is not eliminated after a Melee Combat Attack, it may conduct another Melee Combat Attack from its current area against any enemy unit. This may be done only once per activation.
- Bash (Namtull): If this unit's side scores double the enemy's Melee Combat result, eliminate one enemy unit after applying Hits (but never a Far-Seer Champion). The unit eliminated must be the one with the most accumulated Hits on that side (player's choice if more than one).
- Charisma (Duchess Rammstein): All friendly units located in the same area as this unit have an automatic Bravery Rating of D12 (regardless of their printed rating).
- Crossbows (Vagnar Corps): The unit may re-roll its Missile Combat attack die once per combat. The re-roll must be used.
- Death From Above (Rock Thrower Machines): If this unit is conducting a Missile Combat attack, the targeted unit reduces its normal Area Protection Value by one.
- Demonic Haze (Vulkan): Enemy units that attack this unit have their Missile Combat Rating reduced to D6. A unit with a D6 rating may not attack it.
- Fear (Tor): All House units in the same area with, or are adjacent to, this unit have their Bravery Ratings reduced to D6. Units that are already D6 automatically fail any Bravery Test.
- Fearless (Hero): This unit ignores Stunned and Terrorized effects.
Credits (designers, artists, and publisher line) are omitted from this transcription. The image of a sample 5-player setup on the final page is not reproduced.
Player Aid: Event Table
The rulebook's player aid (page 6) prints a second Event Table. Its wording differs from the Event Table in Section R for several results (noted below); both are transcribed as printed.
- 1 = Blight Raiders Sweep! The Blight sends out its raiders – intercepting convoys, raiding supply depots, surging around the flanks and sweeping along the roads.
- Each player rolls a D3 and reduces each of their three Resources by that amount (if possible).
- Place an Ambusher unit in every Town area controlled by the Blight. If over the Area Unit Capacity, place the unit in a legal adjacent Road area of the players' choice. If none, the unit does not appear.
- Place an Ambusher unit in the "3" Blight Entry Arrow area and another in the "11" Blight Entry Arrow area and then both those units conduct an Advance!.
- 2 = The River Vile Floods! All Bridge and Ford areas are unusable for the remainder of this Game Turn. Place a "Flood" marker on each Ford and Bridge area on the map. Any units (of either side) in a Ford area at this time are eliminated (no Save Attempts allowed). Units on Bridges must Retreat one area. Flooded areas cannot be entered or crossed. Remove the "Flood" markers at the end of the Game Turn.
- 3 = Super-Electric Storm Rolls Through the Valley! Players choose two House units and two Red Blight units, each located in any Plains area. The chosen units are hit by the storm and each receives 1 Hit (no Save Attempts allowed). Players' choice if more than one unit is in the area.
- 4 = Beast Frenzy! All Blight Terror Beast units, along with any other Blight units in their area (riding on the beasts, of course!), conduct an Advance!. If any such activated units enter an area with one or more House units, they conduct a Melee Combat attack with Upgraded Melee Combat Ratings.
- 5 = Unexpected Allies! Randomly select one Mercenary unit from all available Mercenary unit counters. Players decide together which House that unit joins and into which Mountain Pass area it is placed.
- 6 = Blighted Treants! Find the Forest area with the most House units located in it (players choose if more than one). Each House unit in that area must take a Bravery Test. If failed, the unit Retreats one area at a time until it is no longer in any Forest area. If a "1" is rolled on the Bravery Test, the unit is also Poisoned.
The player aid's Event Table stops at 11 in the printed text. The remaining results (12 to 20) are printed in Section R only.
The player aid's gameplay summary (Daytime and Nighttime steps, Area Unit Capacity, Missile Combat and Melee Combat summaries) repeats Sections C, L and I of this rulebook and is not transcribed separately. The Spell Casting and Magic Spell tables described in Section G are on the same aid and are not reproduced.