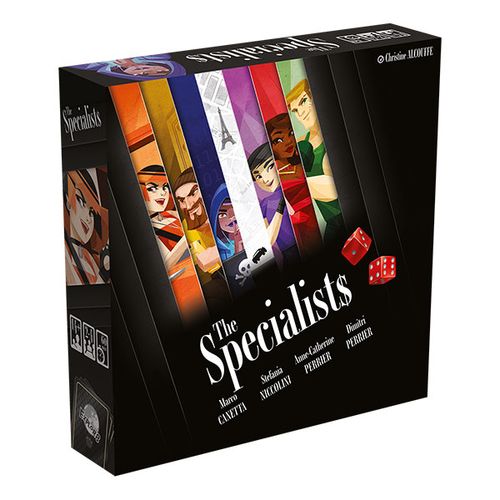
The Specialists
The Specialists Rulebook
Table of Contents
Table of Contents
Goal
Gain millions and become a legend.
Material
- 3 double-sided Continent Boards
- 1 double-sided Las Vegas Board
- 2 Recruitment Boards, double-sided: multiplayer/solo play
- 4 Player Boards, double-sided: multiplayer/solo play
- 1 First Player Tile
- 21 Dice
- 28 Gang Tokens (7 in each player color)
- 8 Player Aids
- 72 Specialist Cards (12 for each Specialist)
- 4 Equipement Markers (1 in each player color)
- 66 banknotes: 31x 1, 15x 5, 10x 10, 10x 20
- 12 Informant Cards
- 6 Starting Specialist Cards & 6 Starting Skill Tokens
Reward Tokens & Tiles
Recruitment Rewards
- 12 Expert Tiles (2 for each type of specialist)
- 3 Full Team Tokens
- 3 Mastery Tokens
Heist Rewards
- 4 First Jewelry Tokens
- 4 First Bank Tokens
- 20 Prime Tokens (5 in each board color)
Variants
Asymmetric Variant
- 8 Asymmetric Starting Tiles (advanced rules)
- 6 Skill Tokens
- 3 Wild Skill Tokens
- 5 Dice Tokens
Solo Variant
- 12 Corruption Cards (front: Rivalry; back: Bribe)
- 3 Solo Tokens
Hideout Variant
- 4 Hideout Cards
Setting Up the Game
For 2- or 3-player games, check the two colored frames at the end of this section.
- Place the Continent and Las Vegas Boards in the middle of the table to form a letter combination (A-B-C-D) (4 possibilities). The order of the letters does not matter.
- Sort the Prime Tokens according to their continent (5 per continent, matching the continent's color and letter). Set aside one random token per continent and place the 4 remaining Prime Tokens on the continent's post-it. Put the tokens that you set aside back in the box.
- Form a Supply with the Banknotes.
- Sort the 12 Expert Tiles by Skill (color) and place them next to the Continent Boards.
- Assemble the two parts of the Recruitment Board and place it next to the Continent Boards. (Dice Pool: A; Dice area: B; Display: C)
- Shuffle the Specialist Cards to form a pile. Reveal the first 6 cards to create the display (or 5 cards in a 3-player game, or 4 cards in a 2-player game).
- Sort the Reward Tokens (Recruitment + Heist) by type. Form a stack in ascending order for each type (tile #1 on the top, then #2, and so on). Place each stack on the matching spot of the Recruitment Board.
- Shuffle the 12 Informant Cards and place them on the Recruitment Board. Reveal the first Informant Card.
- Roll 5 dice (or 4 in a 3-player game, or 3 in a 2-player game) and place them on the Dice Area. Place the remaining dice in the Dice Pool.
- Choose your color and take 1 Player Board (place it on its Multiplayer side), 7 Gang Tokens and 1 Equipment Token in this color.
- Each player rolls 2 dice. The highest roll gets the First Player Tile. In the case of a tie, tied players reroll the dice. Keep your results as they will be used on step 13.
- Form 6 random sets of 1 Starting Specialist Card + 1 Starting Specialist Token (they do not have to match). Starting from the last player, and counter-clockwise, each player chooses a set and receives the die matching the Starting Specialist Card.
- Place your Starting Specialist Card next to your Player Board, and the Starting Specialist Token in the Reward Tokens Area of your Player Board. Place your 3 dice (the two dice that you rolled on step 11 + your Starting Specialist die) on the three rightmost spots of your Player Board (Personal Dice Area), in the order of your choice.
2 players
- Remove the 3+ and 4 Specialist Cards from the game
- Remove the following Reward Tokens: #2 and #4
- Remove one Expert Tile in each type
3 players
- Remove the 4+ Specialist Cards from the game
- Remove the following Reward Token: #4
- Remove 3 random Expert Tiles (they must all be different)
Overview of the Round
The Specialists play in a succession of rounds (maximum 12), each divided in 3 steps:
A) Preparing the Round
- Roll the Dice. Roll 5 dice (or 4 in a 3-player game, or 3 in a 2-player game). Place the rolled dice on the Dice Area on the Recruitment Board. These dice are available for this round.
- New Specialist Cards. Reveal 6 new Specialist Cards (or 5 in a 3-player game, or 4 in a 2-player game).
- Reveal an Informant Card. Place it above the previous Informant Card.
Starting from the first player, and going clockwise, each player plays a full turn.
B) A Player's Turn
-
Choose 1 Die. Choose 1 die among the available die and slide that dice on your Player Board so that it occupies the rightmost free space.
-
Use a Specialist Card. Spend your dice to use a Specialist Card from the display. You may either:
- A/ Recruit a Specialist Card in your team (white die of this card), then activate their Ability (black die) if you want;
- B/ Fast-Play a Specialist Card (activating them directly from the display (black die of this card), without taking the Specialist in your team)
or Become an Informant. Receive the reward indicated on the Informant Card.
-
Perform a Heist. Perform a Heist in a town to gain millions and special rewards.
or Become an Informant. Receive the reward indicated on the Informant Card.
At the end of a player's turn, their left neighbor plays their turn, and so on. Once all players have played, resolve Step C: End of the Round.
C) End of the Round
Once all players have played, discard the remaining Informant Card, as well as the remaining Specialist Cards. Move the remaining die to the Dice Pool of the Recruitment Board.
The player that sits on the left of the first player receives the First player Tile and becomes the first player of the next round.
The Specialists
A Specialist Card shows:
- Codename of the Specialist (and icon reminding their Skill).
- Recruitment Die: this indicates the die that you need to recruit that Specialist. When you recruit a Specialist, it becomes a permanent member of your team, for the rest of the game. (Example: to recruit Ms. Red, you need to spend a "2".)
- Activation Die: this indicates the die that you need to activate that Specialist. Activating a Specialist allows you to use their Ability. This die can also be used to fast-play a Specialist without recruiting it. (Example: to activate Ms. Red, you need to spend a "5".)
- Skill of the Specialist (for heists).
- Ability: when this card is activated, you can use the Specialist's Ability to gain money, equipment, or dice. (Example: Earn 2 millions.)
Each Specialist is associated to a specific die value:
- Ms. Blue — Hacker — die value 1
- Ms. Red — Actress — die value 2
- Mr. Yellow — Safebreaker — die value 3
- Mr. Green — Heavy — die value 4
- Mr. Purple — Acrobat — die value 5
- Ms. Orange — Pilote — die value 6
Icons
Skills: Hacker, Safebreaker, Safebreaker (safe), Acrobat, Heavy, Actress.
- Specialist
- Recruit a Specialist
- Activate a Specialist
- Activate a Specialist once
- 1 Equipment (maximum 8)
- Gain 1 Equipment for each matching skill icon in your team (Example: Gain 1 Equipment for each Actress in your team.)
- Gain 1 Million for each matching Heist (Example: Gain 1 Million for each Robbed Bank.)
- Jewelry
- Bank
- Casino
- Robbed Jewelry
- Robbed Bank
- Robbed Casino
- 1 Million (M$)
- Die showing 5
- Receive a die (choose its value)
- Gain and roll a die
- Discard a die
- +1 or -1 modifier on the die
- +1 modifier on the die
- Starting Skill Token
- Take a Starting Specialist Card
- Asymmetric Skill Token
- Asymmetric Dice Token
- Wild Skill Token
- Solo variant
- Modifier on the 2 remaining dice
- Choose 1 die → Use a Specialist card → Perform a heist
- Or: Take 5M$ or 1 token +/-3
A Player's Turn
1 — Choose a Die
On your turn, you must choose a die among the available ones (from the Dice Area). Slide that die on the rightmost free spot of your Player Board.
If your 4 dice spots are taken, the die that you chose remains near your Player Board. It can still be used normally on your turn.
You can use the rightmost die with a -1 or +1 modifier. This means that a 4 can be used as a 3 or a 5, for instance. You can use the second to last die with a +1 modifier.
Important: A 6 becomes a 1 if you apply a +1 modifier, and a 1 becomes a 6 if you apply a -1 modifier.
The dice of your Player Board will allow you to use a Specialist Card, or can be discarded to gain Equipment when you PERFORM A HEIST (see below).
2 — Use a Specialist Card
A/ Recruit a Specialist
Choose a Specialist from the display. That Specialist joins your team for the rest of the game.
When recruiting a Specialist, you must spend a die matching the white die of the card. Then, place the chosen Specialist Card in front of you, next to your Player Board. Place the used die back in the Dice Pool.
If you already have at least one Specialist Card of the same color in front of you, place your new Specialist Card above the previous one(s), so that it overlaps the previous card while still showing its Ability, forming a single column of cards for each color.
Then, you can activate the Specialist, if you want.
Once you've recruited a Specialist, you may activate them during the same turn. Once the Specialist is in front of you, you may spend a die matching the black die of the card to activate it and trigger its Ability.
- a/ If you have no other Specialists of this color (single card), apply the Ability of that Specialist once. (2 Equipments)
- b/ If, however, you already have other Specialists of the same color in your team, you may either:
- activate the Ability of each card in this color once; (2 Equipments + 1d5)
- or activate the Ability of the Specialist that you just placed, as many times as you have cards of this color in your team (including that card). (2 x 2 Equipments)
Recruitment Rewards (see Recruitment Rewards section) — Depending on your team, you may receive rewards when recruiting a Specialist.
- Full Team: Have the 6 different colors in your team (6 Skills).
- Expert Tile: Recruit 3 Specialist Cards in a given color.
- Mastery Tile: Have 3 Expert Tiles.
B/ Fast-Play a Specialist (or)
Choose a Specialist from the display. That Specialist does not join your team.
To fast-play a Specialist, you must spend a die matching the black die of the card. Place that die directly on the Specialist Card and immediately use its Ability, without taking the card.
You can only use this Ability once, even if you have other cards of the same color in your team. Since the Specialist does not join your team, you cannot trigger your other Specialists' Abilities. (2 Equipments)
You'll be able to use the Specialist's Skill during Step 3 (Perform a Heist) as if the Specialist were in your team. (Ms Blue Skill)
After the Heist, you must discard that Specialist Card and put the die that you spent back to the Dice Pool.
Become an Informant (or)
If you cannot use any Specialist Card on your turn, or if you don't want to, then you automatically become an Informant. Immediately receive the Informant Reward of this round.
3 — Perform a Heist
First, choose a city.
Choose a city in which you haven't performed a Heist yet. You need to:
- have the required Skills and Equipment (check the required Specialist & Equipment Icons on the post-it of that city)
- spend the required Equipment: for each Equipment required, move your Equipment Marker by 1 step to the left.
Skills and Equipment may come from your team, from any Specialist that you fast-played on this turn (marked with your die), or from Prime Tokens (discard these Tokens after the Heist).
You may also use your Expert Tiles if needed.
Optional Action: Use a die as a wild Equipment. You may spend any die instead of moving your Equipment Marker by 1 step, as many times as you wish.
Then, choose the building and leave your signature.
Choose the building that you want to rob (Casino, Bank or Jewelry that has not already been robbed by another player before) and leave your signature on the crime scene. Place your Gang Token on the appropriate spot.
Important: Once you've performed a Heist in a city, you cannot perform another Heist in the same city.
Example: Anne-Cat wants to perform a Heist in Buenos Aires. She has the required Skills and Equipment. She spends 3 Equipment (moving her Equipment Marker 3 spaces to the left) and places her Gang Token on the Casino. She immediately takes 8 M$ and chooses a Prime Token among the available 4 from the post-it.
Last but not least, run with the money.
Take as many millions as indicated on the board for this Heist. Some Expert Tiles may grant you extra millions. You may also receive Heist Rewards Tokens on this occasion (First Bank, First Jewelry and/or Prime Tokens).
At the end of your turn, slide all your remaining personal dice to the right to occupy the rightmost spaces of your Player Board. You can only keep 4 dice from one turn to another.
Heist Rewards
You may receive rewards when performing a Heist.
- Prime Token: Be the first one to perform a Heist in this city or perform a Heist in Las Vegas. Choose a Prime Token among the available 4 from the post-it of this city.
- First Bank: On your first Bank Heist, take the First Bank Token from the top of the matching stack.
- First Jewelry: On your first Jewelry Heist, take the First Jewelry Token from the top of the matching stack.
Become an Informant (or)
If you cannot perform a Heist on your turn, or if you don't want to, then you automatically become an Informant. Immediately receive the Informant Reward of this round.
Example — Stefania's Turn
1. Choose a die. Stefania chooses 1 die from the Dice Area.
2. Use a Specialist Card. Stefania spends one "6" Die to recruit Ms. Orange; Then, she spends one "5" Die to activate Ms. Orange. Since she owns several Ms. Orange Cards, she may either:
- activate the Ability of each card in this color once: (2 M$ + 1 d5 + 1 M$ and 1 Equipment);
- or activate the Ability of the Specialist that she just placed, as many times as she has cards of this color in her team (including that card). (3x 2M$)
Since Stefania now has 3 Ms. Orange, she claims the Ms. Orange Expert Tile which grants an extra effect until the end of the game.
3. Perform a Heist. Stefania wants to perform a Heist. Her target is the Bank of Lima.
She needs 2x Ms. Orange, 1 Mr. Green, 1 Ms. Blue and 3x Equipment.
Since she has no Mr. Green, she decides to discard a "Mr. Green" Bonus Token instead.
She spends 2 Equipment instead of 3 thanks to her Piloting Expert (Orange). That tile allows her to spend 1 less Equipment for Jewelry and Bank Heists.
Having met the requirements, she places her Gang Token on the Bank and immediately receives 5 M$.
Since she is the first player to perform a Heist in Lima, she chooses a Prime Token from the matching Continent Board, and decides to take a "Ms Blue" Bonus Token. She places that token on her Player Board.
Since it is her first Bank, she also takes the First Bank Token and immediately receives 2 dice that she rolls and slides on her Player Board. She also places the First Bank Token on the matching spot of her Player Board.
End of the Game
The game ends when one of the following conditions is met:
- A player performed 7 Heists. Complete the current round, then proceed to the final scoring.
- The 12th Informant Card is revealed at the beginning of the round. Complete the round (each player plays once). Then proceed to the final scoring.
Each Prime Token and Skill Token that you did not spend is worth 1M$.
The richest player (in millions) wins.
If two or more players are tied, the player that performed the most Heists wins.
If there is still a tie, all tied players share the victory.
Variants
Asymmetric
During step 12 of Setup, replace the Starting Specialist Cards with the Asymmetric Starting Specialist Tiles.
Place 1 Asymmetric Tile face down in front of each player. The player that reveals the tile with the weakest value receives the First Player Token. Then, recover all tiles and place them in the middle of the table. Add 2 more Tiles. Place all the required items next to each tile (tokens/cards), face down, then reveal them.
Starting from the last player and proceeding counter-clockwise, all players now choose a tile and take it along with the associated items.
Hideout
At the beginning of the game, you receive a Hideout Card. Place it in front of you (3M$ side up).
At any moment of your turn, you may flip your Hideout Card to gain a bonus (either a die of your choice, or a discount of 1 Skill for a Heist). Then, discard your Hideout Card.
At the end of the game, gain 3M$ if you did not use your Hideout Card.
Solo Variant
Setting Up the Game
To play solo, set up the game as you would for a 2-player game, with the following adjustments:
- Place your Player Board on its Solo side and take your 7 Gang Tokens.
- Form a Token Supply with the 6 Dice Prime Tokens, all Asymmetric Tokens, the 3 Solo Tokens and all other Gang Tokens. Place the other tokens back in the box. Do not place any tokens on the Continent Boards.
- Place the Recruitment Board on its solo side and place 1 First Bank Token and 1 First Jewelry Token face down on it. They will only be used as trackers to earn Prime Tokens. The other tokens are not used in the solo mode.
- Replace the 12 Informant Cards with 12 Corruption Cards.
Each Corruption Card shows a Rivalry part and a Bribe part.
Preparation
Prepare the round as in a 2-player game. The end of the round plays like in a 2-player game.
The Game Turn
Important: You may never choose to become an Informant in this Solo Variant.
You may decide to skip some actions in the turn (such as Using a Specialist or Performing a Heist).
1. Choose 1 die, then trigger an effect
Choose 1 die among the available 3 and slide it on the rightmost free space on your Player Board.
Add up the two remaining dice from the Dice Pool and trigger the following effect:
- a. if the result is 7 = no effect
- b. from 2 to 6 = apply the effect given on the left of the Card (Bribe or Rivalry)
- c. from 8 to 12 = apply the effect given on the right of the Card (Bribe or Rivalry)
If you did not roll a 7, take the Corruption Card and:
Bribe: Flip the card and place it in front of you so that it displays the Bribe part (red-tainted part of the card) face up. In future turns, if you roll a Bribe effect, place the new card face up on top of the previous card, keeping the Bribe part of the previous card visible.
Rivalry: Lock the indicated buildings with Gang Tokens from the matching icons (if this is a Jewelry, place the rival Gang Token on the Jewelry with the highest value) – Your rivals have already robbed these buildings! Then flip the card and place it in front of you so that it displays the Rivalry part (grey-tainted part of the card) face up. In future turns, if you roll a Rivalry effect, place the new card face up on top of the previous card, keeping the Rivalry part of the previous card visible.
2. Use a Specialist Card
You can only use the action USE A CARD. It plays exactly like in a 2-, 3-, or 4-player game.
3. Perform a Heist
You can only use the action PERFORM A HEIST. It plays exactly like in a 2-,3-, or 4-player game, but you do not gain any Prime Token from the Continent or Las Vegas Boards.
On your first Bank and Jewelry Heist, take the matching token from your Player Board, place it above the matching symbol, and score the associated reward (ie. the one from the spot where you placed your token, not on the token itself). Move your token 1 step on each new Bank and Jewelry Heist. Each time you move the token to a new spot, score the matching reward.
End of the Game
You immediately lose the game if:
- You place a 7th Corruption Card face down in front of you (Bribes side);
- Or you place a 5th Corruption Card face down in front of you (Rivalry side).
You win the game and calculate your score if:
- You place your 7th Gang Token. Each remaining Corruption Card in the deck is worth +5M$.
- You reveal the last Corruption Card without triggering an immediate defeat (see above). In that case, play your final round.
Calculate your personal wealth and deduce all Bribes:
| Bribes remaining | 1 | 2 | 3 | 4 | 5 | 6 |
|---|---|---|---|---|---|---|
| Penalty | -1 M$ | -3 M$ | -6 M$ | -10 M$ | -15 M$ | -21 M$ |
Hall of Fame
Now it's time to count your money! Were you better than your infamous predecessors?
- Up to 19 M$: Averell Dalton
- 20-29 M$: Beagle boys
- 30-34 M$: Fantomas
- 35-39 M$: Cat's Eyes
- 40-44 M$: Alibaba
- 45-49 M$: Robin Hood
- 50-54 M$: Arsène Lupin
- 55-59 M$: Bonnie & Clyde
- 60-64 M$: Spaggiari
- 65 M$+: Danny Ocean
For your first games in solo, you may start with one (Experienced) or two (Beginner) Hideout Cards.
Recruitment Rewards (Detail)
Full Team Token (max. 1 token per player)
As soon as you have the 6 different colors in your team (6 Skills), you immediately receive the Full Team Token from the top of the matching stack and score the reward (7M$, 4M$ or 2M$).
Mastery Token (max. 1 token per player)
If you manage to collect three Expert Tiles (see below), then you immediately receive the Mastery Token from the top of the matching stack and score the reward (7M$, 4M$ or 2M$).
Expert Tile
As soon as you recruit the third Specialist Card in a given color, you immediately receive the matching Expert Tile (if it is still available). Place this tile next to your Player Board. The Expert Tile provides you benefits that you can use immediately if needed.
This Expert Tile grants its owner an extra Ability until the end of the game.
- Hacking Expert: Once per turn, during the "Use a Specialist" step, you may apply a modifier of +1/-1 to any of your dice.
- Acting Expert: You may discard 1 die to replace 1 Skill with another on all future Casino Heists.
- Acrobatics Expert: Gain +2M$ on all future Bank Heists.
- Heavy Expert: Gain +4M$ on all future Jewelry Heists.
- Safebreaking Expert: Spend 2 less Equipment on all future Bank Heists.
- Piloting Expert: Spend 1 less Equipment on all future Bank and Jewelry Heists.
Important: You cannot have more than 3 Expertise Tiles in front of you. Once you've unlocked three Expertise Tiles, you may not unlock new Expertise Tiles. All Expertise Tiles' effects are cumulative.
Heist Rewards (Detail)
Prime Tokens
If you're the first player to perform a Heist in a given city, choose a Prime Token from the tokens placed on the post-it of the matching Continent Board and place this token on the appropriate area of your Player Board (max. 4 tokens).
In Las Vegas, all players receive 1 Prime Token.
Prime Tokens can only be used once. Those that allow you to gain a die may be used anytime.
Important: Skill Tokens are not Specialists. They are not considered as a team member and do neither count for the Full Team Token, nor for the Expert Tokens.
First Bank Token (1 max. per player)
When you perform your first Bank Heist, take the First Bank Token from the top of the matching stack. Immediately receive the reward indicated on the token. Then, place the token face down on the appropriate spot above your Player Board (to the left) to remind you that you already performed a Heist in a Bank. The tokens also allow players to keep track of the number of Banks that have been robbed.
First Jewelry Token (1 max. per player)
Play exactly the same as First bank token, when you perform your first Jewelry Heist.
Second Jewelry
When you rob your second Jewelry, you immediately gain 1 die.