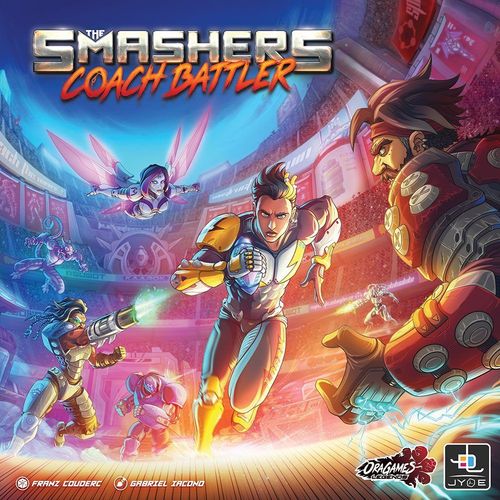
The Smashers: Coach Battler
The Smashers: Coach Battler Rulebook
Table of Contents
Table of Contents
Components
The game contains:
- 60 Smasher cards
- 56 Coach cards
- 27 Equipment cards
- 6 Match cards
- 19 Stadium cards
- 12 AI cards
- 8 Lock cards
- 1 Stadium board
- 18 Boost tokens
- 4 Team boards
- 4 Team benches
- 4 Coach pawns
- 40 Credit tokens
Setup
Follow these steps to prepare the day's tournament. As Smalker says: a good preparation makes for great fights!
- Each player chooses one Coach from the seven available and takes the associated Coach deck. The seven Coaches are Bob, the green Coach (name stylised on its artwork, read here as "Sculta"), Golden Jack, Glagar, the red Coach (name stylised on its artwork, read here as "Krazay"), Styuk and DutyCoach. DutyCoach is playable, but must be set aside if you are playing alone or with an odd number of players. (DutyCoach is the deck used by the AI; see "Solo and Three-Player Play" below.)
- Give each player one Coach pawn and 5 Credits.
- Each player takes one Team board and one Team bench and places them in front of them. Then:
- Place your Coach pawn on space 0 of the Score Track.
- Place your Coach deck and your Credits next to your Team board.
- Place the Lock cards for slots 4 and 5 on the matching slots of your Team board.
- Place your Recruitment card next to your Team board.
Then prepare the shared components:
- Stadium cards: shuffle the Stadium cards to form two decks, one for level 1 and one for level 2. Place them on their spaces on the Stadium board.
- Match cards: place the Match cards on their space in order, so that the card numbered 1 is on top.
- Boost tokens: place the Boost tokens on their reserve space.
- Credits: place the remaining Credit tokens on their reserve space.
- Smasher cards: shuffle all the Smasher cards to form a draw pile.
- Equipment cards: shuffle all the Equipment cards to form a draw pile.
The Team board has five Smasher slots. Slots 1 to 3 are available at the start of the tournament. Slots 4 and 5 are locked until unlocked during play (see "Unlocking Smasher Slots" below).
If at any time during the tournament a draw pile is empty, take its discard pile, shuffle it, and form a new draw pile from it, with care.
Game Overview
A game of Coach Battler is played over several rounds, each made of four phases:
- Team (Équipe): recruit Smashers, acquire Equipment, activate Legends and grow your team.
- Stadium (Stade): find out who you will face and in what kind of stadium.
- Tactics: choose a Coach card and place your Smashers on your Team board.
- Match: reveal your Smashers and Coach card, and fight the opposing team.
Once the match is over, return your Smashers to your Team bench, draw a new Coach card, and start again from the Team phase, until either 6 matches have been played or a Coach has reached 8 points or more.
End of the Game
- The 6 matches are over: the Coach with the most points is the winner.
- A Coach reaches 8 points before the end of the 6 matches: the tournament ends and we have a winner.
- Tie: the Coach with the most activated Legends wins. (Smalker's tip: if the number of Legends is also tied, compare Credits: the richest are always the winners, hé hé! Still tied? No, but seriously! Play one final match, or sort it out yourselves!)
Phase 1: Team (Équipe)
Recruit the best… or not! You are the strategist, after all.
The Team phase lets you recruit Smashers, acquire Equipment, activate Legends and grow your team. In short, everything you need to create a Dream Team!
Recruitment
- Draw 5 Smashers without revealing them.
- You don't like your Smashers? No problem! Discard the ones you do not want and draw as many again. But only once per turn! Don't overdo it.
- Place face down in front of you the Smashers you intend to recruit, and discard the others.
- Reveal all the Smashers you have kept at the same time, and pay the Credits due.
- Place the Smashers you have recruited on your Team bench. They are now active and part of your team.
- When you recruit a Legend, place it face up next to your Team board until it has been activated.
(Smalker's tip: it's time to show your espionage talents. Watch your rivals' recruitment choices. Attack, defence, speed, versatility: be ready! Don't worry, the Sponsors approve of this kind of technique. Hé hé hé…)
Smasher Cards
Each Smasher card shows:
- Name: the Legend's name is printed on the card. Rookies have no name on their card.
- Category and Role: the Smasher's category (Regular or Boosted) and its Role (Runner, Ranger, Breaker, Jumper or Zoner).
- Dismissals needed to activate the Legend: the number of Rookies that must be dismissed to activate a Legend (see "Activating a Legend" below).
- Recruitment cost: the Credits needed to recruit the Smasher.
- Main statistics: the statistics the Smasher provides, shown along the bottom of the card.
- Combo statistics: the statistics shown on each side of the card.
Smasher types: there are two types of Smasher, Rookies and Legends.
- A Legend is a Smasher directly contacted by the Sponsors to join the Legendary Sponsors League. Legends are recognisable by their name on the card. Unlike Rookies, they have not yet earned this honour and are temporary guests.
- A Rookie has not yet earned a place in the League and is a temporary guest. (The Smashers called "Rookies" here are far from beginners at Smash Ball, but all dream of joining the League, and so they are ready to give up their name and be called "Rookies" for the length of a competition.)
Categories: each type of Smasher is either Regular (Réguliers) or Boosted (Boostés). Boosted Smashers are those drawn by chance to receive a little genetic boost at the start of the competition.
Each Smasher has different statistics, oriented according to its Role. These statistics are stronger or weaker depending on its type (Rookie or Legend) and its category (Regular or Boosted).
The five Roles are:
- Runner: fast and agile, they bring the ball into the Smash Zone in a flash.
- Jumper: with powerful jumps, they gain height to react to every situation.
- Ranger: damage, interceptions and handicaps; these rapid shooters can almost do everything!
- Breaker: true projectiles, they charge at high speed and destroy whatever they meet.
- Zoner: masters of their zone, they defend it at all costs. Nobody crosses without paying the price.
(The Role icons in the source's "Le saviez-vous ?" box show the statistic types each Role typically carries. The exact values are printed on each card.)
Recruitment Costs
- Recruiting a Regular Rookie costs 1 Credit.
- Recruiting any other Smasher costs 2 Credits.
The cost of a Smasher is printed on its card.
Team limit: you can have only 8 Smashers on your team. If you recruit a 9th, you must dismiss a team member to make room. Legends can never be dismissed.
Activating a Legend
To send a Legend onto the field, you must dismiss Rookies you have already recruited. Activating a Legend costs Credits and emotions! Precisely, the rules state:
- A Legend can be activated in one of two ways:
- Its Coach discards from its Team bench 2 Rookies of the same category and the same Role as the Legend.
- Its Coach discards from its Team bench 3 Rookies of the same category as the Legend but 3 different Roles from its own.
- Once activated, a Legend joins its team's bench and can be used in all matches, like any Rookie Smasher.
- A Legend can never be dismissed.
- Activate the Legend immediately by dismissing the Rookies. Activation can only be done during the Team phase.
(Smalker's tip: try to use your Recruitment card quickly to activate a Legend. Don't necessarily wait until you have the means to recruit a Boosted Legend or the perfect card for your strategy. You will often see that it is better to get a Regular Legend quickly, rather than losing several turns waiting for the Boosted Legend you want so badly!)
The Recruitment Card
Unless you have made a mistake, you must still have your Recruitment card somewhere near you. This card is unique to each Coach. It simply allows you to replace one Rookie to dismiss when activating a Legend.
Each Recruitment card shows at least 2 Roles, which may be Regular and/or Boosted. These icons show which type of Smasher you can replace.
This Recruitment card can only be used once in the tournament, so use it wisely!
(Smalker's tip: if this is your first tournament, try to recruit Smashers that are the same colour as the symbols at the top of your 2 Coach cards, or that match one of the two symbols on your Recruitment card.)
Buying Equipment
Sponsors let you fight more effectively for just 1 Credit!
- Draw 2 Equipment cards, do not show them to the other players, and discard the one you do not like.
- You may buy and play only one Equipment per turn, during the Match phase.
- Equipment called Sabotage is special: use it to cancel the effect of an opponent's Equipment. The opponent discards its Equipment.
(Attention: some Equipment is very powerful and may have an additional cost to pay when it is used.)
Unlocking Smasher Slots
The Team board has 5 Smasher slots. Only slots 1 to 3 are available at the start of the tournament. To unlock slots 4 and 5, pay the costs printed on their Lock cards: 2 Credits for slot 4 and 4 Credits for slot 5.
When you unlock a slot, it is permanent: remove its Lock card from the game. You are then free to place a Smasher there or not during your matches.
End of the Team Phase
During the Team phase you may buy an Equipment, unlock Smasher slots, or keep your Credits for the next turn.
Then draw 1 card from your Coach deck (2 for the first match).
Phase 2: Stadium (Stade)
Off to glory! It's time to scout.
Here you are told who you will fight and in which kind of stadium.
- Reveal the first Match card. It determines the matchups for the round and tells you which rival you will play next and in what kind of stadium. (Match cards show two pairings, 1 vs 2 and 3 vs 4, plus a Stadium level.)
- Reveal a Stadium card of the level (1 or 2) indicated by the Match card.
Each stadium has its own advantages, represented by statistics to gain. At the start of the match, the team with the highest Mobility statistic gets these bonuses. This information can change your strategy drastically, so stay alert!
Phase 3: Tactics (Tactique)
Show your potential!
You are about to enter the field! Make the final adjustments, and choose a Coach card as well as the Smashers that will take part in the match.
Setting Up Your Strategy
- Choose one of your two Coach cards and place it face down in front of you. Even if you do not want it, or it does you no good, you have no choice!
- Choose and place your Smashers face down on your Team board. A Legend must be activated before it can be placed, and slots 4 and 5 must be unlocked before they can be used.
Coach Card Successes
A Coach card shows the placements needed to activate its successes:
- Minor success (Réussite mineure, marked 2)
- Major success (Réussite majeure, marked 3)
You gain the effects of a success if the placement of your Smashers matches the placement the card asks for.
Example (from the rulebook): two Runners (yellow symbol) respect the placement on the Coach card, so the minor success is validated. Your team gains a bonus of 2 in Defense, added to the other statistics. (The rulebook's second example shows two Runners on the Team board that do not respect the card, which requires a space, occupied or not, between the two Runners. Nothing is gained: "You get nothing! Except the boos of the fans…")
Combo Statistics
Each Smasher has combo statistics on each side of its card. When combo statistics line up between Smashers on your Team board, your team gains +2 of each matching statistic. The rulebook illustrates this with red marks on neighbouring cards; the adjacency rule is taken from that illustration.
Example (from the rulebook): this team combines many Combo Statistics, so it gains +2 Credit, +2 Mobility and +2 Ball, to be added to its other statistics.
(Smalker's tip: try to respect the placements on the Coach card, or complete the Combo Statistics of your Smashers! If you manage both, even better!)
Phase 4: Match
Crush your opponents!
Reveal your Smashers and your Coach card, face up, at the same time as your opponent. Coach cards can have special effects: always apply them first.
Smalker's tip: during the Match phase you can use an Equipment while the steps below are being resolved. Once a step is resolved you cannot go back, so think carefully about when to play your Equipment.
The match is resolved in the following order. (The order is also printed on the Team board.)
1. Credits
Collect Credits according to:
- the Credit statistics of your Smashers on your Team board;
- your Coach card, if its success allows it;
- slots 3, 4 and 5 of your Team board, if they are not covered by a Smasher.
You gain these Credits even if the slots are still locked. Example (from the rulebook): J1 gains 5 Credits in total and J2 gains 4 Credits in total.
2. Stadium and Boosts
The team with the most Mobility takes the Boost tokens indicated by the Stadium card. You do not keep the Boost tokens after the current match. In case of a tie, nobody gets the tokens.
Example (from the rulebook): J1 has 2 Mobility and J2 has 3 Mobility, so J2 takes the Boost tokens. If J1 had had an Equipment increasing Mobility, it could have played it to take the lead, unless J2 had also played one.
3. Attack and Defense
One Coach announces its team's Attack value and the other announces its Defense value, and vice versa. Remember to include any Boost tokens you gained in the previous step, in addition to everything else.
The aim is for a team's Attack to exceed the opposing team's Defense by at least 1 point. There are only three possible results:
- One team knocks the other out (K.O.) without being knocked out itself: that team wins the match and scores 2 points.
- Both teams knock each other out: nobody wins, the match is a draw. Each team scores 1 point.
- Neither team knocks the other out: move on to the Ball.
Record points by moving your Coach pawn along the Score Track at the top of your Team board.
Example (from the rulebook): J1 has 4 Attack and 2 Defense, while J2 has 1 Attack and 4 Defense (the order in which the example lists them). Neither team has enough Attack to knock the other out. Let's play the Ball!
4. The Ball
Since both teams can still stand, it is time to see which one reaches the Smash Zone with the Ball. The team with the most Balls wins the match. As in the previous step, a win scores 2 points and a draw scores 1 point to each team.
Example (from the rulebook): J1 has 3 Balls and J2 has 6 Balls, so J2 wins.
If nobody was knocked out, compare the Ball statistics to determine the winning team. If they are equal, the match is a draw.
When a Coach reaches the Score Track spaces 3 and 6 for the first time, it immediately gains 1 Credit.
After the Match
Once the match is over, return your Smashers to your Team bench, draw a new Coach card, and start again from the Team phase until 6 matches have been played or a Coach has 8 points or more (see "End of the Game" above).
Solo and Three-Player Play (AI)
You are wondering how to play with three players, or even alone? Our marvellous Sponsors have designed an AI able to replace the missing Coach, or to challenge you solo!
Treat the AI as a real Coach, but respect its physical integrity in case of defeat! An AI is expensive!
Setting Up the AI
- Add 1 Team board to the table as if there were one more player. This is the AI's side.
- Take the DutyCoach deck for the AI. There is no need to take its Recruitment card, as it would be of no use to the AI.
- Build a random draw pile of AI cards numbered 1 to 6 (the number is on the back of each card). Card 1 must be on top of the pile.
- Give the AI a Coach pawn, as for the other Coaches, and place it on the Score Track of its Team board.
Then you are ready for the Tactics phase.
Facing the AI
At the start of the Tactics phase, reveal one of the 2 AI cards for the round and discard the other. The AI does not play Smashers: the statistics on the revealed card are its team's statistics.
Place your Smashers normally on your Team board. Look at DutyCoach's statistics to make your move.
When you are ready for the Match phase, reveal the first card of the AI's Coach deck:
- DutyCoach always succeeds its tactical placements.
- Add its Success (2 or 3, as indicated on the AI card) to its statistics.
- The AI can gain Credits only through its Coach cards. For every 2 Credits gained, discard them and draw an Equipment, which the AI plays immediately.
The match then proceeds normally: compare your statistics, respecting the order of resolution. If DutyCoach wins or draws, move its Coach pawn to show the points it gains.
Quick Reference
The rulebook's summary page, transcribed in full.
01 Team Phase
- Draw 1 card from your Coach deck, or 2 for the first match.
- Draw 5 Smashers without revealing them to the other players. You may discard as many of these 5 as you like and draw the same number, but only once per turn!
- Place the Smashers you intend to recruit face down in front of you.
- Discard the Smashers you are not keeping.
- Reveal all the Smashers you kept at the same time and pay the Credits due. Place Rookies on your Team bench and Legends face up beside your Team board. Activate Legends by dismissing Rookies immediately. Activation can only be done during the Team phase.
- You may buy an Equipment, unlock Smasher slots, or keep your Credits for the next turn.
02 Stadium Phase
- Reveal the first Match card to determine the matchups for the round.
- Reveal a Stadium card of the level indicated by the Match card.
03 Tactics Phase
- Choose one of your two Coach cards and place it next to your Team board.
- Place face down on your Team board the Smashers you want to use for the match.
04 Match Phase
- Reveal your Smashers and your Coach card at the same time as your opponent. Apply the special effects of Coach cards.
- Collect Credits from your Smashers, your Coach card, and slots 3, 4 and 5 of your Team board if they are free.
- Check which Coach wins the Stadium's Boost tokens by comparing Mobility.
- Compare your Attack and Defense values to determine who wins the match:
- One team knocks the other out without being knocked out itself: that team wins the match and scores 2 points.
- Both teams knock each other out: a draw, 1 point each.
- Neither team knocks the other out: move on to the Ball.
- If nobody was knocked out, compare Balls to designate the winning team. In case of a tie, the match is a draw.
- Move your Score Track pawn according to the results.
- Check whether a Coach has reached at least 8 points or whether 6 matches have been played. If so, the competition ends and the Coach with the most points wins. In case of a tie, see the details in the End of the Game section.
- If the competition continues, collect your Smashers and start a new round.
Icon Reference
The rulebook's icon key, written out in words:
- Statistics: Credit, Mobility, Attack, Defense, Ball.
- Smashers and cards: Smasher, Recruitment card, Equipment (Sponsor), Coach, Match.
- Roles: Runner, Ranger, Breaker, Jumper, Zoner.
- Categories: Regular, Boosted.
- Success: minor success (2), major success (3).
- Stadium levels: Stadium level 1, Stadium level 2.