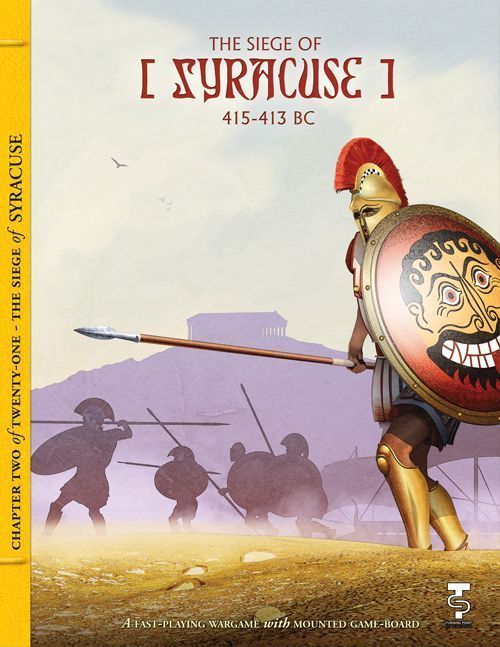
The Siege of Syracuse 415-413 BC
The Siege of Syracuse 415-413 BC Rulebook
Table of Contents
Table of Contents
How This Book Is Organized
This rulebook is structured to introduce concepts following the game's sequence of play. They are written in a format known as the Case System. This approach divides the rules into Modules, each dealing with an important aspect of play. Modules are numbered sequentially and possess a title. Each Module is divided into Sections, dealing with major sub-topics within the Module. These are also numbered sequentially. Finally, the majority of each Section consists of Cases: the specific, detailed rules that govern play. Their sequential numbering follows a logical progression based upon the Module and Section of which the Cases are a part. Look to these numbers to determine where a Case is located in the rules.
3.1.4 — The fourth Case of the first Section of the third Module of the rules.
Learning to Play the Game
Begin by familiarizing yourself with all of the components listed for this game. Then skim through the charts and rules, reading all the titles of the Modules and Sections. Set up a game scenario or portion of a scenario (after reading the applicable Module) and play a trial game against yourself. Try referring to the rules only when you have a question and remember the numbering system we employ makes it easy to look up rules. While a trial game may take you an hour or two, it is the quickest and most pleasant way to learn (short of having an experienced friend teach you). We don't recommend attempting to learn the rules word-for-word. We've written these rules to be as comprehensive as possible—but they are not designed to be memorized. Taking in the rules as you play along is the best approach to mastering this game. We're always open to suggestions on how to improve the comprehension of our rules. Write to us (see addresses below) if you have an idea on how we can communicate better with you.
1.0 Introduction
1.1 Game Scale
Each turn represents one season of approximately three months. Each turn is subdivided into 1 to 10 Impulses. Each Impulse is subdivided into Phases. Each combat factor represents 100 (Hoplites) or 200 men (all others), and 10 to 15 ships (naval unit step).
2.0 Game Components
Each copy of The Siege of Syracuse includes the following:
- One 11" by 17" area map
- One 8.5" by 11" square-tiled battle board
- One sheet of 176 die cut counters
- This set of rules and tables
- Two six-sided dice. Note: Not included, but required for play is a ten-sided die. Players will need to supply their own. A roll of zero on the ten-sided die is read as 10, not 0.
3.0 Game Definitions
The following terms and abbreviations are used in the game:
- Activation: For units to move and/or fight in an Impulse, they must be Activated. Each unit can normally activate once per turn but may be activated more than once, based upon a die roll (DR) check. The number of units that can activate in an Impulse is also determined by a DR check (Sections 6.1 and 6.3).
- Allied: Allies of Syracuse who came to the city's aid. The main contingents were sent by Sparta and Corinth, but others from throughout the Mediterranean came as well. Allied units are referred to as Syracusan in the rules, regardless of their nationality.
- Archers: Lightly-armed infantry equipped with bows.
- Assault Combat: Full-out, close action combat with swords, lances, spears, and shields. This is the deadliest and most costly in terms of inflicting/incurring step losses. Players use a D10 to resolve Assault combat.
- Bog: Any area labeled starting with the letter B is a Bog area.
- Casualties: Many Combat results call for losses in casualties that are reflected in "step" losses. Syracusan, Allied, and Athenian Light Infantry and Cavalry all have 2 steps. The front of the unit depicts a full complement (2 steps) while the back side depicts its reduced (1 step) status. Hoplites have five steps (one for each combat factor). Use the Casualty markers to record the losses sustained, and CF reduction for Hoplites. All other units have 1 step. Note: Sicel units are printed on both sides to indicate their allegiance (green for pro-Athenian, red for pro-Syracusan).
- CF: Combat Factor (Fire or Assault).
- Coastal Area: A land area with at least one border on a sea area.
- D6 or D10: The roll of a six-sided or ten-sided die respectively.
4.0 Sequence of Play
Each turn is subdivided into the following phases that must be performed in the order listed below:
4.1 Random Events Phase
Both players roll a D6 and total the results. The number (2 through 12) determines if a Random Event occurs for the current turn (see the Random Events Table). The Random Event markers serve to remind that a given Event is in play.
4.2 Supply and Initiative Determination Phase
Both players determine their supply capability for the turn and what units are in supply. Players may have to make D6 checks for units to determine their status due to supply. Next, players determine and—if needed—adjust their Morale Levels. Finally, each player performs a D10 check to determine their Initiative Level and determine which player has the Initiative for the turn. Important: The Athenian player automatically has the initiative on the first turn; start checking for Initiative on the second game turn.
4.3 Operations Phase
First, both players perform a D6 check to determine the number of Impulses they may initiate for the turn (1 through 5). The player with the Initiative declares the first Impulse, its type (ground or naval units) and activates a number of units determined by a D10 check. The non-Initiative player may be able to activate friendly units via Reaction, the number of which is predicated upon the actions of the Initiative turn as well as possible DR check(s). Following the completion of the first Impulse, the non-Initiative player can choose to conduct an Impulse (again, declaring if it is a Ground or Naval Activation) or Pass. Once both players declare "Pass" or exhaust the number of Impulses they can initiate, the Operations Phase is over.
4.4 Administrative Phase
In this phase, players perform the following actions in this order:
- Victory Determination: Players determine if one player has achieved the conditions for an Automatic Victory, or if one side will surrender. If neither occurs, play continues.
- Rally: All Disrupted units, on both sides, return to Normal Status. Both players perform D10 checks to determine if Routed units change to Disrupted or recover fully to Normal Status. Any Siege Wall units that are still in place from the Operations Phase are turned face-up to indicate that the Wall is constructed. Both sides check to determine if any replacements are received.
- Reinforcement: Both sides check to see if new units appear and, where they do, deploy them to the map.
5.0 Initiative and Morale
Each side's willingness to conduct the war is abstracted through their Morale Level (ML). A side's ML cannot exceed 10 or fall below 1 regardless of the circumstances in the game.
5.1 Morale Level (ML) Adjustment
A side's ML is set at the start of the game and is adjusted during the Supply and Initiative Phase. A side's ML is adjusted for each entry listed (use all that apply) on the table in the back of the rules. Use the appropriate Morale marker to record each side's ML on the Game Record Track (printed on the map).
5.2 Initiative Level (IL)
Both players roll a D10 and modify the DR for each entry listed (use all that apply) on the table in the back of the rules.
5.2.1 The modified DR result is the player's IL for the turn. The IL cannot be more than 10, or less than 1, regardless of the modified DR result. Use the Initiative marker to record each side's IL on the Game Record Track (printed on the map). In case of a tied IL, the Athenian player has the Initiative as long as the Circle Fort is in play; otherwise the Syracusan player has the Initiative in cases of ties.
6.0 Operations
Each turn is subdivided into a number of Impulses, 1-5 per side (half of the player's IL).
6.1 Impulse Determination
A D6 check is made by both players to determine the number of Impulses each can initiate. Modify the D6 check as follows (use all that apply):
- The Initiative player adds the difference of each side's Initiative Levels. For example, if the Athenian player has an IL of 7 and the Syracusan IL is 6, then the Athenian player adds 1 to the DR. If the situation was reversed, then the Athenian player would subtract 1.
- Per Random Event
6.1.1 The DR result indicates the maximum number of Impulses the player can initiate for the turn in the Operations Phase. However, a player cannot conduct more than 5 Impulses, and can always conduct at least 1, regardless of their DR result; thus a modified roll greater than 5 is treated as a 5. Use a player's Operations marker to indicate this maximum number of Impulses on the Game Record Track, and reduce this by one space as each one is performed.
6.1.2 After the Initiative player performs an Impulse and activates units, the non-Initiative player can declare an Impulse, if his Operations marker is 1 or more, or declare "Pass." Note: A player does NOT have to conduct the maximum number of Impulses. Once a player's Operations marker is removed from the 1 space of the Game Record Track, or both players declare "Pass" back-to-back, the Operations Phase of the turn is over and no other Impulses can be initiated. Example: The Athenian player has the Operations marker in the 5 space of the Game Record Track and conducts 1 Impulse. The Athenian player moves the Athenian Operations marker to the 4 space. The Syracusan player has only 1 Impulse (that marker is in the 1 space), wants to await developments, and declares "Pass." The Athenian player then can either then conduct another Impulse or also declare "Pass." If the former is done the Athenian Operations marker would be moved to the 3 space, and the Syracusan player can once again decide to conduct his only Impulse or declare "Pass." If, however, the Athenian player instead declared "Pass" on the heels of the Syracusan player's declaration, instead of taking another Impulse, the turn would be over and the Syracusan player would lose out in conducting his one Impulse.
6.2 Impulse Phase
Each turn players can activate units for movement and combat. The order of play in an Impulse is as follows:
- Activation Declaration. The player conducting the Impulse declares if this is a Ground or Naval Activation. Only naval units, and ground units that are carried by the activated naval units, can move or fight in a Naval Activation. Only ground units can be activated in a Ground Activation.
- Number of Activating Units. The player conducting the activation determines the number of units that can be activated. The owning player rolls a D10. If the DR is odd, ONE area with a Leader that has not activated may activate. If the DR is even, one area with a Leader that has not activated, and any other Leader with friendly units that are in an adjacent area, may also activate. If there are not any un-activated Leaders in play, then a number of units equal to the D10 result may activate. Rotate units at the end of the Impulse, to indicate they have activated for the turn. Note: Once a player has activated all of his Leaders, a player will only be able to activate a number of units each Impulse equal to the D10 result and DR check for reactivation (Section 6.3).
- Movement. Activated units may move up to the limit of their Movement Point (MP) allowance.
- Reaction Movement. The non-Initiative player can attempt to activate units and move them (Section 6.4).
- Combat. Combat occurs in areas that are occupied by opposing units. Players determine if a Pitched Battle or Skirmish Combat occurs (naval or ground, Section 8.1). Note: Pitched Battles are resolved on the TBB (Sections 6.5, 7.3, and 8.2).
- Wall Construction. Activated units that did not engage in combat can attempt to build or tear down siege walls. The Athenian player (only) can also attempt to construct the Circle Fort (Section 10.3).
6.3 Unit Activation
Units may normally activate only once in a turn. However, Normal Status units (ones that are not Disrupted or Routed) can activate again with a successful D10 check. For each activated unit that a player is attempting to activate, a D10 is rolled. If the DR is less than the owning player's ML, the unit may activate. If the DR is equal to or greater than the owning player's ML, the unit does not activate. If the DR is 10, the unit not only does not activate, but is immediately marked as Disrupted. There is no limit to the number of times a unit can re-activate in a turn with a successful DR check (do you feel lucky?).
6.4 Reaction Movement
The player not conducting the Impulse can attempt to activate units for movement only following the completion of the movement of all of the active player's units in the Impulse. Any units that are in an area occupied by enemy units, or adjacent to one with an un-activated friendly leader, can activate with a successful D10 check. Subtract from this DR a leader's Command Rating if the leader is in the same area and is un-activated. For the Syracusan player only, subtract an additional 1 if there are more friendly, un-routed cavalry CF in the area than that controlled by the Athenian (Section 10.5). If the DR result is less than the owning player's IL, the unit can activate and Reaction move up to the limit of its Movement Point allowance, abiding the rules of movement. If the DR result equals the player's IL, the unit may Reaction move 1 area. If the DR result is greater than the IL, the unit may not Reaction move. A DR of 10 results in the unit not only being unable to Reaction move but being immediately marked as Disrupted.
6.4.1 The player conducting the Impulse cannot conduct Reaction movement. Units that conduct a Reaction move are NOT marked as activated.
6.5 Tactical Battle Board Round Sequence of Play
After setting up opposing units on opposite sides of the TBB (defender first, attacker second, Section 8.1), the following Sequence of Play is used when resolving Pitched Battles:
- Attacking Player's Movement Phase
- Defending Player's Defensive Fire Phase
- Attacking Player's Offensive Fire Phase
- Attacking Player's Assault Combat Phase
- Attacking Player's Rally Phase
- Defending Player's Movement Phase
- Attacking Player's Defensive Fire Phase
- Defending Player's Offensive Fire Phase
- Defending Player's Assault Combat Phase
- Defending Player's Rally Phase
- End Phase
There are normally 10 Rounds of play on the TBB. The number of Rounds can be shortened if there are no longer any opposing units left in play. Once the last Round is completed surviving units are returned to the map.
7.0 Movement
Each unit has a Movement Point (MP) allowance that is used to determine how far it can move on the map and the TBB when it is activated.
7.1 Ground Map Movement
Activated units move from one contiguous ground area on the map to another. Only Sicilian and Syracusan Allied units can move off the map, and then only from the west map edge. An Athenian ground unit that is compelled to move off the map is considered eliminated. A unit's MP allowance is printed on the unit (lower right side). A unit's MP allowance is increased by 2 if it is stacked with a leader at the start of its activation. Units pay 1 MP to enter any area on the map, with the following modifications/limitations (use all that apply):
- +1 MP to enter or leave an area with a Normal Status enemy unit (no MP cost if all enemy units are Disrupted/Routed)
- +1 MP enter an area with an Enemy Siege Wall (or Circle Fort for the Syracusan player)
- +1 MP to enter an area if there are more enemy Normal Status cavalry units than friendly Normal Status cavalry
- Athenian units may not enter Areas I-1 or L-7 (comprising the walled city of Syracuse). Athenian units may enter Area L-20 (that unmarked area between areas B-1 and L-7 where the label failed to appear – our apologies for that).
- Ground units may not cross steep slope borders (denoted by a thin red-brown line) located around many of High Ground areas H-1 through H-7 (this group is collectively referred to as the Epipolae)
- Ground units may enter all-sea areas if transported on a naval unit
- A ground unit may only enter an area if it has enough MP to do so
- The long gray line shown on the map running from areas I-1 to L-6 is not an obstacle (or road) and has no effect on game play.
- Note: Naval units may occupy a coastal land area and are considered beached (un-activated). If enemy ground units enter the area the naval units are immediately relocated to any sea area free of enemy units or off map (owning player's choice) and rotated as activated.
An activated ground unit must stop moving when it enters an area with an enemy unit or any area with a Bog (B).
Note: See Section 6.4, Reaction Movement.
7.1.2 Map Stacking There is no limit to the number of units that can occupy an area. Note that having too many friendly units in one area can affect Supply (Section 9.1).
7.2 Naval Map Movement
Activated naval units move from contiguous sea area on the map to another. An activated naval unit may move an unlimited number of areas on map (its MP allowance is only used on the TBB) but must immediately stop moving when entering an area with an enemy naval unit.
7.2.1 Naval units may move off the map but must perform a D10 check on a later turn to determine if they can re-enter the game. For the naval unit, and any ground unit it is transporting, to re-enter, a DR less than or equal to the player's ML must be made when it is activated. If the DR result is greater, the player must try again in a later Impulse/Turn.
7.2.2 Naval Unit Transport Each naval unit can transport ground units as follows:
- Full strength naval unit (2 steps): 2 ground units Note: Only 1 of these can be a Hoplite
- Reduced naval units (1 step): 1 ground unit (any type) Note: Any number of Leader units can be transported by a naval unit (full or reduced strength)
A ground unit must be in the same area as the activated naval unit to be transported. It costs nothing in MP to board or unload a ground unit on the map (remember, naval units do not expend MP on the map). Ground units may NOT board or unload in enemy-occupied areas, Bog areas, or either Syracuse City area (I-1 or L-7). Any ground unit to be transported by a naval unit can be either Normal Status or Disrupted. Routed ground units cannot be transported (or moved at all for that matter).
7.3 Tactical Battle Board (TBB) Movement
Units, both ground and naval, use their unmodified MP allowance to move on the TBB. All units have a facing arrow that must be oriented to a side of a square. This indicates the unit's front, side and rear aspects. Units must move into the square towards which its front is oriented. It costs 1 MP to turn a unit any number of sides. Units may not move diagonally on the TBB, nor may they attack diagonally. A unit is moved on the TBB individually, but may move as a stack if a leader is present at the start and remains stacked throughout the movement.
7.3.1 A ground unit must normally stop moving whenever it enters a square adjacent to an enemy unit. Any unit can turn in a square adjacent to an enemy unit, even after it moves adjacent, provided it performs a D10 check. Subtract a leader's command rating if stacked. If the unit is a cavalry unit and there is not an enemy cavalry unit adjacent, subtract 1 from the DR. If the DR is less than or equal to the player's ML, the unit may turn or even continue moving. If the DR is greater than the player's ML, the unit's movement is over and it may not turn/continue moving.
7.3.2 Tactical Battle Board Stacking Up to two friendly units can occupy a square on the TBB with the following limitations:
- A cavalry unit may only stack with another cavalry unit
- Leaders may stack with any unit and do not count towards stacking
- A Routed unit may not stack with another unit
- Opposing units may not stack
8.0 Combat
Opposing units of the same type (naval vs. naval, ground vs. ground) that occupy the same area must engage in some form of combat. The player that initiated the Impulse is considered the attacker, regardless of the overall strategic situation. The type of combat that is waged is determined by the players and possibly by a DR check.
8.1 Combat Determination
To determine the type of combat, players perform the following checks:
- Attacking player declares if the combat is to be conducted during the day or night. Night Combat cannot be declared if this is a Naval Activation/Combat.
- If both players have a leader present (regardless of activation status), and both desire it, a Pitched Battle is conducted. Mark the area with the Pitched Battle marker and relocate the units to the TBB. Exception: Units being used for Siege Wall construction are not deployed to the TBB unless the Siege Wall marker(s) are removed from the map (Section 10.2). Defending units set up first in Row 11 of the TBB. Attacking units set up second, either in Row 1 of the TBB (Day) or by a D10 check (Night Combat only, Section 10.6).
- If only one player has a leader present, or only one with a leader desires a Pitched Battle, then a D10 check is performed. The player who desires the Pitched Battle rolls a die and either subtracts his leader's command rating or adds the opposing leader's (if present). Subtract 2 if the player declared a Night Combat (Section 10.6). If the DR result is less than or equal to the player's ML, then a Pitched Battle will occur. Mark the area with the Pitched Battle marker and relocate all of the units to the TBB. Exception: Units being used for Siege Wall construction are not deployed to the TBB unless the Siege Wall marker(s) they are building are removed from the map (Section 10.2). Defending units set up first in Row 11 of the TBB. Attacking units set up second either in Row 1 of the TBB (Day) or by a D10 check (Night Combat only, Section 10.6). If the DR is greater than the player's ML, the combat will be resolved as a Skirmish.
- If neither player desires a Pitched Battle, the combat will be resolved as a Skirmish.
- In areas where both ground and naval units are present on both sides, the Initiative player decides what type of combat will occur (ground or naval). Note: See Section 7.1, last bullet, for areas where ground units are only opposed by enemy naval units.
8.2 Skirmish Combat
Skirmish Combat (ground or naval) represents lower-intensity fighting than that occurring in Pitched Battles. To resolve a Skirmish, both players follow the steps listed below:
- The defending player lines up all friendly units in the area. Exception: Any unit(s) being used for Siege Wall construction are not lined up unless the Siege Wall marker(s) are removed from the map (Section 10.2). Leaders, if present, are stacked with any one unit and these are placed either behind the other units or in front with the others. If only a leader and one unit are present, then these can only be "front and center."
- Attacking player lines up all units in the area opposite an opposing unit. Exception: Any unit(s) being used for Siege Wall construction are not lined up unless the Siege Wall marker(s) are removed from the map (Section 10.2). If there are excess units, these can be deployed as the attacking player desires; held back, all ganged up on one enemy unit, or spread out against other enemy units, as the owning player sees fit.
- The players alternate, defending player first, selecting a unit and either performing an attack against the enemy unit opposite it or performing a DR check to determine if it escapes the skirmish. If it attacks, the owning player designates what CF it is using (Fire or Assault) and rolls a D6. Modify the DR as per the entries listed (use all that apply) on the table in the back of the rules. If the DR is less than or equal to its CF, the enemy unit is immediately Disrupted. If the DR was greater, the attack had no effect. If the player elects to have the unit flee, a D10 check is made. Modify the DR as per the entries listed (use all that apply) on the table in the back of the rules. If the DR is less than or equal to the owning player's ML, the unit has escaped and is retreated to Area L-7, or to any area free of enemy units and that has an Athenian Wall/Circle Fort (Athenian). If no such area exists then the unit cannot escape, and must fight instead. A leader, and any unit it is stacked with, may automatically escape without a DR check.
- Players continue performing Step 3 until there are no longer opposing units in the area. Disrupted units that become Disrupted again are Routed and a D10 check is made. Add 1 to the DR if the units are Sicilian. If the DR result is less than or equal to the owning player's ML (not IL), the Routed unit is placed in Area L-7, or any area free of enemy units and has an Athenian Wall/Circle Fort (Athenian). If no such area exists, the unit is eliminated. If the DR result is greater than the owning player's ML, the Routed unit is eliminated.
8.3 Pitched Battle
Players use the TBB to resolve Pitched Battles. See Section 6.5 for the Pitched Battle Sequence of Play. This section of rules covers how types of combat for a Pitched Battle (Fire and Assault) are resolved, as well as the effects of Combat (Disruption, Rout), and Rally. A player that wins a pitched battle can have his ML increased by 1 in the following turn (Section 5.1).
Designer's Note: Skirmish combats will predominate, but I find it hard to believe that a side can win without fighting a pitched battle to really thwart their opponent or "put paid" to the game.
8.3.1 Fire Combat (Naval or Ground) Units that have a Missile CF can fire upon enemy units that are within range. Archer units can fire through (over actually) and into squares with units (friendly or enemy). All other units can only fire into but not through squares with enemy units. Only the topmost unit in a stack can be targeted for Fire Combat (ignore any enemy leader in the square). To resolve Fire Combat, a D6 is rolled. Modify the DR as per the entries listed (use all that apply) on the table in the back of the rules.
If the DR result is greater than the Fire CF, nothing happens (it missed). If the DR result is less than or equal to the firing unit's Fire CF, the enemy unit is Disrupted. If already Disrupted, an immediate unmodified D10 check is made. If the DR is equal to or less than the enemy's ML, the unit Routed. If the DR is greater than the unit's ML, the unit is eliminated.
8.3.2 Assault Combat (Naval or Ground) Units use their Assault CF to engage in Assault Combat. Assault Combat occurs between opposing units that are adjacent to one another (or ground units aboard opposing naval units that are adjacent in a Naval Combat). Units may only attack through their frontal side, but can defend from any direction (but do so when engaged only through just one side). All of the attacking units CF are totaled and compared to the CF of the unit(s) in the square being attacked. An odds ratio is then calculated.
The odds column to be used on the Assault Combat Results Table (CRT) may be shifted per the conditions listed (see back of this booklet). A D6 is used to determine Assault Combat Results on said table.
8.3.3 Naval Assaults In order for ground units carried on a naval unit to engage in an Assault Combat, the naval units must be adjacent. In addition, if a ground unit on a ship assaults an adjacent enemy unit of any type, it does so on its own, as the ship cannot add its CF. In order for a ground unit to attack, a D10 check must be made and modified as per the entries listed (use all that apply) on the table in the back of the rules. If the DR result is less than or equal to the player's ML, the ground unit can attack normally. If the DR result is greater than the ML, then the unit cannot attack. If the DR result is 10 or more, the ground unit is eliminated.
8.3.4 Ramming Attacks Instead of performing Fire or Assault combats with ground units that are aboard, Normal Status or Disrupted naval units can engage in Ram Attacks. Ram Attacks can only be carried out against a naval unit in the square directly in front of the attacking unit. Only 1 enemy unit can be attacked by a Ram Attack, even if stacked with another in a hex, but there is no limit to the number of times a unit can be attacked in an Impulse. Each Ram Attack is conducted separately.
For each Ram Attack, a D10 is rolled. Modify the DR as per the entries listed (use all that apply) on the table in the back of the rules. If the DR result is greater than the naval unit's CF, nothing happened (the Ram Attack was ineffective). If the DR result is less than or equal to the naval unit's CF, the target unit is reduced one step. Any ground unit on the target naval unit is also immediately reduced and, if not eliminated, marked as Disrupted. An already reduced naval unit is eliminated. Any ground unit carried by the target naval unit is also eliminated.
8.4 Step Results
Hoplite, Cavalry, and Light Infantry units can take casualties in the form of step losses. Archers, Peltasts, and Sicel units are eliminated if compelled to take a step loss in combat. Cavalry and Light Infantry units are flipped to their reduced strength side with the first step loss and are eliminated if a second is taken. Hoplites can incur up to 5 steps of losses, equal to the unit's CF. Use the Hoplite Casualty markers to record the number of step losses incurred by the unit. Flip the unit to its reduced side when it has taken its first 2 step losses.
8.4.1 Leaders Leaders cannot absorb step loss results from the CRT but are back-printed. Flip a leader to his "reduced" side when he is lost in combat (Case 10.4.3).
8.5 Rally
Disrupted units can attempt to Rally to Normal Status during the owning player's Rally Phase of a Pitched Battle. Both Disrupted and Routed units can attempt to change these statuses during the Rally Segment of the Administrative Phase at the end of the turn.
For each unit attempting to Rally, a D10 check is made by the owning player. Add 1 to the DR if the Rally is made during a Pitched Battle and a Normal Status enemy unit is in an adjacent square (Disrupted or Routed enemy units have no effect). If the DR is greater than the player's ML (not IL), the unit fails to Rally and remains Disrupted. If the DR is less than or equal to the player's ML (not IL), the Disrupted unit returns to Normal Status. Note: Routed units are immediately removed from the TBB and so cannot Rally during a Pitched Battle.
The same D10 check is made for Disrupted and Routed units in the Rally Segment of the Administrative Phase. However, a leader's command rating can be subtracted from the DR if he is in the same area as the Rallying unit. Add 1 or 2 to the DR if the unit cannot trace a Supply Line (Section 9.2). Disrupted units return to Normal Status and Routed units return with a successful DR; Routed units become Disrupted. However, a DR of 1 or less for a Routed unit causes it to return to Normal Status (skips being Disrupted) while a DR of 10 or more causes the Routed unit to be eliminated.
9.0 Supply
For naval and ground units to be able to Rally or fight at full effectiveness, they must be able to trace a Supply Line to a Supply source during the Supply and Initiative Determination Phase. A side may also be forced to surrender if unable to trace supply. Leaders do not have to trace supply (these units are always in supply).
9.1 Supply Sources
The following are Supply Sources for both sides:
- Athenian: Any coastal area with an Athenian naval unit. Note: A Bog area (B) cannot serve as a supply source.
- Syracusan/Allied: Areas L-7 and I-1 of Syracuse City (limited, Case 9.2.1), or any coastal area with a Syracusan/Allied naval unit. Note: A Bog area (B) cannot serve as a supply source.
- Sicel (regardless of allegiance): Any area free of enemy units along the west map edge.
9.2 Supply Lines
For a unit to be in supply, it must trace a line of connected areas to a supply source. The area can contain enemy units, provided the following terms are met:
- None of the enemy units are Normal Status (leaders, Disrupted or Routed units have no effect)
- There is a friendly Siege Wall in the area without an enemy Siege Wall present, regardless of the number of Normal Status enemy units in the same area
If neither condition applies, a Supply Line cannot be traced.
9.2.1 Syracuse City (Areas L-7 and I-1) These areas have only a limited supply capacity. The number of units that can be supplied from these areas is determined by the following calculation:
- Start with the current Syracusan ML
- Add a number equal to a D6
- Subtract 2 if Supply Line cannot be traced from Area L-7 to any area on the west map edge or coastal area with a Syracusan/Allied naval unit
- Subtract 3 if there are no Syracusan/Allied naval units left in the game
The total is the number of units (ground or naval) that can be put in supply in both areas, and tracing supply to either. The Syracusan player decides which units to be in supply if the number of units in these areas exceeds the calculated total.
9.3 Effects of Out of Supply
Any Syracusan/Allied or Athenian unit that is out of supply is immediately marked as Disrupted. Any Routed or Sicel unit that is out of supply is immediately eliminated.
9.4 Replacements
During the Rally segment of the Administrative Phase of the turn, both sides can receive replacements. Replacements can also be immediately received per Random Event (see Random Events Table on the back of this booklet). Only reduced ground units that are in supply and are on the map can receive a replacement step that will allow the unit to be flipped from reduced to full strength (Cavalry, Light Infantry) or an increase of a 1 CF (Hoplite). The number of units that can receive a replacement is equal to the player's current ML. The owning player designates the unit to receive the replacement and performs a D10 check. If the DR result is less than or equal to the player's ML, then the unit receives the replacement. If the DR result is greater than the ML, the replacement is lost and the unit does not flip to full strength/increase its CF by 1.
9.4.1 The following units may NOT receive replacements: Naval, Leaders, Archers, Peltasts, and Sicel units of any type.
10.0 Special Rules
The following rules deal with specific units and circumstances of the siege conducted against Syracuse.
10.1 Sicel Units
Sicel units can be put in play by both sides and represent volunteers and draftees of Sicilian natives. These are back-printed to indicate the allegiance when deployed on the map. The number of Sicel units that can be put in play is limited by the countermix (i.e. players cannot make more). At the beginning of the game, all Sicel units are placed in an opaque container (mug, envelop, whatever).
Developer's Note: The Sicels were a non-Hellenic people native to Sicily, and, for much of the campaign, somewhat friendly to Athens.
10.1.1 Sicel Recruitment Sicel units may be brought into play during the Reinforcement Segment of the Administrative Phase. The player with the highest ML may randomly draw a number of Sicel units from the opaque container equal to the difference of the two players' ML. For example, if the Athenian player has an ML of 6 and the Syracusan player an ML of 8 then the Syracusan player can draw 2 Sicel units.
The player with the lower ML can randomly draw one Sicel unit from the opaque container if a D10 check is made and the DR result is less than or equal to the player's ML. If the DR result is higher then the player cannot draw for a Sicel unit. Additionally, if the DR result is 10, one Sicel unit owned by the player will desert and is immediately removed from the game (opposing player's choice). If both players have the same ML, then both players perform a D10 check to see if they can draw for 1 Sicel unit.
New Sicel units are placed at any west map edge area free of enemy units, or with any friendly leader that can trace Supply (Section 9.2). Be sure to deploy the unit with the appropriate side up indicating its allegiance (red for Syracusan, green for Athenian).
Sicel units that are eliminated or desert are placed back in the opaque container for possible re-use in the game on subsequent game turns.
10.2 Siege Walls
Friendly units may construct Siege Walls to provide a securer means of tracing supply (Section 9.2), a refuge for Routed units (Case 8.3.2), or to limit the movement of enemy units (Section 7.1). Units used in combat (any type) cannot construct a Siege Wall.
10.2.1 Siege Wall Construction Any Normal Status or Disrupted unit constructing a Siege Wall in the area it occupies is placed under a Siege Wall marker (side up to indicate "allegiance") during the unit's Activation. If the unit is still in the area and was not used in combat, a D6 check is performed. Modify the DR as per the entries listed (use all that apply) on the table in the back of the rules.
If the modified DR result is 4 or more then the Siege Wall marker is placed in the area and the units are freed from construction (and can reactivate normally if the owning player so desires). If the DR result is 3 or less then the Siege Wall marker remains in place and the construction goes on (the units can try again when they next activate). Up to 2 Siege Walls from both sides (4 total) can be placed in an area (Exception: Section 10.3). Note: Unlike combat units, opposing Siege Walls can occupy an area. Designer's Note: Why 2 when 1 will suffice? Because it will make it harder for your opponent to clear the area (see below).
10.2.2 Siege Wall Deconstruction Any Normal Status or Disrupted unit can tear down a Siege Wall in an area it occupies (friendly or enemy, the process is the same). Place the unit under the Siege Wall. If the unit is not used in combat (any type) and is still Normal Status or Disrupted at the end of the Administrative Phase of the turn, the Siege Wall marker is removed from the map. Removed Siege Wall markers can be re-used but players are limited to the number or markers in the counter-mix.
10.3 Circle Fort
The Athenian player can construct the Circle Fort on any Epipolae area (H-1 through H-7) by constructing a third Siege Wall in the same area. Once the third Siege Wall is completed remove all of the Siege Walls and replace them with the Circle Fort marker. The Circle Fort provides a beneficial DRM for Athenian units in Skirmish Combat in the same area as the fort, as well as serving as a refuge for Routed units.
The Circle Fort can only be destroyed when the Syracusan player occupies the area with a Normal Status unit at the end of the Administrative Phase. Should the Circle Fort be destroyed it cannot be rebuilt (it is out of the game permanently).
Designer's Note: Historically the Circle Fort was built in area H-5.
10.4 Leaders
Leaders represent high-ranking individuals and their staffs/bodyguards. The arrival of a Leader unit to game as a reinforcement increases the owing player's ML by 1 in the following turn.
10.4.1 Leaders and Activation An un-activated Leader allows all units in an area to activate. Units in an adjacent area can also activate with an even DR check (Section 6.2, Step 2). The arrival of a new Leader unit in the game will cause an increase of 1 Level in the owning player's ML.
10.4.2 Leaders and Combat A Leader's command rating is used to influence the Combat DR of units in the Leader's stack (Sections 8.2 and 8.3).
10.4.3 Leader Loss Whenever a unit in a stack with a Leader suffers a step loss or Rout result, the owning player rolls a D6. If the DR result is 6 then the Leader is reduced. If already reduced, the Leader unit is removed from the game. A Leader that is reduced or eliminated will cause a 1 level reduction to the owning player's ML in the subsequent turn.
10.4.4 Ariston This Allied leader has a Command Rating of 2 in a naval battle when stacked with a naval unit. This leader has a Command Rating of 1 for all ground combats (Skirmish or Pitched Battle).
10.5 Syracusan Cavalry/Light Infantry
Each Syracusan Cavalry unit has a corresponding Light Infantry unit. These units can be exchanged at the start of a particular unit's activation, provided it is Normal Status or Disrupted. Routed units cannot be exchanged. The step loss (full strength or reduced) status of the unit remains the same when the exchange occurs. There is no limit to the number of times a unit can exchange from Cavalry to Light Infantry in a turn. Allied, Athenian, and Sicel Cavalry units cannot be exchanged for Light Infantry.
Un-Routed Syracusan Cavalry (only) confer a -1 DR modifier for all friendly units in an area attempting Reaction Movement if there are more Syracusan Cavalry CF than Athenian-controlled Cavalry (Section 6.4).
10.6 Night Combat
Either player can declare a Night Combat. Night Combat can provide a rather problematic DR modifier for Skirmish combat (Section 8.2), as well as beneficial DR modifiers and an odds column shift in Pitched Battle combat (Section 8.3).
When setting up for a Night Combat, the Defender sets up first normally in Row 11 of the TBB. The Attacker sets up second in any row less than or equal to a D10 roll. For example, after the Defender sets up, the Attacker rolls a 9. The attacker can set up his units in any row on the TBB numbered 1 through 9.
10.7 Cavalry Retreat Before Combat
Defending Cavalry units can retreat before combat (Fire or Assault) with a successful D10 check, provided none of the attacking units are Cavalry. Immediately after Defensive Fire, the owning player rolls the die and modifies the DR as follows:
- [Editor's note: the printed modifier symbol before "For Leader's Command Rating" is not recoverable from the PDF text layer; transcribed here as a subtraction, the sense used throughout Section 10.7 and Section 7.3.1.] Subtract the leader's Command Rating, if stacked with the unit
- +1 unit is Disrupted
If the DR result is less than or equal to the owning player's ML, the cavalry unit may retreat one square on the TBB (Pitched Battle) or the opposing player's attack is ignored for the round (Skirmish combat). If the DR result is greater than the player's ML the opposing player's attack is resolved normally. However, if the DR result is 10 or more, the cavalry unit is immediately marked as Disrupted before the attack is resolved. If already Disrupted, the cavalry unit is immediately eliminated.
11.0 Winning the Game
"The Syracusans and their allies now mustered and took up the spoils and as many prisoners as they could, and went back to the city. The rest of the Athenian and allied captives were deposited in the quarries, this seeming the safest way of keeping them; but Nicias and Demosthenes were butchered…" —Thucydides
Players win the game by either achieving an Automatic Victory or compelling their opponent to surrender. Determine whether a player has won the game during the Victory Determination segment of the Administrative Phase of the turn.
11.1 Automatic Victory
Both players can achieve an Automatic Victory as follows:
- The Athenian player achieves an Automatic Victory whenever all areas adjacent to Area L-7 are occupied by Normal Status Hoplite units and there are no Syracusan/Allied naval units in play.
- The Syracusan player achieves an Automatic Victory whenever there are no Athenian naval units in play and all Athenian Leaders currently introduced to the game are either reduced or eliminated.
11.2 Surrender
If neither player has won an Automatic Victory, a D10 check is made to determine if the side with the lowest Morale Level surrenders. Begin making a surrender check with the Winter 415-414 Turn (turn 2). The Surrender DR is modified as follows:
- -1 for each Leader that has been reduced or eliminated
- -1 if there are no friendly naval units in play
- -1 if a Supply line to a Supply Source cannot be traced for any units with any friendly Leader
- -1 for Good Omens (Random Event)
- +1 Bad Omens (Random Event)
If the DR result is less than half (drop any fraction) of the player's ML, a surrender does not take place and play continues to the next turn, without changing the ML. For example, if the Player's ML is 5, a DR result of 2 or less will not cause Surrender, nor a rise in the ML.
If the DR result is greater than half or equal to the player's ML, and equal or less than the ML, then the Syracusans do not surrender, but the player adds 1 to his ML. To continue the example above DR results of 3, 4 or 5 will raise the player's ML to 6, without a surrender.
A DR result greater than the player's ML will cause Surrender and the game is over immediately, with the player that had the higher ML winning the game.
If the game ends without an Automatic Victory or Surrender, the war drags on and potentially involves other city-states in the widening conflict. Neither player wins the game.
Developer's Note: In the summer of 414, Syracuse was about to capitulate to Athens. But just before they could hold the assembly to make that decision, the Corinthian admiral Gongylos arrived with thirteen triremes, immediately followed by the Spartan general Gylippus. Gongylos convinced the Syracusans not to hold that fatal assembly, and Gylippus further heartened them. As a result, Syracuse narrowly avoided the decision to surrender, and thus went on to win its war with Athens.
12.0 Setup and Reinforcements
The Athenian player sets up first followed by the Syracusan player. Unless indicated otherwise, all units set up or enter as reinforcements at full-strength and Normal Status.
12.1 Athenian Set Up
The following units set up in areas L10 and/or L18 (both areas have one Athenian Siege Wall already constructed):
- 8x Naval units, 15x Hoplites, 2x Light Infantry, 2x Peltasts, 2x Archers, 1x Cavalry (1, reduced), 1x Sicel unit (selected randomly from the opaque container), Leaders Lamachus and Nicias. Note: Naval units with or without ground units aboard may also set up in Sea areas adjacent to L10 and/or L18.
The Athenian ML is set at 7 at the start of the game. The Athenian player is considered to be the "initiative player" on turn 1 for calculating IL (Case 5.2).
12.2 Athenian Reinforcements
The following Athenian Reinforcement units arrive when ALL of the following conditions are met:
- Lamachus and/or Nicias is reduced/eliminated
- Circle Fort is constructed (it can have been destroyed, just needs to have built to satisfy this requirement)
- Athenian player has fewer naval units in play than his opponent
- Athenian ML is lower than his opponent
- Athenian player has made at least one Surrender DR check in the game
The turn following the one the above conditions are met the Athenian player receives the following:
- 2x Naval (9-10), 5x Hoplite (16-20), 2x Light Infantry (3-4), 1x Peltast (3), 1x Cavalry (2), Leader Demosthenes
- Additionally, for each eliminated Athenian unit (ground or naval but not Leaders) a D6 check is made. If the DR result is 3 or less, then the unit arrives at full strength as a reinforcement unit. If the DR is 4 or 5, then the unit arrives as a reinforcement but reduced (if an Archer or Peltast it does not return to the game). If the DR is 6, then the unit does not return to the game.
Designer's Note: It is possible that the Athenian player will not receive any reinforcements during the game. This is war. Deal with it!
Reinforcement units arrive during any Athenian Naval Impulse at any Coastal area with an Athenian Siege Wall or unit. Regardless of the number of naval units that appear as reinforcements, all ground units will also arrive in the coastal area (these are disembarking from transports not depicted in terms of counters).
12.3 Syracusan Set Up
The following units set up as directed:
- 5x Syracusan Naval units. These units deploy at Achradna/Teminetes or Syracuse (not in a sea area).
- 3x Hoplites, 2x Light Infantry, 1x Archer, 2x Peltasts, 2x Sicel units (selected randomly from the opaque container), Leader Hermocrates. These units deploy at Achradna/Teminetes or Syracuse.
- 7x Cavalry or 7x Light Infantry in any land areas that are free of Athenian or Athenian-Sicel Allied units.
The Syracusan ML is set at 6 at the start of the game.
12.4 Allied Reinforcements
On Turn 2 the following Allied reinforcement units arrive during any Syracusan Impulse (First Wave):
- 2x Leaders (Gyllipus and Ariston), 3x Naval, 9x Hoplite, 1x Cavalry, 1x Archer, 1x Light Infantry, 1x Peltast, 1x Sicel unit (selected randomly from the opaque container).
Beginning with Turn 4 the Syracusan player performs a D10 check at the start of any of his Impulses to determine when/if the following Allied units arrive (Second Wave):
-
3x Hoplite, 1x Archer, 1x Cavalry, 1x Light Infantry, 1x Peltast, 1x Sicel unit (selected randomly from the opaque container).
-
Reinforced Rams: This marker is received with the Second Wave reinforcements. Place it on the Turn Record Track as a reminder. This increases the CF for all Syracusan and Allied naval units by 1 for Ramming Attacks. This increase is in effect until the turn the Athenian Reinforcements arrive (after which all naval units use their printed CF until the end of the game).
The Second Wave reinforcements arrive at the beginning of the first Syracusan Naval Impulse in which the Syracusan player makes a D10 check that is less than or equal to his ML. If the DR result is higher than the ML, then the Syracusan player will have to try again in his next Impulse. For both reinforcement waves, the naval units, and any ground units that are transported aboard them, arrive at any Coastal area free of Athenian units, but not Achradna/Teminetes or Syracuse. Ground units can also arrive during a later Syracusan Ground Impulse following the one with the successful D10 check, at any area along the west map edge.
Incomplete source. The only obtainable copy of this rulebook ends at Section 12.4. Section 12.5 (Sicel Reinforcements) and the back-of-rules tables (Random Events Table, Assault Combat Results Table, the DRM tables for combat, Initiative and Morale, and Siege Wall construction) are not in the source and are not transcribed here.