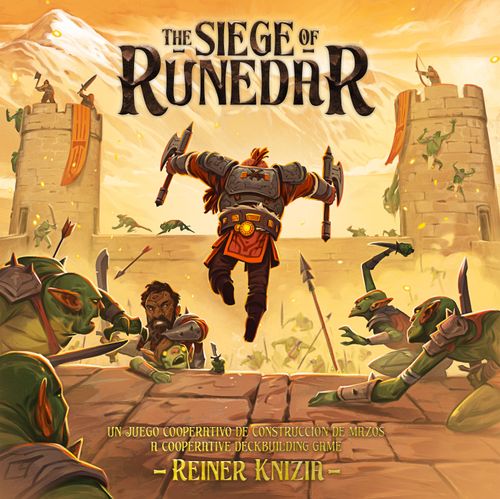
The Siege of Runedar
The Siege of Runedar Rulebook
Table of Contents
Table of Contents
Components
- 1 Fortress — made using the box base, the insert, and 13 cardboard pieces.
- 22 Cardboard Figures: 2 Goblins, 4 Dwarves, 10 Orcs, 4 Trolls, 1 Catapult, 1 Siege Tower.
- 143 Cards:
- 83 Dwarf Cards total, each printed with a background colour and a rune in the upper right corner, made up of:
- 48 Starting Cards — 12 cards for each of the four player colours.
- 35 Upgrade Cards — sorted into three decks (red, grey, and yellow) by the background colour of the illustration.
- 5 Catapult Cards
- 5 Mercenary Cards
- 50 Siege Cards
- 83 Dwarf Cards total, each printed with a background colour and a rune in the upper right corner, made up of:
- 25 Enemy Tiles: 20 Goblins, 5 Trolls (5 sets of x4).
- 4 Discard Tokens
- 62 Resources and Materials: Metal x10, Leather x10, Wood x10, Gold Nugget x20, Rubble x12.
- 1 Double-sided Upgrade Board
Setup
A. Once the Fortress has been assembled according to the Assembly Instruction Sheet, place it in the centre of the table so that all players can see it clearly.
B. In the Fortress, place the 10 x Wood in the Carpenter's, the 10 x Leather in the Tannery, the 10 x Metals in the Foundry, and the 20 x Gold Nuggets in the Central Chamber.
C. Order the Goblin Tiles by the number on the back of them, creating 5 piles. Mix them separately and without looking at them, randomly take 2 Tiles of each number. Then place these 5 pairs of Tiles face down in their corresponding places inside the Tunnel. Next, cover each pair of Tiles with a Tunnel Section (wooden block). Remove the remaining Goblin Tiles from the game.
D. Sort the Siege Cards according to the number on the reverse into piles to form decks and shuffle these five decks separately. Next, form a single face-down deck by placing one deck on top of the other: place deck 5 on the bottom and continue in order so that deck 1 is on top.
E. Place the 10 x Orcs, 2 x Goblins, and 4 x Troll Figures in a Reserve away from the Fortress, and next to them, the Catapult, the Siege Tower, the 5 Dice, and the 10 Damage Tokens.
F. Mix the 5 x Troll Tiles into a face down pile and place it next to the Fortress.
G. Shuffle the 5 x Catapult Cards into a face-down deck and place it next to the Fortress.
H. Each player chooses one of the four Dwarf Figures and places it in the Central Chamber of the Fortress. The players then take the corresponding 12 Starting Cards (the 12 cards with the same background colour and the same rune in their upper right corner, including the two Orc Cards) and their Discard Token. Unused Starting Cards, Figures, and Discard Tokens are removed from the game.
I. Place the Upgrade Board somewhere on the table that is accessible to all players but is not in the way. Check that it shows the side corresponding to the number of players who are going to participate in the game: 1 player; 2 players; 3 players; 4 players.
J. Sort the Upgrade Cards according to the background colour of the illustration (red, grey and yellow), shuffle each of the three decks face down separately and place them in their corresponding places on the Upgrade Board: the red deck on the red space, the grey deck on the grey space, and the yellow deck on the yellow space. Next, draw the top five cards from the yellow deck and place them randomly face up in the five spaces on the Upgrade Board that correspond to the number of players in the game.
K. Display the 5 x Mercenary Cards face up next to the Fortress.
L. Finally, place in the Tunnel Entrance Courtyard, as many Rubble pieces as correspond to the difficulty you want to face during the game:
- 6 Rubble - Easy Mode
- 8 Rubble - Normal Mode
- 10 Rubble - Hard Mode
- 12 Rubble - Epic Mode
Playing the Game
The siege begins. Take on the role of the dwarves charged with the task of defending the walls of Runedar and the treasure it holds within. You will have to face orcs, goblins and trolls, fighting in hand-to-hand combat against those who manage to get over the walls, and shooting from a distance those who are trying to get in. You must keep the raiders at bay long enough to build a tunnel through which to escape the siege and save the treasure.
Each player shuffles their 12 Starting Cards (the 10 x Weapons and Tools Cards and the 2 x Orc Cards), draws two at random, and places them without looking at them under their Discard Token. With the remaining 10 cards, they form a face-down Draw Deck and return it to their play area. Next, they draw the first five cards, these form their Starting Hand.
Players will be able to speak freely about their hand of cards, but never reveal them outside of their turn.
As is common among Dwarves, the shortest player starts the game (or is chosen at random). The turn rotates from one player to the next in a clockwise direction.
On Your Turn
On your turn, take the following actions in the order listed:
A. Activate the Siege Tower and / or the Catapult if they are in your play area.
B. Play Orc Cards if you have any in your hand.
C. Play all the Dwarf Cards in your hand (one action for each) to:
- Move
- Work Resources
- Attack
- Dig
- Upgrade Cards
D. Fill the Upgrade Board if your Dwarf Figure ends the turn in the Central Chamber.
A. Activate the Siege Tower and / or the Catapult
Orcs can climb the fortress walls with ease, but trolls need a siege tower to get over them. Don't let the siege tower get too close or you'll be in trouble. Also, do not lose sight of the catapult that threatens from afar, if you allow it to fire it will destroy you.
First of all, you need to check if the Siege Tower and / or the Catapult are in your play area. If this is the case, you must activate them:
- Activate the Siege Tower: Reveal the first Troll Tile in the pile and place it together with a Troll Figure in the Tunnel Entrance Courtyard, then return the Siege Tower to the Reserve. If you reveal the last Troll Tile, you immediately lose both the game and the Treasure.
- Activate the Catapult: Reveal the first card of the Catapult Deck and place it on the Upgrade Board in the space indicated by the number, this space will be blocked for the rest of the game. If there is already a card in that space, remove it from the game and return any resources on it to the respective Workshops in the Fortress. Additionally, you lose a Gold Nugget: take it from the Central Chamber and remove it from the game. Finally, return the Catapult to the Reserve. If you reveal the last Catapult Card, you immediately lose both the game and the Treasure.
Example: After the Catapult is activated, Catapult Card Number 2 (A) is revealed, the Upgrade Card from space 2 is removed from the game, and the Wood on it is returned to the Carpenter's (B). Space 2 is covered with the Catapult Card, rendering it blocked for the rest of the game (C). Finally, a Gold Nugget from the Central Chamber is removed from the game (D).
B. Play Orc Cards
The orcs will subject you to a constant onslaught, for each one of them that you allow to reach the central chamber where the gold is, you will lose a nugget.
The next step of your turn is to check if you have any Orc Cards in your hand. If that's the case, you have to play these cards before any other. They are played, one by one, placing them face up in your play area. For each Orc Card, you must reveal the top card of the Siege Deck and resolve it immediately. Remove used Siege Cards from the game. If you reveal the last Siege Card, you immediately lose both the game and the Treasure.
Siege Card Effects
- ORC. Place the number of Orc Figures indicated on the card, next to the Outer Wall of the Fortress indicated on the card. If you have to place the last Orc Figure from the Reserve, you immediately lose both the game and the Treasure.
- ARROW. Move all Orc Figures in play one step towards the Central Chamber of the Fortress. From outside the Wall onto the Wall, from the Wall to an adjacent Workshop (Carpenter's, Tannery or Foundry) or from a Workshop to the Central Chamber. Each Orc that manages to enter the Central Chamber immediately steals a Gold Nugget: The Orc returns to the Reserve and the Gold Nugget is removed from the game. If you have to remove the last Gold Nugget from the game, you immediately lose the game.
- SIEGE TOWER. Take the Siege Tower from the Reserve and place it in your play area. If the Siege Tower is already in another player's play area, it is activated immediately and placed back in the Reserve (see Activate the Siege Tower, above).
- CATAPULT. Take the Catapult from the Reserve and place it in your play area. If the Catapult is already in another player's play area, it is activated immediately and placed back in the Reserve (see Activate the Catapult, above).
If the Siege Card shows an arrow in addition to Orcs, Siege Tower or Catapult, the Orcs are always the last to be moved. We recommend moving the Orcs in order, starting with those closest to the Central Chamber and ending with those furthest away, to make sure you move them all.
Example: The revealed Siege Card indicates that a new Orc breaks in and all Orcs in play move (A). First, a new Orc is added next to the indicated Wall (B), then the Orc in the Carpenter's enters the Central Chamber and steals a Gold Nugget, next the Orcs outside the Wall climb onto the Walls, including the Orc which has just been added (C).
C. Play All Dwarf Cards
The dwarves can move around the entire fortress to carry out different tasks: to work the resources that allow them to improve their weapons and tools, to dig the escape tunnel and of course to fight.
After playing all the Orc Cards, continue playing the rest of the cards in your hand. These cards can be from your Starting Deck or Upgrade Cards that you have collected during the course of the game. Play them all, carrying out the action of each one completely before playing the next one.
You can only perform one action per card, each card shows several actions on its left margin and you must decide which one of them you want to carry out. Alternatively, you can play a card and decide not to use any of the actions it offers.
Dwarf Card Actions
Move
Each Dwarf Card allows you to move around the Fortress, but try to get hold of a magic Weapon or Tool and your movement will be unlimited.
With this action, you can move your Dwarf Figure a maximum of two steps. Each step consists of moving the Figure from the place where it is to an adjacent one. For example, from the Central Chamber to the Tannery, or from the Tannery to the adjacent Wall, from the Wall to one of the adjacent Towers, from one Wall to another Wall connected by a Tower, or from one of the Walls to outside of that same Wall.
- To move from one of the Workshops to an adjacent Tower or vice versa, two steps are needed: You have to go up or down the Wall first to gain access to the Tower or get down from it.
- To get up to the Tunnel Tower from the Tunnel Entrance Courtyard, requires three steps: one to the Carpenter's, one to the Wall and one onto the Tunnel Tower.
- To go from one Wall to another connected by a Tower, only one step is needed. It is understood that you pass through the inside of the Tower without having to climb it first.
- To climb down from a Wall to the outside of that same Wall, only one step is needed.
Example: Red Dwarf — This Dwarf in the Central Chamber only needs one step to move to any of the four Courtyards and another step to climb any of the three Walls from the Workshops (A). Yellow Dwarf — This Dwarf in the Tower needs two steps to reach the Carpenter's: one step to climb down onto the Wall and one to move into the Carpenter's (B). Purple Dwarf — This Dwarf on the Wall needs one step to get to the next Wall, since it is not necessary to climb the Tower to cross over to this Wall (C).
The Weapon or Magic Tool Cards allow you to move your Dwarf Figure to any location in the Fortress before performing one of the actions on the card. These cards are the only ones with which you can carry out two actions: move plus one other action on the card.
Work Resources
You can perform this action if your Dwarf Figure is in the Workshop corresponding to the resource indicated by the icon and there are no Orcs there. If this is the case, you can work on the number of resources indicated on the card: Wood in the Carpenter's, Leather in the Tannery or Metal in the Foundry. Take that same number of resources and place them on the Upgrade Board on one or more cards that require the resource in question (see Upgrade Cards, below).
Through this action you can work any of the resources (Wood, Leather or Metal) in the corresponding Workshop, in the quantity indicated.
- If the cards on the Upgrade Board require fewer resources than you can get, only take the ones you need; you can never save resources to use in a later turn.
- On a card on the Upgrade Board, you cannot place more resources of one type than is stated.
- If there are not enough resources in the Workshop in which you are performing the action, you can only take the number of resources which are available.
Some Goblins require resources to stop bothering you. When distributing the resources you obtain, you can use them for this purpose (see Trolls & Goblins, below).
Example: The Dwarf in the Carpenter's can work the Wood since there are no enemies present (A). The player plays a card that allows them to get 2 x Wood (B). Next, they decide to distribute the 2 x Wood on two different cards on the Upgrade Board (C).
Attack
The remaining dwarves at Runedar are few in number, but they are obstinate and tenacious and will defeat the orcs with some ease. But do not get cocky, if you allow more than you can control to enter into the fortress, you will end up with no gold to defend...
Normally, you must play cards one at a time, but both the close-range attack and the long-range attack action are an exception to this. When you perform one of these actions, you can play multiple cards from your hand at the same time to get a larger number of Dice. You can never use more than five Dice. Through this action, you can also attack Goblins and Trolls (see Trolls & Goblins, below).
Close-range attack. You can perform this action if your Dwarf Figure is in the same space as an Orc. To do this, take as many Dice as the cards indicate and roll them. In a close-range attack, only Dice showing hits count. Every 2 hits equals 1 damage and you need just 1 damage to defeat an Orc. You can defeat more than one Orc with the same roll if they are all in the same space and you get enough hits, regardless of how they are distributed on the Dice. Excess hits are lost. Return the defeated Orcs to the Reserve.
The Crossbow face is equivalent to 2 direct hits in a close-range attack, without rolling the Dice.
Example: The Dwarf in the Foundry cannot work the Metal as two Orcs have managed to get in there and, therefore, the Dwarf must eliminate the Orcs before continuing to work (A). You decide to use two cards from your hand to attack at close-range and roll three Dice (B). The roll results in 3 hits, which means you manage to defeat one of the Orcs, the remaining hit is lost (C).
Long-range attack. You can perform this action if your Dwarf Figure is on one of the three Towers of the Fortress. First, choose your objective:
- The Catapult or Siege Tower, if they are in the play area of any player, including yours.
- The Walls adjacent to the Tower where your Dwarf is located or the outside of these.
Then take as many Dice as the cards indicate and roll them. In a long-range attack, only Dice showing Crossbows count. Each Crossbow is equal to 1 damage.
- If you have targeted the Catapult or Siege Tower, you defeat it with just 1 damage. If successful, return the Catapult or Siege Tower to the Reserve.
- If you have targeted a Wall or the outside of it, you can defeat an Orc with just 1 damage. You can defeat more than one Orc with the same roll if they are all in the space you have targeted and you get enough Crossbows. Return the defeated Orcs to the Reserve.
In a long-range attack, you cannot target any of the Workshops, although as we will see later, you can long-range attack the Tunnel Entrance Courtyard from the Tunnel Tower (see Trolls & Goblins, below).
Example: The Dwarf in the Tower can attack the Orc which is on the Wall, or the two Orcs outside the Wall (A). You decide on the second option since the card played allows you to roll two Dice and, therefore, you could kill both Orcs. You roll the Dice and only get one Crossbow (B); therefore, you defeat one of the Orcs in the area you have attacked, you return the Orc to the Reserve (C).
Dig
Although it may be the most tedious task, when all is said and done, finishing the tunnel is the only way to escape. Remember that each section of the tunnel that you clear will mean that the goblins that live under the mountain will be able to get it to the fortress. They will not let you pass with ease.
You can perform this action if your Dwarf Figure is in the Tunnel Entrance Courtyard and there is no enemy (Goblin or Troll) there. Remove as much Rubble as the card indicates and return this Rubble to the Reserve. Of course, you cannot remove more Rubble than is left in the Courtyard.
Tunnel Section Completed: As soon as you remove the last piece of Rubble from the Tunnel Entrance Courtyard, extract the section of the Tunnel closest to the Tunnel Tower and remove it from the game. This will reveal two Goblin Tiles that you must place face up in the Tunnel Entrance Courtyard along with two Goblin Figures.
You must eliminate both Goblins in order to continue digging the next section of the Tunnel (see Trolls & Goblins, below). Once you manage to defeat the Goblins, place the number of Rubble back in the Courtyard corresponding to the chosen difficulty level (6, 8, 10 or 12) and you can continue digging the next section of the Tunnel.
Example: After removing the last piece of Rubble that remained in the Tunnel Entrance Courtyard through the dig action, the player is able to complete a new section of the Tunnel (A). This section reveals two Goblin Tiles that are placed face up next to their corresponding Figures in the Tunnel Entrance Courtyard (B). Until both of these Goblins are eliminated, the Rubble corresponding to the next section of the Tunnel cannot be placed and, therefore, players will not be able to dig.
Upgrade Cards
The tools and weapons that the dwarves currently own are not sufficient to defend the fortress for the time needed to escape, they will have to spend time and resources in order to improve their arsenal.
To complete the upgrade of a card that is on the Upgrade Board, it is necessary that all the resources it requires are placed on it. These are: those indicated on the lower section of the card, plus those indicated by the space where the card is located.
Example: In the previous example, 2 x Woods, 1 x Metal, and 1 x Leather are required to complete the Upgrade Card.
Upgrading a card can be completed over multiple turns and by multiple players. Once completed, the upgraded card will be available to any player, but only on their own turn. There is no limit to the number of turns a card can remain on the Upgrade Board.
Take a card from the Upgrade Board: At any time during your turn, you can take one or more cards from the Upgrade Board that have been completed. For each card you take from the Upgrade Board, you must previously remove from the game a card from your hand that you have not played yet and this can never be an Orc Card. In this way your deck will always consist of 12 cards: 10 Weapons and Tools and two Orcs. When you take a card from the Upgrade Board, return the resources you used to complete the card to the respective Workshops. Once you have obtained a card from the Upgrade Board, that card becomes part of your hand and you will play it on the same turn that you obtained it.
Example: On your turn, you decide to take the Axe Card whose upgrade has been completed. First, you remove from the game one of your cards from your hand (A). Then, the resources are returned to the Workshops (B). Next you take the Axe card and place it in your hand (C). Like any other card in your hand, you will play the Axe card during this current turn.
D. Fill the Upgrade Board
If your Dwarf Figure is in the Central Chamber of the Fortress at the end of your turn, you can fill the empty spaces on the Upgrade Board, in any order, with new cards of your choice, taking into account that in the Red Deck, Weapons and Tools are much more powerful, but they require more resources; the cards in the Grey Deck are slightly less powerful, but also require fewer resources to complete; and that those of the Yellow Deck are the weakest, but are the easiest to complete.
Before filling in the empty spaces, you can take any complete or incomplete cards of your choice from the Upgrade Board and remove them from the game to make room for new cards. All the resources that these cards had are returned to the corresponding Workshops.
End of Turn
At the end of your turn, form a face-down Deck with the 5 cards you just played and place them under your Discard Token. If there are still 5 cards left in your Draw Deck, draw them immediately, this will be your hand of cards for your next turn. If there are no more cards in your Draw Deck, that is, the 12 are under your Discard Token, carry out the same operation as at the beginning of the game: shuffle the 12 cards, randomly place two of them under your Discard Token without looking at them, form a face-down Draw Deck with the remaining 10 cards and draw 5. This will be your hand of cards for your next turn. The turn passes to the next player to your left.
Mercenaries
In especially difficult moments, you can count on the help of the Forest Mercenaries, always taking into account they are not your friends or allies and, therefore, you will have to pay them for their services.
Activate Mercenary Cards: At any time during your turn, you can activate one or more Mercenary Cards. To do this, you must remove the Gold Nuggets indicated by the activated card from the Central Chamber. Each Mercenary Card can be activated only once, turn it over once used.
You can activate a Mercenary Card at any time during your turn, even in the middle of an action. For example, you can activate the Mercenary Card that defeats all the Orcs in the Workshops after revealing a Siege Card that advances the Orcs, but before moving the Orcs. However, you are not allowed to move just some of the Orcs, activate the Mercenary Card, and then move the rest of the Orcs. The actions which the Mercenaries provide are independent, they are not associated with any Dwarves and therefore do not require you to play cards from your hand.
The 5 Mercenary Cards provide the following effects:
- Defeat all the Orcs in the Workshops (Carpenter's, Tannery and Foundry).
- Defeat a Troll in the Tunnel Entrance Courtyard.
- Defeat a Goblin in the Tunnel Entrance Courtyard.
- Do not reveal a Catapult Card when the Catapult is activated, the Catapult returns to the Reserve.
- Cancel the effects of the Siege Card you just revealed.
Trolls & Goblins
Both trolls and goblins entering the fortress are going to position themselves at the entrance to the tunnel and thus blocking it, preventing you from digging any further. Trolls are clumsy, but difficult to take down. You are going to need to work hard to defeat them. Goblins, for their part, are more cunning and, although you will have to fight some of them, many of them will be willing to let you continue with your task if you accept their negotiation terms.
TROLLS: We already know that when the Siege Tower is activated, a Troll comes into play: a Troll Tile is drawn at random and placed, along with a Troll Figure, in the Tunnel Entrance Courtyard. Several Trolls can coincide at the same time in the Tunnel Entrance Courtyard.
Each Troll Tile contains a certain number of damages (circles) that you must inflict (cover with Damage Tokens) to defeat it. Each of these circles indicates the number of hits it requires (in the previous illustration, the Tile shows 3 damages (circles) with 2 hits each). You must cover all these circles with Damage Tokens to defeat the Troll. Once you have done this, return the Troll Figure to the Reserve and remove the Tile from the game.
To inflict 1 damage to a Troll in a close-range attack, your Dwarf Figure must be in the same space as the Troll and roll as many hits as a circle on the Troll Tile requires. You can deal multiple damage with a single roll if you get enough hits: for each damage dealt, cover a circle with a Damage Token. Excess hits are lost.
To inflict 1 damage to a Troll in a long-range attack, your Dwarf Figure must be in the Tunnel Tower and roll at least one Crossbow: each Crossbow is 1 damage. You can inflict multiple damage with a single roll if you get multiple Crossbows: for each damage dealt, cover a circle with a Damage Token.
GOBLINS: We already know that two Goblins are waiting at the end of each section of the Tunnel, and that you have to defeat both of them before continuing to dig. Each Goblin Tile has a circle that indicates how to defeat it. Once defeated, return the Goblin Figure to the Reserve and remove the Tile from play.
Some Goblins are willing to negotiate peacefully: the circles on their Tiles show resources (Wood, Leather, Metal). To get rid of these Goblins, you must work these resources in their respective Workshops and place them next to the Goblin Tile. Once you manage to gather all the resources it requires, return the Goblin Figure to the Reserve, remove the Tile from the game and return the resources to their respective Workshops.
- Some Goblin Tiles show a circle giving the indicated number of each resource (Wood, Leather, Metal) required.
- Some Goblin Tiles instead show a circle giving the indicated number of resources in any combination (Wood, Leather, Metal).
Certain Goblins are only going to ask you to remove a certain number of Rubble that is hindering them, once you perform this task, they will stop bothering you.
- These Goblin Tiles add the number of Rubble indicated next to the corresponding Goblin Tile. You must remove all of them through the dig action to get rid of these Goblins. This Rubble does not form part of any section of the Tunnel, in this case you can dig even though Trolls and Goblins are present.
Finally, you will find more aggressive Goblins that will simply want to steal your Gold and you will have no choice but to attack them.
- If the Goblin Tile shows hit icons, it must be defeated in the same way as Trolls, using a close or long-range attack.
If there are several Goblins and Trolls in the Tunnel Entrance Courtyard that need to be attacked to defeat them, you can do so in the order of your choice.
When you roll the Dice, you are attacking the area, not a specific enemy, so only after rolling the Dice, you must decide where to apply the damage obtained, keeping in mind that you can distribute it among several enemies.
Remember that while there are Trolls and / or Goblins in play you cannot dig the next section of the Tunnel.
Example: Your Dwarf Figure is in the Tunnel Entrance Courtyard and is attacking at close-range the Troll and the Goblin there with three Dice (A). You get 3 hits on the roll and decide to inflict 2 damages to the Troll with 2 hits (B) and a damage to the Goblin with the remaining hit, so you manage to defeat him since it only required 1 damage (circle) of 1 hit (C). On your next turn, you managed to climb the Tunnel Tower to attack the Tunnel Entrance Courtyard at long-range with two Dice: you get one Crossbow equal to 1 damage that you assign to the Troll that is still there (D).
End of the Game
Victory or Defeat?
Even if you remove the last rock and see the sunlight, you will not be able to claim victory. Unfortunately, you will have to overcome one last hurdle.
VICTORY. When you have managed to remove the last section of the Tunnel, there are two last Goblins waiting at the end of it, and these are especially dangerous. You must defeat these last Goblins to be able to save what you have left of the treasure and thus win the game. Record your victory in the Chronicles of Runedar so that future generations will remember your heroic deed. The more gold you save, the greater the recognition you receive.
DEFEAT. You instantly lose the game and the Treasure if you:
- Reveal the last Siege Card
- Reveal the last Catapult Card
- Reveal the last Troll Tile
- Put the last Orc from the Reserve into play
- Lose all the Gold Nuggets
Even if you have not been able to withstand the attacks of your enemies, the bravery you have shown also deserves to go down in history and, therefore, you also have the right to appear in the Chronicles of Runedar. The more Goblins you have defeated, the more recognition you will receive.
Tips and Recommendations
The Siege of Runedar is a cooperative game. Here are a few tips to help you succeed in your cooperation.
- It is important that all actions are discussed and coordinated between all players.
- During your turn, the other players can give their opinions and advice, but remember that the final decision will always be yours.
- It is important that you replace some of your Starting Cards with more powerful ones as soon as possible. Try to get all players to do this in a balanced way so that no player is left with a particularly weak deck.
- Depending on your situation, there will be some cards on the Upgrade Board that suit you more than others, do not hesitate to discard the less relevant to make room for other more useful ones.
- Time is short and there are a multitude of ways you can be defeated, but only one way to be victorious, so dig, dig and dig!
Solo Mode
If you dare to face the challenge with no company other than your axe, you will have to play every turn, one after another, with a single Dwarf and a single deck of cards. Both the setup and the rules remain unchanged, except for the following changes that affect only the Catapult and the Siege Tower:
- When you reveal a Siege Card that shows the Catapult or Siege Tower, place the corresponding Figure in your play area as usual, but lying down.
- If at the beginning of the next turn, you still have the Catapult and / or the Siege Tower in your play area, raise it, but do not activate it.
- If at the beginning of the subsequent turn, the Catapult and / or the Siege Tower is still raised in your play area, then activate it.
- This way you will have two opportunities (two turns) to eliminate the Catapult and / or the Siege Tower before they are activated.
If the Catapult or Siege Tower appears on a Siege Card when you already have the Catapult or Siege Tower in your play area, lying down or standing up, activate it immediately.