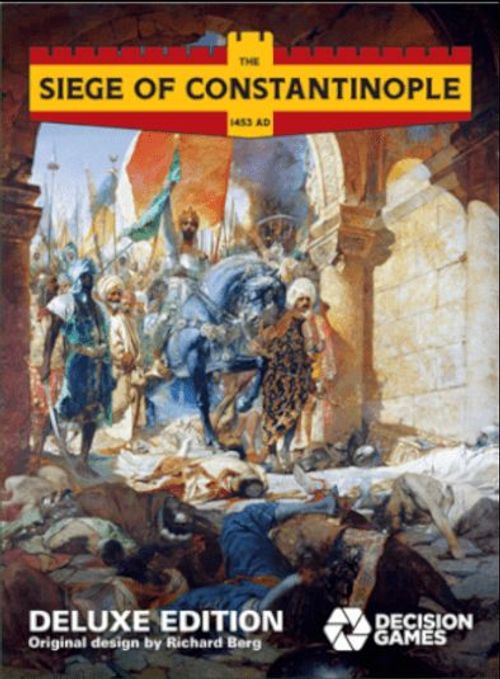
The Siege of Constantinople: The End of the Middles Ages 1453 A.D.
The Siege of Constantinople: The End of the Middles Ages 1453 A.D. Rulebook
Table of Contents
Table of Contents
- 1.0 Introduction
- 2.0 General Course of Play
- 3.0 Game Equipment
- 4.0 Sequence of Play
- 5.0 Movement
- 6.0 Zones of Control
- 7.0 Assaults
- 8.0 Fire Combat
- 9.0 Melee Combat (Assault)
- 10.0 Bombardment
- 11.0 Siegeworks & Engineering
- 12.0 Leaders
- 13.0 Sailors
- 14.0 Victory
- 15.0 The Scenarios
- 16.0 SPI Designer's Notes
- 17.0 Optional Naval Rules
- 18.0 Optional Naval Rules (Simplified)
1.0 Introduction
This game enables the players to recreate the famous siege, commanding the powerful forces of the Ottoman Sultan, Mehmet II, the Conqueror, or the small but able garrison under Emperor Constantine XI and Giovanni Giustiniani. The objective is simple in that the Ottoman player must gain entry to the city in strength, while the Byzantine player must keep him out.
This Deluxe Edition reprints the original SPI game from Strategy & Tactics Magazine, maintaining the earlier edition's rules while incorporating known errata, and adding variant naval rules, new graphics, enlarged counters, and a larger mounted map board. There are two scenarios in The Siege of Constantinople, 1453 AD (hereafter referred to as Constantinople). The Assault scenario covers the second half of the siege, when most of the actual fighting took place. The Assault scenario enables two players to play a quick (two hours or less) game that incorporates all the major portions of the rules. The primary scenario is the Campaign scenario, which covers the siege and can be played in about four hours. For solitaire play, it is recommended that the Assault scenario be used. Additionally, the optional naval rules from Moves magazine are included with this deluxe edition and these rules can be incorporated into the Campaign scenario if so desired by the players.
Constantinople contains several new and/or adapted principles, none of which is overly complex. Some of the combat rules are unusual, and the idea of assault areas and their restrictions may seem strange at first. But it is not a complex game, and the players should find an initial understanding of the rules sufficient to begin play.
Note: These rules use the following color system: Red for important notes such as exceptions or errata, Blue for examples of play, Italic with green background for designer notes. Check for e-rules updates to this game at decisiongames.com
Commonly Used Abbreviations
- 1d6: One six-sided die
- 2d6: Two six-sided dice
- CP: Capability Points
- DR: Die Roll
- EZOC: Enemy Zone of Control
- GT: Game Turn
- PAC: Player Aid Card
- SP: Strength Point
- TEC: Terrain Effects Chart
- ZOC: Zone of Control
2.0 General Course of Play
Constantinople is played in a series of phases, not all of which are used in each GT. One player controls the Ottoman (besieging) Army, while the other player directs the Byzantine (besieged) forces. During each GT, dependent on which scenario the players are using, the players perform a series of maneuvers governed by the phase they are in.
First, the Ottoman player decides whether he wishes to bombard or assault. If he chooses the former, he simply fires his artillery at the walls, after which the Byzantine player may undertake repairs.
If the Ottoman player chooses to assault (he may either bombard or assault - not both), he determines his assault capability for that GT, deploys his forces (secretly) in their chosen assault areas, and launches an assault. He has ten separate impulses of movement, missile fire, and melee combat in which to place 25 attack strength points (SPs) inside the city. As soon as he does this the game is over. If he has failed by the end of ten impulses play reverts to a new GT.
If, at the end of the GT 27, the Ottoman player has not, during an Assault Phase, placed 25 SPs inside the city, the Byzantines have withstood the siege and are victorious.
Designer Note: This GT (4 June 1453) was chosen because it is the estimated date of the arrival of the relief Galley Fleet from Venice, which most assuredly would have turned the tide in favor of the Byzantine forces, given Ottoman failure up to that point.
The naval events of the siege have been abstracted because there was little naval combat, and what there was had minimal tactical effect on the siege. Its main effect was in dictating the strategies used.
DG Developer's Note: Nevertheless, as noted above, optional naval rules as published in Moves magazine are included if the players so wish to implement them.
3.0 Game Equipment
3.1 The Game Map
The two 22x34-inch mounted map boards portray the city of Constantinople and the immediate surrounding areas as it stood at the time of the siege. A numbered hexagonal grid has been superimposed over the terrain features to regulate movement and combat. Explanations of the effects of the different types of terrain features used on the map will be found on the Terrain Effects Chart (TEC). Note that the circled numbers in the sea hexes are only used in the optional naval rules.
3.2 The Playing Pieces
The playing pieces (or units) represent the contingents of fighting men present at the siege, the artillery used, as well as the actual historical figures who commanded the troops. There are also several markers used for informational purposes, such as Breach Damage Level markers. The numbers on the land combat units represent the strengths (attack and defense) as well as the morale of that unit. Strength and capability are designer's quantifications of that unit's numerical composition and military worth.
3.2.1 Sample Units
Typical Combat Unit: the front (full strength) shows the unit type icon (e.g. Infantry), designation, attack strength, defense strength and morale rating; the back shows the Reduced Strength values.
Unit Step Strength: Units are either at full strength or reduced strength (9.2.3).
Typical Leader Unit: the front (full strength) shows the leader's portrait, name, combat rating, morale rating and morale radius; the back is unused.
3.2.2 Summary of Other Counter Types
Siege Tower (non-combat unit); Catapult (non-combat unit); Gun (artillery unit); Cannon (artillery unit); Urban's Bombard (artillery unit); Foss Filled (marker); Ineffective (marker); Impulse (marker); Game Turn (marker); Ottoman Assault Capability (front and back) marker; Breach Level Damage (Unbreached and Breached) marker.
3.2.3 Forces
- Byzantine Army: Purple
- Ottoman Army: Tan
Movement Allowance: The number of movement points (MP) a given unit has available to expend in its respective Movement Segment. See the Terrain Effects Chart for how many MP are required to move into specific hexes or across hexsides. Important: Movement allowances are not printed on the counters.
| Unit Type | MP |
|---|---|
| Leaders | 6 |
| Combat units | 5 |
| Siege Towers | 4 |
| Catapults | 0 (cannot move) |
3.2.4 Combat & Naval Unit Names & Abbreviations
- Basibazouks: Bashi-Bazouks
- Imprl: Imperial
- Medtrn: Mediterranean
- Rhodes: Chios/Rhodes
3.2.5 Leader Unit Names & Abbreviations
3.2.5.1 Ottoman Leaders
- Ishak: Ishak Pasha
- Karadja: Karadja Pasha
- Mahmud: Mahmud Pasha
- Mehmet II: Sultan Mehmet II
- Zaganos: Zaganos Pasha
3.2.5.2 Byzantine Leaders
- AB. Leonard: Archbishop Leonard
- Bochiardi Br: Bocchiardi Brothers
- Caristo: Teodoro Caristo
- Catneo: Cattaneo (Genoese)
- Constntine XI: Emperor Constantine XI
- Crd. Isadore: Cardinal Isadore
- D. Cntcznus: Demetrius Catacuzenus
- Diedo: Alviso Diedo
- F. Contarini: Filippo Contarini
- G. Gustniani: Giovanni Gustiniani
- J. Contarini: Jacobo Contarini
- J. Grant: Johannes Grant
- Manuel: Manuel (Genoese)
- Minotto: Girolamo Minotto
- N. Palolgus: Nicephorus Palaeologus
- Notaras: Megadux Loukas Notaras
- Orhan: Orhan Celebi
- T. Palolgus: Theophilus Palaeologus
- Trevisano: Gabriele Trevisano
3.3 Game Charts & Tables
Various visual aids are provided for the players to simplify and illustrate certain game functions.
- PAC #1: Scenario initial deployment and reinforcement lists
- PAC #2 Charts & Tables: Abbreviated Sequence of Play; Assault Game Wall Damage Table; Bombardment Table; Casualty Possibility Table; Catapult/Missile Fire Results Table; Foss Debris Removal Table; Greek Fire Table; Leader Casualty Table; Levels Repaired Table; Melee Combat Results Table; Movement Allowances Table; Repair Capability Table; Terrain Effects Chart
- PAC #3 Display Tracks: Assault Areas Track; Game Turn Record Track; Impulse Track
- PAC #4 Optional Naval Game: Anti-Ship Bombardment Table; Naval Melee Combat Results Table; Ramming Table; Wind Table
- PAC #4 Optional Naval Game (Simplified): Simplified Naval Melee Combat Results Table (Boarding); Simplified Ramming Table
- PAC #5: Naval Game Log Sheet
- PAC #6: Ottoman Mine Planning Sheet (Ottoman Mine Planning Map; Ottoman Tunnel Determination Table)
3.4 Game Scale
Each hexagon on the map is the equivalent of approximately 200 yards. However, because of the unusual nature of sieges, certain terrain features have been abstracted in the interest of playability. The Foss and the Parateichion were not 200 yards across (they were about one-third that width across, possibly less) and the number of towers was much greater. In addition, the Ottoman camp was less than a mile from the walls. In the game it is off map for obvious play reasons. Each GT is the equivalent of two days, but this too, should not be taken literally. Two days were used so that the players have a frame of reference as to the passage of time, but the game is more interested in periods of action versus periods of relative inaction. However, all actions are, within the relative frame, quite accurate. As the actual "body count" at the siege was general at best (more accurate for the Byzantines than the Ottomans), unit counters represent capability rather than numerical strength. The Ottomans outnumbered the Byzantines 80,000+ to maybe 7,000. An accurate counter mix for this would be ludicrous.
4.0 Sequence of Play
The Sequence of Play in Constantinople consists of three phases, only two of which are used in any given GT. The Assault Phase consists of several impulses, which may be considered turns within a turn. All actions in the Sequence of Play must be performed in the order listed. Once an entire GT has been completed the players move the GT marker to the next GT and begin the Sequence of Play anew. There are 27 GTs in the entire game, but the Ottoman player may, by fulfilling certain victory criteria, shorten the length of the game. If the Ottoman player has not achieved any of his Victory Conditions by the end of the last GT, the Byzantine player automatically wins.
4.1 The Game Turn
1. The Planning Phase
- A) Ottoman Troop Allocation Segment: The Ottoman player secretly notes the location of his troops by assault area.
- B) Byzantine Strategic Movement Segment: The Byzantine player may move any of his land units up to double their movement allowance.
- C) Ottoman Tunnel Segment: The Ottoman player secretly notes where he is attempting to tunnel on his Mine Planning Sheet. He then rolls 1d6 for each hex to see whether the tunnelling operations have succeeded.
2. Bombardment or Assault Phase Selection
The Ottoman Player must choose whether to conduct a Bombardment Phase or an Assault Phase in any given GT. Only one or the other is conducted each GT (Exception: The Ottoman player must bombard on GT 1).
2.1 The Bombardment Phase (Skip phase if Assault chosen)
- A) Ottoman Bombardment Segment: The Ottoman player may bombard the walls of the city with any guns, cannons, or Urban's Bombard that have not been reallocated in the previous planning phase, 1A.
- B) Damage Repair Segment: The Byzantine player may attempt to repair damage to the city walls using the Wall Repair Tables. The Byzantine player may also attempt to discover tunnels.
2.2 The Assault Phase (Skip phase if Bombardment chosen)
- A) Ottoman Assault Capability Segment: The Ottoman player picks a capability chit and adds to the number on that chit the capability number on the Game Turn Record Track for that GT. This gives the number of assault CP he may allot that turn (7.2).
- B) Byzantine Tunnel Discovery Segment: The Byzantine player may attempt to discover Ottoman tunnels (11.1.2). Any discovered tunnels are automatically destroyed.
Assault Impulse (Segments C through I)
- C) Ottoman Movement Segment: The Ottoman player may move his units.
- D) Byzantine Movement Segment: The Byzantine player may move his units.
- E) Simultaneous Fire Combat Segment: The Ottoman and Byzantine players may direct fire combat at each other with any units that have not moved that impulse. Note that though combat is resolved sequentially, all results are applied simultaneously.
- F) Ottoman Engineering Segment: The Ottoman player may attempt to fill in the Foss (5.3.2) by using his combat units as engineers. Only units that have not moved may perform this task.
- G) Byzantine Melee Segment: The Byzantine player may melee (attack) any Ottoman units adjacent to his own. Units eliminated or forced to retreat ("R" result) are removed from the map immediately.
- H) Ottoman Melee Segment: The Ottoman player may melee (attack) any Byzantine units adjacent to his own. Units eliminated are removed from the game immediately.
- I) Simultaneous Ineffective Removal Segment: The players remove all Ineffective markers from the combat units.
Important: The players repeat Segments C through I up to ten times (each sequence being an impulse). At the end of the last impulse, all Ottoman combat units are removed from the map for future use.
- J) Byzantine Repair Segment: The Byzantine player may attempt to repair the city walls, as per 2B above. He may also, in this segment only, attempt to remove fill from filled in Foss hexes.
3. Game Turn Indication Phase. The GT marker is advanced one space on the Game Turn Record Track to signal the passage of 1 GT, unless the Ottoman player has achieved his Victory Conditions, in which case the game is over.
5.0 Movement
During each player's Movement Segment the respective player may move as many or as few of his units as are capable of movement (4.0, 7.2, 12.2).
- These units may be moved in any direction, or any combination of directions, except that Ottoman units may not leave their assigned divisional assault areas and Byzantine units may not leave the city.
- The only other limit to moving units is their movement allowance.
Units are moved one at a time, tracing a path of contiguous hexes through the hex grid.
- As a unit enters each hex it must pay a portion of its movement allowance for entering the hex, and possibly another portion of its movement allowance for crossing certain hexsides.
- Movement costs are listed on the Terrain Effects Chart (see PAC #2).
5.1 How to Move Units
Units may move only in the segments specifically designated for movement (Sequence of Play, 4.0). A player's units may move only during his own Movement Segment. Players should note that advance after combat (9.2.5) is not considered movement for the purposes of this section. The moving player is referred to as the phasing player.
- The Ottoman player is restricted by his assault capability (7.2) as to the number of units he may move in a GT.
- Friendly units may never enter a hex containing enemy combat units. Friendly combat units may enter a hex containing only an enemy leader, catapult, and/or siege tower, in which case the enemy leader, catapult, and/or siege tower is eliminated.
- Friendly leaders may not move into a hex containing only enemy leader units.
- Catapult units may not move.
- Byzantine units may not leave Constantinople.
Friendly combat units may move through hexes containing other friendly units, but they may not end their movement stacked in the same hex with another friendly combat unit. Important: There is no stacking of combat units (5.5).
- Leaders, however, may always stack with combat units, and there may be as many leaders as the owning player wishes in the same hex (5.5).
- Only one catapult unit may be in a single hex.
Once a combat unit has entered an enemy Zone of Control (EZOC) (6.0) it must cease movement for the remainder of that Movement Segment, or Byzantine Strategic Movement Segment (4.0). It may move again in its next Movement Segment (or Byzantine Strategic Movement Segment 4.0), but only if it moves into a hex that is not in an EZOC (6.1).
The number of MP expended by a unit during a single Movement Segment may never exceed its given movement allowance. Exception: Byzantine Strategic Movement.
- Unused MP may not be accumulated from one segment to another, nor may they be transferred between units.
Byzantine land combat units that begin the game in any hex other than a hex in the Parateichion (see the Terrain Key) and/or the Blachernae area inside the city (hexes 3414, 3413, 3513, 3412, 3313, 3213) may not move until an Ottoman unit has meleed a Byzantine combat unit or GT 15, whichever comes first. They are in "reserve" until such action takes place. Reserves are noted in the initial deployment.
Important: During the planning phase, the Byzantine player has a Strategic Movement Segment. During this segment (only) the Byzantine units (including leaders) may move up to twice their movement allowance.
5.2 Effects of Terrain on Movement
Units pay costs for entering certain types of hexes on the map and/or for crossing certain types of hexsides. The different types of hexes and hexsides and their costs are listed on the TEC (see PAC #2).
- Costs for crossing a hexside are always in addition to the cost for entering a hex.
- Units may never enter an all-sea hex or cross an all-sea hexside. Exception: Bridge across the Golden Horn (11.4).
- A unit may not enter a hex if it does not have sufficient MP remaining in its movement allowance to pay the cost for that hex and/or hexside.
5.3 Special Terrain
There are several terrain types in Constantinople that are unusual as far as standard wargames go. They are examined in detail below.
5.3.1 Assault Areas
These are arbitrary, but historical, divisions of the countryside drawn from the landward walls of Constantinople for the purposes of delineating the areas of the walls that may be assaulted by the Ottomans.
- Ottoman divisions (7.1, 15.1.2) and artillery (10.1) are assigned, in the planning phase, to a particular assault area (artillery consists of guns, cannons, and Urban's Bombard).
- Once assigned they may not move out of the area, as delineated by the area hexsides during a given GT until they have crossed a wall hexside (7.1).
- There is no limit to the number of divisions that may be assigned to a given assault area.
- The assault area names are based on the section of the landward walls that they encompass.
5.3.2 The Foss
The Foss was a wide stone moat which ran parallel to and along most of the length of the outer walls. It was capable of being flooded (but was not during the siege) and was divided by partitions into sections (roughly equivalent to the hexsides on the map). The Foss is a formidable, but not impossible, obstacle, unless it is filled with debris. This is accomplished during the Ottoman Engineering Segment of the Assault Segment. It may also be emptied by the Byzantine player in the Repair Segment of the Assault Phase. The Foss has different effects on movement and combat, depending on whether it is filled or empty (see TEC).
5.3.3 The Outer Walls
The outer walls were the second line of defense (after the Foss) of the Triple Walls of Theodosius. Theoretically weaker than the inner walls, the outer walls were actually stronger, as the inner walls, although much higher and thicker, were in a state of disrepair.
- Units may cross any of the outer walls, paying a cost of three extra MP to do so. The Ottomans may use siege towers to lessen that penalty (11.3), and breaching the walls also makes it easier to move across them.
- See the TEC for all movement costs and defensive benefits of the outer walls.
- Defensively, any unit inside the city and adjacent to an outer wall hexside is higher than hexes outside the city and derives a defensive benefit when attacked through that outer wall hexside.
5.3.4 The Inner Walls
The inner walls run from hexes 3114 to 0316. Following the fall of the city to the Venetian Crusaders in 1204, they had fallen into disrepair, and by the time the Byzantines got around to repairing them it was too late.
- There are two sides to the inner walls, consisting of the Parateichion (the section between the inner and outer walls) and the city proper.
- Units in the Parateichion are higher than units in the city proper for the effect on Zones of Control (6.1).
- Units in a clear city hex adjacent to an inner wall are not considered to be on the walls. Thus, a unit in 2411 is in a clear city hex and not on the inner walls.
- Units in tower hexes (considered part of the inner wall) are considered higher than units in both the Parateichion and the city proper and receive benefits accordingly.
- Defensive benefits are received in the same manner. A unit in hex 1213 would not receive a benefit if attacked from hex 1212, but a unit in 1313 (a tower) would receive a benefit if attacked from 1312.
- Tower hexes may be entered only through Gates from the Parateichion (see TEC). Therefore, a unit in 1212 could not melee attack a unit in 1313.
5.3.5 City Walls
City Walls divide one area of the city from another. Only the major city walls of Constantinople are included on the map. City walls act as only minor hindrances to movement and benefit defense similarly. All effects can be seen on the TEC.
5.3.6 Palace Hexes
The two Palace areas are treated as a specific type of terrain. Their defensive benefits and movement costs are listed on the TEC.
- The New Imperial Palace (3213) is considered level with the Parateichion and adjacent to the Blachernae area.
- The Old Imperial Palace (2433) and the Hippodrome (2432, 2533) are level with the rest of the city proper.
5.3.7 Gates
Gates provide easy access to the city through wall hexsides. The Byzantines control all Gates at the beginning of the game.
- The movement benefit of a Gate (they act to negate the movement cost for a wall) is given to the player who controls the Gate. Otherwise the movement cost for crossing a Gate hexside is the same as for crossing an outer wall hexside.
- To control a Gate a player must control both hexes on either side of the Gate.
- Control is defined as being the last player to have a unit physically occupy or pass through the hex.
- There is only one gate on the western outer wall, Kerkoporta (hexside 3212/3313).
- Names of other historical western outer wall gates are shown on the map but those gates were sealed at the time of the siege. They are shown and treated as outer wall hexsides for game purposes.
- Other gates in game play are on other parts of the outer wall, inner wall, towers, and city walls.
5.3.8 The Parateichion
The Parateichion was a roadway between the inner and outer walls. The Parateichion is considered to be inside the city, however, see 7.4. For its height effects, see 5.3.4.
5.3.9 Galata
Galata was a Genoese colony on the shore of the Golden Horn opposite Constantinople. During the siege it remained officially neutral. No land unit may ever enter Galata.
5.4 Effects of Leaders on Movement
No Byzantine combat unit may move during a given Movement Segment unless it begins that segment stacked with a leader unit.
- The leader unit need not move with the combat unit(s).
- The combat unit must simply start the Movement Segment stacked with the leader.
- This rule does not apply to Ottoman units. For the effect of Ottoman leaders on movement, see 7.2.
5.5 Stacking
There is no stacking of combat units in Constantinople (leaders, catapults, and siege towers are not considered combat units).
- There may never be more than one combat unit of any type in a given hex at the end of a particular phase, segment, or impulse.
- Leader, siege tower, and catapult units may always stack with combat units.
- The various markers used for informational purposes do not count in any way for stacking.
- Friendly units may always move through hexes which contain other friendly units but may not stop in such a hex.
- Catapult units may always stack with one combat unit, but not with another catapult unit.
- Guns, cannons, and Urban's Bombard are placed during the Bombardment Phase (10.1)
6.0 Zones of Control
The six hexagons immediately surrounding a hex constitute the zone of control (ZOC) of the combat unit in that hex.
- Hexes upon which units exert a ZOC are called controlled hexes and inhibit the movement of enemy units.
- An enemy unit must immediately cease movement for that phase upon entering an EZOC.
- Certain terrain may negate a ZOC.
6.1 How Zones of Control Operate
- All combat units exert a ZOC.
- Informational markers, leaders, and catapults do not exert a ZOC, nor are they affected by EZOCs.
- ZOCs extend into all land hexes on the map with the following exceptions:
- a) ZOCs never extend through an all-sea hexside or into an all-sea hex.
- b) ZOCs never extend through unbreached wall or gate hexsides into a hex on a higher elevation than the unit exerting the ZOC.
- c) ZOCs never extend through city walls (5.3.5) in either direction.
- d) A unit in an unfilled Foss hex does not exert a ZOC.
- e) Units using siege towers (11.3) do not exert a ZOC.
Important: ZOCs do not extend into Towers. They are considered part of the inner wall and higher than any other hex in the game.
Examples:
- A unit in hex 1411 would not exert a ZOC into hex 1412.
- A unit in hex 1412 would exert a ZOC into hex 1411.
- A unit in hex 1413 would not exert a ZOC into hex 1412.
There is no cost to enter an EZOC, but a combat unit that enters an EZOC must stop. It may move no further for the duration of that segment.
- If a unit begins a segment in an EZOC it may leave that EZOC so long as it does not move directly into another EZOC.
- Note that this rule prevents Ottoman units from crossing wall hexsides if the walls are defended by Byzantine units and/or Byzantine ZOCs.
- Friendly ZOCs never affect friendly units.
- There is no additional effect when more than one unit exerts a ZOC upon the same hex.
- Reduced units exert ZOCs.
- Ineffective units exert ZOCs.
6.2 Effect of Zone of Control on Combat
Units which begin a melee segment in an EZOC must attack (within the restrictions of 9.1). If there is more than one enemy unit in a friendly unit's ZOC, the friendly player may choose which enemy unit to attack. Remember, units may be adjacent and not exert a ZOC (6.1).
Important: Combat between adjacent units, where the defending unit does not exert a ZOC, is voluntary, not mandatory. Such attacking units (not in EZOC) still may attack only one hex (9.1).
7.0 Assaults
To win the game the Ottoman player must get units inside the city. To do so, he must assault the city and its walls. However, to assault the walls with any chance of success the Ottoman player must first bombard them (10.0).
- The Ottoman player must decide, for each GT, whether he wishes to assault that turn or bombard (4.0). He may do only one, not both (Exception: The Ottoman player must bombard on GT 1).
- In an assault, the Ottoman player secretly deploys his divisions in the given assault areas, picks his capability chit to add to how many divisions he may use in a given assault, and then has ten impulses in which to carry the assault into the city.
- If he does not achieve victory by the end of those ten impulses the Assault Phase ends and the next GT proceeds.
7.1 The Assault Areas
The land area outside the city is divided into six areas, five of which are assault areas.
- Blachernae
- Exo-Philopation
- Mesoteichion
- Pegae
- Golden Gate
- Pera (used only for bombardment)
In the Ottoman Troop Allocation Segment the Ottoman player must assign each of his divisions to one of the areas (either in writing or use the Assault Areas track on PAC 3, hidden under a sheet of paper). He may assign all his divisions to one area or distribute them more evenly. However, they must all be assigned to a particular area in this segment. The assignment is secret, and the Ottoman player does not have to reveal it to the Byzantine player until the appropriate assault impulse.
There are six Ottoman divisions:
- The Bashi-Bazouks (who have no leader).
- Zaganos Pasha's division (deployed across the Golden Horn in Pera).
- The European division (under Karadja Pasha).
- The feared Janissaries (under Sultan Mehmet II).
- The Anatolian division 1 (ten units under Ishak Pasha).
- The Anatolian division 2 (ten units under Mahmud Pasha).
Important: These two Anatolian forces count as two divisions for play purposes. Units assigned to one leader may not be transferred to the other.
Once a division is assigned to an area it may not leave that area during a given GT unless and until it crosses a wall or gate hexside.
- Once it crosses a wall hexside it may move anywhere within the Parateichion and the city proper.
- Each GT, the Ottoman player may assign divisions to assault areas regardless of assignments in previous GTs.
Divisions assigned to an area are not required to be placed on the map until an actual assault has begun and they are actually to be used in the assault (7.2).
Zaganos Pasha's division (in Pera) may not cross the Golden Horn (and thus assault) until the Ottomans construct a bridge (11.4). No other divisions may be assigned to Pera until a bridge is constructed.
7.2 Ottoman Assault Capability
The Ottoman player may activate and move only a certain number of divisions per Assault Phase, based on CP and the their respective leader's command ratings.
- Each leader has a total command rating which is obtained by adding all his leadership points together.
- This command rating equals the number of CP required to activate that leader and his division in that Assault Phase.
In the Ottoman Assault Capability Segment the Ottoman player blindly choses one capability chit from a cup.
- He secretly looks at the number on the chit and adds it to the CP on the Game Turn Record Track.
- This is his assault capability (expressed numerically) for that Assault Phase.
- If the CP on the Game Turn Record Track equals zero, just use the number on the pulled chit to determine assault capability.
- He places the picked chit aside until the end of that Assault Phase, when it is placed back in the receptacle.
- Before it is placed back into the receptacle the Byzantine player may look at the chit for verification.
Important: The Ottoman player goes through the procedure above only if he has planned an assault that GT. If he is simply going to bombard the walls there is no need for recourse to this procedure.
The Ottoman player uses his CP to activate leaders (and the units they control).
- He may only activate leaders (and their divisions) for which he has the necessary CP.
- Unused CP may not be accumulated from one turn to the next.
Example: Mehmet II's ratings are 2-2-3. His command rating is 7. It thus takes 7 CP to activate Mehmet II and his Janissaries, even if only one Janissary unit is moved. These CP are then deducted from the total available for that turn.
Special Situations:
- Until the Ottoman player constructs a bridge between the mainland and Pera he must subtract 4 CP from his total for that turn.
- The GT after construction is completed, the Ottoman player does not have to subtract the 4 CP. The 4 CP represent Zaganos Pasha's division and the problems of maintaining communication with them.
- The Bashi-Bazouks division has no leader. It takes only 1 CP to activate this division (Exception: 12.4).
- If a division's leader is eliminated (or while wounded) 10 CP are required to activate that division.
- The Ottoman player does not have to reveal his CP for that Assault Phase, or the units that he has designated as activated, until the end of the GT.
- Divisions do not have to enter on the first impulse. They may delay their entry until a later impulse. However, the entire division must enter during the same impulse.
7.3 When Assaults May Occur
The Ottoman player may choose to launch an assault in any GT except GT 1 (in which he must bombard).
- Every GT thereafter the Ottoman player may either assault or bombard.
- The Ottoman player may assault any hex that he can reach on land.
- Only those units from a division capable of assaulting may assault.
- Units from Pera may not assault until contact is made with the "mainland" Ottomans.
7.4 The Mechanics of Assault
Having determined which divisions may assault, the Ottoman player now has ten assault impulses within which to get 25 land combat attack SPs inside the city proper.
- Units in the Parateichion do not count.
- If he fails to get the requisite 25 attack SPs inside the city by the end of the tenth impulse, the Assault Phase is over, and a new GT begins.
The Ottoman player brings his division(s) on through the western edge of the game map within their designated assault areas.
- The starting point for Ottoman units being brought onto the map into assault areas lies between hex 0101 and hex 3901 inclusive.
- Each unit starts off-map and must pay the cost of the first hex it enters.
- The Ottoman player does not have to bring each division on in the first impulse.
- The Ottoman player may delay each division's arrival until he sees fit, with the knowledge that all action ceases after the tenth impulse.
- The Ottoman player may stagger the arrival of his divisions, but not the arrival of units within a division.
- All units of a division must be placed on the map in the same impulse.
The Ottoman player now uses movement rules, combat rules, and engineer rules to assault the walls and the defenders behind them in an effort to gain the city.
- If at the end of the tenth impulse the Ottoman player has not fulfilled his Victory Conditions, all Ottoman units in the five mainland assault areas and/or the city are removed from the game map and are considered ready for the next GT.
- Units that have lost a step or been eliminated remain so.
- If a unit cannot trace a line of hexes that is free of EZOC and/or enemy units from its hex to the western map edge, it is eliminated. For this purpose, friendly combat units and/or ZOCs negate EZOC.
- If the Ottoman player chooses to end his assault before ten impulses are finished, the Assault Phase is ended. The Byzantine player may not move his units after the Ottoman player withdraws until the next scheduled Movement Segment.
8.0 Fire Combat
Fire combat takes place during the fire combat segments of the Assault Phase. All combat units have fire combat capabilities, as they were mostly equipped with bow and arrow, etc. There are also several Byzantine catapult units.
Exception: The Ottoman gun, cannon, and Urban's Bombard (10.4) units may not engage in fire combat. They are used only for bombardment.
- A unit capable of firing has a range of two hexes, depending on intervening terrain.
- Each unit simply picks a target hex, rolls 1d6 on the Catapult/Missile Fire Results Table, and checks to see the result.
- Any casualties are removed at the end of the Simultaneous Fire Combat Segment.
8.1 Which Units May Fire
All combat units and catapults are capable of fire combat (Exception: Ottoman artillery (guns, cannons, Urban's Bombard) may bombard only (10.0)).
- Byzantine catapult units may fire only. They may not melee.
8.2 How Fire Combat Occurs
All fire combat units, including catapults, have a fire range of two hexes, not including the hex that they occupy. Thus, a combat unit may fire once at any target (an enemy unit) up to two hexes distant (Exception: 8.3).
- To engage in fire combat, a unit must not have engaged in any movement whatsoever in the immediately preceding friendly Movement Segment of the Assault Phase.
- To fire, the owning player simply announces which hex a particular combat unit is firing at and rolls 1d6, consulting the following:
CATAPULT/MISSILE FIRE RESULTS TABLE
| DR | Effect |
|---|---|
| 1-4 | No Effect |
| 5 | Target unit is Ineffective |
| 6 | Target unit loses one strength step |
- Ineffective units suffer no additional effects if another result of ineffective is obtained against them. An ineffective unit may lose one or two steps due to fire.
- Any other DR result is treated as "No Effect."
- Results are applied at the conclusion of the Simultaneous Fire Combat Segment.
- Units that fire may melee and/or fill in the Foss.
- Units do not need leaders to engage in fire combat.
- Fire combat has no effect on leader units, Byzantine catapult units, or units in siege towers.
- A unit may be fired upon by all units in range, so may be fired on more than once in a Fire Combat Segment.
- No unit may fire more than once in a Simultaneous Fire Combat Segment.
If a leader is in the same hex as a unit that is eliminated by fire combat, that leader must be moved immediately to a hex occupied by a friendly combat unit that is within that leader's MP capability.
- The Leader cannot move in the next movement phase. This should be denoted by flipping the leader counter to its reverse side.
- If there is no combat unit that qualifies for the leader to move to, the leader unit is eliminated.
8.3 Effects of Terrain on Fire Combat
Units may fire only at any enemy units within range, regardless of their assault area.
- A unit in one area may fire against an enemy unit in another area.
- Byzantine or Ottoman unit(s) firing from a hex lower than the target hex through an unbreached wall or gate hexside which is part of the target hex subtract one from the DR (a 6 becomes a 5, etc.).
- Units firing from siege towers at targets behind a wall or in a tower, breached or unbreached, subtract one from the DR.
- No unit may ever fire through two wall or gate hexsides.
9.0 Melee Combat (Assault)
Melee combat takes place during the melee segment of the assault impulse of the Assault Phase.
- Only combat units that are adjacent to each other may engage in melee combat.
- Friendly units in an EZOC must attack one of the enemy units exerting an EZOC.
- Friendly units adjacent to enemy units but not in an EZOC may attack one enemy unit.
- A phasing unit may melee no more than one enemy unit per Assault Phase.
Melee combat is resolved by totaling the strengths of the attacking units and consulting the Melee Combat Results Table, cross referencing the total attack strength with the defense strength of the defending unit.
The numbers listed in that column and row are the numbers needed to be rolled on 2d6 to produce a chance of the defending unit having suffered a casualty (dependent on the morale rating of the defending unit).
If a chance of a casualty has occurred, the defending player then refers to the Casualty Possibility Table, rolls 1d6, and applies any resultant casualty immediately, as well as any advances or retreats, before proceeding to the next combat.
9.1 When Melee Occurs
Any combat unit (leaders and catapults are not combat units) may engage in melee combat.
- Friendly units in adjacent hexes in the same assault area may combine to engage in melee combat with enemy units.
- Melee combat may be conducted through any hexside, with the exception that units may not melee through an all-sea hexside.
- Friendly units in an EZOC must attack one (and only one) enemy unit that is exerting an EZOC on that friendly unit (6.2).
- If a friendly unit is adjacent to an enemy unit but that enemy unit is not exerting an EZOC on the friendly unit, then combat is voluntary for the friendly unit.
Example: If the friendly unit were in the Parateichion section of the walls above the enemy unit and the enemy unit were in the Foss, then combat is voluntary for the friendly unit. Melee combat would be mandatory for that enemy unit as the friendly unit is exerting a ZOC even though the enemy unit is not.
Only the phasing player may attack/melee.
- The phasing player resolves one individual melee at a time, taking all casualties, retreats, advances, etc., before proceeding on to the next melee.
- When all melees, both mandatory and voluntary, have been finished the melee segment is over for that player.
- No unit may attack more than once per melee segment and no unit may be attacked more than once per melee segment.
- An enemy unit in a single hex may be attacked by multiple friendly units, combining to simultaneously attack that hex in one melee.
- If a friendly unit is in an EZOC of one enemy unit, and simply adjacent to but not in the EZOC of another enemy unit, the friendly unit must attack the enemy unit exerting the EZOC.
9.2 How Melee Occurs
When a phasing player wishes to initiate a melee attack, he notes the attack strength(s) of the attacking unit(s). If more than one unit is to be used against a single enemy unit, the friendly units' attack strengths are added together to give a total attack strength.
9.2.1 Melee Combat Results Table
The attacker then takes the total attack strength, modifying for terrain, for that combat and refers to the Melee Combat Results Table (9.3).
- He may also add the melee rating of one leader present in a hex with one of the attacking units to the total adjusted strength.
Example: Two Anatolian division units plus Mahmud would have a total, unmodified strength of nine (4 + 4 + 1 = 9).
- The leader may never add more SPs to a total than the total modified (by terrain) strength of the units attacking.
Example: A unit with a strength of 1 could only have one leader SP added, even if the leader's melee rating were 2.
The attacker now rolls 2d6, adjusting the strength of the attacking units as per the TEC.
Example: Each Ottoman unit attacking a Byzantine unit through an unbreached outer wall hexside (Byzantine unit above Ottoman unit) would subtract three from its strength, while if the attack were the other way around (Byzantine unit attacking Ottoman unit) and the Ottoman unit were in an unfilled Foss hex, each Byzantine unit would add two to its strength.
- The strength of an individual unit may never be reduced below one, nor may its leader-augmented strength ever be more than twice its modified strength.
- Having made such adjustments, the attacker now cross-references his total attack strength with the defender's strength.
- The resulting number(s) on the Melee Combat Results Table is the number(s) that must be rolled on 2d6 for the defending unit to suffer a possible casualty.
- If a possible casualty results, the defender immediately refers to the Casualty Possibility Table (9.4).
- If the required number is not rolled there is no loss or casualty.
- If more than one unit is involved in one melee attack, the terrain effects are applied against each attacking unit individually.
Example: Two Janissary units plus Mehmet II in a Foss hex attack a Genoese 2-4-3 through an unbreached outer wall hexside. Each Janissary unit subtracts three from its strength (for the wall) so that the total attacking strength is 6 (2 + 2 + 2 (the last 2 for Mehmet II). Cross-referencing the 6 with the defensive strength of 4, we see that the Ottoman player would have to roll a 6 or a 7 to inflict a possible casualty.
9.2.2 Casualty Possibility Table
If a possible casualty has occurred, the defending (non-phasing player) immediately refers to the Casualty Possibility Table.
- He checks the morale rating of the unit attacked and rolls 1d6.
- He subtracts from this DR the morale rating of any one leader unit who is within range (12.1) of the defending unit.
The adjusted DR is now cross-referenced with the unit's morale rating to produce one of the following results:
-
-: No effect. Defending units remain in place.
-
Inf: Unit is Ineffective until the next Simultaneous Ineffective Removal Segment. Ineffective units may not melee offensively, fire, or move. If attacked, each attacking unit gains +1 SP.
-
R: For Ottoman units, the unit is removed from the map. The affected unit may return the next GT. For Byzantine units, the unit either retreats one hex so that the affected unit is not in an EZOC, or the affected unit loses one combat step.
-
#: Unit affected loses that number of combat steps.
-
*: Possible Leader Casualty (9.2.4).
-
If a combat unit suffers a Casualty Result of 2 when at original strength the unit is eliminated.
-
An already reduced unit suffering a loss of 1 is eliminated.
9.2.3 Combat Unit Step Strength
Combat units are said to have two combat steps. All combat units have information printed on both sides of the counter.
- The front side (higher strength) is the original strength.
- If a unit suffers a one-step loss it is turned over to its reduced side (with yellow stripe).
9.2.4 Possible Leader Casualty
Certain results on the Casualty Possibility Table are marked with an asterisk. This means that if there is a leader present in the same hex as the unit suffering a combat result, there is a chance of the leader being wounded or killed.
The player with the leader so affected rolls 1d6 on the following:
LEADER CASUALTY TABLE
| DR | Effect |
|---|---|
| 1-4 | No Effect |
| 5 | Leader is wounded (9.2.4) |
| 6 | Leader is killed (remove from play) |
If the leader is wounded, the player rolls 1d6 again.
- The number on the second DR is the number of GTs that the leader must be out of action, not including the GT in which the leader was wounded.
- Place the leader unit on the Game Turn Record Track to indicate the turn on which the leader will return to play.
- Byzantine wounded leaders reappear anywhere on the wall within 5 hexes of the hex in which they were wounded. Players will want to note in which hex the leader was wounded.
- Ottoman wounded leaders reappear on the western map edge.
9.2.5 Advance After Melee Combat
If, because of melee, a defending unit vacates a hex, an attacking unit may occupy the hex simply by moving into that hex (but see 10.3.2).
- This is not considered movement for the purpose of expending MP.
- Advances after combat must be taken immediately, before proceeding to the next combat.
- Byzantine units do not require leader units to advance after combat.
- Byzantine units may not advance after combat into a hex outside the city, though they may melee a hex outside the city.
9.2.6 Melee Attacked Catapults and Siege Towers
If catapult or siege tower units are alone in a hex and are melee attacked they are automatically eliminated.
- A unit that melee attacks a catapult or siege tower unit may not melee attack again in that GT.
- If catapult or siege towers units are stacked with a normal defending combat unit they may remain in the defending hex until the normal combat units are forced to leave the hex, in which case the catapult or siege tower unit is eliminated.
9.2.7 Melee Attacked Leaders
Leader units attacked alone in a hex are automatically eliminated unless the owning player can retreat the leader one hex into a hex that is not in an EZOC. Leaders stacked only with siege towers or catapults are treated as leaders alone in a hex.
10.0 Bombardment
Bombardment is the process by which the walls of Constantinople may be reduced and breached. Important: Only the Ottoman player may bombard.
- To engage in bombardment, the Ottoman player allocates his artillery (guns, cannons, Urban's Bombard) to the various assault areas, and states which wall hexside he is firing at for each gun, cannon, or Urban's Bombard counter in each area.
The Ottoman player then rolls 1d6 and consults the Bombardment Table.
- This determines the Breach Damage Level applied to that wall hexside.
- Wall breaches may be repaired by the Byzantine player after the Ottoman player has fired or assaulted (10.5).
Important: Throughout these rules, the term walls is interchangeable with the term walls and gates.
Historical Note: The Byzantine had some small cannon, but they did more damage to the Walls of Constantinople than they did to the enemy, so they were used infrequently to almost no effect during the siege.
10.1 Placement of Artillery
The Ottoman player has nine batteries of guns, two cannons, and Urban's Bombard (10.4). At the beginning of the game, these various artillery units are assigned to their areas.
- For convenience the players may place the artillery counters on the map, although this is not necessary (10.2).
- Artillery do not have a set range. They are placed on the map to show which wall hexside they are bombarding in their assigned assault area.
- If using this method of denoting placement of artillery, players should remember to remove the artillery counters when conducting an assault.
- As in the allocation of his troops, the Ottoman player may change the location of his artillery counters from one area to another.
Exception: The Ottoman player may not move artillery (or any other units) between the Pera area and the other five areas until he constructs a bridge over the Golden Horn (11.4). In any case, neither cannon nor Urban's Bombard may ever cross into Pera.
- Artillery in the other five areas may fire at any inner or outer wall hexside adjacent to hexes in their respective areas.
- An inner wall hexside is considered adjacent to an assault area if it is within the same hex rows as that assault area.
Example: Inner wall hexside 1911/1912 is within the same hex rows as the Pegae Assault Area.
- Each artillery counter must be assigned to a specific assault area and may fire only at wall hexsides within the confines of that area.
- Artillery counters are allocated secretly and revealed only when used. Once used, however, they remain revealed until moved.
If the Ottoman player wishes to move any of his artillery counters he must wait a certain number of GTs, determined by the artillery type, before they may be used after movement.
- Guns moved from one area to another may not be fired for the GT they are moved.
- If cannon or Urban's Bombard move, they may not fire for two full GTs.
Example: If there are four gun batteries in the Mesoteichion area on GT1 and the Ottoman player wishes to move one of those batteries to the Pegae area on GT 2, he could not fire that battery until GT 3 (but the gun would have fired on GT 1). Cannon or Urban's Bombard moved on GT 2 could not fire until GT 4.
10.2 How to Bombard
To bombard a wall hexside, the Ottoman player states which hexside adjacent to the assigned assault area is being fired at and rolls 1d6, consulting the Bombardment Table under the appropriate type of artillery firing: gun, cannon, or Urban's Bombard.
- Each gun, cannon, or Urban's Bombard fires individually. They are never combined. Therefore, the Ottoman player rolls for each artillery counter he fires.
- Before firing any given artillery he must state which of his units in a given area are firing at a given hexside.
- If three gun counters are assigned to fire at a given hexside, they must all fire at that hexside, regardless of the outcome of the bombardment.
- The Ottoman player cannot change his bombardment assignments once allocated, and all allocations must be made before any bombardment is resolved.
- There are no Line-of-Sight problems in bombardment. The outer and inner walls may be bombarded at all times.
- Artillery counters may bombard wall hexsides only within the assault area in which they have been placed.
- Artillery in Pera may fire only at wall hexsides that are adjacent to hexes 3612 through 3124.
- No unit may fire at the seaward walls (walls facing sea hexes), with the exception noted above for Pera.
- Artillery counters may not engage in fire combat in an Assault Phase. They are used solely for bombardment.
- Guns firing at wall hexsides from Pera subtract 1 from the DR when resolving bombardments. DRs less than 1 are treated as 1.
10.3 Results of Bombardment
Walls are breached by bombardment.
- Walls are breached when they reach a Breach Damage Level of 6.
- As many as 10 Breach Damage Levels may be accumulated against any one wall hexside, to account for possible repairs.
The Ottoman player uses the Bombardment Table (10.6) for each wall hexside he wishes to bombard.
- He notes the type of artillery firing and rolls 1d6.
- The resulting number, if any, is the number of Breach Damage Levels applied to that wall hexside.
To denote the present level of breach damage a wall hexside has the Byzantine player places a Breach Damage Level counter in a hex adjacent to the wall hexside in question with the arrow pointing towards the wall hexside.
Example: The Ottoman player fires Urban's Bombard at an outer wall hexside that has a present Breach Damage Level of 3, and he rolls a 4 on the die. The Byzantine player changes the Breach Damage Level counter to a 9, which is the breach damage caused by Urban's Bombard (6) plus the original Breach Damage Level (3). That particular wall would be considered breached as its Breach Damage Level has exceeded 6. Breached wall effects may be found on the TEC. The Breach Damage Level, however, may be reduced by Byzantine repairs (10.5).
10.3.1 Movement Across Walls
- Breached inner wall and tower hexsides (non-gate) may be crossed by units moving during a Movement Segment.
- Unbreached inner wall and tower hexsides (non-gate) may never be crossed.
- Outer walls may be crossed, whether breached or un-breached. However, breaching an outer wall hexside facilitates movement across such a hexside and lessens the terrain effects on combat.
10.3.2 Advance After Combat
- Any outer wall hexside, breached or not, may be crossed because of advance after combat (9.2.5).
- There is no advance after combat through the inner walls or towers, regardless of the breach status of the inner walls or towers.
10.3.3 Breach Damage Level
Once a wall has reached a Breach Damage Level of 6 it is considered breached for movement and defensive purposes.
- Note that the Breach Damage Level may go up to 10. The Breach Damage Level may never exceed 10 for any given hexside. Excess Breach Damage Factors are ignored and are treated as a "No Effect".
- This is so that the Ottoman player may make it harder for the Byzantine player to repair the breach.
- A wall hexside with a level of 10 is no more breached than one with a level of 6. It is just more difficult to repair.
Walls are never permanently breached by artillery bombardment.
- They may be repaired throughout the game.
- Consequently, walls that were breached for movement and defensive purposes on one turn may be repaired by the next turn's Assault Phase.
10.4 Urban's Bombard
Urban's Bombard was an immense cannon constructed especially for the siege by the great Hungarian cannon-maker, Urban. Its barrel was 27 feet long and it fired a stone that stood three feet high. In an age when artillery was relatively new, it was truly a horrifying weapon. Unfortunately, Urban's Bombard had a tendency to blow up (as well as being nearly impossible to move or fire with any frequency), which it did during the siege, killing its designer.
Each time the Ottoman player fires Urban's Bombard Roll an additional 2d6:
- If the DR result totals 11: The bombard explodes.
- It may return after a 3 GT hiatus (the third GT after it explodes), to the same area in which it exploded.
10.5 Repairing Wall Breach Damage
During any wall Repair Segment (2B or 3J in 4.0), the Byzantine player may attempt to repair damage done to the walls of the city by Ottoman artillery.
Important: The Byzantine player has a wall Repair Segment in the Assault Phase, even though the Ottoman player cannot bombard in that phase.
During his wall Repair Segment, the Byzantine player consults the Wall Repair Capability Table and rolls 1d6.
- The resultant number is the total number of Breach Damage Levels he is capable of removing that segment.
- It is not the number he may remove. It is simply the maximum he may attempt to repair that GT.
Once the Byzantine player has determined his repair capability for that GT, he rolls for each wall hexside he wishes to repair. Important: The presence of a Byzantine unit is not necessary for this.
If the Johannes Grant leader unit is adjacent to any of these hexsides, the Byzantine player adds 1 to his DR for that hexside.
- The Byzantine player consults the Levels Repaired Table, cross referencing the DR with that table, and determines the number of Breach Damage Levels he may remove from that hexside that GT.
- The Byzantine player need not use all of his repair capability on a particular hex, but he may not roll more than once per hexside on the Levels Repaired Table.
Each time the Byzantine player removes a Breach Damage Level in repair he must subtract it from his repair capability for that wall Repair Segment.
- He stops repairing when his repair capability reaches zero, when he has run out of wall hexsides to repair, or when he announces that he does not wish to repair any more hexes that segment.
- Unused repair capability may not be transferred from GT to GT.
Example: The Byzantine player is trying to repair a wall hexside with a Breach Damage Level of 7 (breached), and that hexside is adjacent to the Johannes Grant unit. He rolls 1d6. If the DR is 4, he would add 1 (for Grant) to make it a 5. This would mean that he could remove up to 3 Breach Damage Levels, leaving the Damage Level at 4 (un-breached). To indicate this, he simply changes the Breach Damage Level counter.
- Assume that for the sake of argument in the above example the Byzantine player chose to remove only 2 Breach Damage Levels, and that the total repair capability had been 15 for that turn. After the 2 Breach Damage Levels are removed, the repair capability becomes 13.
Important: The Byzantine player may never remove more Breach Damage Levels than he is capable of repairing in a given repair phase.
11.0 Siegeworks & Engineering
11.1 Tunneling
The Ottoman player may dig tunnels in order to attempt to undermine the walls of the city. He may dig three tunnel hexes per GT. It is possible that some of these hexes may be blocked by rock, impeding his advance, or that tunnels may simply collapse from bad engineering. Furthermore, in certain instances the Byzantine player may attempt to locate the tunnels and destroy them. A completed tunnel can be used to destroy the wall hexside above it.
In each Ottoman Tunnel Building Segment, the Ottoman player may construct tunnels in any three hexes.
All Tunnels:
- Must originate from the western map edge.
- May branch out in any direction the Ottoman player wishes, but all hexes in each tunnel must be consecutive and contiguous.
- May cross assault area lines.
- May not be built in any hex that contains any sea or river hexside.
Important: The Ottoman player notes which hexes have been tunneled on his Mine Planning Sheet (see PAC #6). Locations of tunnels are secret and revealed only when discovered or activated.
For each hex that the Ottoman player tunnels he must roll 1d6, consulting the Ottoman Tunnel Determination Table.
- After any adjustments to the DR have been made for the type of terrain being tunneled, the Ottoman player consults the Ottoman Tunnel Determination Table to see whether his tunnel has struck rock or collapsed.
- If either has happened, that hex is considered shut down, and no tunnel may proceed through, out of, or into that hex.
- The Ottoman player should place an "X" in such hex on his Mine Planning Sheet. He does not have to tell the Byzantine player the result of his DRs.
OTTOMAN TUNNEL DETERMINATION TABLE
| DR | Result |
|---|---|
| 1-5 | No Effect |
| 6-7 | Rock: Tunnel is halted. Hex may not be worked again. |
| 8 | Tunnel Collapses: May not be worked again. |
Designer's Note: There is some honesty involved here, so try to keep your baser instincts in line.
Important: A Foss hex, a hex under the Parateichion, or a city hex counts as two hexes tunneled however, the 1d6 is still only rolled once for striking rock or collapse.
11.1.1 Destroying Walls
The object of Tunnels is to place charges under the walls, destroying them for the remainder of the game.
- On the GT after a tunnel passes a wall hexside (the tunneled hex is east of the wall hexside desired to be destroyed), the Ottoman player may announce the location of such tunnel and then blow any one wall hexside adjacent to the tunneled hex.
Important: The tunnel must pass the wall hexside, not simply reach it.
- The blown wall hexside is considered breached for the remainder of the game and may not be repaired.
- If there are any combat or leader units in a hex that is adjacent to a hexside that has been mined and blown the owning player rolls 1d6. On a DR of 5-6: The unit is eliminated. Roll for each unit separately. Otherwise, there is no effect on units.
- The Ottoman player may hold back from blowing a wall beyond the turn following that in which the tunnel penetrated said wall.
- Walls are blown during the Ottoman tunnel segment.
11.1.2 Discovering Tunnels
The Byzantine player may try to discover tunnels and destroy them. In the Assault Phase the Byzantine player has a Tunnel Discovery Segment.
- During the segment, the Byzantine player may call out any three hexes on the map plus any three hexes adjacent to the Johannes Grant leader unit. Thus, the Byzantine player can search a maximum of six tunnels in an Assault Phase Tunnel Discovery Segment.
- Furthermore, in the Damage Repair Segment of the Bombardment Phase the Byzantine player may guess any three hexes adjacent to the Johannes Grant leader unit, but only those three hexes. He does not get the additional three as in his Tunnel Discovery Segment.
- If a hex searched is a hex in which there is a tunnel in existence, the tunnel is discovered, and the Ottoman player informs the Byzantine player of the discovery.
- A discovered tunnel is closed down in all directions, counting the hex in which the actual discovery was made as the first, etc.
- Only hexes already tunneled and connected to the discovered hex are closed down.
- Closed down hexes are considered destroyed for tunneling purposes.
11.2 The Foss
To facilitate movement across the Foss, the Ottoman player may attempt to fill the Foss (with debris and stone, etc.). A filled Foss hex is much easier to enter and is less of a defensive liability than an unfilled Foss hex.
11.2.1 Filling the Foss
During the Ottoman Engineering Segment of an assault segment (4.0) the Ottoman player may fill in any non-occupied Foss hex using any combat unit which has not moved in the immediately previous Ottoman Movement Segment, and which is adjacent to a Foss hex.
- Units in siege towers cannot fill in Foss.
- Filled Foss hexes are designated by placing a Filled marker in the Foss hex.
- Ineffective units may not be used to fill the Foss hexes.
- Each unit may only fill one Foss hex per segment.
- Units that have fired may fill a Foss hex.
- Units in a filled Foss hex may fill an adjacent unfilled Foss hex.
11.2.2 Emptying the Foss
In the Byzantine Repair Segment of the Assault Phase (and only in that segment) the Byzantine player may attempt to empty out filled Foss hexes. Important: The presence of a Byzantine unit is not necessary for this.
Roll 1d6 for each filled Foss hex:
FOSS DEBRIS REMOVAL TABLE
| DR | Effect |
|---|---|
| 1-4 | No Effect |
| 5-6 | Foss hex is emptied (remove the Filled marker) |
Important: +1 DRM if the Johannes Grant counter is adjacent to the filled Foss hex.
11.3 Siege Towers
The Ottoman player has five siege tower counters. These represent wooden towers constructed at the siege site for the purpose of facilitating movement over the outer walls while protecting the units making such a maneuver.
Siege Towers:
- Move at the rate of 4 MP per segment.
- Must be accompanied (stacked) with a combat unit, which is placed under the tower to indicate that it is pushing the tower.
- May not enter an unfilled Foss hex.
- Have no combat strength of their own.
- Are eliminated if the combat unit stacked with it is eliminated.
- May not be rebuilt if destroyed by Greek Fire.
- May be assigned to any division.
- May be reassigned to a different division each GT.
- May never cross an outer wall hexside (breached nor unbreached).
- Any unit in the same hex as a siege tower and adjacent to an outer wall hexside crosses that hexside at the rate of +1 MP (not +3 MP).
- If a combat unit stacked with a siege tower is melee attacked, the attacker subtracts 1 SP for each attacking unit.
11.3.1 Greek Fire
While siege towers and their inhabitants are not subject to normal fire, they are susceptible to the famous Byzantine weapon, Greek Fire. Greek Fire is used to burn down the towers and their inhabitants.
Any catapult unit within two hexes of a siege tower, or any other combat unit adjacent to a siege tower in the Fire Combat Segment, may use Greek Fire to attempt to burn down a siege tower. To do so, an attacking unit opts to use Greek Fire rather than normal fire combat (8.0) that segment.
Roll 1d6:
GREEK FIRE TABLE
| DR | Effect |
|---|---|
| 1-4 | No Effect |
| 5-6 | Siege tower is destroyed by Greek Fire and removed from play. Any unit stacked with the siege tower is eliminated. |
11.4 Constructing a Bridge Across the Golden Horn
Mehmet had a large force stationed in Pera which he could not use because he had no line of communications across the Golden Horn, which was controlled by the Byzantine Navy.
- Starting with GT 10 there is a bridge between Pera and the Blachernae assault area (hexes 3913 to 3611).
- Once a bridge has been established the restriction on Zaganos Pasha's division (7.2) is no longer in effect and Zaganos Pasha's division may now be transferred to the other five areas, and other divisions and guns to Pera.
Important: The Ottoman player must inform the Byzantine player when any divisions and/or guns are being transferred across the bridge (he need not be specific). Such transfers are accomplished during the Ottoman Troop Allocation Segment.
- Gun counters may be transferred across the bridge; cannon counters and Urban's Bombard may not.
- Players should note that gun counters in Pera have penalties assessed against them (10.2).
12.0 Leaders
The leader counters in the game represent actual historical individuals present at the siege. Leaders play an important role in both movement and combat. The rules reflect that the problems of effective leadership were much greater for the Imperial Byzantine "army" than they were for the well-trained Ottoman fighting force.
12.1 Leader Counters
Each leader is rated for three separate capabilities:
- The leader's combat rating.
- The leader's morale rating.
- The leader's morale radius.
The morale rating is used in conjunction with the morale radius. The morale rating of a leader is subtracted from a Casualty Possibility DR, affecting any units that are at the same height and within the number of hexes of that leader's morale radius.
Example: If a combat unit were rolling to check what type of casualty it would suffer (9.2.2) and Giustiniani were within 3 hexes (Giustiniani's morale radius is 3) and at the same height level of that Byzantine unit, the Byzantine player would subtract 3 from the casualty DR for that unit (Giustiniani's morale rating is 3).
Important: Range and morale radius are interchangeable terms.
12.1.1 Leader's Command Rating
Adding all three numbers on a leader's counter produces that leader's command rating, which is used to determine the Ottoman Assault Capability (7.2).
12.2 Leaders & Movement
Ottoman units may move and fight without a leader, but leaders do affect the ability of the Ottoman player to launch an assault on a given turn (7.2)
- No Byzantine combat unit may move during the Movement Segment unless it begins that segment stacked with a leader.
- Byzantine combat units that do not begin a Movement Segment stacked with a leader may not voluntarily move.
Important: This does not apply to advances after combat.
Important: The Johannes Grant unit may not move combat units. It is used only for engineering purposes.
12.3 Leaders & Combat
A leader may add his combat rating (12.1) to any combat unit with which the leader unit is stacked (including catapults and naval units) to increase such unit's strength on melee (not fire).
- The combat rating may not be applied to the defensive strength.
- The morale rating and morale radius of a leader are used to help in determining the casualty suffered by a defending combat unit (12.1).
- A leader may never add more SP to a unit than the unit has SP (terrain adjustments calculated first).
- An Ottoman leader may only add his combat rating to a unit of his division. The names of these units are color-coded to reflect this.
- Leaders may suffer casualties themselves because of melee and/or Ottoman tunnelling (9.2.4 and 11.1.1).
- Leaders can be eliminated by Greek fire (11.3.1).
- Eliminated leaders (9.2.4) may not be replaced.
- If an Ottoman leader is eliminated or incapacitated from wounds, his division has an assault capability of 10 in his absence.
- Leaders are never affected by fire combat. If a unit stacked with a leader is eliminated due to fire combat, the leader is immediately moved to the nearest friendly unit (8.2).
- If a leader is with a combat unit in a melee and the combat unit is eliminated or otherwise removed from play, the leader is immediately moved to the nearest friendly unit. (Exception: 9.2.4). If two units are equidistant from the leader, the owning player chooses which unit the leader goes to.
12.4 Sultan Mehmet II
The Ottoman commander was the great Sultan Mehmet II, The Conqueror.
If Mehmet is killed in battle, the game is over, simply because the Ottomans would have retired and regrouped (possibly) or simply considered their political position.
Optional Rule: For players who do not wish such a simplistic result, if Mehmet is killed the Ottoman player immediately calls off that assault.
- The Ottoman player then may not do anything for the next 3 GTs.
- The Janissaries now have an assault capability of 10 (12.3).
- All other divisions raise their assault capability by 1.
12.5 Giovanni Giustiniani
While the "Roman" Emperor Constantine XI was nominally in charge of the Byzantine Army, true command was in the hands of the extremely capable Genoese soldier-of-fortune Giovanni Giustiniani Longo. It was Giustiniani whose command skill and daring helped the city hold out for so long. Unfortunately, on the fatal last day Giustiniani received a severe and painful wound. His nerve left him, and he fled to Chios, where he died several days later. His Genoese followers likewise deserted the walls, and the Ottoman assault carried the city.
To reflect this situation, if Giustiniani is killed or suffers a wound that would force him to be out of play for more than 4 GTs, then he is considered to have fled.
- Remove Giustiniani from play.
- At the beginning of the following Movement Segment of the Assault Phase, all Genoese combat units are removed from play.
Designer's Note: As in Case 12.4, these rules should have a profound effect on the outcome, but then, so did Giustiniani's actions.
13.0 Sailors
Byzantine sailors may enter the game one unit per GT, beginning with GT 12.
- Sailor units enter during the Byzantine Strategic Movement Segment.
- The leaders Diedo and Trevisano may enter the game with any of these units (Byzantine player's choice).
- Sailors entering the game are placed in any land hex within two hexes of the Golden Horn and east of (behind) the inner walls.
- Sailor units are treated exactly as units in reserve.
14.0 Victory
Victory in Constantinople is simply defined.
Ottoman Victory: The Ottoman player is considered to have taken the city and won the game by placing land combat units with a total attack strength of 25 or greater inside the city proper (not the Parateichion or the towers).
- These SP must be able trace a line of hexes free of enemy units or EZOCs (friendly units negate EZOCs for this purpose) to the western map edge.
- The line of hexes may not be traced through an unbreached inner wall hexside or an all-sea hexside.
Byzantine Victory: The Byzantine player is considered to have won the game if at the end of GT 27 the Ottoman player has not fulfilled the above condition.
15.0 The Scenarios
15.1 The Campaign Game
The Campaign Game scenario uses all rules in the game (naval rules remain optional). Play starts with GT 1 and proceeds normally. The initial placement of units is listed below. The Campaign Game takes about four hours to play, depending on the number of assaults launched. While it does not lend itself easily to solitaire play, it certainly is suitable for multi-player gaming, with different players in command of the various forces.
See PAC #1 for initial deployment and reserve lists.
15.2 The Assault Game
The Assault Game reduces playing time to about two hours, by distilling the essence of the siege. This version is also recommended for solitaire play.
- All rules in 15.1 are in effect, with the exception of the initial deployment.
- There is no mining or tunnelling (11.1) in the Assault Game. Players should ignore that section of the rules, and segments 1C and 3B in the sequence of play.
- Play starts with GT 13 and continues normally. The Ottoman player may assault on the opening turn of the Assault Game.
The Byzantine player deploys his Reserve units first. All Byzantine units marked originally as Reserves are set up as per 15.1.1.
- One sailor unit is deployed anywhere within the restrictions of 13.0 and is also considered in Reserve.
- All other Byzantine units may be deployed as the Byzantine player sees fit after the Ottoman player has determined the wall breaches (15.2.1).
The Ottoman Initial Deployment is per 15.1.2, with the following exceptions:
- Urban's Bombard is in the Mesoteichion.
- One Ottoman 4-3-2 unit of Mahmud Pasha's Anatolian division is at half-strength.
15.2.1 Wall Damage
Certain wall hexsides may already have been damaged. To determine this, the Ottoman player may designate any ten wall hexsides, but no more than five such hexsides per assault area, as damaged. All wall hexsides so designated must be in an assault area that contains at least one artillery counter. The Ottoman player rolls 1d6 for each hexside and applies the proper Breach Damage Level marker to that hexside, as indicated in the Assault Game Wall Damage Table.
- No Fosses are filled at the start of the game.
- Urban's Bombard does not explode during the Assault Game (10.4). The rule is ignored for the duration of the Assault Game.
16.0 SPI Designer's Notes
Published with Strategy & Tactics magazine #66
Siege warfare is not easy to simulate, or more accurately, it is not easy to simulate in such a way that it can be played as a game. The reasons for this are plentiful. Siege warfare is essentially static, and static games have never been popular. The defending forces are usually outnumbered considerably, making counter-mix choices difficult at best, and worst of all, there are intensive periods of inaction which must be accounted for. Only two previous games had ever attempted any type of historical siege simulation. Alesia is more concerned with assault tactics than a true siege of a walled city, and Siege of Jerusalem abstracts a good portion of the actual destruction of the walls and again concentrates on the assault. Constantinople is thus the first simulation of a full siege.
The first problem that confronted the design team was how to simulate bombardment. Initial readings of sources indicated that bombardment of the walls would proceed for long periods before any assault would take place. Then, when the time was ripe, an assault was launched at a portion of the wall prepared by the guns. The way was obvious: divide the game into assault and bombardment turns, with the choice being left to the player.
The Order of Battle and map of the city were fairly easy to come by. We used two main sources: Pear's Destruction of the Greek Empire (probably the best work in English) and Runciman's Fall of Constantinople (a marvelously readable book). Between the two we derived an accurate rendering of the city (with help from some additional works) in terms of where the gates were, etc. We were forced to abstract, to some extent, the triple wall system facing the west as the scale would not allow for an accurate rendering. The outer wall includes the first escarpment and the Peribolos; the Parateichion is too wide in terms of scale and the towers of the inner walls are far fewer than in actuality. However, the feel of the walls is maintained.
The OB was another matter. Numbers are hard to come by, especially for the Ottomans. Even for the Byzantine forces we found only general numbers. We never knew quite how many were in each contingent. The ratings given the units were based on subjective feelings gleaned from the telling of the tale. Ottoman numbers are more guesswork than anything, affected greatly by play balance. For example, much of the Ottoman army was cavalry. That it was not used as such during the siege goes without saying, so, voila, none of the game's combat units are shown as cavalry! As for Ottoman numbers, you can use almost any figure: 80,000, 160,000; even 300,000! We gave up a long time ago trying to gain accurate figures. Ottoman units are rated for effect, rather than manpower. The most feared soldiers of the day were the Ottoman Janissaries, and their ratings, and numbers, show why. With a leader such as Sultan Mehmet II, they are hard to stop. If they can be stopped, you have a good chance to withstand the other units.
This leads us to a discussion of casualties. The Byzantine defenders actually took remarkably few casualties. As a matter of fact, the first major Ottoman assault produced no Byzantine losses. The Byzantines and their allies (mostly the Italian contingents) wore late medieval armor, which protected them to a great extent from the arrows of the Ottoman archers. It wasn't until the Ottomans were able to close in great numbers that the Byzantines finally started to take losses they could ill afford. This is why the Combat Results Table seems to be relatively bloodless. It is because sieges were relatively bloodless in this era. It was not until the city was actually taken that the killing began in earnest.
Because of the relative paucity of Byzantine defenders, Victory Conditions were easy to determine. All the Ottomans had to do was to get into the city in any semblance of strength to take it. There were simply not enough Byzantines to form a second line of defense. Thus, rarely will any fighting take place within the city proper (where the Byzantines are at a stiff disadvantage).
The biggest design decision, however, was to eliminate the naval portion of the battle. Those who read the accompanying article will see that both navies were present, to say the least. And much of the legend of the siege arises from some of the actions surrounding the navies; the great portage arranged by Mehmet and the fantastic naval engagement in which four Genoese galleys beat their way through the entire Ottoman navy. But these actions had little bearing on the siege itself. The portage simply allowed Mehmet to use the Golden Horn to transport troops from Pera, and his navy did little of anything else. The Byzantine navy remained in the Golden Horn throughout the siege.
A naval game was designed; it was even play tested. And it was determined that the time it added to playtime (about 2-3 hours) was not comparable to what it added to the game in terms of strategic decisions. The Ottoman player rarely assaulted the seaward walls because of the currents and shoals upon which his galleys often crashed and the two navies rarely came to grips. The naval rules were also more complex than the rest of the game and were of such length that they, in essence, detracted from the general level of play. They were thus abandoned at the last moment. However, there is a good chance that they will appear in full length in a Moves article, for those interested in such areas of history, and the system did not go for a total loss, as it was the system upon which much of the play of Tyre (another siege game to soon appear) is based.
Constantinople is not a difficult game. It was designed to be fairly smooth in its mechanics, but it does portray the style of warfare with a high degree of accuracy. And for that reason, players will sometimes find that the bombardment periods are periods of seemingly little action. However, this is more than made up for by the one big assault, where all the elements of surprise and daring make for a tremendous amount of excitement. Can the overmatched defenders cover all the areas of the walls? Can the strong Ottoman forces gain that one foothold they need before the Byzantines can rally and throw them out? It's all there: a simulation of one of the most heroic stories in all military history, The Siege of Constantinople, 1453.
17.0 Optional Naval Rules
"Just Add Water...Naval Rules for Constantinople by Richard Berg," Moves magazine #37.
Sometimes an S&T game design takes on a life of its own and inevitably grows beyond the parameters of the issue. Happily, in this case, that which filled the bag too full was a completely independent sub-system of the game in question.
As originally designed, Constantinople included a rather long and detailed naval game. For a variety of reasons, all given in the body of the rules specific in the issue, the naval game was excised. For those gamers interested in this aspect of the siege, as well as those history buffs desirous of having a complete picture, we are herewith publishing complete rules for the naval actions that took place at the siege.
DG Developer's Note: We are providing Mr. Berg's naval rules essentially as presented in Moves magazine. Players likely will find the rules a bit cumbersome. The naval rules are at a somewhat tactical level while embedded in a system that has two-day turns. This calculates out to about ten hours per naval impulse. Additionally, Mr. Berg's naval rules require the tracking of multiple conditions for each naval unit. Given that the naval rules do not match the scale of the land game we decided that a naval game log sheet would be the most reasonable approach for tracking ship actions and status, rather than creating an additional 100-plus markers for only 28 naval counters.
Moreover, we have developed a "simplified" naval system which, in scale and function, we feel better syncs with the land portion of the game. Players have options: they can just play the land game; play with Mr. Berg's optional naval rules; or use the simplified naval rules we have provided.
Important: Players should note that while all Byzantine naval units are galleys, they are all sail propelled.
17.1 Naval Additions to the Game
17.1.1 Map Considerations
The hexes comprising the coast along the seaward walls are dotted with shoals and reefs. These are represented on the game map by numbers, which correspond to the shoals and are covered in 17.4.3 below.
In addition, The Gate of the Lighthouse (2536) and Gate of the Contoscalion (2129) have been added to the original SPI map.
17.1.2 Counter Additions
Naval counters are included in the Deluxe Edition countersheet.
Typical Naval Unit (Optional): shows the ship type, forward edge indicator, melee strength, ramming strength, ram defense strength, and the oar cruise speed max., oar ram speed max. and sail speed max. Back side is Reduced Strength.
- Naval units have strengths for ramming and melee, as well as movement capabilities.
- Each Byzantine naval counter equals 3-4 galleys.
- Each Ottoman naval step is the equivalent of 5-7 galleys, triremes, biremes, fustae, and parandaria (troop barges).
17.1.3 Naval Movement & Combat
Players undertake naval movement and combat first, one player moving his ships before the other player, after which there is a mutual naval combat phase.
- This segment is repeated five times ("impulses") to create one complete naval phase.
- The naval phase is used only in the Campaign Game.
17.1.4 Additions to Sequence of Play
Important: Add at beginning of Sequence of Play:
1. The Naval Phase
- A) Wind Determination Segment: Players determine the wind direction and velocity. Both are rolled for on the first impulse of each naval phase only.
Naval Impulse (Segments B through E)
- B) Initiative Segment: Players roll to determine who moves first in each impulse. High roll goes first.
- C) First Player Movement Segment: The player denoted in Segment B to move first moves his ships. Attempts to ram occur in this segment.
- D) Second Player Movement Segment: The second player moves his ships, as per Segment C.
- E) Mutual Combat Segment: Players engage in combat engendered by Segments C-D. Ships sunk are removed from play.
Important: Segments B through E are repeated a maximum of five times, each segment being an impulse. Players may, by mutual agreement, use fewer than five impulses, but never more.
17.1.5 Rules Changes & Additions
The Naval Game & Land Scenarios (15.0)
The following rules are added or amended if the players agree to add the Naval Game to the play of the Campaign Game. These additions/changes are not intended for use with the Assault game.
Release of Byzantine Units (5.1) Byzantine land combat units that begin the game in any hex other than a hex in the Parateichion and/or the Blachernae area (inside the city, hexes 3414, 3413, 3513, 3412, 3313, 3213) may not move until an Ottoman unit has meleed a Byzantine combat unit, there is a sea assault, or GT 15, whichever comes first. They are in "reserve" until such action takes place. Reserves are noted in the initial deployment.
Galata & Naval Movement (5.3.9) Naval units may enter coastal hexes of Galata, even if they are transporting land units, but they may not land such units in Galata.
Zones of Control (6.0) Naval units do not exert a ZOC, nor are they affected by land units' ZOCs.
Zaganos Pasha's Division (7.1) Zaganos Pasha's division (in Pera) may not cross the Golden Horn (and thus assault) until the Ottomans construct a bridge or get their navy into the Golden Horn and use it as a transport. They may embark on ships and assault the seaward walls.
When Assaults May Occur (7.3) The Ottoman player may assault any hex that he can reach on land. This includes land units transported to the southern shore of the Golden Horn or landed by naval assault on the seaward walls.
The Mechanics of Assault (7.4) Units that may retreat to Ottoman ships may do so, but players must remember that only one unit may be transported per ship.
Fire Combat (8.0) Fire combat does not affect naval units or land units being transported by naval units.
Placement of Artillery (10.1) Artillery units may not be transported by ship.
Constructing a Bridge Across the Golden Horn (11.4) On the GT after the Ottoman player places at least five naval units in the Golden Horn at the same instant, he may assume that there is a bridge between Pera and the Blachernae Assault area.
Important: This is a rule change in that the bridge is not automatically built on GT 10.
17.2 The Naval Game
The naval portion of Constantinople is somewhat unusual in that it runs independent of but (abstractly) concurrently with the land portion of the siege. By that we mean that the naval game is ongoing, while the land game is divided into alternate periods of bombardment and assault. In the land game the combat units retire at the end of an assault period; in the naval game the ships remain in place until the next naval phase.
- Unlike the land game, the naval phase is divided into five impulses in which the four segments of the naval phase are repeated five times (17.1.4).
- Thus, there are five individual "turns" within one full naval phase, although by mutual agreement the players may use less than five, if neither side wishes to move or attack.
- While the naval game is somewhat independent of the land game it does affect the outcome of the siege simply because the city can be assaulted from the sea, and, furthermore, because possession of the Golden Horn is a key to victory.
17.2.1 The General Course of the Naval Game
Wind Speed and Direction
- At the beginning of each naval phase the players determine the wind speed and direction.
- The wind direction at the beginning of the game is North (blowing North to South).
- The wind speed at the beginning of the game is 8.
Initiative
- Each player then rolls 1d6.
- The high DR goes first for that impulse. Reroll ties.
Important: A player could move his units twice in a row, if the DRs so indicated.
Naval Movement
- The first player moves his vessels, followed by the second player.
- There is no combat during naval movement (Exception: Ramming (17.4.1) takes place during naval movement).
Naval Combat
- After both players have completed naval movement there is a mutual combat phase.
- Combat takes place simultaneously.
The entire sequence, from Initiative Determination to Combat phase is then repeated four more times until five impulses (five repetitions of the sequence) have been completed.
- Players may also stop by mutual agreement before five impulses have been completed.
- Naval units are left where they stand at the end of five impulses and play proceeds to the land game.
17.2.2 Naval Unit Facing
The counters for the naval units represent a wide variety of vessels, both sail and oar. They do not represent individual ships. While the Byzantines had only 30 or so galleys the Ottomans had up to 400 ships of all kinds. Rather, they represent groupings of ships with ratings based on capabilities, training, and general seamanship. However, an attempt has been made within the game system to give the naval portion of the game a sort of tactical, ship-to-ship feel.
Players should note that Ottoman naval units have reduced strengths on their reverse side, much the same as land combat units. Byzantine ship counters have a reverse side, but it is not a reduced strength; it represents a reduced crew level when the sailors are removed for land duty.
17.3 Naval Movement
Naval units may move either by sail or by oar. Some ships may move by both, switching between the two propulsion modes at the owning player's discretion. In general, naval units move only through sea hexes. They pay a cost of 1 MP (or two under certain circumstances) to enter any sea hex and they may pay a cost for maneuvering (turning), dependent on the form of propulsion.
- All Byzantine naval units are galleys; they are all sail propelled. None are equipped with oars.
- The Ottoman player has a polyglot collection of galleys, triremes and biremes, and the lighter vessels called fustae. The Ottomans use both sail and oar.
- Naval units may enter only all-sea or partial sea (coastal) hexes.
- They may never cross an all-land hexside.
- Naval units are always faced in a specific direction. The forward edge of the counter (indicated by the red arrow) must always face toward a specific hexside. It may never face or point to a junction of two hexsides.
Naval units (oar or sail) must always move into the hex toward which they are facing.
There are no ZOCs in naval movement or combat; furthermore, naval units never affect land units and vice-versa, with the exception that no friendly land unit may ever enter a hex with an enemy naval unit, and vice versa.
Designer Note: Numerically, the Byzantines were outnumbered by the Ottomans almost 15 to 1, but the seamen in the service of the Imperial Navy, the best of which were the Genoese and the Venetians, as well as the excellence of their huge galleys, more than made up the difference.
17.3.1 Oar Propulsion Naval Movement
Those naval units with oar movement allowances are capable of moving by oar. Naval units move from one hex to another, in a manner similar to land units moving on land.
- Furthermore, each all-sea or partial-sea hex costs only 1 MP to enter.
- Oar-driven vessels may only change facing 60 degrees, or one hexside, for each hex they move.
- Oar-driven vessels must move one hex before changing direction (one hexside). Thus, for each 60 degrees or hexside an oar-driven vessel wishes to change direction it must move one hexside.
Example: To change three hexsides it must move three hexes, adjusting 60 degrees for each new hex entered.
Oar-driven vessels have two speeds: cruising speed and battle (ramming) speed. Both speeds are maximums. The player, as in land movement, is never required to use the full movement allowance when moving his vessels by oar.
- Normally a player will use his cruising speed when moving his vessels, and he is thus limited to the maximum allowance at that speed.
- However, he may shift to battle speed at any time, within certain restrictions, and thus increase his speed.
- Battle speed is voluntary with the exception that the vessel must be in battle speed when ramming.
Important: An oar-driven vessel may not use battle speed two Movement Segments in a row. Furthermore, a vessel using battle speed has a cruising speed of one in the segment after the use of battle speed, even if that segment is in the next GT.
- An oar-driven vessel may change direction after using its last MP.
- There is no cost to change facing.
17.3.2 Enemy Naval Units
A friendly naval unit may move through an enemy-occupied sea hex under certain conditions.
- For the friendly unit to so move it must enter the hex through a hexside toward which either the bow (front) or the stern (back) of the enemy unit is facing.
- It may not move through a hexside toward which an enemy starboard (right) or port (left) side is facing.
- Furthermore, the friendly unit may not remain in such hex and must leave through a hexside toward which an enemy bow or stern is pointing.
17.3.3 Oar & Sail
Ottoman vessels have the use of both oar and sail. These vessels may change mode of propulsion in any Movement Segment.
- To change from oar to sail the vessel may move no more than one hex (in oar mode) that segment.
- The next segment the vessel is considered to be using sail and moves under the rules for sail propulsion with an initial sail speed of one.
- To change from sail to oar the ship may not have moved more than three hexes in the previous Movement Segment.
17.3.4 Naval Unit Stacking
Only one naval vessel is permitted per hex, with the exception during movement through enemy naval units as noted above.
Exception: Ottoman naval units may anchor at the Double Columns (hex 3931) by placing as many Ottoman naval units as the Ottoman player wishes in that one hex. Such units at anchor may never be attacked.
17.3.5 Sail Naval Movement
All movement under sail encounters two particular problems: Momentum, which, in general, means that sail-driven ships tend to keep moving at the rate of the wind; and Wind Direction, which can dictate the speed and maneuverability of a vessel.
Each naval unit using sail has a given movement capability for that impulse. This is the number of MP it must expend during that impulse. Acceleration and deceleration may change this capability, but the capability for that impulse must be used in its entirety.
- Movement capability is usually dictated by Wind Direction and Velocity. Ships entering the game at sea (using sail movement) enter the map with a movement capability equivalent to the Wind Velocity for that GT.
- Ships starting from "anchor" (thus with a zero movement capability) obey the rules for Acceleration.
17.3.5.1 Acceleration & Deceleration
A player may elect to increase or decrease the movement capability of his sail vessels (accelerate or decelerate).
- A sail vessel may never accelerate more than 1 MP (capability) per impulse. It may never accelerate to a higher movement capability than the current Wind Velocity.
- A sail ship may decelerate a maximum of two movement CP per impulse, regardless of any change in Wind Velocity.
- A ship that is successfully rammed has its movement capability reduced to zero.
- If the wind velocity falls and the ship sail speed is higher than the new velocity the ship must reduce speed, at a maximum deceleration of two points per impulse. Thus, it is possible for a ship to be moving faster than the wind, although it will eventually slow down.
- It is not required that a ship increase speed as the wind increases. Acceleration is always voluntary.
17.3.5.2 Wind Direction & Velocity
At the beginning of each naval phase (not each impulse within the naval phase) the players determine the Wind Direction and Velocity for that entire naval phase.
- One player rolls 2d6 and refers to the Direction portion of the Table.
- He then rolls 2d6 again and refers to the Velocity portion of the Wind Tables.
- Players should note Direction and Velocity on the naval game log sheet.
- The game begins with a Northern wind (blowing North to South) at a Velocity of eight.
Example: DRs of 9 and 7, respectively, will produce a Northeasterly wind (a wind blowing from Northeast to Southwest) at a Velocity of 8. According to the facing of the vessel the wind may be blowing from the stern of the ship (called Running Free) or toward the bow of the ship (Sailing on the Wind).
17.3.5.3 Sail Ship Maneuvering
Sail ships move through sea hexes in the same fashion as oar-driven vessels. However, for sail vessels the ship counter realignment is different from oar vessels.
- A sail vessel may turn one hexside (60 degrees) for each hex that it enters without paying any MP.
- It may change two hexsides (120 degrees) for each hex entered by paying a cost of 1 MP for its capability.
- Sail ships may never change facing more than two hexsides in a single hex. They must advance at least one hex further before making another turn.
- When a sail vessel changes facing by two hexes (120 degrees), it may not change facing past a hexside through which the ship would be sailing directly at the wind.
Example: Wind Direction is North (North to South). A sail vessel is facing toward hex 1639 (sailing on the wind). The sail vessel could not turn two hexsides (120 degrees) left, because the sail vessel would have to face hex 1638 (which would face the sail vessel directly into the wind). The sail vessel could, however, turn right to face hex 1439, if the owning player so wished.
- No vessel may ever sail directly into the wind, meaning, a sail ship may not move into a hex in a northerly direction if there is a Northerly wind (blowing from North to South).
- Furthermore, each hex that a sail ship enters that is sailing on the wind (wind blowing on the bow of the ship) costs 2 MP.
- If the movement capability remaining to a ship sailing on the wind is one it must use the remaining MP by turning two hexsides (120 degrees) at a cost of that 1 MP.
Important: A ship (sail or oar) that is not moving may still turn one hexside, unless it has been rammed and pinned/engaged.
17.3.6 Drifting, Run Aground & The Boom
Drifting: Ships that are not moving always drift one hex in the same direction toward which the wind is blowing. If there is no wind, ships drift from North to South.
Run Aground: A sail ship which enters a coastal hex in such a way that it may not turn and leave that coastal hex is considered to have Run Aground.
- The ship counter, and any passengers, is eliminated.
- A sail or oar vessel that leaves the map, for whatever reason, is treated exactly as a sail vessel that has Run Aground.
The Boom: If a sail ship is forced to attempt to cross a Boom hexside because of its momentum, etc., it stops in the hex adjacent to the Boom hexside and is considered damaged for the remainder of the game.
- It does not move through the Boom hexside.
- For the next impulse, the sail ship's movement capability is considered zero, and it obeys the rules for acceleration.
17.3.7 Storm
If the Wind Velocity is "Storm," all ships (sail or oar) in the Golden Horn or at anchor (meaning, in a coastal hex with a zero movement rate) may not move that GT.
- For ships at sea (in the Sea of Marmara) the owning player rolls 1d6 for each ship unit.
- DR of 6: That unit is eliminated, along with any passengers.
- DR 1-5 (Ottoman): The Ottoman player returns his ships to the Double Columns (hex 3931).
- DR 1-5 (Byzantine): The Byzantine player places his ships in either the Harbor of Eleutheris (hexes 1823, 1924, etc.), hex 2129, hex 2130, or hex 2234.
- There is no other movement in that GT.
- Ships that are pinned/engaged from ramming are automatically sunk.
17.3.8 Wind Table
- Wind Direction Table: See PAC #4.
- Wind Velocity Table: See PAC #4.
17.4 Naval Combat
The fifteenth century was a great watershed for naval combat. The advent of sailing vessels of ocean-going capability along with the development of gunpowder and artillery was to change naval warfare forever. Yet, in the Mediterranean, the galley was still Queen of the Sea. The main method of destroying the enemy at sea was boarding. Catapults and Greek Fire were also used, and ramming was still in fashion (but to a much more limited extent than in Greco-Roman days). But hand-to-hand combat was still the staple of the navy and the rules for naval combat, given the scale of the game, reflect this.
17.4.1 Ramming
The object of ramming, primarily, is to pin the opposing vessel so that it may not move making it an easy target for boarding parties. There is a possibility that ramming will sink an opposing vessel. Ramming can also damage the ramming ship. Only oar-driven vessels may ram. Important: Sail ships (and oar ships using sail movement) are not capable of ramming.
- For an oar-driven vessel to ram, it must be using battle speed, and it must start the ram attempt at least three hexes from the intended target.
- Vessels attempting to ram an opposing vessel may make no more than one 60 degree (one hexside) turn during the entire course of its ram attempt, and such turn must be at least two hexes distant from the target hex.
- In order to ram an opposing vessel, the moving vessel must move into a hex adjacent to the target vessel. That adjacent hex must be either to the port or starboard (the sides) of the target vessel. One cannot ram a target vessel from the bow or stern (front or rear). The bow of the ramming vessel must point directly toward the side of the target ship (envision ramming literally and you will get the idea).
- Ramming is performed in a Movement Segment; it is not considered combat.
- Once the above has been satisfied and the phasing player has announced that he is making a ram attempt, he checks his ramming vessel's ram strength against the ram defense strength of the target vessel. He cross-references these on the Ramming Table. The result is the number that the phasing player must roll on a 1d6 for the ram to succeed.
If the ram does not succeed: The Movement Segment is ended for the ramming vessel in the hex adjacent to the target vessel. Such vessel may not engage in boarding and melee (he is faced the wrong direction).
If the ram attempt is successful: The two ships are considered pinned/engaged, both dead in the water (17.3.6).
- Under certain circumstances the target ship may be sunk and/or the ramming ship damaged. Consult the Ramming Table.
- Once rammed both ships may attempt to free themselves, if so desired. At the beginning of a Movement Segment the player with the rammed ship rolls 1d6:
- DR of 1: The ship breaks free but is considered damaged. It may then move;
- Otherwise: It is still pinned/engaged. If the player with the ramming ship desires to free the ramming ship, he rolls 1d6.
- DR of 1-3: He breaks free with no damage;
- Otherwise: the ships remain pinned/engaged.
17.4.2 Naval Melee Combat
Naval melee combat represents all close, ship-to ship actions, including short-range catapults, Greek Fire, and, of course, boarding.
- Naval melee combat takes place in the Mutual Combat Segment of the naval phase.
- Only friendly vessels adjacent to enemy vessels may engage in melee.
- There are no ZOCs at sea, and combat is purely voluntary.
- Melee is simultaneous, meaning the friendly vessel is attacking the enemy vessel and vice-versa at the same time.
- To engage in naval combat ships must be adjacent to each other. Moreover, both of these counters must either be pinned/engaged or adjacent through a port or starboard facing hexside. If both ships are not so situated the melee combat is impossible.
To determine the results of combat the attacker adds the melee strengths of all his attacking units and subtracts the melee strength of the defending unit. The result is the combat differential.
Example: Two ships with a strength of 4 each attack a ship with a strength of 5. The differential would be +3. If the ship with the melee strength of 5 attacked one of the ships with a melee strength of 4 (remember, melee is simultaneous), the differential would be +1.
As many as four friendly ships may attack an enemy vessel. Four is the maximum because of the above restrictions on relative positions.
If a friendly ship is adjacent to more than one enemy ship it must either attack all of them or none of them (simultaneously with the enemy attack, of course).
- To do this it may split its melee strength in any way it sees fit.
- When splitting, the lowest voluntary differential is -3.
- If a ship is adjacent to more enemy ships than it has melee points it must attack the strongest ship(s) at 0 and the rest at 1 or not attack at all.
- When one friendly ship is adjacent to a sole enemy ship it always uses its maximum strength.
Example: A Byzantine Galley with a melee strength of 8 is adjacent to, and capable of melee with, three Ottoman ships with melee strengths of 5, 3, and 2. The Ottoman attacks the Byzantine at +2. Simultaneously, the Byzantine uses two points to attack the 5 at -3, one point to attack the 3 at -2, and the remaining five points to attack the 2 at +3. Remember, when splitting strength, the lowest differential you may voluntarily attack at is -3.
Simultaneous Combat: Combat is mutual and simultaneous. Both players engage in melee at the same time. Losses are taken only after both players resolve their individual battles.
- An enemy ship damaged by a friendly player's DR may still fight at its normal strength in the same combat segment that it was damaged.
- All melee combat Results are applied after both players have finished their attacks.
Important: Leaders have no effect on naval combat. Exception: Any Byzantine naval unit commanded by either Diedo or Trevisano (stacked with the ship counter) adds one to the ship's melee strength for defensive purposes only.
17.4.3 Explanation of Combat Results
All melee combat takes place using the Naval Melee Combat Results Table. The attacker determines his total strength and subtracts that of the defender in order to obtain a combat differential. He then rolls 1d6 and refers to the Naval Melee Combat Results Table to obtain a result, if any, of that battle. Remember, because of simultaneous combat, the roles of attacker and defender will often be reversed.
- No Effect: Nothing has happened in the way of casualties.
- Ineffective: The ship unit suffering such result is halved in movement (rounding down) for the next Movement Segment. It may not attack/melee in the next Mutual Combat Segment. It may defend.
- Damaged: The affected ship unit is permanently halved in movement allowance (or maximum movement capability for sail ships). In addition, the damaged ship's ramming defensive strength is permanently halved (but not its ramming capability). melee is not affected. Note this in the ship's status column on the Naval Game Log sheet.
- Lose One: For Byzantine ship counters, the unit is eliminated. For Ottoman ship units the naval unit is flipped over to its reduced strength level, unless that naval unit is already at reduced strength level, in which case the Ottoman naval unit is eliminated. The Ottoman player should note that a damaged ship that is flipped over retains its damaged status.
17.4.4 Naval Combat Tables
- Naval Melee Combat Results Table: See PAC #4.
- Ramming Table: See PAC #4.
17.4.5 Naval Assaults
The Ottoman player may use his ships to carry land combat units in an attempt to assault the seaward walls of the city, those walls his land army cannot reach by normal means.
- The Ottoman player may transport land units on his ships. He may transport one land combat unit for each full-strength naval unit.
- Naval units not at full strength may never transport land units.
- Land units may be embarked in coastal hexes.
- To pick up a land unit, a naval unit spends one full naval Movement Segment (of an impulse) in the same coastal hex as the friendly combat unit.
- In the next segment the naval unit plus the land unit may move on.
Important: Ships carrying land combat units are not affected in terms of movement or naval combat.
Shoals & Reefs: There are certain coastal hexes along the eastern and southern shores of the city that have numbers in them. These numbers represent the difficult currents in the Sea of Marmora and the dangerous reefs and rocks along the city walls.
- For any ship (Ottoman or Byzantine) to safely enter one of these hexes the owning player must roll 1d6 and have a resulting number higher than the number listed in the hex.
- If the owning player throws a number equal to or lower than the number in the hex the ship counter (and any land unit on the ship counter) is eliminated.
Exception: Byzantine units (only) moving into any of the hexes listed in 17.3.7 do not have to roll for possible elimination.
Debarking Restrictions: Naval units may debark land units in any coastal hex with two exceptions:
- A) Land units may not debark in a hex which they must cross a wall hexside to reach.
- B) Land units may not debark in Galata.
- Ottoman land combat units and leaders placed in coastal hexes may not move or attack until an Assault Phase.
- Siege towers may never be transported by sea, as is the case with all Ottoman artillery.
Important: Stacking rules prohibit more than one land combat unit in a hex (though there is no limit to the number of leaders).
Disposition of Debarked Units: Regardless of the configuration of the hex and the wall, such units are considered to be outside the city until they can move across the wall in an Assault Phase.
- Ottoman combat units in hexes such as 2028 where the wall runs along the edge of the geographical city are considered to be on ships waiting to climb the walls.
- Such land units are considered to be, for combat and assault purposes, in an unfilled Foss hex.
- Combat units landing in a clear hex (such as hex 1521) treat that hex as normal clear terrain.
- It costs three additional MP to cross an outer (or seaward) wall.
- Land units (on ships) in sea hexes adjacent to walls that run along the edge of the city (such as hex 2028) may not move into any hex except across a wall hexside into a city hex. They may not move laterally along the wall (outside the city). They may, of course, move out to sea again.
Important: Debarking rules must be interpreted in the light of the laws of nature and common sense. Most of the seaward walls were literally built up from the sea, and players should remember this when interpreting the rules.
Retreat Results: Ottoman units assaulting seaward walls that receive an "R" result are eliminated, unless there is a ship available for them to retire to or they are three hexes from the inner wall and may trace a line of hexes exclusive of enemy units or ZOCs (for this purpose friendly units negate enemy ZOCs) through normally passable terrain to any hex outside the city.
- If they are to use a ship for retreat, the ship must be within three hexes of the retreating unit and must not contain another combat unit.
Important: Ottoman units that gain entry to the city by sea assault count as only one point each for Victory purposes, regardless of their actual attack strength.
- Such units must be able to trace a line of hexes as per the retreat rule above for them to be counted for victory (although they may be more than three hexes from the walls for this purpose). In addition, if at the end of the last impulse victory has not been achieved, Ottoman units making sea assaults may be removed only if they satisfy the above retreat rule. Otherwise, they are eliminated.
17.4.6 The Boom
A huge boom, from Galata to the Acropolis, effectively hindered entrance into the Golden Horn and greatly aided any galleys defending behind it.
- Ottoman ships wishing to enter the Golden Horn must try to force the Boom (which is represented by the wall hexsides running from hex 3429-3334).
- The two smaller booms on the southern portion of Constantinople are permanent and unforceable. Only Byzantine ships may cross such hexsides.
Control of the Boom: At the beginning of the game the Byzantine player controls the Boom. To control the Boom a player must be the last player to occupy hexes 3430, 3429 and 3330.
- Note that as the Byzantine player already controls the Boom, he does not have to satisfy any of the requirements, unless the Ottoman player gains control of the Boom.
- Passage through the Boom, unless it is broken, is through hexes 3430 and 3429 only.
- Only the player who controls the Boom may make such passage.
- Ships may not ram through a Boom hexside.
- Ships that are melee attacked through a Boom hexside add one to their defensive melee strength, but not to their offensive melee strength.
- The Boom may be broken or set on fire. To do this a friendly ship must spend one full Movement Segment adjacent to a Boom hexside which, in turn, is not adjacent to any enemy ship. At the end of the Movement Segment the Boom is considered destroyed and the entire Boom is no longer in existence.
- Ships adjacent to the Boom are not subject to drift rules. They may remain in such hex without moving.
17.4.7 Artillery Bombardment of Ships
Only the Ottoman player may bombard ships. Only ships in the Golden Horn may be bombarded.
- For each gun SP that the Ottoman player has in Pera, he may bombard one Byzantine ship.
- He bombards ships in his Bombardment Phase only.
- He may not bombard ships in a naval phase or an Assault Phase.
- Guns used to bombard ships may not be used to bombard the walls in the same turn that they bombard the ships.
- To bombard, the Ottoman player rolls 2d6:
ANTI-SHIP BOMBARDMENT TABLE
| DR | Effect |
|---|---|
| 2 | Target ship is sunk |
| 3-10 | No Effect |
| 11 | Target ship is damaged |
| 12 | Target ship is sunk |
17.5 Sailors (Replacing 13.0)
The Byzantine player has the capability of stripping the crews from his galleys to add extra men to his land forces. In doing so he will correspondingly reduce the melee effectiveness of his galleys.
- To assign crews to "shore duty" simply start a planning phase/Byzantine Strategic Movement Segment with the chosen galley counter in any coastal hex on the Southern shore of the Golden Horn.
- During the Strategic Movement Segment, the galley is flipped over (to reveal its reduced strength) and a sailor counter is placed in the same hex.
- The sailor counter may not move in the Strategic Movement Segment that it disembarks but may move in any succeeding Movement Segment.
- To restore the sailors to the ship simply reverse the process.
- Byzantine sailor units are treated exactly as normal Byzantine land combat units.
The two naval leaders, Diedo and Trevisano, may be assigned to land duty, one for each two sailor combat units.
Important: Players should note that the reverse side of the Byzantine ships are for stripping the crews only. They do not represent lost effectiveness due to combat.
17.6 The Great Portage
When Mehmet found that he could not break through the Byzantine naval defenses at the Boom he realized that he had to find some way to contest the Byzantine control of the Golden Horn. Otherwise, he was virtually restricted to a land assault from one direction. Therefore, on 23 April, having failed twice at the Boom, he literally carried a portion of his fleet overland from right behind Galata to approximately hex 3624. By the next evening the Byzantine fleet no longer was in command of the Golden Horn. The rules below attempt to recreate this highly unusual feat.
17.6.1 When the Ottomans May Portage
The Ottoman player may not attempt to Portage (transport over land) his ships until one of the following two requirements are met:
- The Ottoman player has spent at least two successive naval combat segments assaulting the Boom, in an effort to get through. On these two successive segments the Ottoman player must use at least three ship units to attack (Important: the Ottoman player may never attempt Portage before GT 6), or
- The Ottoman player may attempt to Portage automatically starting with GT 20, regardless of whether the first requirement has been met.
17.6.2 How Portage Occurs
Once the Ottoman player has satisfied the above requirements, he may attempt to Portage certain of his ships.
- The Ottoman player may Portage only triremes, biremes or fustae.
- He may not Portage any of his galleys.
- He may Portage as many triremes, biremes and/or fustae as he wishes.
Starting with the planning phase after the above requirements have been satisfied, the Ottoman player rolls 1d6.
- He adds to this DR the assault capability Number on the Game Turn Record Track for the GT he is rolling in. If the total (DR plus capability number) equals five or more then the Ottoman player simply places the ships he wishes to move in any Pera coastal hex within five hexes of 3623. Important: Ottoman ships may not be placed in Galata coastal hexes.
- Ships to be Portaged must start the planning phase in any Pera coastal hex (3530, 3630, 3730, 3830 or 3931) in the Bosphorus.
- Portaged ships may move the GT after they have been Portaged across Pera.
17.7 The Campaign Game Deployment Additions (15.1)
Important: Naval units are not used in the Assault Game (15.2).
All Byzantine naval units, except the Genoese 8-0-D Galley, are placed in any hex in the Golden Horn.
- The Genoese 8-0-D Galley arrives in any all-sea hex along the southern edge of the game-map on any GT the wind is favorable, starting with GT 4.
- It may not arrive before then.
- It may delay its arrival awaiting a favorable wind, etc.
- It may arrive at any time during a naval phase.
All Ottoman naval units arrive on GT 1 along the south edge of the game-map, in any all-sea hex, in oar mode.
18.0 Optional Naval Rules (Simplified)
DG Developer's Note: The following rules attempt to streamline the original optional naval rules. We hope players will find these simplified naval rules a better fit to the flow and time scale of the original land game while also speeding up play.
Important: The above naval rules remain in place except as modified below.
18.1 Weather
- There is no Weather Table.
- There is a Weather DR to simply determine if there is a Storm.
- There is no wind effect other than if a Storm is rolled.
- Roll 2d6: DR 2: Storm. Apply its consequences within the framework of changes below.
18.2 Naval Movement
- Units may move/use any portion of their movement allowance, no matter if by oar or sail. There is no acceleration or deceleration.
- Oar and sail movement is simply declared for each ship by the owning player prior to movement that turn. There is no penalty for changing from one mode of movement to the other at the beginning of a turn.
18.3 Naval Combat
- Use the simplified naval charts for ramming and melee. See PAC #4.
- There is no pinning/engaging or damage to ships. Results are either the ships are sunk or not.
- To melee, ships must be adjacent by starboard and/or port sides. Additionally, a ship rammed that impulse and the ship which rammed it can melee, regardless of facing.