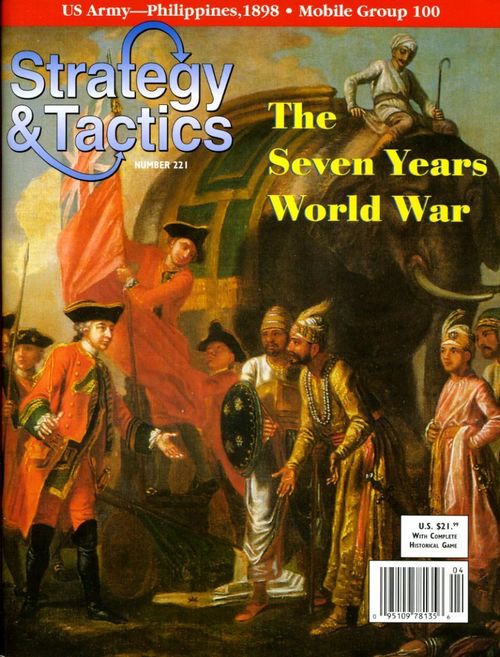
The Seven Years World War
The Seven Years World War Rulebook
Table of Contents
Table of Contents
- [1.0] Introduction
- [2.0] Components
- [3.0] Sequence Of Play
- [4.0] Control Of Powers
- [5.0] Occupation Of Squares
- [6.0] Initiative Determination
- [7.0] Intelligence & Fog Of War
- [8.0] Campaign Markers
- [9.0] Diplomacy
- [10.0] Treasuries, Taxation & Treasury Points
- [11.0] Reinforcements
- [12.0] Stacking
- [13.0] Zones Of Control
- [14.0] Movement
- [15.0] Combat
- [16.0] Forced March
- [17.0] Training & Upgrading Units
- [18.0] Naval Operations
- [19.0] Provisioning
- [20.0] Leaders
- [21.0] Player Negotiations
- [22.0] Victory Conditions
- [23.0] LEGIONS (Optional Rule)
- [24.0] MINOR POWER RECRUITING (Optional Rule)
- [25.0] INCREASING TAXES (Optional Rule)
- [26.0] PILLAGE (oPTIONAL RULE)
- [27.0] ENLIGHTENMENT (Optional)
- [28.0] Scenarios
- [29.0] Charts & Tables
- [30.0] Map Errata:
- [31.0] Designer Q & A
[1.0] Introduction
Seven Years World War (7YWW) is a wargame simulating the global conflict of 1756-63. That war was fought primarily between two coalitions of European powers, but it also involved fighting in the Americas, India and the East Indies, as well as on the high seas. It was also a time of expansion for the Manchu Empire, which could have put China on a collision course with the Europeans. Historically, the Seven Years War resulted in the domination of central Europe by Prussia and of North America and India by Great Britain.
7YWW can be played by two, three, or four, each representing a different coalition of powers. Each player has a variety of military, diplomatic and economic instruments with which he can attempt to dominate the world.
[2.0] Components
2.1 The Map
The game map shows the world as it was during the mid-18th century. A square grid has been superimposed on the map to regularize the position and movement of the playing pieces. When setting up and playing the game, the cardboard playing pieces are placed within the individual squares. Players should note the actual geographic boundaries of the various empires and powers are slightly distorted to clarify their position on the map.
An alpha-numeric grid-reference system has been added down the left (the letters A-Q), and across the top (the numbers 1-30), of the map. Cross-referencing those letters and numbers can allow easy identification of all boxes on the map. For example, the box containing the island of Java can be identified as box K25, the box containing the island of Bermuda as F7, etc.
2.11 Powers. The map is divided into politico-geographic areas called powers. There are two types of powers.
-
Major Powers. These are empires that can be controlled by players. Major powers represent the primary military, diplomatic and economic states of the mid-18th century, which were capable of sustained operations on a global basis. Their names are shown in red on the map.
-
Minor Powers. These are empires, other states, or regions that can’t be controlled by players. Minor power forces basically defend, though they can come into play more actively through the use of Minor Power Alliance campaign markers.
Major Power Abbreviations
AU: Austrian Empire
FR: France
GB: Great Britain
MC: Maratha Confederation (India)
ME: Manchu Empire (China)
OT: Ottoman Empire
PR: Prussia
RU: Russian Empire
SP: Spanish Empire
UP: United Provinces (Netherlands)
Note: While Portugal is a minor power, its many overseas colonies are indicated with a “PO” for clarity .
Minor Powers
Abyssinia, Afghanistan, Africa, Amazonia, Annam, Asante, Baluchistan, Barbary States, Bornu, Buganda, Burma, Darfur, Futa Jallon, German States, Italian States, Japan, Korea, Madagascar, Mysore, Norway, Oman, Oregon, Patagonia, Persia, Poland, Portugal, Siam, Sweden, Tauregs, Timbuktu, Turkestan, assorted unlabeled islands
2.12 Major Power Control Chart
This chart, printed on the right side of the mapsheet, is used to display information about each such power. The information on it includes the following.
Name: the historic name for the power.
Campaign Markers: the number of such markers the player controlling that power receives “for free” each turn.
2.13 Player Areas
Each player has a box on the map in which he can place control markers for the powers he controls, his campaign markers, unrecruited units, etc.
2.2 Game Tables & Charts
These are used to conduct and record certain game functions.
Campaign Chart. This explains the functions of each type of campaign marker. See section 8.0 and 29.7.
Combat Results Tables (CRTs). These are used to resolve combat. There are three CRTs: Engagement, Linear and Revolutionary, each representing a different operational approach to combat. They are printed on the mapsheet; also see rules section 15.0.
Diplomacy Table. This is used to execute diplomatic activities. See sections 9.0 and 29.1.
Enlightenment Table (optional). This is used to spread reason and science. See rules section 27.0 and 29.6.
Increasing Taxes Table (optional). This is used to possibly increase player income. See rules section 25.0 and 29.4.
Minor Powers Recruiting Table. This is used to recruit minor power units. See rules section 24.0, 11.61, 25.3 and 29.3.
Pillage Table (optional). This is used to loot and devastate squares. See rules section 26.0 and 29.5.
Terrain Effects Chart. This shows the various types of map terrain and their effects on play. This is printed on the mapsheet. Also see rules sections 14.0 & 15.0.
Treasury Charts. These show the number of treasury points (the game’s basic unit of currency) required to build and maintain units and perform other game functions. See rules section 10.0 and 29.2.
Turn/Phase Chart. This is used to record the current turn, and to record which particular phase of a turn is occurring. It is printed on the mapsheet. Also see rules section 3.0.
2.3 Playing Pieces
Examine the sheet of die cut cardboard playing pieces. There are three types: combat units, campaign markers and information markers.
2.31 Combat Units
Combat units (or simply “units”) represent various types of military forces. Combat units have a combat strength and a movement allowance.
2.311 Combat Unit strengths
2.312 A unit with a parenthesized combat strength may only defend; it may never attack.
2.313 Power Identity. The power to which a given unit belongs is indicated by a country code and background color.
Major Powers
AU: Austrian Empire [gray]
FR: France [light blue]
GB: Great Britain [burnt umber]
MC: Maratha Confederation [purple]
ME: Manchu Empire [emerald green]
OT: Ottoman Empire [aqua]
PR: Prussia [dark blue]
RU: Russia [light green]
SP: Spain [yellow]
UP: United Provinces (Netherlands) [orange]
Minor Powers
Minor Power units have no identity per se. [white]
2.314 Backprinting. Units are backprinted. The information on the front and back represents different things, depending on the unit type.
(1) Armies, Hordes, Fleets, Legions: front is recruit status, reverse is veteran status, representing the same units in different states of training.
(2) Fortified Zones/Bases: the front represents a fortified zone, the reverse a base. These are two completely different unit types; they are on the same counter simply to save space in the counter mix.
2.34 Unit Types:
European Style Army (or just “army”). An all arms infantry-cavalry-artillery force trained to fight in disciplined ranks, plus engineers, logistics, etc.
Horde. Badly disciplined force with plenty of troops and outdated weapons, plus camp followers, animals, etc.
Legion. An advanced, all-arms formation with permanent higher-level command (division-corps) and organic light troops.
Fortified Zone. A region containing numerous fortresses plus garrison troops.
Base. Includes colonial settlements and their militia, along with other locally raised troops and static forces.
Fleet. An ocean going navy.
2.32 Campaign Markers. Campaign markers are used to generate various military, diplomatic and economic actions.
2.321 Leaders (a special type of campaign marker).
Land Leader (General) + Value
Naval Leader (Admiral) + Value
2.33 Information Markers. These are used to record various game functions or changes in status to squares on the map.
Control. Indicates which player controls a particular power. Each player has a set of control markers.
Enlightenment. Represents centers of reason, science and culture.
Initiative. Indicates which player is the first player in a particular game turn.
Phase. Indicates the current phase in the sequence of play.
Pillage. Indicates a square that’s been pillaged.
Year. Indicates the current game turn.
Note the control, pillage and enlightenment markers are backprinted; use the appropriate side. If players run out of those markers, they may make more.
2.4 Explanation of Game Terms
Attack. An attempt to destroy enemy units and take enemy held squares.
Belligerent. A power controlled by a player (as opposed to being neutral).
Combat Strength. A quantification of a force’s ability to engage in combat and conduct pillage. It’s based on the unit’s training, equipment and leadership.
Control. The status of a power and its forces in terms of when and how a player can use them. A power may be in one of two states of control: player controlled or neutral.
Countermarch. An attack conducted by a non-phasing force.
Diplomacy. An attempt by a player to gain control of other powers, or gain special espionage and coup results.
Enemy. All powers and units controlled by an opposing player.
Force. One or more units in the same square that move, fight or pillage together.
Friendly. All powers and units controlled by a player.
Minor Power. A general term for the various non-major power forces in the game.
Major Power. One of the major countries or empires in the game: Austrian Empire, France, Great Britain, Maratha Con-federation, Manchu China, Ottoman Empire, Prussia, Russian Empire, Spanish Empire, United Provinces. Each major power has its own forces.
Movement. The moving of units across the map.
Neutral. A power not controlled by any player.
Non-Phasing Player. All players other than the currently phasing player.
Occupy. To have a friendly unit in a square.
Phase. A distinct part of a game turn.
Phasing player. The player whose turn is presently taking place.
Pillage. An attempt to degrade the value of a square and thereby gain loot.
Treasury. The basic monetary unit of the game is measured in treasury points.
Unit. A playing piece representing a leader or military formation.
2.5 Game Scale
Each game turn represents one campaign year (from spring to winter quarters). Each military unit represents an entire army or fleet.
2.6 Do or Die
Players will need one six sided die to play the game. The die is used for various randomized game functions.
[3.0] Sequence Of Play
Players set up their units and markers according to the instructions in section 28.0. Each match will last a designated number of “game turns.” Within each game turn, each power will have its own “player turn,” in which the person controlling that power will conduct various actions with its units in a certain sequence of activity, consisting of a number strictly sequences steps called “phases.”
3.1 Game Turn Phase Sequence
(1) Initiative Determination Phase. Players determine who will be the first player (the first player takes his turn first, followed by the others, one at a time, proceeding clockwise around the table).
(2) Treasury Phase. Each player, starting with the first, does the following. (If players agree, they may execute this phase simultaneously to save time.)
(a) Taxation Sub-Phase. Each player collects treasury points.
(b) Free Campaign Marker Sub-Phase. Each player receives certain campaign markers “for free” depending on which powers he controls.
(c) Recruiting Sub-Phase. Each player expends treasury points to recruit new units, purchase campaign markers and remove pillage markers.
(d) Training Sub-Phase. Each player may upgrade recruit status units to veteran status.
(e) Disbanding Sub-Phase. Each player may remove friendly units from the map if he so desires.
(3) First player turn.
(a) Diplomacy Phase. The first player conducts diplomacy in order to try to change the control status of powers, gain intelligence information, or remove enemy leaders from play.
(b) Movement Phase. The first player may move some, none or all of his units, as he chooses. Non-phasing players may declare countermarch by expending forced march markers.
(c) Combat Phase. The first player may attack with some, none or all of his forces, as he chooses.
(d) Pillage Phase (optional). The first player may attempt to pillage squares occupied by his units.
(4) Second and subsequent player turns. Each other power then conducts those steps (starting with the second player, then the third and fourth, if any).
(a) Diplomacy Phase.
(b) Movement Phase.
(c) Combat Phase.
(d) Pillage Phase (optional).
(5) Provisioning Phase. Each player checks all friendly forces on the map to determine if they can forage. He expends treasury points to provision units that can’t forage. Units not provisioned are removed from the map.
(6) Enlightenment Phase (optional). The players may place available enlightenment markers in order of initiative.
(7) End of Turn. Players mark the passage of one year. Flip all face down leaders to their face up side (see 20.42). Play continues until the end of the scenario or until players agree to end the game.
[4.0] Control Of Powers
Players control various powers on the map. Control is gained and lost either through initial scenario instructions, via events, invasions or diplomacy.
4.1 MAJOR POWER CONTROL
A major power may be in one of two states:
(1) Player Controlled. The power is controlled by a specific player.
(2) Neutral. The power is not controlled by any player.
4.11 The control status of a major power is indicated by the player placing his control marker in its box on the map.
4.2 Effects of Control of a Major Power
When a player controls a major power, the following occur:
(1) Units. The player gains control of all units belonging to that power. For example, a player who controls Prussia may conduct operations with all Prussian units.
(2) Campaign Markers. The player gains free campaign markers each turn for that power. For example, control of France would give the player two free campaign markers each turn.
4.3 Neutrals
Major powers not controlled by any player are neutral. They enter play when something happens to trigger their belligerency.
4.31 Effects of Neutrality.
(1) The units of a neutral major power are not controlled by any player; no player may conduct operations with a neutral’s units.
(2) Neutral major powers don’t recruit units, collect or expend treasury points, or receive campaign markers.
(3) Neutral units do not require provisioning.
4.4 Belligerency
4.41 Neutral major powers enter play in the following circumstances:
4.411 Setup. If designated as controlled by a player in the scenario instructions.
4.412 Diplomacy. If a diplomacy attempt against the power succeeds.
4.413 Invasion. Invasion occurs in one of the following circumstances.
(1) A player attacks a neutral major power’s forces with major or minor power forces he controls.
(2) A player moves at least one major power land unit into territory of a neutral major power. Naval units moving through coastal squares don’t count, unless they actually attack enemy forces or end their move in major power territory. Similarly, the placement of minor power units within a neutral major power does not trigger belligerency. If, however, a player gains control of a minor power force and attacks a major power’s units with it, that triggers belligerency as in (1) above.
4.42 Procedure
(1) Diplomacy: The player conducting successful diplomacy places his control marker in the major power’s box.
(2) Invasion: The instant a major power’s neutrality is violated, it becomes a belligerent. That major power comes under the control of the player—other than the one who violated the neutrality—whose total major power campaign values (as listed in the Major Power boxes) are the lowest (if a tie, roll a die). Place the acquiring player’s control marker in its box.
4.5 Reversion to Neutrality
Major powers may return to neutral status. That may occur as the result of diplomacy.
4.51 When a major power returns to neutral status, remove the player control marker from its box. Reversion to neutrality has the following effects, in this order.
(1) All units of other major powers inside the boundaries of the newly neutral major power are picked up and placed on squares within their own major power’s boundaries, or which are occupied by friendly forces. The player who controls each major power force make this adjustment.
(2) All units of that major power outside the boundaries of the newly neutral major power are picked up and placed on squares within that major power’s boundaries. The player who formerly controlled the major power makes this adjustment.
(3) All minor power units within that major power remain in place.
(Remember, the presence of minor power units does not trigger belligerency.)
4.511 Under (1) and (2) above, the square must be the nearest civilized or port square, measured in terms of distance, not movement points. (Count distance via the number of square sides, not vertexes.) If more than one square is an equal distance away, the displacing player may choose one. Units may not be placed in squares occupied by enemy, neutral or minor power units. Displacement of units under (1) and (2) is not movement, and may be done anywhere on the map if necessary.
4.52 A neutral remains neutral until belligerency is triggered again.
4.6 Defection
A player may gain control of a power belonging to another player directly via diplomacy (see the Diplomacy Table, 29.1). In that event, move the power’s control marker to the appropriate space. The player gains control of all of that power’s forces, regardless of location (don’t perform the adjustments under 4.51). If the power’s units are stacked with formerly friendly forces, those units (of the newly controlled power) are eliminated instead.
4.7 MINOR POWER CONTROL
Minor power forces may come under the temporary control of a player. That happens only if the player plays a “Minor Power Alliance” campaign marker. Such markers may be played as follows:
4.71 During the Friendly Treasury Phase: this allows the player to roll once on the Minor Powers Recruiting Table (29.3). Units placed via this table do not cost treasury points; see 11.6.
4.72 During the Friendly Movement Phase: this allows the player to move one force of minor power units. A player may move some or all minor power units in one square. All such units must be moved together.
4.721 Restriction: minor power units may never move cross a border (that is, they must remain in their own country of origin).
4.73 During the Friendly Combat Phase: this allows the player to make an attack with one force of minor power units against any adjacent square. A minor power force may attack and advance after combat across a border; however, it may never retreat across a border except to go back into its own country.
4.74 During the Friendly Pillage Phase (optional rules): This allows the player to attempt to pillage one square with a force of minor power units. Use normal pillage procedure, but the player does not receive any looted treasury points. The minor power can’t pillage a square in its own home country.
4.75 No other minor power operations are allowed other than those listed in 4.7. Note that on playing a minor power control marker, the marker must be immediately returned to the pool. Therefore, a player can take only one action (one recruit, one movement, one attack) per minor power per marker.
4.76 Belligerency. Minor power units may be placed in major power territory if the other conditions of 4.7 are in effect. Placement of minor power units in major power territory doesn’t constitute an invasion. An attack by minor power units against a neutral major power constitutes an act of belligerency.
4.761 Diplomacy. Players may not use diplomacy to change the belligerency status of minor powers.
4.762 Note, even if a player attacks a minor power, that doesn’t trigger belligerency for that minor power in the sense of 4.4. Minor power units may defend normally against attacks. For example, a Russian force marches into Turkestan and attacks a Turkestani force; still, no other player would place his control marker on Turkestan.
4.77 Stacking and Provisioning. Minor power units may never be in excess of the provisioning limit for a square at any time in the game turn. If for some reason minor power units are in excess of a square’s provisioning limit, they are immediately eliminated. Also note minor powers receive certain bonuses on the Terrain Effects Chart for forage.
4.78. If all of the units in one or both forces involved in combat are minor power, then ignore any combat results calling for Campaign markers to be gained or lost.
4.8 Controlling Multiple Major Powers
A player may control more than one major power at a time. A player may not have forces from different powers (major or minor) he controls attack each other. For example, a player controls Russia and the Manchu Empire. He could therefore not have the Russians attack the Manchus, nor could he have a Turkestani force he temporarily controlled attack a Russian force.
4.9 Controlling Powers vs. Controlling Squares
Players need to understand the difference between controlling powers and controlling squares. A player controls a power only if it is belligerent and on his side. Control of a power gives automatic control of all of its units on the map to that controlling player. Control of squares occurs only if the player’s units occupies those squares (the term “occupation” will be used in the rules to reinforce this distinction). For example, player “A” might control Prussia, but if a force belonging to player “B” occupies the Prussia square (the square representing Prussia in Europe: C16), then Player “A” may not collect taxes in that square. In that case, player “B” may collect taxes from the Prussia square; however, player “B” still does not control Prussia. Player “B” could gain control of Prussia only via a diplomacy result.
[5.0] Occupation Of Squares
A player “occupies a square” by having one or more friendly units in it. Should a player abandon a square completely, he thereby loses control of it. In such cases, the player might later regain control by reoccupying the square.
5.1 Occupation of civilized squares gives the player taxation revenue. That is received regardless of whether the player controls the power.
5.2 All types of combat units may control squares, but naval units may control only coastal squares.
5.3 It’s important to understand the distinction between “control” and “occupation.” Control means a player has the loyalties of the ruling elite of a power, and hence control over its forces. Occupation means a player has units physically inside of a square (and hence can actually collect resources). A player may, for example, occupy all the squares in a power, but unless he has diplomatic control, he still does not control it (for example, for the purpose of obtaining free campaign markers). Conversely, if a player controls a power but does not occupy its squares, he can’t collect taxation revenue from them.
[6.0] Initiative Determination
During initiative determination, players decide which player will be the first player for that game turn.
6.1 Each player determines the total campaign values for all powers he controls. (Campaign value is found in each power’s control box.) The player with the highest value becomes the first player for that turn. In the event of a tie, roll a die and the higher player becomes first player. The first player takes his turn first, followed by all other players in clockwise order.
[7.0] Intelligence & Fog Of War
Players may freely examine enemy and neutral units at any times in the game. Players may examine enemy campaign markers and treasury points only when certain conditions apply.
7.1 A player may examine an opponent’s campaign markers and treasury points as the result of diplomacy operations that provide espionage results.
7.2 A player may voluntarily reveal the composition of his campaign markers and treasury at any time.
[8.0] Campaign Markers
Players use campaign markers to generate various military, diplomatic and economic actions over the course of the game, as well as to generate random events.
Historical Note. Campaign markers represent the problems of coordinating the operations of multi-power coalitions on a global scale during this era. Players should study the campaign marker explanations (see 29.7), as some of them will have major effects on the course of the game. Note especially the “Balance of Power” and “Coalition Rallies” markers, which shift the action in favor of the losing players. The “Revolution” marker represents the catastrophic political events that would take place were a king to be overthrown.
8.1 The Pool
At the start of play, place all campaign markers in an opaque container, referred to in the rules as the “pool.” When instructed by the rules to pick campaign markers, a player picks the designated number at random. Once the markers are picked, the player may look at them. Unless otherwise instructed, the player does not have to show his campaign markers to the other players. When a player gains control of campaign markers, he places them in any convenient location near his position at the map. Players also place into the pool all leader counters that don’t begin the game under the control of a player.
8.2 Gaining Campaign Markers
A player gains campaign markers as follows.
(1) Initial Set Up. The set up instructions designate how many campaign markers each player will have to start the game.
(2) Free Marker Sub-Phase. The player receives a designated number of “free” campaign markers at no cost, depending on which powers he controls. The number is indicated in the control box for each power. A player must, aside from controlling the major power, also occupy its capital square with at least one unit from that major power in order to receive free campaign markers for it. For example, to receive the free campaign markers for Great Britain, the player controlling Great Britain would have to occupy the British capital square (C14) with at least one British unit. Free Campaign markers represent each major power’s higher-level leadership.
(3) Recruiting Sub-Phase. During the friendly recruiting sub-phase, the player may purchase additional campaign markers at the cost designated on the Treasury Points Chart (29.2).
(4) Combat Results. Certain combat results cause players to gain campaign markers, representing the political shifts caused by winning or losing battles.
8.3 Accumulating Campaign Markers
A player may accumulate up to the following number of campaign markers.
Two player game: 14
Three player game: 10
Four player game: 8
8.31 If a player has the maximum number of campaign markers and some game action calls for him to gain more, he must return to the pool markers sufficient to make up that difference before picking new markers. Additionally, players may at any time return campaign makers to the pool without playing them. Note, though, certain campaign markers, if picked, will cause a player to lose campaign markers.
8.4 Using Campaign Markers
8.41 Each campaign marker may be used at certain times in the game turn. This is explained on the Campaign Markers Table (CMT, 29.7). Certain campaign markers may even be played during an enemy player turn if so indicated on the table.
8.42 Play of campaign markers is usually voluntary. Note, however, the CMT description for the “Balance of Power” and “Revolution” markers read: “This marker must be played when picked,” which means those markers must be played immediately when picked. Those markers’ counters also have an asterisk printed on them as a reminder of this special status.
8.43 Campaign markers that are played are returned to the pool unless otherwise indicated on the CMT.
8.44 A player may play any number of campaign markers in a turn.
8.5 Losing Campaign Markers
Certain game functions call for a player to lose campaign markers. They include: 1) certain campaign markers; and 2) certain combat results.
8.51 The player picks the designated number of campaign markers at random from those he has in his possession and returns them to the pool. If a player is instructed to lose all his campaign markers, he returns all of those he presently possesses to the pool. If a player is required to lose campaign markers but currently has none, there is no effect or carry over to a later time when he does have some.
[9.0] Diplomacy
Players use diplomacy to bring neutral or enemy major powers under their control, as well as to make espionage and coup attempts. Diplomacy is conducted during the diplomacy phase. A player must expend at least one “Diplomacy” campaign marker in order to be able to initiate a diplomacy attempt. He may expend additional diplomacy campaign markers to improve the chances of his diplomacy succeeding. Other players may play diplomacy campaign markers to defend against such attempts.
9.1 A player may initiate diplomacy only in his own diplomacy phase. Non-phasing players may defend against diplomacy attempts in any diplomacy phase (except their own, of course).
(1) The phasing player designates which power he is designating for diplomacy.
(2) The phasing player places face down in front of him the number of diplomacy campaign markers he will use for the diplomacy attempt (minimum of one).
(3) The non-phasing players places face down in front of them the number of diplomacy markers they will expend to counter the diplomacy attempt. The non-phasing players may choose to deploy no markers.
(4) Simultaneously reveal all diplomacy markers.
(5) Subtract the total of non-phasing diplomacy marker values from the number of phasing diplomacy marker values. That gives the “diplomacy differential.”
(5) Find the column on the Diplomacy Table (29.1) corresponding to the diplomacy differential. That gives the column to be used.
(6) Roll a die and immediately apply the result.
9.2 Diplomacy campaign markers are expended (returned to the pool) upon being used.
9.3 A player may make any number of diplomacy attempts in a turn as long as he has diplomacy markers available. The player does not have to have any units in a power in order to attempt diplomacy against it.
9.4 The non-phasing players may “defend” friendly and neutral powers from enemy diplomacy attempts. They do so by expending diplomacy markers, which reduces the diplomacy differential. Non-phasing players may discuss among themselves what each player will commit.
9.5 Diplomacy Values
Each diplomacy campaign marker has a diplomacy value, a number from one through three. Use those numbers when calculating the diplomacy differential. That is, a diplomacy campaign marker with a value of “3” would be equal to three opposing campaign markers that each had values of just “1.”
9.6 Results
Diplomacy results are explained below to the Diplomacy Table (see 29.1). There are four types of results.
(1) Diplomacy: these change the control status of a major power.
(2) Espionage: these allow the player to examine enemy campaign markers.
(3) Coup: these cause a player to lose campaign markers and/or leaders.
(4) Reaction: these allow the non-phasing players to gain campaign markers.
[10.0] Treasuries, Taxation & Treasury Points
Taxation is a method through which a player can raise treasury points, which are used to build and maintain units and to obtain certain types of markers. Each player maintains one coalition treasury, not an individual treasury for each power he controls. Players should record their current number of treasury points on paper.
10.1 Taxation Types
10.11 Occupation
In order to collect a treasury point from a square, the player must have at least one friendly unit in that square. This may be any combat unit. Each occupied square on the map is worth treasury points, indicated by the number in the square. (Squares with no number printed in them yield no treasury points.) Note that a player may collect taxes from squares he has captured from other players and occupies.
10.12 Trade Routes
A player gains treasury points for control of trade routes. Each trade route is the worth the number of treasury points shown in the box for it.
10.121 There are seven trade routes on the map: American Colonies, West Indies, Antilles, Arabian Sea, China (Annam), Philippines, and East Indies.
10.122 To control a trade route, a player must occupy the port squares that are the route’s termini (that is, the squares to which the end-of-the-line arrows point) with at least one combat unit of any type, and there may not be any enemy fleets occupying any squares containing that trade route’s line. Land units in coastal boxes don’t block a trade route running along that coast. Also note you don’t actually need a fleet to exploit a trade route; merchant shipping is not shown on the map with unit counters.
10.123 East Indies Trade Route
Control of the East Indies Trade Route is more complicated. To control that route, a player must control one terminus square in Asia and one in Europe. If a player controls more than one termini in Asia or Europe, he gains no additional benefits. More than one player can control the East Indies Trade Route at the same time if they fulfill those conditions, and each gains the treasury points.
10.124 Several of the trade routes overlap or cross over each other. That does not affect the tracing of trade route paths as described above in 10.122.
10.13 Pillage
Squares provide no treasury points while they have pillage markers in them. Similarly, no port may be used as a trade route terminus while its square has a pillage marker in it. See optional rules section 26.0 and 10.33.
10.14 A player may accumulate unexpended treasury points from turn to turn.
10.2 Increasing Taxes
Players may increase taxes only if using optional rule section 25.0.
10.3 Expending Treasury Points
A player may expend treasury points for the following reasons (see also the Treasury Chart, 29.2).
10.31 Building (recruiting) units. Units can be built by expending treasury points.
10.32 Buying Campaign Markers. For the designated number of treasury points, a player may pick one campaign marker from the pool.
10.33 Removing Pillage Markers. If the player has a unit in a pillaged square, he may remove the pillaged marker by expending the designated number of treasury points (see 26.4).
10.34 Provisioning. A player must provision units in excess of a square’s forage limit; that is done by expending the designated number of treasury points.
10.35 Trades. Players may freely trade treasury points with each other.
10.4 No Deficit Spending
Players may not expend treasury points unless they actually have those points available. Players may never have fewer than zero treasury points. If some game action calls for them to lose treasury points when they have none to lose, their treasury point total simply remains at zero (until other game actions would again move it into the plus column—but even then there would be no carry over penalty from that earlier time of excess penalty).
[11.0] Reinforcements
Players receive additional units each turn as reinforcements. These units are recruited by paying treasury points for them.
11.1 Recruiting
A player may raise additional units by expending treasury points. Such units are called “recruits.” Recruiting occurs in the friendly recruiting sub-phase.
11.11 The player pays the appropriate treasury point cost for the units he wants to recruit. He then places those units on any friendly occupied civilized square in the same power as the name on the unit.
11.2 Restrictions
Recruited units are placed as indicated by 11.3. A player may place a number of units in a square equal to its treasury value. That is in addition to units already occupying the square. For example, a player may place up to four Prussian reinforcements in the Prussia “4” square (C16), even if there were already other friendly units in the square. Remember, pillaged squares have their treasury values reduced to zero.
11.3 Placement of Reinforcements
(1) Armies may be placed on any unpillaged civilized square of the major power already containing at least one friendly unit. For example, British units could be placed in any of the three civilized squares making up the island group of Great Britain: C13, C14 and B14.
(2) Hordes may be placed on any unpillaged civilized square containing at least one friendly unit. Note this does not have to be in the power’s home country.
(3) Fleets may be placed on any unpillaged civilized square of the major power containing at least one friendly unit and a port. This must be in a civilized port square of that major power.
(4) Fortified Zones may be placed on any unpillaged square containing at least one friendly unit. Note this does not have to be in the power’s home country. There may never be more than one fortified zone per square.
(5) Bases may be placed on any unpillaged square containing at least one friendly unit. Note this does not have to be in the power’s home country. There may never be more than one base per square.
(6) Legions, which are used only if playing with optional rule 25.0, may be placed on any unpillaged civilized square of the major power containing at least one friendly unit.
: ( 7 ) Bases and fortified zones may never be placed in the same square. ( 8 ) A player may convert a friendly base into a fortress by paying the full fortress recruiting cost and flipping the base over to its fortress side. This is not considered to be upgrading (17.0).
11.3 Placement of Reinforcements (clarification) : Major power units may be placed on any civilized square of that power on the map. For example, British units could be placed in the American colonies if other prerequisites are met.
11.4 Limits
The number of units in the counter mix is an intentional design limit. Players may not recruit more units than are available for a particular power.
11.41 Units that have been eliminated for any reason may be reintroduced into play as reinforcements
11.5 Disbanding
A player may remove from the map any friendly unit(s) during the disbanding sub-phase. Note that since the disbanding subphase occurs after recruiting, disbanded units will not be available for placement again until the following turn.
11.6 Minor Powers Recruiting
If a player plays a “Minor Power Alliance” campaign marker (see 4.71), he may roll once on the Minor Powers Recruiting Table (29.3). That costs no treasury points.
Design Note. When using optional rules, minor power units may also be raised via tax rebellion (25.0) or the minor powers recruiting rule (24.0). Those rules sections explain the procedure for placing minor power reinforcements in those cases.
11.61 Procedure
(1) The player playing the minor power alliance marker designates a minor power on the map.
(2) Expend the marker and roll a die.
(3) Apply the result, placing the designated type of unit immediately in the territory of the designated power. (See the Minor Powers Recruiting Table, 29.3, for results.)
11.62 Placement of Minor Power units. Minor power units may be placed only in squares of the designated power (in accordance with the results on the Minor Power Recruiting Table). Exception: fleet units may be placed in trade route squares connected to a terminus located in the power.
11.621 Who places units. The player playing the minor power alliance marker implements the results of minor power recruiting.
11.622 Restrictions. Minor power units may never be placed such that they violate foraging limits for a square. Minor power units may be placed in squares containing other minor power units. They may never be placed in squares containing major power units. Minor power units may not be placed in pillaged squares. And, obviously, land units may be placed only in land or coastal squares; naval units may be placed in coastal or port squares or trade route squares connected to a terminus of the designated power.
11.623 Minor power units may be placed in friendly, enemy or neutral territory, as per 11.622; however, see 4.74 for possible triggering of belligerency.
11.624 Minor power units may be placed in major power squares. This represents rebellions as well as minor power invasions.
11.63 Cost. Minor power units cost no treasury points.
11.7 Recruit Status
Army, horde, fleet and legion units are always received in their “recruit” status. They may be changed to veteran status (see upgrading rule, 17.0). Base and fortified zone units are placed on the appropriate side.
11.8 Neutral Recruiting
Neutral major powers may not receive reinforcements.
[12.0] Stacking
12.1 Limits
There is no limit to the number of units that may be in a square per se; however, see the provisioning rule (20.0) for extra costs that may be imposed for stacking beyond a square’s provisioning limit.
12.11 Enemy & Neutral Units. Friendly units may never enter squares containing neutral and enemy units. Exception: coastal squares. Naval units may move through squares containing only enemy land units; land units may pass through coastal squares containing only enemy fleet units.
12.2 Coalition Stacking
12.21 If a player controls units from different powers, he may stack them together.
12.22 If a player controls units from different powers, he may have them participate in an attack together, but only if a friendly leader is involved in the combat. They defend together normally.
12.23 If a player has units from different powers stacked in the same square and one of those powers becomes enemy controlled due to diplomacy, he immediately eliminates those formerly friendly units.
12.3 No Major/Minor Forces
A player may never stack major and minor power units in the same force.
12.4 Fortified Zones
There may never be more than one fortified zone per square.
[13.0] Zones Of Control
Unlike many other wargames, there are no zones of control in this game.
[14.0] Movement
A unit moves from square to square by paying appropriate movement point costs. Units may be moved singly or in groups. A group of units moving together is called a “force.”
14.1 A force moves from contiguous square to contiguous square. Each square entered costs the amount of movement points designated on the Terrain Effects Chart printed on the mapsheet. A force must have sufficient movement points to enter a square or it may not move.
14.11 A player may move some, none, or all of his units in a single movement phase in any order he desires. Once he has completed a unit’s movement, he may not retrace it or in anyway redo it that same phase.
14.12 Which units may move: in general, the only units that may move are major power units with movement factors of one or more. Leaders may be involved in movement (see 20.0), even though they are not placed on the map. Minor power units may not move.
14.13 A moving force may not pick up additional units as it moves. It may drop off units as it moves, but dropped off units may conduct no further movement in that phase. Exception: see the forced march rule (16.0).
14.14 If moving units in the same force have different movement allowances, that whole force moves, during its entire move that phase, with the allowance of the slowest unit in it at the start of the move, even if the slower unit is dropped off during the course of the move. Exception: a naval force transporting land units uses the movement allowance of the naval units, not the transported land unit.
14.2 Map Geometry
Units may move only along the sides of squares, not through the vertexes of squares. That is, units may not move diagonally.
14.21 Adjacent coastal squares separated by all sea sides of squares cannot be crossed by land units, nor may land units attack across them. For example, a land unit in Florida (G6), could not move or attack into the West Indies (H6) unless it was transported there by a fleet; it could attack across the square side if it followed rule 18.6, concerning amphibious attack.
14.22 The Bosporus (E16) is simultaneously considered a land square for movement to and from the Balkans/Asia Minor, and a coastal square for movement to and from the Black Sea/Mediterranean.
14.23 Map edges. Naval units may move off the east and west map edges, resuming their movement on the corresponding square on the far edge of the map. There is no extra movement cost for that other than the cost of the square entered.
14.3 Prohibited Terrain
14.31 Units may never enter squares containing enemy or neutral units.
14.32 Land units may not enter all sea squares, nor cross all sea square sides unless moving via naval transport or across straits.
14.33 Naval units may not enter all land or polar ice squares, nor cross all land square sides. (For this purpose, a square is considered to be entirely polar ice if it contains any amount of polar ice.) Naval units may enter coastal squares.
14.34 The presence of informational markers in a square has no effect on any unit’s ability to enter it according to the rest of the rules governing movement.
14.4 Naval Movement
Rules for the movement of fleet units and the naval transport of land units are covered under the Naval Operations (18.0).
14.5 Only belligerent major power units may move. Neutral and minor power units and forces may never move.
[15.0] Combat
Combat is used to destroy enemy units and seize terrain. A player may initiate combat during the friendly combat phase. Combat occurs between adjacent opposing units at the discretion of the player whose turn is currently in progress. The phasing player is the “attacker.” The player being attacked is the “defender.” Players use the Combat Results Tables (CRTs) printed on the mapsheet to resolve combat. Players should note all combat takes place during the combat phase; that is, each player completes moving all his units, then conducts all of his attacks.
15.1 Combat Procedure
15.11 For each combat, the players must follow this sequence.
(1) The attacker declares which attacking force will be attacking which defending force.
(2) Determine specifically all units in the attacking and defending forces.
(3) The attacker chooses which of the three CRTs he will use to resolve the combat: Engagement, Linear or Revolutionary.
(4) Determine the strength of both sides; add in the effects of leaders and terrain.
(5) Compare the attacker’s strength to the total and express the ratio as combat odds.
(6) Roll a die and cross index that result with the appropriate CRT odds column. That will give a “combat result.” The result is applied immediately.
15.12 Once an attack has been declared, it must go through to its conclusion. The attacker may not cancel an attack once it’s been declared.
15.2 Attacking
15.21 Attacking is always voluntary.
15.22 Attacking units may attack only in their own combat phase.
15.23 Attacking units must be adjacent to the units they are attacking. Attacks are conducted through the sides of squares; attacks may not be made across vertexes.
15.24 The attacker may attack with some, none or all units in a square. If a player has more than one unit in a square, he may have them attack together, singly or in any combination.
15.25 An attacking force may attack only a single adjacent enemy square. It may not attack more than one enemy occupied square at the same time.
15.26 No more than one single force may be involved in a particular combat. If the player has more than one force adjacent to a single enemy square, only one force may attack it at a time. Thus a given enemy occupied square could be attacked more than once per friendly combat phase, but each attack would have to be launched by an individual force, each one coming in from a different neighboring square.
15.27 Units may not attack into squares they could not normally enter . For example, land units may not attack across all-sea square sides.
15.3 Defending
All defending units in a square must be attacked as one combined defense strength. The defender may never withhold any of his units from combat. A given square may be attacked more than once per combat phase, as long as each attack is made by a separate force.
15.4 Verifying Involved Units
The instant a combat is declared, the attacker and defender should each verify exactly which units are in their respective involved forces.
15.5 Choosing A Combat Results Table
There are three Combat Results Tables (CRTs) in the game: Engagement, Linear and Revolutionary. The attacker always chooses which CRT will be used.
15.51 CRT Prerequisites
(1) Engagement CRT. The attacker may always choose this CRT.
(2) Linear CRT. In order to be able to choose this CRT, at least 50 percent of the attacking units—counted as units, not as strength points—must be armies, legions or fleets. Leaders and campaign markers are ignored when making this count.
(3) Revolutionary CRT. In order to be able to choose this CRT, at least one of the attacking unit must be a legion.
15.52 The player may choose any table he is qualified to use. For example, even if the player has 50 percent armies, he could still choose the Engagement CRT. The Engagement Table is, in effect, the default CRT if the player can’t or won’t use one of the others.
15.6 Determining Combat Odds
15.61 Combat odds are determined as follows.
(1) Total the combat strengths of all attacking units. Include the strength of leaders.
(2) Total the combat strengths of all defending units. Include the effects of leaders, military campaign markers and terrain.
(3) Divide the attacker’s total combat strength by the defender’s total combat strength.
(4) If the attacker’s strength is greater than the defender’s, any remainders are dropped and that is the ratio used to determine which odds column will be used. For example, if the attacker has 14 combat strength points and the defender has 5, the combat odds would be 14 divided by 5, which equals 2.8:1. Drop the .8 remainder for a final odds of 2:1.
(b) If the defender’s combat strength is greater than the attacker’s, round up any remainder. For example, if the defender has 10 combat strength points and the attacker 6, the combat odds would be 1:1.67, which would be rounded up to 1:2.
15.62 Odds less than 1:3 are treated as 1:3. Odds greater than 4:1 are treated as 4:1.
15.63 The 1.5:1 column is used when the attacker has at least 50 percent more strength than the defender, but less than twice as much. For example, the attacker has 7 strength points and the defender 4.
15.64 Combat Modifiers
(1) Leaders: both the attacker and defender may each play one available leader per combat. Add the leader’s strength to the total combat strength of forces engaged in the combat.
(2) Terrain: certain types of terrain may increase the defender’s strength (see the Terrain Effects Chart printed on the mapsheet). Add the defensive strength of the terrain to the total combat strength of the force plus leaders. The increase in defense strength is per force, not per unit. For example, a force of three units defending in wilderness terrain would receive a total increase to its strength of one. Note too that minor power forces are increased for defense in “Terra Incognita” squares.
15.7 Application of Combat Results
Combat results are applied immediately as they occur and in the order given under the particular result explanation.
15.71 Results to be applied against the attacker apply only to those units that participated in the attack, not to other nonparticipating units in the same square.
15.72 Results to be applied against the defender apply to all units in the defending square.
15.8 Retreat & Advance After Combat
Certain combat results call for one side to retreat or advance. Advance and retreat are special forms of movement that take place without expenditure of movement points. Retreat and advance are explained in the notes that accompany the CRTs on the mapsheet.
15.81 Fortified zones and units occupying them may ignore all retreat results.
[16.0] Forced March
A player may conduct additional movement and combat attempts by expending forced march campaign markers. Additionally, those markers also allow non-phasing players the opportunity to conduct countermarch.
16.1 Forced March Movement Procedure
After a player has completed moving a force, he may move it again by expending a forced march campaign marker. The unit or force may then move again up to its normal movement factor.
16.11 A player may play a forced march marker any time after a force has completed its initial movement. There is no limit to the number of times a unit may perform forced march, other than that imposed by the number of forced march markers a player possesses.
For example, a player moves a unit normally, then moves another unit, then moves the first unit again by playing a forced march marker, then moves it a third time by playing another forced march marker.
16.12 A player must expend one forced march marker per force making a forced march.
16.2 Forced March Attacking
After a player has finished attacking with a force, he may have it attack a second and subsequent times in the same combat phase by expending a forced march marker.
16.21 By playing a forced march marker, a player can have all units in a square attack. This applies even in a situation where some units in the square have attacked already and others have not.
16.22 A force may conduct forced march combat after it has advanced or retreated after combat. Note that all units may move and attack once per turn without the player having to play a forced march marker. Forced march markers must be expended only when a player wants to move or attack with a force more than once per turn.
16.3 No Forced March Defense Expenditure
A player does not have to play a forced march marker to defend with a force being attacked by a forced march attack. Defending always occurs automatically.
16.4 Countermarch
Any non-phasing player may conduct countermarch by playing a forced march marker. That allows a non-phasing player to conduct an attack (but not a move) with one force during the phasing player’s movement phase.
16.41 Countermarch Procedure. Countermarch occurs at any time during the phasing player’s movement phase. The instant a phasing force moves adjacent to a non-phasing force, the non-phasing player may declare a countermarch by playing a forced march marker. The normal play sequence is temporarily suspended while the countermarch is resolved. Only a square into which the phasing player has just moved a force may be countermarch-attacked. If, however, there were also other non-moved units in that same square, they would also defend against the countermarch-attack (as a part of a single, combined force).
16.42 Normal rules of combat apply to countermarch, except the non-phasing player is the attacker and the phasing player is the defender.
16.43 Countermarching forces may, if the normal strictures are fulfilled, advance after combat.
16.44 There may be a maximum of one countermarch declared on a force entering a square. If more than one player has forces capable of declaring countermarch, only the player who first declares “Countermarch!” conducts a countermarch.
16.45 Countermarch may be declared only against phasing forces. Different non-phasing players may not declare countermarch against each other, nor may the phasing player declare a counter-countermarch against a non-phasing force. Countermarch may not be declared against forces advancing or retreating after combat.
16.46 Post Countermarch. After a counter-march combat is completed, the moving force may continue moving (if any units survive). If the force had to retreat, it must cease its movement for that turn (it may attack normally). If it advanced, the advance doesn’t count against its movement capability.
[17.0] Training & Upgrading Units
Recruit armies, fleets, hordes and legions may be “upgraded” to veteran status by training or by participation in combat.
17.1 Training Procedure
Training occurs during the friendly treasury phase. The player must have one leader with a command value of one or more. Expend the designated number of treasury points and flip one recruit unit per command point to veteran status. Then flip the involved leader face down when the training is completed. Each leader may train units in only one square per turn. For example, a leader with a value of two could upgrade two units in the same square.
17.11 Generals may upgrade only land units; admirals may upgrade only fleets.
17.2 Upgrading by Combat
Certain combat results will allow a player to upgrade one participating recruit unit to veteran status (see CRT explanations). That doesn’t require use of a leader or expenditure of treasury points.
17.3 No Downgrading
Once upgraded to veteran status, units may not be downgraded to recruit status.
17.4 Certain units begin play already in veteran status.
17.5 A unit must have a veteran side to be upgraded. Units that do not (fortified zones and bases) may not be upgraded.
17.6 Minor power recruit units may be upgraded to veteran status only as a result of combat. In that case, choose one unit at random from those involved in the combat for upgrading.
[18.0] Naval Operations
Players conduct naval operations with their fleets. Land units may move through sea squares via naval transport. Fleets are treated like other combat units, but with the following specifications.
18.1 Fleets may be placed only in ports, coast or all sea squares. Fleets may never enter all-land squares or cross all land square sides.
18.2 Fleet Operations
Fleets conduct movement, combat, pillage and other game operations in the same manner as land units. Fleets may attack enemy naval units in adjacent sea and coastal squares, as well as enemy land units on adjacent coastal squares. Fleets in coastal and port squares may conduct pillage.
Design Note. Fleets can attack land units because they (the fleet units) also represent marine forces.
18.3 Fleet Movement Restrictions
18.31 Fleets block the movement of enemy fleets into their squares.
18.32 Fleets on coastal or port squares do affect enemy land movement. Land units may move through squares containing only enemy fleets but may not stop in them.
18.33 Fleets may move through enemy and neutral land units on coastal squares but not end their movement in such squares.
18.4 Occupation
A Fleet in a coastal or port square is considered to be occupying that square for all game purposes. Exception: a fleet must actually end its movement in a land square to count as a neutrality violation; otherwise, a fleet may move through a neutral land square without triggering violation as long as it ends its movement in some non-neutral square.
18.5 Naval Transport
Land units may be transported by fleets. Both the fleet and the land unit must start in the same port or coastal square. The fleet picks up the land unit and then moves. That’s indicated by placing the land unit under the fleet unit.
18.51 Embarking/Debarking Costs
18.511 There is no movement point cost to embark or debark land units in a port square. This applies even if the square was not friendly occupied at the start of the move.
18.512 It costs a fleet two movement points to embark or debark a land unit in a non-port coast square (including pillaged ports).
18.513 Capacity. Each fleet can transport one land unit.
18.52 Movement. A unit using naval transport uses the transporting fleet’s movement value to determine the total movement points it has for the move.
18.53 Debarking. At any point in a naval move, a unit using naval transport may debark (exit the fleet) if it is on a coast or port square. Place the land unit on top of the fleet unit to indicate that. The debarked unit(s) may conduct no further movement that phase except by forced march. The fleet(s) may continue conducting their own movement.
18.54 A force may remain embarked on a fleet at the end of its movement.
18.6 Naval Combat
18.61 Fleets may attack adjacent enemy units in all sea and coastal and port squares. Combat is conducted exactly as on land.
18.62 Fleets may attack enemy land units located on adjacent port or coastal squares. They may attack through any all sea square side, or through a contiguous coastal square side. Additionally, fleets on port or coastal squares may be attacked by enemy land units. Fleets on all sea squares may not be attacked by enemy land units on coastal or port squares. Note, though, a fleet in a coastal square could not attack an adjacent all-land square.
18.63 Amphibious Attacks. Embarked land units on a fleet may conduct combat (as part of the fleet’s force) only if the fleet is attacking a coast or port square, or if the fleet is defending in a coast or port square. Land units do not have to disembark to conduct this combat.
18.631 The transported land units remain embarked while making their amphibious assault. They may debark only if their force receives a result that would allow an advance after combat, in which case they may debark at no movement point cost and advance into the hex they just attacked. Note that, unlike many other wargames, failing to get ashore in an amphibious assault doesn’t eliminate assaulting land units in this design; they simply remain embarked.
18.64 If a fleet is attacking into an all-sea square, or is being attacked in an all-sea square, embarked land units don’t count for combat. If, however, a transporting fleet is eliminated, its transported unit is also eliminated. If a transporting fleet retreats or advances after combat, then obviously, its embarked land unit also retreats or advances with it.
18.65 Fleets are never increased in defense for terrain, unless there are other disembarked land units in the same coastal square. If in the same square as a friendly fortress, they may ignore any defender retreat results.
18.7 Provisioning
Fleets must be provisioned like land units. They count against a square’s forage value. Land units being transported by fleets must be also still be provisioned. Note that all sea squares have a forage value of zero for major power units; so a fleet at sea must be provisioned in order to survive.
18.8 Leaders
Naval Leaders may apply their values to a combat only if at least one friendly fleet is involved. Land leaders may apply their value in a situation where both land and naval units are involved.
[19.0] Provisioning
During the provisioning phase, each player must either have each of his units forage, or provision them via the expenditure of treasury points to keep them supplied.
19.1 Forage
Each square on the map can support a designated number of units via forage (see the Terrain Effects Chart). Units beyond that number must be provisioned or are eliminated. Forage is calculated in terms of units. For example, a “2” value square could provision one base and one army.
19.1 All units must be provisioned, including bases and fortified zones.
19.2 Provisioning
A player must expend treasury points for any combat units on the map in excess of a square’s forage value.
19.21 Units being transported by fleets must be provisioned normally. Fleets, and any units being transported by them, can forage if they are on coastal squares, using that coastal square’s forage value.
19.3 Unsupplied Units
Should a player be unable to supply units in a square, either by foraging or expending treasury points, those unsupplied units are eliminated. If there is a choice of units to be eliminated, the owning player chooses which will be removed.
19.4 Should a fleet be eliminated owing to lack of supply, any unit aboard it is also eliminated. Note, though, it makes more sense to first eliminate the unit being transported by the fleet.
19.5 Pillaged squares have their forage value reduced to zero; see Terrain Effects Chart.
19.6 Neutral units don’t need to be provisioned and are not affected by foraging.
19.7 Minor power units don’t have to be provisioned; however, the number of such units in a square may never exceed that square’s forage value.
[20.0] Leaders
Leaders are special campaign markers that enhance operations.
20.0 Leaders (clarification): Leaders count against a player's total Campaign markers. Also, if the Revolution event is implemented, Leaders are affected.
20.1 When a player uses a leader, he must place him on the mapsheet in the box of one of the major powers he controls. Leaders are transferred to the map itself only when performing some specific game action.
20.2 Leaders have no nationality per se; however, once placed in the area of a major power, a leader is thereafter assumed to be of that nationality.
20.3 If a power is transferred from the control of one player to another (for example, as the result of diplomacy), the gaining player also gains all the leaders in its area. If returned to neutral status, the leader remains in the major power’s area.
20.4 Types of Leaders
There are two types of leaders: 1) land, indicated by a star on the counter; and 2) naval, indicated by an anchor on the counter.
20.4 Using Leaders
20.41 Combat Enhancement. A leader may enhance the combat strength of one friendly force per combat phase, either attacking or defending. Indicate which force will be supported by which leader. The force must contain at least one unit of the same nationality as the leader. The leader adds his command value to that force’s combat strength. At the end of the combat, the leader is flipped face down but remains in the player’s control in the appropriate major power box. He may not be used again until the following game turn.
20.42 Countermarches. Leaders may also apply their combat value in countermarch situations, just as in 20.41 above.
20.43 Training. A leader may convert recruit units to veteran status (see 17.0). The force upgraded must contain at least one unit of the same nationality as the leader.
20.44 A leader may be used only once per complete game turn.
20.5 Generals & Admirals
A general (land leader) may enhance the combat strength of land units; a general may train land units. An admiral may enhance the combat strength of naval units; an admiral may train navy units. If a mixed force of land and naval units is involved in a combat, the player may use either a general or an admiral to enhance it.
20.6 Leader Elimination
20.61 A leader is eliminated (returned to the campaign marker pool) if any of the following occur.
(1) He is involved in a combat and his force receives certain results; see the combat results explanations beneath the CRTs. Leaders are not otherwise affected by combat results.
(2) A coup result occurs in diplomacy; see the Diplomacy Table, 29.1.
20.62 An eliminated leader is returned to the pool and may be picked again.
[21.0] Player Negotiations
At any time during the game, players may conduct negotiations with each other, making whatever agreements they decide within the following strictures.
21.1 Players may negotiate any of the following: 1) restore a power they control to neutrality; 2) transfer a power from control of one player to another; 3) trade treasury points and campaign markers; 4) end the game by immediately totaling victory points; and 5) any other agreements players find acceptable, as long as they don’t violate game rules. For example, players may agree not to attack each other’s units for a turn, or to move forces out of a country.
21.2 Violating Agreements
Agreements should be made in writing. If a written agreement is broken, the violating player loses all his campaign markers back into the pool. The violated player then rolls a die and receives that number of campaign markers from the pool.
[22.0] Victory Conditions
The game is won by gaining control of strategic objectives that can then be translated into success at the peace table. At the end of the game, players determine who is the winner.
22.1 Victory Points
22.11 At the end of the game, players total their victory points for each of the following:
(1) For each controlled major power, total its free campaign value.
(2) For each controlled civilized square, total its treasury value (zero if pillaged).
(3) For each controlled trade route, total its treasury value.
(4) For each controlled enlightenment marker (if using optional rule 27.0), total up one point.
22.12 Players first sum the totals of (1), (2) and (3) as they existed at the start of the game for each of them. Then sum the totals of (1), (2), (3) and (4) according to the situation at the end of the game. Divide the first large sum into the second large sum. That gives each player his final victory ratio:
| Victory Ratio | Level of Victory |
|---|---|
| 0.80 or lower | Defeat |
| 0.81-1.19 | Equilibrium |
| 1.20-1.49 | Marginal Victory |
| 1.50-1.99 | Continental Victory |
| 2.0 or higher | Global Victory |
22.2 Levels of Victory.
(1) Defeat: your coalition faces collapse.
(2) Equilibrium: you have maintained the balance of power.
(3) Marginal Victory: your coalition has gained some glory.
(4) Continental Victory: your Coalition now dominates one of the world’s major land masses.
(5) Global Victory: your coalition now dominates the world.
22.21 If more than one player attains one or another level of victory, they all can claim victory. Whoever has the highest level of victory is the real winner. On the chart above, “Global” is the highest (best) level of victory, followed by “Continental,” etc.
22.22 Treaty. If all players agree, the game can end at the end of any turn. Check for victory conditions at that time just as described above.
[23.0] LEGIONS (Optional Rule)
Certain major powers have legion units, but they may be recruited only under certain conditions.
23.1 Recruiting Legions
Legions are built during the friendly recruiting sub-phase.
(1) Indicate one friendly veteran army already on the map.
(2) Expend the number of treasury points indicated on the Treasury Chart.
(3) Flip over one leader marker.
(4) Roll a die. If the die roll is less than or equal to the flipped leader’s command value, the player removes the veteran army and replaces it with a recruit legion of the same major power. If the die roll is greater than the leader’s command value, the legion is not placed and the veteran army remains on the map; however, the leader is still flipped.
23.2 Special Effects of Legions
If at least one legion is in an attacking force, it may utilize the Revolutionary CRT; otherwise, legions are treated as normal land combat units.
[24.0] MINOR POWER RECRUITING (Optional Rule)
During any recruiting phase in which one or more major power units occupy any squares of a minor power, another player, determined at random, must roll a die on the Minor Powers Recruiting Table (29.3). Minor power units recruited by the table are placed by the player in the same area. Note such units are not controlled by any player.
24.1 Minor power recruiting die rolls are made after all major power recruiting has been completed.
24.2 Even if more than one player has invaded a minor power, still only one die is rolled. For example, in a three player game, the first player invades Turkestan. One player, chosen at random, rolls on the Minor Power Recruiting Table. The outcome allows the placement of one base unit. The player places a minor power base in any unoccupied Turkestan square.
[25.0] INCREASING TAXES (Optional Rule)
A player may attempt to increase the number of treasury points he gains via taxation by using the Increasing Taxes Table (29.4). Increasing taxes is done per major power controlled by a player; a player may decide to attempt to raise taxes with some, none or all of the major powers he controls.
25.1 A player simply declares “Increasing Taxes.” He rolls a die on the Increasing Taxes Table and immediately applies the result. Increasing taxes is done for squares occupied by units of that major power. If there are units from more than one country in a square, the player chooses which one will (if any) raise taxes. For example, if a player controls France, the effects of increasing taxes would apply to any and all squares occupied by French units, inside or outside of France.
25.2 A player chooses to raise taxes for each major power individually. It affects only civilized squares, not trade routes or other sources of income. For example, a player decides to raise taxes for France; all squares occupied by French units must be checked on the Increasing Taxes Table. Also note that if any squares within France itself were not occupied by French units, the effects of increasing taxes would not be applied to those squares.
25.3 Tax Rebellion
If a tax rebellion result occurs, one other player picked at random, rolls once on the Minor Power Recruiting Table (29.3) and implements that result. If minor power units are to be placed as a result of a tax rebellion result, they may be placed in any one major or minor power territory in which an increasing taxes attempt was made. For example, France occupies France (in Europe), New France (in North America) and the German States. The player controlling France raises taxes and receives a tax rebellion result. No taxes are received for squares occupied by French units that turn, and one other player picked at random decides to implement any effects of the Minor Power Recruiting Table in the German States.
25.3 Tax Rebellion (clarification): A player rolls only once per Power on the Minor Power Recruiting Table in the event of a Tax Rebellion, not once per taxed square. A player may place rebelling units in a square occupied by major power units. However, they must instantly attack those major power units. Combat is resolved normally, except that any result that does not clear the square of all defending (i.e., major power) units results in all rebelling units in the attack being eliminated. This is an exception to the stacking rules.
[26.0] PILLAGE (oPTIONAL RULE)
Players may pillage a square in order to destroy its treasury value, reduce its forage value, and to gain additional treasury points.
26.1 Pillage is conducted during the friendly pillage phase. Players consult the Pillage Table (29.5), roll a die and implement the result.
26.11 Terrain and leaders don’t affect strength for pillage.
26.12 A player may attempt to pillage a square only once per turn.
26.2 Restrictions
A force may not conduct pillage if it is in: 1) a square that already has a pillaged marker; 2) an all-sea square; or 3) a square belonging to a major power he controls.
26.3 Duration of Pillage
A player may remove a pillage marker during any friendly recruiting phase. To do so he must have at least one friendly unit in the square. He then expends the number of treasury points indicated on the Treasury Chart (29.2) and removes the pillage marker.
26.4 Removing a pillage marker restores the square to normal function.
26.5 Effects of Pillage: see the Pillage Table (29.5).
[27.0] ENLIGHTENMENT (Optional)
Players place enlightenment markers on the map to give them advantages in picking campaign markers.
27.1 Enlightenment markers are placed during the Enlightenment Phase. The player: 1) indicates one civilized square occupied by at least one friendly unit; 2) expends one diplomacy marker; and 3) rolls a die and implements the result. (See 29.6).
27.2 Restrictions
27.21 Enlightenment markers may only be placed in civilized squares occupied by at least one friendly unit. They may not be placed in squares already containing an enlightenment or pillage marker.
27.22 There may never be more than one enlightenment marker per square.
27.3 Control of Enlightenment Markers
27.31 An enlightenment marker is controlled by whichever player has major power units in its square. If no major power units are in the square, no player controls it.
27.32 An enlightenment marker has no nationality per se. Should another player gain control of the square, he gains the benefits of the Enlightenment marker.
27.4 Enlightenment Marker Effects
For each enlightenment marker a player controls, the player may pick one extra campaign marker per friendly treasury phase.
27.5 Enlightenment markers don’t affect stacking or forage.
27.6 Enlightenment Marker Destruction
Once placed on the map, an enlightenment marker may be removed only by a successful pillage operation in the square.
[28.0] Scenarios
Players decide who will play each side in exactly which scenario configuration, then set up forces in the order given below. Once everything has been set up, the game starts with the normal sequence of play.
28.1 Scenario Length
Play from 1756-57 to 1762-63 (seven game turns).
28.2 Player Order
Determine first player initiative according to rule 6.0.
28.3 Starting Treasuries
(1) The player controlling Great Britain receives 20 treasury points.
(2) The player controlling France receives 14 treasury points.
(3) In three and four player games, the players controlling neither Great Britain nor France each receive 10 treasury points.
28.4 Campaign Markers Pool
Place all campaign markers in an opaque container. Each player picks the number of campaign markers equal to the total of “free” markers for the powers with which he begins the game. Starting treasury points and campaign markers are in addition to those received during Game Turn 1 and after.
28.5 Players & Powers
28.51 Two Player Game (European; also see 28.54 below)
Coalition 1: Great Britain, Prussia
Coalition 2: Austrian Empire, France, Russia
28.52 Three Player Game (European, also see 28.55 below)
Coalition 1: Great Britain, Prussia
Coalition 2: Austrian Empire, France
Coalition 3: Russia
28.53 Four Player Game (European, also see 28.56 below)
Coalition 1: Great Britain,
Coalition 2: Austrian Empire, France
Coalition 3: Prussia
Coalition 4: Russia
28.54 Two player game (Non-European involvement)
Coalition 1: Great Britain, Prussia, Manchu Empire
Coalition 2: Austrian Empire, France, Russia, Maratha Confederation
28.55 Three player game (Non-European involvement):
Coalition 1: Great Britain, Prussia
Coalition 2: France, Russia, Maratha Confederation
Coalition 3: Austrian Empire, Manchu Empire
28.56 Four player game (Non-European involvement):
Coalition 1: Great Britain, Prussia
Coalition 2: France, Maratha Con-federation
Coalition 3: Austrian Empire, Russia
Coalition 4: Manchu Empire
28.57 Free Deployment Scenario
Each player chooses the following number of major powers:
Two player game: three
Three player game: two
Four player game: two
28.571 In the free deployment scenario, players can choose major powers in any manner they agree upon (at random, in a specified order, etc.). Restriction: no player can choose both Great Britain and France.
28.6 Unit Deployment
Each power’s forces are set up in the order listed below. Note major power units may be set up in excess of forage limits.
BELLIGERENT MAJOR POWERS (set up by controlling power):
GREAT BRITAIN
Armies: veteran x 3, recruit x 1 on any GB squares*.
Fleets: veteran x 4 on any GB port squares.
Base: x 8 (deploy on any GB squares, no more than one per square).
*Optional: if Great Britain is allied with Prussia at the start of the game, one British army (of the four that power begins with) may be deployed in Prussia, representing British forces in Hanover.
FRANCE
Armies: veteran x 5, recruit x 3 on any FR squares.
Fleets: veteran x 2, recruit x 1 on any FR port squares.
Fortified Zones: x 2, one per square in European France.
Bases: x 5 on any FR squares not in European France, no more than one per square.
PRUSSIA
Armies: veteran x 4 in Prussia.
Fortified Zones: x 1 in Prussia.
AUSTRIA
Armies: veteran x 3, recruit x 3 anywhere in Austria.
Fortified Zones: x 1 in the capital.
Base: x 1 in other Austrian Empire square.
RUSSIA
Armies: veteran x 1, recruit x 6 on any RU squares, no more than two per square.
Fleets: recruit x 1 on the Russian capital square.
Fortified Zone: x 1 on the Russian capital square.
Bases: x 6, on RU civilized squares other than the capital, no more than one per square.
MARATHA CONFEDERACY
(If neutral, set up by player controlling France.)
Army: recruit x 1 on the Maratha capital.
Hordes: recruit x 1 on the Maratha capital.
Place two recruit hordes on the other Maratha square.
Bases: x 2, one per MC square.
MANCHU EMPIRE
(If neutral, set up by player controlling Great Britain.)
Armies: x 2 recruit on the Manchu capital square.
Hordes: veteran x 3, recruit x 3 on any ME civilized squares other than the capital, no more than one per square.
Fortified Zone: x 1 on the Manchu capital square.
Bases: x 9, one per ME civilized square other than the capital.
NEUTRAL MAJOR POWERS (set up by indicated player):
UNITED PROVINCES
(Set up by player controlling France.)
Armies: veteran x 1 on the United Provinces capital square; recruit x 1 Java in the East Indies.
Fleets: veteran x 1 on the United Provinces capital; recruit x 1 on Java in the East Indies.
Fortified Zone: x 1 on the United Provinces capital square.
Bases: x 3; one on the Cape Colony civilized square; one on the Java civilized square, one on the UP civilized square in South America.
SPAIN
(Set up by player controlling France.)
Armies: recruit x 2 on the Spanish capital square, recruit x 1 on the “3” Treasury Value SP square in South America.
Fleets: recruit x 1 on the Spanish capital square; recruit x 1 in the SP West Indies square.
Fortified Zone: x 1 on the Spanish capital square.
Bases: x 9, one per SP civilized square outside of European Spain: 7 in the Americas; 1 in West Indies; 1 in Philippines.
OTTOMAN
(Set up by player controlling Great Britain.)
Armies: recruit x 2 on the Ottoman capital square.
Hordes: veteran x 3, one per Ottoman civilized square other than the capital.
Fleet: recruit x 1 on the Ottoman capital square.
Fortified Zone: x 1 on the Ottoman capital square.
Bases: x 3, one per OT civilized square other than the capital.
MINOR POWER FORCES (set up as indicated)
PORTUGAL
Fleets: recruit x 1 on the Portugal European civilized square.
Bases: x 3, one per Portuguese civilized square; one in Europe; two in Brazil.
Portugal (omission) : place one base in Goa (in India).
NORWAY
Base: x 1 on the Norway civilized square.
SWEDEN
Armies: veteran x 1 on the Sweden “3” civilized square.
Fleet: recruit x 1 on the Sweden “3” civilized square.
Fortified Zone: x 1 on the Sweden “3” civilized square.
Base: x 1 on the Sweden “1” civilized square.
GERMAN STATES
Armies: recruit x 2 on the German States square.
Base: x 1 one the German States square.
ITALIAN STATES
Armies: recruit x 1 on the Italian States square.
Base: x 1 on the Italian square.
POLAND
Armies: recruit x 1 on the Poland square.
Base x 1: on the Poland square.
TURKESTAN
Hordes: veteran x 1 on the Turkestan civilized square.
Base: x 1 on the Turkestan civilized square.
PERSIA
Armies: recruit x 1 on the Persia “3” square.
Hordes: veteran x 1 on the Persia “2” square.
Base: x 2 one per Persia civilized square.
OMAN
Fleet: recruit x 1 on the Oman civilized square.
Base: x 1 on the Oman civilized square.
AFGHANISTAN
Hordes: veteran x 1 on the Afghanistan square.
BALUCHISTAN
Horde: recruit x 1 on the Baluchistan square.
MYSORE
Horde: recruit x 1 on the Mysore square.
Base: x1 on the Mysore square.
BURMA
Horde: veteran x 1 on the Burma square.
Base: x 1 on the Burma square.
SIAM
Base: x 1 on the Siam square.
ANNAM
Base: x 1 on the Annam civilized square.
KOREA
Base: x 1 on the Korea square.
JAPAN
Army: recruit x 1 on the Japan “3” square.
Horde: veteran x 1 on the Japan “3” square.
Base: x 2 one per Japan square.
BARBARY STATES
Fleets: recruit x 1 on the Barbary States “2” square.
Base: x 2, one per Barbary States civilized square.
ABYSSINIA
Horde: recruit x 1 on the Ethiopia square.
Base: x 1 on the Ethiopia square.
BORNU
Base: x 1 on the Bornu civilized square.
TIMBUKTU
Horde: veteran x 1 on the Timbuktu civilized square.
Base: x 1 on the Timbuktu civilized square.
ARABIA, AFRICA, TAUREGS, OREGON, AMAZONIA, PATAGONIA, NEW HOLLAND: Each player (in order of initiative) rolls a die on the following table and places any forces called for anywhere in the following areas, no more than one unit per square (and none of these units may be placed with already existing units): Arabia, Africa, Tauregs, Oregon, Amazonia, Patagonia, New Holland. African units may be placed in Futa Jallon, Darfur and Buganda as well. Note that’s one die roll per player, not per area. Units may not exceed what’s given in the counter mix.
| Die | Result | Die | Result |
|---|---|---|---|
| 1 | - | 4 | Base x 1 |
| 2 | - | 5 | Recruit Horde x 1 |
| 3 | Base x 1 | 6 | Veteran Horde x 1 |
[29.0] Charts & Tables
Located on map sheet.
29.7 Campaign Markers Table (addition): The Balance of Power and Revolution markers are not returned to the Pool until the End of Turn phase
[30.0] Map Errata:
The number printed beside the star in the Austrian capitol box should be a seven (“7”), not a one (“1”).
Box M10 should have the abbreviation "Po" in it.
In box D16, the word "Austria" should be "Austrian".
The hexside shared by boxes D17 and E17 should have a dot/dash political border running along it in order to more clearly delineate the boundary there between the Austrian and Ottoman Empires.
Taiwan (square 26-G)is part of the Manchu Empire. Ignore the border between it and the mainland. Square 25-H in Annam is Civilized with a value of "1". There should be a border between Annam and Malaya.
[31.0] Designer Q & A
- Is the Mysore issue resolved, it's two squares, not one so just divvy up the horde and the base?
See the errata.
- When using the Strum marker against diplomacy marker, I assume it is played against the face down markers - or can you see what the other player has first (obviously nice to knock out a "3").
You can play it at any time, so you can wait till the Diplomacy marker is face up but before it is implanted.
- I would assume each player must always control one major power. Should neutrality be disallowed if diplomacy is used? Also, should a player be always able to keep his listed main power (i.e., player 1 GB, player 2 Fr, etc.). If someone gets lucky and gets France or GB to go neutral, could make things tough for that player.
It's in there somewhere that you never lose control of your main power.
- Campaign markers - rules state that if you are at the max, then you must return markers to the pool. What happens if you are one less than the max and draw your free ones?
You return the excess to the Pool before the draw goes over the limit, or not take the free draw.
- Can you use minor county ally reinforce to upgrade a base to a fort?
Only its own.
- Losses, round up or down? (an attack against a fort by itself called for half a point to be eliminated, would the fort be gone?)
Yes.
- Lastly, is it a valid tactic to have one minor attack another just to reduce them both? (Italian states vs. German states to attrit them before French attack them proper). Shouldn't there be some limitation - either on odds necessary (can sucide at 1-3 to really reduce them), or limit minor countries to attacking only major powers?
You can make these attacks.
- Can land leaders be used to help defend bases? Don't know if a base falls within the definition of a "force".
Yes.
- Should there be a limitation on losing/gaining Campaign Markers when attacking bases? (i.e., CM only gained or lost against fleets/armies a la the minor country rule?). Got the French ready to roll up the American east coast, the fleets may die, but what a glorious gain of markers.
No limit for this.
- Do enlightenment markers add to the initiative? or just the free campaign markers.
27.4 They affect only free campaign marker pick.
- Can you stay embarked after combat? Related to above, French just got Bermuda and now are ready to roll with multiple forced marches. Rules state you "may" disembark and move after combat, but do you have to disembark?
You can stay embarked.
Per 4.73. Can you attack a vacant square with a minor country force and then advance that force into the square?
No.
You can move after combat? I missed that. I thought that you could not move at all after you disembark.
No.
Another clarification: Does "Revolution" effect the leaders as well as the other CM's. I am assuming that they leaders go back into the pile too, but I have this nagging doubt and cannot find anything in the
Yes. See the errata. Consider how the French Revolution shook up the command structure and military systems.
What is the difference between European and Non-European involvement scenarios ?
Non-European assumes that the Indians and Manchus are more actively involved. This is getting into the "what if" category, but the Manchu Empire was at its highpoint in this century. Regardless, the game area is not restricted.
Would it be worthwhile to remake the chits into cards.
Cards would be in line with the 18th century, given the importance given to card-playing in that era (see Barry Lyndon). Of course, getting cards into a magazine format is prohibitive. In the upcoming Catherine the Great game, cards representing "policies" will be printed on the map. You indicate their control with a marker.
By the way, is there any use for the little black sailing-ship icons on the map, other than for decoration ?
Mainly to give the map a period look. "Here be monsters!"
Do they have to attack debarked land units in the same square with an enemy fleet or can you choose to engage the enemy fleet in a strictly "naval" combat.
Yes to the latter, but you can make a combine attack against naval and land forces.
Sometimes I felt that the map and counters were only incidental to the real game that was taking place in the off map interactions.
That was part of the idea, this was to be a multi-player game. I used the Campaign markers to give it more of a period feel.
We had so much fun that I hate to make any criticism, but I must admit that unless our results were highly unusual, our game had very little to do with the Seven Years War.
Decisions are made on a global scale, so you send a fleet off in one direction and it cascades into an alternative history.
Does the major power collect free markers during the turn in addition to the initial set up markers?
Yes. Unless otherwise noted, always follow the sequence of play.
Also, set-up instructions have the players roll for units for Arabia, Africa, etc., but even though Base results are likely, there are no bases left in the countermix at this point -- OK to add a few?
Counter mix is the limit, though we may provide some more in a future issue.
A design question: what do "Legion" units represent?
Advanced forces for the era. For example, early use of combined arms divisions, skirmishers, innovative tactics, etc.
I can understand winning small battles all over the world may lead to a higher morale in force marching armies.
This was part of war of the era: you win battles to build morale and change the political balance in your favor.
11.624 "Minor Power units may be placed in major power squares." --but-- 11.62 "Minor Power units may be placed only in squares of the designated power."
11.624 is an exception for rebellions.
Also, Minor Power recruiting rules state that fleets may be placed on trade routes; is this also true for at start fleets, like Portugal's? Or must they stay in their home squares?
Start in home squares. The placement on trade routes refers to reinforcements which can represent privateers and such.