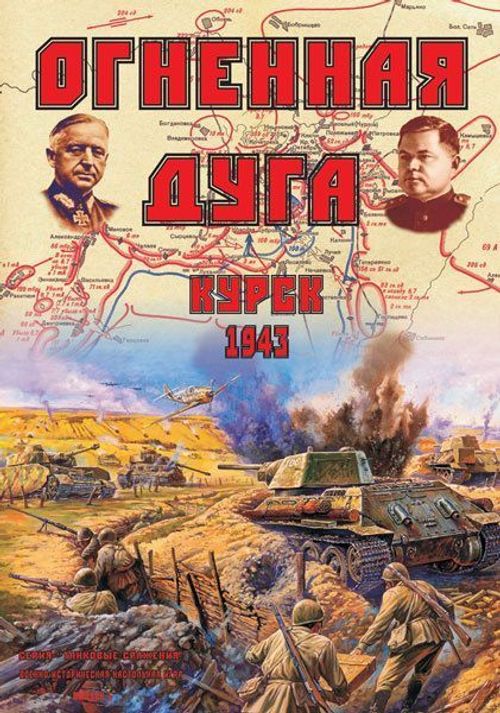
The Salient of Fire. Kursk: 1943
The Salient of Fire. Kursk: 1943 Rulebook
Table of Contents
Table of Contents
- 1. Introduction
- 2. Game Components
- 3. Counters
- 4. Map and Game Board. Counter Symbol System
- 5. Turn Sequence
- 6. Weather
- 7. Movement
- 8. Zones of Control
- 9. Stacking
- 10. Combat
- 11. Unit Types
- 12. Command and Control
- 13. Supply
- 14. Event Markers
- 15. Scenarios and Victory Conditions
- Optional Rules
- Designer's Notes
- Terrain Effects Chart
1. Introduction
The Tank Battles game system models 20th century battles at the operational-tactical level, allowing one to recreate actual historical events with a great degree of reliability.
The terrain on the game map/board is divided into hexagonal cells (hereafter referred to as "hexes"). The map scale is approximately 5 km per hex. Each counter corresponds to an infantry or artillery regiment/division, or a tank brigade/regiment/battalion. One game turn equals one 24-hour period.
2. Game Components
A complete game includes:
- Game box
- Map(s)
- Set of countersheets
- Rules booklet
- Scenario booklet
- Dice
- Player Aid Sheet
3. Counters
The game pieces consist of playing pieces ("counters") representing combat units and elements, as well as additional markers that indicate various game functions.
3.1. Military Units
The counters represent the actual combat units, formations, and elements (hereafter called "combat units" or "units") that participated in the battle. In most cases the counters are two-sided. The counters contain special information needed to play the game:
- The values of the units' combat strength (attack and defense) and speed of movement, expressed in numerical form.
- The combat unit designations as well as symbols indicating their military subordination (depending on what a given counter represents – artillery battalion, divizion [not "division," which would be diviziya - KDC], regiment, brigade, etc.)
- Unit type symbols, as well as various symbols indicating a unit's special abilities.
3.1.1. Unit Losses
If in the course of the game a unit takes losses (i.e., it loses one theoretical "loss level"), the given unit's counter is flipped over to its back "reduced strength" side (on the "reduced strength" side the counter is marked with a solid white stripe at the bottom).
One-sided unit counters are removed from the game as soon as they take one step.
3.2. Markers
3.2.1. Markers
Markers are additional counters indicating the particular status of combat units, as well as various characteristics of a position or area. Examples include:
- Markers for "Air Strike," "Units out of Supply," "Out of Command," etc.
- Status markers for defensive works and blown bridge markers
- Event markers (hereafter called "EMs")
3.3. Modifiers and Shifts
The game uses the terms "modifier" and "shift."
A "modifier" is the number of points that should be added to or subtracted from a numerical value determined by a die roll. That is, this is a "plus" or "minus" to the value resulting from the roll of the die.
A "shift" relates to the Combat Results Table. This table has columns indicating the ratio of the combat strengths of the sides participating in a combat (for example, 1:1, 3:1, 6:1, etc.). The use of a "shift" allows a change of the strength ratio column on the Combat Results Table to one that is worse or better.
For example, a ratio of 1:1 can be changed to a ratio of 3:1 by using 2 shifts in one's favor. Conversely, 2 shifts in the opponent's favor would worsen the ratio from 1:1 to 1:3.
4. Map and Game Board. Counter Symbol System
4.1.
The game map depicts the terrain of the battle with a grid of hexagonal cells ("hexes") printed on it. This makes it possible to regulate movement and to precisely determine the characteristics of the terrain on which a counter is located. The map scale is 5 km per hex.
4.2.
Besides the map, the game board includes the following additional information:
- Map legend
- Combat Results Table (CRT)
- Turn Record Track printed on the game board in the form of a time line on which the players record the number of game turns
- Other information explained in specific games or scenarios
Counter Symbols (see original rules). The source text gives the counter symbol key only as this placeholder line; the symbol key itself is not reproduced in the source file.
5. Turn Sequence
The game consists of a series of alternating turns, in the course of which a player is required to follow a strict sequence of actions, called phases. Phases cannot be skipped or performed in a different order.
A. Preliminary Phase
- Weather Determination. Using the Weather Table indicated in the scenario, one player rolls a die and determines the meteorological conditions for the current turn.
- Pooling of Event Markers. Both players place into an opaque container (such as a cup) those EMs designated in the scenario in terms of their nature, number, and ownership.
B. First Player Turn
(The scenario designates which side goes first.)
- I. Supply Phase. In this phase the player determines whether all his units are "in supply" and "in command." Those units that are "out of supply" or "out of command" are marked with the corresponding marker.
- II. Prepared Attack Phase. The player may attack using all his units adjacent to enemy units (without the 2 negative CRT shifts for an unprepared attack).
- III. Movement Phase. The player may move all his units in accordance with the rules for movement. In this phase, he may conduct overrun attacks, as limited in number by his units' movement points.
- IV. Unprepared Attack Phase. The player may attack his opponent's units with all his units that are adjacent to the enemy, subject to 2 negative CRT shifts (for an unprepared attack).
C. Second Player Turn
The second player follows the same sequence of actions as the first player.
D. Repeat Turns of Motorized Corps and Drawing of Event Markers
One player (as selected by mutual agreement) draws the EMs from the cup one at a time, giving each marker to its owner. The player receiving the EM can either play it or keep it for future turns.
Upon drawing the marker for a motorized corps, the given corps is activated and repeats phases I through IV. Note that only the given corps is activated.
The process of distributing the EMs for both sides ceases upon the drawing of the marker labeled "End Event Markers." After this, the only markers that can be played are ones for repeat activation of motorized corps.
Footnote 1 (as printed): Motorized corps are understood to include mobile tank, mechanized, and motorized formations.
E. End of Turn
The turn marker is moved one space forward.
6. Weather
6.1.
Each operation in the scenarios is given its own Weather Table related to the climate and time of year. It would be ridiculous to condense into one rule the meteorological conditions of summer in North Africa, fall in Burma, and winter in Russia.
6.2.
The effects of weather on movement and combat are indicated in each scenario.
7. Movement
7.1.
A unit's movement is determined by the movement points (MPs) it has available – a number marked on the counter. Different types of terrain require the expenditure of different amounts of movement points. Movement points are expended to enter hexes, to cross certain types of hexsides (for example, rivers), to exit zones of control, and to conduct overrun attacks. The type of forces (infantry, cavalry, or motorized units) affects movement through certain types of terrain. This difference is indicated on the Terrain Effects Chart (TEC).
7.2.
A unit may not expend more MPs than it possesses, save them for the next turn, skip over hexes during movement, or lend MPs to another unit.
7.3.
In his Movement Phase, a player may move any number of his units capable of movement. He is not required to move all his units or to expend all their MPs.
7.4.
A unit must move along a path of adjoining hexes. As it enters a new hex, a unit must pay a number of movement points equal to the cost of the given terrain type for that kind of unit (indicated on the Terrain Effects Chart).
7.4.1. Terrain Effects Chart (TEC)
The TEC indicates a number for each terrain type. This is the amount of MPs that a unit must pay to enter a given hex.
When crossing obstacles lying along hex borders (such as rivers), the number is indicated as "+N." This means that a unit adds the indicated amount to the MPs it expends.
For example, a unit moves through two hexes of clear terrain (MP cost of 1 each). It expends 2 MPs to do so. It continues across a river (cost of +1 MP for crossing a river) and enters the next hex with clear terrain. The unit expends a total of 4 MPs to move 3 hexes with a river crossing.
7.5.
During its movement, a unit may not enter hexes occupied by enemy units or hexes with terrain impassable to that type of unit.
7.6. Entering Enemy ZOC
A unit is required to stop moving when it enters an enemy zone of control (ZOC; see rule 8).
7.7. Entrenching
If allowed by the scenario, any units (other than artillery, tanks, or armored trains) may entrench. Entrenching in an enemy ZOC may take place only in cases where the unit was not attacked in the preceding enemy activation. In one turn the unit may build only the first level of fortification. Only construction units may build fortification levels beyond the first, according to the scenario conditions and at a rate of one level per turn.
7.8. Bridge Demolition
At the end of his Movement Phase, a player with units adjacent to a bridge may attempt to blow the bridge by rolling a 3 or greater on one die. If the bridge is in an opposing unit's ZOC, he must roll a 5 or greater to blow the bridge. If the units making the bridge demolition attempt include engineers, the die roll is modified by +1. Mark the destroyed bridge with a Blown Bridge marker.
7.9. Overrun
During the Movement Phase, a player may conduct a type of attack called an overrun, at a cost of 1 MP (for organizing the attack). An overrun is carried out from a single hex. Only three combat units from a single stack may participate in the overrun. An overrun is conducted as a regular attack, with the exception that neither player is permitted to use artillery, air support, or event markers. In addition, the attacking player suffers 3 negative shifts on the Combat Results Table.
If the attacking player does not throw back the opponent, then his Movement Phase ends immediately and this stack cannot move until an end of the current Movement Phase.
If the attacker does throw back the opponent (the enemy stack has retreated at least one hex or it has been eliminated), he may advance after combat according to the normal rules or he may continue movement. Hexes passed through during advance after combat are counted in movement points spent by overrunning units during this Movement Phase. It is possible to conduct several overruns each turn, limited only by MPs available. If the scenario provides special combat shifts (such as for tactical surprise), they are not used in overruns.
7.10. Movement Types
There are three types of movement in the game: infantry (4-6 MPs, printed in black on the counter), motorized (6 MPs, printed in blue on the counter), and mechanized (tracked vehicles; 6-8 MPs, printed in red on the counter). The various movement types affect the movement capabilities of units (see the Terrain Effects Chart).
7.11. Rail Movement
Some scenarios allow the use of rail movement. The scenario should stipulate how many units can be transported by rail. Loading must take place at railroad stations and takes one complete turn. Unloading may take place no closer than 4 hexes from enemy units, and artillery and tanks may only unload at railroad stations. The length of a rail move for all types of units is 30 hexes. While moving by rail, units must remain at least 4 hexes from enemy units.
7.12. Movement along Roads
If a unit uses movement along a road and increases its speed on account of it, then it is required to move without being part of a stack (units moving along roads must move one at a time). When units move as a stack, they may not use the road movement bonus.
Units appearing as reinforcements along roads from off the map edge must follow this rule: the first unit appearing along the road moves the maximum number of MPs; each following unit moving along that road has one less MP per unit that has already entered along that road. This rule reflects the units being in march column when appearing along a road from off the map edge.
8. Zones of Control
8.1.
A unit's zone of control (ZOC) consists of the 6 hexes surrounding it. ZOCs do not extend into or through certain types of terrain, as indicated on the Terrain Effects Chart.
8.2. Entering a ZOC
A unit entering an enemy ZOC is required to stop in it immediately.
8.3. Exiting a ZOC
A unit may leave a ZOC as a result of combat. In addition, a unit may exit an enemy ZOC in the Movement Phase by expending all of its MPs to move 1 hex (i.e., leaving a ZOC takes the entire Movement Phase). Important: A unit may not move directly from one enemy ZOC into another.
8.4. Effect of ZOCs on Supply Lines
An enemy ZOC blocks a supply line. The presence of a friendly combat unit in a hex in an enemy ZOC restores the supply line.
8.5. Retreat through Enemy ZOC
If as a result of combat a unit needs to retreat through an enemy ZOC, the unit (or stack) suffers one additional step loss for each hex of retreat through enemy ZOC. The owning player of a retreating stack may choose which unit takes the step loss.
Note that only one unit in an entire stack takes the step loss for retreating through an enemy ZOC.
Example: A stack of three units retreats through an enemy ZOC. The stack loses only one step, not three (as would be the case if losses were taken from each counter).
9. Stacking
9.1.
Any number of a player's units may occupy a single hex.
9.2. Who may attack out of a single hex?
Out of an entire stack, only units from one division may participate in an attack.
9.3. Who may defend in a single hex?
No more than three units, of any subordination, may defend in a single hex. The defending player chooses the units.
9.3.1. Indication of Unit Subordination on the Counters (Unit Identification)
A unit's numerical identification is printed as the first number at the top of the counter. The identification of the unit's parent formation is indicated after the slash. For ease of identification, the corps (or army) to which a unit belongs is indicated by color.
9.3.2. Independent Units
Independent units of higher subordination, which may participate in an attack by any of that higher organization's units, have their unit identification printed separately. Units not marked with a color have their unit identification underlined. No more than two independent units may support a single attack.
9.4. Retreat from a Hex by Units Not Participating in a Battle
If a unit or units from a stack have fought a battle and need to retreat as a result of combat, then the entire stack is required to retreat out of the hex.
9.5. Fog of War
A player is not required to show his opponent the units that make up a stack, except, of course, for the unit visible on top.
The opponent is required to reveal an entire stack if it is attacked.
Aside from combat, the composition of an opponent's stack may be revealed with the help of ground or air reconnaissance (see 11.11.5. and optional rule 5).
10. Combat
10.1.
Combat occurs between opposing units (or stacks) that are adjacent to each other.
10.1.1. Attack Sequence
The attacking player indicates specifically which of his units are participating in the attack and which hex with his opponent's units he is attacking (see 10.3). Using the attack strength (of the counters' combat factors), he adds up the total strength of the attacking units. The attack strength is the first number at the bottom of the counter.
Next the attacking player determines all the CRT combat ratio column shifts he will use (tanks, aircraft, artillery, etc.) and announces them to the defending player. After announcing an attack, the attacking player does not have the right to change the announced parameters of his attack.
The defending player adds up the combat strengths of the defending units, using the defense strength (the defense strength is the second number at the bottom of the counter) and determines the shifts he will use (tanks, aircraft, anti-tank, terrain, fortifications, etc.), already knowing the parameters of his opponent's attack. The defender may support his units with artillery or aircraft and change the ratio. When calculating the ratio, round in favor of the defender.
Example: 14:5 is treated as 2:1.
Having determined the ratio, the players apply the positive (to the right) and negative (to the left) column shifts and finally determine the column on the CRT that will be used to obtain the results of the combat.
The attacking player rolls a die. The number on the die indicates the row on the CRT that is cross-referenced with the appropriate ratio column. The intersection of the indicated row and ratio column determines the result of the combat.
Ratios less than 1:4 are treated as 1:4; ratios greater than 6:1 are treated as 6:1.
Example: A strength ratio of 10:1 on the CRT is resolved on the 6:1 column.
Extended Example of Combat. The German player announces an attack on a single Soviet rifle regiment by a full-strength motorized infantry regiment (factors of 3-3-6) supported by two tank battalions with factors of 8-6-8 (each) and using their 2 tank shifts. The total attack strength comes to 19.
The Soviet rifle regiment is on its reduced strength side (factors of 1-3-4) and is stacked with an anti-tank regiment (45mm anti-tank weapons) with factors of 1-[3]-6 and one anti-tank shift. The total defense strength of the Soviet regiment with support equals 6. The Soviet player hopes to strengthen the defense and uses an air support marker in his possession, which gives another 1-column shift in his favor.
The final ratio is calculated. The ratio of strengths is 19:6. This is rounded in favor of the defender to 3:1. The German player has 2 tank shifts, which changes the CRT ratio column to 5:1, but the German shifts are compensated for by the 2 Soviet shifts (1 anti-tank shift and 1 air support shift); i.e., the ratio remains 3:1.
The German player rolls the die and gets a 5. On the CRT, this die roll gives a result of "O(1)." (The source prints "O"; the CRT key and 10.4 define this symbol as D, the defender.) The Soviet player takes 1 step loss (which flips a unit to its reduced strength side or, in this case, eliminates the reduced unit) and retreats one hex.
10.2. Who may participate in an attack?
An attack from a single hex may be only be conducted by units from one division. A single attack from multiple hexes may involve only units from the same subordination (the same corps). An attack can be supported by two units from a higher subordination.
10.3. Who may participate in a defense?
On defense, there is no requirement that the units be from the same subordination. No more than three units, chosen by the owning player, may participate in defense in a single hex.
10.4. Combat Results
The result of a combat is shown on the CRT.
O (D in English) means that the result applies to the defender, while A means that it applies to the attacker.
A number in parentheses (N) indicates how many hexes the loser retreats and how many step losses he incurs. If the number is not in parentheses, then it is only the number of retreat hexes.
УБ (EX in English) is a sustained combat ("exchange"); each side takes one step loss and remains in place. In an УБ (EX), advance after combat is not allowed, even if one side is eliminated.
If the loss indicator is shown inside square brackets [N], then the opponent may choose one of the player's participating units to take a loss. The opponent in this way may select only one step loss.
О-УБ (D-EX in English) means the defender retreats with sustained combat. The defender retreats 1 hex and each side takes one step loss.
A result with an asterisk (*) means that the attacker takes an additional step loss when attacking fortifications or settlements that affect the CRT. (There are a lot of small towns and villages in the game mentioned for information purposes only. The type of terrain in these hexes is the same as in adjacent less lucky hexes without name.) When attacking into other terrain types, this symbol is ignored.
10.5. Attacker Does Not Retreat
Units of the attacking player do not retreat as a result of combat.
10.6. Retreat and Advance after Combat
The losing side is required to retreat the number of hexes indicated on the CRT. Retreating into enemy-occupied hexes is not allowed.
The conditions for determining the path of retreat are listed in decreasing order of importance:
- Not into an enemy ZOC
- Toward a friendly map edge (supply source)
- Into the clearest terrain
Example: According to the combat results, a stack must retreat one hex. Directly in front of it are two hexes occupied by enemy units. Thus the stack is left with four options: two hexes located in enemy ZOCs, a forest hex, and a clear terrain hex. Since the stack has the possibility of retreating outside enemy ZOC, the option to retreat through ZOC is immediately ruled out. Both remaining hexes lie on a path of retreat toward a friendly map edge. Therefore the player is required to choose the clear terrain hex as the higher priority.
A retreating unit must retreat the full number of hexes shown on the CRT. It may not end its retreat such that the number of hexes between the hex where it ends the retreat and the hex in which the combat took place is less than the number shown in the combat results. The retreating units must retreat as a single stack.
10.6.1. Retreat through Enemy ZOC
If a unit or stack is forced to retreat through an enemy ZOC, it is required to take 1 step loss for each hex of retreat through enemy ZOC. Note that losses are per stack and not per counter (see 8.5.).
10.6.2. Retreat of a Stack
When a stack of units retreats, it must end the retreat as a stack.
10.6.3.
If a unit cannot retreat due to terrain conditions or because it is surrounded, then it remains in place and takes one loss for each unfulfilled hex of retreat until it is eliminated.
10.6.4. Advance after Combat
A victorious unit may pursue the enemy, following after the retreating unit(s) and ignoring enemy ZOCs. A victorious unit is not required to advance after combat, and need not advance the full number of hexes. Only attacking units may advance after combat.
The victorious units may advance the number of hexes equal to the length of the retreat required by the combat result. Moreover they may advance the full distance even if the defending units were eliminated.
Advancing units must follow the retreat path, and that they cannot cross impassable terrain. If the defender was eliminated, the stacked units can split up and advance.
10.7. All attacks are carried out consecutively
Determine and fulfill the results of one attack before conducting the next attack.
10.8. Attack Obligation
A unit is not required to attack if it is in the ZOC of an enemy unit. However, if an attack is conducted, then all enemy units in whose ZOC the attacking unit is located must be attacked (or distracted by attacks from other friendly units). Such distracting ("soak-off") attacks must be conducted in the current combat phase.
10.9. Attacks from/into Multiple Hexes
An attack from multiple hexes into multiple hexes is not allowed. The attacks must be divided up either as one unit (or stack) from a single hex attacking multiple hexes, or as multiple units (stacks) from different hexes attacking a single hex.
Different units in a stack are not allowed to attack in separate directions; that is, only one attack may be conducted out of a single hex.
10.10. Choice of Counter Taking a Loss
Losses are applied at the discretion of the owning player (exception: 10.11.).
10.11. "Opponent's Choice of Losses" Result
If the CRT gives a result of [N] (opponent's choice of losses), the opponent may select any participating unit to take one of the step losses.
10.12.
A player may, if desired, declare the non-participation of any units in a combat. In this case, he does not consider them when calculating the ratio, and in the event he takes any losses, he is not required to lose those units.
10.13. Combat Parameters Table
To make it easier to remember the combat parameters (total combat strength, shifts, and modifiers), on the map or a separate sheet there is a Combat Parameters Table with numbered record tracks. The attacking player announces the attack combat strength and places markers on the corresponding spaces on the tracks. In the same way he marks the shifts and modifiers. The defending player also marks his combat parameters after the attack is announced.
Example: the attacker announces an attack strength of 26. He places his "attack strength x10" marker on the "20" space and his "attack strength x1" marker on the "6" space (i.e., "26"). The attacker has 2 shifts in his favor (the "Shifts" marker is placed on the "2" space of the "Shifts" track) and a die roll modifier of "+1" (the "Modifier" marker is placed on the "+1" space of the "Modifier" track).
Combat Results Table
Combat ratio columns run from 1:4 to 6:1. The die roll selects the row. Symbols are as defined in 10.4 and the key below the table.
| Die Roll | 1:4 | 1:3 | 1:2 | 1:1 | 2:1 | 3:1 | 4:1 | 5:1 | 6:1 |
|---|---|---|---|---|---|---|---|---|---|
| 1 | A [3] | A [3] | A [2] | A [2] | A [2] | A (1) | A (1) | EX* | EX* |
| 2 | A [3] | A [2] | A [2] | A (1) | A (1) | D-EX | D-EX | D1 | D (1) |
| 3 |
Key (as printed beneath the CRT):
- D – Result applies to the defender.
- A – Result applies to the attacker.
- EX – Exchange (Sustained Combat). Each side loses one step.
- D-EX – Each side loses one step, and defender retreats one hex.
- N – Number of hexes retreated.
- (N) – Number of steps lost.
- [N] – Winner may choose one of the steps lost from among the loser's units that participated in the combat.
- If the number is in parentheses/brackets, it is simultaneously the number of steps lost and the number of hexes retreated.
- * – Attacker loses one additional step when attacking fortifications and settlements that affect the CRT (see 10.4).
11. Unit Types
The game system places great emphasis on the differences between troop types. Each of the troop types fulfills certain functions, often distinct from others. A combination of various troops in a particular situation can give troops very unexpected possibilities.
11.1. Infantry
Infantry is the basic type of troops. Infantry combat is conducted normally.
11.2. Cavalry
Cavalry has 6 MPs and in combat is treated as infantry.
11.3. Tanks
Tank units have so-called "tank shifts," which can be used both on attack and defense. If units with different types of tanks attack together, then the player uses the highest tank shift.
11.4. Anti-Tank Artillery
An anti-tank artillery unit has an anti-tank shift (underlined to distinguish it from a tank shift), which can be used only on defense and only against tanks. Aside from this, an anti-tank artillery unit's defense strength is enclosed in square brackets [N]. This value may be used only against tanks and only on defense; in any other case, an anti-tank artillery unit's defense strength equals 1. Note that anti-tank artillery is not required to switch to artillery column status for purposes of movement (see optional rule 2.1.).
11.5. Artillery
Artillery is represented in the game by artillery support points.
In addition, the optional rules include expanded rules for artillery.
On the game board or on a separate sheet there is a track on which the players record artillery points (APs) using markers for the different calibers of artillery. The number of artillery points and the schedule for receiving them depend on the scenario. The number in parentheses on the marker indicates the combat strength that a player may use on attack or defense when using that particular type of AP.
In a single attack, the attacking player may use a limited number of APs (as indicated in the scenario), while the defending player may use no more than 1 AP.
The number of APs reflects the artillery strength of the guns used in the specific operation as well as the organization of their use.
Important: In order to receive artillery support, the units participating in the combat must be able to trace a supply line.
11.5.1. Artillery Support Procedure
If a player wants to support an attack with his artillery, he declares it, expends the artillery points, and adds to the attack the artillery fire strength indicated on the marker for the corresponding caliber. The maximum number of APs that can be used in one attack is indicated in the scenario.
11.5.2. Participation of Spotter Planes in an Attack
The participation of spotter planes (the reconnaissance aircraft marker) in an attack adds the possibility of using an additional AP.
11.5.3. Heavy Artillery
Heavy artillery provides an additional engineer modifier.
11.6. Rocket Artillery
Unlike normal artillery, rocket artillery does not add strength, but instead provides a modifier in the attacker's favor when rolling the die (the maximum modifier for rocket artillery is +1).
11.7. Engineers
Engineer units are represented in the game by engineer points (EPs). EPs are noted on the same track as APs. EPs in an attack provide an assault engineer modifier.
An assault engineer modifier is used when attacking fortifications or settlements. It cannot be used for mine clearing or construction.
Only 1 engineer modifier may be used in a single attack. More detailed information can be found on the EP marker itself.
11.8. Fortifications
A unit that spends a complete turn in one hex outside enemy ZOC may build one level of fortifications (see 7.7 Entrenching). Any units other than artillery, tanks, and armored trains may build fortifications. (Footnote 2 below.) Only construction units may build fortifications of level 2 and higher. Building a level 3 fortification requires the use of an event marker and the participation of a construction unit.
Fortifications affect combat as indicated on the Terrain Effects Chart.
Footnote 2 (as printed): In game terms, entrenching entails the creation of a serious system of trenches and covered positions throughout the area contained within a hex. Only the numerous infantry units and units corresponding to infantry are capable of doing this. Individual artillery and tank units cannot create such a system of entrenchments.
11.9. Long-Term Fortifications
Units occupying level 3 long-term fortifications (as indicated in particular games) may ignore retreat results.
11.10. Pontoon Units
Pontoon units may lay pontoon bridges during a movement phase. If laying a bridge within enemy ZOC, the bridge is laid successfully on a die roll of 4-6. Failure does not mean the pontoon bridge is eliminated.
On the reverse side of the pontoon unit is a depiction of a bridge. When a pontoon bridge is laid, flip the counter to the side with the bridge and place it on the hexside between the two hexes connected by the bridge.
11.11. Aircraft
Aircraft are represented in the game by air support markers. An air support marker may be used in three ways.
11.11.1. Air Support
A player may support his units on both attack and defense. One air support marker provides one shift in his favor. However, if the attacker is already using aircraft in an attack, the defending player may guarantee air support only by first "knocking out" the attacker's air support marker (see 11.11.3. Fighters). The defender's units may only receive support from the air support markers remaining after carrying out the defender's fighter operations.
11.11.2. Air Strikes (Bombing)
An air strike may take place at any point in the game, even at the very end of a turn. A player places an air support marker on an enemy stack. The enemy stack must not be located in friendly ZOC or in a forest hex. After placing the air support marker in the hex, the player rolls a die for each unit in the enemy stack. On a roll of 6 the unit takes a step loss. All enemy units in the stack are checked.
When carrying out an air strike, take the anti-aircraft factor into account (see 11.12.).
11.11.3. Fighters
A player may "knock out" the opponent's air support markers. He must immediately state how many of his own markers he is using for the attempt to defeat the opponent's aircraft. For each of his air support markers, the player rolls a die. On a roll of 4-6 the enemy's air support marker is "knocked out" and removed from play for the rest of the turn.
11.11.4. Rear Area Strike
A player may expend an air support marker to conduct a rear area strike. If this marker is not defeated by anti-aircraft fire or by enemy aircraft, then it may try to reduce the opponent's artillery points.
For each of his markers, the player rolls a die.
- 1-5 – that number of enemy APs is eliminated by the aircraft, selected by the player owning the APs.
- 6 – 3 enemy APs are eliminated, selected by the player conducting the strike.
A rear area strike may be turned back by anti-aircraft artillery.
11.11.5. Air Reconnaissance
Air reconnaissance markers are different from general air support markers. A player may ascertain the composition of an enemy stack after placing one of these markers on the hex in question, but only if the enemy stack is not located in forest or a level 2 or 3 fortification. After conducting the reconnaissance, the player removes the marker from play for the rest of the turn.
Air reconnaissance may be used for spotting artillery fire (see 11.5.2.).
11.12. Anti-Aircraft Factor
The anti-aircraft factor is indicated in the scenarios. It reflects the saturation of an army with anti-aircraft artillery. There may be a different anti-aircraft factor for different lines of units in a single army.
The anti-aircraft factor is the die result needed to "knock out" an enemy air support marker used in an attack on the player's units.
The anti-aircraft factor is not applied against opposing aircraft that are providing air support to their side's units.
11.13. Headquarters
The game has counters for corps headquarters as well as higher level headquarters. Headquarters (HQs) provide command and control. Supply lines are traced through them. HQs move as motorized units (8 MPs).
12. Command and Control
12.1.
Units may not move or conduct combat normally without HQ command and control. To be in command, units must be located within a 12-hex radius of their HQ. A command trace may not be interrupted by enemy units or their ZOCs.
An HQ has can be eliminated as a usual combat unit. All subordinated units of a destroyed HQ become "Out of Command". HQ can be recovered during next Movement Phase. Subordinated units of the recovering HQ continue to be "Out of Command" until the end of the Phase.
12.2.
During the Supply Phase, a player determines which of his units are out of command and marks them with the appropriate markers. He may change the status of his units only in his next Supply Phase.
12.3. Out of Command Units
Units out of command may not move on their own if they do not roll a 5 or 6 to move by initiative. A unit moving by initiative moves only half its MPs (rounded down). It may leave, but may not enter, enemy ZOC.
12.4. Ad Hoc Operational Headquarters
Some scenarios have HQs marked "?". These are ad hoc operational formations, which may, if desired, be created anywhere on the map and command forces like a regular HQ. The number of such HQs is specified in the scenarios.
12.5. Recovery of Damaged Units
A unit lost in combat can be recovered. After a unit has been removed from the board, it is placed in an abstract "recovery pool" (set to the side).
Recovering units spend all of their Movement Phase. To bring the eliminated units back to the game a player must select one unit out of several of the same type and recover it. The remaining units are removed from the game and cannot be used for recovering until the end of the game.
If among the recovering units there are units with different ratings, select the unit with the worst ratings. When it comes to shifts, the units with the highest shifts are considered better.
A recovering unit must appear in a hex with or adjacent to its HQ and no closer than 2 hexes from an enemy unit. Its HQ must be in supply. The ratio of recovering units to completely eliminated units is indicated in the scenarios.
Example: As a result of combats, the German player has 3 tank units [in the recovery area] (with ratings of 10-8-6, 8-6-8, and 6-4-8). The German player's recovery conditions in the scenario are 1:1. This means that for each 1 recovering counter he must remove 1 of his counters. Therefore, out of his 3 counters he may recover only one (the player must remove one of the two remaining counters, leaving the last counter for the future). Provided that the unit with worse ratings stays in the game, the German player must decide whether to recover the 8-6-8 now and remove the 10-8-6, or recover the 6-4-8 and leave the 10-8-6 for later, allowing for the possibility that subsequently he will have to choose from higher quality units.
13. Supply
13.1.
Supply is traced from areas of the board edge specified in the scenario or from other supply sources. If an HQ is in supply, then units can be supplied from their HQ if within 12 motorized MPs. A supply line may be interrupted by impassable terrain, enemy units, or enemy ZOCs. The presence of a friendly unit cancels the effect of enemy ZOC for purposes of tracing supply. Railroads may be used when tracing a supply line. 1 MP equals 5 hexes along a railroad.
13.2. Headquarters Supply
In order for an HQ to be in supply, it must be within 12 motorized MPs of a supply source or a road or railroad leading to it.
13.3. Out of Supply
Units found to be out of supply receive the appropriate markers.
13.3.1. Emergency Supply
The first turn a unit is out of supply, it receives an "Emergency Supply" marker. Unsupplied units with these markers may freely move and participate in combat.
13.3.2. Unsupplied
If in the Supply Phase the unit or stack already has an "Emergency Supply" marker, it receives an "Out of Supply" marker. Units marked as "Out of Supply" have their attack strength, defense strength and motorized/mechanized movement ratings halved (rounded down).
14. Event Markers
14.1.
Instead of creating new rules for each operation, the designer decided to reflect the peculiarities of each battle by means of event markers (EMs), which play a big role in the game. At the start of each game turn, during the Pooling of Event Markers Phase, the players put their EMs in some kind of opaque container (such as a cup). In the Repeat Turns of Motorized Corps and Drawing of Event Markers Phase they blindly draw EMs from the cup one by one.
One player (chosen by mutual agreement) draws EMs from the cup one at a time in succession and gives each marker to its owner. The player receiving the EM may either play it or save it for the next turn.
When the marker for a motorized corps is drawn, the given corps activates and repeats phases I-IV. Note that only the given corps activates.
The process of distributing event markers for both players ends when the "End of Event Markers" marker appears. After this only markers for repeat activation of motorized corps may be played.
14.1.1.
If a motorized corps marker comes up, then the motorized corps may be activated a second time. During a repeat activation of a motorized corps, the distribution of EMs stops. After the corps activation is concluded, draw the next EM.
14.1.2.
The drawing of EMs depends on the rules set out in the game scenarios. Each player has his own EMs. A player may save an EM for as long as he likes, if other uses of that marker are not stipulated in the rules.
14.2. End of Event Markers
If the "End of Event Markers" marker appears during EM distribution, then the drawing of all EMs for this turn (other than motorized corps) immediately ends. All undrawn EMs are either removed from the cup or ignored.
The latter is sometimes preferable, since in removing the EMs a player might see the number of motorized corps markers and obtain information he is not supposed to know. In other situations, the question is irrelevant.
14.3. Location of Event Markers in the Game
Drawn EMs may be returned to the cup only during the Pooling of Event Markers Phase.
14.3.1.
Some EMs (for example, "Mobile Engineer Obstacles") may be found in the game for several turns (this is stipulated in the scenario). They return to the game when their effects in the game have ended.
14.3.2.
Some EMs (for example, "Penal Battalions") are used as combat unit counters and may be in the game permanently.
14.4. Tactical Superiority Marker
The "Tactical Superiority" marker reflects increased tactical capabilities of some troops compared with others. Each scenario specifies which troops can play "Tactical Superiority" as well as the number of such markers.
A player may use a "Tactical Superiority" marker to reroll the die on attack or defense if he is not satisfied with the first die roll on the CRT. Always apply the result of the second die roll. A player may see the first die roll before deciding to reroll. Only one reroll is permitted in a single combat.
15. Scenarios and Victory Conditions
Each game comes with a scenario booklet. It includes brief historical information about the operation and an order of battle, and gives the setup of forces and their strengths (the troops in an operation are not always fresh and without losses), the composition and description of operational markers, and the troops' supply sources.
Each scenario includes the victory conditions for the opposing sides. As a rule, this involves inflicting losses on the opponent and capturing important strategic locations. Fulfilling each of these conditions gives victory points. At the end of the game, compare the accumulated number of victory points, using their ratio to determine the winner.
Optional Rules
The optional rules make the game more complicated, but allow a more detailed representation of several peculiarities of the gamed operation. The optional rules are recommended for experienced players.
The counters used when playing with the optional rules are marked with a white circle in the upper left corner.
1. Detachment of Battalions
A player may detach independent battalions from his regiments as desired. Each reduction of a counter by 1 step allows the detachment of one battalion of the corresponding type. A unit may recover a step by "absorbing" an independent battalion of the same type of troops.
2. Artillery
Artillery units may be represented by separate counters. Each artillery counter has a range, which is how far it can fire in hexes. When attacking, artillery must be able to reach any attacking hex, while on defense it must be able to reach any defending hex. The "fire strength" is printed inside parentheses. In order to use its full fire strength, artillery must fire from a distance or be stacked with combat units. In any other cases, an artillery unit has a strength of 1 on attack or defense.
Artillery represented by counters has nothing to do with artillery points.
2.1. Artillery Column
For movement purposes, artillery (other than anti-tank artillery) must change to artillery column status. Artillery column status is indicated by flipping the artillery counter to the appropriate side. At the beginning of his Movement Phase, a player must determine the status of his artillery units. To do this, before starting to move his units and at no cost in MPs, he may switch the artillery to movement status. He may only change an artillery unit's status at the beginning of a later Movement Phase (aside from retreating as a result of combat).
When artillery wants to deploy, it is flipped back to its combat side. Only deployed artillery may conduct fire.
Artillery in column has a combat strength of 0. If artillery in column is attacked separately, it is immediately eliminated.
Retreating artillery counters are immediately switched to Artillery column status.
3. Self-Propelled Artillery
Self-propelled artillery (including anti-tank) combines the characteristics of tanks and artillery. Self-propelled artillery may have both tank and anti-tank shifts. The player may decide which shift he is using in a particular combat.
Self-propelled artillery is not required to switch to artillery column for movement.
All self-propelled artillery units have a range of 2 hexes.
Self-propelled artillery has nothing to do with artillery points.
3.1. Assault Guns
Assault guns carry out direct artillery support to friendly units in direct line of sight.
Assault guns have their attack factor in parentheses with a minus sign (-N). The number indicates how many strength points are subtracted from the opponent's combat strength when the assault gun unit participates in an attack (to a minimum strength of 1).
An assault gun unit may not fire from a distance.
Assault guns always have a tank shift of 1 (in addition to their anti-tank shift), unless otherwise stated.
3.2. Self-Propelled Anti-Tank Artillery
Self-propelled anti-tank artillery is treated the same as normal anti-tank artillery, but uses mechanized movement.
4. Armored Trains
Armored trains are used like self-propelled artillery. They may move only along railroads, at a rate of 30 hexes per movement phase.
5. Reconnaissance
The attack and defense strengths of reconnaissance units are printed in green. Reconnaissance units may reveal the composition of enemy stacks.
5.1. Details of Conducting Reconnaissance
A reconnaissance unit that is in contact with enemy units may conduct reconnaissance against an enemy stack (and must do so if the hex contains a lone unit). The result of the reconnaissance is determined by a die roll:
- 6 – Successful reconnaissance; the enemy stack is exposed and the player receives 1 CRT shift in his favor when attacking the exposed stack. The appropriate marker is used to indicate successful reconnaissance. The successful reconnaissance marker is removed at the beginning of the next player turn.
- 4, 5 – The opponent is required to reveal the composition of his stack.
- 2, 3 – The reconnaissance unit was unable to reveal the composition of the opponent's stack.
- 1 – The reconnaissance unit is eliminated.
A player may conduct several reconnaissance attempts in a turn, movement points allowing, including multiple attempts against the same enemy stack.
5.2. Retreat of Reconnaissance Units
Reconnaissance units may, at the end of an enemy movement phase or before an enemy attack, exit the ZOC of enemy units, ignoring any enemy ZOCs and even enemy units (!) on the way. Reconnaissance units retreating in this way are required to conduct reconnaissance in each hex with an enemy ZOC or counter.
Once a reconnaissance unit begins to exit enemy ZOC, it is required to continue movement until it is completely out of ZOC. The reconnaissance unit is required to retreat along the shortest possible path toward units from its division.
This rule reflects the resourcefulness and mobility of reconnaissance units. The retreat of reconnaissance units through ZOC and even through enemy units reflects not the possibility of their breakthrough or unseen infiltration, but the fact that reconnaissance units, possessing great speed, may in good time retreat in the face of the enemy. So as not to create a cumbersome mechanism for avoiding combat, the designer decided to reflect these reconnaissance unit capabilities in this manner.
6. Construction Units
Construction units may create any level of fortifications.
7. Anti-Aircraft Units
Anti-aircraft units in the game are in addition to the anti-aircraft factor (indicated in the scenario). Anti-aircraft units may "knock out" all enemy air support markers in a 1-hex radius on a die roll of 4-6. Each anti-aircraft unit has an anti-tank shift. Anti-aircraft artillery is required to switch to artillery column status for movement.
8. Flamethrower Tanks and Special Engineer Equipment
Such units have the possibility to use a special engineer modifier (indicated by a yellow engineer symbol inside a red rectangle). When using them the player receives a +1 modifier to the die roll when attacking fortifications and settlements (which give an effect according to the CRT). This modifier may be in addition to the normal engineer modifier.
Designer's Notes
The outline of the "Tank Battles" game system first began to take shape back in 1998. Before that, acquaintance in 1994 with Jack Radey's "Korsun-Shevchenko's Cauldron" ("Korsun Pocket") game system, published in 1979, showed me and my companions how one could reproduce operations of the Second World War in a high-quality and realistic way. In turn, Jack Radey's system (and he made no secret of this) was itself based on the game "engine" of the monster game "Wacht am Rhein" on the battle in the Ardennes, created by the legendary James Dunnigan and Redmond Simonsen and published by the no less legendary firm SPI in 1977.
The scale of Radey's game was astounding: 1 counter = a battalion; 1 mile per hex; three turns per day; as a result the 2,400 counters, 4 large maps, and a hard-to-predict playing time made "Korsun Pocket" a true "monster." However, we enthusiastically devoted our time to this engrossing game.
Then as time revealed, following acquaintance with a number of games from other wargame publishers, we were really in luck. From the very first we encountered a very successful system that combined the virtues of an interesting game process and historical plausibility. Besides that, "Korsun Pocket" was a classic hex-and-counter wargame from the standpoint of its mechanics. Therefore, when the desire arose to make a game on the Second World War along classic game lines, the image of Jack Radey's work stood invisibly before me, and I make no secret of this.
The first operation covered in the "Tank Battles" system was "Dubno-Rovno 1941." Then came other battles: "Moscow 1941," "Crusader 1941," "Kursk 1943," and several others. I immediately decided for myself that I would not use the cumbersome scale of "Korsun Pocket" and moved the scale one level higher. That is, I changed it from battalion level to regimental (one counter equals a regiment) and, accordingly, determined that one hex equals 5 kilometers. This allowed divisions, when necessary, to set up historically reliable unit densities on attack and defense.
The tank and anti-tank "shifts," "attack-defense-movement" characteristics, various equipment types, and combat system on the whole bring to mind "Korsun Pocket." In the earliest design, I wanted to reflect in detail the internal structure of the forces and their deployment of a variety of combat equipment. Immediately regiment-size counters were set up on the map, and on separate detached sheets were located their subordinate elements and individual types of armored vehicles (approximately 20 vehicles per counter). As practice showed, such detail was too complicated for inexperienced players and it had to be abandoned in favor of simplification, although this step also demanded serious moral sacrifices. As a result, the counters began to correspond more to the organizational structure, while the detached sheets, fraught with "Chinese draws" [i.e., knocking pieces out of place - KDC], passed into non-existence. For all intents and purposes, the game paid for this by giving up individual tank types. Nevertheless, wherever it was possible to preserve distinctions, I tried to do so – for example, in the case of qualitative strengthening of divisions with separately detached types of heavy tanks. Or in mixed-type Soviet tank brigades (consisting of T-34s and T-70s), when reduced such counters flip from the T-34 side to the T-70 side, and their tank shift changes, which does not happen with tank brigades consisting exclusively of T-34s.
Difficulties also arose in choosing the time scale, since unit movement depends directly on it. At first one turn was equal to half a day. However, the decision turned out to be too unwieldy, although it allowed support for the necessary loss dynamics. I always had in mind that the game should normally last 6-8 turns, 10 at the most. In the end, I managed to reach the version in which one turn equaled one day. By using repeat activations of motorized corps, overruns, and increased size of the units represented by the counters, a critical balance between the time scale and the loss dynamics was reached.
I consider one of my own successful finds to be the "prepared" and "unprepared" attack phases. They allow one to break through the enemy defense and gain success in the depths of his position in the course of a turn. On the other hand, the unprepared nature of an attack at the end of movement does not allow a player's forces to maneuver too recklessly and conduct unstoppable strikes on the opponent a moment when, by the rules of the game, he cannot react in view of the obvious passivity imposed by the turn sequence.
The particulars of each distinct operation are reflected by means of the event markers, among which are mixed the repeat corps activation markers. The event markers mean that you don't need a separate rules set for each new operation and make the process of assimilating the particular details of the battle easy and accessible, even in the course of the game. The random sequence of the repeat activation of motorized corps was called for to reflect the mobility, unpredictability, and fluidity of tank combat.
I want to emphasize that "Tank Battles" was created as a system from the very beginning. During development, this allowed for verifying the correctness of the adopted design decisions in the conditions of various armies in various military theaters: summer in Ukraine, winter outside Moscow, and fall in Africa. The result, I hope, is a highly historical and suitable game system, calling to acquaint players with the great list of famous battles of the Second World War.
On the basis of rich experience of acquaintance with military-historical games, I can affirm that they are one of the best means of learning history. Already after one game, the volume of knowledge about the simulated event is increasing many times. From under the faceless little red and blue arrows with incomprehensible verbiage arise distinct people and troops, and then comes a deep understanding of what difficulties and what possibilities the opposing sides had.
Terrain Effects Chart
Effect on Movement (MPs per Hex) for Infantry, Motorized and Mechanized units; Effect on Combat in the last column.
| Terrain Type | Infantry | Motorized | Mechanized | Effect on Combat |
|---|---|---|---|---|
| Clear | 1 | 1 | 1 | – |
| Forest | 2 | 4 | 3 | 1 shift on defense; no bombing |
| Dense Forest | 4 | Not Allowed | Not Allowed | 1 shift on defense; +1 AT shift |
| Broken | 2 | 4 | 3 | 2 shifts on defense |
| Marshy | 2 | 5 | 3 | Attack into/from: 1/2 attack strength |