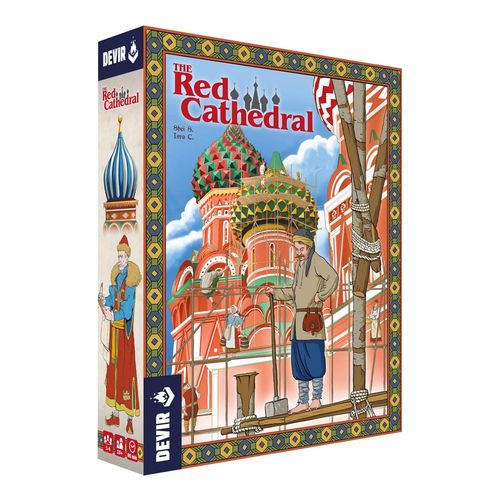
The Red Cathedral
The Red Cathedral Rulebook
Table of Contents
Table of Contents
Game Setup
-
Place the Market board in the center of the table, making sure to leave space next to it for the Cathedral Construction Site.
-
Each player chooses a color and places the following in their own playing area:
- Their personal Workshop board, with either the basic side (recommended for your first few games) or the advanced side up.
- 4 (of their 6) Banners are placed in the Inventory on their Workshop board. The remaining Banners are placed outside the Inventory.
- Their 4 Ornamentations (1 Door, 2 Arches, and 1 Cross) are placed in the matching spaces of their Workshop board.
The Advanced Workshop side shows a compass on the workbench. They have special rules for the use of Workshop tiles and for unlocking the Ornamentations (see Advanced Game Workshops). If you are playing with the Advanced Workshops, use the following setup: Ornamentations are placed in the indicated Workshop tile spaces, four Banners are placed in your Inventory and two Banners are placed in your white Workshop tile spaces.
-
Place the score markers for each player on the "2" space of the Scoring Track (around the edge of the Market board), with the "+40" facing down.
-
Shuffle the Resource tiles and place one randomly in each of the 8 spaces on the Market board. Turn them face up.
-
Shuffle the Influence cards for each of the four groups (the Craftsmen's Guild, the Teamsters' Guild, the Merchants' Guild, and the Clergy) separately. Draw one of each and place them in the four spaces indicated on the Market board (it does not matter which position each card is placed in). If this is your first game, we recommend that you use this set of cards.
-
Take all 5 dice in both hands and shake them. Starting with the space next to the Resource tile that grants Recognition Points, let one die fall randomly into that space. Then drop one die in each of the following spaces, in the direction of the arrows.
Resources and Materials
We use the term Materials to refer to any "physical" objects that are used in the construction, such as bricks or lumber. The concept of Resources (as we use it) includes the Materials, but also Rubles and Recognition Points.
The six Materials are:
- Lumber
- Brick
- Stone
- Gold
- Green Gem
- Purple Gem
The "any Material" icon is equivalent to one unit of any one material.
Game Play
The game is played in turns. Each player plays their full turn before it becomes the next player's turn, and the order of play is always clockwise around the table.
The game ends when one player has completed the construction of their sixth Cathedral section. That player gets 3 Prestige Points as a reward and the end of the game is triggered. The other players will have one final turn before the game ends.
Solo Play: If you wish to play the Solitaire Mode, you can find the rules in the Solitaire Mode section.
The Scoring Track
The Scoring Track that runs around the Market board counts two different things: Recognition Points (numbers with a beige background) and Prestige Points.
Whenever the game tells you to "gain or lose Recognition Points," move your score marker the number of spaces indicated forward or backwards. When you are told that you "gain or lose Prestige Points," move your marker to the closest Prestige Point space forward or backwards. At a certain point, the Recognition Point and Prestige Point spaces are equal.
At the end of the game, the player with the most Prestige Points wins.
A Player's Turn
During their turn, the player must carry out one of these 3 basic actions:
- a. Claim a Cathedral Section
- b. Build sections of the Cathedral
- c. Acquire Resources from the Market
In addition, at any moment during their turn, a player may decide to execute any of these two optional actions:
-
Lose Prestige Points in exchange for rubles at a rate of 1 Prestige Point for 2 Rubles. They move their score marker back to the previous Prestige Point space and take 2 Rubles from the general reserve.
-
Lose 1 Prestige Point in order to roll the dice from any one space on the board. Move the score marker to the previous Prestige Point space, choose one of the eight spaces on the board and re-roll all the dice there. Players can use this optional action only once per turn.
a. Claim a Cathedral Section
The builders are assigned sections of the Cathedral to work on and place the scaffolding they need to carry out their work, represented in the game by the Banners. This will allow the towers to grow vertically out of the main structure and allow the construction teams to reach the highest parts of the towers.
To claim part of the Cathedral, a player carries out these steps:
-
They take any one Banner from their personal Workshop board (possibly opening up a space in their Inventory).
-
They Claim one available Cathedral card by placing their Banner on top of it. A Cathedral card is available if it does not have a Banner on it and it is either any base card or any other type of card that is directly above another card that already has a Banner on it (from any player).
-
They take the Workshop tile that is on the claimed Cathedral card and place it in any empty Workshop space on their Workshop board. They have two choices:
- A. Place the Workshop tile face down. If they do, they will not be able to activate that Workshop later.
- B. Pay the cost (in Rubles) shown in that Workshop space and place the Workshop tile face up. They will be able to receive the benefit shown on that Workshop tile each time they move the die that matches that Workshop's color—see "Activate a Workshop Tile." If the Workshop tile is paid for and placed face up, the player immediately gains the benefit shown on it.
Advanced Game Workshops
If you have chosen to play the game on the advanced side of the Workshop boards, keep the following things in mind. The game plays the same as the standard game in all aspects except that:
- Placing a tile in the Workshop has a fixed cost of 3 Rubles.
- The Ornamentations are not available right at the start of the game. When part of the Cathedral is claimed and the Workshop tile is placed (after first paying the costs), the corresponding Ornamentation becomes available. If the player cannot or does not want to pay to place the tile, the Ornamentation does not become available.
- The Banners in the white Workshops are used in the same way as those in the Inventory, and can be taken directly from there. A Workshop tile cannot be placed on a white Workshop space if the Banner blocking it has not been used.
b. Build sections of the Cathedral
Once the scaffolding has been installed, the construction teams can get to work and finish that part of the Cathedral. To do that, they will need construction Materials and, if they have the opportunity, they can add finishings to the work with beautiful Ornamentations.
Each time a player chooses this action, they may deliver up to three Materials to the Construction Site. Then those materials can be used to Build and/or Decorate the Cathedral. If a section now has all of the required Materials, it is completed and the player is awarded Recognition Points and possibly Rubles. Adding Ornamentations may also award Prestige Points.
Building
The player takes the Materials they want to deliver from their Inventory and assigns them to one or more Cathedral cards that have their Banners on them. There is no requirement that the player finishes a section in a single delivery—simply leave the Materials on the card to show that they have already been delivered.
Building a Cathedral Section: A Cathedral section is finished once it has all of the required Materials on it. When this happens, the following steps are taken:
- The Materials are removed and returned to the general reserve.
- The player gains the Recognition Points and Rubles shown on the card.
- The card is flipped over so it is showing the finished side. The player's Banner is left on the card.
What happens if a Cathedral section is completed when there are unfinished sections below it?
If, when a section of the Cathedral is completed, there are cards that have not been finished below it in the same tower, the players who have claimed those unfinished sections will be chastised by the Tsar. The player(s) who claimed those unfinished cards immediately lose Recognition Points equal to the number of finished sections above their cards without counting their own completed sections.
Decorating the Cathedral
Once a section of the Cathedral has been completed, there is an opportunity for the construction teams to add finishings, installing decorations and other types of improvements.
Each section of the cathedral, once finished, has space to place a single Ornamentation: bases allow the construction of a Door; middle sections allow the addition of Arches, and domes allow the erection of a Cross. Any player can install an Ornamentation on any completed Cathedral section, regardless of who built that section.
To decorate a Cathedral section, the player must deliver the Materials required for the Ornamentation (Door = lumber; Arch = stone; Cross = gold) plus 0, 1, or 2 jewels, which are "set" into the Ornamentation. If jewels are set into the Ornamentation, the player immediately gains:
- 1 Prestige Point for each jewel set into it, or
- a total of 3 Prestige Points if 2 jewels of different colors are set into it.
If an Ornamentation is added without any jewels, no Prestige Points are awarded at that time. Either way, all Ornamentations can generate Prestige Points at the end of the game (in addition to those awarded for any jewels when built), so it makes sense to invest in them even if they are not accompanied by jewels.
Each Material (including any jewels) used for an Ornamentation counts as one Material delivered. Remember that you can only deliver a maximum of three Materials during each Build Sections of the Cathedral action. In this case, when a player sends Materials for a Decoration, all the chosen materials must be sent on the same turn. Unlike parts of the Cathedral, Decorations must be sent and finished in one go.
c. Acquire Resources from the Market
A fundamental part of construction is having all of the required Materials at the moment you need to use them. Everything you might need is available in the Market. Furthermore, your relationships with the different Guilds will help you complete your job and are crucial to becoming the most famous and appreciated architect! Resource management and the use of the Market are the heart of The Red Cathedral.
To visit the Market, a player must follow these steps:
-
Announce which Market die they are going to use.
-
Move that die around the Market board in the direction of the arrows exactly the same number of spaces as the value it shows.
- Optionally, if they use the white die or the die that is their own color, they may spend Rubles to move it additional spaces, at a rate of one Ruble for each extra space (which can result in a total movement that is greater than six spaces).
- Important: A die cannot end its movement on a space that is already occupied by three dice. In other words, the maximum number of dice that can be in each space is three. If the moving die would end up in a full space, the player must choose a different die to move or—if it is the white die or their color—they may pay to increase its movement.
- The die remains on the space it reaches after moving.
-
The player now performs any Market actions that they want to take, based on the space they moved to.
-
Finally, they roll all of the dice that are in that space and then put them back in that space.
Market Actions
Once the die has completed its movement, the player may perform any or all of the following actions. They may perform each action only once, but they may be performed in any order the player wishes:
- Obtain Resources from the Market
- Use Influence
- Activate a Workshop Tile
1. Obtain Resources from the Market
The player takes the resources shown on the Resource tile next to that space from the general supply, multiplied by the number of dice in that space (as a maximum: the player may take a smaller amount if they wish).
Resources are limited to the quantity in the general supply. If any of them run out, any action that would award that Resource has no effect until the supply is replenished.
The Inventory: Every time a player gets Materials, they must put them in their Inventory zone. Each Inventory initially has six open spaces, which can hold one Material each. Players can increase the size of their Inventories by claiming sections of the Cathedral.
Important: If you obtain Materials but there is no open space for them in your Inventory, you cannot discard those already in your Inventory to make space. You can only keep Materials that you have enough space for.
2. Use Influence
Players can use their influence with the four groups on the board—the Craftsmen's Guild, the Teamster's Guild, the Merchant's Guild, and the Clergy—to perform a variety of actions. Each group is assigned a quadrant (representing the seasons of the year) on the Market board, which includes two Market spaces. The quadrant where the chosen die's movement ends determines which of these groups can be influenced that turn.
When a player influences a Guild or the Clergy, they may perform one of the two actions shown on that group's card. Some of these actions require a cost and others do not. Actions marked with the lightning icon only allow the player to perform that action one time this turn, while those with the infinity icon can be performed as many times as the player wishes. For more details, see the Influence Actions Chart.
3. Activate a Workshop Tile
If the player has a Workshop tile assigned to their Workshop that matches the die they moved this turn, they may immediately obtain the benefit shown on that tile.
Some Workshop tiles provide resources, while others show one of the five dice colors. When you activate a Workshop tile that shows a die, you gain the resources shown on the Resource tile next to the space that die is sitting in. You only get these resources once, regardless of the number of dice in that space.
White Workshop spaces: The White Workshop space on each player's Workshop board has two spaces where Workshop tiles can be placed. If a player moves the white die on the Market board and has two tiles assigned to it in their Workshop, they may only choose one of the two to activate that turn (you cannot use both).
Remember: After completing your actions in the Market, you must roll all of the dice in the space you landed on.
Influence Actions Chart
Craftsmen's Guild
- Sell any 1 Material for 1 Ruble.
- Buy 1 of the indicated Materials for 1 Ruble.
- Sell 1 of the indicated Materials for 1 Ruble.
- Buy 1 Material of any type for 2 Rubles.
- Sell 1 of the indicated Materials for 2 Rubles.
- Buy 1 of the indicated Materials for 2 Rubles.
Teamster's Guild
- Pay 1 Ruble to deliver 1 Material to the Construction Site. It can be used to build and/or decorate.
- Obtain 1 Ruble.
- Pay 3 Rubles to deliver 2 Materials to the Construction Site. They can be used to build and/or decorate.
- Pay 2 Rubles to switch the positions of any 2 Resource tiles in the Market.
Merchant's Guild
- Exchange 2 of the same Material in your Inventory for any 1 Material.
- Exchange 1 Ruble plus 1 Material from your Inventory for 1 of any other Material.
- Exchange 4 of the same Material in your Inventory for any 2 Materials.
- Activate 1 of your Workshop tiles.
Clergy
- Obtain 1 Recognition Point.
- Pay 3 Rubles to obtain 1 Prestige Point.
- Discard 3 different Materials to obtain 1 Prestige Point.
- If you have completed at least 1 Cathedral section of each type, you get 2 Prestige Points.
End of the Game
As soon as any player has completed their sixth Cathedral card, and the Recognition Points provided by that card have been awarded, they gain 3 additional Prestige Points for bringing an end to the game. Then, the other players will each have one final turn before the final counting of points is performed.
Final Scoring
At this time, all players must move their score counters back to the closest lower Prestige Point space. If the player is already on a Prestige Point space, they do not move.
Important: If a player goes beyond 40 Prestige Points, flip their score counter so it shows the "+40" side and continue counting from the beginning of the track.
Additional Scoring
On top of the Prestige Points earned during the game, players will add:
- 1 Prestige Point for every 5 Materials and Rubles that they return to the general reserve at the end of the game.
- A number of Prestige Points based on their contributions to each of the towers.
Tower scoring: The total value of a tower is 2 Prestige Points for each section that is completed, plus 1 Prestige Point for each Ornamentation on it. Any sections that are not completed are not counted at all in the final scoring.
Each player counts the number of Banners and Ornamentations of their color they have on the completed Cathedral cards in that Tower.
- The player with the highest total receives the full value of that tower.
- The player with the second highest total receives half of the total value of the tower (rounding down for half points). The next player after them receives half of that, and so on.
If there is a tie for any position, add up the Prestige Points for the positions of the tied players and divide them evenly between them (rounding down). If a player does not have any Banners or Ornamentations in a tower, they receive no points for that tower.
Special Rules for Two-player Games
The player with the greater presence in the tower (more Banners and Ornamentations) gets all of the points granted by that tower and the other player, if they are present in that tower, gets one third of the total instead of half (always rounding down). If they are tied, neither player gets any points for that tower.
Winning the Game
The player with the most Prestige Points is the winner!
If there is a tie, the tied player with the most completed sections wins. If the tied players have completed the same number of sections, the one with the most Ornamentations placed will be the winner. If they are still tied, then the players share the victory.
Solitaire Mode
Ivan Yakovlevich was the architect chosen by the Tsar to design his great cathedral. By direct order of Ivan the Terrible, he will be the one who personally directs one of the construction teams. Nevertheless, your team will also take part in the job. Will you be able to do such brilliant work that it dazzles the Tsar even though you are in direct competition with the architect in charge of the construction?
Setup
Set up the game as you would for two players. Place both score counters on the Scoring Track and set the six Banners and the Ornamentations of the other color to the side. This will be the color used by Ivan Yakovlevich for his building team. You will not need his Workshop board.
Take the Workshop tiles that are only used in games with 3-4 players (the "+" tiles) that have the die action icons. You will have five, one of each color.
Shuffle the five Solitaire cards and lay them out in a line. This is the order that Ivan will carry out his actions. Then, mix up the Workshop tiles that you pulled out and randomly place them face up in the spaces indicated on the Solitaire cards. Place five of Ivan's Banners on top of the "Claim a Cathedral Section" Solitaire card.
Place Ivan's Ornamentations at the end of the row.
Then, with the remaining Banner, immediately perform a Claim a Cathedral Section action for Ivan, claiming the Cathedral base card that grants the most Recognition Points. If there is more than one card worth the same number of points, Ivan will choose the tower that is farthest to the left. Remove the Workshop tile that was on the base card claimed by Ivan from the game. Now the game starts with you playing your first turn.
Gameplay
Play your turn in the normal way, choosing one of the three available actions. Then it will be Ivan's turn. Continue alternating turns in this way until you or Ivan have finished their six parts of the Cathedral.
Regardless, as soon as the end of the game is triggered, no player will get the 3 bonus, but the other player will still get one final turn.
Ivan's Turn
During Ivan's turn, look at the row of Solitaire cards and find the one furthest to the left that has a face-up Workshop tile. First, move the die shown on that Workshop tile as if Ivan was performing an Acquire Resources from the Market basic action, and then flip the Workshop tile face-down. If this would move a die to a space that already has three dice, do not perform this part of Ivan's turn.
Ivan will not gain any Resources from this action, but he may still obtain a Recognition Point (either because he lands on a Market space that grants it or because the Influence card gives him a Recognition Point). In this case, update his score counter.
After the die moves (if possible), perform the action indicated on that Solitaire card.
If, at the start of Ivan's turn, all of his Workshop tiles are face down, carry out these steps before taking Ivan's turn as normal:
Ivan will place one Ornamentation on a built card, if he can, following this criteria and order:
- A. What Ornament to place? The order in which to place them is Door - Arch - Arch - Cross. Once the Door is in place, then the next to be placed is one of the Arches, and so on.
- B. Where to place it? Ivan will try to decorate a card constructed by the player (if there are more than one, you choose which one). If that is not possible, he will choose one of the cards built by him (if there is more than one, you choose which one).
- C. If this is not possible, ignore this step, even if there are other Ornamentations that can be placed. If Ivan has placed an Ornamentation, he gets 1 Prestige Point. He doesn't have to pay any Materials to place them.
Then, take all his Workshop tiles, mix them up again, and place them one by one on the cards face up to prepare for his turn.
Solitaire Card Actions
Actions Performed by Ivan: Ivan immediately obtains 4 Recognition Points.
Inventory: Place 4 Materials of any type on this card. The Material type does not matter, simply take Materials from the pile that has the most.
Transport: Place all of the Materials from Ivan's Inventory on top of his Construction card.
Claim a Cathedral Section: If he still has any Banners, put 1 Banner on a Cathedral card according to this order of preference:
- On a card directly above a section claimed or built by you.
- On a base.
If neither of these conditions can be met, the player chooses which card Ivan claims. If the Workshop tile on that card grants a Recognition Point, Ivan gets that Recognition Point. Either way, any tile that he obtains is discarded.
Construction: Place all of the Materials on top of this card on the Cathedral sections under construction by Ivan. When Ivan takes this action, he does not need to match the specific resources indicated on the Cathedral cards. The only thing he must respect is the number of Materials required. (For example, if a section requires 2 lumber, 1 brick, and 1 gold, for Ivan it requires any 4 Materials). If that section is now completed, Ivan receives the Recognition Points that would normally be awarded.
To determine which card will receive the Materials, look from left to right, bottom to top. The first card claimed by Ivan that you find will be where the Materials are placed. If Ivan has more Materials than are needed, the extras are placed on the next Cathedral card he is building. For example if the current card only needs 3 Materials to be completed, and Ivan has 4 to place, the 1 remaining will go to the next card.