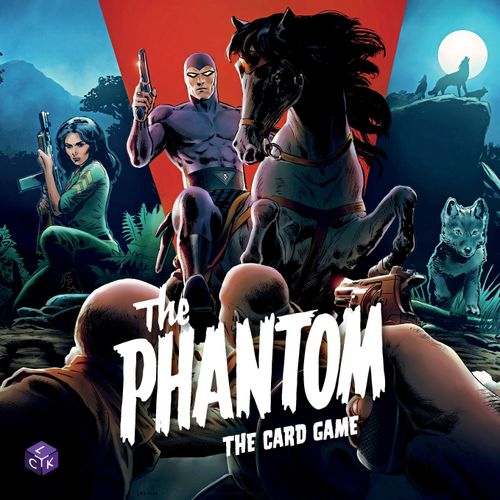
The Phantom: The Card Game
The Phantom: The Card Game Rulebook
Table of Contents
Table of Contents
- Components
- Introduction
- Setup
- Golden Rules
- Gameplay
- Icons and symbols
- Cardchecks
- Combat cardcheck example
- Completing a mission
- End game
- Replaying an adventure
- Additional rules
- Loot
- Achievements
- Martial Arts special rules
- Saving
- Creating your own player deck
- Variant rule: Unlocking promo cards
- Variant rule: Universal Unique
- Variant rule: Item restrictions
- Variant rule: Lingering wounds
- Card Terminology
Components
- Rulebook
- 2 Legend boards
- 58 tokens: 16 Good mark / Multi-use, 14 Inner fire / Mystery, 16 Skull mark / Wound, 12 Triple Multi-use / Triple Wound
- 260 cards:
- 2 Starter decks, each containing: 10 Injury cards and 17 Player cards.
- 3 Adventure decks. Each adventure has multiple parts, defined by the Lore cards, each with an increasing Roman numeral on its back.
- Story of Devil: 6 Lore cards, 7 Mission cards, 5 Objective cards, 23 Player cards, 5 Enraged Wolf cards, 17 Destiny cards, 1 Loot card, and 1 Achievement card.
- Diana in the Jungle Patrol: 4 Lore cards, 4 Mission cards, 2 Objective cards, 31 Player cards, 21 Destiny cards, 1 Loot card, and 1 Achievement card.
- Year One: 9 Lore cards, 4 Mission cards, 4 Objective cards, 25 Player cards, 30 Destiny cards, 1 Loot card, and 1 Achievement card.
- First print exclusive Promo cards - Got Your Back: 3 Player cards (See the Unlocking promo cards variant for usage).
Card Anatomy
- Name - Card name (if a * before it, it is Unique).
- Type and subtype - Subtypes are listed after the "-".
- Abilities and Effects - One or more listed.
- Cost - Resources needed to play this card.
- Discard reward - The resource received for discarding this card for its benefit.
- Keywords - Used for sorting and identifying categories of cards.
- Number in the specific series and from which pack the card originates.
- Flavour text - From the actual comic books.
- Difficulty - Stays the same during 1 game.
- Type line - Must be resolved last, after the card's text.
Card types shown: Injury card, Player card, Lore card, Destiny card, Mission card (double-sided), Achievement card, Objective card (double-sided), Loot card, Legend board.
Introduction
The Phantom: The Card Game is a solo, or co-operative game for 2 players set in the universe of The Phantom.
The goal of The Phantom: The Card Game is to complete adventures. To progress through an adventure, use your cards to complete missions.
Each player starts with a deck of cards referred to as their Player deck. This deck represents their Legend, and the various abilities, allies, and options available to them. While playing, this deck will change, cards will be added to it permanently.
There are two Legends within the game: The Phantom and Diana. In a 2-player game, each player takes on the role of one of these Legends. In a solo game, you choose which Legend you wish to play as.
Setup
Please refer to the setup diagram (Resolved pile, Destiny deck and Destiny row, Set aside pile, Active mission, Token supply, and each Legend board with its Injury deck, Player deck, Discard pile, room for Resource tokens, and Play area). Replaying an adventure? See Replaying an adventure below.
- Each player selects a Legend and places their Legend board in front of them.
- Each player takes the deck (first game: starter deck) that corresponds to their Legend. The corresponding cards can be found by their set symbol on the bottom right corner of the cards.
- Each player separates out their Injury cards (cards 1-10), shuffles them and places them face down at the top of their Legend board. This is their Injury deck.
- Each player shuffles the rest of their cards (first game: 11-27) and places them face down on their Legend board. This is their Player deck. As you unlock cards throughout the game, you will expand your Player deck with newly obtained cards.
- Gather all tokens to form the Token supply.
- Choose an adventure to play. Gather all the cards for that Adventure deck indicated by the symbol in the bottom right and sort them into numerical order, based on the numbers next to the symbol. Be careful not to look at any of the cards in detail until instructed to.
- Remove the Achievement ("A") and Loot cards from the bottom of the deck and place them face up nearby along with their associated reward cards. Take note of what needs to be fulfilled in order to complete them. If this is your first game, skip this step.
Set symbols (bottom right of cards): Diana is marked with a flame symbol and the Phantom with a mask symbol; Story of Devil with a wolf symbol, Diana in the Jungle Patrol with a leaf symbol, and Year One with a handcuffs symbol.
Before your Adventure begins
Turn over the first Lore card (marked with the Roman numeral I on the card back) and follow its instructions. This will tell you how to create the Destiny deck for the start of this adventure. Leave a space to the left of the Destiny deck to place the Resolved pile.
The cards indicated on Lore cards are found next in the Adventure deck. Avoid reading the next Lore card until instructed to do so.
After you completely resolve this, or any future Lore card, return them to the game box.
Choose difficulty level
Choose a difficulty level: easy, normal, heroic, or mythic. (Start your first game on Easy. Difficulty levels are permanent during an adventure.)
Cards are marked EASY, NORMAL, HEROIC or MYTHIC (e.g. "EASY / NORMAL" or "HEROIC / MYTHIC").
IMPORTANT: During the adventure, you will find cards that have multiple copies or are double sided, each relating to a particular difficulty level. You must only use the cards that match your chosen difficulty level.
Golden Rules
Active player
Whenever a card says "you" it refers to the active player.
Card text
If rules on a card contradict the rulebook, follow the rules on the card. When cards contradict each other, the target card takes precedence.
Exhausting and Readying cards
Some cards have abilities that require you to exhaust the card. To exhaust a card, rotate it 90 degrees clockwise. Before this card can be exhausted again it must first be readied, turned left 90 degrees to an upright position. Only cards in a player's Play area can be Exhausted or Ready.
Gaining cards
Lore cards may instruct you to gain a card per player either by placing it on your Discard pile or in your Play area. Achievement and Lore cards may instruct you to "gain (X/Y)", in this case you decide if you want it on top of your deck, in your hand or on your Discard pile. The range X/Y indicates that you draw from all cards in the range between X and Y, a single card at random.
Only the player defeating the Enemy gains a card from Loot while each player who fulfills the conditions of an Achievement gains a card. Gained cards are permanently added to your deck. (See Creating your own player deck).
Fulfilling parts of a card
If you are unable to fulfill everything on a card, do as much as you can, starting from the top.
For example: You reveal Making the best of the Situation. If there is only one card in the Resolved pile, you must place that on the Destiny row. You will be unable to fulfill the second part of the card, but you can complete the third part, and remove the card from the game. (The Event reads: Place one card from the Resolved pile on the Destiny row and resolve it. Place another card from the Resolved pile on the bottom of the Destiny deck. Return this card to the game box.)
Set Aside
You will encounter cards with instructions to Set aside cards, they are placed in a face up pile. These cards do not impact anything in the game until they are in play. For example: a card has an effect that tells you to "From the Enraged Wolf cards Set aside, place one on the Destiny row." Effects like this are the only way Set aside cards come into play. If there are no Set aside cards with that name, instead skip that instruction.
Gameplay
In a 2-player game, both players will alternate taking turns. In a solo game, you play one turn after another. Keep taking turns until the game ends, in either a win or a loss. End game is explained below.
Note: The enemy does not take turns, only players do.
On your turn, carry out the following 6 phases in order:
- Recovery phase
- Destiny phase
- Preparation phase
- Adventure phase
- Fate phase
- Cleanup phase
1. Recovery phase
Choose one of the following options:
- Heal Injuries. Return all your face up Injury cards to the game box (unless you are playing with the Lingering Wounds variant rule).
- Ready all your exhausted Player cards.
Note: Recovery phase is skipped during the first turn of the adventure as your Legend will not be injured, and none of your cards are exhausted.
2. Destiny phase
Unless stated otherwise on the active Mission card:
- Reveal the top card of the Destiny deck and place it face up to the right of any existing cards on the Destiny row. If the Destiny deck is empty and you need to reveal a card, shuffle the Resolved pile to form a new Destiny deck, then reveal the card. If the row is empty, this card will start the row (to the right of the Destiny deck).
- Resolve the Destiny cards. Starting with the leftmost Destiny card, read and follow the instructions of the card. Then, if the card was revealed this turn follow any icons on the Type line. Proceed with the next card in the Destiny Row, and continue to resolve each card, including those that were revealed in this phase. Enemies do not affect anything in this phase unless specified on the card.
3. Preparation phase
Draw cards from the top of your Player deck, until you are at your maximum hand size (defined on your Legend board).
If your Player deck is empty and you need to draw additional cards, shuffle your Discard pile to form a new Player deck, then continue drawing as needed.
4. Adventure phase
You may perform any number of these actions in any order:
- Discard a card from your hand
- Play a card from your hand
- Activate a card in play
- Initiate combat
All of the icons on the cards are explained in Icons and symbols.
Discard a card from your hand
Choose any card in your hand, regardless of the cost shown in its upper left corner, and discard it. Pay nothing to do so, then gain the benefit as depicted by the icons in the upper right of the card you just discarded. A resource icon with a green background gains you a token of that resource from the Token supply, add it to your Legend board. A Wild icon gives you the choice to gain any resource you want.
Play a card from your hand
To play a card, you must spend the resources depicted in the upper left part of the card. Place the card Ready in your Play area. It stays in your Play area until an effect removes it. A cost of multiple resources of the same kind has a stacked look (See Colt .45 in the Cardcheck example).
Example: to put the Bandar Explorer from your hand into play, you return the two resources depicted on the top left of the card, to the supply.
Activate a card in play
Many cards (and your Legend board) have abilities printed on them. You may activate the ability of a card in play by spending the cost shown to the left of the ":". The result of the ability is shown to the right of the ":". To activate an ability, you must spend the entire cost, or you may not choose to activate that ability.
Example, you have a Ready Bandar Explorer in your Play area. To activate its ability, exhaust it, and spend any Resource token to (:) gain a Good mark Resource token.
Note: In a 2-player game, during this phase, the active player is allowed to activate abilities of the other player's cards (not cards in hand) as if they were their own, provided that the other player allows it.
The rules for Cardcheck are described in Cardchecks below.
Initiate combat
An example of combat can be found in the Combat cardcheck example. To carry out combat follow these steps:
- Spend a Skull mark resource from your Legend board.
- Calculate your total Combat value:
- Legends have base Combat value of 1.
- Perform a Cardcheck (see Cardchecks). Each Skull mark and Wild symbol on the revealed card will add 1 Combat value to your total. (Legend board: 1+(Skull mark = X: Add X Combat value).)
- After the Cardcheck, you may now activate any number of abilities that add Combat value.
- Place a number of Wound tokens equal to your total Combat value. You may place them among any number of enemies as you choose.
- Then, if an Enemy has Wound tokens equal to or greater than their health, that Enemy is defeated. Place defeated enemies on the Resolved pile.
- Check for Loot.
5. Fate phase
Resolve all of the face up Destiny cards on the Destiny row one by one, starting with the leftmost one (closest to the Destiny deck).
- If it is an Enemy, it will attack you, dealing you 1 damage. For each damage taken, take the top card from your Injury deck and put it into your Play area face up. If you are unable to do this because your Injury deck is empty, you are immediately Knocked Out. If playing a solo game, you immediately lose the game. In a 2-player game, once a player is Knocked Out, play continues until the other player either wins or is also Knocked Out.
- All cards in play that have a "Fate phase" effect are carried out now.
6. Cleanup phase
- You may discard any cards from your hand.
- If you have more than your Resource limit, return any excess to the Token supply. You may choose which ones to keep.
Icons and symbols
Green coloured icons indicate Positive effects for the player. An icon with a black background indicates this is a resource you must spend.
- Good mark: A sign of a good person, under the protection of the Phantom, symbolised by the four swords of the founders of the Jungle Patrol.
- Inner fire: The burning flame inside a warrior.
- Mystery: The mystery of a hero symbolised by the mask.
- Skull mark: The mark of evil that is used to set fear on evil doers.
- Wild: Anytime you see this icon, you can substitute any other resource icon for it, either when gaining or spending resources.
- Draw the top card from your deck.
- Discard any card from your hand to your Discard pile.
- Combat value: Followed by the combat value or a modifier to the combat value.
- Enemy health: Followed by the health value or a modifier to the health value.
- Exhaust: Turn the card 90 degrees. You may not Exhaust an already exhausted card. If a card doesn't specify another card to Exhaust, it refers to itself to be Exhausted.
- Ready: Turn an Exhausted card 90 degrees to the left, to a vertical orientation.
- Discard from play: Move the specified (in play) card to your Discard pile. If a card doesn't specify another card to Discard, it refers to itself to be discarded.
Cardchecks
Many cards require you to perform a Cardcheck. You perform a Cardcheck in this order:
- Reveal the top card of your Player deck.
- Look at the cost of the revealed card.
- Go over the icons on the Cardcheck one by one. From top to bottom, trigger any outcome where the Cardcheck matches the revealed card's cost.
- Place the revealed card on your Discard pile.
For example: You activate the ability of Colt .45 by exhausting it. That initiates a Cardcheck so you reveal the top card of your Player deck. It is a Bandar Warrior. Since there is a Skull mark on the cost of Bandar Warrior, the first outcome on the Cardcheck of the Colt .45 triggers and you put a Common Enemy from the Destiny row on the Resolved pile.
Then, since the Bandar Warrior also includes a Good mark in its cost, you also trigger the second outcome and must discard the Colt .45. The Bandar Warrior is then placed on your Discard pile.
(Colt .45: Item - Ranged weapon. Exhaust: Cardcheck. Skull mark: Put a Common Enemy on the Resolved pile. Good mark: Discard from play. Modern, 14/27. Bandar Warrior: Ally - Human - Bandar, 27/27, "They use a deadly poison made from the Banga berries.")
Combat cardcheck example
You spend the depicted cost by returning a Skull mark token from your Legend board to the Token supply to initiate combat. As shown on the Legend board your base Combat value is 1.
You perform a Cardcheck and reveal the top card of your deck. The revealed card is Campfire, which has a cost of 1 Wild. A Wild can substitute any resource icon, so you consider this a Skull, to receive 1 Combat value, resulting in a total Combat value of 2.
Exhaust Zobaba to activate his ability which gains you 1 more Combat value. Now you have a total of 3 Combat value, which gives you a total of 3 Wound tokens to place on enemies.
You then place 3 Wound tokens divided as you choose across any Enemy cards on the Destiny row. You choose to place 2 on Oscar (health 3) to have enough Wound tokens to defeat him, and 1 on Lou (health 4). The Wound tokens stay on an Enemy until the card is no longer in play.
Note: If at any time an Enemy has at least 1 Wound token and Wound tokens equal to or greater than their health, that Enemy is defeated. Place the defeated Enemy on the Resolved pile.
(Cards shown: Campfire - Item, "Cardcheck: Any card.", 13/27; Zobaba - Ally - Human, "Exhaust: +1 Combat value. Exhaust: Ready an Ally.", 16/64; Oscar - Enemy - Human 3, 32/64; Lou - Enemy - Human 4, 30/64.)
Completing a mission
If a Mission card tells you to read a new Lore card, find the specified card in the Adventure deck. Remove all cards before that card in that Adventure deck from the game (keep the other cards as they are). Read the new Lore card and follow its instructions, note that cards in the Destiny deck, Resolved pile and Destiny row remain with any tokens on it, unless specified otherwise. Then continue playing in the same turn and phase you were in.
End game
You win or lose depending on card effects that become active during the game. Your win or lose condition may not initially be apparent until you uncover cards that trigger those conditions during play. After you win or lose an adventure, sort its cards back into numerical order except those cards that you obtained and added to your Player deck.
Cards added to your deck remain there until you complete an entire reset of the game by ordering each deck by the numbers and symbols on the lower right of the cards. (Also see Creating your own player deck.)
Replaying an adventure
When replaying an adventure you have already played (won or lost), the Lore card may tell you to place a card in your Play area that is no longer in the Adventure deck. If this happens, find the card in question from your Player deck or Discard pile and place it in your Play area, shuffling your Player deck afterwards. If a Lore card tells you to place one of these cards in your Discard pile, skip this instruction.
Additional rules
Once you are experienced with the game, you should add as many variant rules as you feel comfortable with from the ones that are described below. All variants enhance the gameplay, but add some complexity.
Loot
Each adventure has its own Loot table. When an Enemy is defeated, place the Enemy card on the Resolved pile, then reveal the top card of your Player deck and add together the point values of the card's symbols as shown below the Loot table. Then look up those points against the Enemy you defeated to determine what Loot you gain. Any card you gain may be placed in your hand, on top of your deck, or in your Discard pile.
You may always choose a lower reward from the table than the one you earned.
For example: You place Satan on the Resolved pile. You reveal the top card of your Player deck - it is Devil. Devil has a cost of 2 Skull mark symbols and 2 Wild symbols. You choose the Wild symbols to represent Good marks. Your total points is 8 (3 from each Good mark and 1 from each Skull mark). Looking this up on the Loot table means you gain a copy of "Tight Grip" to either place in your hand, Discard pile, or on top of your deck.
Loot table - Story of Devil
| Points | Enraged Wolf | Python | Satan |
|---|---|---|---|
| 0-3 | Nothing | Nothing | Nothing |
| 4-8 | Gain | Nothing | Gain (63/65) |
| 9+ | Gain (63/65) | Gain | Gain (63/65) |
Points: each Skull mark = 1, each Good mark = 3.
(As printed: the Loot table is card 62/65. Enraged Wolf's "Gain" entries are as shown on the card.)
Achievements
Immediately whenever one of the Achievement criteria listed on the Achievement card for that Adventure is fulfilled, gain a card (see Gaining cards). Any card you gain may be placed in your hand, on top of your deck, or in your Discard pile. When playing with both Loot and Achievements check for Loot first.
Example (Story of Devil Achievement card, 47/65): At any time, if any of the following conditions are met, gain the respective reward cards.
- Place 2 Enemy cards on the Resolved pile on the same turn. (Gain 48/49)
- Place 6 or more Wound tokens during the same turn. (Gain 50/51)
- Use the same Weapon twice in one turn. (Gain 52/53)
- Save the village in Wolves Attack the Wambesi Village. (Gain 54/55)
- Have Devil in play as an Ally when you reveal the Congratulations! card (44). (Gain 56/57)
- Have 3 Ally cards in play at the same time. (Gain 58/59)
- Reveal the Congratulations! card (44) while playing on Heroic or Mythic difficulty. (Gain 60/61)
Martial Arts special rules
Diana's starter deck and some reward cards from 'Diana in the Jungle Patrol' have the subtype Martial Arts. They represent your skill in unarmed combat.
The following rules apply to Martial Arts cards:
- You may not play a Martial Arts card of equal or lower skill level (novice, advanced, etc) as a Martial Arts card of the same name that is already in play.
- You may not activate Weapon and Martial Arts cards on the same turn.
Saving
Sometimes you need to clear the table in the middle of an Adventure, for other purposes. You can "save" after any Cleanup Phase. It is recommended to take pictures of the board that shows the Destiny row, resolved pile, set aside cards, the play area per Legend, the Legend board with tokens, and the active mission. Then make separate containers by following these steps:
- Any tokens on the active mission and Destiny cards.
- All cards that are returned to the game box, followed by the remaining cards in the Adventure deck*, followed by the Active Mission*, followed by the cards on the Destiny row*, followed by the cards in the Resolved Pile*.
- All the players' resource tokens, the Injury deck, followed by the Player deck*, followed by the Discard pile*, followed by the Player cards in play*.
On a future play session, perform the above steps in reverse order and you're set to go and continue the Adventure!
*Backs to backs and fronts to fronts alternatively.
Creating your own player deck
After completing a few adventures, you might have more cards than you wish to use in your deck. You may customise your deck before an adventure starts, providing you follow these rules:
- The minimum Player deck size is 30 Player cards.
- You may have a maximum of 3 copies of any one card.
- Any customisation rules written on cards must be followed. These rules follow the word Deckbuilding.
Cards with keywords may not be included unless the card with the Deckbuilding allowing it also is.
For example: You may not include *Zobaba in your Player deck unless you also include a copy of the Patrol Uniform. Both Diana and The Phantom may however include cards with the keyword Modern.
Variant rule: Unlocking promo cards
This rule provides a more exciting way of adding promo cards to your deck.
If you have any promo cards, instead of adding them directly to your deck, leave them in the game box and whenever you would gain a card from an Achievement or Loot and all the cards have already been gained, instead gain one of the promo cards at random.
Variant rule: Universal Unique
This rule provides a more thematic and realistic Unique restriction.
Unique cards are Unique across all players.
Variant rule: Item restrictions
This rule provides a more thematic and realistic use of items. Add these restrictions when activating a card:
- You may only activate two Weapon cards each turn, or one two-handed Weapon.
- You may only activate one Costume each turn.
Variant rule: Lingering wounds
This rule represents the issues the Legend has with injuries even after they are healed.
When healing an Injury, place the Injury card in your Discard pile instead of returning it to the game box. For the purposes of a Cardcheck, Injury cards are considered to have no symbols. Injury cards cannot be played from your hand. You may discard them in the Cleanup phase.
Card Terminology
Active Mission: A card that describes what the current goal is for the player and what happens when achieving that goal. Mission cards have multiple versions for different difficulty levels. The active Mission is decided by the Lore card. See Setup for placement. When the active Mission is replaced, the replaced Mission is returned to the game box.
Boss: A special kind of Enemy, often on double-sided cards and are placed as part of a Lore card rather than being drawn at random. Bosses are not considered to be a "Common Enemy" which means they cannot be defeated with Colt .45 card or have their attacks cancelled by card effects.
Common Enemy: An Enemy that is neither a Boss or an Objective.
Damage: Take the top card from your Injury deck and put it into your Play area face up. If you are unable to do this because your Injury deck is empty, you are immediately Knocked Out.
Defeated: Enemy cards, including those with 0 health, are not defeated unless you place at least 1 Wound token on them. When at least as many Wound tokens as the health on the Enemy card, it is Defeated. Place the Wound tokens in the Token Supply, and move the Defeated Enemy card from the Destiny row to the Resolved pile (unless cards specify otherwise). Immediately after defeating an Enemy card, check the Loot table and the Achievement list, and gain any earned rewards. Legends never receive Wound tokens, and are never Defeated, only Knocked Out.
Enemy: A Destiny card that is an adversary to the player. During the Fate phase, enemies on the Destiny row will deal one damage each to you.
Event: A Destiny card with an effect in its text area. The effect and any icons on the Type line is resolved in the Destiny phase.
Free: When a card allows you to play or activate something for free, it means that you do not need to pay any cost to play the card or activate the ability.
Gain: Whenever a player gains a card from a range of cards (X/Y), draw that card at random from that range. Gained cards are permanently added to your deck.
Hand limit: The amount of cards you draw up to in the Preparation phase. You may have more cards in hand after this phase as a result of other effects.
Heal: Return a face up Injury card to the game box (unless you are playing with the Lingering Wounds variant rule).
In play: The active Mission, cards on the Destiny row and in any Play area are considered in play. To place a card in your Play area is to put it "into play".
Lore card: A card with the Adventure symbol and a Roman numeral value on one side, and setup instructions on the other. Each Adventure starts with the Roman "I" Lore card. Setup instructions specify the active Mission. The active Mission's instructions specify when and which Lore cards to read next.
Objective: A special kind of card with the Type Objective, is placed when a Lore card defines it.
Peek: Turn the top card of a deck face up and look at it.
Resolved pile: Destiny cards are placed here face up after they have served their purpose. Some cards interact with the Resolved pile. Whenever you need to draw a card from the Destiny deck but the deck is empty, read the active Mission card. Unless specified otherwise, shuffle all the cards from the Resolved pile and make a new Destiny deck out of them, then draw.
Resource limit: The maximum amount of Resource tokens that you may save to the next turn. You may exceed the resource limit during your turn.
Resources: When you gain resources (shown with a green icon), take Resource tokens from the Token supply and add them to your Legend board. When you need to spend resources (shown with a black icon), remove them from your Legend board and return them to the Token supply.
Set Aside: Set aside cards are placed in a face up pile. These cards do not impact anything in the game until they are in play. For example: "From the Enraged Wolf cards Set aside, place one on the Destiny row." Effects like this are the only way Set aside cards come into play. If there are no Set aside cards with that name, instead skip that instruction.
Token: The game includes different types of tokens:
- Resources. Used to track the amount of available resources for the player.
- Wound tokens. Used to track the wounds inflicted on enemies.
- Multi-use tokens. Used when cards refer to placing tokens. Examples include: Destruction token, Distance token, Time token, Training token, and Villager token.
Token Supply: A dedicated place where all tokens not in use are stored.
Type: All Destiny and Player cards have a Type and can have a subtype. The Bandar Explorer has the Type Ally and subtypes Human and Bandar. Other cards can reference the Type or subtype of a card, one of Gurans abilities is to Ready any Bandar card and can Ready an Exhausted Bandar Explorer with his ability.
Unique: Some cards have a * symbol in front of their name, which defines them as a Unique card. Each player may only have one Unique card with the same name in play at the same time. If a second copy of a Unique card comes into play, discard the previously played one first, before resolving any effects of the new card. For the Universal Unique variant rule read the variant above.
Weather: A Destiny card that changes the rules of the game and stays in play until another card says it is placed on the Resolved pile. If there is no Weather card in play the Weather is considered "normal".