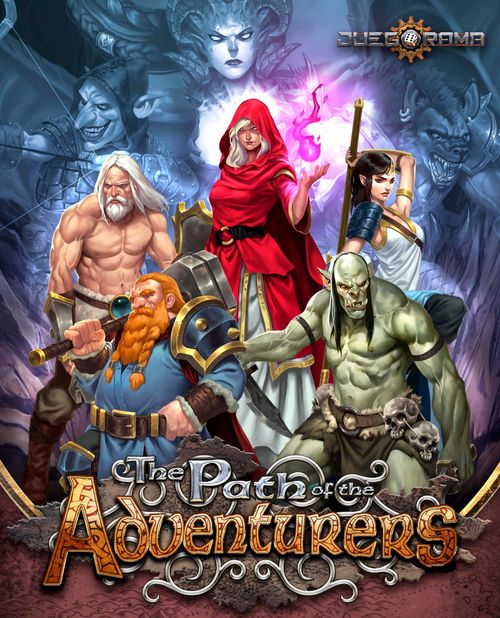
The Path of the Adventurers
The Path of the Adventurers Rulebook
Table of Contents
Table of Contents
Goal of the Game
The goal of the game is to defeat one of the two Dark Lords that inhabit the different locations of the game.
The Map
The game board is created with cards that represent the different locations of the kingdom. The path will form as the game progresses, and will lead to the den of one of the kingdom's Dark Lords. The map will be different each game since it is randomly generated.
Location types: Village, Mountain pass, Castle, Dungeon, Temple, Forest, Ruins.
Adventurers
The adventurers are the main characters of the game. Your adventurer selection can be determining for the final outcome of the game. Each character is unique, with strengths and weaknesses that you will have to balance carefully to ensure a successful adventure.
The adventurers are Thorensen (Battle cleric), Thralar (Half-orc), Melandrir (Elf), Krull (Barbarian), Vhaladia (Sorceress) and Glaicus (Druid).
Each adventurer's attributes and skills are detailed in their adventurer card.
Adventurers are defined by the following attributes:
- Strength
- Intelligence
- Dexterity
- Speed
Additionally, each character will have special skills, described in their adventurer cards. These skills may be activated by rolling "special" results on dice of specific colors. In those cases, the only valid results are the ones rolled on the right colored dice, ignoring the results from dice of other colors.
Cards
The game includes several decks of cards:
- Starting Item cards
- Item cards
- Legendary Item cards
- Encounter cards
- Enemy cards
- Location cards
- Event cards
- Special Skill cards
- Adventurer cards
Starting Item Cards
The item cards are divided into weapons and gear. The items are unique, but they may be assigned to any character. This way, the strengths of each character will be determined by the items they carry.
Weapon Cards
They are the tools used by the adventurers to defeat their enemies. According to their type, weapons can be divided into several categories:
- Melee weapons: They can only be used in the front line of the battle and have limited range. They require strength as their main attribute.
- Ranged weapons: They may be used from anywhere on the board, but require both hands to be used. Ranged weapons require dexterity as their main attribute. When you use them in the front line, you may only aim at adjacent targets.
- Single-handed weapons: As their name indicates, only one hand is required to wield them, which allows you to combine them with shields or other weapons.
- Two-handed weapons: These weapons require both hands to be used. You cannot use shields or other weapons at the same time, but their power and/or versatility makes up for that.
- Armour: Armour is a special type of equipment that is used to reduce damage dealt by the enemy. Armour allows the use of strength dice to obtain "block" results and prevent wounds. Only one type of armour can be equipped at the same time as indicated in the "Equipment slots" section. Armour and shield can be used at the same time and their effects will be cumulative.
Weapons have two main values:
- Difficulty (A): The number of icons you need in an attack roll to damage the enemy.
- Damage (B): The amount of wounds caused by a weapon when an attack is successful.
Weapon's Special Characteristics
Some weapons have additional characteristics, aside from the difficulty and damage values. Those effects will be detailed on the weapon card and can be any of the following:
- Reach: These weapons may attack up to one row away. You may attack a front line enemy from behind an ally, or a second row enemy from the front line.
- Stun: When you successfully hit with a weapon that has the stun tag, reduce the target enemy's initiative by one position. If that enemy was already on position 0 of the track, place a stunned token next to it. A stunned character will lose their next action in battle. Once it's time for a stunned adventurer or enemy to take their turn, discard the stunned token and skip that character's turn instead.
- Splash (X): When you perform a successful attack with splash, all enemies adjacent to the target receive X wounds for each "special" symbol rolled (regardless of the dice color) if the attack was successful.
- Poison: When you hit an adventurer or an enemy with a skill that has this tag, place a poison token next to their miniature or token. On their next turn, before performing any actions, that character receives two damage points for each poison token it owns, and then discards one of them.
- Poisoned: These weapons place poison tokens on their targets. Add 1 poison token next to the target's miniature or token for each "bow" result from a successful attack roll.
- Pierce: These weapons deal damage to all enemies in the same column, when the attack is successful. The first enemy will receive full damage, the next will receive half of the damage, the third enemy a fourth of the damage, and so on. Each new target will receive half the damage than their predecessor. If at any point the damage is 0 or less, ignore it.
- Magical: Deal additional wounds in an attack for your results from intelligence dice. Results from the green dice that match the required ones to hit will be considered extra damage, i.e., a magical sword will deal a base damage of two plus one additional damage point for each "sword" result. This way, if you roll two green dice and you get two "swords", the resulting damage will be 2 (base damage) + 2 ("swords" rolled on green dice) = 4 damage points in total. If you don't roll the results required from the weapon's card difficulty, no extra damage will be applied from green dice. Some skills from the "Elemental Sorcery" category are also considered magical attacks.
Starting Configuration
Each adventurer must carry a weapon at the start of the game. To start the game, it is advisable to use the following setup, although, if the party agrees, they may exchange their weapons among the characters, as long as everybody is carrying a weapon by the start of the game.
Starting configuration (as shown in the rulebook): Half Orc - Sword; Cleric - Hammer; Barbarian - Axe; Elf - Bow; Sorceress - Wand; Druid - Axe.
To equip an adventurer, place the weapon card on one of the four item slots in the lower part of the adventurer's card.
Item Cards
These cards are available in the market for the players, during the market phase. They can be bought by any character who can afford the card. The cards will have different purchase and resell values. It is possible to buy equipment for another player, if you want to.
Legendary Item Cards
This gear is magical and far superior to the standard versions. This kind of gear is not available in the market and can only be obtained in certain locations. Each location will have two types of legendary items that can be gained there. Legendary gear sets are formed by three pieces, which must be gained by defeating enemies in the different locations where they can be found.
The legendary sets are the Elfic Set, Runic Set, Celestial Set, Chaos Set and Orc Set.
Encounter Cards
Encounter cards represent the encounters of the adventurers with hostile forces. These cards indicate the number (A) and type (B) of enemies, their formation (C), any applicable special rules and the treasure (D) obtained after defeating them in battle. These cards will show the values to play with 4 players (grey background) and for the 2-player mode (red background). There are 4 levels of encounter cards, which mark the difficulty of the encounter. If you've just started your adventure, your best option is probably to flee from a level 4 encounter.
Enemy Cards
They describe the attributes of each type of enemy, their attack dice (red for melee and blue for ranged attacks) and special rules, if any.
Location Cards
As previously mentioned, these cards will form the map where the adventurers will move.
The locations have marked spaces for the front lines of both opposing sides (A). Starting from those front lines, the characters can be set up there or on the back rows for the battle (B). This way, the number of adventurers and enemies that can be on the same row is limited. It is very important to keep this in mind since melee weapons can only attack the front line, with a few exceptions. In the same way, each square of the front line has an infinite number of squares forming the column behind it (C).
Each location has its own characteristics, restrictions to formation and rewards (D).
There are 3 cards of each type of location. Every time the party wins on a specific type of location, the difficulty will increase. The first time the party visits a location, they will have to face an encounter card. On their visit to the second card, they will have to face in battle an encounter card and a Lieutenant. On the third location, the party will face an encounter card and a Dark Lord.
Event Cards
Event cards narrate the events that happen during the journey of the adventurers. Events may modify the game's conditions, so it is important to keep them in mind to either exploit or avoid their effects.
Special Skill Cards
Aside from each adventurer's physical attributes, they also have skills according to their role. These skills are divided in several Categories and will combine better with certain weapons, items, and fighting styles. Special skill cards show the following section:
-
Categories: The different skills are classified into categories. Every skill of the same category is marked with the same color. The categories are Battle (red), Archery (blue), Rogue (purple) and Holy (green). It is recommended, at least for your first games, that the players pick a category according to the main role of their adventurer. The Battle category is directly related to strength and is perfect for the barbarian, dwarf and half-orc. Archery is great for the half-orc and elf. Rogue can be used by the half-orc, elf, and barbarian, and lastly, Holy will be best exploited by the dwarf and elf.
-
Effect: It is the result of successfully performing the action that triggers the skill. In many cases, it will be a percentage that will modify the damage of the equipped weapon, and so the more powerful the weapon, the more powerful the effect of the skill. If the result is not a whole number, round it up. E.g., if a weapon deals 3 wounds and you need to calculate 50% of that damage, the result would be 2 wounds.
Some skill cards will use one of the character's attributes as base damage. In that case, take the full value of that character's attribute as shown on their adventurer card, not just the remaining attribute tokens they may have left at the time. That is, if a player is using Thorensen equipped with an intelligence amulet and decides to use the sacred projectiles skill, it will deal the same 3 wounds to two targets, 2 from Thorensen's base intelligence value, plus 1 extra from the intelligence amulet.
-
Cost: The attribute tokens needed to activate the skill. Once spent, the tokens will be the number of dice available to perform the action. When possible, you may spend more attribute tokens to add more dice and improve your chances. On the other hand, it is not possible to perform a special skill without the minimum number of attribute tokens required by the card.
-
Requirements: Some skills require a specific weapon or item to activate them. The action cannot be performed if the adventurer doesn't have the required item.
-
Difficulty: The number and types of icons needed in a roll to successfully perform the action.
Adventurer Card
The adventurer card describes the physical attributes of the character. As mentioned before, these attributes are:
- Strength: The adventurer's physical capabilities. It represents mastery with hand-to-hand weapons and their damage power.
- Intelligence: It measures the adventurer's intellectual capabilities. This attribute will be important when searching for treasures and traps, and for spellcasting as well.
- Dexterity: The adventurer's skillfulness. It shows the character's agility and mastery of ranged weapons.
- Speed: It represents the adventurer's swiftness, their capacity to avoid impacts and their battle initiative.
- Life Points: Life points represent the adventurer's resistance to damage. The higher this value is, the more wounds the adventurer can receive.
- Item slots: The items for battle will be placed on these slots. Aside from the physical limitation of 4 spaces, there is another one regarding the types of cards that can be equipped simultaneously:
- 2 items with the single-handed icon: no more items with the single-handed or two-handed icons can be equipped simultaneously.
- 1 item with the two-handed icon: no more items with the single-handed or two-handed icons can be equipped simultaneously.
- 1 item with the armor icon: no more items with armor icons can be equipped simultaneously.
Attribute Tokens
These tokens indicate the adventurers' three main attributes (Strength, Intelligence and Dexterity).
Each adventurer starts the battle round with as many attribute tokens as indicated on their adventurer card. As you perform actions, the character will spend these tokens as dice during the round, either to attack or defend themselves. I.e., to perform a melee attack, you will need the "sword" icon twice for most weapons. To do so, you may use as many attribute tokens as you own to roll dice of those colors.
Dice
In the Adventurers, there are 3 types of dice which are easily recognizable by their color:
- Strength dice (red)
- Dexterity dice (blue)
- Intelligence dice (green)
Strength Dice (Red)
Strength dice are used for melee combat and are the main resource for hand-to-hand fights.
- Sword: Represents a successful hit in melee combat. Each weapon requires a certain amount of hits rolled to damage.
- Shield: It is a defensive block. You need a weapon or armour that allows you to block damage to use this icon.
- Critical: It can be used as any result of the die.
- Push: If you roll two or more push results, when using a melee weapon, the enemy will be displaced from their current position due to the thrust of the attack. A pushed enemy or adventurer will trade places with the miniature/token right behind them. If there is no one behind, ignore these results.
- Special: Activates certain special skills. Certain character and special skills will require this icon to function.
Dexterity Dice (Blue)
Dexterity dice are mainly used for ranged combat and dodging, and they can be useful at any time of the game.
- Bow: Represents a successful hit in ranged combat. Each weapon requires a certain amount of hits rolled to damage.
- Dodge: You may avoid one wound for each dodge icon rolled.
- Critical: It can be used as any result of the die.
- Reflexes: It allows you to discard a die from your roll, and recover an attribute token of that same type. Ignore the result of that die for the roll. You cannot use the recovered token for that same roll.
- Special: Used to activate special skills. Certain special and adventurer skills will require this icon to be activated.
Intelligence Dice (Green)
Intelligence dice are used for magical attacks and as wild cards for other disciplines. Intelligence always enhances other skills.
- Sword: Represents a successful hit in melee combat. Each weapon requires a certain amount of hits rolled to damage.
- Bow: Represents a successful hit in ranged combat. Each weapon requires a certain amount of hits rolled to damage.
- Dodge: You may avoid one wound for each dodge icon rolled.
- Critical: It can be used as any result of the die.
- Idea: Allows you to reroll a die from that same roll. You must always apply the second result and ignore the first.
- Special: Used to activate special skills. Certain special and adventurer skills will require this icon to be activated.
Enemies
Common Enemies
These enemies populate the locations. Encounter cards will describe their quantities and battle formation.
The common enemies are Gnoll, Goblin, Kentauri, Troll, Voron and Harsaak.
Lieutenants
Lieutenants will always show up the second time the adventurers fight in a location. When this happens, draw a lieutenant card at random. After placing the last of the common enemies in the appropriate formation, as indicated by the encounter card, place the lieutenant immediately next to them. Lieutenants have their own special rules, as indicated by their cards, aside from their own battle profiles. These special rules may affect them directly, or the rest of enemies of the gang.
The lieutenants are Erthias, Efestos, Deretrael, Endrathii and Vreigha.
Dark Lords
The Dark Lords will show up when the group fights in the same location for the third time. They are played just like the lieutenants, but they are significantly more powerful, and the adventurers would be wise to be well prepared in order to defeat them.
The Dark Lords are Anabantha and Silenoz.
Setup
To start a game, first decide the number of players and adventurers that will play. The recommended party size is 4 adventurers. If there are less players than adventurers, one or more players can play with more than one character. Or you can try to defeat the game with less adventurers if you are feeling brave.
Place the adventurer cards in front of the players handling them. Then, take 4 skills cards of one category, for each character, and choose 2 of them by taking them in your hand, or by placing them in front of that adventurer's card. Return the other two cards to that category's deck. If several people want to use the same category, they will have to randomly decide who draws first.
Optional rule: You may start the game by choosing cards from different categories, if you want to.
Prepare the enemy deck and the locations deck by shuffling each one separately and leaving them next to each other, within reach for all players.
In the same way, place the item cards at the center of the table to form the market. Shuffle the deck, reveal 5 cards and place them face up on the table. The cards in the deck are considered the "market" and the revealed cards form the "market window".
Place the adventurers' miniatures on the starting location (Village).
Game Round
A game round is divided into four phases:
- Events phase
- Travel phase
- Battle phase
- Market phase
Events Phase
Skip this phase if it's the first round of the game. One of the players must draw a card from the events deck. Then, read the card out loud and leave it face up to remember the effects for the remainder of the round. If there was another event card in play, place the new one on top covering the previous card, its effect will no longer apply.
Travel Phase
At the start of this phase, if the adventurers are on a location by the edge of the board, place a new location face up next to each of the empty sides of the current location. Then, place a face down encounter card on each of the newly revealed locations. These will mark that they haven't been explored. You may orient the new locations any way you like, or the way you think will be best for the development of the current game.
During their journey, the party of adventurers can move over the revealed map. You may travel through one or more locations, as long as you don't move to an unexplored location. The party must agree where to go and choose a location to travel to. Once decided, move the adventurers to the edge closest to the revealed location. Then, the party must decide if they want to access the new location and how to do it.
There are two options:
-
Exploration: Reveal the encounter card. The card will remain visible until the location is defeated. The party may now decide to attack or retreat.
- Retreat: If they decide to retreat, they will lose any unequipped weapons or items. The party immediately returns to their previous location. Draw a new event card and start a new travel phase.
- Attack: The party automatically starts the battle phase.
-
Assault: Reveal an encounter card. The group automatically enters the battle phase with the "Assault" effect. When the group assaults a location, they will get +2 to their initiative roll. Each adventurer receives 2 additional fatigue markers after the attack, aside from any others they would normally gain from using special skills.
Place the miniatures anywhere you want, but keep in mind the placement rules described in the following section, and then proceed with the turn normally. An explored location cannot be assaulted later on.
Battle Phase
Miniature Placement
Location cards are divided into two sections for combat purposes, the side of the adventurers and the side of the enemy:
- The adventurers' side will be the one where they accessed the location from (usually, the one closest to town).
- Place the enemy tokens indicated by the encounter card on the enemy's side. Position them by matching the formation shown on the card, and always on the side opposing the adventurers' party. Starting from the front line, place the enemies as they are shown on the encounter card from top to bottom, and from left to right. If you cannot replicate the formation due to limitations of the location, fill out the empty spaces of the location by placing the enemies following the card's order and starting from the front line.
Then, the party may decide their starting positions on the adventurers' side. The players may place their characters anywhere, as long as they keep in mind the restrictions and limits posed by the location card. The adventurers cannot be placed anywhere except the front line, unless the front line space of a column is already occupied.
Initiative
At the start of the battle phase, the initiative order will be established, unless the group was performing an assault.
Starting with the player with the highest speed value, roll as many dice as the adventurer's dexterity value. Add up all the "reflexes" and "dodge" results (remember that "critical" rolls can be any result) and place their initiative tokens on the corresponding positions of the initiative track. If two adventurers get the same result, place the last one under the one that was already there. Finally, place the initiative tokens of every enemy involved in the battle. The enemy has fixed initiative values. Just like the adventurers, if they must be placed on a position of the track where there are initiative tokens, place them under the ones already present.
Then, the attack round begins, starting with the adventurers and enemies in the higher positions of the initiative track. The order goes from top to bottom and from left to right, and will remain the same until the end of the encounter.
Optional rule: At the start of a battle round, the players can use a dexterity token to advance one position on the initiative track. In the same way, an adventurer can go back one position to discard a fatigue token.
Combat Actions
Movement
An adventurer can move to a different position of the formation, as long as the destination space is free and within their own side of the battlefield. To do this, they must spend a dexterity token to move as many spaces as their speed attribute. This action can be performed any number of times, as long as the adventurer has dexterity tokens left. Once the character has finished moving, they can perform an attack as long as they have enough attribute tokens to do it.
Target Selection
An adventurer in close combat can attack any enemy in front of them, including diagonals. If there are no enemies within range, the adventurer must move before attacking or skip their turn. An adventurer may perform a melee attack on a flanking enemy if it's located on an adjacent square, in any direction.
An adventurer wielding a ranged weapon can attack any enemy, regardless of their position.
Basic Attack
Basic attacks depend on the weapons used. To perform an attack, the adventurer must select a target within range.
The range and difficulty requisites are detailed on the weapon card. To perform an attack, spend as many attribute tokens as you wish and roll that many dice of the same colors as the spent attributes.
Then, you must compare the results of the roll with the weapon's difficulty. If you have at least the same number of icons indicated by the card, the attack is successful. The damage caused depends on the weapon, and is indicated on their cards.
Special Attacks & Skills
The adventurers have a set of special skill cards that they can use during their turns to perform actions, aside from their basic attack. To use these cards, the adventurer must spend at least the number of attribute tokens indicated by the card. More of the same attribute tokens can be spent to increase the attack's chance of success.
Just like basic attacks, compare the results rolled with the card's difficulty. If you get at least the same number of icons indicated by the card, the attack is successful.
Fatigue: Special attacks and skills have a fatigue value. When you perform these attacks, take as many fatigue tokens as indicated and place them on your adventurer card. Fatigue tokens replace attribute tokens when recovering between rounds. If the adventurer collects 7 fatigue tokens, discard two at the end of the round; that adventurer will only be able to recover two attribute tokens from the seven available. If an adventurer has more fatigue tokens than life points, they will not be able to perform any action that causes fatigue.
Damage Distribution
The attacking player may now assign damage to the previously selected targets. Enemies who receive as many or more wounds than their life points are eliminated from battle. If the damage wasn't enough to defeat an enemy, place as many wound tokens next to it as the damage dealt. If the enemy already had wound tokens, add them to those. The enemy will resist attacks until the number of wounds matches or exceeds their life value, and then they are eliminated. When a front line enemy is eliminated, all enemies behind it will move forward to fill the now empty spaces.
Enemy Attacks
When the initiative order indicates it, the enemies will attack the adventurers. The enemies have a number of dice they will use when performing melee or ranged attacks, depending on their position. An enemy on the front line will always attack using their strength dice. If the enemy doesn't have dexterity dice, they will use their turn to advance towards the front line. If there is an empty space on the front line, the enemy will occupy it and end their turn. If there are no empty spaces, it will occupy a space of the front line by pushing back their teammates before ending their turn.
An enemy will always attack the adventurer right in front of them in melee combat. If there are none, it will attack an adjacent adventurer, or the closest one if they have ranged attacks. If two adventurers are at the same distance, the target will be the one to its right. If there are no targets available, the enemy will flank the adventurers (see Flanking Enemies below).
An enemy on the second, or a further line, wielding a ranged weapon will first attack adventurers on their same column. If there are several adventurers on that column, the target will be the one positioned lowest on the initiative track. If there are no adventurers to attack on their same column, apply the same criteria starting with the next column to the right.
To resolve an enemy's attack, the player sitting left of the target player will roll the appropriate dice, ranged or melee, and counts the number of hits. This number represents the potential wounds the attacked adventurer will receive. The target adventurer can avoid wounds by using their attribute tokens to roll dice. Each dodge result rolled will prevent a wound. There are also some items that will protect the adventurer from damage, by spending strength tokens and rolling "shields".
Flanking Enemies
When a front row enemy doesn't reach the fight and there are no adventurers in the adjacent frontal and diagonal spaces, it will move into a flanking position. Place the enemy next to the nearest front line adventurer. A flanking enemy will double their melee dice for their next attack on the character. It will continue using double dice until it is knocked down.
Flanking enemies cannot be pushed.
If a new enemy flanks, and the front line space is already occupied, place it on the second row and so on. Remember that enemies with ranged attacks can always shoot, so they will never try to flank. Adventurers cannot flank.
Enemy Skills
- Evil: An evil enemy will attack the adventurer with less life points left, from those within reach. When attacking from the front line, they will perform a melee attack, and a ranged attack otherwise. Only targets within reach are considered for the attack, an evil enemy will not move to reach a character with less life points if there are already valid targets available.
- Charge: At the start of their action, if the enemy or adventurer with this skill is not in the front line, move it there and it immediately attacks with as many extra red dice as the number of rows it advanced to get there.
- Bulky: Bulky enemies cannot be pushed or moved by their allies.
- Armored: Ignore the first wound from every attack.
- Regeneration: After their action, and before moving on to the next turn on the initiative track, this character heals all wounds.
- Fire weakness: Attacks with fire weapons or magic will deal double damage to these targets.
Special Enemy Skills
- Voron: Ignores 1 wound from every melee attack he receives.
- Erthias: An adventurer receives 2 wounds each time they miss an attack.
- Vreigha: While in play, all enemies double their life value.
- Dretrael: Starts her turn on a front line position, and will push back any creatures in front of her. (Printed as "Dretrael" in the source; the lieutenant is named "Deretrael" elsewhere in the rulebook.)
- Efestos: The minions add 1 to their Initiative value. If the encounter card drawn along with Efestos also has Kentauri, ignore these creatures and add +2 dice to all of Efestos' attacks.
- Anabantha: Starts her turn on a front line position, facing the adventurer with less life points. She pushes back any creatures in front of her. At the end of her turn, she flies back to the end of the column.
- Endrathii: The minions add one ranged die to their attacks.
- Silenoz: The creatures add one melee die to their attacks.
Fleeing from Battle
At the start of the round, the adventurers may flee from battle. The battle round will proceed normally, according to the initiative order, but the adventurers will abandon the fight instead of performing any actions, and will move to the adjacent location from where they entered.
During the enemy's turn, they will only attack the adventurers still in the fight. If a character is incapacitated before fleeing, it will lose all the items it carried, and will return with their allies with only one life point.
Lost items will remain on the location and may be recovered later on, after defeating the enemies there.
If you flee from battle, the active encounter card will remain on the location, and you will have to defeat all enemies from that card again, even if you had already defeated some.
End of the Battle Round
Once all the adventurers and enemies have taken their turn, the round ends. At this point, the characters may recover their spent attribute tokens to start a new round. If a character has fatigue points, they can discard up to two of them. Then, they recover their attribute tokens up to 7 tokens each. Remember that any remaining fatigue points will count for that total of 7. Start a new round if both sides still have fighters.
Incapacitated Adventurers
If an adventurer receives as many, or more, damage points than their life value, they will be incapacitated. Knock the character's miniature down to represent it, and immediately move to the front line any characters behind it. An incapacitated adventurer cannot perform actions until it recovers at least one life point. Incapacitated adventurers cannot use items on themselves, i.e. healing potions, but they may be healed by other characters. The equipment of incapacitated adventurers cannot be collected or used by other characters until the battle is over.
End of the Battle
Once all the enemies or adventurers have been defeated, the battle ends. If all the enemies have been defeated, the adventurers get the rewards indicated by the encounter card and the location's reward. Each location gives one of two legendary item cards at random. Shuffle any remaining cards from the two sets indicated by the location card and draw one card at random. This card now belongs to the group, and any adventurer can equip it. Then, proceed to the market phase.
If all the adventurers were knocked out, the game ends. Their names will be remembered until a new group of adventurers arrives.
Recovery and Experience
Once the battle is over, incapacitated adventurers recover 1 life point. Then, everyone may choose a new skill card from those available of the categories they already have in hand.
Optional rule: You may slightly modify the difficulty level with the life points healed after a battle. Heal 50% of the characters' life points after a battle to make it less challenging. Or heal them completely if you want an even easier adventure.
Market Phase
During this phase, the players may acquire new items or sell the ones they have on the market. Draw the first 5 cards from the deck after shuffling it, and place them face up. Those will be the items available for purchase during the round. To buy, you must simply pay the price indicated on the item's card, and return the money to the bank. If all players agree and nobody bought anything, you may discard the available market cards and draw five new ones. You may only do this once per round, and only if nobody bought anything. To sell a card, place it next to the ones for sale and take only half of the money of its price from the bank. Potions cannot be sold. After your purchases, any cards left on the market, and any cards sold, will be re-shuffled with the rest of the deck.
Any unequipped items will be left aside and are considered common property of the party. The players may equip or remove items as they see fit, as long as they are not in battle.
The Healer
During the market phase, players may pay 100 coins to heal their character completely. The cost is the same regardless of the amount of life points healed.
End of the Game
The goal of the game is to defeat one of the two Dark Lords. Once achieved, the game ends immediately with a victory and, of course, eternal glory.
If at any time, the village is occupied by a group of enemies, the adventurers will have to travel there in their next travel phase to protect it. If the enemies are not defeated, the game ends.
Naturally, the game ends if all characters are defeated in battle, as previously mentioned. The life of an adventurer is hard and filled with dangers. Of course, it won't be long until another party tries their luck.
Games for Less Than 4 Players
The Path of the Adventurers has been optimized to play with 4 players, but you may play it with less people.
3-Player Games
In this case, one of the players could handle 2 adventurers, thus keeping the character count at 4. Another option is to play with only 3 characters, and to equip them with 1 non-legendary item each at the start of the game. The difficulty will be slightly higher in this game mode, so it is not recommended for unexperienced players.
2-Player Games
In 2-player games, each player will handle a character of their choice. The rules remain the same, except that you will only place the enemies indicated on the smaller section on red diamonds. Any other enemies will not participate in the fight and can be ignored. In the same way, the rewards will be smaller than in a 4-player game, and will also be indicated with a red background, although legendary booty will not change.
Tokens
The game uses the following tokens:
- Strength attribute token
- Intelligence attribute token
- Dexterity attribute token
- Fatigue token
- 1 Wound token
- 5 Wounds token
- Poisoned target token
- Marked target token
- Stunned target token
- Coins tokens
- Adventurers and enemies initiative tokens