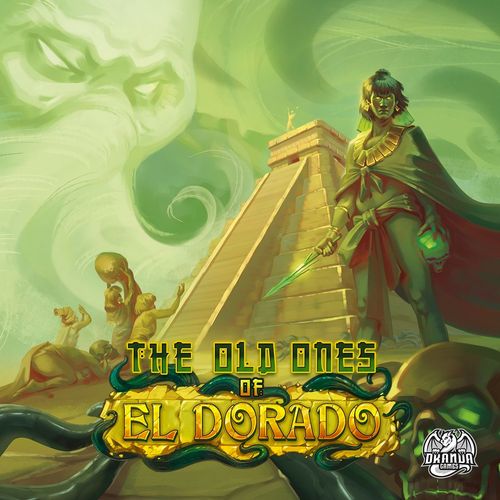
The Old Ones of El Dorado
The Old Ones of El Dorado Rulebook
Table of Contents
Table of Contents
Game Components
- 1 Main board
- This Codex Ledger
- 16 Followers
- 16 Villagers
- 1 First Player marker
- 4 Limit tokens
- 16 Gold
- 16 Clay
- 80 Sanctum tokens (40 Gold Mask / Follower tokens, 40 Clay Mask / Villager tokens)
- 24 Tablet cards
- 3 Pyramid levels
- 20 Madness tokens
- 18 Village tokens
- 16 Worker cards
Before your first game, you will need to assemble the pyramid levels. To do this, take the 5 pyramid pieces from each punchboard (4 walls and 1 floor) and connect them by matching the letters as shown on the inside edges of the pyramid.
Player Components
- 4 Sanctum boards
- 8 Player Aid cards
- 4 '30VP' tokens
- 4 Keepers
- 4 Collectors
- 12 Trackers
- 40 Stone
Solo Components
- 2 Tome cards
- 16 Scholar cards
Deluxe Components
Cards and Village tokens are marked with this icon.
- Deluxe first player marker
- 7 Action site tokens
- 6 Quest cards
- 8 Village tokens
- 6 Tablet cards
- 4 Tome cards
- 3 Worker cards
You can upgrade your copy of The Old Ones of El Dorado to the Deluxe Edition by purchasing the upgrade pack from www.drandagames.co.uk.
Main Setup
-
Place the Main board face-up in the middle of the play area within easy reach of all players.
-
In a solo or 2-player game, set all 4 Limit tokens to the '2 Worker card' side.
In a 3-player game, set 2 to the '2 Worker card' side and 2 to the '3 Worker card' side and assign them randomly to each Action site.
In a 4-player game, set all 4 to the '3 Worker card' side.
Place a Limit token to the right of each Action site and move the Limit tokens far enough to the right so that there is enough space for 2 or 3 Worker cards, respectively, between them and the Action site.
In a 3-player game, Place the Pyramid levels, Madness tokens, Clay, Gold, Followers, Villagers, & Sanctum tokens by the main board within easy reach of all players.
-
Separate the Village tokens facedown into their 4 colours (numbered 1, 2, 3, & 4). Shuffle each pile separately and take 2 grey Village tokens and 2 yellow Village tokens. Shuffle these 4 tokens and place 1 face-up on the 4 Action sites.
-
Place the other Village tokens face-up on the Village map, one per location, matching the number of the location on the map. Return all unused Village tokens to the box.
-
Split the pile of Worker cards in half, and rotate one half 180 degrees. Then shuffle all the Worker cards together. Place a Worker card face up to the right of each Action site on the Main board, in the orientation they are dealt.
Use the Village tokens denoted with Pray, Gold, Tablet, & 2 Clay for your first game, placed from top to bottom in that order, as shown in the setup diagram.
Terminology
- A. Action site
- B. Sacrifice tracks
- C. Action rows
- D. Clearing
- E. Building site
- F. Village map
- G. Score track
Player Setup
- Each player chooses a player colour and collects the following pieces (in their colour where appropriate): 3 Trackers, a '30VP' token, a Sanctum board, 10 Stone blocks, a Collector, a Keeper, and Player Aid cards.
- Place a Tracker for each player on the '0' space of the Score track and their '30VP' token at the top of the Score track.
- Place the other two Trackers for each player on the two starting (left-most) spaces of the Sacrifice track.
- Place each player's Collector at the starting point of the Village map.
- Each player places their Sanctum board face-up in front of them.
- Place each player's Player aid cards and Keeper by their Sanctum board.
- Sort the Tablet cards into six piles based on their backs and shuffle each pile. Give each player one of each card from each pile and place them face up beside their Sanctum board, as shown; any unused cards should be returned to the box.
- Each player takes two Madness tokens from the Supply and places them in the two right-most spaces of their Resource row.
- Deal each player three Worker cards to form their starting hand, and place any left over back in the box.
- The player who most recently worshipped Cthulhu takes the First player marker and will begin the game.
Sanctum Board Reference
- H. Upper Sanctum
- I. Lower Sanctum
- J. Resource row
- K. Paired plinths
- L. Resource Slot
Gameplay Overview
In The Old Ones of El Dorado, the objective is to have the most Victory Points (VP) at the end of the game.
On your turn, you will either:
- Place a Worker card from your hand into an Action row
OR
- Take all the Worker cards from an Action row into your hand
You will take actions based on the Glyphs in the chosen Action row.
Once you finish your turn, the player to your left takes their turn. This continues until any player reaches 30VP. At this point, the current round will conclude, and one final round will be played. The final scoring will then take place, and a winner will be declared.
Important Concepts
Resources
There are seven Resources in the game, and they are split between two types: basic and crafted.
BASIC RESOURCES: The first five Glyphs represent the Basic Resource types. From left to right, these are: Stone, Clay, Gold, Followers, and Villagers. The final Glyph offers a choice between a Follower and a Villager.
CRAFTED RESOURCES: Gold Masks and Clay Masks are Crafted Resources. These are the Glyphs that allow you to gain a Mask directly. The Masks are found on one side of the Sanctum tokens.
However, they are more often crafted from the basic Clay or Gold Resources. This is the Glyph representing crafting Masks.
The Resource Supply is not intended to be limited. In the unlikely event that there are not enough Resources, use an appropriate replacement.
Glyph Overview
Worker cards, Action sites, Sanctum boards, Village tokens, Sacrifice tracks, and Tablet cards all have Glyphs on them. These represent actions you may take.
Some Glyphs have a number before them; this means you can do the action shown beside it that many times.
Glyphs are displayed in three variations, as shown below.
SINGLE GLYPH Activate the Glyph.
MULTIPLE GLYPHS Activate ALL of the Glyphs in any order you wish.
SEPARATED GLYPHS Choose ONE of the groups of Glyphs to activate.
Activate that group of Glyphs as a SINGLE GLYPH or MULTIPLE GLYPH (as appropriate).
Limit Tokens
Each Limit token is placed at the end of an Action row to show how many cards can be played into each row. They also act as a reminder for you to move your Keeper along the top of the cards in a PLACE A WORKER CARD turn and along the bottom of the cards in a TAKE ALL WORKER CARDS turn.
Hidden Information
The only hidden information not available to all players is the contents of the Worker cards in each player's hand (the number of cards in each player's hand should be available to all).
VP Gain
Victory Points (VP) can be earned both during the game and at the end.
When you gain VP, move your Tracker on the Score track.
VP shown inside a green circle are gained immediately.
VP shown inside a purple octagon are scored at the end of the game.
Playing a Turn
On your turn, either:
- Place a Worker card from your hand into an Action row
OR
- Take all the Worker cards from an Action row into your hand
On your turn, activating some Glyphs will lead to further Glyph activations, which then may lead to even more Glyph activations! Your Keeper helps you remember your location in the Action row as you activate a series of Glyphs.
Place a Worker Card
Place a Worker card to the right of an Action site and any existing Worker cards in that Action row.
Each Action row has a maximum limit of Worker cards, as shown on the Limit token. If an Action row is full, you cannot place a Worker card there.
When you place your Worker card, you may rotate it so that either the Physical World or the Other-Lands is at the top of the card.
Move your Keeper to the top half of the Worker card you just placed and activate the Glyph(s) on that half of the Worker card (see GLYPHS p. 14-18).
Next, move your Keeper along the Worker cards in your chosen Action row towards the Action site on the Main board, activating the Glyph(s) on the top half of each Worker card your Keeper moves onto. When your Keeper reaches the Action site, decide which group of the Separated Glyphs you will activate there.
Then, place your Keeper on the right-hand side of the Clearing, sliding any other Keepers in the Clearing to the left. Other players that have a Keeper in this Clearing may activate the Glyph on the Village token located there, starting with the player whose Keeper is left-most in the Clearing.
Example: It is Piety's turn and she is choosing to play a card to an Action row. There is a Worker card already present in the row she chooses but the row can still hold another Worker card as shown on the Limit token.
She decides to play her Worker card with the Physical World side upper-most and places her Keeper on the top half of the Worker card she just placed. After activating the Glyphs there, Piety moves her Keeper to the top half of the next card along the Action row which has an Other-Lands side upper-most and then activates the Glyph.
There are no more Worker cards in the Action row so Piety moves her Keeper to the Action site and chooses which Glyph to activate there.
Piety now moves her Keeper to the Clearing. Benedict's Keeper is present in this Clearing so he gets to activate the Glyph from the Village token there.
Take All Worker Cards
Choose an Action row that has at least 1 Worker card in it, and that would not result in you exceeding your hand limit of 5 cards after drawing all the cards from that Action row (see example below).
Example: Benedict may not take the cards from the second Action row as he has 4 cards in his hand, and it would lead to him having 6 cards in his hand.
However, he may take from the top Action row as this will not take him over the hand limit of 5 cards.
Move your Keeper to the bottom half of the right-most Worker card in the Action row and activate the Glyph(s) on that half of the Worker card (see GLYPHS p. 14-18).
Next, move your Keeper along the Worker cards in your chosen Action row towards the Action site on the Main board, activating the Glyph(s) on the bottom half of each Worker card your Keeper moves onto. When your Keeper reaches the Action site, take all the Worker cards in the Action row into your hand, then choose which Glyph(s) to activate at the Action site.
Then, place your Keeper on the right-hand side of the Clearing, sliding any other Keepers in the Clearing to the left. Other players that have a Keeper in this Clearing may activate the Glyph on the Village token located there, starting with the player whose Keeper is left-most in the Clearing; they must also gain a Madness token (see MADNESS p. 13).
Example: It is Purnell's turn and they are choosing to take the Worker cards from an Action row. There are two Worker cards in the Action row they choose and they have two Worker cards in hand, so this is allowed.
They place their Keeper on the bottom half of the Worker card at the end of the Action row and activate the Other-Lands Glyph there. Next, Purnell moves their Keeper to the bottom half of the next card along the Action row which has a Physical World side on the bottom and then activates the Glyph there.
There are no more Worker cards in the Action row so Purnell moves their Keeper to the Action site. They collect all the cards from that Action row and places them in their hand and then activates one of the Separated Glyphs from the Action site. Purnell moves their Keeper to the Clearing there and ends their turn as there are no other Keepers present.
It is possible, though highly unlikely, that a player cannot PLACE A WORKER CARD, because all Action rows are full, but they cannot TAKE ALL WORKER CARDS because their hand is too full. In the case where they cannot do either, the player must do the TAKE ALL WORKER CARDS action, and take as many cards (of their choice) as they can from the Action row they Activated.
Madness
Rituals can be unwound; By retracing the steps of others and inverting the process, the seeds of MADNESS can be sown. Losing your grip on the Physical World has its own drawbacks. The more of one's mind is given over to Cthulhu, the less one can interact with the Physical World.
Madness tokens occupy Resource slots in your Resource row, but are not considered a Resource. You can only have a maximum 5 Madness tokens in your Resource row. There are shadows of madness on your player board to remind you of this limit.
Gaining Madness
When you take all the Worker cards from an Action row, all other players who have a Keeper in that Clearing gain a Madness token.
When you gain a Madness token, you must place it into your Resource row if you have fewer than 5 Madness tokens. If your Resource row is full, return a Resource to the Supply to make space.
Example: Piety is taking all the cards from the Action row that has Benedict's and Purnell's Keepers in the Clearing. She skips the Glyphs on the Action site to remove a Madness token from her own Resource row.
Benedict and Purnell activate the Village tokens linked to the Action site as normal.
Then, Purnell takes a Madness token. However, he has no room in his Resource row so must choose a Resource to return to the Supply and place a Madness token in its place.
Benedict does not take a Madness token because he already has 5 Madness tokens.
Removing Madness
You may skip a Worker card or activation to remove a Madness token and return it to the Supply.
You must skip all Glyphs on a Worker card or an Action site to remove a Madness token. You may not remove a Madness token by skipping Glyphs in any other way.
Glyphs
In the Physical World, Stone is used to construct the Pyramid of Cthulhu. Clay and Gold are Crafted into Masks and used to shape Tablets in Cthulhu's image. Workers Worship in your Sanctum or are Sacrificed to the The Old Ones.
Glyphs of the Physical World
Gather
When you activate any GATHER Glyph, you will take the appropriate Resource and place it in an empty Resource slot in your Resource row.
If you do not have an empty Resource slot, then you either skip collecting that Resource or may make space for the collected Resource by discarding another Resource from your Resource row back to the Supply.
Example: Genevieve may either gain a Stone block and a Gold OR a Stone block and 2 Clay.
She only has 2 empty spaces so she gains 2 Clay and skips gaining a Stone block - she has 3 Stone already!
Craft
When you activate a CRAFT Glyph, you may replace a Clay or Gold in your Resource row with a Mask. Clay can become a Clay Mask, and Gold can become a Gold Mask.
Sanctum tokens can only ever be Mask side up in your Resource row.
Example: Piety is Activating a Craft Glyph. As the Glyph is numbered she may do this action twice.
She decides to remove 1 Clay and 1 Gold from her Resource row and replaces them with 1 Clay Mask and 1 Gold Mask.
Glyphs of the Other-Lands
Worship
Worship The Old Ones in your Sanctum by honouring them with Masks, or serving them through your entourage.
When you activate any WORSHIP Glyph, you may either...
Return a Villager or Follower from your Resource row to the Supply and place a matching (Villager or Follower) token from the Supply on the corresponding section of your Lower Sanctum, activating the Glyph you covered.
OR
Take either a Mask from your Resource row and place it on an empty matching plinth in your Upper Sanctum, activating the Glyph you covered.
At the end of the game, for every set of Paired plinths in your Upper Sanctum that has been covered with Masks, you will receive the VP as marked between them. Each Villager or Follower token placed on the Lower Sanctum will also be worth a single VP. (see END GAME p. 19).
Example: Purnell is Activating a Worship Glyph and returns a Follower from their Resource row to the Supply, then places a Follower token in their Lower Sanctum covering the Gather Gold Glyph and taking that action.
The Follower token is worth 1VP at the end of the game.
Example: Benedict is Activating a Worship Glyph and moves a Clay Mask from his Resource row to his Upper Sanctum, covering the Build Glyph and taking that action.
As the Paired plinth above is also used then he will be gaining 2VP at the end of the game.
Tablet
Those who visit the Other-Lands can gaze upon the visage of The Old Ones. Only the strongest mind can retain a fraction of their glory and then set about creating intricate Eldritch Tablets in their image, piece by piece.
When you activate a TABLET Glyph, place either 1 Gold or up to 2 Clay from your Resource row onto the lowest face-up Tablet card of the matching type (Gold or Clay).
If you fill a Tablet card with Clay but have one more Clay to place, then place the first Clay on the lowest Tablet card, and then place the second Clay on the next card before you trigger the Glyph(s) on the filled Tablet card.
Once a Tablet card is filled, immediately gain the VP shown and trigger any Glyphs at the bottom of the card in any order, then return the Resources from the completed Tablet card to the Supply and flip that Tablet card. The next Tablet card is now available for you to place Resources on.
Example: Genevieve is Activating a Tablet Glyph and decides to place 2 Clay.
Her bottom Tablet card has a single empty space so she adds the first Clay to that Tablet card and the second Clay to the Tablet card above.
She gains the VP and takes the Resources as indicated on the Glyphs on the Tablet card.
Finally, she returns the Clay from the lowest Tablet card to the Supply and flips the card over to show it has been completed.
Sacrifice
The ancient ones in the Other-Lands demand Sacrifice. Death must be delivered so that you may live forever.
When you activate a SACRIFICE Glyph, take a Follower or Villager from your Resource row and place them lying down on a shaded space at the edge of the Pyramid or Building site. If no shaded space is free, stack the figure on top of an already placed figure. Move your Tracker on the matching Sacrifice track (Follower or Villager) one space forward. You may then activate the Glyph beside that space.
You may not sacrifice Followers or Villagers if your Tracker has reached the end of their Sacrifice track.
At the end of the game, you will identify the Sacrifice track with your lowest Tracker on and score the VP indicated next to that Tracker. (see END GAME p. 19).
Example: Genevieve has just Activated a Sacrifice Glyph and sacrifices a Follower, placing them on a shaded spot of the current Pyramid level.
She now moves her Tracker on the Follower Sacrifice track one space along and chooses to activate the 'Gather 2 Clay' Glyph.
Her lowest Tracker on the Sacrifice tracks is now at the 2VP space and if it does not go further she will gain 2VP at the end of the game.
Build
Pyramids of the Other-Lands warp the mind with their non-Euclidean geometry. Studying their magnificence will allow you to raise a temple to Cthulhu.
When you activate a BUILD Glyph, take a Stone block from your Resource row and place it in an empty space on the current Pyramid level of Building site. Immediately gain 2VP then check to see if the next Pyramid level is completed. This table shows how many Stone blocks are required to complete each level:
| Pyramid Level | 1-2 Players | 3 Players | 4 Players |
|---|---|---|---|
| Level 1 | 3 | 5 | 7 |
| Level 2 | 5 | 7 | 9 |
| Level 3 | 7 | 10 | 13 |
| Contributor VP | 1/0 | 2/1/0 | 3/2/1/0 |
If the next level is completed, VP is awarded to the player(s) who contributed the most to the current level, which varies by player count. If players are tied for a position, all tied players gain the VP for that position, and subsequent positions are skipped accordingly (see example, p. 18). Finally, return the Stone blocks to each player's Supply and place the largest unplaced Pyramid level on the Building site or Pyramid.
You may contribute to the Pyramid even after it is completed. If you do, return a Stone block from your Resource row to your Supply and gain 1VP.
Example: Over the course of the game so far, all four players have added some Stone blocks to the first Pyramid level to build the second Pyramid level, and the ninth Stone block has just been added so majority scoring now takes place.
Benedict has the most Stone blocks on this level so gains 3VP. Piety and Genevieve are joint second so both gain 2VP. Purnell is next but as three awards have been given, receives 0VP for fourth place. Stone blocks are returned to the player's personal supplies and the second Pyramid level is placed on top of the first and the game continues.
Village
The Other-Lands can be used as a mirror to spy upon the Realm of Dreams. With this arcane skill, you can see the dreams of weak-willed individuals and use this knowledge to bring them to your cause.
When you activate a VILLAGE Glyph, move your Collector clockwise along the path to the next location. Sometimes you will have a choice of 2 paths. A Collector can only move forwards along a path, never backwards, as shown by the arrows, and locations cannot be skipped. Collectors can share a location with another Collector.
If you move along a path that shows VP, gain it immediately. You may then activate the Glyph(s) on the Village token at that location.
The paths of the Village map circle back to the starting space. If you reach this location, you do not activate a Village token this turn (but you do gain the VP for moving along the path approaching it). Then, with any further Village Glyph activations, you can continue to go around the Village map again.
Example: Piety is Activating a Village Glyph during her turn and has a choice for her next Collector move. She can either Gain 2 Clay or 1 Follower/Villager.
She chooses to join Purnell following the left path and takes the 2 Clay.
End Game
When a player reaches or exceeds 30VP, the end of the game is triggered. They take their '30VP' token and place it next to the 0 space on the Score track, then return their Score Tracker to the 0 space and continue along the track.
Complete the current round and play one final round, ending with the player to the right of the player with the First Player marker.
End Game points are now rewarded and added to the VP that have been gained during the game by continuing to move your Score Tracker on the Score track.
Any Masks in your Resource row are worth an additional 1VP each. For every three Basic Resources (Clay, Stone blocks, Gold, Followers, or Villagers) in your Resource row and on your incomplete Tablet cards, you gain 1VP. If you have no Madness tokens in your Resource row, gain 1VP.
All completed Paired plinths in your Upper Sanctum gain you the VP as indicated between them. Incomplete Paired plinths do not score anything. Each Follower/Villager token in your Lower Sanctum is worth an additional 1VP each.
Your Tracker that is lowest on the Sacrifice tracks rewards you with VP shown beside it.
Whichever player has the highest score is declared the winner. If tied, then the tied player with the most Sanctum tokens on their Sanctum board is the winner. If there is still a tie, then the tied player with the fewest Madness tokens is the winner. If there is still a tie, the tied players share the victory.
Example: Purnell has 32VP on the VP track and gains the following additional VP: 3VP for their Resource row (1VP for the Clay Mask, 1VP for the 5 Basic Resources and 1VP for no Madness tokens), 6VP for their Upper Sanctum, 3VP for their Lower Sanctum, and 4VP for their lowest Tracker on the Sacrifice track, for a total of 48VP. Genevieve is tied for first place with 48VP, but has only 4 Sanctum tokens on their Sanctum board, so Purnell wins.
2-Player Rules
When only two leaders vie for control of El Dorado, the barriers between the Physical World and Other-Lands wear thin. Ghostly apparitions have been seen carrying gifts, but engaging with them can plunge one deeper into madness...
Setup
When playing with 2 players, follow the normal setup, except in step 10 of the PLAYER SETUP: Take one Stone block from your Supply and place it next to your Keeper; this is your Shadow.
Playing a Turn
After the first turn is played, PLAYING A TURN works slightly differently. Whether you PLACE A WORKER CARD or TAKE ALL WORKER CARDS, there is an extra step at the start of your turn:
Before you move your Keeper from a Clearing, place your Shadow in its place, then move your Keeper as normal.
Shadows act like Keepers, activating Clearing Glyphs when a turn is taken in the same Action row, and gaining Madness if they are in a Clearing where Worker Cards are taken from. Your own Shadow can be activated on your turn, so it is possible to give yourself a bonus action or force yourself to take a Madness token.
If a Shadow and Keeper are activated in the same row, they are treated separately, both activating bonus Glyphs and gaining Madness.
Example: Piety has chosen to TAKE ALL WORKER CARDS from the same row that her Shadow and Purnell's Keeper are in.
Piety Activates Glyphs as normal but the presence of her Shadow also lets her Activate the Sacrifice Glyph on the Village token there. She must also take a Madness token to her Resource row.
Purnell also Activates the Sacrifice Glyph there and takes a Madness token.
The Scholar (Solo & 2-Player)
Whilst studying a recently discovered ancient tome on tribal practices, a Miskatonic University Scholar starts to dream of being a figure of renown in ancient El Dorado. Their actions begin to affect the Other-Lands. You must act quickly if you wish to attain immortality before the Scholar.
Setup
Follow the usual setup as if you were setting up for a 2-player game, but do not set up the player area for the second player. Instead, place the two Tome cards side by side (as shown in the picture below).
In your first game, use the blank sides of the Tome cards (without Cthulhu's image).
Choose a player colour for the Scholar's pieces and place their Collector on the Village map, their Keeper by the Tome cards & their 3 Trackers as usual (one on each of the Sacrifice tracks and one on the Score track).
Place one of their Stone blocks on the left Tome card (this becomes their Decision marker). Place two more Stone blocks below the Tome cards under each of the columns of symbols (these are referred to as their Tablet Progress marker and Worship Progress marker). Keep the rest of their Stone blocks in a Supply by the Tome cards.
Sanctum tokens, Tablet cards and a Sanctum board are not required for the Scholar, so place these back in the box.
When dealing out Worker cards, place the Scholar's hand of three in a face-down draw pile by the Tome cards. Spread them out slightly so you can see how many cards are in their 'hand'.
Finally, shuffle the Scholar cards and place them as a deck by the Tome cards, with room for a discard pile.
The Scholar can be used in a 2-player game as an additional player. This changes the setup and gameplay slightly and is explained at the end of the solo rules (see 2-PLAYER SCHOLAR p. 26).
Solo Gameplay Overview
There are no major changes from the main rules in the Player's turns; the game is played the same way as the 2-player game (see 2-PLAYER RULES p. 20) and the Player takes the first turn.
The Scholar will activate the Village token in the Clearing where you take your action if their Keeper and/or Shadow are present, as usual.
The Scholar's turns play differently. On their turn, The Scholar will PLACE A WORKER CARD or TAKE ALL WORKER CARDS, depending on what is shown on the Scholar card they reveal on their turn.
The Scholar will only activate Action site Glyphs, not the Glyphs on Worker cards.
The Scholar does not collect and store Basic Resources, but can sometimes gain Masks, which are stored near the Tome cards for final scoring.
The Scholar does not collect Madness tokens. Instead, Madness will affect the position of one of the Progress markers on their Tome cards. The Scholar can force the player to take Madness in the usual way.
The card on the top of the Scholar deck shows one of four symbols, representing the Intent on the Scholar's next turn, giving you a clue about what they might do on their next turn.
The game ends when the Player (not the Scholar) reaches or exceeds 30VP. That round is completed and after final scoring, the winner will be adorned as the high priest.
The Scholar's Intent
Information on what the Scholar will likely do in their next turn is shown on the back of the Scholar cards. Be careful, sometimes the Scholar cannot follow the instructions on that Scholar card so will draw another, leading to unexpected turns.
- Hand icon: The Scholar will likely PLACE A WORKER CARD on their next turn.
- Cards icon: The Scholar will likely TAKE ALL WORKER CARDS on their next turn.
- Eye icon: The Scholar will likely play on the row with your Keeper or your Shadow on their next turn.
- Closed eye icon: The Scholar's intent is unclear.
Playing the Scholar's Turn
At the start of the Scholar turn, flip over the top Scholar card from their deck and place it face up on their discard pile. This card will tell you what type of turn the Scholar will attempt to take, and also in which Action row the Scholar will play.
Just like in a 2-player game, the Scholar's Shadow moves to the row their Keeper was in before their Keeper is moved.
The 2 or 3 sections on each Scholar card are: Priority (A), first and second preference (B), and (sometimes) deck shuffle (C).
The Scholar will try to do the Priority. The bottom half shows 2 more symbols, labelled '1' and '2'. The Scholar will try their Priority for action '1'. If that is also not possible, the Scholar will try their Priority action '2'.
The instruction to shuffle the Scholar's deck is only present on 2 cards.
The Scholar's Card Symbols
- Arrow/x symbols: Action to be taken in the specified Action row.
- Figure icon: Action to be taken in the Action row the Player's Keeper is in.
- Cube icon: Action to be taken in the Action row the Player's Shadow is in.
- Hand-and-card icon: Play the card from the top of the Scholar's hand to the chosen Action row.
- Cards icon: Take the cards from the chosen Action row and place them at the bottom of the Scholar's hand.
- Shuffle icon: After the Scholar's turn is completed, shuffle all Scholar cards into a new deck.
Sometimes the Scholar will draw a card that cannot be resolved. In this case, they draw another Scholar card and follow the instructions on that card instead. Repeat if necessary. If the Scholar's deck ever runs out without being shuffled and they need to draw a new card, immediately shuffle all Scholar cards into a new deck and draw from the new deck.
Some example Scholar turns are shown on p. 26.
The Scholar's Actions
The Scholar will only activate Action site Glyphs, not the Glyphs on Worker cards. If the Scholar is presented with Separated Glyphs to choose between, see 'The Scholar's Choices' on p. 25.
- Worship-type Glyph: Move the matching Progress marker up one level (if possible), then Activate all Glyphs by that marker.
- Sacrifice Glyph: Move the Scholar's Tracker that is furthest back on the Sacrifice tracks forward one space. If tied, move the Tracker on the top-most track. Activate a Glyph by that Tracker as normal.
- Build Glyph: Place one of the Scholar's Stone blocks on the Building site/Pyramid. The Scholar gains VP as normal. Follow the 2-player rules for Pyramid level completion and contribution VP.
- Village Glyph: Move the Scholar's Collector one space. If they have a choice of which path to take, see 'The Scholar's Choices' on p. 25. Activate a Glyph at their Collector's location.
Craft and Gather Glyphs may be activated by the Scholar when no other choice is available. As the Scholar gains no Basic Resources the following actions are performed instead:
- For each Clay Glyph, Gold Glyph or Craft Glyph, they gain a Mask token instead. It does not matter which type they take.
- For each Stone Glyph, they Activate a Build Glyph instead.
- For each Follower or Villager Glyph, they Activate a Sacrifice Glyph for that specific type instead.
The Scholar's Choices
Sometimes the Scholar needs to make a choice, whether it is...
- ...which way up a Worker card is placed on a PLACE A WORKER CARD turn...
- ...choosing a path on the VILLAGE map...
- ...choosing between SEPARATED GLYPHS...
- ...how MADNESS affects them...
...the choice is guided by the Decision marker that is always on one of the Tome cards. Once a choice is made, then the Decision marker is always moved to the other Tome card.
1. Card placement: On a PLACE A WORKER CARD turn, check whether the Decision marker is on the Tome card with the green or purple markings, and place the Worker card with the matching side oriented to the top of the board.
2. Village path: When the Scholar's Collector moves around the Village map, it will reach locations where the path splits and the path of travel must be chosen. If the Decision marker is on the left Tome card, move the Collector along the left path. If it is on the right Tome card, move the Collector along the right path. Determine left and right from the direction of travel.
3. Separated Glyphs: If the Scholar is presented with Separated Glyphs, first the Scholar will ignore Craft or Gather Glyphs and choose the other group of Glyphs. However, if the Scholar is presented with Separated Glyphs where:
- There are only Craft/Gather Glyphs.
- There are no Craft/Gather Glyphs.
then check the position of the Decision marker. If it is on the left card, choose the left-most or top-most Glyph group. If it is on the right card, choose the right-most or bottom-most Glyph group.
4. Madness: On a TAKE ALL WORKER CARDS turn, the Scholar may be affected by Madness.
Instead of taking Madness tokens, their Worship marker or Tablet marker will be affected. For the Tome card that has the Decision marker, move the Tablet or Worship marker on that Tome card down a space without activating the space it moves to.
If the chosen marker is not yet on its card but the other one is, move that one down instead. If both markers are not on their cards, then no marker is moved. If both the Scholar's Keeper and Shadow are present, then repeat this process, remembering to move the Decision marker after the first choice.
End Game (Scholar)
On the round you (not the Scholar!) reach or pass 30VP, the game ends after the Scholar has acted, and final scoring will take place.
You score End Game VP normally (Resources, Sanctum, Sacrifice track, and no Madness).
Score the Scholar's Sacrifice track normally. The Scholar also scores 3VP for every 2 Masks by their Tome cards.
Victory goes to the highest score, and if tied, then the Scholar wins.
Hard & Insane Mode
Too easy? Flip one of the Tome cards to the Cthulhu side for HARD mode, then try the other one flipped and for INSANE difficulty, flip both Tome cards!
2-Player Scholar
In a 2-player game, the Scholar can be added as a third player. Set up and play as a 3-player game and use the Scholar rules but without Shadow rules. When the Scholar targets the Keeper, then they will target the Keeper of the player sitting on their left, and when they target the Shadow, they target the Keeper of the player sitting to their right.
Example 1:
Priority: Shadow The Scholar will prioritise taking an action in the Action row with your Shadow (if possible).
1: Play cards If the Scholar has Action cards in their hand and there is room to place a card in that Action row, they play the top Worker card to that Action row (in the orientation as shown by the Decision marker) and activate the Glyph in that Action site.
2: Take cards If the Action row is full, their second choice is to take cards instead.
If the Scholar is unable to do either option, they draw their next Scholar card from their deck and resolve that card instead.
Example 2:
Priority: Take Cards The Scholar will prioritise taking cards from an Action row.
1: Action row 1 If the Scholar has room in their hand, and there are Worker cards in Action row 1, they take those Worker cards and place them at the bottom of their hand.
2: Action row 3 If there were no Worker cards or too many Worker cards in the top Action row, their second choice is to take cards from row 3 instead.
If the Scholar is unable to take cards from either row, they draw their next Scholar card from their deck and resolve that card instead.
Deluxe Edition Content
You can upgrade your copy of The Old Ones of El Dorado to the Deluxe Edition by purchasing the upgrade pack from www.drandagames.co.uk.
Quest Cards
Quest cards add a new twist to the game. Shuffle and deal one face-down to each player at the start of the game. You have a choice on how to use this card, once per game. Either:
A. Reveal the card once you have achieved the criteria. Keep it in face-up front of you and gain the VP shown at the end of the game, or
B. Reveal and discard the card on your turn to take the action in the bottom left of the card.
| # | Criteria | Discard Action |
|---|---|---|
| 1 | Move to 5 locations on the Village map. | Village |
| 2 | Sacrifice 5 times. | Sacrifice |
| 3 | Have 5 stones on the Pyramid/Building site at once, or be the player to complete a Pyramid level. | Build |
| 4 | Worship 5 times. | Worship |
| 5 | Complete the top-most Clay or Gold Tablet card. | Tablet |
| 6 | Have 4 Madness tokens in your Resource row. | Remove 1 Madness token |
Varied Content
Extra Tome cards Randomly shuffle or select these cards in a Solo game instead of the regular Tome cards.
Extra Village tiles Setup: Shuffle these tiles in with the regular Village tiles before placing them on the board.
Action site tiles Setup: Shuffle these tiles and randomly replace/cover the Action sites, except the Gather actions on the right side of site 3.
Extra Worker cards Setup: Shuffle these cards in with the regular Worker cards. They have a new Glyph:
Copy one group of Glyphs at the Action site in this Action row.
A note on theme: This game is a work of fiction. The setting draws on imagined places and themes. It does not depict or attempt to represent any real cultures, peoples, or belief systems. The use of the name El Dorado is intended as a mythical and fictional reference. This game was inspired by the cosmic horror genre created by writer H. P. Lovecraft, however the creators of this game do not endorse or share the controversial views held by the writer.