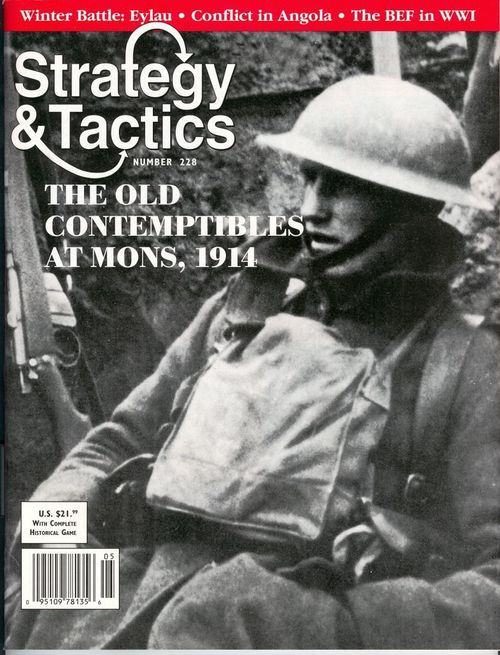
The Old Contemptibles at Mons, 1914
The Old Contemptibles at Mons, 1914 Rulebook
Table of Contents
Table of Contents
- 1.0 Introduction
- 2.0 Game Components
- 3.0 Set Up & Hex Control
- 4.0 How to Win
- 5.0 The Turn Sequence
- 6.0 Stacking
- 7.0 Zones of Control
- 8.0 German Map Entry
- 9.0 Movement
- 10.0 Bombardment
- 11.0 Defensive Fire
- 12.0 Melee Combat
- 12.1 In General
- 12.2 Multiple Defenders in One Hex
- 12.3 Multi-Hex Melees
- 12.4 Attack Sequencing
- 12.5 Stacks Attacking
- 12.6 Terrain Effects on Melee
- 12.7 Melee Resolution Procedure
- 12.8 Poor Odds Melee Attacks
- 12.9 Odds Limits
- 12.10 Receiving Defensive Fire
- 12.11 Final Melee Resolution
- 12.12 Melee Combat Results
- 13.0 Charts & Tables
- 14.0 Optional Rules
1.0 Introduction
1.1 In General
The Old Contemptibles: The Battle of Mons, 1914 (ToC) is an operational-level simulation of the first major clash between the Germans and British in 1914. The "German player" is on the offensive, attempting to win the game by eliminating or isolating British units and seizing key terrain on the map. The "British player" is on the defensive, first attempting to prevent the German player from achieving that side's objectives, then escaping off the map with the bulk of the BEF still intact.
1.2 Game Scales
Each hexagon on the map represents approximately one mile from side to opposite side. Each game turn equals about two hours. The units of maneuver in the game are mostly regiments for the Germans and battalions for the British. Each full-strength German infantry regiment contained some 4,000 men and three-dozen cannon; each full-strength British infantry battalion had some 2,000 men and 18 cannon.
Old Hands Note. Since this battle was fought over only two days, and both sides' forces entered pretty much fully supplied, there are no supply rules. Similarly, there are no replacements. And finally, there are no concentric assault rules, since the British were too proud to become scared when they were surrounded, and the Germans were too inexperienced to know they should be scared when they were surrounded.
2.0 Game Components
2.1 In General
The components to a complete game of ToC include these rules, the 34x22" mapsheet and 123 die-cut counters (also referred to as "playing pieces," "units" and "unit counters"). The other units on the counter sheet are for the play of variants to games published in earlier issues of this magazine. Players must provide themselves with a standard (six-sided) die to resolve combat in the game.
2.2 The Game Map
The game map represents the militarily significant terrain found around the city of Mons in 1914. A hexagonal ("hex") grid is printed over the map to regulate the placement and movement of units across it, much as in Chess and Checkers. A unit is always considered to be in only one hex at any one time.
Each hex contains natural and/or manmade terrain features that can affect the movement of units and combat between units. The various terrains and water bodies on the map have had their exact, real-world configurations altered slightly in order to make them coincide with the hex grid; but the relationships among the terrains and water bodies from hex to hex are accurate to the degree necessary to present players with the same space/time dilemmas faced by their historic counterparts in the real battle.
Also note every hex on the map has a unique, four-digit identification number printed within it. They're provided to help you find exact locations more quickly, and to allow you to record unit positions if a match has to be taken down before it can be completed. For example, the town of Conde is in hex 1708.
2.3 Counters
There are 123 unit-counters used in playing the game, all but one of which represent combat formations. The other is provided as an informational marker to help keep track of the passage of the game turns (see section 5.0). After reading through these rules at least once, carefully punch out the unit counters. Trimming off the "dog ears" from their corners with a fingernail clipper will facilitate easier handling and stacking during play and also enhances their appearance.
Each combat unit counter displays several pieces of information: nationality (and therefore the side each unit is on), German corps affiliation, specific unit identifications, unit type and size, combat strengths, range (for artillery), movement allowance, and reinforcement status.
2.4 Sample Combat Units
Artillery. This unit is the German 2nd Heavy Artillery Regiment, which is part of III Corps. It doesn't belong to any division within the corps.
Cavalry. This unit is the German 3rd Cavalry Battalion, which is part of III Corps. It doesn't belong to any division within the corps.
Infantry. This unit is the German 8th Infantry Regiment, which is part of the 5th Infantry Division, which in turn belongs to III Corps.
2.5 Nationality & German Corps
A unit's nationality (and corps affiliation for German units), and therefore the side it's on, is shown by its color scheme.
- British Expeditionary Force: All units - white on red
- Germans 1st Army:
- III Corps - white on black
- IV Corps - black on gray
- IX Corps - black on white
2.6 Specific Unit Identification
Each of the units in the game is identified by the numbers or letter abbreviation of its corresponding historic designation. The abbreviations are as follows:
- AS - Argyll & Sutherland Highlanders
- B - Bedfordshire
- C - Cheshire
- CL - Duke of Cornwall's Light Infantry
- CM - Cameronians
- CMP - Composite
- DC - Duke of Cambridge's Own
- DE - Duke of Edinburgh's Own
- DG - Dragoon Guards
- DR - Dorsetshire
- DV - Devonshire
- DW - Duke of Wellington's Own
- ES - East Surrey
- GH - Gordon Highlanders
- H - Hussars
- IR - Irish Rifles
- J - Jaeger
- L - Lancers
- LI - Lincolnshire
- M - Manchester
- N - Norfolk
- NF - Northumberland Fusiliers
- RF - Royal Fusiliers
- RI - Royal Irish
- RS - Royal Scots
- S - Suffolk
- SB - King's Own Scottish Borderers
- SF - Scottish Fusiliers
- SL - South Lancashire
2.7 Unit Sizes
Units' historical organizational sizes are shown by the following symbols, from largest to smallest: X-brigade; III - regiment; II - battalion; I - battery.
2.8 Unit Types
The distinctions among the different types of units are important for movement and combat (see sections 9.0 through 12.0).
- Infantry
- Cavalry
- Field Artillery
- Horse Artillery
- Heavy Artillery
2.9 Bombardment Factor
This is the number used to calculate ranged (from a distance) artillery attacks against enemy units, measured in hexes (see section 10.0).
2.10 Melee & Defensive Fire Factor
This number provides the basis for resolving those two kinds of combat (see sections 11.0 and 12.0).
2.11 Movement Factor
This number is a measure of a unit's ability to move across the hex grid printed over the map. Units pay varied movement costs to enter different hexes, depending on the terrain in them, water features along the hex sides surrounding them, and the moving unit's type (see section 9.0).
2.12 German Corps Affiliations
Taken together, the units in the game on the German side represent that nation's 1st Army. That army is further divided into three corps: III, IV and IX (3rd, 4th and 9th). The distinction among the corps is shown by the owning corps' Roman numeral being printed on each counter, as well as by color-coding (see 2.5 above). Note that each German corps consists of two infantry divisions and two "separate" units (one heavy artillery regiment and one cavalry battalion). German corps affiliation is important for movement and combat (see 6.5, 8.2, 10.6 and 12.14).
2.13 Step Strength
Most units in the game have one or two "strength steps" (or simply "steps"). That's an arbitrary term used to express the ability of a unit to absorb a certain amount of combat losses before being reduced in combat effectiveness until it finally ceases to be a coherent formation (a measure of its "robustness" in current US Army jargon).
Those units with printing on only one side of their counter are "one-step" units; those with printing on both sides are "two-step" units. Every German infantry regiment starts play as a four-step unit represented by two counters; however, only one counter for each German infantry regiment is ever in play on the map at any one time. The lower-valued (or "substitute") counter is substituted in-place on the map for the higher-valued one as each regiment suffers combat losses.
If a four-step or a two-step unit suffers a step loss, it's flipped over so its reduced side (the one with the lower melee and defensive fire value) shows upward. If a three-step unit suffers a step loss, that unit counter is removed from the map and the proper two-step substitute unit is put in place of it in the same hex. If a one-step unit, or a two-stepper that had already been reduced, takes a step loss, it's removed from the map (eliminated) and placed in the "dead pile."
All units of both sides start the game at their full step strength. No unit may ever give or loan a strength step to another.
Design Note. German substitute counters are easy to identify; they all have large dots printed in their upper-left corners on both sides.
3.0 Set Up & Hex Control
3.1 In General
Players should first decide which side each will command. After that they should each take their own side's units and place them on or near the map according to the instructions given below.
All British units have a four-digit starting-hex location printed in their upper-left corners. Place each British unit in the exact hex corresponding to the number printed on it.
No German units start play on the map. They will enter the game during Game Turns 1 and 4 via the six entry hexes marked along the board's topmost hex file (hexes 2100, 2700, 3100, 3900, 4300 and 4700). See section 8.0 for details.
3.2 Hex Control
In this game the idea of "hex control" – which side "owns" which hexes at any given instant – is important for reckoning who wins each game (see section 4.0). At the start of play the British player controls all hexes on the map. The control status of a hex switches from one side to the other whenever a unit from the other side enters it or exerts an uncontested zone of control into it. Control switching is immediate, and may occur and reoccur in the same hexes any number of times during play.
4.0 How to Win
4.1 In General
The German player is generally on the offensive throughout the game, attempting to eliminate as many British units as possible while seizing key hexes on the map. The British player wins by preventing the German player from achieving that side's objectives.
4.2 German First Day Victory
Play stops and the German player is considered to have won the game if, at the end of Game Turn 7, that player controls all seven of the Conde Canal south bank bridge hexes: 1809, 2009, 2409, 2708, 2908, 3308 and 4208. Note that though 1809, 2009 and 3308 all have two bridges crossing into them, each of those three hexes still only count as "one south bank bridge hex" for the purpose of this rule.
4.3 Second Day Victory
If the German player fails to win the game at the end of Game Turn 7, play continues until the end of Game Turn 14. At that time the German player is considered to have won if he has earned at least two victory points (VP). He earns one VP for fulfilling each one of the following conditions: 1) the German side controls Bavai [hex 3122]; 2) there are at least 20 British units in the deadpile; 3) no more than eight British units moved off the board via the British exit hexes. If the German player fails to win, the British player is the winner.
Note condition number two may be fulfilled more than once. That is, the German player earns one VP for every 20 British units in the dead pile. (Final remainders between one and 19 British units don't yield any VP, and also see rule 4.5 below.)
Historical Note. In the actual event, the Germans lost by fulfilling only victory condition, number one.
4.4 Exiting the Map
Only British units may move off the map, and they may not do so prior to Game Turn 8. When they do leave they may only do so via the four "British Exit Hexes" marked on the map's south edge (1327, 1628, 1927 and 2228). Leaving the map via those hexes costs one movement point. No unit once off the map may ever reenter play (or bombard back onto the map if artillery).
4.5 Cut Off & Surrounded British Units
British units still on the board but "cut off" at the end of Game Turn 14 are considered eliminated for purposes of judging condition two in rule 4.3 above. A British unit is "cut off" if it's unable to trace a path of contiguous hexes from its location hex to any of the exit hexes that's free of German units and their zones of control.
The presence of a British unit in a German zone of control doesn't negate that zone of control for purposes of tracing these paths. German zones of control may be projected into a tracing British unit's location hex itself without cutting off that unit, but zones of control projected into any hex of the path after the location hex are sufficient to cut that path.
Further, any British unit eliminated during the game prior to the end of Game Turn 14 and that has its location hex immediately surrounded by German units and/or their zones of control at the instant of that elimination, is considered to have been "surrounded" at the time of that elimination. Eliminated/surrounded units each count as two units for the purpose of judging condition two in rule 4.3. For example, a British unit in hex 3122 that is attacked and eliminated during a German melee phase while there were German units in hexes 3023 and 3222 would be "surrounded," and would therefore count as two units. Keep track of surrounded eliminations by placing all such eliminated British units in a separate dead pile. Note that the presence of another British unit in a hex adjacent to an otherwise surrounded British unit does not negate that surrounded condition.
5.0 The Turn Sequence
5.1 In General
Each game turn of ToC is divided into two player turns of sequenced steps (also called "phases"). Every action taken by a player must be carried out in the appropriate phase as described below. Once a player has finished a particular phase he may not go back to perform some forgotten action or redo a poorly executed one unless his opponent graciously permits it.
5.2 The Game Turn Sequence Outline
The game turn sequence is given below in outline. Note the German player turn is always the first player turn of every game turn. Also note the German player turn's phase sequence is fixed while the British player turn sequence is variable. Finally here, also note the sequence within both sides' combat phases is always bombardment followed by melee.
- I. German Player Turn
- A. German Movement Phase
- B. German Combat Phase
-
- Bombardment
-
- Melee
-
- II. British Player Turn
- A. British Movement or Combat Phase
- B. British Combat or Movement Phase
5.3 BEF Move/Fight, Fight/Move, Fight/Fight or Move/Move
The British player is always free to choose, on a player turn by player turn basis, whether he will go through his player turn using the standard move/fight sequence or one of the other three sequences available to him. That is, he may choose to use the standard "move/fight" sequence; or he may choose to go "fight/move" instead, by performing his combat phase first and then following it with a movement phase; or he may choose to have a player turn with two combat phases ("fight/fight"); or he may choose to have a player turn with two movement phases ("move/move").
The decision is always the British player's to make, and he must announce his choice for each of his upcoming player turns at the very start of each of those player turns. Once a sequence decision has been declared, it can't be changed until the start of the next British player turn. Remember, no matter what phase sequence the British player chooses, his combat phase always follows the same bombardment/melee sequence as the German combat phase.
5.4 Game Turns
Use the turn marker provided in the counter-mix to keep track of each game's progress. Place it on the first block of the Turn Record Track printed on the mapsheet at the start of play, and move it forward one block at the end of every British player turn. Play may end with the completion of Game Turn 7 (see 4.2), or at the end of Game Turn 14 (see 4.3), or whenever one player judges his position has become hopeless and he concedes.
6.0 Stacking
6.1 In General
"Stacking" is the word used to describe the piling of more than one unit into a single hex at the same time.
6.2 Stacking & Movement
Stacking rules are in effect for both sides at all times throughout the game turn. Players should therefore pay attention to the order in which they move their units in crowded areas of the map; otherwise, moves made carelessly early in the movement phase may block the ability to move other units later in the same phase.
Except as described in the strictures given below, there are no limits on the number of units that may enter and pass through any given hex over the course of a phase, player turn or game turn, as long as the stacking limit is met on a hex-by-hex and instant-by-instant basis. If any hex containing stacked units is found to be over-stacked or improperly stacked at any time, the opposing player is immediately allowed to remove to the dead pile his choice of the minimum number of involved enemy units necessary to bring the violating stack back into limits.
6.3 Stacking Limit
Neither player may ever have more than five "stacking points" (SP) of units in any one hex at any one time. Every German infantry regiment is worth four stacking points; all other units in the game on both sides are each worth one stacking point.
6.4 Steps & Stacking
Note that a unit's stacking point value doesn't decrease as it suffers step losses. That is, a German infantry regiment is always worth four SP, even as it reduces from three steps down to two steps, or even down to just one step. Likewise, two-step units always retain their original stacking values when reduced to one-steppers.
6.5 German Corps
Units from different German corps may never occupy the same hex at the same time, nor may they in any way attack, stack or move together. This stricture is true no matter what the SP value of the involved German units. See 10.6 and 12.14 for more details.
6.6 Fog o' War
Neither player may look beneath the top unit of any enemy stack until such time as the combat resolution procedure calls for it. Further, once an enemy stack is examined, the combat procedure being resolved may no longer be called off.
7.0 Zones of Control
7.1 In General
Every unit in the game exerts a "zone of control" (ZOC) into the six hexes surrounding that hex. There is no qualitative difference in effect between a hex containing ZOC exerted there by one unit or by several units. The ZOC of both sides' units may be simultaneously exerted into the same hexes.
7.2 ZOC Limits
ZOC don't extend into built-up residential or built-up industrial hexes. ZOCs do extend out of such hexes into neighboring non-built-up hexes. For example, a unit in hex 2707 projects ZOC into 2607, 2706 and 2807. That's because even though the unit is located in a built-up industrial hex, it still projects ZOC into surrounding hexes that aren't built-up. A unit in 3513 would project no ZOC at all. A unit in hex 3506 would project ZOC into 3407, 3505, 3606 and 3607.
Other than the stricture above, ZOC extend into and out of all hexes and across all hex sides, no matter what water features or terrains (other than built-up) are involved.
7.3 ZOC Effects on Movement
All moving units must stop their movement for that phase in the first hex they enter containing an enemy zone of control (EZOC). Units beginning their side's movement phase already in a hex containing an EZOC may move out of that hex provided the first hex they enter contains no EZOC. Units in such situations are allowed to enter another EZOC hex after that first EZOC-free hex, but they would then be forced to halt their movement there for that phase. No units are allowed to move directly from EZOC to EZOC (exception: see 12.13, advance after combat).
7.4 No ZOC Negations
The presence of a friendly unit in a hex containing an EZOC never negates that EZOC for any purpose.
8.0 German Map Entry
8.1 In General
As explained in 3.1, no German units begin the game set up on the map; instead, they enter the map after play has begun.
8.2 German Corps/Division Entry
All Units of the 17th Division (of IX Corps) enter through hex 4700 during the movement phase of the German player turn of Game Turn 1. All units of the 18th Division (of IX Corps) enter through hex 4300 during the movement phase of the German player turn of Game Turn 1. The two separate (see 2.12) IX Corps units also enter on Game Turn 1 through either or both of those two hexes (German player's choices).
All Units of the 6th Division (of III Corps) enter through hex 3900 during the movement phase of the German player turn of Game Turn 1. All units of the 5th Division (of III Corps) enter through hex 3100 during the movement phase of the German player turn of Game Turn 1. The two separate (see 2.12) III Corps units also enter on Game Turn 1 through either or both of those two hexes (German player's choices).
All Units of the 7th Division (of IV Corps) enter through hex 2700 during the movement phase of the German player turn of Game Turn 4. All units of the 8th Division (of IV Corps) enter through hex 2100 during the movement phase of the German player turn of Game Turn 4. The two separate (see 2.12) III Corps units also enter on Game Turn 4 through either or both of those two hexes (German player's choices).
Note on transcription. The last sentence above is printed as "The two separate (see 2.12) III Corps units" in the source. Section 2.12 gives the separate units of each corps, and the units entering on Game Turn 4 belong to IV Corps, so the sentence is transcribed as printed but the corps named there appears to be a misprint for IV Corps.
8.3 No Voluntary Delays
The entry of German units may not be voluntarily delayed or changed to alternative entry hexes. If for any reason one or more units aren't able to enter at the scheduled time (for example, due to British occupation of an entry hex or over-stacking, etc.), they simply wait off board until the start of the very first German movement phase in which they could enter through their designated hex.
8.4 Enter in Column & March Mode
When entering units, the German player should make an off-map column of them, paying attention to stacking rules. The first unit or stack in the column would enter the map by paying one movement point; the second would pay two movement points, etc. Entering German units may use "march mode" during their turn of entry, provided the regular strictures for that kind of movement are met (see 9.20). Alternatively, when not entering using march mode, German units are eligible to attack normally during their player turn of entry.
9.0 Movement
9.1 In General
Every unit in the game has a "movement factor" (MF) printed in its bottom-right corner. That factor is the number of "movement points" (MP) available to the unit to use to move across the hex grid during its side's movement phases. Units move from hex to adjacent hex – no "skipping" of hexes is allowed – paying varied costs to do so, depending on the type of unit moving and the terrain in the hexes being entered and the water features immediately along their hex sides. The movement of each player's units takes place only during his own movement phases; no enemy movement takes place during your own movement phase.
9.2 Limits
MP may not be accumulated from turn to turn, nor may they be loaned or given from one unit to another. A player may potentially move all, some, or none of his units in each of his movement phases throughout the game. Units that move are not required to expend all their MP before stopping. The movement of each unit or stack must be completed before that of another is begun. A player may only change the position of an already moved unit or stack if his opponent agrees to allow it.
9.3 No Minimum Movement Ability
There is no guaranteed minimum movement ability in this game. A unit unable to pay the total required MP costs to enter a hex may not enter that hex.
9.4 Enemy Units
Your units may never enter hexes containing enemy units.
9.5 Stack Movement
To move together as a stack, units must begin their side's movement phase already stacked together in the same hex. Units aren't required, however, to move together simply because they started the movement phase in the same hex; such units might be moved together, individually, or in smaller sub-stacks.
9.6 Splitting Stacks
When moving a stack you may halt it temporarily to allow a unit or sub-stack to split off and move away on a separate course. The units left behind in the original ("parent") stack may then resume their own movement, even splitting off other units if desired. But once you begin moving an entirely different parent stack, or individual unit that began in a different hex than the currently moving parent stack, you may no longer resume the movement of the earlier stack without your opponent's permission.
9.7 Different MFs in a Stack
If units with different movement factors are traveling together in a stack, the stack must use the MF of the slowest unit within it. Of course, as the slower units in a stack exhaust their MFs, you may leave them behind and continue to move with the faster ones.
9.8 Terrain & Movement
All terrain features on the map are classified into two broad categories: natural and manmade. Both of those categories are further divided into different types (see below). There is never more than one type of natural terrain in any one hex, but more than one type of manmade terrain may exist in one hex along with the natural stuff.
9.9 Natural Terrain
There are two types of natural terrain on the map: clear and forest. The effects of those terrains on the movement of units are described below and are summarized on the Terrain Movement Effects Chart (13.1), which is printed on the mapsheet for quick reference during play.
9.10 Clear Terrain
Clear terrain is the "base" terrain of the game. It's just that—clear—devoid of any natural features that would enhance defense of slow movement at this level of operations. For a hex to be considered clear, it must be entirely clear, with no forest in it at all. With the exception of heavy artillery, each clear hex costs units one MP to enter. Heavy artillery pays two MP to enter each clear hex.
9.11 Forest
Forest hexes represent areas where the primary ground cover is trees. Each forest hex costs infantry units two MP to enter, while cavalry must pay three. Artillery units of all kinds are prohibited from entering forest hexes except when traveling along roads (see 9.17 below). A hex with any forest pattern in it is considered to be all forest for all play purposes.
9.12 River Hexsides
Rivers run between hexes, along hex sides, rather than existing in-hex like the terrain types described above. Artillery units of all kinds may only cross rivers via bridge hexsides (see 9.16 below). Infantry units pay an extra MP to cross an unbridged river hexside; cavalry pays an extra two. "Extra" means in addition to the cost of entering whatever in-hex terrain exists in the hex being crossed into. Bridges negate the river-crossing penalties for both infantry and cavalry.
9.13 Canal Hexsides
No unit may move or melee attack across a canal hexside unless that hex side is bridged.
9.14 Manmade Terrain
Manmade terrain exits in four types: bridges, roads, built-up industrial and built-up residential.
9.15 Built-Up
There are two kinds of built-up hexes on the map: industrial and residential. The effects of the two types on game play are identical with the sole exception that built-up industrial hexes don't block artillery lines of sight, whereas built-up residential hexes do block them (see 10.3ff).
Heavy artillery units may only enter built-up hexes when traveling along a road. All other units pay two MP to enter each built-up hex.
Design Note. Built-up industrial hexes contain factories, warehouses, vehicle parks, loading docks, slag heaps, garbage dumps, etc. They aren't as built-up vertically as the residential areas.
9.16 Bridges
Road bridges occur wherever roads cross river or canal hexsides. Railroad bridges are shown with their own symbol distinct from road bridges. For example, a railroad bridge spans hex side 1522/1623. There is no difference in effect between road and rail bridges in play. All bridges allow all units to cross the water-barrier hexside they span without having to pay any penalty MP to do so.
Design Note. Since the extensive rail net running across the area has no effect on play, it isn't shown except for its bridges. Further, there are no bridge demolition rules in the game because the Germans weren't interested in destroying them at this time, and there was a shortage of blasting caps and detonators within the BEF. The one bridge demolition of consequence that did take place, early on near Jemappes, is already reflected in that structure's omission from the map.
9.17 Roads
Roads don't generate any positive movement bonus of their own, but they allow units traveling along their course to enter terrain otherwise prohibited to them, and to enter all types of terrain at a cost of only one MP per hex. For example, heavy artillery normally pays two MP to enter a clear terrain hex; but when traveling along the course of a road, such units may do so at the cost of only one MP per hex.
Traveling along the course of a road means to move from one road hex to an adjacent road hex by crossing the hexside through which the road runs.
Within the overall limit of their MFs, units may combine on and off-road movement during the same phase.
9.18 Cumulative Costs
The total movement cost for entering any hex is always the sum of all the applicable terrain costs involved. For example, a cavalry unit crossing an unbridged river hexside into a forest hex would pay a total of five MP to do so: three MP to enter the forest hex and an extra two MP to cross the water barrier.
9.19 Off Map Movement
Except within the provisions of 4.4, no unit once in play on the map may be moved off it.
9.20 German March Mode Movement
During every German movement phase, any, some, or all of that side's units beginning the phase in a hex not adjacent to any British units may use "march mode" movement. Units using march mode have double their MF available to them, but they may not move next to any British unit during or at the end of such moves.
It isn't necessary to complete the movement of all units that will be using march mode movement in a given phase before moving units that will be using regular movement, or vice versa. Within the above stricture, march mode may take place at any time during the German movement phase; but note that no unit may combine regular and march mode movement during the same phase. Note, too, that adjacent British units negate the possibility of march mode even if they're not projecting zones of control.
German artillery units that use march mode may not bombard that same player turn.
Design Note. There is no British march mode. If you want to move the BEF faster than normal, pick the move/move player turn sequence.
9.21 BEF Movement & Melee Restrictions
British units may not move into the hexes that make up the two northernmost hex rows on the map. Thus, for example, British units may never move into hex 1001, 1101, 1201, etc. British units can melee into hexes located in the more southern of those two hex rows, but rule 12.13 (advance after combat) is suspended in such situations. Further, this rule in no way restricts the British ability to spot, establish lines of sight and/or bombard, which may potentially take place anywhere across the map. South of the line described above, British operations remain unrestricted.
10.0 Bombardment
10.1 In General
"Bombardment" is the method of attack by which artillery units fire at enemy units. Bombardment combat is the first portion of both players' combat phase(s) in every game turn. Each artillery unit may participate in one bombardment attack during each of their side's bombardment phases.
10.2 Range
Each artillery unit has its range, in hexes, printed immediately to the right of its bombardment factor along the bottom edge of its counter. When counting range, count the shortest path of contiguous hexes between the bombarding artillery unit and its target. When counting, don't count the location hex of the bombarding unit; do count the location hex of the enemy unit being bombarded. For example, an artillery unit in hex 2524 bombarding a unit in hex 2823 is firing at a range of three hexes.
No artillery unit may bombard a target that lies beyond its printed range, but bombardments need not always be made "at range." That is, an artillery unit may bombard an enemy unit in a hex immediately adjacent to it, or another hex farther away but that is still at less than maximum range.
10.3 Line of Sight (LoS)
"Line of Sight" (LoS) is the term used to describe the ability of the men in a bombarding artillery unit to actually see and aim at their target, and it is the second factor that must be taken into account when bombarding. LoS is determined the same way as range, except an LoS can be blocked by certain intervening terrain. If the LoS to a target unit is blocked, that unit can't be bombarded by the artillery unit with the blocked LoS. When judging if an LoS is blocked, don't consider the terrain in the location hexes of the bombarding artillery unit or its target; simply consider the terrain in the hexes between the two units.
An LoS is blocked by forest and/or built-up residential hexes. Trace the LoS from the center of the bombarding unit's hex to the center of the targeted unit's hex. If the LoS passes through even the slightest portion of hex containing blocking terrain, or if the LoS runs along a hexside between two hexes, only one of which contains blocking terrain, then that LoS is blocked.
Design Note. Units don't block LoS, neither friendly nor enemy.
10.4 LoS Examples
An artillery unit in hex 3514 can't bombard a unit in hex 3714. Even though built-up industrial hexes don't block LoS, the fact this LoS runs along the hexside shared by 3614 and 3615 is sufficient to block it because the forest in 3615 is blocking terrain.
An artillery unit in hex 3714 can't bombard a unit in 3911, because the built-up residential hex in 3813 blocks its LoS.
An artillery unit in hex 4308 can bombard a unit in 4208 or 4209, since the terrain in the hexes of the bombarding and targeted units is never a factor in judging LoS.
10.5 Multi-Artillery Unit Bombardments
In general, it's permitted for more than one artillery unit to combine their fires in order to bombard the same target unit at the same time. In such cases, however, each artillery unit must be within its own range and have its own unblocked LoS in order to be able to participate. Note also that no targeted unit may be bombarded more than once per bombardment phase, and no artillery unit may participate in more than one bombardment per bombardment phase.
10.6 German Organizational Restrictions
There are organizational restrictions on German multi-artillery unit bombardments. That is, prior to the start of Game Turn 11, German artillery units from different divisions, even within the same corps, may not combine to fire in the same bombardment. After the start of Game Turn 11, German units from different divisions within the same corps may fire in joint bombardments. German artillery units from different corps may never bombard together.
The separate artillery units in each of the three German corps may bombard alone or in conjunction with artillery units from any one of its corps' divisions during each German bombardment phase throughout the game.
10.7 Bombardment Resolution
After establishing LoS, add up the bombardment factors of all the artillery units involved in a given bombardment attack. Find that number within the field of numbers printed down the left side of the Bombardment Results Table (13.2) printed on the mapsheet. Roll a die and cross-index that number to find the result, which is either "No Effect" or a number of step losses between one and three. For example, if four bombardment factors are firing and a three is rolled, the targeted unit would lose one step.
10.8 Terrain Effects on Bombardment
When bombarding an enemy unit located in a forest or either kind of built-up hex, subtract two (-2) from the die roll before consulting the Bombardment Results Table. Note that all terrain effects on bombardment are summarized on the Terrain Effects on Combat Chart (13.2), which is also printed on the mapsheet. Die roll results modified to less than one are treated as ones.
In the example given in 10.7, assume the targeted hex contained forest. In that case, again assuming a roll of three, that roll would be modified to a one (-2), which would allow the targeted unit to come through the bombardment without loss.
10.9 Bombarding Stacks
When bombarding a hex containing more than one enemy unit, the bombarding player is allowed to apportion whatever step losses his attack generates among the units within the targeted hex pretty much as he sees fit, with but one stricture. That is, no unit in a bombarded stack may be eliminated until all the units in it have first been reduced to a step strength of one.
10.10 Move & Fire
It is permitted for artillery units of both sides to move and bombard—or, in the case of the British, to bombard and move, or bombard and bombard—during the same player turn. Likewise, an artillery unit that bombards doesn't thereby forfeit its ability to make defensive fire that same game turn (see section 11.0).
10.11 Spotting for Bombardments
Whenever you bombard an enemy occupied hex within the strictures described in the rules section above, and you also have one or more friendly units (of any types) in one or more hexes immediately adjacent to the hex receiving the fire, that bombardment is considered to have the advantage of being "spotted." As such, bombardments with spotter units are resolved normally, as described above. Any bombardments conducted without the benefit of spotting are penalized in that their resolution die rolls are reduced by one before consulting the Bombardment Results Table. Note, too, that acting as a spotter unit in no way inhibits what other functions such units are allowed to carry out before or after the bombardment for which they've served as spotters. And also note no German unit may ever spot for artillery units belonging to a corps other than its own.
Similarly, if an artillery unit is within range of an enemy occupied hex, but itself has no LoS to it, that artillery unit may still bombard that target hex if it is spotted as described above (and within the same strictures). Bombardments conducted with spotters, but without one or more of the firing artillery units also having their own LoS to the target hex, also suffer the minus-one die roll penalty described above.
11.0 Defensive Fire
11.1 In General
When a melee attack (see section 12.0) is declared against a hex, all the units in that hex have the opportunity to make "defensive fire" against their attackers just prior to the resolution of that melee attack. Infantry and cavalry use their melee factor as their defensive fire factor. Every artillery unit has a defensive fire factor of one. The mere adjacency of melee-attacking enemy units to one of your units or stacks is not by itself sufficient to trigger the ability of those units to make defensive fire. To be able to make defensive fire, a given hex containing one of your units or stacks must itself actually be coming under direct melee attack.
11.2 Defensive Fire & Multiple Units
Defending units in the same hex must combine their defensive fire values to make just one defensive fire die roll against melee attackers coming at them from just one hex. If melee attackers are coming at them from more than one hex, however, the player owning the defensive-firing units must designate into which hex or hexes of oncoming enemy formations his own units will fire. In such cases he may apportion the defensive fire of his units among the various attacker hexes any way he sees fit, as long as no single unit fires more than once or has its defensive fire value split among more than one hex of attackers. It isn't necessary to bring defensive fire against every attacking hex in multi-hex situations.
11.3 Terrain & Defensive Fire
Melee-attacking units launching their melee attack from either kind of built-up hex have the defensive fire die roll made against them modified by minus one (-1). Melee-attacking units launching their melee attack across a canal or river hexside (bridged or unbridged) have the defensive fire die roll made against them modified by plus one (+1). Of course, if both those conditions pertain in a given melee/defensive fire situation, the cumulative die roll modifier would be zero.
Note that all terrain effects on defensive fire are summarized on the Terrain Effects on Combat Chart (13.2), printed on the map sheet. Die roll results modified to less than one are treated as ones; die roll results modified to greater than six are treated as sixes.
11.4 Defensive Fire Resolution
Total the defensive fire strengths of all the units firing against a given melee attack force in one hex. Find that total in the range of numbers printed down the left side of the Defensive Fire Results Table (13.4) printed on the mapsheet. Roll the die; make any necessary terrain modifications as described in 11.3 above; then cross-index that final result to get the defensive fire result, which is either "No Effect" or a number of step losses between one and three. For example, if four defensive fire factors are firing and a three is rolled, the targeted hex of melee attackers would lose a total of one step.
11.5 Defensive Fire Against a Stack
When making a defensive fire against a hex containing more than one oncoming enemy unit, the defensive-firing player is allowed to apportion whatever step losses his defensive fire result generates pretty much as he sees fit among the attacking units within the targeted hex; however, no enemy unit in a stack receiving defensive fire, and that's participating in the melee attack triggering that fire, may be eliminated until all the participating units in the stack are first at one-step strength. Also note that any enemy units located in a hex receiving defensive fire, but that aren't themselves participating in the melee attack triggering that fire, may not be made recipients of any defensive fire results. (Such situations usually arise in respect to close-in artillery units.)
12.0 Melee Combat
12.1 In General
Melee (close-in) combat takes place during your combat phase between your infantry and/or cavalry units, as attackers, and some or all of the enemy units of any and all types, immediately adjacent to them as defenders. Melee attacking is not mandatory; the mere presence of adjacent enemy units and/or their zones of control doesn't trigger a necessity to melee. Melee attacking is always voluntary; but no defending unit may ever refuse to participate in a melee. Note, too, artillery units never launch melee attacks, but they do defend against them.
No attacking unit may participate in more than one melee per friendly combat phase, and no enemy unit may be meleed more than once per friendly combat phase. The player whose combat phase it is, is considered the "attacker," and the other player is considered the "defender," no matter what the overall situation across the map.
12.2 Multiple Defenders in One Hex
If there are two or more enemy units in a hex being melee attacked by your units, you may only attack them as if they were one large, combined, defending unit.
12.3 Multi-Hex Melees
An enemy occupied hex may be melee-attacked in one battle by as many of your infantry and/or cavalry units as you can bring to bear from one, some or all of the surrounding hexes, but no more than one hex may ever be the object of any one melee attack. For example, a unit in hex 1824 may not melee attack into both 1923 and 1924 during the same combat phase. See 12.5 below for more on this.
12.4 Attack Sequencing
There is no artificial limit on the number of melee attacks each player may declare during each of his combat phases throughout the game. The attacker need not declare all his melees beforehand; and he may resolve them in any order he wishes, as long as the resolution of one is completed before that of the next is begun.
12.5 Stacks Attacking
It isn't necessary for all the cavalry and/or infantry units you have stacked in a given hex to participate in the same melee attack. Some of the units in a stack might melee attack into one defender hex while others melee attack into another hex or simply didn't attack at all. (Artillery units would always have to be included in that last category, since they're never allowed to launch melee attacks.)
12.6 Terrain Effects on Melee
If the defender's hex in a melee attack is either kind of built-up terrain, the resolution die roll is modified by minus two (-2) before the result is finally determined.
If the defender's hex in a melee attack is a forest hex, the resolution die roll is modified by minus one (-1) before the result is finally determined.
If all the attackers in a melee attack force are attacking across canal or river hexsides (bridged or unbridged), the resolution die roll is modified by minus one (-1) before the result is finally determined. Note that modifier can accrue in addition to any modifier for terrain in the defender's hex as described above.
Note that all terrain effects on melee are summarized on the Terrain Effects on Combat Chart (13.2), printed on the mapsheet. Die roll results modified to less than one are treated as ones; die roll results modified to greater than six are treated as sixes.
12.7 Melee Resolution Procedure
The attacking player should strive to have several times more melee factors involved in a given melee than the defender. Such battles are called "high odds" melees. To resolve such fights, the attacking player begins by calculating the melee "odds." He does that by adding up the melee factors of all his involved units; then adding up the melee factors of all the enemy units in the hex being melee attacked. Note that every artillery unit defends in melee with a factor of one. Divide the defender-total into the attacker-total and round down any remainder.
High Odds Example. 26 melee factors of attackers versus 7 melee factors of defenders yields an odds ratio of 3:1 ("three to one"). That is, 26÷7=3.71, which rounds down to 3. To turn that "3" into a ratio, you must set a "1" next to it on the right. Thus "3" becomes "3:1," which corresponds to a column heading on the Melee Combat Results Table (13.5) printed on the mapsheet.
12.8 Poor Odds Melee Attacks
In melee attacks in which the defender is revealed to have more melee factors involved than the attacker, no odds calculation or die roll is needed to resolve it. Results in such melees are always automatically "4/0" (see the results explanation below in 12.12), and are called "poor odds attacks."
12.9 Odds Limits
Note that the column headings on the Melee Combat Results Table range from 1:1 to 6:1. Odds greater than 6:1 result in automatic 1/4 results; odd less than 1:1 result in automatic 4/0 results.
12.10 Receiving Defensive Fire
An attacking player must declare each of his melee attacks one at a time, in each case pointing out which of his units from which hexes are attacking into exactly which hexes. After each melee declaration he must pause and allow his opponent to execute defensive fire for that just-declared melee attack (see section 11.0). If the result of that defensive fire reduces the odds of the melee attack, that melee attack must still be resolved after taking the odds reduction into account.
12.11 Final Melee Resolution
After all the potential modifiers and sub-routines described above have been worked through and a final Melee Combat Results Table odds column determined, the attacker rolls a die and consults that table to get a final combat result. For example, at odds of 3:1 and a die roll of three, the combat result is "1/2."
12.12 Melee Combat Results
The number to the left of the slash applies to the attacking force; the number to the right applies to the defenders. Those numbers must be absorbed as step losses by each side. Both players are free to apportion their total of melee step losses among their involved units as each sees fit, but the defender always absorbs his losses first.
There is no carry over of excess combat step losses from one battle to another. Each combat is resolved discretely. If a combat result causes the entire elimination of one side's involved force, any excess combat step losses that would otherwise have been called for are simply ignored.
12.13 Advance After Combat
Whenever the defender's hex in a melee is left entirely vacant of units, the victorious attacking player must advance at least one of his involved units into that hex. He may advance more than one involved unit, up to the normal stacking limit, but he must advance at least one. Note that since artillery units may never make melee attacks, they never advance after combat.
Once that initial advance after combat is made, the victorious attacker may then advance any, some or all of his just-advanced units one more hex, from their new location into any immediately adjacent empty hexes. This second-hex advance is not mandatory.
In all primary and secondary advance-after-combat situations, enemy zones of control are ignored by the advancing units while they make their advance. Further, making an advance after combat does not use up MPs or in anyway affect the participating units' normal ability to move during subsequent friendly movement phases. Note, though, that normal terrain movement prohibitions can't be ignored. For instance, no unit could make an advance across an unbridged canal hexside.
Victorious defenders have no similar advance after combat rule or option; they simply hold their places.
12.14 German Organizational Restrictions on Melee
Prior to the start of Game Turn 11, German cavalry and/or infantry units from different divisions, even within the same corps, may not participate in the same melee attack. After the start of Game Turn 11, German units from different divisions within the same corps may participate in the same melee attack. German cavalry and/or infantry units from different corps may never attack together in the same melee.
The separate cavalry unit in each of the three corps may melee attack alone or in conjunction with infantry and/or cavalry units from any one of its corps' divisions during each German combat phase throughout the game.
13.0 Charts & Tables
See the mapsheet.
Transcription gap. The source rules file contains only the words "See the mapsheet." for this section. The charts and tables it refers to are printed on the game map, not in the rules file, and are not reproduced here: the Terrain Movement Effects Chart (13.1), the Terrain Effects on Combat Chart (13.2), the Bombardment Results Table, the Defensive Fire Results Table (13.4) and the Melee Combat Results Table (13.5). Consult the printed mapsheet for their values. Note that the source's own cross-references to chart numbers are not fully consistent: rule 10.7 cites the Bombardment Results Table as 13.2, while rules 10.8, 11.3 and 12.6 cite 13.2 for the Terrain Effects on Combat Chart; they are transcribed as printed.
14.0 Optional Rules
14.1 Night Game Turns
Game Turns 7 and 8 are now considered night turns. During night game turns, the Germans may not march move, neither side may bombard (both sides may melee), and the British player may not choose the move/move phase sequence.
14.2 Withdrawal Before Combat
After the German player has announced a melee attack against a hex, and before defensive fire is resolved, British cavalry and/or horse artillery units may escape that combat by withdrawing two hexes. Withdrawing units may not enter a German ZOC or terrain they could not enter during regular movement, and they must end two hexes from their starting position. Note the presence of one or more friendly units in a hex containing German zones of control doesn't negate that ZOC.
14.3 Hun Frightfulness or German Ingenuity
At one point in the battle some school children appeared, and the British stopped firing. The Germans used the opportunity thereby created to get forward. Therefore, once per game, the German player may declare "Kinder!" ("Children!") When he does so, the next defensive fire made by the British player is considered to be at a target in built-up terrain, no matter the actual terrain involved.
14.4 French In & West of Conde
To simulate the historic presence of some French territorial troops "in and west of Conde," during Game Turns 1-7, inclusive, no German or British units may move or melee into any hexes generally in and/or west of that town. To use this rule, before starting play, one of the players should take a marker and use it to put a dot in the centers of the following 22 hexes: 1005, 1105, 1206, 1306, 1407, 1507, 1608, 1708, 1609, 1509, 1510, 1411, 1412, 1312, 1213, 1214, 1114, 1115, 1116, 1117, 1018 and 1019. The hexes containing the dots, along with all the others within the rough triangle formed by them and the west board edge, are the ones out of bounds for the first day.