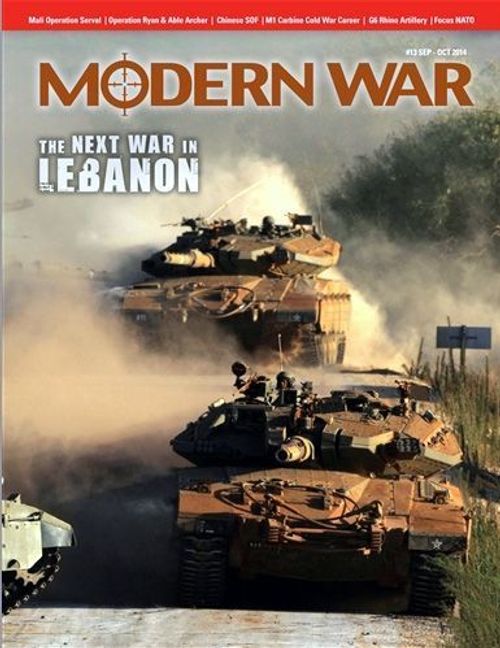
The Next War in Lebanon
The Next War in Lebanon Rulebook
Table of Contents
Table of Contents
- 1.0 Introduction
- 2.0 Game Components
- 3.0 Game Term Definitions
- 4.0 Setting Up the Game
- 5.0 Sequence of Play
- 6.0 Command Control (C2)
- 7.0 Joint Ops ("J") Chits
- 8.0 Stacking
- 9.0 Combat
- 10.0 Special Combat Considerations
- 11.0 IDF Deep Strikes
- 12.0 The Wider War
- 13.0 How to Win
- 14.0 Optional Rules
- 15.0 Scenarios
- 16.0 Joint Ops Action Summary Aid
- Design Notes
1.0 Introduction
The Next War in Lebanon is an operational level wargame of a speculative Israeli invasion of Lebanon in the near future. The context is an Israeli invasion with the goal of eliminating the presence of Hezbollah terrorist group, and presumes a much larger invasion than the 2006 incursion. One player (the IDF) is assigned the role of the IDF (Israeli Defense Force) commander, and the other player is assigned the role of the Hezbollah insurgents, as well as Syrian and Iranian forces if certain events occur to cause their entry into the game (or players may agree to have these additional forces in the mix from the beginning of the game instead).
2.0 Game Components
1 11x17" map 1 counter sheet (176 game pieces).
Players will need to provide at least one six-sided die, but six would be useful.
2.1 The Game Map
The game map features northern Israel and southern Lebanon, divided into 21 large hex territories, representing three categories of terrain: Urban (a major population center, such as the cities of Tyre, Sidon and Nabatiye), Populated (full of villages and small towns, and numerous roads), and Remote (rough terrain with few inhabitants or roads). Stacking in any hex zone is unlimited, and units move and conduct operations within these hex zones to win the game.
Some hex zones are also "Sanctuaries", one for the IDF (representing secure bases in central Israel), and two for the Insurgents (northern Lebanon and Syria.) These are generally inviolable by the enemy player's units, although Israeli SOF units, as well as airstrikes, are eligible to enter any sanctuary.
Note: The Insurgents cannot use Syria as a Sanctuary until the Syria is "activated" into the game by a Cascading Event.
2.2 The Game Pieces
Most of the game pieces represent military units (both regular and irregular) that would potentially become involved in a future conflict in Lebanon. The numbers and symbols printed on the game pieces represent their strength and the type of unit represented by each chit. Each nationality is identified by a specific background color: Israeli (IDF) units are blue, whereas Insurgent units are yellow, and Syrian units are green.
There are two general types of units:
Task Force Headquarters (TF HQs): These game pieces represent command and control units (leaders, staff groups, cadre). Each TF HQ is printed with a unit identification number and a corresponding holding box on the map wherein their subordinate units are placed. TF HQ's do not, themselves, possess any strength or "Firefight ratings", and cannot attack or defend. They are simply place-holder markers, for all intents and purposes.
Military Units: Military units represent formations from companies (1-300 men) to divisions (7,000+ men) size. Most military units represented in the game are brigades, representing several thousand men and numerous vehicles. There are two basic types of military units: Regular (proper military formations) and Irregular (guerilla or insurgent forces).
Military units are printed with two "Firefight Ratings" representing their effectiveness to conduct operations of various types. The efficiency rating any military unit may employ in combat depends on the mode it is in when in play (either "Combat Mode", or "Dispersed Mode"). Combat Mode is a disposition that is concentrated to attack or defend in the way military units are organized and intended to fight on battlefields. Dispersed Mode is a disposition that is 'spread out' to cover a wide area, often separating into smaller groups to operate more methodically or tactically. The advantages of each type of mode is explained as follows:
Combat Mode: Some units are rated better for open combat, like proper military formations. These units are not well-suited for combat with insurgent or irregular forces, however.
Dispersed Mode: Some units are rated better for guerilla warfare, like insurgents. These units are not well-suited for open combat, however.
All military units in the game can operate as either mode. Each military unit is printed as a Combat Mode on the front, and a Dispersed Mode on the back. Switching between modes is explained later (see 3.0).
2.3 Military Unit Representations
The following list provides players with an insight to what each of the military units in the game actually represent.
Armor: a heavy unit employing mainly Main Battle Tanks.
Armored Cavalry: a light unit employing mainly fast, lightly armored vehicles.
Mechanized Infantry: an infantry unit that rides and deploys from wheeled and tracked Infantry Fighting Vehicles.
Light Infantry: a lightly equipped infantry unit that either walks or rides in trucks/ light wheeled vehicles.
SOF (Special Operations Forces): soldiers experienced in long-range patrolling, raids and covert operations.
Combat Support Unit (CSU): A composite unit that represents a grouping of smaller combat asset units, such as artillery, engineer, and logistical support units.
Militia: lightly equipped part-time fighters recruited from local villages.
Guerrilla: full-time fighters, with better equipment and more training than militia.
Main Force: better-equipped and trained fighters, the Insurgent equivalent to regular light infantry.
Rocket/Missile: small groups of short or long-range rocket or missile launchers that are used by the Insurgent player to bombard civilian or military infrastructure targets in Israel, or occasionally support an attack.
2.4 Military Unit Sizes
Military units are portrayed as various sizes, from companies to divisions, and are identified by a simple roman-numeral code:
XXX: Corps (Syrian TF HQ only) XX: Division (IDF TF HQ only, and Syrian Tactical Units) X: Brigade or group of battalions II: Battalion
Note: If a unit is not printed with any code, that unit is considered to be a detachment, cell, "large group" or other anomalous organization.
2.5 Miscellaneous Function Chits
The game also includes various other markers to indicate certain circumstances or situations in the game. There are also a set of "card chits" which function like a deck of cards (drawing one chit from a 'suit' pile, and another from the 'rank' pile to determine what specific playing card has been randomly drawn). Of course, players are free to use a regular deck of 52 playing cards instead (see 2.7).
2.6 Joint Operations Chits
At the beginning of each turn, both players will draw Joint Ops chits, which dictate what a player can do during that turn. No player may conduct any activity, including movement or combat, without possession of the proper Joint Ops chit for that action. The function of each Joint Ops chit is tabulated as follows:
| Staff | Classification | Game Function |
|---|---|---|
| J-1 | Personnel and administration | Reorganizing and reconstituting units |
| J-2 | Intelligence and security | Seeking out the enemy, or evading his efforts to find you |
| J-3 | Operations | Tactical movement, combat, deep (air, naval, missile) strikes |
| J-4 | Logistics | Strategic movement, combat support |
| J-5 | Planning | Advance planning (optional rules) |
| J-6 | Communications | Networked operations and Information Warfare (optional rules) |
Designer's Note: These are named per U.S. military staff sections (slightly modified for the game).
2.7 Cascading Effects Chits
There are eighteen total "Cascading Effects" chits, divided into suits and ranks, exactly like a normal deck of playing cards. Cascading Effect chits are drawn during the so-named phase during the sequence of play, as well as a result of Collateral Damage.
To determine a Cascading Effect, simply organize the chits into two separate piles, one containing the four suit chits, and the other containing the fourteen rank chits (from 'Ace' to 'King'), and place each pile in a separate wide-mouth opaque container (from which to blindly draw one chit from each cup). Whenever a Cascading Effect is required, the drawing player simply randomly draws one suit chit, and then one rank chit (for example, a Spade and a Queen), and this will give him his 'card' to use when referencing the Cascading Effects Chart. Then, conduct the action that is indicated by that card draw as it corresponds to the chart. Neither suit nor rank chits may be saved for later use; once the Cascading Effect is known, the suit and rank chit is each returned to its respective draw cup (or reshuffled into the deck), to be drawn again when required by the sequence of play or collateral damage.
Note: Some events are indicated as a "one-time event", and therefore only ever occur once. If occurring again by a chit pull, ignore it, and treat it as if it was no event (do not redraw new chits).
3.0 Game Term Definitions
The following game terms will be references throughout the rules:
C2: "Command and Control". Each side is assigned a unique "C2 Level", which will be raised and/or lowered by game events. The side with the higher C2 Level is always the "First Player" of the sequence of play of each new game turn. Additionally, the C2 Level indicates the quantity of Joint Ops chits received by that player.
Controlled or Contested: A player "controls" a hex zone if there is at least one undisrupted friendly military unit therein (in any mode), but the enemy player has no undisrupted military units there. TF HQs, by themselves, cannot control a hex zone. If both players have at least one undisrupted military unit in a hex zone, that hex zone is considered "contested".
Firefight Ratings: All military units are printed with two specific Firefight Ratings, the first one showing its strength in combat mode, and the other showing its strength in dispersed mode. Typically, units that are deployed in combat mode have a better combat firefight rating (but a poor dispersed rating), whereas units that are deployed in a dispersed mode have a better dispersed firefight rating (but a poor firefight rating).
Note: If a unit is printed with a parentheses around its firefight rating, it may not use that rating offensively. For example, rocket units may only participate in combat when in a hex zone being attacked (see 9.8).
Mode: One of two modes that exist in either side of a military unit, the front side being a unit in "Combat" mode, and the back side being a unit in "Dispersed" mode. Some units are rated better for one mode or the other, although only units in combat mode may move. Dispersed mode units cannot be attacked by units in combat mode (although a unit in combat mode may be attacked by a unit in dispersed mode per the nroma rules). Some units do not have a dispersed mode (like rocket units, for example).
OOB: Order of Battle; this simply refers to the Holding Boxes printed on the map where units are placed that are assigned to Task Force HQs, which is represented by the appropriate TF HQ chit while on the map. An OOB is limited by the current C2 level for that player for his side.
Note: Any military units may be detached from a Holding Box and placed onto the map directly, without a TF HQ. There is no difference in effectiveness of units that are operating with a TF HQ.
The Insurgents and the Syrian 1st Corps only have one Holding Box each, and only units of that kind may be placed in that box (Insurgent units may not be placed into the Syrian Holding Box, and vice versa).
Draw/Select: When a rule instructs a player to "draw", he chooses it at random (blindly.) When a rule instructs a player to "select", he examines and chooses a choice of that category.
Reaction: Some Joint Ops chits may be played during and amidst the other player's turn, in reaction to a specific activity (usually this will be the insurgent player attempting to evade IDF units, or launching ambushes).
Regular/Irregular: A unit with a better combat mode firefight rating is a regular unit, a unit with a better dispersed mode firefight rating is an irregular unit. This distinction of terms has no specific effect on play, in and of itself. Exception: IDF SOF units and Syrian rocket or missile units are irregular units.
Task Force: A "Task Force" describes a group of military units that are in a holding box, and represented by a TF HQ on the map. Task Forces are important because they are collectively considered to be one unit for movement purposes, such that a Joint Ops chit allows that entire task force to move as if it's one unit (though dispersed mode units cannot move, and so they can't be moved with a task force...they must be left behind in such a case). A TF HQ is limited to the C2 level of that side.
Military Unit: This is a playing piece other than a TF HQ or a function chit that is printed with firefight ratings.
4.0 Setting Up the Game
To set up the game, the players first need to decide which side each will play for the chosen scenario, and then set up all the pieces for that scenario, per the scenario instructions.
Note: In all scenarios, the IDF player always sets up first.
Assign any units to specific TF HQs, placing them in the holding box on the map per each specific TF HQ assigned, or place any units directly on the map instead.
Note: If playing the Next War in Lebanon scenario, the IDF player decides, in secret, whether he will follow a counterforce or countervalue strategy (see 13.1).
Place all suit and rank chits into two separate draw cups, to be drawn blindly when required.
Next, apportion each player an allotment of joint operations (J) chits, as per the scenario instructions (i.e., the current C2 level), half of which he draws randomly (rounded up), and half of which (rounded down) he chooses from the remaining allotment. He should generally keep all of his Joint Ops chits secret from his opponent until they are played.
Begin the Sequence of Play.
5.0 Sequence of Play
Each game turn represents an indefinite period of time, from twelve hours to two or three days, perhaps. Each turn consists of the following "Phases" that must be conducted in the order listed:
Note: There are no separate movement or combat phases, as in most wargames. All movement and combat occurs via the play of appropriate Joint Ops chits during a player's Joint Operation Phase.
-
C2 Determination Phase. Determine which player has the higher C2 level for the turn. That player becomes the "First" player for the turn. The other player is the Second Player. If both sides have the same C2 level, then the IDF player is the First player.
-
First Player Turn
A. Preparation Phase: The First player may play any J-2 chits (Intelligence) they have to examine the other player's chosen Joint Ops chits (but not the chits that he drew blindly).
B. Joint Operations Phase: The First player now plays any of his Joint Ops chits, in any order he prefers, playing and completing each chit one at a time. See the rules sections describing each type of chit. It is at this time that the Second player may play any reaction Joint Ops chits, if eligible.
- Second Player Turn
The Second Player Turn is conducted exactly like the First Player Turn above by the Second player instead.
- Cascading Effects Phase
One player (doesn't matter which) draws one 'suit' chit, and one 'rank' chit from each of the two respective draw cups, then consults the appropriate Cascading Effects Table according to the 'card' just drawn, implementing the instructions given as indicated.
- End of Turn
Both players now discards any unplayed Joint Ops chits, and then select all new Joint Ops chits, up to the limit of their C2 level, selecting all but two of them, drawing those last two blindly.
Note: Planning ahead is rewarded here. You are not only setting up your own next turn, you are also choosing chits to react to what you think your opponent will do in his next turn!
Next, advance the "Game Turn" marker. If this is the last turn of the game, determine the winner. Otherwise, the game continues until the end of the last turn (per the scenario), or one player concedes the game.
6.0 Command Control (C2)
Each player must track his own sides "C2 Level", which represents the maximum number of Joint Ops chits that he may have in his hand at any one time, as well as how many units may be assigned to TF HQs at any one time (see 8.1).
Note: The Optional J-5 chit, and some Cascading Effects will create a temporary exception.
6.2 Drawing/Selecting Joint Ops Chits
After drawing a random number of Joint Ops chits (half of the current C2 level, rounded up), each player may select the remaining half (rounded down) of all available Joint Ops chits remaining, and sets those in front of himself to be used during the game turn. They remain in a player's hand until the end of their Joint Ops phase, at which time they are discarded back into the draw pile.
6.3 Playing Joint Ops Chits
Generally, Joint Ops chits are played one at a time during a player's own Operations Phase (in any order he desires). That played chit's action is thus performed, then the next chit is played, and so on. Some chits may be played together to enhance their effectiveness.
Design Note: Since you select Joint Ops chits during the End of Turn Phase, the enemy has an entire turn to perform actions with his chits, thereby possibly rendering your picks somewhat irrelevant (reflecting very real staff planning issues at this level).
If playing a J-3 Joint Ops chit, units or a TF HQ may be moved from one hex zone to any adjacent hex zone(s). A TF HQ that comprises multiple units may be moved by one J-3 chit, or a quantity of units that are not assigned to a TF HQ may be moved by a J-3 chit. See 7.3.
Designer's Note: This rule is intended to show the advantages and disadvantages of, but mainly the differences between, a powerful though centralized hierarchical regular military force and a weaker though decentralized and amorphous insurgency.
In all instances, when a Joint Ops chit is played, its effect must be implemented immediately, and to completion. In terms of chit play that applies to a specific unit, that unit must complete all of its undertaken actions before a different unit may begin to undertake any action. However, a TF HQ or stack of units may actuate together as a single entity, if permitted by the Joint Ops chit being played. In such a case, that TF HQ or stack must complete all of its undertaken actions before a different unit, TF HQ or stack may begin to undertake any action.
7.0 Joint Ops ("J") Chits
The following rules describe what a player can do with each kind of Joint Ops chit, when he plays it. Note that some Joint Ops chits are only eligible to be played during certain phases of a turn.
7.1 J-1 Administration
During the Operations Phase, the play of one J-1 type chit allows a player to do one of the following actions:
A) Un-disrupt any one unit. Un-disrupt any one friendly unit, or flip any one rocket or missile unit from its "Fired" side to its front side.
B) Rebuild any one reduced unit. A unit that has been depleted to a reduced unit is replaced with a full-strength unit.
C) Rebuild any one eliminated unit (Insurgent). An insurgent unit that has been eliminated is replaced onto the map in any hex zone that is not Israeli-controlled nor occupied by any Israeli units.
D) Change the mode of any one unit. Flip one unit from its current mode side to its other mode side. A unit that is in combat mode may be flipped to dispersed mode, or a unit that is in dispersed mode may be flipped to combat mode. A disrupted unit remains disrupted if it changes modes.
Note: Units in dispersed mode cannot be moved, but also cannot be attacked by units in combat mode (see 3.0).
E) Un-disrupt all units in a sanctuary. Remove the disrupted markers of all units in a sanctuary hex zone.
F) Change the mode of all units in a sanctuary. Flip any units from their current mode sides to their other mode sides. Any unit that is in combat mode may be flipped to dispersed mode, or any unit that is in dispersed mode may be flipped to combat mode. Disrupted units remain disrupted if they change modes.
Note: The above options pertain to any eligible unit, whether in a holding box or on the map as an individual unit.
7.2 J-2 Intelligence
During the Operations Phase (or the enemy's Operation Phase, if played as a "Reaction"), the play of one J-2 type chit allows a player to do one of the following actions:
A) Examine the opponent's chosen Joint Ops (Joint Ops) chits. View all of the currently chosen (but not the blindly drawn) enemy Joint Ops chits that the opposing player had selected during the preceding End of Turn Phase.
B) Examine all the units assigned to a specific TF HQ. View all of the opposing units currently assigned to a specific TF HQ present in one hex zone.
C) Evade an enemy attack (Reaction). If a hex zone is undergoing an attack by enemy units, either player's units (of any type in that hex zone) may possibly be excluded from that combat, in which case they do remain in that hex zone, but may not be attacked or defend during that present Operations Phase. As of the completion of the current Operations Phase, the units are no longer considered to be evading, and the J-2 chit is no longer applicable to it.
The maximum number of units that may evade is per a single six-sided die roll (for example, a roll of "3" would allow a maximum of three units to evade). Add +1 to that die roll if the hex zone is an "Urban" type of hex zone. The evading player always chooses which units will evade. However, subtract a -1 from the insurgent player's die roll if the hex zone is a "Remote" hex zone (this represents IDF aerial reconnaissance).
A player is free to play multiple J-2 chits at the same time, as a reaction, to make multiple die rolls for that hex zone. Any value in excess of the total number of units there is ignored. An enemy player is not necessarily entitled to know what specific units evaded.
Designer's Note: This is primarily a benefit to the Insurgent player, but the IDF player may also evade, if he desires.
D) Intelligence gathering Examine all enemy units assigned to any single TF HQ, or examine all units in a single stack within any hex zone, anywhere on the map.
Exception: TF HQs and/or stacks in a sanctuary hex zone may not be examined.
7.3 J-3 Movement and Attacks
During the Operations Phase (or the enemy's Operation Phase, if played as a "Reaction"), the play of one J-3 type chit allows a player to do one of the following actions:
A) Move friendly military units in Combat mode. One TF HQ or a quantity of units in one zone, but not in excess of that side's current C2 Level, may be moved from one hex zone to any adjacent hex zone(s), even if occupied by any enemy military units.
Exception: Units in dispersed mode cannot be moved.
A TF HQ that comprises multiple units may be moved by one J-3 chit, but any units in a holding box that are in excess of the C2 Level may not move with that TF HQ, and therefore must be left behind in that TF HQ's starting hex if that TF HQ moves out. A player always chooses which unit(s) are left behind, in such a case.
Exception: Most units cannot enter an enemy sanctuary. Although, see 2.1 for special cases.
It is permitted for multiple units that are being activated by a J-3 chit to be moved into different adjacent zones; such units are not necessarily required to move together. Furthermore, if an ambush occurs, it only applies to the unit(s) entering the hex zone where the ambush is declared, not to the stack while it is still present in its origin hex zone.
It is permitted for a unit to be moved more than once if multiple J-3 chits are available to do so, but only ever one at a time.
B) Enter reinforcements (in any mode). Reinforcements are new units that have not yet entered the map (and are listed by each scenario, accordingly), and they may be brought in per the quantities and locations stipulated (usually a sanctuary zone) by the play of a J-3 chit. Once arrived, they may not move via that same J-3 chit (although they may be moved via a second J-3 chits, however). Dispersed units, though normally not permitted to move, may be entered as reinforcements nonetheless.
Note: Sometimes a Cascading Effect will cause new units to enter the game without requiring a J-3 chit.
C) Ambush Any unit that enters a hex zone that is occupied by any non-disrupted enemy military unit may be ambushed via the play of one J-3 chit. An ambush simply initiates combat with the units entering that hex zone, and prevents the moving player from using any J-4 chits during that combat. Additionally, no Close Air Support is eligible during an ambush.
Exception: SOF, the 900th "Kfir", and any units that are moved by airmobile movement are not subject to ambush, and thus always allow the play of J-4 chits in any hex zone they enter.
The moving player can always avoid an ambush by simply playing a second J-3 chit in tandem (which must be played before an ambush occurs, and in fact must be played before those moving units actually enter that hex zone by way of the moving player declaring the play of two J-3 chits to nullify any possible ambush).
D) Launch rocket/missile attack The Insurgent player may declare a rocket attack against Israel (not portrayed on the map) to gain extra victory points. To do so, the Insurgent player simply rolls one six-sided die per each rocket unit present in any one hex zone (but not across multiple hex zone, which would require additional J-3 chits.) If the rocket attack die roll is a "6", the Insurgent player gains one victory point, but also inflicts collateral damage (see 10.0 and 13.0).
Rockets have a limited range, however, and this is denoted on each rocket chit by a printed "SR" (for Short Ranged) or "MR" (for Long Ranged.) SR rockets can only be fired if occupying the hex zones south of the "Short Ranged (SR) Rocket Limit" band printed on the map, whereas MR rockets can only be fired if occupying the hex zones south of the "Medium Ranged (MR) Rocket Limit" band printed on the map.
The Syrian player may declare a missile attack per the same rules as a rocket attack, except that the Syrian player rolls two six-sided dice (instead of only one), and there is no range effects (they may fire from any location, even from the Syrian sanctuary).
In all cases, each rocket or missile may only be fired once per J-3 chit per hex zone (flip that rocket or missile unit to its "Fired" side when fired). A J-1 chit is required to flip a rocket or missile back to its front side again.
E) Conduct a raid (Insurgent only) If the Insurgent player controls (not merely contests) one hex zone adjacent to the Nahariyya zone, the Insurgent player may declare a raid into Israel (not portrayed on the map) to gain extra victory points. To do so, the Insurgent player simply declares a raid, and rolls one six-sided die; the die roll result is the amount of victory points that the Insurgent player receives immediately. If the roll is a "6", however, it also inflicts collateral damage (see 10.0).
Note: The Insurgent player may only ever conduct a maximum of one raid per game turn.
F) Add Close Air Support to a battle (IDF only) During a battle, the IDF player may add one J-3 chit (in addition to a J-4 chit, if any) to combat, thereby allowing the IDF player to roll three additional dice to any one unit's attack, and thereby choosing the highest single die roll of all those dice rolled.
Exception: No Close Air Support may be added during an ambush.
G) Conduct a Deep Strike attack During any Israeli game turn, the Israeli player may play a "J-3" chit as an airstrike upon any hex zone on the map, though not in conjunction with any normal land combat, either as an Area Strike, PGM Strike, or a Decapitation Strike (see 11.0).
7.4 J-4 Movement and Attacks
During the Operations Phase, the play of one J-4 type chit allows a player to do one of the following actions:
A) Fire SAMs (Insurgent only) The Insurgent player can nullify an IDF "Close Air Support" J-3 chit play by declaring a "SAM" (Surface to Air Missile), though only after the IDF player has played a J-3 chit as Close Air Support. To do so, he must roll one six-sided die; if the die roll is a "5" or "6", the IDF player's J-3 chit is discarded (if played as Close Air Support). Any other result is no effect. Firing SAMs cannot be directed at airmobile movement. The Insurgent player may play as many J-4 type chits as he has available during that same phase, but only ever one at a time.
B) Conduct airmobile movement (IDF only). Any one IDF unit may be moved from its present hex zone to any other single hex zone on the map (including an enemy sanctuary hex zone), skipping over (i.e., overflying) any intervening hex zones along the way, even if enemy occupied. The destination hex zone may be occupied by any enemy units, as well, although in such a case, combat will occur there normally, immediately.
Exception: Only Light Infantry and SOF units may utilize airmobile movement.
An airmobile unit cannot be ambushed, and may arrive in either combat or dispersed mode.
Note: If the airmobile unit enters an enemy sanctuary zone, one Cascading Effect will occur each such occurrence.
C) Provide combat support to attacks. When a battle begins, both players may add any J-4 chit they have available to that combat. The effect of a J-4 chit is to simply increase the firepower ratings of all friendly units in that same hex zone one point value higher than the printed ratings (regardless of a unit's mode). However, IDF and Syrian units are not eligible to apply a J-4 chit to a battle occurring in an urban type of hex zone unless at least one undisrupted "CSU" (Combat Support Unit) is also present in that same zone (see 9.8), and only if the attacker in that case. In any case, no more than one J-4 chit may be applied by each side during combat.
D) Conduct strategic movement (IDF/Syria only) Strategic movement is a special movement that allows a quantity of units in one hex zone, but not in excess of that side's C2 Level, to automatically move back to a friendly sanctuary hex zone. Units may even change mode automatically during a strategic movement (despite the fact that dispersed units are not normally permitted to move). This movement is an automatic transfer of any distance via any route, and is not subject to halting (nor may it halt) prior to reaching the sanctuary hex zone, and thus no combat of any kind is ever possible.
Note: A J-4 chit may not be used to move any unit out of a sanctuary hex zone.
8.0 Stacking
There is no limit to the quantity of units that may exist in a single hex zone or a holding box, but no individual stack may contain more units than the owning player's current C2 Level. If a player's C2 Level goes down, then the owning player must form new stacks from those that are already stacked in excess of the current C2 Level.
Stacks may not be inspected by the opposing player (unless a J-2 chit is played for that purpose), though an opposing player is always entitled to examine and know the top-most unit of any stack (including those within a TF HQ holding box), as well as its current mode, and state of disruption, if any.
8.1 Task Force Headquarters (TF HQs)
At any time during a player's Joint Operations Phase, he may attach (assign) some of his own unit(s) in a hex zone to a particular TF HQ in that same hex zone by placing the unit(s) in a corresponding TF HQ box printed on the map. Conversely, a player may instead detach (un-assign) any of his own unit(s) from any particular TF HQ by placing them back into the same hex zone as that TF HQ.
Note: TF HQ's function to facilitate the movement of stacks, but also allow a player to conceal the composition of the units assigned to it (to do this, simply flip the TF HQ's to their reverse side so that the TF HQ's identification is not showing. The Insurgent player is only entitled to know a TF HQ's composition via the play of a J-2 chit, or when that TF HQ engages in combat (whether as the attacker or the defender).
A TF HQ need not have any units attached to it to remain on the map, but it does not possess any combat capability without military units in its particular holding box.
Note: TF HQs may not have other TF HQs attached to them.
The maximum quantity of units that may be assigned to any single TF HQ is equal to the current C2 Level for that side. If the C2 Level is lowered during play, the owning player must immediately detach excess military units (of his choice) by placing them on the map in the TF HQ's hex (no Joint Ops chit is required to do this). In such a case, a detached unit does not change its mode.
There is no limit to the quantity of units that may be detached (un-assigned) from a TF HQ, regardless of the C2 Level.
9.0 Combat
Combat occurs only when opposing military units are occupying the same hex zone, even if as a result of movement, and is immediately automatic (except for units that evade; see 7.2). Combat divides the two opposing player's military units as the "Attacker" and "Defender" whereby the moving player (i.e., the military units entering that hex zone) are considered to be the attacker, and the military units already in that hex zone (if not evading) are considered to be the defender (unless an ambush occurs; see 7.3).
Note: Dispersed mode units cannot be attacked by units in combat mode (although a unit in combat mode may be attacked by a unit in dispersed mode, in which case the units in combat mode defend themselves normally; see 3.0).
No Joint Ops chit is necessary to instigate combat; it is the automatic result of opposing units existing in the same hex zone, unless all present units from one side or the other evade.
Exception: SOF units do not automatically instigate combat. An SOF unit may enter an enemy controlled hex zone during the owning player's own Operations Phase without combat occurring, if the owning player prefers. However, during the Insurgent player's Operation Phase, he may move his units into a hex zone where an opposing SOF unit is present, and instigate combat there, which cannot be avoided (unless that SOF unit evades).
Note: If opposing units begin a game turn already in a hex zone, the Israeli player is always considered to the attacker.
When combat begins, both players remove their respective units from that hex zone, and temporarily place them off to the side of the map. Military units assigned to a TF HQ are removed from that holding box, and placed with the other units being removed from the hex zone. Units must remain in the mode that they were while in the hex zone (a unit's mode may not be changed when being moved from the hex zone). At this time, the players must reveal and announce any applicable J-3 and/or J-4 chits that they desire to play, and their effects must be implemented immediately or when appropriate.
Note: A player may not retroactively play any Joint Ops chit if he did not announce his intention to do so when required. For example, a player may never declare an ambush after combat has already begun, if he did not declare an ambush beforehand.
9.1 Tactical Advantage
At this time, the players must determine which side (the attacker or the defender) possesses the "Tactical Advantage". To do so, each player simply rolls one six-sided die, adding a +1 to the defender's die roll. If the hex zone is an urban type terrain, add another +1 to the defender's die roll. The side that rolled the higher die roll has the tactical advantage.
Note: If the die rolls are even, the defender has the tactical advantage.
The tactical advantage simply allows that side to fire the first unit of that combat, inflicting any damage immediately, if any.
9.2 Firefight (First Round)
To commence combat, the player possessing the tactical advantage selects one of his own non-disrupted units, and then one enemy unit of his choice to be the target of a firefight (although TF HQ units may never be targeted). He then rolls one six-sided die, adding the firefight rating of that unit per its current mode (either its combat mode firefight rating, or its dispersed mode firefight rating). An attacking unit may not add the firefight rating of a mode if that unit is not in that mode.
Note: A disrupted unit may be the target of a firefight, like any other unit.
Next, the opposing player rolls one six-sided die for his targeted unit, but adding its firefight rating of the same mode as the attacker (even if that targeted unit is actually in a different mode; The mode of the attacking unit always determines which firefight rating that both combating units must add, even if the targeted unit is in a different mode. This is the penalty for not rolling the tactical advantage).
Example: An Insurgent unit in dispersed mode has the tactical advantage, and is targeting an IDF unit in combat mode. Thus, the insurgent player rolls one die, adding its dispersed mode firefight rating to his die roll. Then, the IDF player rolls one die, as well, but must add its dispersed mode firefight rating, despite being in combat mode.
Whichever player rolled the higher die roll has won that particular firefight. The lower-rolling unit therefore becomes disrupted, and there is no effect upon the higher-rolling unit. If, however, the higher-rolling and lower-rolling units were in different modes, the lower-rolling unit is disrupted and reduced (see 9.4).
Note: If both the attacking and the targeted unit rolls the same net die roll result, both of the units are disrupted and reduced. If this occurs, Collateral Damage will result (see 10.0).
Exception: CSU units (see 9.8) are never affected by any combat result unless they are specifically targeted. Having supported an attacking or defending unit does not cause them to share any disruption or elimination that occurs to that unit.
The player that had rolled a tactical advantage now proceeds to roll for each and every other friendly unit he has present in that battle, one at a time, selecting one enemy target for each attack. The defending player rolls for each and every defending unit as explained above, the higher die roll winning the firefight, and inflicting a disruption and/or an elimination upon the losing unit.
A targeted unit may be targeted more than once, but only if every other compatriot unit in that same battle has already been targeted at least once. No unit may be targeted two times unless all other compatriot units have been targeted at least once, and no targeted unit may be targeted three times unless all other compatriot units have been targeted at least twice, et cetera.
Note: No unit may ever target more than one enemy unit during a single round of combat. Each combating unit may roll once per round.
If multiple units are targeting the same enemy unit, that targeted unit does not defend itself against each attack (it is still only entitled to one die roll). Instead, the attacking player simply rolls one die per each attacking unit, and chooses the best (highest) die roll to compare against the defending unit's die roll. If the defending unit rolls the highest (or equal) die roll result, only one of the units that attacked it is affected, not all of them (although the defender always chooses which attacking unit is affected, in such a case). However, if multiple die roll results are equal to the defending unit's die roll result, then all of the units that rolled the same die roll result are affected equally.
If a unit has not itself been targeted, it may not roll any die to participate in that combat.
Developer's Note: This gives the attacker a substantial advantage, but remember that the defender will have his chance to be the attacker, so to speak, during the second round of a firefight.
9.3 Disrupted
If a unit is disrupted when it is attacked, a -1 die roll penalty automatically applies to that unit, regardless of its mode. Disrupted units may not ever attack (although they may move normally, defend, be ambushed, attempt to evade, etc), nor may they remain with a TF while disrupted.
Note: When rolling for the tactical advantage, a -1 applies to a player if any units in that combat hex are disrupted.
A disrupted unit will remain disrupted until it is un-disrupted by the play of a J-1 chit (see 7.1).
If a disrupted unit is disrupted twice (while still disrupted), that unit is automatically reduced (see 9.4).
A Rocket or Missile unit that become disrupted is eliminated immediately instead.
9.4 Reduced
If a unit becomes reduced, it is immediately replaced with a reduced unit of the exact same type (although Hezbollah units are simply eliminated instead). Reduced units are printed with a hollow triangle symbol or crescent moon (regular units are printed with a filled triangle symbol or crescent moon). Rocket and Missile units cannot be reduced, and are eliminated instead if becoming reduced.
9.5 Firefight (Second Round)
The second round of a firefight is resolved exactly like the first round of a firefight (without determining tactical advantage), except that the defending player may now roll a die for each of his surviving (i.e., meaning neither disrupted or eliminated) units, and thus targeting the enemy player's units in the same way as described under 9.2. Procedurally, per 9.2, this is simply resolved as if the defender is the attacker.
After resolving each firefight during this second round (and inflicting any additional damage, if any), combat ends for that game turn. Any units that remain in that hex zone will undergo combat again there at the end of the next player's Movement Phase (unless they evade) if they have not moved out of that hex zone.
9.6 Resolving Combat
Each battle is resolved individually, and a battle must be completed before the next attack elsewhere on the map, if any, can commence.
After a battle is over, discard all played Joint Ops chits, and return all non-eliminated units back to the map, in the hex zone where the combat was instigated.
Next, if any Cascading Effects were generated by Collateral Damage, pick one Cascading Effects chit and implement the results as instructed. Lastly, determine the winner of the battle (defined as whichever side has the only military units remaining in a hex zone), if any, and award that player one randomly drawn Joint Ops chit (which he may use immediately, if applicable).
9.7 Brittle Units
Hezbollah Militia and all Syrian units are removed from the map if they are disrupted (Insurgent Militia counters are available to be used again as Reinforcements; Syrian units are removed from the game).
9.8 Combat Support Units (CSU)
CSU units have no individual attack rating or ability, and may not initiate an attack by themselves. However, if accompanying any other friendly unit during an attack (not defense), the owning player may add that CSU unit's combat factor (printed in parenthesis) to one friendly unit's combat die roll (but only as the attacker) per combat, automatically. A CSU unit may never be added to more than one unit's die roll, but it may otherwise be switched to support a different unit during each combat occurring in any hex zone.
Note: Rocket and Missile units are considered to be CSU units when accompanying any other friendly units during combat. When used as a CSU unit, a rocket and missile unit is flipped to its "Fired" side nonetheless. A J-1 chit is required to flip a rocket or missile unit back to its front side.
A CSU unit may only be targeted if all other friendly units have been targeted first during that combat round (which means that a CSU unit cannot be targeted unless the opposing forces are outnumbering). If a CSU becomes disrupted, it may not contribute its factor to any unit's die roll while disrupted.
9.9 Consolidation of the Battlefield
If the hex zone in which the combat occurred is now empty of all undisrupted enemy units, and the attacker still has at least one undisrupted non-HQ unit there (including any CSU, rocket, and/or missile unit), he controls that hex zone. The winning player is then entitled to blindly draw (at random) one Joint Ops chit from his own draw cup, which he may then add immediately to his hand.
Designer's Note: This is bonus, gained because you have prisoners to interrogate, captured equipment, etc.
10.0 Special Combat Considerations
The following special considerations and unit abilities apply as follows:
10.1 Collateral Damage
During each combat in a hex zone, Collateral Damage may occur. Whenever a combat produces a firefight in which both the attacking and defending unit roll the same net die roll result (whereby the attacking and defending units are both disrupted and/or eliminated), collateral damage has resulted.
In such a case, either player (it doesn't matter which) must then draw one suit chit and one rank chit (blindly) immediately, and consult the Cascading Effects chart; Implement the effects as indicated. Regardless of the number of collateral damage results inflicted in a hex zone, a player does not pick more than one chit.
10.2 Special Operation Forces IDF Units
Three particular IDF units have special abilities; The units marked SOF, 299 (Herev), and 900 (Kfir) are printed with their historic identification numbers, and each have special capabilities as explained below:
SOF. The SOF unit does not automatically instigate combat when it enters an enemy hex zone (if entering alone), may enter enemy sanctuaries, and is eligible to utilize airmobile movement (however, the IDF player picks a Cascading Effects each time he enters a sanctuary). Additionally, an SOF units prevents any ambush from occurring in any hex zone it enters.
299 "Herev". The 299 "Herev" battalion, though small, is composed of Druze (ethnic Lebanese) volunteers. As such, it prevents any ambush from occurring in any hex zone it enters.
900 "Kfir". The 900th is a light infantry brigade specifically trained for urban operations, and therefore always awards a +1 tactical advantage die roll modifier to the Israeli side whenever combat occurs in an urban hex zone it occupies.
11.0 IDF Deep Strikes
During any Israeli game turn, the Israeli player may play a "J-3" chit as an airstrike upon any hex zone on the map, though not in conjunction with any normal land combat. The Israeli player may announce his deep strike to be one of three types (per J-3 chit played):
- Area Strike
- Precision Guided Munitions (PGM) Strike
- Decapitation Strike
Area Strike
If the Israeli player declares an Area Strike, it may target half of the units in one hex zone (round any fractions down) that are either in combat mode or dispersed mode (but never both) of his choice; In other words, no more than half of the combat mode units in one hex zone may be targeted, or half of the dispersed mode units in one hex may be targeted, although the Israeli player may choose which half (which he must choose before rolling any dice to resolve that area strike).
Once the Israeli player has decided which mode of unit(s) he will be targeting in a hex zone, and which units will specifically be targeted, he simply rolls one six-sided die per unit (in that mode, only): If the targeted unit(s) are in combat mode, they will be eliminated if the die roll is a "5" or "6". If the targeted unit(s) are in dispersed mode, however, they will only be eliminated if the die roll is "6".
If the units are occupying an urban type of terrain hex zone, units in combat mode will only be eliminated on a die roll of "6", and units in dispersed mode are then immune from area strikes.
It is permissible for the Israeli player to play multiple J-3 chits to conduct multiple deep strike missions of different types (at the same time, in the same hex zone or multiple hex zones) against each mode, respectively. However, if the Insurgent player plays a J-4 chit (see 10.2) as a Surface to Air Missile, all of the strikes in any one zone become nullified. The Insurgent player may play one J-4 chit per each hex zone being struck, if he has multiple chits to play, if he desires.
PGM Strike
If the Israeli player declares a PGM Strike, one particular insurgent unit (only, of his choice) in either mode may be targeted. If the die roll is a "5" or "6", that unit is eliminated.
Note: Urban terrain does not adjust a PGM strike.
Decapitation Strike
If the Israeli player declares a Decapitation Strike, one particular Syrian TF HQ may be targeted (if Syria is in the war.) If the die roll is a "5" or "6", that Syrian TF HQ is eliminated, and all units in that HQ's holding box must now be placed on the map (in whatever mode they were in at the time), revealed for the Israeli player to inspect for the duration of that turn. Note that terrain has no effect in reducing a decapitation strike.
Furthermore, after a decapitation strike, if successful, the Insurgent player's C2 level is reduced one level.
11.1 Surface to Air Missiles (SAMs)
The Insurgent player may play a "J-4" chit, if he has one available, in reaction to any IDF deep strike mission, which simply nullifies that deep strike mission automatically (in which case, the Israeli player does not retain his J-3 chit; it is expended along with the Insurgent player's J-4 chit).
12.0 The Wider War
Syria, Iran and Hamas may enter the war during the course of the game. Syrian forces are represented as actual combat units, whereas Iran and Hamas are portrayed abstractly via the Cascading Effects.
Designer's Note: One of the major risks of a second Israeli invasion of Lebanon is that military forces from other countries in the region might become involved. In the game, units from other countries will enter through the play of Cascading Effects. If players wish, they may agree to have one or more of these forces already deployed at the start of the game, or not use them at all.
12.1 Syria
Syria may become involved by way of a "Syrian Intervention" Cascading Effect. Each time such a result occurs, the Insurgent player rolls a die, as indicated, possibly bringing Syria into the war. Syrian intervention takes place as follows:
The "Syria" hex zone is now activated as a second Insurgent Sanctuary Zone. The Insurgent player deploys all Syrian units there, including the three Syrian missile units (all in Dispersed Mode). These units appear automatically (no J-1 chit is necessary). They may not leave this hex zone, but may launch missile attacks on Israeli civilian or military infrastructure. The IDF player may enter Syria with eligible units, and/or conduct deep strikes against the Syrian missile units, but this will cause the draw of a Cascading Effect.
Furthermore, the Insurgent C2 Level is now raised by one level. Syrian units may move into hex zones in Lebanon normally, but may never enter Israeli territory.
Once Syria enters the war, ignore any further Syrian Intervention result.
The Insurgent player does not need to play J-1 chits to make the Syrian Missile units or ground forces appear. He may use J-1 chits to remove Hits from Syrian units, but may not undisrupt them—Syrian units do not recover from disruption and are removed from the game when disrupted. IDF regular units may not enter Syria (IDF SOF units and airstrikes may, but the IDF player picks a Cascading Effects chit each time he does so).
12.2 Iran
Iran may become involved by way of a Cascading Effect. All eliminated Insurgent units are automatically replaced onto the map, representing an influx of Islamic volunteer fighters, as well as Iranian weapon shipments to Lebanon. These units appear automatically (no J-1 chit is necessary). Though nominally Iranian, these units are considered Insurgent units in all respects and are governed by all of the normal rules pertaining to the Insurgent side.
12.3 Hamas
Hamas units (or more correctly, the "Izz ad-Din al-Qassam Brigades" that forms the military wing of this Palestinian Islamist fundamentalist socio-political organisation, and are the most active in Gaza) are not directly represented in the game except by the pick of a particular Cascading Effect. Their off-map uprising grants the Insurgent player a bonus rocket attack, and is thus assumed to be suppressed by other IDF forces not represented in the game.
13.0 How to Win
Victory is in term of Victory Points (VP). Players gain VP for certain conditions met during and at the end of the game.
13.1 IDF Player Victory Points
At the beginning of the game, the IDF player must decide whether he will follow a "Countervalue" or a "Counterforce" strategy. He decides this in secret and reveals his choice to the Insurgent player at the end of the game (though it might be obvious to the Insurgent player after a few turns).
If he selects "Countervalue", he receives VP as follows:
1 VP per eliminated Insurgent (non-Syrian) unit at game's end.
2 VP per eliminated Syrian unit at game's end.
If he selects "Counterforce", he receives VP as follows:
2 VP per Israeli-controlled hex zone at game's end (except Sanctuaries and Zones in Israel).
13.2 Insurgent Player Victory Points
The Insurgent player receives VP as follows:
1 VP per "hit" on civilian infrastructure by rocket/missile attacks, or raids into Israel.
1 VP per non-Israeli controlled hex zone at game's end (except Sanctuaries).
1 VP per IDF unit that has been reduced by game's end.
3 VP per IDF unit that has been eliminated by game's end.
14.0 Optional Rules
Add the following Joint Operations chits to the game, with the following effects:
J-5 Planning J-6 Signals/IT
14.1 J-5 Administration
During the Operations Phase, the play of one J-5 type chit allows a player to do one of the following actions:
A) Pass/Exchange Joint Ops chits. Play a J-5 chit to select two additional Joint Ops chits which will be received at the end of the current game turn. Note that a J-5 chit may not be played to select another J-5 chit, however. Once selected, the opposing player may not known them unless he plays a J-2 intelligence chit (which would then allow him to see what two chits were selected).
Note: Effectively, you are trading one Joint Ops play this turn for two Joint Ops plays the next turn. Note also that your C2 Level does not change.
14.2 J-6 Administration
During the Operations Phase, the play of one J-6 type chit allows a player to do one of the following actions:
A) Information Warfare Roll one die for each J-6 chit played. For each "5" or "6" rolled, one enemy Joint Ops chit (picked at random) is removed from the enemy's current allotment. Other die roll results have no effect and the enemy's C2 level is not changed by either result.
B) Networked Operations During one combat in any hex zone, add a +1 to the friendly side's tactical advantage die roll. Both players may play any J-6 chits they have available at the beginning of an engagement, and each player may add multiple J-6 chits, cumulatively.
C) Syrian Air Defenses (Insurgent) Assume that the Syrian Air Force and air defence networks are not decisively suppressed by IDF air activity. Each time the IDF player plays a J-3 chit as a Deep Strike in Syria, the Insurgent player may roll one die: The IDF player's J-3 chit is discarded on a roll of "5" or "6", as if the Insurgent player had played a J-4 chit as SAM fire.
15.0 Scenarios
The Next War in Lebanon Instructions and Setup
Game length = 20 turns.
| Side | Unit | At Start | Available Reinforcements | Notes |
|---|---|---|---|---|
| IDF | Task Force HQs | x 6 | 1* | *Enter on play of a J-1 chit. At start: set up anywhere in Israel. Reinforcement: enter in Sanctuary. |
| IDF | Armor brigades | x 8 | ||
| IDF | Mech Infantry brigades | x 7 | 1* | *Enter one unit per J-1 chit played. |
| IDF | Light Infantry brigades | x 3 | ||
| IDF | Armored cav. battalion | x 1 | 2* |
IDF tactical units: at start, anywhere in Israel; may start grouped under TF HQs, in either mode. Reinforcements arrive at any hex zone with a TF HQ or in a Sanctuary zone. C2 Level = 7.
Insurgent: All units may be built after being eliminated. Enter one Militia or Missile unit per J-1 chit played, or enter two Guerrilla or Rocket units per J-1 chit played. Set up anywhere in Lebanon, with at least two units in each hex zone south of the Litani River (including Marjayoun). Reinforcements enter in any hex zone with another Insurgent unit there (Militia or Guerrilla), or in a Sanctuary zone. C2 Level = 5.
Second Lebanon War (2006) Instructions and Setup
Game length = 12 turns.
| Side | Unit | At Start | Available Reinforcements | Notes |
|---|---|---|---|---|
| IDF | Task Force HQ | x 1 | 2* | *Enter all when Israeli Escalation is triggered. |
| IDF | Armor brigades | x 3 | x 4* | *Enter all when Israeli Escalation is triggered. |
| IDF | Mech Infantry brigades | x 2 | x 3* | *Enter all when Israeli Escalation is triggered. |
| IDF | Light Infantry brigades | x 1 | x 1* | *Enter all when Israeli Escalation is triggered. |
| IDF | Armored cav. battalions | x 1 |
IDF: At start, set up anywhere in Israel; units may start grouped under TF HQs, in either mode. Reinforcements enter in the Israeli sanctuary. C2 Level = 6.
Insurgent: All units may be built after being eliminated. Enter one Militia unit per J-1 chit played, or enter two Guerrilla units per J-1 chit played. At start, all units start south of the Litani River, with at least two units in each hex zone (including Marjayoun). Reinforcements enter in any hex zone with an Insurgent unit there, or in a sanctuary zone. C2 Level = 5.
Second Lebanon War Scenario (2006) Rules Changes, Exceptions and Modifications.
15.1 Geographical Limitations. Israeli regular units may not cross north of the Litani River (they may enter Marjayoun.) However, the IDF player may enter and conduct operations with his SOF units (only), and may conduct deep strikes against enemy units, anywhere in Lebanon. No units from either side may ever enter Syria.
15.2 Special IDF Units The 900 "Kfir" light infantry brigade does not have its special capability in the 2006 scenario (this was one of the lessons learned during the war).
15.3 J-4 Chits (Insurgent) If the Insurgent player uses a J-4 chit during combat, he may declare it as a SAM (Surface to Air missile) or AT (anti-tank). If declared as a SAM, the Insurgent player simply rolls one six-sided die: If the die roll is a "6", the Israeli player may not play any J-3 chits during that combat in that hex zone. If declared as an AT, each Insurgent unit's factor (both modes) is increased +2. However, if any Insurgent unit's firefight die roll is an unmodified "1", then the +2 modifier is ended (the Insurgents there have run out of ammunition), and the J-4 chit is removed from that combat (and is replaced into the draw cup normally).
15.4 The Wider War There is No Syrian or Iranian intervention in this scenario; ignore all cascading effects (redraw in such a case) referring to Syria and Iran.
Exception: Syrian Intervention (see 15.5 below).
15.5 Israeli Escalation If the "Syrian Intervention" cascading effect occurs, it is read as "Israeli Escalation" (Operation 'Changing Direction') instead. When occurring, the IDF player rolls one six-sided die; If the roll is a "4", "5" or "6", Israel will escalate its military commitment, and all available reinforcements listed in the table above immediately enter the game (the IDF player does not have to play J-1 chit.). Ignore any further Israeli Escalation that occurs thereafter.
15.6 IDF Player Victory Points The IDF player is awarded VP only under the "Counterforce" schedule – he may not choose "Countervalue".
Designer's Notes:
This is a shorter scenario with fewer forces involved overall. It covers roughly the period from 23 July 2006, when substantial numbers of IDF ground troops began to cross the border, to 14 August when the ceasefire came into effect. The IDF had not engaged in significant large-scale ground operations since the 1982 incursion, and the 2006 campaign exposed many deficiencies in its structures and processes, from mobilization to intelligence, and maneuver capability. This is reflected in the lowered IDF C2 level and smaller number of Task Force HQ units, and the uncertainty of when or even if the Israeli government will decide to send larger forces into Lebanon. The IDF was not prepared for the quality and quantity of anti-tank weapons used by Hezbollah, nor the tactics they used to employ them. In contrast, Hezbollah's use of its anti-aircraft assets was very poor. Hence the changed values when the Insurgent player uses J-4 chits. In 2006, Hezbollah had fewer fighters and a smaller number of rocket units, most of them short-range 122mm "Grad" rocket launchers. Some losses from the Israeli Air Force's air campaign to locate and destroy rocket sites and launchers that began on 13 July have been factored into the opening setup.
Cascading Effects Chart
| Suit | Rank | Effect |
|---|---|---|
| Spade | A-6 | National Level Support: The IDF player draws (blindly) one random Joint Ops chit, and adds it to his hand. |
| Spade | 7-Q | Insurgency Outside Support: The Insurgent player draws (blindly) one random Joint Ops chit, and adds it to his hand. |
| Spade | K | Surprise Media Visit: Christiane Amanpour comes for a tour. Roll one die: 1-3 = IDF player selects one Joint Ops chit. 4-6 = IDF player discards one chit. Note: This is a one-time event. |
| Heart | A-4 | Infiltrators: The Insurgents may move one dispersed unit (regardless of its mode) from any one hex zone to another in Lebanon. |
| Heart | 5-Q | Media Reports Civilian Casualties: If this card was picked as a result of collateral damage, the attacking player must discard half (round down) of his remaining Joint Ops chits (his choice which). Otherwise, no effect. |
| Heart | K | United Nations Resolution Condemns the Fighting in the Strongest Possible Terms: No game effect. Note: This is a one-time event. |
16.0 Joint Ops Action Summary Aid
Summary of Joint Operations Chit Functions (as printed in the rulebook's summary aid).
| Chit | Action | IDF | Ins | Notes |
|---|---|---|---|---|
| J-1 Administration (IDF 5 / Ins 3) | A. Un-disrupt any one unit | X | X | |
| B. Rebuild any one reduced unit | X | X | ||
| C. Rebuild any one eliminated unit | X | In any zone not occupied or controlled by an Israeli unit | ||
| D. Change the mode of any one unit | X | X | ||
| E. Un-disrupt all units in a Sanctuary | X | X |
Design Notes
This game was inspired by my reading of Policy Focus Paper #106, "If War Comes: Israel vs. Hizballah and its Allies", written by Jeffrey White of the Washington Institute for Near East Policy. It was published in September 2010 and can be found online in the E-rules page for this game @ www.worldatwarmagazine.com. The paper included a notional order of battle for an IDF ground and air assault into Lebanon in the near future, in an effort to stamp out Hezbollah once and for all, and I thought that this situation might lend itself well to a game system that emphasizes the limitations and advantages of centralized and decentralized command and control systems...that is, an adaptation of the "staff card system" first used by Joseph Miranda in his game Bulge 20.
One assumption of the game is that the war will be of a fairly short duration, perhaps three weeks or less before material and personnel exhaustion (or perhaps an imposed ceasefire) shuts down high-tempo operations. Another crucial assumption is that the IDF will restrict its ground operations to the southern half of Lebanon, and that it will frame the conflict in terms of engaging Hezbollah only, and not the state of Lebanon itself. The higher C2 Level for the IDF reflects both the relative sophistication of their command and control systems, and their need to expend more chits to carry out large-scale operations via operational headquarters. The Insurgent player has a lower C2 level, but benefits from a decentralized command system; it is almost certain that once the action starts, the IDF would do its best to jam and disrupt Hezbollah's radio and telephone communication systems, making highly coordinated resistance or counterstrokes difficult, if not impossible. Hezbollah knows this and has turned much of southern Lebanon into a network of fortified localities, each ready to defend itself when the day comes. Also, each side has a slightly different mix of Joint Operations chits to use.
The tactics either side is likely to use reflects the game's victory conditions. Hezbollah cannot destroy the IDF or the state of Israel, but it will most likely attempt to maintain a bombardment of Israeli territory with its large stockpiles of rockets and missiles, and do their best to cause maximum casualties to IDF formations, while cementing its role as "defender of Southern Lebanon". Jeffrey White suggests (p. 10) that the IDF might use its "Dahiya Doctrine", where Israel would use its heavy air and ground firepower against civilian infrastructure that facilitates Hezbollah military operations (roads, bridges, fortified villages, industrial and economic targets) as a form of collective punishment. In the game, the IDF player is given a choice of following this doctrine through the "countervalue" option: he will gain victory points for smashing up southern Lebanon through collateral damage results, but the collateral damage events also generally favour the Insurgent player, so he will be making the military task harder with each event (as well as increasing the likelihood of Syrian intervention.) The "counterforce" option proposes that the IDF will do its best to destroy Hezbollah's military capability (and Syria's, should it become involved.) In either case, he benefits if he is left controlling parts of southern Lebanon at the end of the game.
If such a war were to happen, it would involve regional upheaval, massive civilian casualties, and horrific destruction that would take many years to rebuild, if ever. Let us hope that this game never becomes a model of reality. But, Jeffrey White suggests that in the end, such a war would accomplish Israeli—and American—strategic goals. He says:
"If war comes, Washington should not necessarily take immediate steps toward ending it quickly. That is the natural reaction to conflict, based on the belief that war is so terrible that it needs to be stopped above all. And yet, changes must occur: Hizballah's military capabilities need to be broken and its political power reduced; Syria needs to be disabused of the notion that it can play violent games in Lebanon as a means of furthering its own cynical interests without incurring any significant cost; and Iran needs to see its Hizballah proxy militarily defeated and politically humbled. Only successful IDF operations can achieve those goals, and that may take some time. Accordingly, the United States should consider giving the IDF that time—no easy task." (p.41)
It is for this very reason that the capabilities and assumptions each side may have made about the other should be tested out, in the cardboard laboratory of a wargame.