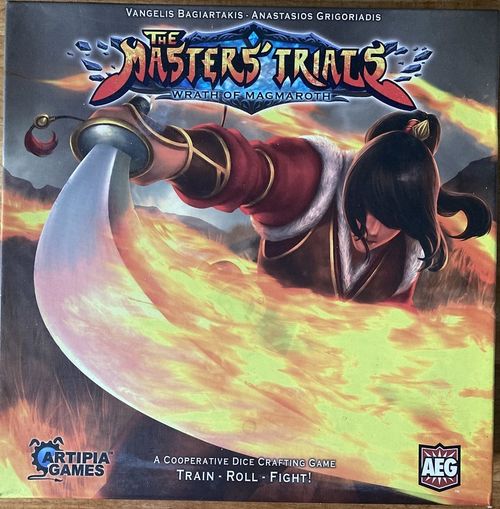
The Masters' Trials: Wrath of Magmaroth
The Masters' Trials: Wrath of Magmaroth Rulebook
Table of Contents
Table of Contents
Goal
In The Masters' Trials: Wrath of Magmaroth, each of you plays one of the masters from the Orders that have banded together to face the threats posed by the evil elemental. Using the techniques you have mastered, you must defeat Magmaroth before time expires.
Components
Your game of The Masters' Trials: Wrath of Magmaroth should include the following. If it does not, please contact customer service for assistance.
- 4 Class Player Boards
- 4 Order Player Boards
- 4 Weapon Player Boards
- 1 Magmaroth Board
- 160 Ability cards:
- 40 Class cards
- 40 Order cards
- 20 Weapon cards
- 20 Relic cards
- 40 Mastery cards
- 4 Player aids
- 20 Dice (4 White, 4 Yellow, 4 Red, 4 Blue, 4 Black)
- 32 Minion cards
- 13 Seal cards
- 11 Location cards
- 112 Damage tokens
- 74 Mana tokens:
- 16 Fire mana
- 16 Earth mana
- 16 Water mana
- 16 Air mana
- 10 Wild mana
- 2 Marker tokens
- 1 Rulebook
Components Anatomy
Ability Cards
- Title: The name of the card.
- Type: This symbol indicates the type of the ability. There are 14 different types in total:
Order Types: Order of the Scorching Winds, Order of the Glowing Embers, Order of the Everlasting Waterfall, Order of the Celestial Tides.
Class Types: Avenger, Mystic, Loremaster, Warden.
Weapon Types: Sword of Fury, Orb of the Elements, Staff of Enlightenment, Chain of Balance.
Other Types: Relics, Mana Abilities.
- Cost: These icons indicate the mana you need to spend in order to master this ability and place it on your character. The wild mana symbol indicates that mana of any element may be spent.
- Effect: Most abilities have an effect that is applied when you use them with a die. Some abilities feature "Ongoing" effects that are always applied while they are placed on a character.
Location Cards
- Title: The name of the card.
- Number of Players: Indicates the section of the card that is applied, depending on the number of players.
- Number of Minions: This indicates how many minion cards are drawn when you enter this location.
- Insight Difficulty: Represents the location's Insight difficulty. You will have to spend that much Insight while in this location, to find Relic cards.
Minion Cards
- Title: The name of the card.
- Health: This number represents the Minion's health. If a Minion receives damage equal to its health, it is destroyed.
- Power: This number represents the Minion's power. During the Minion phase, each Minion deals damage to all players equal to its power.
- Class Type: This symbol indicates when a Minion card is used. When setting up the game, include only Minions that have the symbol of one of the classes that are used.
- Reward Icon: This symbol indicates the Minion's reward. The player that deals the damage that destroys the Minion gets the reward.
Seal Cards
- Title: The name of the card.
- Level: The Seal's level. In each game, depending on the total number of players, you include only a specific number of Seals from each level.
- Unlock Difficulty: This number represents the Seal's unlock difficulty. A player must spend that much Insight in order to unlock this Seal. If a Seal has been unlocked, any player may spend mana in order to break it and mana spent for this purpose remains on the card from round to round.
- Effect: Each Seal has an effect that is applied while the players are in Magmaroth's lair (see "Magmaroth's Lair").
- Break Cost: These icons indicate the mana that the players have to spend in order to break the Seal. Unless a Seal has been unlocked, a single player must spend all the indicated mana, in the same round, in order to break it.
Player Boards
- Type: This symbol indicates the type of the board. Each player chooses a Class, an Order and a Weapon and uses the corresponding boards to create their character.
- Title: The name of the board.
- Abilities: Each board comes with initial abilities. They are used the same way as the Ability cards.
- Dice Color: Indicates the colored die that corresponds to each row.
- Dice Values: Indicates the value of the die that corresponds to each column (only appears on Class boards).
Setup
The following setup is for 2-4 players only. For the solo game, please see "Solo Game."
-
Each player selects 1 Class, 1 Order and 1 Weapon and takes their corresponding boards, placing them vertically adjacent to each other. These create each player's character. Return any unused boards to the box.
For your first game we suggest that you use the following combinations, in this particular order:
- Avenger - Order of the Glowing Embers - Sword of Fury
- Mystic - Order of the Everlasting Waterfall - Orb of the Elements
- Loremaster - Order of the Scorching Winds - Staff of Enlightenment
- Warden - Order of the Celestial Tides - Chain of Balance
-
Each small board comes with its own set of Ability cards - 10 from the Class, 10 from the Order and 5 from the Weapon. Each player takes the sets that correspond to their boards and shuffles them together. They will form their personal Abilities deck. Place each player's deck in front of them facedown and reveal the first 4 cards. These are the "Teachings" from which they get new abilities.
Before you play for the first time, we suggest you take the time and go over the cards in your deck to become familiar with what your character can do.
If you don't like some of the cards in your Teachings, you may discard as many of them as you want and draw new ones. You may only do this once during setup.
-
Each player takes a set of five colored dice (1 white, 1 yellow, 1 red, 1 blue and 1 black). Return the rest of the dice to the box.
-
Separate the Mastery abilities according to their title and place them in 4 piles on the middle of the table. These abilities will always be available to the players.
-
Shuffle all the Relic cards and place them face down to form the Relic deck.
-
Take the tokens and place them in separate piles within reach of the players.
-
Take the Magmaroth board and place it on the table. Put one marker at the 1st space on the Round track and another marker at space 10 on the Health track.
-
Separate the Seal cards by their level, shuffle each set and draw a number of Seals appropriate to the number of players:
Players Level 1 Level 2 Level 3 2 4 2 1 3 5 3 2 4 6 4 3 Place those Seals below the Magmaroth board. Move the marker on the Health track to the appropriate space, adjusted for the Seals revealed.
For your first game and when playing the game in Easy mode, give each player 1 Wild Mana token.
How to Play
The Masters' Trials is a cooperative game. This means that all the players work together in order to defeat the evil Magmaroth and will either all win or lose as a group.
The game is played in a series of rounds. Each round, the players go to a different location within the volcano, fighting Minions along their way. After 9 rounds, they reach Magmaroth's lair and have to destroy it in order to win.
Round Overview
Each round consists of the following phases:
- Location Phase
- Action Phase
- Character Build-Up Phase
- Minion Phase
- End of Round Phase
You carry out each phase as a group and then move to the next one.
Location Phase
Draw a new Location card and place it face-up over the previous one (skip this during the first round of the game and use the Entrance card instead). Look at the number of Minion symbols below the corresponding number of players and draw that many Minion cards, placing them face up on the table.
If at any point the face-up Minions are equal to the number of players plus 3 (for example 6 in a 3-player game), do not draw any additional cards. Instead, at the end of the phase, each player takes damage equal to the number of cards that were not drawn (see "Minion Phase").
The Location card also indicates the Insight difficulty for the current round.
Keep in mind that both the number of Minions and the Insight difficulty change as the game goes on. In rounds 4-7 you add 1 to each number and in rounds 8-9 you add 2.
Action Phase
In this phase you perform actions based on the dice you've rolled. You may choose to play in any order you like, however each player must fully complete their turn before another player starts theirs.
You may perform the following actions in any combination you want and in any order you like:
- Use an Ability: Remove a die and apply the effect of the ability under it.
- Attune: Remove a die and move another die on your character to an adjacent ability. Adjacency is determined by row, not column.
- Provide Assistance: Remove a die and move another player's die to an adjacent ability (once per turn for each other player).
- Heal Damage: Remove a die and heal 1 damage anywhere on your character (remove a damage token from your board).
You may also spend mana to perform Elemental actions which do not require a die. As long as you have enough mana, these actions may also be performed in any combination you want and as many times as you want:
- SPEND 2 Fire mana: Deal 1 damage.
- SPEND 2 Earth mana: Get 1 mana of your choice.
- SPEND 2 Water mana: Move one of your dice to any ability on its row.
- SPEND 2 Air mana: Stun 1 minion (see "Dealing Damage and Stun").
If an ability's effect starts with the word Exhaust it means you take 1 damage and place it on that ability (see "Taking Damage"). This damage may not be prevented by any means. However, it is then treated as any other point of damage on your character - if you heal it, you may use the ability again as normal.
Dealing Damage and Stun
When you use an ability that deals damage, place that many damage tokens on one or more available enemies (usually on Minions, unless you are in Magmaroth's lair in which case you may also attack Magmaroth). You may never attack another player. Unless stated otherwise, you may assign the damage among enemies in any combination you want (for example, if you deal 3 damage, you may place 2 on one Minion and 1 on another).
Damage dealt on Minions stays on them. Another player may later deal additional damage on them and finish them off.
Whenever you destroy a Minion, take the reward listed on the bottom-right corner of the Minion card. Only the player that dealt the final point of damage takes the reward. Since this is done during the Action phase, you may use that mana as normal to do other actions in the same round.
For example, you may destroy 2 Minions, each of them providing you with 1 Fire mana, and then use those 2 Fire mana to deal 1 more damage to a third minion.
Some abilities, as well as one of the Elemental actions, may Stun one or more Minions. When this happens, turn the stunned Minions' cards sideways. These Minions won't deal any damage to the players during this round's Minion phase.
Spending Insight
During your turn in the Action Phase, you may spend Insight equal to the Location Card's difficulty and get a Relic card. Draw the first 2 cards of the Relic deck, choose one to place on your character and one to put at the bottom of the deck (see "Character Build-Up Phase" on how to place cards on your character). Relic cards provide you with Ongoing abilities that are always active, as long as there is no damage token on top of them.
If you happen to generate twice the required Insight, you may perform the process above twice and get 2 Relic cards on your character.
All Relic cards you get, must be placed on your character. You may not draw one and give it to another player.
You may use the ability of a Relic Card the same turn you place it on your character.
Once per round, one of the players may also spend Insight in order to unlock one of Magmaroth's Seals. Unlocking a Seal allows all players to store mana on that Seal in order to break it. The cost to unlock each Seal is written on it. After you pay it, turn the Seal card sideways as a reminder.
If you spend Insight in order to get a Relic while in Magmaroth's lair, instead of drawing two cards and choosing one, search the pile for the Relic you want and place it on your character.
During the Minion phase, Magmaroth attacks along with the Minions. Add the amount of damage dealt by Magmaroth to the Minion damage.
Seals
The Seals form Magmaroth's defense against the intruders in his lair.
During your turn in the Action Phase, you may spend the mana listed on any one of the Seals in order to break it. Normally, the Seals are locked, which means that a single player must spend all the mana listed on a Seal on the same turn to break it. When that happens, turn the Seal card facedown - its effect is no longer applied. If it was granting health points to Magmaroth, subtract those points and adjust Magmaroth's Health track accordingly.
A Seal may be unlocked by spending Insight. If a Seal is unlocked, for the rest of the game, any player may spend as much mana as they wish and place them on the Seal. That mana counts towards the total amount that needs to be paid in order to break it. If at the end of a Round there is not enough mana on the Seal to break it, the mana remains on the card.
Character Build-Up Phase
This phase may be performed by each player on their own as soon as their turn in the Action Phase is completed.
In this phase you may spend the mana you have in order to master new abilities. You may choose any ability in your Teachings or the Masteries piles, as long as you have the mana listed in its cost.
When you master a new ability, spend the mana required and place it anywhere you like on your character. It doesn't matter where it came from (Class, Order, or Weapon). If you place it on top of an ability with damage on it, that damage token is removed from the board - this is another way to heal your character!
You may master as many abilities as you want, as long as you have enough mana to spend.
You may then discard as many Ability cards in your Teachings as you want. Then, draw new ones until there are four. If your Abilities deck ever runs out of cards, continue playing with the remaining cards in your Teachings.
Minion Phase
In this phase, Minions attack the players.
Minions that have been stunned do not deal any damage. At the end of the phase, turn them back to a standing position.
If at any time the Minion deck runs out, shuffle the discard pile and form a new Minion deck.
Each player takes damage equal to the total power of the attacking Minions.
Taking Damage
For each damage you take, place a damage token on an ability on your character. The total damage you take must be spread as evenly as possible among your character's rows.
For example, if you take 4 damage, each of the damage tokens must be placed on a different row. If you end up taking 7 damage, all rows will get 1 damage token and two of them will get an additional one each.
Keep in mind that each ability on your board may only get 1 damage token on it - you may not put multiple damage on one ability.
An ability with a damage token on it is no longer active and its effect may not be applied (or copied by another ability). Treat the ability as if it was blank.
End of Round Phase
Any Insight generated during the round that was not used is lost. If you have any Wild mana tokens, you must replace them with a mana of any other element of your choice - you cannot keep Wild mana tokens from round to round. Similarly, you may only store 1 mana token of each element at the end of the round - any additional you may have are discarded.
Finally, all players reroll their dice.
Magmaroth's Lair
After 9 Rounds, you reach Magmaroth's lair. From that point onwards, during the Location Phase, do not draw a new Location card. Instead, draw Minion cards equal to the number of players and treat the Insight difficulty as 8.
While you are in Magmaroth's lair, you must apply the effects of all the Seals that have not yet been broken (that includes those that are unlocked). Some of them alter Magmaroth's health or power while others provide additional challenges for you to overcome. Also, while in Magmaroth's lair, you are allowed to attack Magmaroth and deal damage to it. When doing so, move the marker on its Health track as many spaces as the damage dealt.
Game End
If at any point, a player has damage tokens on all the abilities in a single row, they are killed and the game is immediately over.
If after the end of the third round inside Magmaroth's lair, Magmaroth has not been destroyed, the whole volcano collapses and all characters die. The game is over.
If you manage to reduce Magmaroth's health to 0, the game immediately ends and you are victorious.
Adjusting Difficulty
Depending on your experience and playing style, you may want to adjust the game's difficulty.
The game offers 3 difficulty levels: Easy, Normal and Hard. The rules, as written, describe the Normal difficulty.
- To play at the Easy level, during setup, give each player 1 Wild Mana token. Also, when drawing Minion cards in the Location Phase, draw as if there was one less player playing.
- To play at the Hard level, draw an extra Minion card in each Location Phase and add 10 health to Magmaroth. You may also include one or more of the following options for an even bigger challenge:
- The Insight cost to unlock Seals is one higher than the printed value.
- Unlocked Seals become locked again at the end of each round.
- When you've reached the maximum number of face-up Minions and you need to draw another one, instead of taking damage, discard the Minion with the lowest power (players choose if there are multiples) and draw the new Minion as normal.
Solo Game
The Masters' Trials: Wrath of Magmaroth comes with 4 different ways to play the game in solo mode - one for each Class. Before you start, choose the Class you want to play with and follow the instructions below on how the setup changes in each case.
IMPORTANT: When playing in solo mode, put all the Minion cards in the Minion deck, regardless of the Class you are using.
Be aware that the solo game does not have an Easy level. Moreover, depending on the combination of Class, Order and Weapon on your character as well as the Seals and the Minions drawn, the difficulty may change. Even if you manage to win, you can always try again with another combination for a different challenge!
Avenger
Seals: 3x Level 1, 2x Level 2
Special Rules:
- Draw a Minion during the first Round.
- There is no limit on the amount of Minions that can be face-up.
- While in Magmaroth's lair, draw 2 Minions per round.
Hard Level: Magmaroth has 10 extra health.
Mystic
Seals: 2x Level 1, 2x Level 2, 1x Level 3
Special Rules:
- At the end of each Minion Phase, after the Minions deal their damage, discard them.
- You may also win the game by breaking all the Seals.
Hard Level: Draw an additional Level 1 Seal.
Loremaster
Seals: 2x Level 1, 1x Level 2
Special Rules:
- Magmaroth has 10 extra health.
- When you enter Magmaroth's lair, deal 1 damage to Magmaroth for each Relic on your character. That damage cannot be prevented.
Hard Level: Draw 3x Level 1, 2x Level 2 Seals instead.
Warden
Seals: 3x Level 1, 1x Level 2
Special Rules:
- Take the Class board of another Class and place it next to your character. Take 4 of that Class' Ability cards at random and place them on its board (you decide where they are placed). This will be your companion - treat them as another character as far as abilities' effects are concerned but do not roll any dice for them.
- Whenever you take damage, also place half of that damage (rounded down) on your companion's board. If at any moment a row on that board is filled with damage, you lose the game.
- You may also win the game by surviving 3 rounds in Magmaroth's lair.
Hard Level: For every 5 health Magmaroth has, it deals 1 additional damage.
Lore
Orders
Order of the Glowing Embers
In the far reaches of the northern steppes lies a monastery. Its pathways consist of scorching hot stones that lend their name to the Order that claims this place as its own: The Glowing Embers.
Over the centuries, an Avenger or a Mystic has most often led the Order. Only through complete surrender to the elements have they mastered the ability to imbue their body with the endurance of the earth and the fury of fire, turning them into dangerous martial artists.
Order of the Everlasting Waterfall
What is a mighty river in the plains, always starts as a tiny stream in the mountains. In the western peaks, such a stream is born of the place known as the Everlasting Waterfall: never dry, never frozen. Under its protective veil has an Order of monks settled.
The master always appears as a young one, usually coming from the ranks of the Mystics or the Wardens. Prone to contemplation, they are able to attune to and embrace the elements that weave the fabric of the world.
Order of the Celestial Tides
Battered by strong winds day and night, the sea to the East is restless. In the mists of a forgotten island, under the stars, the students of the Celestial Tides tend to a massive, yet crumbling, temple.
Guided by a long line of masters that have followed the teachings of the Wardens or the Loremasters, they study the movement of the stars, and their effect on the sea, in order to learn how to tame the tide. Only those who do are able to reach the shore and select prospective students.
Order of the Blazing Winds
The desert in the South is seared by a constant burning wind that creates towering dunes, treacherous to any who do not know the way. Where sand turns into glass, only the initiate can find the ancient retreat of the Blazing Winds, an introspective monastic Order.
Its head is traditionally a Loremaster or an Avenger who has learned from a young age how to unlock their mind and open their third eye, the gateway to insight.
Classes
Avenger
Those who show a knack for martial arts are often bound to become Avengers. Through their teaching, they learn of the destructive and cleansing power of the Fire element.
Mystic
From an early age, Mystics show an interest in all elements and travel the land with a sense of wonder. They have learned to use the stability of Earth as a conduit for the other elements, amplifying their effects in the process.
Warden
For every fighter, there is a healer. Among the monks, Wardens fulfill that role. Using the benevolent power of the Water element, they have dedicated their life to the protection of others.
Loremaster
Loremasters study the ancient texts and learn from the relics of the world. They have a natural affinity with the element of Air and a proclivity for mastering the secrets of Insight.
Rules Clarifications
Rules Questions
If a player has dealt 3 damage to an Efreet and another player deals the last point of damage, who gets the reward?
A Minion's reward always goes to the player that dealt the last damage to it.
What happens if one of my dice lands on an Ongoing ability? Do I get to trigger it again?
No. Ongoing abilities are always active (as long as they don't have any damage tokens on them), regardless of whether your dice land on them or not. If you have a die on an Ongoing ability, you are not able to perform the Use an Ability action on it.
If an effect allows me to apply the effect of another ability, can I choose an Ongoing ability?
No, you can't (see reply above).
If an effect allows me to apply the effect of another ability, can I choose one that has damage on it?
No. An ability with damage on it should be treated as if it were blank.
If I take 7 damage, can I place 3 on the first row and 1 on each other row?
No. When you take damage, you need to spread all of it as evenly as possible. With 7 damage you would have to place 2 damage on two of the rows and 1 damage on each of the other three.
I took 3 damage in one of the rounds and I put them on 3 of my rows. Next round I take 2 more damage. Do I have to place them on the other 2 rows?
No. You only need to spread the damage the moment you take it. So if during one round you put 1 damage on each of the first 3 rows, next round you could again place damage on those rows - you aren't restricted by what happened before.
Some Seals affect the Minions or the actions the players take. Are these in effect when the game starts?
No. All the Seals' effects are only applied while in Magmaroth's lair.
While in Magmaroth's lair, does Magmaroth attack before the Minions?
No. Magmaroth attacks along with the Minions. You count the damage that Magmaroth deals, you add it to those of the Minions, and each player takes the total amount, all at once.
Can Magmaroth be stunned?
No. Only Minions may be stunned.
Card-specific Questions
Awareness
Does the die with which I use Awareness count for the Insight I get?
No. When you apply Awareness's effect, you check to see how many dice you still have on your character, and you get that many Insight. The die with which you used Awareness has already been removed from your character when that happens.
For example, if Awareness is the first ability you use on your turn, it will get you 4 Insight. If it is the third dice action you perform, it will get you 2.
Bracelet of Protection
How exactly does the Bracelet of Protection work?
When you take damage, you need to spread it evenly among the rows on your character. If you have the Bracelet of Protection on a row, you assign one point of damage to go on that row, but the damage token is never placed - the damage is prevented.
If I have a Bracelet of Protection and I take 6 damage, can I use it to prevent 2 of them?
Yes you can. Since you need to spread the damage as evenly as possible, you have to take 1 damage on each row and then assign the 6th damage to any row you want. If you assign it to the row with the Bracelet of Protection, both this and the first one will be prevented - you will end up placing only 4 damage tokens on your character.
Consuming Rage
Do I have to Exhaust Consuming Rage after using its ability?
Consuming Rage's effect allows you to Exhaust up to two abilities on your character in order to do additional damage. Since it says "up to", you may choose to Exhaust zero abilities and thus place no damage tokens on your character. Even if you do choose a higher number, you may Exhaust any abilities on your character, not necessarily Consuming Rage.
Element Conjuration
Can I get 2 Wild mana when I apply Element Conjuration's effect?
No. You may only get two mana of the 4 main elements (Fire - Earth - Water - Air).
Embrace the Elements
What happens if I've stored 2 mana of the same element and my Embrace the Elements gets damage on it?
If at any time Embrace the Elements has a damage token on it, it is no longer active. However, the amount of mana that you can store between rounds is only checked at the End of Round Phase. Normally, you take damage during the Minion Phase, which comes before that. Thus, if you store 2 mana of the same element and your Embrace the Elements gets damage on it during that Phase, at the end of the round, you will have to discard one of that mana. If you take damage at an earlier point during the round (for example in the Location phase, if you cannot draw Minion cards) and heal it during the Action phase, you continue to use the effect as normal.
If I have two copies of Embrace the Elements in my character, do I get to store 3 mana of the same element?
Yes you do.
Focus
When I use Focus, can I move one other dice twice?
No. You move up to 2 of your available dice, one space each.
Healing Riposte
If I have just 1 damage on my character, can I use Healing Riposte? What if I don't have any damage?
When you use Healing Riposte you deal as many points of damage as the amount you healed. If you have just 1 damage on your character, you heal it and you deal 1 damage. If you have no damage on your character, then there's nothing to heal and so you don't deal any damage.
Ignite the Flame
If I destroy a Minion with the 1 damage the effect does, do I get a Fire mana?
Yes you do.
Inner Search
If I use Inner Search to apply the effect of a Torrent of Mana in my Teachings, which card do I Exhaust?
Normally, if another ability applies the effect of Torrent of Mana, it's the Torrent of Mana that gets the damage token. However, in this case it is in your Teachings so it cannot get a damage token on it. Thus, you don't put any damage - you apply its effect and then you shuffle it back in your deck.
If I use Inner Search to apply the effect of Unleash Mana, what happens?
While Unleash Mana is in your Teachings, there is no mana placed on it so you don't get anything.
If I use Inner Search to apply the effect of Enhancement, which row's Wild abilities do I get to use?
You use the row on which Inner Search is located.
What happens if I use Inner Search for a card in my Teachings but my Abilities deck has no cards in it?
You take the card from your Teachings (the effect of which you applied), turn it face down, and place it where your deck was. That single card is now your Abilities deck and you will get to draw it again at the end of the Character Build-Up Phase.
Mend Wounds
If I am the Warden, can I heal myself with Mend Wounds?
Yes you can. Whenever an effect instructs you to heal a character, any of the characters in the game may be chosen, including the one applying the effect.
Metamorphosis
Since I apply the effect twice, if I spend 1 Water mana to get 2 Earth mana, can I spend the second time 1 Earth mana to get back 2 Water mana?
Yes you may. You apply the effect twice and each time is independent of the other.
Rain of Fire
If I destroy a Minion with the first 2 damage that the effect does and it provides me with a reward of 1 Fire mana, can I spend it to deal 2 damage to another Enemy?
When you use Rain of Fire, you first deal 2 damage on an enemy. If that is enough to destroy a Minion, you immediately get its reward and then you apply the rest of the effect. So, yes, you are allowed to spend the Fire mana you got as a reward, to deal additional damage to other enemies.
When applying the second part of the effect, if I destroy a Minion that provides me with a reward of 1 Fire mana, can I spend it to deal 2 damage to another Enemy?
When you start applying the second part of the ability's effect, you declare how many Fire mana you are spending and which Minions you will be dealing the damage to. To do that, you need to have that amount of mana in front of you. You cannot use Fire mana from those Minion's rewards to deal additional damage afterwards.
When applying the second part of the effect, can I spend 2 Fire mana and deal 4 damage to a single Enemy?
No. For each Fire mana spent, you deal 2 damage to a different enemy.
Rejuvenating Gust
Do all players have to heal for the same amount of damage?
No. When the Warden applies the effect of Rejuvenating Gust, each player chooses up to 2 damage tokens on their character and removes them.
Restoration
If I use Restoration to apply the effect of an ability that Exhausts itself (for example, Torrent of Mana), on which card is the damage token then placed?
When an ability's effect starts with Exhaust, it means that you need to put a damage token on that card. Thus, even if the effect is copied by another ability, the damage token goes on the card with the Exhaust text, in this example - Torrent of Mana.
If I use Restoration to apply the effect of another player's Awareness, which players' dice do I count? If I apply the effect of Consuming Rage, which character's abilites are Exhausted?
Whenever you copy the effect of another player's ability, apply its effect as if the ability was on your character. In the case of Awareness, count the available dice on your own character. In the case of Consuming Rage, you Exhaust your own abilities.
Ripple
If I use Ripple to apply the effect of Enhancement, which row's Wild abilities do I get to use?
You use the row on which Ripple is located.
Seal of Paralysis
Do I take damage if I perform an Elemental action?
Yes. You take damage for both regular and Elemental actions (save for Use an Ability).
Strategy Tips
Here are some strategy tips to help you during your first games:
- Cooperation is key to the game. Do not focus only on what your character can do in each round but be aware of what the rest of the players need. It is often wise to Provide Assistance to someone else (by discarding one of your dice) so that they can perform some actions they would otherwise be unable to do. Moreover, who goes first, which Minions should be killed and which Seal should be unlocked are decisions that the players should take together, based on the group's needs.
- Not every player should try to deal with everything that happens in the game. Find out what your character does best and focus on that, leaving those parts that you are not good at to the other players.
- Do not be afraid to take damage, especially during the early rounds of the game. It is often better not to deal with a Minion (and take damage from it) if it means that you are going to put more abilities on your character.
- Do not forget that when you put a new ability on your character, you heal any damage that was previously on the same space. Use this to your advantage when taking damage, by placing the tokens on the spaces where you plan to put abilities later.
- Do not hesitate to discard many cards from your Teachings at the end of the Character Build-Up phase in order to find the ones that work best for your strategy.
- Do not forget to make frequent use of the Elemental actions. More often than not, they can help you deal with difficult situations.