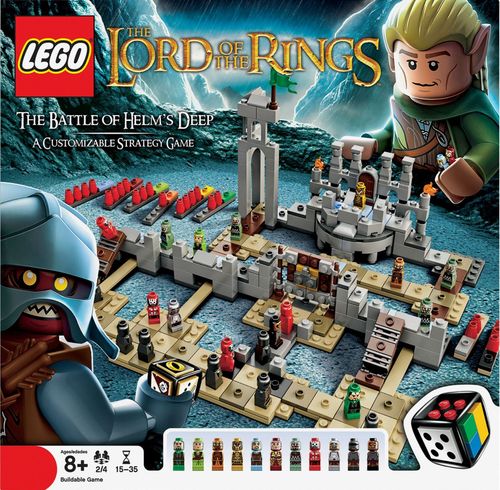
The Lord of the Rings: The Battle of Helm's Deep
The Lord of the Rings: The Battle of Helm's Deep Rulebook
Table of Contents
Table of Contents
Components
Rohirrim Leaders
Aragorn™, Gimli™, Éowyn™, King Théoden™, Haldir™, Legolas™
Rohirrim Warriors
Swordsmen
Uruk-hai Leaders
General, Archer
Uruk-hai Warriors
Berserkers, Swordsmen
Other components
- Space
- Reinforcement space
- Rangefinder
- Health bar
- LEGO® Dice
- Siege ladder
Check the LEGO® Dice is built with these 6 sides.
LEGO tilt: The best way to pick up a LEGO piece is by tilting it before you lift it.
Object of the Game
The first player to defeat all the enemy Leaders wins the game. The Uruk-hai player can also win by reaching the target space shown on the mission map.
Building the Game
In The Lord of the Rings: Battle of Helm's Deep you can rearrange the board to create different missions. Before you start playing, build the sections of the board using the building instructions. Then choose one of the mission maps on the poster and put the sections together as shown. Put all the figures in the right places.
- Mission 1: First Skirmish — A good way to learn the game. Playing time: 5–10 minutes.
- Mission 2: Fight for the Gates — Playing time: 15–20 minutes.
- Mission 3: Battle of the Hornburg — Playing time: 20–35 minutes.
Playing the Game
Each player chooses to play as the Rohirrim, the people of Rohan, or the Uruk-hai, the army of Isengard. If there are more than 2 players, split up into teams. The Uruk-hai player goes first. The Rohirrim and Uruk-hai players then take turns.
Moving
On your turn roll the LEGO® Dice, then choose one of your figures on the board.
-
The One Ring: Move up to 4 spaces OR use your figure's special skill.
-
Three: Move up to 3 spaces.
-
Two: Move up to 2 spaces.
-
If you end your move in a space occupied by one of your figures, move forward to the first available space.
-
If you move into a space next to an enemy, you MUST stop moving and fight.
You may not move diagonally.
Fighting
When you fight, roll the LEGO Dice again to find out what happens. Continue fighting until there are no more enemy figures in the spaces next to your figure or until your figure is defeated and removed from the board.
-
The One Ring: The enemy figure loses 2 health.
-
Sword: The enemy figure loses 1 health.
-
Skull: Your figure loses 1 health.
-
If a Warrior loses any health it is immediately defeated. A Leader is only defeated if it loses all 4 health. Remove any defeated figures from the board.
-
If a Leader loses 1 or more health but is not defeated, move it back 1 space away from the figure it is fighting. If it cannot be moved back, continue fighting.
You may not fight diagonally.
Rohirrim Figures
Leaders
- Charger (Aragorn, Gimli) — Special skill: Move up to 2 spaces. Then choose one enemy figure next to your Charger. That figure loses 2 health.
- Healer (Éowyn, King Théoden) — Special skill: Do not move. Restore up to 2 health to one of your Leaders on the board.
- Archer (Haldir, Legolas) — Special skill: Do not move. Use archery to attack one enemy within range.
Warriors
- Swordsman — No special skill.
Siege Ladders
Both players can use the siege ladders to climb up or down the walls. The spaces on the ends of siege ladders are next to the neighboring spaces on the board and walls. Move and fight on siege ladders as usual.
Archery
If you use archery, attach one end of the rangefinder to the head of your Archer and the other end to the head of any enemy within range. Roll the LEGO Dice again to find out what happens.
- The One Ring or Sword: On target! The enemy figure loses 1 health.
- Skull: You miss! Nothing happens.
Health
- Each Leader has a matching health bar and starts the game with 4 health. If a Leader loses all 4 health it is defeated. Remove the figure from the board.
- Warriors do not have health bars. If a Warrior loses any health it is defeated. Remove the figure from the board.
- If you use a Healer's special skill, restore up to 2 health to one of your Leaders anywhere on the board. Leaders can never have more than 4 health.
You cannot restore health to a defeated Leader.
Gates
If the Uruk-hai player moves 3 Uruk-hai figures onto the 3 spaces in front of the gates, remove the lock and open the gates.
Uruk-hai Figures
Leaders
- General — Special skill: Do not move. Put a defeated Uruk-hai Swordsman on an empty reinforcement space.
- Archer — Special skill: Do not move. Use archery to attack one enemy within range.
Warriors
- Berserker — Special skill: Move up to 2 spaces. Then choose one enemy figure next to your Berserker. That figure loses 2 health.
- Swordsman — No special skill.
Winning the Game
The first player to defeat all the enemy Leaders wins the game.
If you are the Uruk-hai player, you can also win if you have one of your figures stood on the target space shown on the mission map at the end of your turn.
Changing the Game
Try building your own missions and thinking up exciting stories about the characters. You can add one of these new rules or think up rules of your own. When you change the game, it's better to change one thing at a time, and always remember to make sure everyone knows the rules before you start playing!
New Battle Plans
At the start of the game, you can both choose to rearrange your figures on the board.
Rohirrim player: You can choose to include Éowyn or Haldir and use them to replace 1 or 2 of your other Rohirrim Leaders. For example, in the Battle of the Hornburg mission, start by choosing any 4 of your 6 Leaders and placing them onto the blue spaces on your side of the board in any order.
Uruk-hai player: You can choose to place your Uruk-hai figures anywhere within the first two rows on your side of the board.
Chargers & Berserkers Advance!
If one of your Chargers or Berserkers is FIGHTING and you roll 'Sword', the enemy figure loses 1 health AND you can choose to move your Charger or Berserker 1 extra space. This means you can move away from a fight, or into another one! If you move next to another enemy figure, immediately roll again to fight it. Chargers and Berserkers now DO NOT have a special skill if you roll 'The One Ring' when moving.