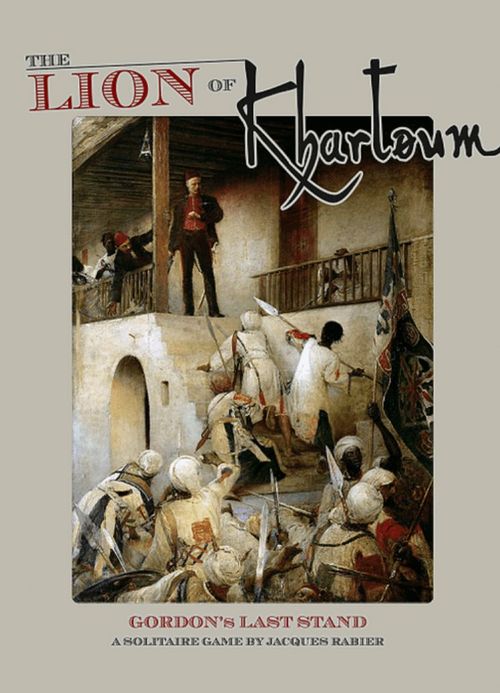
The Lion of Khartoum: Gordon's Last Stand
The Lion of Khartoum: Gordon's Last Stand Rulebook
Table of Contents
Table of Contents
1.0 Introduction
Game overview. The Lion of Khartoum: Gordon's Last Stand is a solitaire strategy and resource-management game, driven by cards, about the siege of Khartoum from February 1884 to January 1885. You play General Charles Gordon, nicknamed "The Chinese", Governor and self-proclaimed defender of Khartoum, besieged by the rebel Dervish forces of the Mahdi. As the player, you must use your few military units and meagre resources skilfully enough to hold out long enough for the British relief force to come to your rescue, or die gloriously as Gordon himself did.
2.0 Game Components
- One 13-page rulebook (this document).
- One game map, 42.50 cm x 27.50 cm.
- 20 event cards.
- 12 banner activation cards.
- 64 counters and markers.
- Play aids: the resource card, the action result tables, a simplified sequence of play, and an optional rules sheet.
- One 8-page game booklet.
You will need two six-sided dice (abbreviated 2D6).
2.1 Game map
The map is a "point-by-point" representation of the city of Khartoum and its surroundings. Four separate paths, made up of circular or square areas linked to one another, converge on the Governor's Palace in Khartoum. Each of them is the path of one Mahdist Banner (a division of the Dervish army): Green, Black, Red or White. The areas of each path are numbered from six down to one; area 6 is the starting area of each path and area 1 ends at the Governor's Palace. These areas are used to manage the placement of friendly units and the movement of enemy Banners. Circular areas represent open terrain; square areas represent terrain such as rivers, ramparts or buildings (square areas surrounded by a single line), and Forts (square areas surrounded by a double line).
Nile bank areas. Areas marked with a blue symbol (a blue dot surrounded by white) are Nile bank areas (see the diagram below). They are the only areas accessible to gunboats.
[Diagram: a Fort and a Nile bank area in the same area.]
Key areas. Areas marked with a star (see the diagram above) are key areas (see Appendix 11.9). Losing control of such areas lowers the city's morale (see Appendix 11.6).
Map tracks. The map has several tracks on which the game markers are placed and moved:
- The Turn track tracks the passage of time (one turn represents roughly one month of real time).
- The Action Points track shows the number of Action Points available (see Appendix 11.2).
- The City Morale track tracks the evolution of Khartoum's morale (see 11.6).
- The Banner Strength tracks, in four colours (black, green, red and white), show the strength of each Banner (division) of the Mahdi's Army.
2.2 Cards
The game is driven by a deck of 20 event cards and 12 banner activation cards.
Event cards. Event cards are used to set up random events that add a historical dimension to the game and may lead you to make important decisions. Each card shows its identification number, its title, the description of the event and how to apply it, as well as the number of Action Points available during the turn.
Banner activation cards. Banner activation cards are used to simulate attacks by the Mahdist forces against Khartoum. Each card bears an identification number and indicates which banner(s) will be active during the turn (that is, which enemy forces will try to advance towards Khartoum).
2.3 Counters
Counters are divided into two categories: markers and units. The number of counters supplied is an absolute limit. For example, you cannot have more fortification-upgrade markers than there are in the game, or build more gunboats than there are counters available. Counters bearing an asterisk (*) are not used in the basic game but with the optional rules described on the optional rules sheet.
[FAQ, Oct. 27, 2020 (publisher errata): the "" and "?" on two of the counters: "" marks an optional counter; "?" marks an Unpredictable Levy troop unit. See the Alternative Rules card.]
Markers. Markers are counters used on the various tracks of the map and of the resource card to manage the current level of Khartoum's resources (see Appendix 11.10), the city's morale level, the number of Action Points available, the positioning and strength of enemy Banners (see Appendix 11.4), as well as the passage of time (turns). The arrival marker of the Relief Force, placed on the Turn track, is used to indicate at the end of which turn the British Relief Force is supposed to arrive to save Gordon. Markers are also used to indicate fortification upgrades, as well as the disorganisation of certain enemy Banners (that is, the fact that they are unable to attack).
- Markers: Resource Points (RP), City Morale (CM) and Action Points (AP).
- Markers: Banner positioning and Banner strength.
- Markers: Turn marker and Relief Force marker.
- Markers: Fortification upgrade and Disorganised Banner.
Units. Units are counters representing the four types of military force used to defend Khartoum.
- Troops represent regular (i.e. professional) infantry units and non-professional units.
- Regular troops: Egyptian Infantry, Sudanese Infantry, Bachi-bouzouks.
- Non-professionals: Militia (Levies).
- Guns are divided into Heavy Guns, representing 20-pounder Krupp guns, and Light Guns, representing various 7-pounder mountain guns and other lighter guns and machine guns.
- Leaders are important officers of Khartoum:
- Lt. Col. J.D.H. Stewart (Gordon's Aide-de-Camp).
- Muhamad Ali Pasha, "the fighting Pasha".
- Muhamad Nushi Pasha.
- Gordon Pasha.
- Gunboats are civilian steamers converted into improvised warships.
Each counter shows the unit's name and three die roll modifiers (DRM; see Appendix 11.7), used (from left to right) for Raid / Sortie / Defence actions. The order in which the DRMs are printed on unit counters follows the order of play (Raid / Sortie / Defence).
Unit counters have silhouettes that quickly identify the strength of the unit: units with two silhouettes are two-step units, while units with one silhouette are one-step units (see Appendix 11.11 for more details about steps).
Units that have their factors replaced by an "X" cannot take part in the specified action. Example: Militia can only be used for Defence, not for Raid or Sortie actions.
2.4 Play aids
Play aids include the resource card, the result tables, the game booklet and the optional rules sheet.
3.0 Game Set-Up
3.1 Card decks
Shuffle the event cards and the banner activation cards separately. Place them face down to create two piles: a pile of event cards and a pile of banner activation cards.
3.2 Game map and resource card
Set up the game map and the resource card as follows:
- Place each Banner positioning marker in its respective starting area (area 6) of each Banner path (see Appendix 11.5).
- Place the Turn marker on space 1 of the Turn track (marked TURN).
- Place the Relief Force marker on space 12 of the Turn track.
- Place the Action Points (AP) marker on space 3 of the Action Points track (marked ACTION POINTS) on the game map.
- Place 2 Egyptian Infantry counters, 3 Sudanese Infantry counters and 3 Bachi-bouzouk counters, all at two steps, in the Available Troops Box of the resource card.
- Place 1 Heavy Gun counter and 5 Light Gun counters in the Available Guns Box of the resource card.
- Place the Leaders Stewart, Ali and Nushi in the Available Leaders Box of the resource card.
- Place the City Morale (CM) marker on space 12 (CM Start) of the City Morale track (City Morale) on the game map.
- Place the Resource Points (RP) marker on space 32 (RP Start) of the resource points track on the resource card.
- Place the Banner strength markers on the Start spaces of their respective strength tracks.
4.0 Sequence of Play
4.1 Sequence of play
The game lasts 12 turns. The actions performed during each turn are as follows:
- Event Phase (except on turn 1).
- Action Phase.
- Banner Activation Phase.
- Reorganisation Phase.
Event Phase (except turn 1). Draw the top card of the event card pile and apply the events described on the card. Note the number of Action Points awarded by the card.
Action Phase. Spend the available Action Points to carry out the actions described below. One Action Point is needed to carry out one action. Once started, an action must be completed before moving on to the next action. Action Points cannot be kept from one turn to the next; any unused point is lost.
Note that, on turn 1, Action Points are pre-allocated at set-up and are not drawn.
Only one action of the same type may be carried out in the same turn. For example, several raids cannot be conducted during the same turn.
Actions.
- Improve the fortification level of one or more areas.
- Raise the city's morale level.
- Increase resource points.
- Build and/or repair one or more gunboats.
- Create one or two militia units.
- Raid.
- Sortie.
- Set up defensive positions.
IMPORTANT: The selected actions must be carried out in the order listed above. For example: if there are three AP to spend, the actions Build/repair gunboats, Sortie and Set up defensive positions must be conducted in that order, if these three actions have been selected.
Note that the order in which the DRMs are printed on unit counters follows the order of play (Raid / Sortie / Defence).
Banner Activation Phase. Draw the top card of the banner activation card pile and activate the banner(s) mentioned on the card. Banners are activated in the order printed on the card, from left to right.
Reorganisation Phase. If necessary, remove the "Disorganised" markers from enemy Banners. Return the infantry units and guns used to their respective "Available" boxes. Return the Leaders wounded the previous turn to the Available Leaders box. Shuffle the banner activation cards.
IMPORTANT: Move the Resource Points marker down one space to reduce the number of resource points by one. Designer's note: This represents the city's monthly upkeep cost. Advance the Turn marker one space (one month) on the Turn track. Check the victory conditions.
4.2 Special rules for turn 1
There is no Event Phase and no Banner Activation Phase during turn 1. During the Action Phase you receive 3 Action Points and 8 free resource points, which are not deducted from the total number of resource points available at the start of the game. During turn 1, you cannot spend more than 8 resource points. These resource points cannot be kept in reserve; if they are not used they are lost. During turn 1, you may use Action Points and resource points only to carry out the following actions:
- Improve the fortification level of one or more areas.
- Raise the city's morale level.
- Build and/or repair one or more gunboats.
- Create one or two militia units.
Designer's note: Gordon arrived in Khartoum in February 1884 and began organising the defence of the city, while the siege itself only actually began in mid-March.
5.0 Event Phase
Event cards may trigger conditional events, or events that occur only once, and provide the player with Action Points for the turn.
5.1 Conditional events. The events of certain cards are triggered only if the card is drawn during certain specific turns, or if a card's event has already been triggered. For example, the event of card No. 2 "The waters of the Nile recede (*)" is triggered only if the card is drawn during turns 9 to 12. This is indicated on the card, but for easier identification the titles of these cards are in italics.
5.2 Events triggered only once. Certain events triggered by event cards occur only once during the game. Once the event has taken place, remove the card from the game. For example, the event of card No. 2 "The waters of the Nile recede ()" is also an event that is triggered only once. This is indicated on the card, but for easier identification the titles of these cards are marked with an asterisk ().
5.3 Available Action Points. Each event card indicates how many Action Points (AP) you receive to carry out actions during the turn. These AP are shown in red in the upper left corner of the card and after the description of the event when the AP are generated at random. Place the Action Points marker on the corresponding space of the Action Points track on the game map.
6.0 Action Phase
During the Action Phase, you may spend the Action Points provided during the Event Phase to carry out the actions listed in section 4.1, as you wish.
Designer's note: Event cards will generate from 1 to 4 AP. You might think that this does not represent many actions for a one-month turn. However, each AP represents a decisive action, while at the same time dozens of minor tasks (such as stamping and signing administrative documents, settling disputes between citizens, etc.), too trivial to be represented in the game, are supposed to keep you busy. Remember that you are supposed to be the Governor of Khartoum, after all.
6.1 Improve the fortification level
Areas on the map can be fortified. To improve the fortifications of an area, that area must be under your control (see Appendices 11.3 and 11.8). Note that the fortification level table (Map Key) on the map gives the starting (Start) and maximum fortification levels of the various areas of the map. Square areas and forts (square areas with a double line) have an intrinsic (starting) fortification level of 1 and 2 respectively, while open terrain areas (circular) have a starting fortification level of zero. The fortification level of an area can only be improved one level above its starting level.
Improving fortifications costs 1 AP during the turn. Improving the fortification level of an area costs 1 RP. A maximum of 4 RP may be spent to improve fortification levels each turn; thus a maximum of 4 areas can be improved per turn.
To show that the fortification level has been improved, place a fortification upgrade marker (+1) in the area where you improved the fortification level.
Example of fortification improvement. It is turn 3. Gordon has 4 AP available (yes, he was lucky) and 30 RP. The Black Banner is in area 6, the White Banner in area 5, the Red Banner in area 6, and the Green Banner in area 6. The Mahdist forces threaten Fort Omdurman and are right at the foot of the southern ramparts. These two areas are key positions and Gordon does not want to risk losing them so early. He therefore decides to reinforce the western and southern defences. He spends 1 AP to be able to carry out fortification improvements. Next, he spends 1 RP to improve the fortifications of Fort Omdurman (area 5, on the Black Banner's path). The fortification level of Fort Omdurman is now +3 (maximum level). Another RP is spent to improve the fortifications of the southern ramparts, which rise from +1 to +2 (maximum level). He places fortification upgrade markers in both areas. He now has 3 AP and 28 RP left. Accordingly, the AP and RP markers are immediately moved to the appropriate tracks.
6.2 Raise City Morale or increase resource points
The City Morale level can be increased by spending 1 AP. It costs 2 RP to raise the city's morale level by one point. A maximum of 4 resource points per turn may be spent in this way to raise city morale.
Designer's note: This represents Gordon ordering the distribution to the needy of biscuits and wheat drawn from the garrison's food reserve, or any other measure intended to support the morale of Khartoum's citizens. This can matter: remember that if city morale falls below 1, you lose the game.
Conversely, food, water and ammunition may be rationed by not spending RP to improve city morale. However, the citizens of Khartoum may not be very happy. Two points of morale may be spent to increase the resource points level by one point. A maximum of four points of City Morale may be spent per turn in this way to increase the resource points level. In any case, only one AP is needed to initiate an increase of morale or resources.
Note that either City Morale or Resource Points may be increased during the turn, but not both at the same time.
6.3 Creating militia
Creating a militia of citizens during a turn costs 1 AP. In addition, it costs 1 CM to create one or two militia units. Reduce City Morale to reflect the expense. The maximum number of militia available at any time is two. Once created, place the militia units in the Available Units box of the resource card. Note that, unlike other combat units, militia units can be rebuilt using the same procedure and at the costs indicated above.
Example of creating militia. Following our previous example, we are still in turn 3. Gordon now has 3 AP available and 28 RP remaining. City morale is 12. He decides to call Khartoum's citizens to the colours. To do so he spends 1 action point and one point of City Morale to mobilise the two available militia counters. These are placed in the Available Units box of the resource card. He must reduce the level of City Morale by one point, as the citizens are not very happy to join the armed forces. He now has 2 AP and 28 RP left, while the CM level is now 11. Accordingly, he moves the AP and CM markers on their respective tracks.
6.4 Build / repair gunboats
Building and/or repairing gunboats costs 1 AP. Either or both actions may be carried out. Building one gunboat counter costs 1 RP per counter built. A maximum of 3 gunboat counters may be in play at any time. Place the gunboat counters built in the Available Gunboats box on the resource card.
Gunboats may be damaged as a result of combat or because of an event card, and must be repaired before being placed again in the Available Gunboats box. Repairing one gunboat counter costs 1 RP per counter. Gunboats may also be destroyed during the game. Destroyed gunboats cannot be rebuilt.
Designer's note: During the siege, General Gordon ordered the conversion of several civilian passenger steamers into improvised gunboats, fitted with guns, machine guns and makeshift armour, in order to provide offensive and defensive support and to transport troops. Each gunboat counter represents 2 to 3 of these converted steamers.
6.5 Raids
Carrying out a Raid costs 1 AP but no RP. A raid represents sending a small number of soldiers to recover supplies, plunder, sabotage, reconnoitre and, if possible, disorganise Dervish operations.
To organise a raid operation you must select one (and only one) regular infantry unit (Egyptian, Sudanese or Bachi-bouzouk) from the Available Units box. This unit may be accompanied by a Leader from the Available Leaders box and by a Light Gun unit from the Available Guns box. Available gunboats may take part in the raid, provided that the enemy Banner targeted by the raid is in a Nile bank area. Any number of available gunboats may take part in the raid. Other types of units may not take part in the raid.
Place the units engaged in the raid, stacked, on or beside the map to remind you that these units will take part in the attack.
Roll 2D6 and call the result the "Raid Result" (RDR). Follow the steps below.
Raid resolution steps:
- To the RDR, add the following modifiers:
- the Raid factor of the infantry unit;
- the Raid factor of the Leader;
- the Raid factor of each gunboat;
- and finally, the Raid factor of the light gun unit.
- To the modified RDR, add or subtract the die roll modifiers (DRM) of the current City Morale and Resource Points levels, which may be positive or negative.
- Then subtract the strength level of the targeted Banner, divided by 2 (rounded up). For example, if the current strength level of the target Banner is 9, then 5 is subtracted from the RDR.
- Cross-reference the final modified RDR in the "outcome" column of the Raid Outcome Table (AOT.2, the Action Outcome table; see Appendix 11.1) and apply the consequences of the raid.
- Place the surviving troops and guns in their respective "Used" boxes. Troops and guns in the "Used" box cannot be committed to other actions during the turn. They will be placed back in their respective "Available" boxes during the Reorganisation Phase. Place undamaged surviving gunboats in their "Available" box. Place damaged gunboats in their "Damaged" box. Place uninjured Leaders in their "Available" box and wounded Leaders in their "Wounded" box.
Example of a raid. Continuing the previous example, Gordon has 2 AP and 28 RP, and City Morale is 11. He decides to reduce the threat posed by the White Banner camped at the foot of the southern ramparts, by carrying out a raid on the spot. The White Banner is located in area 5 of the White Banner's path and has a strength of 6. He spends 1 AP to carry out the raid and selects a Sudanese unit (these are the best for this type of operation), while the best candidate to command the raid is Muhamad Ali Pasha, nicknamed "the fighting Pasha". A light gun unit will provide fire support to the raid, as well as two gunboat counters (the fact that area 5 is a Nile bank area allows the gunboats to take part in the raid).
The die roll modifiers (DRM) are +2 for the Sudanese unit, +2 for Pasha Ali, +1 for the light guns, and 2 x +1 for the gunboats. There are no modifiers for the current levels of resource points and city morale. The total positive modifier in Gordon's favour is +7. However, he must subtract half of the Banner's strength from this total (6/2 = 3). Thus the final die roll modifier (DRM) is +7 - 3 = +4.
He rolls 2D6 and gets a 4, then checks the result on the AOT table, AOT.2 Raid Outcome Table. Without the positive DRM the raid would have been a failure, but now it is a minor success. The raid succeeds in bringing 1 RP back to Khartoum. Gordon moves the RP marker one space, to space 29, on the resource track.
However, this small adventure provokes the ire of the Dervishes, and friendly units may suffer losses. As indicated on AOT.2 Raid Outcome Table, Gordon must roll on the Leaders and Troops Casualties Tables with a DRM of +2, and on the Gunboats Damage Table with a DRM of +2. He first rolls 1D6 on the Leaders casualties table. He rolls a 3, which could have caused a wound for Muhamad Ali, but fortunately, with the +2 DRM, he comes through unharmed.
Gordon checks the Troops casualties table. He rolls 1D6 and gets a 2. It is again modified by the +2 DRM, so the final result is 4. The Sudanese infantry unit loses one step. Its full-strength counter (2 silhouettes) is removed from the game and replaced by a one-step Sudanese infantry counter (1 silhouette).
Finally, Gordon rolls on the Gunboats Damage Table for each of the two gunboats engaged in the raid. The first die roll is a 3, which with the +2 DRM gives a final 5, meaning no damage. The second die roll is a 1, which with the +2 DRM gives a 3: that gunboat unit is damaged (Damaged).
When the expedition returns to Khartoum, Pasha Ali is placed in the Available Leaders box, the reduced Sudanese unit is placed in the Used Troops box, the light guns are placed in the Used Guns box, one gunboat counter is placed in the Available Gunboats box and the other in the Damaged Gunboats box. Gordon will have to have that gunboat repaired.
6.6 Sorties
A sortie represents a major effort to inflict losses on, and win back ground from, the Dervishes in a specific area. Making a sortie costs 1 AP and 1 RP.
To make a sortie, select up to three regular units (Egyptian, Sudanese, Bachi-bouzouk) at two steps and/or Egyptian or Sudanese units at one step located in the Available Units box. Note that neither reduced Bachi-bouzouks nor militia may make a sortie. At least one regular infantry unit (Egyptian, Sudanese, or non-reduced Bachi-bouzouk) must take part in the sortie.
Select one Leader at most. Any number of available gunboats may take part in the sortie, provided that the targeted Banner is in a Nile bank area. As many light gun units, from the Available Guns box, as there are infantry units engaged may take part in the sortie. Heavy guns, if available, may also take part if the sortie is accompanied by at least one gunboat (the heavy guns are considered to be temporarily mounted on a gunboat during the sortie).
Other types of units may not take part in the sortie.
As with a raid, place the units engaged in the sortie in a separate stack, on or beside the map, to remind you which units are taking part.
Roll 2D6 to obtain a "Sortie Result" (RDS) and apply the modifiers mentioned below to the RDS.
- Add the Sortie factor of each unit (troops, guns, Leader, gunboats) engaged in the sortie.
- Add or subtract the die roll modifiers (DRM) of the current City Morale and Resource Points levels.
- Subtract the strength of the targeted Banner.
Cross-reference the final result in the "outcome" column of the Sortie Outcome Table (AOT.3) on the Action Outcome table and apply the results of the sortie.
Move surviving troops and guns to their respective "Used" boxes. Troops and guns in the "Used" box can no longer be committed to actions during this turn. They will return to their "Available" boxes during the Reorganisation Phase. Move undamaged gunboats to the Available Gunboats box and move damaged gunboats to the Damaged Gunboats box. If the Leader was wounded, move the Leader to the Wounded Leaders box; otherwise move the Leader to the Available Leaders box.
Example of a sortie (inspired by real events). We are in turn 8 (September). The Red Banner, with a strength of 6, is currently in area 5. After spending 1 AP and 1 RP, Gordon Pasha decides to send Muhamad Ali Pasha north, along the river, on a sortie mission with one full-strength Egyptian unit and two reduced Sudanese units (at 1 step), as well as one gunboat and two light gun units. His aim is to attack the Red Banner located in area 5. He may use gunboats because area 5 of the Red Banner's path is a Nile bank area. The current RP level is 16 and the CM level is 10. Thus 1 is subtracted from the die roll result because of the rather low resource level. However, there is no modifier because of the CM level. The die roll modifiers are calculated as follows:
Positive DRM: +2 for Muhamad Ali Pasha's sortie factor, +1 for the Egyptians' sortie factor, +2 (2 x +1) for the reduced Sudanese units, +1 for the gunboat, +2 (2 x +1) for the light guns. Total = +8.
Negative DRM: -1 because of the current RP level; -6 because of the strength of the Red Banner. Total = -7.
The final DRM is +8 - 7 = +1.
Muhamad Ali may be overconfident, but he has already faced greater challenges in earlier sorties and has won resounding victories over the Dervishes. However, this time luck abandons the fighting Pasha: the sortie result (RDS) is 3, which becomes a 4 thanks to the +1 DRM. The modified RDS is reported on the Sortie Outcome Table (AOT.3), and the result is not good at all:
Roll the die on the troops, guns and Leaders casualty tables, and on the Gunboats Damage Table, with a die roll modifier (DRM) of -2. But it could have been worse without the +1 DRM.
Gordon first rolls on the Leaders casualties table and obtains a 3, which is modified by the -2 DRM for a final result of 1. Unfortunately, Muhamad Ali will not return to Khartoum this time; his counter is removed from the game.
Gordon rolls on the troops casualties table and obtains a 3, which becomes a 1 because of the -2 DRM. The troops lose three steps. To apply the losses, the two-step Egyptian unit must first be reduced by replacing it with a one-step Egyptian unit. For the second step lost, a choice must be made between eliminating the newly reduced Egyptian unit or eliminating a Sudanese unit that is already reduced. Gordon decides to eliminate the Egyptian unit from the game. The third step lost is applied to one of the Sudanese units, which is eliminated in turn. Only one Sudanese unit survives the expedition.
Gordon Pasha now rolls the die and consults the guns casualties table, obtaining a 4 which becomes a 2 because of the -2 DRM. Normally two guns units would be destroyed, but as only one was engaged in the sortie, only that one is destroyed (and that is quite enough!).
Finally, Gordon rolls the die and consults the Gunboats Damage Table and gets a 5, which is reduced to 3 because of the -2 DRM. The gunboat is damaged.
The survivors of the failed expedition limp back to Khartoum. The Sudanese unit is placed in the Used Troops box and the gunboat in the Damaged Gunboats box.
6.7 Set up defensive positions
This action represents the deployment of troops to prevent the enemy Banners (divisions of the Mahdist army) from advancing along their paths towards the Governor's Palace. To do so, place troops (and other units) in areas under your control. Setting up defensive positions costs 1 AP, but no resource points.
[Clarification, Oct. 27, 2020 (publisher errata): You have no obligation to deploy all your available units on the map when setting up Defensive Positions. You can keep some of them in the Available box. You cannot deploy units on the map in more than one area on each Banner path. For example, if the Black Banner is in area 3 (Fort Mukran), you may deploy your units in area 2 or area 1 of the Black Banner path, but not in both area 2 and area 1.]
[Erratum, Oct. 27, 2020 (publisher errata; replaces the second paragraph of 6.7 as printed): Place up to 4 infantry units (Egyptian, Sudanese, Bashi Bazouks or Levies) per area from the Available Troops box. Non-Professional Troops (Levies) cannot be placed alone in an area. They must be placed with at least one Regular Troops unit.]
Place up to 4 infantry units (Egyptian, Sudanese, Bachi-bouzouks or militia) per area, taken from the Available Troops box. Remember that troops which have already been activated during this turn are in the Used Troops box, and consequently cannot be selected to set up defensive positions during this turn.
Place one (and only one) Leader, taken from the Available Leaders box, per area.
Place any number of guns, taken from the Available Guns box, per area.
Place any number of available gunboats per area, provided that the area in question is a Nile bank area.
We will return to this in more detail during the Banner Activation Phase, but in principle, activated enemy Banners will move directly towards the next areas not occupied by your troops (Egyptian, Sudanese, Bachi-bouzouk or militia) until they are stopped by your troops or reach the Governor's Palace.
Note: The term "troops" is important. Remember that Leaders, guns and gunboats are not troops and, although they can provide very useful bonuses, they cannot be used alone to stop Banners from advancing.
IMPORTANT game tip: Keep at least one Action Point in reserve to carry out this set-up defensive positions action. Otherwise, if there are no troops to prevent the advance of the enemy Banners, they will reach the Governor's Palace directly and you will have lost the game.
Example of setting up defensive positions. It is turn 3. Gordon Pasha has 1 AP and 28 RP in reserve, and the city's morale is 11. He has fortification upgrade markers at Fort Omdurman and at the Southern Ramparts. The Black Banner is in area 6, the White Banner in area 5, the Red and Green in area 6, all on their respective paths. Gordon spends 1 AP (his last) to set up defensive positions. Because a raid has already been carried out during the turn, he has a reduced Sudanese infantry unit in the Used Troops box. He also has a light gun unit in the Used Guns box and a gunboat unit in the Damaged Gunboats box. He therefore cannot use them to establish defensive positions this turn. The other units are available and at full strength.
The available units are: 3 Leaders, 2 full-strength Egyptian units, 2 full-strength Sudanese units, 3 full-strength Bachi-bouzouks, 2 militia units (raised during this turn), 4 light guns, 1 heavy gun unit, and 2 gunboats.
The most dangerous Banners are the Black and White Banners. Each has a strength of 8 and they threaten Fort Omdurman and the Southern Ramparts. Consequently, Gordon decides to send the Egyptians, his best defensive troops, there to contain the enemy attacks. One Egyptian infantry unit is placed in area 5 on the Black Banner's path, and a second in area 4 of the White Banner's path. These two areas are each reinforced by a Bachi-bouzouk unit (they offer no defensive die roll modifier but can still be used as cannon fodder if the units suffer step losses during the defensive action). Gordon also places the heavy guns at Fort Omdurman and a light gun unit on the Southern Ramparts. Fort Omdurman will be commanded by Pasha Nushi and the Southern Ramparts by Pasha Ali.
Nevertheless, Gordon cannot underestimate the threat posed by the Red and Green Banners. Even though they are still camped in their starting areas, they could advance quickly if they were activated and allowed to move unhindered. He must therefore deploy troops along their paths in order to stop them. The problem is that areas 4 and 5 of the Red Banner's path and area 5 of the Green Banner's path offer no defensive bonus to die rolls. But if he chooses to deploy his troops in better defensive positions, such as the North Fort (area 3 of the Red Banner's path) or the Eastern Ramparts (area 4 of the Green Banner's path), any activated Banner would automatically advance into areas 5 and 4 of the Red Banner's path and into area 4 of the Green Banner's path. It is a difficult decision to take. But our hero, Gordon Pasha, is ready to meet the challenge.
He decides not to take any risk against the Green Banner: he positions one Sudanese infantry unit, two militia units and one light gun unit on the Eastern Ramparts (area 4 of the Green Banner's path), in order to benefit from the +1 die roll modifier. On the other side, he chooses to establish defensive positions on open ground against the Red Banner. One Sudanese unit and one Bachi-bouzouk unit, supported by a light gun unit and commanded by Lt. Col. Stewart, form a square in area 4 of the Red Banner's path. Because this is a Nile bank area, Gordon can also place the remaining gunboats in this area, in order to provide fire support to Stewart's forces.
7.0 Banner Activation Phase
7.1 Banner activation phase. Draw the top card of the banner activation card pile. If several banners are activated, activate them in the order indicated (from left to right). If more than one banner is activated, complete the activation of one banner before activating the next. A banner bearing a "Disorganised" marker (often as a result of your actions or because of an event card) will not be activated. Disorganised Banners simply do nothing during the Banner Activation Phase.
Move an activated Banner along its path, from connected area to connected area, towards the connected area not occupied by your troops that has a number lower than that of the area it currently occupies. For example, if an activated Banner is positioned in area 4, it will try to move into area 3. Continue to move the active Banner in this way, from unoccupied area to unoccupied area within the same movement, until it meets your troops (Egyptian, Sudanese, Bachi-bouzouk or militia) deployed in the next connected area, or until it reaches the Governor's Palace area (in which case the game is lost and the Mahdi wins!). If a Banner meets your troops in an adjacent area, it immediately stops its movement to attack those troops on its path.
Example: The Red Banner is activated in area 6. There are no troops in areas 5 and 4, but a militia unit and a Sudanese unit are in area 3. The Red Banner moves into area 5, then area 4, where it temporarily halts its movement to attack the defensive troops positioned in area 3.
7.2 Defensive action resolution phase. Your troops (and any support units stacked with them) will try to prevent the Banner from advancing in the area they occupy. The process is very similar to that used for resolving sorties. To resolve the attack, roll 2D6 to obtain a "Defence Result" (RDD). Add or subtract the following die roll modifiers to the RDD:
- Add the defence factors of the troops, the Leader, the light and heavy guns and the gunboats deployed in the attacked area.
- Add the fortification level, if any, of the area occupied by your troops (including the fortification upgrade marker if present). Example: a Fort area with a fortification upgrade marker grants a DRM of +3 (+2 for the "starting" fortification level and +1 for the fortification upgrade marker).
- IMPORTANT: You have the option to spend immediately one (and only one) resource point to obtain a DRM of +1. Designer's note: This simulates the dispatch of emergency reinforcements, extra ammunition and supplies to the defenders.
- Add or subtract the DRMs for the City Morale and Resource Points levels.
- Subtract the strength of the attacking Banner.
Cross-reference the final result in the "outcome" column of the Defence Outcome Table (AOT.1) on the Action Outcome table, and apply the consequences.
If the Banner succeeds in advancing into the defended area, it stops its movement there. Remove any fortification upgrade marker from the conquered area.
If the Banner advances into a key area, reduce the City Morale by one point.
Certain combat results may force a Banner to retreat one area. If the Banner is already in area 6, it does not retreat; it simply remains in place.
8.0 Reorganisation Phase
This phase comprises the following steps:
- Remove any "Disorganised" marker from enemy Banners.
- Return troops and guns to their "Available" boxes.
- Return the Leaders wounded during the previous turn to their "Available" boxes. These are the Leaders whose counters were turned upside down (see below).
- Turn upside down the counters of the Leaders who were wounded during the turn. They will remain in the Wounded Leaders box until the end of the next turn.
- Shuffle the banner activation card pile with the banner activation card used during the turn.
- Reduce the number of resource points by one point. Note: This rule is often forgotten, but it is important.
- Check the victory conditions (see next section) and advance the Turn marker to the next space (the next month) on the Turn track (white strip marked "TURN").
9.0 Victory Conditions
9.1 Victory. You win and become a legendary hero in England if, at the end of turn 12 (January 1885) or when the Relief Force arrives, the Governor's Palace remains under your control. Note that certain events may bring the Relief Force in earlier than expected.
Designer's note: Historically, a small British contingent, aboard two steamers, arrived on 28 January, but unfortunately the city had fallen two days earlier and Gordon had been killed by the Mahdists, along with many citizens of Khartoum.
9.2 Sudden death. You automatically lose the game if any of the following conditions applies:
- An enemy Banner marker occupies the Governor's Palace area.
- The RP level falls below 1.
- The CM level falls below 1.
9.3 Your performance as Commander of Khartoum. If you have not won the game by holding out until the end of turn 12 (January 1885) or until the Relief Force arrives, you may nevertheless assess your performance by consulting the table below:
| Governor's Palace held until... | Your performance |
|---|---|
| December 1884 | Defeat with honour, Sire! The Queen honours you posthumously. |
| November 1884 | A pretty good job, old chap. Sorry you did not get out in time to have tea with Prime Minister Gladstone. |
| October 1884 | Not too bad. But the Queen will not compare you to Gordon Pasha at your funeral. |
| September 1884 | If by chance you survived, one may doubt that you will be offered anything other than a pen-pushing job in a dark and damp office in London on your return. |
10.0 Alternative / Optional Rules
10.1 Alternative difficulty levels.
- Difficulty level "The Lion Cub of Khartoum": if the game seems too difficult, during set-up set the City Morale and Resource Points levels to their maximum, i.e. 15 and 36 respectively.
- Difficulty level "The Lion King of Khartoum": if the game seems too easy, during set-up set the Banner strength levels as follows: Black and White: 10; Red and Green: 8; keeping the default levels for City Morale and Resource Points.
10.2 No event cards. If the game seems a little too random, play without the event cards. Do not play the Event Phase. You receive three Action Points per turn.
11.0 Appendix: Definitions of Game Terms
11.1 Action Outcome Tables (AOT). The Action Outcome tables, found on the play aids, are used to resolve the actions attempted in the game.
11.2 Action Points (AP). Action Points represent the opportunities to carry out certain decisive actions during the game. Action Points are generated by drawing an event card during the Event Phase (except on turn 1). The event card indicates the number of Action Points usable during the Action Phase. The number of Action Points can be tracked on the Action Points track printed on the map (red strip marked "ACTION POINTS").
11.3 Control of an area. An area under your control is an area not occupied by an enemy Banner marker and which bears a number lower than the one in which the Banner is currently positioned. Example: a Banner is positioned in area 5 of the Green Banner's path. You control areas 2, 3, 4 (and area 1, of course) of that path, but not areas 5 and 6. Any area that is not under your control is considered under enemy control.
11.4 Banners. Banners represent the enemy forces trying to advance towards Khartoum and the Governor's Palace. The combat strength of each Banner is tracked on the Banner strength tracks on the map. Banners may have two different states:
- Active.
- Disorganised.
The "Disorganised" state may result from your actions or be caused by an event card. A disorganised Banner receives a "Disorganised" marker and cannot be activated during the Banner Activation Phase. If a Banner's strength falls to zero, it is considered disorganised until its strength returns to at least 1. The strength of a Banner cannot be reduced below zero.
Designer's note: Historically, the Mahdist Army was organised into three main divisions called Banners (or Flags): the Black, Red and Green Banners. The White Banner, which is not historical, was added for the game.
11.5 Banner paths. A Banner path is a sequence of interconnected areas that manage the movement of Banners from their starting area (area 6) to the Governor's Palace (area 1). Each Banner has a specific path of the same colour as the Banner itself. Each Banner can only move along its own path. Khartoum's units do not move along these paths. Instead you deploy them directly into areas under your control (see 11.3), either in defence or to attack enemy Banners during the Action Phase.
Designer's note: Each turn of the game represents 3 to 4 weeks, which is enough time to move units where they are needed, so there is no need for movement factors such as those often found in simulation games.
11.6 City Morale Level (CM). City Morale represents the will of Khartoum's citizens and garrison to keep fighting, and their assessment of your command and management abilities. The City Morale level is tracked by placing the CM marker on the appropriate space of the City Morale track printed on the map. The CM level influences the die roll modifier (DRM) for certain actions. The DRM is shown in the black strip below each specific space of the City Morale track. Example: if the CM level is 6, the City Morale DRM is -2.
If the CM level falls below 1, you lose the game, because demoralised, the citizens and garrison of Khartoum prefer to surrender and beg the Mahdi for mercy.
11.7 Die roll modifier (DRM). A DRM is a number added to or subtracted from the result of a die roll (or rolls).
11.8 Friends / Enemies. The term "friendly" (or "under your control") refers to all areas and units that are under your control. The term "enemy" refers to Banners and areas under Mahdist control. The term Mahdist used in the rules and on the cards has as synonyms "Ansars" (the faithful) or "Dervishes".
11.9 Key areas. Key areas are identified by a star symbol. Example: Fort Omdurman is a key area. When a key area is occupied (conquered) by an enemy Banner, the City Morale level is reduced by one point. If an area conquered by the enemy returns to your control during the game, the City Morale level is increased by one point accordingly.
11.10 Resource Points (RP). Resource Points represent the reserves of food, ammunition, building materials and labour available to sustain the siege. Resource Points are spent to carry out most actions during the game. The number of Resource Points available is tracked by placing the RP marker on the appropriate space of the resource points track printed on the play aids. The RP level influences the die roll modifier (DRM) for various actions. The DRM for each RP level is shown below each specific space of the resource points track. Example: if the RP level is 31, the Resource Points DRM is +1.
If the RP level falls below 1, you lose the game immediately, because this means the garrison is short of ammunition and/or food and is forced to surrender.
11.11 Steps. "Steps" are the measure of your units' combat strength. They represent a unit's capacity to take losses before being eliminated. During the game your troops will be forced to take "step losses" as a consequence of your actions (Raids/Sorties) or because of enemy actions (Banner activations). When a step loss is taken, remove a two-step unit from the game and replace it with a one-step unit of the same type. Example: if a two-step Egyptian unit loses a step, it is replaced by a one-step Egyptian unit, and not by a Sudanese unit, Bachi-bouzouks or militia. You may freely distribute step losses among the units concerned, but you must always first distribute the lost steps to units that have two steps. Once no units at two steps remain among those concerned, you may assign losses to one-step units. A one-step unit that loses a step is eliminated.
Remember that only troops (Sudanese and Egyptian infantry, Bachi-bouzouks and militia) have steps. Losses concerning gunboats, Leaders and guns are handled differently.