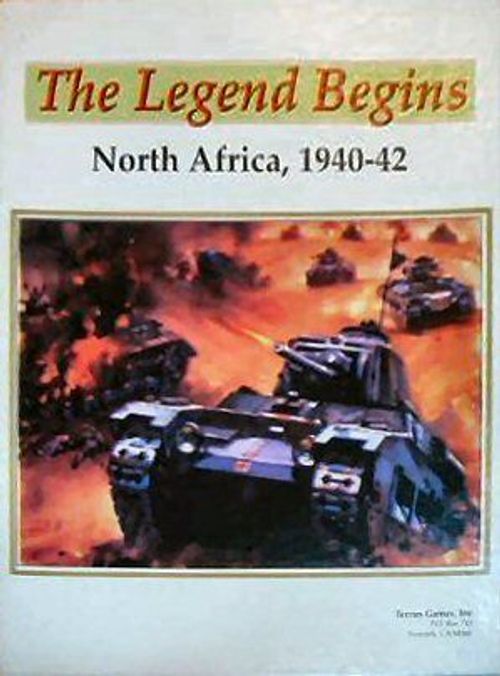
The Legend Begins: North Africa, 1940-42
The Legend Begins: North Africa, 1940-42 Rulebook
Table of Contents
Table of Contents
- 1.0 Introduction
- 2.0 The Playing Pieces
- 3.0 Sequence of Play
- 4.0 Movement
- 5.0 Stacking
- 6.0 Organization Cards
- 7.0 Zones of Control
- 8.0 Important Definitions
- 9.0 Basic Rules of Combat
- 10.0 Combat Modifiers
- 11.0 Retreats
- 12.0 Advance After Combat
- 13.0 Disruptions
- 14.0 Mobile Assaults
- 15.0 Selective Attacks
- 16.0 Special Unit Types
- 17.0 Italians
- 18.0 Field Works
- 19.0 General Supply
- 20.0 Supply Points
- 21.0 Trucks
- 22.0 The Railroad
- 23.0 Sea Movement
- 24.0 Ports
- 25.0 Anti-Shipping
- 26.0 Malta and Convoys From Italy
- 27.0 Off Map Boxes
- 28.0 Cadres & Replacements
- 29.0 Recovered Steps
- 30.0 Resource Points
- 31.0 Turn Record Track
- 32.0 Alexandria Garrison
- 33.0 Automatic Victory
- Advanced Rules
- 34.0 German Leadership & Tactical Superiority
- 35.0 Restricted Hexsides
- 36.0 Infantry vs. Armor
- 37.0 Combat Motorized
- 38.0 Diversionary Attacks
- 39.0 Fog of War (optional)
- 40.0 The Air Game
- 41.0 Reaction
- Special Rules
- 42.0 Railroad Construction
- 43.0 The Littorio Div.
- 44.0 The Italian 5th Army
- 45.0 Sonderverband 288
- 46.0 French Coastal Waters
- 47.0 6 Pounders
- 48.0 Vicissitudes of War
- 49.0 Air Transport
- 50.0 Invasion of Malta
- 51.0 Amphibious Raids
- 52.0 Lulls
- Designer's Notes
- Expanded Sequence of Play
- Terrain Effects Chart
- Resource Points
- Player Aid — Rule Updates & Quick Reference
1.0 Introduction
Parts Inventory: A complete game of The Legend Begins contains:
a. 1 map (in three sections) b. 480 units and markers (in 2 sets) c. 2 Organization Cards (Axis and Allied) d. 2 Status Cards (Axis and Allied) e. 1 Player Aid Card f. 1 Scenario Booklet h. 1 Rules Booklet
2.0 The Playing Pieces
COMBAT UNITS: These are the basic playing pieces in the game and are the primary elements whereby players get things done.
NON-COMBAT UNITS: These units have some of the characteristics of Combat Units with the important exception that they by themselves, can not impede enemy movement or enemy control.
MARKERS: The Markers are used for a variety of purposes, essentially they are play aids and their purposes are explained in the appropriate rule sections.
Sample Combat Unit: A combat unit's counter shows its Steps as a pair of numbers printed in the top corners, its unit-type symbol in the center, and along the bottom either its Combat Factor and Movement Allowance (e.g. 6-12), or, for a unit with separate attack and defense values, its I.D. code together with its Attack Factor and Defense Factor (e.g. 6-8-4).
2.1 How To Read the Units
COLOR: The color indicates the nationality of the Unit. The Allied Player's minor allies (Polish, Free French and Greek) share the same light blue color.
COMBAT FACTOR: A numeric rating of the unit's attack and defense strength. When the unit possesses different values for attack and defense, the values are printed separately as Attack Factor and Defense Factor.
MOVEMENT FACTOR: The number of Movement Points a unit may use during a Primary Movement Segment.
STEPS: The number of step losses a unit can receive before it is eliminated. A unit that receives a step loss is exchanged for the same unit, but at its next lower step level. Generally the next lower step is printed on the back side of the unit, but in cases where a unit originally possessed three or more steps, there is another substitute unit provided.
DIVISIONAL I.D.: Used in the Stacking rules as well as providing some historic flavor.
BRIGADE or REGIMENTAL I.D.: For historical purposes only.
Armor Effect Rating: Printed in a smaller size to the right of a tank, anti-tank or Divisional HQ unit's Combat Factor is its Armor Effect Rating. This value is used in combat to determine Armor Superiority. Also, note that Tank units do not have a Step indicator — this was left off for aesthetic reasons. All tank units have two steps, except for the German tank battalions (three steps).
Unit Size:
- Tank symbol = battalion (all tank units are battalion size)
- II = battalion
- III = regiment
- X = brigade
- XX = division
- XXX = corps
- XXXX = army
Note: that for game purposes a regiment and a brigade are equivalent in size.
Summary of Unit Types:
COMBAT UNITS: Infantry, Motorized Infantry, Machine Gun, Engineer, Armored Infantry, Reconnaissance, Tank, Anti-tank, Heavy Anti-aircraft, Artillery, Divisional HQ.
Infantry type units are: Infantry, Motorized Infantry, Machine Gun, Engineer and Armored Infantry. Anti-Tank, 88mm, Reconnaissance and HQ are not Infantry type units.
MOTORIZED OR NON-MOTORIZED: Combat Units are classified as either motorized or non-motorized. All Combat Units with a Movement Allowance of 4 or less are non-motorized, all others are motorized. Basically the classification effects the movement cost of terrain (see Terrain Effects Chart) and Advance After Combat (rule 12.0).
NON-COMBAT UNITS: Truck (movement allowance 0-12), Replacement Unit (strength 0-4).
Markers: Disrupted; Out Of Supply; Axis Control Crete; Malta Status (Luftwaffe); Improved Position; Fortification; Port Capacity; Interdicted Port (half Port Capacity); Damaged Tanks (Recovered Tank Steps); German Wounded (Recovered Infantry Steps); Game Turn; Railhead; Formation Marker; Supply Points.
3.0 Sequence of Play
The Legend Begins is played in Game Turns. Each Game Turn represents two weeks and is composed of an Initial Phase and an Operations Cycle. The segments of the Initial Phase may be performed simultaneously by the players — there is no action that will affect the opposing player. Both players must complete the Initial Phase before proceeding to the Operations Cycle.
3.1 Game Turn Sequence Outline
A. INITIAL PHASE
-
Replacement/Reinforcement Segment: Both players perform the following actions:
- Receive two Supply Points and one Resource Point at their Entry Box.
- Receive reinforcements, withdraw units, and convert units per the Reinforcement Schedule.
- Receive replacements according to the Replacement Table.
-
Recovery Segment: Both players receive up to half of their Recovered Steps back. They may be immediately used to augment combat units or converted into Replacement units.
-
Organization Segment: Both players may perform the following actions:
- Attach units to a Division by placing them on the Divisional Display (rule 6.2).
- Combat Motorize units (rule 37.0).
- Transfer steps between units of the same type and nationality (rule 28.11).
-
Malta Segment: Either the Axis Player will roll to reduce the Malta Interdiction Value or the Allied Player will roll to increase the Interdiction Value. Who rolls is dependent on the availability of the German "Luftwaffe" marker.
B. OPERATIONS CYCLE
The Operations Cycle is the heart of the game, it is when the units move and have combat. To begin, each player places his four segment chits in a cup (each player has two Primary, one Secondary, and one Tertiary chit). One of the players blindly draws one of the segment chits from the cup. The draw of the chit determines who moves and how far. For example, if the chit drawn is the Axis' Primary, then it is the Axis Player segment and his units may use their full Movement Allowance (see rule 4.0). When the player has completed his segment, another chit is drawn and that segment is then played. The Operations Cycle continues like this until seven out of the eight chits have been played — the eighth chit is not used (consider this eighth chit as lost opportunity from one sides lack of initiative).
When the seventh chit has been played the Operations Cycle is over and so is the turn.
There is one important restriction to the drawing of segment chits — no player may have three segments in a row. When a player gets two segments in a row, the next segment must be one of his opponents. If a friendly segment is drawn, simply return it to the cup and draw again. This two segment limitation applies even between two Game Turns, i.e. if a player ended the Operations Cycle with the last two segments, the first segment of the next Game Turn must be one of his opponents.
3.2 Sequence within a Segment
During each Segment the owning player performs the following phases in the order listed.
- Movement Phase
- Combat Phase
- Supply Phase
These phases are explained in the appropriate rule section. Please see the Expanded Sequence of Play in the back of the rules booklet for more detail.
4.0 Movement
4.1 Movement Procedure
Each unit has a Movement Allowance (MA) which is the maximum number of Movement Points (MPs) it may expend for movement during its Primary Segment. If a unit does not have enough MPs to enter a hex, it may not do so.
Once a unit has completed its movement, it may not be changed. A unit's movement is considered completed when the player begins to move another unit.
A unit may freely pass over or stop in the same hex as a friendly unit. A unit may not enter a hex occupied by an enemy unit.
There are four segment chit types: Primary, Primary, Secondary, and Tertiary.
4.1 The Segments
During a friendly Segment, any or all friendly units may be moved. Only in the Primary Segment may units move their full movement allowances. During the Secondary Segment units move two-thirds of their Movement Allowance. During the Tertiary Segment units move one-third of their Movement Allowance.
Infantry type units move 4 MPs during the Primary Segment, 3 MPs during the Secondary and 2 MPs during a Tertiary Segment.
Besides the reduced movement allowance, the Secondary and Tertiary Segments are nearly identical to the Primary Segment — in all segments there is a Movement, Combat and Supply Phase. There are some actions, however, that may only be performed in the Primary Segment. These are:
- Sea Movement
- Rail Movement
- Air Transport
- Special Truck Transfer
- Repair Ports
- Building Fortifications (note: Improved Positions may be built in any friendly segment)
These actions are explained later in the appropriate rules section.
4.3 Desert March Rate
Due to the harsh climate non-motorized units are severely restricted when moving off Track or Road. A non-motorized unit (not being transported) may move into a maximum of two non-road/track hexes per friendly segment.
4.4 Terrain Effects on Movement
A complete list of all terrain features and their affect on movement is contained in the Terrain Effects Chart.
Roads and Tracks: A unit that follows the path of a road or track may use that reduced movement rate and may ignore the cost of the other terrain. Note the small numbers printed on the map near the coast road, those are there to help players calculate their road movement cost.
Desert: No unit may move into more than two consecutive desert hexes in a friendly movement segment. After moving into its second desert hex, the unit must either stop or, if it can, continue movement in non-desert hexes. Movement in desert and non-desert hexes may be combined in a single segment in any manner, as long as the unit moved into no more than 2 consecutive desert hexes. The portion of the map delineated as desert was rarely traversed and generally unmapped.
Jebel and Sebakha: All units must stop and end their movement for that segment after entering a Jebel or Sebakha hex unless using the road or track rate.
Ridges and Escarpments: Units moving across Ridges and Escarpments (if eligible) may need to pay additional MPs besides the cost to enter the hex. A unit moving by road or track that crosses a ridge or escarpment may ignore the additional cost or restriction. A motorized unit may only move or Advance After Combat across escarpments at passes.
Railroads, Airfields, Ports, Towns, Landmarks & Cities: Have no effect on movement, but might have other functions which are explained under the appropriate rules section.
Exiting The Map: Units may only move off the map to enter friendly Off Map Boxes (rule 27.0). Units that are forced off the map by a Retreat are eliminated.
5.0 Stacking
Stacking refers to the placing of more than one unit in a hex.
5.1 Stacking Limits
Each side may have up to seven (7) Stacking Points in a hex at the end of their movement segments.
5.2 Stacking Points
- BATTALIONS = 1
- REGIMENTS/BRIGADES = 2
- DIVISIONS = 3
Headquarters, Supply Points, Trucks, and all game markers have no stacking value and may freely stack in a hex without limit.
5.3 Stacking Restrictions
The stacking limit can never be voluntary exceeded except during the course of movement. At the end of each friendly movement segment all stacking violations of that Player must be corrected by eliminating enough units to satisfy the seven stacking point limitation.
5.4 Division Stacking
Units of the same division stacked together with the divisional HQ are never valued at more than three stacking points total. Note, the Italian infantry divisions have no HQs, but may still benefit from this rule when the two regiments (or two/three regiments in the case of the Trento/Maletti Division) stack together.
EXAMPLE: Two brigades stacked together, each belonging to a different division, would have a stacking value of four. Three brigades and a divisional HQ stacked together, and all brigades belonging to that HQ, would have a stacking value of only three.
NOTE: Stacking represents more of a command control limitation that the actual limit of how many men and vehicles can fit in a hex.
5.5 Temporary Overstacking Caused by a Retreat
Units that become overstacked due to a Retreat (rule 11.0) are not immediately penalized. The owning player has until the end of his next Movement Phase to correct the overstacking. If the stack is attacked before it is corrected, only seven stacking points may defend in the hex (defender's choice) and the attacker receives a favorable shift of one column to the right on the CRT. All defending units are affected by the combat results.
5.6 Artillery Stacking
One artillery unit may stack for free (no stacking value) in each hex. Other artillery units in the hex count normally.
6.0 Organization Cards
6.1 Purpose
Each player is provided with an Organization Card for his multi-unit formations (mainly divisions). The cards are helpful for handling large stacks and for keeping units hidden from your opponent. Players use the card to indicate which units belong to which HQ. The HQ unit remains on the map while the subordinate units are placed on the Display. The units on the Display are considered in the same hex as the HQ for all purposes.
6.2 Entering and Exiting the Display
A unit on the map may enter the Display by moving to the hex where the HQ is located. If the unit has the same divisional I.D. as the HQ the transfer is immediate. If the unit does not have the same I.D., than the transfer to the display must wait until the Organization Segment of the Initial Phase.
Units may exit from a display during any friendly Movement Segment.
Example: The 7th Armored Division HQ is on the map currently representing four tank battalions, two mechanized infantry battalions, and a reconnaissance battalion. Its total strength would be 31 (30 for the combat units and 1 for the HQ).
6.3 Restrictions on Formation Composition
- Each formation may contain only as many units as it has boxes for.
- Each box may only contain a certain type of unit as described within the box.
- A German formation may not contain any Italian units and vise versa.
- A British division may contain only one non-British Allied brigade.
- A non-British Allied division may contain only one British brigade.
- A non-British Allied division may only contain units of that nationality, with the exception of case 5 above. For example, the New Zealand division could not contain any South African brigades. It could, however, contain one British brigade.
6.4 HQ Markers
All non-divisional formations use HQ Markers instead of HQ units. A HQ marker is not a Combat unit. It has no Combat Strength or Movement Allowance. These values are derived from whatever units constitute the formation. The HQ Marker has no Armor Effect Rating, no transport capability, and by themselves can in no way impede enemy movement — they are simply markers.
HQ Markers are kept off the map until used. They can be used at any time. Simply remove an applicable Combat Unit from the map and replace it with the HQ Marker. Units join and detach from the HQ under the same rules as Divisional HQs.
An empty HQ marker must be immediately removed from the map. It may be used again at any time — HQ Markers cannot be destroyed.
6.5 Tank and Recon Units
All tank and British recon units have no divisional I.D. These units do not have to wait until the Organization Segment to transfer to the Display, they may transfer during any friendly segment. They may be attached to any HQ that allows a unit of that type.
COMMENTARY: The British (and to some extent the Germans) shifted their tank and recon units between divisions constantly.
6.6 Substitute Units' Holding Boxes
There are two types — Specific and Generic.
SPECIFIC: Specific is for units which have three or four steps and two counters are provided so all steps can be represented. There should at all times be one unit in all the specific boxes. The other unit should be either in play, on the Reinforcement Track or in the Cadre Box. An empty box or a box with two units is a warning flag that something is amiss.
GENERIC: The Generic units are for all units that have more than two steps, but don't have a specific counter to represent them when they lose more than two steps. As with the boxes above, there should at all times be one unit in each box. Either the generic unit of the proper I.D., or the unit it is representing on the map.
7.0 Zones of Control
GENERAL RULE: The six hexes surrounding a hex occupied by one or more combat units constitute the Zone Of Control (ZOC) of those units. A ZOC represents artillery fire, enemy patrols and the ability of a mobile unit to react to or intercept enemy units in adjacent hexes.
Most motorized units have a special Active ZOC, all other combat units have a Limited ZOC.
7.1 Which Units Have ZOCs
Any combat unit with a white band across its counter has an Active ZOC. All other combat units have a Limited ZOC. All non-combat units and markers (including HQ Markers) have no ZOC.
7.2 Effects Of Limited ZOCs
- BLOCKS LOC: A Line of Communication (see 8.3) cannot be traced through an enemy ZOC unless that hex is occupied by friendly units.
- HINDERS MOVEMENT: Each time a unit exits an enemy ZOC it must pay additional MPs. Motorized units pay two additional MPs (+2 MPs) and non-motorized units pay one additional MP (+1 MP). There is no penalty to enter an enemy ZOC.
- ROADS & TRACKS: The Road or Track rate cannot be used when moving from one enemy ZOC directly into another enemy ZOC; however, the Road or Track rate may be used when entering or leaving an enemy ZOC.
7.3 Effects of Active ZOCs
An Active ZOC has all the same properties as a Limited ZOC, and in addition:
- STOPS MOVEMENT: A unit or stack that enters an enemy Active ZOC must stop and either end its movement or conduct a Mobile Assault (see 14.0) against an adjacent enemy unit. A unit which starts its movement in an enemy Active ZOC and wishes to move has three options: a) It may exit that ZOC via any non-Active enemy ZOC hex and continue moving normally (it may even reenter an enemy Active ZOC elsewhere). b) It may Mobile Assault (see 14.0) an adjacent enemy hex, hoping to either remove the enemy Active ZOC or escape from it. c) It may move directly into another enemy Active ZOC and stop. This movement requires the use of the unit's entire MA (and hence may not conduct a Mobile Assault after moving).
- MANDATORY COMBAT: (rule 9.1 case 2).
- HINDERS RETREATS: (rule 11.0).
Enemy Active ZOCs stop movement, enemy Limited ZOCs hinder movement.
7.4 Reducing And Negating ZOCs
- ESCARPMENT: An Active ZOC is reduced to a Limited ZOC when exerted up and over an escarpment hexside.
- JEBEL AND CITY: An Active ZOC is reduced to a Limited ZOC when exerted into or out of a hex with Jebel or City terrain.
- FIELD WORKS: An Active ZOC is reduced to a Limited ZOC when exerted into or out of a hex with a Field Work marker or a permanent Fortification (rule 18.0).
- DIRECT SUPPORT: A unit's Active ZOC is reduced to a Limited ZOC when the unit is placed in "Direct Support" of non-motorized units (rule 15.2).
- FRIENDLY UNITS: Friendly units negate enemy ZOCs in the hex they occupy for the purpose of Retreats (rule 11.0) and for tracing a LOC (see 8.3).
The 201st Guards Brigade has an Active ZOC. However, the Active ZOC is reduced to a Limited ZOC when it is exerted up and over an Escarpment hexside or into a hex with Field Works.
The 132nd Brigade has a Limited ZOC. However, the Limited ZOC is enhanced to Active ZOC status when it is exerted across and down an Escarpment hexside.
7.5 Enhancement Of Limited ZOCs
- A Limited ZOC is upgraded to an Active ZOC if it is exerted across and down an escarpment. This applies even if the unit is in Field Works. This reflects the advantage it would offer to artillery and heavy arms fire.
8.0 Important Definitions
8.1 Control of a Hex
A player has "control" of a hex if at least one of his units occupies the hex or one of his units was the last to pass through that hex. A friendly unit's ZOC is not by itself sufficient to take Control of a hex.
8.2 Friendly Map Edge
The Friendly Map edge for the Axis Player is the western edge (1701-1002). The Friendly Map edge for the Allied Player is the eastern edge (1678-Alexandria).
8.3 Line of Communication (LOC)
See updated rule on play aid at end of rule book.
IMPORTANT: A LOC may not be traced through sea hexes via ports.
8.4 Isolated
A unit which cannot trace a LOC is considered Isolated. Isolation effects Attrition (rule 19.6) and Delivery of Recovered steps (rule 29.4).
8.5 Regimental Equivalent
For convenience, one regiment or one brigade, or two battalions will hence forth be called a "Regimental Equivalent."
9.0 Basic Rules of Combat
GENERAL RULE: Your friendly units may attack adjacent enemy units in the Combat Phase.
9.1 Conditions & Restrictions
- LIMITED ZOC: A unit in an enemy Limited ZOC is never required to attack, but always has the option of doing so.
- ACTIVE ZOC: Combat is mandatory if friendly units occupy enemy Active ZOC hexes. All adjacent enemy units exerting Active ZOCs must be attacked.
- NON-PARTICIPANTS: Not all of the friendly units in a hex are required to attack. Some may attack while others in the same hex do nothing. Units which do not participate in the attack do not suffer any adverse effects from the attack.
- MULTI-HEX ATTACK (A): Not all of the friendly units in a hex are required to attack the same defending hex. Units in the same hex may attack adjacent defenders in different hexes.
- MULTI-HEX ATTACK (B): Attacking units may attack the same defending unit from as many different hexes as possible, provided all of the attackers are adjacent to the defender's hex.
- MULTI-HEX ATTACK (C): If a unit or stack is adjacent to more than one defending hex, it may attack those hexes in one single combat.
EXAMPLE: Unit A can attack units X and Y, units B, C and D can attack unit Z.
- COMBAT LIMIT: No enemy unit may be attacked more than once per segment and no friendly unit may attack more than once per segment (exception: Mobile Assaults, rule 14.0).
- COMBINED DEFENSE: All defending units in a hex must be attacked as one combined defense strength (exception: Selective Attacks, rule 15.0).
- ODDS LIMIT: Combat at odds less than 1-4 generate an automatic A1/Repulsed result. Combat at odds greater than 7-1 are resolved on the 7-1 column.
9.2 Procedure
STEP ONE: For each attack, compare the combined combat strength of the participating attacking units against the total defense strength of the involved defending units and express the comparison as a numerical odds ratio (attacker to defender). Round off this odds ratio downwards to conform to one of the odds ratio categories found on the CRT. Example: a 53 to 18 would be a 2-1.
STEP TWO: Take into account any column shifts (see Combat Modifiers) due the defending or attacking units. Example, one column shift for the attacker would bring a 1-1 to a 1½-1. If both sides have column shifts than subtract the lesser from the greater to obtain the final number of shifts for one side.
NOTE: Column Shifts are applied after odds computation. Therefore, an attack which had 12-1 odds with one column shift left would use the 6-1 column.
STEP THREE: The attacking player rolls the required number of dice (see Magnitude) and reads the results on the appropriate row under the odds. Roll a white die or dice to determine step losses. Roll a black die to determine the victor of the combat.
STEP FOUR: The results are implemented. Players immediately remove any step losses, and perform (if any) Retreats or Advances After Combat (rules 11.0 and 12.0).
9.3 Magnitude
The Combat Table is essentially designed for battles where one side or the other has three to five steps. To resolve larger battles — more dice are rolled; to resolve smaller battles — players modify their one roll.
The number of combat steps involved in a Combat determines the number of die rolls the attacker will make on the Combat Table. Take whichever side (attacker or defender) has the fewest steps involved, and use that total to find the number of die rolls from the Magnitude Chart (next to CRT).
EXAMPLE: If 20 steps attacked 9 steps it would be a Magnitude 2 combat.
SUB-ONE: When resolving combat where one side has only one or two steps, each player reduces his step losses by one. Example, a result of "A1/D4" would reduce to "D3".
9.4 Combat Results
The A/D results on the CRT express step losses. For example, an A1/D2 means the Attacker loses one step and the defender loses two steps. When performing a combat with two or more white dice, simply add together the total number of steps from each result to obtain the grand total. For example, a Magnitude 3 combat with results of A1/D2, D1, and A1/D3 would have a grand total of A2/D6.
The results in italic express who won the combat. If it reads "Advance" or "Overrun" then the attacker has won. If it reads "Repulsed" then the defender has won. If it reads "Engaged," then neither side wins.
- Overrun = The defending units Retreat (rule 11.0) and becomes Disrupted (rule 13.0). The attacking units may then Advance After Combat (rule 12.0).
- Advance = The defending units Retreat and become Disrupted, the attacking units may occupy the defender's vacated hex.
- Repulsed = The attacking units becomes Disrupted and may retreat if the attacker desires.
- Engaged = Neither side retreats or becomes Disrupted.
9.5 Distributing Losses
Both players have a hand in determining which units receive the step losses. The owning player always picks each even numbered loss, and the opposing player picks each odd numbered loss. For example, if the attacker has to lose five steps, then he may pick the second and fourth loss; while his opponent picks the other three.
RESTRICTIONS:
- No unit can take a second step loss in a single combat until all other friendly non-HQ/Artillery units in that hex have taken their first.
- HQ and Artillery units cannot be chosen for a step loss until all other friendly units in that hex have been eliminated.
- German 88mm Flak units cannot be chosen until all other non-HQ/Artillery units in that hex have taken at least one step loss.
NOTE: Non-Combat units cannot be removed to satisfy a step loss. These units are automatically removed if their accompanying combat units are eliminated.
9.6 Poor Odds Attacks
Friendly units in an enemy Active ZOC, and unable to achieve odds of at least 1-4, must perform a "Poor Odds" attack. Poor Odds attacks generate an automatic A1/Repulsed result (see 9.1 case 9). Magnitude has no affect.
Poor Odds attacks are performed before regular combat, so a Poor Odds attack can not be used as a "soak off" (i.e. you cannot attack some enemy units at less than 1-4, so other attacks can be made at greater odds).
10.0 Combat Modifiers
10.1 Rounding Fractions
Whenever a unit's attack or defense strength needs to be halved, round each individual unit UP for both the defender and the attacker and add the totals together.
10.2 City & Jebel
Units defending in a city or Jebel hex receive one shift to the left on the Combat Result Table.
10.3 Escarpment, Ridge & Sebakha
All units attacking up and across an Escarpment or Ridge hexside or out of a Sebakha hex have their combat strength halved.
10.4 Armor Superiority
In a Combat where one side has a unit involved that has a greater Armor Effect Rating than any of the opposing units, then that side is said to have Armor Superiority. Armor Superiority entitles that player up to two shifts in his favor on the CRT. The number of shifts is determined by taking the difference between the best Armor Effect Rating amongst his units and the best Armor Effect Rating amongst the opposing units. If the difference is one factor, then the player receives one shift. If the difference is two or more factors, than the player receives two shifts.
Note that only one unit is used on each side to determine the differential, it does not matter how many more tank or anti-tank units one side has than the other.
EXAMPLE: two German 9³-12 panzer battalions attack a British 5¹-12 tank regiment. Odds would be 18 to 5 or 3-1, with two shifts for the German player, bringing it to a 5-1.
EXAMPLE: An 88mm Flak unit (2⁴-12) is attacked by a British tank regiment (6²-12). The odds would be 6 to 2 or a 3-1 with the defender (the 88mm) receiving two shifts, bringing it to a 1½-1.
10.5 Heavy Artillery Barrage
If the defending hex contains Field Works, the attacker may declare a Heavy Artillery Barrage if he has an artillery unit participating. The artillery unit must be on its zero MA side (see rule 16.2). A Heavy Artillery Barrage can provide either one, two or three shifts on the CRT depending on the number of Supply Points expended (rule 20.0).
- 1 Shift = 1 Supply Point
- 2 Shifts = 2 Supply Points
- 3 Shifts = 4 Supply Points
10.6 Air Support
The attacker increases his combat strength by the number of Support Factors from Air Units on Ground Support. See Air Rules for complete details.
10.7 Disruption
Disrupted units may not attack and if attacked they defend at half strength (rule 13.2).
10.8 Italians
The attack strength of Italian units is often dependent on the result of the Italian Table (rule 17.1). The defense strength of Italian units can be halved if Isolated (rule 17.2).
10.9 Field Works
Units may be doubled or Tripled in Field Works (rule 18.0). Tank units are halved when defending in Field Works.
10.10 Overstacked
If the defending hex contains more than seven stacking points the attacker receives one shift (rule 5.5).
10.11 Supply
Units attacking without Attack Supply have a reduced Attack Factor (rule 19.5 case 3). If all defending units are marked Out Of Supply, then the attacker receives 1 shift (rule 19.5 case 5).
11.0 Retreats
11.1 Who Retreats
If the CRT indicates "Advance" or "Overrun" then the defender must Retreat. Attacking units always have the option to Retreat on any result except "Engaged."
11.2 Length of Retreats
Defending units which must retreat and attacking units which opt to retreat are retreated two hexes. There are two exceptions (see case 2 and 3 under Retreat Guidelines).
11.3 Disruption
All units which retreat become Disrupted (rule 13.0).
11.4 Retreat Guidelines
The Retreat direction is always determined by the owning player but must follow, if possible, the guidelines below (listed in order priority).
- Avoid entering enemy ZOCs if possible.
- Units are not retreated the second hex, if that additional hex will cause any step losses.
- Units are not required to retreat the second hex if the first hex is Jebel or City terrain or the hex contains a friendly Field Work.
- Units that are the target of a Selective Attack (rule 15.0) do not Retreat. Instead, place the units under the non-motorized units.
- Supply Points with the stack are only Retreated if they can be carried by a Truck.
- Units may never Retreat into or through enemy units, off the map or into hexes normally prohibited to them in movement; units that cannot Retreat are eliminated.
11.5 Retreat through Enemy ZOCs
If a retreating force has no other option then to retreat through enemy ZOCs, then the owning player may do so. A retreat through enemy ZOCs has no penalty unless the retreating force enters an "Interlocking Enemy Active ZOC." Interlocking Enemy Active ZOCs occur where an Active ZOC is exerted into a hex from two enemy occupied hexes which are not adjacent to each other (see diagram below).
Units which retreat into or through an Interlocking Enemy Active ZOC will lose one step for each enemy motorized step in one of the hexes forming the Interlocking Enemy ZOC (use the hex with the fewest enemy motorized steps). Motorized steps in Direct Support (rule 16.2) or Disrupted (13.0), or in Field Works are not counted and have no effect on Retreats.
Losses caused by this are distributed the same way as in 9.5.
11.6 Combat Against Previously Retreated Units
If a unit or stack is Retreated into a friendly occupied hex and that hex then undergoes an attack in the same Combat portion of the Segment, the Retreated unit(s) do not add their strength or size (for Magnitude purposes) to the combat. However, if that hex must Retreat, the previously Retreated units are again retreated.
NOTE: The above rule does not apply to Retreats made from Mobile Assaults. Units that Retreat from an Mobile Assault are always figured into any subsequent Mobile Assault.
Retreating units can finish their retreat overstacked when the retreat into other hexes would cause any additional step losses because of an interlocking Active ZOC.
12.0 Advance After Combat
12.1 Who May Advance
Advance After Combat is allowed to the Attacker whenever an Advance or Overrun result is indicated on the CRT. Eliminating all defending units in a hex does not by itself earn Advance After Combat priviledges. Defending units never advance.
12.2 When Advances are Performed
The option to Advance After Combat must be exercised immediately, before any other combat situations are resolved.
12.3 Length of Advance
If the CRT result was "Advance," then Advance After Combat is limited to entering the defender's vacated hex. If the result was "Overrun," then the units may advance accordingly:
- Non-motorized infantry, non-deployed artillery, supply w/truck unit, and HQ may only advance one hex.
- Motorized units, and all tank units with a MA of 9 may advance two hexes.
- All other tank units and Reconnaissance units may advance three hexes.
Maximum advances on an Overrun result.
12.4 Procedure
Advancing is determined in hexes, not by Movement Points. Terrain cost, and the +2 MP for exiting an enemy ZOC is ignored.
12.5 Guidelines and Restrictions
- PROHIBITED TERRAIN: No unit may advance into a hex or across a hexside that is normally prohibited to it in normal movement.
- DEFENDER'S HEX: The first hex of the advance must be into the hex which was attacked.
- JEBEL: A unit which advances into a Jebel hex (road or non-road) must stop its advance in that first Jebel hex.
- ACTIVE ZOCS: Enemy Limited ZOCs never affect an advance, enemy Active ZOCs do. Advancing units may ignore enemy Active ZOCs in the vacated hex. After that, all advancing units must stop their advance if they enter an enemy Active ZOC. This will guarantee motorized units a two hex advance unless blocked by terrain or enemy occupied hexes.
- SELECTIVE ATTACKS: (rule 15.0) Attacking units that are victorious in a Selective Attack may not Advance.
13.0 Disruptions
13.1 How Units Become Disrupted
Defending units become Disrupted if they retreat, and attacking units become Disrupted on "Repulsed" results. Indicate Disruption by placing a Disruption Marker on top of the units.
13.2 Effects
- They may not attack and if attacked they defend at half strength (round fractions up).
- They may not receive Replacements or build Field Works.
- If Motorized, they lose their Active ZOC (they still have a Limited ZOC).
- They may not end their movement in an enemy Active ZOC unless they are stacked with non-Disrupted units or in a friendly Field Work. If they cannot move away — they are eliminated.
- Disrupted Artillery units may not generate a Heavy Barrage shift.
- Non-Combat units are not affected by Disruptions.
13.3 Abilities
Disrupted units may move normally. Units may enter or pass through friendly Disrupted units without becoming Disrupted.
13.4 Removal
Disruption markers are removed from all friendly units at the end of each friendly segment (during the Supply Phase). Exception, units which became Disrupted in the preceeding combat phase due to a Repulsed result, must wait until the end of the next friendly segment to remove their Disruption marker (i.e., all units are Disrupted for at least one friendy segment).
Supply, Isolation and enemy ZOCs have no effect on the removal of Disruption markers.
14.0 Mobile Assaults
Mobile Assaults are a form of combat allowed during the Movement Phase.
14.1 Who May Mobile Assault
Only motorized units and those non-motorized units being transported by Trucks (rule 21.0) may Mobile Assault.
Only one unit or stack may participate in a Mobile Assault. A unit may pick up other friendly units while it moves in order to form a stack before the Mobile Assault, however, the units picked up are considered to have expended the same number of MPs as the stack has at the moment of the union.
14.2 MP Cost to Overrun
The Movement Point cost to Mobile Assault is equal to the MP cost to enter the hex plus two MPs (Terrain Cost +2 MPs). Note, do not add 2 MPs for exiting an enemy ZOC when calculating the cost to enter the defender's hex, this is already represented by the +2 MP to Overrun.
Units may not Mobile Assault into hexes or across hexsides prohibited to motorized units.
14.3 Initiating a Mobile Assault
When a unit or stack wishes to Mobile Assault, stop adjacent to the target hex, pay the MP cost and immediately resolve the Mobile Assault. Mobile Assaults are allowed at any odds (if using Fog of War options it is likely you will not know the odds until the Mobile Assault is resolved).
For Mobile Assault purposes only, mandatory combat due to an Active ZOC is ignored. That is, a stack about to Mobile Assault is not required to attack all adjacent units with an Active ZOC.
An attacker successful in a Mobile Assault can enter the hex occupied by the defender even if it is an "Active ZOC to Active ZOC" movement and that unit can continue its movement or conduct another MA.
14.4 Resolving a Mobile Assault
Mobile Assaults are resolved similar to normal combat with the following exceptions:
A. The attacker may not use Air units. (Artillery is allowed). B. The attacker has his Attack Strength halved. If the Attack Strength has already been halved due to a Combat Modifier — then halve it again. C. "Advance" results are treated as "-" results. D. Neither side suffers Disruption.
Step loses are applied normally. The defender only retreats if an "Overrun" result is achieved.
If the Mobile Assault achieves an "Overrun" result, the attacker may then continue his movement from the defender's vacated hex or from the hex the Mobile Assault occured from (his choice). If an "Overrun" result is not achieved, then the units which performed the Mobile Assault must seize movement.
14.5 Multiple Mobile Assaults
Units which Mobile Assault (and achieve an Overrun) may conduct another Mobile Assault if they have sufficient MPs remaining; they may even Mobile Assault the same unit again. All units that Mobile Assault are eligible to attack during the Combat Phase. The attacker may even target defending units that were Mobile Assaulted during the Movement Phase.
15.0 Selective Attacks
GENERAL RULE: When a defending stack is composed of units with both a Limited and an Active ZOC, the attacker may perform a Selective Attack against one or both groups.
15.1 Types of Selective Attacks
There are two types of Selective Attacks. Both use all rules of normal combat.
- He may attack just the units exerting the Active ZOC. The units with just a Limited ZOC are completely ignored. If a Retreat is called for, the defending units with an Active ZOC are not retreated, but instead are placed underneath the defending units with a Limited ZOC. There is no Advance After Combat.
- He may split the attack into two separate combats — one against the units with an Active ZOC, and one against the units with a Limited ZOC. The units with an Active ZOC must be attacked at odds of at least 1-3. There are no Retreats or Advance After Combat unless both attacks result in a Retreat for the defender.
15.2 Direct Support
The defender can avoid Selective Attacks by placing his motorized units in "Direct Support" of the non-motorized units, in which case the stack must be attacked as one combined defense strength. Indicate motorized units acting in Direct Support by placing them underneath the non-motorized units.
All the Motorized units in Direct Support lose their Active ZOC (but retain their Limited ZOC).
15.3 Acting Independently
Indicate motorized units that are acting independently by placing them above the non-motorized units in the stack. These units retain their Active ZOC, but they may be the target of a Selective Attack.
The three stacks above have different characteristics. Stack (A) exerts a Limited ZOC, but all units must be attacked as one combined defense strength. Stack (B) has an Active ZOC, but the reconnaissance unit could be attacked separately without involving the other two units. Stack (C) has an Active ZOC, but again, the stacked could be attacked without involving the infantry brigade (however, both motorized must be attacked). In all cases, any attack against the infantry brigade must involve the motorized units (either separately or combined into one attack).
15.4 Adjusting Stacks
Players are allowed, within limits, to rearrange the placement of their units within a stack during the opponents movement.
Each stack may only be rearranged once per enemy segment. If the opposing player asks about the arrangement of the stack, and the arrangement either changes or remains the same, then it can no longer be changed in that segment.
15.5 Selective Mobile Assaults
A Mobile Assault can be directed against those defending units in the stack exerting an Active ZOC and ignore the others. The MP cost to make a Selective Mobile Assault is the same as a normal Overrun (terrain cost plus two). If the Mobile Assault is successful the Mobile Assaulting units may not advance into the defender's hex; they may, however, continue moving.
When motorized units stacked with non-motorized ones are acting independently, and a selective attack is conducted against those motorized units, artillery units deployed to their non-mobile side in that hex can support them.
16.0 Special Unit Types
16.1 Reconnaissance Units
Reconnaissance (or Recon) units have the ability to avoid combat. If the defending hex consist only of Recon units, and the attacker achieves either an Advance or Overrun result, the Recon unit is said to have avoided combat and all step losses for both sides are ignored. However, the Retreat and the Advance After Combat are performed normally and the Recon unit does suffer Disruption if the CRT result was "Overrun."
Disruption has no affect on a Recon unit's ability to avoid combat. Avoiding combat is compulsory for a Recon unit if the conditions apply. Recon units out of supply lose their ability to avoid combat.
A Recon unit may not avoid combat if it is stacked with other non-recon units (exception: see below), in Field Works, or is in a situation where retreating would eliminate the unit. The combat is resolved normally in those cases.
If a Recon unit is the only unit operating independently in a stack and becomes the target of a Selective Attack (rule 15.0) which results in a Retreat, then it avoids combat and is placed underneath the stack (rule 11.4 case 4). Recon units do not have any AT capacity (they're rebuilt by tank replacement) (See 16.5)
16.2 Artillery Units
Artillery units have two sides — if an artillery unit does not move during a friendly segment, it may be flipped over to its zero MA side where its Attack Factor and Defense Factor are increased.
Artillery units have a range of one — they may contribute their Attack Factor, Defense Factor and Heavy Barrage potential to an adjacent hex.
Each artillery unit may contribute its Attack Factor to one attack during the friendly combat phase. More than one artillery may contribute to a single attack. Each artillery unit may use either its Attack Factor or Barrage Shift — not both.
Each artillery unit may contribute its Defense Strength to all adjacent defending hexes during the enemy combat phase. No more than one artillery unit may contribute its strength to each hex.
An Artillery unit may only provide a Heavy Artillery Barrage when on its non-mobile side. An Artillery unit that is forced to retreat is immediately flipped to its mobile side.
Artillery Factors and/or Ground Support Factors as a whole may not exceed the printed ground strength — excess AF and/or GSF are ignored.
16.3 Army HQs
There are three functions for Army HQs: 1) a source of General Supply (rule 19.0); 2) augmenting a Line of Supply (rule 19.2); and 3) an entry location for units returning from the Cadre Box (rule 28.5).
An Army HQ can never be eliminated. If caught alone in a hex by an enemy unit it is placed in any friendly Off Map Box. Army HQs may not be Disrupted.
Players may disband his Army HQ voluntarily in any friendly segment at the beginning of the Movement Phase. Disbanded HQs are immediately replaced in any friendly Off Map Box, but can not be moved in that segment.
16.4 Armored Infantry
Although not printed on the counters, all Armored Infantry type units have an inherent Armor Effect Rating of 1.
16.5 Anti-Tank Guns
All non-tank units with an Armor Effect Rating (including Armored Infantry) derive their rating from anti-tank guns. Anti-tank guns have the following restrictions and benefits:
- The Armor Effect Rating of non-tank units are reduced by one when attacking.
- Non-tank units may only use their Armor Effect Rating if there are enemy tank units involved in the combat.
- Non-tank units in Improved Positions (rule 18.2) and non-tank units attacked by a pure armored force (rule 36.2) have their Armor Effect Rating increased by one.
16.6 Engineers
The Italian Guastatori engineer battalion and all Divisional HQs have their Attack Factor doubled when attacking Improved Positions and their Attack Factor tripled when attacking Fortifications.
16.7 Gurkha Battalions
The two Gurkha battalions have their Attack Strength doubled if the defending stack contains any Italian units. The Gurkhas were excellent troops and feared by the Italians.
16.8 Amphibious Units
The Royal Navy Marine Battalion and Kampfgruppe Hecker are the only two units which may perform amphibious raids (rule 51.0). These two units only enter play if purchased (see 51.1 case 3).
17.0 Italians
COMMENTARY: The Italian Army had serious weaknesses in equipment and morale that is not fully shown by their combat strength. Once the Germans arrived their was also the problem of cooperation — having to be rescued in Africa and then told what to do in their theater of war, made the Italians a bit on guard with the Germans. Consequently, Rommel had difficulty using the Italians in any offensive role. Some Italian divisions were kept from his direct command, and others simply disobeyed his orders.
IN GENERAL: Whenever Italian units attack, the Axis Player must roll on the Italian Table for the effectiveness of the Italian units. If Italian units are Isolated at the moment of combat their defense strength is halved.
17.1 Italians Attacking
After announcing the attack, but before calculating odds, the Axis Player rolls one die and consults the Italian Table. Use that one result for all Italian units participating in that attack. Each separate attack involving Italian units requires its own separate roll on the Italian Table.
ITALIAN TABLE MODIFIER: If there are no Germans involved in the attack, add +2 to the die roll. Obviously, this modifier will be in affect in all 1940 scenarios.
NOTE: It may be necessary for the Axis Player to perform all his attacks involving Italian units first, in case the Italian units are not able to achieve at least 1-4 odds and fail to provide a necessary soak off attack.
EXAMPLE: The two Italian units plus the German unit attack the Allied brigade. The Axis Player rolls a "2" on the Italian Table, which results in the Italians not participating. The final odds would be 7-8 (or 1-2).
17.2 Italians Defending
Italian units that are Isolated at the moment of combat, and are not stacked with German units, have their defense strength halved (round fractions up). Italian units stacked with any number of German combat units are not affected by this rule. The Italian forces would often crumble in desparate situations unless buttressed with German units.
18.0 Field Works
DESIGNER'S NOTE: Each player is supplied with only ten Field Work markers. This limitation is intentional to prohibit players from an overzealous defensive policy — any general putting too much effort into defense would have been relieved of command.
IN GENERAL: There are two types of Field Works — Improved Positions and Fortifications.
18.1 Properties Common to Both Types
- Non-permanent Field Works may not be captured and used by the opposing player — they are only friendly to the side that built them. Permanent Field Works may be captured and used by the other side.
- Friendly Field Works do not cost any extra MPs to enter or leave.
- The effects of Field Works apply to the whole hex, it does not matter whether units are stacked above or below the Field Work marker.
- Active ZOCs are reduced to Limited ZOCs when exerted into or out of a Field Work.
- IMPORTANT: All Tank units defending in a hex with a Field Works marker are halved (round fractions up). Total all tank units before halving. Units with 0 AT rating in an improved position have their AT rating increased to 1.
18.2 Improved Positions
- DOUBLED: All units stacked with an Improved Position marker have their Defense Strength doubled. Tank units in Field Works are halved, so the doubling would bring them to their original strength.
- ANTI-TANK BENEFIT: Non-tank units have their Armor Effect Rating increased by one.
HOW TO BUILD: An Improved Position can be built in any type of terrain. Any non-disrupted infantry-type unit that foregoes all movement during a friendly segment may build an Improved Position. No attacks are allowed out of the hex during the segment it is built. The Improved Position is considered completed as soon as the owning player indicates the building unit will not move. Enemy ZOCs (both types) and supply have no effect on the ability of a unit to build an Improved Position.
REMOVAL: An Improved Position is removed whenever it is left unoccupied or when an enemy unit enters the hex.
18.3 Fortifications
- TRIPLED: All units stacked with a Fortification have their Defense Strength tripled. Half tank units before tripling.
- NO ARMOR SUPERIORITY: No Armor Superiority shifts are possible (for either side) when the defender occupies a Fortification.
- VACANT: Fortifications may be left vacant (they represent minefields). Vacant Fortifications have an intrinsic defense strength of 1. Treat a vacant Fortifications just like you would a one step unit (for Magnitude purposes, for tracing a Supply or LOC path, and for negating an enemy ZOC during a Retreat).
- ATTACKER'S STEP LOSSES DOUBLED: The attacker doubles his step losses when attacking Fortifications (an A0 would become an A1). EXAMPLES: An A2/D1 would become an A4/D1. An A1/D1 against a Minefield would first reduce to A0/D1 (for Sub-one) then increase to A1/D1 for the fortification.
EXAMPLE: The 9³-12 and the two 7-8-4's attack the 6-8-4 and the 6¹-12 in the Fortificaion. The 6²-12 is halved before tripling. The final odds would be 23 to 33 (or a 1-2).
HOW TO BUILD: Fortifications may only be built on Improved Positions. Any non-Disrupted infantry-type unit that has a Line of Supply (rule 19.2) and a LOC to his friendly map edge, and forgoes all movement during a friendly Primary Segment may build a Fortification. No attacks are allowed out of the hex during the segment it is built. Fortifications cost one Resource Point (rule 30.0) per hex. The Fortification is considered completed as soon as the owning player indicates the building unit will not move and spends the Resource Point.
REMOVAL: A Fortification is removed the instant an enemy unit enters the hex.
18A Permanent Fortifications
Bardia, Mersa Matruh and the three hexes surrounding the port of Tobruk are permanent Fortifications. Permanent Fortifications act like normal Fortifications in all respects except they may not be destroyed. See updates to rule on play aid at end of rule book.
At the start of each scenario, the Permanent Fortifications belong to the player listed in the scenario instructions. The opposing player must treat any vacant Permanent Fortification hexes the same as a vacant Fortification marker (an intrinsic strength of one).
TOBRUK: The Fortification benefits of Tobruk are only applicable if the enemy units are attacking across the black solid line which indicates the Tobruk Perimeter. A player is free to build Improved Positions and Fortifications inside Tobruk so as to have the all-round defensive benefits of normal Field Works.
19.0 General Supply
All units need to be in General Supply during their friendly Supply Phase or they will suffer the affects of rule 19.5.
19.1 How to be in General Supply
A unit is in General Supply if it can trace a Line of Supply (rule 19.2) to a Supply Source (rule 19.3).
19.2 Line Of Supply
A Line of Supply is a path of consecutive hexes from the unit to the Supply Source. The path may not enter an enemy occupied hex, a vacant hex in an enemy ZOC, enter more than two consecutive desert hexes, nor cross an all-sea hexside.
The length of the path is determined by the Supply Source. A Line of Supply to an Army HQ can be up to nine motorized MPs or four hexes long (which ever is longer). A Line of Supply to any other source can be a maximum of four motorized MPs or 2 hexes (which ever is longer). The +1 or 2 MP cost for exiting an enemy ZOC is always ignored when determining the length of a Line of Supply.
19.3 Supply Sources
Each Supply Source can provide General Supply to an unlimited number of units.
- A friendly map edge.
- A friendly Army HQ if it has an overland LOC to the friendly map edge.
- A friendly Supply Point.
- A friendly port hex if the port has a capacity (rule 24.1) greater than zero. Port Supply is not always available (see 19.7).
Note that the new LOC rule (see updated rule 8.3) makes it easier for supply units to become isolated and hence consumed when supplying isolated units.
19.4 Supply Points for General Supply
A Supply Point can provide General Supply to an unlimited number of units. A Supply Point is never removed for providing General Supply unless the Supply Point is Isolated (rule 8.4) and provides General Supply to one or more units during a friendly Supply Phase.
19.5 Effects of Being Out of Supply
Units which are not in General Supply during their friendly Supply Phase are marked with an Out of Supply marker and are affected by penalties below:
- The unit may move a maximum of two hexes unless being transported by Sea, Rail or a Truck unit which is not Out of Supply.
- The unit may advance only one hex.
- The unit's Attack Factor is equal to its step value. For example, a four step infantry brigade would have an Attack Strength of four.
- The unit's Armor Effect rating is reduced to zero.
- The attacker receives a favorable shift of one column to the right if all participating defending units are marked Out of Supply.
- If the unit is Out of Supply and Isolated, it will suffer Attrition (see below).
19.6 Attrition
A unit which is Out of Supply and Isolated will suffer Attrition. Attrition occurs each friendly Supply Phase, starting with the first Supply Phase it was found to be Isolated.
For each applicable unit, the owning player rolls a number of dice equal to its step value. For each die roll equal to or less than its Attrition Value, that unit loses one step.
ATTRITION VALUES: 1 = German units. 2 = Allied units. 3 = Italian units.
When rolling for the attrition of a stack, roll for the replacement units in that hex.
EXAMPLE: A four step German regiment and a three step Italian regiment must check for Attrition. The Axis Player rolls four dice for the German regiment with each "1" rolled causing one step loss. The Axis Player then rolls three dice for the Italian regiment with each 1, 2 or 3 causing a step loss.
ATTRITION DIE ROLL MODIFIER: Subtract one from each die roll if the unit is currently Disrupted.
19.7 Port Supply
Each port that is used to provide General Supply during a Primary Segment, must be checked for Supply Availability. Supply Availability is not checked during Secondary and Tertiary segments, it is assumed to be available at those times. To check for Availability, the owning player sails a hypothetical convoy to the port and rolls on the Anti-Shipping Table (rule 25.0). If the AST result is "-" or "2", then General Supply is available. If the AST result is a 3, 4 or 5 then General Supply from that port hex is not available and the units (if Isolated and unable to draw General Supply from a Supply Point) will suffer Attrition.
EXAMPLE: The Allied Player has six REs besieged in Tobruk and it is an Allied Primary Segment. During his Movement Phase he sails a Supply Point into the port. Now it is his Supply Phase, rather than spend the Supply Point for General Supply, he first checks to see if the Port can provide General Supply. He rolls on the AST table (under the Tobruk column using the appropriate airfield modifiers) and the result is a "3" — indicating General Supply is not available. He now has a choice — he can burn the Supply Point to provide General Supply, or he can put the six REs Out of Supply and resolve Attrition against them. Had this been a Secondary or Tertiary Segment, General Supply through the port would have been automatic.
19.8 Removing Out of Supply Markers
All units which can trace a Line of Supply during a friendly segment to a General Supply Source are immediately resupplied and can remove their Out of Supply Markers. A unit which removes the marker during a Movement Phase has its MA halved (round fractions up) for that Movement Phase.
20.0 Supply Points
IN GENERAL: Supply Points are used for Attack Supply and to provide General Supply.
20.1 Receiving Supply Points
Each turn during the Replacement/Reinforcement Segment, each player receives two Supply Points at his Entry Box (see 26.3).
20.2 Characteristics
Each supply unit has a front and back side which indicates the number of Supply Points it is currently representing.
Each player is supplied with only ten supply units. This limitation reflects the fact that Africa was just one theatre of many during WWII. Supplies not needed in Africa were dearly needed elsewhere.
When a player captures one of his opponent's Supply Points he must replace it with one of his own. If a player is to receive Supply Points and he has none available (all are being used), the Supply Points are forfeited.
Supply units have no stacking value, no combat strength, no step to lose in combat, and by themselves do not impede enemy movement in any way. If caught alone in a hex with an enemy unit they will either be captured or destroyed (see Supply Demolition).
Supply Points may be moved in one of four ways:
- Trucks (rule 21.0)
- The Railroad (rule 22.0)
- Sea Movement (rule 23.0)
- Air Transport (rule 49.0)
The details of Transporting are discussed in the appropriate section.
20.3 Attack Supply
For a unit to participate in Combat at full strength, it must be in Attack Supply. To be in Attack Supply the unit must be able to trace a Line of Supply to a Supply Point at the instant of the combat. If tracing to a Supply Point located with the Army HQ, the Line of Supply may be up to 9 motorized MPs or 4 hexes long (which ever is longer). If tracing to any other friendly Supply Point, the Line of Supply may not be longer than 4 MPs or two hexes.
If an attack results in two or more step losses (count attacker and defender losses), then the supply unit is removed before it can provide attack supply to any other attacks.
A Supply Point may move in the segment that it provides Attack Supply. Only attacking units need Attack supply, units never consume supply or need to trace a Line of Supply in defense. Units in General Supply but attack without Attack Supply (either voluntarily or not) have their Attack Factors halved (Armor Effect Ratings are unaffected).
Mobile Assaults do not require Attack Supply. A unit in General Supply can Mobile Assault without the need to trace a Line of Supply at the moment of combat.
DESIGN NOTE: This gives a unit that is temporary surrounded one friendly segment (at halved strength) to get back in supply. If not in General Supply by the end of the segment, it will become very helpless under rule 19.5.
20.4 Heavy Artillery Barrage
Heavy Artillery Barrages requires additional Supply Points to be removed (see 10.5). The Artillery units must have a Line of Supply to the Supply Points. Supply Points used for this are removed immediately and are in addition to the Supply Point for Attack Supply.
20.5 Demolition and Capture of Supplies
A player may attempt to destroy his Supply Points (demolition) during either a friendly or enemy segment.
Demolition during a friendly segment must occur before the combat portion of the segment. Roll one die for each Supply Point and consult the Demolition Table. Only one demolition attempt is allowed for each Supply Point per segment.
Demolition during an enemy segment occurs the instant the enemy unit enters the hex (either by movement or Advance After Combat). The procedure is the same except the die roll is modified by −2. All supplies that are not destroyed are captured by the enemy player.
Captured Supplies may be used immediately.
21.0 Trucks
GENERAL RULE: Trucks are used to carry Supply Points and non-motorized units. One Truck can carry either:
- One regiment/brigade or two battalions of non-motorized infantry-type units.
- Two infantry-type replacement units.
- One Supply Point.
19.1 Procedure
There is no movement cost to pick up or drop off units. A Truck merely enters the hex where the unit is, picks it up, and may continue moving. It may also drop off units during movement and continue moving. The transported unit may not make any other type of movement in the segment it is moved by a Truck.
21.2 Properties
A Truck unit does not enable a non-motorized unit to possess an Active ZOC — only units with a white band have Active ZOCs. A Truck does allow a non-motorized unit to Mobile Assault and to advance up to two hexes in Advance After Combat.
21.3 Trucks in Combat
A Truck is a non-combat unit. If caught alone in a hex by an enemy unit or eliminated along with other friendly units (Trucks have no step to lose in Combat), it is removed from play and placed in the Cadre Box. Truck units can be replaced by the expenditure of one Resource Point (see Replacement Rules).
21.4 Special Transfer Movement
A Truck unit may make a special Transfer Movement during a friendly Primary Segment. A Truck unit that is not transporting any supplies or units may be moved to any friendly hex to which it can trace a LOC. Distance is not a factor, it may even be transferred to an Off Map Box. A Truck unit that makes the Special Transfer Movement may not move normally in that Primary Segment.
This is a good way to get your Truck units back to Tripoli or the Nile Delta to pick up more supply.
21.5 Attached Trucks
Divisional and Army HQs have the same transport capability as Trucks (these represent the trucks directly attached to that organization). These units are indicated by a wheel symbol on the upper left side of the counter. They pick up and drop off supplies/units just like Trucks. They may not, however, use the Special Truck Transfer Movement.
22.0 The Railroad
22.1 Rail Movement
Only the Allied Player may use Rail Movement and only during his Primary Segment.
The Allied Player may move one RE or one Supply Point by rail per friendly Primary Segment. Each tank step counts as one RE for rail movement.
A unit using Rail Movement must start the Primary Segment on a rail hex. The unit may move an unlimited number of hexes along the rail line. Each rail hex entered must be unbroken and part of a continuous unblocked segment of track that extends back to the Allied's friendly map edge. The track is considered blocked if occupied by an Axis unit or its ZOC (negated or not).
Units moving by rail may not use any other type of movement (Truck or Sea Movement) that segment.
Units moving by rail may not be moved into or out of enemy ZOCs.
The railroad is considered to extend into the Delta Box, from which units may be railed in and out.
22.2 Railroad Destruction and Repair
If an Axis combat unit spends one additional MP in a rail hex, then that rail hex is considered broken. Indicate broken rail hexes with any spare markers or use the Rail Head Marker to indicate the furthest functioning rail hex.
The Allied Player may repair two broken rail hexes per friendly movement phase. The rail hex must be friendly and not adjacent to any enemy units. It is not necessary to have a friendly unit present.
23.0 Sea Movement
IN GENERAL: Each player has a limited capacity to move units by sea from one friendly port to another.
23.1 Procedure
Sea Movement is allowed only from one friendly port to another during a Primary Segment. Units using Sea Movement must start and end their movement in a friendly port hex. Simply take the units you wish to move by Sea Movement from the port hex and place them outside the port of debarkation. At this time resolve the Anti-Shipping attack (see section 25.0) and move the survivors into the port.
Units that use Sea Movement may not use normal movement (including Truck and Railroad) during that Primary Segment or perform any activities (i.e. build Field Works or take on Replacements).
Sea Movement is allowed into and out of enemy ZOCs as long as the port hex is friendly.
23.2 Shipping Points
The unit of measure for Sea Movement is Shipping Points. Shipping Point values are calculated as follows:
- 2 = Each Truck unit, Supply Point, tank step or tank replacement.
- 2 = Each infantry type Regimental Equivalent.
- 1 = Each non-tank battalion, or infantry-type Replacement unit.
23.3 Shipping Limits
The Allied Player may move four (4) Shipping Points by Sea Movement per Primary Segment and the Axis Player may move two (2). Exception: The Axis may move eight (8) Shipping Points out of the Italy Box to any friendly African port. This is in addition to the two (2) Coastal Shipping capacity between African ports.
24.0 Ports
IN GENERAL: Sea Movement into and out of ports is limited by Port Capacity. Port Capacity can change due to the proximity of an enemy Air HQ unit (Port Interdiction) and/or from damage (Port Demolition).
24.1 Port Capacities
Printed near each port is a Port Track to record the current Port Capacity. The Port Capacity is the number of Shipping Points that can be embarked and/or debarked per Primary Segment. If the port is undamaged, the Port Capacity is the far left number. If the port is damaged, place a Port Capacity marker on the current Capacity.
EXAMPLE: At full capacity, Tobruk can debark and embark four Shipping Points per Primary Segment.
24.2 Port Interdiction
A port's capacity is halved (rounded down) whenever there is an enemy Air HQ or enemy controlled airfield within ten hexes (this represents use of the port being restricted to night hours to protect shipping from air raids). Indicate this by flipping over the Port Capacity marker to its "½" side.
A player may ignore the air raid threat and use the port's full capacity. If he does so he must add two (+2) to his AST dice roll for any convoy sailing into or out of the port.
24.3 Port Demolition
A player may reduce his port capacity through demolition (to avoid having it fall into enemy hands intact). Demolition during a friendly segment must occur before combat. Demolition during an enemy segment occurs the moment the enemy unit enters the hex.
To resolve the demolition attempt, roll one die for each box to the right of the capacity marker, and consult the Demolition Table. Subtract two to each die roll if the demolition attempt occurs during an enemy segment. Each hit moves the Port Capacity marker one to the right on the Port Track. A port may never be damaged beyond the far right box.
EXAMPLE: The Allied Player wishes to demolish the port of Benghazi during his own segment. The port is at full capacity so he rolls four dice. His results are 2, 5, 1 and 3. Since three of his rolls are hits, he reduces Benghazi's Port Capacity three boxes. The port capacity is now 1.
23.4 Port Repair
A player may increase the capacity of a damaged port through Repair. During a Primary Segment the owning player may raise the Port Capacity of any friendly port, one box, at a cost of one Resource Point (see 30.0).
Supply, Isolation and Enemy ZOCs have no affect on Port Repair.
A port may never be Repaired more than one box per Primary Segment and never repaired beyond the far left box.
23.5 Italy, Tripoli & The Nile Delta
These ports can never be demolished or affected by Port Interdiction. Italy and the Nile Delta have an unlimited Port Capacity, while Tripoli has a Port Capacity of "6".
25.0 Anti-Shipping
IN GENERAL: Each convoy must roll on the AST.
25.1 Convoys
Each unit, or group of units embarking from a single port is considered a separate Convoy. A Convoy from one Port may not combine with a Convoy from another. Each Convoy must roll once on the Anti-Shipping Table (AST).
25.2 Procedure
The AST has a column for each port. A Convoy must use the column of the port of embarkation or debarkation — whichever is least favorable to him. Roll two dice for each Convoy and subtract one from the dice total for each airfield in friendly control (unless the Convoy is from the Italy Box, in which case see Malta rules below).
25.3 The Airfields
Each printed airfield controlled by a player provides a −1 modifier to his AST dice rolls. There are six airfields. Five of the airfields are located in North Africa: Benina, Martuba, El Adam, Sidi Baranni, and Fuka; and the sixth is the airfield on Crete. The five in North Africa will change hands with the ebb and flow of the campaign, but control of Crete is predetermined according to the Turn Record Track and the specific scenario instructions.
25.4 Spotting the Convoy
If the AST result is a number, then the convoy has been spotted and will be attacked. If the result is a "-", then it is not spotted and the convoy arrives safely at port.
25.5 Resolving Convoy Attacks
If a number is rolled on the AST, the owning player must roll one die for each step, Supply Point, or Truck unit that is in the Convoy. If the result of that die is less than or equal to that number from the AST, then that step, Supply Point, or Truck unit is eliminated (sunk). A combat unit totally sunk is placed in the Cadre Box.
EXAMPLE: An Allied convoy of one brigade (4 steps) sails from the Nile Delta box to Tobruk. The Allied Player rolls a "11" on the AST. He controls four airfields on the map plus Crete so he subtracts five from 11 to get a modified roll of "6." A six with a destination of Tobruk results in a number "2". This means the convoy is about to be attacked, and for each "1" or "2" rolled there will be a hit. He now rolls four dice for his brigade (one for each step) and receives two hits. The Allied Player reduces the brigade by two steps and moves the reduced brigade into Tobruk.
26.0 Malta and Convoys From Italy
COMMENTARY: Located between Italy and Africa, the British island-base of Malta was very effective against Axis convoys. The Axis could neutralize Malta with a concerted effort by the Luftwaffe but Malta would spring back to life as soon as the planes were transferred away.
26.1 Procedure
For attacks on Axis Convoys from Italy, do not use the Airfield modifiers. Instead, use the Malta Track's Interdiction Value to modify the dice roll. If the Convoy does not land in Tripoli, but sails on to one of the on-map ports, the AST is used again (using the port column the Convoy intends to debark at) and all airfield modifiers apply. In this way, a convoy can be attacked twice — once past Malta and once when entering an African port.
NOTE: An Axis convoy from Italy to Tripoli would only be attacked once on the Malta column of the AST. An Axis convoy from Tobruk to Tripoli would use the Tobruk column.
26.2 The Malta Track
The Interdiction Value of Malta is recorded on the Malta Track with the Malta Status marker. Each turn during the Malta Segment, one player will have the opportunity to either increase (Allied Player) or decrease (Axis Player) the Interdiction Value. If the German "Luftwaffe" marker is in play, then the Axis Player attempts to decrease the Interdiction Value. If the Luftwaffe marker is not in play, then the Allied "Royal Navy" marker is considered automatically in play and the Allied Player attempts to increase the Interdiction Value.
If a player has the opportunity to change the Interdiction Value, he rolls one die and compares his result to his Success Numbers at the bottom of the Malta Track under the current Interdiction Value. If the result is equal to or less than the number, the Interdiction Value changes one box in the appropriate direction.
DESIGN NOTE: It gets progressively harder for the Axis to decrease the modifier and progressively harder for the Allies to increase the modifier.
EXAMPLE: If the Malta Status marker is in the −1 box with the Luftwaffe side up, the Axis Player would need to roll either a "1" or a "2" (with one die) to move the marker to the −2 box.
27.0 Off Map Boxes
IN GENERAL: Off Map Boxes represent areas beyond the map edge that were significant to the war in North Africa.
27.1 Movement
Only Motorized units may move out of Off Map Boxes (OMBs). A motorized unit may move from one box to an adjacent box at the rate of one box per friendly segment.
A non-motorized unit may not move out of an OMB unless a Truck unit transports it or the unit leaves the box via Sea Movement.
Motorized units may exit Sirte or the Nile Delta by simply paying the movement cost of the first hex entered.
Movement into an OMB from a hex on the map edge may be done by both motorized and non-motorized units by paying 1 MP.
RESTRICTION: A unit that has exited Sirte or the Nile Delta onto the map, may not reenter that OMB until the next friendly segment.
27.2 Characteristics
An unlimited number of units may occupy an Off Map Box. Units in OMBs do not exert a ZOC onto the connecting map edge. All units are automatically in General Supply while in an OMB. Enemy units may not enter an enemy OMB.
27.3 Nile Delta
The Nile Delta is the Allied Player's Entry Box. All his Reinforcements and Replacements are placed here when they arrive. Allied units may enter the box from any land hex on the eastern map edge. Allied units in the Nile Delta may remain there as long as the Allied Player wishes.
27.4 Italy
Italy is the Axis Player's Entry Box. All his Reinforcements and Replacements are placed here when they arrive. Axis units may only enter or leave the box using Sea Movement. Axis units and Supply Points may remain in Italy as long as the Axis Player wishes. With limited port capacities in Africa and the uncertainty of getting a Primary Segment, the Axis Player may occassionally find himself accumulating a stockpile of supply in Italy.
27.5 Tripoli and Sirte
These are located to the west of the map. Only Axis units are allowed in these OMBs. Tripoli is connected to Sirte and Sirte to the Axis friendly map edge. A unit in Tripoli wishing to enter the map must first move through Sirte. The opposite is also true — an Axis unit on the map wishing to move to Tripoli, by land, must move through Sirte.
27.6 Crete
Crete can never be entered by either player. Its function is merely to indicate who controls the island and therefore receives the Airfield Modifier. Use the Crete Control marker for this purpose.
28.0 Cadres & Replacements
28.1 Cadre Box
All units that lose their last step are placed in the Cadre Box. Units remain in the box until replaced.
28.2 Replacement Units
Replacement units are used to restore reduced or eliminated units. One Replacement of the proper type can add one step to a reduced combat unit or, if the unit is in the Cadre Box, bring it back into play at its lowest step value.
Replacement units are non-combat units and can in no way impede enemy movement. If caught alone by an enemy unit, it is immediately placed in the Replacement Pool; the enemy unit(s) may continue moving. Replacement Units that are stacked with other friendly combat units, cannot be removed to satisfy a step loss.
Replacement Units can move by themselves or (for Infantry-type) be transported by Trucks, Rail or Air Transport.
Players receive Replacements either as a Reinforcement from the Reinforcement Schedule or from the Replacement Table. Replacements enter play, like Reinforcements, at the appropriate Entry Box.
28.3 Replacement Table
Each turn both players roll on their respective Replacement Tables to receive new Replacement Units. Players use two dice and use that one roll for each column of the Table.
EXAMPLE: The Allied Player's Replacement roll is a "10" — he receives one British Inf, one tank and one Australian replacement.
28.4 Replacement Pool
After a Replacement unit is used to replace a step (or the Replacement is eliminated), it is placed in the Replacement Pool. When the Replacement Table indicates that a player is to receive a Replacement, that Replacement must come from a Replacement available in the Pool. If there are no Replacements of that type available, then the player receives none of that type that turn.
28.5 Procedure
For a unit on the map to receive a Replacement it must be stacked with the Replacement unit. For a unit in the Cadre Box to receive a Replacement, the Replacement must be located in a friendly Off Map Box, friendly port hex or with the friendly Army HQ.
A unit that forgoes all movement during a friendly segment may absorb a Replacement. No attacks are allowed out of that hex during that segment. The Replacement is absorbed the instant the owning player indicates the unit will not move. Enemy ZOCs and General Supply have no affect.
If a reduced unit receives a Replacement increase it one step; or, if the unit was in the Cadre Box, place the unit (at its lowest step value) in any friendly Off Map Box or with the Army HQ if the Replacement unit was located there.
The Replacement unit in each case is placed back in the Replacement Pool.
28.6 Restrictions
A player can replace as many units each Turn as he has Replacements, but each unit can only receive a maximum of one Replacement each friendly segment.
Tank Replacements can replace tank and reconnaissance units. Infantry Replacements can replace all others (including AT and HQ). Replacement units are subject to attrition die rolls.
28.7 Special Cases
- TRUCKS: Truck units do not require Replacements. To replace a Truck unit the player must expend one Resource Point.
- ARTILLERY and GERMAN 88mm FLAK: These units require the expenditure of one infantry-type Replacement unit plus one Resource Point. HQs: Divisional HQs require the expenditure of one infantry-type Replacement unit plus one Resource Point.
28.8 Random Tank Replacement
If there are two or more tank units in the Cadre Box, and the owning player has expended a Replacement to bring one on the map, he must randomly determine which one it will be. Either roll a die or place all the tank units in a cup and draw one.
DESIGNER'S NOTE: Tank replacements were usually an assortment of what was available. The law of average will make the most common tank the most often replaced.
28.9 Cadre Elimination
All multi-step brigades and regiments which lose their last step require two Replacements to bring out of the Cadre Box. All other units (battalions, tank units, HQs, artillery units and all single step units) require only one Replacement.
28.10 Fragile Units
All Libyan and Blackshirt units which lose their last step, may not be replaced.
28.11 Transferring Steps
Two units of the same type and nationality may transfer steps between them. To transfer, simply reduce one unit by a number of steps, and increase the other unit by the same amount. Transferring steps occurs during the Organization Segment. The units that participate must be stacked together.
29.0 Recovered Steps
GENERAL RULE: A portion of the players step losses in combat can be Recovered and brought back as Replacements.
29.1 Recovery
When a unit loses a step a portion of that step may be Recovered. Step losses which occur due to Attrition, the AST or due to a Retreat through enemy ZOCs may not be Recovered.
NOTE: Isolation does not affect Recovery. The desert battles were too fluid to prevent a force from escaping into the desert.
The portion of the step Recovered is determined thusly:
- ALLIED STEPS: Half of the step is recovered if the Allied player won the combat or the result was Engaged. One-fourth is recovered if the Axis Player won the combat. See 9.4 for the definition of "winning."
- AXIS STEPS: Two-thirds of the step is recovered if the Axis Player won the combat or the result was Engaged. One-third is recovered if the Allied Player won the combat.
EXAMPLE: Both sides loss two steps in a combat in which the Allied Player is determined the victor. The Allied Player would Recover one step (2 x ½ = 1) and the Axis Player would recover two-thirds of a step (⅓ x 2 = ⅔).
29.2 Status Track
Players keep track of their Recovered steps and fractions of steps on their Status Track. Tank and Recon steps recovered are recorded with the "Tank Damaged" marker. All other steps recovered are recorded with a Wounded marker of the appropriate nationality. Track is not a limit for recovered steps.
29.3 Returning Recovered Steps
During each Initial Phase during the Recovery Segment, HALF (drop fractions) of all accumulated Recovered Steps are immediately available to restore friendly units or be converted into Replacement units.
If a player has only one accumulated Recovered Step, then the step is available on a roll of 1, 2 or 3.
Only whole step losses can be Returned to play, fractions of steps are ignored until a whole step can be made.
EXAMPLE 1: The Allied Player has seven Australian Wounded steps, 3¾ British Wounded steps and one Damaged Tank step. During the Recovery Segment he would receive three Australian Replacements, one British Replacement and have a 50% chance of receiving a tank replacement.
EXAMPLE 2: If the Allied Player accumulated five British wounded steps on Turn 1, he would receive them back accordingly:
- Turn 2: two steps
- Turn 3: one more step
- Turn 4: one more step
- Turn 5: on a roll of 1, 2 or 3 he would receive the last step. If unsuccessful, he would roll again next turn.
29.4 Delivery of Recovered Steps
Recovered Steps can be used immediately to restore reduced units in exactly the same way Replacements do. Any unit which is in General Supply and has a LOC to the friendly map edge can receive Recovered Steps (even units in an enemy ZOC). This will have no affect on the unit's movement during the Operations Cycle. Units in the Cadre Box restored by a Recovered step are placed in a friendly Off Map Box or with the player's Army HQ.
Those Recovered Steps which are not used immediately, may be converted into Replacement Units or returned to the Status Track.
29.5 Tank Repair Limit
Each side is limited to the number of recovered Damaged Tanks steps that may return to play each turn.
AXIS: Axis player may repair 2 tank units per turn regardless of nationality (either 2 German, 2 Italian or one of each).
ALLIED: The year determines the Allied Repair Limit:
- 1940 = 1 per turn
- 1941 = 2 per turn
- 1942 = 3 per turn
30.0 Resource Points
Resource Points are your coins to buy all that is precious and rare. All those items that would require special attention, precious resources, or the constant badgering of High Command require Resource Points.
30.1 Receiving Resource Points
Each turn, during the Replacement/Reinforcement Segment, each player receives one Resource Point. There are no Resource Point units, players keep track of accumulated Resource Points on their Resource Point Track with their Resource Point Marker. No player may accumulate more than four Resource Points — all Resource Points received in excess of this are forfeited.
30.2 Using Resource Points
Resource Points (RP) can be used during any friendly segment. See the Resource Chart for a complete list of what Resource Points are used for.
31.0 Turn Record Track
31.1 Reinforcements
Both sides receive Reinforcements according to the Reinforcement Schedule. On the turn they arrive, place the Reinforcements in the appropriate Entry Box. Reinforcements may move normally or use Sea Movement on the turn they arrive.
31.2 Withdrawals
The Schedule also indicates Withdrawals. On the turn that a Withdrawal is indicated, that unit is immediately removed from play. Keep Withdrawn units handy. They may return to play later as a "Return" if indicated by the Schedule.
31.3 Reduced Strength
If a unit that is required to withdraw is deficient in steps, a number of Replacements, equal to the deficiency, must be spent (returned to the Replacement Pool). If not enough accumulated Replacement steps are available, the Replacement units must be spent as they become available.
31.4 Substitutes
If an isolated unit is required to withdraw or if the player does not want to withdraw that specific unit, then a temporary substitute of the same nationality and type must be Withdrawn in its place until the actual unit withdraws. The substitute's current Combat Strength must be at least equal to the full Combat Strength of the unit to be withdrawn.
When the actual unit is finally withdrawn, the substitute arrives the next turn as a Reinforcement in the Entry Box.
31.5 Returns
Some previously Withdrawn units will be returned to play as indicated on the Schedule. The Returning unit is treated exactly as a Reinforcement. If the Returning unit was withdrawn deficient in steps, and was not yet able to replace all its step losses, then it arrives with its current step deficiency.
31.6 Removals
If the Schedule indicates that a unit is to be "Removed," the owning player must remove it in the same fashion as he would a Withdrawal. In this case, the unit is permanently removed from the game and any steps it possessed are converted into Replacement steps of the appropriate type.
EXAMPLE: On the Jan. I Turn, the 6 RTR and the 7 Hus. are removed. If they both currently had two steps each, then the Allied Player receives four Tank Replacements. If they were both in the Cadre Box, then the Allied Player would receive no Replacements for their removal.
COMMENTARY: "Removal" means either the cadre departed without its equipment, or the unit was disbanded and the personnel went to other formations.
Removed tank steps can be converted to Replacement units or may be used in a manner just like returning Recovered Steps. During the Recovery Segment of the Initial Phase, these Removed steps are immediately available to restore friendly tank units. All the restrictions about introducing Replacement/Recovered steps in sections 28.0 and 29.0 must be observed. No units may receive more than one step during this Initial Phase (even in combination with regular recovered steps). Extra steps which can not be used in this way may be converted into Replacement units. If there are still any unused steps left, they are lost.
31.7 Conversions
A "Convert" represents a unit being upgraded with different equipment. When the Schedule indicates a conversion, the owning player must remove the old unit(s) and replace it with the new one in the same location and with the same number of steps. If the old unit is in the Cadre Box, then the new unit is placed in their. Conversions are performed during the Reinforcement/Replacement segment.
When "converting" two or more units to two (or more) other units, converted units can be placed in any hex where the original ones existed.
STOP! It is recommended you play at least one scenario before proceeding to the next rule section.
32.0 Alexandria Garrison
RULE: The Allied Player must keep at least four steps worth of Allied units in Alexandria at all times. During segments when the city hex is surrounded or Axis Controlled, he is relieved of this requirement.
33.0 Automatic Victory
RULE: If a player achieves an Automatic Victory in any scenario or in the Campaign Game, the game ends immediately and he is declared the winner.
ALLIED: The Allied Player achieves an Automatic Victory by controlling any hex on the western map edge for two consecutive enemy segments with a supplied combat unit that can trace a LOC to his friendly map edge.
AXIS: The Axis Player achieves an Automatic Victory by controlling any hex on the eastern map edge for two consecutive enemy segments with a supplied combat unit that can trace a LOC back to his friendly map edge.
Advanced Rules
The following rules add more detail to the game. Players may use these in whole or in part. None should be used until players become comfortable with the basic rules.
Rule 34.0 is now required in 4th edition.
34.0 German Leadership & Tactical Superiority
In 1941 the German army was flush with confidence and experience from their victories in France, Poland and Norway. Brilliantly lead by general Rommel, the Afrika Korps maintained a high level of morale and efficiency throughout the desert war.
34.1 CRT Reroll
The Axis Player may reroll any CRT die roll (black or white) of 1 if he has German steps involved in the combat. In addition, the Allied Player must reroll any CRT die roll of 6 or more if the defending hex contains German steps.
A reroll which results in a 1 or 6 must be kept.
34.2 Magnitude Affects
If the Magnitude of the combat required more than one die, and two or more 1's or 6's are rolled, then the attacker may only re-roll a die for every four steps (or fractions there of) of German units involved.
EXAMPLE: The Axis Player is attacking and rolls two 1's. The Axis Player has only three German steps involved in that combat, so he may only reroll one of the 1's.
34.3 Montgomery
Beginning in October 1942 (the Oct I turn) and thereafter, the Allied Player does not have to re-roll his 6's. The Axis Player is still allowed to reroll his 1's.
Montgomery arrived in August 1942 and set about rebuilding morale in the 8th Army. His efforts began to show after just a few months.
35.0 Restricted Hexsides
A Restricted Hexsides represents a narrow gap between two natural obstacles.
RULE: No more than five stacking points may attack across a Restricted Hexside. A Restricted Hexside is defined as either an Escarpment Hexside or a hexside that has Sea on one side and Sebakha or an Escarpment on the other. For example, 1507/1608, 1608/1609, 3515/3516 and 3414/3514 are all Restricted Hexsides.
36.0 Infantry vs. Armor
36.1 Infantry vs. Pure Armor
If the defending force consist of only tank units and those tank units are not in Field Works, Jebel or city terrain, then all attacking infantry type units have their attack strength halved. This applies even if the attacking force includes tanks.
COMMENTARY: In the open desert, infantry in the attack would be of little help against a mobile tank force.
36.2 Pure Armor vs. Infantry
If the attacking force consist of tank units without any accompanying infantry type unit, then all defending non-armor units have their Armor Effect Rating increased by one.
Tanks were often ineffective against enemy infantry if not accompanied by friendly infantry.
EXAMPLE: If the 6²-12 and the 8-12 attacked the 6³-12, the infantry would have its Attack Factor halved. The odds would be 10 to 6 (1½-1). The German 6³-12 would also receive a shift for Armor Superiority to bring the final odds to 1-1. If the 6³-12 attacked the 8-12, then the 8-12 would increase its Armor Effect Rating to 2 since the attacking force contained no infantry type units. The odds would be 6 to 8 (1-2) with one shift right for Armor Superiority.
37.0 Combat Motorized
IN GENERAL: A player may Combat Motorize a non-motorized brigade or regiment by placing it with a Truck unit, in the Organization Display of a motorized formation.
A Combat Motorized unit is a non-motorized unit with an Active ZOC.
PROCEDURE: A unit may only be Combat Motorized during the Organization segment of the Initial Phase if it is stacked with a motorized formation HQ. At that time the non-motorized unit and the Truck unit may enter the motorized formation's Display. Supply and Enemy ZOCs have no effect on this procedure.
A non-motorized unit can only be Combat Motorized while in the display. If it leaves the display it is treated as a non-motorized unit being Trucked (and hence with no Active ZOC).
EXAMPLE: A non-motorized brigade stacked with a Truck unit and placed in the "Inf bde. or bn." box of the British 7th Armored Division becomes a motorized brigade.
38.0 Diversionary Attacks
RULE: A player may declare a Magnitude one, two, three or four attack a "Diversionary Attack." A Divisionary Attack reduces the Magnitude to Sub-one, but all Advance and Overrun results are ignored. Apply Disruptions normally.
NOTE: This rule is useful for soak-offs.
39.0 Fog of War (optional)
This Third Edition of The Legend Begins has been specifically designed for Fog of War. Players are urged to keep their Divisional Displays hidden and to use the HQ markers as often as possible. Your opponent should not be allowed to look underneath the top unit of your stacks. A player's stack should only be revealed if the opposing player attacks it at odds of 1-3 or more.
40.0 The Air Game
IN GENERAL: Air Units can be used to assist ground units in the combat phase (Ground Support), interdict enemy movement (Interdiction), or attack the opposing player's air units (Air To Air Combat).
40.1 How To Read Air Units
An air unit's counter shows its Attack Factor and Defense Factor (or a combined Air-to-Air Factor), its Type letter, its Range, and its Ground Support Factor (GSF).
AIR TO AIR FACTOR: A numeric rating of the air unit's attack and defense strength when involved in Air To Air Combat. When the air unit possesses different values for attack and defense, the values are printed separately as Attack Factor and Defense Factor.
GSF (GROUND SUPPORT FACTOR): The combat strength the air unit provides in Ground Support. This factor is doubled during Primary Segments.
RANGE: The distance in hexes an air unit can be from an Air HQ unit or Airfield. Range can be traced over any type of terrain and/or enemy units.
TYPE: There are four types of Air Units: (B) Bomber, (GS) Ground Support, (F) Fighter, and (FB) Fighter Bomber.
40.2 Air Placement & Range
Air units may be placed in any hex, irregardless of terrain and enemy units. Air units placed on the map must be placed within Range of an airfield or Air HQ and be Supported (see 40.10). Air units not performing any air missions are kept off the map.
40.3 Definitions
INTERCEPTOR: Any F or FB type unit sent to attack enemy Escorts and Bombers. Interceptors may not attack other Interceptors. Interceptors have their Range halved. Interceptors may attack any/all enemy Escorts and Bombers within three hexes of its placement hex.
ESCORTS: Any F or FB type unit sent to protect friendly Bombers. Enemy Interceptors must attack Escorts before they may attack the Bombers. Escorts may not attack, they may only defend.
BOMBERS: Any FB, GS or B air unit on a Ground Support or an Interdiction mission. Differentiate FB units acting as Bombers from those acting as Escorts by placing them underneath the stack. Bombers may never attack enemy air units.
40.4 Procedure and Sequence
Air units are placed in the combat portion of a Primary or Secondary Segment. No air units may be used during Tertiary Segments.
SEQUENCE: For convenience "Attacker" refers to the player whose segment is in progress, "Defender" refers to the opposing player.
- The Attacker places his Bombers and Escorts.
- The Defender places his Bombers, Escorts and Interceptors.
- The Attacker places his Interceptors.
- Perform Air-to-Air Combat.
- Resolve ground combat and then remove all air units from the map, except those on an Interdiction mission.
40.5 Air-to-Air Combat
Air-to-air combat occurs when Interceptors attack enemy air units. Each F or FB air unit targets a single enemy air unit. If it survives it may attack another.
CONDITIONS AND RESTRICTIONS:
- Escorts and Bombers may coexist in the same hex as enemy Escorts and Bombers. They may not attack each other.
- If the stack contains Escorts, the Interceptor is not allowed to target Bombers unless it attacks each Escort and survives.
- An air unit may be attacked more than once by different F or FB air units, but no air unit may be attacked more than once by the same air unit.
- An air unit which recieves an Abort result is immediately removed from the map. No other air unit may attack it, and it may not attack.
PROCEDURE:
- Select the Air Unit which will attack.
- Select the target.
- Subtract the defender's Defense Strength from the attacker's Attack Strength to get the "Differential." This Differential determines which column to use on the Air-to-Air Combat Table.
- Consult the Air-to-Air Combat Table, roll two dice, and implement the results.
If the attacking air unit was not eliminated or aborted, then it may target another enemy air unit using the same procedure. It may continue to attack until it is eliminated or aborted.
TWO AGAINST ONE: If Interceptors outnumber Escorts, then two Interceptors may join up to attack a single target. Do not add their Attack Factors together, rather use the best Attack Factor and add one to it. Both Interceptors are affected if the attacking air unit is eliminated or aborted.
40.6 Ground Support
Air units may assist ground units in the combat phase by contributing their Ground Support Factor (GSF) to the combat. Both the attacker and the defender may allocate Ground Support. Ground Support may be performed by any air unit with a GSF.
Both the attacker and the defender add their GSF strength to their ground unit strength. Artillery Factors and/or Ground Support Factors as a whole may not exceed the printed ground strength — excess AF and/or GSF are ignored. During each Primary Segment the attacker's GSFs are doubled. During Secondary Segments GSFs are normal. Air missions are not allowed during Tertiary Segments.
40.7 Interdiction
An air unit may be placed on the map to hinder the movement of enemy ground units.
PROCEDURE: Both players may place air units on Interdiction during the combat portion of the segment. If the air units survive Air-to-Air Combat, then they remain in the hex until the next combat phase. At that time they may be removed or used again for another air mission.
INTERDICTION ZONE: Interdiction affects the hex the air unit occupies plus all six surrounding hexes. This is called an Interdiction Zone. There is no additional affect if two or more Interdiction Zones overlap. EFFECTS: Interdiction Zones only affect enemy ground movement and only in the following ways:
- The road and track rate in an Interdiction Zone is reduced to 1 MP per hex.
- Movement across an Escarpment hexside on a road is increased to +1 MP. Both hexes which border the hexside must be within the Interdiction Zone.
40.8 Aborted Air Units
An air unit which was aborted in Air-to-Air Combat is flipped to its "Inoperative" side. It may not fly again until it has been repaired. Air units are repaired by spending one friendly segment on its Inoperative side. At the end of that friendly segment, flip it over and it may operate normally in the next segment (enemy or friendly).
40.9 Air Unit Replacement
Each turn (during the Reinforcement/Replacement Segment) both players may take one air unit out of their Cadre Box for each Air HQ they have on the map. The Italian Air HQ may only replace Italian air units, the German Air HQ may only replace German air units.
40.10 Support
All air units require Support. Support comes from Air HQs and Airfields. An air unit that does not have Support is removed before Air-to-Air combat takes place.
40.11 Air HQs
An Air HQ is a combat unit with one step and a defense strength of one. It has no ZOC. Air HQs provide Support to air units and affect Port Interdiction (rule 24.2).
Air HQs are placed on the map or repositioned during any friendly Primary Segment. An Air HQ may be removed from the map during any friendly segment (a wise move if the army is retreating or if the Air HQ is in danger).
When an Air HQ is placed or repositioned on the map it is placed with its construction side up. While on its construction side it can not Support Air Units or affect Port Interdiction. At the start of the next friendly Primary Segment the Air HQ is flipped over and may be used normally.
SUPPORT FACTOR: The small number to the right of the Air HQ's type box is the Support Factor. The Support Factor is the maximum number of air units that may trace their Range to that Air HQ.
STACKING: No more than one Air HQ may be placed in a hex.
ELIMINATION: An Air HQ which is eliminated or forced to retreat is placed in the Cadre Box along with one air unit of the owning player's choice (represents air units caught on the ground). The Air HQ may be replaced at the cost of 1 Resource Point.
40.12 Airfields
The five airfields printed on the map have a Support Factor of two.
If an Air HQ is located on the airfield, then the total support factor of that hex is equal to the Air HQ's Support Factor plus two.
EXAMPLE: The German Interceptor is attacking the three Allied air units. The Interceptor must attack the Escort first. The differential is +2 and the Axis Player rolls a 7 on the Air-to-Air Combat Table. The result is "No Contact" (the Escort was by-passed). The Interceptor now goes after the first bomber with a differential of 4. The result is a DX which eliminates the bomber and aborts the Interceptor.
41.0 Reaction
Ignore 41.0 in 4th edition.
IN GENERAL: Reaction allows the opposing player a chance to move a few units a short distance at critical times.
41.1 When Reaction Occurs
Reaction must be triggered to occur. Reaction is triggered by the following two cases:
- By combat.
- When the draw of a Segment Chit gives a player two segments in a row.
41.2 When Reaction Occurs
Reaction by combat occurs after the attacker has declared the attack but before it is resolved. Their can be one Reaction for each combat and it is performed before the next attack is declared. If no combat is declared, then their is no Reaction.
Reaction by two-segments-in-a-row occurs between the two segments. The second segment is not begun until the opposing player is allowed Reaction.
41.3 Procedure
The player who is allowed Reaction is called the Reaction Player.
STEP ONE: The Reaction Player rolls one die and divides the result by two (round any fractions down). The result is the number of MPs that he may distribute to his units (or stacks) for movement purposes. The possible results are: 0, 1, 1, 2, 2, 3.
STEP TWO: The Reaction Player moves his units adhering to all the rules under movement, stacking and Zones of Control. Road and Track movement is allowed. After he has done so, the Reaction is over.
41.4 Guidelines & Restrictions
- The only action allowed during Reaction is land movement by motorized units (this includes Trucks carrying non-motorized infantry).
- Each MP can move either a unit or group of units that started stacked together. The group must remain together during Reaction, they may not move off in separate directions. A result of 2 or 3 MPs may go to one unit/group or be distributed among different units or groups. Example: a result of 3 could allow three groups to move 1 MP.
- A Reaction die roll of "1" results in no MPs and no Reaction occurs.
- A motorized unit/group may exit an enemy ZOC during Reaction; however, since exiting an enemy ZOC cost 2 MPs this can only occur if the Reaction die roll results in 3 MPs (a Reaction die roll of 6). If the unit/stack under attack vacates the hex, then no combat takes place and the attacker may Advance After Combat as if he achieved an Overrun result.
- For Reaction triggered by combat, only units within 3 MPs of the defender's hex may be moved. For Reaction triggered by two-segments-in-a-row, any unit may be moved.
- A unit/stack that Reacts for one combat is eligible to React again and again for other combats, so long as it is within 3 MPs of each hex under attack.
Special Rules
The following rules apply only to the Campaign Game or to a particular scenario. Players need only reveiw these rules as needed.
42.0 Railroad Construction
CAMPAIGN GAME ONLY
COMMENTARY: The Railroad initially ended at Matruh. During 1942 the Allies extended it to the Tobruk perimeter.
42.1 Procedure
If the Allied Player spends one Resource Point at the start of a turn, he may add one hex to his rail line each friendly segment during that turn. Since it is possible to get four friendly segments during a turn, it is possible to build four rail hexes with one Resource Point.
RESTRICTIONS:
- A rail hex cannot be built in an enemy ZOC.
- The Allied Player may only spend one Resource Point a turn on Railroad Construction.
42.2 The Railhead
The Allied Player keeps track of his furthest constructed rail hex with his Railhead Marker. The Railhead starts the Campaign Game at Mersa Matruh.
43.0 The Littorio Div.
GAZALA SCENARIO
COMMENTARY: The Littorio Division was in Africa for four months before Rommel was allowed to use it. It was finally released when Rommel took Tobruk.
43.1 Strategic Reserve
The Littorio Division arrives in Africa as a Strategic Reserve. As a Strategic Reserve it is under the following restrictions:
- It may not participate in combat.
- It may not move within 6 hexes of an enemy unit.
The Littorio may act as a garrison. If an enemy unit moves within six hexes of it, the Littorio Division is not required to move away.
43.2 How to Release it
The Littorio Division is automatically released from Strategic Reserve if either of the following occurs:
- Tobruk becomes Axis controlled.
- An enemy unit moves adjacent to it.
If the division is not stacked together, then this only applies to the applicable unit.
43.3 Individual Release
If the Axis Player expends one Resource Point, he may release the "LZ" recon unit. All other Littorio units may be released at the cost of two Resource Points each.
The Axis player must attempt to move the Littorio Division to a hex more than 6 hexes away from all enemy units. If the only way to do that is to move temporary closer to an enemy unit, that is OK.
44.0 The Italian 5th Army
1940 SCENARIOS ONLY
RULE: The following five Italian infantry divisions belong to the Italian 5th Army — Bologna, Brescia, Pavia, Sabratha and Savona. These divisions are in Strategic Reserve and may not exit the Tripoli Box until released.
They are released by the following schedule:
A) Any two divisions may be released if and when the Allied Player takes Bardia. B) The remaining divisions are released if and when the Allied Player takes Tobruk or move west of Tmimi (hex 3331).
The Italians used Cyrene (3722) as a forward preparation area for divisions in reserve. Two divisions may leave the Tripoli Box and move to Cyrene (via the coast road). They are still considered in Reserve and may not move east of Cyrene until Released.
When the Allied player doesn't take Bardia or Tobruk, Italian 5th Army is not released even until the end of the campaign game.
45.0 Sonderverband 288
GAZALA AND EL ALAMEIN
COMMENTARY: The Sonderverband 288 unit contained a large group of highly trained combat units and skilled technicians, neither of which would be easily replaced.
RULE: The Son. 288 unit cannot be rebuilt to full strength if it losses steps. It may only be rebuilt up to its third step (6-7-12).
46.0 French Coastal Waters
ITALIAN INVASION OF EGYPT
COMMENTARY: Until November 1940, the British were reluctant to violate French coastal waters. The Italian convoys, therefore, could use the Tunesian coast as a safety zone from Malta.
RULE: Until the Nov. I Turn, the Axis Player may modify his AST dice roll by −2 for convoys from Italy to Tripoli. If the convoy is spotted, convoy attacks are resolved normally.
47.0 6 Pounders
GAZALA AND EL ALAMEIN
COMMENTARY: The British forces suffered through most of the desert war with the obsolete 2 pounder anti-tank gun. The 6 pounder was a vast improvement, and began to arrive in the late spring of 1942.
RULE: When the Reinforcement Schedule indicates "6 Pdr" the Allied Player may convert one of his anti-tank units or one of his divisional HQ units to their 1²-12 side. This is performed during the Initial Phase.
Some Allied divisions do not have an improved rating on their back side. These HQ units may not be converted.
48.0 Vicissitudes of War
CAMPAIGN GAME ONLY
COMMENTARY: While the Replacement table reflects normal needs, there were some events that triggered unusual surges of replacements.
48.1 The Fall of Tobruk
If the Axis Player captures Tobruk (applicable only after the August I 1941 turn) then the following occurs:
- The Allied Player receives eight (8) steps of tank Replacements. These eight tank replacements arrive 5 turns after the turn Tobruk falls (the time it would take to sail from England or America).
- The Axis Player converts the 200th and 361st to their motorized versions. After Aug I 1941 — the conversion of the 200th and 361st regiments. They are converted even before the entry of 90th Division HQ.
- The Littorio Division is released from Strategic Reserve (rule 43.0).
48.2 The Fall of Benghazi
If the Allied Player captures Benghazi (applicable after the July I 1941 turn only), the Axis Player receives four (4) steps of German tank Replacements. These four Replacements arrive the turn following the turn Benghazi falls (the time it would take to rail to Italy and sail to Africa).
Since there are not enough tank Replacement units to represent these surges, players must use some type of temporary marker. If the Axis takes Tobruk but loses it before the entry of these units the conversion still takes place. No conversion if Tobruk never lost by Axis.
49.0 Air Transport
CRUSADER AND EL ALAMEIN
IN GENERAL: The Axis Player may use Air Transport to bring supply, reinforcements and replacements onto the map.
COMMENTARY: Germany's Ju-52 transport planes were a precious commodity, and only when the Mediterranean became extremely dangerous to Axis shipping would they be released by the High Command.
49.1 Restrictions and Conditions
- The Malta Interdiction value must be at +2 or +3.
- The Axis Player must expend one Resource Point.
- Only non-motorized infantry-type units, supply points, or infantry replacements may use Air Transport. Tank steps, Trucks, artillery and motorized units may not.
49.2 Procedure
Purchase the Air Transport Counter during the Initial Phase. The Transport counter allows three Shipping Points to be transported from Italy to a friendly controlled airfield during each Axis Primary Segment. The airfield must be located at least ten hexes from an enemy airfield or enemy Air HQ. The unit must end its move at the airfield — it may not perform any other activities that Primary Segment. Place the Air Transport counter over the unit to indicate this. Remove the Air Transport from the map at the end of the turn.
50.0 Invasion of Malta
CAMPAIGN GAME
IN GENERAL: The Axis Player may attempt to capture the island of Malta.
50.1 Restrictions and Conditions
- The Axis Player must expend four Resource Points.
- The Malta Status Marker must be in the −3 space with the Luftwaffe side up.
- The Invasion must occur before the July I 1942 turn.
50.2 Procedure
- Resolve the invasion during the Malta Segment of the Initial Phase.
- Expend the four Resource Points and roll one die.
- The assault is successful on a roll of 1-4; the assault fails on a roll of 5 or 6.
IF SUCCESSFUL:
- The Malta Status Marker remains in the −3 space for the remainder of the game.
- The three Ramcke battalions and the two Italian Folgore regiments are removed from the game.
IF UNSUCCESSFUL:
- Malta remains in British control and normal Malta Status continues. The three Ramcke battalions and the two Folgore regiments are removed from the game.
51.0 Amphibious Raids
GAZALA
IN GENERAL: An amphibious unit can sail from a friendly port and land behind enemy lines to destroy Supply Points, Airfields, block enemy movement and/or attack enemy units.
51.1 Restrictions & Conditions
- Only the two amphibious units (Kampfgruppe Hecker and the Royal Navy Marine Battalion) may conduct Amphibious Raids.
- Each Amphibious Raid cost one Resource Point.
- To build or replace an Amphibious Unit cost one infantry plus one Resource Point. The unit must spend two turns (one month) on the Turn Record Track before it is available (this represents training time).
51.2 Raid Procedure
- The amphibious unit must start the segment in a friendly port hex.
- The raid must occur during a friendly segment.
- To conduct the amphibious raid, move the amphibious unit to any vacant coastal hex and then resolve Anti-Shipping attacks. Determine the port closest to the coastal hex and use that column on the AST (using any applicable airfield modifiers). If the unit survives Sea Movement, roll another die to see if it lands in an organized state. A result of 1 or 2 the unit is Disrupted; a 3-6 is no effect.
- The raiding unit may not move or build an Improved Position on the segment it lands. If it lands undisrupted it may attack any adjacent unit(s). The raiding unit is considered in automatic supply (General and Attack) that first segment only. In the next friendly segment the raiding unit may move normally and must trace supply like all other units.
- An amphibious unit may be evacuated from any coastal hex during any friendly segment (even if Disrupted). The amphibious unit is automatically disrupted if evacuated. Place the amphibious unit in a friendly port and resolve anti-shipping attacks in the same way the initial raid was performed.
52.0 Lulls
CAMPAIGN GAME
COMMENTARY: The desert war had long stretches of inactivity when both sides built up their strength and supply.
RULE: A player who performs no land movement, air movement or combat during a friendly Primary Segment receives an extra Supply Point. The Supply Point may be placed with his Army HQ (if not isolated) or in a friendly Off Map Box.
The only actions allowed during the Movement and Combat Phases of the Primary Segment is Sea Movement. Not a single unit, Truck or Supply Point may move by land, rail, or air transport. You may not build Field Works nor absorb replacements. The Supply Phase is performed normally.
DESIGN NOTE: It is assumed that the inactivity has saved enough petrol and ammunition to warrent an increase in stocks. The main purpose of this rule is to speed up play during non-critical periods. It also serves as a benefit to the player with a short supply line. He is not as pressured as his opponent to move his Trucks during each Primary Segment. The petrol he is saving by having a shorth supply line is reflected by the extra Supply Point.
This rule may be used in any scenario if both players agree.
Designer's Notes
The Legend Begins could have been a lot different. At various stages in its design and development (a labor of epic proportions) it had more rules and greater detail. In an effort to show the most important aspects with the least amount of rules I cut, trimmed and sanded the design down to its present version. Everything that players enjoyed in the first edition is still there, but cleaned up. Some rules were rewritten for clarity, other less important rules were simplified, some hard to remember rules were dropped.
The most important change from the first edition was making the game play faster. This was done so players could enjoy one of the best parts of the game — the conversions and growth of the two armies. The old version had five segments in a half-week period, the new version increased the Movement Allowances and has seven segments in a two week period. The bigger movement allowances fit in well, and made the game more exciting.
The design concentrates on four aspects: Mobility, Tank warfare, the tether effects of supply and an attrition based combat system.
MOBILITY:
This is the most important part of the game. The rules that reflect this are the Movement Allowances, Active ZOCs and Selective Attacks.
Non-motorized infantry was intentionally made very slow so players would be forced to use their Trucks to carry them about. I did not want them to be able to move four to six hexes and attack or they would have become too important in a mobile battle. My intention was to make non-motorized units nearly useless unless in a positional defense or attacking a stationary target.
Active ZOCs make motorized units very valuable. Players will usually put all their non-motorized units in Prepared Positions and keep their motorized units mobile to stop enemy movement. Players are penalized by stacking non-motorized with motorized units (Selective Attacks), and by placing their motorized units in Field Works (lose their Active ZOCs and tanks are halved). The temptation for a motorized stack to double its defense in a Prepared Position is great, but is rarely worth it.
At first it may seem unfair that a small motorized battalion can stop a large division, but in practice that small battalion is easily brushed aside in a Mobile Assault.
TANK WARFARE:
The tank in the desert (more so than any other theater) was supreme. Army commanders would gauge their strength and decide whether to advance or withdrawal by the number of tanks they had. Territory held or lost, or the number of infantry forces available paled in importance.
The game attempts to show this with the respectable combat strengths and Armor Superiority shifts given to tank units. These two assets will be the prime ingredient to all mobile offensives. These assets will lose their importance when used against Fortifications and to some degree Improved Positions.
I have delt with combined arms theory in a different way. I've actually provided a rule (36.1) which will tempt players away from combined arms (the British initially liked their armor operating independently). Their is no combined arms bonus per se, yet stacking your motorized infantry with your tanks will make for a stronger stack and will preserve your tank strength by absorbing half of the step losses.
Once you understand that non-motorized infantry is not going to work well with motorized units, players will not stack these units together and this rule will come into play seldomly.
SUPPLY:
My goal with the supply rules was to keep it as simple as possible, but to still show the tether effect of a long supply line. Detailed supply consumption rules would have slowed the game and offered little more.
The game rewards holding and capturing ports, stock piling supply, and having your army near your supply source. It shows the affects of the railroad, ports, sea movement and air cover.
Given the limited number of Truck units, both players will find it very difficult to supply an advance without help from ports, yet it is still possible.
I think it is very interesting how one player can hold on to a port while the other side will find it very difficult. For example, try holding out in Mersa Matruh as the Axis Player or in Benghazi as the Allied Player. The game makes it possible for both sides to try it.
THE CRT:
Players will experience great anxiety when they resolve their first Magnitude four combat with the cream of their army — the attrition is usually heavy for both sides. The affect of this works well with the large battle scenarios like Gazala, Crusader and El Alamein — where both armies will be decimated (like they were historically) after just a few turns. The high attrition also spreads out the step losses more evenly through the army. The previous edition had tank units taking almost all the step losses.
RECOVERY:
This rule solved a lot of problems. It allowed the high attrition CRT to work, it allowed the Axis Army to stand up against the superior replacement rate of the Allied Army, and it showed how an army previously beaten in a battle weeks earlier could rise again (Rommel's Riposte).
SELECTIVE ATTACKS:
This rule helped solve the problem of one Reconnaissance unit creating an Active ZOC for a large stack of non-motorized units. It also fit into the game system very well, and shows the difficulty of tank and infantry working together.
Once you understand that non-motorized infantry is not going to work well with motorized units, players will not stack these units together and this rule will come into play seldomly.
RESOURCE POINTS:
Assigning most of the major assets a cost, and then limiting the currency, forces each player into some important decisions. The rule also made it possible to include a lot of chrome rules like the Malta Invasion, Naval Bombardment and Amphibious Assaults. The Convoy Escort is nice for the Axis Player when he is shipping his panzer battalions from Italy. When the shipping gets real dangerous, the Axis Player can call for a Battleship Escort.
TWO SEGMENTS IN A ROW:
This can be your most powerful aid, although you can never tell when its going to happen. At the start of an offense it can allow you to get around an open desert flank, or exploit a breakthough. During the fury of the battle if might allow you to attack an enemy stack you Disrupted in the previous segment. The best possible situation is when an enemy stack attacks and becomes Disrupted, and then you get two segments in a row to attack it back.
PZIII SPECIALS:
The 9⁴-12 battalions have three steps yet only the 1st and 2nd steps have the four armor affect value. The last step uses the 3³-12 counter. Historically, less than half of the battalion was composed of these tanks. In combat they would, more likely than not, be the first step to be lost.
ANTI-TANK DEFENSE:
It might be worth while to review a few points about anti-tank ratings. First, remember to increase the rating by one when in an Improved Position. Second, increase the rating if the attacker has no infantry and you do. The best possible rating would be a German 88mm Flak unit in an Improved Position with infantry being attacked by an Allied pure-armored tank force (a rating of four increased to six).
Expanded Sequence of Play
A. Initial Phase
-
REPLACEMENT AND REINFORCMENT PHASE. Both players place two Supply Points plus their reinforcements in their Entry Boxes. Both players receive one Resource Point. Rail Construction (42.0), Air Transport purchase (49.0), Amphib Unit purchase (51.0).
Both players roll on their Replacement Tables and place the Replacements they receive in their Entry Boxes. Each friendly Air HQ on the map allows the owning player to receive one air unit from the Cadre Box (the replaced air unit starts on its Inoperative side).
-
RECOVERY SEGMENT. Both players receive up to half (drop fractions) of their Recovered Steps back. They may be immediately used to augment combat units or converted into Replacement units.
-
ORGANIZATION SEGMENT. Both players may attach units to a division, even if the unit has a different divisional I.D. than the division it is attaching to (rule 6.2). Both players may transfer steps (rule 28.11), and perform conversions (rule 31.7). Combat Motorize units (37.0).
-
MALTA SEGMENT. One player rolls for Malta Interdiction.
B. Operation Cycle
An Operation Cycle consist of seven segments and each segment consist of a Movement, Combat and Supply Phase.
- Draw a segment chit at random.
C. Movement Phase
- Owning Player moves some, none or all his units. This includes: Sea Movement, Air Transport and Special Truck Transfer, and Rail Movement if it is the Primary Segment. Rail repair and destruction (22.2).
- Mobile Assaults occur during movement (TEC +2 MP). The attacker's strength is halved.
- Cost +2 MPs (motorized) or +1 MP (non-motorized) to exit an enemy ZOC.
- In lieu of movement a unit may: absorb replacements or build fieldworks. In lieu of movement an Artillery unit can flip to its non-mobile side.
- Perform all Demolition attempts on friendly Ports and Supply Points before the combat phase. Perform demolition on enemy ports and Supply Points the instant the unit enters the hex. Port Repair (23.4).
D. Combat Phase
- Perform Air Game Sub Phase (Advance Game only): a. Attacker places his air units on Ground Support, Interdiction and Escort. b. Defender places his air units for Defensive Ground Support, Interdiction, Escort and Interception. c. Attacker places his Interceptors. d. Resolve Air-to-Air Combat.
- Resolve Combat. If Italian units are involved, first roll on the Italian Table.
- Conduct the Advance After Combat before preceeding to the next combat.
- Place Disrupted Markers on all units that suffered an Overrun or Repulsed result.
- Remove any Supply Points used for Attack Supply or Heavy Barrage Shifts. Do not count attacks against Recon units which avoided combat.
E. Supply Phase
- General Supply is checked for all friendly units. Place Out of Supply markers on units which do not have a Line of Supply. If a port hex is used as a General Supply Source (during a Primary Segment) the owning player must check for its availability.
- Perform Attrition on all Out of Supply units which are also Isolated.
- Remove all Disrupted markers from friendly units except those caused by a Repulsed result in the previous combat phase.
If this was the seventh segment, then the turn ends. Otherwise draw another segment chit and repeat the Operations Cycle.
Actions Only Allowed During a Primary Segment
- Sea Movement
- Rail Movement
- Air Transport
- Special Truck Transfer
- Repair Ports
- Build Fortifications
- Port Supply not automatic (rule 19.7)
- Attacker's GSFs doubled
- Build or Reposition Air HQs
Terrain Effects Chart
| Terrain Type | MP Cost (Non-Motorized) | MP Cost (Motorized) | Effects on Combat |
|---|---|---|---|
| Clear | 1 | 1 | – |
| Rough | 1 | 2 | – |
| Jebel [1][2] | 1* | 2* | 1 Shift Left |
| Desert | 1** | 1** | – |
| Sebakha [1][2] | 1* | 2* | Units attacking out of are halved. Units defending in suffer 1 Shift Right on the CRT. |
| Sea | Prohibited | Prohibited | Not allowed |
| Ridge | No Effect | +1 | Attacker halved if attacking up and across |
| Escarpment [3] | +1 | Prohibited | Attacker halved if attacking up and across. Motorized units may not advance across. |
| Track | 1 | ½ | – |
| Road | 1 | ⅓ | – |
| City | as other terrain | as other terrain | 1 Shift Left |
| Town, Airfield, Port or Railroad | as other terrain | as other terrain | – |
| Improved Position [4] | as other terrain | as other terrain | Non-tank units Doubled in Defense Strength. Non-tank Armor Effect Rating +1. |
| Fortification [4] | as other terrain | as other terrain | Non-tank units Tripled in Defense Strength. Tank units x 1½. No Armor Superiority allowed. |
* All units must stop upon entering a Jebel or Sebakha hex unless moving by road or track. ** Units may not move into more than two consecutive Desert hexes per friendly segment.
[1] Armor superiority can be used in an attack against Jebel/Sebakha hexes.
[2] A Mobile Assault can be conducted against units in Jebel/Sebakha hexes, but Motorized units, which conducted a Mobile Assault against units in Jebel or Sebakha, have to finish their movement at the end of that MA.
[3] Mobile Assaults are not allowed across Escarpments even through a road hexside (because in eZOC to eZOC condition, the presence of the road is ignored).
[4] Artillery is never be doubled or tripled in a fortification or improved position.
Resource Points
- PORT REPAIR: It takes one RP to repair a port one box or add 1 Rail Hex (42).
- FORTIFICATIONS: It takes one RP to build a Fortification.
- REPLACE TRUCKS: Each Truck unit replaced cost one RP.
- REPLACE ARTILLERY: Each Artillery and 88mm Flak unit replaced cost one RP plus one Infantry Replacement.
- SHIPPING LIMITS: Players may increase their Shipping Limit by two for each RP expended.
- CONVOY ESCORT: Cost 1 RP per convoy. Provides a +1 die roll modifier to all AST die rolls against the convoy. Note: this is a modifier to the attack roll — not to the detection roll.
- BATTLESHIP ESCORT: Cost 2 RPs per convoy. Provides a +2 die roll modifier to all attack rolls if convoy is spotted.
- ITALIANS: Each RP expended during a Primary Segment allows one Italian division (and all components) to attack at full strength. Must be spent before the die is rolled for the Italian Table.
- NAVAL BOMBARDMENT: Cost 1 RP. Provides a free Heavy Artillery Barrage (1 Shift) against an enemy Field Work located on a coastal hex. There must be a friendly airfield within 8 hexes of the coastal hex.
- SUPPLY SHIP: Cost 1 RP. Allows the player to reroll his Port Supply Availability die roll (rule 19.7). Represents another supply ship hurriedly dispatched.
- LITTORIO: 1 RP will release the LZ recon unit from Strategic Reserve. 2 RP will release any other Littorio unit.
- INVASION OF MALTA: Cost 4 RP. (see rule 50.0).
- AMPHIBIOUS RAID: Cost 1 RP. Allows owning player to conduct an amphibious raid (rule 51.0).
- BUILD AMPHIBIOUS UNIT: Cost 1 RP plus 1 infantry replacement.
- AIR TRANSPORT: Cost 1 RP. Allows the Axis Player to conduct Air Transport for one turn. May only be used if current Malta Status is +2 or +3.
- U-BOAT IN THE MED: Cost 3 RP. The Axis Player may move the Malta Status Marker two spaces to the left.
- MALTA REINFORCED: Cost 3 RP. The Allied Player may move the Malta Status Marker two spaces to the right.
Player Aid — Rule Updates & Quick Reference
This section reproduces the errata/FAQ Player Aid referenced throughout the rules above as the source for the updated 4th-edition rulings.
5.0 Stacking
Q: What happens if withdrawal of a headquarter causes overstacking? — Treat it as a temporary overstacking caused by a retreat (5.5).
6.0 Organization Card
Q: A non-motorized unit can enter a motorized formation display only when it is combat motorized. Is this correct? — Yes.
8.3 Line of Communication (Updated)
A LOC can be no more than 9 MPs to a road or track and thence along the road or track an unlimited distance to a Friendly Map Edge. The LOC can also be traced (9 MP's + unlimited road/track) to another friendly SP if that SP can trace a LOC to a Friendly Map Edge or to a SP which can trace a LOC to a Friendly Map Edge. A LOC can be extended by SPs an unlimited number of times as long as the last SP in the chain can trace a LOC to a Friendly Map Edge.
18.0 Field Works
18.3 Fortifications (Updated)
- REMOVAL: In addition, any vacant fortification more than 4 hexes from a friendly unit (in any supply status) is automatically removed during the replacement/reinforcement segment. This is not applied to permanent fortifications.
- Each player may not have more than SIX fortifications placed on the map at the same time. Permanent fortifications are not counted for this limitation (but fortifications built within the Tobruk perimeter are counted, though). There is no restriction in the total number of fortifications that may be built during the whole course of the game. This rule in not applied to improved positions.
- Artillery should never be doubled or tripled in a fortification or improved position.
Quick Reference: Stacking (Limit = 7)
- 1 = Battalions
- 2 = Regiments/Brigades
- 3 = Divisions
- One artillery can stack for free.
- HQ, Supply Points, Trucks, markers without limit.
- Units of the same division with HQ (or any Italian units from same division) are never more than 3 stacking points.
Quick Reference: Segments
Primary
- Full movement*
- Sea, Rail, Air Transport, Special Truck Transfer, Repair Ports, Build Improved Positions/Fortifications
Secondary*
- 2/3 movement
- Build Improved Positions
Tertiary*
- 1/3 movement
- Build Improved Positions
- No Air sub-phase
* Infantry type units move 4MPs during the Primary Segment, 3MPs during the Secondary and 2MPs during the Tertiary.
Quick Reference: Zones of Control
Active ZOCs
- Any unit with a white band.
- Stops Movement
- Mandatory Combat
- Hinders Retreat
- Reduced to Limited in Direct Support, disrupted, up Escarpment, into/out of Jebel/City, Fortification/Field Works.
Limited ZOCs
- All other combat units
- Blocks LOC
- Hinders Movement (+2 Mot./+1 non)
- Roads & Tracks can't be used ZOC to ZOC
- Upgraded to Active down Escarpment
Quick Reference: German Tactical Superiority
- Axis may re-roll one CRT roll of "1" for every 4 German steps involved.
- Prior to Oct '42 (OCT I), Allied player must re-roll one CRT roll of "6" for every 4 German steps involved.
Quick Reference: Step Recovery
- Axis Win: Axis — 2/3 (or Eng.); Allies — 1/4
- Allied Win: Allies — 1/2 (or Eng); Axis — 1/3
Quick Reference: Supply
General Supply: 9 Mot. MPs or 4 hexes to Army HQ which has an overland LOC to friendly map edge. 4 Mot. MPs or 2 hexes to map edge, Supply Point, Port with capacity > 0.
Attack Supply: 9 Mot. MPs or 4 hexes to supply point stacked with Army HQ. 4 Mot. MPs or 2 hexes to any other Supply Point.