The Last Crusade
The Last Crusade Rulebook
Table of Contents
Table of Contents
1. Getting Started
To play The Last Crusade, you and your opponent each need your own deck of cards of differing nationalities. If you are playing a historical game, this normally means one person plays the Axis commander while the other commands a deck of Allied cards. Of course, if you want, there's nothing to stop you from playing out a hypothetical battle of the early Cold War period that pits the US against the USSR or even battling decks of the same nationality against each other just for fun.
You also need a couple of dozen small markers (beads, pennies, whatever) per player, and at least two or three regular dice. The Last Crusade can be played by any number of players, but the rules are written in the context of a two player game.
2. The Cards
There are three basic types of cards in The Last Crusade: Terrain cards, Unit cards and special cards. Terrain cards are neutral while Unit and Special cards are specific to one side.
2.1 Terrain cards
Terrain cards represent typical types of terrain found in the European theater. They are used to construct the Battlefield and may affect combat and movement. Once used to set up the battlefield, Terrain cards are never moved and are not included in the play deck.
Terrain cards have four main components:
- Supply Cost: This is the number of supply points this Terrain card costs if used as one of your starting zones. Terrain costs are only paid during setup.
- Name: This is the type of terrain the card represents.
- Historical information Text: This section gives some historical background about the Terrain type. It has no effect on game play.
- Game effects: This section describes what the terrain type does in game play. These effects apply to the units in the Terrain card's zone. Some effects apply only to defending units, or to assaulting units, while others affect all units. The Game Effects specify which.
2.2 Unit Cards
These cards are your actual fighting forces. Each card represents roughly a platoon-sized unit or its equivalent.
Units are divided into three general types: armor, infantry, and aircraft. Armor and aircraft are pretty self-explanatory. Infantry units include not only actual units of riflemen, but also things like transports, armored cars, and artillery. Units included in this category are those which could historically be defeated by small arms fire or light support weapons.
Unit cards are part of your play deck. During the game, they are deployed to the Battlefield, where they maneuver and engage in combat with enemy units. When one of your units is destroyed, it goes to your opponent's Victory Pile and its Supply cost counts toward your opponent's score at the end of the game.
Unit cards have the following components:
- Supply Cost: This is the amount of Supply points which must be paid to buy this unit as part of your starting forces or to deploy it during play.
- Name: This describes the unit. Printed behind each unit's name is the general type: armor, infantry, or aircraft. These unit types are also differentiated by differences in the color of the card's background.
- Infantry Firepower (infFP): This is the number of dice the unit rolls against infantry-type targets in combat.
- Armor Firepower (armFP): This is the number of dice the unit rolls against armor-type targets in combat.
- Air Firepower (airFP): This is the number of dice the unit rolls against aircraft units in combat. Units with a gray number here may only fire at aircraft in response to an air strike. They may not fire at passing aircraft.
- Defense Value (def): This is the maximum number of hits the unit can take. When the number of hits on the unit equals this number, the unit is destroyed.
- Subhead: This is a quick description of the type of unit represented by the card. For ground units, the Subhead usually specifies if a unit is motorized or unmotorized - units that are described as a type of vehicle (like tank or armored car) in the Subhead are of course motorized.
- Historical Information: This area includes some historical information about the unit and has no effect on game play.
- Game effects: Some units have special advantages or disadvantages. If so, they are described here.
2.3 Special cards
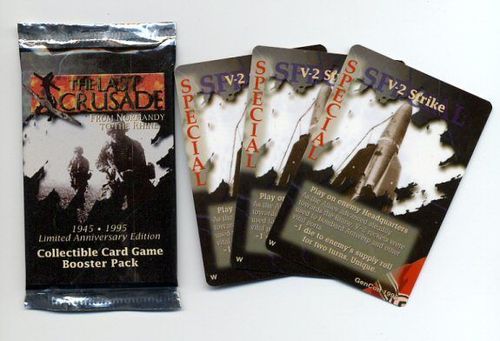
Special cards include non-combatant support units, obstacles, support weapons and fortifications. Some cause events to occur that help recreate the "fog of war". Others provide special opportunities or advantages, or help support particular strategies. Special cards are part of your play deck and may be played from your hand when specified on the card.
Special cards have the following features:
- Supply cost: This is the cost in supply (if any) to bring the card into play. Cards with no supply cost are free. Only cards that have a supply cost and are normally deployed in the Reinforcement Phase (such as Obstacles and support weapons) may be used during the game setup. Special cards that are not deployed into play during the Reinforcements Phase may not be played during game setup, even if it has a Supply cost. If one of your cards with a Supply cost is used, destroyed, or discarded, place it in your opponent's Victory Pile.
- Name: This describes the card.
- Subhead: Some Special cards belong to particular categories (obstacles, Fortifications, and Headquarters Troops for example). If that is the case, then the category is listed here. If not, the Subhead explains how or when to play the card. Cards that say "Play on..." are used once and discarded. Special cards that say either "Play on enemy Headquarters" or "Play at any time" are played against your opponent - they may be used at any time and then they are discarded. Those that say "Attach to..." are attached to units in play and can be used until the unit they are attached to is destroyed.
- Historical Information: This section provides the historical background behind the card. Generally, this section has no effect on game play - however, some game effects target "Hitler" or "Stalin" cards; any cards that mention either of these leaders, even in the historical information section, count as one of these cards.
- Game Effects: This area, written in bold text, describes what game effects the card has when played.
3. Game Effects
Before getting into the nuts and bolts of the game, you should be familiar with some specific terms and basic game concepts.
3.1 Commitment Status
Ground units in play are always either committed or uncommitted. Uncommitted units are those that have not moved or bombarded since the beginning of their turn, and are free to act in any legal manner. Units that have moved, assaulted, or bombarded cannot do so again until their next turn and are considered committed.
All units begin the game uncommitted. Uncommitted cards are placed facing the player. When a card becomes committed, turn it sideways.
A unit becomes committed under the following circumstances: the unit performs a ranged attack (usually only artillery units); the unit uses all of its Movement Factors by moving and/or assaulting during the Fire & Maneuver Phase; or the unit digs in. The play of certain Special cards may also cause a unit to become committed. A unit that is committed may not move or perform ranged attacks. It may defend itself normally, however, if the zone it occupies is assaulted. Also, units can perform tasks that don't normally cause commitment (such as AA fire) even when committed.
Units become uncommitted during the Reinforcements Phase of the owning player's turn.
Aircraft never become committed.
3.2 Spot Status
In addition to their commitment status, units on the ground are also either spotted or unspotted. Unspotted units are "hidden" on the Battlefield - that is, their exact location and nature is unknown to the enemy (even if the opposing player knows what the unspotted unit's type is). Spotted units are those that have been identified by the enemy.
All units begin the game unspotted. Place unspotted cards face down. Units may become spotted later due to recon or combat, at which time they are turned face up. When a unit becomes spotted, all cards attached to that unit become spotted as well - this includes cards that are attached to the unit later in the game. If an infantry unit mounts a transport, and either card is spotted, both units become spotted.
It is important to keep track of which units have been spotted because normally only spotted units may be targeted by air strikes or artillery attacks. Some Special cards may cause an air strike or bombardment to fire at an unspotted unit. If this happens, the attacking unit uses the lower of its infFP or armFP and suffers a +1 TN penalty.
3.3 "Infantry" vs. "Infantry"
The Infantry unit type, as mentioned above, encompasses a wide range of unit types. The term "infantry," however, also applies to a narrow type of unit: actual platoons of foot soldiers. This latter subtype can be identified by the word "infantry" in the card Subhead. In these rules, true infantry (those cards with "infantry" in the Subhead) are referred to as Infantry soldier units.
3.4 Special Effect Precedence
Whenever the effect of one card conflicts with that of another, the last card played takes precedence. For example, if there is a Heavy Fog card in play (which states that all ground combat is simultaneous) and an attacker plays a Covered Approach (which states that the attacker fires first in the first round of combat) the Covered Approach takes precedence and the attacker may fire first.
3.5 Stacking Limits
There is a limit to the number of units that can be in one zone at one time. Each zone in the Battlefield has a stacking limit of three units. The headquarters has a stacking limit of nine units including Headquarters Troops cards. Units may move (not assault) through fully-stacked areas. If the stacking limit of a zone is ever exceeded, remove enough units to satisfy the limit. The removed units are destroyed and placed in your opponent's Victory Pile.
3.6 Supply Lines
Ground units are considered to be "in supply", which means they can receive supply from the supply stockpile, only if they can trace an unbroken line of zones not occupied by enemy units back to their Headquarters. Supply Lines cannot be traced diagonally. They can, however, be traced in a zigzag pattern. Aircraft are always considered to be in supply.
3.6 Attachments
(Numbered 3.6 a second time in the source.)
Some special cards say: "Attach to [a type of unit card]". These cards may only be played during the Reinforcement Phase. They are played directly on the unit they are being attached to. Once attached, these cards become an integral part of the unit - they do not count as a separate unit for stacking purposes. Attached cards may not be transferred between units.
A unit may have one attached support weapon and one attached Leader or Hero. Using a Leader's ability does not commit the unit to which it is attached.
4. The Playing Area
Find a large flat surface on which to play The Last Crusade. This playing surface is divided up into three major areas: the Battlefield and a rear area for each player. Each player's rear area contains a Headquarters, Supply Stockpile, and Airfield. The last two can be set off to the side - they are outside of the Battlefield.
-
Headquarters: This represents the rear echelons of your forces. Capture of either side's Headquarters by opposing forces ends the game. During play, new ground units are initially deployed in the HQ. They may be kept there for defense (some types of units are required to stay there) or move out onto the Battlefield.
The Headquarters counts as a zone for the purposes of calculating both movement and range. Usually, Special cards that can target a zone can also target a player's Headquarters. Artillery units may fire from the Headquarters; range from the HQ may be counted through any of the three zones that connect to it. The Headquarters does not have a Terrain type.
-
Supply Stockpile: This is where Supply counters representing your logistical resources are kept. Unused Supply points accumulate from turn to turn without limit. The Supply Stockpile is completely off the Battlefield and generally cannot be affected by your opponent's actions in the game.
-
Airfield: When not on missions, aircraft are stored in the Airfield, which has no stacking limit. All aircraft units and Ordnance cards are initially deployed into the Airfield. Like the Supply Stockpile, the Airfield is considered to be far away from the Battlefield and generally cannot be affected by your opponent's actions - though some Special cards can affect the Airfield.
-
Battlefield: This is where most of the action takes place. In a standard two-player game, it's divided into nine zones, with two air corridors running between them. During setup, a terrain card is placed in each zone. This defines the type of Terrain for the zone and its effects on the units within the zone.
Two air corridors span the depth of the Battlefield, running between the columns. Aircraft move along these corridors to attack zones adjacent to them or to reach the enemy's Headquarters and attack units there.
5. Setting Up
Decide which player will play the Allies and who will play the Axis. Each player needs six Terrain cards and a deck consisting exclusively of unit cards of his selected nationality and special cards according to the 12.1 and 12.2 rules.
5.1 Deck Construction
There is no limit on the amount of cards you may use when creating a deck. Use as many or as few as you like. Remember, though, that if you run out of cards you'll be stuck trying to finish the game with what you've got. No deck may contain more than eight of any one unit card and more than two of any one special card. See 12. Special cards to learn which special cards you can put in your deck.
Choose any six Terrain cards to use in the current game. Set any others aside; they won't be used. Your opponent needs six Terrain cards of his or her own.
5.2 Setup Supply
Both players receive a set amount of Supply points with which to begin the game. These points are used to pay for Terrain and starting forces. See the specific rules of each country to know their starting amount of supply points. Any setup Supply not spent is lost, so it's a good idea to spend it all.
5.3 Terrain Placement
From the six Terrain cards you selected earlier, draw three at random. Look at them, then place them face down in a row in any desired order to create your edge of the Battlefield. Your opponent should do the same on the opposite edge. Once both players have placed their Terrain cards, turn them face up. Your three cards determine the Terrain in your starting zones. Subtract the Supply point cost of the Terrain in your starting zones from your starting Supply.
Once both players have arranged and paid for their Terrain, roll one die. If the roll is even, place the Allied player's three remaining Terrain cards face-up in random order to form the terrain in the center row of the Battlefield. If the roll is odd, use the German player's cards. Neither player has to pay for Terrain cards placed in the center row. Set aside the three leftover cards - they won't be needed in this game.
Before the game begins, both players must agree whether or not Bridge Terrain cards may be used. Placement of a Bridge Terrain card in either player's starting zones creates a special terrain condition. Players always have the option of playing a Bridge card as a Clear Terrain card if they do not want to play with the Bridge effects. Bridge cards that are placed in the center row of the Battlefield are always treated as Clear terrain.
5.4 Starting Forces
Both players may now look through their decks and spend their remaining setup Supply points on starting forces. These points may be spent to buy any Unit cards, and any Specials that are either Fortifications, Obstacles, Support Weapons, Headquarters Troops, or Ordnance cards. All Specials bought during setup must have a Supply Cost printed on the card, otherwise the card cannot be used during setup. Once you have selected your starting forces, shuffle the remaining cards of your deck and put them to one side. These cards form your Reinforcement Deck.
5.5 Initial Deployment
Beginning with the German player, both players place their starting forces. These may be placed in (or adjacent to, in the case of Obstacles, see below) the player's starting zones or Headquarters - subject to stacking limits, of course. Arrange units within zones around the Terrain card to form a neat square. Special cards attached to units are placed directly on those units and do not count against the stacking limitation.
Place all Aircraft and Ordnance cards face down in the Airfield.
Obstacle cards may be played along any edge of the three starting zones in front of your headquarters, or along the edge of your Headquarters - between it and any one Battlefield zone.
All cards begin the game unspotted and, as mentioned earlier, should be placed face-down. No units may begin play dug in.
5.6 Starting Hand
Draw seven cards from your Reinforcement Deck to form your starting hand. There is no limit to the size of a player's hand once play begins.
5.7 Starting Supply
Roll to determine the number of Supply points you begin the game with. See the specific rules of each country to know how many dice you will roll.
Place a number of Supply counters equal to the total shown on the dice in your Supply stockpile. These rolls are in lieu of the Supply roll each player would normally make at the beginning of the first turn - skip the Supply roll on your first turn.
5.8 Initiative
Both players roll one die. The player with the highest roll wins the initiative and begins the first turn. Once the first player has completed the turn sequence, move on to the next player. A turn is not complete until all players finish the turn sequence.
6. The Combat System
Before going over the turn sequence, it's worth taking a quick look at the combat procedure used throughout the game. Unless otherwise noted, all combat in The Last Crusade follows these same steps.
6.1 Unit Stats
Each combat unit has four numbers along its left side: Firepower values for use against infantry (marked "inf" and referred to as "infFP"), armor (marked "arm" and referred to as "armFP"), and anti-aircraft (marked "air", called "airFP"), and a Defense value (marked "def").
On most cards the airFP is grayed out - this means that the unit cannot make opportunity fire at passing aircraft. It may only return fire in response to an air strike. Units with normally colored airFP values (generally air and anti-aircraft units) do not suffer this restriction.
When you attack with a unit, choose a specific target (an enemy unit). Then roll a number of dice equal to your attacking unit's appropriate Firepower (FP) value - use the attacking unit's infFP when attacking Infantry targets, armFP when attacking Armor targets, and airFP when attacking aircraft. Terrain or Special cards may affect that Firepower value, increasing or decreasing the number of dice rolled. For example, the Village card reads "Air strikes and artillery into zone -1 FP". This means when making an air strike or artillery attack against a target in the zone, you must subtract 1 die from the appropriate Firepower value.
6.2 Target Numbers
All dice are rolled against a standard Target Number (TN) of 5. Each individual die result that equals or exceeds the Target Number causes a hit on the target unit (generally, a 5 or 6 represents a hit). This target number may be modified by Special cards, Terrain, or unit type. For example, the 7.2" Rockets unit reads, "-1 TN." This means that the unit rolls against a TN of 4 and every die that reads 4, 5, or 6 is a hit on the target unit. Low Target Numbers are better than high ones because low TNs represent better odds of a hit.
6.3 Damage
Mark each hit done to the target by placing a marker on the card. When the number of hits equals the target's Defense value, it is destroyed. Destroyed units should be placed into their opponent's Victory Pile. At the end of the game, the value of the cards in each player's Victory Pile are used in determining the winner. Destroyed cards remain the property of their owner, however, and must be returned at the end of the game.
6.4 Adding Modifiers
A note on how modifiers work in combat: start with the unit's base FP and modify it by all modifiers from attached cards - calculate multiplicative modifiers first. Then, apply modifiers from Terrain, non-attached Special cards, and other one-time sources - again, always apply multiplicative modifiers first.
For example, a Rifle Platoon (infFP of 3) with an attached MG Crew (+2 infFP) is defending a Hill (+2 infFP) against an attacking German infantry unit. The defender plays an Ambush card that doubles the Rifle Platoon's infFP for the first round of combat. The Rifle Platoon has a total infFP of 12 (base 3 + 2 for the MG x 2 for the Ambush + 2 for the Hill).
7. The Turn Sequence
Each player turn consists of five phases that are played through in order. The actions within a phase generally do not have to follow a predetermined order. The turn sequence is:
- Phase 1: Reinforcement
- Phase 2: Air Action
- Phase 3: Recon
- Phase 4: Bombardment
- Phase 5: Fire & Maneuver
Phase 1: Reinforcement
During this phase, perform all the following actions in any order.
Uncommit: Uncommit all of your committed units.
Return Aircraft: All of your Aircraft flying Combat Air Patrol missions from the previous turn must return to the Airfield. They are subject to anti-aircraft fire while returning to base.
Roll Supply: See the specific rules of each country to know how many dice you will roll. Place markers equal to the total in your Supply Stockpile.
Draw a Card: Draw one card from your Reinforcement Deck. You may purchase additional draws at a cost of 3 Supply points each - there's no limit to the number of cards you can buy or to the size of your hand.
Check Indefinite Cards: If you have, on previous turns, played any Special cards marked "Indefinite" and they are still in play, roll a die for each one. On a result of 5 or 6, the card effect ends and the card is discarded. On any other result, the card remains in effect.
Refit: You may repair any of your damaged units that are in supply. To refit a unit, simply pay one Supply point and remove a damage marker from the unit. Normally only one point of damage can be repaired per unit each turn. You may repair multiple units as long as you have sufficient Supply to pay for the repairs.
Certain Special cards, such as the ARV and Field Hospital, allow a unit to refit one point of damage for free. This refit point may be used in conjunction with a refit point paid for with Supply, allowing the unit to repair multiple damage points.
Fortifications and Headquarter Troop cards may also be refitted in the same manner as units.
Deploy Units: You may deploy cards from your hand by paying the Supply cost in the upper left corner from your Supply Stockpile.
Deploy new ground units and Headquarters Troops into your Headquarters. Each unit is deployed separately, meaning that no unit may be deployed already mounted on another unit. If the HQ has reached its stacking limit of nine units, you may not deploy any further units into it until some units leave.
Deploy new Aircraft and Ordnance on your Airfield. Ordnance cards are deployed independently. They are only attached to Aircraft when an Aircraft is launched.
New Fortifications may be deployed in any zone occupied by your troops. Fortifications count against a zone's stacking limit, but they can contain a unit which does not.
Obstacles may be deployed along the edge of any zone occupied by your troops. Obstacles do not count against the stacking limit, but only one Obstacle may be deployed along each edge of a zone.
Special cards that say "Attach to..." are added directly to appropriate units already on the Battlefield. Stack such cards underneath the units they affect. Cards attached to spotted units become spotted also.
Phase 2: Air Action
During this phase you may move your air units to positions from which they can conduct recon and combat operations.
Pay 2 Supply points for each aircraft that leaves the Airfield (unless the card specifies otherwise). Before leaving, Fighter-Bombers may be equipped with Ordnance cards kept at the Airfield. Once so equipped, the unit keeps the attached Ordnance until it is used or discarded.
Grouped Aircraft
Aircraft units may leave the Airfield individually or they may be grouped together. Grouped aircraft units move and attack together. Enemy fighters and anti-aircraft guns may make only one interception against the group, targeting one specific aircraft within it.
Aircraft Movement
All aircraft have unlimited movement, but they must trace this movement along one of the two air corridors (they never actually enter any Battlefield zones). An aircraft unit may stop adjacent to any zone on the Battlefield or fly into the enemy's rear area, adjacent to the enemy Headquarters. When an aircraft is between two Battlefield zones, it is considered to be adjacent to both. When in the rear area, it is considered to be adjacent only to the Headquarters. Once stopped, an aircraft may conduct recon and/or attacks in adjacent zones during later phases. Stopping ends the aircraft's movement.
Aircraft are automatically spotted while moving and should always be face-up when not in the Airfield.
Anti-Aircraft (AA) Fire
Enemy anti-aircraft units on the ground may fire on your aircraft any time your planes pass adjacent to their zones - even if the AA unit is committed. This opportunity fire occurs when the aircraft first comes into position adjacent to the AA unit - not when the aircraft leaves that position. Only units with airFP values that are not grayed out may take such opportunity fire. This does not commit the AA unit or cost any Supply, but it does cause it to become immediately spotted. An AA unit firing at a group of aircraft may each only target a single unit within the group.
Combat Air Patrol
Fighter-Bomber units may be placed on Combat Air Patrol (CAP) during your Air Action Phase. Aircraft to be placed on CAP may only be equipped with Drop Tanks, not Rockets or Bombs. To place a unit on CAP, move it to a position in either air corridor adjacent to the center row of cards. Going on CAP takes the place of other actions - CAP Aircraft cannot recon or perform air strikes later in the turn.
During your opponent's Air Action Phase, any of your fighters on CAP may choose to intercept any enemy aircraft that enter either air corridor. If you choose not to intercept, your opponent may choose to intercept your CAP fighters with his or her own fighters. Interception leads to air-to-air combat (see below).
Your fighters on CAP remain in the air until forced to return to the Airfield by combat or until your next Reinforcement Phase. CAP fighters are subject to AA fire when moving to and from their CAP position, but not when intercepting or fighting enemy aircraft.
Fighter or Bomber?
Bombers are clearly labeled as such, but fighter type aircraft are labeled "Fighter-Bomber" and can act in either role. Fighter-Bomber units not carrying Ordnance cards are considered fighters for the purposes of air-to-air combat. The exception to this rule is the Drop Tanks card, which does not prevent Fighter-Bombers from being considered fighters. Heavy Bombers, Dive Bombers, Jet Bombers, and Fighter-Bombers carrying Ordnance are considered bombers for air-to-air combat purposes. Fighter-Bomber units carrying Ordnance cards may jettison them to regain their fighter status - jettisoned cards are destroyed and placed in your opponent's victory pile.
Air Combat
Air-to-air combat occurs when an aircraft (or group) intercepts another aircraft (or group). Air combat is fought in two rounds. At the start of the first round, the intercepting player declares which enemy units his or her air unit will attack, followed by the intercepted player. Bombers (see the definition above) may only fire on units that first declared attacks on them.
Once all targets are announced, all fire occurs simultaneously (meaning no aircraft is destroyed until it has a chance to fire back). A unit which has not been declared a target makes its attack roll at -1 TN.
The same process is followed for the second round. At the end of two rounds, all surviving Fighter-Bomber units not equipped with Drop Tanks must return to the Airfield. Fighter-Bombers equipped with Drop Tanks may discard them to continue their missions. Surviving Bomber units may also continue movement. No Aircraft unit or group can be intercepted twice by the same enemy unit or group during the Air Action Phase - though it can be intercepted again while returning home during the Recon or Bombardment Phases.
When returning to the Airfield after resolving an attack or recon, the unit may move down either air corridor. It may be intercepted by enemy CAP aircraft or fired on by AA units it passes on its return trip. Remember though, that AA fire occurs when the target Aircraft initially moves adjacent to the AA unit - so AA units in the zone currently adjacent to the aircraft do not get to fire as it leaves.
Phase 3: Recon
Units that have the Recon ability may attempt to spot enemy units in adjacent zones during this phase. Spotting is important for more than just knowing what units the enemy has deployed - you can only bombard or make air strikes against spotted units.
Resolve your recon attempts in any order, one unit at a time. For each unit, choose a zone to be reconned. This zone must be adjacent to the reconning unit. Recon may not be performed diagonally. If the reconning unit is unspotted, you must reveal the entire card (but not attachments) to show that it is eligible to attempt the recon. You may then place the reconning unit back face-down. It remains unspotted.
For each reconning unit, roll a number of dice equal to the Recon value on the card. Unlike attacks, during recon you may split your dice among two or more targets as long as they are in the same zone.
Choose the specific unspotted enemy unit or units you wish to recon and allocate the unit's recon dice between them. Roll dice against a TN of 5 (this may be modified by Terrain or Special cards). Any roll of 5 or better indicates success. The target unit becomes spotted and must be turned face-up.
Like ground units, air units may recon adjacent zones (or the HQ, if in the rear area). After reconning, units that are not going to perform an air strike during the Bombardment Phase return to the Airfield.
Phase 4: Bombardment
Aircraft do not take part in the movement and assaults of Phase 5 - instead, their air-to-ground attacks occur during this phase. Artillery may also choose to attack during this phase, or hold its fire in order to directly support assaults or defenses in the following phase. Perform air strikes and bombardments with any or all of your artillery and airborne aircraft units in any order during this phase.
Air Strikes
Aircraft that are adjacent to Battlefield zones (or the enemy Headquarters) containing spotted enemy units may perform air strikes. Each aircraft unit attacks individually. Air strikes do not cost any additional Supply points.
Start by choosing a spotted target. Make an attack against it using the standard combat procedure. Aircraft in a group do not have to all attack the same unit, but they must all attack into the same zone. Unless otherwise noted, Headquarters Troops are Infantry type targets with Defenses of 3.
Units in the Airfield and Supply counters in the Supply Stockpile may only be attacked using certain Special cards.
Return Fire
Once your attack is resolved, all surviving enemy ground units in the zone (even those that were not attacked) may return fire, again using the standard procedure. AA units in a zone under attack may return fire even if they already fired on the Aircraft during Phase 2. Even units with grayed-out airFP values may return fire - except against Heavy Bombers (due to the high altitude from which they attack). Unspotted units that return fire become spotted and are turned face-up.
Returning fire does not commit a unit. Once an aircraft or group performs an air strike, move it immediately back to your Airfield. It may be intercepted by enemy CAP or fired on by AA units it passes on the return trip.
Artillery Bombardment
An artillery unit can bombard any spotted enemy unit within the range listed on its card. Ranges are listed in zones. Range can be measured front-to-back or side-to-side (it does not need to be counted in a straight line), but is never measured diagonally. Artillery that fires immediately becomes spotted and committed.
To bombard, make a single attack against the target using the standard combat procedure. Each artillery unit that bombards during this phase costs 1 Supply point. An artillery unit may not fire if you don't have enough Supply to pay this cost.
Phase 5: Fire & Maneuver
This is the phase in which you move your ground units and attempt to capture zones from your opponent. During this phase you may move any or all of your uncommitted ground units and carry out assaults on enemy positions.
Ground Movement
All ground combat units have Movement Factor (MF). A single MF can be used to move from one zone to another (including the Headquarters). Armor and motorized units have 2 MFs each. Unmotorized units have 1 MF each. Infantry mounted in transports are considered motorized and have 2 MFs while mounted.
Movement is always back-and-forth or side-to-side, never diagonal. Units in your Headquarters area may move to any of the three zones on your edge of the Battlefield (and vice-versa). Units may exceed zone stacking limits while moving, but may not end their movement in, or assault from, a full zone. Units may only move into zones containing enemy troops by assaulting.
Moving into a zone with Terrain marked "Difficult" ends a unit's movement and commits it, even if it has MFs remaining. If a unit or units assault into a zone with Difficult Terrain, the assault is resolved before they become committed. Any assault into Difficult Terrain commits a unit, even if it withdraws back into a non-Difficult zone. Also, if a unit assaults from a zone containing Difficult Terrain and withdraws back into the zone, it becomes committed.
Digging In
Some units have the ability to dig in. These units are marked "Commit to dig in." Digging in requires 1 MF and commits the unit. Dug-in units may ignore the first hit they receive in each round of combat, i.e. the first hit taken in the Bombardment phase and in each round of any assaults they face. Dug-in units are considered Fortified for the purpose of Terrain effects. Mark units as dug-in by tucking their edges under the edge of the zone's Terrain card.
Units in the HQ can dig in (you may want to place an unused Terrain card in the HQ and tuck the dug-in units under its edge). However, units in Fortifications and mounted units cannot dig in.
Transports
Some units are marked "May transport infantry." Unmotorized infantry soldier units may mount these units and move as if motorized - while mounted, the infantry unit and transport function as a single unit (with the exception of assault Supply costs, see below), and count as only one unit against a zone's stacking limit. Special cards that cause one of the units to commit or retreat affect both the transport and the infantry unit. When crossing damaging obstacles, mounted units are affected as one unit. Damage is applied to the transport first. Place the infantry on top of the transport card while mounted.
It does not cost any MFs to mount or dismount from a transport. However, a mounted unit spends 1 MF each time its transport moves. This means that if a mounted unit moves one zone and dismounts (becoming an unmotorized unit with 1 MF), it has expended all of its movement for the turn and immediately becomes committed.
Assaults
A unit that is in supply and has at least 1 MF available may attempt an assault on an enemy-held zone. No more than three units may assault from any one zone, excluding the Headquarters, which may mass an assault that includes nine units. You may move units through one zone in order to assault another, but only if those units can still retreat without violating the stacking limit of the zone they launch the assault from. It is possible for a unit with more than 1 MF to assault more than once per turn.
To begin an assault, designate which zone or zones the assault is originating from and which units from these zones are participating. You may support the attack with any uncommitted artillery units within range of the zone you are assaulting. All participating units become spotted and all participating artillery units also become committed.
Once all units have been designated, pay 2 Supply points for each participating armor unit, 1 point for each infantry unit, and 1 point for each supporting artillery piece. Mounted units must pay 1 Supply for the mounted unit and 1 Supply for the transport. A unit may not participate in an assault if there is insufficient Supply to pay these costs.
All units in the zone being assaulted become spotted. The defender must designate which defending units will be supplied, paying 1 Supply point for each (regardless of unit type). Units that are not supplied make attacks using only half their Firepower (rounded up). If the zone in question is not in supply, then none of the units can be supplied in combat.
The defender may also designate any uncommitted artillery within range of the zone under assault to support the defense. These artillery units become spotted and committed, and cost the defender 1 Supply each. Artillery may not fire if there is insufficient Supply to pay this cost. Supporting artillery fires during both rounds of combat.
If the zone is being simultaneously assaulted by units from multiple zones, the defender must designate the attack from one zone as the main attack, and the others, consequently, as flank attacks. Units that are part of flanking attacks each receive +2 to their armFP and infFP values. Units in the flanking force(s) retain this bonus even if the main attack force is destroyed.
Assault Combat
Once the assault begins, assaulting units are considered to be in the zone under assault for both artillery range and Terrain modifier purposes.
Assaults are resolved in two rounds. At the start of the first round, apply the effects of any enemy obstacle crossed by your assaulting force. Engineer units can negate the effects of obstacles, but they give up their first round fire to do so. Then all defenders, including supporting artillery, attack first using the standard procedure. Resolve fire one unit at a time - the defender need not specify all targets beforehand. Immediately remove any destroyed assaulting units from play, without returning fire. After all defending units have fired, the surviving assaulting units and their supporting artillery may fire - again resolve one at a time.
Once all the first round fire has been resolved, the assaulting player may opt to withdraw any or all assaulting units, returning them to their zones of origin. If all assaulting units are withdrawn or destroyed, the assault ends. If not, and if assaulting units other than supporting artillery remain, a second round of combat is resolved.
All fire in the second round is simultaneous - no units are removed from play until they have fired. Obstacles have no effect in the second round. Second round fire does not cost additional Supply.
If after two rounds of combat, all defending troops in the zone are eliminated, the attacker may advance any or all of the assaulting units (subject to stacking limits) into the zone, capturing it and making it a friendly zone. This does not constitute movement as these units already paid 1 MF to make the assault in the first place. If any of these units are capable of moving further, they may move on into empty or friendly zones, or attempt another assault on an adjacent zone.
Whether or not you choose to occupy the zone, remove all enemy obstacle or Fortification cards defending the zone you just captured and add them to your Victory Pile.
8. Special Rules
These special rules reflect combat situations that were not uncommon on the battlefield.
8.1 Infantry Support
Whenever an assaulting force contains only Armor, double the armFP of any defending infantry soldier units (units that actually say "infantry" in the card's Subhead). This does not apply in Clear Terrain where the tank is king, but does make all-armor assaults in other terrain very dangerous.
For artillery units supporting the attack from a distance, the attack from a distance does not count as infantry support. However, the units that go along with the armor don't need to be infantry soldier units. Any Infantry-type unit assaulting with the armor is sufficient to prevent this rule from taking effect.
This rule only takes effect if all the units used to initiate the assault are Armor units and the assault is against a zone with non-Clear (or non-Steppe) Terrain. If the armor is accompanied by Infantry units at the beginning of the assault the rule does not take effect - even if those units are destroyed early in the assault.
8.2 Mounted Infantry in Combat
When unmotorized infantry are mounted on transport units, the group counts as a single unit for calculating defensive Supply costs, but as two separate units when calculating assault Supply costs.
In combat, the two units' Firepower values are combined and may only be used against a single target. All damage received is applied to the transport unit first - when it takes as many hits as its Defense value it is destroyed. Any excess damage is applied to the infantry unit it was carrying. However, if a damaged infantry unit mounts a transport, keep track of its existing damage - it's not transferred to the transport.
8.3 Headquarters Assaults
Units in zones on the enemy's edge of the Battlefield may assault into the Headquarters. Resolve these attacks as normal assaults. If units assault the HQ from more than one edge zone, the defender must designate one group as the main attack and the other group or groups as flankers. Once all defending units in the Headquarters are destroyed, the Headquarters is captured and the game ends. Headquarters Troop units that have no Firepower values are automatically destroyed in an assault if all defending combat units in the HQ are eliminated.
9. Victory!
When one player's HQ is captured, the game ends and the score is calculated. Each player receives Victory points equal to the Supply cost of all the cards in his or her Victory Pile. The player who captured the Headquarters receives an additional 5 points. The player with the highest total wins. Don't forget to return all cards in your Victory Pile to their owner, and retrieve yours.
Under certain rare circumstances it may not be possible for either player to take the other player's HQ. If both players agree that this is the case, the game ends and no one gets the 5 point bonus for taking the Headquarters. Total the value of each player's Victory Pile. The player with the highest total wins.
10. Special Effects
Many Special cards fall into distinct categories that are explained below. Cards belonging to these categories list them in the Subhead.
10.1 Fortification
Fortifications are structures from which units can defend themselves. Deploy them into friendly zones during your Reinforcement Phase. Fortifications count against a zone's stacking limit, but may hold one unit (of the type specified on the card) that does not count against this limit. A unit inside a Fortification is protected from attacks; before damage can be applied to the unit inside, the Fortification must be destroyed. Any excess damage from the attack that destroys a Fortification carries over to the unit inside. The Firepower value used to attack a Fortification depends on the type of unit making the attack. Infantry soldier units and Fighter-Bombers use their armFP value, all other units attack using their infFP value.
Note: This is a change from the original Fortification rules in the Normandy to the Rhine edition. This is to reflect that infantry units confronted with a Fortification generally had to use their limited antitank weapons to take out bunkers and the like and fighter aircraft armed with machineguns and light cannons needed bombs or rockets to be effective against these types of targets. It also allows self propelled guns - designed to support infantry by knocking out strongpoints with HE shells - to be more effective in this role.
Fortifications may be refitted in the same way as units and may be deployed in the Headquarters. When destroyed, place Fortifications in your opponent's Victory Pile.
10.2 Generals
Generals are almost identical to Headquarters Troops (see below) except that they cannot be attacked and they have Indefinite duration (also explained below). Only one General per side may be in play at any one time.
10.3 Headquarters Troops
These are primarily non-combat troops that support the front-line troops in various ways. Deploy them into your HQ (where they remain and count against the HQ stacking limit) during your Reinforcement Phase. Most have no FP values, but they all have a Defense of 3 (unless noted otherwise on the troop's card). They can be spotted and attacked like other units using infFP. Unspotted Headquarters Troops must be revealed when their special abilities are used. If the card is unspotted, it remains so. Place it back face-down after using its special ability.
You may only use one of a specific type of non-combat Headquarters Troop in a single turn. Combat units like Railway Guns and Armored Trains are exempted from this restriction.
10.4 Leaders
These cards represent officers, heroes, and others with the leadership ability to improve the performance of their units. Play by attaching them to combat units during the Reinforcement Phase. If the unit is destroyed, the Leader is lost with it. Leaders do not count toward a zone's stacking limit.
Like Support Weapons (see below), Leader cards are labeled "Attach to unit" in the card's Subhead. These cards are different from weapons because they represent officers, aces, or medal winners. Forward Observers, and other, non-officer, non-hero individuals are not Leaders.
10.5 Obstacles
Obstacles include Barbed Wire, minefields, and other impediments to your opponent's movement and assaults. Play them face-up along one edge of any zone occupied by your troops during your Reinforcement Phase. There cannot be more than one obstacle on any one edge of a zone, although another may be placed on the adjoining edge of a neighboring zone. Thus, it is possible to have two Obstacles between zones. Obstacles do not affect stacking limits. They affect all enemy units that cross over the edge of the zone they are played upon. If destroyed, they go to your opponent's Victory Pile. An Obstacle that is negated by Engineers is not destroyed unless the zone it is played on is captured by the enemy. Your own obstacles never affect your units.
During your Reinforcement Phase, you may choose to remove any of your Obstacles from play - put removed obstacles into your discard pile.
10.6 Ordnance
Ordnance cards are weapons and attachments that enhance Fighter-Bomber aircraft. These cards may only be used on Fighter-Bomber units. Bomber Firepower values assume that they already carry full bomb loads. Play Ordnance cards face-down into your Airfield during your Reinforcement Phase. Ordnance cards are discarded to the opponent's Victory Pile after use.
10.7 Support Weapons
Support weapons include bazooka teams, MG crews, and other weapon sections that improve the combat capability of ground units. Like Leader cards, Support Weapons are labeled "Attach to unit." Play by attaching them to combat units during your Reinforcement Phase. Each unit may have a maximum of one Support weapon attached to it. This does not count against the zone's stacking limit. If the unit is destroyed, the weapon is lost with it.
11. Special Abilities
Certain units and Headquarters Troops have special advantages or disadvantages. These are printed in the Game Effects section of the card and described here.
11.1 Airborne
The unit may conduct airborne operations if three conditions are met. First, the Airborne Drop card must be in play. Second, the enemy player may not have any aircraft on CAP. Third, there may not be any cards that prevent aircraft from flying in play. If these conditions are met, then during your Fire & Maneuver Phase you may move any or all airborne-capable units in your HQ directly to any zone on the Battlefield (not the enemy's Headquarters), at a cost of 2 Supply per unit. Airborne units are always considered in Supply while the Airborne Drop card is in play.
The units move along air corridors like aircraft and are subject to AA opportunity fire. If the target zone is held by enemy troops, the airborne arrival is treated as an assault - except that the standard assault Supply cost does not apply to the paratroopers. As usual, friendly units in adjacent zones may make simultaneous assaults, and the defender must designate one assault as the primary and the others as flank attacks. Once the airborne assault or movement is complete, the airborne units are committed. If an airborne assault fails to take an enemy-held zone, the airborne units are destroyed, even if they have adjacent friendly zones to fall back to.
11.2 Artillery
The unit may make ranged attacks during the Bombardment Phase and in support of assaults or defenses in the Fire & Maneuver Phase. Any such attack spots and commits the unit. The unit's range in zones is listed in the Game Effect section of its card. Artillery range may not be counted diagonally.
11.3 Atrocities
Waffen-SS units often executed prisoners. Whenever an SS unit (or other unit marked "Atrocities") participates in an assault, roll a die. On a 6, prisoners are killed. All enemy ground units receive +1 Def for the remainder of the game, reflecting their unwillingness to surrender. This effect can only occur once per game.
11.4 Counterattack
Generals with this ability allow you to conduct one assault during your opponent's Fire & Maneuver Phase. Declare and carry out this assault at any time, so long as it does not interrupt an enemy assault as it is being resolved.
11.5 Flankers Fire First
Turretless self-propelled guns generally suffer from this disadvantage. If attacked from the side or rear, they must turn the entire vehicle toward the enemy to engage a target. When attacked by flanking forces, any units in the flanking forces may fire at the unit before it fires. This effect applies to both rounds of combat.
11.6 Friendly Fire
Heavy Bomber units attack from high altitude, making it hard to discriminate friend from foe. Whenever a Heavy Bomber performs an air strike in a zone adjacent to friendly troops, count each 1 rolled as a hit on a randomly determined adjacent friendly unit.
11.7 Ignores Hitler (Stalin) Cards
If a player has a card in play with this ability, that player can completely ignore the effects of any "Hitler" (Stalin) card.
11.8 Indefinite
This card's effects linger for one or more turns. Each turn after the card is played, during your Reinforcement Phase, roll one die for each of your Indefinite cards in play. On a 5 or 6, the card effect ends and the card is discarded. Otherwise, the card remains in effect.
11.9 Negates Obstacles
An assaulting force that contains a unit with this ability may choose to ignore any obstacle card it encounters. This does not destroy the Obstacle, just negates its effects for the combat in question. If the unit is used to negate the obstacle, it is not eligible to fire in the first round of combat. If the unit is mounted, its transport cannot fire either.
11.10 Recon
Units with a printed Recon value may attempt to spot enemy units during the Recon Phase.
11.11 Unique
A Unique card may only come into effect once per game. Should an identical card come into play, discard it and ignore its effects.
12. Special Cards
Each nation has a deck of special cards made of 2 parts: the common special cards and the nation special cards.
12.1 Common special cards
As indicated by its name, the common special cards are used by nations of the same side (Allies, Axis, Soviet). They are some of the special cards used by the major power of that side. For example, Hungary uses the Axis (German) common special cards whereas Yugoslavia uses the Soviet special cards and the Free French use the Allied (U.S.) special cards.
12.2 National special cards
These are the special cards that can only be used in a deck by one only nation. For example, Blown Dam can only be played by the German player, Assassination Plot with a blue back can only be played by the U.S. player. Note that a special card of another nation can have the same name. For example, Partisan Activity with a red back is a Soviet special card and Partisan Activity with a blue back is a U.S. special card.
13. Bridges & Rivers
The placement of a Bridge Terrain card in a player's starting zones creates a river between that starting row and the center row of zones. A bridge crosses the river directly in front of the Bridge card, but in the other columns the river forms an obstacle (you may want to place some unused Terrain cards face-down in the space between the rows to indicate the river); no Obstacle cards may be played along zone sides adjacent to a river. Bridges and rivers have a number of important game effects.
13.1 Movement Effects
Unmotorized infantry soldier units (cards that actually say "Infantry" in the card subhead) may cross a river at any point. All other ground units may only cross at a friendly bridge or ferry. Likewise, infantry soldier units may freely trace supply lines across rivers at any point. All other units may only trace a supply line across a river via a friendly-controlled bridge or ferry.
If you control the two zones on opposing banks of a river, you may use engineer units as temporary ferries. To do this, move the engineer unit into the river, in the space between the zones. This costs 1 MF and commits the unit. As long as the engineer unit remains in place, one unit per turn may cross the river at this point (in addition to infantry soldier units, which may cross freely). If a zone on either side of the ferry is captured by the enemy, the engineer card must leave the river on your next Reinforcement Phase.
13.2 Recon Effects
Any ground unit attempting to recon across a river suffers a -1 penalty to its Recon value.
13.3 River Assaults
Rivers up the ante when it comes to assaults. Infantry soldier units may assault across a river at any point, but they may not fire in the first round of combat unless equipped with a Special card that allows them to do so (such as the Assault Boats card). Supporting artillery, however, may fire in the first round as usual. Without a bridge, there is no retreat across a river: if the zone is not captured, all assaulting units are destroyed.
Non-infantry units may only assault across a river at a bridge. All defending units, including supporting artillery, attack at -1 TN against units crossing the bridge. Units can retreat across bridges - failed assaults do not automatically cause destruction.
When assaulting units in a Bridge Terrain zone from a side that does not require you to cross the river (in other words, from the side or rear), treat the terrain as clear.
13.4 Bridge Demolition
Bridges can be destroyed. Aircraft and artillery may strike or bombard bridges in the Bombardment Phase, but make their attacks at +1 TN. If a Bridge takes as many hits as its Defense value, it is destroyed. Primary bridges (Bridge Terrain cards) have Defense values of 5.
During your Fire & Maneuver Phase, your engineer units may attempt to demolish a bridge adjacent to their location. This costs 1 MF per unit and commits the unit. Roll 2 dice and subtract 4 from the result: that is the number of hits the bridge takes.
13.5 Bridge Repair
Bridges do not refit damage like other cards. They may only be repaired by engineer units. To repair a damaged bridge, you must control both zones that are connected by the bridge and have an engineer unit in one of these zones. During the Fire & Maneuver Phase, engineer units in these zones may attempt repairs by committing. Roll a die for each unit and divide the result by 2 (round up). This is the number of hits repaired. Destroyed bridges cannot be repaired.
13.6 Minor Bridges
It's possible to find minor bridges across a river. During the Recon phase, recon-capable ground units adjacent to a river may sacrifice their normal recon rolls to scout for a minor bridge. Roll 1 die for each unit which does so, with a result of 6 indicating that a minor bridge has been located. Place a marker of some sort in the river to indicate the bridge's presence. Minor bridges may not be found in the same location as a major bridge.
Minor bridges are subject to the same rules as normal bridges, except that only 1 unit may move or assault across a minor bridge each turn. Minor bridges have Defense values of 3, and once destroyed may not be repaired.