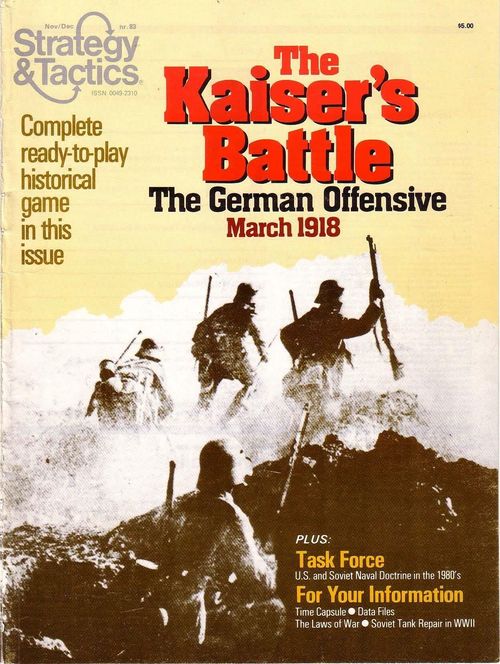
The Kaiser's Battle: The German Offensive, March 1918
The Kaiser's Battle: The German Offensive, March 1918 Rulebook
Table of Contents
Table of Contents
- 1.0 Introduction
- 2.0 Equipment
- 3.0 Glossary and Abbreviations
- 4.0 Sequence of Play
- 5.0 Movement
- 6.0 Zones of Control
- 7.0 Stacking
- 8.0 Combat
- 9.0 Artillery
- 10.0 Trenches
- 11.0 Weather
- 12.0 Air Operations
- 13.0 German Divisional Breakdown
- 14.0 Supply
- 15.0 Reinforcements
- 16.0 Corps Attachments
- 17.0 Special Rules, Turns 1 and 2
- 18.0 Setting Up the Game
- 19.0 Unit Abbreviations
- 20.0 Victory
1.0 Introduction
The Kaiser's Battle is a simulation of the German 18th Army's dramatic counter-offensive that almost crushed the British 5th Army under General Gough during March 1918 in Picardy.
2.0 Equipment
2.1 The Map and Charts
The map is a 22" x 34" representation of part of the Picardy area of France during the years of the First World War.
2.2 The Playing Pieces
The cardboard pieces (counters) represent the actual military units that participated in the campaign. Each counter contains certain information that is vital to the play of the game.
2.2.1 Colors
The counter mix includes forces of three nationalities: British, French, and German. Each nationality is portrayed by a color unique to that force.
2.2.2 Sample Unit
A. The unit below is a German Stosstruppen Division. (Counter illustration: front and back shown in the original; not reproduced here.)
B. The back has a reduced Combat Strength.
2.2.3 A Note on Unit Designations and Sizes
Since all unit designations play an important role in the game, it is necessary that both players be familiar with their format. British infantry battalions are given in the sequence battalion/division/corps. All brigades (or regiments) are given in the sequence brigade (or regiment)/ division/corps. Finally, German divisions are given in the sequence division/corps. Regardless of a unit's type, the last number in its designation is always its corps.
2.2.4 Unit Sizes
| Symbol | Size | Symbol | Size |
|---|---|---|---|
| XXX | Corps | III | Regiment |
| XX | Division | II | Battalion |
| X | Brigade | I | Company |
HQ units are considered company-size.
2.2.5 Summary of Combat Unit Types
(Counter illustrations for the front and back of each type are shown in the original; not reproduced here.)
- Headquarters
- Stosstruppen
- Infantry/Service Company
- Cavalry
- Engineer
- Regimental/Replacement Unit
2.2.6 Summary of Marker Types
(Counter illustrations for the front and back of each type are shown in the original; not reproduced here.)
- Artillery
- Persistent Gas
- Air Observation
3.0 Glossary and Abbreviations
3.1 Glossary
3.1.1 Combat Resolution Die Roll
The die roll made by both sides to resolve an attack.
3.1.2 Combat Strength
Combat Strength (CS) is a quantification of a unit's strength in attack and defense.
3.1.3 Morale Value
Morale Value (MV) is the quantification of a unit's skill in defensive combat. The higher the number, the better the unit in question.
3.1.4 Movement Allowance
Movement allowance (MA) is a quantification of a unit's mobility, expressed in movement points (MPs).
3.2 Abbreviations
| Abbr | Meaning | Abbr | Meaning |
|---|---|---|---|
| AP | Artillery Point | MP | Movement Point |
| AirP | Air Point | MV | Morale Value |
| CS | Combat Strength | OOS | Out of Supply |
| DRM | Die Roll Modifier | SP | Stacking Point |
| EZOC | Enemy ZOC | VP | Victory Point |
| HQ | Headquarters | ZOC | Zone of Control |
| MA |
4.0 Sequence of Play
4.1 The Turn
A. The game is played in turns, each of which consists of two player-turns (one German and the other Allied) plus numerous independent phases and stages.
B. The player (or side) whose player-turn is in progress is termed the phasing player (or side).
4.2 Turn Sequence Outline
Each turn proceeds in the order below:
4.2.1 Weather Stage
Beginning on Turn 3, Germany rolls a die to determine the weather for the remainder of the turn.
4.2.2 Air Operations Stage
This begins on Turn 3.
4.2.2.1 Air Allocation Segment
Both sides secretly assign Air Points (AirPs) to missions (12.0).
4.2.2.2 Interception Segment
The effects of Interception are determined.
4.2.2.3 Ground Attack Segment
German and Allied ground attacks are resolved (12.3).
4.2.3 Reinforcement Stage
4.2.3.1 Pre-Determined Reinforcement Segment
The Allies deploy scheduled reinforcements on the map (15.3).
4.2.3.2 Variable Reinforcement Segment
Beginning on Turn 6, the Allies roll a die to determine the number of service companies made available for use (15.2).
4.2.4 Artillery Stage
4.2.4.1 Counter-Battery Phase
Beginning on Turn 3, both sides secretly allocate and resolve counter-battery fire (9.2).
4.2.4.2 Persistent Gas Fire Phase
Beginning on Turn 3, Germany may allocate some, none, or all of its Artillery Points (APs) to Persistent Gas fire against the Allies (9.3).
4.2.4.3 German Drumfire Barrage Phase
On Turns 1 and 2, Germany resolves Drumfire Barrage attacks (9.4).
4.2.5 German Player-Turn
4.2.5.1 German Breakdown Phase
Beginning on Turn 3, Germany may break down its divisions (13.1).
4.2.5.2 Movement Phase
4.2.5.2.1 First Movement Segment
German units may move and may enter and leave enemy Zones of Control (EZOCs).
4.2.5.2.2 Second Movement Segment
Those German units that did not move in the First Movement Segment may now move and triple their MAs. However, they must remain out of EZOCs for the duration of the segment.
4.2.5.3 Combat Phase
German units must attack adjacent Allied units (8.0). (Source typo ".Combat Phase" corrected to "Combat Phase".)
4.2.6 Allied Player-Turn
4.2.6.1 Movement Phase
4.2.6.1.1 First Movement Segment
As per German Segment, except Allied units may move.
4.2.6.1.2 Second Movement Segment
As per German Segment, except Allied units may move.
4.2.6.2 Combat Phase
Allied units must attack adjacent German units (8.0).
4.2.7 Terminal Phase
A. Germany determines if Persistent Gas markers are removed (9.3.4).
B. If this is the end of Turn 10, the game ends and victory conditions are assessed.
C. Otherwise, advance the Game Turn marker to indicate the start of a new turn.
5.0 Movement
A. During the Movement Phase, the phasing side may move as many or as few units, in any order, as desired.
B. Eligible units are moved individually, tracing a path of contiguous hexes through the hexgrid. Once a particular unit begins moving, it must complete its movement before any other unit moves.
C. Movement is calculated in terms of MPs, which are expended as a unit moves from hex to hex, the amount depending on terrain.
D. As long as a unit's MA is not exceeded in a single Movement Segment, it may move as many or as few hexes as desired.
E. Unused MPs may not be accumulated nor may they be transferred to another unit.
F. Each Movement Phase is divided into two Movement Segments; a unit may move in either of these segments, but never in both.
5.1 Movement Restrictions
5.1.1 One Segment per Phase
During a Movement Phase, the phasing side may move all, some, or none of its units. A given unit may move either in the First or the Second Movement Segment, but not in both.
5.1.2 Enemy-Occupied Hexes
A unit may never enter a hex occupied by an enemy unit.
5.1.3 Enemy-Controlled Hexes
A. A unit must stop immediately upon entering an enemy-controlled hex (6.0) and may move no further during that Movement Phase.
B. A unit may leave an enemy-controlled hex at the beginning of its First Movement Segment by expending half its MA (round fractions down) in addition to the cost of the terrain entered. Such a maneuver may be performed only if the unit moves directly into a hex that is not enemy-controlled.
C. A unit may not enter nor leave an enemy-controlled hex in the Second Movement Segment (5.2).
5.1.4 Advance and Retreat in Combat
Advances or retreats due to combat do not occur in the Movement Phase and do not affect a unit's MA.
5.1.5 Minimum One-Hex Movement
A unit may always move at least one hex per friendly Movement Phase, even if it does not possess enough MPs to accomplish this maneuver, as long as it does not move from one EZOC to another.
5.2 The First and Second Movement Segments
5.2.1 First Movement Segment
During the First Movement Segment, each of the phasing side's units may move up to the limit of its MA. Each unit may enter and leave Zones of Control (ZOCs) normally (5.1.3).
5.2.2 Second Movement Segment
A. During the Second Movement Segment, each of the phasing side's units that did not move in the First Movement Segment may move up to triple its MA. Exception: Headquarters (5.2.3).
B. However, each unit that moves in the Second Movement Segment must remain out of EZOCs at all times during this Segment (including at its start and at its finish).
5.2.3 Headquarters
Headquarters (HQ) units may move only in the First Movement Segment – they may never triple their MAs by moving in the Second Movement Segment.
5.3 Terrain Effects on Movement
The MP costs of all hexes and hexsides are summarized on the Terrain Effects Chart.
5.4 Effects of Other Friendly Units on Movement
A. A unit may move through hexes occupied by other friendly units at no additional MP cost.
B. There is no limit to the number of friendly units that may move through a particular hex during a Movement Phase. However, there are limitations with regard to the number of friendly units that may end the Movement Phase in the same hex (7.0).
C. Friendly-controlled hexes never interfere with the movement of friendly units.
D. There is no MP cost to stack or unstack.
6.0 Zones of Control
The six hexes immediately surrounding a unit (or stack) constitute that unit's ZOC. ZOCs affect movement, combat, and supply. Hexes upon which units exert ZOCs are called controlled hexes. All units exert ZOCs at all times. Exception: Service companies (15.2).
6.1 Effectiveness of ZOCs
A. Units exert their ZOCs at all times during the turn.
B. A unit never pays an additional MP cost to enter an enemy-controlled hex. However, units do pay a penalty to leave an enemy-controlled hex (5.1.3).
C. Terrain never affects ZOCs.
D. There is no additional effect in having more than one unit exert its ZOC into a given hex.
6.2 ZOCs and Movement
6.2.1 Entering an EZOC
All units must cease movement immediately upon entering an EZOC. Such units may move no further during the Movement Phase.
6.2.2 Leaving an EZOC (Printed as "Leaving and EZOC".)
A. A unit may leave an enemy-controlled hex at the beginning of its Movement Segment, but only if it moves into a hex that is not enemy-controlled (5.1.3).
B. A unit that exits an enemy-controlled hex during a Movement Phase may enter another enemy-controlled hex at some later point in that phase.
6.2.3 Moving Between EZOCs
Units may not immediately move from one enemy-controlled hex to another, except as a result of advance after combat.
6.2.4 Effect of Friendly Units on EZOCs
Friendly units do not negate EZOCs in the hexes they occupy for the purpose of movement.
6.3 ZOCs and Combat and Supply
A. A hex that is controlled or occupied by an enemy unit blocks the tracing of friendly supply through that hex.
B. Friendly units (not friendly ZOCs) negate EZOCs in the hexes they occupy for the purpose of tracing supply.
C. Friendly units do not negate EZOCs in the hexes they occupy for the purpose of tracing a retreat due to an unsuccessful attack (8.7.4).
7.0 Stacking
A maximum of 12 friendly Stacking Points (SPs) may occupy the same hex at the end of a friendly Movement Phase.
7.1 Stacking Points
Each unit is worth a certain number of SPs.
| SPs | Size/Type |
|---|---|
| 12 | Division |
| 4 | Brigade or Regiment |
| 2 | Battalion |
| 1 | Company or HQ |
7.2 Stacking Restrictions
A. Stacking restrictions apply only at the end of a friendly Movement Phase.
B. During the Movement Phase, any number of friendly units may enter and pass through a stack.
C. If a stack of units exceeds 12 SPs at the end of a friendly Movement Phase, the excess must be eliminated by the owner.
8.0 Combat
A. Friendly units adjacent to enemy units during the Combat Phase must attack those enemy units.
B. Each unit possesses a CS, used when attacking or defending. This strength may not be divided among different combats.
C. The phasing side is termed the attacker and the non-phasing side is termed the defender. Each combat may be affected by terrain, artillery, and/or supply.
D. Combat results include step losses and possible advances or retreats.
E. Each side determines the total CS of all its participating units.
F. The attacker rolls a single die and applies relevant die roll modifiers (DRMs) per 8.3. This modified die roll is then multiplied by the attacker's total CS to get the attacker's product.
G. The defender rolls a single die and applies relevant DRMs per 8.4. This modified die roll is then multiplied by the defender's total CS to get the defender's product.
H. Divide the attacker's product by the defender's product, rounding fractions down. Compare that value to the defender's MV to determine a combat result (8.7).
I. Apply the combat result immediately, before resolving any other attacks.
J. Separate combats may be resolved in any order the phasing side desires, so long as all necessary combats are resolved at some time during the Combat Phase.
8.1 Which Units May Attack
8.1.1 Requirement for Adjacent Units to Be Attacked
Every non-phasing unit adjacent to a phasing unit must be attacked by some phasing unit during that Combat Phase. Exception: Units in towns or trenches (8.1.3).
8.1.2 Requirement to Attack Adjacent Units
A. All the phasing side's units ending their Movement Phase adjacent to enemy units must attack some unit during the ensuing Combat Phase. Exception: Units in towns or trenches (8.1.3).
B. The phasing side may choose which friendly units will attack each adjacent enemy unit so long as all adjacent, enemy-occupied hexes are attacked.
8.1.3 Units in Towns or Trenches
A. Any units occupying town or trench hexes are not obligated to attack adjacent enemy units during the friendly Combat Phase. If they choose to attack adjacent enemy units, they are only obligated to attack one adjacent stack, although they may attack more if desired.
B. Enemy units adjacent to friendly units in these positions are still obligated to attack those friendly units during the enemy Combat Phase (unless the enemy units also occupy a town or trench hex).
8.1.4 Restrictions
No unit may attack more than once per Combat Phase and no unit may be attacked more than once per Combat Phase.
8.2 Multiple Unit and Multi-Hex Combat
If a phasing side's unit is adjacent to more than one enemy unit, it must attack all those adjacent enemy units that are not engaged by some other attacking unit. Exception: Units in towns and trenches (8.1.3). (Printed as "8.21" in the source; the unnumbered paragraph is kept under 8.2 here.)
8.2.1 Multi-Hex Attackers
Units in two or more different hexes may combine their CS to attack a single, adjacent hex.
8.2.2 Multiple Defenders in Same Hex
A. All units in a given hex must be attacked as a single, combined CS.
B. The defender may not withhold a unit in a hex that is under attack.
8.2.3 Multiple Attacking Units in Same Hex
When a single hex contains more than one unit, each of those units may attack a different hex at the owner's discretion.
8.2.4 Adjacency Requirement
A single attack may involve numerous attacking and defending units. However, for an attack to be resolved as a single combat, all attacking units must be adjacent to all defending units.
8.2.5 Terrain Effects When Defender in Multiple Hexes
If several units subject to a single attack are defending in more than one hex, the defender considers all of its participating units to be occupying the most favorable terrain type among those hexes occupied by its units.
8.3 Attacker Die Roll Modifications
The following DRMs may be made to the attacker's combat resolution die roll:
| DRM | Condition |
|---|---|
| +1 | Fog (11.0) |
| +X | Allocation of Artillery Points (APs) in Rolling Barrages (9.5) |
8.4 Defender Die Roll Modifications
A. The following DRMs may be made to the defender's combat resolution die roll:
| DRM | Condition |
|---|---|
| +3 | If any attacking unit is currently isolated (14.0) |
| +2 | If any attacking unit is out of supply (14.0). |
| +1 | If any attacking unit is out of communication (14.0). |
| +1/+2 | Allocation of SOS Barrage APs (9.6) |
| +1 | If the attacker is conducting an attack with units of two or more different corps formations (16.0). |
| +X | Terrain occupied by the defender (5.3.2) |
B. All of these DRMs are cumulative.
8.5 Strength Steps
A. Most combat results call for a number of strength steps to be lost by the attacking or defender.
B. The following summarizes the number of steps possessed by each combat unit:
-
Each division consists of three strength steps. The first (and most powerful) step is represented by the front face of the division counter. The second step (portraying a weaker CS) is represented by the reverse side of the counter. The third (and last) step is represented by a regimental-sized replacement unit, placed on the map in the hex vacated by the division-size unit (which is removed from the map).
-
All regimental replacement units consist of a single strength step only (13.2).
-
Each brigade and non-replacement regiment unit consists of two strength steps. The first (and more powerful) is represented by the front face of the counter. The second step (portraying a weaker CS) is represented by the reverse side of the counter.
-
Each regimental replacement, battalion, company, and HQ consists of a single step. This step is represented by the front face of the counter. (Some units may be back-printed with other values. These values are not a second step (15.0).)
8.6 Morale Value
Each combat unit possesses a MV, which is a number ranging from 1 (worst) to 5 (best).
8.6.1 Different MVs in Same Hex
If more than one unit is stacked in the same hex, the stack as a whole automatically assumes a MV equal to the highest MV possessed by any of the units within the stack.
8.6.2 Multi-Hex Defender
If several units subject to a single attack are defending in more than one hex, all defending stacks automatically assume a MV equal to the highest MV possessed by any of the defending units.
8.7 Combat Resolution
The result of each attack is determined by dividing the attacker's die roll-CS product (8.0.F) by the defender's die roll-CS product (8.0.G). If this quotient is 1 or greater, it is compared to the defender's MV in order to determine if the attack is successful or unsuccessful. (Source printed "8.02.F"; read as 8.0.F.)
8.7.1 Quotient < 1
If the quotient that is created due to the division of the attacker's die roll-CS product by the defender's die roll-CS product is less than 1, the result is Attacker Eliminated. All attacking units are immediately removed from the map and are considered to have lost all of their strength steps.
8.7.2 Quotient > 1 But < Defender's MV
If the quotient that is created due to the division of the attacker's die roll-CS product by the defender's die roll-CS product is 1 or greater but equal to or less than the defender's MV, the attack is unsuccessful (8.7.4).
8.7.3 Quotient > Defender's MV
If the quotient that is created due to the division of the attacker's die roll-CS product by the defender's die roll-CS product is greater than the defender's MV, the attack is successful (8.7.5).
8.7.4 Unsuccessful Attack
A. If an attack is unsuccessful, each attacking stack immediately loses one strength step and immediately retreats into any adjacent hex that is neither controlled nor occupied by an enemy unit (owner's choice).
B. If such a retreat is impossible, the attacking stack remains in place and loses a second strength step.
Play Note: Since stacking restrictions apply only at the end of a Movement Phase, it is permissible to violate stacking restrictions when conducting a retreat.
8.7.5 Successful Attack
A. If an attack is successful, the defender immediately loses a number of strength steps equal to the difference between its stack's MV and the quotient created in 8.0.H.
B. If such a loss eliminates the defender entirely, the attacker may conduct an advance after combat (8.8).
Example: A British brigade (CS of 10, MV of 4) and company (CS of 1, MV of 3) in a town are being attacked by a German division (CS of 30). Germany rolls the die and obtains a 4, multiplied by 30 to yield 120. The British roll the die and obtain a 1 (becoming a 2 because of the presence of the town); 2 is multiplied by 11 (the total British CS) to yield 22. 120 divided by 22 yields 5 (dropping fractions). The composite British MV is 4, so the attack is successful. The difference between 5 and 4 is 1, so the British lose one step and remains in place. This step loss is fulfilled by eliminating the company unit.
8.8 Advance and Retreats After Combat
8.8.1 Attacker Retreat
If an attack is unsuccessful, surviving attacking units are obligated to retreat one hex after combat (8.7.4).
8.8.2 Defender Retreat/Advance
The defender never retreats or advances after combat.
8.8.3 Attacker Advance
A. If all defending units have been entirely eliminated as a result of an attack, all participating attacking units may advance a variable number of MPs after combat, paying normal MP costs for each hex entered or hexside crossed.
B. To determine the number of MPs that each attacking unit may advance, the attacker rolls one die, applying it to all of the participating attacking units:
-
German Stosstruppen may advance a number of MPs equal to this die roll.
-
All other German and all Allied units may advance one-half (round fractions down) the number of MPs shown on this die roll.
8.8.4 Conduct of Advances
A. When advancing, move each victorious unit individually. The first hex entered must be the hex formerly occupied by the eliminated units. Each unit may then continue to advance up to the MPs determined in 8.8.3.
B. If the number of MPs in the advance is not sufficient to enter the first hex, no advance may take place.
C. German non-Stosstruppen and all Allied units must halt their advance immediately upon entering an EZOC. Stosstruppen units may continue to advance regardless of the presence of EZOCs. (No special MP costs are paid to enter and exit these ZOCs.)
8.8.5 Advance Is Voluntary
Victorious units are never required to advance. They may halt their advance at any time during the course of the advance.
8.8.6 German Advances on Turns 1-2
During Turns 1 and 2, special rules are applied to German advances after combat (17.0).
8.8.7 Combat After Advance
Units that advance adjacent to enemy units may not participate in another combat for the remainder of the Combat Phase.
9.0 Artillery
A. Each side receives a variable number of APs during each Turn. These numbers are listed turn by turn on the Turn Track. Regardless of how an AP is used, it is considered expended after use and may not be used again for the remainder of the Turn.
B. Both sides must keep a record of their AP expenditures on their respective Artillery Tracks.
C. APs may never be accumulated from turn to turn.
9.1 Types of Artillery and Artillery Fire
9.1.1 AP Types
There are two types of APs: field and heavy.
-
Field APs may be used only against a target within 10 hexes of a friendly HQ.
-
Heavy APs may be used against any hex on the map.
9.1.2 Artillery Fire Types
There are three types of fire that may be used by field or heavy artillery:
-
Counter-Battery fire (9.2).
-
Persistent Gas fire (9.3).
-
Barrage fire (9.4, 9.5, and 9.6).
9.2 Counter-Battery Fire
Beginning with Turn 3, both players conduct counter-battery fire simultaneously during the Counter-Battery Fire Phase of the Artillery Stage.
9.2.1 Requirements
At the beginning of the Counter-Battery Fire Phase, each side may allocate some, none, or all of its available APs to counter-battery fire. APs may be allocated to this mission only in multiples of 10.
Example: If the Allies had 18 Field and Heavy APs available, they could allocate only 10 APs to counter-battery fire (or none at all).
9.2.2 Revealing Counter-Battery Allocations
APs are allocated to counter-battery fire secretly. It is suggested that both sides write the number of APs allocated to this task on paper, revealing their allocations simultaneously. The number of Field and Heavy APs allocated is then immediately deducted from each side's Artillery Track (9.8).
9.2.3 Conducting Counter-Battery Fire
When allocating APs to Counter-Battery fire, roll a die and consult the Counter-Battery Fire Table to determine the effectiveness of this fire. Cross-reference the roll with the number of allocated APs and read the result:
| Result | Explanation |
|---|---|
| - | No effect. The enemy's APs are not affected. |
| 2, 3, 4, 5 | Divide the enemy's current Field and Heavy AP totals by the indicated number (drop fractions). The result is the number of enemy Field and Heavy APs that remain available for use throughout the remainder of the turn. |
| All | All of the enemy's Field and Heavy APs are unavailable for use throughout the remainder of the turn. |
Example: If the Allies had 10 Field and 8 Heavy APs remaining after Counter-Battery fire allocation and Germany obtained a result of 3 against due to counter-battery fire, the Allies would end the phase with 3 Field and 2 Heavy APs remaining for use during the rest of the turn.
9.2.4 Allocating APs to Counter-Battery Fire
APs allocated to Counter-Battery fire are not subject to range restrictions. Either Field and/or Heavy APs may be freely allocated to this mission – they are identical in this regard.
9.3 Persistent Gas Fire
Beginning on Turn 3, Germany may conduct Persistent Gas fire. This takes place during the Persistent Gas Fire Phase of the Artillery Stage.
9.3.1 Requirements
At the beginning of the Persistent Gas Fire Phase, Germany may allocate some, none, or all of its available APs to Persistent Gas fire. However, APs may only be allocated to this mission in multiples of 15. Allocations are made openly, and as they are announced, they are immediately deducted from Germany's Artillery Track.
9.3.2 Result
For every 15 APs allocated to Persistent Gas fire, Germany may place one Persistent Gas marker on any target hex of its choice (9.3.3).
9.3.3 Placement of Gas Marker
A target hex may be of any terrain type and may be enemy-occupied. However, it must be at least six hexes away from the nearest friendly unit at the moment of its placement on the map. In addition, its placement is subject to artillery range restrictions (9.1.1).
9.3.4 Duration and Effects
A. Once placed on the map, a Persistent Gas marker remains in place until conditions for its removal have been met (9.3.5).
B. Each Persistent Gas marker exerts a Zone of Effectiveness that includes its hex and all six adjacent hexes. The zone has the following effects on all units:
-
The MP cost to enter the hexes is doubled for all purposes (including advances after combat).
-
Each stack that ends its Friendly Movement Phase in one of these hexes immediately loses one strength step (8.5).
C. There is no additional effect if a given hex is within the Zone of Effectiveness of more than one marker.
9.3.5 Removal of Persistent Gas Markers
A. At the beginning of the Terminal Phase, Germany rolls a die for each Persistent Gas marker on the map.
-
On a 1, the marker is immediately removed.
-
On all other rolls, the marker remains in place.
B. A marker may not be removed from the map under any other circumstances.
9.3.6 Counter Mix Limit
The number of markers included in the game is an intended limitation. If all six are currently on the map, no Persistent Gas fire may be performed. However, as each marker is removed from the map, it immediately becomes available for use again.
9.4 Drumfire Barrage
During Turns 1 and 2 only, Germany may perform Drumfire Barrage attacks.
9.4.1 In General
-
At the beginning of the Drumfire Barrage Phase of Turns 1 and 2, Germany may allocate all, some, or none of its available APs to Drumfire Barrage.
-
Drumfire Barrage is resolved in separate attacks. There is no limit to the number of attacks that may be made in this phase except for the number of APs currently available.
-
As each attack is declared, the stated number and type of APs are deducted from the German Artillery Track.
9.4.2 Allocating APs and Selecting a Target
A. A Drumfire Barrage attack may consist of from 1 to 6 APs. For each declared attack, Germany chooses any enemy-occupied target hex.
B. A target hex may only be attacked by Drumfire Barrage once per Phase. The target hex is subject to range restrictions (9.1.1).
C. A target stack may be within the ZOC of a German unit.
9.4.3 Procedure
A. As each attack is declared, consult the Drumfire Barrage Table.
B. Cross-reference the number of enemy SPs in the target hex with the number of APs allocated to the attack, determining the proper column to employ during resolution.
C. Germany then rolls a die, cross-referencing the roll with the column. Immediately apply the result (9.4.5).
9.4.4 Die Roll Modifiers
Germany's die roll may be modified by the terrain occupied by the defending stack (5.3.2).
9.4.5 Results
Results of Drumfire Barrages are:
| Result | Explanation |
|---|---|
| - | No Effect |
| # | Compare this number to the MV of the target stack (8.6). If # ≤ MV, the attack is unsuccessful, and nothing further occurs. If # > MV, the target stack immediately loses a number of steps equal to the difference between # and the stack's MV. |
9.4.6 AP Types
APs allocated to a Drumfire Barrage attack may comprise both Field and Heavy APs, assuming range requirements are met.
9.5 Rolling Barrages
Each side may perform a single Rolling Barrage in support of each attack that is declared during the friendly Combat Phase, assuming APs are available and range restrictions have been fulfilled (9.1.1).
9.5.1 AP Allocation
A. The maximum number of APs that may be allocated to a Rolling Barrage is 2 APs in clear weather and 1 AP in mist (11.0). Each of these increases by one for an observed target hex (9.5.3).
B. No APs may be allocated to a Rolling Barrage during fog. (The first two turns are automatically fog; 17.4.)
C. As each barrage is declared, deduct the appropriate number and type of APs from the owner's Artillery Track.
D. A Rolling Barrage may consist of both Heavy and Field APs, assuming both range requirements are met.
9.5.2 Effect
For each AP allocated to a Rolling Barrage, the attacker applies a +1 DRM to its subsequent combat resolution die roll (8.0.F).
9.5.3 Observed Targets
If the target hex is successfully observed (9.7), the maximum number of APs that may be allocated to a Rolling Barrage is 3 in clear weather and 2 in mist.
9.6 SOS Barrages
During the enemy Combat Phase, the defender may perform a single SOS Barrage in support of each of its stacks under attack, assuming the available APs and range restrictions have been adhered to (9.1.1).
9.6.1 AP Allocation
A. The maximum number of APs that may be allocated to an SOS Barrage is 4 in clear and 2 in mist (11.0).
B. No APs may be allocated to SOS Barrages during fog.
C. As each SOS Barrage is declared, the appropriate number and type of APs are deducted from the owner's Artillery Track.
D. An SOS Barrage may consist of both Heavy and Field APs assuming both range requirements are adhered to.
9.6.2 Effects
Divide by 2 the number of APs allocated to an SOS Barrage, dropping fractions. The result is the number that is added to the defender's subsequent combat resolution die roll (8.0.G).
9.6.3 Range Requirement
The friendly stack supported by an SOS Barrage must be within the range limitation of the defender's APs.
9.7 Observation
If a target hex is successfully observed, a Rolling Barrage has the potential to be increased in effectiveness (9.5.3).
9.7.1 Observation Methods
There are two means of obtaining successful observation on a target hex:
-
Through the use of hilltops (9.7.2) or
-
Through air observation (12.2).
9.7.2 Hilltop Observation
A. The means of obtaining successful observation from hilltops is affected by the weather (11.0).
B. If the weather is clear, observation is successful if, at the moment of combat resolution, the attacker can trace a line of contiguous hexes, free of enemy units or their ZOCs, no more than six hexes in length from a participating attacking unit to a hilltop hex.
C. If the weather is mist, observation is achieved as if it were clear, but the line of hexes from attacking unit to hilltop hex may be no more than three hexes in length.
9.7.3 Effect of Friendly Units on EZOCs
Friendly-occupied hexes negate EZOCs in the hexes they occupy for the purposes of tracing a path of hexes from an attacking unit to a hilltop hex.
9.7.4 Effect of Fog
Rolling Barrages may never take place during fog. Hence, observation is never possible during these turns.
9.7.5 Attacker on Hilltop
If an attacking unit occupies a hilltop hex, it automatically obtains successful observation on the defending units.
9.8 Artillery Tracks
Both sides possess an Artillery Track on which their respective Field and Heavy APs are recorded with appropriate Artillery markers. Each time either side performs any type of artillery fire, the number of Field and/or Heavy APs allocated to the mission should be immediately deducted from the current total. When this total reaches zero, that type of AP may not be employed again for the remainder of the turn.
9.8.1 German APs
A. Germany receives 50 Field and 30 Heavy APs during Turns 1 and 2 (9.8.3).
B. It receives 35 Field and 30 Heavy APs during Turns 3-6.
C. It receives 30 Field and 20 Heavy APs during Turns 7-10.
9.8.2 Allied APs
A. The Allies do not receive any APs during Turns 1-2.
B. They receive 8 Field and 6 Heavy APs from Turns 3-6.
C. They receive 16 Field and 12 Heavy APs from Turns 7-10.
9.8.3 Turns 1 and 2 Note
Due to the fog on Turns 1 and 2 (11.1.3), the only artillery fire possible those turns is German Drumfire Barrage (9.4).
10.0 Trenches
A. There are three types of trench hexes: redoubts, fieldworks, and wire. Trench hexes are permanent terrain features.
B. Units occupying such hexes have improved defensive capabilities and are not obligated to attack adjacent enemy units during the friendly Combat Phase (8.1.3).
C. Their effects (5.32) apply to both sides and are applied no matter what direction a unit moves into the hex from or from what direction the hex is attacked. (Printed as "5.32"; the cross-reference is kept as printed, most likely meaning 5.3.2.)
11.0 Weather
The state of the weather affects observation and air operations.
11.1 Weather Determination
11.1.1 Procedure
Beginning with Turn 3, during the Weather Stage, Germany rolls a die and consults the Weather Table to determine the state of the weather for the remainder of the turn.
11.1.2 DRM in PM Turns
In all PM Turns, apply a +1 DRM to the weather die roll.
11.1.3 Weather Turns 1-2
The weather on Turns 1 and 2 is automatically fog.
11.2 Weather Effects
A. There are three possible weather states: clear, mist, and fog. Each condition has a different effect on observation (9.7.2) and air operations (12.1).
B. If fog is in effect, the attacker applies a DRM to the combat resolution die roll (8.3.1). (The printed cross-reference "8.3.1" does not exist; the fog DRM is listed in 8.3.)
12.0 Air Operations
A. Beginning with Turn 3, during the Air Operations Stage, Germany receives 8 AirPs and the Allies receive 6 AirPs.
B. During the Air Allocation Segment, each side must secretly assign its AirPs to one of three types of missions: Air Observation, Ground Attack, or Interception. (It is suggested to write the allocations down on paper and then reveal them simultaneously.)
C. One AirP may be assigned to only one mission, though the owner may allocate different AirPs to more than one mission in this segment if desired.
D. AirPs may never be eliminated, although their availability may be affected by the weather (12.1).
12.1 Weather Effects
Depending on the state of the weather, the number of AirPs available to each side during the Air Operations Phase is affected in the following ways:
-
In clear weather, all assigned AirPs are available to both sides.
-
In mist, half of each side's assigned AirPs are available.
-
In fog, no AirPs are available to either side.
12.2 Air Observation
AirPs allocated to Air Observation allow the owner to successfully observe enemy target hexes for Rolling Barrages (9.7).
12.2.1 Limit on AirPs Allocated to Air Observation
No more than one-half (round fractions down) of a side's available AirPs may be assigned to Air Observation during the Air Allocation Segment.
12.2.2 Procedure
A. For each AirP assigned to Air Observation, the owner receives an Air Observation marker. At the beginning of the ensuing friendly Combat Phase, the owner may deploy the markers on any enemy stacks on the map (no more than one marker per stack).
B. Any enemy stack with an Air Observation marker on it is automatically observed (9.7) for the purposes of Rolling Barrage during that Combat Phase.
C. At the end of that Combat Phase, remove each marker from the enemy stack. It may not be used again for the remainder of the turn.
D. AirPs allocated to Air Observation may be reduced by Interception (12.4).
12.3 Ground Attack
A. AirPs allocated to Ground Attack allow the owner to conduct attacks on enemy units in the same manner as Drumfire Barrage (9.4).
B. Ground Attacks may be performed throughout the length of the game.
12.3.1 Procedure
A. For each AirP assigned to Ground Attack, the owner may declare a Ground Attack on any enemy stack on the map during the Ground Attack Segment; German attacks are resolved first, followed by Allied.
B. A Ground Attack is resolved exactly as a Drumfire Barrage Attack, except AirPs are substituted for APs when consulting the Drumfire Barrage Table.
C. Each attack may consist of from 1 to 6 AirPs.
D. A given AirP may only be assigned to one Ground Attack per segment.
E. A Ground Attack may be directed against any enemy-occupied hex.
12.3.2 Restrictions
A. Ground Attacks may never be directed against hexes occupied solely by enemy HQ units.
B. AirPs allocated to Ground Attack may be reduced by Interception (12.4).
12.4 Interception
AirPs allocated to Interception missions allow one side to reduce the other's AirPs allocated to Air Observation and Ground Attack missions.
12.4.1 Procedure
A. When the number of AirPs allocated to Interception missions by both sides has been revealed during the Air Allocation Segment, the effects of these allocations must be resolved in the immediately ensuing Interception Segment per the following:
B. Both sides divide their friendly AirPs allocated to Interception missions by two, rounding fractions down.
C. This quotient is the amount by which the enemy's AirPs allocated to Air Observation and/or Ground Attack missions may be immediately reduced (12.4.2).
12.4.2 Effects
A. Reductions of AirP allocations to Air Observation and/or Ground Attack missions due to Interception is performed by the enemy (the side performing Interception).
B. The number by which these AirPs may be reduced may be applied exclusively toward Ground Attack, exclusively toward Air Observation, or in any combination the enemy desires, as long as the total reduction of AirPs does not exceed the number calculated in 12.4.1.
Example: Germany has 4 AirPs allocated each to Air Observation and Ground Attack. The Allies have 6 AirPs allocated to Interception. Thus, the German AirP totals may be reduced by 3 (6 divided by 2). The Allies decide to reduce the German Air Observation AirP allocation to 1 and leave the German Ground Attack allocation alone. The Allies could make this 3-point reduction in any other desired combination.
13.0 German Divisional Breakdown
Beginning with Turn 3, during the German Breakdown Phase, Germany may break down any of its divisions on the map into three regimental replacement units, assuming the requirements for breakdown have been met (13.1).
13.1 How Divisions Break Down
13.1.1 Procedure
A German division that is to be broken down must begin the German Breakdown Phase outside of EZOCs. If this requirement is met, Germany may replace the division counter with three regimental replacement units. The regiments must be placed in the hex formerly occupied by the division counter, which is removed from the map.
13.1.2 Movement Restrictions
The regimental replacement units that are placed on the map in place of a division may not be moved in the immediately ensuing German Movement Phase.
13.1.3 Permanence of Break Down
Once a division counter has been broken down, it may not be brought back onto the map through recombination; it is permanently removed from the map.
13.1.4 Limits
Germany may break down as many of its eligible division units per turn as desired. Exception: Counter Mix Limit (13.2.3).
13.2 Regimental Replacement Units
13.2.1 Purposes
German regimental replacement units are used for two purposes.
-
For divisional breakdown (13.1), and,
-
As the third strength step in German divisions that take combat losses (8.5).
13.2.2 Single Step
Unlike normal German regiment units (i.e., those with historical designations), all regimental replacement units consist of a single strength step only.
13.2.3 Counter Mix Limit
A. The number of regimental replacement units that are provided in the game is an intended limitation. If no regimental replacement units are available for use, then no German divisions may break down and German divisions that are reduced to this state are eliminated instead.
B. However, as soon as a regimental replacement unit is eliminated from play, it becomes available for use again.
13.2.4 Stosstruppen
Regimental replacement units that are created from Stosstruppen divisions (either through breakdown or combat loss) are not considered Stosstruppen.
14.0 Supply
A. At the instant a unit is performing an attack, it must determine its supply state. There are four possible states of supply: in supply, out of communication (OOC), out of supply (OOS), or isolated.
B. Supply is never determined for defending units. It has no effect in the game other than on attacking units.
14.1 How to Determine Supply
14.1.1 Requirement
A. Supply is determined for attacking units only at the moment their attacks are about to be resolved. Exception: German units exiting the map (20.1.2).
B. At this time, all attacking units must attempt to trace a supply line (14.1.2) to a Friendly HQ unit.
14.1.2 Tracing a Supply Line
A. A supply line is defined as a path of contiguous hexes traceable from an attacking unit's hex (exclusive) to the hex occupied by any friendly HQ unit (inclusive).
B. None of these hexes may be enemy-occupied or enemy-controlled (unless occupied by friendly units).
C. Terrain never affects the tracing of supply lines.
14.1.3 Supply State Determination
Supply states are determined as follows:
-
If an attacking unit is able to trace a supply line in six hexes or fewer, it is in supply.
-
If an attacking unit is able to trace a supply line in 7-12 hexes it is OOC.
-
If an attacking unit is only able to trace a supply line that is over 12 hexes, it is OOS.
-
If an attacking unit is completely unable to trace a supply line, it is isolated.
14.2 Supply Effects
14.2.1 In Supply
An attacking unit that is in supply fights normally.
14.2.2 Other States
A. If an attacking unit is OOC, the defender applies a +1 DRM to its combat resolution die roll.
B. If an attacker is OOS, the defender applies a +2 DRM to its combat resolution die roll.
C. If an attacker is isolated, the defender applies a +3 DRM to its combat resolution die roll.
14.2.3 Requirement in Multi-Attacker Combat
It is only necessary for a single attacking unit to be OOC, OOS, or isolated in a given attack in order for the defender to receive the DRMs listed in 14.2.2.
14.2.4 Effect of Different Supply States in Same Attack
In a given attack, if the attacker has different supply states, only the supply state most disadvantageous to the attacker applies.
15.0 Reinforcements
A. The Allies receive both pre-determined and variable reinforcements during the Reinforcement Stage.
B. Germany never receives reinforcements.
15.1 Pre-Determined Reinforcements
15.1.1 Procedure
A. During the Pre-Determined Reinforcement Segment, the Allies place their scheduled reinforcements directly in their indicated entry hex on the map.
B. Pre-determined reinforcements are made available according per the Allied Reinforcement Schedule (15.3). (Printed as written.)
15.1.2 Placement on the Map
A. All pre-determined reinforcements are placed in their indicated entry hex, stacked if necessary (15.1.5).
B. In the ensuing Allied Movement Phase, these units are free to move normally (they are not obligated to count their entry hex's MP cost).
15.1.3 Effect of Enemy-Occupied Hexes and EZOCs
A. Pre-determined reinforcements may not be placed in an enemy-occupied or in an EZOC.
B. If scheduled reinforcements are prevented from placement on the map by this restriction, they may be placed on any map edge hex within three hexes (or more, if necessary) of the original entry hex without delay.
C. Pre-determined reinforcements may never be delayed.
15.1.4 Unaffected by Turn 2 Movement Limitations
The movement of pre-determined reinforcements on Turn 2 does not count against the Allied movement restrictions (17.1.3).
15.1.5 Unaffected by Stacking Restrictions
Stacking restrictions may be violated in an entry hex on the turn in which reinforcements are placed on the map.
15.1.6 Immunity to Certain Attacks Upon Placement
Reinforcements may never be attacked by Drum Fire Barrage or Ground Attack in the turn they are placed on the map in their indicated entry hex.
15.2 Variable Reinforcements
15.2.1 Procedure
During the Variable Reinforcement Segment, starting with Turn 6, the Allies roll a die to determine the number of service companies created for their use. The number rolled is the number of service companies that may be immediately deployed by the Allies (15.2.3, 15.2.4).
15.2.2 Creation of Service Companies
A. Each time an Allied infantry battalion is eliminated from play, it is removed from the map, flipped over to its reverse side, and placed aside for the time being. This reverse side will portray a service company unit, which may be placed back on the map according to the procedure described in 15.2.1.
B. All service companies are identical – it makes no difference which ones are chosen by the Allies for use during the Variable Reinforcement Segment.
15.2.3 Deployment
A. After a number of service companies are made available during the Variable Reinforcement Segment, they must be immediately deployed on the map by the Allies.
B. Each service company may be placed on top of any Allied HQ unit that is currently on the map, even if this HQ is currently in an EZOC.
C. If there are no Allied HQs on the map, no service companies may be deployed.
15.2.4 Service Company Attributes
Service companies function as normal company-size units, except they do not exert ZOCs.
15.2.5 Limitations
A. The number of service companies available for use is limited to those infantry battalions that have been eliminated from play. If no more service companies are available for use at the moment they are rolled for, then none may be created.
B. However, as each service company on the map is eliminated from play, it immediately becomes available to be used again by the Allies.
15.3 Allied Reinforcement Schedule
Pre-determined reinforcements are listed by turn of entry, designation, and entry hex.
| Turn | Hex | Unit(s) |
|---|---|---|
| 2 | A | 8LN/58/3 |
| 2 | C | 149/50/19, 150/50/19, 19 Corps HQ |
| 3 | B | 25/9/5, 26/9/5, 27/9/5, 5 Corps HQ |
| 4 | C | 23/8/19, 24/8/19, 25/8/19 |
| 4 | D | 17/24/19, 72/24/19, 73/24/19, 1/1Cv/19, 2/1Cv/19, 9/1Cv/19 |
| 6 | B | 28/10/5, 29/10/5, 30/10/5 |
| 7 | B | 184/62/5, 185/62/5, 186/62/5, 64/22/5, 65/22/5, 66/22/5 |
16.0 Corps Attachments
All units belong to a specific corps (the last number in a unit's designation). If any attack is conducted by units that belong to two or more corps formations, the defender adds 1 to its combat resolution die roll (8.4).
17.0 Special Rules, Turns 1 and 2
Special rules apply to one or both sides in Turns 1 and 2.
17.1 Movement Restrictions
17.1.1 Turn 1 German Restrictions
On Turn 1, only German units that occupy trench hexes may move.
17.1.2 Turn 2 German Restrictions
A. On Turn 2, all German units that were permitted to move on Turn 1 may move.
B. In addition, Germany rolls a die, the number rolled is the number of German units that were not permitted to move on Turn 1 that may now move during Turn 2.
17.1.3 Turn 1-2 Allied Restrictions
A. At the beginning of the Allied Movement Phase of Turn 1, the Allies roll a die twice.
-
The number rolled first is the number of 18th Corps units that may be moved during this Movement Phase.
-
The number rolled second is the number of 3rd Corps units that may be moved during this Movement Phase.
B. At the beginning of the Allied Movement Phase of Turn 2, the Allies again roll a die twice.
-
The number rolled first +1 is the number of 18th Corps units that may be moved during this Movement Phase.
-
The number rolled second +1 is the number of 3rd Corps units that may be moved during this Movement Phase.
17.1.4 Allied Reinforcements Not Restricted
Allied reinforcements that enter the map during Turn 2 may be moved normally and do not count against the Allied movement restrictions in 17.1.3.
17.1.5 All Restrictions Lifted on Turn 3
All German and Allied units may move normally starting with Turn 3.
17.2 Turn 1-2 German Artillery Restrictions
17.2.1 Persistent Gas
Germany may not perform Persistent Gas fire (9.3) on Turns 1 or 2.
17.2.2 Drumfire Barrage
Germany may perform Drumfire Barrage attacks only on Turns 1 and 2 (9.4).
17.3 Advances After Combat
A. During Turns 1 and 2, German Stosstruppen units may advance a number of MPs equal to a die roll multiplied by 2.
B. In addition, German non-Stosstruppen units may advance a number of MPs equal to an unmodified die roll (8.83). (Printed as "8.83"; the cross-reference is kept as printed, most likely meaning 8.8.3.)
17.4 Weather
The weather on Turns 1 and 2 is automatically fog. As a result, no air operations occur. Rolling and SOS Barrages may not take place. In addition, the attacker's combat resolution die roll is affected (8.3).
17.5 Supply
All German units are automatically in supply during Turns 1 and 2.
17.6 German Divisional Breakdown
German divisions may not break down during Turns 1 and 2.
18.0 Setting Up the Game
After players have chosen sides, they must deploy their forces on the map according to the instructions of the following Cases. In addition, both players' Artillery markers should be placed in the proper boxes on their respective Artillery Tracks (9.8).
18.1 German Setup
| Hex | Unit | Hex | Unit |
|---|---|---|---|
| 3804 | 50/9 | 4310 | 1B/17 |
| 3806 | 45R/9 | 4328 | 220/47/Gyl |
| 3902 | 88/3 | 4400 | 10/17 |
| 3903 | 28/3 | 4407 | OR/17 |
| 3908 | 238/17 | 4411 | 34/4R |
| 4101 | 113/3 | 4412 | 37/4R |
| 4102 | 6/33 |
18.2 Allied Setup
| Hex | Unit(s) |
|---|---|
| 0133 | 8AR/61/18 |
| 0720 | 61/20/18 |
| 0820 | 59/20/18 |
| 1303 | 6/3Cv/18, 7/3Cv/18, Cd/3Cv/18 |
| 1615 | 84/18 |
| 1727 | 3/2Cv/3, 4/2Cv/3 |
| 2016 | 60/20/18, 150/18 |
| 2223 | 21E/3 |
| 2402 | 129/18 |
| 2405 | 89/30/18 |
| 2516 | 83/18 |
| 2605 | 2SF/30/18 |
(As printed, hex 3321 appears twice in the source Allied setup, with "3xxx" and "5/2Cv/3, 9RB/14/3"; both rows are kept as printed, and the hex numbers are not corrected.)
19.0 Unit Abbreviations
The following abbreviations are used on the counters:
| Abbr | Meaning | Abbr | Meaning |
|---|---|---|---|
| AR | Argyll and Sutherland Highlanders | KR | King's Royal Rifle Corps |
| B | Bavarian | IN | London |
| BD | Bedfordshire | MN | Manchester |
| BF | Buffs | OB | Oxford and Buckinghamshire Light Infantry |
| BK | Berkshire | OU | Queen's |
| Cd | Canadian | R | Reserve |
| Cv |
(As printed: the source lists "IN" twice, for London and for Inniskilling Fusiliers, and spells "Warickshire"; the table shows the source text except the spelling "Warwickshire", which is corrected here.)
20.0 Victory
The game ends at the completion of Turn 10. At this time, Germany determines its Victory Point (VP) total, comparing it to the victory conditions in 20.3 to determine a victor.
20.1 How Germany Accumulates and Loses VPs
20.1.1 VPs for Towns
A. At the end of the game, Germany receives 1 VP per town hex west of the German VP line that it either occupies or was the last to pass through.
B. It may be convenient to write down the town names controlled by Germany during the course of the game.
20.1.2 Exited German Units
At the end of the game, Germany receives 3 VPs per unit that exited the map (20.2). For Germany to be eligible to receive these VPs, the exiting unit may not be isolated (14.1.3) at the moment it leaves the map.
20.1.3 VP Deductions for Allied Control
At the end of the game, Germany loses 1 VP for each Allied unit that occupies a fieldwork, redoubt, or wire hex.
20.1.4 VP Deductions for Combat Losses
At the end of the game, Germany loses 1 VP for each division removed from the map due to combat loss and replaced with a regimental replacement unit (13.2).
20.2 Exiting the Map
A. Only German units may exit the map. Exiting the map is considered normal movement, but may only be performed from a western map edge hex.
B. To exit the map, a unit must expend a number of MPs equal to the type of terrain the unit is exiting the map from.
C. Once exited, a unit may never return to the map.
20.3 How to Win the Game
| VPs | Level |
|---|---|
| 56+ | German Decisive |
| 46-55 | German Substantive |
| 36-45 | German Marginal |
| 26-35 | Allied Marginal |
| 16-25 | Allied Substantive |
| ≤ 16 | Allied Decisive |
Section 21.0 (Credits) of the source is omitted as attribution.