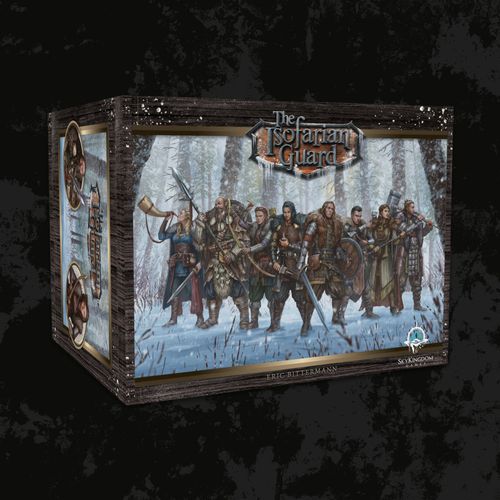
The Isofarian Guard
The Isofarian Guard Rulebook
Table of Contents
Table of Contents
- Overview
- Forteller
- Components
- Component Diagrams
- Component Diagrams – Cards
- Guard Ability Card
- Stonebound Ability Card
- Enemy Card
- Enemy AI Card
- Harvesting Card (Front / Back)
- Mining Card (Front / Back)
- Enemy Drop Card (Front / Back)
- Speaking Stone Card (Front / Back)
- Weapon Card (Front / Back)
- Armor Card (Front / Back)
- Accessory Card (Front / Back)
- Item Card (Front / Back)
- Tool Item Card (Front / Back)
- Field Event Card (Front / Back)
- Prestige Card (Front / Back)
- Component Diagrams – Maps
- Starting a New Game
- 1. Exploration Phase
- 2. Narrative Event Phase
- Guard Dashboard
- Guard Ability Dashboard
- Customizing the Guards
- Enemy Dashboard
- 3. Battle Phase
- Round of Battle Order
- End of Battle
- Combat Chips
- Guard [Keywords] and Base Stats
- Round of Battle Example
- Saving Your Progress
- Variations to Gameplay
- Appendix 1: Glossary
- Appendix 2: Iconography
- Appendix 3: Enemy AI Targeting
- Appendix 4: FAQ
Overview
The Isofarian Guard is a solo/co-op narrative driven adventure board game for 1-2 players.
In this game, you lead a group of Guards from the country of Isofar, located in the world of Telios, on a cooperative, narrative-driven campaign full of exploration, adventure, battle, and choices, traversing unique and diverse areas throughout the land. Along this journey, you will experience the world and events within them through the eyes of each member of the Guard from various perspectives.
There are five unique campaigns that can be played completely solo or with a partner, spanning many hours of gameplay, and each has several branching paths that make future replays unique. In each campaign, the players will usually control a different pair of Guards, represented by moving a miniature or chips across the nodes of the map or mini-maps.
The campaigns must be played in sequential order, starting with Campaign 1 and finishing with Campaign 5.
In the first campaign, you'll find a tutorial where you control Grigory – the captain of the Guard. Shortly after the tutorial is completed, Grigory will be joined by another member of the Guard, at which point more options will become available to the players, offering them the freedom to explore a completely open world, traveling to any location they desire while managing the health and chip bags of the Guards.
In addition to several hundred hours of gameplay content in the main narrative, there are also dozens of side quests to complete. Many of these offer various choices via branching paths, some of which might unlock incredible treasures, while others may lead to very dangerous situations! Completing side quests will be of benefit by granting weapons, armor and accessories that cannot be obtained otherwise. In turn, these optional rewards will be of great use in progressing the main storyline.
Defeating enemies provides loot in the form of many different items and materials, as well as Sil and Lux Essence. Enemies will increase in difficulty and become more varied as the chapters of each campaign go on, scaling with the Guards as they use the resources they have gained in multiple ways in order to unlock various upgrades and increase their strength.
Winning the Game
The five campaigns included within the game compose a single story. As such, players complete or win the game by finishing all of the campaigns, uncovering the story of The Isofarian Guard along the way.
Forteller
The Isofarian Guard partners with Forteller Games, a companion app that provides professional audio narration for the game's story scenes, played in the Guards' own voices with sound effects and music. The app is free to download on the Apple App Store / Google Play Store, or the narration can be purchased and played from the Forteller website (www.fortellergames.com). It saves your progress across sessions, supports a spoiler-free browsing mode, tracks your completion of each narrative campaign, and works across any officially supported platform with a single account and purchase. Any audio-narrated scene in the rulebook or game is marked with a headphone icon and the title of the track — look for these to add narration to your playthrough. Using Forteller is entirely optional; the physical game and narrative text are complete without it.
Components
- 1 Double-Sided Map of Isofar
- 9 Guard Bust Cards
- 2 Guard Dashboards
- 2 Guard Ability Dashboards
- 7 Double-Sided Mini-Maps (1 Board, 6 Card)
- 4 Enemy Dashboards
- 160 Field Event Cards (+4 Plastic Deck Covers)
- 18 Prestige Cards
- 71 Guard Ability Cards
- 222 Enemy Cards
- 32 Harvesting Cards
- 24 Mining Cards
- 29 Enemy Drop Cards
- 92 Stonebound Ability Cards
- 728 Enemy AI Cards
- 64 Weapon Cards
- 56 Armor Cards
- 79 Speaking Stone Cards
- 96 Plastic Card Separators
- 9 Plastic Square Card Separators
- 49 Accessory Cards
- 111 Item Cards
- 6 Tool Item Cards
Components – Continued
- 1 Rulebook
- 5 Campaign Books
- 1 Quests Book
- 1 Player Aid Foldout
- 1 Enemy Index Book
- 1 City Index Book
- 1 Fort Istra & Save Index Book
- 1 Sil Dual Dial Tracker
- 1 Lux Essence Dual Dial Tracker
- Translucent Cubes and Gems: 30 gray cubes, 24 red cubes, 20 green cubes, 20 blue cubes, 14 purple cubes, 12 yellow cubes; 4 red gems, 4 orange gems, 4 blue gems, 4 green gems, 4 yellow gems, 4 purple gems, 4 white gems
- Guard miniatures: Grigory & Alek, Kharzin & Vera, Dunamis, Catherine & Yury, Pavel & Yana
- 3 Fabric Drawstring Bags (Black, Gray, and Blue)
Chip Components
- 1 Black Single Skull Chip, 1 Black Double Skull Chip, 1 Black Triple Skull Chip, 2 Black Compass Chips
- 10 Black Single Sword Chips, 10 Green Single Sword Chips, 10 Purple Combo Chips, 10 Red Weaken Chips
- 10 Black Double Sword Chips, 10 Green Single Shield Chips, 10 Purple Evasion Chips, 10 Red Break Chips
- 10 Black Single Shield Chips, 10 Green Evasion Chips, 10 Purple Heart Chips, 10 Red Fear Chips
- 10 Black Double Shield Chips, 10 Green Heart Chips, 10 Purple Corruption Chips, 10 Red Seal Chips
- 1 Black Aggro Chip, 10 Green Strengthen Chips, 10 Purple Freeze Chips, 10 Red Stun Chips
- 1 Black Narrative Event Chip, 10 Green Bolster Chips, 10 Purple Poison Chips, 10 Red Upkeep Chips
- 2 Black Scroll Chips, 1 Black Caravan Chip, 1 Black Boat Chip, 1 Black Campfire Chip
- Bust Chips (1 each): Grigory, Alek, Catherine, Yury, Kharzin, Vera, Pavel, Yana
Component Diagrams
Guard Dashboard
- Guard Bust Card
- Health Point (HP) Track
- Attack (ATK) Track
- Defense (DEF) Track
- Weapon Slot
- Armor Slot
- Accessory Slot
- Item Slot
- Satchel Slots (4 Slots)
- Action Point (AP) Active/Exhausted Area
Guard Ability Dashboard
- Positive Chip Status Area
- Negative Chip Status Area
- Discard Area
- Ability Slots (I-VI)
- Speaking Stone Gem Ready Slots
- Speaking Stone Gem Exhausted Slots
Enemy Dashboard
- Enemy Card Slot
- Enemy AI Draw Slot (Cards Face-Down)
- Enemy AI Discard Slot (Cards Face-Up)
- Health Point (HP) Tracks
- Attack (ATK) Track
- Defense (DEF) Track
- Action Point (AP) Active/Exhausted Area
Component Diagrams – Cards
Guard Ability Card
- Chip-Activated Flip Icon
- Ability Name
- Primary/Secondary Icon
- Class Icon
- Resource Cost
- Action Point (AP) Cost
- Ability Effects
Stonebound Ability Card
- Bust or Infinity Icon
- Ability Name
- Reactive Icon
- Speaking Stone Element
- Ability Effects
Enemy Card
- Rarity Stars
- Enemy Name
- Attack (ATK) Value
- Defense (DEF) Value
- Action Point (AP) Value
- Health (HP) Value
Enemy AI Card
- Enemy Name
- Special AI Icon (Cards 7-8)
- AI Ability Effects
- AI Card Icon
- AI Card Number
Harvesting Card (Front / Back)
- Rarity Stars
- Material Name
- Material Type
- Material Quantity
Mining Card (Front / Back)
- Rarity Stars
- Material Name
- Material Type
- Material Quantity
Enemy Drop Card (Front / Back)
- Rarity Stars
- Material Name
- Material Quantity
Speaking Stone Card (Front / Back)
- Speaking Stone Element / Stat or Chip Bonus
- Speaking Stone Name / Bonus Quantity
Weapon Card (Front / Back)
Front: 1 Rarity Stars, 2 Weapon Name, 3 Resource Cost Icon, 4 Attack (ATK) Modifier Icon. Back: 1 Ability Name, 2 Unlocked Stonebound Ability, 3 Attack (ATK) Stat Bonus, 4 Open Stone Slot, 5 Bust or Infinity Icon.
Armor Card (Front / Back)
Front: 1 Rarity Stars, 2 Armor Name. Back: 1 Equipment Type, 2 Defense (DEF) Stat Bonus, 3 Open Stone Slot, 4 Bust or Infinity Icon.
Accessory Card (Front / Back)
Front: 1 Accessory Name, 2 Limited Activation Icon, 3 Accessory Effects. Back: 1 Equipment Type.
Item Card (Front / Back)
Front: 1 Item Name, 2 Compass Icon, 3 Item Effects. Back: 1 Equipment Type.
Tool Item Card (Front / Back)
Front: 1 Tool Item Name, 2 Tool Item Effects. Back: 1 Equipment Type.
Field Event Card (Front / Back)
Front: 1 Field Event Name, 2 Region Icon, 3 Narrative, 4 Path Options. Back: 1 Field Event Name, 2 Region Icon, 3 Path Outcomes.
Prestige Card (Front / Back)
Front: 1 City Name, 2 Prestige Level, 3 Bonus Type Icon, 4 Bonus Effects. Back: 1 Prestige Icon.
Component Diagrams – Maps
Map of Isofar
- Yellow Map Node
- Movement Path
- Boat Dock Node
- Orange Map Node
- Location Name
- Mining Node
- Harvesting Node
- Blue Map Node
- Red Map Node
Mini-Map
- Location Name
- Node Location Name
- Green Map Node
- Blacksmith Node
- Marketplace Node
- Inn Node
- Orange Map Node
Starting a New Game
To start your adventure with The Isofarian Guard, place the map of Isofar on the table, then turn to page 1 of the "Campaign 1 Book" and read the narrative there (or play the track using Forteller) to set the scene.
Now continue to page 3. Each Campaign Book informs you which pair of Guards to play as. For the tutorial, both players share control of Grigory. Take the Guard Dashboard with Grigory's Guard Bust Card snapped into the slot and place it on the table, then take a Guard Ability Dashboard and place that on the table as well. Follow the instructions in the Campaign Book for setting up Grigory's starting equipment cards, Guard Ability Cards and Stonebound Ability Card, then continue reading to set up his starting stats using red and gray cubes. Retrieve the chips he needs from the chip trays, using one of the fabric bags as his "Guard Bag". Finally, place Grigory's Bust Chip to indicate his current location at Node 28 on the map.
Place the I and II Enemy Dashboards side-by-side above Grigory's, then use another fabric bag as the "Event Bag", with the following chips inside:
- Single Skull Chip (1)
- Double Skull Chip (1)
- Triple Skull Chip (1)
- Compass Chip (2)
The four Field Event Decks each contain forty cards, and each region is identified by a unique icon. Shuffle the decks separately and place them face-up (gray title side showing), then place the deck cover for each region on top of the corresponding deck.
Set the Sil and Lux Essence Dual Dials to "0".
Keep the Player Aid Foldout and Enemy Index Book nearby for reference.
Note: You will only need two Enemy Dashboards for the initial tutorial in Campaign 1, but the third and fourth would normally be placed as pictured (see "Enemy Grid" on page 44). Afterward, another Guard will join Grigory in his adventure, and this setup is used for this and all future campaigns, regardless of playing solo or co-op. If you're short on table space, rearrange the Guard Dashboards in whichever way is suitable, perhaps by placing the second above the first.
Other books, mini-maps, card index boxes, and component trays for cubes and gems can be placed anywhere within reach for easy access, or to one side to conserve space.
1. Exploration Phase
Gameplay is split into three phases: 1. Exploration Phase, 2. Narrative Event Phase, 3. Battle Phase.
Exploration is the term for the gameplay elements that occur outside of Narrative Events and battle. During this phase you may:
- Travel between nodes
- Battle against enemies (Skull Chip)
- Complete a Field Event (Compass Chip)
- Begin a Narrative Event (Narrative Event Chip)
- Customize the Guards
- Change equipment
- Change abilities
- Advance Skill Trees
- Reorganize, use and drop satchel contents
- Rest at an Inn
- Exchange items and materials at a Marketplace
- Craft equipment at a Blacksmith
From the start of Chapter 2 of each campaign:
- Rebuild Fort Istra
- Begin a Side Quest (Scroll Chip)
- Begin a Caravan Quest (Caravan Chip)
- Begin a Puzzle or Bounty Quest (Prestige)
- Harvest wood, mine ore, and catch fish
Nodes
Isofar is explored by traveling along a series of nodes on various maps. Use the Guards' corresponding miniature or Bust Chips to indicate their current position on a map as instructed by the Campaign Books, or simply as you prefer. Guards may only move to a node that's connected to the node they are currently occupying via a path, waterway, or orange node, as appropriate.
Yellow Nodes
Yellow nodes are the most common type of node on the main map, but also appear on mini-maps. When moving to a yellow node, draw a chip from the Event Bag, unless a Narrative Event Chip, Scroll Chip or Caravan Chip has been placed next to it (see page 28). The chip drawn will either be a Skull Chip or a Compass Chip. After resolving its outcome, return the chip to the Event Bag.
If one of the Skull Chips is drawn, players may choose to exhaust 1 action point (AP) from both Guards to skip the battle phase completely, so long as they both have at least 1 AP available. This means the Guards will have less AP available at the start of their next battle. Once they run out of AP, battle cannot be avoided in this way, and neither Guard will have any AP for the first round. You won't be able to draw chips or activate Guard Ability Cards that round, but will still be able to take other actions, like activating Stonebound Ability Cards or using accessories and items. AP can be restored by resting at an Inn, Fort Istra or by using a Tent.
If the players do not choose to skip the battle (or the Guards have run out of AP), look up the current node on the corresponding Index in the Enemy Index Book and begin the Battle Phase (see page 43 for more on the battle phase).
If a Compass Chip is drawn and there are fewer than three purple cubes on the deck cover of the Field Event Deck detailing the current region, immediately place a purple cube on one of the spaces on it. You then have three options:
- You can choose to continue exploring without having to enter a battle event.
- You can choose one of the battles for that node from the Enemy Index Book, ignoring any "ambushes", even on blue nodes. Hunting specific enemies can be useful for obtaining a particular enemy drop.
- You can choose to draw a Field Event Card from the region the Guards are currently exploring if the deck cover now has three purple cubes on it.
Field Event Cards
Field Event Cards are random encounters that occur as you travel across Isofar, focusing on the daily lives of Isofar's inhabitants rather than battle. These cards offer multiple choices in how to respond to them, utilizing various mechanics that might interact with the Guards' Chip Bags, satchel contents, or other components. These cards are split into four decks of forty cards, each with its own deck cover detailing the nodes belonging to that region. All cards are put into play at the start of the first campaign, and discarded for the rest of the game once completed, unless specified otherwise. Any time chips are drawn as a result of a Field Event, they are returned to the Guard's Bag at its conclusion, regardless of color or type.
When drawing a Field Event Card, draw from the deck in which the Guards are currently located:
- Return the purple cubes on the deck cover to the supply.
- Read the presented narrative.
- Choose a path without turning over the card.
- Flip the card over, read the outcome, and follow the instructions listed on the card.
- Return the card to the supply (unless the card instructs you to return it back to the deck).
Green Nodes
Green nodes are "safe" nodes. When landing on these nodes, no chip is drawn from the Event Bag, and certain actions might be performed instead. All green nodes on the main map are also Harvesting and Mining locations. Typically, nodes on mini-maps are also green nodes, but other types might also appear.
Harvesting and Mining
The Harvesting and Mining actions are unlocked when you arrive at Fort Istra at the start of Chapter 2 of each campaign, where you will obtain the Wood Chopping Axe and the Pickaxe tool items. These unique items are noted by the satchel icon on the back of the cards. These actions can be performed on special green nodes, indicated by the icons on the map that match the ones on their cards, so long as the required tool is in one of the Guards' satchel slots. When you land on a green node with one of these icons, no chip is drawn from the Event Bag, and you may choose to perform the indicated action instead.
Wood and ore material cards are numbered to indicate the amount being carried in a single satchel slot, and the maximum amount of each type of wood and ore that can be held by the party at any time is normally 4. The type of material found at each green node is listed at the back of the City Index Book.
When performing these actions, the Guards obtain the maximum quantity they can currently carry of the material found at that node, taking the card representing this value and placing it in one of their satchel slots.
If another card of the same type of material was in any satchel slot before taking this action, remove it and return it to the supply beforehand (e.g. the 1-2 card can never be used in conjunction with the 3-4 card in order to obtain 6 of that material).
Note: Some green nodes might allow the Guards to fill up on more than one type of material, allowing them to take the maximum amount of each with one action.
Blue Nodes
Blue nodes are "water" nodes, forming a network of routes across Isofar. The entrances and exits to this network are always marked with the boat icon. In order to explore blue nodes, the Guards will need a boat, depicted using the Boat Chip. Sometimes the narrative will direct you to these nodes, where a boat will be provided, if required. Later in the story, you'll also have the opportunity to build a boat of your own and sail whenever you'd like.
To travel by boat, move the Guards to a node with a boat icon and replace the Guards' miniature or Bust Chips with the Boat Chip. Move between blue nodes by following the flow of rivers and currents across the ocean. The Guards can then exit the boat at any node with a boat icon, placing the Guards' miniature or Bust Chips back on the board and leaving the Boat Chip behind at that node.
Usually, the boat remains in place while the Guards continue the exploration phase, so the Guards must move back to that node in order to travel by boat again, but if the Guards should fall in battle, or at the start of a new campaign, the boat will return to the Boat Dock building at Fort Istra.
Whenever you travel to a blue node, draw from the Event Bag as you would on a yellow node, though all encounters are "ambushes", where the enemy goes first and you cannot retreat from battle. All blue nodes are part of the "Water Region" of Field Event Cards, regardless of their location on the map.
Fishing
The Fishing action is unlocked when you arrive at Fort Istra at the start of Chapter 2 of each campaign, where you will obtain the Fishing Pole tool item so long as you have rebuilt the Boat Dock. This unique item is noted by the satchel icon on the back of the card. This action can be performed on any blue node, so long as this tool is in one of the Guards' satchel slots. When you land on the blue node, a chip is drawn from the Event Bag and resolved as normal. Once any battle or Field Event has been resolved, you may then choose to perform the fishing action.
To catch a fish, draw a single chip from either one of the Guard's Bags. The color of the chip drawn determines the type of fish caught. Return the drawn chip to the bag and place the fish Item Card in an open satchel slot. After the fishing action has been completed, you must move to another node before catching another fish.
Fish caught by chip color: Black Chip – Dusk Tuna; Green Chip – Emerald Koi; Purple Chip – Amethyst Trout; Red Chip – Foxtail Carp.
Orange Nodes
Orange nodes are "linking" nodes, allowing for movement from the main map to a mini-map and vice versa. A mini-map is a zoomed-in version of a more detailed area of Isofar, such as a city or a cave. When moving to an orange node, never draw from the Event Bag. Instead, move to either the corresponding node on another map, or to an adjacent node on the current map, and act accordingly in either case.
Example: If the Guards were on node 68, and moved South to node 69, you could enter the mini-map of the city Ryba, or you could pass through to nodes 78, 81, or 79. If you chose to enter Ryba by node 69 you would place the Ryba mini-map on the table, and place the Guards on the "Salt Gate" node and continue the exploration phase within the city. The same rules apply when exiting a mini-map area. If you chose to exit Ryba by the Salt Gate node you would place the Guards on node 69 of the main map and continue the exploration phase.
Red Nodes
Red nodes are "impassable" nodes. The Guards may not land on red nodes unless the narrative in the Campaign Books directs otherwise, at which point they will usually act as if they were orange nodes.
Example: If the Guards were on node 14 they could not move to node 16 and pass through to node 20 and beyond. They would need to find another path around.
Mini-Map Nodes
Nodes also appear on mini-maps. Most of these nodes are green nodes, although some might be yellow nodes, and there are also orange nodes to facilitate traversal between the maps. In addition, some mini-map nodes feature certain icons which allow you to perform special actions while the Guards are visiting them.
Note: Many mini-map nodes are considered "Points of Interest", with a scroll depicting their name. As with any other green node, no chips are drawn when the Guards land on one of these, and you'll visit these locations many times throughout the game.
Inns
At an Inn, the Guards can rest from their adventures and keep abreast of local affairs. Information about what is on offer at each Inn is listed in the City Index Book. These actions can only be performed during the exploration phase, not during a Narrative Event.
Resting
Inns charge a fee in order to "rest" there, which is paid in Sil. By resting, the Guards' HP and AP is restored back to their maximum value. All Guards start with a maximum HP of 20 (which can be increased up to a maximum of 30), and each starts with 2 gray AP (which can be increased up to a maximum of 5). When resting at an Inn, the Guards' Bags remain unchanged.
After resting, a "Checkpoint" is created and the Campfire Chip is placed on the map, indicating the Inn. Checkpoints are only used if the Guards fall in battle. At the end of a game session, record this location in the Fort Istra & Save Index Book. See page 65 for more on "Saving Your Progress".
Prestige
Prestige is unlocked at the start of Chapter 2 of each campaign. To gain Prestige with a city in Isofar, you must complete objectives posted at the Inn for that city. Each Inn has three objectives to complete: one Puzzle Quest, and two Bounty Quests.
Each city has three Prestige Cards associated with it. The first time you complete an objective for a city, you'll record your progress in the City Index Book and receive the "+1" card for that city, and completing the remaining objectives will allow you to replace it with the "+2" and "+3" cards, respectively.
Prestige Cards grant players additional benefits in recognition of their continued assistance to the residents of the city they represent. These bonuses are listed on the back side of each Prestige Card:
- Prestige +1 reduces the Sil cost to stay at the Inn for that city.
- Prestige +2 reduces the Sil and material costs for purchasing and crafting items at the Marketplace and Blacksmith for that city.
- Prestige +3 grants a unique bonus to the Guards that's thematically linked to that city.
Marketplaces
At a Marketplace, the Guards may choose to "buy" or "sell" various items and materials. Information about what can be exchanged at each Marketplace is listed in the City Index Book. These actions can only be performed during the exploration phase, not during a Narrative Event.
A Marketplace might offer consumable items, such as Health Potions to restore HP, or Tents that allow the Guards to rest and create a checkpoint at any yellow node. Some stock food items unique to that city which offer additional benefits to the Guards. You'll also find various enemy drops, which are normally found by defeating them in battle, and are used to craft various pieces of equipment. Each Marketplace values these items and materials differently, so it is always useful to travel to different cities across Isofar for the best deal.
Example goods: Health Potion (Buy 5 / Sell 2, Effect: Heal 5 HP); Tent (Buy 20 / Sell 10, Effect: Create a save point at current node and heal both Guards by 10 HP); Metal Fragments (Buy N/A / Sell 5, Effect: Used in crafting).
Buying – When items and materials are bought, the required amount of Sil is reduced from the Sil Dual Dial, and the newly-purchased cards are placed in one of the Guards' satchel slots.
Selling – When items and materials are sold, the card must be in one of the Guards' satchel slots. The card is returned to the supply, and the amount of Sil gained is added to the Sil Dual Dial.
Blacksmiths
At a Blacksmith, the Guards may choose to "craft" or "sell" various pieces of equipment. Information about what can be crafted at each Blacksmith is listed in the City Index Book. These actions can only be performed during the exploration phase, not during a Narrative Event.
Each Blacksmith offers a selection of "recipes" for crafting equipment, mainly weapons and armor for each Guard to increase their stats. You can also craft accessories such as the Goat Skull Mask, which allows you to redraw a chip once per turn, as well as consumable items such as Smoke Bombs, which provide the Guards with the opportunity to evade incoming attacks. You'll even find useful tool items, like Expanded Satchels, which increase the capacity of the Guards' satchels and allow them to carry a lot more items.
Example recipes: Volk Blade (Materials: 1 Captain's Blade, 2 Iron Ore, 4 Pine; Craft 15 / Sell 8); Alloy Short Sword (Materials: 1 Iron Short Sword, 2 Metal Fragments, 2 Pine; Craft 12 / Sell 6); Cerulean Staff (Materials: 1 Aquamarine, 4 Pine; Craft 20 / Sell 10).
Crafting – When crafting a piece of equipment, the required amount of Sil is reduced from the Sil Dual Dial, while the required materials are discarded from the Guards' satchel slots and returned to the supply (materials must be in the Guards' satchel slots at the time of crafting, not in the Fort Istra Stash). The newly-crafted card can then be equipped to a Guard immediately, or placed in one of their satchel slots.
Selling – When a piece of equipment is sold, the card must either be currently equipped or in one of the Guards' satchel slots. The card is returned to the supply, and the amount of Sil gained is added to the Sil Dual Dial.
Fort Istra
Fort Istra serves as the main hub for the Guards throughout the five campaigns; a place for them to rest, train, and grow stronger. When you first arrive, the Fort is in ruins and not in operation. You'll have to rebuild and upgrade the Fort's buildings to get things running again, unlocking new content and in-game mechanics.
This location has its own special mini-map with removable pieces to represent its rebuilt and upgraded buildings. In order to rebuild or upgrade buildings at Fort Istra, you must collect and exchange the required materials for each one. The requirements for each building are listed in the Fort Istra & Save Index, as are full details of the benefits and services granted by each of them.
Time does not flow the same way in Fort Istra. As you rebuild and upgrade the Fort, your progress will carry over from one campaign to the next. How quickly the Fort is rebuilt is entirely up to you. It is not expected that players completely rebuild and upgrade the Fort before moving on to their next campaign.
Whenever the Guards land on a node within Fort Istra, reference the Fort Istra & Save Index for details of what actions they have available to them. Rebuilding Fort Istra provides the following benefits and services:
- Lumbermill: This building is essential to the reconstruction effort at Fort Istra. Once upgraded, retrieve wood from any Harvesting node.
- Lapidary: Retrieve ore from any Mining node. Once upgraded, exchange Speaking Stones for stronger ones.
- Boat Dock: Unlock the boat for traversing blue nodes. Once upgraded, send materials back to the Stash.
- Barracks: Rest here to restore the Guards' HP and AP, as well as remove negative chips from their bags.
- Apothecary: Craft special items, only found here.
- Blacksmith: Craft the strongest weapons and armor.
- Training Yard: Access special challenges for the Guards, with unique rewards.
- Courtyard: If the Guards fall in battle, you'll have the option to respawn them here. Later, access special Spirit Boss challenges, with further unique rewards.
- Stash: Store inventory not currently held by the Guards. Can be accessed from any node in Fort Istra.
Note: As the Guards progress the narrative, people from across Isofar will join the movement at Fort Istra and offer their services to assist in rebuilding it. Send them out on special commissions to gather materials, battle enemies and assist with purchasing and crafting in cities.
2. Narrative Event Phase
As players explore the country of Isofar, the narrative in the current Campaign Book will prompt you to place the Narrative Event Chip, Scroll Chip or Caravan Chip to indicate certain nodes on the various maps. These may be any color node. The Narrative Event Chip has a book icon, and is used for main story sequences. Scroll Chips are used for Side Quests, as well as the narrative triggers for Caravan Quests, Puzzle Quests and Bounty Quests. There are two Scroll Chips, meaning that any two of these quests can be active at any one time. The Caravan Chip is used exclusively as the starting point for Caravan Quests.
When the Guards' miniature or Bust Chips are moved to a node indicated by one of these chips, players may either read or listen (using Forteller) to any associated narrative, then follow the instructions to progress. Moving to one of these nodes does not immediately trigger the Narrative Event; players may choose to trigger them, but are locked-in once they commence. If the players decide not to trigger the Narrative Event, they continue by following the instructions that apply for that type of node during the exploration phase.
Side Quests are available from the start of Chapter 2 of each campaign. The Campaign Books will direct you to the Quests Book once they are available. These are limited to the current chapter you have progressed to in each campaign (i.e. if you're currently in Chapter 2, you may not begin those limited to Chapters 3 or 4). However, if you progress to a later chapter in the campaign, you may complete those from previous chapters.
Once a Narrative Event has been completed, you'll mark the square next to it in its respective book with an "X" using a pencil, and remove its Narrative Event or Scroll Chip from the map. Some of these Narrative Events have multiple parts (scenes). Once completed, Narrative Events cannot be repeated. If players run out of Scroll Chips, they can still start a new Side Quest, Caravan Quest, Puzzle Quest or Bounty Quest by removing the Scroll Chip from another quest, but any progress in the current scene for that quest will be lost.
Battles that occur as a result of a Narrative Event are usually more difficult than those encountered in the wild. Once a Narrative Event begins, players may not perform any of the actions that are normally available during the exploration phase, so they cannot equip anything nor rearrange their abilities. The Guards are unable to "retreat" from Narrative Events and are locked-in until they either fall in battle or emerge victorious. If the Guards are defeated, they will respawn back to the latest checkpoint, as indicated by the Campfire Chip, or at Fort Istra Courtyard if no checkpoint is available. They'll then have to begin the Narrative Event from the beginning by traveling back to the Narrative Event Chip or Scroll Chip.
Guard Dashboard
In The Isofarian Guard, players will manage two unique Guards throughout each campaign. Players will use the Guard Dashboards to keep track of their various stats. Campaign 1 starts with one Guard Dashboard, while the other campaigns start with two. At the beginning of each campaign, the respective Campaign Book will indicate which Guards to use. If playing the game solo, a player will manage both Guard Dashboards simultaneously, and if playing the game co-op, then each player will manage one Guard each.
At the start of a campaign, snap the Guard Bust Card into position. Place the Guard's starting equipment in the weapon and armor slots. Reference the Guard's base stats on pages 57-58 to determine their starting health (HP), attack (ATK), defense (DEF), and action points (AP). Place red cubes on the health, attack and defense tracks according to their values, and gray cubes in the AP active area.
- Guard Bust Card – Each Guard has a unique Guard Bust Card which is snapped into the Guard Dashboard when in use. These cards stay inserted throughout a campaign and are only switched at the start of a new campaign, or when a Campaign Book instructs players to do so.
- Health Point (HP) Tracks – Health points are tracked with red cubes. All Guards start with 20 HP, and this may be increased to a maximum of 30 HP through various means. If a Guard's HP is increased over 20, two red cubes are used, and a purple cube should be used to mark the maximum HP value of the Guard.
Example: A Guard's max HP has been increased to 22, and they have max HP. One red cube would be placed on "20" and another on "2" to indicate the current HP value, while a purple cube would be placed on "3" to indicate that the HP value cannot go higher.
If a Guard's HP reaches 0, that Guard has fallen in battle and can no longer take their turn. If the surviving Guard is victorious, or retreats, the fallen Guard is revived with 1 HP at the end of battle.
- Attack (ATK) Track – Attack is tracked with red cubes. A Guard's base attack may only reach a maximum of 10. Guards may temporarily modify their attack over 10, and enemies and other effects may temporarily lower a Guard's attack. Modifiers are cumulative, but a Guard's attack value can never be lowered below 0.
- Defense (DEF) Track – Defense is tracked with red cubes. A Guard's base defense may only reach a maximum of 10. Guards may temporarily modify their defense over 10, and enemies and other effects may temporarily lower a Guard's defense. Modifiers are cumulative, but a Guard's defense value can never be lowered below 0.
In addition, some Guard Ability Cards and Stonebound Ability Cards may boost a Guard's defense with a bonus that's tracked using blue cubes. Blue defense cubes are not discarded during the cleanup phase of battle, and are discarded at the start of the Guards' turn instead.
Note: It is important that blue cubes are not used to track regular defense modifiers, as some abilities interact specifically with blue defense cubes.
- Weapon Slot – Weapon cards are placed in this slot to equip a Guard. When a weapon card is placed in this slot, the Guard immediately gains any bonuses found in the Stone Slots shown on the back of the card. Bonus stats are increased on the Guard's Dashboard, and bonus chips are added to the Guard's Bag. When the card is removed from this slot, the Guard immediately loses these bonuses. Only one weapon card may be equipped at any time.
In addition, weapon cards may feature open stone slots on the back. Place Speaking Stone Cards in these slots to give the Guard additional bonuses. If there is an open stone slot available, place the Speaking Stone Card in the weapon slot, underneath the weapon card. When the weapon card is removed, the Speaking Stone Cards underneath are also removed. Therefore, a weapon slot will only ever contain a number of Speaking Stone Cards equal to the number of open stone slots on the back of the weapon card on top. Players may freely change the weapon and Speaking Stones they have equipped during the exploration phase.
- Armor Slot – Armor cards are placed in this slot to equip a Guard. When an armor card is placed in this slot, the Guard immediately gains any bonuses found in the Stone Slots shown on the back of the card. Bonus stats are increased on the Guard's Dashboard, and bonus chips are added to the Guard's Bag. When the card is removed from this slot, the Guard immediately loses these bonuses. Only one armor card may be equipped at any time.
In addition, armor cards may feature open stone slots on the back. Place Speaking Stone Cards in these slots to give the Guard additional bonuses. If there is an open stone slot available, place the Speaking Stone Card in the armor slot, underneath the armor card. When the armor card is removed, the Speaking Stone Cards underneath are also removed. Therefore, an armor slot will only ever contain a number of Speaking Stone Cards equal to the number of open stone slots on the back of the armor card on top. Players may freely change the armor and Speaking Stones they have equipped during the exploration phase.
-
Accessory Slot – Accessory cards are placed in this slot to equip a Guard. When an accessory card is placed in this slot, the Guard immediately gains the bonuses found on the front of the card. Bonuses from accessories might be persistent effects which are always active, or they might grant additional actions for a Guard to perform during a round of battle. When the card is removed from this slot, the Guard immediately loses these bonuses. Only one accessory card may be equipped at any time. Players may freely change the accessory they have equipped during the exploration phase.
-
Item Slot – Item cards are placed in this slot to equip a Guard. In order to be available during battle, an item card must be placed in this slot beforehand. The item may be used any time during a Guard's turn once chips have been drawn from their bag. When the card has been used, it is immediately returned to the supply. Only one item card may be equipped at any time. Players may freely change the item they have equipped during the exploration phase, and may move or swap an item from a satchel slot to their item slot by exhausting 2 action points (AP) during the battle phase.
-
Satchel Slots (4 Slots) – Guards store various equipment and materials acquired during their journey in these slots. Each Guard normally has four satchel slots, though this number can be increased by procuring Expanded Satchel tool items. Each satchel slot can hold any one square card, though some materials are numbered to indicate a larger amount being carried by the Guard in a single slot, and the card is flipped or replaced to show a change in the quantity of that material being stored. The maximum amount of these materials that can be held by the party at any time is normally 4 (e.g. the 1-2 card can never be used in conjunction with the 3-4 card in order to obtain 6 of that material).
Example: The Guard has two satchel slots which contain cards. The first slot is a Wolf Pelt enemy drop card and the second slot is a Pine harvesting card. The Pine card has been flipped to the reverse side to show that a quantity of "2" is being stored in that slot.
You may rearrange items between the Guards' satchels at any time during the exploration phase, and drop any card from either by returning it to the supply (except tool items). If all of the Guards' satchel slots are full and a new card is acquired, you must choose whether to drop one of the stored cards or the new card. Once returned to the supply, cards are lost forever.
- Action Point (AP) Active/Exhausted Area – Action points (AP) are represented by gray or green cubes, and are stored in this area of the Guard Dashboard. These are used to perform actions, and also indicate how many chips are drawn from a Guard's Bag at the start of their turn. Permanent AP is represented by gray cubes, whereas temporary AP is represented by green cubes and is returned to the supply after the battle during which it was gained. Each Guard may have a maximum of 5 gray AP and 5 green AP.
During a Guard's draw at the start of their turn, the player will draw chips one at a time from the Guard's Bag without looking, equal to the amount of AP in the top part of this area on the Guard Dashboard (both gray and green). Black chips are the only chips that count toward the draw number. A player's draw stops if there are no more chips remaining in the bag.
When a Guard uses a Guard Ability Card that requires AP, the player moves the required AP cubes from the active area to the exhausted area. At the end of the Guards' turn, AP in the exhausted area is refreshed and the cubes are moved back to the active area.
Guard Ability Dashboard
Each Guard also has a corresponding Guard Ability Dashboard. This dashboard is used to equip Guard Ability Cards and Stonebound Ability Cards, as well as serve as the area where most chips will be placed during battle. The maximum number of any type of chip there can be in total between a Guard's Bag and on their Guard and Ability Dashboards at any time is five. In this case, "type" refers to chips with the same symbol and color.
- Positive Chip Status Area – This area is used during battle to store active positive status chips that are currently benefiting the Guard. These chips may be: Green Evasion, Green Heart, Green Strengthen, Green Bolster, Purple Evasion, Purple Heart.
All chips stored here are returned to the supply during the cleanup phase at the end of a round, except green and purple Evasion Chips, and purple Heart Chips. If they are not activated by an incoming attack, green and purple Evasion Chips are cleaned up at the start of the next Guards' turn. Green Evasion Chips are returned to the supply, while purple Evasion Chips are moved to the Guard's discard area. Purple Heart Chips are also moved to the Guard's discard area.
- Negative Chip Status Area – This area is used during battle to store active negative status chips that are currently hindering the Guard. These chips may be: Red Weaken, Red Break, Red Fear, Red Seal, Red Stun, Red Upkeep, Purple Corruption, Purple Freeze, Purple Poison.
All red chips stored here are returned to the supply during the cleanup phase at the end of a round, while all purple chips are moved to the Guard's discard area.
-
Discard Area – This area is used during a battle to store chips which have been discarded and will eventually return to the Guard's Bag. All black and purple chips (except purple Evasion Chips) are moved to the discard area during the cleanup phase at the end of a round. If the Guard's Bag is empty at the start of their turn, refill it with all the chips in this area. If it is not empty, you may still do so by losing 1 HP. This is the only time you may refill the Guard's Bag in this way.
-
Ability Slots (I-VI) – This area is used to equip Guard Ability Cards and Stonebound Ability Cards. Players may equip either type of ability to any open slot of this dashboard, but are limited to a total of six cards. Guard Ability Cards always start battle with the "Primary" (P) side facing up. They are activated by placing chips representing Sword and Shield resources drawn from the Guard's Bag onto them and exhausting a number of action points (AP). When equipping a Stonebound Ability Card, the corresponding colored Speaking Stone Gem is also placed in the ready slot with the matching numeral. Gems always start battle in their ready slots, and are moved onto their cards to activate them. Gems then cycle to their exhausted slot and back to their ready slot during the following cleanup phases.
-
Speaking Stone Gem Ready Slots
-
Speaking Stone Gem Exhausted Slots
Example: Grigory has his starting Guard Ability Cards "Guard", "Feint", and "Advance" equipped in slots I, II and III, and his "Cross Slash" Stonebound Ability Card in slot IV of his Guard Ability Dashboard. Note the red "fire" Speaking Stone Gem that has been placed in ready slot VI below "Cross Slash".
Customizing the Guards
During the exploration phase, you can customize the Guards through a variety of actions. These actions can only be performed during the exploration phase, not during a Narrative Event nor once battle has commenced, and must be taken before drawing a chip from the Event Bag.
Players can outfit the Guards with any available weapons, armor, accessories or items, and may organize, use and discard items from either of the Guards' satchels. Players can also equip any unlocked Guard Ability Cards and Stonebound Ability Cards to their Guard's Ability Dashboard. Finally, each Guard has a unique Skill Tree, and players can unlock some of the unique upgrades and stat increases found there.
Equipment
You may equip various pieces of equipment to the Guards during the exploration phase. Equipment includes weapons, armor, accessories, and items. The Guard Dashboard has slots to equip one of each at a time. To equip anything, the card must usually be in one of the Guard's satchel slots, although when it is crafted it may be equipped immediately.
Weapons and Armor
Weapons and armor can only be equipped by the Guard whose bust icon appears on the back of the card, unless it features the infinity icon, in which case it can be equipped by any Guard.
Equipping a weapon will allow a Guard to perform a Standard Attack during battle, as indicated by the resource cost and attack modifier icons in the bottom-left corner. The numerical value next to the attack modifier icon is added to the Guard's attack (ATK) stat for this attack only. If a status effect chip is pictured, it is added to the target of the attack.
Weapons and armor cards feature special "Stone Slots" which grant them bonuses and can be used to attach Speaking Stone Cards to the Guard's equipment. Some of these stone slots might be permanently occupied and already contain bonuses.
Bonuses from weapons and armor might include stat increases to health (HP), attack (ATK), defense (DEF) or action points (AP), as well as bonus chips for the Guard's Bag. The Guard immediately gains these bonuses when the card is equipped. Bonus stats are increased on the Guard's Dashboard by moving the corresponding red cube to the new value of the stat or by adding new gray cubes to the Guard's AP pool, and bonus chips are added from the supply to the Guard's Bag. When the weapon or armor card is removed, the Guard immediately loses these bonuses.
Weapon and armor cards might also have open stone slots. These do not contain bonuses themselves, but are used to equip Speaking Stone Cards and gain bonuses from them in turn. This is the only way to equip Speaking Stone Cards, whether they come with a Stonebound Ability Card or have been acquired by another means. You may only attach Speaking Stone Cards equal to the number of open stone slots that are available. When the Speaking Stone Card is removed, the Guard immediately loses the bonuses it provided.
Example: A weapon card has one stone slot occupied by a purple Heart Chip and two open stone slots for attaching Speaking Stone Cards. When this weapon is equipped, the chip is added to the Guard's Bag and up to two Speaking Stone Cards can be placed beneath this card to gain their bonuses as well.
Gaining certain weapons can even unlock new Stonebound Ability Cards, although the former does not need to be equipped in order to equip the latter.
Accessories and Items
Accessories give special benefits that can affect both the exploration and battle phase. Equip them to the Accessory Slot and follow the text on the card. Accessories with limited effects for use in battle are marked with the limited activation icon. The numerical value next to the icon represents how many times the effect can take place, and a purple cube is placed on the card each time it is activated. Once the numerical value is met, the card is flipped over to indicate that it cannot be activated again during this battle.
Accessories with a caravan icon in the top-left corner are obtained via a Caravan Quest. If these are unlocked in one campaign, they can be used in later campaigns once the Guards have reached Fort Istra in Chapter 2.
Items can only be used in battle if they are equipped to the Item Slot, though items with a compass icon can be used directly from a satchel slot at any time during the exploration phase. Players may freely change the item they have equipped during the exploration phase, and may move or swap an item from a satchel slot to their item slot by exhausting 2 action points (AP) during the battle phase. An item only affects the Guard who has it equipped unless stated otherwise, and all items (except tool items) are consumables, so they can only be used once before being returned to the supply.
Abilities
The actions that can be performed by the Guards in battle are represented by which Guard Ability Cards and Stonebound Ability Cards they have equipped. The maximum number of abilities a Guard can have equipped in any combination is limited to the six ability slots on their Guard Ability Dashboard. You may equip and swap out any number of abilities during the exploration phase. Be sure to try out multiple combinations and builds when faced with the many challenges that the Guards are to overcome. These cards are acquired by unlocking them on the Guards' Skill Trees, through Side Quests, and via other special events.
Guard Ability Cards
Guard Ability Cards represent the basic actions available to the Guards in battle. Each Guard has their own unique set of abilities. These are activated by placing Sword and Shield resources onto them and exhausting action points (AP). Guard Ability Cards are always placed with the "Primary" (P) side facing up at the start of battle, and might flip to the "Secondary" (S) side during battle. Many Guard Ability Cards have passive effects written on them, including those indicated by the reactive icon. Guard Ability Cards may feature [Keyword] effects unique to each Guard that, when triggered, allow them to reach their full combat potential (see pages 57-58 for more on [Keywords]).
Stonebound Ability Cards
Stonebound Ability Cards provide the Guards with actions so strong that they can be activated independently of the chips and action points (AP) they have available during a turn, but there is a one-turn cooldown before they can use it again.
Stonebound Ability Cards can only be equipped by the Guard whose bust icon appears in the top-left corner of the card, unless it features the infinity icon, in which case it can be equipped by any Guard. If these Universal Stonebound Ability Cards are unlocked in one campaign, they can be used in later campaigns once the Guards have reached Fort Istra in Chapter 2.
These powerful abilities are each associated with an element type. When equipping a Stonebound Ability Card to an ability slot on the Guard's Ability Dashboard, a plastic Speaking Stone Gem of the corresponding color is placed on the associated ready slot.
Speaking Stone Gems always start the battle as ready. When activating a Stonebound Ability Card, the player moves the gem from the ready slot to the card in the ability slot. During the cleanup phase, the gem is automatically moved from the card to the matching exhausted slot, then back to the ready slot during the following cleanup phase.
The number of Stonebound Ability Cards of any element that can be equipped between the two Guards is limited by the number of that color Speaking Stone Gem included with the game, though any color gem can be used for a "rainbow" Stonebound Ability Card.
Speaking Stone Gems not only allow the Guards to use their Stonebound Ability Cards, but also provide them with special bonuses. When equipping a Stonebound Ability Card, flip over the card to reference the Speaking Stone Card that is included with the ability, and, in turn, flip over the Speaking Stone Card to see what bonuses are gained. There must be an open stone slot on the Guard's weapon or armor card to attach the Speaking Stone Card. Once attached, this card is placed underneath the weapon or armor card, and the bonus effect from the card is gained immediately.
Example: Grigory has the "Cross Slash" Stonebound Ability Card equipped to ability slot VI on his Guard Ability Dashboard. This ability comes with a "Garnet" Speaking Stone Card, so this is equipped to any open stone slot on Grigory's weapon or armor, and the double Sword Chip provided by the Speaking Stone is added to his bag. A red "fire" gem is placed in ready slot VI. Grigory activates "Cross Slash" by moving the gem from the ready slot to the card. During the cleanup phase, it is moved from the card to the exhausted slot, then back to the ready slot during the following cleanup phase.
Speaking Stone Cards
Speaking Stone Cards can not only be gained by equipping Stonebound Ability Cards, but might also be acquired via battle rewards, Narrative Events, Side Quests, and other special events. Equipping Speaking Stone Cards is the main way to build the Guards' Chip Bags in The Isofarian Guard.
A Speaking Stone Card gained from a Stonebound Ability Card must be attached to a weapon or armor card with an open stone slot, and both must then be equipped to an equipment slot. The Speaking Stone Card is placed beneath the equipment card it is attached to, occupying the same equipment slot, and the Guard receives any bonuses specified on the back of the Speaking Stone Card immediately. The Speaking Stone Card must remain equipped for as long as its associated Stonebound Ability Card is equipped, bearing in mind that it can be swapped and attached freely between open stone slots while reorganizing equipment at any time during the exploration phase. When the Stonebound Ability Card is unequipped, the Speaking Stone Card and any bonuses (such as bonus stat modifiers, or bonus chips in the Guard's Bag) are also removed and returned to the supply.
Speaking Stone Cards acquired independently of Stonebound Ability Cards may be stored in a satchel slot or the Fort Istra Stash, but only provide their bonuses when attached to an open stone slot on a weapon or armor card that has been equipped, just as with any other Speaking Stone Card.
Skill Trees
As the Guards journey across Isofar and defeat various enemies, they will gain Lux Essence. Lux Essence represents a party's communal experience pool and may be used to gain new bonuses. Lux Essence is tracked using the Lux Dual Dial, and is spent to acquire upgrades on each Guard's Skill Tree. Skill Trees can be found in the Fort Istra and Save Index Book.
At the start of each campaign, the starting upgrade of each Guard is unlocked by default. Every subsequent "node" on a Skill Tree has a Lux Essence cost and chapter requirement in order to be unlocked. Lux Essence requirements increase as the story progresses and enemies grant more experience to the Guards. This system prevents you from over-leveling and keeps you in pace with the story.
Players can unlock upgrades that connect to any upgrade they have already unlocked and are on the same level or above, so long as they can fulfil the Lux and chapter requirement. Reduce the Lux Essence cost from the Lux Essence Dual Dial and gain the bonuses listed. Mark that the node has been unlocked by checking the box below it in the Fort Istra and Save Index Book. These tracking sheets are also available on the game's website: www.thestoneboundsaga.com/theisofarianguard
Upgrades identified by a stat icon featuring a "+" symbol will increase a Guard's maximum health, attack, defense, or AP. Upgrades with a colored border represent a chip that is added to the Guard's Bag. Once unlocked, all upgrades are permanent.
Example: A "+1" heart icon is an increase to the Guard's maximum health (HP) by 1. A heart icon with a purple/colored border adds a purple heart chip to the Guard's Bag permanently.
Guards may also unlock new Guard Ability Cards and Stonebound Ability Cards on their Skill Trees. These are unique to each Guard and may only be used by them. Once unlocked, players have the option to add these new abilities to their Guard's Ability Dashboard at any time during the exploration phase of the game. Guard Ability Cards can be identified by the class icon, while Stonebound Ability Cards can be identified by the Speaking Stone element icon, and they each feature the name of the ability that can be unlocked in a scroll underneath.
Example: An icon showing crossed swords/shield indicates a Guard Ability Card from Grigory's Skill Tree ("Meditate"). The icon can also be found on the card below the Primary (P) and Secondary (S) icons. A flame icon indicates Grigory's default Stonebound Ability Card "Cross Slash", which uses the fire element.
Enemy Dashboard
In The Isofarian Guard, there can be up to four enemies in battle at any time. Players will use the Enemy Dashboards to keep track of their various stats. Each dashboard is modular and can be added to the battlefield at any time if additional enemies join the fray. The Index Books or Campaign Books will inform you of how many enemies are in a battle and how they are placed.
When a battle occurs, place an enemy card in the enemy card slot. Shuffle its corresponding enemy AI deck and place it face-down in the enemy AI draw slot. Reference the enemy card to determine its starting health (HP), attack (ATK), defense (DEF), and action points (AP). Place red cubes on the health, attack and defense tracks according to their values, and gray cubes in the AP active area.
-
Enemy Card Slot – Enemy cards are placed in this slot during battle. If an enemy is affected by a status effect chip, it is placed on top of the card in this slot. If an enemy's HP reaches 0, that enemy is defeated and the enemy card is flipped over to reveal the rewards collected if the Guards are victorious at the end of the battle.
-
Enemy AI Draw Slot (Cards Face-Down) – Enemy AI cards are placed in this slot during battle. Each enemy has an AI deck of eight cards. Two of these AI cards are unique, with much stronger effects than those found on their other, regular AI cards. These are marked with the special AI icon, and are always numbered 7 and 8. All eight cards are shuffled and placed face-down at the start of the battle. When an enemy starts its turn, flip over the top AI card in this slot and place it face-up in the enemy AI discard slot. Once all cards have been discarded from the enemy AI deck, it is shuffled again and returned face-down to the enemy AI draw slot.
-
Enemy AI Discard Slot (Cards Face-Up) – Enemy AI cards are discarded to this slot during battle. For so long as an AI card is visible in this slot, it is considered active and any passive effects written on it are applied, including those indicated by the reactive icon. If ever an enemy AI card cannot be drawn, shuffle and return them face-down to the enemy AI draw slot.
-
Health Point (HP) Tracks – Health points are tracked with red cubes. An enemy's starting HP can be found on their enemy card, and certain enemy AI abilities might allow them to heal beyond that, but an enemy's HP may never exceed a maximum of 109. Two red cubes are used to indicate the HP value of an enemy, one on each track.
-
Attack (ATK) Track – Attack is tracked with red cubes. An enemy's base attack may only reach a maximum of 10. Enemies may temporarily modify their attack over 10, and Guards may temporarily lower an enemy's attack. Modifiers are cumulative, but an enemy's attack value can never be lowered below 0.
-
Defense (DEF) Track – Defense is tracked with red cubes. An enemy's base defense may only reach a maximum of 10. Enemies may temporarily modify their defense over 10, and Guards may temporarily lower an enemy's defense. Modifiers are cumulative, but an enemy's defense value can never be lowered below 0.
In addition, some enemy AI abilities may boost an enemy's defense with a bonus that's tracked using blue cubes. Blue defense cubes are not discarded during the cleanup phase of battle, and are discarded at the start of the enemies' turn instead.
Note: It is important that blue cubes are not used to track regular defense modifiers, as some abilities interact specifically with blue defense cubes.
- Action Point (AP) Active/Exhausted Area – Action points (AP) are represented by gray or green cubes, and are stored in this area of the Enemy Dashboard. These are used to perform actions by enemies. Permanent AP is represented by gray cubes, whereas temporary AP is represented by green cubes and is returned to the supply after the battle during which it was gained. Each enemy may have a maximum of 5 gray AP and 5 green AP.
When an enemy uses an AI ability that requires AP, the player moves the required AP cubes from the active area to the exhausted area. At the end of the enemies' turn, AP in the exhausted area is refreshed and the cubes are moved back to the active area. Enemies will still spend AP as directed by their AI cards even if the ability would not have any effect.
3. Battle Phase
A battle normally begins when you draw a Skull Chip from the Event Bag while exploring (unless it is avoided by spending AP), or when you are forced into battle by a Narrative Event, Side Quest, or a Field Event Card. Guards might also choose to begin a battle themselves when they draw a Compass Chip.
Which enemies the Guards will fight is normally determined by using the Enemy Index Book, but Narrative Events will list the enemies in their respective Campaign Book, and Side Quests will list them in the Quests Book instead. The Enemy Index Book lists the nodes from the main map at which enemies could be encountered in each chapter, corresponding to those found in all campaigns. This is then followed by the enemies found at the nodes from the "Frozen Wastes" and "Ice Caves" mini-maps. Nodes are on the left, and the single, double, and triple Skull Chip icons are along the top.
The star value next to the enemy name tells you which enemy card to use, but they will always use the same AI decks. Enemy cards can have 1-4 stars, with higher star enemies being stronger and having higher stats, and the star value is usually roughly equal to the chapter being played. Enemy Dashboards are numbered I-IV, and the roman numeral after the enemy name indicates the order in which the enemy is placed. Enemies with names marked in red text are "ambushes", where the enemy goes first and you cannot retreat from battle.
Example: If you drew the double Skull Chip for Node 1 you would battle against a 1-star Timber Wolf in slot I, and a 1-star Timber Wolf in slot II of the battlefield.
Unless otherwise stated, enemies enter battle following the order of the enemy slots (I-IV). Retrieve the necessary Enemy Dashboards, enemy cards and AI decks. Enemy Dashboards are normally set up on the table in a grid shape, but you may arrange them however you prefer as long as the enemy turn order is followed from I-IV. This represents the battlefield and is referred to as the "Enemy Grid". The "Front Row" of the enemy grid consists of the enemies in slot I and slot II, and the "Back Row" consists of the enemies in slot III and slot IV. At the start of battle, Guards may only target enemies with attacks if they are in the front row of the grid unless an ability states otherwise, but can target all enemies in the grid with an effect. If all enemies in slots I and II are defeated, the enemies in slots III and IV can be targeted with attacks as well. An ability that states "attack all enemies" would target enemies in all slots.
Each specific enemy has their own enemy card and a deck of eight AI cards. The enemy cards and their AI cards can be found in one of the three card index boxes included in the game. Each enemy type has a divider so you can easily locate their cards. Place the correct card for each enemy in battle on their Enemy Dashboard, and shuffle the AI deck of each one separately, placing it in their enemy AI draw slot. If at any time it is required to draw AI cards but none remain in the deck, shuffle the discarded AI cards and place them face-down back in the enemy AI draw slot, then proceed with the draw.
Set the enemies' stats for their health points (HP), attack (ATK), and defense (DEF) using red cubes, and action points (AP) using gray cubes.
Add Enemies
Sometimes, one enemy might summon another enemy into battle. Newly added enemies go into the lowest enemy slot that is not currently occupied, including being occupied by defeated enemies. If an enemy attempts to add another enemy and all enemy slots or cards of that type are in use, reset the HP of the enemy that currently has the lowest value back to their starting HP as indicated on their enemy card, if it does not already exceed that value. In the case of a tie (including enemies with 0 HP), bring a new enemy into battle by resetting the HP of the one in the lowest numbered slot. If the Guards are victorious, enemy rewards are gained for each time a type of enemy has been defeated, not just for the number of enemy cards that have been used.
Ambush
In an ambush encounter, the enemy goes first and you cannot retreat from battle. Once all enemies have taken their turn, the cleanup phase occurs and battle order returns to normal with the Guards going first. Ambush encounters are indicated with red text in the Enemy Index Book. All encounters that occur on blue nodes are ambushes.
Damage
Any time a Guard or enemy performs an attack against a target, the "Attack" (ATK) stat of the attacker is compared to the "Defense" (DEF) stat of the defender in order to calculate the resulting "Damage".
These values can be modified through various means to give one combatant an advantage over the other. This modifier lasts until the end of the round, or while the ability is active.
If the attack value exceeds the defense value, the target takes damage equal to the amount by which the attack value exceeds the defense value, reducing that amount of health points (HP) from their current value. Therefore damage from attacks is calculated as follows:
(Base ATK + ATK modifier) minus (Base DEF + DEF modifier) = HP damage
Example 1: An enemy targets Grigory with an AI ability that has an attack modifier of "+2", already having a base attack of "3". Grigory has a base defense of "3" and has an ability active modifying his defense by "+1". The enemy would attack for "5", minus Grigory's defense of "4", and therefore Grigory would take "1" damage.
Example 2: A player draws two single Sword Chips, placing them on "Critical Strike" and exhausting 2 AP to activate it. Grigory has a base attack stat of "3", and a modifier of "+2" from "Critical Strike", so he attacks the enemy target with a total of "5" against their defense.
Defeat
Any time the HP of an enemy reaches 0, flip their enemy card over. Rewards for defeated enemies are collected at the end of battle.
If the HP of one of the Guards reaches 0, the remaining Guard continues to battle. If the battle is victorious or they retreat, the fallen Guard will be revived to 1 HP. If the HP of both Guards reaches 0 before that of their enemies, they are defeated and have fallen in battle.
When a Guard falls in battle or an enemy is defeated, the effects of the ability currently in play are seen through to conclusion (as are any reactions to this ability), after which they can no longer take their turn nor be targeted by any attack or effects.
Exchange Resources
Any time a Sword or Shield resource is paid (usually while either activating a Guard Ability Card or performing a Standard Attack), they can be exchanged at a ratio of 2:1.
Example: A single Sword Chip can be used to perform a Standard Attack, but two single Shield Chips can also be used to perform the same Standard Attack.
Retreat
Isofar is a very dangerous place, and sometimes you may feel the need to retreat from an enemy encounter in order to regroup. When retreating, all members of the Guard forfeit their turn to take the "Retreat" action instead. This action can only be taken at the start of a round. All enemies still take their turn as normal, after which the cleanup phase is performed and the battle is over. Perform the usual post-battle maintenance (see page 50), but, importantly, gray AP is not refreshed and no rewards are obtained.
The Guards may never retreat from ambushes or Narrative Events. If one Guard has fallen and the other retreats, the fallen Guard is revived with 1 HP and their bag remains unchanged.
Start of Battle
A member of the Guard always goes first unless the encounter specifies that the battle is an ambush. If the Guards have exhausted all of their action points (AP) avoiding battles initiated by Skull Chips drawn from the Event Bag, the actions available to them will be limited until their exhausted AP is refreshed.
The order in which the players choose to activate the Guards during their turn is important, as the order in which attacks are performed and abilities activate can change the way enemies behave with their AI cards.
Verify that all Guard Ability Cards are flipped to their Primary (P) sides, all Speaking Stone Gems are in their ready slots, and all accessories have been reset with their purple cubes removed.
The battle is about to begin!
Round of Battle Order
Guards' Turn
- Check any equipped accessories for effects that apply at the start of a round and trigger them. Some accessories have effects that only trigger once before the battle begins, occurring even if the battle is an ambush.
- Discard all blue cubes on both of the Guards and return them to the supply.
- Choose a Guard to activate.
- If the Guard's Bag is empty, refill it with all the chips in the discard area on the Guard's Ability Dashboard. If the bag is not empty, you may choose to lose 1 health (HP) to refill it with all the chips in the discard area on the Guard's Ability Dashboard instead. This is the only time you may refill the Guard's Bag in this way.
- Without looking, draw chips one at a time from the Guard's Bag. The number of chips drawn is equal to the amount of active AP at the start of the turn. Only black chips count against draw, and players must draw until the count is reached or the bag is empty. Resolve any positive or negative chips as each one is drawn and place them in the positive or negative status chip area of the Guard's Ability Dashboard, respectively.
- The next actions may be taken in any order, or not at all.
-
Activate Guard Ability Cards by paying the required cost. Place a number of chips representing the required amount of Sword and Shield resources on the Guard Ability Card being activated, and exhaust any action points (AP) required to perform the ability by sliding AP cubes from the active area to the exhausted area of the Guard's Dashboard. Chips with multiple resources cannot be split and used on multiple Guard Ability Cards. Once these requirements have been fulfilled, resolve the effects listed on the card, except those that are passive effects triggered when specific conditions are met (indicated by the reactive icon) and those that are triggered by [Keywords] (see pages 57-58).
Guard Ability Cards are always placed with the Primary (P) side facing up at the start of battle, and their Secondary (S) side can only be accessed by flipping the card. Cards with the chip-activated flip icon are flipped to the opposite side if they have been activated this round and are still active during the cleanup phase by still having chips on them, but not all Guard Ability Cards are flipped in this way.
You may activate as many Guard Ability Cards as you are able to fulfil the requirements for in a turn, but any single Guard Ability Card cannot be activated more than once per round, unless it is somehow activated by activating another ability, or by triggering [Keywords].
-
Activate Stonebound Ability Cards using ready Speaking Stone Gems. Each Stonebound Ability Card has a matching Speaking Stone Gem of the same color that goes in the slot with the same numeral. When you activate a Stonebound Ability Card, move the matching gem from its ready slot and place it onto the Stonebound Ability Card. Stonebound Ability Cards can only be activated by the gem in the ready slot with the same numeral that the Stonebound Ability Card is on. Stonebound Ability Cards typically have very powerful effects, and therefore there is a one-turn cooldown period after using a Stonebound Ability Card. The gem is moved to the exhausted slot during the cleanup phase, and it will remain in the exhausted slot for a whole turn before becoming ready again.
-
Enemies' Turn
- Discard any green Evasion Chips and blue cubes on enemies and return them to the supply.
- Activate the enemy in slot I.
- Draw an AI card from the enemy's face-down deck, and place it face-up in the AI discard slot.
- Resolve the actions on the enemy AI card. Actions are separated by dividers, and all actions that can be performed are resolved in order, from top-to-bottom. Enemy AI cards refer to targets from the perspective of the enemy itself, not the Guards. Therefore, the enemy of an enemy would be the Guards, and an ally would be a fellow enemy. Actions might cause enemies to draw and resolve further AI cards. Enemies continue to perform actions for as long as they have enough action points (AP) to do so, only ceasing their turn once the logic of the cards causes them to reach the words "END TURN". This is the only time these cards are drawn and their actions resolved. If an AI card is drawn at any other time, it is not resolved, though it is still considered active while visible in the enemy AI discard slot, and passive effects written on the card are still applied, including those triggered when specific conditions are met (indicated by the reactive icon).
- Activate the remaining enemies in order (slot II, slot III, slot IV). Repeat steps 3-4 for each enemy.
- Refresh exhausted AP for all enemies by moving it back to their active area.
Cleanup Phase
- Discard all chips from enemies except green Evasion Chips and return them to the supply.
- Discard all chips from Guard Ability Cards and weapons, as well as any chips that have not been used. Black and purple chips are moved to the discard area on the respective Guard's Ability Dashboard. Green chips are returned to the supply. Flip over cards that indicate they flip after being activated.
- Discard all chips from the positive and negative chip areas on the Guard Ability Dashboards. Purple chips are moved to the discard area on the respective Guard's Ability Dashboard. Green and red chips are returned to the supply.
- Move exhausted Speaking Stone Gems to ready slots, then move active Speaking Stone Gems to exhausted slots.
End of Battle
Victory
The battle will end in either victory or defeat (unless the Guards retreat). The Guards are victorious when the HP of all enemies on the battlefield reaches 0. Collect the rewards found on the reverse of each defeated enemy's card. Rewards may include enemy drops, Sil, Lux Essence, or equipment. Enemy drops can be stored in the Guards' open satchel slots, or dropped. If a Guard already has that enemy drop card in a satchel slot, flip or replace the card to the new quantity. Since the maximum quantity is normally 4, any enemy drops acquired beyond that are automatically dropped. Record any "Sil" received on the Sil Dual Dial, and any "Lux Essence" gained on the Lux Dual Dial.
One Guard Falls In Battle
If the HP of one of the Guards reaches 0 but the battle is victorious, or the remaining Guard retreats, no rewards are lost. The fallen Guard is revived with 1 HP and their bag remains unchanged.
Both Guards Fall In Battle
If the HP of both Guards reaches 0 before that of their enemies, they are defeated and have fallen in battle.
Note: Isofar is a dangerous and deadly land, fraught with peril. The Guards must be ready for anything, but surprises lurk around every turn. It is natural for players to have their Guards fall in battle many times when playing The Isofarian Guard, so do not be discouraged. Try out different combinations of Guard and Stonebound Ability Cards, and investigate the myriad accessories and items available to purchase and craft in each city. If observing the intended difficulty of the game, it is considered that a Guard's weapon and armor should have the same rarity as the current chapter number.
The Guards drop all items and materials in their possession at their current node, but retain all weapons, armor, accessories and tool items. Place the cards in a pile beside the map and mark the node and the pile using purple cubes. The first time they return to this node, the Guards may collect these items by placing them in any of their open satchel slots, so long as they have not both fallen in battle again in the meantime. If the Guards fall, or run out of open satchel slots, the cards are returned to the supply.
All Sil in the Sil Dual Dial is lost, but any Lux in the Lux Dual Dial is kept. Remove all green, red, and negative purple chips from the Guards' Bags. Respawn the Guards' miniature or Bust Chips at the latest checkpoint, as indicated by the Campfire Chip, or at Fort Istra Courtyard if no checkpoint is available. Revive both Guards with 20 HP (their starting HP value). Then, add five Weaken Chips to both of the Guards' Bags and exhaust all AP from both Guards.
Post-Battle Maintenance
No matter the outcome, return all cards, chips and cubes on Enemy Dashboards to the supply. Return all black and purple chips on Guard and Ability Dashboards back to the respective Guard's Bag. Return all green chips, red chips and green AP cubes on Guard and Ability Dashboards back to the supply. Do not remove any chips from either Guard's Bag at this time. Refresh all gray AP (unless retreating). Flip all Guard Ability Cards back to their Primary (P) sides, move all Speaking Stone Gems back to their ready slots and remove purple cubes from all accessories.
Continue playing the game in the exploration phase or Narrative Event phase, accordingly.
Combat Chips
The Guards each have their own bag containing multiple weighted chips, which, along with their action points (AP), represent their stamina in battle. During battle, players will draw chips from these bags and use them to activate Guard Ability Cards. Many chips will also apply immediate positive or negative effects.
A chip's color is determined by the edge of the chip (outer ring). A chip may be black, green, purple, or red.
- Black Chips used in battle are either single or double Sword or Shield resources. Black chips are moved to the discard area of the Guard Ability Dashboard during the cleanup phase.
Note: Black chips are the only color chips that ever count toward the number of chips drawn, unless indicated otherwise by the all-draw icon.
- Green Chips are either single Sword or Shield resources, or positive status effect chips. Green chips are returned to the supply during the cleanup phase.
- Purple Chips are either Combo Chips, or status effect chips. These might be either positive or negative. Purple chips on Guards are moved to the discard area of the Guard Ability Dashboard during the cleanup phase. Purple chips on enemies are returned to the supply during the cleanup phase.
- Red Chips are all negative status effect chips. Red chips are returned to the supply during the cleanup phase.
Any chips that can be found in a Guard's Bag that do not represent a Sword or Shield resource are also considered to be "Status Effect Chips":
- Green Chips: Positive: Evasion, Heart, Strengthen, Bolster.
- Purple Chips: Positive: Evasion, Heart. Negative: Corruption, Freeze, Poison.
- Red Chips: Negative: Weaken, Break, Fear, Seal, Stun, Upkeep.
As the Guards increase their strength, they will add more black and purple chips to their bags using equipment and items, as well as via their Skill Trees. Some of the Guard's abilities can add positive chips to their bag, while other abilities might apply negative chips to enemies, but, in turn, enemies might be able to hit back and put negative chips into their bag!
The maximum number of any type of chip there can be in total between a Guard's Bag and on their Guard and Ability Dashboards at any time is five. In this case, "type" refers to chips with the same symbol and color.
Sometimes chips are not returned to the supply or bag under certain conditions. Chips might sometimes be placed on accessories to activate an effect. These chips remain until the effect has triggered, or until the player decides to move them to the supply or discard area. In addition, any time chips are drawn as a result of a Field Event Card, they are returned to the Guard's Bag at its conclusion, regardless of color or type.
Aggro Chip
Unlike the other chips in this section, the Aggro Chip is not placed in one of the Guard's Bags and drawn during battle, but instead placed on one of their Dashboards at the end of the Guards' turn, on top of the Guard Bust Card. The Guard who most recently performed an attack against an enemy target "has aggro" (even if that attack did no damage or was evaded). The Aggro Chip remains on that Guard's Dashboard until the other Guard has aggro.
If enemies use abilities listed on their AI cards that can target a Guard and no condition is met (including "having aggro") then the players may choose which Guard is the target of the ability.
Bolster Chip
A green chip that gives a Guard +1 to their Defense Stat (DEF) for each Bolster Chip drawn. This effect lasts from the point the chip is drawn until it is returned to the supply.
Bolster Chips are placed in the positive status area on the Guard Ability Dashboard while active. Once the round is over, Bolster Chips are returned to the supply during the cleanup phase of battle.
Break Chip
A red chip that gives a Guard −1 to their Defense Stat (DEF) for each Break Chip drawn. This effect lasts from the point the chip is drawn until it is returned to the supply.
Break Chips are placed in the negative status area on the Guard Ability Dashboard while active.
The effect of the Break Chip becomes active for an enemy once placed upon the enemy card by a Guard Ability Card or Stonebound Ability Card. Each Break Chip on the enemy card gives the target −1 to their Defense Stat (DEF).
Once the round is over, Break Chips are returned to the supply during the cleanup phase of battle.
Combo Chip
A purple chip that, despite counting as both a single Sword and a single Shield resource, is not considered a "Sword Chip" nor a "Shield Chip", and is therefore unaffected by an enemy AI ability that applies to them. Combo Chips cannot be split and used on multiple abilities or attacks.
This chip can still be used when exchanging resources, where adding a single Sword or Shield resource can make it count for two of the other resource.
Example: Grigory's Guard Ability Card "Take Cover" requires two Shield resources to activate. He can do so with one Combo Chip and one single Sword Chip.
Corruption Chip
A purple chip that prevents a Guard from using any Guard Ability Cards during the round from the point the chip is drawn until the end of the round. Stonebound Ability Cards may still be used.
Example: Grigory draws a Corruption Chip at the start of his turn. He can't use "Guard", "Feint", "Advance" etc., but he may still activate his "Cross Slash" Stonebound Ability Card using its Speaking Stone Gem as normal.
Corruption Chips are placed in the negative status area on the Guard Ability Dashboard while active. Once the round is over, Corruption Chips are moved to the Guard's discard area during the cleanup phase of battle.
Evasion Chip
A green or purple chip that allows a Guard or enemy target to evade an incoming attack. When this status effect chip is active, the next attack performed against the target misses, but still counts as an attack, and any effects associated with the attack will also miss.
Evasion Chips are placed in the positive status area on the Guard Ability Dashboard while active. Each time an incoming attack has been successfully avoided, remove one Evasion Chip from the dashboard. Green Evasion Chips are returned to the supply, while purple Evasion Chips are moved to the Guard's discard area.
Enemies will only ever receive green Evasion Chips. Evasion Chips are placed on the enemy card while active. Each time an incoming attack has been successfully avoided, remove one Evasion Chip from the enemy card and return it to the supply.
If they are not activated by an incoming attack, green and purple Evasion Chips are cleaned up at the start of the next Guards' or enemies' turn. Green Evasion Chips are returned to the supply, whereas purple Evasion Chips are moved to the Guard's discard area.
Note: If an attack that adds a negative chip is evaded, the attack misses and no negative chip is added to the target. This is usually the only time that the effect of an attack is not applied, as a successful hit with an attack that deals no damage would still apply its effects.
Fear Chip
A red chip that immediately stops the player from drawing more chips for the current Guard. Some abilities allow a player to draw additional chips after Fear has been drawn.
Fear Chips are placed in the negative status area on the Guard Ability Dashboard while active. Once the round is over, Fear Chips are returned to the supply during the cleanup phase of battle.
Freeze Chip
A purple chip that immediately returns 1 green action point (AP) from the Guard's Dashboard to the supply when drawn (if available). The removed green AP does not change the draw amount for the Guard for the remainder of that turn.
Freeze Chips are placed in the negative status area on the Guard Ability Dashboard while active.
When Freeze is added to an enemy, the chip is placed on the enemy card and 1 green action point (AP) is removed and returned to the supply (if available). The effect occurs for each Freeze Chip added to the enemy target. The Freeze Chip is added to an enemy even if the target doesn't have any green AP to remove.
Once the round is over, Freeze Chips are moved to the Guard's discard area during the cleanup phase of battle, whereas Freeze Chips on enemies are returned to the supply.
Heart Chip
A green or purple chip that immediately causes the Guard to heal 1 HP before the next chip is drawn.
Heart Chips are placed in the positive status area on the Guard Ability Dashboard while active.
Once the round is over, green Heart Chips are returned to the supply during the cleanup phase of battle, whereas purple Heart Chips are moved to the Guard's discard area.
Poison Chip
A purple chip that immediately causes the Guard to lose 1 HP before the next chip is drawn.
Poison Chips are placed in the negative status area on the Guard Ability Dashboard while active.
Each time a Poison Chip is added to an enemy, place the chip on the enemy card and reduce their HP by 1 immediately.
Once the round is over, Poison Chips are moved to the Guard's discard area during the cleanup phase of battle, whereas Poison Chips on enemies are returned to the supply.
Seal Chip
A red chip that prevents a Guard from using any Stonebound Ability Cards during the round from the point the chip is drawn until the end of the round. Guard Ability Cards may still be used.
Example: Grigory does his initial draw and activates "Cross Slash", which is a Stonebound Ability Card. Next, he activates a Guard Ability Card that allows him to draw more chips. During this draw, he draws a Seal Chip. Grigory may no longer activate Stonebound Ability Cards, but his "Cross Slash" ability already hit.
Seal Chips are placed in the negative status area on the Guard Ability Dashboard while active. Once the round is over, Seal Chips are returned to the supply during the cleanup phase of battle.
Shield Chip
A "Shield Chip" is defined as a chip that exclusively has shields on it. A purple Combo Chip is not considered a Shield Chip, despite counting as both a single Sword and a single Shield resource. Double Shield Chips cannot be split and used on multiple abilities or attacks. Note that two Sword resources can be used in place of one Shield resource, and vice versa.
Strengthen Chip
A green chip that gives a Guard +1 to their Attack Stat (ATK) for each Strengthen Chip drawn. This effect lasts from the point the chip is drawn until it is returned to the supply.
Strengthen Chips are placed in the positive status area on the Guard Ability Dashboard while active. Once the round is over, Strengthen Chips are returned to the supply during the cleanup phase of battle.
Stun Chip
A red chip that immediately causes the Guard to exhaust all green action points (AP) when drawn. The exhausted green AP does not change the draw amount for the Guard for the remainder of that turn.
Stun Chips are placed in the negative status area on the Guard Ability Dashboard while active.
When Stun is added to an enemy, the chip is placed on the enemy card and the enemy target immediately exhausts all green action points (AP). The Stun Chip is added to an enemy even if the target doesn't have any green AP to exhaust.
Once the round is over, Stun Chips are returned to the supply during the cleanup phase of battle.
Sword Chip
A "Sword Chip" is defined as a chip that exclusively has swords on it. A purple Combo Chip is not considered a Sword Chip, despite counting as both a single Sword and a single Shield resource. Double Sword Chips cannot be split and used on multiple abilities or attacks. Note that two Shield resources can be used in place of one Sword resource, and vice versa.
Upkeep Chip
A red chip that increases the action point (AP) cost of abilities that have an AP cost by 1 for each Upkeep Chip drawn (including increasing a 0 AP cost to 1 AP). This effect lasts from the point the chip is drawn until it is returned to the supply.
Upkeep Chips are placed in the negative status area on the Guard Ability Dashboard while active.
Each Upkeep Chip placed on an enemy card by a Guard Ability Card or Stonebound Ability Card increases the action point (AP) cost of their AI abilities by 1 until the end of the round.
Once the round is over, Upkeep Chips are returned to the supply during the cleanup phase of battle.
Weaken Chip
A red chip that gives a Guard −1 to their Attack Stat (ATK) for each Weaken Chip drawn. This effect lasts from the point the chip is drawn until it is returned to the supply.
Weaken Chips are placed in the negative status area on the Guard Ability Dashboard while active.
The effect of the Weaken Chip becomes active for an enemy once placed upon the enemy card by a Guard Ability Card or Stonebound Ability Card. Each Weaken Chip on the enemy card gives the target −1 to their Attack Stat (ATK).
Once the round is over, Weaken Chips are returned to the supply during the cleanup phase of battle.
Guard [Keywords] and Base Stats
Each Guard has their own unique [Keyword] which appears on some of their Guard Ability Cards, along with their starting base stats.
Grigory
Base stats: 20 HP, 3 ATK, 2 DEF, 2 AP.
Activate one of Grigory's Guard Ability Cards that features the [Chain] keyword. Each subsequent Guard Ability Card that is activated this round will trigger its [Chain] effect, in addition to its main effect.
Alek
Base stats: 20 HP, 2 ATK, 1 DEF, 2 AP.
Activate one of Alek's Guard Ability Cards or Stonebound Ability Cards that can trigger the [Empower] keyword of one of his Guard Ability Cards. The ability does not need to be activated by chips in order to trigger the [Empower] effect.
Catherine
Base stats: 20 HP, 2 ATK, 1 DEF, 2 AP.
Activate one of Catherine's Stonebound Ability Cards that can trigger the [Harmonize] keyword of one of her Guard Ability Cards. The ability does not need to have been activated by chips in order to trigger the [Harmonize] effect.
Yury
Base stats: 20 HP, 3 ATK, 1 DEF, 2 AP.
Activate one of Yury's Guard Ability Cards that features the [Surge] keyword. Trigger the [Surge] effect of the activated card by paying its green action point (AP) cost. [Surge] effects cannot be triggered by paying their cost more than once per card per round even if you would have enough green AP to do so, and cannot be triggered with gray AP.
Kharzin
Base stats: 20 HP, 3 ATK, 2 DEF, 2 AP.
Activate one of Kharzin's Guard Ability Cards that features the [Inspire] keyword. Trigger the [Inspire] effect of the activated card by spending an additional number of Sword or Shield resources equal to the number indicated in the brackets with the keyword. Combo Chips cannot be used to trigger the [Inspire] effect.
Vera
Base stats: 20 HP, 2 ATK, 1 DEF, 2 AP.
Activate one of Vera's Guard Ability Cards that features the [Burst] keyword. Place a yellow cube on any of her other Guard Ability Cards. Once the required yellow cube count is met, immediately trigger the [Burst] effect of that card. [Burst] effects cannot be triggered by meeting this count more than once per card per round. If the [Burst] effect is triggered, return the yellow cubes on that card to the supply and flip it to the opposite side during the cleanup phase.
Pavel
Base stats: 20 HP, 3 ATK, 2 DEF, 2 AP.
Activate one of Pavel's Guard Ability Cards that features the [Endure] keyword. Draw three chips from his ally's bag. Negative chips drawn are gained by Pavel and placed in the negative area of his Guard Ability Dashboard. For each negative chip drawn, immediately trigger the [Endure] effect of the activated card. Return the remaining chips to the ally's bag. If Pavel's ally has fallen, they cannot be targeted by effects, meaning the [Endure] effect cannot be triggered.
Yana
Base stats: 20 HP, 2 ATK, 1 DEF, 2 AP.
Activate one of Yana's Guard Ability Cards that features the [Awaken] keyword. If the indicated Speaking Stone element has been activated by any Guard this round, trigger the [Awaken] effect.
Round of Battle Example
In this example we will go through a full round of battle. This example uses Grigory's starting equipment and stats against a "1 Star Timber Wolf" which is commonly found in the start of Campaign 1 during the tutorial section. All cards, cubes and gems have been placed in their proper locations in the dashboards to begin the battle.
Let's follow the order listed on the Player Aid Foldout.
- Check equipped accessories and trigger any start-of-round effects. Grigory has no equipped accessory, so we move to step 2.
- Discard any active blue cubes on both Guards. Since this is round 1, no blue cubes (temporary defense) have been gained by Grigory, so we move to step 3 (these would have been added by various abilities).
- Choose a Guard to activate. Grigory is the only Guard in battle, so we activate Grigory.
- If Guard's Bag is empty, refill bag with chips from discard area. If bag is not empty, you may choose to lose 1 HP to refill bag with chips from the Guard's discard area. This is the only time you may refill the Guard's Bag in this way. Grigory's bag is full since the battle has just started.
- Draw chips one at a time from Guard's Bag equal to active AP. Only black chips count against draw, and players must draw until the count is reached or the bag is empty. Resolve any positive or negative chips as each is drawn. We draw chips one at a time from Grigory's bag, equal to his active AP, which is currently 2. The first chip we draw is a single Sword Chip, and the second is a single Shield Chip.
- The next actions may be taken in any order, or not at all.
- Activate Guard Ability Cards by paying the required cost.
- Activate Stonebound Ability Cards using ready Speaking Stone Gems.
- Perform a "Standard Attack" against a single enemy target by paying the required cost.
- Activate an equipped accessory.
- Use an equipped item.
- Move or swap an item from a satchel slot by exhausting 2 AP.
Let's spend the single Shield Chip on the Guard Ability Card named "Guard". The card requires one single Shield Chip and 1 AP to activate it, so we place the single Shield Chip on top of the card and we pay the required AP cost. While this Guard Ability Card is active (has a chip on it), Grigory's defense is increased by +1, and we add a green single Shield Chip to Grigory's bag. The [Chain] effect does not activate.
We slide 1 AP cube from active to exhausted on his Guard Dashboard and add the green single Shield Chip to Grigory's bag.
Next, let's perform a Standard Attack using the remaining single Sword Chip. To perform the attack, we place the single Sword Chip on Grigory's weapon card on his Guard Dashboard.
Next, we calculate the damage against the Timber Wolf. A Standard Attack uses his base attack with no modifiers. Grigory has a base attack stat of 3, and the Timber Wolf has a base defense of 1. The Timber Wolf will take 2 points of damage. We reduce the HP track on the Timber Wolf from 7 to 5.
Let's continue attacking by using Grigory's Stonebound Ability named "Cross Slash". To do this we move the Speaking Stone Gem from the ready slot (currently in slot IV) to the Stonebound Ability Card to activate it.
"Cross Slash" states "Attack all enemies for +1 attack (ATK)." Grigory has a base attack stat of 3 so we add +1 to this attack which brings it to a value of 4. The Timber Wolf has a base defense of 1 so the Timber Wolf will take 3 points of damage. We reduce the HP track on the Timber Wolf from 5 to 2. Note that if there were multiple enemies in battle you would calculate the damage to each one individually.
We have now used all of the chips drawn, and his Stonebound Ability Card. Grigory still has 1 AP cube left, but we cannot use it for anything.
- Activate the other Guard. Repeat steps 4-6. Grigory is the only Guard in battle, so we move to step 8.
- Refresh exhausted AP for both Guards. We exhausted 1 AP to activate "Guard" this turn so we refresh the AP cube back to the ready area on the Guard Dashboard.
- Place Aggro Chip on the Guard who last performed an attack against an enemy target. Grigory was the only Guard to attack so we place the Aggro Chip on his Guard Bust Card.
This concludes Grigory's turn, so we now move to the enemy's turn.
The Timber Wolf now takes its turn.
- Discard any green Evasion Chips and blue cubes on enemies. Since this is round 1 no chips or blue cubes (temporary defense) have been gained by the enemy, so we move to step 2 (some enemies can add these using AI abilities).
- Activate the enemy in slot I. The Timber Wolf is in slot I so it is activated.
- Draw an AI card from the enemy's face-down AI deck. Place face-up in AI discard slot. We draw the top card from the enemy's AI deck and place it face-up on the enemy AI discard slot.
- Resolve enemy actions on AI card.
The AI card states:
Choose Target Highest DEF, Aggro
Since Grigory is the only target, he is targeted by the enemy. If two Guards were in battle the Timber Wolf would target the Guard with the highest defense value first (modifiers included). If both Guards had the same defense value, the Guard that had aggro would be targeted. If no Guard had aggro the player would choose the target.
Attack Target Bite AP 2, ATK +3
The Timber Wolf attacks Grigory with an ability named "Bite". The ability costs the Timber Wolf 2 AP and raises its base attack by 3 for this attack.
Next, we slide 2 AP cubes from active to exhausted on the Enemy Dashboard, and the Timber Wolf performs "Bite" against Grigory.
Let's calculate the damage against Grigory. The Timber Wolf has a base attack stat of 2 so we add +3 to this attack which brings it to a value of 5. Grigory has a base defense of 2, but we activated "Guard" on his turn which means his defense is currently a value of 3. Grigory will take 2 points of damage. We reduce the HP track on Grigory from 20 to 18.
Now that the attack has resolved we move to the next action on the AI card which states, "End Turn". The enemy's turn is complete, so we move to the next step.
- Activate remaining enemies in order (slot II, slot III, slot IV). Repeat steps 3-4 for each enemy. Since there are no other enemies in the battle we move to the next step.
- Refresh exhausted AP for all enemies. The Timber Wolf exhausted 2 AP to activate "Bite" this turn so we refresh the AP cubes back to the ready area on the Enemy Dashboard.
Now that the Guard and enemy turns are complete, we move to the "Cleanup Phase".
- Discard all chips from enemies except green Evasion Chips and return them to the supply. No chips were placed on the Timber Wolf, so we move to the next step.
- Discard all chips from Guard Ability Cards and weapons, as well as any chips that have not been used. Black and purple chips are moved to the discard area. Green chips are returned to the supply. Flip over cards that indicate they flip after being activated. First, we discard the chips used on the Guard Ability Card and Grigory's weapon and move them to the discard area of his Guard Ability Dashboard.
- Discard all chips from the positive and negative chip areas. Purple chips are moved to the discard area. Green and red chips are returned to the supply. No chips were placed in the positive or negative chip areas, so we move to the next step.
- Move exhausted Speaking Stone Gems to ready slots, then move active Speaking Stone Gems to exhausted slots. Grigory used his Stonebound Ability Card named "Cross Slash" this round so we have an active Speaking Stone Gem on the "Cross Slash" card. We move it from the card to the exhausted slot on his Guard Ability Dashboard. Notice that the gem is placed on the same numbered slot as the card. In this case the gem is placed in slot IV.
Both chips are now in Grigory's discard area on his Guard Ability Dashboard. Next, we flip over Guard Ability Cards that were active this round. This means "Guard" is flipped to the opposite side. Now, "Take Cover" will be available to Grigory in the next round.
Now that the Cleanup Phase is completed, our round of battle is over and a new round can begin!
Alternate Example
During Grigory's turn we could have used two Guard Ability Cards instead of using a Standard Attack. Had we done so, we would have triggered the [Chain] effect:
Example: If we had activated "Guard" and then "Advance", we would have added a green single Sword Chip to Grigory's bag from the normal effect of using "Advance", then we would have added another green single Sword Chip from the [Chain] effect of "Advance" as well. This would have given us more bonus chips for later turns, but not dealt as much damage to the Timber Wolf. As green chips do not count against the draw action, these bonus chips can be very helpful in future rounds. Finally, we could have chosen to activate the abilities the other way around, first "Advance" then "Guard", in order to gain the [Chain] effect from "Guard" instead, adding a second green single Shield Chip, rather than the second green single Sword Chip (see pages 57-58 for more on [Keywords]).
Video examples of battles can be found at www.thestoneboundsaga.com/theisofarianguard
Saving Your Progress
Leaving the Game
Since The Isofarian Guard is a game that spans dozens or even hundreds of hours of gameplay, sessions can be as long or short as players desire. When players have decided to leave the game, they can keep track of their progress quickly and easily.
Important information is tracked on the save sheets provided in the Fort Istra and Save Index. These will document the Guards' stats, Sil, Lux Essence, current scene, last checkpoint, and the status of the Field Event decks. These sheets are also available at www.thestoneboundsaga.com/theisofarianguard for those who do not wish to mark their books.
In addition, the game's partners at Gametrayz have provided an innovative system for the Guard and Ability Dashboards, safely storing the Guards' current stats, equipment, materials and abilities in an organized fashion, affording quick setup when players are ready to continue their journey across Isofar!
Not only that, but there is also an "Online Campaign Tracker", providing players with another alternative to marking their books. Use this service to track all of the above, as well as your Fort Istra Stash, Quest status, Skill Tree progression, and more. This service is integrated as part of Rulepop – the official rules website of The Isofarian Guard! Find it at: isofarian-guard.rulepop.com
This incredible site allows you to find rules quickly and easily; not just information from the core ruleset, but also the "Enemy Index" and "City Index", as well as additional resources for those seeking extra support.
Checkpoints
The Campfire Chip is used to indicate a checkpoint. To create a checkpoint, the Guards must rest, usually at an Inn (see page 24). Checkpoints are only used if the Guards fall in battle (see page 50), at which point they will respawn back to their most recent checkpoint, unless the Campaign Book specifies otherwise. You may also respawn the Guards at the Fort Istra Courtyard if you choose, or if you have not yet made a checkpoint so far this campaign.
The Tent item might also be used to create a checkpoint at any yellow node. Tents can be bought or crafted. After drawing and resolving a chip from the Event Bag during the exploration phase, discard the Tent item as normal and place the Campfire Chip to indicate the node at which the Guards are currently situated. Both Guards heal 10 HP and move all AP to their active area, but their bags remain unchanged. Unlike most items, the Guards cannot use a Tent during battle.
Variations to Gameplay
Adding and Removing Players
The Isofarian Guard can be played with 1-2 players. Unless the campaign dictates otherwise, there are always two members of the Guard traveling and fighting together, with players controlling one each in co-op play. Nothing changes during solo play except that one player will control both members of each party.
When a new player joins the adventure, choose one of the Guards for them to control. Players may choose to exchange control of the Guards at any time during the exploration phase.
Difficulty Levels
The Isofarian Guard offers three levels of difficulty for you to choose from. Players may choose to change the difficulty level at any time during the exploration phase.
Story Mode (Easy) – This mode offers a streamlined experience with a decreased level of difficulty for those that just want to enjoy the story with minimal challenge.
- Decrease enemy stats for all battles as follows: DEF −1.
- As well as restoring HP and AP, resting at Inns removes all negative chips from the Guards' Bags.
- Narrative events do not have to be restarted from the beginning if the Guards fall in battle.
Standard Mode (Normal) – This mode offers the standard level of difficulty and is the recommended mode for most players.
- Use rules and stats as they appear printed in books and on cards.
Tenebris Mode (Hard) – This mode offers a challenging experience with an increased level of difficulty.
- Increase enemy stats for all battles as follows: ATK +2, DEF +1, AP +1.
- All non-narrative encounters are now "ambushes" (cannot retreat from any battle).
- Guards may only equip up to two Stonebound Ability Cards each.
- On defeat, all items and materials are returned to the supply when dropped.
Appendix 1: Glossary
Ability – When referring to Guards, "ability" refers to both Guard Ability Cards and/or Stonebound Ability Cards. When referring to enemies, their abilities can be found on their AI cards.
Action Points (AP) – "Action Points" (AP) are the stat used by all Guards and enemies to perform actions, and are represented by gray or green cubes. For Guards, they also indicate how many chips are drawn from a Guard's Bag at the start of their turn. Permanent AP is represented by gray cubes, whereas temporary AP is represented by green cubes and is returned to the supply after the battle during which it was gained. Each Guard and enemy may have a maximum of 5 gray AP and 5 green AP.
In addition, some abilities may boost a Guard's or enemy's defense with a bonus that's tracked using blue cubes. Blue defense cubes are not discarded during the cleanup phase of battle, and are discarded at the start of the Guards' or enemies' turn instead.
Note: It is important that blue cubes are not used to track regular defense modifiers, as some abilities interact specifically with blue defense cubes.
Attack (ATK) – A Guard's or enemy's "Attack" (ATK) stat is used when they perform an attack. This value can be modified by various means. If the attack value exceeds the defense value, the target takes damage equal to the amount by which attack exceeds defense.
Defense (DEF) – A Guard's or enemy's "Defense" (DEF) stat is used when they are attacked. This value can be modified by various means. If the attack value exceeds the defense value, the target takes damage equal to the amount by which attack exceeds defense.
Exhaust – Refers to moving action points (AP) and Speaking Stone Gems from their active position to their exhausted position.
Gain – Refers to Guards and enemies receiving chips which are "gained" to the appropriate area of their dashboard and applying the effects immediately. Conversely, a Guard may have a chip "added to bag", which will only take effect when it is drawn.
Action points (AP) might also be "gained", in which case they are placed in the active area of the dashboard and available to use immediately.
Health Points (HP) – "Health Points" (HP) are the stat used to represent a Guard's or enemy's remaining life. All Guards start with 20 HP, and this may be increased to a maximum of 30 HP through various means. An enemy's starting HP can be found on their enemy card, and certain AI abilities might allow them to heal beyond that, but an enemy's HP may never exceed a maximum of 109.
Immune – Some accessory cards grant the effect of being "Immune" to various negative chips. This prevents the indicated chip from activating once drawn, although the chip could still be added to the Guard's Bag.
Limit – The maximum number of any type of chip there can be in total between a Guard's Bag and on their Guard and Ability Dashboards at any time is five. In this case, "type" refers to chips with the same symbol and color.
Example: You may have up to five black single Sword Chips as well as up to five green single Sword Chips in a Guard's possession at any one time. To help track this, you may wish to rearrange the chip trays into "Guard 1" and "Guard 2", with five of each type in each tray.
If a chip would be added to a Guard's Bag or Dashboards that would go over the limit of five chips, discard the chip to the supply. If the chip limit has been reached for both Guards and that chip would also be applied to an enemy, it might be necessary to utilize colored cubes to indicate the chip on the enemy instead.
A player may look in their Guard's Bag at any time to verify the number of chips that can be found there, but may not look in the bag during a chip draw action.
All Guards start with 20 HP, and have a maximum of 30 HP. An enemy's starting HP can be found on their enemy card, and may never exceed a maximum of 109.
Each Guard and enemy may have a maximum of 5 gray AP and 5 green AP.
The maximum amount of materials numbered to indicate a larger amount being carried in a single slot that can be held by the party at any time is normally 4 (e.g. the 1-2 card can never be used in conjunction with the 3-4 card in order to obtain 6 of that material).
Besides chips on enemies, resources (e.g. chips, cubes, dials, gems, etc.) are limited by the number of components included with the game.
Lux Essence – The experience gained from winning battles and completing objectives. Players may hold up to 99 Lux Essence in the Lux Dual Dial at any one time. Lux Essence can be used to unlock nodes on the Guard's Skill Trees, and in a variety of ways at Fort Istra.
Negate – Some accessory cards grant the effect of being able to "Negate" various negative chips. This prevents the indicated chip from activating once drawn, as well as immediately returning it to the supply.
Rarity – Weapons, armor and materials use a star rating system to denote their rarity and strength. Gold stars represent a value of 1, while red stars represent a value of 5 (1 through 7 star ratings, combining gold and red stars).
If observing the intended difficulty of the game, it is considered that a Guard's weapon and armor should have the same rarity as the current chapter number.
Refill – Refers to taking all of the chips in the discard area of a Guard's Ability Dashboard and returning them to their bag. This can only usually be done during step 4 of the Guards' turn, when they can do so for free if their bag is empty, or at a cost of 1 HP otherwise.
Example: Grigory has chips left in his bag at the start of his turn, but wants to refill it in hopes of getting a particular draw, so he reduces his HP by 1 and refills his bag, then draws chips equal to his active AP.
Refresh – Refers to moving action points (AP) and Speaking Stone Gems from their exhausted position to their active or ready position, respectively.
Rules Conflict – When rules conflict between sources, observe the following priority order: 1. Campaign Book, 2. Cards, 3. Rulebook.
Sil – The currency of Isofar, gained from defeating enemies, selling at Marketplaces and Blacksmiths, and through various Side Quests. Players may hold up to 99 Sil in the Sil Dual Dial at any one time. Sil may also be stored in the Fort Istra Stash in unlimited quantities (see the Fort Istra and Save Index Book).
Stat – The following values may be referred to as "Stats": health points (HP), attack value (ATK), defense value (DEF), and action points (AP).
Target – Refers to the recipient of an attack or effect. Players may choose who to target with their Guard, whereas the enemy's target is specified for each ability on their AI cards. Guards may only target enemies in the front row of the battlefield with an attack unless an ability says otherwise, but can target any enemy with an effect. The front row of the battlefield consists of enemies in slot I and slot II. Once enemies in slot I and slot II have been defeated, the enemies remaining in slot III and slot IV may be attacked as if they were in the front row. When a Guard falls in battle or an enemy is defeated, the effects of the ability currently in play are seen through to conclusion (as are any reactions to this ability), after which they can no longer take their turn nor be targeted by any attack or effects.
Tool Item – The following items are referred to as "Tool Items" and are identified by the Satchel icon on the back: Wood Chopping Axe, Pickaxe, Fishing Pole and Expanded Satchel. They cannot be dropped or lost if the Guards fall in battle, and they cannot be equipped to the item slot, but they can be stored in the Fort Istra Stash. Like all items, they do not transfer between campaigns, but each pair of Guards will be able to obtain most tool items once they reach Fort Istra in Chapter 2 of each campaign.
Appendix 2: Iconography
There are various icons printed on different game components. Refer to the sections below to determine how to interpret these icons.
General Icons
These icons all represent stats and are found on various components.
- Health (HP) Icon: This icon always represents the health points of a Guard or enemy. It can be found on the Guard Dashboard, Enemy Dashboard, and the Guard Skill Trees.
- Defense (DEF) Icon: This icon always represents the defense value of a Guard or enemy. It can be found on the Guard Dashboard, Enemy Dashboard, Guard Skill Trees, and various cards.
- Attack (ATK) Icon: This icon always represents the attack value of a Guard or enemy. It can be found on the Guard Dashboard, Enemy Dashboard, Guard Skill Trees, and various cards.
- Action Point (AP) Icon: This icon always represents action points of a Guard or enemy. It can be found on the Guard Dashboard, Enemy Dashboard, Guard Skill Trees, and various cards.
Ability Card Icons
These icons can be found on Guard Ability Cards, Stonebound Ability Cards and enemy AI cards.
- Heart Icon: This icon indicates a change in health points (HP), either from healing or health loss, depending on the text listed on the card.
- AI Card Icon: This icon indicates an enemy AI card. Some Guard Ability Cards and Stonebound Ability Cards can affect enemy AI cards, or are activated by AI conditions.
- Attack (ATK) Modifier Icon: This icon indicates that the ability raises the base attack value of the Guard by the # for the duration of this ability.
- Special AI Icon: This icon indicates a special enemy AI card. Each enemy has two of these unique cards, with much stronger effects than those found on their other, regular AI cards. They are always numbered 7 and 8.
- Defense (DEF) Modifier Icon: This icon indicates that the ability raises the base defense value of the Guard by the # for the duration of this ability.
- Reactive Icon: This icon indicates the card has a persistent passive effect written on it that will only trigger when specific conditions are met.
- Blue Defense Cube Icon: This icon indicates that the target's defense is temporarily boosted by 1. A blue cube is placed on the target's defense track while active. Do not use blue cubes to track regular defense modifiers.
- Yellow [Burst] Cube Icon: This icon indicates a yellow cube used to trigger Vera's [Burst] effect (see page 58).
- Aggro Icon: This icon indicates the Guard who "has aggro", which will be the one who most recently performed an attack against an enemy.
Guard Ability Card Icons
These icons can be found on Guard Ability Cards.
- Primary Icon: This icon indicates the Primary side of a Guard Ability Card. Guard Ability Cards are always placed with the Primary side facing up at the start of battle.
- Secondary Icon: This icon indicates the Secondary side of a Guard Ability Card. The Secondary side can only be accessed by flipping the card from its Primary side.
- Chip-Activated Flip Icon: This icon indicates that the Guard Ability Card flips to the opposite side if it has been activated this round and is still active during the cleanup phase by still having chips on it.
- [Burst]-Triggered Flip Icon: This icon indicates that the Guard Ability Card flips to the opposite side during the cleanup phase if Vera's [Burst] effect for that card has been triggered this round (see page 58).
- All-Draw Icon: This icon indicates that not only black but all chip colors count towards the draw limit when drawing chips as the result of the effect specified on the Guard Ability Card.
Note: This icon also appears on Field Event Cards. Remember, any time chips are drawn as a result of a Field Event, they are returned to the Guard's Bag at its conclusion, regardless of color or type.
- Resource Cost Icons: This icon indicates the "Resource Cost" required to activate a Guard Ability Card. This is shown using a combination of Sword and Shield resource icons, next to which is a numerical value indicating the amount of each one needed to activate the ability.
Note: When the combined Sword and Shield icon is shown with a "1", one Sword and one Shield resource are needed to activate the ability. If "2" is shown, two Sword and two Shield resources are needed to activate the ability.
- Action Point (AP) Cost Icon: This icon indicates the "Action Point Cost" required to activate a Guard Ability Card. This is shown using an AP cube icon, next to which is a numerical value indicating the amount of AP needed to activate the ability. The AP cost can be paid using both gray and green AP cubes.
Class Icon: These icons indicate a Guard Ability Card that is unlocked through the Guard's Skill Tree. Each Guard has their own unique class icon which can be found below the Primary (P) and Secondary (S) icon of their respective Guard Ability Cards. The icon can also be found on each of the Guard's Skill Trees.
Class icons by Guard: Tactician Class (Grigory), Apothecary Class (Alek), Remnant Class (Catherine), Marauder Class (Yury), Sentinel Class (Kharzin), Vanguard Class (Vera), Watchman Class (Pavel), Prophet Class (Yana).
Miscellaneous Icons
These icons can be found on specific types of cards.
- Boss Icon: This icon indicates that the enemy is a "Boss" in the campaign. This icon can be found in the top-left corner of some enemy cards.
- Guard Bust Icon: This icon indicates the Guard that is able to equip the card it appears on. Each of the eight Guards has their own unique Guard bust icon. This icon is found in the top-left corner of Stonebound Ability Cards and on the reverse of weapon and armor cards.
- Infinity Icon: This icon indicates that any Guard is able to equip the card it appears on. If Universal Stonebound Ability Cards are unlocked in one campaign, they can be used in later campaigns once the Guards have reached Fort Istra in Chapter 2. This icon is found in the top-left corner of Stonebound Ability Cards and on the reverse of weapon and armor cards.
- Limited Activation Icon: This icon indicates that the effect of this accessory may only be activated the number of times shown during this battle. Once this value is met, the card is flipped over to indicate that it cannot be activated again until after the battle ends. This icon can be found in the top-right corner of some accessory cards.
- Caravan Icon: This icon indicates that this accessory is obtained via a Caravan Quest. If caravan accessories are unlocked in one campaign, they can be used in later campaigns once the Guards have reached Fort Istra in Chapter 2. Chips stored on cards with this icon are not discarded during the cleanup phase. This icon can be found in the top-left corner of some accessory cards.
- Compass Icon: This icon indicates that the item can be used from the satchel during the exploration phase. This icon can be found in the top-right corner of some item cards.
Speaking Stone Element Icons: These icons indicate the element type of a Stonebound Ability Card. When equipping a Stonebound Ability Card, the corresponding colored Speaking Stone Gem is used on the Guard's Ability Dashboard. Any color gem can be used for a "rainbow" Stonebound Ability Card.
Elements: Fire (Red), Earth (Orange), Water (Blue), Wind (Green), Neutral (Yellow), Darkness (Purple), Light (White), Rainbow (Any Color).
Appendix 3: Enemy AI Targeting
Enemy AI cards usually begin by identifying a target with the "Choose Target" command, and might even change target mid-card. These aren't always as simple as targeting a Guard in order to make an attack.
These cards use keywords in order to succinctly identify their intended target. The target is that which exclusively fulfils the first of the listed conditions. If nothing fulfils this criteria, move to the next condition. If enemies use AI abilities that can target a Guard and no condition is met (including "having aggro") then the players may choose which Guard is the target.
Enemy AI cards refer to targets from the perspective of the enemy itself, not the Guards. Therefore, the enemy of an enemy would be the Guards themselves, and an ally would be a fellow enemy.
Note: This list does not include any AI abilities that only appear exclusively on Boss AI cards.
- Aggro: The Guard who has aggro is the target of the attack. At the end of the Guards' turn, the Aggro Chip is placed on the Dashboard of the Guard who most recently performed an attack against an enemy. Many AI abilities will use this condition as a tie-breaker if the first condition is a draw or cannot be met.
- Highest/Lowest HP: The Guard with the most/least health points (HP) remaining is the target of the attack.
- Highest/Lowest ATK: The Guard with the highest/lowest attack value (ATK) is the target of the attack. This includes all active modifiers, such as any from active Guard Ability Cards and Stonebound Ability Cards, and chips in the positive and negative areas.
- Highest/Lowest DEF: The Guard with the highest/lowest defense value (DEF) is the target of the attack. This includes all active modifiers, such as any from active Guard Ability Cards and Stonebound Ability Cards, chips in the positive and negative areas, and any boosts provided by blue cubes.
- Highest AP: The Guard with the most action points (AP) in total between both the active and exhausted areas of their Dashboard is the target of the attack.
- All Enemies: Both Guards are the target of the attack.
- Self: The enemy performing the ability is the target.
- Next Ally: The enemy in the next numbered slot is the target. If the enemy using the ability is in the highest numbered slot, their next ally is the enemy in slot I.
- All Allies: All other enemies in battle are the targets. Does not include the enemy performing the ability.
- Self and All Allies: The enemy performing the ability and all other enemies in battle are the targets.
- Active Speaking Stone: The Guard with the most Stonebound Ability Cards currently activated is the target of the attack.
- [Chip Type] in Bag: The Guard with the highest number of this type of chip in their bag is the target of the attack.
- Another [Enemy Type]: Another enemy of this type is the target. Does not include the enemy performing the ability.
Appendix 4: FAQ
Most Asked
Q. What color chips count towards the draw count when drawing chips as part of the Guards' turn? A. Black chips are the only color chips that ever count toward the number of chips drawn, unless indicated otherwise, usually by the all-draw icon.
Q. What do I do with unused chips that I have drawn in a turn? A. Discard them just as you would chips from Guard Ability Cards and weapons.
Q. If an attack does not cause any damage, will the effects associated with the attack still hit? A. Yes, this still counts as an attack, so the effects still hit. In general, only Evasion Chips can cause the effects to miss.
Combat
Q. Can a Guard perform a Standard Attack multiple times during their turn? A. No, a Guard may only perform a single Standard Attack per round in a battle.
Q. Can a chip with multiple resources be used to activate multiple Guard Ability Cards? (double Sword Chip, double Shield Chip, Combo Chip)? A. No, you cannot split the resources from chips to activate multiple Guard Ability Cards. Chips must be placed on the ability they are activating.
Q. Can a Guard activate the same Guard Ability Card multiple times during their turn? A. No, a Guard Ability Card cannot be activated more than once per round, unless it is activated by a Guard's [Keyword] effect, or by another ability.
Q. Can green AP be used to pay for Guard Ability Cards or enemy AI abilities that have a gray AP cost? A. Yes, this is true for Guards and enemies.
Q. What happens with the Aggro Chip during the first round of an ambush battle? A. The Aggro Chip is only placed on a Guard once they perform an attack on an enemy target (even if the attack misses or does no damage). Since the Guards skip their turn at the start of an ambush, no Guard would have aggro yet. If the enemy AI cards cannot target one of the Guards with the conditions listed, the player chooses the target of the enemy attacks.
Q. Can you lose 1 HP to fill a Guard's Bag if the result will bring them to 0 HP? A. No, this would result in the Guard falling in battle before the draw action takes place.
Q. If you run out of chips after you have started a draw action, can you then choose to lose 1 HP to refill a Guard's Bag? A. No, you must choose to lose 1 HP to refill a Guard's Bag before a draw action begins.
Q. Can an enemy heal above their starting HP value? A. Yes, if an enemy AI ability states that the enemy heals, and this would take the enemy over their starting HP value, then the enemy heals that amount above that value, up to the maximum of 109 HP.
Q. What happens when an enemy begins their turn and has no AI cards left to draw? A. If no AI cards can be drawn, shuffle the discarded cards and place them face-down in the enemy AI draw slot and proceed with the draw. This also applies if the enemy attempts to draw a new AI card in the middle of their turn and runs out of AI cards to draw.
Q. What happens when the attack modifier of a weapon card includes a status effect chip? A. When a status effect chip is pictured on the front of a weapon card, that chip is added to the target when performing a Standard Attack, but is not added to attacks arising from any Guard Ability Cards or Stonebound Ability Cards that include an attack modifier.
Q. Can fallen Guards or enemies be targeted by an attack or an effect? A. No, an enemy may not target fallen Guards and anything that would affect "All Enemies" (as in, both Guards) would only apply to the other Guard, and Guards cannot target enemies that have been defeated with their abilities either. However, if a targeted Guard falls and the AI card has additional actions remaining that would target them, the target does not change, and any remaining actions are still performed, if possible.
Q. When do I execute the actions on an enemy AI card, and what abilities are always in effect? A. Actions on AI cards are only executed if the card is drawn during the enemies' turn, but any card visible in the enemy AI discard slot is considered to be active. Any effects that say "while this card is active" are passive effects that apply at any point during battle, and the card will feature the reactive icon if this effect only triggers when specified conditions are met.
Q. If a chip is removed from a Guard Ability Card that has been activated by a chip, will it flip during the cleanup phase at the end of the round? A. The Guard Ability Card flips to the opposite side only if there is a chip activating it at the start of the cleanup phase.
Q. Where do I get the Heart resource to perform a Standard Attack with the Bleeding Heart Daggers? A. A Standard Attack can only be performed with this weapon by taking a green Heart Chip from the positive chip area of the Guard Ability Dashboard. The healing effect is still applied when the chip is drawn.
Q. When an attack is evaded, are additional effects listed on the card also evaded? A. Yes, when an attack is evaded both the attack and its effects are evaded. Note that an ability must have an attack modifier to be considered an attack. If an ability of any kind does not have an attack modifier, it cannot be evaded.
Example: The Timber Wolf enemy uses an attack called "Swipe". This ability has an attack modifier and the text states "Attack Target" above it, so it can be evaded.
Timber Wolf: Choose Target — Lowest HP, Aggro. Attack Target — Swipe, 1 AP, ATK +2.
Another enemy uses an ability called "Bellow" that adds a Fear Chip to the target Guard's Bag. Since the ability has no attack modifier and no text that states "Attack Target", the ability cannot be evaded.
Bellow, 1 AP — Add 1 Fear Chip to target's bag.
Q. What happens when an enemy AI card states to "discard" a chip from a Guard's Bag? A. The chips are discarded from the bag, and their effects do not trigger. Unless the card text specifies otherwise, discard black and purple chips to the discard area of the Guard Ability Dashboard. Green and Red chips are returned to the supply.
Q. If an enemy adds another enemy to the battle, does defeating the new enemy grant rewards as well? A. Yes, all enemies defeated in battle grant rewards.
Q. What if the Guards are victorious but there are still actions or effects of Guard or enemy abilities that have not been fully applied? A. The Guards are not victorious until all the text on the card has been applied in full.
Other
Q. Can you customize a Guard during a Narrative Event? A. No, you may only customize a Guard during the exploration phase. This includes changing the weapon, armor, accessory, or item cards. This also includes changing equipped Guard Ability Cards, Stonebound Ability Cards, and Speaking Stone Cards.
Q. When a bonus chip is unlocked from a Guard's Skill Tree, does it have to be added to the Guard's Bag? A. Yes, any time a bonus chip is unlocked from a Guard's Skill Tree it must be added to the Guard's Bag.
Q. Can a Stonebound Ability Card with the infinity icon be used in any campaign once unlocked? A. Yes, once a Universal Stonebound Ability Card has been unlocked and acquired, it can be equipped by any Guard from the start of Chapter 2 of each campaign.
Q. Can I remove a Speaking Stone I equipped to an empty stone slot when equipping a Stonebound Ability Card and place it in a satchel? A. The Speaking Stones granted by equipping a Stonebound Ability Card cannot be moved to the satchel. Unequipping the Stonebound Ability Card will return the Speaking Stone to the supply.
Q. Can Guards trade the contents of their satchels? A. Contents can be rearranged freely amongst any of the slots in either of the two satchels at any time during the exploration phase.
Q. Can I combine Speaking Stone Cards gained from Stonebound Ability Cards at the Lapidary? A. No, these Speaking Stones must remain intact and be returned to the supply when the Stonebound Ability Card is unequipped.
The Index (page references) that follows the FAQ in the printed rulebook is omitted here as it carries no rules content beyond page numbers.