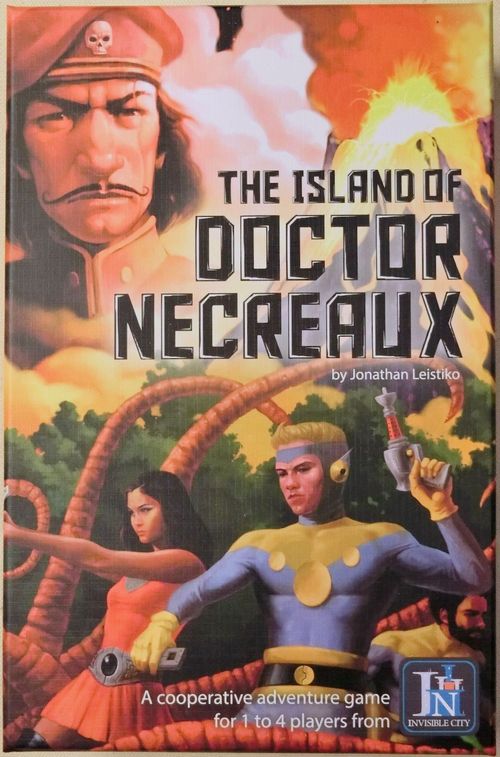
The Island of Doctor Necreaux: Second Edition
The Island of Doctor Necreaux: Second Edition Rulebook
Table of Contents
Table of Contents
How To Play
Your Mission
Infiltrate Doctor Necreaux's secret volcanic island lair, find the captured scientists, and get them to the escape shuttle before the island explodes! You'll do this by drawing and resolving as many cards as you can from the adventure deck (which represents the island), hopefully drawing the scientists and then the escape shuttle before time runs out.
Your Equipment
- Two card decks: 26 skill cards and 76 adventure cards.
- Two special cards: The Scientists and the Escape Shuttle.
- Four secret cache cards.
- Eleven six-sided dice (2 per agent + 3 extra).
- A game tracker.
- Speed, draw, and countdown markers.
- 50 charge tokens.
- 12 hit tokens.
- 12 experience (XP) tokens.
- 3 Unstoppable tokens.
Creating Your Team
In The Island of Doctor Necreaux you play an agent, a super-spy trained with three exceptional skills. You'll start with three blue-backed skill cards. These skill cards will dictate what your agent can do.
For your first game, we recommend the following skill sets:
- Give the first player these skill cards: Lucky, Martial Artist, and Keen Senses.
- With two players, give the second player these skill cards: Pyrokinetic, Danger Sense, and Psychic Blaster.
- With three players, give the third player these skill cards: Clairvoyant, Polymath, and Perfect Strategist.
- With four players, give the fourth player these skill cards: Scout, Charmed, and Security Expert.
Note: When you set up agents in future games, please refer to the Extended Rules & Glossary.
The printed skill card diagram labels the parts of a skill card: (1) Charges, (2) Card name, (3) Trait, (4) Card text, (5) Card type icon, (6) Card number.
Place your agent's skill cards face-up in your play area. If a skill card indicates a number for starting charges, put that many charge tokens on that skill card.
Not all skills (like Clairvoyant) start with charges. You'll have to find ways to charge these skills such as skill triggers (pg 5), resting, or by using items or other cards.
Then, give each player two dice. If one of your skill cards gives you an extra die, take it now.
After all players have their agents set up (two dice, and three face-up skills per agent with charges as needed), your team is ready to go. Review your cards out loud and let the other players know what your agent can do.
Charges
A charge token is placed on a card to show its charges. If an effect says to gain a charge, add a charge token. If an effect says to spend a charge, remove a charge token from the card.
You may use effects that spend a charge as many times as you want, as long as you can pay the spend cost each time.
Please refer to the Extended Rules & Glossary for definitions of keywords on skill cards.
Setting Up the Island
The gold-backed adventure cards represent the island. To set up the island, first look for the two special cards: The Scientists and the Escape Shuttle. Set them aside. Next, find the four secret cache cards, shuffle them face-down, and set them aside.
Sort the remaining adventure cards by number with cards A-1 to A-25 in "pile 1," A-26 to A-50 in "pile 2," and cards A-51 to A-76 in "pile 3." The adventure deck comes with cards A-1 to A-76 already in sequence. For your first game, it should be easy to find and sort them. Put the escape shuttle card in pile 3 and shuffle it thoroughly. Place pile 3 face-down, then draw a secret cache card and put it face-up on top of pile 3. Next, put the scientists card in pile 2 and shuffle pile 2 thoroughly. Place pile 2 face-down on top of pile 3, then draw and place another secret cache card face-up on top of that pile. Finally, shuffle the cards in pile 1 and put pile 1 face-down on top of the other two piles. This stack of cards is the adventure deck.
Note: This is a special set up for new players. When you set up the island in future games, please refer to the Extended Rules & Glossary.
The printed set-up diagram shows the top pile (A1 to A25, shuffled, face-down), then a secret cache card (face-up), the scientists (shuffled in), the middle pile (A26 to A50, shuffled, face-down), then another secret cache card (face-up), the escape shuttle (shuffled in), and the bottom pile (A51 to A76, shuffled, face-down).
Set the unused skill cards aside in a face-down pile. This is the skill deck. Set the unused secret cache cards and the box aside (but not too far away). The diabolical doctor's deadly den of doom is ready for you! Are you ready for it?
The Countdown Begins
Place the unused charge tokens, hit tokens, XP tokens, the game tracker, the adventure deck, and the dice in easy reach of all players. Put the red countdown marker on the starting space marked with the number of agents on your team (1 = 11, 2 = 9, 3 = 7, 4 = 5). This marks the number of turns your team has to find the scientists, get to the escape shuttle, and get off the island.
Put the yellow speed marker and the blue draw marker on zero. You're ready to begin your adventure!
The printed picture shows a game tracker set up for a three-player game. The adventure deck is set up and on its space, the countdown marker is on 11, and the speed and draw markers are set to zero.
During Play
Skill Triggers
Remember to check your skills for effects that trigger at the start of the turn (like Scout or Psychic Blaster) or combat (like Martial Artist), when you draw a card (like Clairvoyant), or when you roll.
Experience Points
During play, you may suffer the bad effects of a trap or be defeated by horrible monsters. When you do, you'll learn from it and gain experience points (XP). When you gain XP, put an XP token in the "XP Pool" on the game tracker. Any player can spend XP from the XP pool at the start of a turn to give an agent another skill card. To do this, pick an agent, spend two XP for every skill card they have, then draw a new skill card from the skill deck and add it (with its starting charges) to that agent's play area.
Taking Damage
When your team takes damage, you get to distribute that damage to one or more agents as you see fit. When an agent takes damage, it affects that agent's skill cards. Each skill can take two hits (note the two hearts on the front of the card). For each point of damage your agent takes, you must choose to do one of the following:
- Flip one of your skill cards face-down (it keeps its charges) so just one heart shows. This card is disabled. Treat it as having no text or traits, unless an ability prevents it from being disabled.
- Discard one of your agent's face-down skill cards (and any cards attached to it).
Sometimes a card will let your agent avoid damage. When this happens, follow the instructions on that card.
The three skill cards your agent starts with can absorb five points of damage before your agent dies. The sixth point of damage will force you to discard your agent's last skill card. When you discard your last skill card, transfer your agent's special cards to other agents on your team and discard all of your other cards. Your agent has perished. You're no longer in play. Try not to take too much damage.
Play tip: You'll have more fun if you keep at least one skill face-up instead of disabling all of your skills. It's generally better to lose a disabled skill than to disable another skill.
Your First Turn
Explore or Rest?
Start by deciding if you're exploring or resting.
Play tip: On your first turn, it's usually better to explore because you don't have any damage to recover yet.
Exploring
Exploring: Pick a Speed
Most of the time, you'll explore the adventure deck. When you choose to explore, decide as a team what your speed will be (pick any number greater than 0). This is the number of cards your team will attempt to draw during your explore action. Higher speeds let you draw more cards, making it more likely for you to find the scientists and escape before the countdown timer reaches zero.
Play tip: Some cards (especially traps) check your speed and punish you for going too fast or too slow. A speed of seven is a good choice for your first turn.
Once your team has agreed on a speed, put the speed marker on the corresponding number on the speed track.
Exploring: Draw an Adventure Card
When you're exploring, draw a card from the adventure deck, advance the draw marker one step, then resolve the card.
Exception: Do not move the marker for cards you draw while following a card's instructions.
After you resolve an adventure card, discard it, then check the draw marker. If the draw marker's number is equal to or greater than the speed marker's number, end your turn.
To resolve an adventure card, read the text and follow its instructions. There are seven types of cards in the adventure deck: specials, traps, rooms, events, items, secret caches, and monsters.
Instructions for resolving the different types of cards follow.
Specials
Special cards have a rocket icon in the lower-left corner and a gold title box (like skill cards do). You won't encounter these until you're well into your adventure. They're the cards you're looking for.
The Scientists
These are the scientists the diabolical Doctor has kidnapped. If you find them, it's a small, if incomplete, victory. Assign them to an agent to keep them safe.
Card text: Put 3 charges on this card the first time it enters play. When your team rests, gain 1 charge on this card. Spend 1 charge: gain 1 charge on a card. Spend 1 charge: destroy a card at any time.
The Escape Shuttle
You must find this card to get off the island. If you find it before the countdown timer hits zero, your team can escape! (See page 12 for details.)
Card text: You may choose to end the game just before you move the countdown marker. (This is not an item.)
Traps
Traps have a skull icon in the lower-left corner and a blue title box. Traps with a speed-test icon test your team's speed. To resolve these, roll two dice, compare their sum to your speed, and check the card for further instructions. If you trigger the red text on a trap, gain 1 XP. Many speed tests require only one roll for the team; some of the tests tell each player to roll. The card text will indicate when all players must roll to test speed.
When you draw a Sliding Wall trap see page 6 in the Extended Rules & Glossary for detailed instructions.
Rooms
Rooms have a door icon in the lower-left corner and a brown title box. Rooms do lots of different things. Follow the instructions on the card and resolve it accordingly.
Events
Events have a volcano icon in the lower-left corner and a green title box. Some events test your team's traits. To resolve a trait test, pick an agent (one specialized in the trait being tested is a good choice). Tally how many times that agent has the requested trait. This is the agent's trait tally. If it's your agent, roll two dice and add the result to the trait tally. If the sum is less than ten, the roll is a failure; gain 1 XP and your agent takes damage equal to one die you rolled for the test (you pick). If the sum is ten or greater, the roll is a success. You may flip all of your agent's cards face-up, draw a new skill card from the skill deck, and add it to your agent with its starting charges.
Items
Items have a ray gun icon in the lower-left corner and a yellow title box. When you draw an item card, count your blessings that you don't have to fight or take damage, but you don't get to keep the item. You won't find neat stuff laying around waiting for you to take it on this island. The Doctor's an overconfident megalomaniac, but he's not foolish. When you draw an item card, put it face-up on "Monster Loot" on the game tracker.
When you defeat a monster that has loot, you'll gain one or more of the items from the monster loot.
Secret Caches
Secret cache cards have a trunk icon in the lower-left corner and a silver title box. Give the card to an agent on your team and do what it says.
Card text: Attach this card to an agent on your team and gain 6 charges on it. Each time a teammate rolls doubles, you may move a charge from this card to a card on your team.
Monsters
Monster cards have a monster icon in the lower-left corner and an orange title box. When you encounter a monster, you can either fight it or flee.
Fighting
When you fight a monster, each player simultaneously rolls two dice and adds them. Compare each agent's sum to the monster's combat value (CV), the number in the red circle on the left.
- Put one hit token on the monster for each agent whose sum is greater than the monster's CV.
- The monster hits the team once (dealing one damage) for each agent whose sum is less than the monster's CV.
- Ties do nothing.
Each monster's health is equal to the number of agents on your team.
Example: If your team has three agents, each monster you fight will have three health.
Once all agents' rolls are resolved, if the number of hit tokens on the monster is equal to or greater than the monster's health, the monster is defeated.
If the monster is defeated, check the monster card for loot (the number in the yellow circle on the right), then discard it. If the monster has a non-zero value for loot, you may browse the monster loot pile and take up to that many cards from it. Assign each item to a specific agent. If you defeat a monster with a non-zero value for loot and there are no cards in the monster loot pile, gain 1 XP.
If the monster is not defeated, you may choose to start the next round of combat (the monster and agents retain any damage) or flee. The next round of combat is resolved like the first, with players rolling two dice and adding the sums, applying hit tokens, taking damage, and checking to see if the monster is defeated.
Fleeing
If you flee, each agent takes one damage. Discard the monster and any cards in the monster loot, gain 1 XP as you think about the life choices that brought you here, and end your turn.
See the Extended Rules & Glossary for definitions of keywords on monsters.
Resting
You may wish to rest instead of explore when your team has taken some damage and is low on charge tokens. Resting gives you a chance to heal and regroup.
When you rest, each player may either enable one of their agent's cards by turning it face-up or add one charge token to any one of their agent's cards. You may also freely transfer items between agents on your team.
Next, your team may draw the top adventure card and choose to resolve it (with a speed of 0) or discard it.
Ending your Turn
Your turn can end in a number of ways:
- drawing and resolving your last card while exploring,
- resolving or discarding the top card of the adventure deck while resting,
- some card effects can end your turn, or
- retreating from a monster ends your turn.
At the end of your turn (whether you explored or rested), move the countdown marker one step toward zero. If the countdown marker has not reached zero, start your next turn. Reset the speed and draw markers and decide whether to explore or rest. Proceed accordingly.
When the countdown marker reaches zero, the island and everything on it will be blown to Kingdom Come.
Do your best to be somewhere else when that happens.
Ending the Game & Winning
There are three ways for the adventure to end:
- All agents have died (lost all of their skill cards). How tragic! Perhaps the next team will do better?
- The countdown timer reaches zero. The island blows up with you on it. The world is safe, but the cost was high. If it's any consolation, you'll be remembered as heroes.
- You're about to move the countdown marker, have the escape shuttle, and choose to end the game.
If you escape with the scientists, you flee the island just before the bomb explodes and rescue the scientists. Congratulations! You've saved the world. Necreaux couldn't have possibly survived that fiery inferno... ...Could he?
If you take off in the shuttle but don't have the scientists with you (perhaps didn't find them; perhaps you left them behind with a lost team), you escape the island with your life! What a relief! But...
As you're zipping away to safety, you spot another shuttlecraft taking off from the other side of the island. Did the diabolical Doctor escape with his scientist captives?
You quickly calculate coordinates per pursuit prep protocol when BOOM! The bomb explodes, blasting balsamic bits of island, volcano, and lava in a fiery flash that scrambles your systems as the sinister shuttle skitters skyward.
At least you have your life. ...And your memories of your adventure.
Good luck! The world's fate is in your hands!
Extended Rules & Glossary
This booklet contains extended rules for experienced players and a glossary of keywords and terms used in the rules and on cards. If you have not read the How To Play booklet and/or played a game of The Island of Doctor Necreaux, the contents of this booklet will not be very useful.
The Rule
If a card contradicts the rules in this booklet or the How To Play booklet, do what the card says.
Keyword Glossary
Terms without an icon are used throughout the game. Terms marked with the monster icon are mostly used on monster cards. Terms marked with the skill icon are mostly used on skill cards.
Active. An active card is a face-up card that's in play, typically a skill or an item in front of a player. The current adventure card is also an active card. Some traps and other cards stay in play after you've resolved them. They also count as active cards. Cards in the adventure and skill decks and in discard piles are not active cards.
Boost (TYPE). Increase the monster's combat value (CV) by one for every (TYPE) card in play. A monster with "Boost: Psychic" gets +1 CV for every psychic card in play. Note that a card with a trait repeated on it (e.g., Tech, Tech, Tech) only counts as one card.
Brutal #. Each time a brutal monster hits, it deals # damage instead of just one point of damage.
Chaotic damage. When you select an agent to take damage from this monster, assign each point of damage to a randomly-selected skill card.
Chaotic targets. Assign each hit from this monster to a randomly-selected agent.
Delay. Roll two dice (unless told to do otherwise) and add them. Draw that many cards from the adventure deck without looking at them or changing their order. Put the card you're delaying face-up on the adventure deck. Put the cards you drew back on top of the adventure deck.
Destroy. Discard. When you deal one damage to a disabled (face-down) card, you must destroy (discard) it. You will also destroy monsters and items during play.
Disable. Flip face-down. When an active skill card takes one damage, you disable it. You may also disable items during play. Treat disabled cards as having no text (unless the card is unstoppable). Disabled cards keep their charges.
Durable #. A durable monster has extra points of health (typically twice as much). Example: A "Durable: x2" monster fighting a team of three agents has six points of health and takes six hits to defeat (since three times two equals six).
Enable. Flip face up. When your agent rests and heals damage, you'll flip one of your disabled cards face-up. Enabling a card does not add charges to or remove charges from it.
Explosive. If an explosive monster is undefeated at the end of a combat round, discard it and all cards in Monster Loot. End the combat and continue play normally.
Irreplaceable. If you destroy a card that's irreplaceable, put it in the game box until the game is over. That card may not re-enter play this game.
Loot #. The team may select and claim up to # cards from Monster Loot after defeating this monster.
Neutralize. Treat a neutralized card as blank (unless it's unstoppable): no traits, no text. Nothing. It still counts as its card type.
Parasite. If a parasite hits the team (even if it does not deal damage), end the combat and attach it to a skill card on your team. The agent with the parasite suffers the parasite's penalty as long as it is attached to that agent's skill card. That agent's player may destroy the parasite by declining all benefits of a rest action.
Relentless # dice. After you defeat a relentless monster, roll and sum # dice and delay it by that amount.
Solo Bonus. If you're playing a solo game and one of your agent's skill cards says "Solo Bonus" at the bottom of it, discard it, gain a step on the countdown timer, then draw two skill cards. Add one to your agent with starting charges and discard the other.
Stun damage. You must use damage from this monster to disable cards before you use it to destroy cards. You may not use damage from this monster to destroy a skill card unless all skill cards on your team are disabled.
Swarming damage. Divide damage this monster does by two, rounded down (minimum zero). Every agent on the team takes that much damage from this monster; do not distribute the damage.
Traits. Character skills and some other special cards fall into one of four broad categories called "traits." The four traits are Combat, Heroic, Psychic, and Tech.
Unstoppable. An unstoppable card remains active, even if it is face-down or otherwise neutralized. When you would flip an unstoppable card face-down, put an unstoppable token on it instead. Unstoppable cards can still be destroyed normally.
Set Up for Experienced Players
Creating the Island
Shuffle the adventure cards (but not the special cards or the secret cache cards). Make three face-down piles: two piles of 25 cards and one pile of 26.
Add the escape shuttle card to the pile of 26 cards. Shuffle them and set them face-down. This is the bottom of your adventure deck. Add the scientists to one of the piles of 25 cards. Shuffle them and set them face-down on top of the 26-card pile. That's the middle of your adventure. Shuffle the remaining pile of 25 cards and put them on top of the adventure deck. The island is ready for you!
Creating Your Agents
Shuffle the skill cards. Deal four skill cards to each player. Set the un-dealt skill cards aside, face-down. This is the skill deck.
Review your skills. Choose three to keep. Put them in front of you. These are your agent's starting skills. Once each player has chosen starting skills, put each player's left-over skill card face-up in easy reach of all players, creating a skill pool. You'll use this to complete your agents.
Take turns reading your starting skills out loud, then work together to complete your agents. One at a time, each player may swap one (and only one) of their agent's starting skills with a card in the skill pool. Each agent should have three skill cards before the first turn starts.
Knowledge is power, so remind the other players what your agent is good at and get ready to go!
The Sliding Wall Trap
This is a special trap that will split the team into two teams if you do not avoid it. When you split up, each team must have at least one agent on it.
The printed card reads: "≥ Speed: That was close! (No effect.)" and "< Speed: Split the team into 2 teams. Regroup if a team (a) loses an extra countdown step at the end of its turn or (b) draws another Sliding Wall Trap card. If you're regrouping because you drew this card, finish the turn as one team."
Note: This trap has no effect if you're playing with only one agent. Aren't you lucky?
Decide which team will finish the current turn. This is the "main" team. The other agents are caught on the other side of the wall; they are the "lost" team. Agents and cards on the other team are not on your team anymore. They don't participate in your team's encounters. They can't swap items or share rest actions with you. However, both teams still use the same XP pool and monster loot pile.
After the split, the main team finishes its turn normally, reducing the countdown timer by one at the end of the turn. Then the lost team begins their turn. If you're on the lost team, take your turn normally, but with one exception: your team does not reduce the countdown timer at the end of your turn. (You're acting at the same time as the main team, so you're "sharing" the time their turn took.)
There are two ways to reunite split teams:
- If you draw a Sliding Wall trap while split, a secret wall lifts. Immediately discard the Sliding Wall and reunite the teams. If you still have cards to draw, encounter them together as one team. At the end of the turn (whether it began as the "lost" team's turn or the "main" team's turn), reduce the countdown timer normally.
- At the end of either team's turn, reduce the countdown timer an extra step. You retraced your steps and found each other. Yay!
After you're reunited, continue play normally.
Variants
Scaling Play
There are many ways to set up the game to make it easier or more difficult. Here's how we like to scale the game, starting with the easiest version and proceeding upwards in difficulty:
- Intro: The easiest version of Necreaux is the one you play when you follow the instructions in How To Play.
- Level 1: For a more interesting game, follow How To Play set up for the deck, but use the agent creation rules in Set Up For Experienced Players (page 5).
- Level 2: To slightly increase the difficulty, follow How To Play set up for the deck, but do not add the lower secret cache. You can omit just the upper secret cache card for a harder game. Omitting both secret caches makes the game harder still. Use the agent creation rules in Set Up For Experienced Players.
- Level 3: For a little more challenge, follow deck and agent creation rules in Set Up For Experienced Players, but put a secret cache card between the bottom and middle sections and another between the middle and top sections. Adding only the upper secret cache makes the game even harder. Adding only the lower secret cache makes the game harder still.
- Level 4: For an easier-than-normal game, follow Set Up For Experienced Players to set up the deck, but shuffle one or two secret caches face-down into the adventure deck before you split it into three sections. Use the agent creation rules in How To Play.
- Level 5: For a just-slightly-easier-than-normal game, follow Set Up For Experienced Players to set up the deck, but use the agent creation rules in How To Play.
- Level 6: For a normal game, follow all set up rules in Set Up For Experienced Players.
- Level 7: For a "classic Necreaux" game, follow Set Up For Experienced Players to set up the deck, but use a silent drafting system to determine your agents' skills: Deal four skill cards to each player. Look at your cards and pick one. Pass the others to your left. Do not discuss your cards with the other players while you "pick and pass." Do this until you have three skill cards; discard the fourth. Also: discard any items remaining in Monster Loot after you claim monster loot.
An Uncertain Ending
You can use this variant in tandem with any other variant. At the end of setup, reduce the countdown timer 3 additional steps. The game does not end when the countdown timer reaches zero. If you end a turn with the countdown timer at zero, roll a die. (This roll cannot be modified, re-rolled, or substituted.) If it comes up "6," the island blows up and the game ends. Any other result lets the game continue.
No Time To Waste!
To play a shorter game, remove 24 adventure cards from play before you set up the deck. You can do this in one of two ways:
- Remove 24 cards at random.
- Deal 24 adventure cards, evenly divided, to the players. Have each player put one card (their choice) back in the adventure deck.
Whichever way you choose, put the removed cards in the box, face-down and out of play. Your adventure deck has 52 cards (give or take) now. Split them into three equal piles. If there are excess cards, put them in one of the three piles and use that pile as the bottom. Shuffle the scientists into the middle and the escape shuttle into the bottom and assemble the deck normally. Move the countdown timer 5 steps toward zero after you place it on its proper starting spot.
Multiple Agents
A player can have more than one agent. If you do this, create and control each agent as if it were controlled by a different player. For example: when you roll for combat or for a trap that requires each agent to roll, roll separately for each agent you control.
Five Players/Agents
You can play The Island of Doctor Necreaux with five agents. If you do, the countdown marker starts on 4. All other aspects of setup and play are normal. We only recommend this for experienced players. If you do this with inexperienced players, be prepared for a very long game.
Tips & Hints
Warning! This section has spoilers!
Q: To win the game in normal "experienced player" mode, I have to get through 78 cards in (11/9/7/5) turns. I'll have to have a speed of (7+/8+/11+/15+) every turn. It's impossible to win this game!
- Clue #1: You don't have to draw all 78 cards. That's only a worst-case scenario. In a best-case scenario, you'll have to get through 52 cards.
- Clue #2: That's an average speed. You can start slower, then speed up later when you're better-able to handle monsters, traps, and damage, which brings us to...
- Clue #3: During play, you'll have events that give you additional countdown turns, skill cards, and items. All of these make your team much stronger than when you started the game.
- Clue #4: The Scientists are a very powerful card. You can go much faster once you have them. They'll help you a lot; even more if you can get extra charges on them.
- Clue #5: The Diabolical Doctor Necreaux succumbed to a classic megalomaniacal flaw and created Sliding Wall traps without recognizing or understanding the power of teamwork. Sliding Wall traps actually help you instead of hinder. If you have two teams exploring at a speed of four, that's like one team exploring at a speed of eight. If you're ready to exploit them, Sliding Wall traps are one of the most useful cards you can encounter.
Performance Evaluation
A game of TIoDN has four possible outcomes:
- Utter failure: All agents die before time runs out.
- Failure: Time runs out and the agents do not escape.
- A draw: Agents escape without the scientists.
- Success!: Agents escape with the scientists.
If you crave more detailed feedback, assess how you did with this performance evaluation:
- Number of adventure cards in the discard pile: +1 per card
- Number of turns remaining: +5 per remaining turn
- Used silent draft (see Scaling Play, "classic Necreaux" in Variants, page 7) to build agents: +10 points
- Never spent XP (aka "hardcore mode"): +10 points
- Agents had the scientists at end-of-game: +10 points
- Agents had the escape shuttle at end-of-game: +10 points
- At least one agent escaped the island: +10 points
- ...with the scientists: +10 points
- Started with fewer turns than instructed to on the countdown timer: +10 per "lost" turn
- Used pre-made agents from "How To Play": -3 points
- Added secret cache cards to the adventure deck during set up: -5 per cache
- Number of skill cards discarded due to damage: -10 per skill
- Started with extra turns on the countdown timer: -10 per extra turn
- Used adventure deck set-up from "How To Play": -30 points
Some scoring guidelines:
- 95 is a good score for a game with the "How To Play" setup.
- 100 is a good score for a game set up per page 5 in this booklet.
- 130+ points is a good score, no matter what set-up you use.
- 142 points or more is a truly epic feat.
Icon and Term Reference
The printed icon key maps each icon to its meaning:
- Charge: "+" means gain a charge; "-" means spend a charge.
- Card type icons: Event, Item, Monster, Room, Secret Cache, Skill, Special, Speed Test, Trap.
The printed Icon and Term Reference page repeats the keyword entries in the Keyword Glossary above and is not transcribed separately.