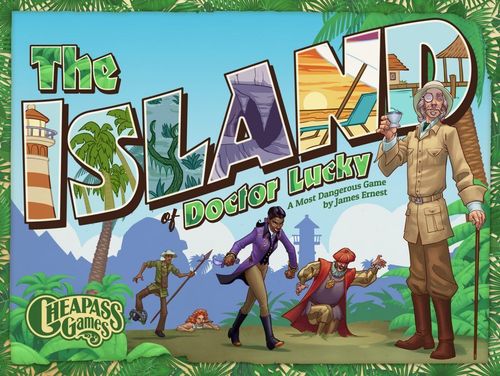
The Island of Doctor Lucky
The Island of Doctor Lucky Rulebook
Table of Contents
Table of Contents
The Basics
Your goal is simple: Kill Doctor Lucky. You can try to do this when you are alone with him and no one else can see you. You can also kill him from a distance, using a Hazard card.
When you try to kill Doctor Lucky, his abundant Luck (played by other players) will usually save him.
But you will gain a little strength each time you try, and eventually the Doctor's Luck will run out!
The Island of Doctor Lucky is based on our very first game, Kill Doctor Lucky, and they have many rules in common. However, you should read these rules carefully, as some mechanics have changed, and others are brand new!
Components
The Island of Doctor Lucky includes:
- Eight Player Pawns
- One larger Pawn for Doctor Lucky
- One small round Token for the cat.
- Eight Character Cards
- 72 Game Cards
- The Isla Fortuna Game Board
- These Rules
Note: The basic rules are best for groups of 4 to 8 players. Supplemental rules for 2 or 3 players are given on the last page.
Missing a Piece? If you discover that something is missing from your game, please contact us at cheapass.com.
Component Details
The Board: There are 24 regions, or "spaces," on Isla Fortuna. Players can move and see between any two connected spaces, i.e., spaces that share an edge.
Moving: Players start with a Move of 1 (one step), but they can gain more movement through play.
There are four airplanes, located on the Plains spaces, which act as quick-move connections. You can move between any two airplane spaces with one step.
Seeing: Players and Doctor Lucky can see each other on the same space, and on all adjoining spaces. For example, a player in the Frog Pond can see (and be seen by) others in the Frog Pond, Sunset Beach, the Sugar Farm, and the Cliffs of Social Anxiety.
The Cards: There are three types of card in the deck: Weapons, Hazards, and Failure Cards. There are also eight Character cards, which do not shuffle into the deck.
Luck: Doctor Lucky's "Luck" can appear on every type of card in the deck, and is represented by shamrocks like the one shown on the card. The Luck value of a card has nothing to do with its other functions, but you can discard these cards whenever you need some Luck.
Weapons: You don't need a Weapon to kill Doctor Lucky, but they make your murder attempts stronger. Each Weapon card is usable everywhere, but also has a single space where it is even better.
Hazards represent the dangerous surprises found all over the island, including traps, creatures, and terrain. You can throw Hazards at other players, or at Doctor Lucky, if they are alone and in the right type of space.
Failure Cards represent the majority of Doctor Lucky's Luck, and this is their only function. While Weapons and Hazards might have zero, one, or two Luck, Failure Cards have from 1 to 4 Luck. The details for all these cards are given below.
The Cat: Doctor Lucky's panther, Ragu, is a beloved fixture of Isla Fortuna, and is represented by the small round token. She acts as a "sight line stopper."
When Ragu is in a region, pawns in that region (including players and Doctor Lucky) can't see into the neighboring spaces. They can still see each other, but they are too distracted by the cat to look anywhere else. This might be because she is so cute, or because she is extremely dangerous, or perhaps both.
Setting Up
Each player chooses a Character card and the corresponding pawn. Place your Character card on the table in front of you.
Players' pawns start on Castelo Feliz. Doctor Lucky starts at Sunset Beach. The cat starts in the Observatory.
Shuffle the deck and deal a hand of cards to each player:
With 2 or 3 players, the starting hand is 7 cards. See the back page for some additional rules for 2 and 3 players.
With 4 to 6 players, the starting hand is 6 cards.
With 7 or 8 players, the starting hand is 5 cards.
Set the deck beside the board, with space for a discard pile beside it. When the deck is empty it is not recycled.
Begin with a random player. Play usually proceeds to the left, but sometimes the turn order can be altered by Doctor Lucky, as described below.
On Each Turn
A turn has two steps, called Phase 1 and Phase 2.
In Phase 1, you may do one of the following, or pass:
- Move your pawn,
- Move the cat, or
- Play a Hazard.
In Phase 2, you may do one of the following, or pass:
- Draw a card, or
- Try to kill Doctor Lucky.
Note: Because the Phase 2 options require that no one can see you, you will often be unable to do anything in Phase 2. More details on both phases are below.
Phase 1
In Phase 1 you may do one of three things: move yourself, move the cat, or play a Hazard. You can also choose to do none of these and just stay put.
Moving Yourself: Your character begins with a basic Move of one step. One "step" takes you from one region to any adjacent region. You can also step directly between any two regions that contain airplanes.
Gaining Movement: Each time you play a Hazard (see below) you will gain +1 Move. This gives you a longer range of movement for the rest of the game. Note: it takes no more than four steps to get anywhere on the board!
Moving the Cat: Instead of moving yourself, you may move the cat. Ragu knows the island better than anyone, so she can hop directly to any space.
About the Cat: Ragu is quite a distraction, so anyone who is in a region with her (including players and Doctor Lucky) is unable to see outside that region. Move her correctly in Phase 1, and you can often prevent people from seeing you in Phase 2!
Playing a Hazard: Instead of moving, you can play a Hazard on Doctor Lucky or on another player.
Each Hazard card is marked with a particular type of region where it can be played (for example, Forests). The target of your Hazard must be alone on that type of space.
"Alone" means that no other pawn, including players and Doctor Lucky, is on the same space. However, Ragu doesn't care, so you can absolutely throw a Hazard at someone who is alone with the cat.
The effect of the Hazard depends on whether your target is a player or Doctor Lucky, as follows:
Playing a Hazard on Another Player: When you throw a Hazard at another player, that player pays one of two penalties. They must either:
- Pass you one card from their hand, or
- Discard enough Luck to match the value of the Hazard. For example, discard at least 3 Luck if the Hazard is worth 3.
- If your target's hand is empty, there is no penalty*.
Playing a Hazard on Doctor Lucky: When you throw a Hazard at Doctor Lucky, it is resolved in a similar fashion to a murder attempt, described later.
Starting on your left, each player has one chance to discard Luck to foil the Hazard, and if your opponents don't play enough Luck, you win the game!
Gaining Movement: After you play a Hazard, no matter what the target or the outcome, you gain +1 to your Move. Keep the Hazard card face down under your Character card, on the "+ Move" side, as shown in the example.
In this example, Janet Principle has accumulated two extra Moves, and now has a Move of 3. She also has +1 Attack.
*Optional Rule: You're Out!
For an even more dangerous game, you can add this rule: If you throw a Hazard at a player who holds no cards, that player is eliminated from the game! Make sure everyone agrees to this rule at the start of the game, because it will dramatically affect the way players manage their hands.
Phase 2
In Phase 2 you have to be unseen to act. You can either draw a card, or try to kill Doctor Lucky, but only if no one is looking at you. If you're being watched, you will have to do nothing.
Draw: Take one card from the top of the deck. You may draw only if no one, including Doctor Lucky, can see you.
There is no limit to the number of cards you can hold.
When the deck empties, it is not recycled, so players will no longer have the option to draw cards.
Make a Murder Attempt: If you are alone with Doctor Lucky and no one else can see you, you can try to kill him. You may play a Weapon to improve your attack, or you can try to kill him with your bare hands.
Attack Value: You start with a basic Attack of 1. This increases by 1 point each time you make a murder attempt, similar to the way that Hazards increase your Move.
You can play one Weapon to improve the value of your attempt. The Weapon value is added to your Attack Value.
Note that each Weapon is useful everywhere, but also has an improved value in a specific place. For example, the Beach Chair is worth 2 points anywhere, but is worth 4 points in Sunset Beach.
Foiling a Murder Attempt: Doctor Lucky escapes murder attempts when other players discard a sufficient amount of his Luck.
Luck is represented by the shamrocks found on most cards, and each point of Luck that is discarded cancels one point of the Attack Value.
Starting on the left of the murderer, and going just once around the table, each player in turn may discard as many cards as they wish (or none at all), to contribute their Luck value to Doctor Lucky's escape.
Failure! If sufficient Luck is played, Doctor Lucky lives and the game continues.
Success! If sufficient Luck is not played, Doctor Lucky dies, and the murderer wins the game!
Hint: In general, it's safe to assume that every player's hand starts with some Luck. So when playing Luck on early murder attempts, it makes sense to pass unless you are very late in the rotation. Always use your best judgment and play only as much Luck as you have to!
Gaining Attack Strength: That which does not kill Doctor Lucky makes you stronger! Each time you fail at a murder attempt, you gain +1 Attack. If you played a Weapon, keep that card face down under your character card on the "+1 Attack" side. If you did not play a Weapon, you can use any discard for the same thing. (It doesn't matter which discard you choose, because the discards are not recycled.)
Note: Hazards played on Doctor Lucky are foiled in the same manner, although nothing can modify a Hazard's base value. As mentioned above, Hazard cards become +1 Move.
Also Note: The card backs have "boot" and "sword" icons in the corners. When you stack modifier cards below your character card as shown in the example, you can reveal the boots as +1 Move, and the Swords as +1 Attack.
Between Turns: Moving Doctor Lucky
Doctor Lucky walks in a fixed path around his island, stopping at each region in order. After each player's turn, Doctor Lucky moves one step forward, to the next space in sequence. From the highest number, space 24, he steps to space 1.
When Doctor Lucky moves, he can sometimes cause players to draw cards, and he will often change the turn order.
Drawing Cards: If Doctor Lucky moves into an empty Building space, all players who hold fewer than three cards draw one card.
"Empty" means that there are no players in the building. (The cat doesn't count.) These spaces have a card icon to remind you of this rule.
If the deck is nearly empty, the order in which players draw their cards will matter. Start to the left of the last active player, and proceed around the table to the left.
When the deck is empty, players can no longer draw cards.
Turn Order: If Doctor Lucky moves into a space with a player, the turn jumps to that player, and will proceed to the left from there.
Exception: On the first round of the game, this rule is off, and the turn order cannot change. This means that Doctor Lucky does not activate players by moving into them until each player has had at least one turn. At the end of the last player's first turn, the rule goes into effect.
Moving the turn around like this can cause some chaos, but it also means that you can lie in wait for the Doctor and be guaranteed a turn, unless someone else is waiting with you.
If Doctor Lucky moves into a room occupied by more than one player, the turn moves to the player in the room who is closest to the left of the last active player.
For example, if Player 1 moves into a space with Player 3, and Doctor Lucky moves in behind him, then Player 3 will take the next turn.
"Riding the Lucky Train": Sometimes you can take several turns in a row by moving one step ahead of Doctor Lucky, and letting him re-activate you with his next move. This doesn't let you draw a lot of cards (because the Doctor is always watching you), but it can help you move to a better place, bringing the Doctor along with you.
Note that you can't just ride the Lucky Train through an occupied room, as explained above, though you can sometimes leapfrog another player who is in your way.
Winning the Game
The goal is simple: Kill Doctor Lucky.
Although your early murder attempts will probably fail, they are still worth making. They always make you stronger, and they will pull cards out of other players' hands.
You should be selfish with your Luck when other players make murder attempts. If you're pretty sure that someone after you will play enough, it's better to be aggressive and pass.
This game can have both a winner and a loser. The "loser" is the last player who could have played Luck, but didn't!
Not every game has a loser. Don't be the loser.
Rules for 2 or 3
With only two or three players, the basic rules can lead to a very short game. We suggest adding "Strangers" to balance the game, as described here. Strangers are essentially automated players.
Strangers sit between the live players. With two players you will have two Strangers, and with three players you will have three. Give each Stranger a Character card.
The Strangers' pawns begin on the empty Plains spaces (Desperation Bluff, Salient Point, and Lone Horse Ranch). With two Strangers, just pick any two of these.
Live players start with hands of 7 cards. Strangers do not have hands.
Strangers can see and be seen just like live players.
Strangers take turns, as described below, and they can be activated by Doctor Lucky. They can also be moved by players.
In Phase 1, you may allocate movement points between yourself and any number of Strangers. So for example if you had a Move of 3, and chose the "move yourself" option, you could move yourself twice, and a Stranger once, or even move three Strangers one step each.
When they are asked to play Luck, Strangers will discard the top card of the deck. Sometimes this card has no Luck on it, in which case it will simply have no effect.
On a Stranger's turn, in Phase 1 they will usually move one space upstream (i.e., to the next smaller number), unless they are already in a position to make a murder attempt.
In Phase 2, if they can make a murder attempt, they will. They can't play Weapons, but they do gain +1 Attack each time they fail. Strangers can even win the game!
If you play a Hazard on a Stranger, the Stranger reveals one card from the deck. If it has enough Luck to stop the Hazard, it is discarded. If not, you get to put it into your hand!
Strategically, the Stranger to your right is a little bit like your ally, and the Stranger on your left is a little bit like your enemy. You want to position your ally to catch Doctor Lucky so that you can take more turns.