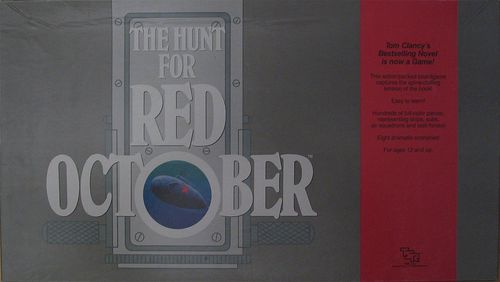
The Hunt for Red October
The Hunt for Red October Rulebook
Table of Contents
Table of Contents
Getting Ready to Play
The Game Pieces
Your Hunt For Red October game should contain the following pieces:
- 3 sheets of fold-up ship pieces
- 1 sheet of air squadron counters
- 1 map board
- 1 battle board
- 1 NATO task force card
- 1 Soviet task force card
- 1 rule book
- 144 plastic bases
- 2 colored dice (numbered 0 to 9)
- 2 white dice (numbered 1 to 6)
Carefully separate the ship pieces along the perforations and fold them over as shown, mounting each on a plastic base.
Next separate ("punch out") the cardboard counters. Sort them into NATO detection markers, Soviet detection markers, NATO air squadrons, and Soviet air squadrons.
Look at the dice. The colored dice are used for most game functions. They have ten sides, numbered 1 to 0 (The 0 is read as a 10). The white dice are used for Soviet initiative and to attack detected submarines. The rules always state when to roll a red (ten-sided) die and when to roll a white (six-sided) die.
Setting Up the Board and Displays
Set out the Map Board, the Battle Board, and the NATO and Soviet Task Force Cards. Place the Map Board on a table between the two players. The NATO player sits at the west map edge (U.S. and Canada). The Soviet player sits at the east map edge (Europe and Africa). Set up the Battle Board and both players' Task Force Cards at the north edge of the map. (This setup can be changed to fit your table.) The whole layout should look something like this: Battle Board and the two Task Force Cards at the north edge, the Map Board in the middle, the NATO player at the west edge and the Soviet player at the east edge.
Learning the Game
Set out the Map Board, the Battle Board, and the NATO and Soviet Task Force Cards. Put a few Soviet and NATO ships, subs, and airplanes on the board for reference. Now page through the rule book. Look at the diagrams and the Turn Steps, and skim the rules. Next, read the rules from beginning to end. Don't try to memorize them, but as you finish each section review it briefly to be sure you understand it. If you have questions, read the appropriate example in the middle of the rule book, moving pieces on the board if necessary. This should clarify how the rule is used in the game.
The Hunt For Red October game has eight scenarios. Each scenario is a different game situation; in effect, The Hunt For Red October is eight different games. All eight scenarios are played with the same rules, but the NATO and Soviet navies start in different places, with different numbers of ships, and different goals.
Scenarios 1 and 2 are good scenarios to start with if you haven't played the game before. They are simple situations with relatively few ships and air squadrons per side. You will enjoy playing the other, larger scenarios more if you first learn the rules by playing the small scenarios.
Once the scenario is chosen, sort out and assemble the ship, submarine, and air squadron pieces needed to play that scenario. Put them on the map in their starting positions, and you are ready to begin playing!
Reading the Pieces
All the information needed about ships, submarines, and air squadrons is printed on the playing pieces.
The pieces are designed to conceal crucial information from your opponent. For example, your ship pieces are placed on the board facing you. All your opponent sees are the flags on the backs, telling him that these are enemy ships. Aircraft squadrons are placed face down so your opponent cannot see what type they are.
Ship Pieces
Throughout these rules, the term "ship" refers to both surface ships and submarines.
A ship piece front shows: Name or Type, Class, Detection Rating, and Attack Rating (example piece: Adams, DDG, 4 and 4). The back shows the flag.
The Detection Rating indicates how good that ship's radar, sonar, and search helicopters are. These things are used to detect enemy ships and air squadrons. Ships with high detection ratings usually find what they are looking for; ships with low detection ratings tend to overlook things.
Your ships can try to detect enemy ships and air squadrons at several different times during the turn. This is explained further under Detecting Enemy Pieces. A ship with a helicopter printed next to its detection rating (ASW Helicopter) can search for enemy submarines when it is part of an ASW screen.
When you try to detect an enemy piece, roll one colored die. If the number rolled is equal to or lower than your piece's detection rating, the enemy piece is detected.
The Attack Rating shows how much firepower the ship has. Ships with white attack ratings are especially effective when attacking enemy surface ships (not submarines). Pieces with yellow attack ratings are especially deadly when attacking enemy air squadrons.
When one of your ships attacks an enemy piece, roll one colored die. The enemy piece is hit if the number rolled is equal to or lower than your ship's attack rating. (Sometimes you roll the white die instead. This is explained further under Attacking Enemy Pieces.)
The Ship Type is included for interest only; it has no effect in the game. The abbreviations used are:
| Abbreviation | Meaning |
|---|---|
| SSN | Nuclear powered submarine |
| SSGN | Nuclear powered cruise missile submarine |
| SS | Conventionally powered submarine |
| SSBN | Nuclear powered ballistic missile submarine |
| FF | Frigate |
| FFG | Frigate with anti-aircraft missiles |
| FFL | Light frigate |
| DD | Destroyer |
| DDG | Destroyer with anti-aircraft missiles |
| CV | Aircraft carrier |
| CVN | Nuclear-powered aircraft carrier |
| CVL |
The back of a ship piece shows its flag. This identifies the piece as either a Soviet or NATO warship. The back of a submarine piece shows its flag and a generic silhouette identifying the piece as a submarine.
Task Force Pieces
Task force pieces represent large groups of ships. Instead of bunching a lot of individual ship pieces into one space on the board, ships in a task force are kept on the task force display. A single piece, representing the whole task force, shows where those ships are on the map.
Task force pieces do not have detection ratings, attack ratings, or ship type designations.
Aircraft Squadron Pieces
Many different types of aircraft appear in the Hunt for Red October game. All aircraft squadrons have three ratings: Range (short, medium or long), Detection Rating, and Attack Rating (the piece shows its Type, Range, Detection Rating and Attack Rating).
The Detection Rating and Attack Rating are the same as a ship's detection and attack ratings.
Range indicates how many spaces an aircraft squadron can move. Aircraft have either short (S), medium (M), or long (L) range. These ranges allow aircraft to move:
- S aircraft can move 1 space.
- M aircraft can move 4 spaces.
- L aircraft can move 8 spaces.
Some aircraft squadrons are especially good at finding and destroying enemy submarines (anti-submarine warfare—ASW). These ASW aircraft squadrons have white airplane silhouettes instead of black.
The backs of all Soviet and all NATO aircraft squadron pieces are the same. The back side of the piece is turned up when the squadron is undetected so the other player can't see what type of aircraft are in the squadron. When the squadron is detected, the piece is turned face up.
Markers
Two types of markers are used in the game: Detection Markers and Captured Air Base Markers.
You must put one of your detection markers in every space where you search for enemy ships and aircraft squadrons. One side of a detection marker shows a Radar Search and the other shows a Sonar Search. Place the marker with its radar side up if you are trying to detect surface ships or aircraft squadrons. Place the detection marker with its sonar side up if you are trying to detect submarines.
Captured air base markers are only used in a few scenarios. They are placed on NATO air bases that have been captured by the Soviet player.
Reading the Map
The Map Board is divided into land and sea spaces. Ships can move through any sea spaces. Air squadrons can move through land and sea spaces.
Sea Spaces
Dark blue spaces are Deep Sea spaces. Light blue spaces are Shallow Sea spaces. There is no difference between deep and shallow sea in the basic game. Sea spaces are defined by thin black lines and by the borders between deep and shallow sea (moving from shallow to deep sea, or vice versa, is a one-space move, even though there is no thin line separating the two spaces). The mountains running the length of the Map Board are the Mid-Atlantic Ridge. They have no effect on play and do not divide the map into spaces.
Patrol Symbols
Sixteen spaces on the Map Board contain NATO and Soviet symbols. These are Patrol Symbols. They have no effect in the basic game, but they are used in some of the scenarios to show where pieces can be set up.
Land Spaces
Land spaces are just like sea spaces except ships cannot enter them. The terrain in the space has no effect, whether it is green, white, or brown.
Five land spaces are ports: Norfolk, New York, Le Havre, Leningrad, and Severomorsk. These are the only land spaces that ships can enter. Even if its land space connects to several sea spaces, a port is connected to only one sea space.
Playing a Turn
Every turn of the Hunt For Red October game has six steps. These steps must be done in order. Steps cannot be combined or rearranged in any way. For example, during step 2, First Sea Movement, the first player moves his surface ships and submarines. He cannot move his air squadrons at this time, nor can the second player move any of his ships or air squadrons. When step 2 is finished the first player cannot move any ships for the rest of the turn, even if he has ships that didn't move during step 2. Turn steps can be interrupted when ships and air squadrons search for enemy pieces and attack pieces that are detected. Detection and attack steps are explained elsewhere.
Turn Steps
Step 1: Initiative. Each player takes two detection markers from his offboard pile and places them on the map in his "Detection Markers" space. Then each player rolls a die. The NATO player rolls a colored die, the Soviet player rolls a white die. The number rolled tells how many extra detection markers both players get. Each player adds that many additional detection markers to his "Detection Markers" space. Whoever has the most detection markers has the initiative for this turn. If both players have the same number of detection markers, the Soviet player gets the initiative.
Example: Both players put two detection markers in their map space. The NATO player rolls a 7 and the Soviet player rolls a 4. The NATO player adds seven more detection markers to his "Detection Markers" space for a total of nine markers. The Soviet player adds four markers to his space for a total of six.
Step 2: First Sea Movement. The player with the initiative decides whether he wants to move his ships first, or have the other player move first. That player moves all of his submarines, surface ships, and task forces.
If your opponent moves one of his pieces into a space that already contains one of your submarines, you can play a detection marker there. When this happens, movement stops temporarily while the search is going on; see the Detection Steps.
Example: NATO task force bravo has moved into a space containing two Soviet submarines. The Soviet player plays a detection marker in that space. The NATO player stops moving immediately and the players refer to Detection Steps to resolve the search.
Step 3: Second Sea Movement. Now the other player moves his submarines, surface ships, and task forces. Like before, the player whose ships are not moving can play a detection marker if an enemy ship moves into a space with one of his submarines. It doesn't matter whether the submarine moved in the First Sea Movement step or stayed where it was; a detection marker can be played in either case.
Step 4: Aircraft Movement. During this step players take turns moving their air squadrons. The player who moved his ships first also moves his aircraft first.
The first player can move as many squadrons as he wants to the limit of their ranges. When he is done, the second player does the same. When the second player is done, the first player can move any squadrons which have not moved already. Players keep alternating this way until all their aircraft squadrons have moved or neither player wants to move any more squadrons.
Either player can "pass" when it is his turn to move squadrons, allowing his opponent to move again. If both players pass, one after another, this step ends and no more aircraft movement is allowed.
If one player runs out of squadrons before the other or simply stops moving squadrons, the other player can finish moving all his remaining squadrons at once.
No detection markers can be played during this step.
Step 5: Combat. During this step, both players use the detection markers left in their "Detection Markers" spaces to search for enemy ships and aircraft.
The player who has the most detection markers left picks a space where he wants to search and plays one or more detection markers there. (If both players have the same number of markers, the Soviet player is first.) Follow the Detection Steps to resolve the search. If enemy pieces are detected and either player wants to fight a battle, refer to the Battle Steps. Then the other player chooses a space and the procedure is repeated. Continue alternating this way until neither player has any detection markers left, neither player wants to play any more detection markers, or neither player has anyplace left where he can play detection markers.
Example: NATO task force bravo is in the same space with six Soviet aircraft squadrons. The NATO player has more detection markers. He plays four detection markers in the space, radar side up. The Soviet player plays three detection markers, radar side up. The players then follow the Detection Steps to see whether they find each others' pieces.
If a player detects any enemy pieces, he can attack. In that case, follow the Battle Steps.
Step 6: End of Turn. Aircraft squadrons return to air bases within their movement ranges. Both players remove all of their detection markers from the map and their "Detection Markers" space and return them to the offboard pile.
These Turn Steps are summarized at the back of the rule book for handy reference during the game.
Moving Pieces
How Far a Piece Moves
Ships and submarines can move three spaces during the Sea Movement Steps of the turn. You must move each piece as far as you plan to move it before starting to move another piece. Pieces can move together if they start in the same space, move along the same path of spaces, and stop moving in the same space.
Crowding
Up to three of your ship pieces can be together in a space when you are done moving. One of these pieces can be a task force marker. However, you cannot have one of your submarines and one of your task forces in the same space at the end of your move. All of your pieces can move freely through spaces containing other, friendly pieces; the restrictions apply when all your moving is done.
A port is a special kind of space. You can have any number of surface ships, submarines, and task forces in a port. There are no crowding restrictions in ports.
If you move into a space containing enemy submarines you may have to interrupt or stop your move, if your opponent plays a detection marker.
You can move through a space containing enemy surface ships as if they weren't there, or move in and stop. Surface ships cannot try to detect enemy ships during the Movement Step.
Task Forces
A task force is a large group of surface ships. A task force lets more than three ships be in a space at once. All of the ships in a task force are placed on the task force card. The task force piece is placed on the map. The task force piece moves like a regular surface ship, but it represents all of the ships in the task force.
Example: All of the ships in the Alpha task force spaces on the NATO Task Force Card are treated as if they are in the space on the map where the Alpha task force piece is.
A task force can contain up to 12 small surface ships and three large surface ships. It cannot contain any submarines.
Surface ships that are in the same map space as a task force at the start of their Movement Step can join the task force. Or, conversely, a task force can drop off ships before it moves. Any number of ships can leave the task force, as long as no more than three of your ships occupy a single space at the end of your move.
If two or more ships are in a space at the start of your Movement Step, you can form a task force. Remove the ships from the map space and arrange them in an empty task force box on the Task Force Card. Place the appropriate task force piece in the map space.
If a task force ever has only one ship in it, that task force marker is removed from play.
Ships in a task force must be in the anti-submarine (ASW) screen, the antiaircraft (AA) screen, or the center of the task force. At least half of the ships in the task force must be in the ASW screen. The AA screen must contain more ships than the center of the task force. Within these restrictions, you can arrange ships in your task forces however you like. (The significance of the various parts of the task force is explained in the battle rules.)
You can rearrange the ships in a task force at the start of your Movement Step. Sometimes you have to do this if battle losses or detachments have left your task force with too few ships in one of the sections.
Example: Soviet submarines attacked NATO task force Echo last turn. Three NATO ships were sunk, all from the ASW screen. At the start of his Movement Step this turn, the NATO player has two ships in Echo's center, three in its AA screen, and only two remaining in its ASW screen. He must either move ships into his ASW screen or move ships out of the task force so that the task force complies with the rules.
Effects of Detection on Ship Movement
When you move a ship into a space containing one or more enemy submarines, the other player can play detection markers in that space. You must stop all ship movement temporarily while your opponent conducts his search.
If your pieces have not moved their full three spaces, they can continue moving after the search, and any resulting battle, is finished. If your piece is detected and damaged in an attack, it cannot move any farther.
Ports
A port counts as a space when moving ships and task forces. It does not count as a space for air squadrons, however, because it is part of the land space that surrounds it. If an air squadron can reach the land space, it can reach the port inside it.
Air squadrons can fly over enemy ports if the land space does not contain an enemy air base. Ships and task forces can never move into enemy ports.
Air Bases
All air squadrons begin the game on air bases (NATO air bases are blue, Soviet air bases are red). They must return to air bases during step 7 of each turn. (Printed as "step 7" in the rulebook, which has only six turn steps; the returning step is Step 6, End of Turn.)
An air base with no number printed in its box can hold as many air squadrons as you want to put in it. An air base with a number printed in its box can only hold that many squadrons.
Aircraft carriers are also air bases (see below).
Aircraft Carriers
Aircraft carriers serve as mobile air bases. Each aircraft carrier has a box on its Task Force Card that lists how many and what type of air squadrons start the game on that aircraft carrier. These air squadrons can use land bases as well as aircraft carriers. An aircraft carrier can never hold more aircraft of any type than are listed on the card. It can never base any type of aircraft that is not listed in its box on the card.
Aircraft squadrons based on an aircraft carrier move with the carrier when it moves.
Moving Air Squadrons
How far an air squadron can move depends on its range:
- Short range air squadrons can move 1 space;
- Medium range air squadrons can move 4 spaces;
- Long range air squadrons can move 8 spaces.
Air squadrons can use their full range during turn step 4, Air Movement. They can move their full range again during step 7 when they return to air bases. There is no restriction on how many air squadrons can move into a space during turn step 4; players can stack as many squadrons into a single space as they want. The only restriction applies during step 7, when players must observe air base restrictions.
Once you have moved air squadrons into a space during step 4 and then turned air movement over to your opponent, you cannot move any more aircraft into that space that turn.
Example: The Soviet player moves 10 squadrons into the Iceland space and then lets the NATO player move air squadrons. Regardless of what the NATO player does, the Soviet player cannot move any more squadrons into Iceland this turn.
A returning air squadron can land at any of your air bases within its range. It doesn't have to go back to the air base where it started. If it cannot reach a base, however, it is destroyed and removed from the game.
An air squadron can never enter or move through a land space containing an enemy air base. It can enter a space containing an enemy aircraft carrier.
Detecting Enemy Pieces
Every time a detection marker is played, follow these steps:
Detection Steps
Step 1: Marker Placement. The Detection Steps start when one player plays one or more detection markers, either during his opponent's Movement Step or during the Battle Step. Whenever you play a detection marker, you give your opponent the chance to play detection markers of his own, but only in the same space where you just played.
Step 2: The Search. Whoever played the first detection marker in this space conducts all of his searches first. When he finishes, the other player conducts his searches. Before rolling the die for a search, you must indicate which ship or air squadron is searching and whether it is looking for submarines, surface ships, or aircraft.
Step 3: Battle Decision. If neither player detected any enemy pieces, continue with the turn wherever you left off (either the Movement Step or the Battle Step). If you detected enemy pieces and want to attack, go to the Battle Steps. If both sides detected enemy pieces and both want to fight, the player who did his searches first is the attacker. If pieces were detected but neither player wants to fight, continue with the turn.
The Detection Steps are repeated at the back of the rule book for easy reference during play.
Using Detection Markers
Each detection marker in your "Detection Markers" box on the map enables you to conduct one search during the turn. To conduct a search, you must play a detection marker. Simply take one of your detection markers from the map box and place it in the space where you want to search.
When you play a detection marker, it must be placed with either the sonar or radar side up. Play the sonar side up if you want to search for submarines. Play the radar side up if you want to search for surface ships or air squadrons.
When you have played all of your detection markers from your "Detection Markers" box, you cannot perform any more searches for the rest of that turn.
At the end of the First Sea Movement, Second Sea Movement, and Combat Steps of the turn, all detection markers that have been played are removed from the map and returned to the off-map piles. Any markers that you do not use in a turn are removed from their box at the end of the turn; you cannot save them for later.
When and Where Detection Markers Can Be Played
- You can play detection markers during your opponent's sea move, if he moves one or more ship pieces into a space where you have at least one submarine. You must play the detection marker immediately, and only in that space.
- You can play detection markers during your sea move, if you move into a space containing an enemy submarine and your opponent plays a detection marker against you. You must play the detection marker immediately, and only in that space.
- You can play detection markers during turn step 5, Combat. These markers can be played in any space where both sides have pieces.
When your opponent plays a detection marker, you are always entitled to play detection markers of your own in that same space (if you have a detection marker left).
Each player can only play detection markers in a particular space once per turn step. However, you can play detection markers in the same space during the Movement Step and again during the Combat Step.
How Many Detection Markers Can Be Played
You can play one detection marker in a space for every ship or air squadron you have in that space. There is only one exception to this rule: in a task force, only those ships in the ASW screen with helicopters can play sonar detection markers.
Example: Soviet task force 2 is operating alone near Iceland. The Soviet player has eight ships in the task force. All of these ships have helicopters. Only four of them, however, are in the ASW screen, so the Soviet player cannot play more than four sonar detection markers in that space.
How to Conduct a Search
When all detection markers have been played in a space, the player who played his markers first conducts his searches.
First, indicate which ship or air squadron is searching and what it is searching for: submarines, surface ships, or air squadrons. Pair up the searching piece with an appropriate detection marker: sonar if searching for submarines, radar if searching for surface ships or air squadrons.
To resolve the search, roll one colored die. If the number rolled is equal to or less than the searching piece's detection rating, you have detected one or more enemy pieces.
If you detected enemy surface ships or submarines, point at one of the enemy pieces; that is the ship you detected. Your opponent must turn the detected piece sideways so you can see what it is. If it is an individual ship, that ship is detected. If it is a task force, every ship in the task force is detected. Your opponent must turn every ship sideways in a detected task force so you can see them.
If you detected air squadrons, roll one white die. The number rolled is the number of air squadrons you detected. Your opponent gets to choose which air squadrons in the space he will reveal. The detected squadrons are turned face up.
No piece can search more than once in a step. For example, a surface ship which uses its radar to search for enemy air squadrons cannot use its radar again to search for surface ships or its helicopter to search for submarines until a later turn step. A piece can search up to two times per turn, however (three if it's a submarine):
- Once during enemy sea movement (if the piece is a submarine and enemy ships enter its space);
- Once during its own movement (if it enters a space containing an enemy submarine and the enemy plays a detection marker);
- And once during the combat step.
An enemy piece can be searched for as often as you want. If, for example, you have six air squadrons in the same space as an enemy task force, you can search for the task force six times. A piece can only be detected once, however; additional detections have no additional effect against an already-detected piece.
Detecting Submarines
Submarines, ASW aircraft squadrons, and surface ships can search for submarines. Normal (non-ASW) aircraft squadrons cannot. Ships in a task force can search for submarines only if the ships are in the ASW screen and have helicopters. If none of the ships in the ASW screen have helicopters, only one sonar detection marker can be played by the task force.
Submarines are very hard to find when they don't want to be found. Whenever a piece searches for a submarine, its detection rating is reduced. A NATO piece has its detection rating reduced by one when it searches for Soviet submarines. A Soviet piece has its detection rating reduced by two when it searches for NATO submarines.
Example: A NATO submarine with a detection rating of 6 needs to roll a 5 or less to detect a Soviet sub. A Soviet frigate with a detection rating of 4 needs to roll a 2 or less to detect a NATO sub.
Fighting Battles
Regardless of the overall, strategic situation, the player who chose to fight a battle in a particular space is the attacker in that space. If both players want to fight, the player who played the first detection marker in that space is the attacker. The other player is the defender. In any case, both players probably will get the chance to damage and sink enemy ships and squadrons during the fight.
Battle Steps
Step 1: Initial Target Placement. The defending player puts all of his detected pieces onto the Battle Board, placing them in the "Attack First" or "Attack Second" portions of the board.
Step 2: Attacker Commitment. The attacking player puts all of his detected pieces, plus any other pieces from that space that he wants to use in the battle, on the Battle Board in the "Attack First" or "Attack Second" areas.
Step 3: Defender Commitment. The defending player puts any undetected pieces from that space that he wants to use in the battle on the Battle Board, again assigning each piece to either the "Attack First" or "Attack Second" portion of the board.
Step 4: Air Interception. Both players can attack detected enemy aircraft squadrons with aircraft squadrons in their "Attack First" part of the Battle Board. If undetected air squadrons attack, they become detected at the end of the step. Damage takes effect at the end of the step.
Step 5: First Attacks. Pieces in the "Attack First" part of the Battle Board attack detected enemy pieces. Fighters that attacked in step 4 cannot attack again during this step.
During the First Attack Step, no ships in the center of a task force can be attacked.
If undetected ships attack during the first attack step, they become detected at the end of the step.
Pieces in the "Attack First" part of the Battle Boards that are damaged, sunk, or shot down during this step still get to attack first. The damage is not inflicted until the end of the step.
Step 6: Second Attacks. Any pieces in the "Attack Second" part of the Battle Board can attack any detected enemy pieces. All damage takes effect after all attacks have been made.
Step 7: Battle Conclusion. Move all surviving pieces from the Battle Board back to their previous locations on the map or the Task Force Card. Turn all detected pieces away from your opponent; they are not detected any more. Return to your place in the Turn Steps.
The Battle Steps are repeated at the back of the rule book for easy reference during play.
Battle Board diagrams: the Battle Board has a NATO half and a Soviet half. Each half has an "Attack Second" area and an "Attack First" area. The Task Force portion has three columns on each side: Task Force Center, Task Force AA (Anti-Aircraft) and Task Force ASW (Anti-Submarine Warfare). The remaining area (pieces not in task forces) holds non-task force ships, submarines and air squadrons. The center of the board reminds players: pieces with WHITE attack ratings roll 2 dice when they attack surface ships; pieces with YELLOW attack ratings roll 2 dice when they attack aircraft squadrons.
Sidebar: Alfa Class Nuclear Powered Submarines. Displacement: 3,700 tons (submerged). Length: 267 feet. Max Speed: 45 knots (submerged). The Alfa is likely the fastest submarine in the world. A titanium alloy hull allows the Alfa to dive to a depth of 2,500 feet or more—deeper than any other attack submarine. The alloy also makes the sub more difficult to detect with a magnetic anomaly detector (MAD). The major weakness of the Alfa is the great amount of noise generated by its liquid metal nuclear reactor. Six Alfas are known to be in service with the Soviet navy.
Placing Pieces on the Battle Board
Only pieces in the space where the detection markers were played can be placed on the Battle Board. Pieces in a task force must be placed in the same spaces on the Battle Board (ASW screen, AA screen, or task force center) that they occupied on the Task Force Card.
Surface ships that were not in a task force, and all submarines and air squadrons, are placed in the non-task force portion of the Battle Board.
Detected pieces are turned so both players can see them on the Battle Board. Undetected pieces are kept turned away from your opponent on the Battle Board.
Pieces must be placed in either the "Attack First" or "Attack Second" part of the Battle Board. You can put as many pieces as you want in either category. Pieces in the "Attack First" area attack during the First Attack Step and then become detected. Those in the "Attack Second" area attack during the Second Attack Step.
How To Conduct Attacks
Each piece in a battle must attack a specific enemy piece. Each piece can attack once during a battle.
Before rolling any dice, tell your opponent which of his pieces is being attacked. Select one or more of your pieces to attack it. Roll one colored die for each attacking piece. If the number rolled is equal to or lower than your piece's attack rating, you hit the enemy piece. There are two exceptions to this rule: use a white die when attacking with an undetected submarine; you get to roll two dice when attacking with certain pieces (this is explained in the next rule).
Every piece that you designate to attack a specific enemy piece must do so, even if you destroy the enemy before all of your pieces get to shoot. Likewise, if all of your pieces miss a particular enemy, you can't decide afterward to attack with more.
Example: The Soviet player designates two Kara cruisers to attack a detected Trafalgar submarine. Both cruisers hit the submarine. Only one hit is needed to sink a submarine, so the second shot has no effect. The second cruiser cannot shoot at a different target.
Example: The same two cruisers are designated to attack a submarine. Both cruisers miss. The submarine survives this round of battle, because the Soviet player only designated those two pieces to attack. If this is the First Attack Step the submarine can be attacked again in the Second Attack Step.
Some pieces are entitled to roll two dice, instead of one, when they attack.
Which Pieces Roll Two Dice
You can roll two dice when one of your pieces with a white attack rating attacks an enemy surface ship.
You can roll two dice when one of your pieces with a yellow attack rating attacks an enemy aircraft squadron.
Whenever a piece gets to attack with two dice, both dice must be used against the same enemy piece.
Restrictions on Attacking
- You cannot attack enemy pieces that are not detected.
- Submarines cannot attack aircraft squadrons.
- ASW aircraft are the only aircraft squadrons that can attack submarines.
Effects of Hits on Ships
A submarine is sunk by a single hit. Any hit on a submarine sinks it; remove the piece from play.
Small surface ships can survive one hit. When a small surface ship is hit once, mark it with a damage flag. A second hit sinks the ship; remove it from play.
Large surface ships can survive two hits. Mark the ship with a damage flag the first time it is hit. The second time it is hit, pull the flag out slightly to show two damage flags. The third hit sinks a large surface ship; remove it from play.
A damaged surface ship can only move one space per turn. Aircraft squadrons can't land on a damaged aircraft carrier (one or two hits). A damaged carrier with only one hit can still launch its squadrons, but they can't land on the carrier. Any squadrons on an aircraft carrier when it suffers its second hit are destroyed.
Whenever an attacking piece rolls a one, it scores a Critical Hit. A critical hit counts as two hits.
Effects of Hits on Aircraft Squadrons
A hit does not always damage an aircraft squadron. If the attack die roll was a one or a two, the target squadron is shot down; remove it from play. If the attack die roll was a three or higher, the aircraft squadron is driven away. It must return to an airbase at the end of this battle step.
Optional Rules
After you have played a few scenarios, you may want to add the following optional rules to your game. They make the game more realistic with only a small increase in complexity.
You can use some, all, or none of these optional rules, but both players must agree on which optional rules to use before starting to play.
Missile Defense
Surface ships and aircraft squadrons can attack incoming missiles instead of their opponent's pieces. Pieces that do this must be placed in the "Attack Second" area of the Battle Board. Then, whenever one of your surface ships is hit by an enemy surface ship or air squadron, you can try to negate that hit. Tell your opponent how many pieces are attacking the incoming missile. Roll a normal attack for each piece, but increase its attack rating by one when it is attacking a missile. If this missile defense attack succeeds, the hit against the ship or air squadron is canceled. An anti-missile attack still counts as that ship's one attack for the battle. Pieces with white attack ratings can roll two dice against incoming missiles.
Example: Nine Soviet Backfire squadrons attack a U.S. carrier task force. Five of the Backfires attack the Nimitz. Nimitz is hit three times. The U.S. player announces that all five of his Knox-class frigates in the "Attack Second" ring will fire to protect Nimitz. The U.S. player rolls 1, 3, 3, 5, and 9. Four of these shots hit, knocking down all three of the Soviet missiles; the fourth hit has no effect because all of the missiles were destroyed. The remaining four Backfires damage a U.S. destroyer and cruiser. The U.S. player cannot use anti-missile fire to protect those ships because all of his eligible ships have already fired in defense of Nimitz.
Jamming
Some aircraft squadrons protect other squadrons by jamming enemy radar. Only those air squadrons with no attack ratings can jam (AWACS, Hawkeyes, and Bears).
A jamming aircraft squadron is turned face up (it is detected automatically) and placed on top of the squadrons it is protecting. A jamming aircraft can screen any number of squadrons. Up to three aircraft can jam a given space.
Each jamming aircraft reduces enemy detection ratings by one when used against aircraft in the protected stack. An aircraft squadron cannot attack or detect enemy pieces on a turn when it jams.
Fast Submarines
The Soviet Alfa and Akula submarines are very fast. These ships can move four spaces per turn instead of three.
Reaction Attacks
An undetected piece which attacks in the second battle round escapes automatically under the basic rules. In fact, some sort of limited counterattack would always be possible. If your opponent has undetected pieces in the "Attack Second" portion of the Battle Board, you can designate any number of ships and air squadrons for Final Attacks. These pieces can't attack during the first or second battle rounds, although they can be attacked normally. At the end of the second battle round, all enemy pieces which attacked are detected. If any of the pieces you designated for final attacks are still intact, one of them can attack. It must attack an enemy piece which was undetected until after the second round.
Decoy Submarine Pieces
Each player can use two decoy submarine pieces in any scenario where the player has submarines. Decoys can move and use detection markers like any other submarine from the player's force. If a decoy uses a detection marker, its search fails automatically. If a decoy is detected, remove it from play temporarily. At the start of your next Sea Movement Step, you can place the decoy in any space containing another of your submarine (or decoy!) pieces.
Anti-Aircraft Quality
Instead of destroying an air squadron whenever a 1 or 2 is rolled, this rule reflects the qualities of individual fighters and AA systems.
An aircraft squadron is destroyed if the die roll against it is equal to or less than one-half of the attacking piece's attack rating. Any other hit forces the squadron to return to its base.
Example: An F-14 squadron (attack rating = 6) destroys an enemy air squadron with a die roll of 1, 2, or 3, while a 4, 5, or 6 sends the enemy back to its base. A Grisha-class light frigate (attack rating = 3) only destroys an enemy air squadron with a die roll of 1, while a 2 or 3 sends the enemy air squadron home.
Anti-Aircraft Doctrine
Ships equipped with extensive AA weapons (those with yellow attack ratings) must be positioned properly to take full advantage of their equipment. You can roll two dice when one of your pieces with a yellow attack rating attacks an enemy aircraft squadron, if:
- Your attacking piece is not part of a task force, or;
- Your attacking piece is in the AA screen or center of a task force.
Splitting Attack Ratings Against Multiple Targets
Pieces which get to roll two dice in battle can use them against separate targets. Both attacks have to be announced before the dice are rolled.
Airbase Defense SAMs
The prohibition against flying over enemy air bases reflects the presence of surface-to-air missile defenses (SAMs) at these bases. These SAM launchers can be represented directly in the game. Allow aircraft to fly over enemy air bases, but doing so exposes them to attack from the ground.
Each land air base space has an attack rating equal to the number of air squadrons that can base there. Air bases with unlimited capacity have an attack rating of 6. Every time enemy air squadrons move into your air base space, you can immediately roll two colored dice to attack those planes. No detection marker or search is necessary: SAMs can attack undetected enemy aircraft. Hits have the usual effect. Without flipping the counter to its detected side, point to which of the enemy aircraft squadrons you want to attack.
Aircraft on Patrol
Long range aircraft can be assigned to patrol an area. When you move a long range aircraft squadron to a space, you can announce that the squadron is patrolling that area. The squadron does not have to return to base at the end of the turn; it can stay on patrol until it is shot down or forced to land. However, it cannot move to any other space until after it returns to its base, either because of combat or at the end of a turn.
Alternately, patrolling aircraft can accompany a task force. These aircraft are placed on the Task Force Card with the task force. They can be in the ASW screen, AA screen, or center of the task force. They do not remain in one space; instead, they are always with the task force. The only other move they can make is to return to base at the end of a turn. Aircraft patrolling with a task force do not need to stay within range of a base when the task force moves. The task force must be within range of the base when the squadron joins it, however. The squadron can return to any friendly air base, regardless of range.
Amphibious Assault
This optional rule is used in scenarios where at least one player has an amphibious assault vessel (LPD or LHA). Players can use amphibious assault to take air bases (but not ports) away from their opponents.
The only air bases that can be taken by amphibious assault are those on Greenland, Iceland, the Faeroe Islands, and Norway. All of these air bases begin the game under NATO control. If one is taken by the Soviets, the NATO player can use amphibious assault to try to take it back.
An amphibious assault happens at the end of turn step 5 after all detection attempts and battles are finished. The assaulting player rolls a colored die. The amphibious group's attack rating is determined by the air units that are still flying in the space with the assault vessel.
| Attack rating | Situation |
|---|---|
| 9 | Only the assaulting player has air squadrons in the area. |
| 7 | The assaulting player has more air squadrons than his opponent in the area. |
| 4 | Both players have air squadrons in the area, but the assaulting player does not have more. |
| 3 | No one has air squadrons in the area. |
| 1 | Only the defender has air squadrons in the area. |
Subtract 2 from the die roll if the amphibious vessel has suffered any damage. If the attacker rolls a number equal to or less than his attack rating, he captures the air base.
Shallow Water Detection
A submarine is easier to detect in shallow water. The light blue sea areas are shallow water. The detection rating of any piece searching for a submarine in shallow water is increased by 1. This is cumulative with modifiers for detecting submarines.
SOSUS and Standing Patrols
The NATO and Soviet symbols printed on the map mark spaces where these forces maintain constant surveillance. They represent a combination of patrolling surface ships and aircraft, and SOSUS (SOnar SUrveillance System). These symbols are referred to as Patrol Symbols.
Patrol symbols act as immobile, unarmed submarines. Whenever an enemy ship enters a space containing one of your patrol symbols, or is in the space during turn step 5, you can play a detection marker (sonar or radar) and search for the piece. Patrol symbols have a detection rating of 5. They cannot attack, however; their purpose is to aid friendly ships and aircraft and to detect and identify enemy vessels.
Damage Control
During step 6 of each turn, players can try to repair damaged ships.
If the ship is at sea (not in a port space), roll one colored die. You can remove one damage flag if the die roll is 10.
If the ship is in a port space, roll one white die. If the die roll is 5 or 6, the ship is completely repaired and can sail next turn. If the die roll is 1 or 2, the ship is too severely damaged to be repaired in the course of the game; remove it from play. If the die roll is 3 or 4, there is no effect; the ship stays in port and is still damaged.
Tankers
Airborne tankers are used to extend the range of aircraft squadrons. During aircraft movement, a tanker can fly with two other aircraft squadrons. All three squadrons can fly to the limit of the tanker's range. The two accompanying aircraft can then continue on as if their movement started from the tanker. Two medium-range aircraft, for example, could fly eight spaces with a tanker and four more on their own to reach 12 spaces away from their air base. If the tanker is destroyed or forced to return to its base, however, the aircraft it is supporting are destroyed, unless there is another friendly air base within range.
Tankers are used only in scenario 8, War in the Atlantic. That scenario describes how to set up the pieces.
Examples of Play
Example 1: Task Force Alpha intends to move three spaces. It drops off two frigates in the first space, before the task force moves. After the task force is done moving, the two frigates also move three spaces along a parallel course. This concludes the NATO Sea Movement Step. In the Air Movement Step, two squadrons of A-6s from Nimitz (in Task Force Alpha) fly four spaces to attack the Soviet vessel in the Norwegian Sea.
Example 2: As the NATO task force moves into the space containing a Soviet submarine, the Soviet player announces that his submarine is trying to detect the NATO task force. The task force stops moving temporarily while the search is resolved. The Soviet player plays three detection markers in the space. The NATO player has the option to respond with detection markers of his own. He decides to play four sonar detection markers. This is the maximum number he can play because he has only four helicopter-equipped ships in his ASW screen. When the searches are resolved, the Soviet player rolls 1, 5, and 8; the task force is detected. The NATO player rolls 2, 3, 5, and 8; two Soviet submarines are detected.
Example 3: This is how Task Force Alpha is organized on the NATO Task Force Card. (The card has Anti-Aircraft Screen and Anti-Submarine Warfare Screen areas, boxes for Task Forces Alpha, Bravo, Charley and Delta, and a "Pieces Not in Task Forces" area for surface ships.)
Example 4: The NATO task force and Soviet submarines are deployed on the Battle Board for the battle. NATO is the defender in this battle (the Soviets played the first detection marker) so all detected NATO pieces must be placed first. All of the NATO pieces must be placed in the Task Force portion of the board. Because two Soviet submarines are detected, the NATO player places all of his ASW and AA screen ships in the Attack First portion of the board. By doing this, he hopes to force the Soviet player to place his detected subs in the Attack First portion of the board, where they cannot attack the center of the task force. He decides to hold Saipan and Nimitz until the second round, in case either of the detected submarines survives the first round of attacks. Because this battle is occurring during the Sea Movement Step, Nimitz cannot launch any of its air squadrons.
The Soviet submarines are not part of a task force so they must be placed at the top of the Battle Board. Seeing that his detected submarines probably will not survive the first round of battle, the Soviet player places them in the Attack First portion of the board. He places his undetected submarine in the Attack Second portion of the board, where it can attack the center of the NATO task force and then escape. The Soviet player will use two white dice when the undetected sub attacks (two dice because the sub has a white attack rating, and white dice because it is undetected).
Hidden Movement Map
Two pages (16-17) of the rulebook reproduce the game map in a printable form for hidden movement (map only, no rules text). It shows the sea and land spaces, NATO and Soviet air bases (with capacities), ports (Leningrad, Severomorsk, Le Havre, New York, Norfolk), patrol symbols, and the NATO and Soviet Detection Markers spaces. Sweden is marked "No pieces may enter."
Scenarios
The Hunt for Red October game has eight scenarios. Each scenario is a different situation, with different groups of ships, aircraft, and starting locations. The scenarios all start with a brief description of the situation. Orders of Battle lists the forces involved on both sides. When aircraft carriers are listed, the carrier comes with a full load of aircraft squadrons. Setting Up describes where the pieces are when the game starts. How to Win describes what each side's goal is. Special Rules contains any changes to the standard rules, or rules that apply only to that scenario.
The first three scenarios—Arctic Patrol, The Hunt for Red October, and North Atlantic Convoy—are good choices for your first few games. Scenarios 4 through 7—MAG to Norway, Long Live the Queen, The Gauntlet, and Amphibious Assault—use more pieces and take more time to play, so they are better choices after you have played the game a few times and are familiar with the rules. The last scenario—War in the Atlantic—uses all of the pieces in the game and can last many hours as players battle back and forth across the sea.
Scenario 1: Arctic Patrol
The chill gray waters near the Arctic Circle conceal the first naval battleground of the war. Neither side has been able to bring major surface forces to bear, but silent shapes slip below the surface of the sea, trying to strike the first lethal blows.
Orders of Battle. Each player has a force of submarines, aided by a few marine reconnaissance aircraft, with which to gain control of the Norwegian Sea. If the optional rule allowing decoys is being used, then add two decoys to both sides' pieces.
NATO:
- 4 Los Angeles class submarines
- 1 Trafalgar class submarine
- 1 P-3C Orion air squadron
Soviet:
- 3 Alfa class submarines
- 4 Victor class submarines
- 2 Tango class submarines
- 2 IL-38 air squadrons
Setting Up. The Soviet player places his air squadrons in the Kola air base. He then places his submarines no more than two per space, within three spaces of Kola.
The NATO player places his air squadron on Iceland and sets up his pieces, one per space, within three spaces of Iceland.
How to Win. The game ends when the Soviet player rolls a 5 or 6 on the white die during the Initiative step. The game cannot end until turn 3, however; a roll of 5 or 6 on the first two turns does not end the game.
Each player totals up the points he has earned at the end of the game. Players get:
- 2 points per enemy sub sunk;
- 3 points for each of your subs that is within five spaces of the enemy airbase.
Special Rules. The air squadrons can fly missions normally, but they must return to the airbase where they started the game at the end of each turn.
Scenario 2: The Hunt for Red October
Can you, as Captain Marko Ramius, skillfully guide your submarine from the chill waters near the Arctic Ocean to the safety of an American port? Or, can you, with the entire force of the Soviet Navy at your disposal, locate and destroy the traitor who threatens to turn over your most advanced vessel to the capitalist foe?
One player controls Red October. Using special, hidden movement, he tries to escape across the North Atlantic, remaining undetected all the while.
The other player controls the rest of the Soviet Navy. He combs the waters of the Atlantic Ocean, setting up underwater blockades with submarines while his surface fleets desperately search for the escaping Red October. If he finds it, he must sink it; Red October cannot be allowed to fall into American hands!
Orders of Battle.
- Red October (SSBN), Captain Ramius (detection 4, attack 6).
- Soviet Navy: 12 submarines; Task Force 1 (Kiev with 5 escorts); Task Force 2 (Kirov with 5 escorts); Task Force 3 (Minsk with 5 escorts).
Setting Up. Put all of the Soviet submarines in a bowl, hat, box lid, or other convenient container. Then draw 12 submarines randomly—these form your submarine force. Then select 15 (small) ships of your choice to escort Kiev, Kirov, and Minsk.
The Soviet player can place six submarines, one per space, anywhere on the board. The other submarines and two task forces start in the port of Severomorsk. One Soviet task force can begin in the North Atlantic.
Red October begins the game anywhere in the North Atlantic within four sea spaces of Severomorsk. Do not, however, place the Red October piece on the board. See the hidden movement rule.
How To Win. The Red October player wins by entering an American port in 10 turns or less. The Soviet player wins by sinking Red October.
Special Rules.
The Soviet player always has the initiative in this scenario. He does not roll a die to get detection markers. Instead, every Soviet piece can try to detect Red October once per turn.
All Soviet ships suffer a -2 penalty to their detection ratings when searching for Red October, instead of the usual -1 for detecting a Soviet submarine.
The Red October piece is not used on the game map. Instead, the player uses a copy of the map printed on page 16 of the rules (or a photocopy of that page) to track the location of his submarine. Place a numeral 1 in the space where Red October begins. It can move one space a turn, so place a numeral 2 in the space it moves to on the second turn, a 3 on the space it moves to on the third turn, and so on.
Red October is a large piece, so three hits are necessary to sink it. The first hit reduces its speed to one space per turn.
Only Soviet submarines can enter the two spaces adjacent to Norfolk and New York. Soviet surface ships and air squadrons cannot enter these spaces. Red October can enter any sea or American port space on the map.
Scenario 3: North Atlantic Convoy
Protecting sea lanes has historically been one of the primary functions of a navy. Never was this more graphically illustrated than during the world wars, when battles against German submarines proved crucial to Allied victory. The North Atlantic is sure to be a battleground again, as NATO convoys strive to maintain the lifeline between American production and the European front line.
Orders of Battle.
NATO:
- 1 convoy piece
- 4 Perry class frigates
- 4 Knox class frigates
- 2 Spruance class destroyers
- 4 Los Angeles class submarines
Soviet:
- 4 Victor class submarines
Setting Up. The Soviet player places his submarines in any spaces he wants, except for spaces with NATO patrol symbols. He can place up to two subs per space.
The NATO player places all of his surface ships, including the convoy, in the port of New York. All of these ships form a task force. He can place his submarines, up to two per space, in any spaces not occupied by Soviet subs.
How to Win. The scenario lasts five turns, or until the convoy marker reaches the port of Le Havre, whichever happens first.
The Soviet player wins automatically if the convoy has not reached Le Havre after five turns. If it reaches Le Havre, each player totals up his victory points. The player with the most points wins.
The Soviet player gets:
- 2 points per merchant ship sunk
- 2 points per NATO warship sunk (including subs)
- 1 point per NATO warship damaged
The NATO player gets:
- 3 points per Soviet sub sunk
Special Rules. The convoy piece (and thus, any task force containing it) can only move two spaces (not three) per turn.
The convoy piece represents dozens of merchant ships. The piece itself can never be sunk. Each hit against the convoy piece sinks a merchant ship. Players must keep track of merchant losses on a separate sheet of paper.
Scenario 4: MAG to Norway
With the main blow to NATO forces in Germany comes a coordinated drive, with airborne, amphibious, and mechanized Soviet divisions pushing into Norway. Their target is the strategic airfields that control the Norwegian Sea. The Norwegian army, hastily mobilized, offers stubborn resistance, but help is needed.
A U.S. Marine Assault Group swiftly boards its transport in Virginia. For the next several days, this is one of the most important vessels in the world. Dozens of ships are assigned to protect it, and the Soviets try everything they can to sink it.
Setting Up. All Soviet surface ships are placed in two task forces and start in the port of Severomorsk. The air squadrons start at the Kola air base. The submarines can be placed, one per space, in any spaces except those with NATO patrol symbols.
NATO surface ships are placed in three task forces, one each with Saipan, Nimitz, and Wisconsin. The Saipan task force starts in the port of Virginia. The other two must be placed within three spaces of Virginia. The submarines can be placed in any sea spaces except those with Soviet patrol markers or Soviet submarines. The F-15s and Orions start at Iceland.
How To Win. The NATO player wins if he moves Saipan into a space adjacent to Norway and keeps her there for one full turn. The Soviet player wins by preventing this.
Special Rules. Both players place four detection markers in their "Detection Markers" space at the start of the turn, instead of the usual two.
Orders of Battle.
NATO:
- Saipan
- Nimitz
- Wisconsin
- 6 Perry class frigates
- 7 Knox class frigates
- 2 Ticonderoga class cruisers
- 5 Spruance class destroyers
- 5 Adams class destroyers
- 4 Los Angeles class submarines
- 2 Sturgeon class submarines
- 2 F-15 air squadrons
- 2 P-3C Orion air squadrons
Soviet:
- Kiev
- Kirov
- 4 Grisha class frigates
- 7 Krivak class frigates
- 4 Kara class cruisers
- 4 Kresta class cruisers
- 8 Victor class submarines
- 3 Tango class submarines
- 2 Alfa class submarines
- 6 Backfire air squadrons
- 4 Blinder air squadrons
- 3 Bear air squadrons
- 4 MiG-29 air squadrons
- 2 MiG-23 air squadrons
- 2 MiG-31 air squadrons
Scenario 5: Long Live the Queen!
An immediate threat is created by the sudden sortie of a Soviet fleet striking out for the North Sea. American forces are scattered all over the ocean. The Royal Navy must once again defend the shores of England!
Setting Up. British surface ships are placed in one task force in any sea space adjacent to Great Britain. The aircraft squadrons are placed in Great Britain. The subs are placed, one per space, in any spaces the NATO player wants.
Soviet surface ships are placed in one task force, one or two spaces away from Severomorsk. The subs are placed, no more than two per space, in any spaces not occupied by British subs or NATO patrol markers.
How To Win. The game ends anytime after the second turn when only one player has surface ships in the North Sea. (The North Sea is the two sea areas containing the words "North Sea" and "Scotland.") The last player to have a surface ship anywhere in the North Sea is the winner.
Orders of Battle.
NATO:
- Invincible
- 3 Leander class frigates
- 4 Broadsword class frigates
- 3 Trafalgar class submarines
- 2 Tornado air squadrons
- 3 Nimrod air squadrons
Soviet:
- Kiev
- 2 Grisha class frigates
- 3 Krivak class frigates
- 2 Sovremenny class destroyers
- 2 Kresta class cruisers
- 3 Victor class submarines
- 2 Alfa class submarines
- 1 Charlie class submarine
Scenario 6: The Gauntlet
A carefully formed plan is set into motion: a powerful task force from the Soviet Mediterranean Fleet is to sail northward to join the Northern Fleet before hostilities erupt. But the timing is off, and war breaks out before the task force sets out. Including the new super carrier, Kremlin, the fleet must run through the heart of NATO sea power to reach safety in the north.
Setting Up. All of the Soviet ships are placed in a single task force in the Gibraltar space. All Soviet air squadrons are placed at Kola.
NATO pieces are assembled into three or four task forces. Each task force can have no more than one aircraft carrier. NATO task forces are placed on the map using this procedure:
The NATO player chooses a space (other than the space containing the Soviet fleet) where he would like to start his task force. The Soviet player rolls the colored die. If the result is 0, the fleet starts right where the NATO player wants it to. If the result is 1 through 9, however, the Soviet player chooses any sea space that many spaces away from the space chosen by the NATO player. That is where the task force begins.
Example: If the die roll is a 6, the Soviet player puts the NATO fleet in a space that is six spaces away from the spot chosen by the NATO player.
This procedure is repeated for each NATO fleet. No two NATO fleets can start in the same space.
NATO submarines are set up in spaces containing NATO patrol symbols, one submarine per space. The two Tornado squadrons are placed in England.
How to Win. The game ends when all Soviet ships have reached Severomorsk or have been sunk.
The player with the most victory points at the end of the game wins. Victory points are earned as follows:
- 5 points for each large enemy ship sunk
- 3 points for each small enemy ship sunk
- 1 point for each hit inflicted on surviving enemy ships
- 10 points for each Soviet ship that reaches Severomorsk (Soviet player only)
Sidebar: Kiev Class Aircraft Carrier. Displacement: 42,000 tons. Length: 899 feet. Max Speed: 32 knots. The Kiev class of ships might better be described as aircraft carrying cruisers; they are not aircraft carriers in the same sense as U.S. vessels like Nimitz. The four Kiev vessels are the largest Soviet warships currently afloat. The ships are an interesting blend of armament and airgroup. They carry surface to surface (SS) and anti-submarine warfare (ASW) weaponry in addition to their anti-aircraft (AA) missiles. The airgroup is made up primarily of Hormone helicopters, although they also carry a squadron of the virtually obsolete Forger vertical take-off and landing (VTOL) fighters.
Orders of Battle.
NATO:
- America
- Nimitz
- Wisconsin
- 6 Perry class frigates
- 7 Knox class frigates
- 2 Ticonderoga class cruisers
- 5 Spruance class destroyers
- 5 Adams class destroyers
- 4 Los Angeles class submarines
- 1 Sturgeon class submarine
- Invincible
- 3 Leander class frigates
- 4 Broadsword class frigates
- 2 Tornado air squadrons
Soviet:
- Kremlin
- Kiev
- 3 Grisha class frigates
- 2 Krivak class frigates
- 2 Sovremenny class destroyers
- 3 Kara class cruisers
- 1 Kresta class cruiser
- 3 MiG-29 air squadrons
- 3 Badger air squadrons
Scenario 7: Amphibious Assault
Losses in the first phases of the war are heavy on both sides. Still, the Soviets take the offensive. A strong task force sails from Severomorsk for an unknown destination. It contains the large amphibious assault vessel Ivan Rogov. NATO forces must rally to defeat this invasion force before it can land.
Setting Up. Each player arranges his surface ships into two or three task forces. All Soviet task forces start in Severomorsk. One NATO task force must be placed adjacent to Le Havre. All other NATO task forces must be placed within two spaces of the United States.
Players then take turns placing submarines on the board. NATO places the first submarine. Only one submarine can be placed per space.
How to Win. Before the game starts, the Soviet player secretly selects a target for his invasion. It must be Greenland, Iceland, or the Faeroes. The Soviet player writes this on a slip of paper and sets it aside.
The NATO player wins by sinking Ivan Rogov. The Soviet player wins by moving Ivan Rogov adjacent to his target space and keeping it there for one full turn.
Special Rules. At the start of each turn, both players put four detection markers in their "Detection Markers" boxes instead of the usual two.
Sidebar: Nimitz Class Nuclear-Powered Aircraft Carrier. Displacement: 91,400 tons. Length: 1,092 feet. Max Speed: 30+ knots. Nimitz class carriers are the largest warships in the world. They carry airgroups totaling more than 85 aircraft, including two squadrons of F-14 Tomcats. The advanced reactor powering the vessel needs replenishment only after 13 years of operation. There are currently four ships in the class, with two more—Abraham Lincoln and George Washington—under construction. The nuclear-powered carrier epitomizes the capital ship of the U.S. Navy, and is a vessel unmatched by any other nation in the world.
Orders of Battle.
NATO:
- Foch
- John F. Kennedy
- 3 Type A69 frigates
- 5 Perry class frigates
- 2 Type C70 destroyers
- 4 Knox class frigates
- 2 Adams class destroyers
- 3 Sturgeon class submarines
- 1 Ticonderoga class cruiser
- 2 Los Angeles class submarines
Soviet:
- Kremlin
- Ivan Rogov
- Kiev
- 5 Grisha class frigates
- 7 Krivak class frigates
- 5 Kara class cruisers
- 5 Kresta class cruisers
- 4 Sovremenny class destroyers
- 2 Alfa class submarines
- 1 Akula class submarine
- 3 Tango class submarines
Scenario 8: War in the Atlantic
The balloon has gone up! Central Europe is a battleground where the forces of NATO and the Warsaw Pact struggle for military supremacy. Neither side has yet resorted to nuclear weapons.
But the fight on land, as often before in history, depends in many ways on the war at sea. The navies of NATO must keep the convoys flowing from America to Europe, and they must protect their territories from Soviet adventurism. The powerful Soviet navy can put to sea aggressively, striving to break NATO control of the North Atlantic.
Orders of Battle. This scenario uses all of the pieces in the game (except Red October). You don't get them all at the start, however; the rules on setting up explain which pieces you start with and when you get more.
Setting Up. These instructions apply to both players. Put all of your ships on the table with their flags toward you. Shuffle them around so that you do not know which piece is what kind of ship. Then follow your specific instructions for setting up.
Soviet: Pick 12 submarines from your pieces. These begin the game at sea. Set aside the rest of your subs; they enter as reinforcements. Separate Ivan Rogov from the remaining ships. Now draw 16 small ships and one large ship. Set them aside, also, with the subs; they, too, will enter as reinforcements. The 28 surface ships left (including Ivan Rogov) form your fleet at the start of the game.
Place your 12 submarines, no more than two per space, in any deep sea areas, or any shallow sea areas that do not contain NATO patrol symbols. Place your 28 surface ships in Soviet ports, or shallow sea areas that contain Soviet patrol symbols. The ships can be placed individually or in task forces. One task force can be set up in the Baltic Sea.
Place all of the Soviet aircraft counters in a bowl, box lid, or hat. Draw 16 and set them aside with your other reinforcements. Place the rest on any Soviet air bases (including aircraft carriers, where eligible: in this scenario carriers do not automatically start with a full complement of aircraft).
NATO: Set aside the LHA and Convoy pieces. Select the following pieces randomly, to be used as reinforcements: six submarines, 12 small surface ships, and 10 aircraft squadrons. Set these aside. Assemble the remaining ships into six task forces and assign one large ship to each task force. Now allow the Soviet player to randomly select two of these task forces. Place those two task forces with your reinforcements.
Place all the rest of your subs (no more than two per space) in any deep sea or shallow sea spaces which do not contain Soviet patrol symbols. Place the convoy pieces and LHA vessels in American ports. Place your air units on air bases or carriers. Finally, place any remaining task forces within two spaces of a NATO air base, or in any North Atlantic Ocean deep sea spaces.
How to Win. The game lasts until one player has earned at least 150 victory points. After this happens, the game ends as soon as an initiative dice roll in turn step 1 results in a tie. Or, the game ends when all of one player's ships and air squadrons have been sunk or destroyed.
Players earn victory points throughout the game. Keep a running tally on a piece of paper during the game. Players earn points for the following:
- 2 points per enemy aircraft squadron destroyed
- 3 points per small enemy ship sunk
- 5 points per large enemy ship sunk
- 1 point per merchant ship which reaches Le Havre (NATO player only)
- 4 points per merchant ship sunk (Soviet player only)
- 20 points per enemy air base captured or recaptured
- 15 points on any turn during which no convoy moves closer to Le Havre than it was at the start of the turn (Soviet player only)
Special Rules.
Reinforcements: At the start of each turn after the first, both players roll two white dice; one for aircraft, one for ships. You can immediately place that number of ships or aircraft squadrons from your reinforcements on the map. Soviet ships are placed at Severomorsk or Leningrad. Soviet air squadrons are placed at one of the three Soviet air bases. NATO reinforcements are placed in North American ports or air bases.
NATO Task Force Reinforcements: These pieces are not brought on with the normal reinforcement procedure. However, any turn when the NATO player rolls a 1, 2, or 3 on his initiative roll, he can place one of these reinforcement task forces in any deep sea space on the southern edge of the map.
Convoys: Each convoy represents 30 merchant ships. As the convoy comes under enemy attack, however, the NATO player must keep a written record of how many ships are in each convoy. This can be done easily with paper and pencil. Every hit against a convoy sinks one merchant ship.
Convoys (and any task forces containing convoys) can move only two spaces per turn instead of three.
The NATO player can have only one convoy piece in any deep sea space at a time. This means that the next convoy cannot leave a U.S. port until the previous convoy reaches shallow water adjacent to France (or is completely sunk). When a convoy reaches Le Havre, the NATO player returns that piece to either New York or Norfolk at the end of the turn.
Initiative: Both players add 15 detection markers to their "Detection Markers" box at the start of the turn, instead of the usual two.
Ivan Rogov: If Ivan Rogov is sunk, it can be replaced. If the Soviet player rolls 5 or 6 for ship reinforcements, he can substitute Ivan Rogov for another ship. That other ship is removed from play.
Turn, Detection, and Battle Step Summaries
These pages restate the Turn Steps, Detection Steps and Battle Steps given above. Points where the summary's wording adds to the earlier text:
- Step 1 (Initiative): the NATO player rolls a colored die, the Soviet player a white die; the number rolled tells how many extra detection markers both players get, added to the two already in each player's "Detection Markers" space.
- Step 2 (First Sea Movement): the player with the most detection markers in his map space decides whether he moves his ships first or has the other player move first. If both players have the same number of markers, the Soviet player decides who moves first.
- Detection Step 3 (Battle Decision): if you detected enemy pieces and want to attack, go to the Battle Steps. If both sides detected enemy pieces and both want to fight, the player who did his searches first is the attacker. If pieces were detected but neither player wants to fight, continue with the turn.
- Battle Step 5 (First Attacks): during the First Attack step, no ships in the center of a task force can be attacked. Undetected ships that attack during the first attack step become detected at the end of the step. Damage takes effect at the end of the step.