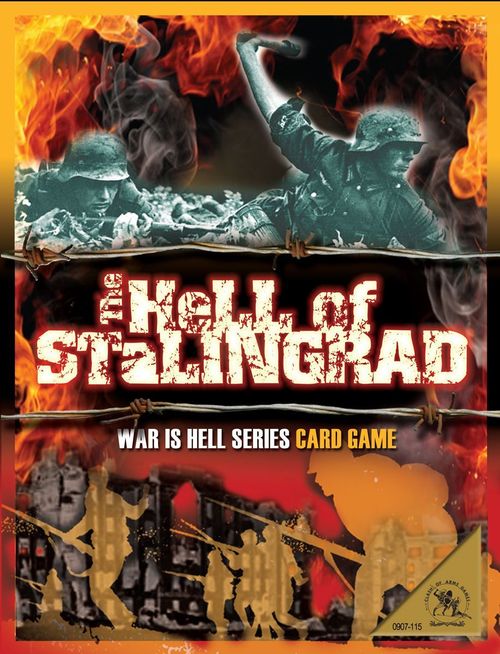
The Hell of Stalingrad
The Hell of Stalingrad Rulebook
Table of Contents
Table of Contents
- Game Components
- Stalingrad U Foundation Course
- Effects, Icons, & Terror Tactics
- Campaign Cards
- Carnage Cards
- Tracking Cards
- Unit Counters
- Building Cards
- Play Mats
- German Cards
- Soviet Cards
- Units on Buildings
- Leader Counters
- Destroying Units
- Sniper Shots
- Soviet Brutality
- Deplete and Supply
- Overrun
- Basic Game
- Stalingrad U Senior Class
- Hero Cards
- Four Player Game
- Game Turn: Strategy Phase
- Game Turn: Battle Phase
- Battle Phase Example
- Game Turn Summary
Game Components
- Combat Decks: 33 Basic German Cards, 33 Basic Soviet Cards, 24 Advanced Cards
- Formation Decks: 18 German Cards, 18 Soviet Cards
- Commanders: for the Two-Player Game and the Four-Player game
- Campaign Decks: 10 German Cards, 10 Soviet Cards
- Building Deck: 24 Building Cards, 4 Volga Cards
- Game Mats
- 4 Tracking Cards and Counters
- 140 Unit Counters
- 26 Leader Counters
- 50 Carnage Cards
- 21 Fire/Inferno Counters, 4 Hold Counters, 4 Bucket Counters
- Reference Charts
Stalingrad U Foundation Course
Grenadiers had a saying, "To survive a week fighting in the ruins meant you had graduated from Stalingrad University, the School of Urban Warfare," where your headstone diploma awaits.
Basic Game
The first section of the rules covers everything you need to know to get started. All the game's components are discussed. The advanced section builds on the foundations laid out in the basic rules and expands on them.
Supreme Commanders
A double-sided Supreme Commander Card provides each player with a starting general on the front and his replacement on the back. The 6th Army begins the siege with the reliable General Paulus, while the Soviet's have the contemptible General Lopatin.
Supreme Commanders are set apart from the action of the game and are only referenced when a player needs to reload his hand with more cards. Supreme Commanders are immune to all card effects and cannot be hurt or injured by any attack.
The only ill that may befall a commander occurs when a Campaign Card has his portrait crossed out. Flip the Supreme Commander card over and use his replacement for the rest of the game. The four-player game uses two additional commanders, each of whom follows their own rules for being replaced.
A. Hand Size
Before the game, each player draws Combat Cards equal to their Supreme Commander's hand size. During the course of play, additional cards may be acquired and there is no limit to the number of cards that may be held at any one time. The Supreme Commander's hand size is referenced when a player takes a Reload Hand Action to fill his hand out with new cards.
B. Reload Hand Action
When a player wishes to add more cards to his hand during a battle, he must take a Reload Hand Action during the Battle Phase. A player is allowed to discard any cards he has in his hand and draw new Combat Cards up to the hand size allowed. Each Supreme Commander also has a unique action (such as adding a unit) that takes place when your hand is reloaded.
Effects, Icons, & Terror Tactics
Effects can come into play from cards or units. Effects are resolved immediately and last only as long as it takes to complete them. If a player cannot use an effect when it is made available the effect is lost.
With the exception of Overrun and Supply, effects only apply to the current battle.
Example: The Precision Kill of StuG added to Dar Gova will only affect other units on Dar Gova.
- An effect is a single occurrence unless indicated otherwise (ex. x2 or x3).
- The Shield and Nationalistic Icons are permanent effects which stay with and identify a unit.
- Terror Tactics are effects used by an Elite Unit and once resolved the unit is flipped over.
- A player who must discard a card lets his opponent randomly select the card to be placed in the Discard Pile.
- The attacker is the player using the effect, the defender is the player receiving the damage.
- Negative Effects work against the player who must use them. Rubble Forts are deadly ruins created by indiscriminate German air or artillery strikes while a Sacrifice requires the destruction of one or more Rifle Units.
Kill: The defender chooses one of his unshielded units to be destroyed per Kill inflicted.
Precision Kill: The attacker chooses any one enemy unit to be destroyed per Precision Kill.
Shielded Icon: A unit with this effect can only be destroyed by Precision Kills.
National Symbol: Icon which identifies a core unit.
Draw: The attacker draws one Combat Card per # shown on the effect.
Discard: The attacker randomly discards a card from defender's hand per #.
Fire: Each Fire added by an effect advances the Fire Counter one space on the Fire Track.
Bucket: Each Bucket added advances the Bucket Counter one space on the Bucket Track.
Overrun: A formation on the Staging Line may be maneuvered to a battle.
Sniper Shot: Any leader, hero, or unshielded unit may be targeted for death.
Deplete: The attacker chooses one formation in the battle to be depleted.
Supply: Any formation in a battle or on the staging line may be supplied.
Rubble Fort: The German Player must add a Fort unit to the Soviet side.
Sacrifice: Soviet Player must destroy a Rifle unit per Sacrifice to use the card.
Campaign Cards
The major events that happen beyond the scope of the siege are represented by the Campaign Cards. One card is drawn during every Strategy Stage.
A. Reinforcement Number
At the beginning of every turn new formations are dealt from the Formation Deck. The total number of formations that a player is allowed to draw is equal to the number of buildings in play, plus the card's Reinforcement Number.
B. Hourglass Advancement (Soviets only)
When a Campaign Card with an hourglass icon is revealed, immediately advance the Hourglass Counter one additional turn.
C. Commander's Disgrace
If a card has your Supreme Commander's portrait crossed out, flip his card. Your replacement commander will be with you for the rest of the game. Ignore any further Commander's Disgrace. Only Paulus and Lopatin are affected by Campaign Cards.
Campaign Card Effects
The text underneath the card's title is the card's effects and are applied when drawn. Some detailed explanations:
Burn Militia Brigade (Soviets Only): If the Soviet Player has a Militia Brigade on the Staging Line, the brigade is placed in the Ash Heap. If no Militia Brigades are in play, a brigade is removed from the Destroyed Pile or the Formation Deck, and sent to the Ash Heap. Reshuffle the Formation Deck if a Militia Brigade is removed.
Discard Hand: The Player's entire hand of Combat Cards are placed in the Discard Pile, he must take a Reload Hand Action during a Battle Phase to redraw a new hand of cards.
Demote General (Germans Only): Each Demotion required by a Campaign Card can be fulfilled one of two ways, either a Lv. 1 General is flipped and becomes a Lv. 0 General or a Lv. 0 General is destroyed.
Execute All Commissars (Soviets Only): Every Soviet Commissar Counter in play is destroyed.
Carnage Cards
Carnage Cards are divided into three sections, each of which is read independently of the others. When a card is drawn, only the section you are referencing is read, while the other sections are ignored. For instance, if you are drawing for a Hold Action, only read the Hold Action section and ignore the other two areas of the card. Under no circumstances are two sections of a Carnage Card referenced for the same draw.
A finished Carnage Card is placed in the Ash Heap. If you run out of Carnage Cards remove them from the Ash Heap and reshuffle.
A. Sniper Shot Section
Anytime a Sniper Shot is used to target a formation's leader or a hero, draw a Carnage Card and reference the sniper section. Each Card has either one of three results:
Close Escape: The defending player must discard one card but the target survives and is unharmed.
Hit: The defending player must discard one Card. If the target is a Leader Counter, the leader is killed and removed from play. If the target is a hero, the first hit wounds him, the second hit kills him. Place a dead hero in the Ash Heap.
Hideous Death: The defending player must discard two cards. Additionally the target is automatically killed. Heroes slaughtered by a Hideous Death are immediately placed in the Ash Heap.
B. Battle Intensity Section
A Carnage Card is drawn during the Battle Phase to determine where the Hold and Fire Counters are placed on the Tracking Card. Additionally, each section also has one of three icons which determine who wins Initiative.
Stuka: German Player wins Initiative, he applies the building's German Initiative Effect and takes the first Action Round.
Rat: Soviet Player wins Initiative, he applies the building's Soviet Initiative Effect and takes the first Action Round.
Binoculars: The player with the most Recon Units on the building wins Initiative. Soviet Player wins ties.
C. Hold Action Section
The player who takes a Hold Action must choose between one of two effects. If a card has both fires and buckets listed as an option, the fire is used by the German Player, the bucket by the Soviet Player.
Tracking Cards
There are four Tracking Cards in the game, each of which is paired with a Building District. The Tracking Card records the length of a battle through Hold Counters and the progress of the Fires, Infernos, and Buckets Counters added during battle. Smoldering Ruins is the starting area for all of the Tracking Card's counters.
A. Skull Track
The number of Hold Actions that must be used to end a battle is recorded on the Skull Track. Before a battle, a Carnage Card is used to determine the battle's intensity. For example if the Battle Intensity number of a Carnage card is 3 the Hold Counter is placed on the 3rd space of the track.
Every time a Hold Action is used during a battle, the Hold Counter is moved to the right along the Skull Track. When the Hold Counter reaches the Break Test space, the battle ends and the Break Test is taken.
B. Fire Track
Every time a fire is added, advance a Fire Counter one space along the Fire Track. Only one Fire Counter can ever be on the Fire Track at a time.
When the Fire Counter reaches the Inferno Den, the counter is flipped and remains as an Inferno Counter. There is no limit to the number of Inferno Counters that can be in play and each one adds a Break Test Dice for the German Player. Every time an Inferno Counter is placed, a new Fire Counter is added to the Smoldering Ruins.
Example: One Fire is added, the Fire Counter is advanced into the Inferno Den and flipped, turning it into an Inferno Counter. A new Fire Counter is placed in the Smoldering Ruins space of the Tracking Card.
C. Bucket Track
Any time a bucket is added, the Bucket Counter advances one space along the track. Only one counter can be on the track at a time.
When the bucket reaches the Inferno Den restart the counter at the Smoldering Ruins and discard one Inferno Counter. If there are no Inferno Counters in play return the Fire Counter to the Smoldering Ruins instead.
Example: Two Buckets are added and the Bucket Counter is advanced into the Inferno Den, the Inferno Counter is discarded and the Bucket Counter is sent to the Smoldering Ruins.
Unit Counters
The charnel house of Stalingrad is fed by the screams of countless soldiers fighting and dying. Companies, battalions, and platoons of troops are represented by Unit Counters. Unit Counters can only be placed on buildings. Each Unit Counter has an elite side and a core side. Some units will enter the battle only as Core Units, while others will start on their elite side.
Elite Units have a Terror Tactic, which is employed as soon as a unit is added to a building. Once the Terror Tactic has been resolved, the unit is flipped to its Core Unit side and will remain on the building as either a shielded or unshielded Core Unit. Stacking units onto a building will assist in victory. The player who has the most units on a building at the end of a battle receives a Break Test Die, there is no limit to the number of units that can be on a Building Card.
German Elite Units → German Core Units
- Panzer (1 Kill) → Armor (Shielded Unit)
- StuG (1 Precision Kill) → Armor (Shielded Unit)
- Storm Trooper (1 Kill) → Grenadier (Unshielded Unit)
- Heavy MG (2 Kills) → Grenadier (Unshielded Unit)
- Pioneer (1 Precision Kill) → Grenadier (Unshielded Unit)
- Motor (Draw 1 Card) → Recon (Unshielded Unit)
Soviet Elite Units → Soviet Core Units
- T-34 (1 Precision Kill) → Fort (Shielded Unit)
- Assault (1 Kill) → Rifle (Unshielded Unit)
- Molotov (1 Precision Kill) → Rifle (Unshielded Unit)
- Commando (Inflicts 1 Discard) → Recon (Unshielded Unit)
- NKVD (Draw 1 Card) → Motivator (Unshielded Unit)
Motivation Special Rule
The Soviet Player may execute a Rifle Unit on a building with a Motivator to generate 1 extra Patriotism for a formation in the battle. Destroy the Motivator once the execution is complete and place both units on the purchased Combat Card.
Building Cards
Building Cards represent the charred hellscape of Stalingrad, a patchwork maze of wastelands and fortress strongholds. The cards have the same information printed on the top and bottom so that both players can read the information.
A. District & Terrain
Each Building Card belongs to one of four districts labeled A-D. The German objective is to close each district by capturing buildings and reaching the Volga.
Building Cards are either one of two terrain types, Ruin Hell or River Bank. When a Ruin Hell building is captured the card will be replaced by either a new building from the same district or a Volga Card.
River Bank buildings are close to the water's edge. A captured River Bank building is automatically replaced by a Volga Card.
B. German and Soviet Initiative Effect
Buildings have a unique Initiative Effect for each player. The Initiative Effects are identified by icons, a Stuka for the Germans and a rat for the Soviets. The effect takes place in the Battle Phase when Initiative is determined. The player who wins Initiative uses the building's Initiative Effect before taking the first Action Round. The Initiative Effect is only used by the player who wins Initiative and only once per Battle Phase.
Example: In Red Square, the German Initiative Effect is to add 1 Fire (note the fire next to the Stuka) while the Soviet effect is to add a NKVD unit to the building (the blue and red hat next to the rat).
C. Concentration Level
The yellow number in the boot is the Building Card's Concentration Level. A player may not exceed the Building's Concentration Level when Maneuvering formations during the Strategy Phase. A player may always Maneuver less than the maximum number of formations allowed by a building's Concentration Level.
Example: Each player could Maneuver a maximum of 3 formations to assault or defend the Red Square.
D. Defense Level (Soviet Player only)
A building's Defense Level only applies to the Soviet Player. During a Break Test the Soviet Player will always roll one die for each of the building's Defense Levels.
Play Mats
Player & Campaign Mats
Each player is given a special matt which is placed on their Staging Line. The matt has areas for their Combat and Formation Decks. Combat Cards are discarded to the Discard Pile and Formations to the Destroyed Pile. Units and extra counters can be saved in the middle of the matt.
The Campaign Matt is placed in the Building Line and has areas for the Soviet Campaign Deck, German Campaign Deck, and the Carnage Cards. When a Campaign or Carnage Card is used place it in the Ash Heap. Any card which is burnt or removed from ends up in the Ash Heap.
The Turn Track
At the beginning of every game the Hourglass Counter starts on the turn track's Hourglass Icon. Every turn the Hourglass Counter is advanced at least one space. The Basic Game concludes at the end of Turn 3 and the Advanced Game at the end of turn 6.
Replacing Decks
Anytime a player's Combat Deck runs out, reshuffle the Discard Pile. The reshuffled cards are the new Combat Card Deck. When a player's Formation Deck runs out of cards reshuffle the Destroyed Pile. The reshuffled cards become the new Formation Deck.
Any formation in the Ash Heap, is out of the game and is never reshuffled. Carnage Cards are the only cards which can escape the Ash Heap. When the Carnage Cards have all been used, remove them from the Ash Heap and reshuffle them.
German Cards
Infantry Doctrine: Combat Cards with this Doctrine may only be played on Infantry or Motorized Formations.
Tracked Doctrine: Combat Cards with this Doctrine may only be played on Tracked or Motorized Formations.
General's Doctrine: A Combat Card with this Doctrine may only be used if a Leader is on the Formation when the card is played.
Combat Cards are played directly on formations. Any formation can use Combat Cards regardless of whether it is depleted or full-strength. The number and type of Combat Cards a formation can use during the course of a battle is limited by its Shock Strength and its doctrine. Formations can only use Combat Cards with matching doctrines. Mixed Doctrine formations can use Combat Cards with either the Tracked or Infantry Doctrines. The General's Doctrine can only be used by formations with either a General or a Veteran General.
A. Shock Strength
The number of Combat Cards that can be played on a German Formation during a battle is equal to its Shock Strength. A Veteran General increases the Shock Strength of its formation by +1.
B. Formation & Card Doctrine
The type of Combat Cards that can be played on a German Formation is determined by matching the formation's doctrine to the doctrine of the Combat Card. A formation will be either Infantry, Tracked, or Mixed Doctrine. A formation gains the General's Doctrine with a Leader Counter.
C. Vanguard Effects
When a formation is Maneuvered to a battle for any reason, its Vanguard Effects take place immediately. The effects can be to add units to building or fires to the Fire Track.
D. Card Effects
When a Combat Card is used its Card Effects are applied immediately and only influence the current battle. The effects will be to either add units to a building, add fires to the fire track, inflict damage, or inflict a Sniper Shot.
Card Rank (Bottom of Combat Card)
Combat Cards will be either. Basic (Private's Chevron) or Advanced (Star).
Card Use Example
A. The 16th Panzer has a Shock Strength of 2 but no General. The formation can play at most two Tracked Doctrine Combat Cards.
B. The 76th Infantry has a Shock Strength of 1 and a Lv. 0 General. The 76th may have one Combat Card played on it of the Infantry or General's Doctrine. The formation is depleted but this has no effect on its ability to use Combat Cards.
C. The 60th Motor has the Mixed Doctrine. The formation can use both Tracked and Infantry Doctrine Combat Cards. The Leader Counter provides the option of using the General's Doctrine as well. Normally the 60th Motor could only play one card as its Shock Strength is 1. The Veteran General increases the Shock Strength allowing a 2nd card to be used.
Soviet Cards
Unlike their more disciplined and trained adversaries, the Soviets fight with raw patriotic fervor.
Soviet Combat Cards are played directly on formations. The number of cards that can be played on a formation is determined by its Patriotism.
A. Patriotism & Patriotism Cost
A Soviet Formation's Patriotism determines the total value of Combat Cards they can be used on the formation during a battle. The Patriotism Value of Combat Cards is deducted from the Patriotism of the formation, when the formation has 0 Patriotism left it cannot use any more Combat Cards. A Brutal Commissar will increase the Patriotism of a formation by +1.
Any number of 0 value Combat Cards can be played on a formation. A formation follows the same rules for using Combat Cards regardless of whether it is full-strength or depleted.
B. Vanguard Effects
A formation Maneuvered to a battle for any reason applies its Vanguard Effects when it arrives at the building. The effects can be to either add units to building, inflict a Sniper Shot, or add a bucket to the Bucket Track.
C. Combat Card Effects
When a Combat Card is used its Card Effects are applied immediately and only influence the current battle. The effects will be to either add units to a building, add buckets to the Bucket Track, inflict damage, inflict a Sniper Shot or Sacrifice a Unit. If a card requires a Sacrifice, it must be made before the rest of the effects on the Combat Card take place.
D. Depletion Effect and Icon
A Soviet Formation which is depleted in battle will have a reaction based on its Depletion Effect. The accompanying icon is a visual reminder to the text which is meant to be read when the formation is depleted.
Burning Skull - Formation is Unique, when destroyed the formation is sent to the Ash Heap.
Machine Gun - When depleted during the Battle Phase one or more Rifle Units are executed and destroyed. If a player does not have the Rifle Units to cover the effect, the formation retreats to the Staging Line, and kills its Commissar if it had one.
Red Star Medal - When depleted, the formation adds an Elite Unit to the building.
Card Rank (Bottom of Combat Card)
Combat Cards will be either Basic (Gold Chevron) or Advanced (Gold Star).
Soviet Card Use Example
A. The 10th NKVD has a Patriotism of 3. The formation has one Combat Card played on it with a Patriotism Value of 3. The only cards which can be used on it are 0 value cards which can be played on any formation.
B. The 37th Guard has a Patriotism of 2 and a Lv. 0 Commissar. Even though the formation is depleted, this does not affect its ability to use cards. The 37th has two Combat Cards played on it, each of the value of 1, so it is out of Patriotism and can use only 0 value cards.
C. The Militia Brigade normally has a Patriotism of 1 but the presence of the Brutal Commissar increases its Patriotism to 2. The first card used by the Militia Brigade is a 0 value card. The 2nd card played on it is a Combat Card with a Patriotism Value of 2. Normally the Militia Brigade would not be able to use such an expensive card but the Brutal Commissar increases the Patriotism of the Militia Brigade to 2. The card used on the Militia Brigade is another 0 value which is allowed since a 0 value can be played on any formation.
Units on Buildings
The main objective for any player during a battle will be to pack a Building Card with units. Any number of units can be stacked on a building.
Units are of either two types, Elite or Core. When an Elite Unit is added to a building it applies its Terror Tactic and is then flipped over to its core side. Core Units are designated by the nationalistic symbol on their counter (either the German Cross or the Soviet Hammer and Sickle). Some units will be added to a building as a Core Unit. Once placed on a building the unit remains until it is destroyed or the building is captured.
Example: The battle for the Army Barracks is not going so well for the Soviet Player, the Germans have nine units on the Building and the Soviets have none. The Combat Card Deadly Roadblock has been used on the Soviet's Action Round. The card's effect is to add three different units to the building.
A. The T-34 is an Elite Unit and its Terror Tactic is to inflict 1 Precision Kill. Any Unit on the building can be destroyed by the Precision Kill, the Soviet Player targets the armor unit and it is removed. The Soviet Player adds a T-34 counter flipping it over its core side as a Fort Unit.
B. The Rifle Unit is already a Core Unit and does not flip. The Soviet Player picks any Rifle Unit from his Unit Pile, ignoring the Elite Unit on the back and places the Rifle Unit on the building.
C. The Commando Unit is also an Elite Unit and its Terror Tactic is to inflict one Discard. The Soviet Player randomly destroys one card from the German Player's hand and then flips the Commando over to its Core Unit Side, a Recon Unit. The Recon Unit will remain on the building until the unit is destroyed or the building is captured.
Leader Counters
Leader Counters are representations of the individuals in charge of a formation either as German Generals or Soviet Commissars. Leader Counters are double-sided and are either inexperienced Lv. 0 Leaders or Lv. 1 Leaders who have survived long enough to become masters of fighting in the deadly ruins of Stalingrad.
The Lv. 0 Leaders are further identified with a name but the counter is meant to be generic. When a formation enters play it is always given a Lv. 0 counter. A player can have 13 Leader Counters in play at once but a formation can only have one leader at a time. The only way for a leader to switch formations is through a Consolidation.
Benefits of Leaders
A General of either level allows a German Formation to use the General's Doctrine. A Veteran General adds his level to a formation's Shock Strength. A Soviet Brutal Commissar adds his level to the Patriotism of the Soviet Formation. A leader counter can be flipped to its Lv. 1 side either through a Promotion or Graduation.
Destroying Leaders
Leaders always stay on a formation and can only be targeted by Sniper Shots. A Hit or a Hideous Death results in the destruction of the leader.
Any time a formation is destroyed the Leader Counter is also destroyed. A Soviet Commissar is also destroyed if his formation retreats. A killed or destroyed leader is discarded but the counter can be used again and given to a reinforcing formation as its new Lv. 0 Leader.
Destroying Units
Units are destroyed though Kills, Precision Kills, Sniper Shots, or Soviet Brutality against their own troops. A unit which is destroyed is removed from the building and returned to its Unit Pile. Since Elite Units are flipped as soon as they are placed on a building, your opponent will only be able to destroy units on their core side. Kills, Precision Kills, and Sniper Shots function the same way for both players. The player using an effect is the attacker, the player receiving is the defender.
Kills & Precision Kills
Every Kill inflicted destroys one Unshielded Unit of the defending player's choice. If the defender only has Shielded Units on a building, then no units are destroyed and the excess Kills are lost. Each Precision Kill inflicted destroys any one unit on the building of the attacker's Choice.
Spillover Damage
Spillover Damage is only inflicted if ALL of the units on a building are destroyed. If the defender has no units on a building and receives either a Kill or Precision Kill, the attacker may advance the Fire or Bucket Counter by one space on the Tracking Card. A Sniper Shot never inflicts Spillover Damage.
Sniper Shots
The most versatile type of attack is a Sniper Shot, which can be used to target leaders, heroes, or any Unshielded Unit on the building. A Sniper Shot targeted against a unit does not draw a Carnage Card to determine the results of the shot. The Unshielded Unit is destroyed automatically.
In addition to targeting a unit, A Sniper Shot can target a formation's leader or a hero involved in a battle. The result of the shot is not automatic. The attacking player must draw a Carnage Card to discover how the attack is resolved. Reference the Sniper Shot section of the Carnage Card.
Close Escape: The defending player must discard one card but the target survives and is unharmed.
Hit: The defending player must discard one card. If the target is a formation's leader the counter is killed. If the target is a hero, the first hit wounds him turn the card on its side, the second hit kills him, place in the Ash Heap.
Hideous Death: The defending player must discard two cards, the target is killed, if a hero place in the Ash Heap.
Soviet Brutality
The Soviets massacred 20,000 of their own men to win at Stalingrad and now you will too.
Sacrifice Effect
When a Combat Card displays the Sacrifice Effect, the Soviet Player must destroy one of the Rifle Units he has on the building per Sacrifice required. Should the Soviet Player not have enough Rifle Units to meet the requirement of the Sacrifice then the Soviet Player cannot play the Combat Card.
Motivator Special Rule
One extra point of Patriotism can be generated with a Motivator. The Motivator Special Rule can only be used when a Combat Card is being played whose value is more Patriotism than a formation has left. Remove both the Motivator and a Rifle Unit and place them on the Combat Card they were used to help purchase. The units are out of play until the end of the battle when they are returned to the Soviet Player's Unit Pile.
Deplete and Supply
A formation is either at full-strength (standing) or depleted (on its side).
A. Deplete
Depletion is a severe draining of resources that endangers a formation. A depletion can occur through effects or battle fatigue. When a formation is depleted it is turned on its side to indicate that is at reduced strength. A depleted formation suffers no penalties for using Combat Cards. Soviet Formations may be further influenced by Depletion Effects.
Destroyed Formations
A depleted formation which suffers further depletion is now destroyed. Destroyed formations are placed in the player's Destroyed Pile. Leaders on a destroyed formation are killed. Formations in the Destroyed Pile may be reshuffled and reenter play as reinforcements. The four starting Soviet Formations are unique and sent to the Ash Heap. A formation may only be depleted once a round, a full-strength formation cannot be destroyed through a "double depletion" in one round.
B. Supply
Supply represents a rejuvenation of a formation through new troops and materials. A Supply Effect can only be used on a depleted formation, however, unlike other effects which are limited to the current battle, any depleted formation in play can benefit. A formation receiving a Supply is returned to full-strength. A formation that is Supplied does not acquire a lost leader. The only way for a formation to regain a leader is through Consolidation or Promotion.
Overrun
An Overrun is an effect which allows a player to add a fresh formation to a battle.
Concentration Levels
The number of formations that are allowed to be Maneuvered to a building in the Strategy Phase is limited by its Concentration Level.
An Overrun Effect allows any formation currently on the Staging Line to be Maneuvered to a building during the Battle Phase. A player may Maneuver a formation even if doing so would exceed the Building's Concentration Level.
Overrun Effect
Any formation on a player's Staging Line may be used for an Overrun, even a formation which is depleted or has been previously involved in battle this turn. Formations currently engaged at another building cannot be selected for an Overrun. The chosen formation is Maneuvered from the Staging Line and added to the battle.
Once the Overrunning formation joins a battle, its Vanguard Effects are applied. The formation then remains at the building and is counted as any other formation for the purposes of the battle. Once it is Maneuvered to the battle Combat Cards can be played on it as normal. Any number of formations may Overrun a building.
Only formations in a battle can use a card which grant an Overrun Effect. Formations on the Staging Line are not a part of the battle and cannot use a Combat Cards to Overrun themselves.
Example: The Soviet Player uses the Combat Card Pistol Persuasion. The card has a value of 2, the only formation he can play the card on is 39th Guard. The Soviet Player Sacrifices the Rifle Unit he has on the building to use the card. He is now allowed to Supply any formation in play, he could Supply the 39th Guard but instead looks to his Staging Line and chooses to Supply the depleted 193rd Rifle. Finally he Maneuvers the 193rd to the building using the Overrun and adds the formation's Vanguard Effect, two Rifle Units.
Basic Game
Play Area Set-up
Divide the play area into three Lines. The areas closest to each player is their Staging Line. The central area is the Building Line where the Campaign Matt (not shown) is placed. The German and Soviet Matts (not shown) are placed in each player's Staging Line along with their Starting Formations (4) and their Supreme Commander.
One Leader Counter is placed on each Starting Formation on his Lv. 0 side. Each player shuffles the 33 Basic Combat Cards and all 14 cards of their of Formation Decks. The decks and all of a player's units and extra leaders are placed on their play matts. The Campaign Decks and the Carnage Cards are shuffled and placed on their appropriate places on the Campaign Matt. The Hourglass Counter is set on the Turn Track of the Campaign Matt.
Building & Tracking Card set-up
Shuffle all 24 Building Cards. Starting with District A deal one card at a time stopping only when the first District A Building Card is drawn. Place the Building Card in the space reserved for the District A Building. Next reshuffle the deck and deal one card at a time. Stop dealing when you reach the first District B Building Card. Place the Building Card in the space reserved for the District B Building. Repeat the process for Districts C & D.
Example: The Building Deck is shuffled and cards are dealt for District A. The first three cards dealt are for other districts, the fourth card drawn is the Army Barracks. The Army Barracks is put in the space reserved for District A. The Building Deck is reshuffled and cards are dealt for District B. The first red card drawn is the Worker Slums. The deck is reshuffled and the process is repeated for districts C&D resulting in both the Burnt Wastelands and Orlovka Village being placed into the Building Line. Each District is given a Tracking Card which is placed next to it.
Once each district has a card, add in the 6 Volga Cards into the Building Deck and reshuffle. Place the shuffled Building Deck at the end of the Building Line. Pair each District with a Tracking Card. Place a Fire, Bucket, and Hold Counter in each card's Smoldering Ruins. The remaining Fire Counters are given to the German Player to look after.
Game Length
The Basic Game lasts 3 Turns.
German Victory
The German Player wins a sudden death victory at any time all four Building Districts are filled with Volga Cards. A victory is also achieved by the German Player if the last turn finishes with no Building Cards in play.
Example: At the end of the Basic Game's third turn, Volga Cards are in Districts A & C. The German Player also captured the Building Cards in districts B & D on the last turn. No Building Cards are left in play at the end of the Third Turn, the result is a German Victory.
Soviet Victory
The Soviet Player wins a sudden death victory in any Strategy Phase in which the German Player cannot Maneuver a formation to assault a building. The Soviet Player also wins a victory if he has at least one Building Card remaining in play at the end of the game's last turn. Note: A Building Card remains in play if it has not been captured.
Start Playing
Once set-up is complete, the game starts with the First Turn's Strategy Phase.
Stalingrad U Senior Class
Any player who is daring and ruthless enough to survive the Basic Game will graduate to the Advanced Rules. Players will now be able to use the deadliest Combat Cards in their arsenal.
Advanced Game
The same set-up and victory conditions for the Basic Game are used for the Advanced Game with one exception. All 45 Combat Cards are now used and shuffled into each Player's Combat Deck. The Advanced Game lasts until the 6th Turn. Remember that Districts are not readied on the last turn of the game.
New Combat Cards
The rules for using Advanced Combat Cards are the same as for using the Basic Combat Cards. The difference between card types are the effects, which are written in text instead of using Icons. Advance Cards bundle multiple actions and effects, but still count as a single Combat Card action.
Card Effects
Discard: The acting player randomly discards one or more cards from his opponent's hand.
Take a 2nd Action: The acting player takes a 2nd action and can play another Combat Card, Reload Hand (using the rules from his Supreme Commander), or take a Hold Action. A player can never benefit from more than one of these effects per Action Round.
Reload Hand: The player follows the directions from his Supreme Commander's Card.
Promote (Germans only): Any Lv. 0 General in the game may can be flipped to a Lv. 1 Veteran General. Any formation in play without a General can use a Promotion to give it a Lv. 0 leader. Two Promotions can be used to give a leaderless formation, a Lv. 1 Veteran General.
Advanced Cards
Militia Surrender: The German Player inflicts two discards. The German Player then destroys ANY four Rifle Units in play. The Rifle Units targeted may be in the current battle or on any Building Card. The Soviet Player then takes a 2nd Action.
Brutal Flanking: The Soviet Player must discard his entire hand. The German Player then adds 3 Panzer Units to the building.
Command Vacancies: Promote 4 Generals. The German Player then takes a 2nd Action.
Determined Strike: The player inflicts three discards, Promotes 1 General, and Reloads Hand.
All Out Effort: The German Player Reloads Hand, places 1 Inferno Counter on the District's Tracking Card, and takes a 2nd Action.
Command Strategy: German Player Reloads Hand, Promotes a General, and takes a 2nd Action.
Forced March: The German Player draws a new formation from his Formation Deck, places a Lv. 0 General on the card and adds it to the battle as if the formation had Overrun the building. The German Player then takes a 2nd Action.
Stalin's Ghost: The next card played by the Soviet Player has its Patriotism Value changed to 0. The Soviet Player then takes a 2nd Action.
Collecting Tongues: The German Player gives his hand to the Soviet Player. The Soviet Player looks over the cards and places one of them in the German Player's Discard Pile. He then returns the hand to the German Player and takes a 2nd Action.
Rat's War: The Soviet Player looks through his Discard Pile and removes one card. He adds the card taken from the Discard Pile to his hand and then takes a 2nd Action.
German Despair: Three discards are inflicted on the German Player, a 2nd Action is then taken.
Last Stand: The Soviet Player chooses one Soviet and one German formation involved in the battle and depletes them. If the Soviet Player does not have a formation to deplete, he cannot use the card. The Fire Counter is returned to the Smoldering Ruins but Inferno Counters are unaffected.
Hidden Infiltrators: The Soviet Player draws a new formation from his Formation Deck, places a Lv. 0 Commissar on the card and adds it to the battle as if the formation had Overrun the building. The Soviet Player then adds three Assault Units to the building.
Hero Cards
Heroes are exceptional warriors whose very presence can change the course of a battle. A Hero Card can be played during an Action Round. Unlike other Combat Cards, the hero is independent of formations and can be used even if no other Combat Cards could normally be played. When the hero card comes into play, place it so that it touches the Tracking Card.
Killing a Hero
The only way to remove a hero from the game is with a Sniper Shot. A hero can be targeted by any sniper attack, even one launched by another hero. The attacking player draws a Carnage Card and reveals its effects:
Close Escape: Hero is unharmed, but the owning player must discard a card.
Hit: Hero is now wounded. Lay the card on its side. If a hero receives two hits during the course of a battle, the hero is killed and placed in the Ash Heap. The owning player must also discard a card when a hit is inflicted.
Hideous Death: The hero is automatically killed, place him in the Ash Heap. Additionally, the owner of the slaughtered hero must discard two cards.
Any hero who survives to the end of the battle, either healthy or wounded, is placed in the Discard Pile. A killed hero is permanently out of the game in the Ash Heap. A wounded hero whose card is played in a later battle, reenters play healthy.
Hero Cards have a major and minor effect which take place as soon as the card is played. Minor effects add units or inflict Sniper Shots and are resolved as normal.
Major Effect: Add/Remove Inferno — The German Player adds an Inferno and the Soviet Player removes one.
Major Effect: +2 Break Test Die — The German Player rolls two extra Break Test Dice. The effect takes place even if a hero is killed and removed from play.
Major Effect: Steal 1 Break Test Die — The German Player loses one of his Break Die to the Soviet Player. It is now a Soviet Break Die. Soviet Player cannot steal the German Pity Die. The effect takes place even if a hero is killed and removed from play.
Major Effect: Intercept — A hero with the Intercept Effect is played on your opponent's round to cancel a card he has just used. Any Combat Card can be intercepted except another Hero Card. The intercepted card is placed in the Discard Pile without being resolved. The Intercepting Hero enters play and its secondary effects are resolved. Once the effects of the Intercepting Card have been completed the opposing player takes his next round.
Example: Vasily Zaitsev is used to Intercept a German Combat Card. The German Combat Card is placed in the Discard Pile unresolved. Vasily enters play and inflicts two Sniper Shots. The German Player now begins his next round.
Four Player Game
The four player game is run as a normal Advanced Game with two new Supreme Commanders introduced to allow each player to control his own commander. The new commander is used as the original ones to determine a player's hand size and is referenced when a Reload Action is taken.
The new starting Supreme Commander for the Germans is General Wietersheim who is replaced by General Hube any time there are no Panzer Divisions on the Staging Line. Colonel Saraev, the new Soviet Supreme Commander, is replaced when the 10th NKVD is sent to the Ash Heap.
In the four player game each player controls their own formations. Players divide up formations when they become available but the player who has Saraev always uses the 10th NKVD and the player who owns Wietersheim always owns the 14th Panzer.
Battles can be fought out of sequence as long was each player only fights one battle at a time. Players are free to discuss strategy, trade cards, and play Combat Cards into each others battles as long as only one card is used per Action Round.
Example: While the battle for Dar Gova is being waged by Wietersheim and Chuikov, Paulus and Saraev fight savagely for the Burnt Wastelands.
Game Turn: Strategy Phase
1. Progress Turn
Advance the Hourglass Counter one space sequentially across the Campaign Matt's Turn Track. The game concludes at the end of the last scheduled turn.
Basic Game: 3 Turns Advanced Game: 6 Turns
2. Campaign Card
Both players turn over their top card and apply their effects. The Soviet Card is assumed to take place first if there is a conflict between Campaign Cards.
3. Reinforcements
Each player adds the reinforcement number of their Campaign Card to the number of buildings currently on the table, the result is the number of cards each player is allowed to draw from their Formation Deck.
A reinforcement formation is placed on the Player's Staging Line. Unless instructed otherwise by a Campaign Card the formation is full-strength and is given a Lv. 0 Leader Counter.
Example: The Campaign Card for the German Player has a reinforcement number of one and there are currently two buildings face-up on the table. The German Player draws three new formations and adds a Lv. 0 Leader Counter to each. Note: On the first turn of the game each player will draw at least four reinforcements.
4. Consolidations
War materials are now scavenged from one dying formation to save another. A player who has two or more depleted formations on his staging line may sacrifice one of his formations to generate a Supply. The Supply must be used immediately on a different formation. The Supplied Formation is returned to full-strength while the sacrificed formation is placed in the Destroyed Pile. Any number of consolidations may be made each turn.
A Leader Counter on the Sacrificed Formation is normally lost when the formation is sent to the Destroyed Pile. The Leader Counter may be transferred from the Sacrificed Formation to the Supplied Formation only if the Supplied Formation does not have a Leader. Under no circumstances can a formation have more than one Leader Counter.
Example: The Soviet Player has two depleted formations on his Staging Line. The Soviet Player decides to sacrifice the 112th Rifle and Supply the 39th Guard. Since the Guard Formation does not have a Commissar, the Leader Counter is transferred from the 112th Rifle before it is destroyed.
5. Ready Districts
Districts whose building has been captured will now have it replaced by either a new building or a Volga Card. New buildings are drawn for each open district. Complete the draws for each district separately, reshuffling between draws. When drawing cards for a district:
- Ignore any building not belonging to the district being readied.
- The first building drawn for the appropriate district takes the place of a captured building and is placed next to the District's Tracking Card. One Fire, Bucket, and Hold Counter is placed in the Smoldering Ruins.
- The first Volga Card drawn takes the place of the captured building and closes the district. Turn the District's Tracking Card over.
- No buildings are drawn on the last turn of the game, (Turn 3 for the Basic Game and 6 for the Advanced Game). If a District does not have a Building Card on the game's last turn, it will be empty of buildings for the remainder of the game and counts as a closed district.
New Building
A new building is treated as any other and must be captured if the German Player is to win the game. Make sure the Fire, Bucket, and Hold Counter on the District's Tracking Card are reset.
Volga Cards (Blue Cards)
The six Volga Cards in the Building Deck represent the successful push of the 6th Army to capture the city. The Germans have cut off one entire district of the city and closed it down. The German Player automatically wins the game at any time there are 4 Volga Cards in play. Building Cards belonging to a district that has been closed down are ignored and play no part in the rest of the game.
River Banks
The Grain Elevator, Pavlov's House, Mamaev Kurgan, and Red Oktober Factory are the last cards in their district. When a River Bank Building Card is captured, a Volga Card is automatically dealt from the Building Deck. Replace the captured building with the Volga Card, reshuffling the Building Deck when finished.
Example: In Turn 1 of the Basic Game the German Player manages to capture the buildings for Districts A: Tsarista Gorge, B: Pavlov's House, and D: Traktor Factory.
On Turn 2 the Building Districts are readied. Starting with District A, new Building Cards are drawn. The first two buildings dealt belong to different districts and are ignored. The third Building Card drawn is the Grain Elevator (building from District A) which replaces the previously captured Tsarista Gorge.
Pavlov's House was the building captured in District B. It is a River Bank Building, so a Volga Card is taken from the deck and placed in the area previously occupied by Pavlov's House. District B is now closed and its Tracking Card turned upside down. The deck is reshuffled and Building Cards are now dealt for the captured Traktor Factory. The first three cards drawn belong to different districts, the fourth card drawn is a Volga Card. The Volga Card now replaces the Traktor Factory. District D is now Closed and its Tracking Card turned upside down.
The German Player has two turns to capture the two remaining buildings. Districts are not readied on turn 3, the last turn of the Basic Game.
6. Maneuver Formations
Formations move to assault or defend a building through Maneuvers. The number of formations, full-strength or depleted, that can be moved to a building is limited by the building's Concentration Level, (the yellow number inside the boot icon). The Concentration Level may never be exceeded in the Strategy Stage.
The assaulting formation is moved form the Staging Line until it touches the Building Card. The German Player MUST assault at least one building or he automatically loses the game.
Once the German Player finishes Maneuvering, the Soviet Player takes over and Maneuvers his defending formations. The Soviet Player may not exceed the Concentration Level of the building and may only Maneuver to defend buildings assaulted by the German Player. Once Maneuvered, a formation cannot leave until the battle ends or it is required to retreat by a Depletion Effect.
Example: The German Player Maneuvers three of his Formations to assault Red Square (the maximum number allowed by Red Square's Concentration Level) and assigns a fourth to assault Orlovka Village. The Building Card in District A is a Volga Card and cannot be attacked. The Soviet Player chooses to Maneuver three formations to defend Red Square (the maximum allowed) and assigns two formations to defend the Orlovka Village. The Concentration Level of the Village is four, so the Soviet Player could assign up to four formations to defend it. He may not assign any formations to defend the Oil Plant since it has not been assaulted. The Soviet Player leaves the 92nd Naval on the Staging Line.
Game Turn: Battle Phase
One Battle Phase is fought for each building assaulted by the German Player. A Game Turn may have as many as four and as few as one Battle Phases. Each Battle Phase follows the same six steps which are completed sequentially before moving to a new battle. Note: Should a Soviet Player choose not to defend a building with formations, A Battle Phase is still fought but the Soviet Player can only take Reload Actions, Hold Actions, and Play Hero Cards (Advanced Rules).
1. Vanguards
First the Soviet Player completes the Vanguard Effects from all of the formations he has maneuvered to the building. Once the Soviet Player has finished his Vanguard Effects the German Player completes the Vanguard Effects for all of his assaulting formations. Should the Soviet Player inflict a Kill or Precision Kill when there are no German Units on the building he can choose to inflict Spillover Damage or hold his fire until after the German player completed his Vanguard Effect.
Example: The 138th Rifle's Vanguard Effect is to add two Rifle Units to Red Square. The Militia Brigade adds 1 Recon Unit to the building and 1 Bucket to the Bucket Track. The Bucket Counter is advanced from the Smoldering Ruins to the 1st space on the Bucket Track. Finally the Army Reserves adds 3 Rifle Units.
Vanguard Example Continued: The 71st Infantry adds two Grenadier Core Units for its Vanguard Effect. The 3rd Motor adds one Armor Core Unit and one Motor Elite Unit. The Motor Unit allows the German Player to draw a Combat Card. The Motor Unit is then flipped to its Core Side and becomes a Recon Unit.
The 14th Panzer has two separate Vanguard Effects. First one fire is inflicted, the German Player moves the Fire Counter from the Smoldering Ruins and advances it one space along the Fire Track. The Panzer Unit added is also an Elite Unit. The Panzer Unit inflicts one Kill before flipping to an Armor Unit. The defender chooses the target of the Kill and a Rifle Unit is destroyed.
2. Battle Intensity
Draw a Carnage Card and reference the Battle Intensity section, ignore the rest of the card.
The number in the center of the card is the Intensity Level and tells where the Hold Counter starts on the Intensity Track and how many fires are added to the Fire Track.
Example: The Carnage Card is drawn and the Intensity Level is a 2. The Fire Counter is advanced two spaces along the Fire Track and the Hold Counter is put on the 2nd Box of the Skull Track.
3. Initiative
Reference the Carnage Card again to determine who has Initiative. If the icon at the bottom of the card is a rat the Soviets win Initiative, a Stuka icon means the Germans win, if the icon is a pair of binoculars then Initiative goes to the player with the most Recon Units on the building. The Soviets win if both players are tied for the number of Recon Units. The player who wins Initiative gets to use his Initiative Effect from the Building Card.
Example: The Initiative Icon on the card is a pair of binoculars. Players count the number of Recon Units on the building, each player has one Recon Unit. The Soviets win ties (home field advantage).
The Soviet Player wins Initiative and checks the Initiative Effect of Red Square (the Icon next to the rat). In this case Red Square has an NKVD hat so the Soviet Player adds a NKVD Unit. The NKVD Unit is an Elite Unit so the unit's Terror Tactic is applied (the Soviet Player draws a Combat Card) and the unit is flipped.
4. Action Rounds
Players alternate actions. The player who wins initiative goes first with one of three actions:
- Play a Combat Card.
- Reload Hand Action (See your Supreme Commander's Card).
- Call A Hold Action (Draw a Carnage Card & advance the Hold Counter along the Skull Track).
A Carnage Card drawn for a Hold Action gives a player the choice of two separate effects, such as a Sniper Shot or a Precision Kill, either effect can be chosen. If fires and buckets are presented, the German Player can select the fire and the Soviet Player the bucket. Once the effect has been completed the player who took the Hold Action, advances the Hold Counter one space along the Skull Track. The battle ends when the Hold Counter reaches the last square of the Skull Track.
Once a player finishes an Action Round, his opponent takes a round. Players continue trading rounds until the Hold Counter reaches the Break Test Square of the Skull Track. Note: A battle automatically ends in a Soviet Victory at any time all of the German Player's formations and units in a battle are destroyed.
5. Break Test
A roll of the dice will determine which player claims ownership of the building. The number of dice a player rolls during the Break Test is decided by how well he did fighting the battle:
A. One Formation Die is awarded to the player with the most full-strength formations. B. One Unit Die is awarded to the player with the most units on the buildings. C. One Inferno Die is given to the German for each Inferno on the Tracking Card. D. One Defensive Die is given to the Soviet for each Defensive Level of the building. E. One Determination Die is given to the German Player if he is rolling no other die.
Example: A Break Test is taken for a battle at the Traktor Factory. The German Player achieves four dice, one die for having more formations, one die for being tied in units, and two dice for having two Inferno Counters on the Building District's Tracking Card. The Soviet Player is awarded three dice, one die for being tied in units and two for the Defensive Level of the Traktor Factory. When all is said and done the German Player has four Break Dice and the Soviet Player three. If the German Player had done terribly in the battle he might only be rolling the determination die. The Determination Die is only given if the German Player is rolling no other dice.
A. Formation Break Test Die
The player with the greatest number of full-strength formations at the building wins the Formation Die. Depleted formations are ignored when determining which player has the most formations. Should both players have an equal number of full-strength formations at the building then each player gains 1 Formation Break Test Die. If neither player has any full-strength formations at the building then no Formation Die is awarded for the Break Test.
B. Unit Break Die
The side with the most units on the Building Card wins the Unit Die. If both players have an equal number of units on the building then each player gains one Unit Break Test Die. Leaders are never on a building so do not count for determining the die. If there are no units on the building, no die is awarded.
C. Inferno Break Die
The German Player gains one Inferno Break Test Die for each Inferno Counter on the Building District's Tracking Card.
D. Defensive Break Die
The Soviet Player always gains between one and four Defensive Break Dice. The total number of dice available to the Soviet Player is determined by the Defensive Level of the building being fought over (the number in the Building Card's grenade icon).
E. Determination (aka Pity) Die
The German Player gains one Determination Die if he has no other Break Test Die to roll. If a Bloody Slaughter is rolled with the Determination Die, it is treated instead as a Soviet Victory. The German Player can never lose the Determination Die once it is awarded in a Break Test and cannot use it with other Break Test Dice.
Rolling the Dice
Both Players roll all of the dice they have available to them. The Break Dice are not added together but read individually.
Dice Results
Each player rolls the Break Test Dice they have, three results are possible.
A. German Victory: The highest die roll belongs to the German Player. B. Soviet Victory: The highest die roll belongs to the Soviet Player. C. Bloody Slaughter: Each player rolls the same number of high die rolls.
Only the single highest scoring dice from each player is used. If both players have the same highest die score then the player who rolled the most high scoring dice is the winner. A Bloody Slaughter only results if each player has the same number of high scoring dice.
A. German Victory
Should the German Player win the highest die roll, the Soviet position has been overwhelmed and the Germans have captured the building. Any remaining units are returned to their owner's pile and the German Player removes the building from play placing it as a trophy on his Staging Line.
B. Soviet Victory
When the Soviet Player achieves the highest die roll the Soviets have retained control of the building. Each player receives 10 Kills, representing the hideous bloodshed of urban warfare. Destroyed units are removed and extra Kills ignored, Spillover Damage never occurs during Break Tests. Shielded Units are never removed as the result of the Break Test. Once all Kills have been inflicted, any surviving units remain and are not removed. Inferno, Fire, and Bucket Counters on the Tracking Card stay in play and will still be in effect the next time the building is assaulted.
C. Bloody Slaughter
If both players are tied in the number of high scoring dice, the result is a Bloody Slaughter. Each player receives 10 Kills to his units on the building. Destroyed units are removed and extra Kills are ignored, Spillover Damage never occurs during Break Tests. Shielded Units are immune to Kills and are never removed as the result of the Break Test. The player who has the most units on the building after the 10 Kills have been inflicted gains an additional die. Another Break Test is taken. If the result of the 2nd Break Test is a tie, another Bloody Slaughter takes place. The player with the most units after the 2nd Break Test gains an additional die and so on until either a German or Soviet Victory is achieved.
6. Aftermath
Regardless of which side wins the battle it is time to clean up the field of combat.
A. Discard used Combat Cards and Heroes
All the Combat Cards used in the battle are now discarded. The cards are placed in each player's Combat Card Discard Pile. Once the Combat Deck runs out the Discard Pile is reshuffled and it becomes the new Combat Deck.
B. Deplete Formations & Graduate Leaders
Every formation that survived to the end of the battle is depleted and returned to the Staging Line. A full-strength formation will be depleted and a depleted formation will be destroyed. All destroyed formations are placed in the Destroyed Pile and their leaders killed. Every Lv. 0 Leader that survived the battle is flipped to its Lv. 1 side. Leaders already at Lv. 1 are not flipped. Note: A formation which had to retreat from the battle is unaffected by depletions or graduations.
C. Units & Counters
If the German Player wins the battle all the units are removed from the building and placed in each player's Unit Pile. Inferno Counters are removed and all other counters are placed in the Smoldering Ruins Box of the Tracking Card.
D. Building Captured?
If the German Player wins the Break Test the building is captured. The German Player picks up the Building Card and places it in his Staging Line, the building is now out of play. The District Tracking Card stays in place. Should the Soviet Player win the battle, the Building Card remains and the German Player can attempt to capture it again next turn.
Battle Phase Example
Soviet Action Round 1: After applying the Building's Initiative Effect, the Soviet Player takes the first action of the battle. He has a choice of playing a Combat Card, using a Reloading Hand Action, or taking a Hold Action.
The Soviet Player places the card Deathtrap Surprise on the table touching the formation which will use it, in this case the 138th Rifle, the only formation which has enough Patriotism. The 138th has 1 Patriotism so normally the 138th cannot afford a card with a Patriotism Value of 2. The Brutal Commissar, however, increases the Patriotism of the formation by +1, so Deathtrap Surprise can be played by the 138th.
The card's effect adds two Molotov Units, one Fort and, one Bucket. The two Molotov Units are Elite and the Soviet Player must first apply their Terror Tactic. Each Molotov Unit inflicts 1 Precision Kill. The Soviet Player is allowed to choose any unit to target with the Precision Kill.
The Soviet Player decides to destroy the Recon Unit and one of the Armored Units. Once the Terror Tactics has been applied the Molotov Units are flipped to their Core Side and are added to the building as Rifle Units.
The Fort Unit added by the Deathtrap Surprise is already a Core Unit so the Soviet Player places one of his Fort Units on the Building Card ignoring the Elite Unit on the back.
The card's effect also adds one bucket to the Tracking Card. The Soviet Player advances the bucket one space along the Bucket Track.
Once the Soviet Player finishes, the German Player starts his round and can choose to play a Combat Card, Reload Hand, or take a Hold Action.
German Action Round 2: The German Player chooses to play the Combat Card Panzer Group as his action this round. The card is of the Tracked Doctrine and could be used on either the 3rd Motor or the 14th Panzer.
The Card's effects add two Panzer Units, one Heavy MG and advances the Fire Counter one space along the Fire Track. The Terror Tactics of the Panzer Units Inflict one Kill each, while the Terror Tactic of the Heavy MG inflicts two Kills. The German Player inflicts 4 Kills total. The Soviet Player chooses the unshielded units to be destroyed. The Elite Units are flipped. Two Armor and two Grenadiers are to added to the building.
Soviet Action Round 3: The Soviet Player takes the reigns and must again decide what type of action to take. The Soviet Player chooses Pistol Persuasion and puts it into play behind the Army Reserve. The Army Reserve has a Patriotism of 1 and cannot normally use a card that Patriotism Value of 2, however, the Soviet Player uses the Motivator's Special Ability.
The Motivator Executes a Rifle Unit which increases the formation's Patriotism by 1 and allows the Army Reserve to use the card. (The Soviet Player puts the destroyed units on the card they helped to purchase). The card's effects require a Sacrifice so the Soviet Player must destroy another of his Rifle Units before he can use the card's other effects.
Having sacrificed a Rifle Unit, the card now grants a Supply, which is used on the 138th Rifle. The formation is turned to indicate that it is now at full-strength.
The card also allows an Overrun, so the Soviet Player Maneuvers the 92nd Naval from the Staging Line to the battle. The Soviet Player now has four Formations on the Staging Line, exceeding the Building's Concentration Level, but this is allowed because he used an Overrun to Maneuver the formation to the battle. The 92nd adds its Vanguard effect of a Commando Unit.
The Commando's Terror Tactic is to inflict a discard. The Soviet Player randomly takes a card from the German Player's hand and discards it. The unit is flipped to its core side and placed on the building.
German Action Round 4: The German Player decides on a Reload Hand Action. He looks at his Supreme Commander, General Paulus and follows the directions on the card.
First the German Player discards any unwanted cards from his hand and then draws up to the hand size allowed by Paulus. Finally the German Player applies his Supreme Commander's special ability which for Paulus is to add a fire to any Building District's Tracking Card. The German Player chooses to add a fire to Red Square and advances the Fire Counter one space.
Soviet Action Round 5: The Soviet Player decides to take a Hold Action. A Carnage Card is drawn and the section for Hold Actions is referenced. All Hold Actions provide a choice of two effects, the card drawn in this example gives the option to inflict 2 Precision Kills or take a Sniper Shot. The player chooses the Sniper Shot and targets the Veteran General on the 14th Panzer. He draws another Carnage Card, referencing the section for Sniper Shots, the result is a Hideous Death.
The General is killed and the German Player must discard 2 cards. The Soviet Player randomly picks two cards and places them in the German Player's Discard Pile. Finally, the Hold Marker advances one space on the Skull Track.
German Action Round 6: The German Player uses the card Reign of Terror. The card is of the General's Doctrine so a formation must have a General to play the card. Only the 3rd Motor can use Reign of Terror. The first effect of the card creates two Rubble Forts. The German Player adds two Fort Units to the Soviet side.
Next the German Player inflicts two Depletions. He may only deplete the same formation once a round so he can't use them on the same target. The Militia Brigade and the 92nd Naval are targeted and their Depletion Effects are activated.
The Soviet Player must execute two Rifle Units to fulfill the Depletion Effect from the Militia Brigade. Only one Rifle Unit is on the building to be destroyed, so the Depletion Effect was not fulfilled, the depleted Militia Brigade retreats to the Staging Line, killing its Commissar. The Depletion Effect for the 92nd Naval adds a Molotov Unit. The Terror Tactic for the Molotov Unit is applied and the Soviet Player chooses to destroy an Armor Unit. The Molotov is then flipped to its core side and placed on the building.
Soviet Action Round 7: The Soviet Player uses an Advanced Combat Card. Collecting Tongues is a 0 value card so it can be used on any formation.
German Intercept Round: Collecting Tongues is a devastating card. Fortunately for the German Player he has the Hero Card Hauptmann Meunch which is set down so that it is touching the Tracking Card. Hauptmann Meunch has an Intercept Effect which cancels any card just played. Collecting Tongues is placed into the Soviet Player's Discard Pile and its effects are unresolved. The German Player completes the rest of the Intercept Card's effects which are to add a Motor Unit and take a Sniper Shot.
The German Player draws one new card as the Terror Tactic from the Motor Unit is applied. The Motor Unit is flipped to a Recon Unit and added to the building. The German Player uses his Sniper Shot to target the Soviet Recon Unit. Since the target is a unit, no Carnage Cards are drawn, the unit is automatically destroyed. Once the effects of the Intercept Card are resolved the Soviet Player takes his next turn.
Soviet Action Round 8: The Soviet Player uses the card Dig or Die, the Sacrifice is fulfilled when a Rifle Unit is destroyed. The Soviet Player then advances the Bucket Counter three spaces on the Tracking Card.
German Action Round 9: The German Player plays another of his Hero Cards, Von Lorringhoven. The Hero adds +2 Break Dice which will be taken into account during the Break Test. Three Panzer Units are also added inflicting one Kill each. However, the only units remaining on the building are shielded, so the Kills are wasted. The units are flipped, then placed on the building.
Soviet Action Round 10: The Soviet Player uses Rat's War. The card allows the Soviet Player to look through his Discard Pile and remove a card, adding it to his hand. The Soviet Player looks and chooses Collecting Tongues. The card is returned to his hand. The Soviet Player now takes a 2nd Action. All of the Soviet Formations have used up all of their Patriotism. The only cards the Soviet Player can use are 0 value cards and heroes. Fortunately he has both but can only wisely play one. If he uses Collecting Tongues, the card's benefit of allowing a 2nd Action will be lost since a player cannot take more than one 2nd Action in a round. The Soviet Player instead decides instead to his hero, Tania Chernova. Tania allows to the Soviet Player to steal one Break Die, which will be used during the Break Test. Her Sniper Shot is targeted against Von Loringhoven. A Carnage Card is drawn resulting in a hit. A card is randomly picked and discarded from the German Player's hand and Von Loringhoven card is tipped on his side to show he has been wounded.
German Action Round 11: The German Player calls a Hold Action. The Carnage Card provides the option of adding two fires or inflicting a Sniper Shot. He chooses the fires.
A. The German Player advances the Fire Counter one space along the Tracking Card moving it into the Inferno Den. The Fire Counter is flipped over and becomes an Inferno Counter. A new Fire Counter is added to the Smoldering Ruins.
B. Two fires were added by the Hold Counter meaning that one more fire space is still owed the German Player. The new Fire Counter is advanced out of the Smoldering Ruins and into the first space of the Fire Track.
C. The Hold Counter is advanced into the last space of the Skull Track ending the battle, so a Break Test is now taken.
Both Players now determine the number of Break Test Dice they will roll.
Formation Die: The players are tied with two formations each. The depleted formations do not count when determining dice. Since both player are tied with formations each player gains one dice.
Unit Die: The German Player wins the unit dice since he has nine units on the building to the Soviet Player's three.
Inferno Dice: The German Player gains one die since he has one Inferno on the Tracking Card.
Defensive Dice: The Defensive Level of Red Square is two, so the Soviet Player acquires two dice.
Dice Count: The German Player will roll one Formation Die, one Unit Die, one Inferno Die, and two Bonus Dice granted by Von Loringhoven. Tania steals one of the German Die, leaving the Germans with four dice. The Soviet Player also rolls four dice, one Formation Die, two Defensive Dice, and the one stolen by Tania.
Note: A card's effects are always applied when they come into play. A player will roll the dice given or stolen by a hero even if the hero is killed during the battle. He may be dead but his legend will live on...at least until the end of the Break Test.
First German Roll: 3, 3, 4, 5 - First Soviet Roll: 1, 2, 2, 5
The highest single score for each player is a 5, the result of which is a Bloody Slaughter. Each player takes 10 Kills. All of the Soviet Player's units are shielded, so he suffers no additional loses. Four of the German Player's units are unshielded so all are destroyed. After the destroyed units are removed, the German Player has more units on the building so he gains a die.
Second German Roll: 1, 1, 3, 5, 6 - Second Soviet Roll: 2, 3, 6, 6
The highest roll is a 6, the Soviet Player has two sixes vs. the German Player's one, the result is a Soviet Victory.
It is now time to clean up the battlefield.
A. Discard used Combat Cards and Heroes
Rat's War, Deathtrap Surprise, Dig or Die!, Pistol Persuasion, Militia Surrender, Reign of Terror, Panzer Group, Tania Chernova, Hauptmann Meunch, and Von Loringhoven are placed in their owner's Discard Piles. Note: Even though Von Loringhoven was wounded the hero is "healed" once he is discarded.
B. Deplete Formations & Graduate Leaders
All formations now suffer a depletion. The 92nd Naval and 3rd Motor are already depleted so they are both destroyed and placed into their owner's Destroyed Pile. The Leader Counter on the 3rd Motor is killed since its formation was destroyed. The 138th Rifle, Army Reserve, 71st Infantry, and 14th Panzer are all depleted and returned to their owner's Staging Line. Note: Since the 138th was not depleted during an Action Round its Depletion Effect does not come into play and is ignored. The Army Reserve is the only formation with a Lv. 0 Leader, so its Commissar is flipped to a Lv. 1 Brutal Commissar.
C. Units & Counters
Since the Soviet Player won the Break test, all the Units and Counters remaining on the building and Tracking Card stay in place. The only counter which is moved is the Hold Counter which is placed on the Smoldering Ruins.
D. Building Captured?
The Soviet Player won the battle so the building remains in place. The German Player now selects the next battle to be fought. The Orlovka Village is the other building being assaulted, so the last battle fought for the turn will be at the village. Players will follow the same steps at Orlovka Village and will start with the Soviet Player adding his Vanguard Units.
Game Turn Summary
A Game Turn has a Strategy Phase and between 1-4 Battle Phases.
Strategy Phase
- Progress Turn: Advance the Hourglass one space on the Turn Track.
- Campaign Card: Players draw the top Campaign Card.
- Reinforcements: Players draw new cards from the Formation Decks.
- Consolidations: Destroy depleted formations to generate Supply.
- Ready Districts: Draw new buildings for empty districts. Hold, Fire, and Bucket Counters are reset for the new buildings drawn. Volga Cards close a district if they drawn for a new building.
- Maneuvers: German Player Maneuvers assaulting formations to buildings, then Soviet Player Maneuvers his defending formations.
Battle Phase (1-4)
Fight one battle for each building engaged by one or more German Formations. The German Player chooses the order that battles are fought in.
- Vanguards: Soviet Formations apply their Vanguard Effects first followed by the Vanguard Effects of the German Formations.
- Battle Intensity: Draw a Carnage Card. Place Hold and Fire Counters.
- Initiative Effect: The player who won Initiative applies his Initiative Effect and takes the first Action Round.
- Action Rounds: Players trade-off Action Rounds. Each player takes one of three actions.
- A. Play Combat Card
- B. Reload Hand Action
- C. Hold Action
- Break Test: Players determine and then roll their Break Test Dice. The highest single die wins, three possible results.
- A. German Victory: The highest die roll belongs to the German Player.
- B. Soviet Victory: The highest die roll belongs to the Soviet Player.
- C. Bloody Slaughter: Each player scores the same number of high die rolls.
- Aftermath: Clean up the field of combat.
- A. Discard Used Cards
- B. Deplete Formations & Graduate Leaders
- C. Unit & Counters
- D. Building Captured?
Once all Battle Phases are resolved, start the next turn.