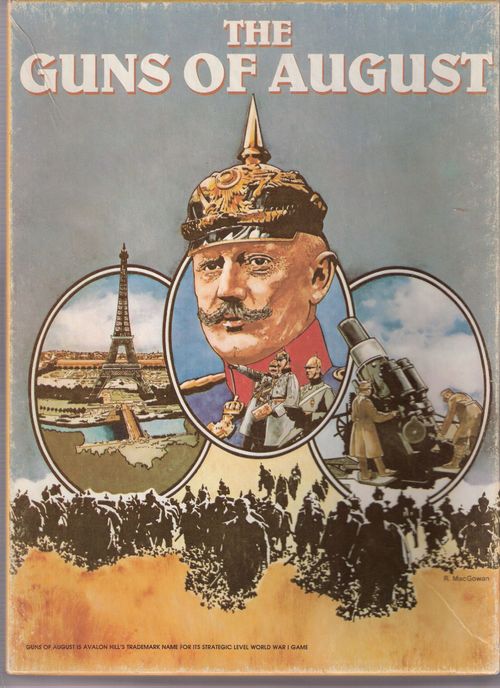
The Guns of August
The Guns of August Rulebook
Table of Contents
Table of Contents
- Basic Game Rules
- 1.0 Introduction
- 2.0 The Mapboard
- 3.0 The Playing Pieces
- 4.0 Prepare for Play
- 5.0 Sequence of Play
- 6.0 Belligerents, Neutrals, and Declarations of War
- 7.0 How a Country Is Conquered
- 8.0 Control of Hexes
- 9.0 Zones of Control
- 10.0 Stacking Limitations
- 11.0 Supply and Isolation
- 12.0 Movement
- 13.0 Combat
- 14.0 Reinforcements and Replacements
- 15.0 Victory Conditions
- Advanced Game Rules
- Optional Rules
- Charts
Basic Game Rules
1.0 Introduction
THE GUNS OF AUGUST is a strategic simulation of the First World War. The game is designed for two players, one who controls the Central Powers, and the other who controls the Allied Powers, or "Allies."
There are ten different situations, or scenarios, each of which is played as a separate game. The first nine scenarios simulate the combat on the Eastern and Western Fronts during different years between 1914 and 1918. The final scenario, The Campaign Game, begins in August 1914, and continues in monthly Game-Turns until November 1918, although the rules allow the game to end earlier, or to continue through 1919.
The rules numbered so that each major section of the rules has a whole number (such as 1.0); subordinate rules have a corresponding decimal place (such as 1.1, 1.2, or even 1.21). This rulebook includes a table of contents to help players locate any specific section of the game rules.
There are three sets of rules. The Basic Game rules (§1 to §15) introduce the fundamental concepts of the game system, and the game may be played using just these rules at the outset. The Advanced Game rules (§16 to §25) increase both the realism and the complexity of the game. Players can use any or all of the Optional Rules (§26 to §40).
2.0 The Mapboard
2.1 The four-section mapboard depicts the European territory where the major fighting of the First World War occurred. Use two western sections together to form the playing area for all Western Front scenarios; use the two eastern sections together for all Eastern Front scenarios. Use all four sections when playing both fronts for a one year scenario, or when playing the Campaign Game.
Hexes in Greece are considered on the Balkan Front. Hexes in Serbia, Bulgaria and/or Turkey may be considered on either the Eastern Front or the Balkan Front.
Various tracks and playing aids are on each side of the map board. The appropriate sections of these rules explain use of these graphic aids.
2.2 A hexagonal grid superimposed on the mapboard regulates the movement and positioning of the playing pieces and delineates the various terrain features that affect play. This hex grid uses an alphabetical letter and a number to identify each hex individually.
EXAMPLE: Paris is located in hex F11.
2.3 The terrain features depicted on the map affect unit movement and combat capabilities. The Terrain Effects Chart (see page 50) summarizes these.
3.0 The Playing Pieces
There are two basic types of colored, die-cut playing pieces: military units and game markers.
3.1 Military Units
The following sections discuss the military units that represent the military formations of various nations.
3.1.1 Nationality: The color of the piece and the abbreviation printed on the unit indicate its nationality as shown in the following table:
- AH = Austria Hungary
- G = Germany
- B = Britain
- GR = Greece
- Be = Belgium
- I = Italy
- Bu = Bulgaria
- Mo = Montenegro
- F = France
- Ne = Netherlands
- R = Russia
- Tu = Turkey
- Ru = Rumania
- US = United States
- Se = Serbia
3.1.2 Unit Size: Standard NATO symbols indicate the size of the military formation a unit represents:
- XXX = Corp
- XX = Division
- X = Brigade
- III = Regiment
- II = Battalion
3.1.3 Designation: The military units of each nation contain a printed, numerical designation. These designations are not always historical; they are included chiefly for play-by-mail purposes.
3.1.4 Unit Class and Type: There are three different classes of military units: Combat Units, Combat Support Units, and Air Units. Each class contains one or more types. The following table shows examples of these unit types:
- Combat Units: Infantry; Cavalry; Infantry Stosstruppen (only German units)
- Combat Support Units: Artillery; Siege Artillery; Fort Construction Engineers; Railroad Repair Engineers; Tanks
- Air Units: Air Unit
3.1.5 United States Army Divisions: U.S. Army divisions had as many men as a European army corps, so whenever the rules refer to a "corps-sized unit," e.g., for Sea Supply (§11.3), Rail Movement (§12.2), or Sea Movement (§12.3), it also applies to U.S. infantry and cavalry divisions.
NOTE: There are several "non-corps-sized combat units" in the game, e.g., Turkish cavalry divisions.
3.2 Sample Military Unit
(The sample unit illustration labels the unit's Attack Strength, Defense Strength and Movement Allowance.)
The Attack Strength is the unit's basic combat strength when attacking.
The Defense Strength is the unit's basic combat strength when defending.
The Movement Allowance is the maximum number of movement points the unit may expend during the movement phase.
NOTE: Military units are not back-printed.
3.3 Game Markers
The back-printed Game Markers are used to represent man-made installations such as forts and entrenchments, or as record-keeping devises on the mapboard. There is a separate set of markers for the Central Powers and the Allied Powers.
(Marker illustrations include: Beach Head; Infantry Replacement Points; Artillery Replacement Points.)
4.0 Prepare for Play
4.1 The players choose the scenario they wish to play by mutual agreement. Inexperienced players should begin with the first Scenario: 1914 Western Front.
NOTE: Players may instead want to try the 1914 Eastern Front as the 1914 Western Front has a number of special rules (see §37.4).
4.2 The players should now refer to the scenario rules (§37.0) that specify the game length, victory conditions, and initial deployment restrictions. After both players have finished their initial deployment, place the month and year markers on the circular display printed on the map, and initiate the Sequence of Play.
5.0 Sequence of Play
Each scenario is played in a series of turns that are known as Game-Turns. Each Game Turn represents one month and consists of two identical Player Turns followed by an Interplayer Turn.
A player is the "phasing player" during his own Player-Turn; the other player is the "non phasing player." In general, only the phasing player takes action during a Player-Turn. During the Interplayer Turn, both players perform various special activities within the restrictions of the Game Turn Sequence that follows.
5.1 Central Powers Player-Turn
5.1.1 War Declaration Phase: The phasing player may declare war on neutral countries (see §6.0).
5.1.2 Supply Determination Phase: The phasing player checks the supply status of his units and places Isolation markers on unsupplied units (see §11.0).
5.1.3 Movement Phase: The phasing player may move any or all of his units, in any order he wishes, within the restrictions of the Movement rules (see §12.0). In addition, he may perform any construction or repair operations within the restrictions of the appropriate rules.
5.1.4 Combat Phase: The phasing player may designate and resolve any combat he wishes to initiate, in any order he chooses, within the restrictions of the Combat rules (see §13.0).
5.1.5 Demoralization Removal Phase: The phasing player removes all Demoralization markers from his units except markers which were incurred during the current Player-Turn (see §13.44).
5.1.6 Isolation Phase: The phasing player again checks the supply status of his units and eliminates units that have reached their maximum isolation level.
5.2 Allied Player-Turn
- 5.21 War Declaration Phase
- 5.22 Supply Determination Phase
- 5.23 Movement Phase
- 5.24 Combat Phase
- 5.25 Demoralization Removal Phase
- 5.26 Isolation Phase
5.3 Interplayer-Turn
5.3.1 Naval Phase: The Central Powers player may initiate submarine warfare (see §23.0).
NOTE: Omit this phase in the Basic Game.
5.3.2 Morale Phase: Starting from Jan 1916 Each player rolls the die once for each country he controls as required by the Morale Phase Rules (see §24.0).
NOTE: Omit this phase in the Basic Game.
5.3.3 Reinforcement Phase: Both players receive reinforcements and replacements in accordance with the appropriate rules (see §14.0).
5.3.4 Game-Turn Phases: Advance the marker(s) indicating the current Game Turn one month in the Game-Turn display printed on the map.
5.3.5 Weather Determination Phase: The Central Powers player rolls the die to determine the weather for the next Game-Turn (see §25.0).
NOTE: Omit this phase in the Basic Game.
6.0 Belligerents, Neutrals, and Declarations of War
6.1 Belligerents
6.11 The scenario specifies which countries form the Central Powers and the Allies. These countries are belligerents, which are enemy nations at war at the start of the scenario. All units of Central Powers countries are enemy units to units of Allied countries and vice-versa. All units of Central Powers countries are friendly units to units of other Central Powers countries. All units of Allied countries are friendly units to units of other Allied countries.
6.12 During a scenario, neutral countries may become belligerents and join either the Central Powers or the Allies. In general, if either player declares war on a neutral country, that country immediately joins the opposing player's alliance. In addition, a neutral country may become a belligerent, even if neither player has declared war against it, according to the restrictions of various scenarios, or optional rules.
6.2 Neutrals
6.21 The scenario specifies which countries are neutral at the start of play. A neutral country remains neutral until either player declares war against it, or until it enters the war in accordance with the scenario, or optional rules.
6.22 The units of belligerent countries may not enter the territory of a neutral country without first declaring war against that country. Belligerent units may never retreat into the territory of a neutral country; if forced to do so, eliminate such units immediately.
6.23 If either player declares war against a neutral country, it immediately becomes a belligerent in the alliance controlled by the opposing player; that player immediately deploys assumes the control of the country's units and such units become subject to the normal movement and combat restrictions.
6.3 Declarations of War
6.31 During the War Declaration Phase, the phasing player may declare war against a neutral country by declaring this aloud. The neutral country immediately becomes a belligerent in the alliance controlled by the opposing player. The non-phasing player immediately deploy all the forces available to that country (including reinforcements, not replacements) through the current Game-Turn.
6.32 Once a player declares war on a country, that country remains an enemy belligerent until it is conquered, or the scenario ends.
NOTE: We recommend neutral units not be deployed until a player declares war against the neutral country; when this occurs, the opposing player immediately deploys the neutral country's units.
6.4 Special Neutral Countries
6.41 Denmark, Switzerland and Sweden are permanently neutral and prohibited territory. They have no units.
6.42 Albania and Luxembourg are special neutrals and have no units: belligerent units may enter them without declaring war.
7.0 How a Country Is Conquered
7.1 An enemy player who controls all of a country's cities at the start of the Interplayer-Turn has conquered that country.
7.2 When a country is conquered, remove all of its units from play immediately and permanently. Once a country is conquered, it cannot receive reinforcements or replacements and cannot renter the war.
8.0 Control of Hexes
8.1 A player controls a hex if a friendly unit occupies it or was the most recent to occupy it.
8.2 At the start of a scenario, a player controls all hexes in the countries under his control, except hexes currently or most recently occupied by an enemy unit.
NOTE: Treat hexes located "behind the enemy front" as having been most recently occupied by an enemy unit.
8.3 When a country becomes a belligerent, the alliance the country joins controls all of the hexes in that country.
8.4 When a country is conquered, each hex in that country remains under the control of the player who currently controls it, subject to the limitations of Rule 8.1.
9.0 Zones of Control
A zone of control (ZOC) is a different concept from the concept of Rule 8.0 (CONTROL OF HEXES). A zone of control is the area around a combat unit that inhibits enemy combat units in various ways. A combat unit exerts a ZOC into hexes regardless of whether the player who controls that combat unit controls the hexes (as defined in Rule 8.0).
9.1 Each unentrained combat unit always exerts a ZOC into the six hexes adjacent to the hex it occupies.
NOTE: Entrained units, combat support units, and air units do not exert a ZOC. A ZOC never extends across an all-sea hexside or across the border hexside of a neutral country.
9.2 The ZOCs of a friendly unit and an enemy unit may overlap; this does not negate the effect of either unit's ZOC.
9.3 The presence of a friendly unit in any enemy ZOC does not negate the effect of the enemy ZOC in the hex the friendly unit occupies.
9.4 During the Movement Phase, a unit may enter an enemy ZOC and may continue moving if it has sufficient remaining movement points; it is not required to stop immediately upon entering an enemy ZOC. A unit may move directly from one enemy ZOC to another (even if exerted by different units) by expending two additional movement points, over and above the normal cost for the hex the unit enters.
9.5 During the Combat Phase, a unit may never retreat into an enemy ZOC (even if a friendly unit occupies it).
10.0 Stacking Limitations
10.1 The maximum number of friendly units that may occupy a single hex at the end of the phasing player's Movement Phase is limited as follows:
- three combat units,
- one regular artillery unit,
- one siege artillery unit,
- one tank unit, and/or
- one air unit (only in cities per §20.1).
More than one regular artillery unit may stack in a hex; however, the total number of combat units and regular artillery units in a hex may never exceed four. The stacking limits of other unit types are not affected.
EXAMPLE: Two combat units and two regular artillery units could stack in a hex.
An unlimited number of engineer units may occupy the same hex.
10.2 During a Combat Phase, units may retreat through hexes in violation of the stacking limit. At the end of the Combat Phase, however, the stacking limit is enforced and the player who controls the units must immediately eliminate the excess units.
10.3 An unlimited number of game markers may occupy a single hex; there is no effect if multiple markers of the same type are in a hex.
10.4 (OPTIONAL): There are two alphabetized sets of Front markers for each player, and the East and West Front Substitution Boxes printed on the mapboard.
Players may place Front markers (which indicate both entrenched and unentrenched status) on the mapboard in lieu of the unit(s) and markers in any single hex. Place the counters that the Front marker represents in the corresponding box on the appropriate edge of the mapboard. Once adopted, players will find that the use of these substitute counters and boxes greatly facilitates the setting-up and playing of the game, and heightens the game's realism by enhancing the secrecy concerning the disposition of each player's forces.
COMMENT: This rule may help players deal with the game's liberal stacking limits.
11.0 Supply and Isolation
Only a supplied unit may use its full Movement Allowance or Combat Strength. Any unsupplied unit is isolated and its Movement Allowance and Combat Strengths are halved, with fractions rounded up (FRU). There are three levels of isolation, which players indicate by placing an appropriate isolation marker on a unit (or stack of units). An isolated unit is eliminated when it reaches its maximum isolation level.
11.1 When Supply States and Isolation Levels are Determined
SUMMARY: Place and advance Isolation markers only during the Supply Determination Phase; remove Isolation Markers in either the Supply Determination or Isolation Phases. Eliminate isolated units only during the Isolation Phase.
11.11 The phasing player must determine the supply state of the units he controls during the Supply Determination and Isolation Phases. There are two states: supplied or isolated. Any unit is isolated if it is not supplied.
11.12 When a player checks the supply state of a unit during the Supply Determination Phase, he immediately removes any Isolation maker on the unit if the unit is currently supplied; otherwise,
- If an isolated unit does not already have an Isolation marker, it immediately gains an Isolation 1 marker.
- If an isolated unit already has an Isolation marker, replace the marker immediately with a marker at the next highest isolation level.
11.13 During the Isolation Phase, the phasing player determines the supply state of each of his units with Isolation markers. He immediately removes the marker if the unit is currently supplied and eliminates the unit only if its Isolation Level and location are:
- Level 1 and not in a city hex
- Level 2 and not in a city hex of its home country
- Level 3 and anywhere
11.2 How a Unit's Supply State is Determined
11.21 When a player checks the supply state of his units, any unit that possesses a valid supply path is supplied. Any unit that does not possess a valid supply path is isolated.
11.22 A valid supply path is a path of five or fewer hexes leading from the hex a unit occupies to a hex containing a friendly supply source or to a friendly controlled rail line free of enemy controlled (per §8.0) hexes and enemy ZOC leading to a supply source. The hex a unit occupies does not count against the five hex limit; the hex containing the initial rail line hex or supply source does count against the five-hex limit. A valid supply path may begin in an enemy ZOC, but may not enter another enemy-controlled hex or ZOC (even if the hex in the enemy ZOC is occupied by a friendly unit); nor may it be traced across an all-sea hexside, or the border hexside of a neutral country.
11.23 A friendly supply source is any controlled city in a friendly or conquered country. A city continues to function as a supply source until enemy units or ZOCs occupy every adjacent, non-neutral land hex. A city may only serve as a supply source if it is possible to trace a valid supply path from the city to another city which is also a friendly supply source.
11.24 Each of the four rail entry hexes ("R1, R2, R3, and R4") on the eastern edge of the map in Russia is a friendly supply source for Allied units unless the Central Powers player currently controls it.
11.3 Sea Supply
11.31 During the game, each player possesses a sea supply capacity that he may use to supply land units that he controls. This capacity is expressed as a number of supply capacity points which are available each Turn. To supply any corps-sized unit (see §3.1.5) requires one point. To supply any other unit requires one-half point.
11.32 Any city in a coastal hex is a port. Rule §8.0 defines "control of a port".
11.33 The Central Powers sea supply capacity is one point. The Central Powers may use this capacity to supply any unit that possesses a valid supply path to any port on the Baltic Sea that they currently control.
11.34 The Allied sea supply capacity is six points. The Allies may use this capacity to supply any unit that possesses a valid supply path to any port that the Allies currently control. EXCEPTION: See §11.35, §11.36, and §11.37.
11.35 The Allies may never use their sea supply capacity to supply a unit that is tracing its supply path to a port on the Baltic Sea.
11.36 The Allies may not use sea supply to supply a unit that is tracing its supply path to a port on the Black Sea unless they currently control Constantinople (per §8.0).
11.37 The Allies may not use sea supply to supply a unit tracing its supply to a port on the Adriatic Sea unless Italy has entered the war.
12.0 Movement
During his movement phase, the phasing player may move all, some, or none of his units. Land units may use three different modes of movement during the Movement Phase: regular movement, rail movement, and sea movement. The units of the non-Phasing player may not move and combat is prohibited during the Movement Phase.
12.1 Regular Movement
12.11 During his Movement Phase, the phasing player may move as many or as few units as he desires, in any order he wishes. Players move each unit individually, tracing a path of contiguous hexes through the hex grid. Once a player begins moving a particular unit, he must complete its movement before any other unit may move.
12.12 The distance that a unit may move during a single Movement Phase is dependent on the unit's Movement Allowance. A unit expends movement points from its Movement Allowance in each hex it enters according to the type of terrain in the hex. The Terrain Effects Chart summarizes the movement point costs for each type of terrain present on the map. A unit may never enter a hex unless it has a sufficient number of unexpended movement points to pay the full cost required to enter that hex. EXCEPTION: see Rule 12.17.
12.13 A unit may expend all, some, or none of its movement points in a single Movement Phase. A unit may not transfer unexpended movement points to a different unit or accumulate them from one Game-Turn to another.
12.14 A unit may never move across an all-sea hexside unless it is using Sea Movement (see Rule 12.3).
12.15 A unit may never enter a hex occupied by an enemy unit. A unit may enter an enemy ZOC, at no additional cost, and may continue moving if it has remaining movement points. A unit may move directly from one enemy ZOC to another by expending two additional movement points, over and above the normal cost for the hex the unit enters.
12.16 The Movement Allowance of an isolated unit is halved (rounding up) (see §11.0).
12.17 During the Movement Phase, a combat unit (only) may always move one hex, even if it does not have sufficient movement points to pay the full cost required to enter that hex.
12.2 Rail Movement
12.21 During his Movement Phase, the phasing player may move entrained units via rail movement through contiguous rail hexes (connected by the printed rail line symbol) which he currently controls.
12.22 Rail capacity determines the maximum number of units that a player may entrain during a single Movement Phase. The rules governing rail capacity points on each front are as follows:
- The rail capacity for each player on the Western Front is eighteen points.
- The rail capacity for each player on the Eastern Front is twelve points.
- Each corps-sized unit requires one rail capacity point to entrain.
- Any other unit requires one-half point to entrain.
If a unit moves from one front to another while entrained it counts against the rail capacity for each front.
12.23 During his Movement Phase, the phasing player may entrain or detrain any unit he controls that occupies a rail hex by expending one movement point from the unit's Movement Allowance. Place a unit that entrains under an Entrained marker. Remove the marker immediately when a unit detrains.
12.24 While entrained, a unit may move up to twenty-four hexes via rail movement without expending any movement points. An entrained unit does not exert a ZOC and may not attack an enemy unit.
12.25 A unit may never entrain in an enemy ZOC nor may an entrained unit voluntarily enter an enemy controlled hex or ZOC.
12.26 A unit is not required to detrain at the end of a Movement Phase; however, if an enemy unit moves adjacent to an entrained unit, the entrained unit is automatically detrained in the hex it occupies and its defence Strength is halved (FRU) if it is attacked in the same enemy Player-Turn.
12.27 A unit may combine regular and rail movement during the same Movement Phase within the limit of its Movement Allowance; but a unit may only use rail movement once in a single Movement Phase.
12.28 The presence of a rail line in a hex does not negate the normal terrain cost to enter the hex for units using regular movement.
12.3 Sea Movement
12.31 During the game, each player possesses a sea movement capacity that he may use to move land units he controls that is expressed as a number of points that are available each turn. To move any corps sized unit via sea movement requires one point. To move any other unit requires one-half point.
12.32 The Central Powers sea movement capacity is one point. They may use this capacity to move units from any port on the Baltic Sea to any other port on the Baltic Sea that the Central Powers player currently controls.
12.33 The Allied sea movement capacity is six points. The Allied player may use this capacity to move units from any controlled port to any other controlled port as defined in §11.32. EXCEPTION: see §12.34, §12.35, and §12.36
12.34 The Allied player may not use sea movement (or conduct an amphibious invasion in the Advanced Game) on the Baltic Sea.
12.35 The Allied player may not use sea movement (or conduct an amphibious invasion in the Advanced Game) on the Black Sea unless the Allied player currently controls Constantinople
12.36 The Allied player may not use sea movement (or conduct an amphibious invasion in the Advanced Game) on the Adriatic Sea unless Italy has entered the war.
12.37 A unit which is moved by sea movement may not use regular or rail movement during the same Movement Phase, nor if it moved or attacked earlier in the same Game-Turn (if using Advanced Game §23.2).
13.0 Combat
During the Combat Phase, the phasing player may attack any enemy unit(s) adjacent to any unit(s) he controls. Only units that are directly adjacent to an enemy unit may participate in an attack upon that unit. Each attack the phasing player initiates is resolved separately. For each attack, the phasing player is the Attacker and the non-phasing player is the Defender, regardless of the overall strategic situation.
13.1 Combat Procedure
13.11 The phasing player may attack any enemy unit adjacent to a unit he controls. Any un-demoralized unit that is adjacent to an enemy unit may participate in an attack upon that unit. A demoralized unit may not attack but may defend normally during the combat Phase. A unit may never attack an adjacent unit across an all-sea hexside.
13.12 Attacking is voluntary. Units are never compelled to attack, and not every unit adjacent to an enemy unit need participate in a given attack.
13.13 Other units in a hex that contains an attacking unit need not participate in that same attack or any other attack. The results of an attack never affect a unit in a stack that is not participating in a given attack.
EXAMPLE: If one unit in a stack attacks a given hex, the other units in the stack could attack a different hex, or not attack at all.
13.14 If the phasing player wishes, he may attack enemy units in the same hex separately; however, if he attacks any unit in a hex, he must attack all other units in that hex during the Combat Phase.
13.15 If the phasing player wishes, he may attack enemy units in more than one hex simultaneously, as a single attack, as long as every unit that participates in the attack is adjacent to every defending enemy unit.
13.16 A given unit's Attack Strength or Defense Strength is always unitary; that is, a player may not divide it among different combats for either attack or defense.
13.17 No unit may attack more than once per Combat Phase and no enemy unit may be attacked more than once per Combat Phase.
13.18 The phasing player may initiate his attacks separately, in any order he desires, by announcing which hex he wishes to attack. The non-phasing player may then allocate his eligible combat support units (see §13.2), after which the phasing player immediately resolves the attack, before he initiates any further attacks.
13.19 The phasing player resolves each attack by determining the Combat odds, rolling one die and applying the appropriate die roll modifications (DRMs), and locating this modified result on the Combat Results Table (see §13.4). The Combat odds are determined by dividing the total Attack Strength of all attacking units by the total Defense Strength of all defending units; always round off fractions in favor of the Defender to conform to the simplified odds found at the top of the Combat Results Table. Thus a total Attack Strength of nine against a total Defense Strength of seven yields Combat odds of 1 to 1.
13.2 Combat Support Units
13.21 When the phasing player initiates an attack, before he allocates the specific units participating in the attack, the non-phasing player may allocate any combat support unit(s) in the defending hex to any combat unit(s) in the same hex. If the non-phasing player allocates a combat support unit to a combat unit, treat the two units as one indivisible unit for combat result purposes. The phasing player may attack a combat support unit separately if the non-phasing player does not allocate it to a combat unit.
EXAMPLE: The phasing player announces he wishes to attack a hex occupied by four enemy units: a 5-7-4 infantry unit, a 4-6-4 infantry unit, a 3-3-3 artillery unit, and a 0-1-2 engineer unit. The non-phasing player then announces he is allocating the artillery unit to the 5-7-4 infantry unit, and the engineer unit to the 4-6-4 infantry unit. The phasing player must either attack all the units in the hex combined (Defense Strength 17) or make two attacks: one against the artillery and the 5-7-4 infantry, which have a total Defense Strength of 10; the other against the 4-6-4 infantry and the engineer, which have a total Defense Strength of seven.
13.22 Combat support units may not attack an enemy unit unless a friendly Combat unit participates in the attack.
13.23 The number of artillery units participating in an attack may never exceed the number of combat units participating in an attack.
13.3 How Terrain Affects Combat
13.31 Decrease the die roll used to resolve an attack by one if all defending units occupy a hex with city, swamp, rough terrain, or any combination thereof.
NOTE: The die roll is decreased by one, not two, when a hex containing both a city and rough terrain is attacked.
EXAMPLE: A city in rough terrain decreases the die roll by one.
13.32 Decrease the die roll used to resolve an attack by one if all attacking units occupy a river hex and none of the defending units occupy a hex traversed by the same river.
NOTE: A river hex is a hex in which the river passes through at least two hex sides, or enters the hex and flows into the sea. A hex in which the river passes through only one hexside is not a river hex.
13.33 All DRM (including those for terrain) are cumulative. The Terrain Effects Chart summarizes these effects.
13.4 Explanation and Execution of Combat Results
13.41 Interpret the abbreviated results indicated on the Combat Results Table as follows:
-
AE = Attacker Eliminated. Eliminate all attacking units.
-
AA = Attacker Attrition. Attacker must lose Attack Strength at least equal to the printed Defense Strength of the defending unit(s). Defender suffers no loss.
-
AD = Attacker Demoralized. Attacker must retreat one hex or lose unit with the largest Attack Strength. Units which retreat are demoralized (see Rules §13.42, §13.43, §13.44, and §13.45).
-
BD = Both Demoralized. Attacker suffers "AD" result; Defender suffers "DD" result. Apply the result to the Defender first.
-
DD = Defender Demoralized. Defender must retreat one hex or lose unit with the largest Defense Strength. Units that retreat are demoralized (see Rules §13.42, §13.43, §13.44, and §13.45).
-
DX = Defender Exchange. Eliminate all defending units. Attacker must lose Attack Strength at least equal to Defender's loss (i.e., equal to printed Defense Strength of Defender).
-
DE = Defender Eliminated. Eliminate all defending units.
13.42 Whenever a Demoralized result occurs, the player has the option of retreating one hex or losing the unit with the largest strength. Only combat units may retreat. If a player chooses to retreat, eliminate all combat support units that he used in the combat. Combat units which retreat are demoralized (see §13.44).
EXAMPLE: An attack occurs against a hex occupied by a 5-7-4 infantry unit, a 4-6-4 infantry unit, a 3-3-3 artillery unit, and a 0-1-2 engineer unit. The non-phasing player has allocated the artillery unit to the 5-7-4 infantry unit (Defense Strength 10) and the engineer unit to the 4-6-4 infantry unit (Defense Strength 8).
If the phasing player attacks all the units combined and a Demoralized result occurs, the non-phasing player must either eliminate the 5-7-4 and artillery unit (they have the greatest Defense Strength), or retreat all units in the hex. Combat support units cannot retreat, so the retreating means the non-phasing player must retreat the combat units and eliminate the combat support units.
If a Demoralized result occurs against one of the paired units, the non-phasing player must eliminate both units or retreat the combat unit and eliminate the combat support unit.
13.43 Whenever units retreat, the owning player may retreat the units in any direction, providing these units end their retreat in a hex with a supply path (see §11.2) no longer than that of the hex they originally occupied, or no further from the nearest supply source if they were unsupplied during combat. Units may never retreat off the map, across an all-sea hexside or the border hexside of a neutral country, or into an enemy ZOC or a hex occupied by an enemy unit. Immediately eliminate units that cannot retreat without violating any of these restrictions.
NOTE: Units may retreat two hexes at the owning player's discretion.
13.44 Combat units that retreat are demoralized; place a Demoralization counter marker on top of such units immediately. Demoralized units may not attack. The die roll is increased by one if any defending unit is demoralized. During the Demoralization Removal Phase, the phasing player removes all Demoralization markers from his units except markers incurred during the current Player-Turn.
13.45 Whenever a hex retreat or elimination completely vacates a hex, any opposing combat unit(s) that participated in the attack which left the opposing hex vacant, and that is currently adjacent to the hex, may immediately advance into the hex. This option, which is known as "Advance After Combat," must be exercised immediately, before any further combat is resolved. Units that advance after combat are not required to expend Movement Points, and are not subject to the normal restrictions that an enemy ZOC imposes on normal movement.
Note: A unit may only advance after combat if it participated in the attack which left the opposing hex vacant; not an earlier attack against the hex during the same Combat Phase.
13.5 Combat Results Table
The Combat Results Table is located on the Player-Aid Card.
14.0 Reinforcements and Replacements
14.1 Reinforcements
14.11 During the Reinforcement Phase, both players check the Reinforcement Schedule and deploy any reinforcements scheduled for the current Game Turn on the mapboard.
14.12 Take all reinforcements from the unused portion of the counter mix (not from previously eliminated units); the number and type of unused units available limits reinforcements. If the required unit(s) is not available, the reinforcement is cancelled.
14.13 The owning player may deploy the unit(s) he receives as reinforcements in any city that he currently controls in the unit's home country. Reinforcements may not deploy in a hex in which the unit(s) would be isolated (see §11.2 & §11.3), or violate stacking limitations (§10).
14.14 Certain reinforcements arrive in specific hexes at specific times. These units, and only these units, may deploy in a hex adjacent to the designated hex if that hex is currently stacked to the legal limit. The units may not be deployed in an adjacent hex in violation of §14.13, and may not be deployed in an enemy ZOC.
14.15 All Russian reinforcements must initially deploy in any of the Russian rail entry hexes (R1, R2, R3, or R4) in Russia. If the Allied player wishes, these units may enter the game entrained.
14.16 United States reinforcements may arrive in any port in France or Britain that the Allied player currently controls. A port is any city in a coastal hex.
14.17 During the Reinforcement Phase of November 1914, the Allied player must remove three Russian infantry corps from the map (assume these units are redeployed off the map against Turkey). These three corps may reenter the game as Allied reinforcements on the Game-Turn after the Allied player conquers Turkey.
14.18 Reinforcements that cannot deploy on the Game-Turn in which they are to arrive are cancelled. Neither player may voluntarily delay the reinforcements he is to receive on any given Game-Turn.
14.2 Replacements
14.21 During the Reinforcement Phase, each belligerent country receives one infantry replacement point for each city in the country not controlled by the enemy player, and one artillery replacement point for each multiple of five infantry replacement points it received (FRU).
EXAMPLE: A country that receives one infantry replacement point receives an artillery point as well.
There are several exceptions to this rule:
- The maximum number of German infantry replacement points is twenty. Decrease this by one for each German city that the enemy player controls.
- The maximum number of French infantry replacement points is ten. Decrease this total by one for each French city that the enemy player controls.
- The maximum number of Italian infantry replacement points is five. This total is automatically decreased by one for each Italian city that the enemy player controls.
- In addition to its cities, Russia receives one infantry replacement point for each Russian rail entry hex that the enemy player does not control.
- The United States receives no replacement points until November 1918. If the game is still in progress, the United States receives ten infantry replacement points per turn, for the remainder of the game.
NOTE: Only belligerent countries receive replacement points. A country never receives replacement points while it is neutral or after it is conquered.
14.22 Record the replacement points each country receives on the Replacement Tracks located on each side of the mapboard. Most countries have two markers: one for infantry replacement points, and one for artillery replacement points. If a country does not have a marker, it may not receive replacements of that type.
NOTE: Belgium, Bulgaria, Greece, the Netherlands, and Montenegro do not receive artillery replacements.
14.23 Players may expend replacement points on the Game Turn they receive them, or they may accumulate them and expend them later. A country may not accumulate more than twenty replacement points of either type.
14.24 During the Reinforcement Phase, each player may purchase replacements by expending the appropriate country's replacement points. Players must take replacements from units eliminated earlier in the game.
NOTE: Players should place eliminated units in any convenient space where they can be distinguished from the unused portion of the counter mix.
14.25 To replace any combat unit, the owning player must expend a number of infantry replacement points (from the unit's home country) equal to the unit's Attack Strength. To replace any combat support unit, the owning player must expend a number of artillery replacement points as shown in the table below.
Replacement Cost per Unit or per Attack Strength (AS) factor
| Unit Type | First purchase | Subsequent |
|---|---|---|
| Infantry or Cavalry | 1 Infantry RP / AS | 1 Infantry RP / AS |
| Artillery | 1 Artillery RP / AS | 1 Artillery RP / AS |
| Engineer (RR, Fort) | 3 Artillery RP / Unit | 3 Artillery RP / Unit |
| Siege Artillery | 5 Artillery RP / Unit | 5 Artillery RP / Unit |
| Stosstruppen* (§18.1) | 7 Infantry RP / Unit | 5 Infantry RP / Unit |
| Tanks* (see §19.1) | 4 Artillery RP / Unit | 2 Artillery RP / Unit |
| Air Units (see §20) | Automatic (Free) | Automatic (Free) |
* NOTE: Advanced Game units not used in the Basic Game
Deploy a replacement unit on the mapboard immediately after purchasing it, under the same restrictions as a reinforcement unit of the same country.
14.26 Russian replacements may either enter the map like Russian reinforcements (see §14.15), or may be deployed in any Russian city which is controlled by the Allied player, according to the restrictions of §14.13.
14.27 Britain cannot replace its 6-8-4 or 5-7-4 infantry units, or its 5-5-5 or 4-4-5 cavalry units. Permanently remove these units from play when eliminated and substitute new units in the reinforcement pool as follows:
- Replace a 6-8-4 with a 5-7-4; when a 5-7-4 is eliminated, replace it with a 4-6-4
- Replace the 5-5-5 with the 4-4-5; when the 4-4-5 is eliminated, replace it with a 3-3-5
NOTE: This rule simulates the effect of the loss of long-term professional soldiers on the high quality of the pre-war British army.
During the Reinforcement Phase of each January turn, if Britain is a full participant, add three 4-6-4 infantry units, one 3-3-5 cavalry, and one 3-3-3 artillery unit to the "pool" from which British replacements are taken.
14.28 If France is conquered, treat the French engineer units as British units for replacement purposes.
14.29 Once a country is conquered, it receives no replacement points for the remainder of the game.
15.0 Victory Conditions
15.1 Victory Points
15.11 During the game, the Central Powers' player receives one victory point for each objective city he controls (as defined by Rule 8.0). The Allied player does not receive victory points.
15.12 Objective cities are printed in red. There are ten cities on each front.
| Western Front | Eastern Front |
|---|---|
| Antwerp | Breslau |
| Dijon | Brest-Litovsk |
| Essen | Bucharest |
| Florence | Budapest |
| Frankfurt | Constantinople |
| Lille | Kiev |
| Metz | Königsberg |
| Paris | Lemberg |
| Trieste | Riga |
| Verdun | Smolensk |
15.2 How Victory is Determined
15.21 For any scenario, the victor and the level of victory achieved are determined from the Victory Conditions Chart printed on the Player-Aid Card.
15.22 In addition to a draw (which is considered a tie game - neither player is the victor), there are three levels of victory that the winning player may achieve.
- The lowest ranking is an Operational Victory.
- The next best victory is a Strategic Victory.
- The best possible victory is an Automatic Victory.
Determine the level of victory by totaling the number of victory points that the Central Powers' player possesses when the game ends, and locating this total on the Victory Conditions Chart opposite the current Game Year.
15.23 During the Game-Turn Phase of each Game-Turn, the Central Powers' player should total the number of victory points he currently possesses. If this total equals or exceeds the number indicated for a Central Powers' automatic victory, the game immediately ends as an automatic victory for the Central Powers. If the total is equal or less than the number indicated for an Allied automatic victory, the game immediately ends as an Allied automatic victory.
15.24 If neither player achieves an automatic victory prior to the last turn of the scenario, the number of victory points the Central Powers' player possesses during the last Game-Turn Phase determines the level of victory.
15.25 If the scenario is played on a single front, the Central Powers' player is automatically awarded a number of victory points for the objective cities he controls on the other (unplayed front). This total is under the appropriate heading on the Victory Conditions Chart.
EXAMPLE: During the last Game-Turn Phase of the 1914 Western Front Scenario, the Central Powers' player controls Antwerp, Essen, Frankfurt, Lille, Metz, and Trieste, for a total of six victory points on the Western Front. In addition, in 1914, he possesses four victory points on the Eastern Front, raising his overall total to ten. This is an Operational victory for the Central Powers in 1914.
Advanced Game Rules
16.0 Entrenchments
NOTE: Entrenchment markers represent man-made defenses which the Central Powers (black) and the Allies (white) may be construct during the game. These markers are back-printed and contain a number from one to three, which indicates the maximum number of combat units that may be stacked under the marker. Entrenchments do not affect the Stacking Limitations (see §10).
16.1 How to Construct Entrenchments
16.11 During the Movement Phase, a combat unit constructs an entrenchment by expending two Movement Points in a hex and occupying that hex at the end of the Movement Phase. Combat support units and entrained combat units may not construct entrenchments.
16.12 A player may construct an entrenchment in any hex except a hex containing a Fort marker.
16.13 A player may place only one Entrenchment marker in a hex. The first marker placed in a hex must be a level 1 entrenchment. An entrenchment may be upgraded one level per turn; thus, it takes three turns to construct a level 3 entrenchment.
16.14 A unit may only move under an Entrenchment marker during the friendly Movement Phase. Units that are under an Entrenchment marker may move above the marker during their Movement Phase, or during any Combat Phase. There is no Movement Point cost to move a unit above or below an Entrenchment marker.
16.2 How to Remove Entrenchments
16.21 The number on an Entrenchment marker may never exceed the number of friendly combat units that occupy the hex at the end of any phase. Replace or remove the Entrenchment marker immediately if combat units voluntarily abandon or retreat from an entrenched hex.
16.22 The phasing player may voluntarily reduce or remove any of his entrenchments at any time during his Player Turn.
16.3 How Entrenchments Affect Combat
16.31 A unit that is under an Entrenchment marker may not participate in an attack.
16.32 Decrease the die roll by one when all of the defending units in an attack are under an Entrenchment marker.
NOTE: See Optional §26.5.
17.0 Forts
NOTE: Each player has a separate set of Fort markers in addition to a small number of (pre-war) forts printed on the map. For ease of play, place one Fort marker in each hex containing a printed fort - this marker represents the fort; treat the printed fort symbol as a normal city. All forts represent major defensive installations.
Forts do not affect Stacking Limitations (see §10).
17.1 How to Construct Forts
NOTE: Fortifications constructed during the game are fortified zones with large numbers of small steel-reinforced concrete dugouts, pillboxes, and artillery observation posts, such as the German Siegfriedstellung (aka "Hindenburg Line").
17.11 Only a fort engineer that spends three entire friendly movement phases in hex in detrained status may construct a fort in that hex. The movement phases need not be on consecutive turns. Place the fort on the mapboard at the end of the third friendly Movement Phase.
NOTE: A player may build a fort in an enemy ZOC.
17.12 A fort may only be constructed in a hex which contained a level 3 entrenchment at the start of the Movement Phase. If the hex is occupied by a fort engineer unit at the beginning and the end of the Movement Phase, the marker is flipped over to represent a fort. A fort may be built in any hex containing a level 3 entrenchment, even a hex adjacent to an enemy combat unit. No more than one fort may be built in a single hex.
17.13 Units may move under a Fort marker during the Friendly Movement Phase. Units under a Fort maker may move above the marker without any Movement Point cost during their Movement Phase or any Combat Phase.
17.2 How Forts are Destroyed and Captured
17.21 The phasing player may voluntarily destroy any fort if a friendly combat unit occupies the hex at the start of his Movement Phase. When a fort is destroyed, the Fort marker is immediately removed from the map.
17.22 A combat unit automatically captures a vacant enemy fort when it enters the hex. Immediately replace the fort marker with a marker of the capturing player.
17.3 How Forts Affect Combat
17.31 Units under Fort makers may not attack.
17.32 The die roll is decreased by two (-2) if all defending units are under the fort marker. The terrain in a Fort hex does not decrease the die roll any further (consistent with §13.31).
NOTE: See Optional §26.5 and Optional §38.0.
18.0 Stosstruppen
Stosstruppen (literally, "thrust troops") were German infantry that employed new infiltration tactics to break the deadlock of trench warfare. Stosstruppen function like regular infantry except as specified below:
18.1 How Stosstruppen Are Created
18.11 The Central Powers player may begin using German infantry replacement points to create stosstruppen units in July 1917. They become available in July 1917 but players must purchase them as replacement units.
18.12 To create a stosstruppen unit requires seven infantry replacement points. Replace stosstruppen at the normal cost.
18.13 Germany may create no more than two new stosstruppen units per game turn. There is no fixed limit for replacing these units.
18.2 How Stosstruppen Affect Combat
18.21 The die roll is increased by one for each supplied stosstruppen unit participating in an attack.
18.22 Whenever stosstruppen participate in an attack, the attacker must fulfill any required loss by eliminating stosstruppen units before eliminating any other type of unit.
19.0 Tanks
NOTE: The first Allied tank units appeared at the Battle of Cambrai on the Western Front in November 1917. Tank units are treated like combat support units except as specified below.
19.1 How Tank Units Are Created
19.11 The Allied player may begin using French and British artillery replacement points to create tank units in July 1917. They enter the force pool in July 1917 and players must purchase them as if they were replacement units.
19.12 To create a tank unit requires four artillery replacement points. Replace tank units at the same cost.
19.13 The Allied player may create no more than one new British and one new French tank unit per Game-Turn. There is no fixed limit for replacing these units.
19.2 How Tanks Affect Combat
19.21 The die roll is increased by one for each supplied tank unit participating in an attack.
19.22 Whenever tank units participate in an attack, the attacker must eliminate one tank unit for each combat unit eliminated to fulfill the required loss. The eliminated tank unit's Attack Strength counts as part of the attacker's loss when determining losses from an "AA" or "DX" result.
19.23 Like any combat support unit, a tank unit may not attack unless a combat unit also participates in the attack.
20.0 Air Units
NOTE: During World War I, aircraft played an extremely limited combat role until the Allied offensives in the last months of the war.
There is only one French air unit and one British air unit.
20.1 How Air Units Operate
20.11 The Allied player receives both air units as reinforcements in July 1918. He must deploy them in accordance with §14.13.
20.12 Air units are not subject to the normal Movement rules. During the Allied Movement Phase, an air unit may move from any Allied controlled city to any other Allied controlled city within eight hexes.
20.13 An air unit may never enter a hex adjacent to an enemy unit except during the Allied Combat Phase. If an enemy unit moves adjacent to an air unit, the air unit is automatically moved to the nearest Allied controlled city which is not adjacent to an enemy unit. If there is no such city within eight hexes, the air unit is eliminated. An eliminated air unit is automatically replaced on the Game Turn following its elimination.
20.14 Air units do not possess a Combat Strength. During the Allied Combat Phase (only), a supplied air unit may move to any hex containing an attacking Allied combat unit that is within four hexes of the hex the air unit occupies. After the combat is resolved, the air unit immediately returns to the hex it occupied at the start of the Combat Phase.
20.15 The die roll is increased by one for each air unit in the same hex as an attacking Allied combat unit.
20.2 [OPTIONAL] Air Unit Ease-of-Use Counters
NOTE: An "Air Unit" represents the ground support element of an aircraft unit: the ground crews, maintenance shops, etc. Two Air Counters are included for the improved ease-of-use of Allied aircraft. The intent is to have one less reason to rummage through huge stacks of units.
| Country | Aircraft depicted on counter |
|---|---|
| Britain | Airco DH-4 bomber |
| France | Breguet XIV bomber |
20.21 If the Air Unit is in supply then the Air Counter (which flies from the Air Unit) is also in supply.
20.22 The Air Unit moves in the Movement Phase as governed by §20.13 except it cannot move adjacent to an enemy unit at any time.
20.23 The Air Counter is held off-map until it is used in the Combat Phase as governed by §20.14. Place the Air Counter on an Allied unit within four hexes of the Air Unit that will receive the air support, resolve the attack, then remove the Air Counter and put it in a convenient location for later use.
21.0 Railroad Repair
In the Basic Game, it is only necessary to control a rail hex in order to use it for rail movement and supply purposes. In the Advanced Game, a player must control and repair rail hexes to use them.
21.1 How Railroads are Repaired
21.11 Whenever a player captures rail hex in a neutral or enemy country, or that previously occupied by an enemy unit, the player must repair it before using it for rail movement or supply purposes.
21.12 Each hex entered by a non-entrained, supplied, rail repair engineer unit during a Movement Phase is considered repaired at the end of that Movement Phase.
21.13 A rail hex in an enemy zone of control may not be repaired, and may not be used for friendly rail movement or supply purposes. Once a rail hex is repaired, it may still be blocked for rail movement and supply by an enemy zone of control, but the hex remains repaired as long as an enemy unit does not enter it.
21.14 Each player has a separate set of Railhead markers. Use a Railhead marker to indicate the last repaired rail hex in a continuous line of repaired hexes.
22.0 Garrison
In order to deny the replacement value of a captured city, the capturing player must garrison the city by maintaining at least one combat unit in the city hex.
22.1 Garrisoning Belligerent Countries
22.11 During the Reinforcement Phase, each ungarrisoned city in a belligerent country produces one infantry replacement point, exactly as if the player who controls the belligerent country currently controlled the city.
22.12 If an enemy combat unit garrisons a city, it may not produce any replacement points.
22.2 Garrisoning Conquered Countries
Beginning the Game Turn after a country is conquered, the conquering player must garrison all cities and Russian rail entry hexes in the conquered country, up to a maximum of twelve (12). An entrained unit cannot act as a garrison. The conquering player loses one infantry replacement point for each ungarrisoned city in a conquered country as follows:
22.21 Central Powers: Germany loses replacements for ungarrisoned cities on the Western Front (Britain, France, Belgium, and the Netherlands), and Russia in or north of Brest-Litovsk (i.e., other than Kiev and Odessa); Austria loses replacements for all other ungarrisoned cities.
22.22 Allied Powers: Russia loses replacements for ungarrisoned cities in Rumania, Bulgaria, Germany east of Berlin (inclusive), and Austria-Hungary east of Budapest (inclusive); France loses replacements for all other ungarrisoned cities.
23.0 Naval Phase
(Note: the section numbers below are reproduced as printed in the source document, which contains some numbering irregularities.)
23.1 Submarine Warfare Segment
Players should refrain from using the Submarine Warfare rules unless the Optional Variable Entry rule 29.0 is also used.
23.11 Beginning in January 1915, the Central Powers player may initiate unrestricted sub-marine warfare by announcing this aloud.
23.12 During each subsequent January Game-Turn, the Central Powers player has the option of continuing or discontinuing submarine warfare. He must inform the Allied player which option he has chosen.
23.14 Whenever unrestricted submarine warfare is maintained, the British infantry replacement rate decreases by one point each year. Thus, if submarine warfare is initiated in January 1915, the British infantry replacement rate is immediately reduced by one. If submarine warfare continues in 1916, the British replacement rate is reduced by an additional one. If submarine warfare is discontinued, the British replacement rate is immediately increased by one: this increase continues until submarine warfare is reinitiated, or the original British replacement rate is regained. Britain may never exceed its original rate of five. Additionally, a -1 DRM is applied to Britain's Morale Determination (see §24.1) if Submarine Warfare has been in effect for the previous six months. See also Optional §32.2 for the effect of Submarine Warfare on the Allied sea movement and supply capacity.
NOTE: The reduced British infantry replacement rate in the 1915 and 1917 scenarios takes into account the historical effects of submarine warfare.
30.15 [sic] Submarine Warfare ends permanently in the January after the United States enters the war.
NOTE: The adoption of convoy tactics and the United States' entry into the war resumed the flow of raw materials into Britain and ended the threat of starvation.
30.16 [sic] If the Optional Variable Entry rule (§29.0) is being used, the die roll for the United States is decreased by one whenever submarine warfare is in effect at the start of the turn or is declared during the turn.
23.2 Allied Blockade Segment
23.11 [sic] Beginning in January 1915, the Allies automatically institute an effective blockade against the Central Powers, so these effects apply automatically to the replacement rates of these countries for the current year.
23.22 Blockade Table:
| Year | Germany | Austria | Italy (if CP) |
|---|---|---|---|
| 1915 | -1 | 0 | 0 |
| 1916 | -2 | -1 | -1 |
| 1917 | -3 | -1 | -1 |
| 1918 | -5* | -2* | -2* |
* Apply a -1 Morale Determination (DRM) (see §24.1)
The number represents the number of infantry replacement points deducted from that country's total each Game-Turn. These losses are not cumulative. There is no other effect on the Central Powers.
NOTE: The German and Austrian replacement schedules for the scenarios include blockade effects. The modified replacement schedule are:
| Year | Germany | Austria |
|---|---|---|
| 1915 | 9/10 | No change |
| 1916 | 10/8 | 3/3 |
| 1917 | 8/9 | 3/3 |
23.3 Naval Operations Segment
In the Advanced Game, all sea movement occurs during this segment. Sea movement is conducted exactly as in the Basic Game (see §12.3). The Central Powers player conducts his sea movement, if any, first. The Allied player may then conduct sea movement and/or amphibious invasions. Treat units conducting amphibious invasions exactly as if they were using sea movement except as noted below.
23.31 Allied units participating in an amphibious invasion count against the Allied sea movement capacity. The units must begin in an Allied controlled port. They may be moved to any port or beach hex subject to the restrictions of §12.3).
23.32 If the Allied player wishes, he may invade a hex occupied by enemy units. Place the invading units in the hex (observing the normal Stacking Limit) above the enemy units that occupy the hex. In such a case, combat is immediately mandatory; it is resolved exactly like regular combat. When the combat is fully resolved, if all of the defending units are not eliminated or retreated, the entire invading force is eliminated.
23.33 If units invade a vacant hex, they are not permitted to move or attack any enemy unit(s) until the next Allied Player-Turn.
23.34 If an invading force is not eliminated, the Allied player may immediately place a Beachhead marker in the invaded hex. This hex is a port for the purposes of Allied sea movement and sea supply (only) as long as the Beachhead marker remains in the hex. Immediately remove the Beachhead marker if an enemy unit enters the hex. The Allied player may voluntarily remove the marker during any subsequent Naval Phase.
NOTE: There are only two Allied Beachhead markers. Players may not use the Central Powers Beachhead markers except for player-devised special rules).
23.35 The Allied player may not conduct more than one amphibious invasion in a single Game-Turn, and may not conduct an amphibious invasion before January 1915. The Central Powers player may never conduct an amphibious invasion.
23.36 If the Central Powers player controls Bremen or Trieste, he may attempt to intercept an Allied invasion of any hex within twelve hexes of either of these cities by rolling one die and consulting the Naval Interception Table, which is located on the Player-Aid Card.
24.0 Morale Phase
NOTE: In 1916, many of the belligerent countries began to experience serious morale problems; desertion became a major problem first in Russia, then in Austria-Hungary and France. In 1917, war weariness triggered a revolution that forced Russia out of the war. By the autumn of 1918, similar uprisings began breaking out in Austria-Hungary and Germany, leaving these powers no option but unconditional surrender. The Morale rules mirror these historical events.
24.1 Morale Determination
24.11 Beginning in 1916, during each February, May, August, and November Game-Turn, each player must roll the die once for each belligerent he controls which has an infantry replacement rate of three or more, and apply the result obtained on the Morale Table immediately. The Morale Table is located on the Player-Aid Card.
24.12 The United States is exempt from §24.11.
24.2 Explanation of Morale Table Results
24.21 S - Surrender. The country immediately surrenders and is conquered (see §7.0) by the enemy.
24.22 D2 - Desertion. The owning player rolls one die for each of the country's units currently on the map. If the result is two or less (three or less if it is demoralized), eliminate the unit (it may be replaced). Subtract two from all future Morale rolls for the country.
24.23 D1 - Desertion. Same as D2, except unit deserts on die roll of one or less (two or less if it is demoralized). Subtract one from all future Morale rolls for the country.
24.24 RR - Reduce Replacements. Halve the country's infantry replacement rate for the next three Game Turns (FRU).
24.25 * - No effect.
EXAMPLE: Russia suffers a D1 result in February so its May Morale roll has a -1 DRM; it suffers a D1 in May so its August Morale roll has a -2 DRM; it suffers a D2 in August so its November die roll has a -4 DRM.
25.0 Weather Phase
During the Weather Phase of each Game-Turn, the Central Powers player rolls one die and consults the Weather Table to determine the weather on each front for the next Game-Turn (by cross-indexing the next month and the die roll). The Weather Table contains three possible results:
- C = Clear
- M = Mud
- S = Snow
There is a marker provided for each front to indicate the weather on that portion of the mapboard.
25.1 Effects of Clear Weather
There is no effect on play.
25.2 Effects of Mud Weather
25.21 Reduce all Movement Allowances by one Movement Point.
EXCEPTION: The German 420mm (3-1-1) siege artillery unit may not use regular movement in mud.
25.22 Reduce the non-rail portion of a supply path to four hexes.
25.3 Effects of Snow Weather
25.31 Halve all Movement Allowances (FRU).
EXCEPTION: The German 420mm (3-1-1) siege artillery unit may not use regular movement in snow.
23.32 [sic] The non-rail portion of a supply path is four hexes.
25.33 The distance an entrained unit may move via rail movement is sixteen hexes.
25.34 Engineers may not build forts or repair railroads.
25.35 Air units may not participate in combat.
25.36 Amphibious invasions are prohibited.
NOTE: Any unit moving or tracing supply from one front to the other is subject to the restrictions of least favorable weather.
25.4 Spring Thaw Rule
During the month of March, treat clear weather as mud weather if the previous Game-Turn's weather was snow.
Optional Rules
26.0 Optional Combat Rules
26.1 Automatic Victory
During the Movement Phase, if the phasing player moves enough units adjacent to a hex to attack the enemy unit(s) in that hex at 8 to 1 or greater odds, he may announce an automatic victory against the hex. All the units in the defending hex are immediately flipped face down and lose their zone of control; the units that achieved the automatic victory may not move any further and must attack that hex during the immediately following combat Phase where the result of the combat is an automatic "DE." The phasing player may freely move other non-attacking units past the automatic victory hex, ignoring the normal Zone of Control restrictions imposed by Rule 9.0.
NOTE: Automatic victories are prohibited in Mud and Snow weather. In this case, defending units retain their zone of control, and 8-1 attacks are resolved normally (i.e., on the 6-1 column with a +1DRM).
NOTE: The German player may achieve automatic victories during his August 1914 Special Movement Phase (see §37.4.4). In this case, remove Allied units at the end of this phase and allow German combat units to advance into the vacated hex.
26.2 International Combat Coordination
Decrease the die roll by one if units of more than one nationality participate in the same attack. Increase the die roll by one if units of more than one nationality are defending the same hex.
Exceptions: Ignore the presence of German and Russian units when using this rule.
26.3 "Big Push" Attacks
Beginning in 1916, the phasing player may announce that an attack against three or more combat units will be a "big push" attack provided no attacks against this many units have been conducted yet in the combat phase. This attack continues until an "AE", "AA", or "AD" combat result occurs. Units from one country may only participate in one "big push" attack per turn.
NOTE: A "big push" attack is the equivalent of the British Somme or German Verdun Offensives of 1916. It allows a player to attack the same defending units more than once in a single Combat Phase (see §13.17).
EXCEPTION: An amphibious invasion may not be a "big push" attack.
EXAMPLE: In July 1916, three British 4-6-4 infantry and one 3-3-3 artillery each in hexes H9 and H10 (30 factors, +1DRM) attack three German 4-6-4 infantry entrenched in hex I10 (18 factors, -1DRM) at 1-1 odds with a 0DRM. The Allied player declares the attack will be a "big push" attack.
- The first attack results in a BD; the Germans and the Allies each eliminate one 4-6-4 infantry rather than retreat. The odds are now 2-1 (26-12)
- The second attack also results in a BD; each side again eliminates one 4-6-4 rather than. The odds are now 3-1 (22-6).
- The third attack results in an AD: the British eliminate a 4-6-4 rather than retreat both stacks of units and the battle is over.
26.4 Captured Artillery
Whenever an artillery unit is eliminated because a player chose to retreat to comply with an "AD," "BD," or "DD" result, the opposing player receives one artillery replacement point which is awarded to the country which conducted the attack. If more than one nationality participated in that attack, the country that contributed the greatest Attack Strength receives the replacement point. If all countries contributed equally, roll the die for each country with the highest die roll receiving the replacement point.
26.5 Attacking from Forts and Entrenchments
For ease of play, players may ignore the rules that prohibit units under Fort or Entrenchment markers from attacking.
NOTE: If using the optional Front markers with this rule, no Entrenchment markers are necessary - the entrenched side of a Front marker represents that all units in a hex and means they are all entrenched
27.0 Multi-Player Rules (Optional)
The Guns of August is particularly suitable as a multiplayer game. For the best game, we recommend players follow these guidelines.
27.1 Three-Player Game
One player controls the Central Powers. There are two Allied players: one controls all Allied units on the Western Front; the second controls all Allied units on the Eastern Front.
27.2 Four-Player Game
There are two Allied players and two Central Powers players. Each player controls the units of his alliance on one front - east or west.
NOTE: For ease of play, the map can be divided as if two separate games are being played. The Central Powers players may choose any agreeable method for allocating reinforcements and replacements. One method would parallel the historical facts and elevate one player to the role of Commander-in-chief on alternate years as follows:
- 1914 - West
- 1915 - East
- 1916 - West
- 1917 - East
- 1918 - West
27.3 Five-Player Game
As in the four-player game, except the fifth player is a third Allied player. He controls British and U.S. units, and is responsible for all Allied naval operations.
27.4 Six-Player Game
As in the five-player game, except the sixth player is a third Central Powers player who controls Austria-Hungary, Turkey, and Bulgaria.
28.0 Secret Mobilization and Deployment (Optional)
The Front markers and the substitution boxes printed on each side of the mapboard allow players to simulate realistically the secrecy of the initial mobilization in 1914, and the "fog of war" which persisted on both fronts.
28.1 Secret Mobilization
At the start of any scenario, each player may use his Front markers to conceal the disposition of his initial setup. Deploy the units represented by the markers face down in the appropriate substitution boxes. For greater secrecy, each player may record on paper the units represented by each alphabetized Front maker.
NOTE: Players may make up additional markers if they find it necessary.
28.2 Fog of War
During any game, if the optional Front makers are used, a player may never examine the units in the enemy player's substitution boxes until he attacks the hex occupied by the corresponding marker. Units in substitution boxes may be deployed face-up, or face down, and blank counters may be placed in the boxes to confuse the opposing player: however, a Front marker may not be deployed on the map unless it represents at least one combat unit.
29.0 Optional Variable Entry Rules
In the standard rules, all countries enter the war historically in the month indicated on the Scenario Chart. These rules introduce an element of uncertainty concerning the participation of Britain, Italy, the United States, Turkey, Bulgaria, Rumania, and Greece. If players use the Variable Entry rules, all standard rules remain in effect, except where this section specifically alters them.
29.1 How to use the Variable Entry Table
29.11 During the Reinforcement Phase of each February, May, August, and November Game turn, the die is rolled once for each country listed on the Variable Entry Table. Roll for these countries in the order in which the table lists them. The Allied player rolls for each country listed under the Western Front. The Central Powers player rolls for each country listed under the Eastern Front.
EXCEPTION: In August 1914, the Allied player rolls for Britain at the start of the Inter-Player turn rather than during the Reinforcement Phase.
29.12 The die roll for each country is modified by all appropriate modifiers (cumulatively). If the modified result is within the printed number range shown where the name of the country and the current year intersect, the country remains neutral. If the modified result is greater than the larger number, the country joins the Central Powers immediately. If the modified result is less than the smaller number, the country joins the Allies immediately.
29.13 Do not roll for a country after it joins the war.
EXCEPTION: see §29.2.
29.14 Any neutral country that enters the war before or after its historical entry date receives reinforcements according to the standard rules and Reinforcement Schedule.
EXCEPTION: The United States (see §29.3).
29.15 When the Variable Entry rules are used, players may still declare war against a neutral country. In this case, the country automatically joins the opposing player's alliance immediately, as in the standard rules.
EXCEPTION: Greece (see §29.34).
29.2 Britain
If the German player declares war on Belgium or declares unrestricted submarine warfare (§30), Britain automatically enters the war as an Allied country and it receives reinforcements and replacements according to the standard rules. If Germany does neither of these things then Britain is subject to the Variable Entry rules as follows.
29.21 There are three possible levels of British participation when Britain is subject to the Variable Entry rules: full participation, limited participation, or neutrality.
29.22 If the modified die roll for Britain's entry is three or less, Britain fully participates as an Allied country. In this case, all standard rules remain in effect.
29.23 If the modified die roll for Britain's entry is four or five, Britain's participation as an Allied country is limited. In this case, the Allied sea movement and supply capacity decreases to four points; the British infantry replacement rate is halved (FRU); British entry rolls increased by one; and the die roll for Italian and U.S. entry increase by one.
29.24 If the modified die roll for Britain's entry is six or greater, Britain remains neutral: any British units outside of Britain automatically return to Britain and may not leave while Britain remains neutral. In addition, the Allied sea movement and supply capacity decreases to three points; the Allied player may not roll for U.S. entry; and the die roll for Italian entry is increased by one.
29.25 If Britain is a neutral or limited participant, the Allied player continues rolling for Britain each February, May, August, and November game turn until Britain becomes a full participant.
NOTE: Once Britain is a limited participant, a modified die roll >= "4" continues limited participation. Britain will not revert to neutrality.
29.3 Italy, United States, Turkey, Bulgaria, Rumania and Greece
29.31 If any of these countries, except the United States, enters the war before or after its historical entry date, the country receives reinforcements according to the standard rules and Reinforcement Schedule.
29.32 If the United States enters the war before or after April 1917, the U.S. reinforcements begin arriving three months after the Game-Turn on which the U.S. enters the war, and the entire U.S. reinforcement schedule is revised accordingly.
Example: If the U.S. enters the war in March 1916, the first U.S. reinforcement would arrive in June 1916 instead of June 1917, and the U.S. replacements would begin in November 1917 instead of November 1918.
29.33 Whenever Turkey enters the war, the Allied player must immediately withdraw three Russian infantry corps from the mapboard. These units, and the French and British reinforcements scheduled for August 1918, may arrive as Allied reinforcements on any turn after the Allies conquer Turkey.
29.34 If Greece is neutral and the Allied player wishes to invade Salonika, the Central Powers player immediately rolls for Greek entry.
- If Greece joins the Central Powers, follow the standard rules.
- If Greece joins the Allies, Greek units deploy immediately and the Allied units may land at Salonika.
- If Greece remains neutral, the invading units may occupy Salonika. Once the Allied player has invaded Salonika, however, he is prohibited from declaring war on Greece (in accordance with §6.3).
NOTE: When using the Variable Entry Rules, Greece is conquered when all Greek land units are eliminated. Greek units are automatically in supply in Greece.
30.0 The Scenarios
THE GUNS OF AUGUST may be played as a full Campaign Game representing the entire war from August 1914 through November 1918, or as individual scenarios, each of which represents one year. The Campaign Game is always played as a two-front game (using the full mapboard), but all other scenarios may be played as a two front game or as just an Eastern or Western Front game (using the appropriate half of the map).
As a general guideline, the Western Front includes any hex on the two western mapboard panels except hexes in Italy and Austria-Hungary. The hexes in Italy and Austria-Hungary on these two boards are on the Italian Front. The Eastern Front includes any hex on the two eastern mapboard panels except hexes in Greece; hexes in Greece are on the Balkan Front. Hexes in Serbia, Bulgaria and/or Turkey are on either the Eastern Front or the Balkan Front.
For all scenarios, the order of battle and initial deployment restrictions derive from the Scenario Set-Up Chart printed on the Player Aid Card. The Basic and Advanced Game rules govern each scenario unless superseded by a special scenario rule presented in this section.
30.1 Scenario Length and Victory Conditions
30.11 The 1914 Scenario lasts five Game Turns - from August through December 1914.
30.12 The 1915-1917 Scenarios each lasts twelve Game Turns - from January through December of each year.
30.13 The 1918 Scenario lasts nine Game-Turns - from March through November 1918.
30.14 The Campaign game lasts fifty-two Game-Turns - from August 1914 through November 1918.
30.15 Use §15.0 to determine victory in all scenarios.
30.2 How to use the Scenario Set Up Chart
30.21 At the start of a scenario, each player consults the chart to determine the number and type of units available to each country, and the initial deployment restrictions for each country during the year the scenario represents.
30.22 The first four columns on the left side of the chart list the countries, scenario years, alliance, and the month in which each country enters the war as a belligerent. In the Alliance column, the abbreviations are as follows:
- CP = Central Powers
- A = Allies
- N = Neutral
- CONQ = Conquered by the Central Powers
NOTE: A country remains neutral until the Reinforcement Phase of the Game Turn indicated under the Entry Date column for the year it enters the war.
EXAMPLE: Italy is neutral until the Reinforcement Phase of May 1915.
EXCEPTION: All countries that enter the war in August 1914 are belligerents at the start of the game.
30.23 The second four columns of the chart indicate the minimum number of corps-sized units that must deploy on each of the four fronts depicted on the map at the start of the scenario: the Italian Front is a secondary part of the Western Front; the Balkan Front is a secondary part of the Eastern Front. The restrictions for deployment on each front are as follows:
- Western Front - the Central Powers units deploy east of the front line; Allied units deploy west of the front line, with British units within six hexes of Britain.
- Eastern Front - Central Powers units deploy west of the front line within six hexes of their home country; Montenegrin units deploy in Montenegro; Russian units deploy east of the front line.
- Italian Front - Central Powers units deploy in Austria-Hungary; Allied units deploy in Italy.
- Balkan Front - Central Powers units deploy in Bulgaria and/or Serbia; Turkish and Serbian units deploy in their home countries; Allied units deploy in Greece.
30.24 In a single front game, subtract the minimum number of corps required to deploy in the unplayed front(s) from the total available to each country at the start of the game. In a two front game, players may deploy units in any manner they desire as long as they deploy the minimum number of corps on each front.
30.25 In the 1914 Scenario, and at the start of the Campaign Game, all units deploy in their home country. In all scenarios. Each player deploys their own alliance's units and the units of neutral countries attacked by the opposing alliance (see §37.3).
30.26 The Replacement Points column indicates the number of infantry replacement points each country receives on each of the two primary fronts during each turn of the scenario. Use this number when playing a single front game. In a two-front game, a player may split a country's replacement points between the Western and Eastern Fronts in any manner, as long as that country retains its total replacement rate.
NOTE: Artillery replacement points are received according to §14.21.
30.27 The remaining columns of the Scenario Set-Up Chart indicate the total number of each type of unit available in each country in each separate scenario. These units should be deployed at the start of the scenario according to §37.23 and Rule 37.3.
30.3 General Scenario Rules
30.3.1 Initial Deployment Sequence
In a two-front game, place one "West Front" and one "East Front" maker in a cup. Each player draws one marker and deploys first on the front he selects from the cup. In a single front game, the player who draws the front in play deploys first.
NOTE: Players may use Optional §28.1 instead of the above.
If players cannot agree on a method to determine the initial deployment sequence, the Central Powers player declares which front (East or West) he wishes to deploy second on. The Allied player must deploy first on this front; the Central Powers player must deploy first on the other front.
30.3.2 Entrenchments
No unit may entrench before October 1914. In all scenarios after 1914, all belligerent units on the Western Front may begin the game entrenched. In all scenarios after 1915, all belligerent units may begin the game entrenched. Neutral units may never entrench.
30.3.3 Forts
In all scenarios, all forts printed on the mapboard are forts. In all scenarios after 1914, each player may deploy one Fort marker on the Western Front and one Fort marker on the East Front in any non-swamp hex at the start of the game.
NOTE: Players control all forts on their own side of the front lines at the start of a scenario.
30.3.4 Railroads
In all scenarios after 1914, all rail hexes behind the front (except in neutral countries) are repaired and operable at the start of the scenario.
30.3.5 Artillery Deployment
In a single front game, subtract one artillery unit from a country's total for every six corps the country is required to deploy on the unplayed front (round fractions down). Players may freely deploy other combat support on either front.
30.3.6 Weather
In August 1914, the weather is automatically clear. In all other scenarios, the Central Powers player must roll to determine the weather for the first Game-Turn prior to the start of play.
30.4 Special 1914 Scenario Rules
30.4.1 Belgium and the Netherlands
Belgian and Dutch units are deployed by the Allied player at the beginning of the August 1914 Game-Turn prior to placement of Central Powers units. Belgian units must deploy in Antwerp and Liege, and may not retreat on any combat result during the first Game-Turn.
If the Central Powers do not declare war against these countries in August 1914, immediately remove Belgian and Dutch units from the mapboard and apply all normal rules.
30.4.2 German Deployment
German units on the Western Front may deploy in Germany or Luxembourg at the start of the scenario. The German 420mm (3-1-1) siege artillery unit must initially deploy on a rail hex.
30.4.3 British Expeditionary Force
British units must deploy in Britain. During the first Game Turn, Britain must send these units to France via sea movement unless players are using Optional §29.0, or they are using Optional §38.0 and Germany has invaded Britain.
If players are using Optional Variable Entry (§29.0), the Allied player may roll for British entry at the start of the Inter-Player turn in August 1914. If Britain enters the war, it sends the British Expeditionary Force to France during the following Naval Phase; otherwise, all British units must remain in England until Britain enters the war.
30.4.4 German Special Movement Phase
During the August 1914 Game-Turn, immediately after the Central Powers Combat Phase, all German units on the Western Front north of Metz receive a special second Movement Phase. This is exactly like a normal Movement Phase, except that these units have their movement allowances reduced by one movement point and may not use rail movement.
30.4.5 French Offensive Doctrine
During the first Game-Turn (only), all French combat units that begin their Combat Phase in an enemy zone of control must participate in an attack.
NOTE: This rule reflects the "l'attaque a l'outrance" ("all-out attack") doctrine France employed in the Battle of the Frontiers in August 1914.
30.5 Special 1916 Scenario Rules
Add one to all Russian Morale die rolls.
30.6 Special 1918 Scenario Rules
No units may be deployed in or move into Russia or Rumania.
30.7 (Optional Rule) 1919 Game Extension
By mutual agreement in 1917 or earlier, players may extend the length of the Campaign Game another twelve Game-turns, through November 1919.
30.8 Special Campaign Game Rules
30.8.1 Introduction
The Campaign Game is one continuous scenario that lasts from August 1914 through November 1918. The initial deployment and Special 1914 Scenario Rules are in effect during the Campaign Game. All Basic and Advanced Game Rules apply in the Campaign Game.
EXCEPTION: see §30.8.2.
30.8.2 Special Campaign Game Replacement Rule
Beginning in 1915, during the Reinforcement Phase countries may convert certain corps-sized units into weaker units in order to increase their total number of corps. Each country may convert three corps per Game-Turn. Convert any non-isolated corps by removing it from the map, paying a conversion cost in infantry replacement points, and receiving two weaker corps as normal replacement units.
Units convert according to the following table:
| One of these | plus the Conversion Cost (infantry replacement points) | converts into |
|---|---|---|
| 5-7-4 | 3 | two 4-6-4 |
| 4-6-4 | 2 | two 3-5-3 |
| 3-5-3 | 1 | two 2-4-3 |
| 3-3-4 | 1 | two 2-2-4 |
NOTE: This rule is an exception to the rule that states players may take replacements only from previously eliminated units.
EXAMPLE: Germany converts a 4-6-4 into two 3-5-3s. The 4-6-4 has not been "eliminated" so it cannot be rebuilt; however, it can become part of the product of the conversion of a 5-7-4 unit into two 4-6-4 units.
30.8.3 Artillery Units
Players may use artillery replacement points to create additional combat support units ("buildable units") up to the counter mix limit.
30.8.5 Optional Free German Deployment
In the Campaign Game (only), the Central Powers Player may ignore the restrictions of §37.23 and deploy the German army in any desired manner.
31.0 Turkish Reaction (Optional)
NOTE: The Turkish situation is a special one in THE GUNS OF AUGUST. The majority of the Turkish army was fighting off map for most of the war. The Allies started the Gallipoli campaign to capture Constantinople and open a supply line to Russia. The use of this new optional rule will allow players to better simulate the Turkish participation in World War I. It is recommended players use Variable Entry rules (Optional §29.0) in conjunction with this rule.
31.1 Reinforcements
31.11 Turkey has an "Invasion Reaction Force" (IRF) of four Turkish infantry corps in place of the two infantry corps reinforcements scheduled for November 1914. Two IRF corps arrive at Constantinople during the first Reinforcement Phase in which Allied units are in Turkey, and two additional Turkish infantry corps arrive there in the next Reinforcement Phase. If there are no Allied units in Turkey during a later Reinforcement Phase, the Central Powers player must withdraw from the mapboard all Turkish infantry corps in excess of five. These withdrawn units return to the IRF but will reappear on a subsequent Game turn as specified above. The Central Powers player may use Turkish infantry replacement points to replace eliminated Turkish units for their return to the Invasion Reaction Force.
31.12 The Central Powers player receives one Turkish infantry corps reinforcement at Constantinople from the IRF during the Reinforcement Phase of the first Game-Turn in which one of Rumania, Bulgaria, or Greece enter the war on the Allied side or the Allies conquer one of them. This unit remains permanently in the force pool.
NOTE: This reinforcement may be received only once per game (not once per country).
31.13 The Central Powers player receives one Turkish infantry corps from the IRF as reinforcement at Constantinople on the turn after Russia is conquered.
31.14 Use the Optional Turkish Player Card in conjunction with this option.
31.2 Constantinople
31.21 Constantinople functions as a Central Powers supply source unless Allied units occupy both of the hexes adjacent to the city (RR34 and SS34).
31.22 Allied units invading Constantinople must roll for passage of the Dardanelles. On a die roll of "1-3", they are successful and may invade; a die roll of "4-6" is equivalent to an "A" result on the Naval Interception Table.
NOTE: The Allied player is not required to roll for passage of the Dardanelles if he controls hex OO35.
31.23 During any Reinforcement Phase in which Turkey is neutral or the Allied player controls Constantinople, and Britain is a full participant in the war, the infantry replacement values for Odessa and rail entry hex R4 increase to two points each (superseded by Optional §38.8.5 if that rule is used).
31.3 Morale
The Central Powers player rolls for Turkish morale (see §24.0). The following DRMs (only) apply to Turkey:
- (-1) during 1916
- (-2) during 1917
- (-3) during 1918 and 1919
- (+1) if Russia is conquered
- (+1) if France is conquered
- (+1) if Britain is not a full participant in the war
- (-1) if there is not a path of contiguous Central-Powers-controlled rail hexes, free of Allied ZOC, from Constantinople to Budapest
An "RR" result sets the Turkish infantry replacement rate of "0" for the next three Game Turns.
NOTE: "D1" and "D2" results also apply to Invasion Reaction Forces that are not currently on the mapboard.
32.0 Allied Sea Movement & Supply (Optional)
32.1 Total Capacity
Determine the Allied Sea Movement and Sea Supply capacity by totaling the capacities of the following Allied countries if they are belligerents:
- Britain (full participant): 4
- Britain (limited participant): 2
- France: 3
- United States: 2
NOTE: Add U.S. capacity starting the turn after the first U.S. combat unit arrives in France or Britain.
32.2 Effects of Submarine Warfare
Whenever unrestricted Submarine Warfare is in effect, British sea movement capacity and sea supply capacity decreases by one point each year. If Submarine Warfare ceases, the British capacity is immediately increased by one; this increase continues each year until Submarine Warfare restarts or Britain regains its original capacity.
During each January Game-Turn, if the United States is an Allied country, the British capacity automatically increases by one (but may not exceed its initial capacity).
EXAMPLE: The Central Powers start Submarine Warfare in January 1915, so British sea movement and supply capacity immediately decrease by one. If it continues in 1916, they decrease by an additional one. If the U.S. enters the war in November 1916, the capacities increase by one in January 1917 and every January thereafter until it reaches its initial value of "4" even if Submarine Warfare remains in effect.
NOTE: If using the Naval Module (§38.0), British sea movement capacity (§38.5.3) is reduced/increased by 1 point per year and sea supply capacity (§38.9) is reduced/increased by 2 points per year, and the British capacity cannot exceed its original levels.
33.0 Replacements After Surrender (Optional)
33.1 France
If France surrenders, Britain and Italy (if they are Allied powers) may receive additional replacement points for French cities not controlled by the Central Powers. Beginning in the Game-Turn after France surrenders, one infantry replacement point is received for every two French cities (rounded down) controlled by the Allied player. If both Britain and Italy are Allied powers, divide these replacement points evenly between the two countries, with Britain receiving any odd replacement point.
NOTE: The Central Powers player does not lose any replacement points for French cities controlled by the Allied player (see §22.21)
33.2 Austria-Hungary
Beginning in the Game-Turn after Austria-Hungary surrenders, Germany receives one infantry replacement point for every two Austro-Hungarian cities (rounded down) controlled by the Central Powers player.
NOTE: The Allied Powers player does not lose any replacement points for Austro-Hungarian cities controlled by the Central Powers player (see §22.21).
34.0 National Fronts (Optional)
Historically, there were geopolitical considerations that limited where a country's armies could deploy. The Fronts on which a country's units may be used are as follows:
Immediately eliminate any land unit that ends its Movement Phase outside one of its allowed fronts.
| Nation | Western | Italian | Eastern | Balkan |
|---|---|---|---|---|
| Austria-Hungary | X | X | X | |
| Belgium | X | |||
| Britain | X | X | X | |
| Bulgaria | X | X | ||
| France | X | X | X | |
| Germany |
35.0 Local Counterattacks (Optional)
Any unit(s) that defended against an attack where the combat result was AE, AA, or AD may advance into the hex or hexes vacated by the attacker(s).
36.0 Naval Action During the World War: Fleets in The Guns of August (Optional)
This module modifies Basic Game Rules 5 (turn sequence), 11.3 (sea supply), and 12.3 (sea movement), and replaces Advanced Game Rules 23.1 (Allied Blockade segment) and 23.2 (Naval operations segment).
(Note: this module's cross-references to "§38" refer to this naval module, as printed in the source document.)
36.1 Naval Units (see naval units counter sheet)
Each naval unit counter represents a squadron of capital ships with their attendant smaller ships (cruisers and destroyers). Each "BB" represents four capital ships; each "BC" represents three capital ships; and each "B" represents five to seven capital ships.
Counter values:
- Gunnery Factor: Relative strength of firepower when firing at defending naval units
- Protection Factor: Relative ability to withstand an attacker's firepower
- Ship Type: BB represents dreadnought battleships; BC represents dreadnought battlecruisers; B represents pre-dreadnought battleships
- Unit ID: Identification number for that nationality's unit of that type
36.2 Sea Areas
36.2.1 There are five sea areas on the map:
- Baltic Sea
- North Sea, including the English Channel
- Western Mediterranean
- Adriatic Sea
- Black Sea
36.2.2 Off-map sea areas
There are two sea areas off the map:
- Atlantic Ocean, which starts 4 hexes west of hex row "A" and 11 hexes north of hex row 1.
- Eastern Mediterranean, which starts east of hex row "Z" and south of hex row 35.
36.3 Ports
Place the naval units of each country in a port controlled by that country at the start of play; they may use any supplied, friendly controlled port thereafter. A combat unit entering a port destroys any enemy naval units in that port.
EXCEPTION: Naval units may not use Cetinje and Durazzo or be supported (§38.5.1) by them.
36.3.1 Inland Ports
The cities of Antwerp, Bremen, Hamburg, Rouen, and Stettin are ports for sea supply (§11.3), sea movement (§12.3), and naval movement (§38.5.2) if the city's water path to the sea is free of enemy ZOC.
36.3.2 Off-map ports
Off-map ports may be used for sea supply (§11.3) and naval movement (§38.5.2), but not may not be entered by land units. Britain controls the off-map ports of Scapa Flow, Malta, and Gibraltar; Russia controls the off-map ports of St. Petersburg and Sevastopol.
36.3.3 British Beach Hexes
The following hexes in Britain are "beach" hexes: B5, C6, E7, F7, G7, I5, I4, I3, and H3 (marked on a map illustration in the source document).
36.4 Modified Sequence of Play
36.4.1 Central Powers Player-Turn
- 36.4.1.1 War Declaration Phase: There is no change from §5.1.1.
- 36.4.1.2 Naval Warfare Phase (new): Both players move naval units, resolve naval combat, and establish sea control for the rest of the Game Turn. NOTE: The Allied Player and Inter-Player Turns do not have a Naval Warfare Phase.
- 36.4.1.3 Supply Determination Phase: There is no change from §5.1.2.
- 36.4.1.4 Movement Phase: There is no change from §5.1.3 except the Central Powers may conduct sea movement and amphibious invasions during this Phase.
- 36.4.1.5 Combat Phase: There is no change from §5.1.4.
- 36.4.1.6 Demoralization Removal Phase: There is no change from §5.1.5.
- 36.4.1.7 Isolation Phase: There is no change from §5.1.6.
36.4.2 Allied Player-Turn
- 36.4.2.1 War Declaration Phase: There is no change from §5.1.1.
- 36.4.2.2 Supply Determination Phase: There is no change from §5.1.2.
- 36.4.2.3 Movement Phase: There is no change from §5.1.3. Allied Sea Movement and Amphibious Invasions occur during this Phase.
- 36.4.2.4 Combat Phase: There is no change from §5.1.4.
- 36.4.2.5 Demoralization Removal Phase: There is no change from §5.1.5.
- 36.4.2.6 Isolation Phase: (no change)
36.4.3 Inter-Player Turn
- 36.4.3.1 Submarine Warfare Phase (new): In January of each year (only), the Central Powers player may start or end submarine warfare (see §23.0).
- 36.4.3.2 Morale Phase: There is no change from §5.3.2.
- 36.4.3.3 Reinforcement Phase: There is no change from §5.3.3.
- 36.4.3.4 Game-Turn Phases: There is no change from §5.3.4.
- 36.4.3.5 Weather Determination Phase: There is no change from §5.3.5. (printed as "§5.1.6" in the source)
36.5 Naval Movement
Naval units of any belligerent country move during the Naval Warfare Phase that occurs during the Central Powers Player Turn. This is an exception to §5.0.
36.5.1 Support Range
36.5.1.1 Naval units may only remain in, move into, or move through sea areas that are within support range of a friendly, supplied port.
36.5.1.2 A port's support range is 15 hexes. Estuary and Kiel Canal (T4, U5, & V4) hexes count as two hexes each and must be free of enemy ZOC.
EXAMPLE: Kiel can support naval units in the North Sea and the Baltic Sea.
36.5.1.3 Off-map ports can support the following sea areas:
| Port | Sea Areas in Support Range |
|---|---|
| Scapa Flow | North Sea and Atlantic Ocean |
| Malta | Eastern and Western Mediterranean |
| Gibraltar | Atlantic Ocean and Western Mediterranean |
| St. Petersburg | Baltic Sea |
| Sevastopol | Black Sea |
36.5.2 Moving Naval Units
Each player secretly writes down the actions of each of their naval units for the current Naval Warfare Phase. Movement occurs in a series of steps that the players repeat until all naval units have reached their ordered destinations, sink, or withdraw from combat:
36.5.2.1 Simultaneously move all naval units one sea if they have not yet reached their ordered destinations. A naval unit may hold its position during a step to coordinate its movement with other naval units.
36.5.2.2 Check for naval combat (see §38.6) in each sea area where opposing naval units are present, and resolve combat if combat occurs.
36.5.2.3 An alliance controls a sea zone if it has an undamaged naval unit in it after naval combat.
36.5.2.4 The side controlling a sea area after combat ends may automatically withdraw damaged naval units to ports within support range.
36.5.2.1 Naval Choke Points (numbered as printed)
Players simultaneously reveal to each other the movement of naval units through naval choke points before they write other movement orders, after which they write all other movement orders and reveal them simultaneously.
36.5.2.1.1 The Danish Straits: The Allied player must reveal to the Central Powers player the number and type of Allied naval units that move between the North Sea and the Baltic.
36.5.2.1.2 The English Channel: The Central Powers player must reveal the number and type of his naval units that move into the Atlantic from the North Sea to the Allied Powers player.
36.5.2.1.3 The Strait of Otranto:
a. If Italy has entered the war, players must reveal to the side with which Italy is allied the number and type of all naval units that enter or exit the Adriatic. b. Allied naval units may not enter the Adriatic unless Italy has entered the war.
36.5.2.1.4 The Strait of Gibraltar: The Central Powers player must reveal number and type of naval units that move between the Atlantic and the Western Mediterranean to the Allied Powers player.
36.5.2.1.5 The Dardanelles: Naval units may not move through the Dardanelles unless their alliance controls Constantinople.
36.5.2.2 En Route Restrictions
36.5.2.2.1 Every sea zone that a naval unit enters en route to its destination must be free of enemy naval units for the naval unit to move on to the next area. If the en route unit encounters enemy naval units, it must fight them in that zone and either sink them or force them to retreat.
EXCEPTION: Central Powers naval units moving between the Baltic Sea and the North Sea via the Kiel Canal are not subject to this restriction.
EXAMPLE: If the Allies control the North Sea and the Kiel Canal is free of enemy ZOC, a German naval unit in the Baltic may move from Kiel to Hamburg without interference.
36.5.2.2.2 If a naval unit is the only counter in the sea area after combat, it controls the area and can move on to the next sea area. The area is uncontrolled after the moving naval unit leaves the area.
36.5.2.2.3 A naval unit that retreats from an engagement while en route must retreat to a friendly, supplied port that is within support range.
36.5.2.3 U.S. Naval Deployment Limits
Britain's limited fuel oil supplies meant the U.S. Navy could only deploy coal-burning battleships to Britain.
36.5.2.3.1 European ports may support only one U.S. naval unit in the first year after U.S. entry. Place all other U.S. naval units in the Naval Warfare Map "Holding Box."
36.5.2.3.1 [sic] European ports may support one additional U.S. naval unit at the start of each subsequent year after U.S. entry.
36.5.3 Types of Naval Activity
Naval units are either in port or on patrol. A naval unit in port may do one of three things during a Naval Operations Phase: patrol a sea area, move to a port, or remain in port. A naval unit on patrol may remain in its current sea area, patrol in a different sea area, or go into port.
36.5.3.1 Patrol
A "patrol" is the long term commitment of a naval unit to establishing control of a sea area during that Game Turn.
a. A naval unit may patrol any sea area if the zone it patrols and every sea zone that it enters en route to its destination sea zone is in support range of a friendly, supplied port.
EXCEPTION: A naval unit may move without interference between a sea area and a port bordering the same sea area.
EXAMPLE: If the Central Powers control Kiel, Calais, and Trieste with all three ports in supply, then Germany can order a naval unit in Kiel to patrol the Adriatic. The unit can move en route through the North Sea since that area is within support range (15 hexes) of Kiel. It can move en route through the Atlantic since Germany controls Calais, which is within support range of the Atlantic, including an off-map distance of four hexes. Finally, it can move en route through the Western Mediterranean to the Adriatic as both are within support range of Trieste.
EXAMPLE: If the Allies control the North Sea and the Atlantic Ocean and both areas are in support range of friendly ports, then Britain may order a naval unit that was patrolling the Atlantic in August to patrol the North Sea in September.
b. Naval choke point restrictions (see §38.5.2.1) and en route restrictions (see §38.5.2.2) apply to all patrols.
EXAMPLE: Assume Italy is an Allied power and the Central Powers Player orders a naval unit in Kiel to patrol the Adriatic Sea. The Central Powers player must notify the Allied Player of the number and type of each naval unit that will move through the English Channel, the Strait of Gibraltar, and the Strait of Otranto before the Allied Player writes out his secret orders.
36.5.3.2 Move to a port
a. A naval unit may move to any friendly port if all the sea zones that it enters en route to the port are in support range of a friendly, supplied port.
EXCEPTION: A naval unit may move without interference between two ports bordering the same sea area.
EXAMPLE: A German naval unit may move from Bremen to Hamburg if Britain controls the North Sea.
b. Naval choke point restrictions (see §38.5.2.1) and en route restrictions (see §38.5.2.2) apply to all movement to ports.
36.5.3.3 Remain in Port
A naval unit that remains in port takes no further active part in that Player Turn. A naval unit in a foreign port must leave in the next naval phase if the host country surrenders.
36.5.4 Sea Movement
The following section replaces Rule 12.3.
36.5.4.1 During the game, each player possesses a sea movement capacity that he may use to move land units he controls by sea. This capacity is expressed as a number of points that are available each Turn. To move any corps-sized unit via sea movement requires one point. To move any other unit requires one-half point.
36.5.4.2 This table shows the countries that can use Sea Movement and the number of points available per month.
| Country | Sea Movement Points/Month |
|---|---|
| Britain | 12 |
| France | 3 |
| Germany | 3 |
| Italy | 1 |
| Netherlands | 2 |
| United States | 5 |
36.5.4.3 Nations may use this capacity to move their own units from any friendly-controlled port or beach hex to any other friendly-controlled port or beach hex. Sea movement can only occur if a friendly naval unit controls each sea area through which the sea movement occurs.
EXAMPLE: A land unit in Rouen can only use sea movement if the North Sea is under friendly control.
36.5.4.4 A unit that uses sea movement may not use regular or rail movement during the same Movement Phase, but may attack normally after it moves.
36.5.5 Invasions
This section replaces Rule 23.2 in its entirety.
NOTE: Treat units conducting amphibious invasions exactly as units using sea movement except as noted below.
36.5.5.1 Only British, French, German, and United States units may participate in amphibious invasions.
36.5.5.2 Invasions count against a country's sea movement capacity. The units must begin in a controlled port. They may move to any enemy-controlled port or beach.
EXCEPTIONS: There are three exceptions:
- The Allies may not invade a hex on the Black Sea unless they control Constantinople
- The Allies may not invade a hex on the Adriatic Sea unless Italy has entered the war
- If an undamaged enemy naval unit is in the port
36.5.5.3 If units invade an enemy occupied hex, place the invading units in the hex (observing the normal Stacking Limit) above any enemy units. The invading units do not have a ZOC if there are enemy units in the hex. Resolve combat in the Combat Phase with a -1 invasion DRM. Eliminate all invading units if any defending unit remains in the hex after combat ends.
36.5.5.4 An invasion receives a +1DRM for naval gunfire support if two or more undamaged friendly naval units are patrolling a sea area touching the invasion hex.
EXAMPLE: An invasion of an unfortified port with fire support would have a cumulative -1 DRM (-1 for invasion; -1 for defending a city; +1 for naval gunfire support).
36.5.5.5 If units invade a vacant hex, they have a ZOC but may not move or attack any enemy unit until the owner's next Player-Turn.
36.5.5.6 A player may attack a port or beach hex using normal attacks and amphibious invasion by resolving the normal attack(s) first; resolve the amphibious invasion last as a separate combat against all surviving defenders.
36.5.5.7 If an attacking unit survives, the invading player immediately places a Beachhead marker in the hex that acts as a port for sea movement and sea supply purposes (only) as long as the Beachhead marker remains in the hex. The owning player removes the Beachhead marker immediately if an enemy land unit enters the hex, or voluntarily during any subsequent Movement Phase.
NOTE: Each side has only two Beachhead markers.
36.6 Naval Combat
36.6.1 Combat may occur between enemy naval units in the same sea area depending on whether there are naval units patrolling or en route through that sea area in the current step (§36.5.2).
| Patrolling units from | Combat occurs on a die roll of |
|---|---|
| Both sides | 1-6 (automatic) |
| Only one side | 4-6 |
| Neither side | 6 |
36.6.2 Naval combat occurs in a series of rounds. During each combat round, both players may fire each of their naval units once at an enemy naval unit. No more than four naval units may fire at any one enemy unit in each round. Calculate all combat results before inflicting damage (see Naval Combat Results Table).
EXAMPLE: The Germans have three BBs and the British have six BBs. Each German BB attacks a British BB at 4 to 8 (or 1-2), obtaining "light" damage on one British BB. Before the results are applied, four British BBs attack one German BB at 16 to 8 (or 2-1), and two British BBs attack one German BB at 8 to 8 (or 1-1), obtaining one "heavy" damage hit. The results of this round are now applied.
36.6.3 At the conclusion of each round, both players roll on the Damage Control Table to repair light damage. Heavy damage can only be repaired when all combat rounds for that month are over. Treat all "RH" results in combat as "RL" if one side has not yet disengaged.
36.6.4 Both players may try to withdraw naval units to a port within support range after each round. Withdrawal attempts are resolved using the Disengagement Table.
DISENGAGEMENT TABLE (number indicates die roll needed for disengagement)
| Withdrawal Unit \ Pursuit Unit | BC | BB | B |
|---|---|---|---|
| BC | 1-4 | 1-5 | 1-6 |
| BB | 1-2 | 1-3 | 1-4 |
| B | 1 | 1-2 | 1-3 |
Naval units with light damage add one to their die roll. Naval units with heavy damage add two to their die roll.
If a player withdraws his naval units into a port, no further naval combat can occur in that area in that step.
NOTE: A fleet comprised solely of German naval units receives a +1 DRM to all disengagement attempts due to the effect of their Gefechtskehrtwendung, or special turn away maneuver.
36.6.5 At the end of the Naval Operation Segment, only one player should have naval units in each sea area. That player controls that sea area for this month.
36.7 Repair of Naval Units
36.7.1 After each naval phase, countries may repair their damaged naval units per the National Capabilities Chart.
36.7.2 The time to repair a country's naval unit doubles at a base or port outside the home country.
EXCEPTION: Consider Gibraltar and Malta to be British "home country" ports for repairing naval units.
36.8 Blockade
This rule replaces the Allied Blockade rule (§23.2).
A country is under blockade if it does not control at least one of its critical sea areas. The Blockade Effects Table shows the critical sea areas for each country and the penalties associated with not controlling each of them. Only countries shown on the BET suffer blockade effects.
BLOCKADE EFFECTS TABLE (§38.8)
| Country | Critical Sea Areas | Level 0 | Level 1 | Level 2 | Level 3 | Level 4 |
|---|---|---|---|---|---|---|
| Germany | North Sea | 0 | -1 | -2 | -3 | -5* |
| Germany | North Sea and Baltic Sea | 0 | -1 | -1 | -1 | -1 |
| Austria-Hungary | Adriatic Sea or (Eastern & Western Mediterranean Sea) | 0 | 0 | -1 | -1 | -2* |
| Britain | North Sea & Atlantic Ocean |
- * Apply a -1 Morale Determination DRM (see §24.1). The DRM is not cumulative with increasing blockade levels.
- ** Constantinople cannot be enemy-controlled. Supersedes §31.23 if players use the Optional Special Turkish Situation Rule (§31).
- † The infantry replacement values for Riga and rail entry hex R1 each increase to two points each (§38.8.5).
- ‡ The infantry replacement values for Odessa and rail entry hex R4 each increase to two points each (§38.8.5).
Notes: Numbers show the change in infantry replacements per turn due to the effects of each blockade level in each critical sea area. If the BET shows two areas (e.g., "A and B") then a blockade must exist in both areas for the blockade to take effect. If the BET shows two areas (e.g., "A or B") then the blockade is in effect if either area is under blockade.
Blockade Level modifiers:
- +1 Blockade established in this turn
- +1 per continuous year of blockade
- -1 Blockade interrupted in this turn
- -1 per continuous year without being under blockade
36.8.1 Blockade Levels
Blockade levels correspond to a blockade's effect on a country's economic productivity and morale. Blockade levels range from "Level 0" to "Level 4."
36.8.2 Increasing Blockade Levels
The Blockade Level increases when control of a sea area is lost, and for each year of continuous blockade.
EXAMPLE: The Central Powers lose control of the North Sea in January 1915, so Germany's Blockade Level goes from zero to one. If the Germany does not regain control in January 1916, the blockade level will rise to two; if not by January 1917, it rises to three.
EXAMPLE: Britain has only a damaged naval unit in the North Sea, and Germany has none. Neither side controls the North Sea so both sides are under blockade.
36.8.3 Reducing Blockade Levels
Breaking an enemy blockade reduces the Blockade Level, as does each continuous year not under blockade.
EXAMPLE: Germany is at Blockade Level 2 in May 1916, but controls the North Sea in June 1916, so its Blockade Level decreases by one to Level 1. If Germany retains control for one year, the Blockade Level will fall to zero in June 1917. If Germany loses control in July 1916 the Blockade Level immediately rises to two, and if Britain maintains the blockade until July 1917 the Blockade Level will then rise to three.
36.8.4 Special Effects on Britain
The effects of surface blockade and submarine warfare (see §30.0) are cumulative.
36.8.5 Russia
Russia may increase the number of infantry replacement points it receives under the following conditions:
36.8.5.1 If the Allies control the Black Sea and the Eastern Mediterranean Sea, and Constantinople is neutral or controlled by the Allied Powers, then Odessa and rail entry hex R4 are each worth two infantry replacement points.
36.8.5.2 If the Allies control the North Sea and the Baltic Sea, then Riga and rail entry hex R1 are each worth two infantry replacement points.
36.9 Sea Supply
This section replaces Rule 11.3.
36.9.1 During the game, each player possesses a sea supply capacity that he may use to supply land units that he controls. This capacity is expressed as a number of supply capacity points which are available each Turn. To supply any corps-sized unit (see §3.1.5) requires one point. To supply any other unit requires one-half point.
36.9.2 Countries may only supply units from their own countries.
36.9.3 U.S. and British units in France do not count against their respective nation's sea supply capacity.
36.9.2 [sic] The following countries have sea supply capacity:
| Country | Sea Supply Capacity Points |
|---|---|
| Britain | 24 |
| France | 3 |
| Germany | 8 |
| Italy | 4 |
| Netherlands | 2 |
| United States | 4 |
36.9.5 Trace sea supply through sea areas from the port of debarkation to a port in the home country. Sea supply can only occur through a sea area controlled by a friendly naval unit. Land units are out of supply if uncontrolled sea areas block their sea supply path.
NOTE: Gibraltar and Malta are not "home country" ports for sea supply purposes.
36.9.6 Sea supply is limited by a country's sea supply capacity and by the port of debarkation's capacity to supply units inland. Each objective city port can handle 24 supply points of all nations using sea supply through that port. Any other port can handle 12 supply points except Cetinje and Durazzo on the Adriatic Sea, which can only handle three supply points each. A beachhead can handle six supply points.
36.10 Dardanelles Campaign
NOTE: Players should use this section only if the Optional Turkish Reaction Rule (see §31) is not used.
Re-creation of the Dardanelles Campaign is very difficult in THE GUNS OF AUGUST. The Allies were able to establish the Gallipoli beachhead because the Turks had too much coastline to defend with too few troops, but the map portrays only a small portion of the Turkish coast. The following small changes taken together allow players to recreate the drama and frustrations of that strategically relevant campaign to open the Dardanelles for maritime communication with Russia.
36.10.1 Central Powers units may not be placed in or enter the Turkish beach hex (OO35).
36.10.2 Constantinople cannot be invaded by sea.
36.11 Gunboat Diplomacy
NOTE: The withholding and gifting of capital warships were critical elements in Turkey's decision to enter the war on the side of the Central Powers.
36.11.1 Turkish Dreadnoughts
NOTE: Britain seized four foreign dreadnoughts it was building in British shipyards as war loomed in early August 1914. The two being built for Turkey, Sultan Osman I and Reshadieh, were equal to Britain's best dreadnoughts and were to go to Turkey in late August. Britain's seizure of these dreadnoughts strengthened the Royal Navy at the cost of Turkish enmity.
At the start of the August 1914 Interplayer-Turn the Allied Player must decide whether Britain will keep the foreign dreadnoughts.
36.11.1.1 If Britain seizes the dreadnoughts then it receives a BB squadron in the August 1914 Allied Reinforcement Phase.
36.11.1.2 If Britain allows the sale it does not receive a BB reinforcement in while Turkey receives a 2-3 BB naval unit in the August 1914 Reinforcement Phase and a permanent -1 DRM on the Optional Variable Entry Table (see §29.0).
36.11.2 The Goeben
The German Player decides the fate of the Goeben immediately after the Allied player decides whether Britain will keep the foreign dreadnoughts. Germany may give the Goeben to Turkey, give it to Austria-Hungary, or keep it when it appears as a 1-2 factor battlecruiser (BC) in the August 1914 Reinforcement Phase.
36.11.2.1 If Germany retains Goeben, it appears in Trieste as a German reinforcement. If Britain kept the foreign dreadnoughts (see §38.11.1) then Turkey receives a permanent -1 DRM on the Optional Variable Entry Table (see §29.0).
36.11.2.2 If Germany gives Goeben to Austria-Hungary, it appears as an Austro-Hungarian reinforcement; if Britain kept the foreign dreadnoughts (see §38.11.1) Turkey receives a permanent -1 DRM on the Optional Variable Entry Table (see §29.0).
36.11.2.3 If Germany gives Goeben to Turkey, it appears as a Turkish reinforcement; if Britain keeps the foreign dreadnoughts (see §38.11.1) there is no effect on the Optional Variable Entry Table (see §29.0).
36.12 Effects on Reinforcements and Supply
France normally receives three 4-6-4 infantry units in Marseilles in August 1914 that represent reinforcements from France's North African colonies, while U.S. reinforcements normally arrive in any British or French port (see §14.16). These reinforcements assume the Allies retain control of the sea as they did historically, but this may not be the case when using the Naval Rules.
36.12.1 French North African Reinforcements
The three French 4-6-4 units that arrive in Marseilles in the August 1914 Reinforcement Phase are permanently eliminated per §14.18 if the Allies do not control the Western Mediterranean Sea during that Phase.
36.12.2 U.S. Reinforcements
U.S. reinforcements that cross the Atlantic to reach Europe count against U.S. sea movement capacity. If the Allies do not control a port in Britain or France U.S. forces must land via an amphibious invasion.
36.12.2.1 If the Allies control the Atlantic Ocean, the North Sea, and the Western Mediterranean, U.S. reinforcements arrive at any Allied-controlled British or French port.
36.12.2.2 If the Allies control the Atlantic Ocean and the North Sea but not the Western Mediterranean, U.S. reinforcements enter at any Allied-controlled British or French port except Marseille.
36.12.2.3 If the Allies control the Atlantic Ocean and the Western Mediterranean but not the North Sea, U.S. reinforcements enter at Marseilles or at hex A13 if the Allies control the chosen entry hex.
36.12.2.4 If the Allies control the Atlantic Ocean but not the North Sea or the Western Mediterranean, U.S. reinforcements enter at hex A13 if it is Allied-controlled.
36.12.2.5 U.S. reinforcements enter in the Naval Warfare Map "Holding box" if the Central Powers control the Atlantic Ocean or the Allies do not control hex A13. They may move to Europe normally depending on which of the conditions (§38.12.1.a - d above) the Allies meet.
36.12.3 U.S. and British Supplies
36.12.3.1 U.S. units outside of the United States are automatically out of supply if the Allies do not control the Atlantic Ocean.
36.12.3.2 British units outside of Britain are automatically out of supply if the Allies do not control either the Atlantic Ocean or the North Sea.
36.13 Changes to Variable Entry (§29)
36.13.1 Changes to British Entry
36.13.1.1 If Germany declares war on Belgium, Britain enters the war as if Germany had declared war on Britain; it receives normal reinforcements and replacements.
36.13.1.2 If the Central Powers attempt an amphibious invasion from Calais to Cherbourg, Britain automatically enters the war as an Allied country as if Germany had declared war on Britain; it receives normal reinforcements and replacements. A special naval phase immediately interrupts the Central Powers movement phase: place all British naval units on patrol in the North Sea where they engage any Central Powers naval units there. The Central Powers movement phase resumes after the naval phase ends. If the Central Powers still control the North Sea the invasion occurs normally; otherwise, the invasion aborts and each invading land unit returns to its original port.
36.13.1.3 If Britain does not enter automatically, it will enter the war according to the Variable Entry rule (§29.1) using the following Variable Entry Table and die roll-modifiers:
NOTE: Britain will never join the Central Powers.
| 1914 | 1915 | 1916 | 1917 | 1918 |
|---|---|---|---|---|
| 1-6 | 1-6 | 1-6 | 1-6 | 1-6 |
- -2 if the Central Powers (CP) declare war on the Netherlands
- -2 if Russia surrenders
- -1 per CP-controlled Objective city in France or Russia
- -1 if the CP control Paris
- +1 per Allied-controlled CP Objective city
- +3 if the Allies declare war on Belgium
36.13.1.4 Use the Optional British Player Card when using this option.
36.13.2 Changes to Greek Entry
36.13.2.1 If using the Variable Entry rules for Greece (see §29.5) and Greece joins the Central Powers when the Allies invade Salonika, the undamaged Greek naval unit automatically forces all invading land units to abort and return to their ports of debarkation and end their movement, while Greece remains with the Central Powers.
36.13.2.2 If Allied land units occupy Salonika while Greece is neutral, they automatically destroy the Greek naval unit if Greece later joins the Central Powers.
37.0 Mobilization of Armies in the World War: Unit Production in The Guns of August (Optional)
During the World War, the mobilization of soldiers and the production of armaments took time in order to field the divisions, corps, and armies sent to the various fronts. Within this module, countries conscript soldiers on a regular basis during the year but can train or accommodate only so many at any one time. This manpower mobilization is abstractly represented by the concept of personnel points; supply points represent the factories, shipyards, farmlands, and raw materials. Each country has a certain amount of personnel and supply points each turn. They use these two types of points to field new units and create replacements for old units.
Except where modified in this module, the standard rules apply. The Optional Special Campaign Game Replacement Rule (§37.7.2) is used except that each nation is not limited in the number of units to be converted per turn and conversions can start in August 1914.
NOTE: The mobilization module assumes the Optional Naval Module Rules (§38) are in effect.
37.1 Procedure
37.1.1 Each turn during the reinforcement phase, each player secretly writes down what new units or conversions he will produce for that month, and the month in which the units or conversions will enter.
37.1.2 The number of units each player may produce is limited by their unit cost in terms of supplies and personnel points on the Unit Productions Costs Chart (UPCC) and by the total amount of supply and personnel points each country receives for that turn as per the Resources Availability Chart (RAC), and any supply points saved from previous turns.
EXAMPLE: Germany receives 28 personnel points and 40 supply points as per the RAC on August 1914. The German player builds four 4-6-4s, which cost 16 personnel points and 24 supply points, one 3-3-3 which costs one personnel and nine supply points, convert three 5-7-4s into six 4-6-4s, and convert one 4-6-4 into two 3-5-3s. The German has used all 28 personnel points and 33 supply points. The German saves seven supply points for future use.
37.1.3 After production, those new units enter the game in the reinforcement phase after the number of turns listed on the UPCC has passed.
EXAMPLE: A 3-5-3 corps produced in August 1914 has a production time of one month so it will become available in the September 1914 reinforcement phase.
37.1.4 Nations may accumulate supply points from turn to turn. Personnel points must be used on the turn of availability or be lost.
37.1.5 For each city that a country loses, reduce its supply and personnel points by one.
37.1.6 Countries receive one additional supply point per turn for each city captured, garrisoned, and connected to the home country. The connection can be by rail, through controlled sea areas via friendly controlled ports, or a combination thereof.
37.1.8 If using the optional "Captured Artillery" combat rule (§26.4), the capturing country receives three additional supply points for each artillery unit it captures in that turn.
37.1.9 The blockade costs the affected country in supply points two times the replacement points it loses in the standard game as modified by the Naval Module.
37.1.10 Any country may loan supply points to any other country. The amount loaned cannot be more than one-half the amount that country would normally receive. The loaning country must have an uninterrupted supply line either by rail or by sea to the borrowing country. If the supply line is by sea, the supplies reach the borrowing country the following month.
EXAMPLE: Turkey is neutral in September 1914 and England loans ten supplies to Russia, which is the maximum Russia can receive. In October 1914, the Central Powers control the Baltic but Turkey is neutral and the Allied Powers control the North Sea, the Atlantic, the Eastern and Western Mediterranean, and the Black Sea so the supplies reach Russia via the Black Sea in October 1914 and can be used in that turn.
37.1.11 When playing with the Naval Module the supply points being transferred by sea will be lost if the sea areas between the country sending the supply points and the country receiving the supply points are not under friendly control for the full turn of the transfer.
37.1.12 The United States must take its scheduled reinforcements. If using normal entry rules, the U.S. does not have any personnel or supply points available until November 1918; if using Variable Entry Option 1, they become available starting at DOW+20; if using Option 2, they become available starting at DOW+19
37.2 Naval Construction
Build naval units in the same manner as the other units, but use the Naval Construction Chart (NCC) to determine the cost and time needed to build the unit. Countries build naval units in three steps:
- Construct the unit's hull
- Launch the unit's hull, and
- Complete the naval unit.
All naval units under construction in a port are destroyed if the port becomes enemy-controlled.
37.2.1 Construct the Unit's Hull
37.2.1.1 The player pays the naval unit's initial cost, selects the port where unit construction will occur, and places the appropriate naval unit on the Shipyard Activity chart in the "Naval Hulls under Construction" box for that port.
37.2.1.2 The number shown on the NCC and on the Shipyard Activity chart limit the maximum number of hulls a country can have under construction at any one time.
37.2.1.3 A nation may start new naval units in a port before hulls under construction have been finished as long as the total number of hulls under construction does not exceed the national limit.
37.2.1.4 Only Britain, Germany, and the United States may produce BC naval units. Players must decide whether a unit will be a BB or a BC when the initial cost is paid.
NOTE: Countries could not interchange battleship and battlecruiser hulls because they represent fundamentally different design trade-off decisions between speed, armor, and firepower.
37.2.2 Launch the Unit's Hull
The player moves the naval unit to the "Finished Naval Unit Hulls" box for that port on the Shipyard Activity chart in the Reinforcement Phase of the turn when the "months until launching" for that naval unit have elapsed.
37.2.3 Complete the Unit
37.2.3.1 Once a unit's hull launches, the player pays the naval unit's final cost shown on the NCC and moves the naval unit to the "Naval Units Being Completed" box for that port on the Shipyard Activity chart.
NOTE: The player may pay this final cost in any reinforcement phase, but the unit cannot start the completion process until the cost is paid.
37.2.3.2 The player moves the naval unit to the port on the board or to the port's corresponding box on the Naval Warfare Map in the Reinforcement Phase of the turn when the "months until completion" elapse.
EXAMPLE: Britain pays the initial cost for a BB hull in July 1915 and starts constructing the hull in Portsmouth. The hull launches in April 1916, but Britain does not pay the final cost until the May 1916 Reinforcement Phase. Britain does not complete the unit until the Reinforcement Phase of November 1916, when the BB naval unit appears in Portsmouth on the Naval Warfare Map. The new naval unit will be ready for use in the December 1916 naval Phase.
38.0 Fortresses & Siege Artillery (Optional)
NOTE: This optional rule adds historical fortresses and connects them with new railways as necessary. It distinguishes between older and more modern fortifications, and adds historically available siege artillery units.
38.1 Pre-war Fortresses
38.1.1 A pre-war fortress is a map-printed fortification or a hex identified as such under this rule.
38.1.2 A pre-war fortress is not itself a city but it is a supply source in the same manner as a city. This modifies §11.23.
38.1.3 France
38.1.3.1 Add a pre-war fortress at Nancy, hex L15 (Epinal), and Belfort.
38.1.3.2 Decrease the die roll by three (-3) if all defending units are under the fortification markers of Verdun, Nancy, hex L15 (Epinal), or Belfort.
38.1.3.3 Add a railroad extending from J15 to Belfort to Nancy.
38.1.4 Germany
38.1.4.1 Add a pre-war fortress at Breslau, Danzig, hex EE11 (Posen), and hex GG10 (Thorn).
38.1.4.2 Decrease the die roll by three (-3) if all defending units are under the fortification markers of Strasbourg or Metz.
38.1.4.3 Make the following railroad changes:
- Connect rail hex EE11 to rail hex MM7
- Connect GG10 to Danzig along the Vistula
38.1.5 Russia
38.1.5.1 Add a pre-war fortress at Odessa, Riga, and Warsaw.
38.1.5.2 Make the following railroad changes:
- Delete the railroad in hexes FF11 and GG11.
- Add a railroad extending from HH11 to HH10 to GG10.
- Add a railroad extending from II12 to II13, to GG14, to GG15, and then to FF15.
- Add a railroad extending from Riga to RR1, to SS2, to TT1, and to UU2.
38.1.6 Austria-Hungary
a. Add pre-war fortresses at Cracow, hex R21 (Trento), and Trieste. b. Decrease the die roll by three (-3) if all defending units are under the fortification marker of R21 (Trento). c. Connect rail hex S21 to R21.
38.2 Siege Artillery
Countries may build one siege artillery unit of each type according the following table.
| Country | Strength | Date Available* |
|---|---|---|
| Austria-Hungary | 2-2-2 (305mm) | August 1914 |
| Germany | 3-2-2 (305mm) | At Start |
| Germany | 3-1-1 (420mm) | At Start |
| Britain | 3-2-2 (305mm) | January 1916 |
| France | 3-2-2 (305mm) | January 1916 |
| Italy | 2-2-2 (381mm) | January 1917 |
| United States | 3-2-2 (355mm) | August 1918 |
* The date a unit is available as a replacement unit. Germany's siege artillery units are available and deployed at the start of the game.
Charts
Combat Results Table
| Die Roll | 1:1 | 2:1 | 3:1 | 4:1 | 5:1 | 6:1 |
|---|---|---|---|---|---|---|
| 0 | AE | AA | AA | AD | BD | BD |
| 1 | AA | AA | AD | BD | BD | DD |
| 2 | AD | AD | BD | BD | DD | DX |
| 3 | BD | BD | BD |
Die roll modifiers (DRM):
- -2 if all defending units under fort marker.
- -1 if all defending units are under Entrenched marker.
- -1 if all defending units occupy a hex with city, swamp, rough terrain, or any combination thereof. Example: A city in rough terrain decreases the die roll by one.
- -1 if all attacking units occupy a river hex and none of the defending units occupy a hex traversed by the same river.
- +1 if any defending unit is demoralized.
- +1 for each siege artillery attacking unit under a Fort Marker and every six regular artillery strength point participating in any attack (round fractions down).
- +1 for each attacking Tank, Stosstruppen and/or Air unit.
Notes: A die roll less than zero is treated as zero; A die roll greater than six is treated as six; At odds less than 1:1 the die roll is decreased by one; At odds greater than 6:1 the die roll is increased by one; All modifiers are cumulative however the die roll modifiers may not total more than +3 nor less than -3.
The Combat Results are explained in §13.41.
Terrain Effects Table
| Terrain Feature | Movement Point Cost | Effect on Combat |
|---|---|---|
| Clear Hex / Political Border | 1 | NE |
| Coastal Hex / Beach | 1 | NE |
| Rough Hex / Scenario Front | 2 | -1 |
| Swamp Hex | 2 | -1 |
| River Hex | NE | -1 |
| Lake Hex | Prohibited | Prohibited |
| Rail Entry Hex | NE | NE |
| City / Railroad | NE | -1 |
| Objective City / Political border Railroad |
NE = No Effect; other terrain in hex determines movement and combat effects. -1 = Subtract one from die roll. -2 = Subtract two from die roll.