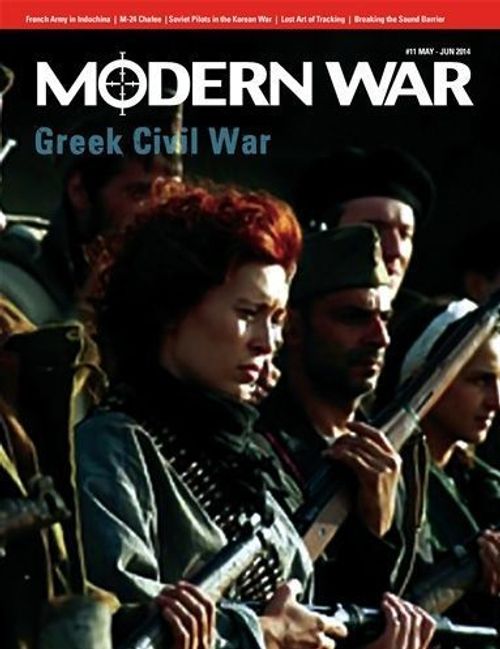
The Greek Civil War, 1947-49
The Greek Civil War, 1947-49 Rulebook
Table of Contents
Table of Contents
- 1.0 Introduction
- 2.0 Components
- 3.0 Unit Levels
- 4.0 Setup
- 5.0 Sequence of Play
- 6.0 How to Win
- 7.0 Political Index
- 8.0 Initiative Phase
- 9.0 The Mobilization Phase
- 10.0 Movement Phase
- 11.0 Conflict
- 12.0 Conflict Results
- 13.0 Infrastructure
- 14.0 Control Phase
- 15.0 Attrition Phase
- 16.0 Special Rules
- 17.0 Optional Rules
- 18.0 Historical Details
1.0 Introduction
1.1 In General
A. The Greek Civil War, (known as Andartes, translated as guerrilla/ rebel/ resistance fighter) is a two-player game simulating the 1947-49 conflict between the Greek government and the DSE (Dimokratikos Stratos Elladas, Greek Democratic Army), the fighting organization controlled by the Greek Communist Party. During the game, the side playing the DSE (hereafter called DSE) tries to erode the government's power, replacing their governing structures with its own, while the side playing the Government (hereafter called Government) tries to contain this threat to civil society with civilian police and the servicemen and reservists of the Greek National Army.
B. Central to play of the game is the Political Index (PI). Both sides maintain their own PI during the game. The PI quantifies the level of support or commitment the Greek "man in the taverna" is willing to provide (as opposed to other political movements or methods) as an agent of social change, or guarantor of security. The Government PI is also a measure of the stability of the political regime. PIs are measured in Political Points (PPs) and recorded on the Record Track. PIs change constantly during the game, depending on events and territorial control. The highest level is 99, and the lowest is 0. If either side's PI reaches 0 at any point in the game, its has reached the point of political collapse for that side, and the game ends.
1.2 Abbreviations
| Abbr | Meaning | Abbr | Meaning |
|---|---|---|---|
| #D6 | That Many Six-Sided Dice | MA | Movement Allowance |
| CRT | Conflict Resolution Table | MP | Movement Point |
| DRM | Die Roll Modifier | PI | Political Index |
| IS | Infrastructure Square | PP | Political Point |
2.0 Components
2.1 The Map
The map shows mainland Greece, divided into Regions, and parts of the adjoining countries to the north (Albania, Yugoslavia, Bulgaria).
2.2 Regions
A. The irregular map areas are called Regions, each with a name. Regions represent the general geography of the area and are coded U for Urban or R for Rural, affecting operations there.
B. Each side deploys its units into Regions, into either the Infrastructure Squares (ISs, the small square or squares within any Region's boundaries) or the Open area (outside of the squares within a Region). When both sides have units in the same Region, conflict may occur.
C. Athens and Thessalonika are separate Regions unto themselves.
2.3 Structure of a Region
A. The smaller boxes within Regions are ISs. Each Region may have one, two or three such squares. These represent the populated areas of that Region and the Infrastructure there (power plants, water sources, roads, buildings, etc). Each IS may never contain more than one unit.
B. Units that are in ISs (not in the open) are considered to be occupying the towns or cities of that Region. There may only ever be one unit in any particular IS at any one time, but if a Region has more than one IS, then each side may have units in different ISs, but not both in the same IS.
C. Units that are in the open (not in any ISs) are considered to be occupying the wilderness of that Region. There is no limit to the number of units that may be in a Region in the open, but if both sides have units in the open, they must be organized as separate stacks.
2.4 Movement Routes
Units may move from the open area of one Region to the open area of another if the two Regions share a common border or are connected by an arrow.
2.5 Political Points
Printed next to each Region's name are two numbers, separated by a slash. The numbers to the left and right of the slash are the number of Political Points (PPs) each side (DSE and Government, respectively) may be awarded or lose for certain combat outcomes in that Region.
2.6 Foreign Areas
Foreign Areas are Albania, Yugoslavia, and Bulgaria. These are considered Regions, though they have no ISs and only DSE units may ever enter and exit them. However, events during play may deny the DSE access to one or more of the Foreign Areas.
2.7 Map Displays
There are displays and tracks on the map sheet for keeping track of events during the game.
2.8 Airstrikes Available
This is a convenient space for the Government to place Airstrike markers when not being used to attack targets on the map. Airstrike markers in this space are considered to be available for use. Any Airstrike markers that are not available for use are set to the side, off the map.
2.9 Sequence of Play and Posture Reminders
These remind players of what to do next and the current posture of the Greek government.
2.10 Game Charts and Tables
The game uses several charts and tables:
2.10.1 Expanded Sequence of Play
A more complete reminder for players of what to do, when.
2.10.2 Mobilization Charts
This lists the cost of building units in terms of Political Points. There is a separate Mobilization Chart for each side.
2.10.3 Conflict Resolution Table
The CRT is used to resolve all conflict (combat declared by either side).
2.10.4 Political Index and Turn Record Track
This records each player's current PPs, on a scale of 0-99. A counter is provided for both sides to place on their own track.
2.10.5 Game Turn Record Track
This records the current turn.
2.10.6 Politics Table
Uses to determine the Government player's current doctrine (16.3).
2.10.7 Government Mobilization Table
Used by the Government during the Mobilization Phase (9.0).
2.10.8 DSE Mobilization Table
Used by the DSE during the Mobilization Phase (9.0).
2.11 The Playing Pieces
A. Both sides are provided with a set of counters (units) that represent conventional and unconventional forces. During their respective turns, players move their units among the Regions on the map, and engage in various kinds of conflict in order to destroy enemy forces and change the PI in their favor. Both sides can mobilize new units by paying for them with PPs.
B. DSE units are red; Government units are blue (white for police units).
C. There are also several types of informational markers to remind players of certain game events or conditions. These counters are white.
2.12 Unconventional Units
Most units in the game are conventional type units, representing large formations of full-time combatants, operating continuously against the enemy. Some units, however, are considered unconventional-type units, signified with a white band printed behind their ratings. Unconventional units represent smaller teams operating, often clandestinely, in a Region. Unconventional units function just like conventional units, but have special abilities (10.5, 11.6, 16.1).
2.13 Sample Unit
A. Each unit contains three numbers, from left to right: Conflict Rating, Level, and Movement Allowance (MA).
B. Conflict Rating is the ability of the unit to engage in combat via the CRT.
C. The Level is the relative state of combat effectiveness and morale of the unit. A higher level means a unit is more effective. Level 4 is the highest.
Design Note: It is important to know that unit levels may change during the game, and units may potentially be replaced by units of higher or lower levels.
D. The MA is a measure of how many sequential Regions the unit may travel each turn. If the MA is printed in a circle, the unit is Infiltration Capable (10.5).
E. The unit size is above the unit type symbol.
| Symbol | Size |
|---|---|
| XX | Division |
| X | Brigade |
| II | Battalion |
2.14 Airstrike Markers
A. Only the Government is provided with Airstrikes. Airstrike markers represent additional firepower that may become available, either air support (representing about 25 combat aircraft) or artillery assets (batteries of guns or occasional naval gun support).
B. Airstrikes may be placed anywhere on the map to provide a special combat support ability (11.4), but they have no levels, and are expended after use.
2.15 Dice
Players need to provide two six-sided dice to play the game.
2.16 Other Markers
Markers are provided for: Doctrine (16.3), Terror (16.4), Population Resettlement (16.5), and Stalin Score (17.1).
3.0 Unit Levels
3.1 Levels
A. A unit's level indicates its capability in battle, and is the small number in the lower middle of the counter, ranging from 1 (lowest) to 4 (highest). Certain combat results on the CRT cause levels to go up or down. Units that are out of supply for too long will go down levels.
B. A unit that goes from Level 1 to Level 2 is simply flipped over to its reverse side, where the next level is printed. A unit that goes up from Level 2 to Level 3 is simply replaced by a unit (of the same exact type) printed with Level 3). A unit that goes up from Level 3 to Level 4 is simply flipped over to its reverse side. Reverse the process for units that suffer a decrease in their level.
C. No unit can go higher than Level 4, but if a unit goes below Level 1 (or below 0 for those units that start at level 0), it is automatically eliminated.
Design Note: Some unit types cannot increase above Level 1, while unconventional units cannot increase above level 0. (LOK units that are Level 1 are no longer unconventional.) Other units increase only to Level 2 or Level 3. These limits are enforced by the counter mix limitations.
3.2 Skipping Levels
Combat results may cause units to skip levels going down, but never when going up.
3.3 Airstrike Markers
Airstrike markers have no levels. They are never affected by combat.
4.0 Setup
4.1 Government
A. The Government sets up first.
B. Determine the Government Doctrine, then the Mobilization PP Limit, and finally the Duration (number of game turns) for that Doctrine (16.3).
C. Next, set up seven 13-1-2 army units and one 3-1-4 mountain unit in the open area of any desired Region(s) within Greece, as modified by the initial dice roll on the Politics Table.
D. Finally, sets up five 2-1-1 police units in the ISs of any Regions within Greece, as desired.
E. Set aside all remaining units for later in the game.
F. Set the Government Political Index to 60.
4.2 DSE
A. The DSE sets up second, but he does not roll on the Politics Table. As the rebellious faction, it is free to choose its own strategy in terms of disposition of its forces.
B. Set up three 1-0-3 front units, four 2-1-1 cadre units, and five 2-1-0 guerilla band units in any desired Region(s) within Greece), in the open areas and/or ISs of any Regions within Greece.
C. Set aside all remaining units for later in the game.
D. Set the DSE Political Index to 50.
5.0 Sequence of Play
Each turn represents an indeterminate period of time, from several weeks to several months. The Sequence of Play for each turn is as follows.
5.1 Initiative Determination Phase
Determine who will be the First and Second Player (8.0). The First Player completes the following phases in the order listed below, and then the Second Player completes the following phases in the order listed below.
5.2 Mobilization Phase
This applies only on odd-numbered turns. Build new units or improve existing ones per the Mobilization rule (9.0).
Exception: There is no Mobilization Phase for either side on the first turn. In the first turn, all areas are considered uncontrolled by anyone until the first Control Phase.
5.3 Movement Phase
The phasing side moves its units in per the Movement rule (10.0).
5.4 Conflict Phase
A. The phasing side initiates conflict with its units per the Combat rule (11.0).
B. First conduct all Open combat, then conduct any Infrastructure combat.
5.5 End of Turn Steps
After both players have completed the phases of their own turn above, proceed to the End of Turn Steps.
5.5.1 End of Turn Control Check Step
Check each Region in Greece. If one side's forces control that Region, it receives the PPs listed for its side, adding them to its Political Index or subtracts them from the opponent's Political Index (14.0).
5.5.2 End of Turn Attrition Step
This applies in even-numbered turns only; both sides (starting with the second player) remove any units that are subject to attrition (15.0).
5.5.3 Next Turn Step
Move the Turn marker one space to the next higher turn number to reflect the passing of one turn.
5.5.4 Victory Check Step
A. (Optional) Before the game begins, both players may agree to end the game on a specific game turn, instead of ending the game when one side's PI is 0.
B. Players may agree to end the game on Turn 5, 10, 15, 20, 25 or 30, at which time (at the end of that turn, during this step), victory is determined by whichever side has the higher PI.
C. If both sides have the same exact PI when the game ends, the result is a draw.
6.0 How to Win
6.1 Sudden Death Victory
A. The game has no predetermined length, unless playing with the optional Victory Check rule (5.5.4).
B. Both sides maintain their own PI. This index changes throughout the game. If, at any time, either side's PI is reduced to zero or less, the game immediately ends, and the other player is the winner.
C. Next, the winner determines the level of victory based on her/his PI.
| PI | Victory Level |
|---|---|
| 0-25 | Draw: The civil war is over, for now. Both sides will be at it again before too long. |
| 26-50 | Marginal Victory |
| 51-75 | Decisive Victory |
| 76-100 | Turning Point |
6.2 Shorter Game
Players may find it might take a long time to beat the enemy down to zero PI. If so, they should conduct a victory check in the Victory Check Step of any fifth game turn of both player's consent, comparing PPs at the end of that game turn. If one side has more than the other, then that player has won the game.
7.0 Political Index
Each side has a PI, indicating a quantity of PPs available to each side throughout the game. PPs are used to purchase units, as well as determining who is winning the game at that time (the side with more PPs)
7.1 Gaining PPs
When a side gains PPs, move its marker up the PI. If that side loses or expend PPs, move the marker down the appropriate number of spaces.
7.2 PI Limits
If a PI goes to 99, it can go no higher (no matter how successful your cause, there are always those people out there that believe in another dogma). A PI can go lower than zero, however; if a PI drops to zero or lower, the game comes to an end immediately (6.0).
7.3 PI Changes
A. A side can only gain PPs by controlling certain Regions (during the End of Turn Control Check Step), or by combat results that award PPs.
B. A side can lose PPs by spending PPs to purchase (mobilize) units, or by losing them to the opponent (14.7).
Design Note: Political Table results (4.0) may specify how many PPs may be spent in each Mobilization Phase (9.0).
8.0 Initiative Phase
A. During each turn's Initiative Phase of, players determine who will be the First Player and the Second Player. The player with the higher number of PPs can choose the player to have the initiative, going first in this turn (the first player). The other player is the second player. If tied, the DSE has the Initiative.
B. Initiative remains in effect for the remainder of the turn.
Design Note: Sometimes there are distinct advantages to going second!
9.0 The Mobilization Phase
The phasing side may expend PPs to create, rebuild, and improve units.
9.1 Building New Units
A. The phasing side builds new units during a friendly Mobilization Phase by spending PPs.
B. The costs to build units is listed on each side's Mobilization Chart. There is a limit to the quantity of PPs the Government can spend in a Mobilization Phase, but not for the DSE.
C. When a unit is purchased, it must first be purchased at Level 1. Higher levels can be purchased only as an upgrade to a lower Level unit.
D. Place newly mobilized units on the map in locations as per the instructions on the Mobilization Chart. Units may be placed in any Open area or in any available (unoccupied) IS.
Play Note: If a unit is required to be placed in the same Region as another unit of a particular type, then that other unit must have already been in place at the start of that same Mobilization Phase, not also placed during that same Mobilization Phase.
E. The presence of enemy units has no effect on placing units (except that only one unit may ever be placed in the same IS). You do not have to control a Region to place units in it (unless otherwise specified).
9.2 Upgrading a Unit's Level
A. The phasing side can spend PPs to upgrade a unit that is already on the map (i.e., not purchased in the same phase).
B. A Level 1 unit can be upgraded to Level 2, a Level 2 unit can be upgrade to Level 3, and a Level 3 unit can be upgraded to Level 4. The cost of each Level upgrade is listed on the Mobilization chart.
Exception: Units without an upgrade counter may not be upgraded to the next higher level.
C. No unit may be upgraded by more than one level per turn.
9.3 Replacements and Demobilization
A. When units are removed from the map for any reason, they become available for mobilization and upgrading. No unit is ever eliminated permanently.
B. Either side may voluntarily remove friendly units from the map during the Mobilization Phase. These units become immediately available for mobilization, or used to replace units via the level system. However, neither side gains PPs for demobilizing units.
9.4 No New Cardboard
The number of units in the counter mix is a limit.
9.5 Government PI Mobilization Limit
The Political Table indicates the maximum number of PPs that the Government may spend during each Mobilization Phase, rounding any fractions up, (i.e., 10, 15 or 20).
9.6 American Aid
If the Government's PI is below 30, or the DSE's PI is above 70, American Aid is triggered (and stays in effect for the rest of the game). In the Mobilization Phase of this and every subsequent Government player-turn, the Government receives 10 additional PPs. These can be spent above the PP limit of the Government's current Doctrine.
10.0 Movement Phase
10.1 Movement Phase
The phasing side moves its own units (all, some, or none, as desired) during the friendly Movement Phase.
10.2 Movement Allowance
A. Each unit is printed with a MA, which indicates how many times that unit may move from one Region (the Region it is in) to an adjacent Region (one that shares a connecting border or is connected via an arrow connection route).
B. A unit can move into a number of Regions up to its movement.
Exception: Guerilla-type units are static units, not printed with a movement number. Once placed on the map (in the Open area of a Region or in an IS), they may not move to another Region.
10.3 Moving into Infrastructure Squares
A unit may move from the Open area of a Region into an empty IS, but this requires the expenditure of one movement point (MP) from that moving unit's MA.
10.4 Moving from Infrastructure Squares
A. A unit may move from an IS into the Open area of a Region, or to any empty IS in that same Region (though there is never any strategic reason to do this), but this requires the expenditure of 1 MP by the moving unit.
B. Furthermore, if moving to an Open area of a Region that is occupied by any enemy unit(s), that movement must halt (unless using infiltration movement).
Design Note: The two Urban Regions, Athens and Thessalonika (whose displays have been enlarged on the map for ease of play), are contained within the Regions of Viotia and Serres respectively and those Regions must be moved through when leaving.
Examples: A unit with an MA of 2 starting in the Open area of Larissa could move one square into Magnesia, and then into an empty IS there, or into the Open area of a connecting Region (Evritania, Fokida, Evia, or across the water into Korinthia). A unit with an MA of 2 in Athens could move into Viotia and then to Korinthis, Fokida, or Evia.
10.5 Movement Restrictions
10.5.1 Enemy Units in Open Status
A. A unit must halt its movement for the remainder of that Movement Phase when it enters a Region containing any enemy units in the Open area of a Region. It may move no further that Phase.
B. It may leave the Region in the following Movement Phase, and move normally. However, if it enters another Region containing enemy units in Open status, then it must again halt.
Play Note: A unit is not required to stop when it enters a Region containing enemy units only in IS. A unit, on entering a Region, may immediately occupy an empty IS, by expending one more MP.
Exception: An infiltration capable unit (printed with a white circle behind its MA) is not required to halt when it enters a Region containing any enemy units in the Open area of that Region, though it may, if desired.
10.5.2 International Borders
A. DSE units may enter and exit Albania, Yugoslavia, and Bulgaria freely, though this may change if using the optional Tito Breaks with Stalin rule (17.1).
B. Government units may never enter these Regions, however.
10.5.3 Infiltration Movement
A unit may use Infiltration if its movement is printed in a circle. Such a unit does not have to halt when it enters a Region containing enemy units in the Open area of a Region.
10.6 Breaking Down Divisions
A. During the Movement Phase, the Government may remove any of its army units, replacing each with three brigade units, thus exchanging firepower to cover more ground.
B. The purpose of this is to allow an army to spread out and move into different directions, or perhaps to occupy multiple ISs within a Region.
C. This does not require the expenditure of any MPs or PPs, but must occur before the army unit has moved.
D. To do this, simply exchange the division counter, wherever it may be, for three infantry brigades, and place the counters in the same Region where the army was. All three brigades must be of the same level as the replaced army unit.
E. Three brigades that are in the same Region may also be combined into one army unit, under the same conditions as for breaking down a division.
F. Brigades that are newly-formed from an army division (or a division that is combined from three brigades) may move normally immediately afterward.
G. A division may never be broken down into only two or fewer brigades, and fewer than three brigades may not be combined into a single division.
H. A unit cannot be broken down and be recombined in the same Movement Phase.
10.7 LOK Unit Modes
A. Government LOK units may be broken down as well, but each is replaced with one unconventional LOK unit (with slightly different ratings) instead of three brigades.
B. Conversely, an unconventional LOK unit may be converted back to a conventional LOK unit, in the same manner.
11.0 Conflict
11.1 Declaring Attacks
A. Conflict represents various types of conventional and unconventional operations. Conflict may occur when there are enemy units in the same Region during a Conflict Phase.
B. Conflict is resolved using the Conflict Resolution Tables. There are two of these, depending on whether the conflict is occurring in the Open area of a Region, or in an IS.
C. Units in adjacent Regions may not attack each other.
D. Conflict is an attack declared by the phasing side after the Movement Phase has ended.
E. Conflict is always optional, but the phasing side may declare as many attacks as it has units to attack with (and enemy units to attack) across the map.
F. When an attack is declared, the phasing side is the attacker; the other is the defender.
G. An attack may be declared against any enemy unit in the Open area of a Region, or into any ISs within that Region, but only by attacking units that are in that same Region (either in the Open or in an IS).
Play Note: The attacker is not required to decide and declare all attacks at the beginning of the Conflict Phase. The attacker may decide each attack, one at a time, after observing the results of preceding attacks. However, all of the intended attacks in a Region must be completed before any attacks are begun in another Region. Within this stricture, the attacker may execute attacks among the various Regions in any desired order.
H. However, if there are enemy units in the Open area of a Region and in any IS(s) within that same Region, the enemy unit(s) in the IS(s) cannot be attacked until the other enemy units in the Open area of that Region have been eliminated or left the Open area of that same Region.
I. A unit that is already in an IS may attack an enemy unit in any other IS (within the same Region), even if there are other enemy units in the Open area of a Region. It is also permissible for a unit already in an IS to attack an enemy unit in the Open area of a Region.
11.2 Conducting an Attack
A. Any attacking unit(s) in a single Region may attack a single Open area or a single IS in that same Region, although when doing so, the attacking unit(s) must attack all of the enemy units there.
B. The attacker may choose to attack with as few or as many units as desired, as long as all of the attacking units are in the same Region and are targeting the same Open area or IS.
C. A single attack may never be directed against the Open area and an IS in any Region, nor against two or more ISs at the same time in any Region.
D. The attacker may combine the attack of units in the Open area of a Region and any other friendly unit(s) in the IS(s) within that same Region, if desired.
E. No unit is ever required to attack, however; the phasing side is free to choose to attack with some of its units, and not with others.
F. An Open area or IS may be attacked multiple times during the same Combat Phase, but only by different attacking units.
G. Once the attacking units have been chosen to attack an Open area or Infrastructure box, sum their total strength and that of the defender in that Open area or Infrastructure box, dividing the attacker's strength by the defender's strength, rounding off any fractions, to get a combat odds ratio.
H. Using the same odds ratio, resolve the attack via the Open CRT or the Infrastructure CRT, depending on the location of the targeted enemy.
Example 1: 9 factors attack 6 factors; The odds are 1.5 to 1. Drop the fraction and use the 1:1 column.
Example 2: 3 factors attack 4 factors; The odds are 0.75 to 1, so resolve on the < 1:1 column.
11.3 Attacking in the Open or an Infrastructure Square
A. If an attack is conducted against any enemy unit(s) in the Open area of a Region, resolve the attack is using the Open CRT.
B. If an attack is conducted against any enemy unit(s) in the IS within a Region, resolve the attack using the Infrastructure CRT.
11.4 Airstrikes
A. After the odds ratio of an attack have been calculated, but before the attack die roll has been rolled, the Government can add an available Airstrike to that attack to increase the odds of that attack.
B. No more than one Airstrike may be added to any attack, and an Airstrike may never be added to any attack upon an IS.
C. Resolve the attack normally, per the increased odds ratio. The Airstrike is expended and no longer available during that same turn, but may be purchased normally during the next Mobilization Phase.
D. Conversely, the Government can add an available Airstrike to the defense of a Government unit under attack, per the same conditions above, except that the enemy's attack is reduced to the next lower odds ratio on that CRT.
E. The DSE may never use any airstrike.
11.5 Resolving an Attack
A. To resolve an attack, after determining the odds ratio, the attacker must rolls 1D6, then cross references the roll with the odds ratio of the appropriate CRT to obtain a result. The result is a code, explained below the CRTs to indicate the effects of that attack.
B. Implement the effects immediately, then conduct the next attack in that Region (if any) or elsewhere on the map (if any). If this was the last attack of the Combat Phase, the Combat Phase ends.
C. If the attack succeeded in eliminating all enemy (defending) units from an IS, then one (only) of those attacking units may occupy that square, but must decide to do so or not do so before the next attack is resolved, or forgo the opportunity.
11.6 Unconventional Units
A. Unconventional units that attack or are attacked while in an IS possess the unique ability to spend PPs to modify the conflict die roll (for combat occurring in an IS only).
B. To do so, after an attack has been declared, but before the attack die is rolled, either side may declare its intention to spend PPs to modify the die roll. When doing so, apply a +1 die roll modifier (DRM) when attacking or a -1 DRM when defending. The cost in terms of PPs is listed on the Unconventional Unit DRM Table.
C. Once PPs are spent to modify a die roll on the Infrastructure CRT, they are expended permanently, regardless of the combat results.
D. The DRM may only be +1 or -1.
E. The owner may spend only the PPs listed in the table to obtain the DRM.
F. If two opposing unconventional units are involved in the same combat, the attacker decides first whether to spend PPs to obtain a +1 DRM before the defender decides whether to spend PPs to obtain a -1 DRM.
G. When both sides spend PPs to obtain a DRM, they cancel each other out, but the PPs are still expended.
12.0 Conflict Results
Odds ratios that are less than 1:1 are resolved via the < 1:1 column of the Conflict Resolution Table, and odds ratios that are greater than 4:1 are resolved via the ≥ 4-1 column of the CRT.
12.1 Results Explanations
The CRTs indicate outcomes via percentage codes. These are explained Results Explanations Table. In all cases, the results only apply to the units involved in that combat. If the outcome of an attack results in a fraction, round that fraction up.
Example: If three units are involved in a combat that calls for 50% of them to be eliminated, then two of those units must be eliminated.
12.2 Conflict Results Tables
A. The two CRTs indicate the various possible results per each odds ratio and die roll.
B. The CRTs reflect two distinctly different types of combat, such that more casualties are likely to be inflicted upon a defending force out in the open areas, and more casualties are likely to be suffered by the attacker during street fighting.
12.2.1 Open Conflict Resolution Table
This CRT may be used only when attacking an enemy unit in the Open area of a Region.
12.2.2 Infrastructure Conflict Resolution Table
A. This CRT may only be used when attacking an enemy unit in an IS.
B. An Airstrike may never be used on this CRT.
12.2.3 Results
A. The conflict results are explained in the Results Explanations Table.
B. The CRT results codes are defined as follows:
(The CRT results codes themselves are printed on the separate charts sheet; see the note in the Table of Contents.)
Note: the source prints a second section numbered "12.2" immediately after 12.2.3 ("Levels"). It is transcribed below as "12.2 Levels" as printed, and is followed by 12.3 and 12.4.
12.2 Levels
A. If a combat result calls for units to be reduced, those units must be flipped and/or replaced to lower levels to comply with that reduction. If a reduction reduces a unit more levels than it currently possesses, it is eliminated, and there is no other effect. The reductions ado not carry over to any other units in that Region.
B. If a combat result calls for units to be increased, those units may be flipped and/or replaced to higher levels to comply with that increase. If an increase applies to a unit that is already at its maximum level, then that unit is not increased any further. If more than one attacking unit was involved in an attack, an increase may be applied to any of the attacking units, unless all of the attacking units are already at their maximum levels.
12.3 Elimination
Results can cause either 50% or 100% of the units in the same Open area or Infrastructure box to be eliminated, regardless of their level. If the result is 50% eliminated, the owner decides which units will be eliminated.
12.4 Retreat
A. If a result calls for one side to retreat, the owner moves all surviving units into either an adjacent Region (that they could normally enter), unoccupied by any enemy units in the Open area of that Region.
B. A retreat may also be into any unoccupied ISs in the Region where the conflict occurred, even from another IS in that same Region, if any.
C. It is even permissible for multiple units to retreat into multiple directions, or for some to retreat to an adjacent Region, and others into any unoccupied ISs.
D. A unit cannot retreat into an adjacent Region and then into an IS within that adjacent Region, however.
E. If a retreating unit has no legal location to which it can retreat, eliminate it instead.
F. Units capable of infiltration movement (movement number printed in a circle) may retreat a number of Regions up to their MA. They may retreat through enemy units, but must not end in the same Regions as enemy units in the Open area of a Region. They may end their retreat in an IS, if available.
Play Note: If a unit retreats into an IS, it is eligible to be attacked there normally by any enemy units that have not yet conducted any attack.
13.0 Infrastructure
Design Note: ISs represent the space where the local populace resides. By moving units into an IS, you are committing your forces to working amongst the people. By so doing, you gain political advantages, but also face additional challenges.
13.1 Moving Into/Out of Infrastructure Squares
Units may move into and out of any IS by moving a unit from the Open area of a Region (or from another IS, if unoccupied) at a cost of 1 MP, or vice versa.
13.2 Limitations
A. All Regions in Greece have one or more ISs. There can be a maximum of one unit per IS.
B. The side that moves a unit into a particular IS occupies that square. Occupation of a square changes only if a unit moves out of a particular square, or if combat eliminates that unit (with the attacker sometimes moving into that square).
14.0 Control Phase
14.1 Control Phase
A. Control of a Region is checked during the Control Phase. Control of a Region allows that side to collect PPs.
B. During the Control Phase, both sides check the map to see which Regions their forces control.
C. Each side collects the PPs for each controlled Region. The DSE collects the PPs to the left of the slash, the Government to the right of the slash.
14.2 Definition of Control
A Region is controlled if one side's units occupy all of its ISs. The presence of units in the Open area of a Region has no effect on control.
14.3 Disputed Control
If both sides (or neither) have units in a Region's ISs, or if not all of a Region's ISs are occupied, then control is disputed there, and neither controls that Region, so no PPs are awarded to either side for that Region.
14.4 Control of Foreign Regions
The DSE always controls Albania, Yugoslavia, and Bulgaria. It does not have to have actual units in these Regions to gain PPs due to control of them. The DSE will always receive the PPs for those regions in the Control Phase.
Exception: When using the optional Tito Breaks with Stalin rule, one or two of these countries will close their borders, and the DSE will no longer gain the benefits of controlling it or them.
14.5 Government PP Terror Penalties
A. At the end of the Control Phase, the Government is penalized one PP per Region with a Terror marker in it, and for each Rural Region that has had its population Resettled.
B. The Government may also be penalized PPs for not fulfilling the garrison requirements for Tight Defense and Area Defense (16.3).
14.6 DSE PP Penalties
At the end of the Control Phase, if there are no DSE conventional units anywhere in Greece, the DSE is penalized with the subtraction of PPs equal to the dice roll of 2D6.
14.7 Political Gain/Deduction Choice
A. Control of a Region awards PPs to that side, as indicated by the printed slash result (the points to the left of the slash are awarded to the DSE, the PPs to the right of the slash are awarded to the Government).
B. In receiving these PPs, the controlling side may choose to add them to its own PI, or subtract that amount from the enemy's PI. The choice is one or the other, not both.
C. The controlling side can only add or subtract the PPs for its side of the slash and cannot add or subtract the PPs on the other side of the slash.
Example: If the Government controls Larissa, it may either add 2 PPs to is PI or subtract 2 PPs from the Government's PI. It may not use the 3 PPs on the DSE side of the slash.
15.0 Attrition Phase
15.1 In General
A. Certain units are subject to reduction during the Attrition Phase of an even-numbered turn. They are all Government Police-type units and all DSE Front-type units.
B. During the Attrition Phase, both sides must check all Regions they control. Attrition is applied against eligible units located in Regions under enemy control.
15.2 Effects of Attrition
50% (fractions rounded up) of all units in each Region subject to attrition are reduced one level. The owner may choose any combination of units to be reduced. This represents personnel bring arrested, deserting, defecting, starving, migrating, or simply going into hiding.
Example: The Government has one Level 1 Police and two Level 2 Police in a Region controlled by the DSE. As such, the Police units are subject to Attrition. The Government could reduce both Level 2 units to Level 1, or eliminate the Level 1, and reduce one Level 2 unit.
16.0 Special Rules
16.1 Hiding Among the Populace
Unconventional Forces include DSE Front and Government LOK units (if they have been switched to that mode). These units may attack a unit in an IS even if there are other enemy units in the Open area of a Region.
16.2 Airstrike Collateral Damage
If any Airstrikes are used in a combat in an Urban Region, a Terror marker must be placed in that Region.
16.3 Greek Politics
A. The domestic politics of Greece were and are complex and variable, and party politicians exerted a great degree of control over how the military was deployed and used during the war. This is reflected in the game by the Politics Table.
B. At the beginning of the game and periodically thereafter, the Government must roll 2D6 twice on the Politics Table to determine any restrictions on its conduct of the military campaign, the resources available to conduct it, and how long that state of affairs is expected to last.
C. The first roll on the Politics Table gives the prescribed deployment for the Greek National Army (GNA), which is in one of three states.
16.3.1 Tight Defense
A. Whenever possible during the turn, Athens and Thessalonika, as well as the Regions that contain them (i.e. Viotia and Serres), must contain at least one army division, or equivalent breakdown (three infantry brigades). If the Government cannot satisfy this condition in the Control Phase, it must immediately deduct a quantity of PPs from his PI that is equal to the roll of 1D6 for each Region that is not sufficiently garrisoned.
B. A Tight Defense limits the Government to spending no more than 10 PPs per Mobilization Phase.
16.3.2 Area Defense
A. In the Control Phase of each player turn, all Urban and Rural Regions must contain at least one Government unit of any type. If the Government cannot satisfy this condition, it is penalized one PP for each such Region that is empty of Government units.
B. An Area Defense limits the Government player to spending no more than 15 PPs during each Mobilization Phase.
16.3.3 Aggressive
A. No restrictions. An aggressive and bellicose government is in power, committed to wiping out the Communists by any means possible. An Aggressive Defense limits the Government to spending no more than 20 PPs during the Mobilization Phase.
B. If playing with Optional Rule 17.3, roll 2D6 again on the Politics Table to determine the Mobilization Phase PP limit (Instead of the set Mobilization PP limit above).
C. Finally, roll 2D6 once more on the Duration column to see how many turns it will be before the Government must roll again on the Politics Table (in the Initiative Determination Phase).
D. Record these circumstances on the Charts and Tables using the supplied markers.
16.4 Terror Markers
A. Terror markers may be placed as a side-effect of conflicts and Population Resettlements. There may ever only be one Terror marker in a Region at a time. When a Terror marker is in a Region, it is considered to be terrorized, with the following effects:
-
The Government is penalized 1 PP per Terrorized Region (no matter who caused it) in the Control Phase.
-
The DSE may not mobilize (i.e., place) Front type units in a terrorized Region.
-
The side controlling a terrorized Region does not receive PPs for control of that Region during the Control Phase.
B. Terror markers are only removed as a result of EA (Effective Action) or VE (Very Effective action) conflict results on the CRT (representing the removal of all terrorizing elements and a return to stability, even if dictatorial stability, in that Region).
16.5 Population Resettlement
A. This represents moving large numbers of peasants out of their traditional villages, to deny the DSE a source of recruits or hostages. Only rural Regions may have their population resettled.
B. To accomplish this, the Government must have at least one conventional unit in the Region to be cleared. At the beginning of the Mobilization Phase of its player turn, the Government announces that the population in that Region will be resettled, with the following effects:
-
Place an R marker in that Region to denote that it is treated as Remote for the rest of the game.
-
Place a Terror marker in that Region; that Region is now terrorized (16.6).
-
Roll 1D6, and add that value in PPs to the DSE's PI immediately, and subtract that value in PPs from the Government's PI.
-
Population Resettlement causes Refugees, and thus the Government player is penalized 1 PP thereafter in each of its succeeding Control Phases for each Region that has been Resettled. The Government can never return the population to that Region.
-
For the remainder of the game, the side controlling the Region receives only 1 PP for that Region during the Control Phase. (The R marker is printed with 1/1 as a reminder,)
17.0 Optional Rules
17.1 Tito Breaks with Stalin
A. Due to ideological and political differences, the Yugoslavian government will break off relations with the USSR at some point in the game (historically in July 1949). The DSE follows this development with a Stalin Score, recorded on the Record Track.
B. At the beginning of each of its Mobilization Phases, the DSE rolls 2D6, adding that total to its Stalin Score.
C. When the Stalin Score reaches or passes 50, the Greek Communist Party must decide whether to follow the Titoist or Stalinist line. The DSE rolls 1D6 on the Communist Dogma Table, and applies the result:
-
Stalinist: Yugoslavia shuts its borders; this country is now out of play. All DSE units inside Yugoslavia at that moment are eliminated. DSE units may still enter and leave Albania and Bulgaria, but the DSE now receives PPs only for these countries. There will also be an internal purge to root out revisionists, which is represented by the loss of PPs: The DSE must therefore roll 2D6, and deduct that amount from its PI.
-
Titoist: DSE units may continue to operate from Yugoslavia, but Albania and Bulgaria close their borders as above; they are now out of play. All DSE units there at that moment are eliminated. The DSE now receives only PPs for controlling Yugoslavia. Finally, the DSE is perceived as an instrument of Tito's wish to annex northern Greece, incorporating it into Macedonia as part of his Greater Balkan Confederation, which is represented by the loss of PPs: The DSE must roll 4D6, and deduct that amount from its PI.
17.2 American Aid
A. The United States, in one of the first exercises of the Truman Doctrine, began to provide military and economic aid to the Greek government in March 1947. In game terms, American aid is triggered at the start of the first Mobilization Phase of either player turn if the Government PI is equal to or less than 30, or if the DSE PI is equal to or greater than 70.
B. American aid remains in effect for the rest of the game. The amount of American aid is 10 PPs. The PPs accrued for American aid are added to the Government PI, but are in addition to the maximum PPs available for mobilization from the Government PI.
17.3 1944 Start of the Greek Civil War
This optional rule assumes that the open conflict between the leftists and the rightists that began in December was not quelled, presuming that the British had insufficient forces to deploy to Greece (owing to military misfortunes or even disasters elsewhere in Europe, such as in Normandy, perhaps).
A. The game set-up is unchanged, but the DSE may not build and place any new units (except Front units) in any Region until there is at least one Level 2 Guerilla band unit already present in that same Region (representing the gradual rise of communist influence while the Second World War is still raging in Europe).
B. If the only Guerilla unit in a Region becomes reduced to Level 1 or is eliminated, that restriction is immediately reimposed (until a Level 2 Guerilla unit is present in that same Region).
C. Guerilla units themselves are never upgraded beyond Level 2, nor ever promoted to any other kind of unit.
D. This restriction applies irrespective of location in a Region (whether in an Open area or an IS).
E. The DSE is permitted to build as many Guerilla units in the same Region as it can afford, although 9.3 and 9.4 apply normally to Guerilla units,.
F. When playing this optional rule, the Government's Mobilization Phase PP unit is determined via the roll of 2D6 (instead of as set limit of 10, 15, or 20, respectively, as restricted by 16.3).
18.0 Historical Details
The following types of game pieces are defined here for informational purposes only (this information has no effect on play):
18.1 DSE Units
| Type | Description |
|---|---|
| Cadre | A group of 50 or fewer organizers and agitators. |
| Front | Represents a network of full and part-time supporters and auxiliaries who can be relied on to collect tactical intelligence, provide safe places for DSE combatants in the bands and brigades, to cache supplies, rest, reorganize and conduct recruiting and training. |
| Guerrilla Band | A group of 100-300 full-time combatants of the DSE, best at raiding and harassing government security forces. |
| Partisan Brigade | A group of 1,000 or more full-time combatants, organized and equipped for pitched battles. |
18.2 Government Units
| Type | Description |
|---|---|
| Army Brigade | A triumvirate sub-unit of a division, with 2,000-3,000 men in it. |
| Army Division | A large military unit with a theoretical strength of 9,000-10,000 men. |
| LOK Unit | A commando-style light infantry unit with an authorized strength of about 600. The Government player has the choice of using any of his LOK units in a conventional or unconventional mode. (LOK = Lochoi Oreinon Katadromon "Mountain Raider Troops") |
| Police Unit | 200-500 paramilitary police (Gendarmery) or militia (National Defence Corps). |
The Credits section (19.0) of the source is attribution only and is not transcribed.